archives for 10/2009
Picking Rhubarb Swiss
Chard on a chilly morning, I nearly put my hand into a stunning
dragonfly. The insect was too cold to fly away immediately so it
just quivered its wings as I snapped shot after shot. Finally,
its muscles were warm enough for liftoff, and the dragonfly sped off to
nibble on gnats.
I suspect our healthy population of dragonflies (and bats) is part of
the reason why we aren't plagued by biting insects, despite living next
door to a swamp. If you want dragonflies in your garden (and you
do!), putting in even a tiny pond can do the trick, especially if you
add some plants to give the dragonflies a spot to land. As a kid,
I transplanted some dragonfly nymphs from a more established pond to my
tiny backyard water garden and was rewarded with a healthy dragonfly
population for the rest of my childhood.
My dragonfly is a female Common
Green Darner, distinguished from the male by the brown eyes.
Even if you don't care about dragonfly identification, you should check
out the site linked above for the stunning photos. Enjoy!
Some of your storage
vegetables need to be cured before storage; some don't. If you
cure vegetables that don't need to be cured, they'll rot. And if
you don't cure vegetables that do need to be cured, they'll rot
too. Time for a good list!
| Vegetable |
Curing
method |
| Beet |
none |
| Cabbage |
none |
| Carrot |
none |
| Garlic |
1 - 2 weeks in a warm, dry place |
| Onion |
2 - 3 weeks in a warm, dry place |
| Parsnip |
none |
| Potato |
2 weeks at 50 - 60 degrees
Fahrenheit and 95% humidity (slightly warmer than a root cellar) |
| Sweet Potato |
2 weeks at 80 - 85 degrees
Fahrenheit (dry) |
| Turnip |
none |
| Winter Squash (including
Pumpkins) |
2 weeks in a warm, dry
place. (Don't cure acorn squash!) |
Curing serves a couple of purposes. In all crops except white potatoes, a primary purpose is to dry the vegetable up so that it won't rot in storage. White and sweet potatoes and winter squashes develop a hard skin during curing that will protect the crop during storage.
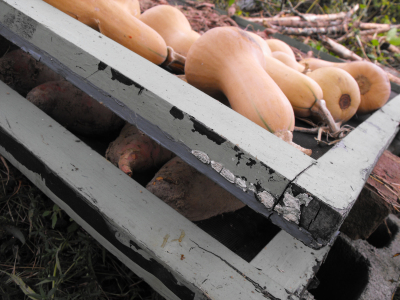 The cheapest and easiest method I've come up
with for curing vegetables is to lay them out on some old window
screens Mom found for me by the side of the road. I put the first
screen on four cinderblocks, cover the screen with drying vegetables,
then put bricks on the four corners of the frame to let me put another
screen on top for a second drying layer. The trick is to get good
air circulation all the way around your vegetables, so don't pile the
roots on top of each other. If you're a good scavenger, you can
recreate my curing rack setup for next to nothing.
The cheapest and easiest method I've come up
with for curing vegetables is to lay them out on some old window
screens Mom found for me by the side of the road. I put the first
screen on four cinderblocks, cover the screen with drying vegetables,
then put bricks on the four corners of the frame to let me put another
screen on top for a second drying layer. The trick is to get good
air circulation all the way around your vegetables, so don't pile the
roots on top of each other. If you're a good scavenger, you can
recreate my curing rack setup for next to nothing.People with more space will get away with drying their vegetables inside, but our trailer just isn't big enough to handle that type of operation. Instead, I harvest my crops a bit earlier than other folks might and put my drying racks under a tarp or roof outside to cure storage vegetables before the frost hits.
| This post is part of our Storage Vegetables lunchtime series.
Read all of the entries: |
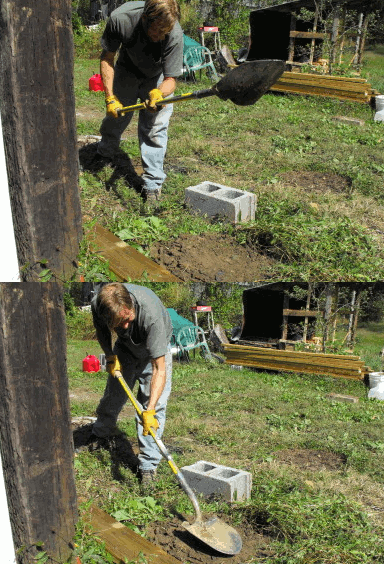
We started putting the foundation together for our upcoming 8x16
workshop/bath house today.
The ground needs to be built up in a few places and pounding it with
the back of the new shovel seems to do the trick nicely.
| This post is part of our Building a Storage Building from Scratch
series.
Read all of the entries: Part 1: Foundation
Part 3: Walls and scavenging lumber
Part 5: The roof
|
Wednesday night reached
a low of 37 F --- dangerously close to the frost. We're not ready
to light our first fire, so it took a while for us to emerge from our
nightly cocoons. When I did get up, Strider was unusually
affectionate, nestling down beside me as I read my morning blogs, and
even Lucy didn't seem quite so keen on uncurling herself before her
morning walk.
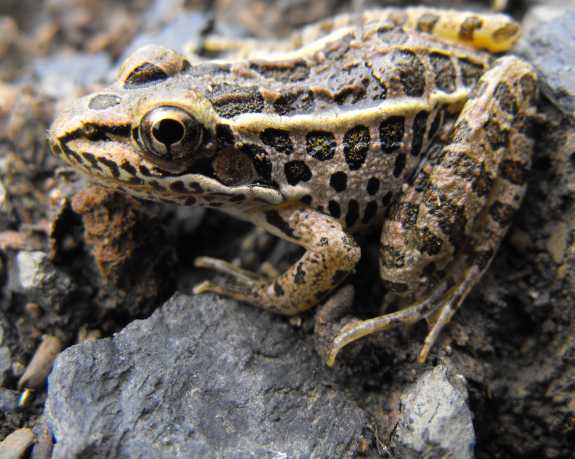
The great thing about sudden cold weather, though, is wildlife.
"Cold-blooded" animals aren't ready to hibernate yet, but the chilly
temperatures make them slow down. While weeding, I got a great
shot of a tiny Pickerel Frog. Usually, Pickerel Frogs are the
fastest amphibians on our farm, pushing off with those long hind legs
and disappearing before my mind even registers "frog." But not
today!
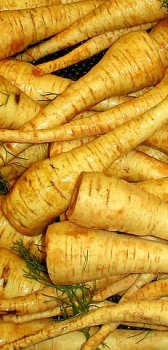 The
trick to keeping your storage vegetables fresh all winter is
understanding the type of conditions they prefer. Storage
conditions can be measured by temperature, humidity, ventilation, and
darkness. Nearly all crops like it dark and airy, but each
vegetable has a favorite range of temperature and humidity conditions.
In practice, I divide
our storers up into two main categories --- cool, wet storers and warm,
dry storers. Cool, wet storers thrive in root cellars and can
also be kept well in simpler storage operations like mulched garden
rows, storage mounds ("clamps"), trenches, a basement, or the crisper
drawer in your fridge. Warm, dry storers will do much better in
your attic, an unheated room, or under your kitchen sink.
I'm vastly
oversimplifying by dividing crops into these two categories, but it's
far too easy to get carried away trying to provide a half dozen
different storage conditions to keep all of your crops happy. The
table below gives some storage data on common vegetables:
| Vegetable |
Optimal
storage conditions |
My storage
conditions |
My storage
location |
| Beet |
32 - 40 F, 90 - 95% humidity | cool, moist |
haven't done it yet |
| Cabbage |
32 - 40 F, 80 - 90% humidity | cool, moist |
haven't done it yet |
| Carrot |
32 - 40 F, 90 - 95% humidity |
cool, moist |
haven't done it yet |
| Garlic |
32 - 50 F, 60 - 70% humidity | warm, dry |
kitchen shelf |
| Onion |
32 - 50 F, 60 - 70% humidity | warm, dry |
kitchen shelf |
| Parsnip |
32 - 40 F, 90 - 95% humidity | cool, moist |
haven't done it yet |
| Potato |
32 - 40 F, 80 - 90% humidity | cool, moist |
storage mound |
| Sweet Potato |
50 - 60 F, 60 - 70% humidity |
warm, dry |
under the kitchen sink |
| Turnip |
32 - 40 F, 90 - 95% humidity | cool, moist |
haven't done it yet |
| Winter Squash (including Pumpkin) |
50 - 60 F, 60 - 70% humidity | warm, dry |
under the kitchen sink |
Despite ignoring some of the optimal conditions, I've had great luck keeping onions, winter squash, and sweet potatoes fresh until they're all eaten up. (In fact, we still have some of last year's sweet potatoes to finish up as this year's are curing!) Don't get too caught up in thinking you have to build a fancy root cellar before you can enter the world of storage vegetables.
| This post is part of our Storage Vegetables lunchtime series.
Read all of the entries: |
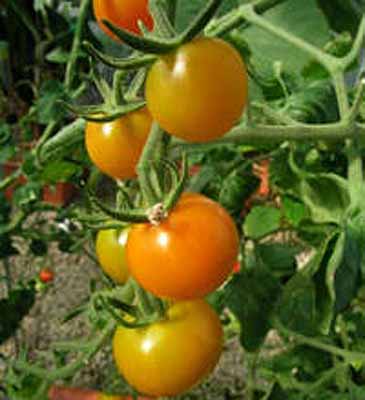 Boing
Boing has an interesting post on a National Geographic news article
that reports on a recent round of tests to see how productive a mix of
human urine and wood ash would be for tomatoes.
Boing
Boing has an interesting post on a National Geographic news article
that reports on a recent round of tests to see how productive a mix of
human urine and wood ash would be for tomatoes.
The plants fertilized this way yielded 4 times as much fruit as non
fertilized plants, and bore a significant increase in the nutrient
magnesium.
I would be a little concerned about the long term salt build up that
may occur with this method and need more information before I try
something as risky as mixing a salty substance with our topsoil.
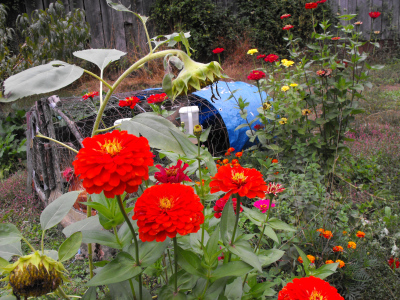 Flowers tend to be at the very bottom of my
gardening list, and I only managed to toss some seeds in the ground
around June this year. I ignored them for a month, then gave them
a half-hearted weed. Flowers. Whatever.
But in the middle of September, the first brilliantly red zinnia popped
open. Our deer deterrents
were up and running, so a couple of sunflowers kept their leaves,
opening huge yellow heads. The Cocks' Comb from Mark's mom pushed
up brilliant magenta combs and the marigolds turned into a hedge of
orange.
Suddenly, my half-hearted flower bed is the heart of the garden.
Why didn't I plant more? Why didn't I plant them sooner? I
guess next year I'll have to pay more attention to flowers!
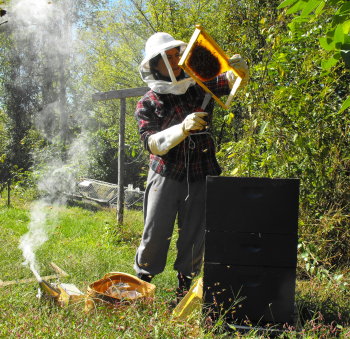 We checked up on our remaining 3 bee hives
today and were happy to discover evidence of well functioning
colonies in all of them.
The home made frame
perch tool seems to have warped a bit since the last upgrade,
which means I should have allowed more distance between the arms.
An easy fix once I finish fixing a few other things around here.
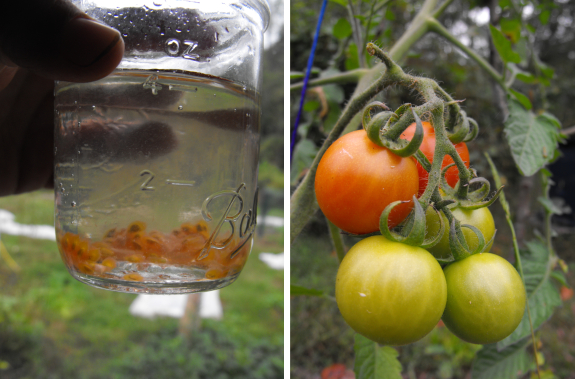
One volunteer, though, is going strong. Its big, red tommy-toes are ripening just about as fast as Lucy can pick them (darn dog!) and the leaves and stem show no sign of blight. Looks like we found a seriously blight-resistant tomato!
I stole one tommy-toe out from under Lucy's nose and am processing the seeds in preparation to saving them for next year. There's a good chance the tomato is Crazy, a variety I grew in my garden last year but that didn't make it onto my roster this year due to old seeds. What didn't kill us will make us stronger!
 We started to have some trouble back in the
summer with one of the Plymouth Rock hens laying her egg on the ground, which
made it easy to miss and pull the tractor over it, creating a
scrambled egg in the yard.
It seems like a golf ball is close enough to an egg to fool even our
smart Plymouth Rocks. No broken eggs since we installed the fake at a
price well under a buck depending on where you get your sporting
supplies from.
 When I was in high school, I was obsessed with
water gardening. My father and I built a little concrete pond in
the backyard and I stocked it with plants and aquatic life. But
the places where the concrete liner rose above the surface were an
eyesore, so I did everything I could think of to try to get moss to
grow there. I had absolutely no luck. In the end, I decided
that moss was hard to grow.
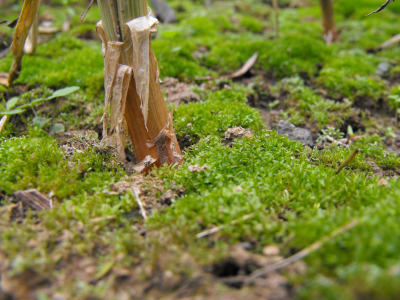
Looks like my raised beds don't think so. After our six months of
autumn, one bed has grown quite a nice crop of moss amid the Egyptian
onions. I hope that means that my no-till technique has built an
equally lush soil ecosystem below the surface!
 A week from today, Mark and I will be
climbing the Uxmal pyramid on the Yucatan Peninsula. So this
week's lunchtime series is actually a two week series, spanning the
days we'll be away on our honeymoon.
Luckily, I found just
the book to fuel two weeks of permaculture musings: Designing
and Maintaining Your Edible Landscape Naturally by Robert Kourik. This
book was written about the time I entered third grade, but the facts
are nowhere near out of date. Actually, I can see where the
fascinating forest
garden book I read a
few months ago grew organically out of the rich compost of Robert
Kourik's guide.
Robert Kourik's
flawlessly researched and referenced book is also based on his years as
a landscape architect, tempting clients to include edible plants in
their ornamental gardens. This week's first half of the series
sums up his wisdom about the foundation of permaculture plantings ---
soil.
This post is part of our lunchtime series reviewing Robert Kourik's Designing and Maintaining your
Edible Landscape Naturally.
Read all of the entries:
|
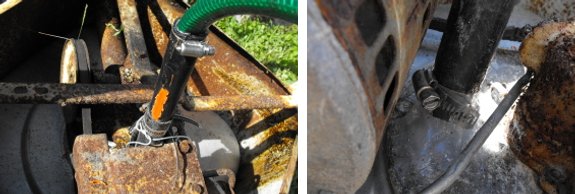
I found out today that our Maytag wringer washer is the model E2L, the
longest running production of any of the wringer machines. The run
started in 1945 and the last one was made in 1983.
Judging by how brittle our discharge hose was I'm guessing ours is
closer to the 1945 era. I tried building one back from scrap pieces and
2 layers of silicone. Tomorrow will be the test run to see if this
operation is a viable solution without any leaking.
 I figure chances are pretty good that we'll
return from our honeymoon to a frosted farm, so we're doing frost
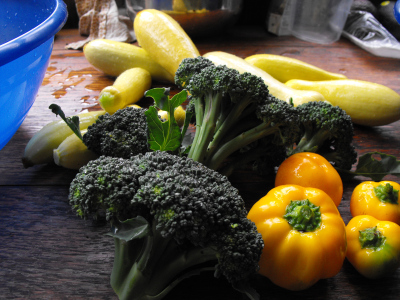
preparations before we leave. I've gathered up our curing
sweet potatoes, garlic, and butternut squash to be hung in mesh
bags in the kitchen. In the garden, I picked the last of the
basil (already nipped by a 35 degree night on Saturday) and what may be
the last of the summer squash, peppers, and green beans. One more
gallon of summer bounty hit the freezer and we ate our last batch of
pesto pasta with basil fresh from the sun.
I'm torn about whether to pick all of the green peppers and bring them
inside to eat when we return, or whether to gamble by draping the
plants in row covers and hoping that we'll have some orange peppers
when we get back instead. I vastly prefer the latter, but think I
might do the former --- I'm not big on gambling and even green peppers
taste pretty good after the frost.
 I've been dabbling in no-till techniques for
the last few years, due to a vague understanding that tilling is bad
for the soil. Robert Kourik's book gave me the low down on the
best no-till techniques and why they succeed (or fail.)
So, what's wrong with
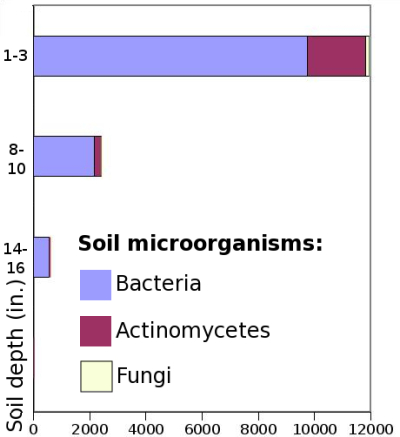
tilling? Although we can't see it, our soil is teeming with
microscopic and macroscopic life, most of which lives in the top three
inches of soil. Tilling churns up soil, mixing the microorganism
playground with the lower soil and resulting in a lot less life.
Although you might expect that the microorganisms folded deeper into
the earth just expand their populations, lack of air and sun quickly
kills them off.
Bare soil is another
bane of conventional tilling. Erosion is the obvious problem ---
rain washes away the precious topsoil when it is unprotected by plants
or mulch. But sun is just as much of a problem. When bare
soil is exposed to summer sun, the heat vaporizes nitrogen and kills
the precious soil microorganisms, resulting in a garden that requires
much more fertilizer in order to grow your veggies.
Of course, we can't just
throw our lettuce seeds amid the grass in our lawns and expect it to
grow. So how do we garden without annual tilling and bare soil?
This post is part of our lunchtime series reviewing Robert Kourik's Designing and Maintaining your
Edible Landscape Naturally.
Read all of the entries:
|
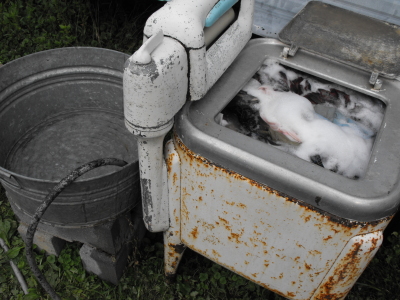 The wringer
washer is working again with a small leak, which is a bit smaller
than before.
I think silicone was a bad choice for this problem due to the nature of
the metal in question, but I went for it because it's what I had on
hand.
Next time I think I'll take john wilson's advice and use some of that
fiberglass bondo stuff when trying to merge this type of metal with a
hard plastic.
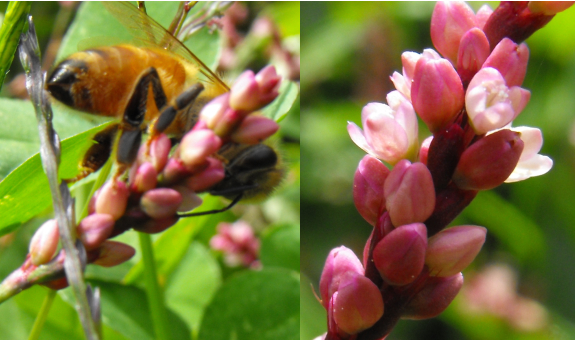
Conventional wisdom has
it that honeybees are attracted to asters and goldenrod at this time of
year. The chilly, cloudy weather we've had lately hasn't been
conducive to much bee activity at all, but when the sun does tempt our
bees out, they go straight to the smartweed instead. Tiny, pink
smartweed flowers seem to be just my bees' speed, especially since the
"lawn" right outside their hive is chock full of it.
I have a difficult time identifying smartweeds. All of them
belong to the genus Polygonum,
half of them are invasive species, and most areas have about two dozen
look-alike species to choose from. My best guess is that my
smartweed is Oriental Lady's Thumb (Polygonum
caespitosum), a native of Asia that is common in damp areas.
Mark suggested collecting seeds of the smartweed and expanding its
territory since the flowers seem to be so popular with the bees.
I'm not comfortable encouraging invasive plants too much, but I think I
will make a habit of skipping the last grass mowing in the fall to give
our bees some late nectar right by the hive.
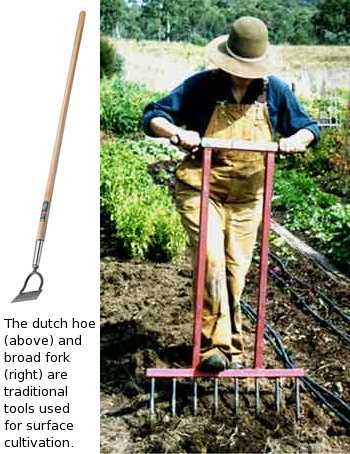 I've already written a long post about sheet mulching, one good method of growing
plants without tilling the soil. The problem with sheet mulching
is that it requires gobs of organic matter. Can you get similar
results with less outlay of cash?
A traditional British
method of gardening without tilling is known as surface
cultivation. Farmers usually till or dig the soil the first year
to loosen the ground and increase soil pores, but after this they
merely layer two to four inches of compost onto the ground each year
and plant without tilling. A special hoe known as a Dutch hoe
cuts off weeds just below the crown, leaving the roots in place to
increase fertility of the soil and leaving the tops in place to mulch
the soil surface. By the third year of surface cultivation, very
few weeds are left since new seeds aren't turned up through tilling.
My gardening technique
has aspects of surface cultivation in it, and I'm looking forward to
that decline in weeding (two years from now since my 2008 garden went
to seed and set me back a couple of years.) Robert Kourik notes
that the tedious weeding in surface cultivation can be minimized by
mulching as much as possible. My father has good luck laying damp
newspapers around his vegetables, a method that I may have to try next
year. This year's grass
clipping mulch has
also been highly effective.
The problem with surface
cultivation, beyond labor-intensive weeding, is that productivity often
begins to decline after 5 to 6 years when soil compacts. Some
farmers simply till their garden at that point and begin again.
Others use a spading fork or broad fork to loosen the soil without
tilling. I suspect that simple crop rotation may do the trick in
our garden --- we grow enough root crops that require the ground to be
churned up during harvest that we will probably end up digging every
bed at least once or twice a decade.
This post is part of our lunchtime series reviewing Robert Kourik's Designing and Maintaining your
Edible Landscape Naturally.
Read all of the entries:
|
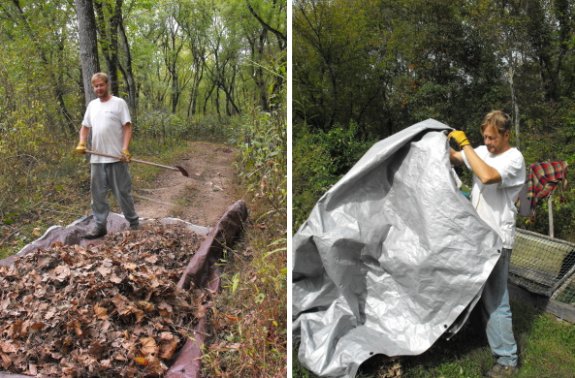
Transporting piles of leaf material with a large tarp
is a lot easier than putting them in trash bags if your goal is garden
mulch.
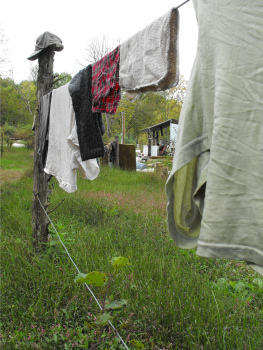 September
gave us 6.2 inches of rain over 10 days. The days that didn't
rain were generally cloudy, so I put off doing laundry until we both
ran out of the essentials.
Tuesday, I gave in and washed anyway. Three big loads of laundry
later, I had filled up the clothesline and moved on to draping clothes
on the grape trellises. I didn't even get to our bedding before
running out of both laundry detergent and space on the line.
Four hours of clouds later, it started to rain. I scurried around
and gathered up damp clothes, then draped them all over the house while
a quarter inch of water fell on our garden. Wednesday turned out
to be the prettiest sunny day in a long time, so I carried all of the
clothes back outside,
flipping clothes over halfway through the day so that every one finally
dried all the way through. Just this once, I think if I had a
clothes drier I would have used it. (Good thing I don't have one!)
Despite the astonishing amount of effort required to get there, we have
enough clean clothes to last us for our entire week long
honeymoon. Most of the posts for the next eight days will be
auto-posted --- saved up topics we never got a chance to serenade you
with during the height of the growing season. The farm will be in
the able hands of my brother, and we plan to not even check email for
most of the time. So if anything looks funny on the site, I
promise I'll fix it when I get home!
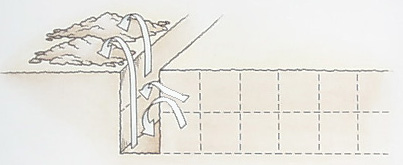 Another no-till technique is double-digging, a
slightly complicated method of breaking up the soil to a depth of two
feet without inverting the soil layers. Double-digging is
extremely laborious, but can result in porous soil that greatly
increases vegetable yields, especially in heavy clay soil like
ours. After double-digging, soil doesn't need to be worked for
several years, much like the surface cultivation system.
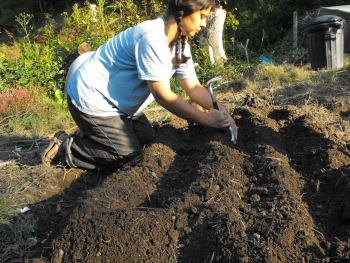 We used a modified method of double-digging to create
our raised beds. First, Mark tilled up our topsoil, being
careful not to go too deep (not a problem with the tiny tiller I had
him working with the first year.) Then I laid out aisles and
shoveled the loose soil from the aisles to the side to create raised
beds. The result is a double thickness of loose topsoil without
as much of the back-breaking labor of double-digging. The
grassy/clovery aisles between our raised beds produce high quality
mulch, protect the soil from erosion, and promote water infiltration
(rather than runoff) during heavy rains.
After the first
year, we put the rototiller away and spend the rest of our time
weeding, applying manure, and mulching. I'd recommend our bed system
to anyone, with just one caveat. Raised beds don't work well in
sandy soil or extremely hot climates where the soil will dry out
rapidly. Of course, if you have sandy soil, increasing soil
porosity won't be a problem for you anyway.
This post is part of our lunchtime series reviewing Robert Kourik's Designing and Maintaining your
Edible Landscape Naturally.
Read all of the entries:
|
 I was struck by a throwaway sentence in Good Farmers, a book about traditional
farming practices in Central America and Mexico. The author
noted that traditional farmers usually lack heavy equipment and funds
to pay for lots of hired help, so they have to take a process-oriented
approach to big tasks rather than being project-oriented. For
example, if they have a steep hillside that they'd like to terrace and
create farmable ground, traditional farmers are more likely to put in a
spare afternoon here and there building the terrace bit by bit rather
than renting a bulldozer to get 'r done.
Homesteading is slowly teaching me to slip out of my project-oriented
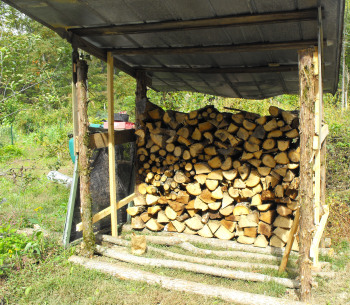
mindset and enjoy the journey. For example, the wood we bought
was delivered to our parking area, half a mile from our house. At
first, I was considering just taking a day and making golf cart trip
after golf cart trip to bring the wood back to its shed. But
instead I've been taking in a load of wood whenever I need to drive the
golf cart out to the cars anyway. A week later, our shed is
already a third of the way full!
 Honeymoon, day 1. We drove south out of
the mountains of Virginia all the way down to the flatlands of
Alabama. Roadside pine trees push their way in amid the hardwoods
I'm used to and an unfamiliar grass coats the edge of the
blacktop. We don't stop for me to botanize, although we do pass a
man pulled off on the side of a six lane highway by a lake, fishing
pole in hand.
Down south, the humidity has not yet lifted to give way to a crisp,
mountain fall. I'm a homebody most of the time, but I love the
feeling of covering new territory, even if it is pavement and
buildings. Mark and I sleep fitfully and wake up early, in a
different time zone, ready to explore a Native American mound!
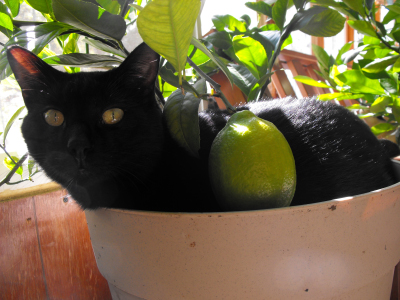
(Nothing photogenic yet on our trip, so this is a picture of the lemon
tree soon after we brought it inside to prepare for our trip.
Huckleberry enjoyed the new addition to his living space.)
 The obvious method to prevent bare soil in
a vegetable garden is mulch, but unless you shell out the cash for a
dumptruck load or two, chances are there won't be enough to go
around. How else can you protect your soil?
Close plant spacing can shade your soil surface, preventing damage to
the underground ecosystem while also keeping weeds from growing.
I often plant my lettuce and leafy greens far closer than the
instructions on the seed packet recommend. The result is an
endless carpet of green food, with little weeding after the vegetable
seedlings catch hold.
|
|
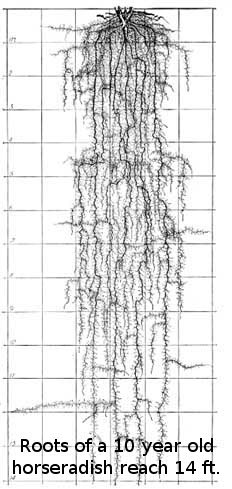
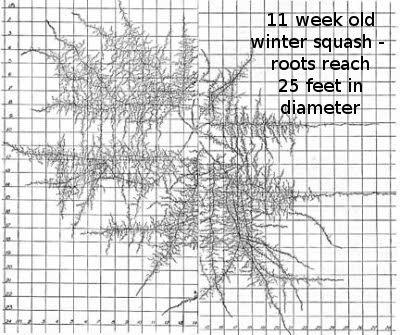
Close spacing does have its limits, though. I've learned the hard way that tomatoes need lots of air circulation in our climate to prevent blight --- Kourik recommends planting them four feet apart. In addition, roots of our garden vegetables are much larger than I'd ever suspected --- carrot and swiss chard roots reach seven feet deep while pumpkin roots can grow horizontally to 20 feet in diameter. Without double digging and heavy amendments of compost, roots of these plants will compete with the neighbors and both will struggle. Check out the amazing root diagrams in John Weaver's Root Development of Field Crops (available free online) for more information. |
More fascinating tidbits from
Robert Kourik's book are coming next week. If you can't wait,
check out his
blog.
This post is part of our lunchtime series reviewing Robert Kourik's Designing and Maintaining your
Edible Landscape Naturally.
Read all of the entries:
|
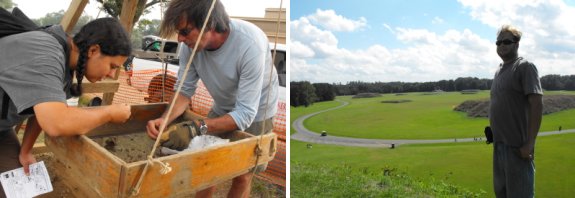
Moundsville is an exciting and interactive park that provides an
interesting glimpse into what life may have been like in this country
before European influences began their crusade against all who opposed
them.
This post is part of our Moundville and Cruise to Mexico honeymoon
series.
Read all of the entries:
|
 Eight hundred years ago, Moundville, Alabama, was the home of a city of 10,000 people.
Once a year, a thousand of their descendants and random tourists
descend on the mounds for a day of fun and edification. Mark and
I were thrilled to discover that the Native American Festival was being
held the day before our cruise ship departed, and was nearly on our
way. The stars were aligned to bring us to another Native
American mound.
While our visit to Moundville wasn't the same soul-bending experience as our trip to Serpent Mound,
we still ended up rivetted. The mounds themselves were amazing
--- a dozen "small" ones and one sixty feet tall, the last of which we
were allowed to climb. But what really captured my attention was
the educational booths set up for the festival. I learned so much
about Native American crafts that I'll have to turn it into a lunchtime
series --- fire making, river cane baskets, pit-fired pottery!
Then there was the semi-authentic Native American food, an actual
archaeological dig, and an astonishing number of vendors whose crafts
should have been in a museum. Despite hundreds of screaming kids,
we stayed until the Alabama heat sent us scurrying for cover. If
you're ever close to Alabama in October, I highly recommend that you
drop by the festival!
This post is part of our Moundville and Cruise to Mexico honeymoon
series.
Read all of the entries:
|
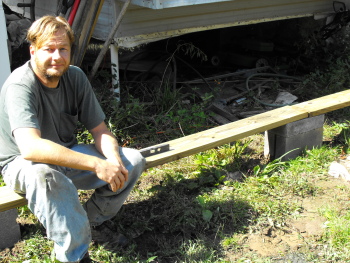 The location we chose for the new
building has a bit of a slope to it. This requires different size
blocks at different intervals to make it all level.
After a shopping spree at the hardware store I learned you can get the
solid cinder blocks in both 4 inch and 2 inch sizes, which oddly cost
the same even though you get twice as much material with the 4 inch
version.
| This post is part of our Building a Storage Building from Scratch
series.
Read all of the entries: Part 1: Foundation
Part 3: Walls and scavenging lumber
Part 5: The roof
|
 During the last frantic day before our
wedding celebration, I noticed a monarch licking the handles of our
iced tea jugs. One of the butterfly's wings was slightly
crumpled, and I guessed that the insect was having trouble making the
long journey to its wintering grounds in central Mexico. Even
though I believe that nature picks off wounded animals for a reason, I
had to carry the monarch over to the sunflowers, where it began feeding
greedily.
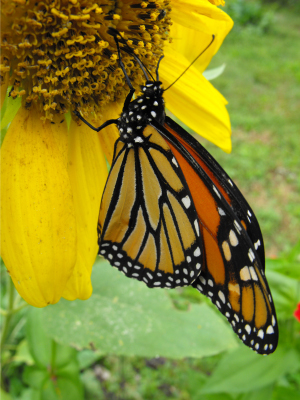 Since we're currently cruising toward Mexico
at this moment while my brother watches the farm, I thought this
monarch was an apt symbol of this week's mini-adventure. Despite
being a homebody, I've always dreamed of traveling. Nine years
ago, I did --- setting off with a backpack full of camping supplies and
sketchbooks for a year-long expedition through Great Britain,
Australia, and Costa Rica.
In the end, what I remember most from that journey was the
homecoming. How American grocery stores seemed huge and slighly
obscene. How the dozens of boxes of books and clothes I'd stored
in my mother's basement seemed even more obscene --- what did I need
with so many possessions?
In a way, that trip was the beginning of my path toward
simplicity. Slipping
outside my own world, I saw myself in a completely new way. What
insight will this adventure bring?
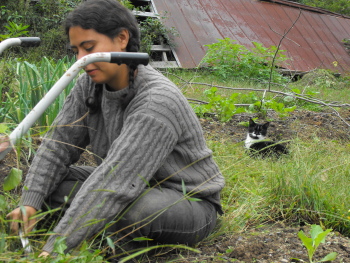
I've always said a cat would be worth its weight in gold if it could
pull weeds out of the garden.
I guess the next best thing is to have your cat keep you company while
you get the job done yourself.
 No
root cellar, but you still want to store root crops for the
winter? Don't despair --- storage mounds are cheap and easy to
build. You'll see a few more potatoes rot away than you would in
a good root cellar, but storage mounds are definitely worth the effort.
We tried out a simple
storage mound in 2007 that kept our potatoes fresh for months. If
I'd known what I know now, I suspect we would have had potatoes all the
way through to spring. What I did wrong:
- I dug my potatoes and stored them in August when the ground was still warm. I would have been better off leaving them in their rows until October.
- I put all of my potatoes in one mound, so I had to re-cover the mound every time I wanted a fresh potato. I would have been better off if I made several smaller mounds rather than one big mound.
- I should have stuffed straw down the ventilation pipe for additional insulation.
- I should have begun the mound slightly underground for better
insulation. Digging eight to twelve inches down before laying
down the first mulch layer works well.
- I wrapped a piece of plastic around my mound, hoping to keep the dirt from washing away in the rain. Bad idea! You want plenty of ventilation in your storage mound, so leave the plastic off.
Storage mounds --- also
known as "clamps" --- won't work well in the extreme north or the
extreme south, but if you have moderate winter temperatures, lots of
root crops, and no root cellar, they're worth a shot. Be sure to
build your clamps in a well-drained location. Potatoes, carrots,
beets, turnips, cabbage, parsnips, and apples can all be successfully
stored in clamps.
Check out our storage
vegetable series for more information about planting, harvesting,
and curing crops for fresh winter eating.
| In addition to rivetting
information about soil, Robert Kourik's Designing
and Maintaining Your Edible Landscape Naturally
is chock full of what may be my very favorite thing in life --- well
researched lists! I took copious notes and even made a few
spreadsheets, preparing for the hard day when I have to return the book
to the library. Now, I understand that some of you may find lists less tantalizing than I do. In fact, my father told me that spreadsheets give him shivers, and not the excited ones they give me. So, I promise you some tempting tidbits along with the lists. And for you list-lovers --- start salivating now! These lists are good! |
|
This post is part of our lunchtime series reviewing Robert Kourik's Designing and Maintaining your
Edible Landscape Naturally.
Read all of the entries:
|
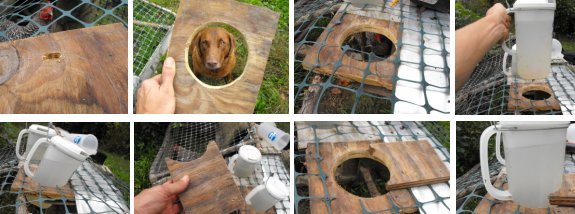
When building a wooden holder for the Avian Aqua Miser one must
remember to allow a bit of wiggle room for the container to slide in
and out easily. Even though the hens don't seem to mind the tilt, a
simple back bracket is all it takes to even things out for a more
balanced look.
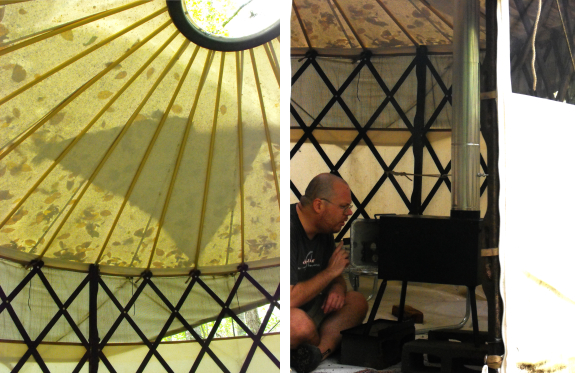
Mark wants to live in a
round house some day, and I have to admit that the idea has merit every
time I go visit Joey's yurt. The circles and lines in the yurt
always capture my interest and I end up taking photos that could almost
be abstract, like the one on the left.
Joey considered taking the yurt down for the winter, but instead he
bought a Two
Dog Stove, specially designed for safe use in tents. The
stove is so small that Joey was able to carry it in by himself soon
after our most
recent flood. Setup took mere minutes with the ultra-cool
telescoping stove pipe --- no need to laboriously fit pieces together;
just grab both ends and puuuullll.... I'm curious to see how well
the stove keeps Joey warm during his wintry visits to the farm.
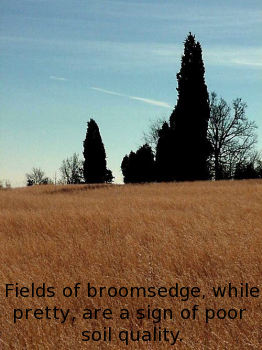 Imagine for a minute that you just moved onto
a large farm, the way we did three years ago. How do you know
where the soil is ideal for a garden? Soil tests are a good move,
but it would cost an arm and a leg to decipher the microhabitats that
cover even a quarter of an acre on our farm. You can do what I
did and just plant things randomly and watch half of them die, or you
can use Robert Kourik's list of indicator plants to find good and poor
garden spots.
Is your yard overrun with hopclover and whitetop aster? Chances
are your soil is excessively alkaline and needs some acidification
before it will make good garden ground. What if you've got a lot
of sheep sorrel, goldenrod, and field bindweed? That means your
soil is sandy.
I took Robert Kourik's three page list of indicator plants and compiled
all of the ones that live in Virginia and the surrounding area, adding
in an indicator plant or two of my own. The resulting spreadsheet
is easy to sort by category so that you can see all of the wetland or
cultivated land indicators in one spot --- oh the wonders of
technology! Download my Virginia soil
indicator plants spreadsheet and enjoy!
This post is part of our lunchtime series reviewing Robert Kourik's Designing and Maintaining your
Edible Landscape Naturally.
Read all of the entries:
|

I was walking by the bee hives today and noticed this crowding by the
entrance. No doubt it's due to it being cold this morning, but a steady
flow of bees were going and coming which makes me wonder how they
decide who gets to stay home on a cold day like this one?
There's nothing more
depressing than picking one of the two watermelons
in your garden, cutting it open, and discovering that it's not yet
ripe. That's what happened in our garden last year, so this year
we grew more watermelons and started learning the secrets to
ensure we only pick the watermelons when they are fully ripe.
Some folks say they can tell when their watermelons are ripe by
thumping the side and listening for a hollow sound. Good
luck. Others count the days since they planted their seeds and
look at the days to maturity on the seed packet --- this is a good
start, but doesn't factor in chilly weather droughts, and other
features that set your ripening back by a day, a week, or a month.
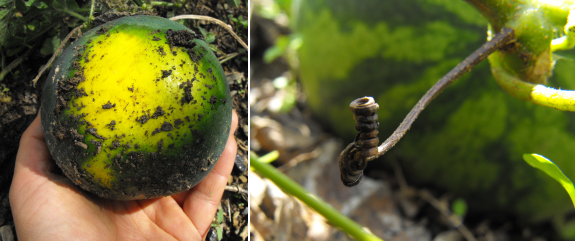
I've found two signs that seem to be much more fail-safe. A ripe
watermelon will turn yellow, tan, or white on the portion touching the
ground --- the Sugar Baby in the photo on the left is a great
example. This pale spot can be harder to see on lighter green
watermelons, like the Dixie Queen on the right. Here, I focus on
the tendrils directly opposite the stem running to the
watermelon. Once these tendrils start to dry up and turn brown,
your watermelon should be juicy and sweet.
As a final note, we grew four varieties of watermelons this year ---
Sugar Baby, Dixie Queen, Early Moonbeam, and Sweet Favorite
Hybrid. Sugar Baby won the prolific fruit prize and Dixie Queen
won the taste test (but had very few fruits.) Early Moonbeam was
more of a novelty melon, with its yellow flesh, while we never actually
got a fruit from the Sweet Favorite Hybrid. It's always worth
planting several varieties if you have a fruit or vegetable that
doesn't seem to be working for you --- chances are that one of the
varieties will become your garden's new star!
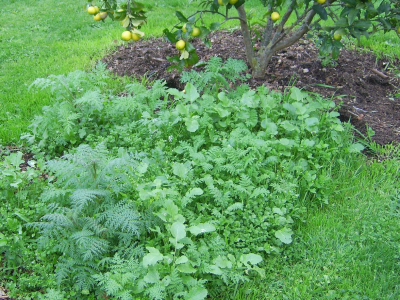 Once you know the
shortcomings of your soil, you can start planning green manures,
mulches, and herbal leys to correct deficiencies. All three of
these fertility campaigns are built around dynamic
accumulators ---
plants that concentrate micro and macronutrients from the soil into
their leaves, stems, and roots. Robert Kourik's book seems to be
the source of most of the data in more current books and websites about
dynamic accumulators, and once again I compiled the most useful species
into a dynamic accumulator
spreadsheet.
Looking for a
calcium-rich plant to help harden your chicken's eggshells? Why
not grow some comfrey or dandelions. Need to boost the nitrogen
content of low fertility soil? Clovers and vetches are hard to
beat, but you might also be able to gather high nitrogen tobacco-stalks
from your tobacco-growing neighbors.
All summer, as I dragged
our heaviest chicken tractor up and down a steep hill in the mule
garden, I've been considering planting a dynamic accumulator patch
there to be mowed at intervals, providing fertility to nearby garden
beds. It turns out that this concept has a formal name --- an
herbal ley. The term herbal ley technically refers to a pasture
of mixed grasses, legumes, and herbs, but I see no reason why I can't
use a similar patch to feed my darling fruit trees and
vegetables. I'll be playing with my dynamic accumulator
spreadsheet this winter to come up with a mixture of plants that
provides a well-rounded assortment of nutrients.
This post is part of our lunchtime series reviewing Robert Kourik's Designing and Maintaining your
Edible Landscape Naturally.
Read all of the entries:
|
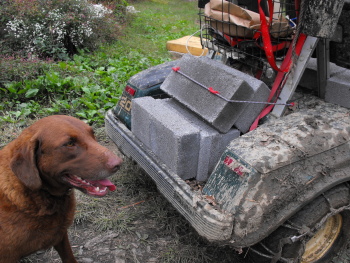 The Club Car continues to be a work horse for
hauling in heavy loads, even during this wetter than usual spell we've
been going through.
I think it's time to consider building a frame towards the back to
upgrade the carrying capacity from 2 full golf club bags to something
more farm appropriate.
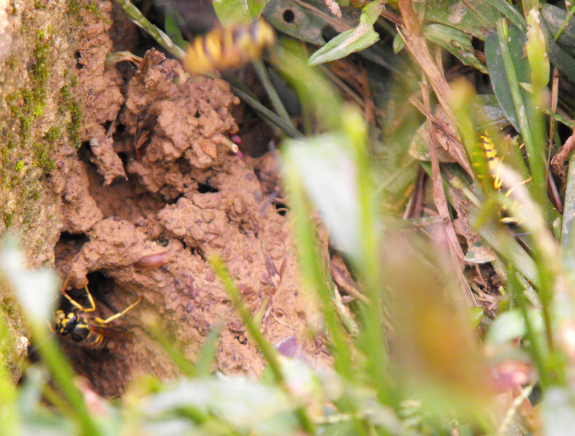
As a budding beekeeper,
I've learned that most stinging insects aren't so bad. Honeybee
stings stop hurting in minutes, the wasps that move into our trailer in
search of ladybugs rarely sting, and bumblebees generally mind their
own business. But I have a hard spot in my heart for
yellowjackets.
Last year was the worst year ever for yellowjackets --- it seemed like
every time I mowed the yard, I got stung. This year, we only seem
to have one nest within our cultivated perimeter (and another along the
driveway). Since I've marked the locations and give them a wide
berth, stings have been relatively minor.
I've been stung
by pretty much everything out there, and I have to say that
yellowjacket stings are the most painful. All summer, I've
considering finding a way to kill the colony living between my rhubarb
and asparagus, but I can't wrap my mind around poison. Turns out
I've waited long enough that winter will soon do it for me.
Unlike honeybees where most of the colony survives the winter, only the queen
yellowjacket overwinters, starting a new colony in the
spring. Sure is nice to be able to put off one more problem until
next year....
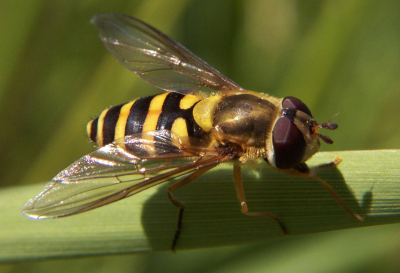 In the rush to produce the
world's biggest pumpkin and the world's tastiest strawberries, it's
easy to ignore flowers. But flowering plants should have a
prominent place in any organic garden since they attract beneficial
insects. Everyone knows that ladybugs are the cat's meow, but did
you know that hover flies (also known as syrphid flies) are great
aphid-eaters and that tiny parasitic wasps will eat your pest insects
from the inside out?
The problem with
attracting beneficial insects is that there are a dozen or more key
insect players, and each one needs to be fed supplemental pollen and
nectar all through the growing season. Luckily, many plants
support several different kinds of beneficial insects, especially
plants like umbellifers, composites, and mints that host scores of tiny blooms.
I compiled another spreadsheet to help me keep track of all
of the different nectary plants for beneficial insects, starting with
the ones listed in Robert Kourik's book but expanding out to include
plants listed on Farmer
Fred's website.
It's clear that fennel, goldenrod, and Queen Anne's lace are top
nectary plants, while ragweed appears to be as beloved by some species
as it is by our honeybees. Stay tuned for more nectary musings as
I plan next year's garden.
 This post is part of our lunchtime series reviewing Robert Kourik's Designing and Maintaining your
Edible Landscape Naturally.
Read all of the entries: This post is part of our lunchtime series reviewing Robert Kourik's Designing and Maintaining your
Edible Landscape Naturally.
Read all of the entries:
|
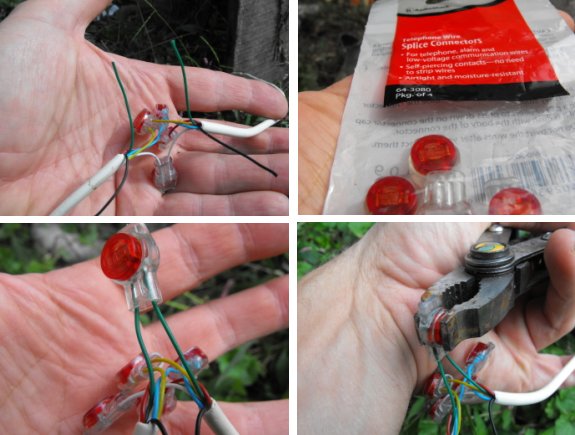
It's been over a year since our phone line was cut in half by some
reckless weed eating on my part. At the time I just stripped each wire
and wrapped them together with a bit of electrical tape for protection.
Well that kind of repair will only last so long if it's subjected to
the outside elements.
I had to repeat that fix twice last winter due to moisture getting into
the taped area and knocking out our phone service. Also the twisting of
the wires can sometimes cause them to become weak and break.
I was quizzing our local radio shack guy on this last week hoping to
find a clever solution and he came through with these phone splice
connectors. Expect to spend just under a buck for each one, and get 2
packages if you need more than 4 wires spliced like most phone cables.
It's really easy. You just slide each wire all the way in and crimp
down with a set of pliers. Make sure you press hard.
 We're
home, safe and sound! Two purring cats, an ecstatic dog, three
tractors of happy chickens. Deer damage in the garden --- I will
consider it a tithe to the earth for our stunning cruise
adventure. Plenty of orders for our homemade chicken
waterer ---
yay! The earth smells of damp leaves and the creek is middlin'
high.
We'll be more talkative later. For now, I'm just glad to be home!
 Now that we're home from our
journey, it's time to bring my obsession with Robert Kourik's book to
an end too. Where better to end than with my greatest weakness
--- fruit trees?
Robert Kourik's book
threw everything I thought I knew about fruit trees on its head.
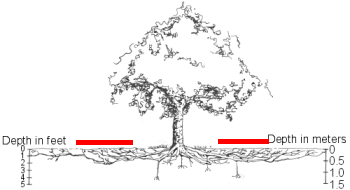
You know how the roots of trees extend as far vertically and
horizontally underground as the tree's canopy spreads
aboveground? That's bunk. In fact, tree roots often grow
1.5 to 3 times as wide as the canopy of the tree. And while some
vertical roots sink deep to give the tree stability, the majority of
the tree's feeding is done in the top two to four feet of the soil,
with the primary focus on the top few inches.
What does this mean for
folks planting a little orchard in their backyard? Many of us
mulch our trees to prevent them from having to compete with grass for
nutrients --- if we do that, we should be mulching much further out
than the cute donut around the trunk. In fact, Kourik recommends
planting a cover crop close to the trunk of the tree and instead
focusing your mulch on the area halfway between the trunk and the
dripline of the tree, then continuing the same distance beyond the
dripline of the tree. (I've marked this area with a red line in
the diagram above.)
If all of this talk of
roots has whetted your appetite like it has mine, you might want to
check out one of Robert Kourik's more recent books --- Roots
Demystified.
My copy is already on hold through the interlibrary loan system.
This post is part of our lunchtime series reviewing Robert Kourik's Designing and Maintaining your
Edible Landscape Naturally.
Read all of the entries:
|

Sailing on the cruise ship Holiday is considered the lower end of the
cruise industry, and our expedition was one of its last voyages before it
gets retired next month.
It's hard to believe this level of luxury is considered out of date. We
had a stellar time aboard the Holiday and have managed to sum it all up
with a couple of videos and some pictures for next week's lunch time
series.
This post is part of our Moundville and Cruise to Mexico honeymoon
series.
Read all of the entries:
|
 The frost kindly waited until our return to
threaten --- frost by the end of the weekend. Most major frost
preparations are long since complete, but I picked the last of the
everbearing red raspberries and Mexican sour gherkins, took in a
bowlful of green tommy-toe tomatoes, and picked the last big bowl of
shiitakes.
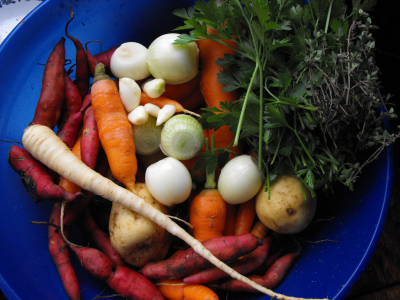
Meanwhile, our first day home glowered coldly at us, so I decided to
make some roast roots to warm up the house and our dispositions.
The 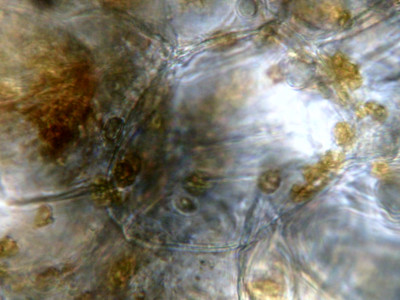 parsnip I dug clearly wasn't
quite ready yet, so I filled up our roasting pan with masses of
carrots, tiny sweet potatoes that need to be eaten ASAP, and white
potatoes, shiitakes, onions, garlic, thyme, and parsley, all from the
garden. Toss on a storebought chicken, and our dinner was nearly
as good as the ones on our cruise.
The second photo is a closeup of a carrot cell, showing the
chromoplasts that give the root its color. More on the fancy,
digital microscope the photo was taken with later.
 In doing a little research on the ship we
sailed on I discovered it was one of three ships contracted by FEMA
after hurricane Katrina to provide housing for relief workers and
victims of the storm.
Politicians from both parties criticized the deal due to the ships not
being fully utilized, but with a little hind sight it seems like it
was a quick decision in the face of a disaster that didn't quite work
out as planned.
I like the idea of relief workers having a comfortable place to
recharge after a long day or night of helping people as they try to put
various pieces back together. Maybe the government should consider
designing a ship with this purpose in mind?
This post is part of our Moundville and Cruise to Mexico honeymoon
series.
Read all of the entries:
|
 The best book I read while on
our cruise
was Brad Kessler's Goat
Song: A Seasonal Life, a Short History of
Herding, and the Art of Making Cheese. The book traces the
first year in the author's life with Nubian milk goats, and I warn you
that after you finish it you will want milk goats too. I had to
remind myself repeatedly that I wouldn't have been able to leave the
farm if I got milk goats and thus wouldn't have been on the cruise.
The book was almost blog-like in parts, a format that I obviously
enjoy. One chapter ran through the highlights of a season of
milking, day by day, and another chapter was a blow by blow account of
cheese-making. He mixed in some monks, a visit to artisanal
cheese-makers in France, and the effects that herding has had on our
language and culture. When I closed the cover, I could almost
smell new hay, meadow flowers, and goat cheese lingering in our cabin.
Our tour of Uxmal in the Yucatan of Mexico was one of the highlights of
the cruise. We had an awesome tour guide by the name of Armando Chan
who was part Mayan. His words really added a nice element to our
understanding of this amazing culture.
The atmosphere of history is fascinating and we decided 3 hours was
just not enough time to explore such a mystical place. Maybe we can
plan for an extended adventure at Uxmal for our next Yucatan excursion?
This post is part of our Moundville and Cruise to Mexico honeymoon
series.
Read all of the entries:
|
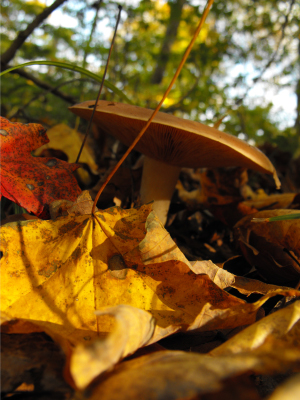 We
got back home Thursday after dark, so I was shocked the next morning
when I stumbled out of bed, looked out the window, and saw huge blobs
of color on the hillside. Autumn leaves!
Sunday, the cloudy weather broke for a few hours, and I took Lucy and
the camera out in the woods to explore. Mushrooms had popped up
all over and freshly fallen leaves were strewn around them.
Closer to home, our shiitake logs were all coated in mushrooms, despite
not being soaked in weeks. I guess this is perfect mushroom
weather --- cool and wet.
And now, Monday morning, the ground is thick with our first frost and
temperatures are in the mid 20s. Surely we haven't skipped
straight to winter?
Now
that we're back on land, it's time to bombard you with pictures and
stories of our adventures. We can't force you all to come over
and watch a mind-numbing, three-hour-long slide show, so instead this
week's lunchtime series covers the highlights. This way, rather
than falling asleep in the dark, you can just skip our posts if they
get too boring.
As we mentioned previously, before hopping on the cruise ship we spent
a day at Moundville's
Native American Festival, the highlight of which
was learning to make fire. I summed up the fire-making experience
in a four minute video --- my first effort at video editing, so please
excuse my growing pains. The expert on the video created an ember
out of two pieces of pine, a bow,
and a cap stone in less than three minutes. It didn't quite catch
in
his tinder due to humid Alabama weather, but the concept is
extraordinarily well explained. Watch and learn!
This post is part of our Moundville and Cruise to Mexico honeymoon
series.
Read all of the entries:
|

A friend of mine gracefully brought to my attention the fact that I was
ignoring the 6 inch freeze zone when I was laying the
ground work for our new building project.
I decided to experiment with some posts from the large cedar tree I cut
down last month. It's easier for an amateur like me to use this method
compared to leveling out the cinder blocks.
| This post is part of our Building a Storage Building from Scratch
series.
Read all of the entries: Part 1: Foundation
Part 3: Walls and scavenging lumber
Part 5: The roof
|
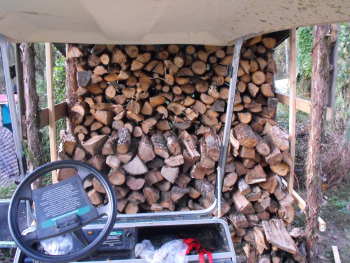 At the end of last winter, Huckleberry tore
apart the air pipe that channels heat from our exterior wood
furnace into the trailer. Then the stove pipe rusted
out. We were trying to hold
off on lighting our wood stove until the end of the week when we would
hopefully have the floor of the shed up and could just move the stove
there, rather than fixing it in its current location.
All weekend, I shivered in a house that barely reached 50 degrees,
baking large dinners to warm up the kitchen. Mark had a space
heater in his room, but I didn't want to break down and use
electricity. Finally, Monday morning, the interior temperatures were in the
thirties. Yikes!
So sweet Mark threw
together some short-term fixes on the wood stove and lit us a
fire. By mid morning, I took off my winter coat, sweater, gloves,
and second pair of pants. Ah, wood heat!
As a side note, you can see that our wood shed is already halfway
full. It looks like we may run out of space before we run out of
wood and will have to build a second shed. A good problem to have!
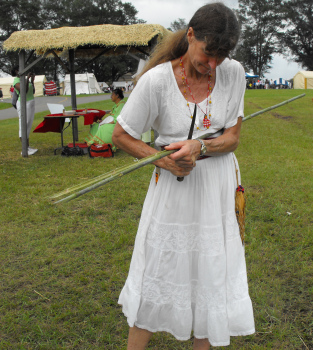 We
also learned about two other intriguing Native American crafts at the
Moundville
festival --- cane baskets and pit-fired pottery. The
lady on the right is splitting a piece of river cane (a native bamboo)
in half, then in half again. Next, she will shave the top off
each quarter to make a strong, slender cane perfect for basket-weaving.
River cane used to be ubiquitous throughout the South, and Native
Americans put it to good use, turning the canes into baskets, spears,
shelters, and much more. I was inspired by the demonstration to
work harder at planting our own mini cane brake where the power line
cut creates an opening in our floodplain forest.
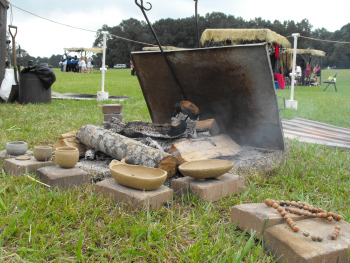 Crowds
of school children pushed us onward, past the basket-weaver to the
pit-fired pottery demonstration. I took pottery classes in high
school and college and loved the feel of mud on my hands, but always
found the kiln infrastructure too daunting to try on my own.
Native Americans, of course, used simpler techniques than electric
kilns. Instead, they dug shallow pits about a foot deep, placed
pots on a mound in the center, and built a fire around the edges.
The fire starts small, but is slowly allowed to engulf the pots over
the course of five to six hours, turning the pots first black then back
to clay color. Again, I resolved to try to mine a bit of the clay
along our creekbank and give pit-firing a shot.
This post is part of our Moundville and Cruise to Mexico honeymoon
series.
Read all of the entries:
|

Yes.....a couple of the mechanical
deer deterrents failed recently due to some simple hang ups. It
took me a few attempts before I came up with what I call the supporting
arm structure for the clanging surface.
The support provides more adjustment choices when fine tuning the swing
and helps to secure this deer deterrent contraption even during heavy
winds.
Is a failure like this frustrating? Heck yeah it is, but the feeling of
knowing we are one step closer to a better solution helps to ease the
pain.
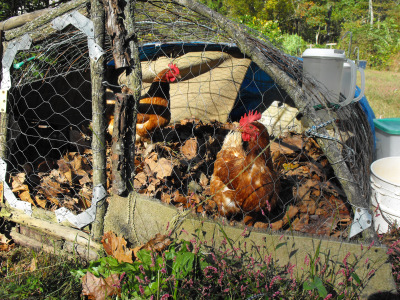 Our chickens are pretty self-sufficient as
long as the temperature doesn't get too far below freezing. We've
been known to leave them for up to four days with just an extra automatic chicken waterer and
a few scoops of feed sprinkled over the ground. The only problem
with leaving them alone for so long is that they scratch the ground up
pretty badly, and in rainy weather the soil turns into a morass of mud.
Before heading out on our cruise, I decided to try a different
tactic. I begged Mark to rake me
up a bunch of leaves, and I filled each tractor with a mountain of
organic matter. When we returned a week later, each mountain had
sunk to a mole hill of shredded leaves well mixed with chicken poop,
but the ground wasn't muddy despite an inch and a half of rain.
I'm emulating the traditional
Guatemalan method of using this combination as a well-balanced soil
amendment, though I plan to use the poopy mass as mulch on my garlic
beds rather than working it into the soil.
After
Moundville,
we got on the boat for our five day cruise. I had
been concerned that spending so much time at sea might be a bit boring,
but instead the experience was so astounding that we'll definitely
repeat it soon. I summed it up in my second editted video ---
this one's shorter and tighter than the last one, I promise. 
This post is part of our Moundville and Cruise to Mexico honeymoon
series.
Read all of the entries:
|
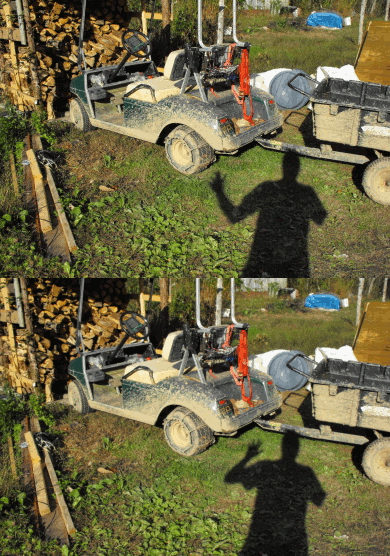 Yesterday we figured out the hard way what
happens when you exceed the load limit in the heavy
hauler trailer we use with the golf cart.
Normally it seems to be able to handle a full load of wood half haphazardly thrown in, but when you carefully stack each log next to
its neighbor the volume increases to the point of a problem.
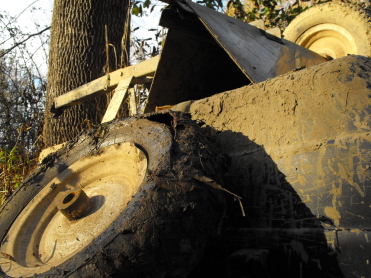
I heard a loud pop coming from the driveway where Anna was hauling
firewood and knew some sort of tire mishap had occurred.
I think they sell these replacement wheels at the big box stores, or
maybe we'll get lucky and our tire guy will work another rubber miracle
by bringing it back to a functional life for a small fee?
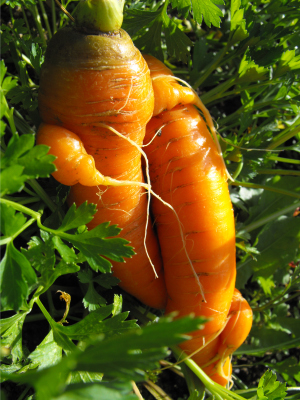 This post is a continuation of the
never-ending saga of the weird growing year. Remember how things
like potatoes that are supposed to be carefree kicked the bucket?
Well, our carrots --- which many people find difficult --- grew like
kudzu.
Wednesday, I harvested two beds and came up with 27 pounds of carrots,
enough to completely fill the crisper drawer of our little
fridge. Many of the carrots were as big as or bigger than
store-bought, and I suspect they will store for months if I can keep
the moisture level correct.
We've got four beds left to harvest, but I planted those beds late so
the carrots are smaller. I plan to give those to my brother and
mother so that they, like us, will turn orange by spring.




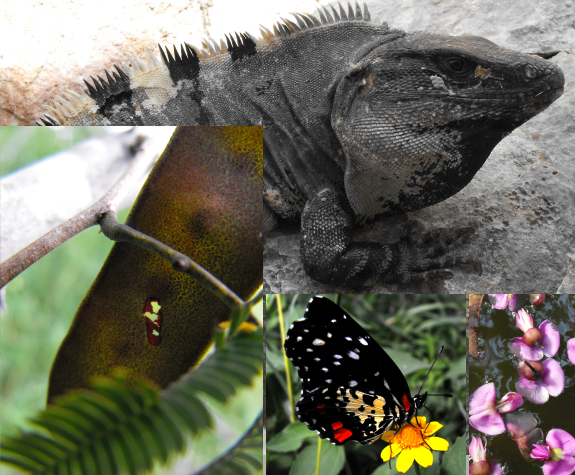
Of
course, being who I am, as soon as the tour guide turned me loose I
headed in the opposite direction from the rest of the group, toward the
woods. The Yucatan Peninsula is covered with dry, scrub forest
due to very thin topsoil over limestone. Trees were short, and
many were legumes --- presumably the poor soil gives trees that can
make their own nitrogen an advantage. Butterflies abounded, as
did huge iguanas that had taken up residence in the abandoned rooms all
around the ruins. Swallows soared and chittered, Africanized
honeybees gathered pollen in the grass, and Mark and I sat in the shade
and lived Uxmal.
This post is part of our Moundville and Cruise to Mexico honeymoon
series.
Read all of the entries:
|

It's always a nice bonus when Lucy gives a project
a few sniffs and then announces her seal of approval.
| This post is part of our Building a Storage Building from Scratch
series.
Read all of the entries: Part 1: Foundation
Part 3: Walls and scavenging lumber
Part 5: The roof
|
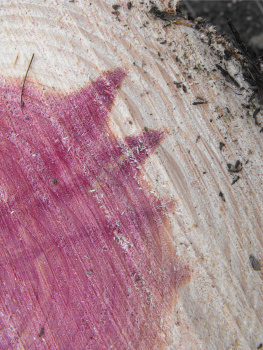 Some
of you may be wondering about our decision to use untreated cedar posts
as the foundation of our
shed. It
almost certainly wouldn't pass the building inspector's eagle eye, but
luckily small sheds are often exempt from code restrictions (especially
when you live out in the middle of nowhere.)
How long will the red
cedar posts last in the ground? Your guess is as good as mine,
but I suspect they'll last a good long while. Red Cedar (Juniperus
virginiana) wood contains substances that
naturally kill termites, but it's hard to say
whether the wood is as effective against fungal rots.
The red heartwood, from
which Red Cedar gets its name, is the most hardy part. Mark
carefully chose large cedar trunks with plenty of heartwood, figuring
that even if the pale sapwood rots away, enough heartwood will remain
to support our shed. People have been using Red Cedar as
untreated fenceposts for a long time, and Mother
Earth News notes that they will last for 15 to 20 years. Since our supports
are significantly thicker than typical fenceposts and will be protected
on the top from water, I wouldn't be surprised if they lasted for
several decades.
At Uxmal, we learned that Mayans
traditionally tore down their homes and started fresh every 52
years. It just makes sense to me to create a structure that uses
fewer resources (and costs less money), but that will need care and
maybe will even have to be replaced in our lifetime. So far,
we're on track to build the shed for around $6 per square foot,
including insulation. At that rate, we could rebuild our shed
every 5 years for the rest of our lives and still come out ahead of
someone who used more traditional methods.
| This post is part of our Building a Storage Building from Scratch
series.
Read all of the entries: Part 1: Foundation
Part 3: Walls and scavenging lumber
Part 5: The roof
|
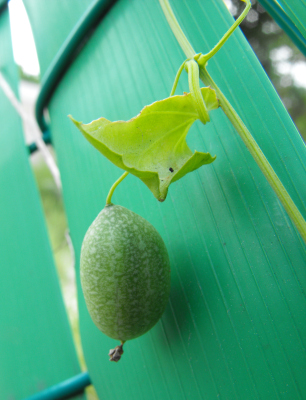 Our
second day on shore, we decided to take it easy --- our excursion to
Uxmal had both worn us out and drained our wallets. Instead, we
got off the boat on the island of Cozumel and simply explored. We
ran the gauntlet, passing vendors trying to lure us into their booths,
taxi-drivers anxious to take us for a ride, and time-share salesmen.
The water was the stunning turquoise you see in photographs and never
quite believe and so clear that we could look down from the pier and
see fish swimming several feet below. I was intrigued by the
plant life in a vacant lot, full of species I had no way of
identifying. One, though, especially caught my eye --- could that
be Mexican
Sour Gherkin climbing wildly over a fence? I was 98%
sure the plant was at least a relative, but decided against nibbling on
its fruits.
 After
walking for a couple of hours in the heat, trying to reach an elusive
museum, Mark found us an out of the way corner to relax against a
replica Mayan statue. We posed for photos, let a little Mexican
rain sprinkle on our heads, then headed back to the ship for a stunning
meal and a nap.
(Do you like my sombrero? Mark and I got matching hats as our one concession to being tourists. They
should be great for weeding the garden next summer.)
This post is part of our Moundville and Cruise to Mexico honeymoon
series.
Read all of the entries:
|
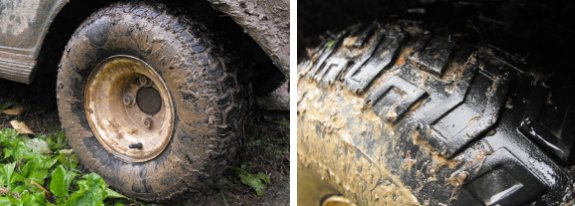
We decided to upgrade the traction
chains on the golf cart to a more respectable solution. Now we can
cruise through the mud with a bit more ease.
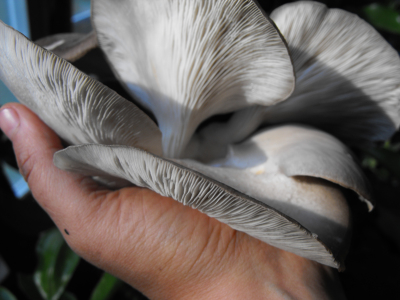 One of the four oyster mushroom logs that we
inoculated this spring popped into life Monday. I was so excited
that I tossed the frozen mushrooms into a skillet and then into our
bellies right away.
Then I wished I'd waited a little bit. Don't get me wrong, those
mushrooms were a delicacy! But oyster mushrooms are relatively
easy to propagate using one of the techniques in our "How
to Cultivate Edible Mushrooms for Free" series, and I wished I'd
taken the time to take a spore print first. Maybe if we get
another flush of mushrooms before the cold weather really sets in....
 Some of the best fruit I've ever eaten has
been stolen. One fall, I housesat for a friend whose land butted
up against an abandoned apple orchard currently being turned into
subdivisions. Those apples were some of the sweetest, tangiest
fruits I've ever tasted --- I don't even know what variety they were,
but I gathered huge bags full to turn into applesauce.
After we moved into town from our farm when I was in fourth grade, my
mother used to take us out hunting abandoned fruit on quiet side
streets and alleys. She scouted carefully and found several trees
whose fruit was left to rot on the ground, yellow jackets buzzing
ominously between. Sometimes she rang the door bell and asked for
permission. Sometimes we scurried around and filled plastic
grocery bags surreptitiously when no one was home. This is how we
got our June Apples (Early Transparents) --- the type of apple you
might envision the gods eating on Mt. Olympus.
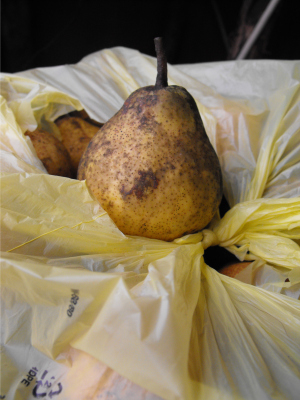
Yesterday, I collected some pears --- not quite stealing since the
property owner's niece had said I could. I didn't plan it ---
just went walking on the private park to enjoy the autumn colors, then
stumbled upon fruit rotting on the ground. Luckily, my backpack
was full of old grocery bags, so I filled them to the brim, stopping
only when my backpack refused to zip closed. Now what will I do
with a couple of gallons of delicious, but a bit gritty, country pears?
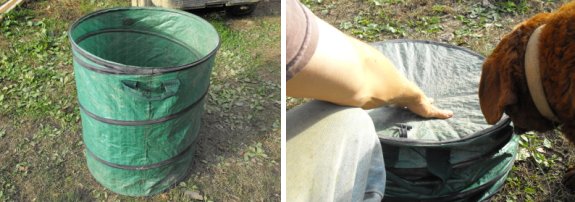
The collapsible lawn and leaf bag is a product that works and works
well. I imagine most folks would use it to support a big trash bag so
that your lawn and leaf material can be bagged up and hauled off to a
land fill. We use it in the raw to increase our mulch material, and it
makes the job a bit smoother than trying to
use a large tarp.
 As I wrote
yesterday, I was
raised on found fruit so I hardly notice things like spots and bruises
and gritty pears. Mark, on the other hand, was raised on Red
Delicious --- he doesn't seem to mind insipid fruit as long as it looks
and feels pretty. I chopped up one of my stolen pears for lunch
yesterday and he turned up his nose at the texture, which sent me to
the internet, wondering about pear grit.
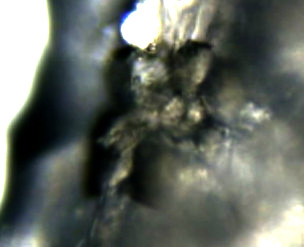
It turns out that the
grit in pears is caused by stone cells (also known as sclereids)
--- the same material that makes walnut shells and cherry pits
hard. All pears produce stone cells, but there are a few ways to
get around them. The pears you buy in the grocery store have been
bred to produce far fewer schlereids, but even old fashioned pears are
more edible if raised properly. To reduce grit, pick your pears before they are ripe, when stone
cells are at a minimum.
 Every
year, I let myself splurge a bit on new perennials for the
garden. Last year, my splurge
rounded out our traditional fruits --- a cultivated black raspberry,
blueberries, a plum --- and started exploring the world of nut trees (a
butternut.)
From previous years, we have young apples, pears, peaches, a nectarine,
a cherry, cultivated blackberries, ever-bearing red raspberries,
strawberries, rhubarb, asparagus, and hardy kiwis. We've started
grapes, a persimmon, wineberries, and a Chinese chestnut ourselves.
This year, Dave Jack's Edible
Forest Gardens volume 1 came in on interlibrary loan just as I was
starting to get my cold weather craving for new perennials. I
flipped to the back of the book, to the list of the top 100 forest
gardening species for the eastern U.S., and my mouth watered. So
many delicious species, some of which I'd never considered! This
week's lunchtime series highlights the four species I chose to splurge
on this fall to fill in gaps in our forest garden.
| This post is part of our Splurging on Perennials lunchtime series.
Read all of the entries: |

There are 2 ways to handle a chicken escape. Scurry around and capture
each offender and return him or her to their proper place.... or sit back,
take a few pictures, spread a handful of feed in the tractor and wait
for your flock to casually return to the roost.
 As I raked up four big bins of leaves Monday,
I couldn't help thinking of all of the other Americans engaged in the
same chore. And yet, as always, I have it backwards. Here I
am raking up leaves out of the driveway, not to clear the driveway of
waste, but to salvage a precious resource. Isn't that mentality
at the heart of permaculture --- seeing nothing as a waste product?
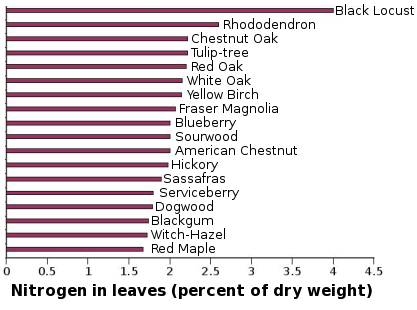
I've been wondering which tree species have the highest quality leaves,
so I took a little time to search the scientific literature. The
best study I found was "Seasonal Nutrient Dynamics in the Vegetation on
a Southern Appalachian Watershed" by Frank Day and Carl Monk.
I've excerpted the nitrogen content of the various trees in the chart
above. I'm not surprised that Black Locust tops the chart since
the species fixes atmospheric nitrogen using bacteria attached to its
roots. What does surprise
me is that thick oak and rhododendron leaves, which I assumed were low
quality, actually have a high percentage of nitrogen compared to puny
little maple leaves. Although I can't find a value for Sycamore
(my current leaf of choice), I suspect it may be a high quality leaf
based on its phylogeny and texture.
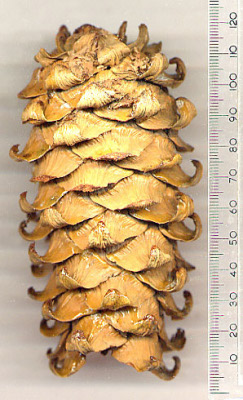 I've always been curious
about pine nuts, but never took the time to research them
properly. Stone Pine (Pinus
pinea)
is the European response to producing pine nuts, but is really only
good to zone 7. Instead, Jacke suggested Korean nut pine (Pinus
koraiensis) for
our region since it is tolerant of cold weather and makes high quality
nuts.
Planting a nut pine is
an experiment with a capital E. The trees
are huge, so we'll be cutting a gap in the pine forest on the south end
of our garden to plant them in rather than using up precious garden
space. Some folks say Korean nut pines bear in 3 to 8
years. Others warn you that you'll need to wait 40 years.
Hmmm.... 
The seedlings are
pricey, so I decided to try my hand at germinating
seeds bought on ebay. (Don't try to just plant the pine nuts
you'd buy in the grocery store --- without their protective shell,
these rot in the ground.) Stay tuned for updates on this
experiment...over the next 40 years.
| This post is part of our Splurging on Perennials lunchtime series.
Read all of the entries: |
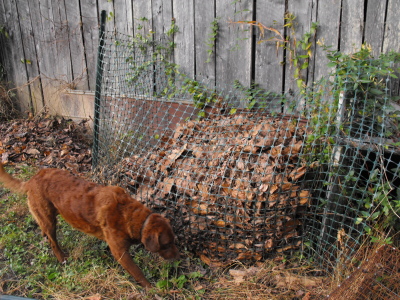
Our new leaf containment area is starting to fill up fast making me ask
the question....will there ever be too much mulch?
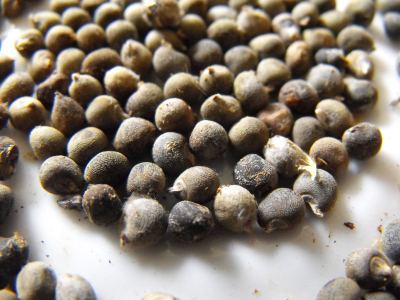 Rain drummed on the trailer roof Tuesday
morning. "Slow down," it urged. "Take the day to catch up inside."
Our kitchen had become a disaster zone of epic proportions in the rush
of harvest and honeymoon. Baskets and mesh bags of butternuts, sweet
potatoes, and pears spread out like a fungus across the floor while our
lone counter had become a dumping ground for a big bowl of ripening
peppers and tomatoes, crushed eggshells for next year's garden, and
much more. Seed heads were scattered hither, thither, and yon, waiting
to be dehulled, labelled, and stored away for spring, while the
mattress off the futon we moved outside to clear window space for our
citrus trees was engulfing half the room. I bought a bushel box of
Stayman apples from the back of a pickup truck last week, and those
were also tossed blithely on the floor in front of the sink.
Seven hours later, the rain was still drumming on the roof, but the
harvest was tucked away, the house much cleaner. (I sure am lucky to have a
handy boyfriend who's also a much better housekeeper than I am!) "Now sit down," said the wet
cat, who had fled the bustle into the rain. "It's time to purr in
a warm lap."
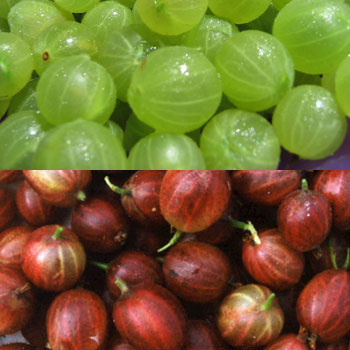 On a less experimental note, I ordered two
gooseberry bushes. Gooseberries and currants (both in the genus Ribes)
are some of the best plants for forest gardening since they are able to
bear fruit in partial shade. Ever since last winter when I read
the second volume of the Edible
Forest Gardens
book, I've been trying to decide between digging up a native currant I
found in the woods or buying a named cultivar. After reading this
Virginia
Extension factsheet on currants and gooseberries, I chose the
latter.
Gooseberries are best for fresh eating, which is how I prefer my fruit, as opposed to currants that are best cooked. There are two
different kinds of gooseberries (very much like there
are two kinds of cultivated grapes)
--- the European gooseberries tend to keel over here unless you spray
them with chemicals while the American ones do well here but may not be
as tasty. Newer varieties combine the best of both worlds.
I decided to try an improved American variety (Poorman), and a European
variety with good disease-resistance (Invicta.)
 There is one downside to the Ribes
genus --- some serve as an alternate host to the white pine blister
rust that decimates commercial plantings of white pine. As a
result, most gooseberries and currants were eradicated in the U.S. in
the 1900s before people realized that only the European black currant (Ribes nigrum) was really serving as
an alternate host to the rust. Now, many states outlaw planting
all Ribes species while other
states only outlaw the black currant. Here in Virginia, you can't
plant Ribes nigrum
except for varieties that have been bred to resist the rust, but you
can plant other gooseberries and currants with no problems. I
chose Indiana Berry to get my
two bushes from since the nursery has a good selection of varieties
that are supposed to do well in Virginia, and has the lowest prices I
could find once you add on shipping.
| This post is part of our Splurging on Perennials lunchtime series.
Read all of the entries: |
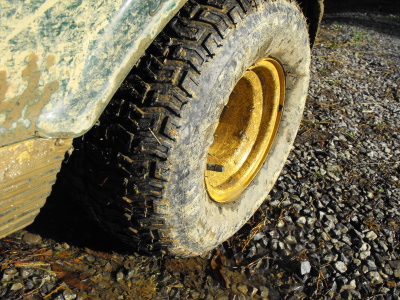 It's been almost a week now since we upgraded
the rear tires on the golf cart and the only regret I have is that we
didn't do this as soon as we liberated her from the nice and clean
campground that she came from. I would guess that our ground grippage
has doubled in comparison to the traction cables we had rigged on her
before.
 Want a free golf cart?
Move to Oklahoma! A federal tax rebate currently allows people
buying street-legal golf carts to write off $4,200 to $5,500 of
the cost. Add in the state rebate in Oklahoma and your golf cart is
free. (Although Oklahoma may have figured out this loophole and
be working to fix it.)
Even if you don't live
in Oklahoma, now might be a time to buy that golf cart for your
homestead. We've been thrilled at the way our
electric golf cart acts as a utility vehicle on the farm, hauling
leaves, firewood, and bodies (living, of course.) It runs through
the mud with ease, only has to be charged every month or two, and
hardly ever breaks down.
Right now, I believe the
only types of golf cart that fit the federal subsidy are made by
Tomberlin and Star, the cheapest models of which can cost as little as
$2,000 once you take your tax credit. It sounds like a great
deal, but some folks suspect these cheaply bought but sturdily
constructed golf carts will be available used starting next year for
extremely small sums. So maybe it'd be better to wait and save
even more....
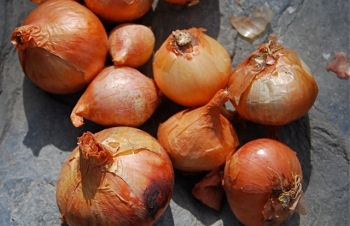 The
last perennial I bought with my splurge money was potato onions (also
known as multiplier onions.) We've had varying levels of success
with onions in the past, and I hope that the potato onions will keep us
from having to buy any more onions in the store.
Currently, we grow two kinds of onions. Egyptian
onions
are one of my favorite plants --- they are so prolific that I end up
giving away lots of top bulbs every year, expanding my patch, and still
have the top bulbs sprouting out of my worm bin and compost
piles. We eat the greens nearly all year, but I'm often too lazy
to clean the little bulbs that end up being considerably under an inch
wide after peeling off the brown skin.
For bulb onions, we instead depend on plants grown from seed. Copra hybrid
has served us well, though we never seem to be able to plant enough to
keep us going all year. This year, I made the mistake of planting
my onions in heavy soil and got very low yields.
Potato onions are supposed to be prolific perennials, like Egyptian
onions, with big bulbs that store well, like seed onions. I
ordered my starts from Southern
Exposure Seed Exchange
--- the same company that sent us such great garlic bulbs last
year. I hope that within a few years, we'll have so many
perennial onion patches that we'll no longer have to buy seeds!
| This post is part of our Splurging on Perennials lunchtime series.
Read all of the entries: |

The oldest chicken tractor has been limping along lately due to some
wear and tear. I finally took some time today for upgrades to
the frame, roost, and nest box.
One thing I learned is that using walnut is a mistake for a project
like this. I went for it because we had so much of it on hand and it's nice and straight. In retrospect it looks like a small walnut
log that sits on the ground might only last a couple of years before you start seeing serious
signs of rotting and decay.
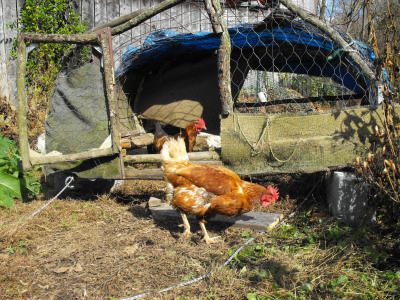
...you have a chicken tractor up on blocks in your front yard.
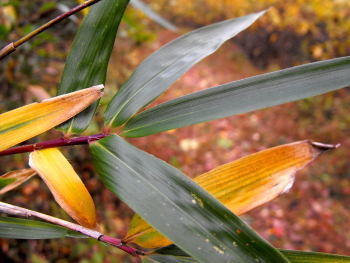 The last new perennial we're trying this year
is river cane (Arundinaria gigantea.)
This native bamboo can be used for basket-making,
trellises,
and even for dinner. (The young shoots are edible, although not
quite as tasty as some Asian species.)
Rather than coughing up the $30 per plant many nurseries are charging,
I dug up five wild plants from a friend's property. Most folks
recommend planting a rhizome barrier around your bamboo, but I think we
may use our shoots quickly enough that a barrier won't be
necessary. I hope I don't live to regret this decision!
| This post is part of our Splurging on Perennials lunchtime series.
Read all of the entries: |

This will be our 4th Halloween here on the farm and still no trick or
treaters.......it's hard to complain when that equals extra chocolate
for us.
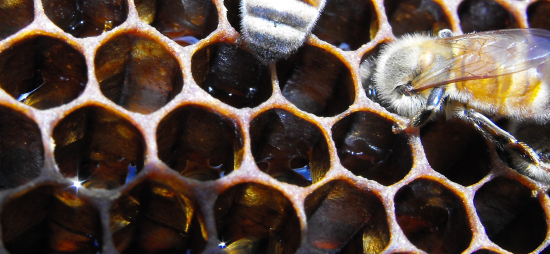
How much honey does a hive
need to survive the winter? 50 to 60 pounds in Virginia (equal to
7 to 9 full depth frames.)
How much honey is in each of our hives? 25 pounds in two and 35
in the third. Yikes! Time to drop my snobbery and feed the bees.
On the bright side, each hive is still evaporating nectar into honey in
uncapped cells near the top of the hive. Presumably this must be
aster nectar from the surrounding woods, since every other flower is
long gone.
 Lisa Katayama from Boing Boing had an
interesting post pointing to the January 1938 issue of Popular Science
where they spotlight an Ohio farmer who used a metal mold to form this
surreal image of a face
onto a pumpkin. Ohio farmers really were ahead of their time when
it came to thinking outside of the box.
Richard Twedell is the president of Vegiforms, a
company in Ohio that offers a few different plastic molds that might
tickle your fancy and satisfy your vegetable sculpting urges. He claims
his heart shaped zucchinis sell for 3 bucks to a local restaurant,
which could add up to some real money if it caught on as some sort of
new holiday trend.
Want more in-depth information? Browse through our books.
Or explore more posts by date or by subject.
About us: Anna Hess and Mark Hamilton spent over a decade living self-sufficiently in the mountains of Virginia before moving north to start over from scratch in the foothills of Ohio. They've experimented with permaculture, no-till gardening, trailersteading, home-based microbusinesses and much more, writing about their adventures in both blogs and books.
