
archives for 04/2011
 What
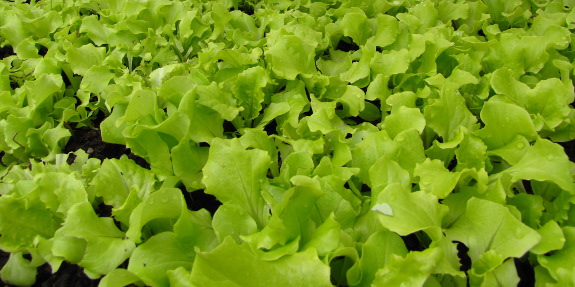
does our garden look like at the end of March? Mostly, it looks
like lettuce --- great big gobs of brilliantly green leaves to eat
every day. We've been nibbling on lettuce for about a fortnight,
but only in the last week has the growth reached the point that salad
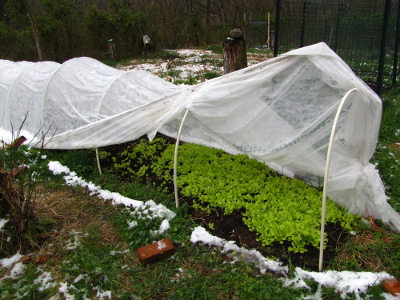
is a daily affair. Mark showed me that I can carefully lift the
edges of the quick
hoop up without
tearing the fabric, so I've decided
the beds are even easier to get into than my old cold frames were, and
the speedy access means I think nothing of running out to cut a salad
for
lunch.
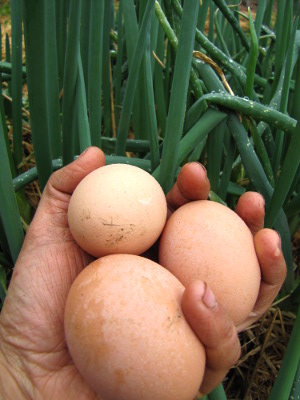 Egyptian onions are growing far
faster than we can eat them at the
moment, and the parsley is finally coming out of its winter
slump. The parsley
plants that I seeded last fall survived the
winter and would probably be pretty big if I hadn't been snipping off
nearly every new leaf as soon as it appears starting in February.
Add in eggs --- the other mainstay of the spring diet --- and you've
got the best egg salad we've ever eaten.
We're also trying to eat
up (or freeze) the last of the butternuts
before their centers get too dry. The potatoes
in the crisper
drawer of the fridge
are good for months yet, but the sweet potatoes
are developing bad spots --- my fault for letting them sit on the cold
floor through the deepest part of the winter. The same
problematic storage conditions are tempting my garlic to sprout.
It looks like we're going to have enough storage
vegetables to carry us through despite these problems, and we're
already losing interest in winter fare as
the fresh garden goodies begin to roll in.
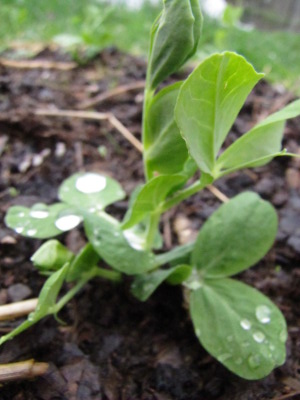 Nearly everything I've
planted this spring is already up and running
--- storage onions both in the quick hoops and out, broccoli and
cabbage sets in quick hoops, Asian greens and swiss chard in the
open. Breadseed poppies are thriving and our second planting of
peas is already up and growing, though the earlier seedlings are
about three inches taller. I'm still waiting on parsley, carrots,
spinach, and garbanzo beans to poke above the soil surface, but given
our frequent rains this week, I suspect they've already
germinated. Even the chicory seeds I tossed on new hugelkultur mounds
in the forest garden have sprouted.
Next up --- tomatoes in
a quick hoop next week and lettuce out in the
open. I've started peppers inside and will be transplanting
broccoli and cabbage seedlings out of their protective covering as soon
as the plants get a few true leaves. Otherwise, though, I'm
looking forward to the April garden "lull" to give me time to weed and
mulch our existing beds and prepare the soil for the huge May rush.
 Although
it's helpful to get an idea of which common foods are good or bad for
you, I think it's more important to recalibrate our intake of the major
food groups. Michael Barbee presents one recommendation for
overall nutrition (shown here), but he also cautions that the best diet
is
individualized. Paying attention to how your body feels when you
eat certain foods is the best way to develop a personal diet that's
healthiest for you. Our bodies' needs also change over time, so
we
have to be flexible enough to realize that what suited us last year
might not suit us tomorrow.
That said, we should all
ditch the USDA food pyramid. Michael
Barbee suggests that the caveman diet is a good place to start instead
when
recalibrating our food sensors. Pre-agricultural
man got about
half his calories from wild game and rounded out his diet with nuts,
seeds, eggs, fruits, vegetables, insects, and worms. Dairy,
grains, and legumes are newer additions to the human diet, cause many
of us problems, and should probably be consumed only in moderation by
everyone.
As I mentioned earlier,
Mark and I have changed our eating habits
drastically in the last year. We've lowered our intake of grains,
potatoes, and other carbohydrates to one to two servings per day and
have increased our fats and protein to fill in the gap. We also
boosted fruits and vegetables, aiming for these goodies to
fill around two-thirds of our plate at every meal (with a bit more
carbs on Mark's plate since he seems to need more.)
Astonishingly, this changed dietary regime has stopped many of our food
cravings, toning down my chocaholic tendencies and finally breaking
Mark free from his dependence on snack crackers. I wonder if we
had some kind of nutritional imbalance that got corrected by changing
the way we eat?
| This post is part of our Politically Incorrect Nutrition lunchtime
series.
Read all of the entries: |
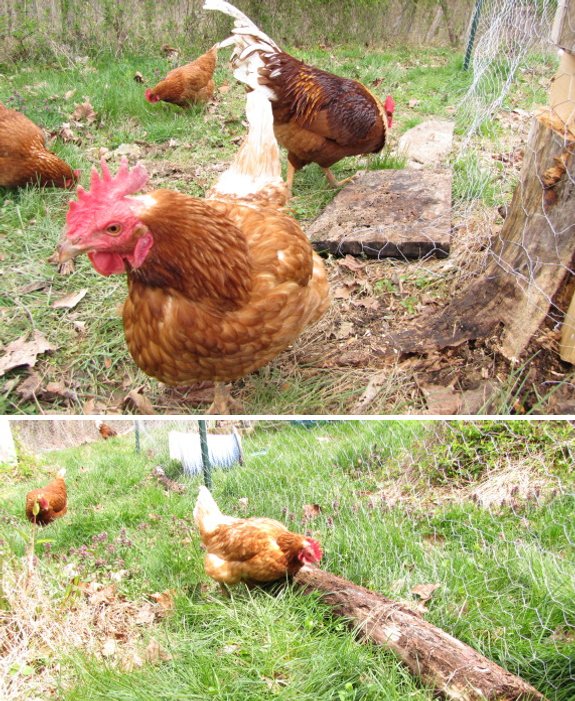
A potential escape spot in
any chicken
fence is where the ground meets the wire.
I like using old logs that
are way past the point of firewood. Sometimes I'll lay them on top of
the wire and other times it works out better to have the log on the
bottom depending on if there's any slope to deal with.
Old boards from the broken
down house worked as the same function, but you don't get the bugs and
worms that come along with a punky log.
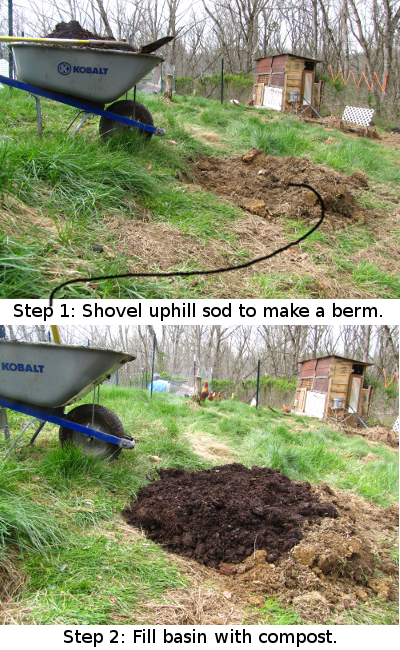 Almonds are one of my new
favorite foods, so I decided to see if we could grow them.
Traditionally, almonds are grown in the sunny south, especially in
California where summers are dry, but orchardists have recently
developed hardy almonds that can live all the way north to zone
5. We chose Alenia (Prima) and Dessertniy (Bounty) because they
are late-blooming (which means less likely to succumb to our frequent
spring frosts), have thin shells, and are supposed to have tasty
nuts. (Bitterness can be a problem with some almond varieties.)
The main problem people
report with growing almonds in the east is fungal diseases that result
from our wet summers. To nip fungi in the bud, we've sited our
new trees in the sunniest part of the yard and given them a bit more
air space than they require (planting them 20 feet apart rather than
the rated 10 to 15 feet.) Unfortunately, this area is on a slope,
but I built cepa terraces for our trees to make them
easier to tend and to capture rainwater for the roots.
Those of you with the
keenest eyes have probably noticed that our new almond beds are in the chicken pasture. We moved our flock on
to pasture two on Friday, giving me some breathing room to plant
almonds and grapes in the old pasture. Before rotating the
chickens back to this pasture, we'll make some simple tree cages out of
chicken wire to keep the birds from scratching up my new plantings.
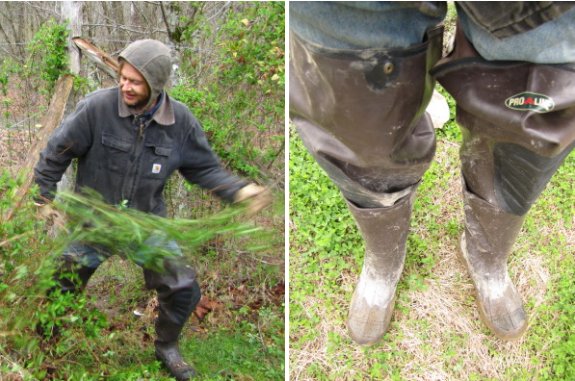
The Pro Line hip waders came
in the mail the other day and I got a chance to take them out for a
test drive.
A little extra effort to put
on, but well worth it compared to walking
across the creek in my boxer shorts trying to keep my pants dry.
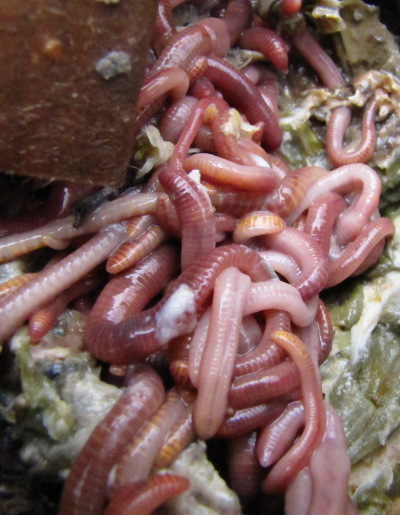 A
cold week slowed down decomposition action in our worm bin. I'd gotten used to
seeing worms in last week's bedding when I went to put in the next
week's scraps, but this Friday the worms seemed to be hanging out only
in the older food. I'll cut back a bit on the amount of food I
add to the bin while waiting for warm weather to return.
I wonder if our worms
were huddled up into these clusters to stay warm, or if every worm just
happened to want to eat the same tasty morsel?
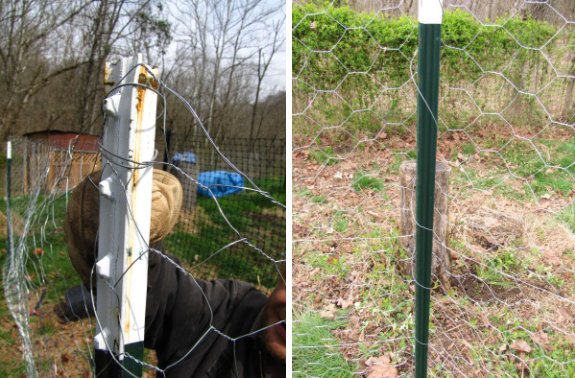
I've had good luck weaving a
strand of electric fence wire up and down a post to secure the wire in
place.
Cut the strand just a little
longer than the height of the post. I prefer to start at the bottom and
weave my way up, which seems a little easier than starting at the top.
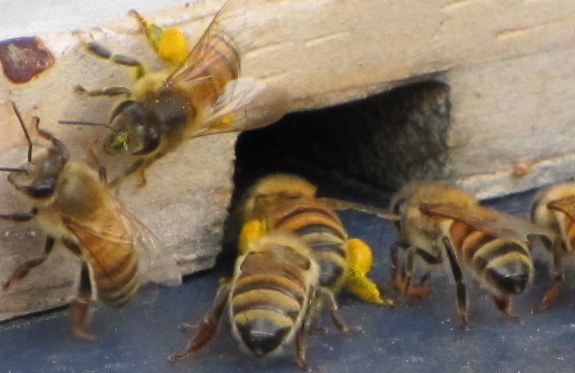
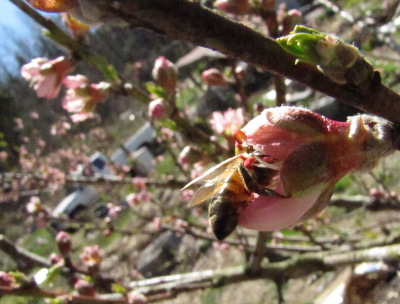 Our honeybees have been
coming out to fly during warm spells all through March, and we started
seeing native
pollinators two
weeks ago, but Sunday was the day when the whole farm began to
buzz. Both the flowers and the insects were just waiting for the
week of cold, rainy weather to let up, and when the frost melted and
the sun came up, the honeybees almost seemed to be prying our kitchen
peach flowers open.
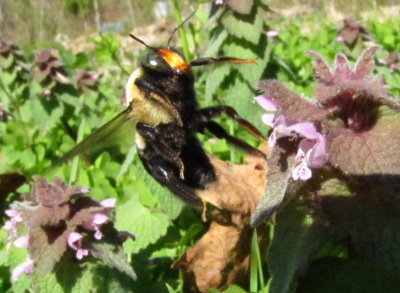 Fruit
tree blooms were a hit, but so were the numerous flowers in the
"lawn." Everyone loves dandelions and I also saw quite a bit of
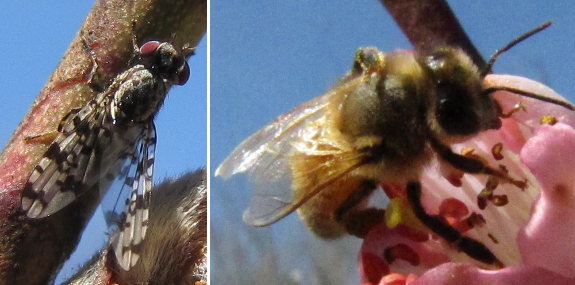
activity around the purple dead nettles. (This guy is a
bumblebee, although I didn't brush up on my bumblebee
identification
enough to figure out his full name. Below is some sort of fly and
what might be a miner
bee.)
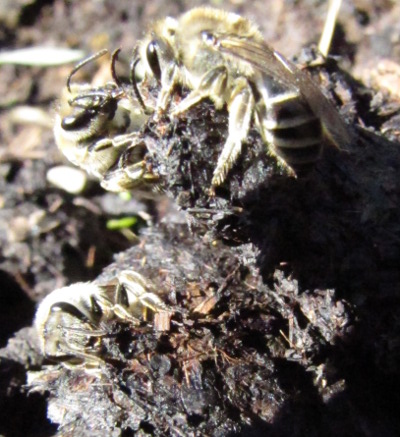
Nature never acts quite
the way you'd suspect, so I wasn't entirely surprised to see the
largest congregation of bees...on the manure pile! I knew that
butterflies visit manure to suck up salts (and there were both
butterflies and moths present), but I didn't realize that bees were
equally interested. Our honeybees turned up their noses at the
composted excrement, but there were at least fifty of these small bees
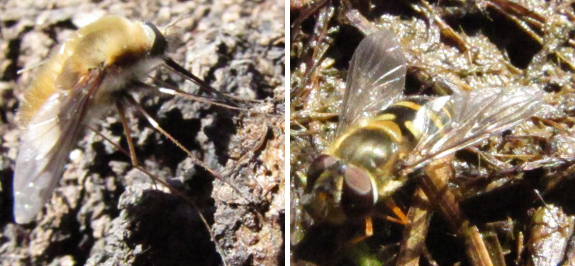
(miner bees again?) on the manure, along with a couple of greater
bee flies and hover
flies.
I'm glad to see that our
pollinator population is so diverse and healthy! Too bad some of
the trees they're pollinating got ahead of themselves and bloomed all
the way out before Saturday night's 27 degree freeze. I expect
moderate damage to the full-bloomed pears, barely blooming cherry, and precocious nectarine, and hardly any damage at all to the kitchen peach who valiantly held her horses until the freeze watch was past. Great job, kitchen peach!
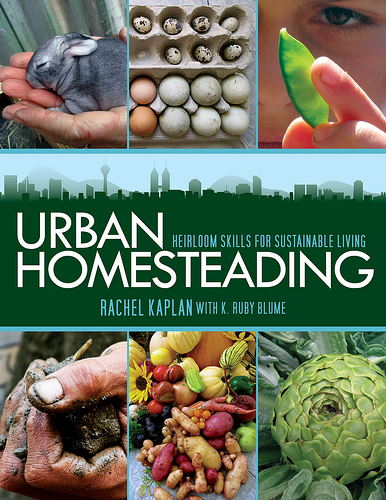 Urban Homesteading, by Rachel Kaplan with K.
Ruby Blume, is a breath of fresh air in the usually stuffy room of
gardening and homesteading literature. Don't get me wrong --- I
adore books by Paul Stamets, Steve Solomon, and others, but these texts
tend to be written by, for, and about middle class, white, straight
people. Urban
Homesteading
highlights ideas that are applicable to everyone, and the stunning
photos in the book back that theme up.
The case studies
sprinkled throughout Urban
Homesteading are
part of what gives this book such a rich flavor. For example, the
authors highlight Spiral Gardens, a non-profit that brings
gardening and fresh food into a low-income community in Berkeley where
lack of access to fruits and vegetables leads directly to shortened
lifespans. Reading Rachel Kaplan's book reminds me that there is
a social justice element to growing your own food that we often forget
in our middle class bubble. Can you imagine living in a place
where you can't get perishables without driving and can't afford to
drive? Of course growing your own is the answer!
 I don't want you to think the
book is preachy or dense, though. Instead, Urban
Homesteading is
an easy to read introduction to dozens of topics that every beginning
homesteader is interested in, all told with an urban flare. And
the book is worth reading just for the artwork --- stunning photos of
dozens of urban homesteads and homesteaders interspersed between
original artwork by K. Ruby Blume. This is the perfect book for a
budding urban homesteader to pore over
for ideas, or for the established homesteader to put on her coffee
table (if she has one) to subtly influence more mainstream guests.
(In the interest of full
disclosure, I should tell you that Rachel Kaplan let me download a
pre-release version of the ebook to review, but I have to admit that I
didn't expect the book to be half as good as it is!)
| This post is part of our Urban Homesteading lunchtime series.
Read all of the entries: |
 The last
time I checked in on our bees, they had started raising a
bit of brood, but this time the nursery was much bigger. Baby
bees of all ages lined three frames, adding up to a total of two full
frames of brood if you merged them all together.
I'm impatiently waiting
until our hive has six frames of brood, which is the bare minimum
needed to split
a hive the easy way
without hunting down the queen. Although it took a month for the
hive to build up from half a frame to two frames of brood, I suspect
the colony might reach the splitting threshold in just a few weeks now
that the wildflowers, fruit trees, and garden weeds are all in full
bloom. Nectar flows usually tempt queens to lay faster, and we're
in the midst of one heck of a nectar (and pollen) flow.
 Have you ever tried to explain to a mainstream
American why you homestead? The conversation often goes something
like this:
Mainstream American:
"Okay, now explain to me again why you put so much effort into growing
tomatoes. Did you know they're less than a dollar a pound at Food
City?"
Me: "Yuck! We
can't even eat storebought tomatoes any more. A sun-warmed,
organic tomato picked straight off the vine is so delicious..."
My eyes mist over and I start counting the days until our summer garden
is in fruit again.
Mainstream American
(snapping her fingers impatiently): "Hello!? Are you still
there? Did you mention something about me not being able to use
an indoors shower when I visit you?!!!"
Me: "Yeah, we haven't
gotten around to that yet. The garden and orchard just seem more
important right now."
Mainstream American: "So
hire somebody to install one. Duh!"
Me: "I'd rather wait a
few years until we have time to do it ourselves. I don't think
it's worthwhile to work 40 hours a week outside the home so that we can
have modern conveniences."
Mainstream American
(frantically trying to change the subject away from homesteading): "Did
you see that cool car commerical in the Super Bowl last night."
Me: "Super Bowl?
Is that baseball?"
 Which is all a far too long way of saying that
one of my favorite parts of Rachel Kaplan's Urban Homesteading was her explanation of why
she thinks homesteading is important. Rachel writes that people
considering homesteading for the first time often think about what
they'd lose in the endeavor, but that
the homesteading
lifestyle isn't about what you do without, but what you gain. As
a result of living more simply, we have more time with people who
really matter and our souls (and bodies) are nourished by being part of
the ecosystem. We're more self-sufficient, so losing a job isn't
a disaster and we know how to rebuild after a fire or hurricane.
And, of course, there's a deep satisfaction involved in making things
with your own two hands.
That said, Rachel
explains that she's not seeking self-sufficiency but community
sufficiency, achieved by building guilds of people (and plants,
animals, fungi, and bacteria) who fill all of the niches in her
community. Her
book considers the big picture right from the beginning, looking at
social justice and peak oil as ethical reasons to homestead that
transcend the personal.
I'd be curious to hear
what your own goals and beliefs about
homesteading are. Do you homestead to be prepared for the
apocalypse? Because you don't want to get a job? Because
you're enthralled by the beauty of a garden in full leaf? What do
you say when that mainstream American tries to understand your life
choices?
| This post is part of our Urban Homesteading lunchtime series.
Read all of the entries: |
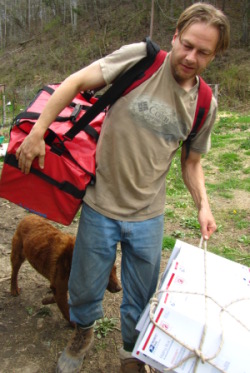
These oversized bags are good
for keeping things safe and dry, but you can carry more boxes by
wrapping them together with some rope.
 I
consider stump
dirt to be a miracle
planting aid. But what is it?
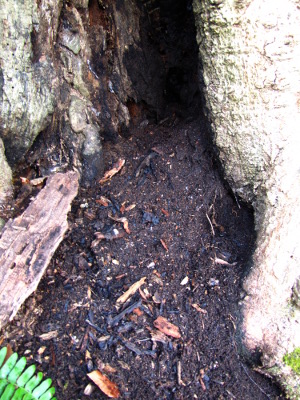
The obvious answer is
--- that moist, dark, earthy-smelling organic matter found inside
decaying trees or logs. Different trees create stump dirt of
varying quality; my favorite source by far is our ancient hollow beech
halfway up
the hillside, while box-elders product lower grade stump dirt.
Maybe hardwood stump dirt is better than softwood?
The analytical side of
me started nibbling away at what stump dirt actually is a few weeks
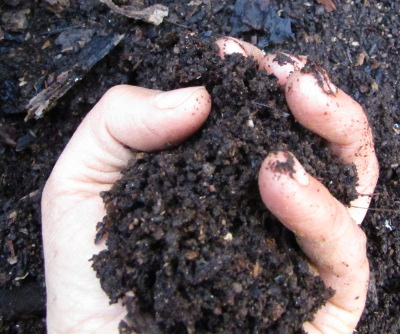
ago, and the best idea I've come up with is that stump dirt is pure
organic matter created when fungi decompose wood. The closest
mainstream garden ingredient I could find is mushroom compost, but that
is the result of fungi growing on higher nitrogen substrates like straw
and manure, so any comparisons should be taken with a grain of
salt. One study of mainstream mushroom compost showed that it
consisted of:
- 28% organic matter and 58% moisture
- 1.12% nitrogen, 0.67% phosphate, and 1.24% potatssium (aka NPK of
1.12-0.67-1.24)
- 2.29% calcium, 0.35% magnesium, and 1.07% iron
- C:N ratio of 13:1
 Naysayers on the internet
report much lower NPK values for mushroom compost, though --- closer to
0.7-0.3-0.3 --- and I suspect our stump dirt is at the lower end of the
fertilizing spectrum. That would explain why the garden beds I
treated with stump dirt last year didn't show much growth --- stump
dirt isn't a replacement for compost. Instead, it makes a great
ready-made potting soil and can also be used like peat moss to fluff up
organic-matter-poor soil. If we ever had enough to apply stump
dirt to our garden in large quantities, I suspect it would act a bit
like biochar, providing spots for
microorganisms to grow unhindered. And stump dirt from
deep-rooted forest trees is probably even higher in micronutrients than the analysis above
portrays.
All of that said, you
can't buy stump dirt, and you only find it in middle-aged to old
forests. I mine a couple of five gallon buckets every year out of
our beech tree, but save it for extra-special occasions. Another
reason to have a mature woodlot on your property, perhaps?
 I
have to admit that I've been guilty of thinking of urban homesteading
as homesteading lite in the past, but Rachel Kaplan's Urban
Homesteading
helped me realize that the city version is not just a subgenre, but is
instead an endeavor with just as much potential as rural
homesteading. I was struck by the way Rachel's book introduced
all of the topics you'd expect to find in an intro to homesteading, but
took the specifics of city life into account. Below, I've listed
just a few of the ways that her advice differs from that found in rural
homsteading tomes.
- Gardening --- In addition
to a section about how to find space to grow food in the city (which I
thought was so important it's going to make up its own post), Urban Homesteading
gives tips on making a seed ball to use in guerilla gardening and
building self-watering planters out of used materials. Espaliers
are another good choice for fitting lots of fruit trees in a city
backyard.
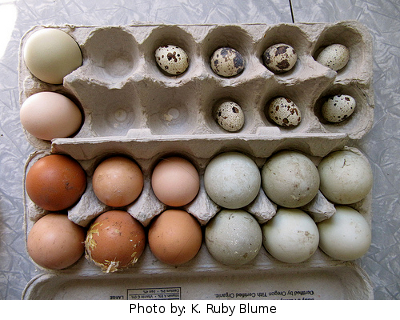
- Livestock --- In the
city, animals need to be small and, most of all, quiet. Compost worms, honey bees, chickens, and
rabbits are Rachel's top picks, followed by quail, ducks, and
goats. I'd never seen quail
on a top livestock list before, but Rachel explains that Japanese quail
(aka coturnix) can live in a very small space, produce eggs when less
than two months old, lay daily for at least a year, and require only
67% as much feed to produce a pound of eggs as chickens do.
- Utilizing waste --- One
of the few things I envy about city life is the amount of biomass free
for the taking. Rachel gives a recipe for making "Berkeley
compost" out of used coffee grounds, and I know from my own experience
that fallen leaves, grass clippings, and even bales of straw (leftover
from Halloween decorations) are often easy to find during trash pickup
day in the city. If you're building a structure or renovating
your existing house, discarded building supplies are also easy to come
by.
- Stocking up on food ---
In addition to all the usual advice about canning and fermenting, Urban Homesteading challenges
you to find ways to glean forgotten produce from the city. Many
people ignore the fruit that drops from their trees and will be glad
for you to come clean the apples or pears out of their yard.
- Legalities --- The downside of city living (from my point of view, at least) is the fact that you have to toe the line about number of livestock, permits, and so forth.
 With the American
population so concentrated in our cities, it's essential that we find
ways to let urbanites join in the homesteading fun. Rachel
Kaplan's book gives lots of great tips to help city dwellers head in
that direction.
| This post is part of our Urban Homesteading lunchtime series.
Read all of the entries: |
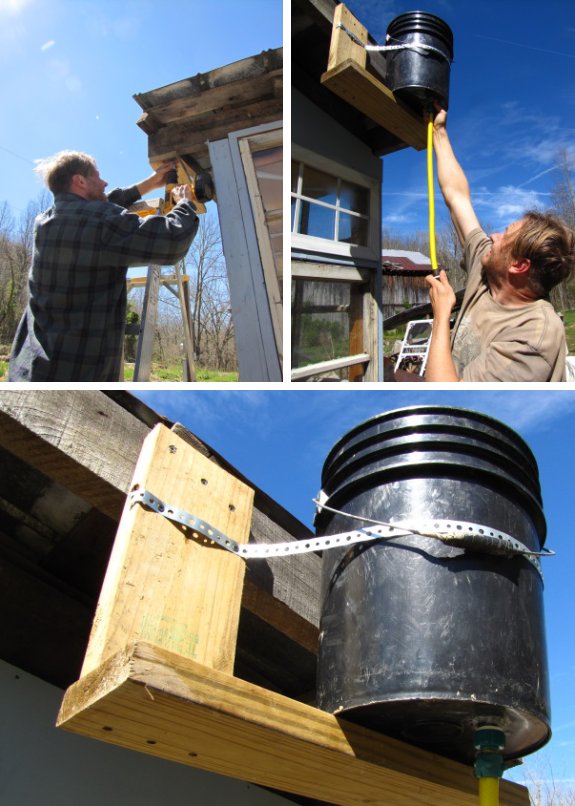
I think five gallons is a
good start for our first do it yourself solar shower.
For the longest time I had a
50 gallon solar barrel image in my mind, but finally realized we didn't
need nearly that much volume, and 5 gallons might warm up faster.
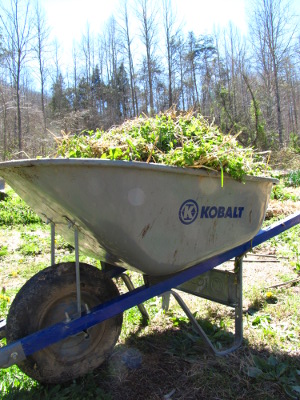 April is a weeding
month. It's essential to get the small perennials weeded before
they really start growing so that I don't damage their new shoots and
flowers, so this week's goal is to weed the strawberries, asparagus,
rhubarb, herbs, perennial onions, and garlic.
Next week, I'll focus on
the beds to be transplanted or planted into this month, then will move
on to the beds earmarked for summer crops. Last call (if I don't
run out of time before planting season begins) will be weeding the
spring garden that I planted in February and March.
A winter mulch of straw makes this weeding job less
time-consuming, but there's still plenty of chickweed, bittercress,
dandelions, and dead nettles pushing up through my mulch. Every
year, I get a bit further ahead of the weeds --- maybe this year will
be the one where I'll rip all of the spring weeds out before they go to
seed.
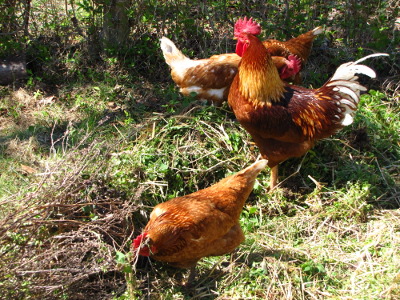
The task looks a bit
daunting, but feels better once I dive in and begin. Twenty-six
beds later, I feel as peaceful as if I'd spent the day meditating, and
the chickens are sated on three wheelbarrow loads of worms, snails, and
chickweed. I think April is going to be a good month.
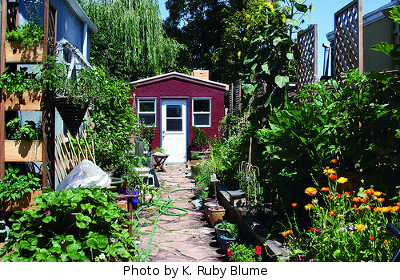 Suburbanites can turn their
lawns into vegetable gardens, but how do real city-dwellers find space
to homestead? Rachel Kaplan gives you several ideas to
choose from, such as...
- Fill up your own soil first, of course.
- Then ask your neighbor if you can turn their yard into a garden. If you share the bounty, they're bound to say yes, and may become a gardening convert.
- Container gardening works on balconies, roofs, and any other spot with a bit of sun.
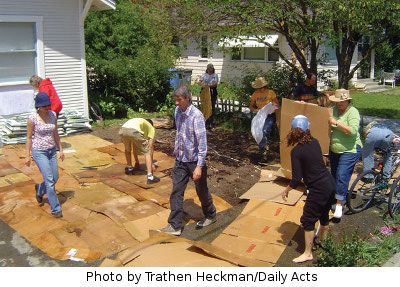
- Tear up unused concrete and
asphalt. The photo above shows how a small driveway can
turn into a vibrant garden. Rachel's book gives tips on the best
tools and tricks to use during pavement demolition.
- Sign up for a plot in the local community garden.
- Look for abandoned lots, find out who owns then, and see if you can get permission to turn the ground into a garden. (Or guerrilla garden on the sly.)
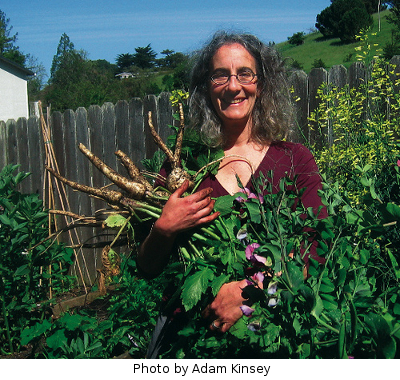 Rachel
includes an inspiring map of her personal "walking gardens." In
addition to filling up her own yard, she grows vegetables in another
yard with the owner, keeps bees and chickens in a third and fourth
yard, and has a plot at the community garden. Now that's what I
call hunting and gathering!
While you're doing your
rounds, don't forget to scope out sources of garden fertility.
I'm imagining setting out for my daily walk with the yellow wagon and
coming home with a bag of leaves from the curb, some food scraps from a
restaurant to go in the worm bin, and of course an armful of produce
for dinner. Almost makes me want to live in the city!
| This post is part of our Urban Homesteading lunchtime series.
Read all of the entries: |
Look up the part#....which is 176556, pay 11 dollars plus shipping, and wait.
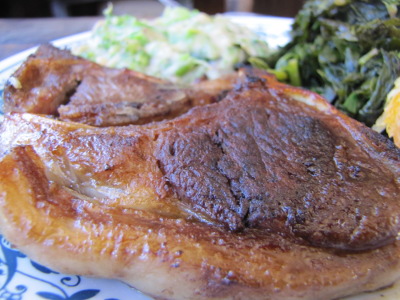 I
eased into cooking with meat by buying it ground, but have since been
branching out into using more and more of the whole animal.
Growing
our own broilers
trained me to use every bit of a chicken, and
now that we've bought a whole
lamb, I've been
doing the same with red
meat. It turns out that there are five main categories:
Ground
meat is the
easiest to cook with since you can make it into
burgers, sausage, or use it any other way you'd use hamburger or ground
turkey.
If I hadn't asked for the front legs of our lamb to be ground up, there
wouldn't
have been much ground meat, though, mostly from the belly.
Steaks are cuts that are tender
enough to fry or grill and eat with a knife and fork. Both chops and sirloin can be cooked as steaks,
with the latter being a bit more tender. Our pastured lamb
growers recommend searing lamb steaks over medium-high heat then
finishing up cooking at a lower temperature, which worked great for us.
Roasts are cuts that are a bit
tough to be fried up and should instead be either stewed over low heat
or baked in a cool oven for an hour or more. Letting them
marinate first 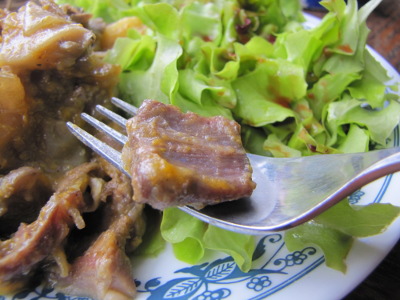 in an acidic marinate like
tomatoes or wine can also help tenderize the meat. Legs are the hind legs, cut whole
and looking a bit like a ham. Shanks are the upper arm (front
leg). Riblets are half bone and half fat
and meat --- they're the only part that I'm a bit at a loss about how
to cook.
Bones won't come with your lamb
unless you specifically ask for them,
but you should! Bones make a wonderful broth, boiled for several
hours in a pot of water. The remains can be fed to your dog.
Heart
and liver are
cooked like any other organ meat. I sometimes
cook these up into broth, very occasionally fry up a liver for Mark,
and sometimes give the organs to the cats and dog as a health boost.
Once you learn to cook
meat in each of these categories, you'll be ready to cook nearly the
whole animal of just about every type of livestock out there.
With chickens, the meat type is more a factor of age than cut, but it's
still good to know how to grind or stew up old birds and to make broth
out of the bones. Even if you're not buying a whole animal,
cooking with unusual cuts allows you to buy cheaper meat that is just
as good for you, and to respect the meat animal by not tossing less
tender parts of their body.
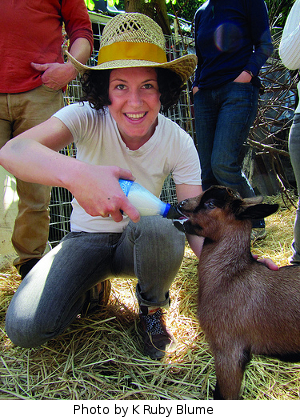 I'm
sure several of you are interested to hear Rachel Kaplan's take on the
Dervaes' attempt to protect their trademark on the term "urban
homesteading."
Since she's written a book by that name, I figured Rachel had been
contacted by the Dervaes family, and I was right. She emailed:
Our publisher is working on the legal front with all of this right now, and hasn't even disclosed to us his strategy, but he (and we) and everyone we know feels strongly that urban homesteading is a cultural movement owned by the many, and not the few, and that the Dervaes' claim is lacking in merit. We are continuing our work in the world, and of course the publication of the book, on which we have worked so hard.
We believe this has even become the issue it is because this is a cultural movement--so many people are interested and involved in this. We are hoping for an amicable resolution to the struggle, but it remains to be seen how the whole thing plays out.
After our own experience seeing the diversity of people interested in homesteading topics at the Organic Grower's School, I have to agree with her. I hope that the themes become so mainstream that the Dervaes family has no hopes of maintaining control over the term "urban homesteading."
Our $2 ebook shows you how to create your
own job so you have time to homestead.
| This post is part of our Urban Homesteading lunchtime series.
Read all of the entries: |
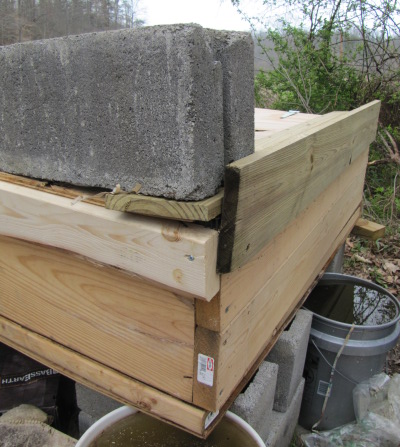 The worm bin
has been having a problem with unwanted visitors.
My solution for today was to
add a 2x4 and some pieces of appearance board to the frame and part of
the lid.
I'll know by next week if
it's working, or if I need to take the worm bin armour level up a notch.
If we build another one I
think we'll design the lid to have a slope and maybe attach some shower
board to the plywood surface.
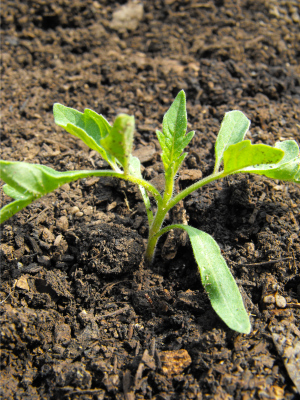 Over
the years, I've learned that putting tomato seeds in a cold frame (or,
this year, a quick
hoop) in early April
results in sets that are smaller than those started inside but more
ready to hit the ground running when it comes time to transplant them
into the garden in mid May. It sounds counterintuitive --- start
with smaller plants, end up with more tomatoes --- but my cold frame
seedlings tend to have more roots and to be healthier than seedlings
started in flats indoors.
Cold frame tomatoes
don't send up leaves until mid to late April, so they never get
leggy and aren't exposed to any low temperatures that can stunt their
growth. During the years that I started tomatoes indoors, I often
ended up with plants that grew slowly even once I put them out in the
garden since night-time temperatures in the trailer in April can easily
drop down into the thirties or forties, doing long term damage to the  tender
seedlings. If your tomato seedlings have a purplish cast to their
leaves, they've been stunted by cold weather.
The only really hard
part about starting tomatoes in a cold frame is hearing from your
friends about how they started tomatoes two weeks ago, and not giving
in to peer
pressure. I
just remind myself that my method not only works better, it's also less
work and requires no electricity, and I manage to hold firm until the
soil temperature reaches 50 degrees. For future reference,
asparagus shoots up at the same temperature tomato seeds need for
germination, so I won't need to relentlessly check soil temperature
next year. (And, look, asparagus!!)
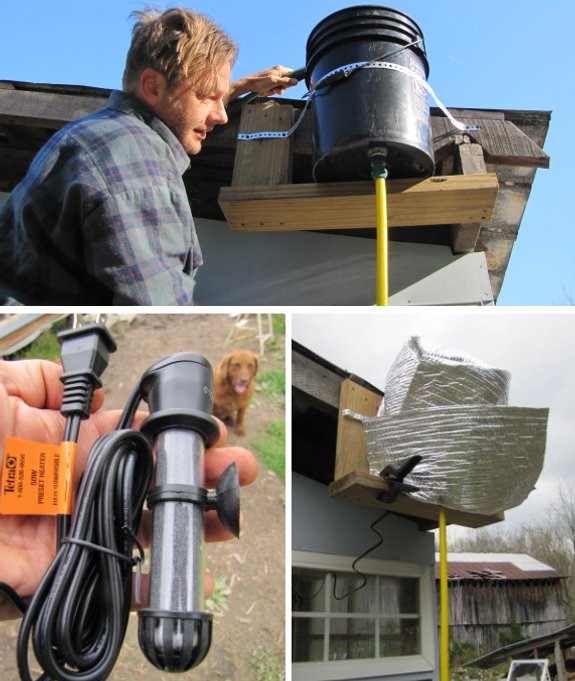
It would seem that our spurt
of springtime sunshine wasn't quite enough energy to heat up my 5
gallon bucket solar shower
to any noticeable warmth.
The next stage of the
experiment involves a small 2-15 gallon submersible aquarium heater
which can be found for around 15 dollars at local retail outlets. It
automatically warms your water to a 76 to 80 degree range, but you need
to give it a full 24 hours to reach that temperature.
 Installing
the heater was easy thanks to the attached suction cup and it didn't
take much effort at all to wrap some reflectix around the sides and the
top to hold the heat in.
I plugged in a Kill-a-Watt
device to measure how much power it will need. Anna thinks it might be
comparable to heating up a pot of water on the electric stove, which is
just the sort of debate we got the Kill-a-Watt gizmo for. The heater is only
rated at 50 watts, which might be less power at 24 hours compared to 5
minutes of a 220 volt stove top coil.
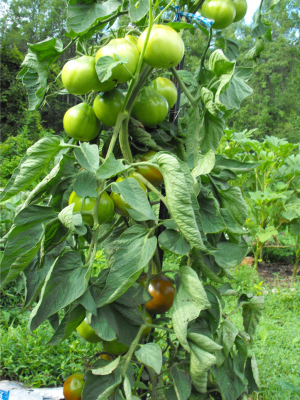 Five
years ago, I went hog-wild and started about 35 different types of
tomatoes. Every year since then, I've been whittling our
selection down to the varieties that taste the best, produce the most,
and are least blight-prone. Here are the eight varieties we'll be
growing in 2011:
- Martino's roma ---
delicious and a copious fruiter. Was more
resistant to the blight than our other roma varieties (San Rodorta and
Russian), partly because the
vine is a bit less vigorous.
- Yellow
roma --- mixes with Martino's roma to make a very unique
sauce.
The vine grows like crazy, so it has to be pruned a lot, and the fruits
do tend to crack on top, so they require a bit more preparation than
Martino's roma.
- Ken's red --- an un-named
but delicious big, red slicing tomato that we got from my friend Ken.
- Japanese black trifele --- this was given to me as "Brandywine", but the fruits are shaped like a drop of water and a search of the internet suggests my tomato is actually Japanese black trifele. Purple slicing tomato with great taste, although you have to cut off a woody top part.
- Blondkopfchen --- extremely productive, small yellow tommy-toe.
 Stupice
--- red slicing tomato that's just a bit larger than the biggest
tommy-toes. Our
earliest tomato to ripen, listed at 52 days.
- Early Pick --- another
red slicing tomato that's very early.
- Crazy --- large, red tommy-toe that produces nearly as early as Stupice. Somewhat blight resistant.
We grow one plant each
of the last six varieties for eating in the summer and about
twenty-five romas
to keep us in spaghetti sauce, pizza sauce, ketchup, and dried
tomatoes
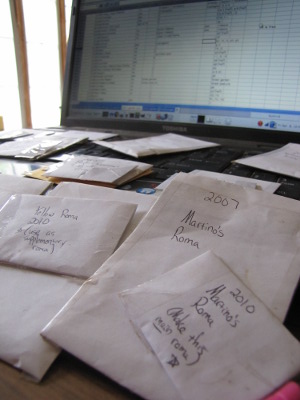
all year. I had actually forgotten which tomato varieties I
wanted to focus on this year, so I was very glad I'd made notes on my
seed-packets when I packaged up the summer's seeds!
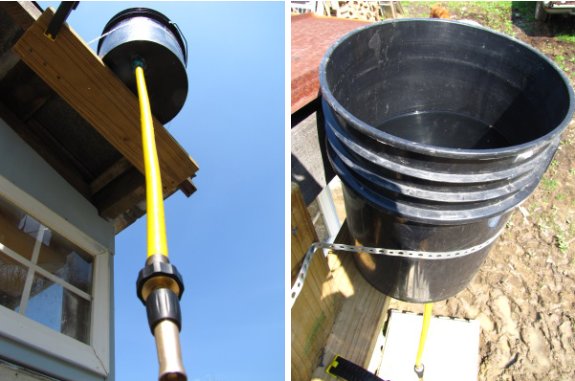
The 50 watt aquarium heater
didn't seem to add much heat at all to the 5
gallon bucket solar shower set up.
I gave it about 20 hours and
decided to give up on this being a low tech way of heating up a small
amount of water.
My next approach could be
something more conventional, but I've got another low tech idea that
needs to see the light of day to satisfy my curiosity.
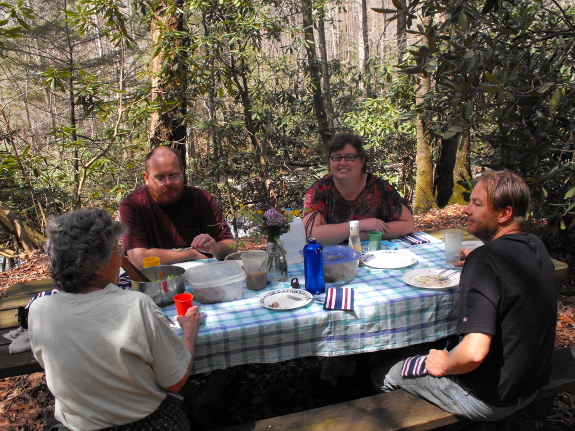

I could write about how
we baked up some of the last homegrown roots along with a leg of lamb,
salad, and a lemon meringue pie for a true spring feast. How we
had a centerpiece of lilac and other spring flowers, and a roaring
creek for background music. But then you'd think Joey's birthday
party was peaceful.
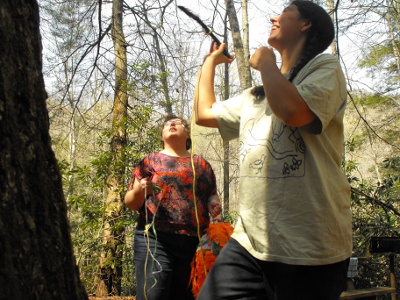
It wasn't. Mom and
Maggie made a homemade pinata and after we'd stuffed ourselves, we got
down to fun and games. I tied a string to a stick and threw it
over a branch...
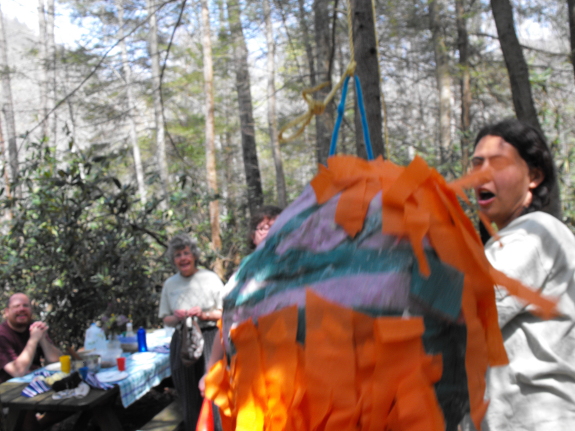
...then hoisted the
pinata aloft.
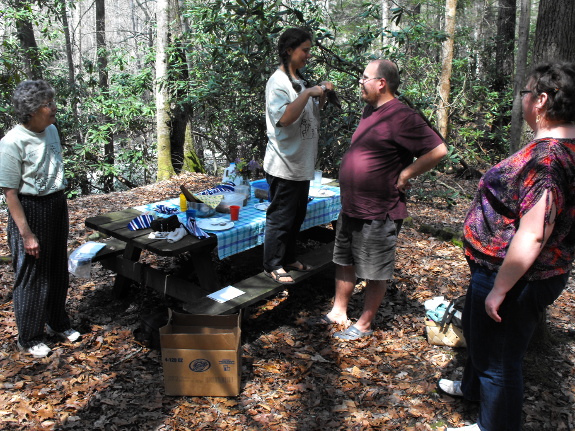

As the birthday boy,
Joey got to go first. I tied on his blindfold, enjoying my place
of power atop the picnic table. (Yes, I am the shortest person in
my family.)
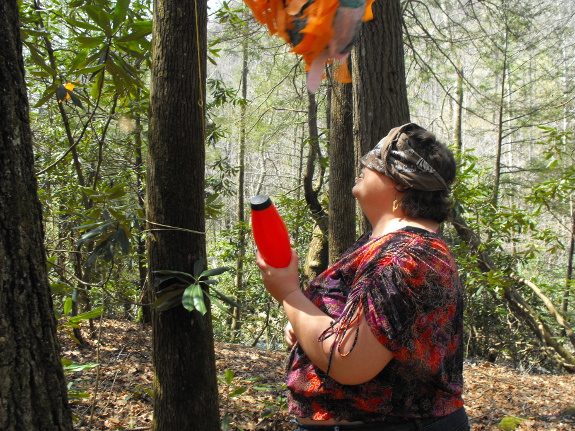
We each gave it a try.
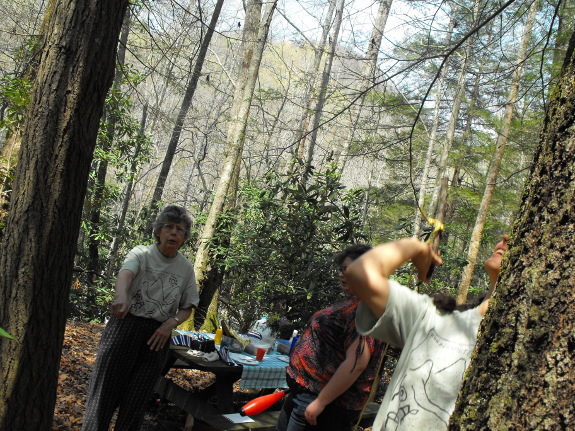
"No, Anna, it's over
there!"
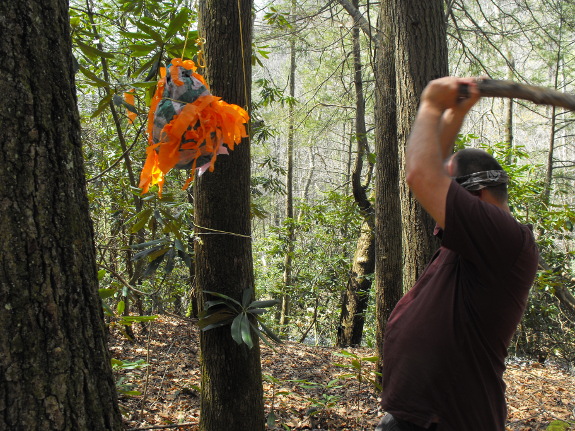
Then Joey got smart and
ditched the plastic bat and picked up a branch. Whack!
Whack! Whack!
We were laughing so hard
we could hardly pick up the baggies of dried dates, cashews and other
treats.
Thanks for the great
party, everybody!
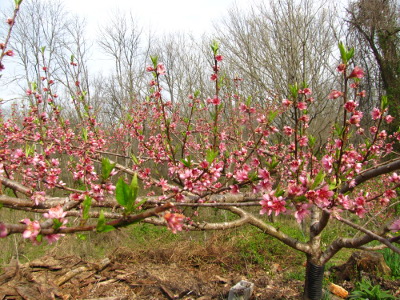 Our
lunchtime series will be going on summer vacation starting this week
--- the winter is over and I'm itching to be outside doing (or at least
napping under the peach tree) rather than indoors pondering.
There may be a few series sprinkled through the summer, but they'll be
erratic until cold weather sends me back to my books.
For those of you who go
into withdrawal with only two posts from us per day, why not check out
some of our other blogs?
- Our chicken blog
is my favorite spot for rambling at length about chicken pastures,
chicken behavior, and more. I also post updates and tips about
our chicken waterer there.
- Our deer deterrent blog is Mark's inventing website --- those of you who get a kick out of his ability to make something from nothing will really enjoy it. And, of course, you can learn some great tips about keeping deer out of your garden.
 Wetknee
is where I post longer musings on living simply and making a living
with an internet business.
I also include updates about our ebooks over there, so be sure to
subscribe if you want to know as soon as ebooks are ready.
Wetknee
is where I post longer musings on living simply and making a living
with an internet business.
I also include updates about our ebooks over there, so be sure to
subscribe if you want to know as soon as ebooks are ready.- Cosmic cookout is
where Mark ponders or debunks conspiracy theories, the physics of
consciousness, and the disclosure movement.
- Clinchtrails is where I post photographs that are too pretty not to share but that don't fit in any post, along with bits and pieces about natural history and trips.
Stay tuned for
tomorrow's lunchtime post to explain the exciting side of lunchtime
series being on vacation!
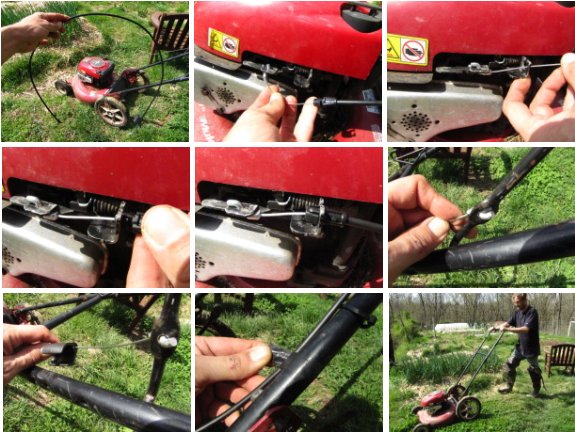
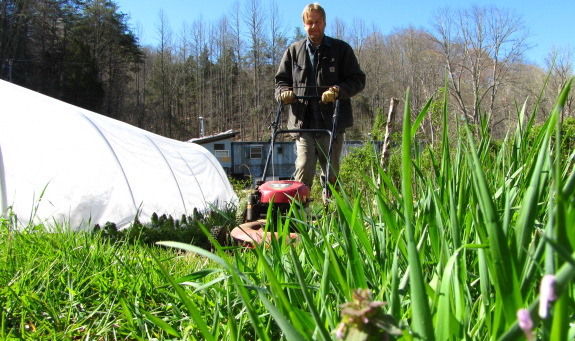
It only takes a few minutes
to install
a new engine cable.
I had to break a plastic
fastener to get the old cable off and decided some electrical tape was
good enough to secure it to the support handle.
Let the spring/summer mowing
fun begin!
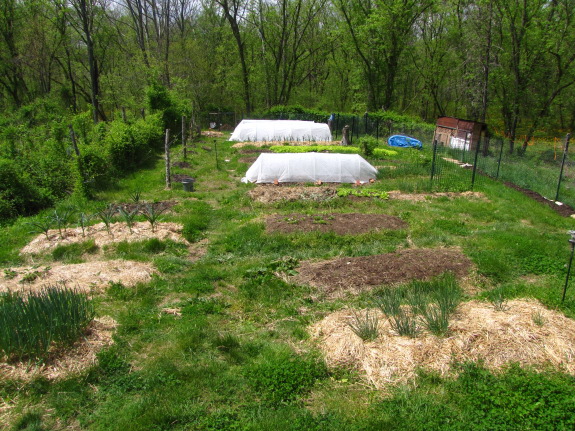
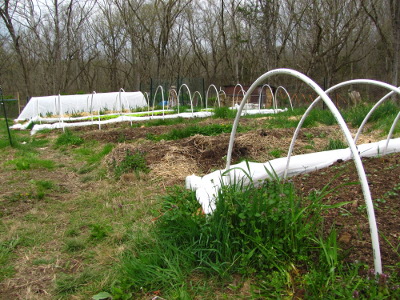 I
took the fabric off all of the quick
hoops except the tomato
bed
Saturday because the heat was starting to make the lettuce turn a bit
bitter (and I wanted the plants to capture every raindrop from the
weekend's thunderstorms.) I'll probably re-cover the beds tonight
and leave them protected for a while since the weather is supposed to
return to 30s to 60s rather than the recent 50s to 80s.
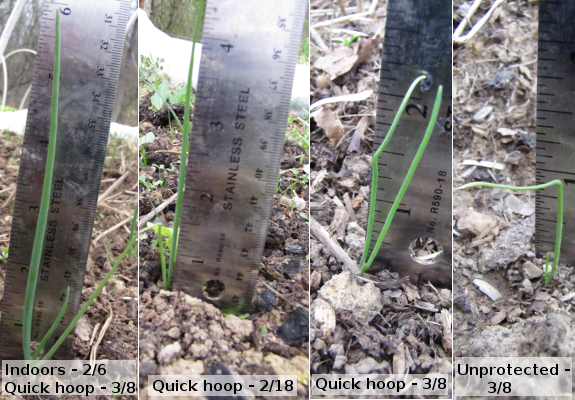
 I
was intrigued to see the differences between onion seedlings planted
at various times, and places: inside, under quick hoops, and
unprotected outside. As you might expect, the onions started
earliest inside then transplanted under the row covers are tallest,
followed by the earliest plants direct-seeded into quick hoops, then by
later plants direct-seeded into quick hoops. The onions seeded
directly into unprotected ground once the soil temperature reached 35
degrees are smallest, but they've all germinated in good
numbers and I suspect the head start given by the row covers won't make
much difference in the long run. I'll let you know if I can still
see effects of
the various planting schedules at harvest time, but since onions aren't
a crop I need to rush to the table, I may plan to use the quick hoops
for something else next spring.
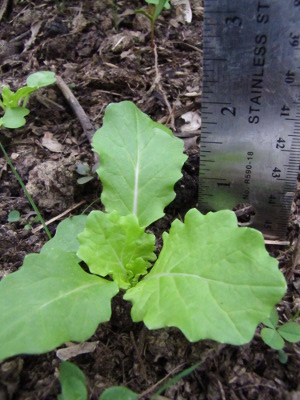
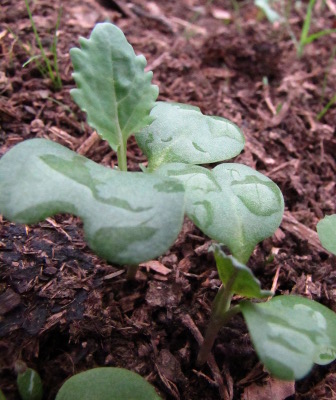
Something
like greens, maybe. Asian greens (above) and volunteer mustard
are nearly big enough to eat, and the swiss chard started in a quick
hoop already has two true leaves. We've had a couple of meals of
 overwintered kale and mustard greens, but with only four plants
surviving, we're ready for a big mess of fresh greens. Maybe in a
week or so?
Last
year at this time, we'd already planted out our broccoli and cabbages,
but the seedlings are still a bit small for transplanting. It's
tough to tell whether a cold frame would have made these crucifers come
up sooner than the quick hoops did --- the asparagus was earlier last
year
too, which makes me think that the soil just took a bit
longer to warm up this spring than last.
The mule garden is
starting to feel full and vibrant again with all of this new
growth. Time to mow the aisles and dream of big harvests!
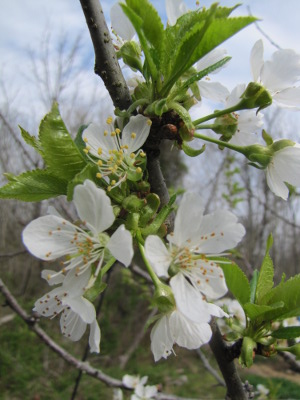 My real reason for putting
the lunchtime series on hold so early this
year is that a week of weeding cleared my mind enough that I realized I
had six
ebook ideas
and I wanted to give myself time to work on them. With so many ideas, I
don't quite know where to start, so I was hoping you'd chime in with a
comment to let me know which of these top three would float your boat:
- The Short, Sweet, and
Self-sufficient Guide to Growing Backyard Mushrooms. When Cat
emailed me a few weeks ago to see if I would write an introductory post
to growing edible mushrooms for her blog, I realized that the bits and
pieces of information I've presented over here don't really make a
coherent whole. I tend to send people to books by Paul Stamets
when they ask me for advice about getting started with mushrooms,
but his books (although inspiring) make the process seem a lot
more difficult than it really is. I'm thinking of a short (maybe
20 to 40 page) ebook giving a brief explanation of mushroom biology,
telling which species are easy to grow, introducing the simplest
methods of growing them, and then covering home propagation. My
focus would be on tasty, cheap, and simple.
- Chickens in Permaculture. I don't really feel like I'm ready to write a definitive book about chickens in permaculture, but the great thing about ebooks is that you can put together the best information currently available, sell it for 99 cents so that lots of people will get inspired and start experimenting, then revise it later. I'm envisioning this ebook being as short as the mushroom one and talking about the pros and cons of pastures, tractors, and deep bedding, which plants you can grow to feed your flock, other alternatives for making your own chicken feed, and types of chickens to consider when starting a self-sufficient flock.
- The Weekend Homesteader
--- Darren
had the great idea of writing an ebook full of short projects that
people can use to dip their toes into the vast ocean of homesteading
without getting overwhelmed. I stole his idea and Mark and I soon
came up with a series of projects that would walk a beginner through
planting their first lettuce bed, making an under-the-sink worm bin,
scrounging supplies at the dump, and much more. This ebook would
be longer than the previous two and geared toward a generalized
beginner rather than than to the more experienced homsteader.
 One
of my goals with focusing on ebooks rather than on lunchtime series
this summer is to reach more potential homesteaders. I adore
preaching to my choir, but my father pointed out that if I put ebooks
up on Amazon for 99 cents, I'll find lots of new readers who might not
have considered the homesteading lifestyle before they downloaded my
ebook.
With that in mind, I
hope I can ask you for another favor. We
currently have two ebooks up on Amazon, and although some random folks
have found them, no one has left a review on either. If you've
bought Microbusiness
Independence
from us, please consider dropping by to leave a review. And, if
you're into butchering chickens, perhaps you'll consider our newly
updated Eating
the Working Chicken
ebook,
complete with dozens of photos to walk you through the entire process
from coop to table. I really appreciate you taking the time to
help me with my ebook project!
 Every year, I tweak my method
of growing sweet potato slips. Year 1, we put sweet potatoes in
partially filled glasses of water and they rotted, so year 2 we
added a heat mat under the glasses. The heat mat tempted
several of the sweet potatoes to sprout, but I was disappointed at how
late the slips showed up --- we didn't fill the last of our sweet
potato beds until early July. So, last year, I
started the slips at the end of March...and the roots sat there
until April, producing slips during the same time frame as they had the
year before. I also lost several tubers last year since I chose
big roots that were less inclined to sprout.
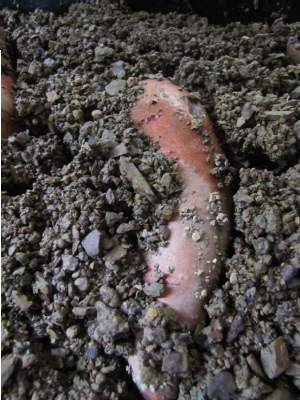
This year, I made yet
more changes to my sweet potato propagation method. I chose
tubers that were about two inches in diameter at the widest point and
placed them beside the incubator for two weeks to
preheat. Monday, I dug about a gallon of small
gravel out of an eroded wash above the alligator swamp and filled up a
seed-starting flat, laying the sweet potatoes on their sides and then
packing damp gravel between them. I added the clear top on the
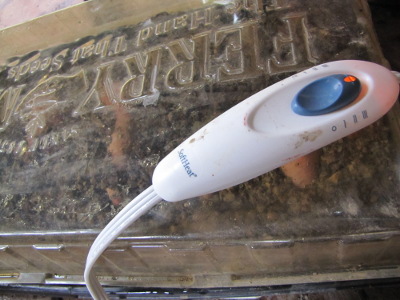 flat to keep the contents moist and slipped a heating pad underneath to
promote sprouting instead of rotting.
In case you're trying to
decide if sweet potatoes are worth growing, I'll throw some numbers out
there. Conventional wisdom, repeated all over the internet, holds
that white potatoes give you the most calories per acre, but in our
garden last year, we got just over 6 pounds of sweet potatoes per
garden bed, which comes to 2,379 calories. In contrast, we
harvested 6.5 pounds of white potatoes from each bed, but the white
potatoes have fewer calories per pound, so they lost the race at 2,034
calories per garden bed.
That said, the greatest
number of calories I've ever harvested from one
garden bed was a tie between a
bed yielding 13.5 pounds of carrots fall before last and the 3.5
cups
of amaranth seeds I threshed in the summer, both clocking in at just
over 2,500 calories. Clearly, white
potatoes aren't the only high calorie food you can grow in just a bit
of space. I wonder which other oft-repeated tidbits of gardening
lore aren't precisely correct? The moral of the story is --- try
several different kinds of high calorie crops and choose the ones that
match your soil, climate, and taste buds.
 While I'm flooding you with
news updates, I thought I'd go ahead and mention that Walden Effect is
changing over to Branchable
as our new web host and blogging software this week. We're
excited to be using Joey's full feature blogging platform --- he
already saved the day last week by retrieving a post that I'd
accidentally deleted in February and reposting it with a backdate so
that it didn't clutter up the front page of the site. If you're
looking for a way to blog so that you're in control of your own data,
Branchable is the way to go.
You probably won't
notice much different over here, but those of you
who read Walden Effect in an RSS reader will see a flood of old posts
when I do make the switch. And there's a slight possibility that
there will be some brief down time as I make the migration
happen. So, please bear with us!

We recently cut down this box
elder tree to make room for chicken pasture number 5 and thought the
stump would make a good home for our cardboard
propagated mycelium.
Making vertical
grooves took about half as much time compared
to drilling holes, and sealing it up
with bees wax was a bit easier thanks to the effect of gravity.
Now we wait and wait some
more. It might take a year or more for the first mushroom to pop out.
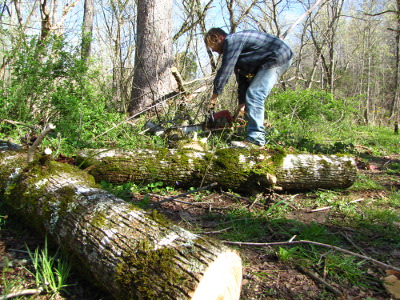 There's
an old saying that American Indians on the Plains used every part of
the buffalo. Although I'm aware that the saying is part of the Noble
Savage image and
might not be technically true, I still think it's a great analogy for
our goals as permaculture-inclined homesteaders. So when Mark cut
down a box-elder to make way for an everbearing
mulberry, I decided
to see how much of that tree we could use.
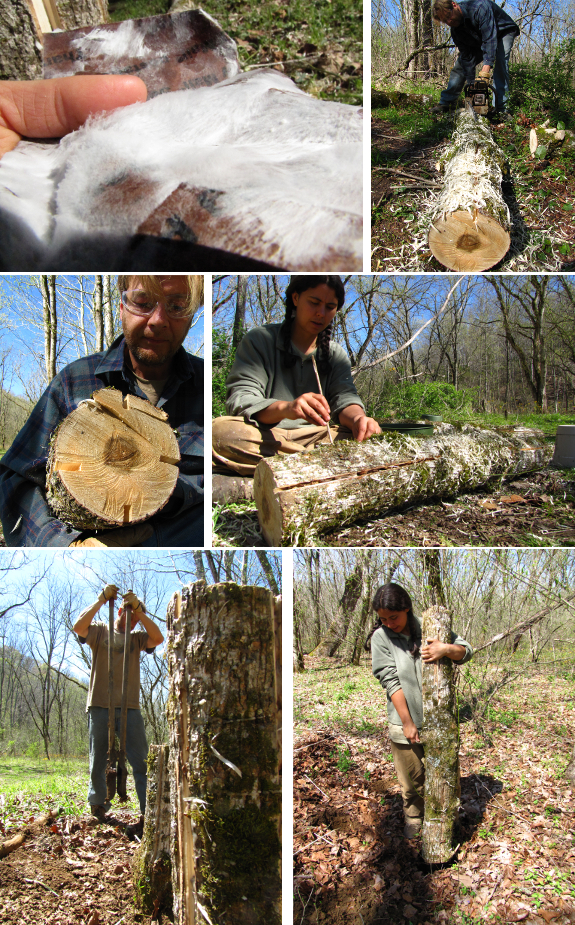
We cut three big logs
and used our
new gash method to inoculate them with homegrown oyster
mushroom spawn. Mark dug deep holes and dropped in the logs to
turn them into no-work mushroom
totems right there
in the moist shade of the floodplain. Then we set to work
inoculating the stump --- a way of taking advantage of even the roots
of the tree. Since we pass this spot twice a day while walking
Lucy, the resultant mushrooms won't go to waste.
The rest of the wood
will soon be cut into firewood for next winter. We've discovered
that box-elder makes perfect kindling, and is also all we need for most
of the winter to keep the well-insulated East Wing warm.
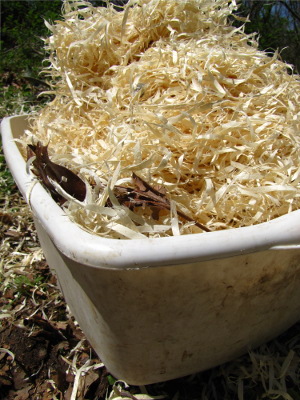 Finally,
I gathered up the big shreds of sawdust kicked up by the
chainsaw. Assuming I haven't let our
chicks die in the
shell with temperature variations, they're due to hatch this weekend
and will need some bedding for the few days they'll spend inside.
I'd been wondering what I'd use and was thrilled to see such prime wood
shavings.
The only part of the
box-elder that is currently going to waste is the smallest
branches. I dragged them into a small brush pile, though, and
hope they'll rot down and turn into a breeding ground for worms and
other critters. Since the spot is inside a soon-to-be chicken
pasture, hopefully even that fertility will eventually wind its way
into our bellies.
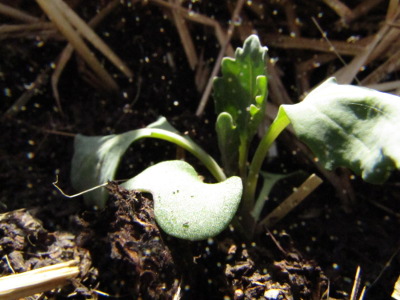 Pure joy is gently uprooting
clods of sunlit earth housing young broccoli and cabbage seedlings,
then watering them into new beds while the flock scratches through the
compost pile next door. I could almost taste the crisply sweet
broccoli heads as I worked, and it was tough to make myself stop when
the requisite 50 plants (plus 7 cabbages) were in the ground.
Another couple dozen
sets still grace the quick hoop, but I want to keep them in reserve to
replace any seedlings that die in the next week. I've learned the
hard way that transplants are magnets for cut worms (I always lose a
few plants, but never enough to bother making each seedling a
protective collar), cat damage, and freak killing
frosts. 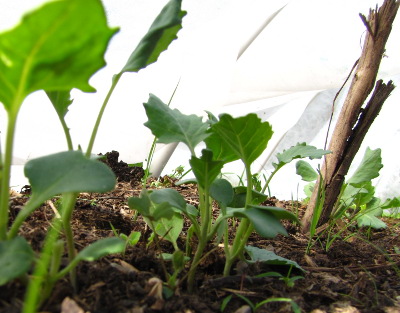 This year I waited a couple
of extra days until the 10 day weather forecast had lows all above
freezing, but you just can't trust the spring weather not to throw a
monkey wrench in the works for fun.
After I replace any dead
seedlings next week, the rest of my crucifer babies will be looking for
a home. Joey, Mom, this is your chance to add some crunch to your
spring garden! I may also tuck a few extras into the hugelkultur
donuts beyond the
canopy of my fruit trees and perhaps even transplant a few into the
soon-to-be vacated chicken pasture. After all, I learned last
year that broccoli leaves are one of our chickens' favorite foods.
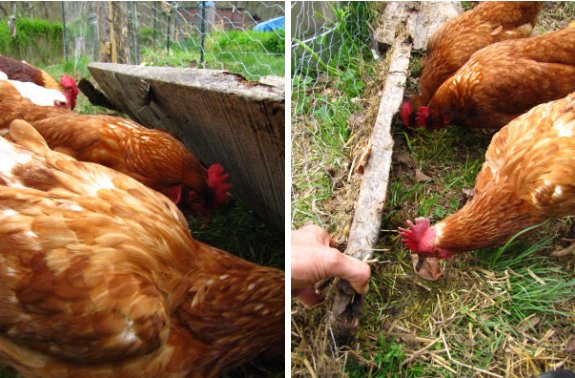
Tilting up the old
boards I used to attach the chicken wire is like an instant buffet of
worms and bugs for our flock.
Part of my new routine when I
collect eggs in the evening is to lift a few of the boards up for a
minute or two while the chickens scratch and peck for fresh crawling
snacks.
It's got me thinking about
some sort of gizmo that lifts up a board or piece of cardboard long
enough to let the chickens forage.....maybe wait till nightfall to
reset it so that it can be ready to provide fresh worms and bugs the
next day.
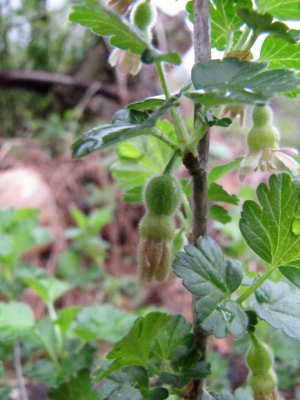 In
the long run, tree fruits are the least work for the most food, but
they also take so darn long to produce! Due to a couple of years
learning about how to
plant trees in our waterlogged clay soil, we only ate our first tree
fruits --- peaches --- last summer. This year, we'll have more
peaches and maybe a pear, but it could be another couple of years
before we taste a homegrown apple.
Meanwhile, we've been
eating strawberries since our second year on the farm (and could have
eaten them less than a year after planting if we'd set
them out in late summer.) Our everbearing
red raspberry
fruited the first year we had it in the ground, and has since colonized
two more garden rows and our rabbiteye
blueberries also had a handful of fruits the first year. Thornless
blackberries fruited
copiously starting the second year and grapes had a few fruits the
first year (if you don't count the year they grew in the garden as hardwood
cuttings.) If
the photo above is any indication, it looks like our new gooseberries are going to be fruiting the
second year after planting too (which is a bit surprising since I put
them in the ground later than I should have and they had a hard summer.)
 Which is all a long way of
saying --- don't put all of your fruit eggs in the tree basket.
Planting a few small fruits in your garden the first year ---
especially brambles and strawberries --- is a great way to keep
yourself from going crazy waiting for that apple tree to slowly
mature. (And, yes, this post really is just an excuse to show off
my strawberry and gooseberry flowers.)
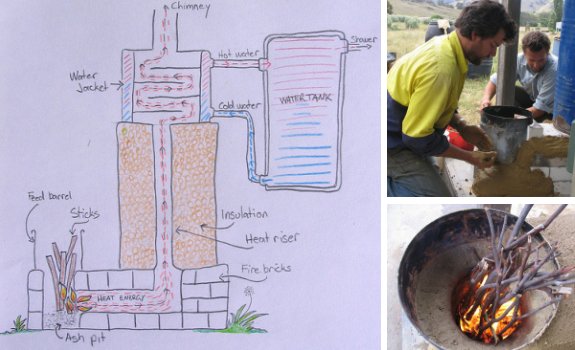
I appreciate all of the
alternative suggestions that readers have sent in concerning our solar
shower experiments and I especially liked the rocket stove shower
design by Milkwood.com
sent in by reader Sarah.
They built theirs in 2 days
and I'm guessing the cost to be around 200 to 400 dollars depending on
what type of materials you choose.
It's a bit complicated for
our current needs, but the idea has got me wondering if this could be
easily modified to handle some sort of hot water chicken dunking
station which might come in handy if the price of propane continues to
go up.
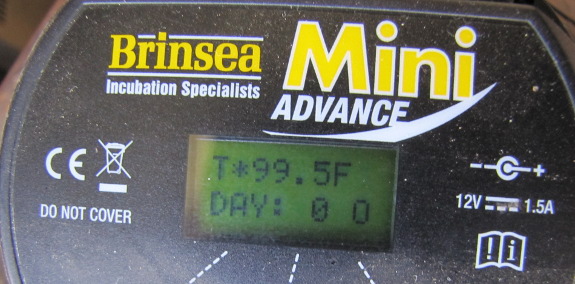
 I am a nervous chicken
mother. For three weeks now, the kitchen thermometer has occupied
one of my central processors and I even had a nightmare that the heater
was running too hot (only to wake up and find that I was right.)
I've peered at the eggs, candled
them, topped off
their water, and, as of Friday, taken
out the egg turner and replaced it with a paper liner for hatching. Despite all that, I
didn't really believe we'd end up with a living chick. "If we
even get one," I promised myself, "it will be a success."
Twenty-one days will be
up today at 1 pm, and by Friday night I was starting to lose
faith. I'd read all kinds of reports on the internet of ways
chicks can die in the shell. Not only can I kill them if I let
the temperature get too hot or too cold (which I did a grand total of
four times), but the chicks could drown while trying to hatch if I kept
the incubator too humid. Shells that look porous when candled
(didn't I have one of those?) tend to let in bacteria and the chicks
die young, and then there's the question of whether our old hens are
even able to create a viable embryo at their advanced ages.
Then, Saturday
afternoon, I heard a strange bumping sound from the corner of the
kitchen. I pulled out the incubator and peered in to see that not
one but two eggs were rocking to and
fro. Someone was alive inside! Half an hour later, a third
egg joined the chorus, and at supper time egg number four chimed
in. Then, silence as the wearied chicks rested inside their hard
shells.
Today will be the big
day. Will we hatch live chicks? How many? Whose
eggs? So far, all three eggs laid by the young Golden Comet have
shown signs of life along with one of the eggs from the old
girls. No matter what happens, I plan to throw another batch of
eggs in as soon as the chicks are fully dry and ready to move to a
brooder --- if I can manage to keep at least 57% of my eggs alive to 20
days, this incubation experiment has merit. It's a good thing I
"planned" this hatch to coincide with a day of rest, because it's going
to take a team of mules to drag me away from my spectator role.

When our first
home grown chick showed
up he was already up and walking and we missed the break out drama.
Not so with chick 2.0.
He or she has made some
progress, but decided to rest at the half way point as of 5 minutes ago.
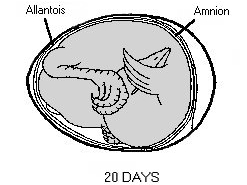
7 am on day 21 --- two
eggs are pipping. I knew the head developed on the blunt end of
the egg and somehow expected the first cracks to show up at that tip,
but both cracked areas are instead about a quarter of the way down the
shell.
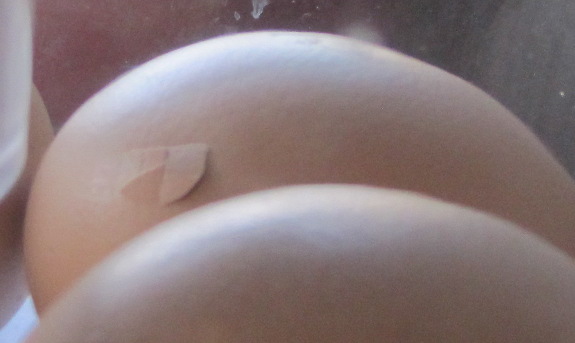
The first signs of
pipping are exciting, but then...nothing happens. I wait, and
wait, and wait, nearly figuring the chicks died until I notice the
membrane below the cracked shell undulating as the chicks
breathe. Around lunchtime, the monotony is broken when one chick
gets inspired by the sound of Mark's voice and peeps up a storm.
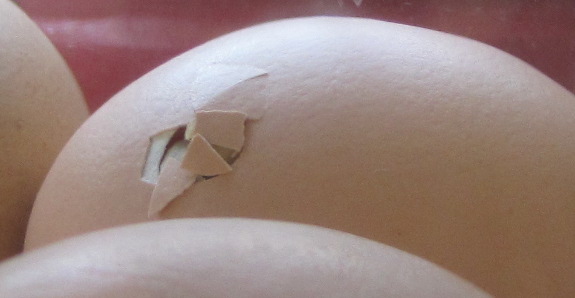
2:25 pm --- One chick
has pecked
through the membrane and I can barely see a beak moving inside!
The
chick doesn't seem to be pecking at the shell so much as whacking its
whole face against the boundary of its miniscule world.
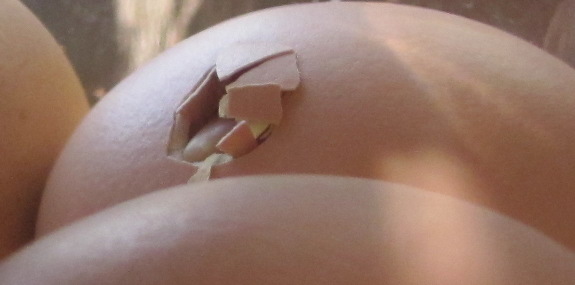
3 pm --- While I wasn't
looking, a third egg started pipping. But there's now no movement
from anything except the chick that showed off its beak half an hour
ago.
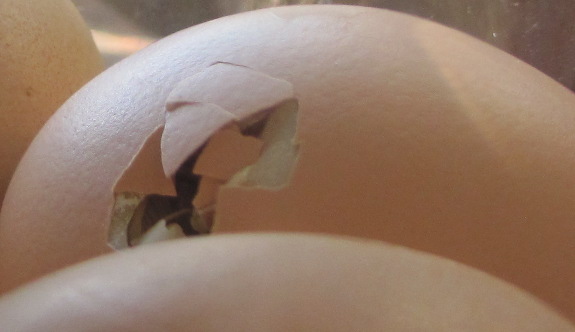
4 pm --- The most active
chick finally decides to get to work. Slowly but surely, it
knocks against the side of the egg, turning its head so that the crack
progresses around the egg's circumference. After 45 minutes, the
opening is half an inch long --- is this going to take all month?
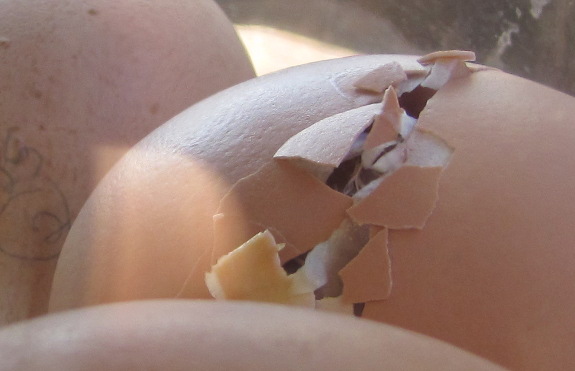
4:45 pm --- Rest, who
needs rest? Suddenly, the chick is pecking like
mad. (I turn the incubator around and notice a fourth egg has
begun to pip.)

A thin line of blood
appears on the egg's membrane where the
chick scratched itself, but the little trooper keeps right on going.
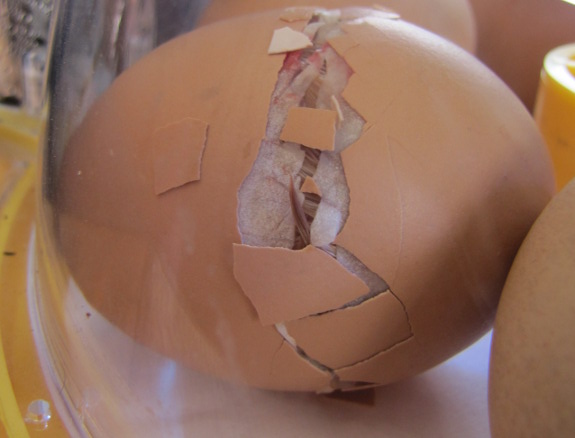
One hard whack
rolls the egg over so that the chick's head is pounding against the
floor, at which point the youngster begins to push and strain against
the
three-quarters severed lid.
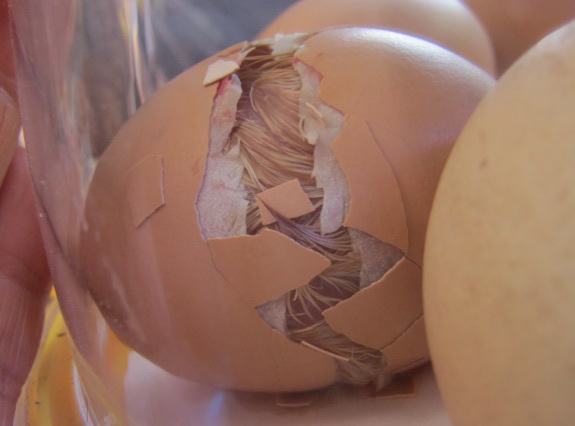
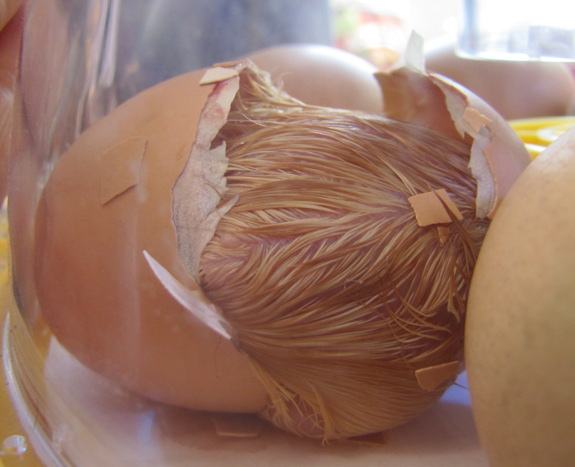
5:10 pm --- Plop! Out it falls onto the
floor of the incubator.
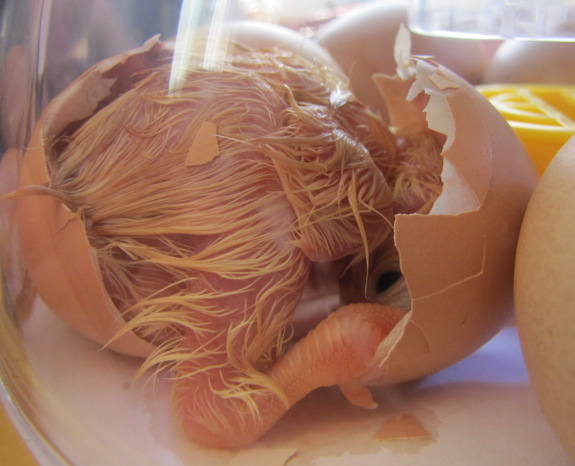
After all of that
commotion breaking out of the shell, you wouldn't have thought it would
take another half hour for the chick to figure out how to get its head
out of the lid.
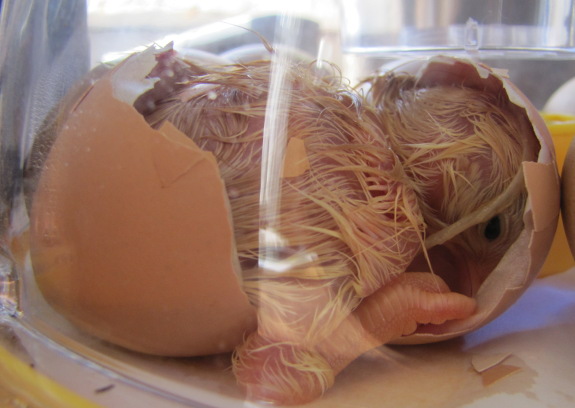
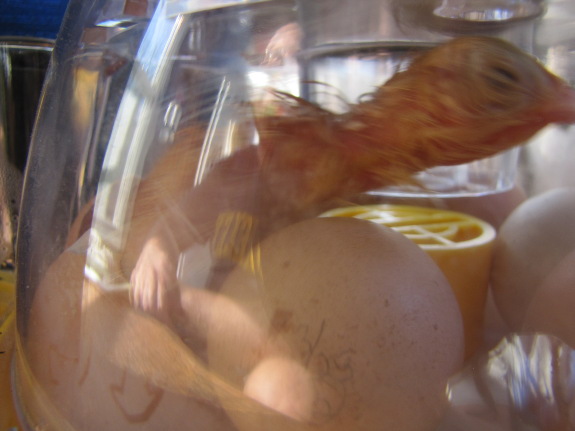
A massive flapping of
incipient wings and the chick is free to drape itself across its
unhatched siblings. Two in-shell chicks join in the crazy peeping.
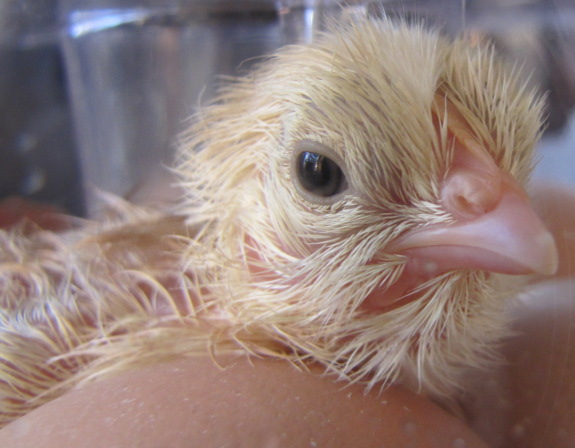
No signs of further chicks out of the shell this morning. Now I'll have to make the hard choice --- open up the incubator against everyone's advice and take out chick #1 and check on the chicks who haven't poked through yet, or leave them all another day?
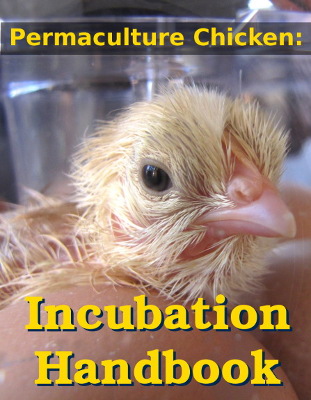
See scads more cute chick photos (and learn how to become an expert at
incubation) in my 99 cent ebook.
Permaculture
Chicken: Incubation Handbook walks beginners through perfecting the
incubating and hatching process
so they can enjoy the exhilaration of the hatch without the angst of
dead chicks. 92 full color photos bring incubation to life, while
charts, diagrams, and tables provide the hard data you need to
accomplish a hatch rate of 85% or more.
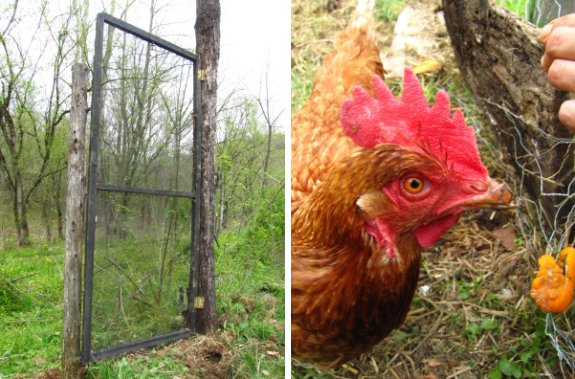
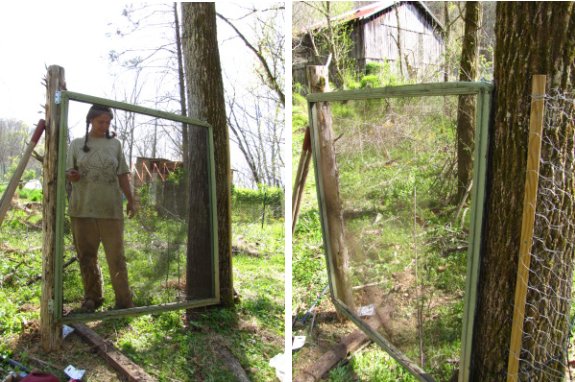
I decided this old salvaged
screen door was in good enough shape to function as chicken pasture
gate #6.
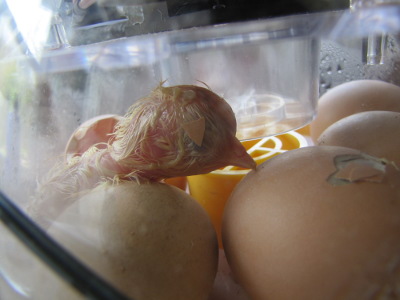 Learning to hatch chicks is a
roller coaster of emotion. The excitement of the first pipping,
worry as nothing happens for hours, elation as a
healthy chick pops out of the shell. Then agony as a chick
that was nearly hatched is accidentally clawed by its recently hatched
sibling and perishes without quite making it out of the egg. More
sadness as I autopsy four other dead chicks --- one made the beginning
of an exit hole in the egg 36 hours previously then gave up and three
are nearly fully formed but are unaccountably dead in the shell. I bury
them under the peach tree and remind myself that this first trial is a
learning endeavor and we did get two live chicks.
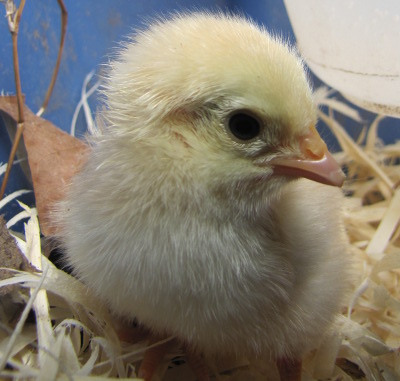 But can they play
together? The chick that hatched Sunday afternoon is already
drinking and running about in its brooder by Monday at lunch while its
sibling hatched nearly a day later and gets brutally pecked when I
introduce it to the brooder. All the youngest chick wants to do
is to sleep off its exertions, so I clean out the wet, foul-smelling
incubator and pop the chick back in for a few more hours of solitary confinement.
But this morning, the late chick is belly up in its incubator --- late-hatched chicks often don't make it through the first day.
I'll be posting the
scientific side of what I learned and our plans for the next hatch over
on our chicken blog later in
the week. For now, though, I'm just practicing my deep breathing
and reminding myself that this was an experiment and I said I'd be happy with one living chick.
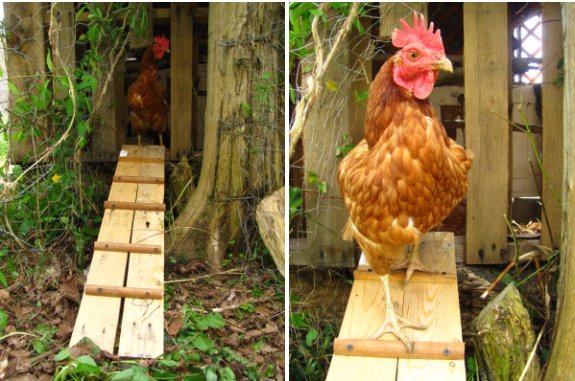
When I first installed this
chicken ramp one of the hens looked at it and cried "Too Slippery!"
10 minutes later she was
pleased with the addition of 5 speed bumps and boldly decided to be the
first one to get halfway down the new poultry ramp.
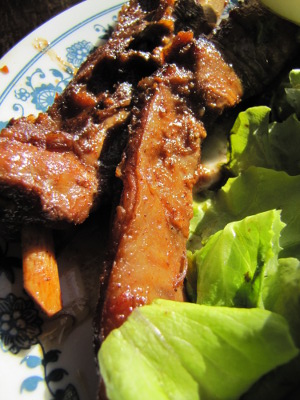 I've
been trying out several new recipes as part of our goal of turning
an entire lamb into delicious dinners, and one of my favorites has
been Tex-Mex Lamb Ribs. First, mix together:
- 2 tbsp vegetable oil
- 0.25 cups balsamic vinegar
- 0.25 cups lemon juice
- 3 cloves of garlic, minced
- 1 tbsp chili powder
- 1 tsp cumin
- 0.5 tsp black pepper
- 1.25 tsp salt
- 2 tbsp honey*
*This is the only part of the recipe I didn't measure. I just
drizzled
in a bit of honey since the recipe I was tweaking called for
storebought orange marmalade and I was replacing it with lemon juice
and honey.
Pour the marinade over
about 1.5 pounds of lamb ribs and let them sit in the fridge
overnight. Then pour the whole mass into a covered baking dish
and bake at 350 degrees Fahrenheit for two hours.
It's far from mandatory,
but I threw in a handful of asparagus spears for the last 15 minutes to
take advantage of the extra juices. And after we ate the ribs, I
saved the marinade/fat to make the base of some turkey burritos and Lucy
munched up the bones --- nothing wasted!
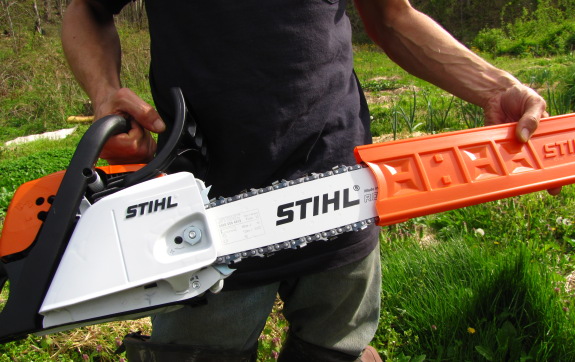
One homesteading tool that I
would have a hard time doing without is a good chainsaw.
That's why finding a solid
backup to our trusty Stihl 039 has been on my to do list for
years now. The 039 has been an outstanding saw, but when we got it I
didn't know much about the finer elements of operating one of these
machines and in retrospect wished I had chosen a slightly lighter model
for 80 percent of the cutting we do around here.
Now the plan is to shift the 039 to backup status with today's
arrival of the new and sexy MS 211. Luck would have it that while
supplies last you can buy a 6 pack of Stihl synthetic 2 cycle mixing
oil and double the warranty from 1 to 2 years. The synthetic seems to
be just a bit higher in price and the word on the playground is that
the extra performance is worth the money.
 I've got so many tidbits to
share about garden experiments that I'm going to sum them up in one
post. (Actually, I had too many for one post, so another will be
coming along one day soon.)
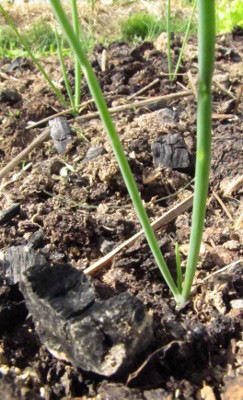
- Biochar --- I applied urine-soaked biochar to half of a few beds in February and am starting to see the results. Two of the beds house lettuce and poppies, and I can't really see a difference between the biochar half and the other half. On the other hand, the onion test bed has a striking difference in both germination and height --- 21 seedlings averaged 10.8 cm tall for the biochar half and 16 seedlings averaged 8.4 cm tall for the control half. The results aren't statistically significant (yes, I geekily measured every seedling and ran a t-test), but the the trend is interesting. I wonder if the better germination/survival of the biochar bed could be because the dark charcoal heated up the soil in that critical early spring germination period?
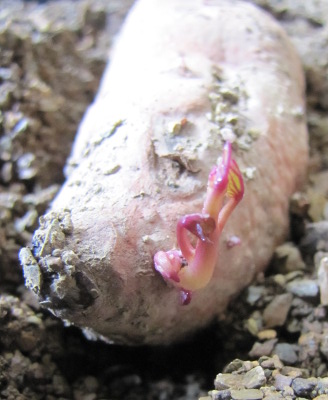 Sweet potato slips ---
This year, I decided to start
our sweet potatoes in gravel instead of water in hopes of rotting
fewer tubers and getting slips sooner. Eight days after putting
the potatoes in, I already see the first shoot! The jury's still
out on whether we'll get more slips sooner than with our previous
method, but I'm thrilled to see such early growth.
Sweet potato slips ---
This year, I decided to start
our sweet potatoes in gravel instead of water in hopes of rotting
fewer tubers and getting slips sooner. Eight days after putting
the potatoes in, I already see the first shoot! The jury's still
out on whether we'll get more slips sooner than with our previous
method, but I'm thrilled to see such early growth.- Mulching over winter weeds
--- In an effort to keep the weeds around the garlic in check without
freezing my fingers in cold March soil, I
topped the weeds off with a thick layer of straw. The results
were so-so --- the chickweed and purple dead nettle still pushed up
through the straw, but the mulch slowed it down
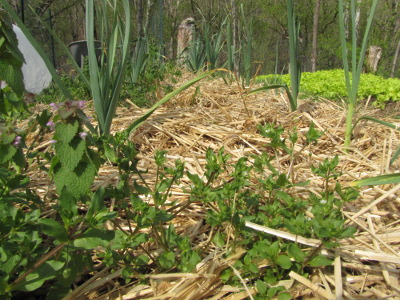 enough that neither went to seed
before I got a chance to clean up the beds this week. It was
simpler than I thought it would be to slip my fingers under the mulch
and root out the weeds, but I did lose a considerable amount of straw
in the process since it clung to the plants being pulled out. If
I'm desperate, I'll over-mulch again, but a more efficient use of my
straw would have been to follow up in late fall and mulched before
weeds arrived.
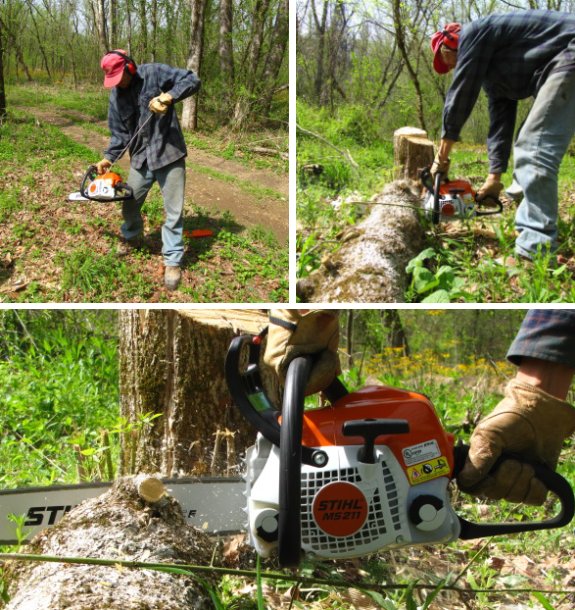
The Stihl MS
211 occasional use chainsaw
cuts like a knife.
It feels like the pull
resistance is less which makes starting it up a lot easier compared to
the 039.
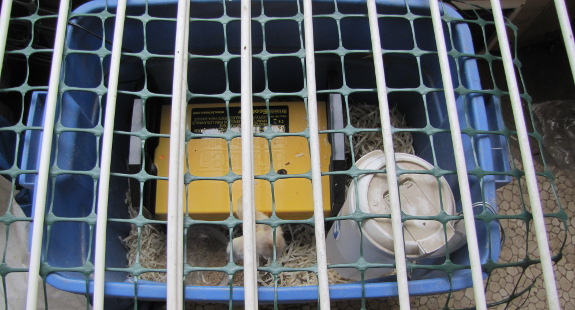

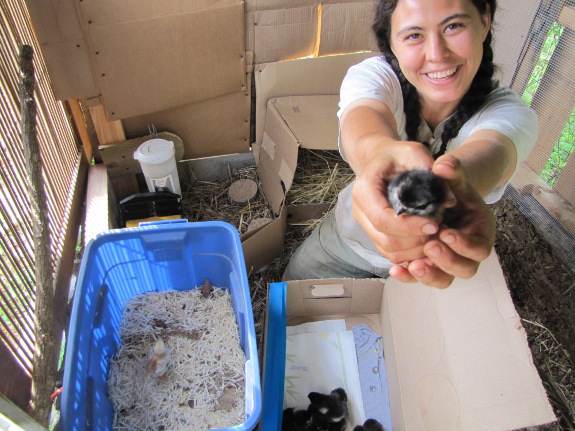
This has been our chick's home all week. (The
fencing on top is to keep out the cats, who were very interested in
their new housemate.) I've kept the chick in the house mostly
because a lone chicken is a lonely chicken, and I wanted to be able to
talk to it and keep it company. The chick and I have really
started to bond, which is a bad thing since I don't know whether it's a
girl (and will stay in our flock for a couple of years) or a boy (and
will grace our table this fall.)
 Meanwhile, I started doing
the math and realized we might not have enough eggs this winter if I
didn't act fast. Most chickens start laying when they're six
months old, but if they reach the critical age late enough in the year
when the light is beginning to fade, the hens will hold off until the
spring. We barely had enough eggs this winter with our current,
aging flock, and we definitely need more layers for the winter.
So I decided to take a gamble and buy some local Black Australorp
chicks to keep our homegrown chick company and give us some definite
eggs this fall.
 Why is it a gamble?
After perusing Craigslist across a four state area, the chicks closest
to our homegrown chick in age were two days younger. That sounds
like nothing to us, but chickens mature so fast that two days of
chickhood is closer to two years of human infancy. And chickens
are mean, picking on smaller and weaker flockmates relentlessly.
There's a chance that our older chick will beat up the new chicks and
we'll have to separate them.
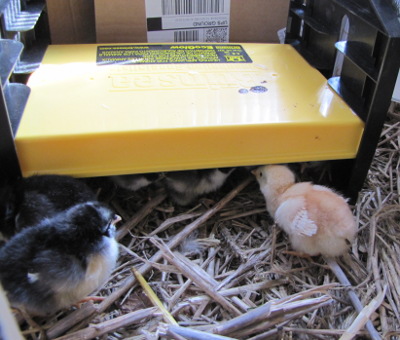
We moved our homegrown
chick to a fenced off part of the chicken coop Thursday evening,
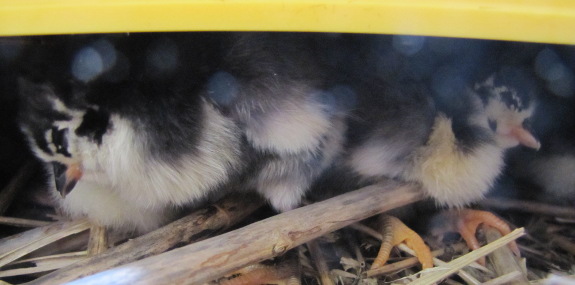
introducing sixteen youngsters at the same time. The newcomers
were a bit chilled from their journey and immediately crawled under
their Ecoglow brooder to take a nap, while our
homegrown chick went crazy exploring his new habitat. After a
while, a particularly perky Australorp came out to join him, and our
chick did peck at the youngster a bit, but not so much that the two
couldn't eat at the same food dish.
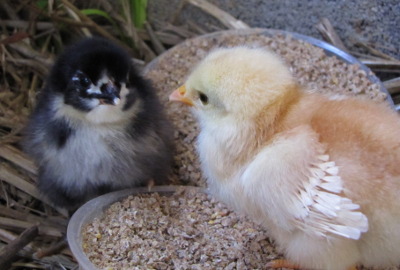 It's too soon to be sure that
the newcomers will get along with their older "sibling", and I'll check
on the flock several times today to make sure there's no bullying going
on. If all goes well, we'll raise the chicks together until
they're old enough to easily sex, then will give our friends five of
the pullets to expand their flock. The cockerels will go in our
bellies, and we'll keep a couple of hens to try out this heirloom
variety in our pasture.
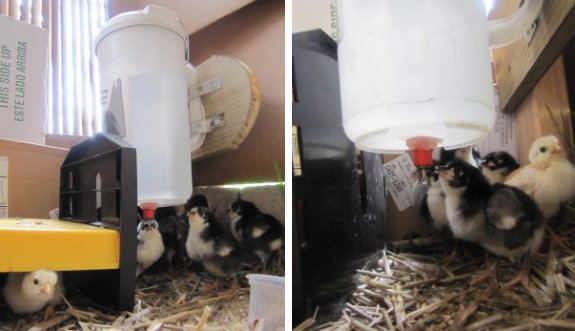
Chicks grow fast, which means
the height of the automatic waterer needs to be adjusted to fit their
needs.
It's also important to make
sure the waterer is secured with no risk of falling.
My new way of mounting takes
just a few minutes more than hanging from a hook. The waterer gets
attached to a piece of board with some plumbers strapping like in the
photo above and the board screws into a 2x4 support beam. It's easy to
unscrew the unit and move it up an inch or so as the chicks get older.
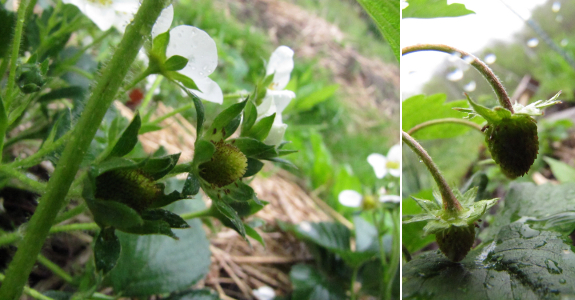
 I
went out in the drizzle Friday afternoon to retie a few training lines
that had come loose around our fruit trees...and ended up spending half
an hour dreaming of the fruit to come.
My father is already
eating strawberries out of his South Carolina garden, but our
"June-bearers" aren't due until mid May. On the other hand, the alpine
strawberries (the
right hand photo above) might ripen sooner --- the tiny fruits are
pretty much full-size.
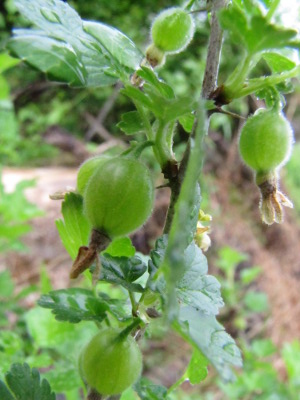
Our gooseberries are swelling so fast that I
could almost imagine popping one in my mouth. Meanwhile, there
are tiny flowers on the grapes, budding flowers on the rabbiteye
blueberries and everbearing
red raspberries, and
full blooms on the northern highbush blueberries.
 Of
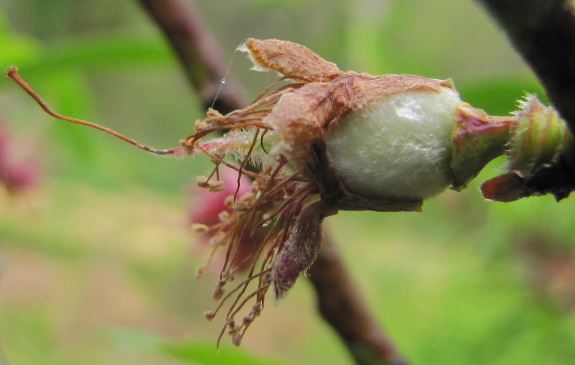
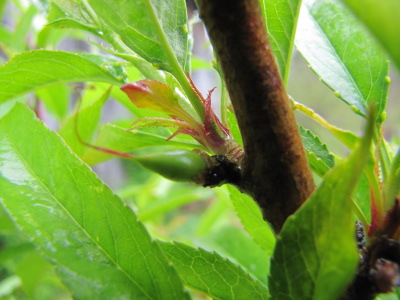
course, it's the tree fruits I'm really watching with an eagle
eye. I love this time of year when the tiny fruits start pushing
their way out of the faded flowers. The photo above is one of the
many, many fruits gracing our kitchen peach, the back peach seems to be
nearly as loaded, and there are even some baby fruits on the nectarine
this year.
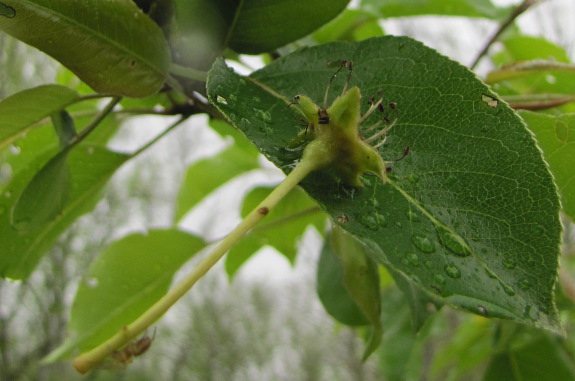
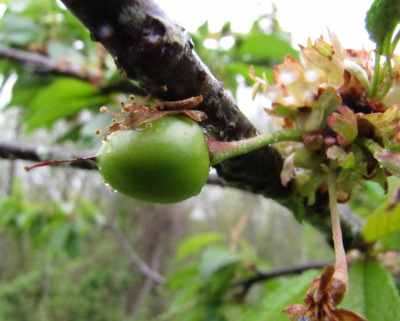 The
pear --- as I suspected --- is just a tease. She's a little young
to be bearing fruit anyway.
The cherry, on the other
hand, is an old maid. She must have heard me mention that this
was her last year on earth if she didn't start producing, so she killed
back half of her branches to gather up enough energy to make half a
dozen fruits. I guess she'll get another year to prove herself
after all.
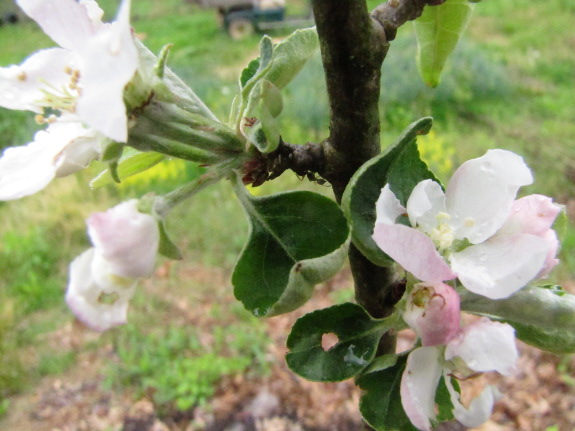
And look at this!
Our first real apple flowers! (We did have blooms on our Stayman
Winesap last year...in the fall, after it had lost all of its leaves to
cedar
apple rust and then
leafed back out.) Surprisingly, this isn't our biggest, oldest,
or happiest apple, but the Yellow Transparent is in second place and (I
seem to remember) tends to fruit at a young age for an apple.
Maybe next year the tree will be past the teasing stage and ready to
give me fruits.
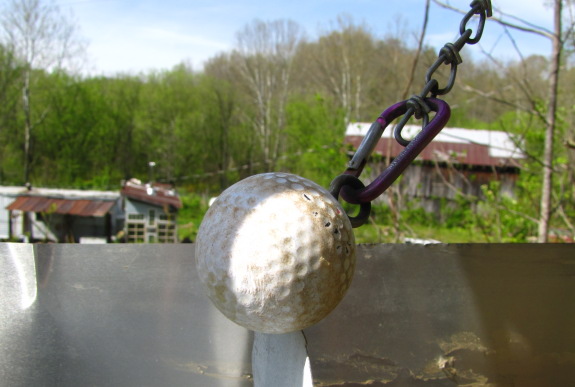
We've got 3 mechanical
deer deterrents going
right now and zero damage to the garden.
I see fresh deer tracks in
the mud just about every day when I walk Lucy, which tells me they're
out there and keeping a safe distance from our cacophony of protection.
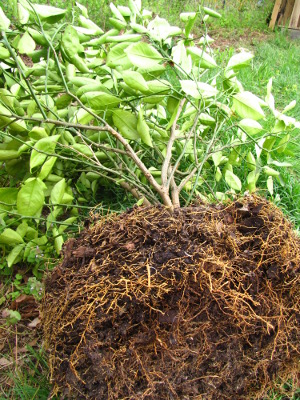 Three years ago, we got a dwarf
meyer lemon and a dwarf tangerine to keep as houseplants. The
lemon started producing right away and has given us more fruits each
year, but the tangerine thought it would be more fun to just grow a
huge bush with massive thorns. After some research, I started
thinking that perhaps my "tangerine" was actually the dwarfing
rootstock with the grafted tangerine part dead, so I decided it was
time to cull the "tangerine" from our crowded sunroom space.
I dumped the whole plant
out beside the compost pile a few weeks ago...and was surprised to see
that it survived several heavy frosts. I don't want you to think
I was nice to it --- actually, the tree's roots were bare, its leaves
face down, and yet it continued to live. Then, this week, I
noticed that the crazy citrus had decided now was a good time to bloom.
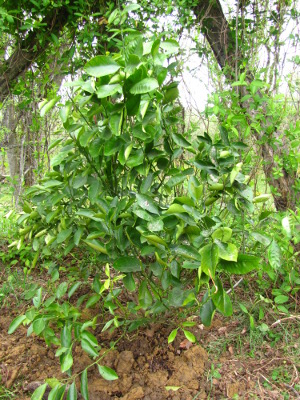
Mark talked me into
giving the tree one more summer to shape up. I plopped it in the
ground in the corner of the chicken pasture and will look forward to
seeing some fruits to prove its identity. If I'm wrong and the
tree turns out to be a tangerine after all, we'll dig it back up in the
fall to move inside, and if it's the rootstock, we'll let it die out
this winter. Trifoliate orange --- the most common dwarfing
rootstock used for citrus --- is hardy in our region, but our tree
lacks trifoliate leaves and is probably the less hardy tangerine
dwarfing rootstock --- Cleopatra mandarin. I guess time will tell
whether our citrus deserved its reprieve.
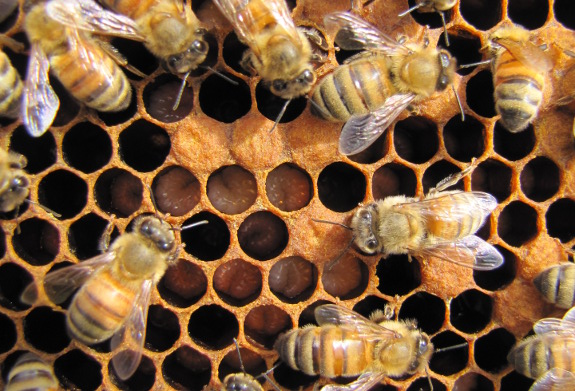
 The hive is filling up their
brood box fast. When I checked on the bees at the end of last
week, they had four full frames of brood, making me think that they
might be strong enough to split in a week or so. For
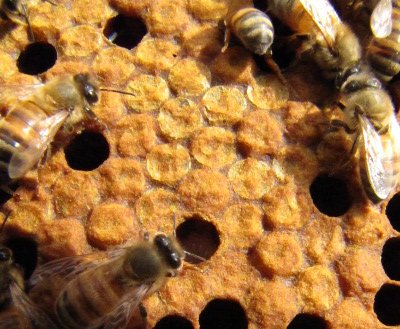
those of you new to bees, the photo above shows capped brood (the brown
stuff) nearly ready to hatch out into adults along with mid-sized
larvae (the pale grubs) nearly ready to be capped for
metamorphosis. And adult bees tending the babies, of course.
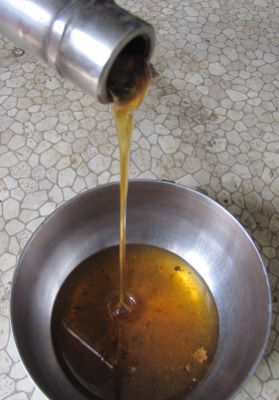
Meanwhile, I snagged two
big frames of honey to
extract. Since
we had two hives die over the winter, the apiary contains far more
honey than the bees can use, and we went through last summer's 4.5
gallons of honey astonishingly quickly. I gave away perhaps a
quarter of it and also started baking our butternut
squash pies with
honey, which put quite a dent in the stores. With only half a cup
left on the shelf, I was glad to be able to jar up two more quarts to
tide us over.
I tried a few different
methods of adapting some sort of shoulder strap to our chainsaw and
none of them felt balanced enough to be practical.
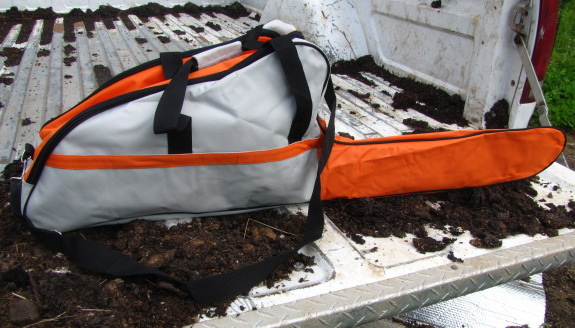
The above 20 dollar chainsaw
purse is a good solution that comes with its own shoulder strap.
It's made of some heavy
material with a hard bottom and a side pouch for small tools. I found
this one on Ebay from the seller who goes by "Ed's Small Engine Barn"
out of Columbia Kentucky.
Yes..... I'd say there's
enough room left over inside to fit a small 1 gallon fuel container.
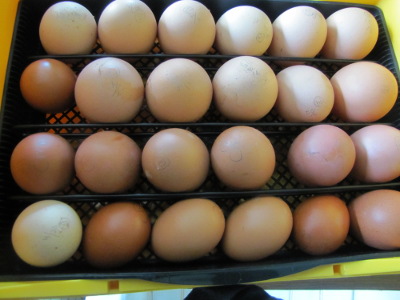 We've started on phase two of
our chick-raising plan. I know, I know, we've already got two
heaping handfuls of chicks out in the coop, but they're
only going to put a small dent in my chicken goals for the year, which
include:
- About five new hens to replace our old birds
- Two hens of a broody variety to make incubation easier in 2012
- 25 broilers to go in the freezer
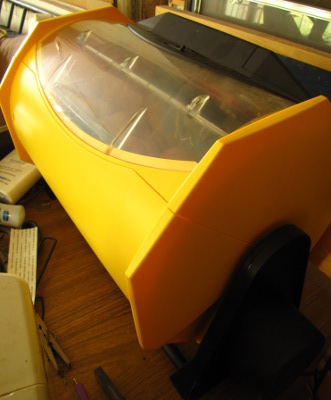 For round two, we splurged
and bought a Brinsea Octagon 20 incubator. I'm hoping the larger
capacity (it holds 24 hen eggs) will result in multiple living chicks
even if my hatch
rate continues to be
terrible. The new incubator monitors humidity as well as
temperature, which will make it more likely that chicks will survive (I
hope.)
In addition to saving up
enough of our eggs to pop in the incubator, we ordered hatching eggs
online. The eggs were pricey --- I could have gotten chicks for
nearly the same cost! --- but I want to learn incubation and am excited
to be adding Cuckoo Marans to our flock since this variety is what
Harvey Ussery uses as mother hens. My goal for hatch two is to
double my previous hatching rate and end up with at least seven living
chicks, which just might be enough to give us the two broody hens I
crave.
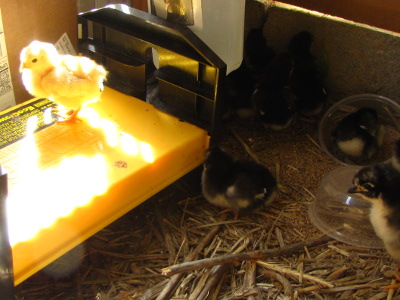 Meanwhile, we had one small
setback in the coop this past weekend --- a rat broke in and hauled off
two chicks, leaving behind one dead and fourteen alive. I'd read
that rats are a huge problem with young chicks, but had previously kept
our youngsters in the house until week three, which prevented predation
problems. Although the losses were preventable, I consider the
current system better than the alternative. Yes, we could keep
the chicks inside longer or we could turn their outside home into a
rat-proof cage, but I really like the way the chicks' current living
arrangement has them foraging from day one and allows them to bask in
the sun. My hope is that the surviving chicks will be more wilely
and better pasture animals. Can you tell that I'm working on
emotional detachment from the farm animals?
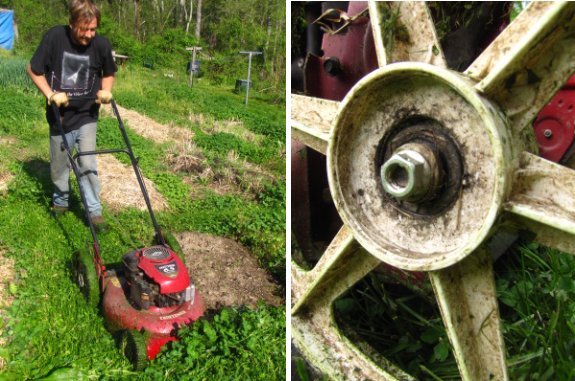
The Craftsman walk behind
mower developed a slight wobble last year and my short cut solution was
to add a couple of large flat washers to fill in the space where the
plastic was broken.
Turns out it was not such a
great idea. The wobble got a little bit worse each time I used it and
for some reason I got stuck on upgrading both rear wheels to a more
sturdy pneumatic version and forgot the simple route of looking up the
part number and ordering the original wheel from Sears.
It's hard enough to push this
thing through heavy grass and weeds and over uneven terrain without
making it harder with a wheel that wobbles. Take my advice and replace
a wobbly wheel sooner than later. Our Craftsman walk behind mulching
mower rear wheel part number ended up being 151155 and after shipping
it cost about the same as an engine
cable.
Update:I got the part number wrong-It's 189159 and it comes with 2 metal bearings.
 Crimson clover is one of the
cover crops we put in last fall that didn't winter kill. I've been laboriously
ripping the clover out --- a difficult task since crimson clover
doesn't really start growing much until the spring, so lots of weeds
colonized the bare soil over the fall and winter. Now that the
clover is big and strong, its roots are also quite tenacious. Let
me just tell you that weeding three beds of overwintered crimson clover
took as long as weeding ten or fifteen beds that had been home to fall
oats.
Despite the pain and
agony of dealing with my mistake, I decided to leave one clover bed
alone to see what happens. A few days ago, pyramidal red blooms
opened up, and Tuesday I noticed that the bed was loudly buzzing from
the bees who had come to call. Maybe this cover crop has merit
after all, I pondered, leaning in close with the camera. That's
when I noticed that every single one of the honeybees present was
feeding on purple dead nettle --- Mark had just mowed down our weedy
"lawn" and the bees had found the only weeds left  in bloom. To be fair,
though, I should mention that our native miner
bees seemed to be concentrating their efforts on the crimson clover.
Although you would think
I'd be telling you that crimson clover is off my cover crop list for
good, I'm actually pondering whether a mixed planting of crimson clover
and oats in the fall might not be a good combination. The oats
would prevent weeds from colonizing the ground, then would die back
into a high carbon mulch over the winter. Come spring, the
crimson clover would poke through and put in some serious growth to add
nitrogen to the soil. I've read that crimson clover will reliably
mow kill as long as you wait until it's in full bloom --- I was only
hand-weeding because I thought the clover wouldn't bloom in time to let
me kill it and still plant my summer garden. Definitely worth a
try for next year!
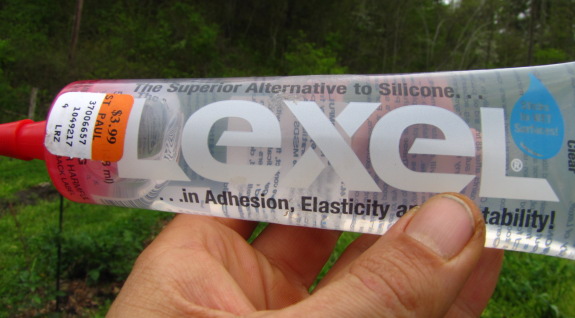
I got this tube of Lexel for
the 5
gallon bucket solar hot water experiment thinking that the extra cost
would be worth it if it was indeed a "superior alternative" to silicone.
The main problem I had with
it was the amount of time it takes to dry. Expect to wait 1 to 2 days
for it to cure and 1 to 2 weeks before you reach "total firmness".
Lexel might be the better
choice if you need some extra elasticity, but I like a good old
fashioned tube of silicone that can be expected to dry and be ready to
use within hours depending on temperature and humidity.
 The
May edition of Weekend
Homesteader is now available for 99 cents in
Amazon's Kindle store! The series presents a simple and cheap
project for every weekend of the year to provide stepping stones on
your path to true self-sufficiency. As the introduction says:
Since May has four and a half weekends, the first volume of the series has four and a half projects:
- Planning your summer garden (with tips on the easiest vegetables to grow)
- Making a kill mulch (and why no-till gardens are healthier)
- Planting your summer garden (with information on when and how to plant)
- Making a rain barrel (to collect free water for your garden)
- Turning off your TV (and finding time for what really matters)
 Click the "like" button near the top of the
Amazon page even if you don't buy the book.
Click the "like" button near the top of the
Amazon page even if you don't buy the book.- Scroll down near the bottom of the page to where it says "Tag this product." Click on anything you want, but I'm aiming for "homesteading" and "self-sufficiency", and your vote there would really help. (Again, no purchase necessary.)
- Buy the ebook if you're interested.
- Leave a review, if at all possible.
- Leave a comment on the Weekend Homesteader May resource page letting me know what you loved or hated about this first installment. My advance reader says I'm preaching in the TV chapter, and I'd be curious to hear if that turned you off. (I actually thought I was up on my soapbox more during the no-till chapter.) Were the exercises too easy, too hard, or just right? Did you have trouble with any part of the ebook? I'll take what you say into consideration as I write the June volume.
- Tell your friends!
Thank you so much for taking the time to make Weekend Homesteader a success!
 "I
have a hypothesis that the last chance of frost is past when the pecan
trees are in full leaf," my father posited. "What do you think?"
The idea appealed to me,
in part because of the old saying that it's
safe to plant
your corn when the oak leaves are the size of a
squirrel's ear.
I saw oak leaves twice this big a week ago along with volunteer squash,
tomatoes, and sunflowers. Ever since, I've been pondering whether
I'm really going to put out
half of my summer garden three weeks before the frost-free
date.
Meanwhile, the
scientific side of my mind sidetracked into finding out what cues trees
use to
decide when to leaf out. The only options I could come up with
are soil
temperature, air
temperature, and day length, all three of
which (along with the ten day weather forecast) are what I use to
determine my own planting schedule. A search of the internet,
though, suggests that our trees are keeping track of how much cold
weather they've faced, and when they think they've had enough, they
leaf out (as long as the air is warm enough.) That would mean
that an abornmally cold winter (like
this past one) would produce an early spring (like this one) since the
trees would have counted up the required number of chilly days earlier
than usual.
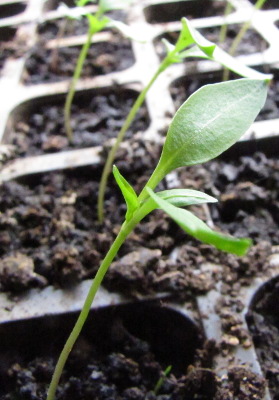 Put that way, I'm not so sure
I want to base my planting date on our trees' decisions. However,
the soil has warmed to 60 degrees and
the ten day weather forecast predicts no lows beneath the mid forties,
so I went ahead and planted green beans, corn, squash, melons and
cucumbers (in quick
hoops), okra, mung
beans, and basil, along with
sunflowers, millet, ground cherries, and amaranth in the forest pasture. I'm going to hold off
on putting out my homegrown pepper sets, though, until the night lows
are just a bit higher.
How about you? Are
there trees that you feel confident predict the time to plant your
summer garden?

First, I want to thank
everybody who went over to Amazon and bought Weekend
Homesteader, liked
it, or suggested tags
for the ebook. Thanks to you, after less than 24 hours, the ebook
is #1 in the
Kindle Store's Vegetable Garden section and #95 in the general
gardening section for the whole site! I also appreciate those of
you who popped on over to get our other ebooks and boosted EATING
the Working Chicken
to #1 in Kindle's Poultry Cooking section and Microbusiness
Independence to #12
in Kindle's E-commerce division. Wow! I feel like I'm on
the New York Times bestseller list.
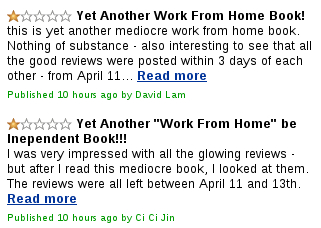 I
have a couple more requests, then I'll shut up about this ebook
project. It would be great if we kept on a roll and stayed up
there in the ratings long enough to get random strangers buying the
ebooks, so I'd be thrilled if you like, tag, or buy the book (if you
haven't already.) Perhaps more important, though, I could really
use some reviews on all three ebooks. Two reviewers posted nearly
identical negative reviews on Microbusiness Independence this morning,
and I felt like a failure until Mark pointed out that the reviewers
might have a competing ebook and be trying to run down the
competition. Sure enough, when I clicked on their profile, all of
their reviews are 1 star. Still, I don't think most people are
going to go to the trouble of checking on those negative reviews, and
I'd love to drown them out with a tide of good opinions. Don't
lie, of course, but if you enjoyed the ebooks, please leave a review.
I
have a couple more requests, then I'll shut up about this ebook
project. It would be great if we kept on a roll and stayed up
there in the ratings long enough to get random strangers buying the
ebooks, so I'd be thrilled if you like, tag, or buy the book (if you
haven't already.) Perhaps more important, though, I could really
use some reviews on all three ebooks. Two reviewers posted nearly
identical negative reviews on Microbusiness Independence this morning,
and I felt like a failure until Mark pointed out that the reviewers
might have a competing ebook and be trying to run down the
competition. Sure enough, when I clicked on their profile, all of
their reviews are 1 star. Still, I don't think most people are
going to go to the trouble of checking on those negative reviews, and
I'd love to drown them out with a tide of good opinions. Don't
lie, of course, but if you enjoyed the ebooks, please leave a review.
Finally, I was really
serious about emailing you a free copy of Weekend Homesteader's May
edition if you don't want to jump through Amazon's hoops. Even
though I'm trying to leverage the site, I don't approve of their
monopoly. So, feel free to email
me if you want to
read the ebook without buying into the Kindle format.
Thanks again!
You've all made my day!
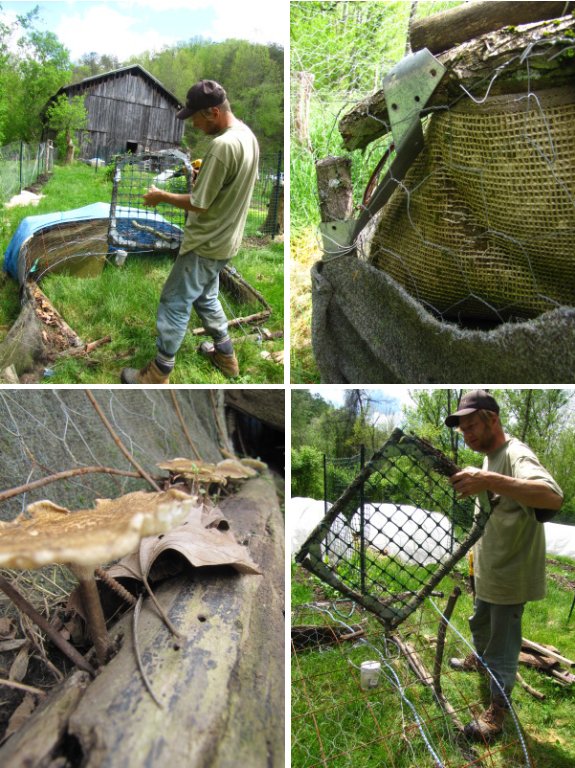
I took apart one of our first
chicken tractors today now that we have our flock on a forest
pasture rotation system.
The walnut logs were rotting
pretty bad, but the rest of it felt like it had another few years left
in the game. I was especially pleased at how well the pieces of carpet
held up under these conditions.
It was a concept that served
us well back when we first started out with poultry, and pulling the tractor
back and forth between gardens really helped to clear multiple areas
that now have patchs of lush grass.
Time for another round
of small experiments in progress!
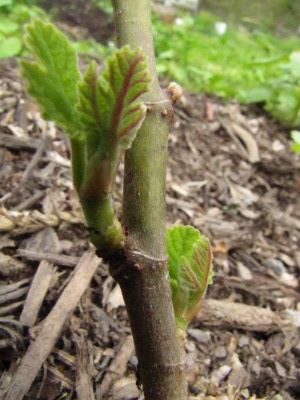 Tender
perennial winter protection --- This fall, I tried two different
methods of protecting perennials that are marginally winter hardy in
our region. For
our rosemary, I simply put four cinderblocks around each plant and
filled in the center with autumn leaves. All three of my
rosemaries died, partly because Lucy got obsessed with digging the
biggest one up, but primarily (I'm guessing) because my winter
protection was too slap-dash. On the other hand, the plastic
netting that I wrapped around my hardy fig and filled with leaves
did the job quite well. The only thing I'd change there is to
wait to remove the leaves until mid-April --- I took the protection off
prematurely and the tops of the fig twigs died back.
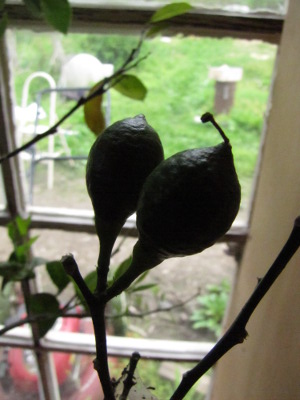 Feeding house plants with urine
--- I've been watering
our potted dwarf citrus trees with urine for months now --- one cup
per week for the biggest plants, watered down into half a gallon of
liquid, and half a cup (similarly diluted) for the smaller
plants. All I can say is --- wow, what a success! After a
couple of years of giving us six or seven lemons, our dwarf
Meyer lemon is currently decked out in 37 fruits, most of which are
so big there's no chance they'll be aborted, and the tree is blooming
some more. Our younger dwarf citrus plants are also growing like
crazy, although none have fruited yet. Without a control, I can't
promise you that the urine I've been feeding our plants is responsible
for this sudden heavy yield, but I'd definitely recommend the technique
to anyone.
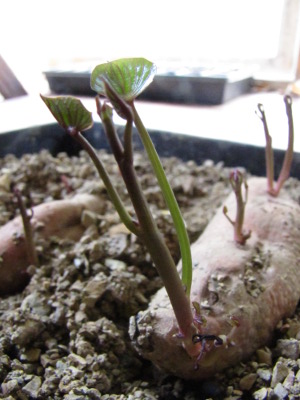 Sweet potato propagation
--- A week ago, I told you that the sweet
potatoes we're propagating in damp gravel on top of a heat mat had started
to sprout. Now there are sprouts shooting up all over, one of
which is nearly big enough to clip and root! I took the clear lid
off the flat so that the shoots can get a bit taller, and expect to be
ready to put sweet potatoes in the ground far sooner than ever
before. This method is definitely a winner and will be our sweet
potato slip production method from here on out.
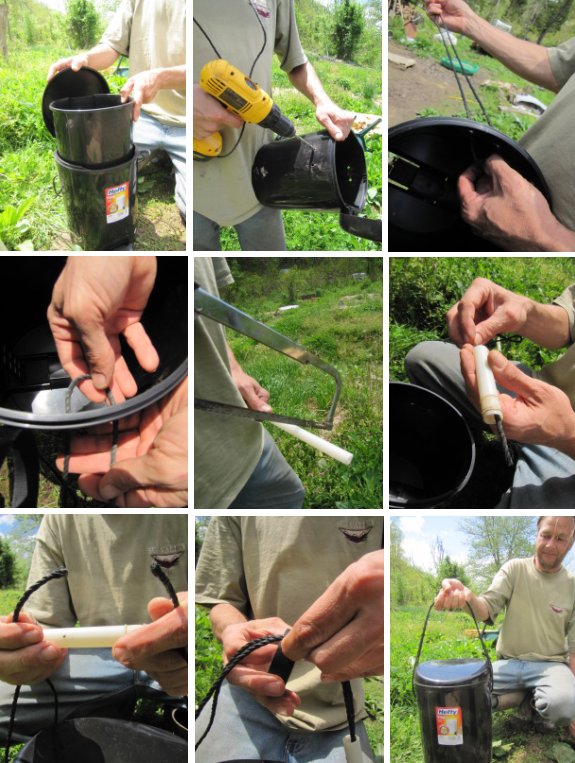
Our first compost container
was just an old 3 gallon pickle bucket salvaged from the dumpster at
Hardies. (Thanks Ben)
I saw this small trash can
and thought it would make a nice upgrade to our compost system if it
only had a handle to make it easy to carry the scraps out to our
chickens each morning.
This style of bucket can be
found at Lowes for around 12 bucks and it only takes a few minutes to
fabricate a rope handle.
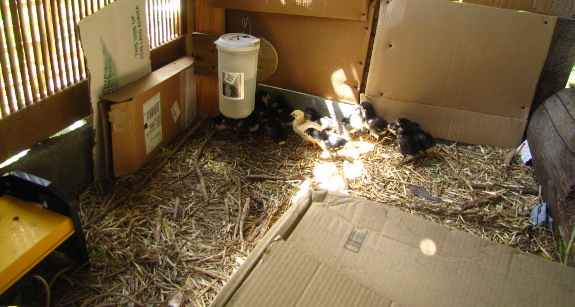
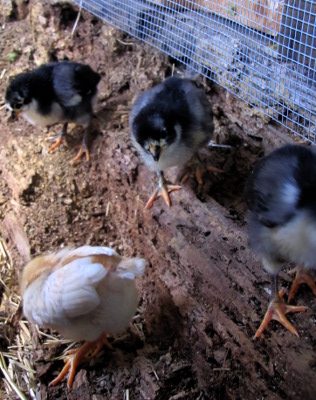 I've
been expanding the chicks'
home at intervals, most recently giving them free rein to explore half
of the chicken coop on Friday. My method lacks any hint of
science. Instead, I just give the chicks more room whenever they
seem to be bored with their current setup.
Except for our homegrown
chick, the young flock is easily spooked when I start moving things
around. They run into the corner and hide until I quiet down,
then wait for the yellow chick to give them permission to go
play. When they do start moving, though, it's like a stampede ---
14 balls of fluff exploring every nook and cranny of their new home.
I've been very impressed
by their budding foraging abilities already. These chicks have
caught a gnat out of the air, chased down a daddy-long-legs (then
looked at it in confusion), and scratched through the loose debris on
the top of the rotting log that makes up one side of their coop.
Although they're tiny, I'm seriously considering letting them run out
to play with the rest of the chickens in a week or so.
Unless, that is, they decide they want to break out sooner ---
homegrown already flew out of the chick area and back in once on Friday.
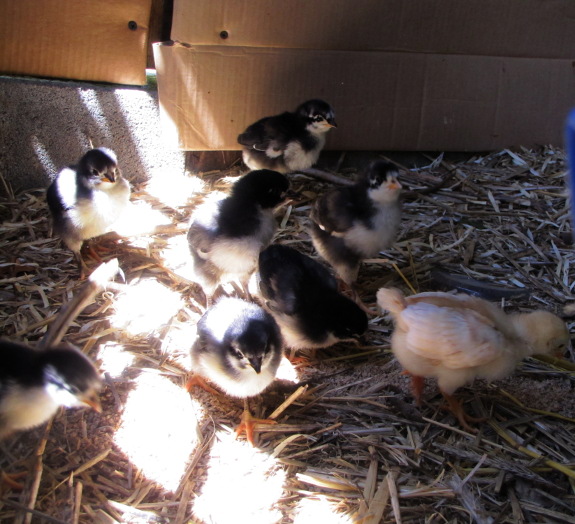
Got an old document scanner
you don't use anymore? Why not give it a new life by converting it into
an automatic chicken coop door opener and closer.
Chicken
sitter.com has some of the details, but be aware this is an advanced
project compared to other
automatic chicken coop door openers. Some
knowledge of Linux will be required to control the scanner.
Makes me wonder if the
scanning arm of an old printer would offer the same results. What I
like about this project is the availability of used scanners out there.
I've seen them in thrift stores in the 10 to 20 dollar range and if you
know someone who has upgraded lately you might find an old free one in
their barn.

Edited to add:
After years of research, Mark eventually settled on this automatic chicken door.
You can see
a summary of the best
chicken door alternatives and why he chose this version here.
If you're planning on
automating your coop, don't forget to pick up one of our chicken waterers. They never spill or
fill with poop, and if done right, can only need filling every few days
or weeks!
Want more in-depth information? Browse through our books.
Or explore more posts by date or by subject.
About us: Anna Hess and Mark Hamilton spent over a decade living self-sufficiently in the mountains of Virginia before moving north to start over from scratch in the foothills of Ohio. They've experimented with permaculture, no-till gardening, trailersteading, home-based microbusinesses and much more, writing about their adventures in both blogs and books.

