
archives for 02/2010
 I've
been a bit quiet on the garden front lately because now is really the
time for dreaming, not for growing. But the garden is actually in
much better shape than any previous winter garden I've been in charge
of, so I thought I'd take you on a quick tour.
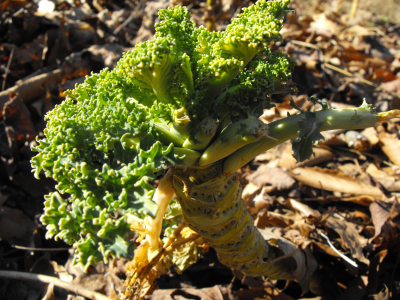
It's quite possible to
have some greens and lettuce even in the dead of winter around here as
long as you start them in the early fall and the deer don't get
them. In previous years, the deer have always eaten my greens to
the ground, but Mark's deer deterrents are worth their weight in
gold! This year we still have some kale and mustard hanging on
--- just enough to put half a cup in potstickers every week or two. (No
lettuce because I planted it late and didn't get it up to speed in
time.)
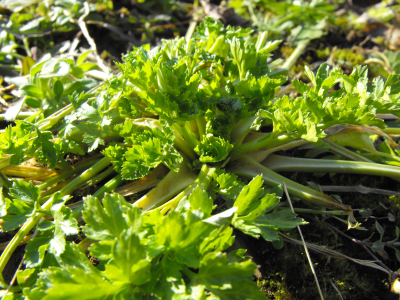 I've
always read that you can eat parsley all winter, but the deer adore it
so I've never had it later than August. As a result, I've never
even bothered to plant it in the sunny half of the garden (where I put
the plants which will grow on warm winter days.) Nevertheless, my
small bed emerged from the snow a week or so ago green and
beautiful! The plants tend to have short stalks in the cold, but
the leaves are delicious --- perfect for adding a bit of freshness to
tuna or egg salad or soups.
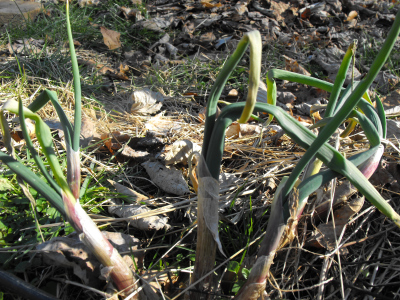
Of course, no winter
garden is complete without scads of Egyptian
onions. I
planted a couple of beds of them, and then tried to compost the extras,
which meant I instead spread volunteer onions all over the yard.
You can never have too many, though --- I put the fresh green tops into
omelets and egg salad and cut up the entire onions into soups.
Meanwhile, inside, we
still have enough sweet potatoes and garlic for several months, though
the carrots are beginning to reach the bottom quarter of the drawer and
we've only got three butternut squash left. The freezer is still
full of the bounty of the summer, and the only vegetables we buy in the
store are potatoes and onions (because our crops were disappointing
this year.) And now it's February, and time to plant the first
lettuce bed!
 If
you've been following along for a while, you may remember my series
about traditional
Chinese farming practices. The book Farmers
of Forty Centuries
opened my eyes to farming methods that were clear forerunners of modern
organic gardening, complete with nitrogen fixing plants and massive
infusions of compost. As the name suggests, farmers in China
maintained the fertility of the same garden patches for as long as
4,000 years using their ancient techniques.
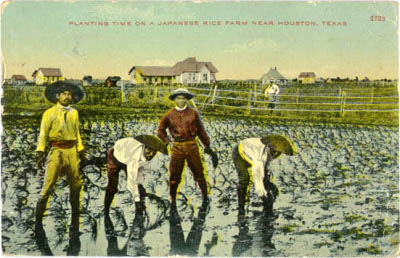
Fast forward ahead just
forty years after the book's publication date, and farming practices in
Japan (once very similar to those in China) turned around 180
degrees. After the end of World War II, Japanese farmers were
sucked in by the allure of time-saving American "innovations" like
chemical fertilizers, herbicides, and pesticides. According to
Masanobu Fukuoka, author of The
One-Straw Revolution, centuries of building
humus-rich soil washed away in just twenty years. Within one
generation, the Japanese soil was dependent on ever greater amounts of
chemical fertilizers to produce a crop.
Was there any way for
Japan to return to a more natural way of farming? Fukuoka said
yes, and his book struck a chord with both Japanese folks and Americans
in the 1970s. Stay tuned for his insights in this week's
lunchtime series.
| This post is part of our One-Straw Revolution lunchtime series.
Read all of the entries: |

Another winter day at Wetknee
where the snow is taking its sweet time saying goodbye.
Rocket stoves are currently
being
introduced to several third world countries to help lower the pressure
of firewood harvesting on native forests. The stoves are designed
to need very little wood in order to heat up your
cook pot, so trees get left in place. I love the concept, but
can't help wondering --- why don't we promote rocket stoves in the U.S.
too? I'd never tell someone in a third world country to institute
environmentally friendly measures I wasn't willing to put into practice
in my own life.
Before I knew it, I'd penciled a rocket stove onto our ten year plan
and started researching. First, I discovered that you can't use
rocket stoves inside because they're basically an efficient
hearth. So, in practice, they'll probably be part
of a summer kitchen in our long term plan --- something I want anyway
because I always dread turning on the stove on a sweltering summer day.
The video I've embedded above is well worth watching if you'd like to
build your own rocket stove. It looks like we could probably make
one quite cheaply, though it would take quite a bit of trial and error
to figure out certain parts. The sheet metal looks an awful lot
like a stovepipe to me, suggesting that we might not need welding
skills (the part that scared us off building our own initially.)
Alternatively, we could buy one pre-made for around $125.
Have any of you built or used a rocket stove? What did you think
of it?
 Masanobu
Fukuoka's The
One-Straw Revolution
is a hodepodge of advice for farming and living. To be completely
honest, I adored the first third of the book, but was annoyed by the
philosophical bent of the rest. Sure, I agree that we should
garden organically, eat locally, minimize our meat consumption, eat in
season, turn away from commercial farms and back to the small family
farm, reject growth economics, live simply, and work to live rather
than live to work. But those concepts are all old hat now.
Since I wasn't alive while he was writing the book, I don't really know
whether Fukuoka's ramblings were insightful and innovative at the time
or simply derivative.
That said, the first
third of the book was rivetting. His farming
method (which I'll describe tomorrow) clearly paved the way for the
entire permaculture
movement. Fukuoka dubbed his technique "natural farming", and it
went far beyond simple organic gardening. He advocated working
with nature and mimicking natural processes, positing that many parts
of modern agriculture systems are only necessary because the farms are
out of balance and we're working against nature. As a result, he
also used the inspiring phrase "do-nothing farming", referring to the
aspects of modern agriculture that he did without.
Although there was still
a lot of work involved in Fukuoka's farm, his
do-nothing farming was unique. He promoted no-till techniques,
green manure, and mulching. You don't hear much about
Fukuoka nowadays, but I wonder whether he wasn't as influential in the
birth of the
permaculture movement as its self-styled father, Bill Mollison.
| This post is part of our One-Straw Revolution lunchtime series.
Read all of the entries: |

The home made storage
building is pretty much sealed up in the upper rafter section thanks to
several rounds of cutting salvaged wood to size and securing it in place.
 While
I'm on the subject of more efficient stoves, I wanted to do some
research into efficient wood stoves for space heating. Our exterior wood stove
is a good choice for heat on our farm since wood is a renewable
resource (and is cheaper than most other options), but I'm still
concerned about the pollution that comes out the chimney.
Luckily, scientists have been plugging away at building a better wood
stove and have developed models that can eliminate 90% of the smoke and
use only about half the wood.
The new,
energy-efficient stoves come in two categories. The first, shown
to the right, is a non-catalytic stove that increases its combustion
efficiency using firebox insulation, a large baffle that extends the
gas flow path, and pre-heated combustion air (which is actually a lot
like the reasoning behind the design of the rocket stove.)

Wood stoves with
catalytic converters (shown on the left) can cut emissions of even the
most efficient non-catalytic stove in half, but they don't seem to use
less wood. Although I'd love to be polluting less, catalytic wood
stoves aren't the best choice for most homesteaders. The $100 to
$200 catalytic converter wears out within two to six years, and you
need to be relatively adept at tinkering to keep it in prime operating
condition. The startup costs are also higher
So how much does a new,
energy-efficient wood stove cost? From what I can find online, it
seems like new non-catalytic wood
stoves start around $1,200 and go as expensive as you can
imagine. In 2009 and 2010, there's a 30% tax credit in effect for
buying wood stoves with at least 75% efficiency, which is a great deal
if you can use it. If you buy and burn a lot of wood, a more
efficient wood stove might pay for itself even without the tax credit
--- I estimate that we'd start saving money after about 4 years if we
bought the cheapest model.
Although efficient wood
stoves seem like a good idea, I'm still not ready to take the
plunge. I'm very curious about whether our current wood stove
could be retrofitted to increase its efficiency. Has anyone tried
that out?
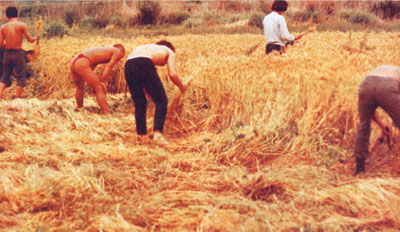 So
what did Masanobu Fukuoka's natural farming technique look like?
In the fall, he seeded white clover, a winter grain (rye or barley),
and rice all at once into a field. The seeds were rolled in balls
of clay so that they could simply be dropped onto un-tilled soil rather
than being pushed beneath the surface.
That autumn, the clovers and
winter grains sprouted and grew while the
rice seeds waited. The clover formed a groundcover beneath the
rye or barley, crowding out weeds and fixing nitrogen to enrich the
soil. By spring, the winter grains were ready to be harvested ---
Fukuoka threshed
the grains
and tossed all of the straw back onto the fields, forming a thick
mulch. He added in a small amount of manure from his chickens,
but no other compost or fertilizer.
 Meanwhile, the rice had
already sprouted and started to grow. The
young rice plants were trampled down when the winter grains were
harvested, but quickly sprang back to life, growing amid weeds and
clover.
The traditional method
of growing rice in most of Japan and China
consisted of flooding the rice paddies for the entire growing season as
a method of weed control, but Fukuoka realized that rice is actually
healthier when growing in damp, but not sodden, soil. So he opted
to flood his fields for a mere week in the spring, long enough to drown
out most of the weeds and weaken the clover, giving the rice a head
start. Then he dried the fields back out and the rice grew
happily above its nitrogen-fixing groundcover. In the fall, he
harvested the rice and once again returned the straw to the field,
along with seeds for next year.
Fukuoka noted that after
20 years of using his natural farming method,
the soil on his farm was much richer than when he began. He
harvested just as much grain (or more) from his fields as the
commercial farmers using chemicals nearby. And the photos in his
book look remarkably weed-free --- I'm jealous.
| This post is part of our One-Straw Revolution lunchtime series.
Read all of the entries: |
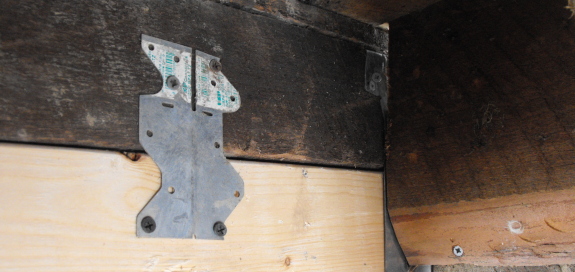
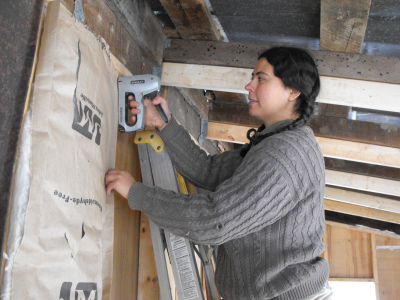
We had a box of these corner
brackets that flattened out nicely with a few bangs of a hammer.
Extending the rafters will allow us to squeeze in some extra insulation.
 My
mindset already seems to be taking in the permaculture
mantra "one man's trash is my
treasure."
All through our building
project, I've been letting the sawdust slip
into the mud and disappear, but this week I suddenly realized it was a
gold mine! I swept up about half a gallon and wish the
wood-cutting part of the project wasn't nearly over.
Shall I use my precious
sawdust for making bricks for a rocket stove or for mixing with wood
chips to
provide our mushroom spawn a better substrate? Choices, choices!
 Masanobu
Fukuoka realized that his system of natural farming wouldn't be exactly
replicable in other parts of the world --- for example, we'd be
hard-pressed to grow rice here in Virginia. So he summed up his
method into four principles that can be used anywhere.
First, he admonishes us not to
till or turn the soil. Although Fukuoka
doesn't go into the science behind the
disadvantages of soil tilling,
he did mention that cultivating soil gives troublesome weeds like
crabgrass and dock a foothold. As my father can tell you, once
crabgrass gets into your garden, you might as well move on.
 Principle 2 is "no
chemical fertilizer or prepared compost." I know the latter
may be fighting words! But I see his point ---
in nature, plant matter is naturally composted on the soil surface, a process
which promotes the growth of beneficial fungi.
Fukuoka adds fertility to his soil by returning straw (and a bit of
poultry manure) to the soil surface and keeping a groundcover of white
clover growing at all times.
Third, Fukuoka refuses to
weed by tillage or herbicides.
Instead, he uses mulch, a clover groundcover, and temporary flooding
to keep the weeds in check. In addition, his winter grain/rice
rotation keeps the
fields constantly covered with crops, so weeds never have a fallow
period to gain a foothold.
Finally, principle 4 is "no
dependence on chemicals." All organic
gardeners will agree to that.
| This post is part of our One-Straw Revolution lunchtime series.
Read all of the entries: |
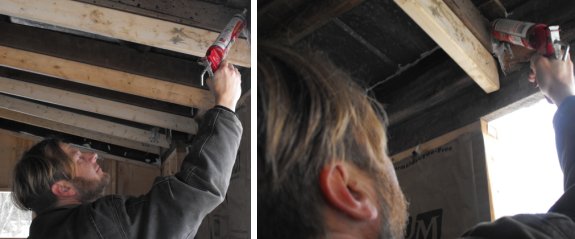
The home
made storage building got
about half way sealed today thanks to four tubes of caulk and five
tubes of liquid nails.
 Human
names elude me. Without really trying, I can rattle off the
scientific names of hundreds of plants, tell you their lineage, their
uses, where they like to grow. But present me with a few people,
and they blur together into a sea of faces.
I can just hear what you
want to say --- "I have a hard time with names too." Let me
clarify with a short story. When I was a freshman in college, a
girl sat at my table every day, but for weeks (months? maybe even the
whole first semester?) I didn't know who she was and I mostly ignored
her. Then, one
day, she brought a potted heather plant to lunch with her. "Nice
plant," I said. "Yes, it's a heather, just like my name," she
replied. A light went off in my head --- this girl's name was
Heather, which was a plant, so I could remember her! Now, to use
modern parlance, we are BFFs. 
I've been thoroughly
enjoying everyone's insightful comments, especially over the last few
weeks, but it bothers me that I have a hard time remembering which one
of you is the pig farmer and which one lives on the prairie. I
considered asking you all to rename yourselves after plants, but then I
came up with an even better solution! Anyone who wants can now
create an
account on Walden Effect. This will make it easier for you since
your comments will post immediately (rather than waiting for me to
check in and mark them as non-spam.) You'll also be able to
create your own user page, with links to your main webpages, maybe a
photo of yourself, and hopefully at least one reference to a plant or
animal to jog my memory.
I hope you'll give it a
try! Just click here and follow the directions to
make your account and user page. If you run into any problems,
just email me and I'll make them better.
You might also want to read about all of the
registered users on Walden Effect.
Don't want to
share? That's okay --- you can still post comments anonymously or
by typing in your name just the way you always could. Either way,
I look forward to learning more about you!
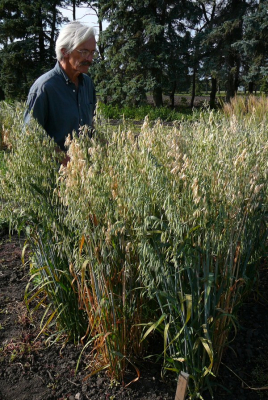 As
I mentioned before, Masanobu Fukuoka's natural farming helped inspire
the permaculture movement, but I ended up being drawn in a different
direction by his experiences. I've been struggling to develop a
workable no-till system for my garden over the last three years, and my
constant problem is lack of sufficient mulch. We mow
all of our grassy areas and add the clippings to our garden beds and even rake
leaves out of the woods
to top things off, but I still end up with bare soil and way too many
weeds. So you shouldn't be surprised that my epiphany upon
reading The
One-Straw Revolution had to do with mulch.
The organic gardening
and homesteading movement has us all growing our
own tomatoes and broccoli, but I'd say that 99% of us have never even
considered growing
our own grains.
And yet, grains make up a huge percentage of our diets. Clearly,
they also made up a huge percentage of Masanobu Fukuoka's garden.
Perhaps the solution to my mulch problem is to return to a more
holistic gardening method. If we grew all of our own grains as
well as all of our vegetables, I'd never be in need of mulch again.
Fukuoka says that his
method of growing grains uses one hour per week
per person, a figure that sounds remarkably manageable. Could we
tweak his system a bit, perhaps trading
buckwheat, sorghum, or corn for rice, and replicate his success?
I'm suddenly determined to find clover seeds, buy a bit of straw to
prime the pump, and plant my hull-less oats in a do-nothing test plot
rather than in a traditional garden bed.
| This post is part of our One-Straw Revolution lunchtime series.
Read all of the entries: |
Little
house in the suburbs dot com is hands down the coldest
automatic chicken waterer I've seen so far.
I can't prove it, but I feel
like all chickens can appreciate the simple comfort of a cool drink on
a hot summer day.
We've got side by side Avian Aqua Misers and one day last summer I put a
handfull of ice in one of them and noticed how our Plymouth Rock hens
favored the colder water.
I know it's not a scientific
test, but maybe I can expand the parameters next summer to see if
there's any truth to this crazy hypothesis?

Our homemade
storage building
continues to be a learning experience. When we started out, I
blithely said, "Let's put in as much insulation as possible despite the
cost," and Mark agreed. What I didn't realize is that you have to
plan for your insulation needs from the get-go.
The map and chart at the
top of the page show EPA's insulation recommendations for new
wood-framed homes when heating with gas, heat pumps, or fuel oil.
(They recommend more insulation if you heat with electricity, and don't
even give you an option for heating with wood.) We're in their
zone 4, which means we should have at least R30 in our ceiling and R13
in our walls. The latter is easy, but the former is a bit of an
issue.
 Assuming
you're using fiberglass insulation (which fits our wallet and
our remote setting), you need thicker wall or ceiling cavities to fit
more insulation. A typical 2X4 wall will hold up to R15 --- if
you try
to cram R19 in, you compress the insulation and, I believe, actually
get less insulative value than you would have with a lower rated batt
of insulation.
Our original rafters are 5.5 inches deep, which
would only allow us to put in R19 insulation up there --- makes me
chilly just thinking about it (although I think the trailer ceiling has
about R13.) So we extended our rafters with some two by fours,
giving us the space to increase our ceiling insulation to R30.
For future reference, here is the cavity depth you need for some common
insulation r-values:
- 3.5 inches --- R13
- 6 inches --- R19
- 9 inches --- R30
- 12 inches --- R38
Most of our building
project has been very forgiving of my learn-as-we-go mentality, but
insulation requires some forethought. For those who might want to
try their own hand at building --- shun the fault I fell in!
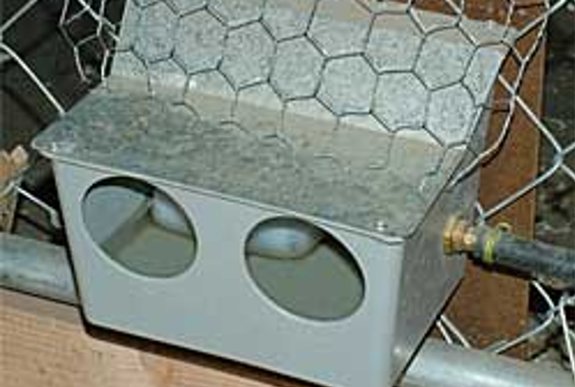
Plumjam.com has an interesting automatic
chicken waterer that caught my eye while I was enjoying their poultry
project pictures.
It's a huge improvement over
the regular gravity fed waterers, but still needs to be cleaned out,
and it cost more than an Avian Aqua Miser.
I'm not sure I would trust
the float not to get stuck, and would most likely be checking on it
often to see if it were flowing. I never have this concern with the
Avain Aqua Miser.
I would be willing to bet a
box of doughnuts that if the chickens were given a choice side by side
with this waterer and an Avian Aqua Miser they would forget all about
those two big scary holes to peek into and start geting all their hydration from
a source that will always provide clean drinkable water without nearly
as much fuss.
 A
few of you were as intrigued by the rocket stove
concept as I was, and Roland's comments sent me searching the web for
more information. Basically, I wanted to know if I could design a
slightly modified rocket stove made out of found/bought materials to
simplify construction. I was also interested in any updates to
the design that might maximize efficiency.
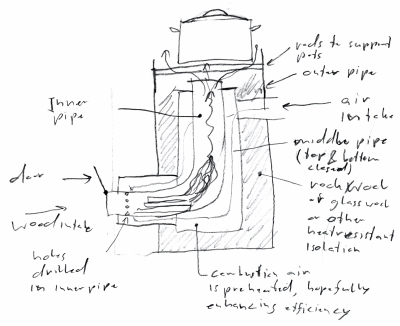
Preheating
the combustion air
The drawing shown here
is Roland's suggestion for preheating the combustion air to increase
efficiency, in much the way that efficient
space-heating wood stoves
work. A search of the web turns up contradictory pages --- folks
who have tried similar methods are split on whether it increases
efficiency or not. Many sites suggest that the conventional
design already preheats the combustion air by passing the air intake
underneath the burning fire, so I think I'll stick with that.
Insulation
Insulating the burning
chamber is another important factor in rocket
stove efficiency. The official Aprovecho design calls for making
your own fire bricks, which are rated at about R10 when fully
assembled. Roland's suggestion --- perlite --- has an R-value of
2.7 per inch, so four inches of loose-filled perlite placed between an
inner and an outer wall could be a much easier option than making our
own fire brick. (For future reference, other folks mention using
materials such as vermiculite (R2.08 per inch) and pumice (R2 per
inch).)
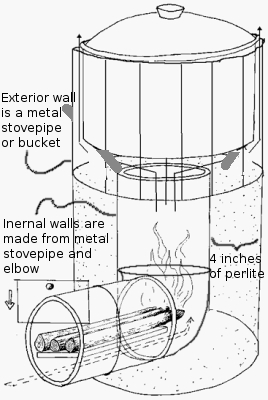
Body
materials
I've seen various DIY
rocket stove options using found or bought
materials, and the ones that caught my eye used nested stove
pipe. The image shown here is my revised version of the official
design made out of one big stove pipe, two pieces of smaller stovepipe,
and an elbow to connect the smaller stovepipe pieces together. As
Roland mentioned, the bigger stovepipe might be replaced by a metal
bucket --- otherwise, I'd have to add some kind of cap to keep the
perlite from coming out the bottom. I'm envisioning the pot
sitting on pieces of rebar stuck through the exterior walls rather than
welding anything together.
There's a bit of math
involved in deciding how high the interior
chamber should be and how much air space should be left between the pot
and the skirt -- more on that later!
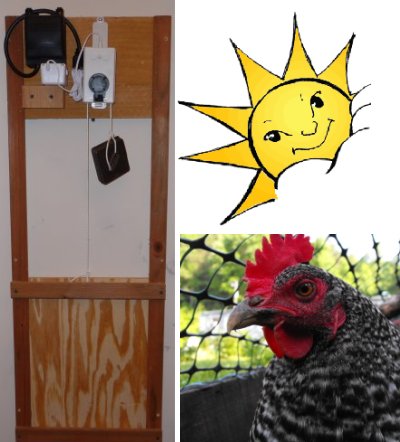 What
do you do if you want to install an automatic chicken coop door but
you don't have electricity running to your coop?
Chicken
coop door.com has
recently come out with a new solar powered option that will save you
the chore of letting your girls out in the morning and remembering to
lock them back up at night.
The price is 324 dollars and maybe worth it if you don't have the skill and
time to build an automatic chicken coop door yourself.

Edited to add:
After years of research, Mark eventually settled on this automatic chicken door.
You can see
a summary of the best
chicken door alternatives and why he chose this version here.
If you're planning on
automating your coop, don't forget to pick up one of our chicken waterers. They never spill or
fill with poop, and if done right, can only need filling every few days
or weeks!
 As
part of my continued obsession with lower-energy cooking, I
decided to try to make a haybox to cook my chicken carcass down into
stock Sunday. Someone (Heather?) had emailed me in response to my
Dutch
oven post,
telling me that you can bring a pot of incipient soup to a boil, wrap
it in towels, and leave it alone for the afternoon. The cast iron
and towels will hold in the heat, and the soup will cook itself.
While researching rocket
stoves,
I stumbled across a mention of hayboxes, which seem to work on a very
similar principle to Heather's idea. You fill up a box with hay
(or other insulation), put in your boiling pot, and leave it alone for
several hours. I've seen figures suggesting that using a haybox
with long-cooking recipes like chicken stock will save 80% of the
energy you would use to simmer the stock on the stove. You should
leave the pot in the haybox somewhere between once and twice as long as
you would have left it on the stove. If you're worried about
bacteria, bring the whole thing back to a boil for a few minutes on the
stove before serving.

So how did my experiment
go? I brought my carcass and water to a boil and tucked it into
an old comforter in a cardboard box. (The image on the left shows
the pot before I bundled the rest of the comforter over the top.)
Our house temperature was low on Sunday --- 50 degrees Fahrenheit ---
but when I peeked in six hours later, the pot was still steaming and
the stock was a lovely yellow. Success!
Everett commented on my mention of
planting clover to
say:

I don't know why inoculant is so hard to spell, but I struggle with it too and seem to have to look it up every few weeks. Anyway, back to the point....
If you're not a gardener, you may not realize that nitrogen is usually the limiting ingredient in many plants' growth, and is thus one of the big three components of chemical fertilizers. Organic gardeners often add nitrogen to the soil with compost or manure, but others take advantage of nitrogen-fixing bacteria to turn the copious nitrogen in the atmosphere into nitrogen their plants can use. This week's lunchtime series will explore how this symbiosis can be worked to your advantage in the garden.
Check out our chick waterer, perfect for day-old
chickens!
| This post is part of our Nitrogen Fixing lunchtime series.
Read all of the entries: |

A perfect complement to
yesterday's solar
powered automatic chicken coop opener would be this portable hyrdogen
generator.
Kristie
Lu Stout has an interesting post about this exciting new product
that will allow everybody to generate their own hydrogen from water and
store it in a safe, low pressure battery-like container. No word yet on
how much it might cost, but plans are to have a tabletop model
available by the end of 2010.
Getting off the grid with
solar or wind has always come back to battery storage. If this
technology improves, it could replace most of those expensive and toxic
chemical batteries and bring alternative energy within the reach of the
common homesteader.
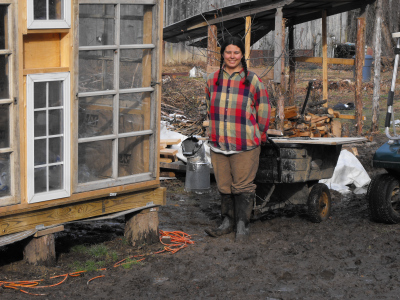 As
you've probably gathered by now, we don't live next to the road.
A third of a mile of floodplain lies between our trailer and our car
parking area, and during this abnormally wet winter that means a third
of a mile of mud.
It's been weeks since the ground has been dry enough for the golf cart
to traverse our swamp, but we went ahead and bought a vanful of building
supplies last week to finish up the homemade
storage building.
Since insulation is, by definition, light and airy, we didn't have a
problem hauling in enough to finish the walls. But the sheets of
plywood we plan to cover the interior with were another matter.
Mark wisely asked at the store to have the four by eight panels cut in
half, but even a four by four sheet of plywood is extremely
ungainly. I set out on Monday to see how many sheets I could haul
through the mud to move our project along.
Attempt 1 began with me
hoisting four sheets onto my head. By the time I crossed the
creek, I knew this method wasn't going to work. Luckily, I ran
into the heavy
hauler
halfway home, lashed the plywood down, and marveled over how wheels
made the work lighter. Elapsed time: 1 hour. Sheets per
hour: 4.
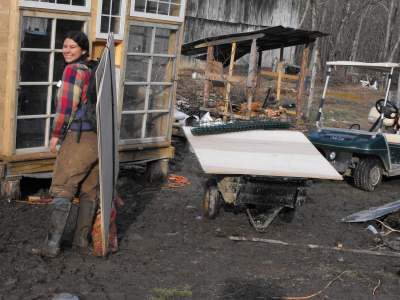 My
major physical weakness is carpal tunnel, and I knew that I couldn't
pull the heavy hauler through the mud again without waking up the next
night with tingling hands. So for attempt 2, I got out my hiking
backpack and some rope. Out at the van, I lashed four sheets onto
the backpack and manhandled it onto my back. The boards felt
positively light, but they also went a bit akilter and I had to
constantly push them back into place. Elapsed time: 40
minutes. Sheets per hour: 6.
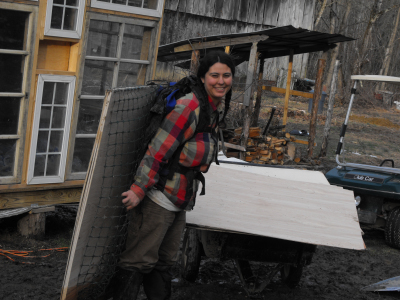 For
attempt 3, I got smart and stupid all at once. First the smart
part. I realized that the pea trellis material
would make a perfect sling to hold the wood together, making it easy to
tie it onto my backpack. The whole thing seemed so easy, in fact,
that I got greedy and decided to haul in six sheets instead of
four. Bad idea! By the time I sloshed through the mud and
made it home, I was worn out! Elapsed time: 50 minutes.
Sheets per hour: 7 --- but that doesn't count the hour I spent
collapsed on the couch afterwards!
At least we have some
wood to work with, now. Mark has plans to fix up the driveway,
which may make all of this muddy hauling a thing of the past.
More on that later....
 "Nitrogen,
nitrogen everywhere, but not a drop to drink," could be a plant's
plaintive song. The atmosphere we breathe is 78% nitrogen, but
plants are incapable of putting the elemental nitrogen to use.
Instead, they need ammonia or nitrate and depend on the useful nitrogen
they can suck out of dead plants and animals as part of the nitrogen
cycle.
Nitrogen-fixing bacteria
are the flip side of the coin. These
microorganisms can take the nitrogen from the air and turn it into a
useful form, but the process takes up vast quantities of energy.
Some bacteria species are able to scavenge the energy on their own, but
others have opted to team up with nitrogen-hungry plants.
The best-known symbiosis
is between rhizobia bacteria and
legumes. It all begins when a bacterium senses flavonoids given
off by the legume's roots. "Home for sale!" the flavonoids say,
and the bacterium secretes a chemical in reply --- "I'd like to move
in." "Great!" says the root, and it curls its tiny root hair
around the bacterium to make a safely enclosed root nodule. The
plant fills the nodule with carbohydrates (free energy!), proteins, and
oxygen, and the bacterium responds by fixing atmospheric nitrogen into
ammonia to feed the plant. The pair lives happily ever after.
| This post is part of our Nitrogen Fixing lunchtime series.
Read all of the entries: |
 Mark
read my
post this morning and said, "Everyone's going to think that I'm a
slacker, sitting back and watching you carry all that plywood
in!" I said, "Of course not! Everyone knows you were
working really hard on another job and that you usually do all the
hauling anyhow." "Hmph," Mark replied.
Clearly Mark was right,
since my mom just sent me this email: "Does Mark haul any plywood in??
I love the photos of you,--but, seriously, does he?? What has
Mark been doing while you've been dragging?"
I'm going to post more
about it tomorrow morning, but Mark was busy doing manly chores in
town, talking to mechanics who won't really talk to me and moving
forward on the driveway repair project. I took the photos of
myself using the timer function on the camera. Shame on you all
for not thinking that Mark does his share! 
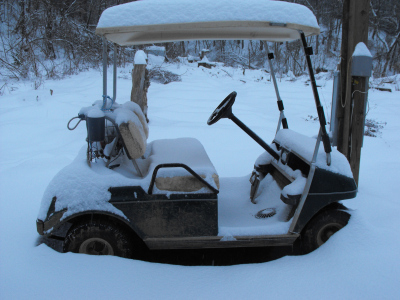
To further muddy the
waters, here's a picture of the golf cart in the snow a week ago....

We've had a really good test
for the storage
building roof today
thanks to a steady stream of rain. No leaks so far while we begin the
process of measuring, cutting, and installing the plywood that Anna
worked so hard to bring in yesterday.
 Remember
our huge pile of
firewood? We
ran through it unbelievably fast --- first the power was
out for two weeks
and we had to keep a big fire going just to keep the trailer above
freezing due to lack of a fan. Then we had two weeks of below
freezing temperatures and again had to keep the fire raging to keep us
warm. The result is that the 1.75 cords of wood that we thought
would last all winter lasted a mere month.
So in January, we went
back to electric heat. I hated to give in to the coal-fired power
plant, but our firewood supplier took our $50 down payment and dropped
off the face of the earth. Due to major environmental guilt, I
keep the trailer between 40 and 50 degrees when heating with
electricity, which is really quite comfortable if you wear layers (and
are used to it.)
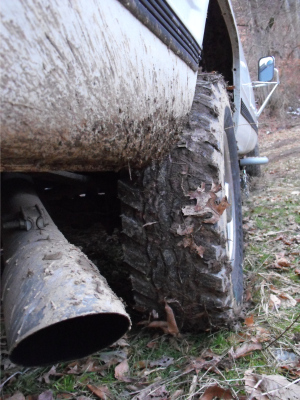
That's all a long
explanation for why Joey
came in his truck last week instead of his car --- he wanted to drop
off a load of firewood for his poor, freezing baby sister. The
firewood was much appreciated, but the truck got stuck due to
completely treadless tires. Rather than calling a tow truck to
haul Joey out, we called our mother and begged her to come pick Joey up
so that Mark and I could take advantage of this opportunity to haul
gravel for our driveway. (We ordered some of that from our hauler
too, but we really haven't heard from him in over a month....)
On Monday, Mark babied
the truck out of the mud (now thawed and thus a bit less precarious)
and took her to town to get new tires. We thought the two back
tires we needed to replace would come to about $300, but Mark came home
with a receipt for only $140 --- he had discovered the wonder of
retread tires! If you, like me, have never heard of retreads,
you're in for a treat. Old tires end up in a factory where
they're tested for safety and have the old tread buffed off, then a new
tread is is applied. The end result is nearly as good as a new
tire (and every bit as safe), for a fraction of the price.
Apparently, at this time, only big tires (R16 and greater) are
retreaded, so most of them end up going to large-scale trucking and
bussing fleets, but farmers are also retread fanatics. If you
have a truck that needs new wheels, retreads seem like the way to go!
 Scientists
have discovered that inoculating legumes with nitrogen-fixing bacteria
can increase crop yields. The theory is simple --- if your plants
lack the proper bacteria to team up with, they're stuck begging ammonia
out of the soil rather than producing their own.
But you can't just
inoculate your entire garden with one kind of
bacterium and be done with it. Most plants that team up with
nitrogen-fixing bacteria are picky about the bacteria species they move
in with. Clovers share one set of bacteria species, garden and
soup beans another, and alfalfa, soybeans, peanuts, clover, and peas
each have their own. You can often buy seeds already coated in
the proper inoculant, or can even transplant a bit of soil from your
previous pea patch to your new one to get the useful bacteria started.
As a side note, I was
intrigued to learn that legumes aren't the only
plants that team up with nitrogen-fixers. The other common,
nitrogen-fixing plant in our area is the shrub alder (Alnus
sp.) I've been keeping an eye out for some wild alders to
transplant into my forest
garden as a method
of naturally boosting the
area's fertility.
| This post is part of our Nitrogen Fixing lunchtime series.
Read all of the entries: |
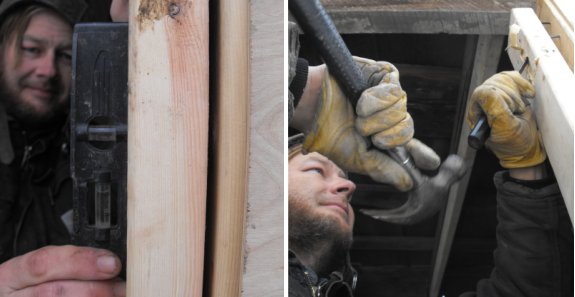
We forgot to use a level when
we were setting up the outer door frame of the storage
building and because of
that a small gap needed to be added towards the top to level it out.
 Why
do gardeners start so many seedlings indoors when the plants nearly
always do just as well when planted in a cold frame or simply
direct-seeded after the last frost? My best guess is that the
same antsiness I feel as the days get longer affects everyone else
too. Starting some alpine
strawberries this
winter has been a good way to feed the ache without going nuts with
grow lights and flats.
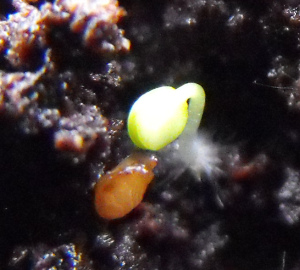
It took two solid weeks
for my strawberries to germinate, but this weekend I noticed the first
tiny specks of white as roots started digging into the stump dirt.
Monday, the cotyledons began to unfurl from 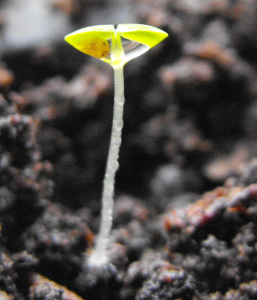 the
seed coats, and Wednesday the flat was full of tiny green leaves, each
one heavy with a drop of dew. I guess it's nearly time to take
the lid off and let them start growing!
the
seed coats, and Wednesday the flat was full of tiny green leaves, each
one heavy with a drop of dew. I guess it's nearly time to take
the lid off and let them start growing!
We're due to start some
plants outside this week, too, if the ground thaws out. People
around here traditionally plant their first peas on Valentine's Day ---
it's a crap shoot, but in the years when the early peas grow, everyone
who bowed out is jealous. I'll also be tossing out some poppy
seeds, some for us to eat and some just for the bees.
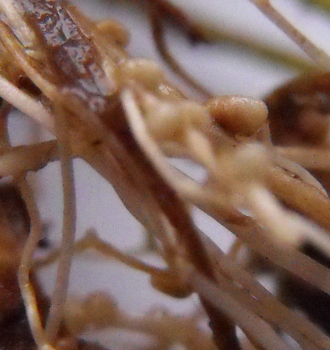 So
let's return to Everett's comment --- should I buy an inoculant to get
my clover patch off to a good start? If you already have clover
growing in your yard (which we do), chances are good that the proper
bacteria are already present. Go out and dig up a plant, and you
should be able to see little white bumps on the roots --- the nodules.
However, even if the
nodules are present, your plants may not be
currently teamed up with nitrogen-fixing bacteria. The way to be
sure is to cut a nodule open and look at the color. Nodes that
are actively fixing nitrogen are pink or red inside, while inactive
nodes are white, tan, or green. My nodes were white --- why?
The clover I dug up was
right in the middle of our muddy mess, an area
which has been waterlogged for about a month due to heavy rains and
snows. When legumes are stressed, they stop feeding their
bacteria and start paying attention to their own survival, so acidic or
waterlogged soil, drought, lack of organic matter, or even high soil
temperatures can kill off your nitrogen-fixing bacteria. I'll dig
up another plant in the part of the yard where I want to plant my
clover (currently under snow), and if I find more white nodes, I'll
need to inoculate.
| This post is part of our Nitrogen Fixing lunchtime series.
Read all of the entries: |
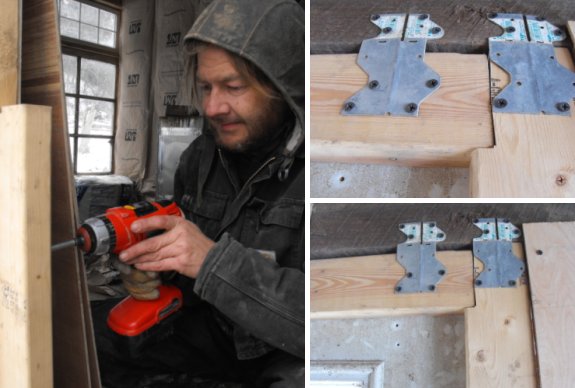
The do it
yourself storage building
now has a door up thanks to a couple more smashed brackets that work great at keeping the stopping
portion of the frame in place.
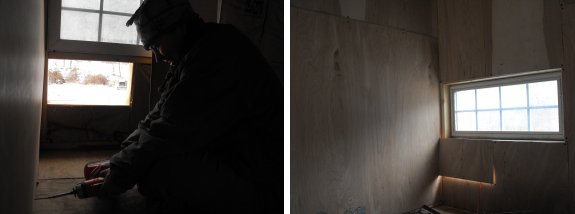
Somewhere in the middle
of the morning Thursday, the homemade
storage
building began to
feel like inside
rather than outside.
I could tell because Mark went outside, leaving the door ajar, and I
came along behind him and closed the door to keep the room warm.
And it was warm inside. Despite
being snowy and barely above freezing outside, once Mark fired up the
wood stove, the building heated up surprisingly fast. We don't
even have the insulation up in the ceiling yet, but within an hour we
were shedding our coats and working in our indoors clothes. I
guess we've been losing a lot
of heat from our exterior wood
stove to the outside!
I wonder if,
rather than saving up for an efficient
wood stove, we
should instead
make another small building and install two small wood stoves,
relegating the trailer to summer use. Not this year,
though! The garden is already starting to pull at my brain,
begging me to finish up winter chores and start the pruning.
(The photos above show
what I've been up to while Mark
was putting in the door --- covering the walls with a nice, smooth
plywood. I find myself getting lost in the swirls of the wood
grain.)
 Due
to their nitrogen-fixing bacteria, legumes are a great way to break
your garden out of the nitrogen cycle. It's almost like printing
your own money, this ability to create your own usable nitrogen out of
thin air. So how do you put your newfound knowledge to use?
The first thing to
understand is that your legumes are holding onto
every bit of nitrogen they can. Planting beans beside corn plants
and hoping that the beans will feed the corn is mostly just wishful
thinking --- the beans are going to feed the beans. However, when
nitrogen-fixing plants die, the nitrogen in their bodies will end up
back in the soil, so the next crop will benefit. Take advantage
of this bit of biology by planting spring peas, then follow them with
summer corn.
Legumes also shake off
their nitrogen-fixing nodules when they are stressed by drought, shade,
defoliation, or grazing. Robert
Kourik
suggested planting a row of corn between rows of clover, mowing the
clover, and watching the corn take up the off-loaded nitrogen and
increase its 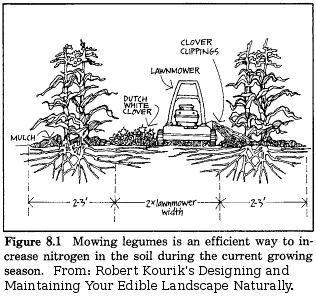 growth. In fact, for
those of you (like me) who are a bit leery of clover taking over in Fukuoka's
do-nothing clover/grain permaculture, you might get the best of
both worlds by interspersing rows of clover with rows of grain.
Of course, the most
common method of using legumes to increase a
garden's stores of nitrogen is green manuring. You plant a legume
as a cover crop, then till it into the soil when it is just about to
flower (the stage at which the plant contains the most nitrogen.)
This method, although widespread, is difficult in a no-till garden.
| This post is part of our Nitrogen Fixing lunchtime series.
Read all of the entries: |
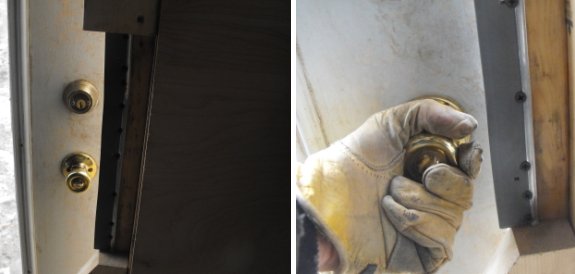
The downside to fabricating a
door
frame with a stopping
plate is allowing for enough room for your hand to grip the knob
without banging it against the frame when you pull it closed.
I decided to solve this
problem with a small section of a rubber door sweep. It blocks the gap
nicely while providing a smooth and soft surface for any close calls
that might happen.
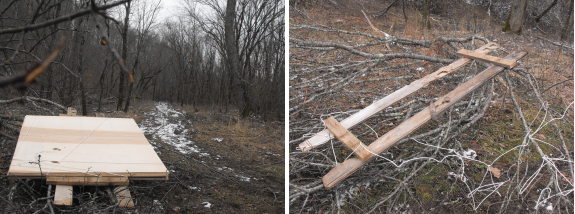
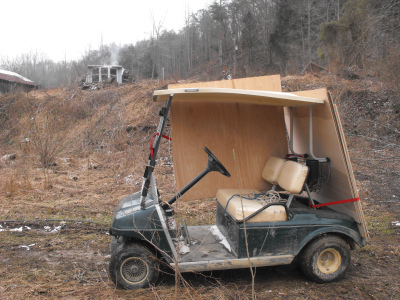 With
Mark on the job, our second round of plywood hauling went much more
smoothly than the first. While I was finishing
up the inside walls of the homemade
storage building,
he wandered off to the barn and rigged a holder out of discarded boards
within half an hour. If I hadn't overloaded it ("Surely twelve
boards won't be too many to carry between us!"), it would have been
perfect, but as it was we barely made it two thirds of the way
home. Luckily, that's where dry ground begins, so Mark was able
to go get the golf cart and drive our load back to the building.
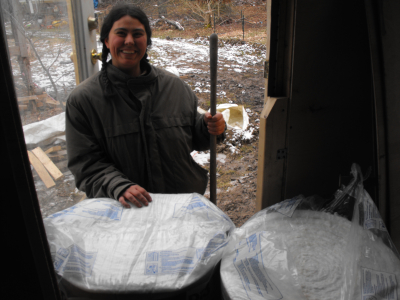 Meanwhile,
I hauled in some more insulation using the old hoe trick. You
stick the handle of the hoe through the plastic wrapper of two rolls of
insulation, pushing one roll all the way back to the hoe blade so that
your head has room to sit between the two rolls. Stuff some
discarded underwear under your coat as a shoulder pad, and it's pretty
simple to carry the insulation home. Now we're all set to start
on the ceiling next week!
"Is that men's underwear sticking out of your jacket pocket?" Mark
asked in disbelief as I set out.

It was a great day to take in
some southern Appalachian contemporary art and well worth a trip to the
big city on a Saturday. We got drawn to the William King museum to see
some big names like Matisse and Picasso, but I think the local
collection had more style and flavor. It was curated by Ray Kass, a
painter and writer who bi locates between Blacksburg and Manhattan.
 Are you looking for some more blogs to
follow? I read over fifty, ranging from personal odysseys to
nonprofit newsletters, but only a few are so rivetting I want to share
them. These top three blogs are my personal picks based on:
posting frequently enough to keep me hooked, mixing personal and
informational in a fun proportion, and either being beautiful or well
written (or both.)
Causabon's Book is probably the blog I
discuss the most at the dinner table. Sharon Astyk is a Jewish
homesteader and peak oil writer who sucks you in with her tales of
family life and simple living but adds plenty of meat about how to
store your food and prepare for the end of civilization. Her
posts are thought provoking and mirror my own world while also veering
off in other directions. (She used to write over on her personal blog, but is mostly writing at
the link above.)
Sugar Mountain Farm is "stories from a small
farm in Vermont's mountains raising pigs, sheep, chickens, ducks, dogs
and kids naturally on pasture." I started reading because we're
contemplating running pigs on pasture some day, but I kept reading
because Walter's photos were astounding --- really the best I've seen
on any blog. It's also fun to read about someone running a
successful small farm.
Not Exactly Rocket Science is a new favorite,
interpreting new scientific discoveries into layman's terms. This
isn't precisely homesteading, but you need to know the science to make
it all work!
What are your top three
blogs and why?
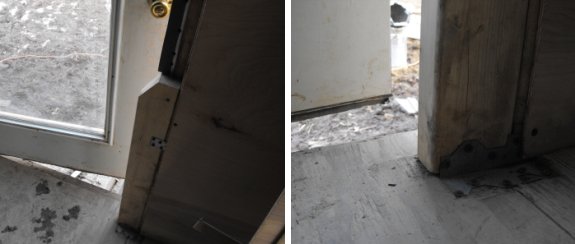
The home
made door frame stopping
plate gets most of its firmness from this bottom corner bracket. I
chisled out about a 1/4 of an inch of the floor to compensate for the
depth of the bracket. This is done to avoid a bulge in the future
linolem floor.
Last
year at this time, the snowdrops were blooming, but this year the
ground is hard and chilled. So I set out on Sunday afternoon to
search for spring.
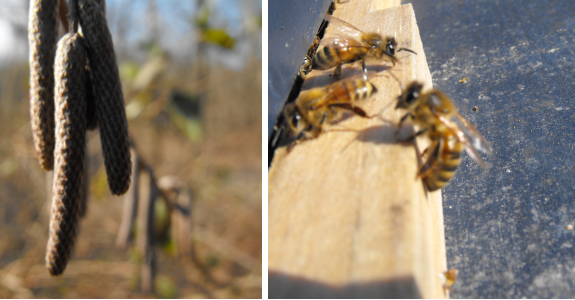
For the first time in
weeks, the bees
were out on cleansing flights
and the nearby wild hazel bushes were close to blooming. The
catkins had elongated and softened, but still no sign of stamens ---
not spring yet!
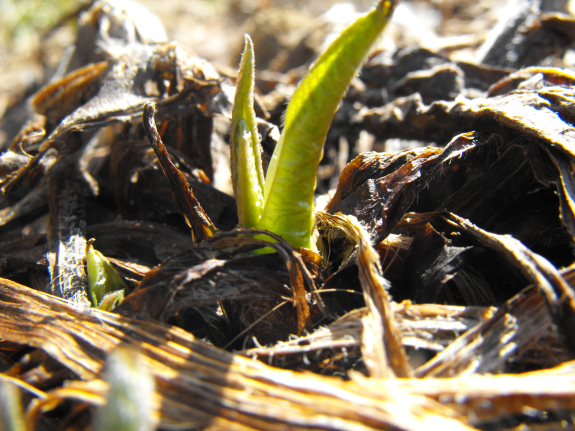
In the forest
garden,
the comfrey leaves had died back into a brown mulch. But in the
center of each plant, little green tufts of new leaves were poking
up. Spring?

Down at the baby creek,
I got captivated by flashing ripples over the clay streambed. Not
spring, but definitely pretty.
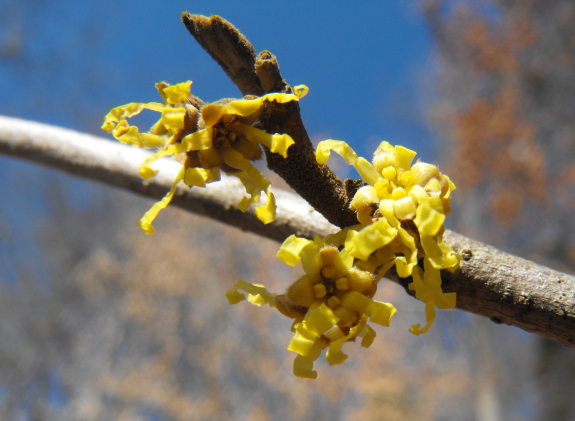
Then, at last, I found a
flower. Sure, it's witch-hazel (which can bloom at intervals all
winter), but I'm counting it! February's first flower --- spring!
 Did
you know that before the Industrial Revolution, the average person
worked for about two or three hours a day? Studies from a wide
range of pre-industrial civilizations show similar data --- it takes
only about fifteen hours a week to provide for all of our basic human
needs. And that's using hand tools.
So why is the average
American working a dreary forty hours a
week? I've heard from at least half a dozen readers who say that
they'd love to live like Mark and I do, but only once they save up some
large sum of money or bring their microbusiness up to a level where it
can pay them some other large sum of money per year. So, even
though it's a bit off topic, I want to spend this week's lunchtime
series talking about money --- how much do we really need and how can
we make it without selling our souls?
Most of the information
I'll present is drawn from Joe Dominguez and Vicki Robin's Your
Money or Your Life
and the loosely affiliated Financial
Integrity website.
You can find the same nine step program, complete with worksheets and
examples, in both the book and the website. (Download
the worksheets and examples from the website for free here.)
Both are highly recommended! I'm going to gloss over some aspects
of the program that seem old hat to me, so if you like what you read
here and want to learn more, I highly recommend you go straight to the
source.
| This post is part of our Your Money or Your Life lunchtime series.
Read all of the entries: |
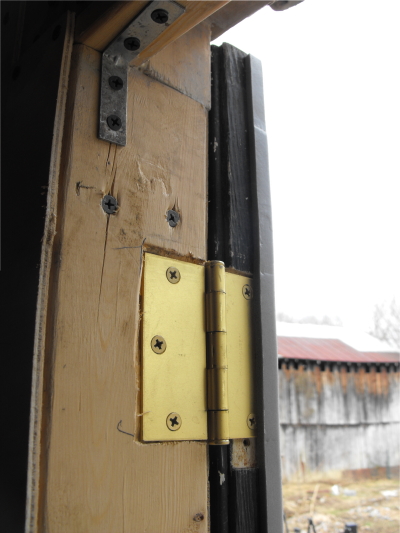
The hinge area of the home
made door frame ended up with a small gap even though I chisled out
enough wood for the hinge to be flush with the frame.
A medium sized strip of
stick-on foam was enough to seal most of the space.
Making a door frame from
scratch wasn't as hard as I thought it might be, but I can already see
how much time a fabricated frame would save, especially if you're trying
to make it look perfect.
 My first attempt at
home mushroom cultivation involved morels. It was a dismal
failure, although I'd like to try again this year with all of the new
tricks I learned during my oyster
mushroom propagation semi-success. Meanwhile, Mark
talked me into adding a few morel plugs to this
year's spawn order.
The spawn arrived this weekend, and I quickly set out to plant the
morels.
The factsheet that came
with our order made planting morels from plugs seem extremely
easy. First, find trees that morels like (apples, ash, aspen,
elms, maples, or birch.) Make sure the soil under the trees is
appropriate --- no long-undisturbed soil like you'd find in a mature
forest, but plenty of organic matter and good drainage. We have
six young apple trees and six morel plugs, so it was easy to decide
where to plant them.
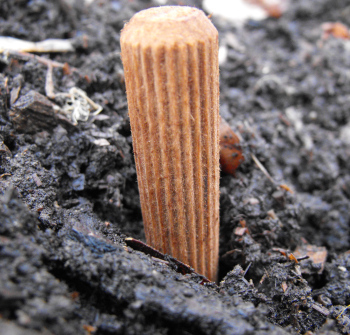 Next,
push the plugs all the way into the ground with your fingers at the
tree's drip line. Five minutes later, I was done planting.
It's really that simple!
Now, the trick will be
getting them to fruit. Field and Forest Products asserts that
it's quite easy to grow morels in the soil (as long as you put them
near an appropriate tree.) The difficult part is getting them to
fruit. No one's quite sure how to do it, so your best bet is to
plant morels in several different areas to hedge your bets, then wait
and hope. For $7.50, I'm willing to gamble.
 Did you know that your job
may be costing you money? Step 2 of Your
Money or Your Life
involves calculating your real hourly wage, which is a very powerful
exercise for folks who thought the $50 per hour they're supposedly
making really ends up in their pockets.
To follow along at home,
first make some notes on how long you really spend
working. Start with those 40 hours in your cubicle, of course,
but then add in the hour you spend grooming, your daily commute, and
the extra hour you vegetate in front of the tube to wind down after
work. Do you have to study or take classes to stay up to date in
your field? Do you end up spending a week in bed because you're
so run down from work that you catch the flu? Add it all up!
Next, add up all of your
work-related expenses. These include the
gas and upkeep on your car, those fancy duds you wear to the office,
every meal or $5 cup of coffee you consume away from home because
you're too busy to pack a lunch, the six pack of beer you drink while
winding down in front of the tube, the massages you pay for to wipe out
the work stress, and the money you give other people to do your
household chores since you don't have time (daycare, house cleaning,
lawn upkeep, etc.) Don't forget to include your taxes.
Finally, use the formula
below to figure our your real hourly wage.
Total hours you really work in a week
The example at the top
of the post from the Financial
Integrity website
shows how someone who thought she was making $48 per hour was
really making $25.57. The book includes someone who thought he
was making $11 per hour who was actually making $4. Without too
much of a stretch of the imagination, I can see how working could send
some job slaves into debt!
Luckily, I've very
rarely had a real job, but when I did I could
clearly see that the extra job-related time and money was a trap.
If you're working a real job, I encourage you to add it all up and
figure out your true hourly wage. Would you have accepted that
job if you'd realized you were only making $7 per hour?
| This post is part of our Your Money or Your Life lunchtime series.
Read all of the entries: |
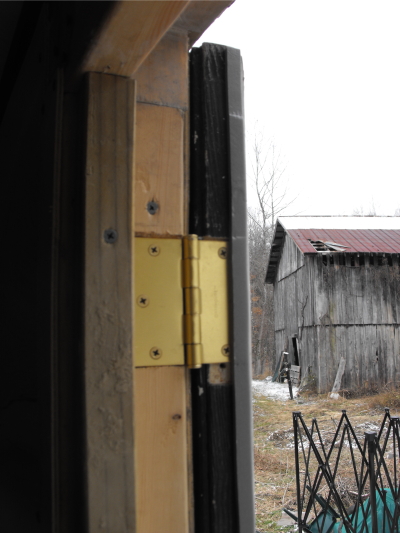 I
would like to express some appreciation here for all the comments
lately, especially the tips given for the home
made door frame.
I thought adding another stop
plate to the hinge side was a great idea and jumped on it today while
at the same time deleting the L bracket, which is no longer needed
since the liquid nails has finished curing.
Would I build another door
frame from scratch in the future? Yeah...it wasn't all that bad and the
finished product will meet our needs for years to come.
 The
couple that works together, stays together...or pitches a huge hissy
fit and gets a divorce. Mark and I don't celebrate Valentine's
Day, but we do spend every day living in each others' pockets, usually
very amicably. In fact, one of my favorite parts of the day is
the time I spend working on a project with Mark.
Even though I grew up
with a handy father, I somehow missed most of the lessons on basic
tool-use. So Mark has taught me how to use a power drill, a miter
saw, and so forth. Monday, I was putting up the last bit of wall
paneling, this time around the newly re-wired electric outlets.
How, I wondered, does one cut a small rectangle out of a piece of
plywood with a jig saw?
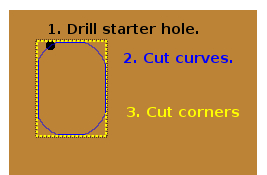
I know this is old hat
to those of you who dabble (or work) in construction, but I found this
technique elegant and captivating. First, Mark used a drill to
start a hole in the plywood. Then he cut along the line, curving
around each corner so that he could keep cutting until an oval section
fell out. Third, he went back and cut the corners out --- the
pictures hopefully make this process clearer than my description.
It's always a good day when I learn something new!
 The
next step in the Financial Integrity process is to keep track of all of
your expenditures for a month. Now sum up the expenditures in
categories and divide each one by your real hourly wage.
This can
be a bit of an eye-opening experience for many people because money is
an abstract for most of us. We often don't realize that the $500
plasma screen TV we bought on a whim last month actually represented 45
hours of work --- that's a solid week of full time employment!
This exercise alone is probably enough to tempt many people to cut back
drasticly on their spending.
On the other hand, dyed
in the wool skinflints like me sometimes come
to another realization. I simply don't believe in spending money
on non-essentials (something Mark has worked hard to train me out of),
and this step helped me realize that a few luxuries really are
worth it. I defnitely don't mind working for an hour to get to
enjoy a meal with my family at a restaurant now and then, or to get a
whole month of entertainment through netflix. After reading Your
Money or Your Life,
I finally made peace with spending a bit of money on luxuries.
Whichever end of the
spendthrift/skinflint spectrum you stand on, this
step is definitely worth your while. Try it out and watch your
spending habits change.
| This post is part of our Your Money or Your Life lunchtime series.
Read all of the entries: |
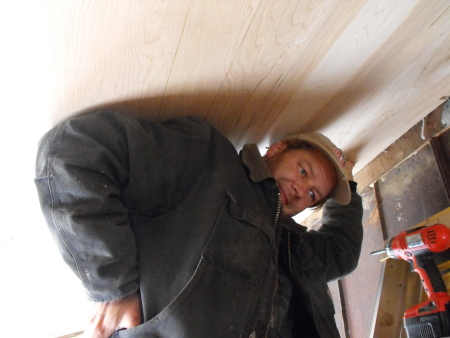
Holding up the plywood for the ceiling is a challenge to say the least.
I eventually adopted a
technique of using the upper portion of my arm along with the top of my
head to hold each piece in place.
I knew having a hard head
would come in handy one of these days and that day was today.
Hey you
two...what's your secret to a smooth working team?
George
W-Texas
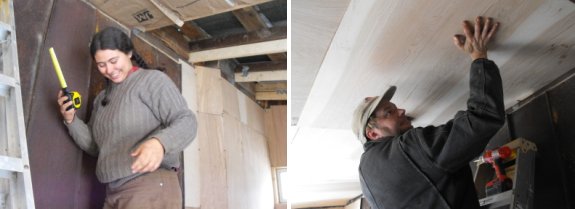
Thanks for the question
George. It's really hard to pin down just one thing that makes two
people work well together. We try to figure out which task is best
suited for our skill set. For example. Anna is really good with math,
so she is in charge of measuring for this
project. I've got a
little more upper body strength so I usually do most of the heavy
lifting.
Last but not least you should
both agree on a time to stop working. A sure way to create extra
friction is to have one person thinking it's 10 minutes till the end of
the day and the other wanting to push through till sunset. Anna and I
usually wind down around 4pm and shift into an evening chore routine.
 Many
people chase the almighty dollar because they think having more
money will make them happy. But scads of scientific studies have
shown that people with more money are no happier than those with less
(once you pass over the lowest income hurdle of having food and
shelter, that is.)
In fact, affluence is a relative thing --- if
you hang out with folks who barely have two pennies to rub together and
you've got two nickels, you're going to feel rich. On the other
hand, if you hang out with someone who owns his own island, you're
going to feel poor despite having a huge house and a fancy car and your
own yacht.
The American dream tells
us that we'll really be happy once we've got
all of the modern conveniences that our neighbors have, but most of the
time
when you try to have it all, you just end up with lots of little bits
of nothing. You work so many hours that you barely enjoy your
McMansion, then you're putting in overtime to save for your
kids' college education and end up feeling like you're living with
strangers. How can you break out of the cycle of measuring
yourself against your neighbors and always wanting more?
The trick is to learn
the value of "enough" by recalibrating your financial sensors.
Throw away your
television and stop listening to commercial radio --- those ads that
you think you can ignore are really seeping into your dreams.
Even movies are nefarious --- have you noticed that most movie
characters have a fancy new car and all of the modern
conveniences? By watching, you're telling your psyche that these
movie stars are who you want to measure yourself by.
If you can disentangle
yourself from the mainstream media, chances are you'll stop wanting so
much stuff. Mark and I are barely middle class by most people's
standards, but when people ask me what I want that I don't have, I
honestly can't think of anything. (Except more mulch, of
course...) By learning that "enough" for us costs very little
money, we were able to quit our
jobs and devote most
of our time to the things we really enjoy.
I think that people who
achieve financial independence and
true happiness are marked by only one thing --- they can figure out
when they have enough. Are you always in search of the next
raise, a new car, or a fancy gadget to make you happy? Or do you
realize that the things you really value in life are time with friends
and family, time to explore your hobbies, and time to change the
world? If the latter, then you have learned the value of enough
and can skip most of the Financial Integrity process --- you're there!
| This post is part of our Your Money or Your Life lunchtime series.
Read all of the entries: |
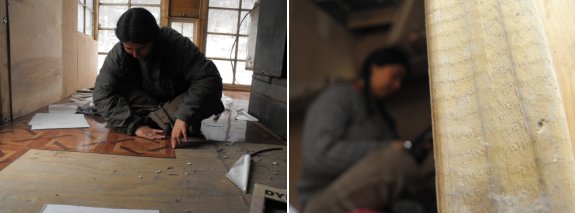
We decided to go with these
peel off and stick linoleum pieces for the floor of the home
made storage building.
They turned out to be a cheaper option compared to getting a roll of
the stuff and I'm thinking a bit easier for amateurs like us. It was a
smooth operation and we had most of it done before we knew what hit us.
Last fall, I
raked leaves out of the woods to cover nearly all of my vegetable
garden beds.
My hope was that the leaves would keep weeds from growing over the
winter, expedite spring planting, and also rot down to fertilize the
soil.
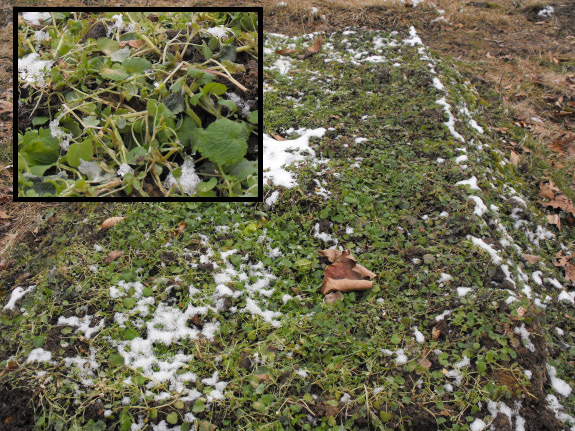
Those leaves seem to
have done their weed-killing job admirably. The photo above is a
bed which didn't end up getting mulched --- it's now completely covered
with dead-nettles and chickweed. The bed below was mulched ---
notice the bare soil where I raked the leaves back to give me a spot to
plant poppies. The soil under the leaves was also unfrozen and I
glimpsed a spider scurrying around, which is in stark contrast to the
lifeless permafrost atop the un-mulched bed.
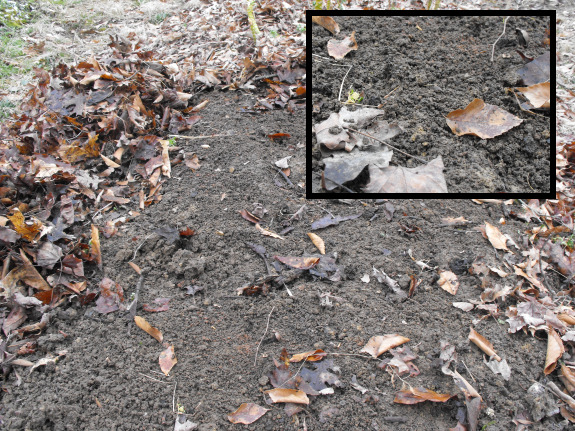
I was a bit disappointed
to see that the leaves hadn't decomposed much at all, but in a way
that's a good thing. We'll add manure before planting to boost
the fertility of the soil, and will push leaves back around plants once
they come up to keep the weeds at bay. I can already feel the
year's weeding being cut in half.
 Joe Dominguez, one of the authors of Your
Money or Your Life,
retired at age 31 using the formula he outlines in the book.
After figuring out the true value of his time and minimizing his
spending, he invested his savings in long term U.S. treasury bonds and
lived off the proceeds. Unfortunately, I don't know that his
success is replicable any longer --- treasury bonds are currently only
paying half of what they paid at that time, and I haven't stumbled
across any other types of investments that are as safe and stable while
paying such a high rate of return. I feel like it would take a
very determined person to save up a quarter to a half a million dollars
of investment capital and then manage to disentangle their souls from
the rat race.
While discussing the
book's anticlimactic ending with Mark, he pointed
out that we've really reached the same point using our chicken waterer
microbusiness. With just a few hours of work per week, we make
enough money to pay all of our bills and get to spend the rest of our
time pursuing our dreams. Basically, we're retired.
If you're still working
a full time job and dreaming that some day you
can retire and live your dream, now's the time to rethink your
priorities. You only live once, so you might as well enjoy your
hours here on earth! Here are a few more resources to speed you
on your way:
- Your Money or Your Life
by Joe Dominguez and Vicki Robin --- a bit out of date now, twenty
years after being published, but most of the book is still right on
track. (There's also a new edition that might be a bit more
up-to-date.)
- Financial Integrity website --- the up-to-date and free version of the above.
- The Ultimate Cheapskate's Roadmap to True Riches by Jeff Yeager --- if you need some more help learning to save money, this book should be on your reading list.
- The Four-Hour Work Week by Timothy Ferriss --- this is the book that jump-started us on our own quest to leaving the rat race.
- Microbusiness Independence by Anna Hess and Mark Hamilton --- This is our own personal story of how we created a small business that pays all of our bills in just a few hours a week, along with lots of tips to replicate our success.
| This post is part of our Your Money or Your Life lunchtime series.
Read all of the entries: |
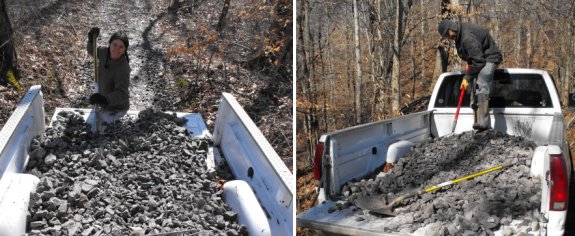
It was a good day to take advantage
of the nice weather and do some driveway repair.
Push with the rake, shovel,
rake some more and repeat several times.
Tradition
dictates that we plant our first peas on Valentine's Day, but the weather thought
otherwise --- it snowed on Valentine's Day, and on the four days
thereafter. We finally got lucky on Friday, with a stunning
day that sent us scurrying in five directions to take advantage of the
warmth.
I had soaked my snow pea
seeds the night before, so they were plump and ready to hit the ground
running. Without fungicidal coatings (that pink stuff on some
storebought seeds), the earliest spring peas are in a footrace, trying
to sprout and grow before bad fungi in the cold, wet soil causes them
to rot. Since it's supposed to be a stunning weekend (temperature
in the fifties!!!), I've got high hopes for my peas.
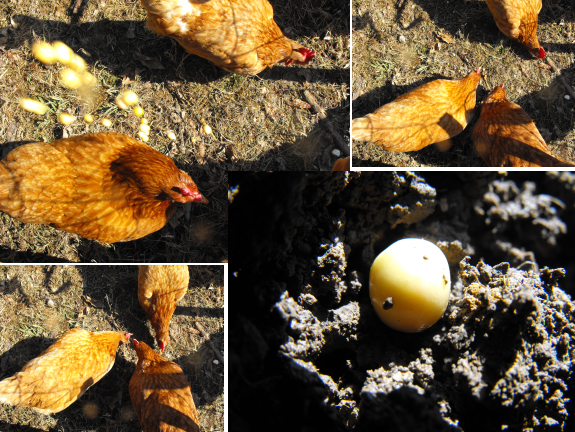
As always, I soaked a
few peas too many, so I tossed them to our four year old hens.
These girls are still laying, probably because I give them treats now
and then like these plump peas or last week's chickweed. They gobbled down my
excess seeds in seconds and then stood and stared up at me --- more
please?
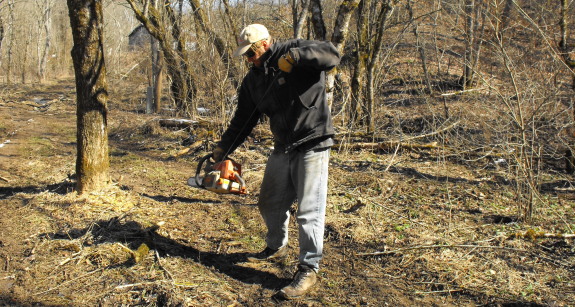
Project oyster
mushroom logs step 1. Cut
down small, fresh, box elder trees to be carried to the new soaking
station.
Did you know that checking on
your
honeybees in the
winter can be
dangerous?
I tossed together this
video of Friday's events to
prove it.
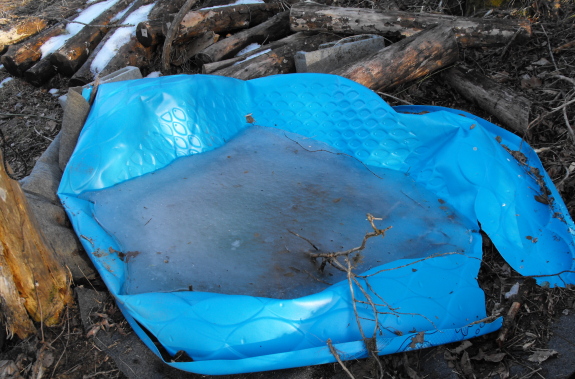
Just flipping your mushroom
log soaking pool over is
not enough to winterize it. This one was crushed by the weight of falling snow during the blizzard of 2009. Next year we'll hang it up somewhere in
the barn.
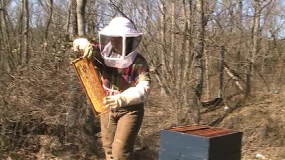 When
I last checked on our honeybees,
a little over a month ago, I was a bit concerned that one hive might
not have enough honey to make it through the winter. The one I
worried about was a healthy hive, but I'd made the mistake of combining
a very weak hive with the stronger hive that fall,
and I think the double dose of workers ate through their honey stores
very rapidly. I knew that our strongest hive had honey to spare,
but I decided to wait until February to do anything about it.
February came in like a
lion, and just kept roaring for most of the month. The weather
was far too chilly to get into that hive, and I started worrying (and
having nightmares about starving bees.) So when Friday warmed up,
the bees were at the top of my agenda.
I opened up the hives,
and was shocked to see that all three seemed to have nearly as much
honey as had been there a month ago! I can't quite figure out why
they ate masses of honey in December, but very little in January ---
maybe they finally killed off their summer workers in the interim and
had fewer mouths to feed? Maybe the sugar water they were still
evaporating from my late fall feedings had been turned into
honey? No matter --- I needn't have been concerned. Just to
keep the nightmares at bay, I moved a few frames of honey from the
strongest hives to the other two hives, even though now I didn't think
they would need it.
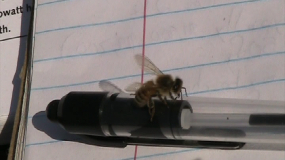 Meanwhile,
the bees were so pleased by the weekend's balmy weather that they went
out foraging. They kept coming by and visiting with me as I
played in the woods --- one buzzed around me at the ford (a fourth of a
mile from the hives) and another landed on my notebook as I read in the
woods Saturday (maybe even a little further away, on the top of a tall
hill.) Granted, my visitors could have been wild bees, but they
seemed extraordinarily tame, and almost interested in me. Or
maybe it was the smell of recently peeled orange on my hands....
I wonder if they found the witch hazel
blooming on the
north side of the property and had a winter snack?
 Although
Edible Forest Gardens is truly the
book to read for North American forest gardening information, I'm
always intrigued to go back to the primary sources. So I checked
out Forest
Gardening: Creating an Edible Landscape by Robert Hart, the father
of temperate forest gardening.
I have to admit that I
was sorely disappointed by about two thirds of the book. Robert
Hart was clearly a dreamer, a poet, and a philosopher, not a
scientist. His book jumps around through a discussion of how
important it is to eat your vegetables, how ley lines can impact your
garden, and through several similar topics. But in the midst of
all that,
he also documents his journey toward creating the first temperate
forest garden. As I suspected, there were some fascinating ideas
waiting for me in the book --- we all have something to learn from this
forest gardening pioneer.
Stay tuned for more
information in this week's lunchtime series. Meanwhile, if you
haven't already, check out our series about the
roots of permaculture
and our how to series about planning a forest garden.
| This post is part of our Robert Hart's Forest Gardening lunchtime
series.
Read all of the entries: |
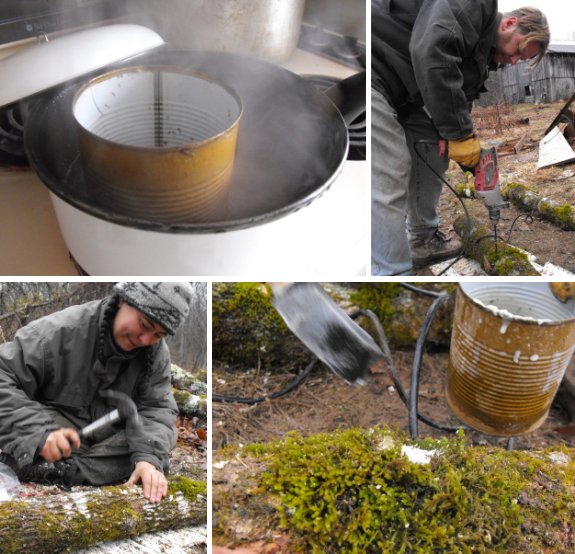
I upgraded the beer can from last
year's wax melting kit
with this bigger and stronger tin can. I also improved the heating
process by using a hot water bath as seen in the photo. This allowed
for much better control and a safer place to rest the can while we
drilled the next round of holes for the new oyster mushroom logs.
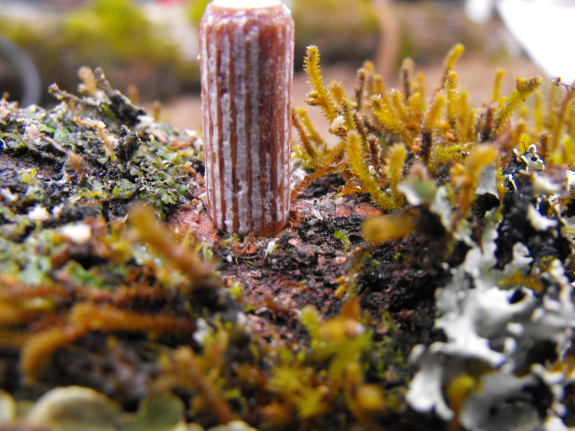
Oyster mushrooms are a
lot less picky than shiitakes, so you can put them in the easier to
come by deciduous softwoods rather than in the more difficult to
come by hardwoods.
Last year, though, we had a few extra sycamore logs leftover from
shiitake inoculation, so we went ahead and inoculated sycamore logs
with our oyster spawn too. As a result, this is the first year
we're putting oyster mushroom plugs into our ubiquitous box-elders.
You might have wondered
why Mark
was cutting down fresh trees on Friday when our woods is
full of deadfall from the December storm. We could have used some
of that deadfall for our mushroom logs, but it wouldn't have worked as
well. When the trees tumbled down in December, they were dormant
and were storing all of their sugars in their roots --- the deadfall
that resulted was very low quality from a mushroom point of view since
it lacked any sugars at all. Now that spring is coming, trees are
starting to push nutrient-filled sap up to the branches, a process that
maple syrupers take advantage of to fill their buckets with maple
sap. By waiting to cut down fresh trees in late February, we're
giving our spawn a higher quality substrate, full of sugars to help
them grow quickly.
Our box-elder logs were
completely coated with a dense mixture of mosses and lichens, unlike
last year's sycamores which were bare-barked. I can't seem to
figure out whether these epiphytes will help or harm the oyster
mushrooms' growth, but they sure are pretty!
 One of my favorite parts of Forest
Gardening
was its in depth description of several tropical forest gardens.
In locations as diverse as India, Indonesia, Sri Lanka, Tanzania,
Nigeria, Central America, and the Amazon, people have been creating
forest gardens for at least a thousand years.
I've described Central
American forest gardens and Amazonian
forest gardens in the past, and
all of the tropical forest gardens seem to be pretty similar.
These forest gardens are usually small --- less than two acres in size
--- and are located around the farmers' homesteads where they serve as
a kitchen garden. The many-layered forest includes fruit and nut
trees as well as plants that produce timber, fuel, medicines, and other
products. In many cases, some of the trees are cash crops ---
coffee, cinnamon, and nutmeg in Sumatra, bananas and coffee in Tanzania.
Most forest garden owners had plots out in the open where they planted
cereals and other sun-loving vegetables to supplement their forest
garden food.
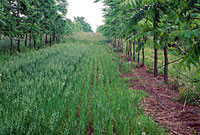 Forest gardens are often
in mountainous areas where tilling the soil would lead to erosion and
soil loss. In fact, a more modern incarnation of forest gardening
was developed specifically for this erosion-reducing purpose. In
the 1970s and 80s in Nigeria, B.T. Kang developed a system called alley
cropping that consisted of growing cereals and vegetables in strips
between leguminous trees on hillsides. The trees prevented
erosion and fertilized the crops by fixing nitrogen. The trees
were also pruned heavily, with the cut branches used as mulch in the
annual garden and as garden stakes, firewood, and fodder.
Why was forest gardening
so widespread in the tropics but not in temperate regions? The
fact is that many useful tropical plants will fruit in the semi-shaded
understory, while most temperate fruits need full sun to grow. In
addition, the light in the tropics is intense enough to enable tropical
forest gardeners to grow traditional vegetables like beans, tomatoes,
and corn in the understory of an open forest, another element that
won't work here. Developing a temperate forest gardening system
was the challenge that Robert Hart and later pioneers faced.
| This post is part of our Robert Hart's Forest Gardening lunchtime
series.
Read all of the entries: |
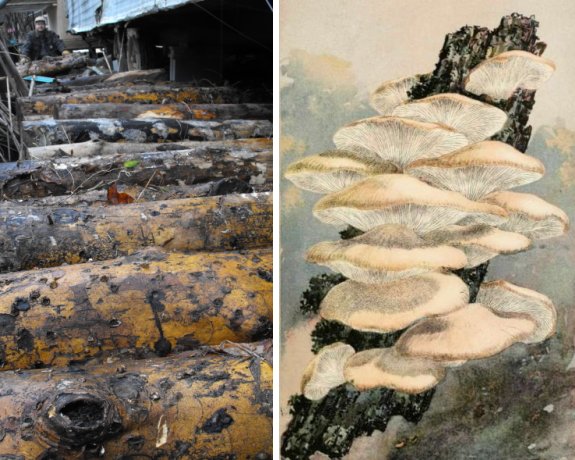
We finished up the new
oyster mushroom logs
today and carefully moved the old logs to the new station. This time
we're using two rows of metal pipe to keep the logs off the ground,
which helps to keep out unwanted fungus that's not as edible.
Credit goes to Chest
of Books.com for the
lovely image next to our picture.

I should have given our
honeybees credit for more good sense this weekend. I thought
the bees were out scouting the woods for witch-hazel, but now I suspect they were
instead out for the first real spring flowers.
Monday, I stumbled
across this speedwell blooming in the yard. Even though it's an
alien invasive species, I was pleased as punch --- this blog post had
about fifty exclamation marks in it before I toned the punctuation down.
The little blue flowers
were closed up from the cold rain, but had clearly been in full bloom
over the weekend. Since blue is one of the honeybees' favorite
colors, I think it's highly likely that our workers found the patch and
sucked it dry. No wonder they were so visible on Sunday --- our
bees probably found spring's first flowers long before I did.
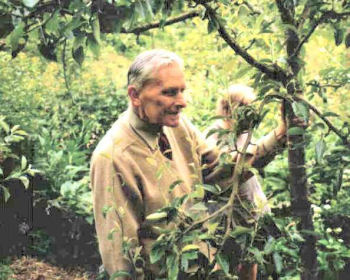 Robert
Hart began his adventures in forest gardening as a plain old
back-to-the-lander like us. He had a twenty acre farm in England,
most of which was pasture. There he ran poultry, goats, sheep,
cattle, and bees, but he soon found the inevitable slaughter involved
in livestock-rearing to be too much and became a vegan.
Hart's forest garden was
a replacement for the food he had once gotten from his livestock.
He focused on a one acre tract beside his house and began
planting. About an eighth of the garden was an old orchard, full
of apples, pears, and damsons (plum-like fruits), while the rest of the
area was originally a traditional vegetable garden. Hart began
planting herbs and black currants in the understory of the orchard,
mulching heavily with with straw, compost, and grass clippings in the
spring and early winter. He quickly realized that the combination
of mulch and perennials made the forest garden much simpler to keep up
than the traditional vegetable garden, though he noted that he would
occasionally have to go on a "crawl-and-claw expedition through the
undergrowth" to weed.
Like traditional forest
gardeners in the tropics, Hart maintained sun-loving plants in a
different part of the garden. But he was able to grow a
surprising amount of food under and amid his trees --- masses of mints
and other herbs, his signature black currants (one
of the few temperate
plants that fruits exuberantly in the shade), and a host of wild
and
semi-wild vegetables like dandelions, nettles, and chicory. He
also grew patches of osier and willow that he allowed his neighbors to
coppice for use in basket-making.
| This post is part of our Robert Hart's Forest Gardening lunchtime
series.
Read all of the entries: |
I got this cedar tree notched
and ready to come down when a feeling came over me that it might
still fall the other way, which would take down one of the power lines
and leave us in the dark.
Nothing our little 4
ton hand winch can't
handle. We just used the ladder to secure a cable high up on the tree
in question, secured the other end to another tree and cranked it in a
way that left it no choice but to fall away from the electricity.
 As you've probably figured out, we've put a
halt to our building for now. We're not
quite done, but we need a few days over 50 degrees to allow us to seal
in the skylight so that we can finish the roof, then the ceiling, then
the floor. And we need the same temperatures to caulk around the
windows, paint the outside walls, and then paint the roof. But
that's all okay, because there's a lot to be done outdoors before the
growing season really gets into full swing.
Wednesday, Mark
cut down a lot of red cedar trees while I stood around and
looked pretty (aka watched to make sure the trees were falling the
right way.) We've had trouble getting our apple trees to grow
since they keep coming down with cedar
apple rust.
The solution seems to be cutting down nearby cedar trees, which serve
as an alternate host for the fungus, so we took out the ones closest to
our orchard and will take out more if necessary in later years.
We ended up girdling some of the ones closest to the power line rather
than risking losing our electricity --- I hope the girdled trees die
quickly and don't grow over the wounds.
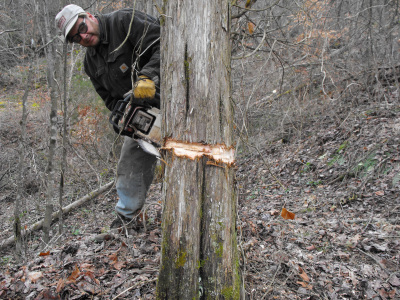
I'm afraid that opening
up the canopy over there has made me think big again. I know that
we don't have the manpower to expand our garden area now, but I can't
help wondering if we should figure out what we'd like to use that space
for and do some preliminary work to keep it from growing up in brambles
and honeysuckle. I could seed it in clover and turn it into
spillover chicken
tractor pasture, or
plant some fodder trees and figure it'll someday be part of a pig
or goat pasture.
I could take advantage of the sparse canopy of tulip-trees left behind
and fill the space with fruiting shrubs like hazels or gooseberries, or could plant black
locusts and sourwood in the understory for
bees. So much potential, and so little time left before the
growing season will make its own decisions about the disturbed ground!
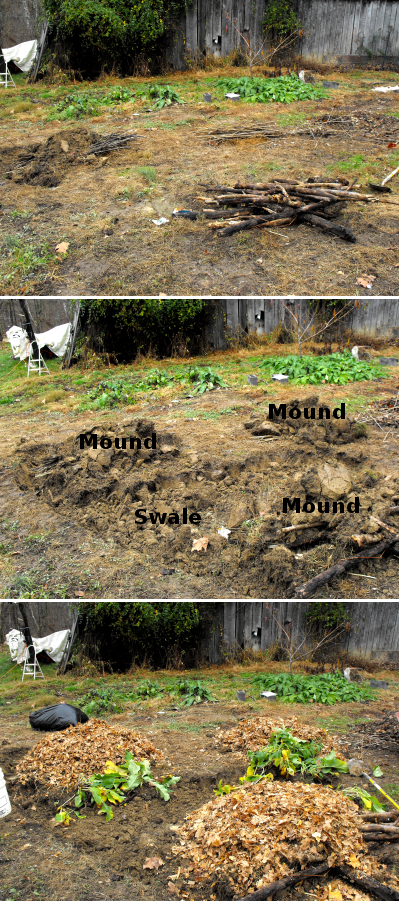 Robert
Hart created mounds in his garden just like the
mounds I built for my
hazel trees.
He layered branches and leaves on the ground, then
topped them with turf (grass-side down), compost, and soil. He
considered the mounds a method of increasing his gardening space, with
the improved drainage being secondary. According to Hart,
mound-gardening originated in China and was also very popular in
Germany, where it was known as Hugelkulturin.
Hart also created little
bog gardens, laying down a sheet of plastic
and topping it with peat. The bog gardens allowed him to extend
his repertoire to include cranberries and other bog plants. In
fact, varied habitats could be considered one of the themes of his
overall garden, which contained the forest garden, bog garden, annual
vegetable
garden, and even a little pond. Intuitively, Hart had latched
onto an idea that every ecologist understands --- areas with multiple
habitats can support more species than less diverse areas.
| This post is part of our Robert Hart's Forest Gardening lunchtime
series.
Read all of the entries: |
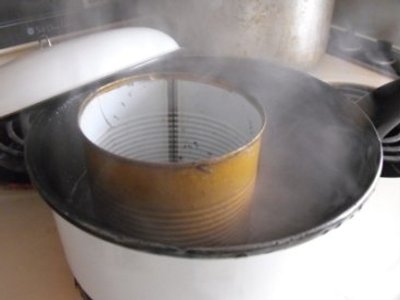 I
finally got around to washing the mushroom
wax pot last night and had some trouble.
It seems like a small amount
of wax somehow leaked out and bonded with the teflon.
Next year I'll use stainless
steel instead of teflon and avoid this sticky problem.
 We
played hookie Thursday morning to help our movie star neighbor film an
audition tape. I was a bit daunted by the idea of reading lines
with him, but was thrilled once I learned I didn't have to be on
camera...and found out that we'd get some of his homegrown honey as
payment. I forgot to mention that the
beeswax we used to seal over our oyster mushroom plugs also came from this same
neighbor, traded for a dozen eggs. It sure is fun to barter with
like-minded souls!
When the camera stopped
running, I drooled over our neighbor's Meyer lemon tree. I posted a
picture of it last year,
loaded down with over a hundred fruits, and this year the tree felt
like it was twice as big. I hesitate to call it a "dwarf"
anymore, although the lemon isn't tall --- just six feet wide.
"My tree is so big, I can't move it outside any more," our neighbor
complained. "That's part of the reason I want to add a room to
the house, to give my lemon space to grow. I feel like I'm
married to a tree," the bachelor finished, in mock despair.
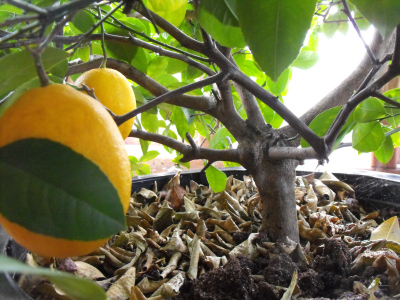 "I
can take it off your hands if you want," Mark said, ever helpful.
"I'd trade my wife for two of them."
"I
can take it off your hands if you want," Mark said, ever helpful.
"I'd trade my wife for two of them."
Okay, so Mark only
mentioned the part about two trees when I got indignant at only being
worth as much as one lemon plant. Luckily for us both, our
neighbor only had the one tree on hand, so we decided to beef up our
own lemon tree's existence instead. Our neighbor attributes a lot
of his success to the huge pot his lemon tree is growing in --- it
looks to be about ten gallons in capacity. We'll have to plan on
hunting down a couple of mammoth pots to give our citrus room to grow.
 The last forest garden tidbit
that caught my fancy was Robert Hart's Bouche-Thomas hedges. He
planted apple trees diagonally so that they grew into each other and
created a rigid
fence like the one shown in the drawing here. Since I'm currently
in the research stage of including
hedges on our property, these looked intriguing.
Overall, I found Robert
Hart's Forest Gardening
to be a bit disappointing since it was low on how to information and on
plants suitable
for North American climates. His book isn't a reference work so
much as it is a dreamer's manifesto. But it often
takes a dreamer to bring an idea like forest gardening to a temperate
climate. The next generation of forest gardeners are still
working to make his dream a reality.
| This post is part of our Robert Hart's Forest Gardening lunchtime
series.
Read all of the entries: |
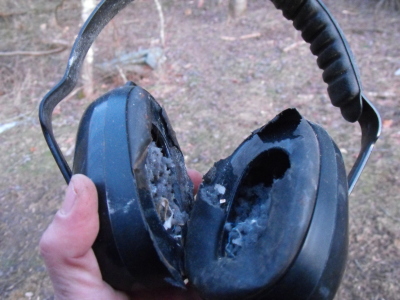
I made the mistake of storing my hearing protection in the barn after a
round of chainsawing a few months ago.
Not only did a team of mice
shred the foam padding but it looks like they took out a long term
lease and moved right in.
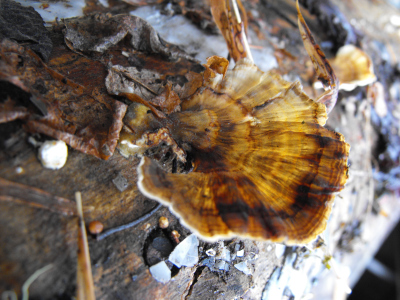 My
mushroom identification skills are sub-par, but I know for a fact that
this little guy shouldn't be growing out of the side of one of my
shiitake logs. I'm pretty sure it's a turkey tail, which is a
medicinal species and a useful decomposer of fallen logs.
Unfortunately, the turkey tail's presence means that the shiitake spawn
probably lost the battle for that log.
We're still relatively
new to mushroom cultivation, and losing a few logs to invasions of wild
fungi is pretty normal. Nevertheless, we'll take some steps to
keep our other logs turkey-tail-free. It's good for our logs to
be close to the ground for humidity, but we've
propped them up on metal pipes to prevent direct
contact. After all, as I learned this winter, the
soil is jam-packed with fungi.
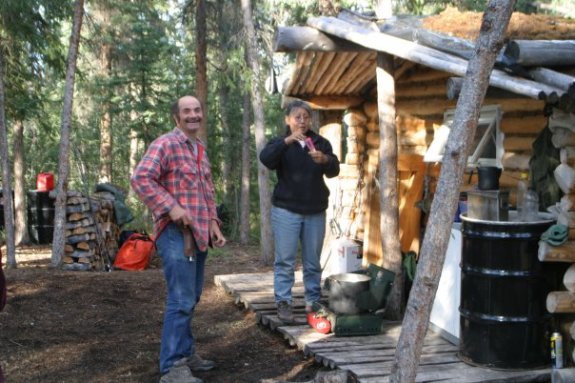
Heimo Korth grew up in the
suburbs of Wisconsin and when he was 18 wrote a letter to a random
trapper in Alaska looking for work. He got a job as a packer, learned
to love the wilderness of Alaska, and has been there ever since
homesteading with his Eskimo wife Edna.
A small 3 man film crew spent 10
days with Heimo and Edna to get a feel for what it's like to be one of
the last full time homesteaders in the 19 million acres of prime boreal
forest that is now known as the Arctic National Wilderness Refuge.
It's an excellent
documentary you can watch for free here that provides a glimpse into this
lifestyle and climate. The producers don't hold much back and you learn
first hand how to snare and skin a rabbit without using a knife. I
really liked Heimo and Edna and felt like I was visiting them with this
film. Makes our recent bout with a colder than normal winter look like
a day in the park compared to the struggles they've got to go through
to get by.
 We
have a glorious moat between where we park the cars and our
trailer. There's the creek, of course, but also a third of a mile
of woods --- far enough that we usually can't hear any road noise and
never get trick-or-treaters or uninvited visitors.
Even when
the golf cart can't make the trip and I'm
stuck hauling
in big sheets
of plywood by hand,
I never wish we lived closer to the road. In
fact, if given a choice, I'd rather be a bit more isolated --- we
can actually see one neighbor's light if we stand in just the right
spot in the yard during the winter.
When we come home from
the
outside world, the ten minute walk back to the trailer is decompression
time, returning us to the present and reconnecting with nature. I
see wood ducks and great blue herons along the creek and check out
tracks in the mud. By the time I get home, my head is filled with
beauty, not cars and stores.

If you enjoyed yesterday's
documentary on Arctic
homesteading then you
will most likely appreciate how Robert Long and his family get by
homesteading in the New Zealand bush.
It's a nice short video which takes time to interview the
13 and 16 year old kids and show how they feel about growing up in such a
remote and beautiful setting.
Want more in-depth information? Browse through our books.
Or explore more posts by date or by subject.
About us: Anna Hess and Mark Hamilton spent over a decade living self-sufficiently in the mountains of Virginia before moving north to start over from scratch in the foothills of Ohio. They've experimented with permaculture, no-till gardening, trailersteading, home-based microbusinesses and much more, writing about their adventures in both blogs and books.
