
Setting up the Brinsea Mini Advance Incubator
 The
Brinsea
Mini Advance Incubator gives you a lot of control over incubation
settings, so it takes a few minutes longer to set up than a traditional
incubator. Of course, you have to start with fertilized
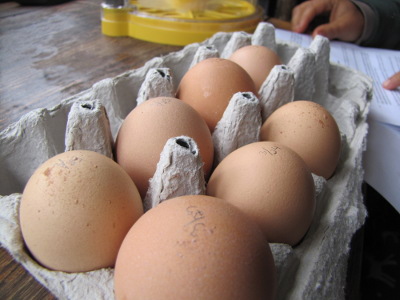
eggs that have been stored properly --- our hens came through
with the seven eggs we needed within the four day window pre-hatch with
no trouble. I penciled the date each egg was laid on the shell
and tried to guess who each egg came from based on egg size and color
(maybe two from the old girls, three from the young
  Golden
Comet, and two from the White Cochin?)
Next step was to adjust
the turning angle, which Brinsea recommends setting between 90 and 120
degrees. The eggs sit in a plastic cradle with seven holes in the
bottom (one for each egg) so that the underside of the egg rests on
another surface below. When the turning motor spins the lower
surface, the eggs rotate like wheels, with their turning angle
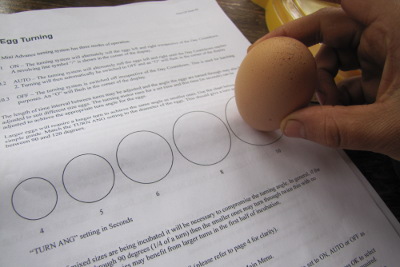
depending on how long the motor runs for. The instructions 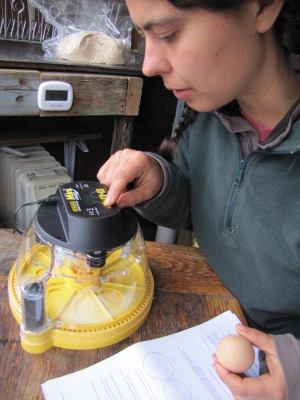 include a diagram to let you
measure the diameter of your egg and come up with a rough estimate for
turning time. Our extra large hen eggs seemed to be larger than
the biggest circle, so I set the turning time to 12 seconds, but after
marking an egg and watching it turn, I backed off to 8 seconds.
You can also set the
incubation temperature (99.5 for chicken eggs), number of days
remaining so that the egg turner will stop two days before hatch,
turning interval, and temperatures at which an alarm goes off. We
stuck with the manufacturer's settings for all except the turning angle
and the number of days (which, oddly, came pre-set at 40 rather than
the 21 day chicken incubation period.)
After preheating the
incubator and filling half of the well in the center with water, we
plopped our eggs in, making sure the blunt ends faced the center.
Although the eggs tend 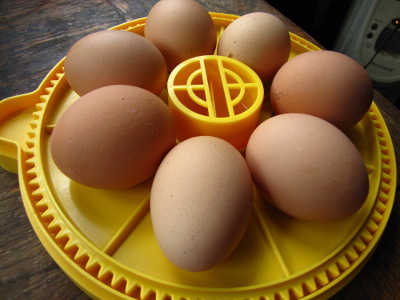 to sit pretty flat at first,
they will eventually tilt a bit so that one end points up. The
instructions explain that the big end should point up, and that we
might need to turn an egg around if for some reason the little end
starts pointing up.
Now we just have to wait
and hope that we can keep the temperature in range. I chose this
model because it's one of the few consumer-grade incubators that
actually tests the internal temperature and makes subtle adjustments
rather than relying on you to keep 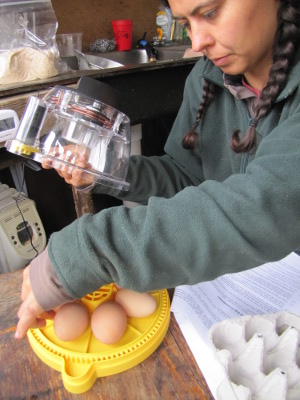 the incubator in a room with
constant air temperature. Still, the directions say that you
should, optimally, keep the room temperature between 68 and 77 and
never let room temperature drop below 63 degrees or let the incubator
sit in direct sunlight. I can promise the latter, but not the
former. In a week, we'll candle the eggs and hope to see signs of
life, then rethink our incubation area if need be. Even if we
don't get a hatch, I'm sold on this model --- it's easy to use and the
temperature control worked well all day Sunday. If the eggs die,
it will be our own fault.
Want more in-depth information? Browse through our books.
Or explore more posts by date or by subject.
About us: Anna Hess and Mark Hamilton spent over a decade living self-sufficiently in the mountains of Virginia before moving north to start over from scratch in the foothills of Ohio. They've experimented with permaculture, no-till gardening, trailersteading, home-based microbusinesses and much more, writing about their adventures in both blogs and books.
Want to be notified when new comments are posted on this page? Click on the RSS button after you add a comment to subscribe to the comment feed, or simply check the box beside "email replies to me" while writing your comment.
- Remove comment
- Remove comment
