New Skil drill field report
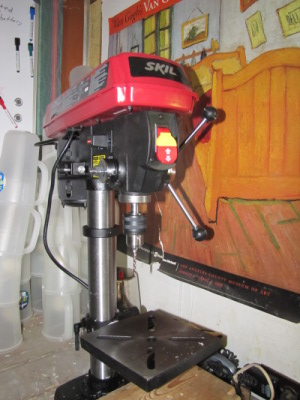
 We recently upgraded our drill
press with the plan of increasing our production of automatic chicken
waterers by sending the old drill to a local friend so he can start
doing some of the work.
The design is basically the
same as the old drill press with the addition of a safety switch that
can be turned off easier if you have some sort of difficulty.
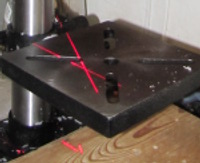
It's also got a battery
powered laser that shines two intersecting lines where the drill bit is
expected to first bite.

Want more in-depth information? Browse through our books.
Or explore more posts by date or by subject.
About us: Anna Hess and Mark Hamilton spent over a decade living self-sufficiently in the mountains of Virginia before moving north to start over from scratch in the foothills of Ohio. They've experimented with permaculture, no-till gardening, trailersteading, home-based microbusinesses and much more, writing about their adventures in both blogs and books.
Want to be notified when new comments are posted on this page? Click on the RSS button after you add a comment to subscribe to the comment feed, or simply check the box beside "email replies to me" while writing your comment.

Since you are just making small holes, have you looked at alternatives like a small die punch? Maybe even a manual one. It could be that the plastic you're using is just to tough to punch through easily, but if it works it is probably faster and in case of the manual punch doesn't require electricity. For this kind of material you'd probably need a hollow punch shaped like the tip of a syringe, I think; it will penetrate the wall at one point and then slice the rest of the circumference of the hole.
Depending on how many waterers you want to make, it might also be worthwhile to have the containers injection molded with the right hole in them, as well as a hook for hanging them. This could be cost effective from a couple of hundred pieces per year.
We actually considered getting our waterers extruded whole (minus the nipple), but whenever we look into it, we have to order about 10,000, which is out of our price range. (We send out about 1,000 pre-made waterers per year, so we'd have to find a place to store all those waterers safely for ten years too. Sounds daunting.)
I don't know much about die punches, but my gut says that the plastic would crack. Mark has to be very careful even drilling to prevent cracks, and when he used to build waterers outside in the cold two years ago, they often cracked unless preheated in the sun. But I could be wrong!
All thermoplastics become more brittle when they're cold, but when and how much depends on the type. The glass transition temperature plays a role with plastics. What material are the containers made of? I was guessing PE, but that should not be very brittle above -120 °C.
If the containers crack easily when drilled you are either using (a) the wrong plastic (I'd recommend PE, because it only becomes brittle far below the freezing point and is the cheapest of plastics available), (b) the wrong drill bit or (c) the wrong method. WRT (b), for relatively brittle plastics a conventional twist drill (with the 118° tip angle) is probably the wrong tool. At least the cutting angles (1-4 in the picture) need to be different, depending on the type of plastic, from those used for metal drills. A flat wood drill bit or a spur (or brad) point bit would probably do better, because they start cutting the hole at the circumference instead of in the center. WRT (c), if you are drilling through a thin layer of brittle plastic, you should support that layer directly under it, so it cannot deform too much. Make a wooden jig. If you only drill the bottom of the container a cilindrical piece of wood with a slightly smaller diameter than the container and slightly longer erected on the plate of the drill should do the trick. Upend your container over the jig and drill. Of course the stroke of the drill press should be sufficient to allow you to remove the piece from the jig. If you do it right, the jig can also work as an alignment tool.
You cannot extrude a container with a bottom. I'm assuming you mean injection moulding or blow moulding? You should look around more. A thousand pieces should be worthwhile to have made by injection moulding, provided you can pay some of the tooling costs up front (that tooling would then be your property). If all the tooling costs need to be amortized over the production run you get stuck with those big runs. I've had relatively complex pieces make economically by injection moulding from say 400 pieces/year.
Thanks for that information. I always like hearing first hand reports of someone's experience.
From what you are saying here I think I need to look more into injection molding to see if there are some lower end options we have not considered.
That might need to wait for the growing season demands to lighten up a bit.
Mark, what are the containers you use for the chicken waterer made of? There should be a plastic recycling code on it, typically on the bottom.
Most thermoplastics (such as PP) contain some additives. E.g. to make them more UV resistant and to prevent degradation during molding. I'm surprised that your containers are brittle. Most PP is quite tough, especially when thin (used for molded hinges).
Copper is a good material for a water flasks and pipes because it has antimicrobial properties. That is why you don't have biofilm issues with copper water pipes.