How to take softwood cuttings
 One of the joys of working
with plants is how easy they are to propagate, even without waiting for
the plants to go to seed. I've posted previously about propagating
grapes from hardwood cuttings, but during the summer, the
techniques are a little different. Now the cuttings are known as
"softwood cuttings" because they consist of this year's new, flexible
growth along with the leaves, and the technique is subtly different too.
Choose
an easy plant to propagate. I've got a windowsill
of softwood cuttings in action right now, but some are highly
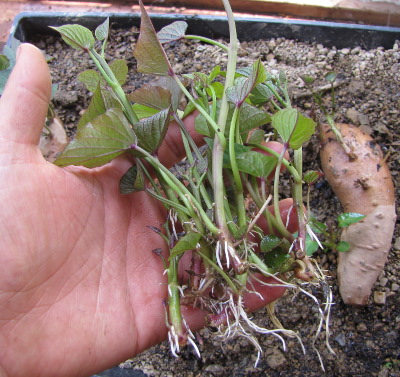
experimental. The sweet
potato slips I began in a bed of gravel are one of the easiest types
of softwood cuttings --- they root in just a few days. Similarly,
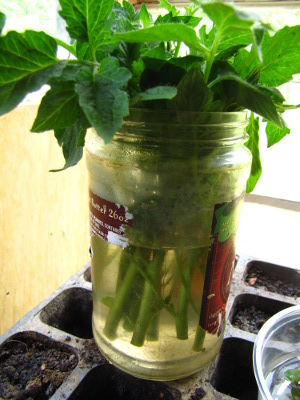
I snipped off some suckers from my tomatoes when I was pruning last
week because I want a few more plants, and I expect to see roots on all
the new tomato plants shortly. I've had 17% rooting success with softwood
cuttings of rosemary
and 50% success with hardy
kiwis (although the
latter died when I didn't baby them enough in the garden.)
Currently, I'm also trying out thyme (which is supposed to be
relatively easy) and trifoliate orange (the dwarfing rootstock for
Meyer lemons.) I recommend starting with any vigorous perennial
you're in love with, as long as the original plant didn't come grafted
onto a different rootstock (a sure sign that softwood cuttings will be
difficult.)
 Take a cutting with four or five
nodes. Both
softwood and hardwood cuttings need at least four nodes per cutting
(five is better) since these are the points that can grow leaves and
roots. Nodes are easily visible on dormant grapevines as bumpy
spots, and on softwood cuttings as the location where leaves are
attached to the stem. Since you can't expect every cutting to
root, you might as well increase your chances of success by taking
several.
Keep
the plants moist. Softwood cuttings are much
more sensitive than hardwood cuttings are to lack of moisture.
After all, the plants have leaves actively releasing water into the
atmosphere, so they need new water to take the lost liquid's
place. The best way to keep softwood cuttings moist is to install
misters that wet the plants (either from above or below) every minute
or two, but in the homesteading world, you can often get away with just
putting your cuttings in a glass of water. Make sure that at
least two of the nodes are below the water level at all times, and
change the water if it starts to get gunky. An alternative is to
fill a pot with moist potting soil, stick the cuttings into the dirt
two nodes deep, and then attach a transparent plastic bag over the top
of the pot. (I've had less luck with the second method because
it's tougher to harden off the plants to low moisture conditions after
they root.)
 Rooting hormone increases your
chances.
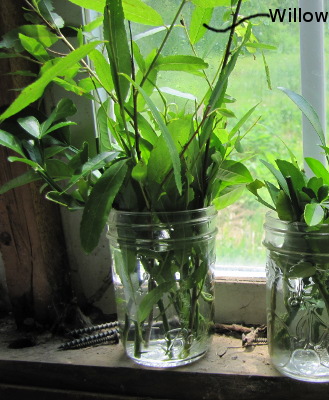
You can buy rooting hormone in the store, but I like to just snip a few
twigs off the creek willow (Black Willow, Salix
nigra, but any
willow will work) and stick them in the glass with my cuttings.
Willows release a natural rooting hormone as they grow their own roots,
which will speed your more important cuttings along.
Harden
off your new plants. Once your cuttings
grow roots, you'll be tempted to toss them into the garden.
That's fine with the very vigorous rooters like tomatoes and sweet
potatoes, but I've learned the hard way that more tender perennials
need some time expanding their root network before being set out in the
hot sun. (As a rule of thumb, figure that if you had less than
90% success with rooting your cuttings, they need a hardening off
period.) Transplant your rooted cuttings into pots and put them
in a sunny windowsill (but not in a hot greenhouse), watering them
regularly. Once the plant's roots fill the pot, your cutting is
ready to go into the ground.
If you haven't already
jumped on the softwood cutting bandwagon, I strongly encourage you to
give it a try. The only downside is finding a spot in the garden
for all those vigorous plants you materialized out of thin air.
Want more in-depth information? Browse through our books.
Or explore more posts by date or by subject.
About us: Anna Hess and Mark Hamilton spent over a decade living self-sufficiently in the mountains of Virginia before moving north to start over from scratch in the foothills of Ohio. They've experimented with permaculture, no-till gardening, trailersteading, home-based microbusinesses and much more, writing about their adventures in both blogs and books.
Want to be notified when new comments are posted on this page? Click on the RSS button after you add a comment to subscribe to the comment feed, or simply check the box beside "email replies to me" while writing your comment.
