
archives for 04/2014

The weather forecast this
week seems just right for transplanting. Not only is it supposed
to be warm at night, it's due to start raining at the end of the week,
which will give transplants a leg up. Even the 10-day forecast
shows no sign of freezes (which I take with a grain of salt since Sunday
night was supposed to be 30 and instead dropped down to 23).
That's good because, while onions, broccoli, and cabbage can handle
temperatures in the upper twenties once they're established, it's nice
to set the seedlings out when they won't have to deal with freezing
until they've got their legs under them.
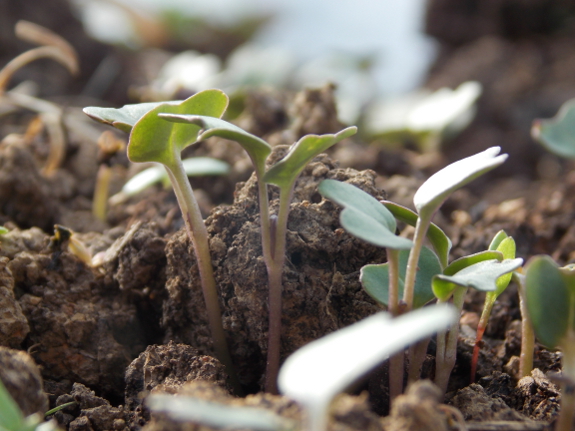
The seedlings I started inside two and a half weeks ago are leggy and yellowed, despite their doses of manure tea
(so they're not pictured). Hopefully, those inside starts will
catch back up once they're in the ground, but I have a backup
plan. The babies under quick hoops are just now sprouting into
hefty, healthy seedlings, which will be ready to fill any gaps in two or
three weeks. This way we'll get the best of both worlds --- an
early start on some seedlings and definite good health for others.
Mark's mantra is "Backups, backups, backups!" and I'm always glad when I
apply it to the garden.
This cedar roosting station
has something for everybody.
The bottom rung is for small
chicks to practice on while the medium level is for the birds that need
a step before you get to the top sleeping roost.
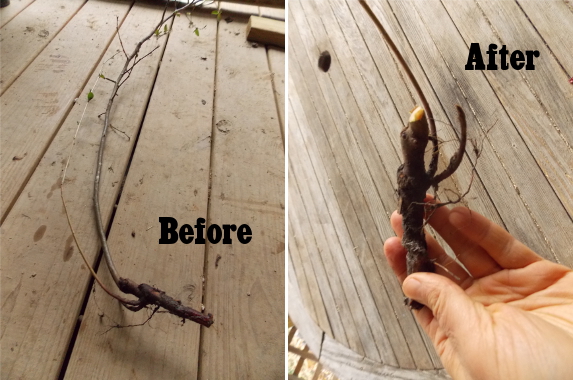
Mom and I like to swap plants, so on her most recent visit, she brought me a sucker
from a flowering quince bush and I gave her a few suckers from an
elderberry bush. None of the suckers had many roots, and the
quince had a pretty tall stem. Would it survive?
The first step when you
end up with a perennial that has far more top growth than bottom growth
is to whack back the stems to be more proportional to the roots.
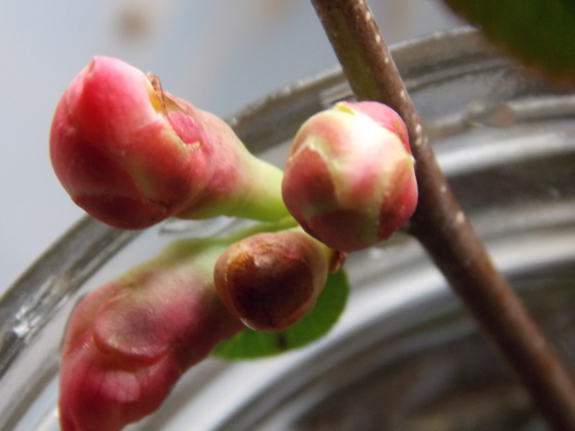
You definitely want to remove any flower buds, too, since your little
transplant shouldn't be worrying about reproduction this year.
(But feel free to put those bud-covered stems in a vase for a bit of
early spring color inside.)
If you've got several
plants like this, it's generally a good gamble to go ahead and plant
them outside after pruning, but if you really want to make sure that
each plant survives, throw it in a pot and let it grow in the house for a
while. Moderate light levels and ease of watering will help the
plant get its feet under it over the next few months, at which point it
will fare much better when returned to the outside world.
This type of babying is
also handy if you get plants from a friend who lives in a warmer climate
than you do. Mom's quince was already leafing out, and I knew we
were going to get freezes the next few nights, so I figured it would be
happier indoors than out in the cold ground.
Thanks for the quince, Mom! I'm looking forward to sour fruits and pretty flowers in a year or two.
When is the best
time to start propagating sweet potatoes? The first week in April.
Moist gravel is our medium of
choice, sunk half way down.
Our yields got a lot better
when we started using a heat
pad.
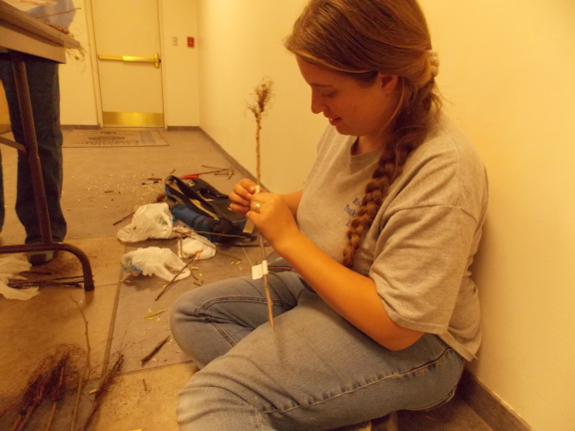
When I first walked into our grafting workshop
and saw the selection of scionwood, I was a bit disappointed. The
extension agent had teamed up with a local farmer, who brought in prime
scionwood from his trees in exchange for some free rootstock.
That part was good. The bad part was that the only options were
pretty mainstream: Red Delicious, Yellow Delicious, Granny Smith, Lodi,
Winesap, Stayman Winesap, Wolf River, and Early Harvest. Only
Early Harvest was on my wish list, although I did go ahead and get a Red
Delicious (for Mark), a Winesap (for backup), and a Wolf River (as an
experiment).
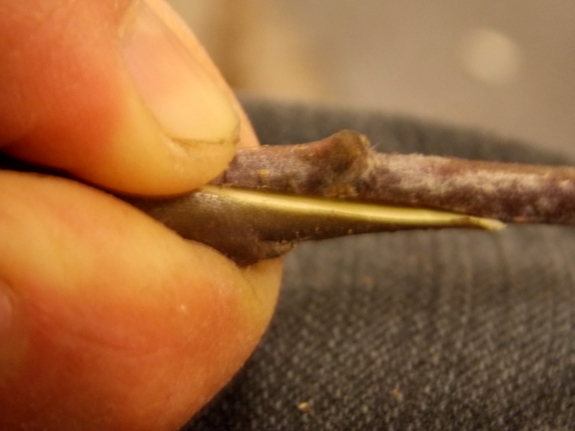
But Kayla and I are slow
grafters, so as others left, they offered us the remnants of special
scionwood they'd brought to the class. Much of this scionwood was
so skinny that I had to match only one side of the scionwood to the
rootstock, so it might or might not take. Despite the sub-par
scionwood, though, I couldn't turn down varieties I'd never heard of
like Wood's Favorite (a seedling of Maiden's Blush) and Pound Pippin
(aka Fall Pippin, a popular commercial variety in the nineteenth
century), plus a modern variety 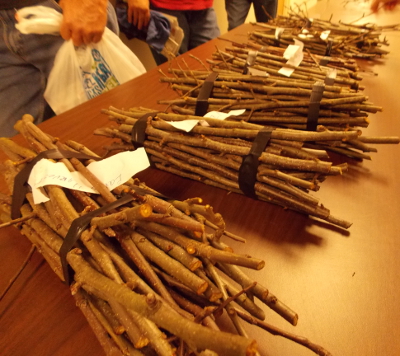 that
Kayla adores (Jonagold) and one that Mark adores (HoneyCrisp). I
also snagged a variety of Winesap that the attendee swore was the "real
old-fashioned Winesap," and I took a gamble on a pear that the owner
told me was an early, red variety, name unknown. (There were a few
pear rootstock available at the workshop --- the pear, of course,
didn't go on apple rootstock.)
Some of my gambles will
probably perish. For example, when I came home and looked up
Jonagold, I discovered that the variety is rated as very susceptible to cedar apple rust,
which is our worst apple disease and which I treat only with variety
selection. On the other hand, perhaps I should have taken another
grafter up on his offer of a White Apple, which I thought was just a
vague term but which actually turns out to possibly be a synonym for
Belmont, another rare variety. Even though each unknown type will
take up space and a bit of time, I don't mind gambling on the chance of
getting a truly astounding apple variety or two when these plants start
bearing between 2019 and 2022.
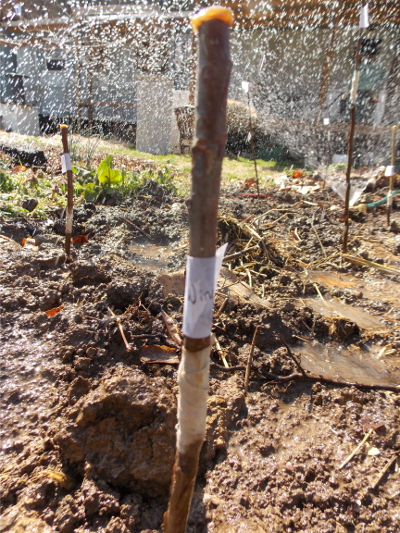 Back
at home, I soaked the roots of the baby trees overnight to make up for
them sitting out during the workshop, then I made them a good
home. Mark reminded me that every tree that came home from the
first two grafting workshops I attended died from deer nibbling, weed
explosions, and lack of water. Our farm is much more established
now, but I still went a bit overboard on protecting our babies. I
planted them about a foot or so apart in the row where I'd ripped out
cultivated blackberries last fall, within easy hose reach of the trailer
and in soil that's rich and weed-free. After watering the trees
in and mulching them well, I even erected a deer-proof cage out of trellis material and U-posts
just in case those few deer who make it into our homestead every year
make a bee line for the baby apples. Hopefully our new trees will
all survive and thrive!
We cleared some stumps out of
the new Star Plate pasture today.
I like to cut logs off the
top for firewood if the stump is long enough.
Anna's part in this dance is
to collect the pieces in a wheelbarrow.
 "Fascinating
- I have never seen this before! I thought you just plant [sweet
potatoes] like regular potatoes. Can you post pictures as they
sprout and
what you do with them later? Thank you!" --- Alice R.
I thought I'd already made a
cohesive post about propagating sweet potatoes, then realized I was
thinking of the chapter I included on sweet potatoes in the second
edition of Homegrown Humus.
For those of you who haven't given that ebook a read, here's my
tried-and-true method of making homegrown slips --- the little rooted
plants that you use to grow sweet potatoes in the garden.
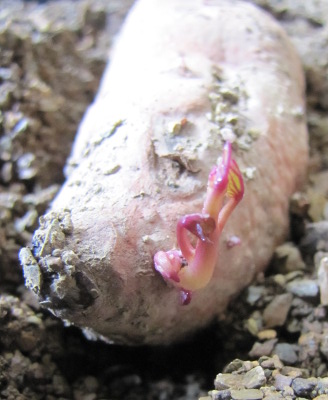 As
Mark posted earlier this week, we start by sinking a few skinny tubers
halfway into wet gravel in the bottom of a seed-starting tray (with the
insert removed). I generally save out skinny tubers on
purpose, selecting ones that are less than two inches in diameter since
they seem to spit out slips quickly without wasting too much food.
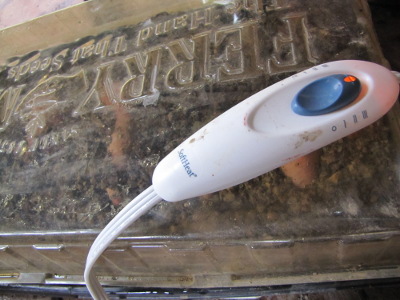
I place a heating pad
turned to medium or high (depending on the weather) under the flat, and
then mostly ignore it for a few weeks. You can choose to put the
clear top on the seed-starting tray, in which case you really can ignore
the contents (although mold might start to form). Alternatively,
you can leave the top off and just add water as needed to keep the
gravel moist. The warm, moist environment will soon tempt your
tubers to grow little sprouts like the one pictured above.
Once
these sprouts start popping up, it's time to take off the top of the
tray (and to make sure you keep the tray well watered). The
sprouts will grow quickly, and several will pop up on each end of most
tubers. Once a sprout is about four inches long, simply snap it
off the tuber and place it in a vase or other container of water so the
bottom half inch of the sprout is 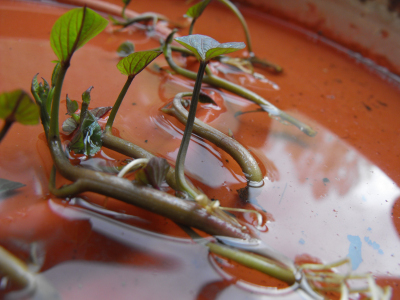 under water. Within a week, each
sprout should have at least two or three roots an inch or so long ---
you've grown your own sweet potato slips!
Sweet potatoes like it
warm, so wait until after the frost-free date to plant them out in your
garden. Pick an overcast day (or set them out in the evening) and plant
each slip so the leaves are above ground and the roots are below
ground. Water them in well, and come back by the next day to water
again as needed. After that, they'll take off and will provide a
carefree crop (as long as you keep the deer away). Happy sweet potatoing!
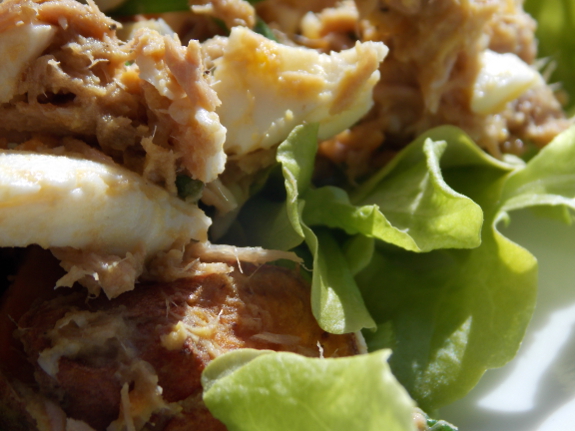
Here's another egg-related recipe
to use up those delicious morsels, mixed in with canned tuna, fresh
chives, and sweet potatoes stored from last winter. (Of course, I
added bacon, too, to tempt Mark's appetite.) The ingredients:
- 4 hard-boiled eggs. (You can increase this up to 8 eggs if you have them on hand and want the salad to be eggier rather than tunaier.)
- 1 large (12 oz) can of tuna, drained
- 5 slices of bacon, cooked
- 1 large sweet potato, cut into bite-size pieces
- 0.25 cups of chives, cut into small pieces
- about 2 tablespoons of balsamic vinegar
- about 4.5 teaspoons of honey
- salt and pepper
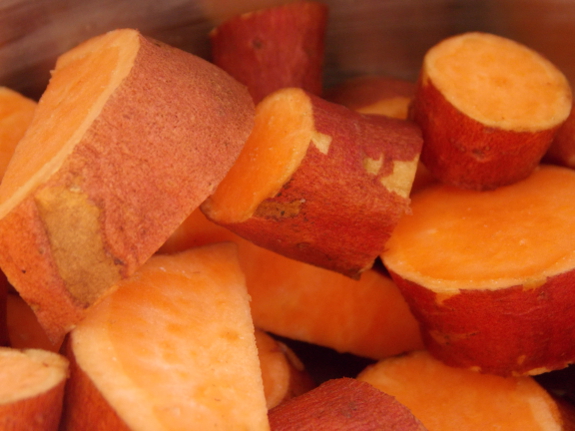
Bake the bacon on a tray
in the oven at 350 degrees, flipping the slices over as they start to
brown on one side, then removing them when they brown on the
other. Chop the sweet potato into bite-size chunks, mix the potato
into the bacon grease, add salt and pepper, then put the tray back in
the oven to cook the sweet potato (stirring once or twice).
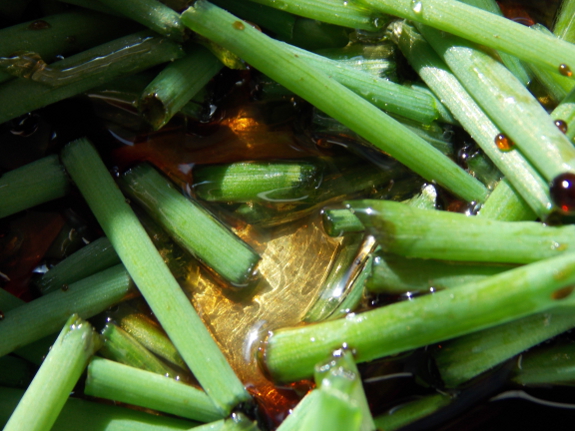
Meanwhile, mix the
balsamic vinegar, honey, and chives. Drain the tuna (and make
Huckleberry's day by giving him the juices), then add the tuna to the
bowl. Spoon the hard-boiled eggs out of their shells,
break them into small pieces, and add them as well. Break the
bacon into bite-size pieces and add it to the salad, then spoon the hot
sweet potato out of the pan and into the bowl, leaving as much of the
grease behind as you can.
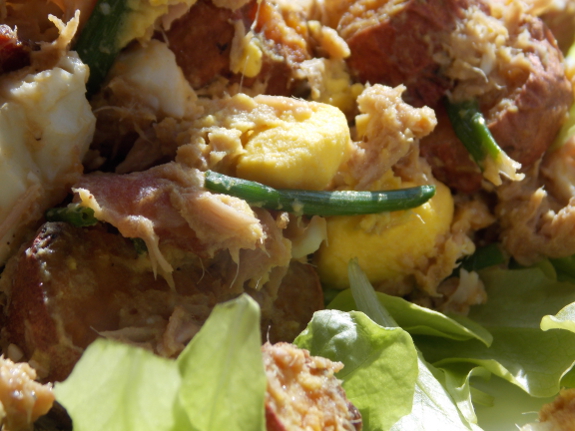
Mix and serve over a bed of homegrown baby lettuce. Serves four happy spring campers.
Use them as a layer of mulch
for the new baby
apple tree bed?
That's the best idea we've
come up with so far.
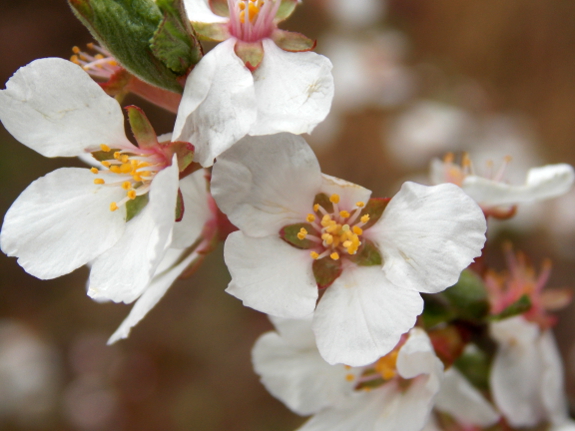
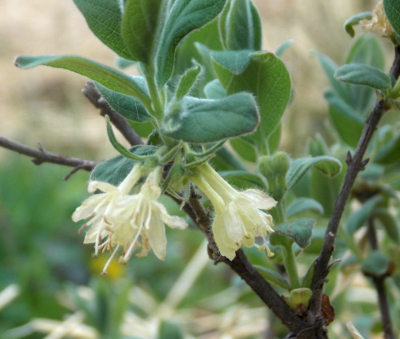
The Nanking cherries
always lead the way, heralding bloom time for our woody
perennials. This year, one bush is completely coated in flowers,
suggesting we'll have quite a crop of these small fruits (which we
primarily grow for the chickens).
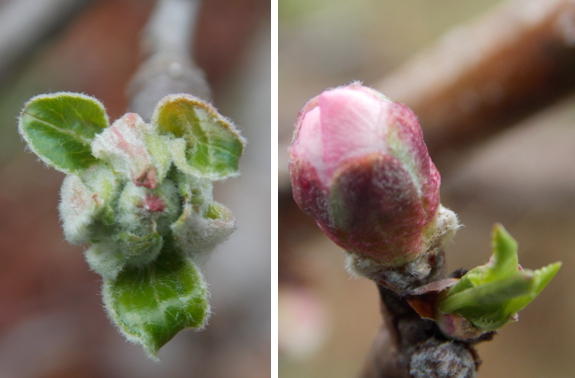
Although I enjoy the cherry flowers, I spend much more time watching the buds on my favorite fruit trees. While pruning
six weeks ago, I saw a lot of dead wood on the peach trees, so I wasn't
terribly surprised to notice that the flower buds weren't swelling the
way they should have been in late March. Most peach trees are
rated to survive up through zone 5, but I'm now guessing that folks in
zone 5 probably see many years with no fruits, even if their peach trees
live through the cold. A low of -12 this past winter nipped
between 90% and 99% of the flower buds on our peach trees, and only time
will tell whether the few flowers left are enough to produce even a
scanty crop.
On the other hand, the
apples were largely unfazed by the wold weather. Plump buds are
starting to open into flower clusters, although I reminded them that the
coming week will be more seasonable, so they might want to slow back
down.
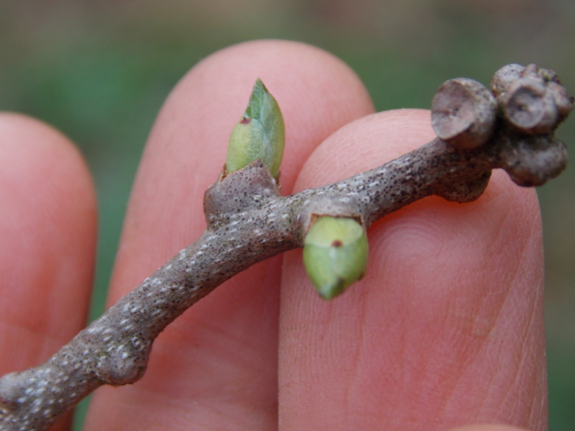
Speaking of slowing things down, the hardy kiwis
are also starting to open their first buds. Of all of our woody
perennials, hardy kiwis are the most prone to being nipped by late
spring freezes, but there's not much I can do about the situation other
than to wait and hope.
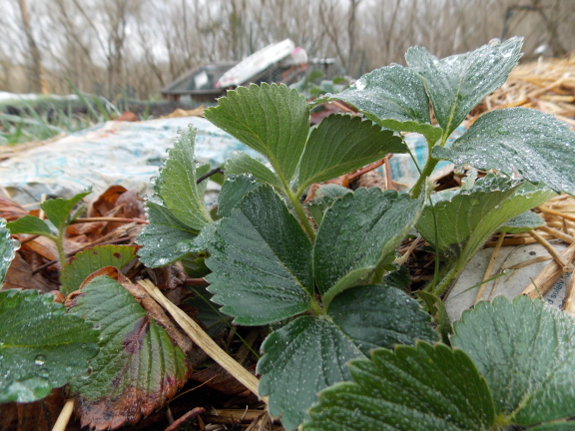
One task I did add to my
agenda for the week to come is to get the strawberry beds weeded and
ready to go as they start thinking about blooming. The first new
leaves are opening over the plants and I can already see the flower buds
pushing out of each plant's core, so I want to hurry up and weed before
my efforts would risk breaking off precious blooms. Unlike with
fruit trees, where you thin many flowers off, every single strawberry
bloom could turn into a fruit, and I want them all! We're still
enjoying strawberry leather and jam from last year, but are quite ready to taste fresh, homegrown fruit again in less than two months.
Our new chicks are still a
little timid and only roam a few feet from home.
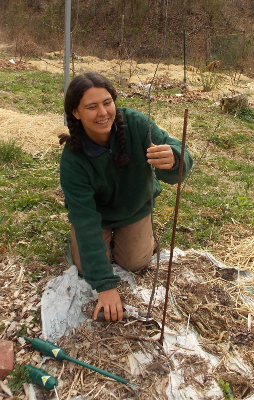
It seems a bit
counter-intuitive to go out in the spring and cut down a baby apple
tree, but that's exactly why I planted the tree below. I set out
the Budagovski 9 (aka Bud 9) rootstock last spring with the intention of
using it to create more rootstocks for grafting in spring 2015.
To that end, I let the tree grow for a year, and now I'm cutting it back
to prompt the tree to send out shoots.
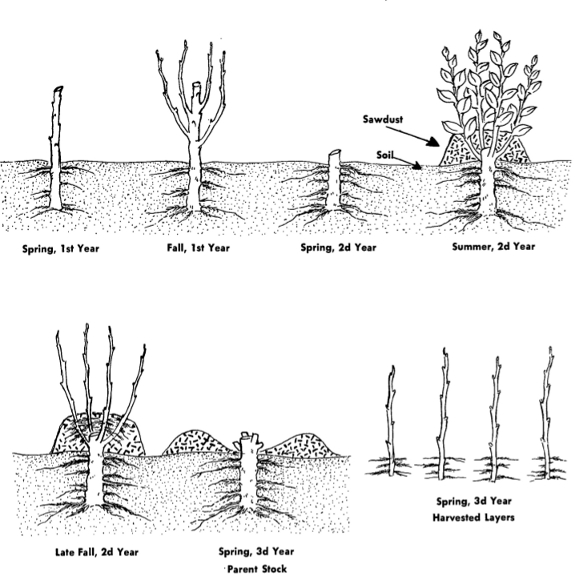
 The
image above, from the 1957 Oregon Extension Service document
"Propagating Clonal Rootstocks," sums up the process of stooling very
succinctly. I'll keep my eye on my little tree this spring, and
once the shoots are four to six inches tall, I'll mound up sawdust (or
perhaps dirt) around the lower half. Just like hilling potatoes,
I'll come back through a couple of times during May and June, adding
more sawdust until my mounds are 12 to 15 inches tall.
After that, it's a
waiting game. The tree will send out roots into the sawdust around
the base of each shoot, and by this time next year I'll be able to rake
back the sawdust, clip off the rooted shoots, and use them as
rootstocks for another dwarf tree planting.
I only expect a few shoots this first year, but the stool (plant I'm
cutting from) should increase production over time, and can keep
churning out shoots for over a decade. Not a bad return on my few
dollar investment.
Although I don't know for
sure that my stooling experiment will work out, I'm confident enough
that I'm adding three more rootstock varieties to the row this year ---
MM111 and M7 for apples, plus OHxF for pears. I know that seems a
little overboard since I just grafted a dozen new trees last month,
but I love propagating, and I've never had any of my new perennials go
to waste. If we don't use them, they make great gifts!
I used to think it was a good
idea to have an epoxy kit handy for emergencies.
We've had this unopened
container of Loctite's
Plastic Bonder in a drawer for a couple of years now, and when I
went to try to fix Anna's favorite stainless steel pot handle today I
realized it was all dried up.
Not sure what went wrong,
maybe if I stored it in a Mason Jar or Ziplock bag it would still be
fresh and ready to go?
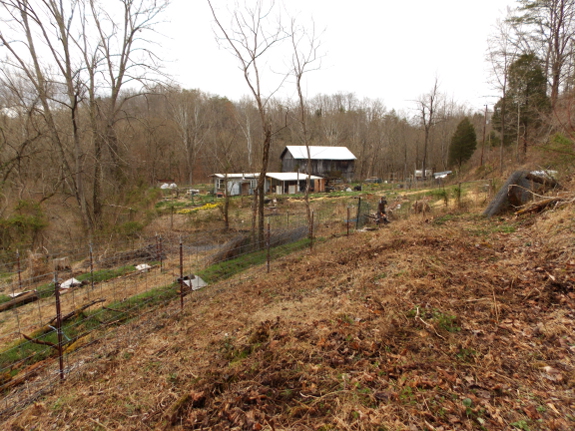
Mark and I have just
about finished clearing out the closer half of the starplate
pasture. Last year, Mark cut down all the big trees, but there
were still stumps and logs to be cut into firewood, briars and honeysuckle to be ripped out, and plenty of punky wood to be thrown into the swales.
We've learned the hard
way that making the ground relatively even is a good idea in new
pastures so that mowing is simplified and non-chicken-friendly weeds
don't get out of control. Right now, all of the trip hazards are
obvious, but in a month or two, our exuberant greenery will take over
the ground, covering up stumps and vines. As my grand-nephew would
say, "That's a recipe for a lost flywheel shaft key."
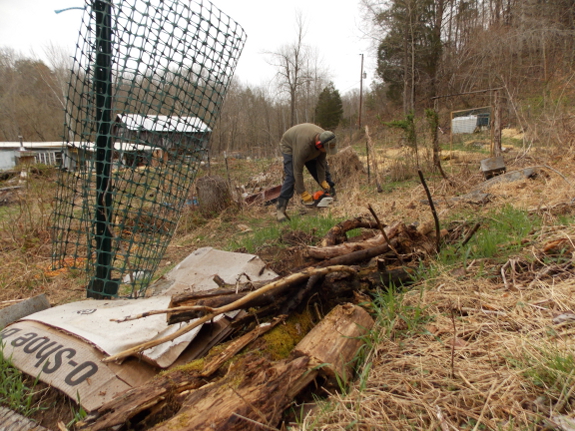
Another thing we're doing differently in this new forest pasture is to plant the fruit trees in rows, making easier-to-care-for tree alleys.
By fencing all of the fruit trees into their own rows, any eventual
larger livestock can be kept out, and chickens can be allowed into the
alleys in small doses only so as not to over-fertilize the trees.
I'm getting a little
stuck on planning out the fencing for these tree alleys, though.
My goal is to minimize the number of gates involved, since each one
takes Mark an afternoon or so to build, making them the most
time-consuming part of the fencing process. I also want to ensure
easy human access to all parts of the pasture, limited chicken access to
the tree alleys and the other paddocks, and hypothetical large animal
access to the non-tree paddocks.
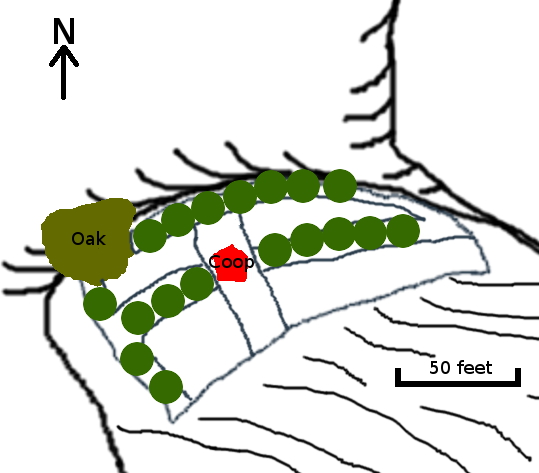
Here's one possibility,
which uses a central paddock the animals always have access to in order
to ease fencing and gates. I think that I can just unlatch a
corner of a livestock panel and prop it open to let chickens into each
paddock, which would mean we'd just need two gates to make it easy on
humans entering the pasture and then entering the permanent paddock in
the middle. The downside is that any permanent pasture will get
scratched bare in no time, so I'll either have to deal with mud around
the coop or will have to plan for some kind of mulch in this permanent
yard. One final upside is that the permanent yard can open out
onto the woods for winter chicken pasturing without scratching up
pasture areas I care about.
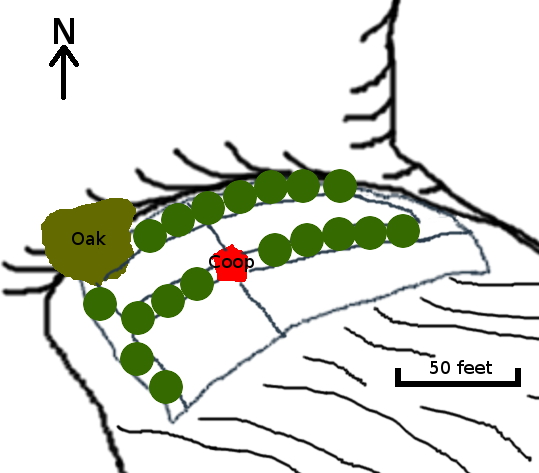
Another option is to do what we usually do and use popholes
to let chickens into the paddocks we want them in. The upside of
this method is --- no muddy mess around the coop! The downside is
--- if we want to add larger animals, we'll have to come back in and
make real doors for access, which might be tough. Another
potential issue is that there's no easy way to shunt chickens into the
woods for winter pasturing, but we work around that issue now using
temporary fencing and can do that again.
Using either of these
methods, I'll also need to decide how wide the tree alleys should
be. We'll be planting semi-dwarf apples and pears here, which are
usually spaced about 15 feet apart, but if I make the tree alleys 15
feet wide, there won't be much room in between. Once again, I'm
forced to decide between two imperfect scenarios: wide tree alleys that
"waste" a lot of pasture space but ensure large animals will never
nibble on the tree limbs, or narrow tree alleys that maximize pasture
area but possibly let hypothetical livestock eat lower limbs.
Which would you choose?
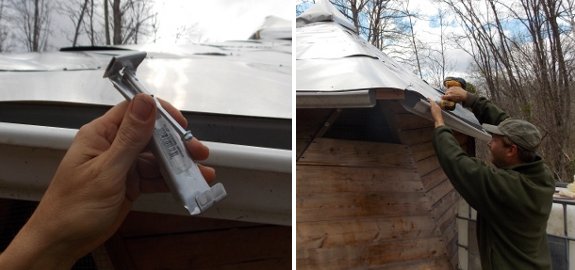
Hanging gutters is pretty easy once you figure out the front end goes first.
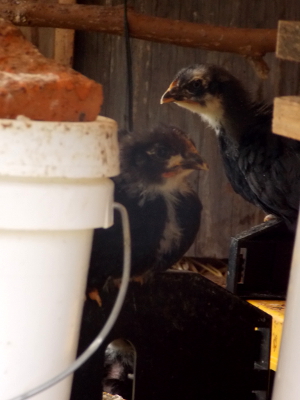 At one month old, our chicks still fit into their brooder,
but quarters are starting to get cramped. So we're beginning to
get more serious about putting the finishing touches on the starplate coop to ready it for move-in day.
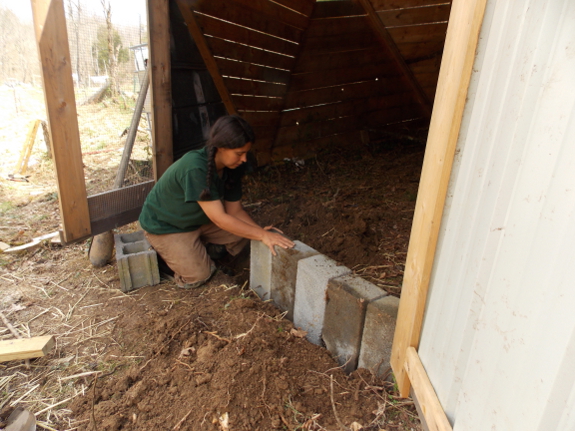
While Mark worked on gutters and popholes Tuesday, I took over the door step in front of the coop. The deep bedding
system is a great way to manage manure, but it does make doors
difficult to close since bedding tends to push through the
opening. For this coop, we opted to raise the doors up above the
eventual height of the bedding, then to add a door step to hold the
bedding in place (and to keep chicks from running under the door while
the bedding is low). Sinking cinderblocks partway into the soil
behind the door seemed to do the trick, but only time will tell how
they'll hold up to daily traffic.
I figure we'll be 100%
finished with the coop the first time a chick starts scratching where it
shouldn't. Nothing like a living deadline to finish up a
complicated project.
Today was the first day of our 2 new Hazelnut varieties. Jefferson and Eta.
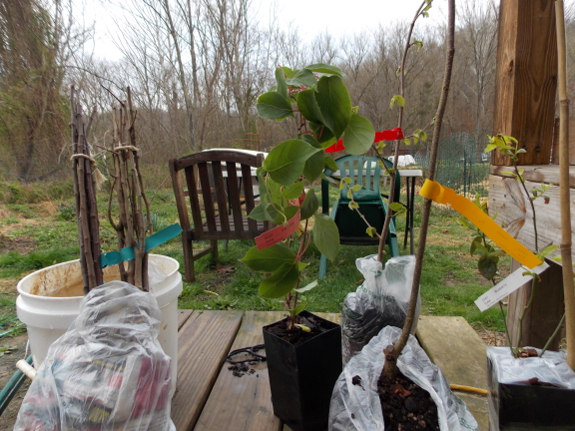
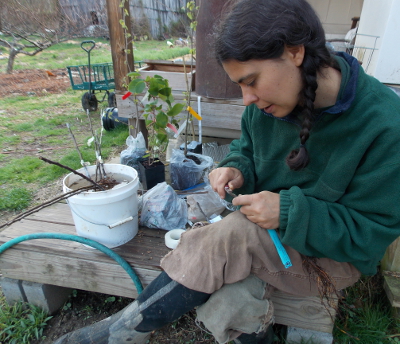 When I placed my perennial order last fall, I hadn't planned on attending a grafting workshop.
So, in addition to a couple of second-generation hybrid hazels, another
hardy kiwi, and a blueberry gift for Kayla, I ordered five pear
rootstocks and eight apple rootstocks for the two of us to split.
You'd think those rootstocks would be going begging with ten newly
grafted plants in a nursery bed, but I still had five pieces of
carefully collected scionwood waiting to be put to the knife. I
remind myself that these apples will be going onto M7 instead of MM111
rootstock, so they can be planted a few feet closer together --- surely
I'll be able to find them a home at this time next year when they're
ready to leave the nursery bed?
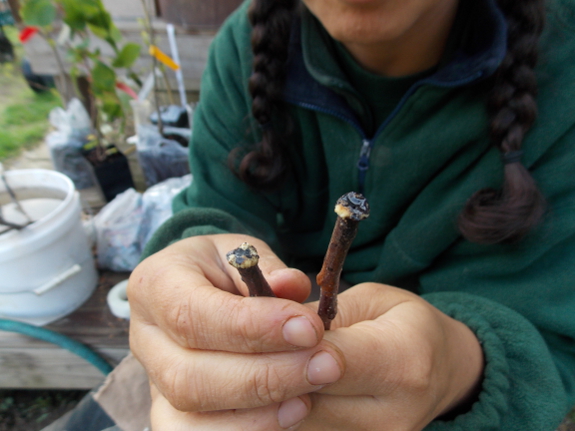
 One
of the apple varieties I wanted to try this year is the chestnut crab,
which I think might make the sweet, tiny apples I used to pick from a
street tree when I was a kid. A reader sent me some extra
scionwood, and when I pulled the twigs out of their protective wrapping,
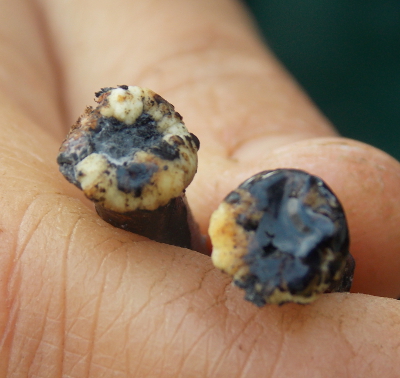
I discovered that the bases had callused.
This enlarged white area is what often happens when a cutting is
starting to root, so I figured I'd take the extra pieces and stick them
in a pot of soil in my propagation area to see what will happen.
My understanding is that most crabapples don't get much bigger than an
apple grafted onto semi-dwarf rootstock, and since crabapples can also
be used as rootstocks for other apples, if these two cuttings root, I'm
sure they'll have a use on the homestead. (Yes, I am incapable of
turning away from anything perennial that shows potential for rooting.)
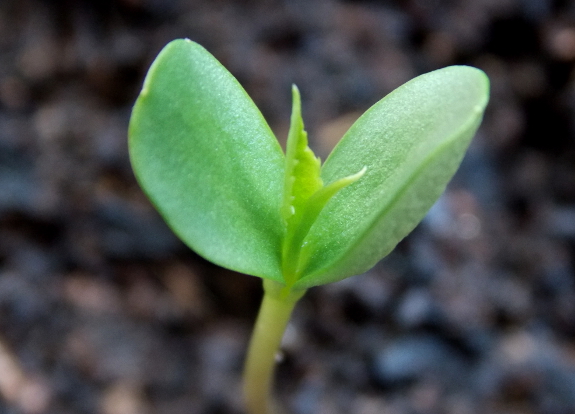
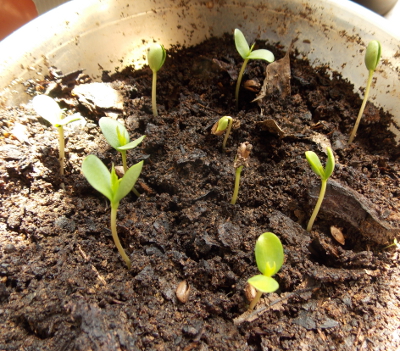 On a final appley note, I pulled my Arkansas Black seeds
out of the fridge a week or so ago and noticed there was ice on the
damp rag I'd put in their container. So I let the whole thing sit
out for a few days and soon noticed little roots pushing their way out
of the dark seed coats! I carefully transplanted each sprouted
seed into a depression in a pot of stump dirt and now the baby apples
are opening up their leaves. Yet another fun fruiting experiment
in the making!
The sound our mower makes when it starts on the first pull is my favorite Spring sound next to toad songs and grouse thumping.
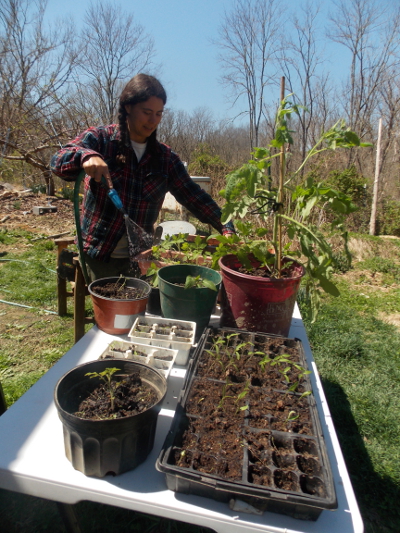 We nearly always see frosts right up to our frost-free date
of May 15, but starting in mid-April, we also enjoy multiple-day
periods without freezing temperatures. It's worth taking the
seedlings outside for some of those warm days, especially as they get
bigger and more able to handle breezes and blazing sun.
Sunbathing-seedling afternoons also give me a chance to overwater pots
so water runs out the bottom without making a mess inside. This
type of watering helps prevent salt buildup in the growing zone of the
pots, and while it's probably not necessary with short-term potted
plants, flushing out the pots makes me happy.
If we lived in a normal,
climate-controlled dwelling, I'd have to be more careful of my first
stages of hardening off. But since our trailer often drops down
into the mid-forties at night at this time of year, similar
temperatures outside are no big deal for our seedlings. I do
continue to take them inside at night, though, if the forecast low is
below 45 --- our microclimate seldom matches the forecast, and it would
be a shame to lose all of these little tomatoes and peppers to a freak
frost.
Our Intermediate
Bulk Containers have a 2.5 inch fitting that we needed reduced down
to a typical 3/4 inch hose hookup. The difficulty is guessing what kind
of threading it is.
These rubber connectors snug
up to any threading and are easy to install.

The garden bounty is
starting to come in, which is lucky since our freezer and larder are
nearly bare. We're eating leaf lettuce every day, kale nearly
daily, shiitake mushrooms from the old logs under the fruit trees
whenever they feel like popping up, lots of chives and Egyptian onions,
and masses of eggs. Working with what's in season, I made this recipe with shiitakes and dandelion greens in place of the sweet potatoes, and it was delectable!
The new crop coming in
this week is rhubarb. I have two neglected plants...neglected
because I rarely think of eating rhubarb. The trouble is that the
sour stalks require so much sweetening, they don't push my good-for-you
buttons. Does anyone have a recipe for rhubarb that doesn't rely
on copious sweeteners? If all else fails, I'll do what I usually
do --- give the stalks to my mother or brother to bake into a pie.
Mark and I only tasted our first homegrown apples
last year, and those trees were already two or three years old when we
put them in the ground four years ago. By that math, the little
trees I grafted this spring won't fruit until 2020 or 2021. It's hard to imagine waiting five to
eight years to taste the fruits from the trees we just grafted.
On the other hand, you
can also look at those non-fruiting years as an opportunity to really
get the orchard in stellar order so the eventual fruits are so
chock-full of micronutrients they knock your socks off. To that end, I'll be growing cover crops in the tree alleys
where this year's babies will be set out next year, and then I'll
probably grow vegetables or raspberries in between the baby trees in
later years until the trees begin to fill in their space. The bed I
pulled blackberries out of last fall is proof that simply topdressing
soil with manure and mulch every year will result in supremely dark and
loose earth in no time, and I'm sure my apple trees would love some soil like that to grow into.
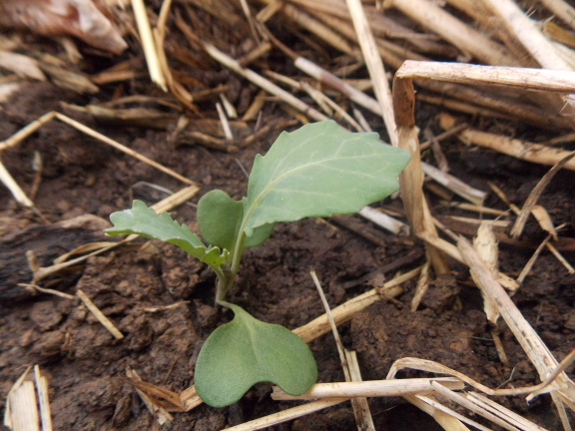
That
mental perambulation reminded me that I have some spare room in between
the new grape vines I installed this past fall. I mulched the
grape rows well to begin the battle against weeds, but the transplants
won't have spread their roots far yet. Why not sneak in an extra
two dozen cabbage transplants into that ground? In an effort to
hedge my bets against weird weather, I started about 200 more cabbage
seedlings under the quick hoops than I actually need, and they all came
up, thrived, and need homes. I know I have a plant-propagation
problem...but I can quit any time....
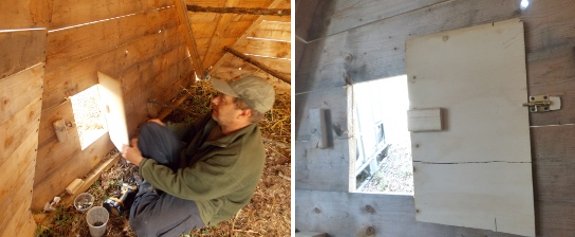
We made this first Star Plate
chicken door out of 1/4 inch plywood.
Past experience tells me it's
better to have the lock on the inside.
All winter, our farm
grows toward the sun. I plant most of our fall and early spring
crops in the mule garden, the furthest away from the shade of the
hill. We bask in the warmth that comes in the south-facing bank of
windows in front of the trailer, and our tractored chickens do the same
with their open-fronted living quarters.
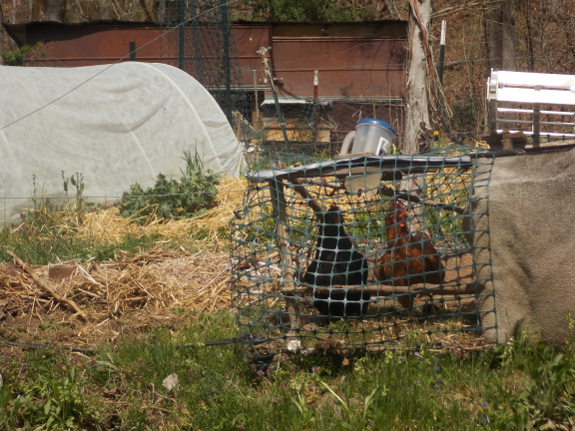
But as April brings a
spell of days in the low 80s, everything turns around. First comes
the chicken tractor, which I literally turn 180 degrees so the solid
back creates a shaded zone for hot afternoons. I start to close
the shades on the trailer's west windows to block out afternoon
heat. And soon we'll even switch our work schedule so we do
outside tasks in the morning instead of the afternoon.
This heat spell won't
last long, and by tomorrow I'll be scurrying around to cover up
seedlings, glad the strawberries haven't yet opened their blooms.
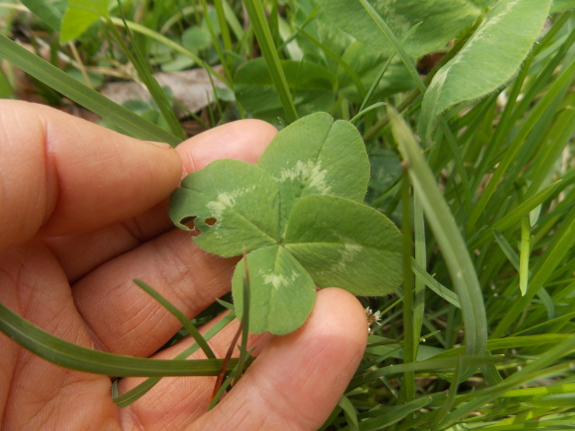
The hint of summer was fun, though, since it gave me the chance to
lounge in the yard and find the year's first four-leaf clovers (two in
one patch).
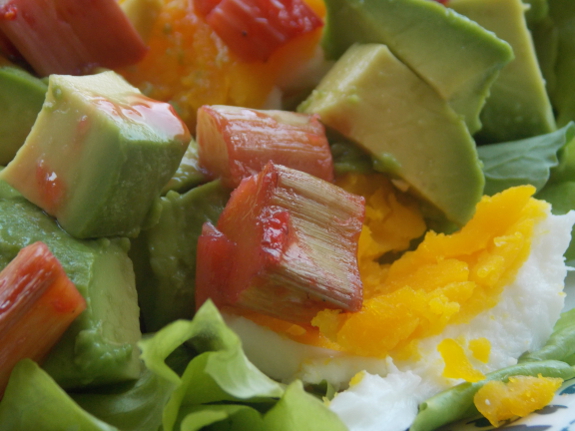
As a completely unrelated side note, I really appreciated everyone's rhubarb suggestions! I merged several pieces of advice together by tossing about a cup of chopped stalks with about two tablespoons of strawberry freezer jam
and roasting them at 450 degrees for about ten minutes until they were
just becoming soft. Adding the strawberry-roasted rhubarb to a
spring salad of lettuce, baby kale, and arugula, topped with hard-boiled
eggs, a store-bought avocado, and a bit more strawberry jam drizzled on
top was delicious!
Today was the day I tested
out the repair
job on the ATV
garbage hauler.
I think it's going to hold
together for many future trips.
It also comes in handy for
hauling bags of leaves back to the garden.
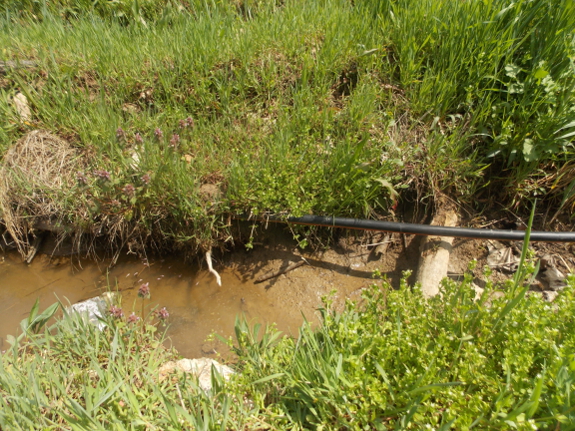
 As one of our readers commented, my terraforming project created tiny chinampas. All winter, the rye
I sowed on the raised parts of the beds thrived despite the soggy
aisles, and come spring, wildlife moved into the little ponds between
the beds. I found two baby snapping turtles hanging out in the
shallow water this weekend, and plenty of tadpoles are escaping their
eggs to join in the fun.
As long-time readers will
realize, we struggle to deal with the wet ground in certain parts of
our garden, so seeing how well these little chinampas do has been an
eye-opening experience. I decided to go ahead and dig the back
garden into similar raised beds to ensure that this year's tomatoes
don't suffer from wet feet.
You'll know if your soil
is wet enough to need small-scale chinampas because rushes and sedges
will be growing in the mown aisles along with grass. To confirm
that the groundwater is too high for the soil to be planted into as-is,
dig around a clump of earth, then grab the grass on top as if lifting
the clump up by its hair. If the soil is well-drained, the whole
clump will stay together since roots go straight down into the
subsoil. If the soil is waterlogged, the top will peel off since
the plant roots stayed in the inch or two of soil above the water.
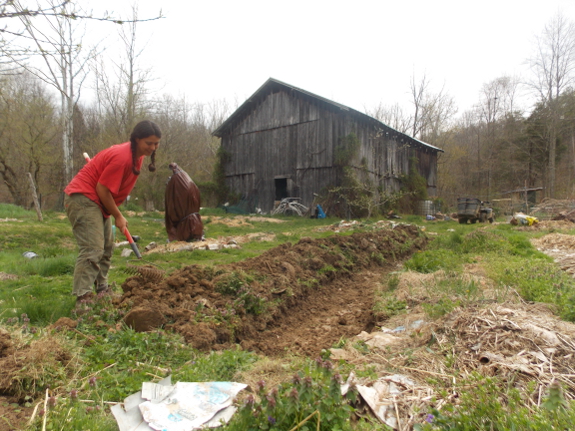
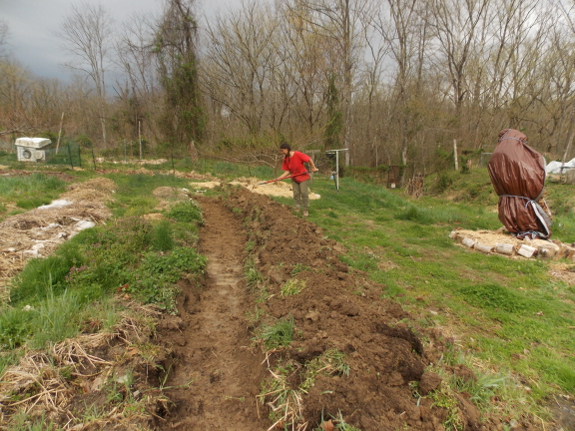
I dug one long chinampa
Monday, which is about all my wrists can take before they start to
complain. I mostly tried to place the sod grass-side down so it
will rot quickly, but I wasn't all that particular about it, knowing
that I can always lay down some cardboard over top before transplanting
in my tomato sets.
Of course, the down-side
of turning the garden into chinampas is that I may be walking through an
inch or two of water in the aisles if the summer is wet. But
better my feet get wet than my tomatoes complain! Plus, if the
aisles turn into ponds, they won't have to be mowed, right?
We've been having a problem
with our young fig tree "accidentally" exposing herself.
I've tried to explain to her
how "good" fig trees stay buttoned up, but the only response I get is
the classic rolling of the eyes with some lame excuse about how other
fig trees are dressed these days.
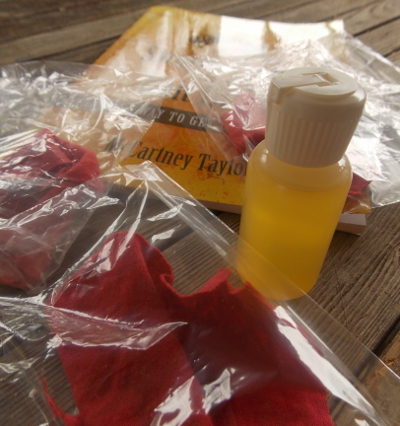 Last year, I started researching swarm traps just as the garden was heating up, so we didn't really manage to get anything going in time to catch a swarm (although a swarm did end up in the barn anyway).
But now that we have all of our ducks in a row, it's simple to bait a
few hives with lemongrass oil and hope we'll catch free bees.
This is a bit early in
the year to be setting up swarm traps, but Mark noticed some honeybees
nosing around the porch over the weekend, and we wondered if they were
looking for a new hive cavity. The colony in our Warre hive
still hasn't started building comb in the empty third box, but bees
don't always read books, so it's possible the bees figured it would be
easier to swarm than to build down the way they're supposed to. I
could know for sure what's going on if I opened up the hive and looked
for developing queen cells, but I'd rather toe the Warre line and leave
the hive closed, then hedge my bets with swarm traps.
I baited three different hives, and need to put in an hour to finish building last year's real swarm trap and install it as well. It will be interesting to see which of the following a swarm of honeybees prefers:
- A Langstroth hive made up of two shallows, one box with fully drawn comb and one box empty.
- A Warre hive made up of two boxes, both with fully drawn comb.
- A top bar hive with no comb and smelling of mouse. (Over the winter, a pesky rodent nested under the lid, and even though I brushed away the nest, the scent remains.)
While this experiment
is far from scientific, I'm always curious which of the main beekeeping
methods the bees themselves would prefer, and this should give me some
indication. Here's hoping we catch a swarm early enough that it
makes it through the winter!
What do you do if your hitch
pin is lost somewhere
along a muddy driveway?
Poke around the barn till you
find an old, rusty socket wrench.
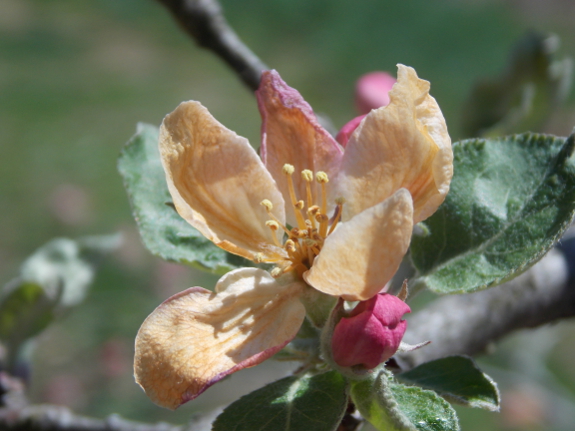
Forecast low: 26. Actual low: 23. Fruit damage: high.
I've tried protecting tree blooms in the past, but haven't had any luck with wrapping trees and
don't want to try to run sprinklers all night. So we just roll
with the weather, some years not getting any tree fruits at all.
I had hoped that this year's slow spring meant our trees would bloom late enough to miss the hard freezes, and the blooms were
slow, but the freeze still came. The question is --- did it kill
everything? It's hard to say how low the temperature actually got
at various levels above the ground and in different parts of the
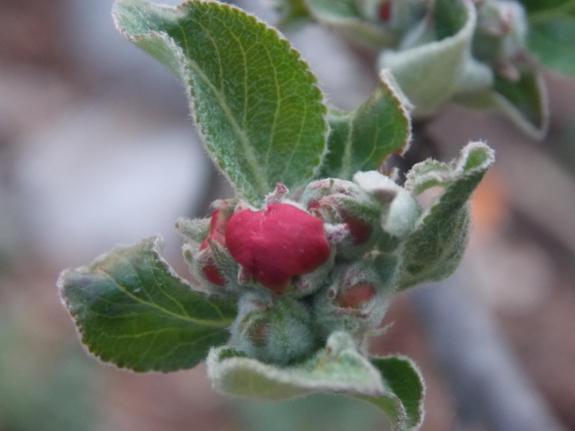
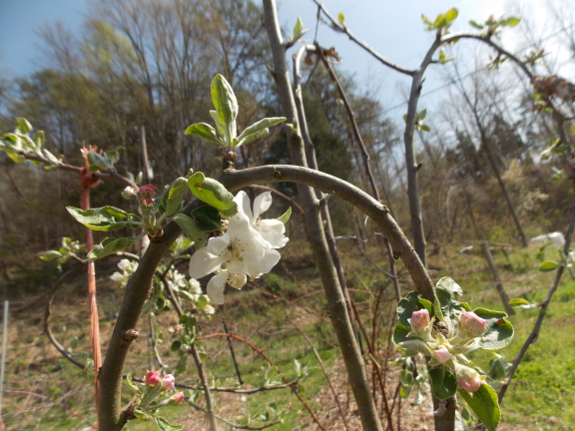
yard. The apple blossom above was clearly nipped, but many of the
dwarf apples closer to the hillside are running slower and are at first
pink or even tight cluster stage --- some of them might have made
it. (Here's a chart of critical temperatures in case you're dealing with a similar late freeze and want to guess which of your trees are in danger.)
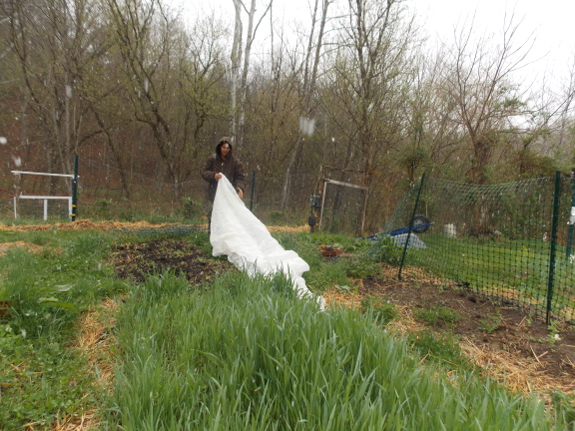
 Low-lying plants are much easier to protect. I pulled out all of my old pieces of row-cover fabric to shelter tender vegetable seedlings like lettuce, broccoli, and cabbages.
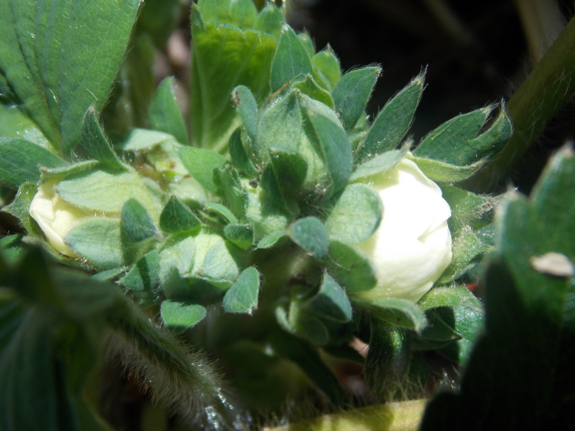
At this time of year, I
often cover up strawberries too, but only a few had even opened as far
as the flowers shown to the right --- "popcorn stage." The popcorn
flowers will have gotten nipped, since they can be damaged when the
temperature drops to 26.5, but tight flower buds are okay down to
22. I figured it was better to miss five or ten of the earliest
strawberries than to lose whole beds of broccoli.
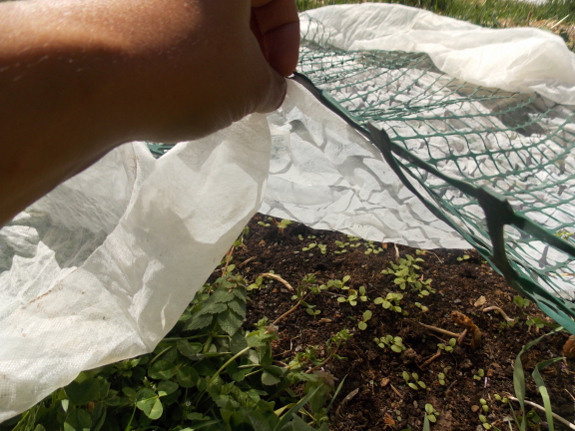
Under their covers, all
of the seedlings came through with flying colors, even though the freeze
was so hard that weeds in the yard like clover and dock were nipped
back. I usually don't cover peas, but I was a little concerned
about them and carefully laid a row cover over half of the beds.
Interestingly, of the uncovered beds, one (in front of the trailer) was
moderately nipped and one (in the mule garden beside quick hoops) looked
just fine. A few pea seedlings elsewhere in the mule garden came
out from under their cover and those were nipped, so it seems like
microclimate effects are hard at work in the garden.
The good news is that,
even if we don't get any tree fruits this year, we should have plenty of
berries to go around. Our blueberry flowers are in what's called a
tight cluster, safe down to 20 to 23 degrees, so most should be
okay. Blackberries and raspberries haven't enough thought about
blooming, and their leaves came through the freeze just fine. Add
in strawberries and figs and we'll definitely enjoy fruits this summer
--- yet another reason to grow berries even though they take a bit more work day to day than fruit trees do.
We installed another chicken
door in the Star Plate coop today along with sealing up the front door
to keep any small chicks from squeezing through the crack.
Tomorrow is their move in
date.
 One
of my favorite parts of homesteading is the daily surprises.
Sunday, the hummingbirds showed up and I learned that the tiny birds
sustain themselves in the early spring on peach blossoms and the
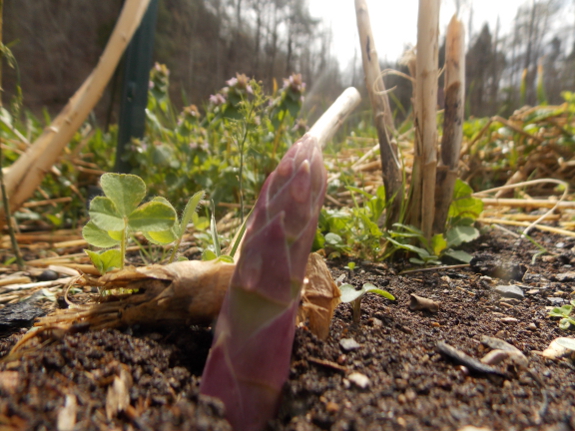
like. Monday, I harvested our first two asparagus spears in
preparation for the hard freeze. And Tuesday I noticed that my baby apple trees were starting to leaf out.
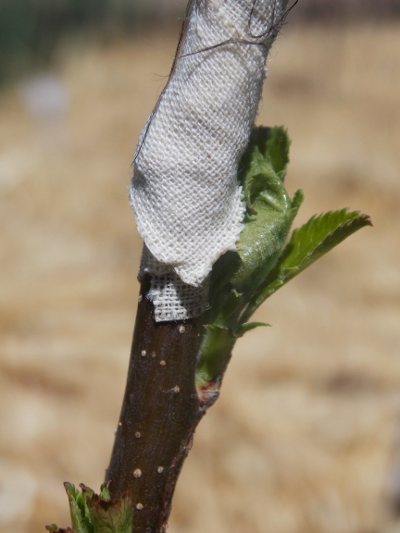
Most of the trees' action
so far is on the rootstock, which is normal but which requires a little
care. With newly grafted trees, you don't want the rootstock to
put its energy into growing leaves and branches. Instead, you'd
like the plant to focus on healing up that junction between rootstock
and scionwood, then to start feeding energy into the scionwood
above. To keep the baby trees in line, I went through and
carefully picked off the sprouts coming off the rootstocks, and will
repeat the task as needed until the scionwood is growing strong.
Like many aspects of
homesteading, care of a baby tree doesn't take much time, but should be
timely. I think the biggest difference between someone with a
green thumb and someone who kills every plant they try to raise is the
willingness to spend a few minutes a day with their eyes wide open, then
a few more minutes tending to whatever needs their care. Just
walking through our core homestead with my senses wide open is another
of my favorite parts about homesteading.
Once we moved the new chicks in to the Star Plate coop Anna decided the back wall would be a good place to mount the swarm trap we built last year.

Readers of my book blog will know that
I considered signing back on with my old publisher to make Naturally
Bug-Free available as a print book, but decided to self-publish this
paperback instead so I could maintain the e-rights.
 While making that decision, I spent a couple of weeks turning the interior into a work of art, with
big color pictures that should really suck you in (even though the
paper isn't glossy). And then I decided to also make a
black-and-white edition for those of you who can't afford the high price
tag of the color version.
The black-and-white copies are on sale
for only $4.99 on Amazon, and the full color version is on sale for
$16.62. Both are eligible for Amazon's usual free shipping
offers. Plus, you
get a free copy of the ebook through Amazon's matchbook program with the
purchase of either paper edition, so you
can see those color pictures even if you buy the cheaper black and white
edition on paper.
To celebrate (and spread the word), I'm running a giveaway --- one lucky reader will win a signed color paperback copy of Naturally Bug-Free, a starter culture of kefir, a Walden Effect t-shirt (only sizes medium, large, or 2XL are now available), and a seed starter pack (containing some of our favorite vegetable varieties).
That's a $72.49 value just for spending a minute plugging my new
paperback. Use the form below to enter, and thanks for your help!
a Rafflecopter giveaway
A crushed Swiss Chard seedling is a small price to pay for the help Huckleberry provides in the garden at this time of year.
My weather guru reports
that (despite the high groundwater from a wet winter), spring 2014 has
been unusually dry. As in previous years, this sets up a feedback loop, which in the current instance will likely lead to a hot, dry summer.
 I have to admit, even though I don't like heat that much, I do
like this forecast. From a gardening perspective, it's much
easier to add water than to take it away, so a hot, dry summer could
mean lots of tomatoes and other crops that sometimes flounder in our wet
climate. Plus, we might finally be able to drive the truck back
to our core homestead, making it much easier to stock up on firewood,
manure, and other essentials.
In the short term, the forecast was simply a reminder to pull out the sprinklers.
I knew the ground was getting dry, but didn't realize quite how parched
the garden had become until Kayla and I were out weeding Friday.
Maybe some artificial rain will tempt those asparagus spears to push the
rest of the way out of the soil?
Running the creek sprinklers all day felt like a good way to celebrate Easter.
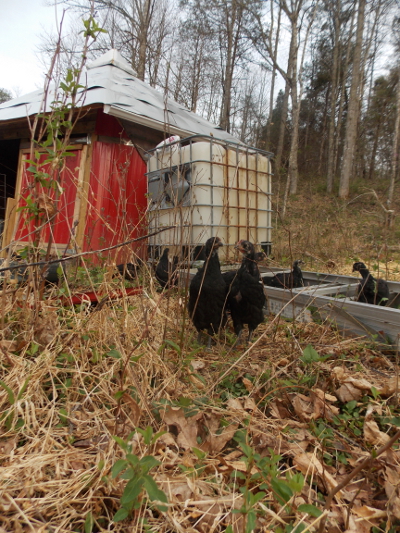 When
moving chickens to a new home, I generally lock them inside their
night-time accommodations for one or two days so they home in on the
spot. After that, I open the door and let them roam.
Our chicks loved the
starplate coop so much, they didn't even feel the need to go outside for
the first eight hours of door-opened freedom. Instead, they
enjoyed the inside perches --- despite their small size, multiple little chickens hung out on the top-most roost.
Eventually, though, the
whole flock came tumbling out the door and wandered a full ten feet away
from the hen house. The ground is still winter-brown in this
shady spot close to the hillside, but our chicks enjoyed pecking at new
leaves coming out on tiny tree saplings.
Soon, we'll have the
chicks fenced into rotational paddocks, but for now they're small enough
not to cause much damage if just allowed to free range. As long
as they're not in the garden, this is probably my favorite chick age ---
all they need is to be shut in at night, given free-choice feed and a poop-free waterer, and they're golden.
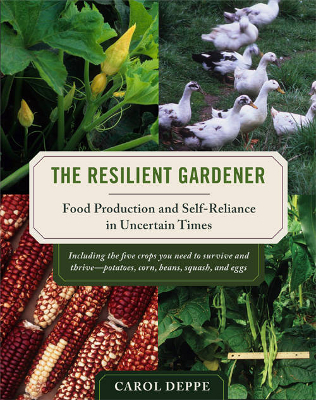 I've had Carol Deppe's The Resilient Gardener
on my shelf for a couple of years, but only read it from cover to cover
this spring. Why the wait? I'm ashamed to say that part of
my foot-dragging was due to an assumption that the book was very dry
since the only photos are in a central insert. Despite lack of
images in the text, though, the book is very engagingly written.
A more important issue is
that Deppe and I have very different gardening and dietary habits, so
much of her information isn't relevant to me. In many ways, she
follows the gardening advice of Steve Solomon,
which is probably a great way to grow in the Pacific Northwest, but
doesn't suit our farm or palates. On the other hand, it might suit
many of you better than it did me --- the information is definitely
well-researched and is based on personal experience, which is what I
always look for in a homesteading book.
With all of those caveats, what finally got me to crack the cover? Now that we're going to try ducks
(arriving this Friday!), I figured I should go straight to the source
and learn from an expert. Stay tuned for helpful hints on ducks
and more in this week's lunchtime series.
| This post is part of our The Resilient Gardener lunchtime series.
Read all of the entries: |
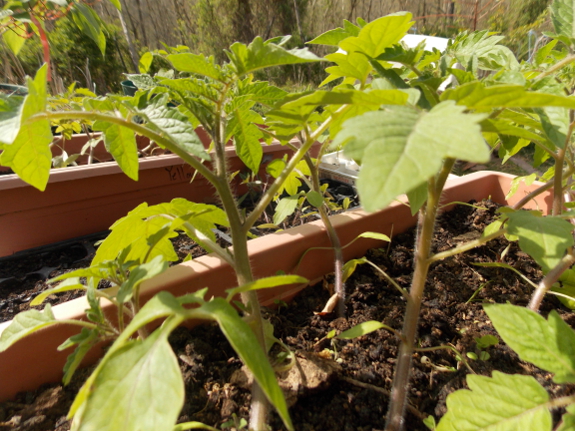
Two parts manure and one part stump dirt
will keep these tomato seedlings bright green until they go into the
ground. I wonder if hefty transplants will turn into extra early
tomatoes?
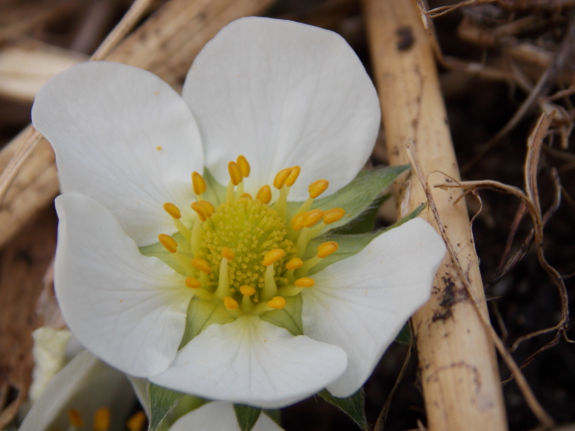
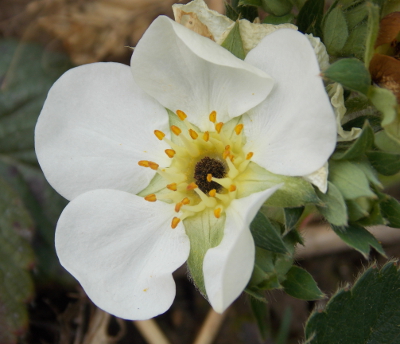 Less than a week after the hard freeze,
I'm able to start assessing what got nipped. The bad news is that
the strawberries were harder hit than the numbers suggested --- lots of
flowers are opening and most have black centers, meaning they aren't
going to turn into fruits. On the other hand, the first undamaged
flowers are also starting to open, which means we only lost about the
first four of five days worth of strawberry fruits.
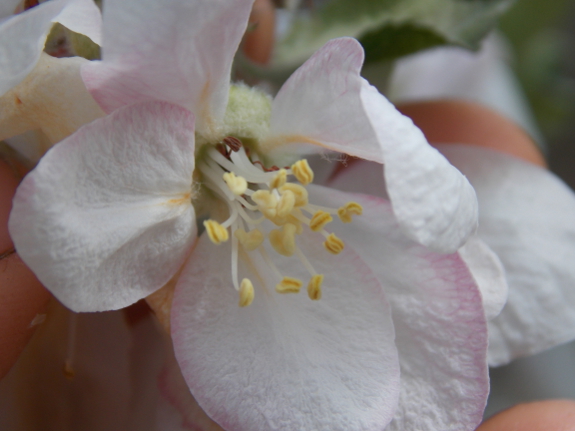
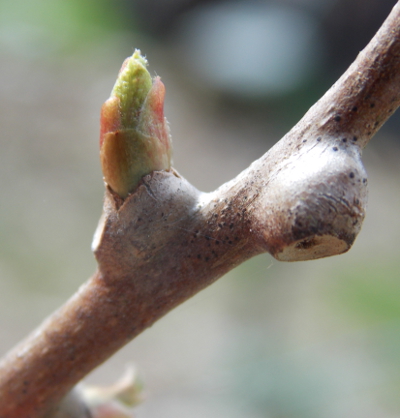 The
apples are also starting to open flowers that were tightly closed last
week. Most are clearly damaged, with brown stamens, but a few look
okay like the one above. The big question will be whether the
female parts of the flowers survived --- it doesn't take all that much
pollen to fertilize every tree, but if the ovaries are damaged, there
won't be any fruit.
I was also heartened to
see that a few of the hardy kiwi buds were slowpokes and missed the
freeze. Maybe we'll still get a chance to taste homegrown kiwis
this year?
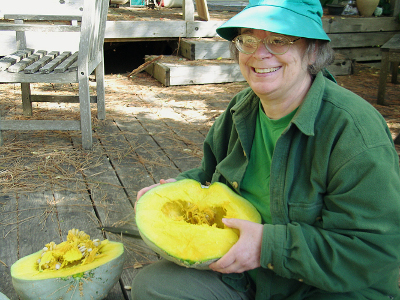 As the subtitle of her book attests, the primary theme of Carol Deppe's book
is finding ways to grow food that will work even when times are
tough. If you can't afford store-bought groceries, break your leg
and can't spend every minute in the garden, and have to deal with crazy
weather, would you still be bringing in a harvest? Carol Deppe
would.
What's her secret?
Mark would sum it up in one word --- backups. Deppe goes into more
depth, recommending diverse plantings of multiple varieties and types
of crops, no single main crop, succession planting,
using short-season varieties to work around erratic weather, and
including animals in your homestead. Due to climate change, she
recommends not counting on crops that are on the edge of their hardiness
range in your area, and instead says you should focus on crops that are
being grown commercially by your neighbors since these tend to be
dependable.
| This post is part of our The Resilient Gardener lunchtime series.
Read all of the entries: |
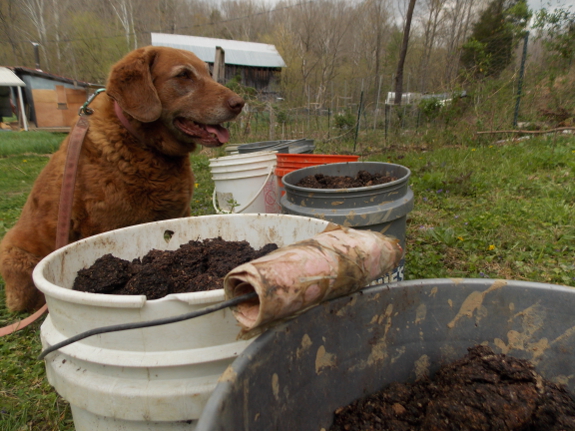
The handles seem to be the weakest link in our bucket brigade. Anna made this replacement grip out of a feed sack and tape last year, and it has held up well.
Some buckets have lost their entire handle, though. Maybe rope replacements will do the trick?
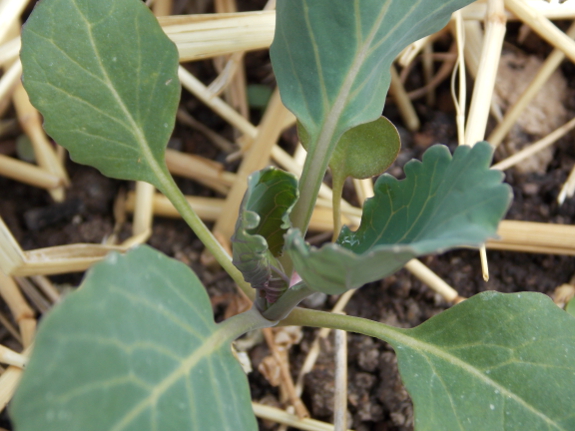
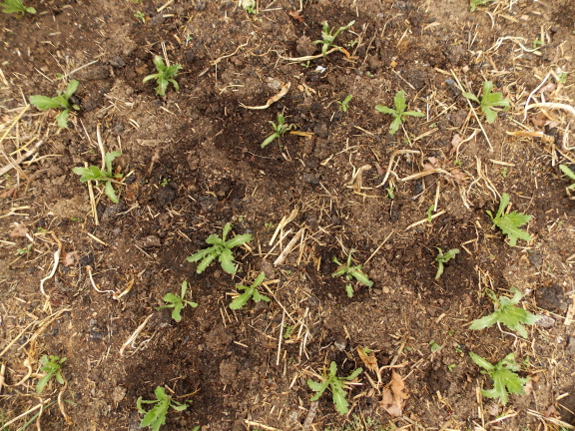
There are a lot more gaps than usual to fill in the garden this spring. The cold, wet winter killed two-thirds of our potato onions
and softneck garlic (although our hardneck garlic, Music, is plugging
right along unhindered). A dry spell when I didn't think to water
made for holey germination in the carrot and Swiss chard beds, and Huckleberry's hard work scratched up some peas and poppies. Time to fill in the gaps!
For some crops, it's not
too late to just replant. I scattered another round of carrot
seeds on the appropriate bed and popped Swiss chard seeds into hoed rows
(after teasing apart the one seed cluster that had fully germinated,
leading to three seedlings in one spot). There were enough poppy
seedlings clustered too close together that I could just transplant them
to fill in the gaps, and then I slipped broccoli starts into the holes
between garlic plants.
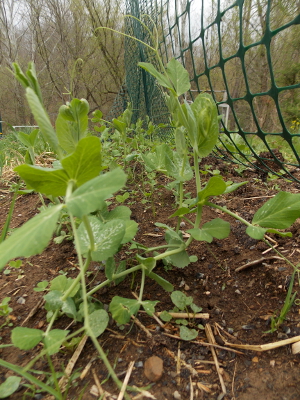 After
that, I started getting whimsical. How about a few carrots in the
gaps in the pea beds? Maybe some Red Russian kale in the spaces
between potato onions?
The trick with filling in
gaps is to add crops that will mature at about the same time as the
vegetables that originally owned the bed. You also don't want to
plant something that's going to get too big, shading out the vegetables
you really care about, and you definitely don't want to add anything
that will need trellising. So no cabbages, even though I have
plenty more starts on hand, and nothing that will need more than two
months to mature. (The carrots are small hybrids, listed at 54
days to harvest.)
I seeded and transplanted
Monday and Tuesday, knowing a rainy spell was due to blow in Tuesday
afternoon. Hopefully water from the sky will sprout my seeds and
settle my transplants, filling the garden with life.
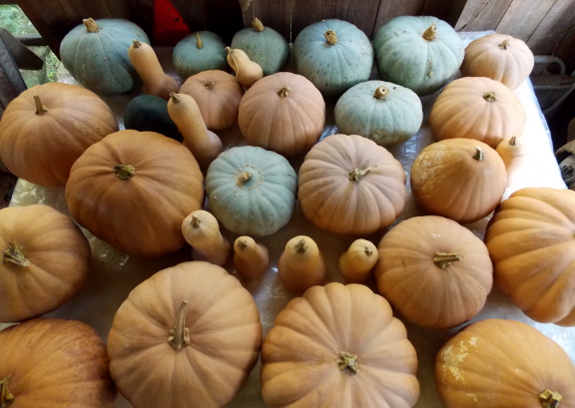 Carol Deppe puts her advice on garden resiliency
to work by growing different staples to feed herself at different times
of the year. Corn and dried beans fill her belly in the spring;
she eats fruit all summer; potatoes, winter squash, and fruit feed her
in the fall; and potatoes and winter
squash are on the menu in the winter. To these garden staples,
Deppe adds duck eggs (and a bit of meat) from
her flock, along with some purchased pastured meat and canned tuna.
Deppe's staples are one one of the reasons I didn't get as much out of
her book as I'd hoped to. Although I like the lack of wheat in
Deppe's diet (due to her struggles with celiac's disease), Mark and I
strive for a higher protein diet,
so Deppe's focus on potatoes and other high-carb staples didn't sit
well with me. I also don't really believe in the notion that you
can stay healthy primarily based on supplements, so her use of cod liver
oil to replace most meat in her diet doesn't seem like a nutritious
long-term solution.
On the other hand, I was
intrigued by how well Deppe seems to listen to her body. She notes
that she feels most full after eating foods high in water and fiber,
and she used her own varying hunger levels to discover that she needed
to eat animal-based omega 3s. After noticing that plant-based
sources of omega 3s didn't fulfill her cravings, she did some research
and discovered that only some people are able to turn 18-carbon plant
omega 3s into 20- and
22-carbon animal omega 3s. Perhaps that's why some people crave
meat much more than others do?
| This post is part of our The Resilient Gardener lunchtime series.
Read all of the entries: |
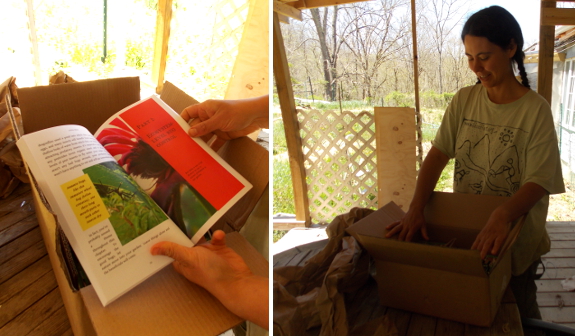
The thrill of picking up a box of Anna's newest paperback at the mailbox can only compare to when the first box of Weekend Homesteaders arrived. A few of these books will be gifts, but most are earmarked for giveaways here on the blog.
Nearly as good was the smile
on Anna's face when she saw that some of our readers had purchased paper
volumes of Naturally Bug-Free. If you're on the fence about
getting your own copy of this beautiful and informative text, Amazon has
marked down both the color and black-and-white versions another 5%. Act now while they're on sale.
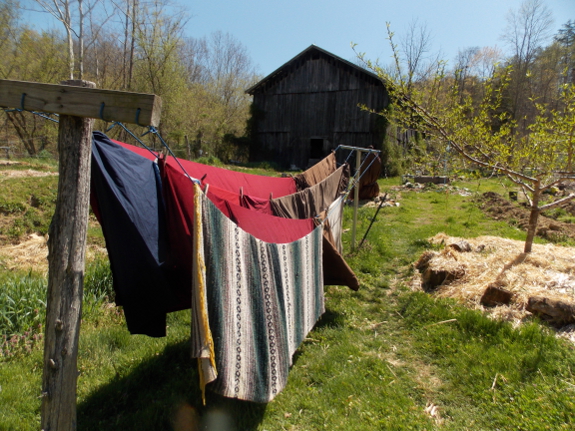
Late April is the perfect
time to slip in some extra laundry days. And Wednesday was a
perfect late April drying day, with lots of sun and some gentle breezes
to blow the sheets dry.
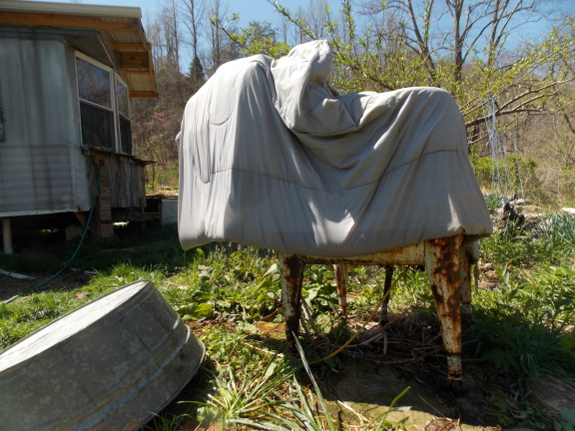
I always come up upon a
problem in my washing campaign at this time of year, though. I
like to wash some heavy things like comforters and winter coats right
around now, but these items are too big to fit through the
wringer. And, un-wrung, the wet items are too heavy for me to
carry to the line and too heavy for the line to hold up. But I
figured out last year that if I just wash one bulky item per day, I can
drape it over the wringer washer, flip it over once and squeeze out some
of the water collecting in the bottom edges, and have a clean, dry
comforter in less than 24 hours. That's right --- a wringer washer
does double duty as a drying rack!
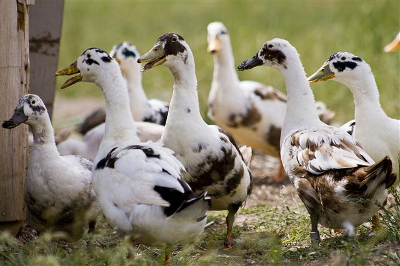 My favorite part of The Resilient Gardener,
by far, was Deppe's chapter on ducks. She keeps her ducks the way
we keep our chickens --- on pasture as part of a diverse
homestead. By the time you read her duck chapter, you'll want some
waterfowl too.
Why the focus on
ducks? Deppe considers ducks to be the perfect livestock for the
Pacific Northwest, and sings their praises in great depth. She
believes ducks forage better than chickens, lay better at an older age
and in the winter, are easier to keep out of the garden with two-foot
fences, and are happy even during cold, wet winters. On the other
hand, Deppe warns that ducks aren't for everyone. Ducks are more
vulnerable to predators than chickens are, the ducklings cost more and
usually can't be sexed at hatching, they need water to dabble in, they
don't do well in confinement and can't live in tractors, they can't
stand frozen winters, and they require more coop space since they roost
on the ground. But if you have a larger homestead with plenty of
room for the ducks to forage, Deppe believes ducks are the way to go.
I won't go into depth
about Deppe's duck advice since you'll really want to read the whole
chapter if you're interested in following her lead. However, I did
want to end with a few of her tips on making duck-care more
sustainable. During the proper seasons, Deppe feeds her ducks
cooked potatoes and winter squash, the former of which cuts feed costs
by 67% if ducks are also given lots of space to forage.
(Winter squash is lower in protein, so Deppe finds that addition doesn't
cut feed costs nearly as much.) Deppe's ducks get the cull squash
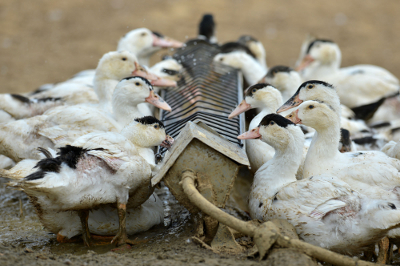 that are small or were harvested not quite ripe, and the ducks seem to enjoy Delicata and Sweet Meat especially.
Another hint Deppe gave
for making your ducks homestead-worthy pertains to ducklings. She
notes that if you let ducklings swim in warm water during their first
few days of life (carefully drying them in their brooder afterwards),
the activity turns on the ducklings' wax glands so they quickly become
waterproofed and able to forage in damp conditions. On the other
hand, if you skip that early swim, the wax glands won't activate until
the ducks are eight weeks old, and you'll have to baby your ducklings
that whole time so they don't get wet and chilled.
I love how passionate
Deppe is on the subject of ducks, but Mark and I are equally passionate
about chickens. So even though we're trying ducks this spring on
her advice, we'll be keeping careful records of which type of bird does
best on our homestead. Stay tuned for lots of number crunching
(and cute photos) all season!
| This post is part of our The Resilient Gardener lunchtime series.
Read all of the entries: |
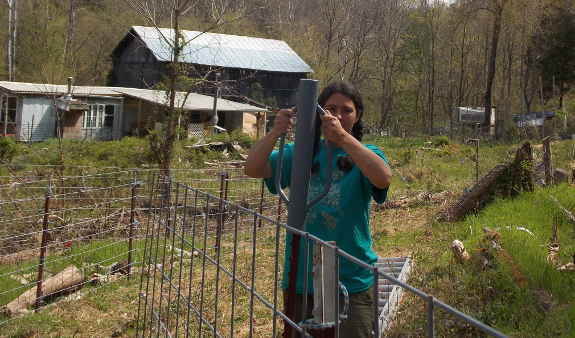
When we bought our t-post driver last year, I considered welding a weight on the top to give each stroke more oomph.
But it turns out Anna has become the primary pounder now that we don't use a sledge hammer.
The Tractor Supply Deluxe Post Driver is just the right weight for Anna as-is. So we'll keep the driver weight-free.
We got Mom two dwarf
apple trees a year ago --- an Early Transparent and a Cox's Orange
Pippin. They've already paid for themselves, in my opinion,
because Mom's close observation opened my eyes to a characteristic I
should have been thinking about when choosing fruit tree varieties ---
bloom time. During that hard freeze
a couple of weeks ago, Mom noted that her Early Transparent hadn't
started blooming yet, so its flowers weren't impacted. With my
mother's observation fresh on my mind, I noticed that my own Early
Transparents were also late bloomers that might have missed the worst of
the freeze.
Suddenly, I understand why Early Transparent is probably the most common apple variety planted in our area. The tree stands up to cedar apple rust
and is also less likely to be nipped by our (quite common) late spring
freezes. In case you're in the market for a late-blooming apple,
other choices include Arkansas Black, Bedan, Belmac, CrimsonCrisp, Gala,
Golden Delicious, GoldRush, Haraldred, Honeycrisp, Indian Summer Crab,
King, Melrose, Michelin, Nittany, Northern Spy, Northwest Greening,
Queen Cox, Ramey York, Red Boskoop, Red Rome, Red Yorking, Rome Beauty,
Sweet Sixteen, Winter Banana, Winesap, Wise, and Wolf River.
By the way, isn't it cool how my loops turned an eight-year-old non-blooming dwarf apple into a tree loaded with flowers in one season? Now I just have to wait and see if any of them survived the freeze and turn into fruits.
 There's much more information in The Resilient Gardener
than I touched on in this week's lunchtime series, and I especially
recommend checking out her book if you want to read more about growing
winter squash, dried beans, and corn as staple crops. In the
meantime, I'll end with a few fascinating tidbits that didn't fit into
any other post.
Last spring, I had
problems with some kind of tiny critters eating the tops off my
seedlings, so I perked right up when Deppe mentioned her cure to this
pesky problem. When she pulls weeds, she leaves some of them lying
along the edges of the beds in clumps to feed slugs and sowbugs, which
she finds makes the critters leave her seedlings alone. The trick
is worth a try, even though weeds left in the garden often re-root in
our wet weather.
Speaking of weather,
Deppe recommends some good tricks for dealing with drought. If
you're unable to water, try removing every other plant in your vegetable
rows so the ones left behind can spread their roots further in search
of water. And if you know a drought is coming and you won't be
able to irrigate, don't fertilize beforehand since the plants' growth
spurt will require more liquid to sustain itself.
The final tip has to do
with long-term seed storage. Deppe saves a lot of her own seeds,
and stores some for long periods as a backup. If you want to
follow her lead and put away a stock of emergency seeds, she recommends
drying the seeds at 95 degrees in a dehydrator until the seeds are dry
enough to shatter when hit with a hammer (for corn and beans).
Then place the dried seeds in a jar in the freezer and they're likely to
stay alive for many years.
I hope that whetted your
appetite enough to give Carol Deppe's book a try! Even though Mark
and I won't be replicating a lot of her methods on our homestead, the
book is definitely one of my favorites for providing realistic advice
that is tried and true on the author's homestead. Every
permaculture homesteader should give The Resilient Gardener a read.
| This post is part of our The Resilient Gardener lunchtime series.
Read all of the entries: |
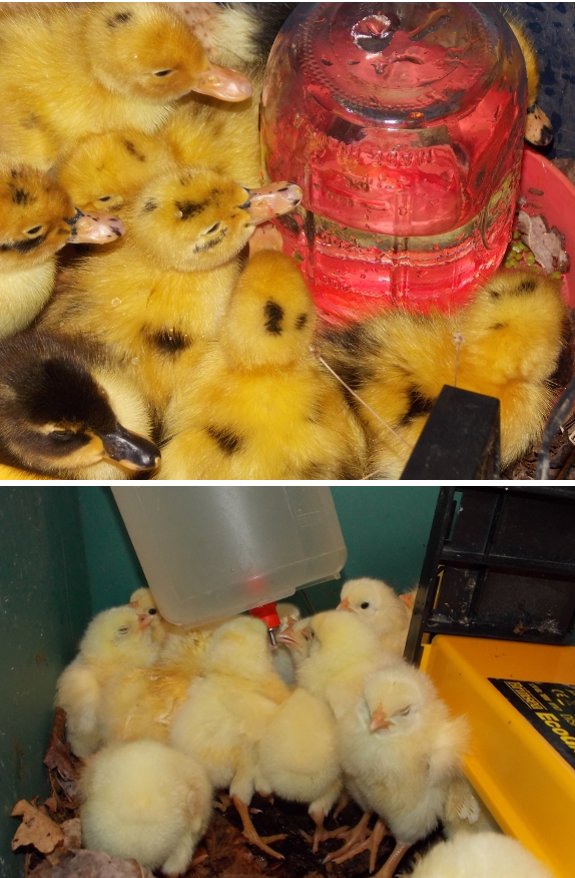
We picked up our box
of ducks and chicks this morning from the post office.
26 Jumbo Cornish Cross chicks
along with 10 Ancona ducks.
They came from Lebannon
Missouri. Total price was $121.45.
Since I don't have any
experience with ducks, I'm doing everything by the book at first.
(In case you're curious, "the book" means the duck chapter in The Resilient Gardener combined with Storey's Guide to Raising Ducks.) But I'm already starting to wonder which troublesome aspects of duckling care I can safely change.
First up is the waterer
situation. Ten ducklings managed to empty a pint of water out of a
traditional waterer in an hour and a half, and I suspect most of that
liquid ended up in their bedding or feathers. Although ducks do
need to submerged their heads from time to time to 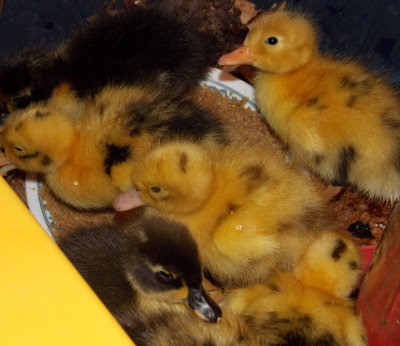 clean their eyes, I'm wondering if a nipple-based waterer can be their primary drinking source if I give them an open container of water once a day for eyeball purposes.
Books also recommend that
you not brood chicks and ducklings together, the primary reason being
that ducks empty their waterers all over the bedding and all over the
chicks, making the latter sick. But if we keep the bedding dry
with a better waterer, perhaps it will be okay to raise all 36
fluffballs in the same place? I'm on the fence about this one,
though, because it would be pretty interesting to keep feed consumption
data on both types of birds separately (although that would also require
Mark to build another outdoor brooder).
The other big difference
between chicks and ducklings is that the latter need more niacin in
their diet. I plan to offer the ducklings some brewer's yeast
instead of a chemical supplement, but I've also read that the real
solution is to make sure ducklings have access to plenty of bugs.
That shouldn't be a problem since we'll have them out on pasture by next
week!
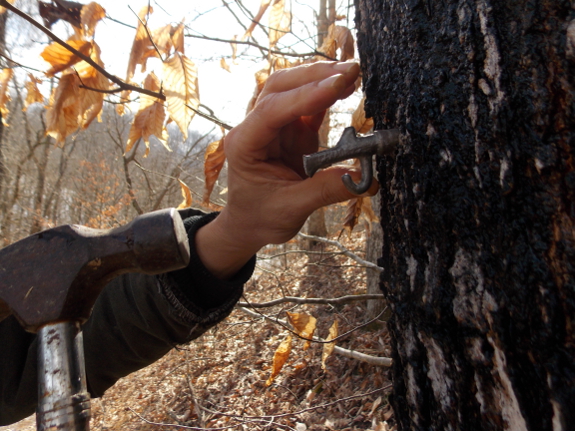
A recent article about the nutrional
benefits of maple syrup has got me thinking we should expand our syrup
collection plans to an additional tree.
According to the article
maple syrup has some of the same beneficial compounds found in berries,
tea, and flaxseed.
Last year, we had an
astonishing fruit harvest, and I took advantage of the opportunity to
try out different ways of preserving the bounty. We've enjoyed
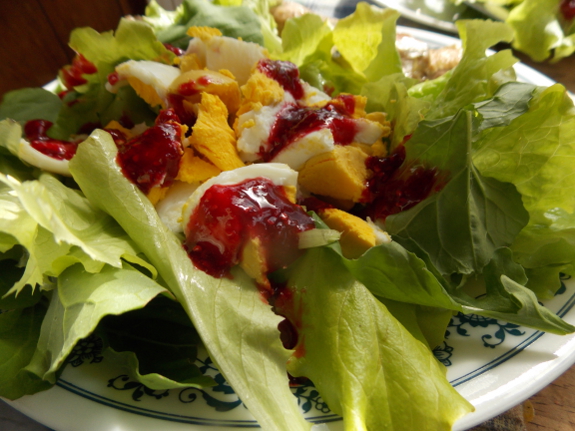
large quantities of strawberries for years now, so we know that strawberry freezer jam is astonishingly good when heated enough to pour sparingly over spring salads and that strawberry leather is a delicious dessert. But how about ways of preserving extra peaches, raspberries, and blackberries?
Last summer, I tried a
bunch of different preservation methods, and after a winter of eating
out of the larder, I now know which techniques are worth repeating and
which aren't. White peaches are best fresh, and I was disappointed
by the leather I made out of those that weren't quite ripe (but had to
be cut into before brown rot
overtook the whole fruit). On the other hand, cooking down those
not-quite-ripe peaches until they were quite thick and then freezing the
sauce turned out to be a delicious addition to my morning bowls of kefir.
With the extra berries, I tried out various kinds of jam. I have to admit that even though I had fun experimenting with traditional types of jam-making, the results were too sweet and too cooked for my palate. On the other hand raspberry freezer jam and blackberry freezer 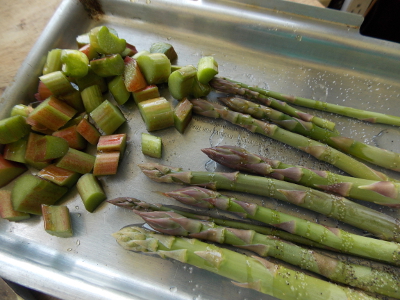 jam
were quite possibly even better than strawberry freezer jam...although
next year I might strain the seeds out of the bramble fruits since
they're a bit harder between your teeth than strawberry seeds are.
On a mostly unrelated
note, we're also tasting the first asparagus of the year this
week. We haven't had to get creative there because asparagus
roasted with a bit of oil, salt, and pepper is so good, we eat it like
candy. Like strawberries, we feel like there can never be too much
asparagus in our kitchen and on our table.
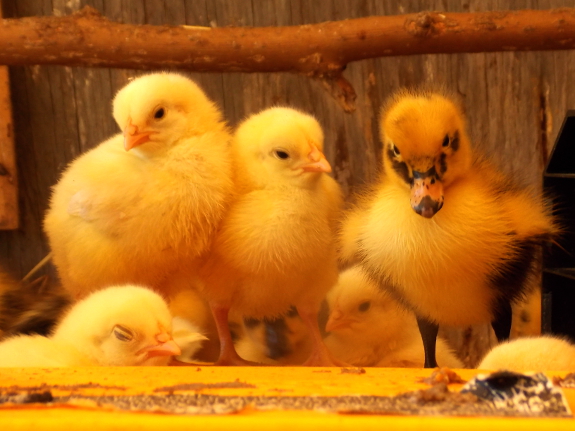
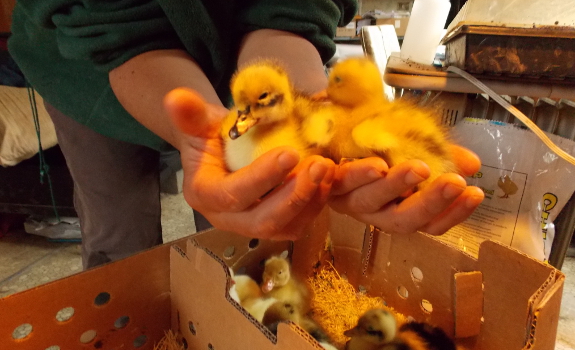
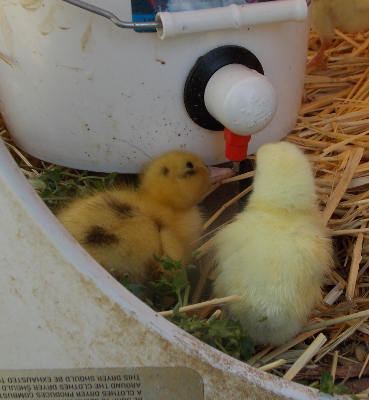
Anna and I both think the ducklings have the land fowl beat, but Adrianne is partial to fluffy chicks.
Which do you vote for?
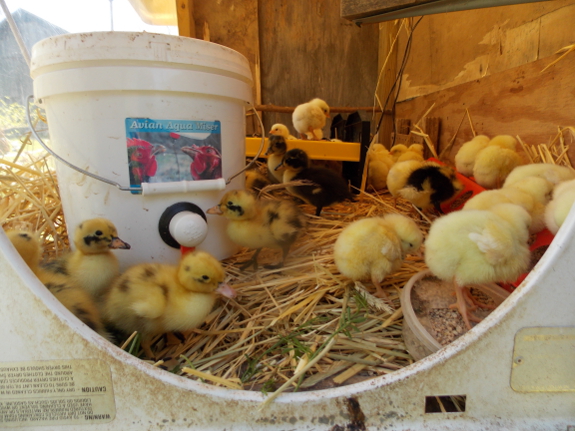
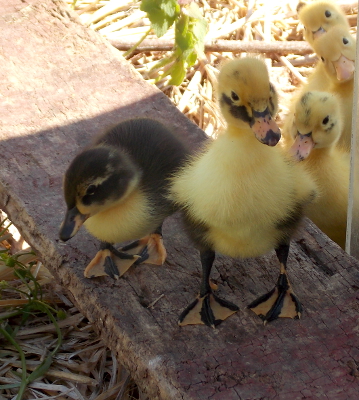 I often keep chicks inside for up to a week before tossing them into the outdoor brooder, but this batch
was already two days old when they arrived, and the weather had been so
warm, I opted to move everyone outside Saturday morning. By
Saturday afternoon, I was sitting and watching them through the open
door when chicks started tumbling out onto the ground, so I figured, why
not let them go outside early too? I did have to babysit the
youngsters a bit when a few of them couldn't figure out how to get back
inside, but soon both ducklings and chicks were busy pecking at ants,
crowfoot seeds, and dead nettle flowers.
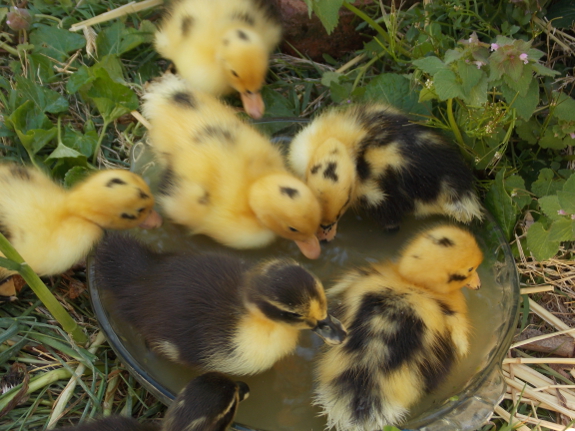
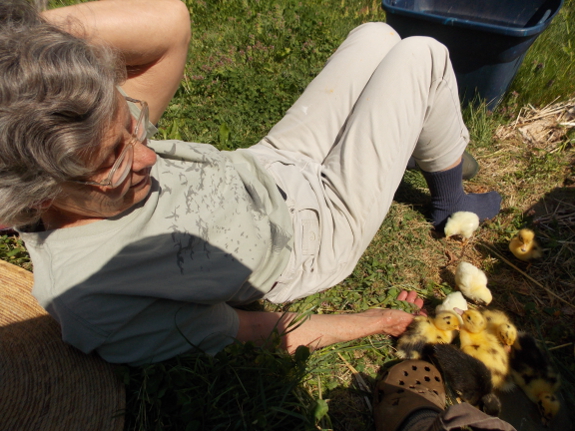
 Sunday,
Mom came over, and I figured it was time to let our ducklings go for a
swim. Mark found a glass pie pan in the barn that was just the
right depth for safe escapes, and the ducklings took to it like, well,
like ducks to water.
The chicks soon came running over to see what all the excitement was about, but most ran right back inside to drink from our EZ Miser.
(We did decide to stick to a nipple waterer for both ducks and chicks in the brooder, but will be giving the ducklings daily swims to keep their eyes and nostrils happy.)
The Ancona ducklings and
Cornish Cross chicks are much tamer than the Australorps we usually
raise, so I showed Mom that they'd clamber right onto her hand if she
left it on the 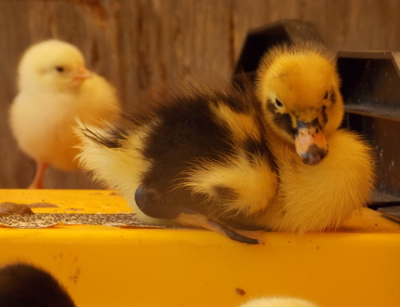 ground. She baited the hand with dead nettles, and soon was snuggling with ducklings.
Despite their cuteness,
though, I don't think Mark needs to worry that the adorable livestock
will be impossible to turn into dinner. If ducks are anything like
chickens, they grow out of their cuteness about the time they start to
lose their fluff --- around week two or three. I'll enjoy the
cuteness while it lasts and will enjoy chicken and duck dinners in July
just as much.
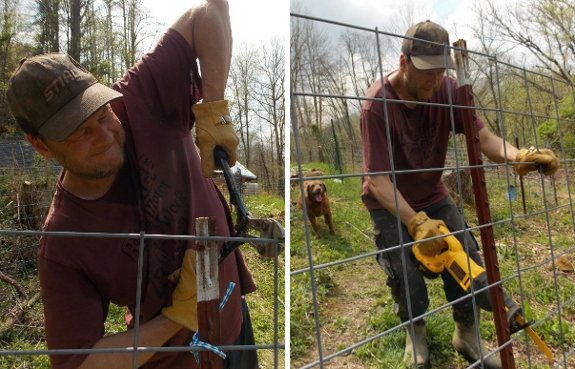
Cutting these cattle
panels with baby bolt cutters takes a lot of elbow grease.
A battery powered reciprocating
saw takes only 15 seconds per junction.
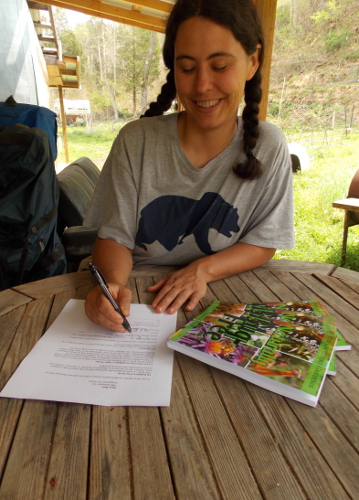 Although the announcement makes me feel a bit flaky, I'm excited to tell you that I've signed a contract with Skyhorse to make Naturally Bug-Free available in print in spring 2015! The book will probably be slightly renamed (to The Naturally Bug-Free Garden) and will be a moderately expanded version of the ebook currently up on Amazon.
Why the change of tune? Close readers will recall that I had offered the book to Skyhorse, but thought the deal was off when they balked at leaving me the ebook rights.
I'd like to say that I'm a keen negotiator, but I think that Skyhorse
is instead a smart publisher willing to change with the times.
Whatever the reason, the publishing house decided to take a chance on me
--- the first time they've ever bought a title without the ebook rights
attached --- and they came back to me last Friday with a new offer.
I was more than happy to
accept a slightly lower advance in exchange for keeping the e-rights for
myself while having the paper edition put together and distributed by
pros. Skyhorse sold many more copies of The Weekend Homesteader on paper than I thought they would,
and they definitely moved far more than I ever could have shifted on my
own, so I'll be thrilled to have them work their print magic on my bug
book.
What's relevant to you,
the reader? Three things. First, if you've already bought
the ebook or plan to buy it in the near future, you'll have the old
version, but I'll update the ebook with the Skyhorse version in a month
or two. At that time, Amazon will let you upgrade to the revised
version for free. As always, when you buy one of my ebooks, you
get free upgrades forever!
 Second,
I plan to unpublish the homemade paper version tomorrow (although I'll
still have a few on hand for giveaways), so if you really, really want
my original version rather than waiting a year to get the official
version on paper, you'd better grab it now. This is especially
relevant for those of you who want the cheap black and white version
since the official version will be full color and more expensive,
although probably cheaper than the full-color version I offered.
Finally, I'm taking this
opportunity to expand the book a bit, so some of you may see your garden
featured in print! Drop an email to anna@kitenet.net
with high-resolution photos (anything except pictures from a camera
phone will probably work) and an explanation of your experience with
controlling pest insects in the garden without chemicals and you might
be featured in the print edition. To sweeten the pot, anyone whose
contributions make the cut will win one of our homesteading care
packages --- a paperback of your choice (The Weekend Homesteader, Watermelon Summer, or my color version of Naturally Bug-Free), a kefir starter culture, some of our favorite seeds, and a Walden Effect t-shirt (size L or 2XL).
Mark likes to say, "Anna
always gets what she wants." And after this experience working
with my publisher, I'm starting to think he's right....
We attached this cattle panel to a 2x6 extension by drilling holes in the wood and threading through some 14 gauge galvanized wire securing each corner.
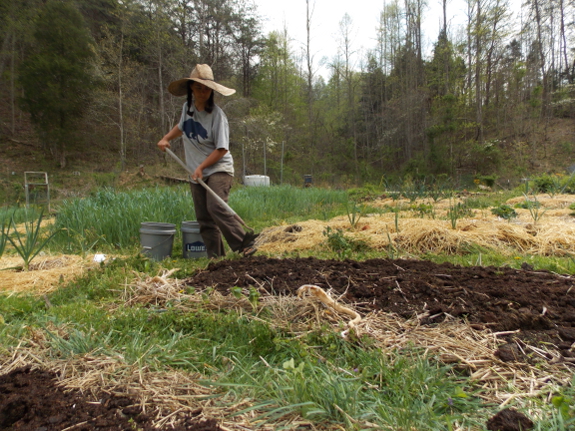
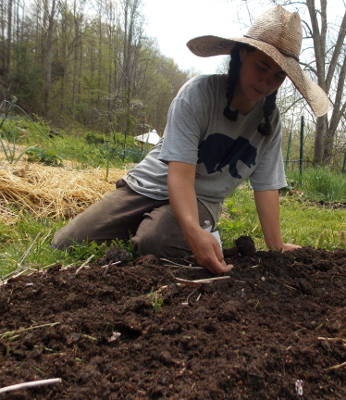 You would have thought that the best thing about Monday would have been signing a book contract,
but my favorite part was actually sneaking in some bean, corn, basil,
and squash seeds between thunderstorms. There's nothing like
rushing to plant while the first raindrops fall to get your heart
racing. Plus, I always love the first summer planting, even if it
is a gamble.
You would have thought that the best thing about Monday would have been signing a book contract,
but my favorite part was actually sneaking in some bean, corn, basil,
and squash seeds between thunderstorms. There's nothing like
rushing to plant while the first raindrops fall to get your heart
racing. Plus, I always love the first summer planting, even if it
is a gamble.Runnersup included signing the book contract, watching by flashlight with Mark as twenty male toads hollered for females in the sky pond, and watching the ducklings dabbling. The big influx of neotropical migrants that came over the weekend and the first lightning bugs were highlights of previous days.
What kind of mind games do you play with yourself to keep your moods mellow and your days a delight?
A Spring storm brought down a
dead tree recently.
We were cutting it up for
firewood today when Anna found this yummy morel.
The last couple of
weeks have been prime time for morel hunting around here.
Want more in-depth information? Browse through our books.
Or explore more posts by date or by subject.
About us: Anna Hess and Mark Hamilton spent over a decade living self-sufficiently in the mountains of Virginia before moving north to start over from scratch in the foothills of Ohio. They've experimented with permaculture, no-till gardening, trailersteading, home-based microbusinesses and much more, writing about their adventures in both blogs and books.
