archives for 03/2014
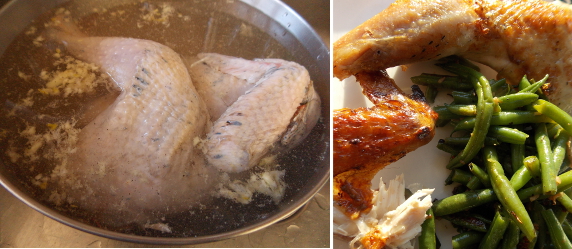
One of the few
store-bought foods that Mark and I still consider a guilty pleasure is
the occasional rotisserie chicken. That makes me want to learn to
cook a chicken as succulently delicious so I can make an equally tasty
(but more nutritious) version at home. My first experiment
involved brining one of our homegrown chickens with pepper and garlic added to the salted water, then roasting
the bird while basting with butter. The result was tasty,
but the leg meat was still a bit tougher than I would have liked.
I'm curious to hear from
our readers who also grow heirloom chickens for meat. Do you have a
favorite way of turning the meat tender and succulent? Or perhaps
this is a losing battle and you can only get that kind of mouth-feel if
you raise Cornish Cross, who grow so fast they're still very young when
slaughtered? I'd love to hear your feedback in the comments
section!
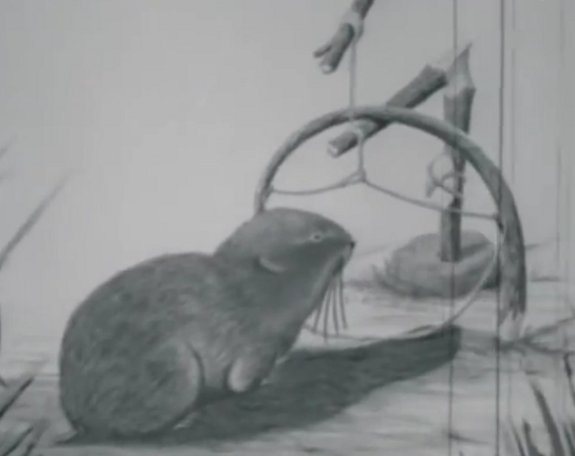
This 1955 Survival film was
made by the US Navy to educate pilots on how
to live off the land in north temperate regions but has some
considerable entertainment value to the modern day homesteader.
I enjoyed the drawings of
animal traps and the narrator's casual tone, even though he seems to
think turtles are amphibians.
The section on edible insects
taught me that caterpillars are not good to eat but grubs are often the
safer bet.
October through February
are our primary visiting seasons due to farm constraints the rest of the
year. Of these months, the first and the last are the best for
trips because weather is mild enough that the chickens don't need extra
care and the house can survive without a wood fire, but the garden isn't
nipping at my heels. Soon, our first chicks will be hatching and
I'll want to be on hand in case they have trouble for the next couple of
months, and after that the weeds will be growing a mile a minute, then
the garden produce will be begging to be preserved. I rarely feel
called to leave the farm at any season, but soon even those urges will
be stilled.
Which is all a long way of explaining why we slipped away this weekend to visit my father and attend the South Carolina Organic Growing Conference.
More photos and tidbits from the trip in later posts --- today I'm just
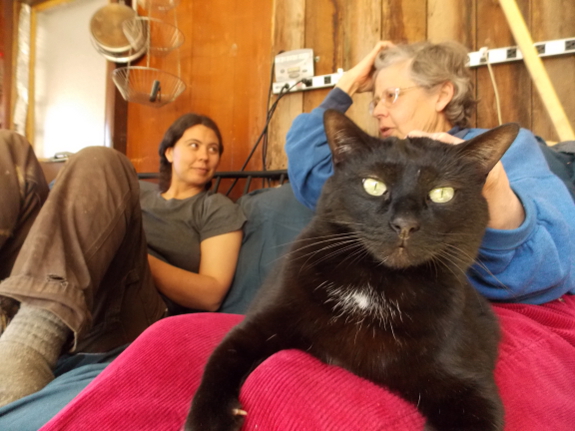
sharing a photo of Mom's visit last weekend when Huckleberry clearly
ruled the roost.

If you want to go to a
conference 45 minutes from your father's house and want to squeeze in a
visit at the same time, do you attend the conference first and visit
afterwards, or do you have family time right off the bat? Mark's
gut said the latter, and I think he was right, since I wanted to see
Daddy more than I wanted to learn at the conference...and some weeks I
can't manage even one night away from home. After a wonderful
visit on Friday, I managed to net two whole hours of sleep, and that
only came once I gave up on the bed in the guest room and on the quiet
and comfortable couch and went to squeeze myself into the back seat of
the car. (Yes, I am the world's weirdest sleeper and really like
small spaces. I should have brought my tent.)
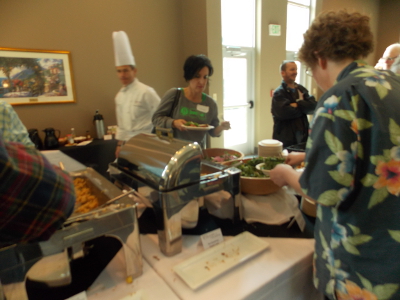 Anyway, that's all a long way of explaining why --- even though Mark and I were itching to hear Tradd's
newest talks and to check out the South Carolina Organic Growing
Conference --- we only managed to enjoy a delicious lunch there before
heading home. On two hours of sleep, even pastured pigs, medicinal
mushrooms, and biointegrated homesteads didn't sound as lovely as
returning to the peace and quiet of our own farm.
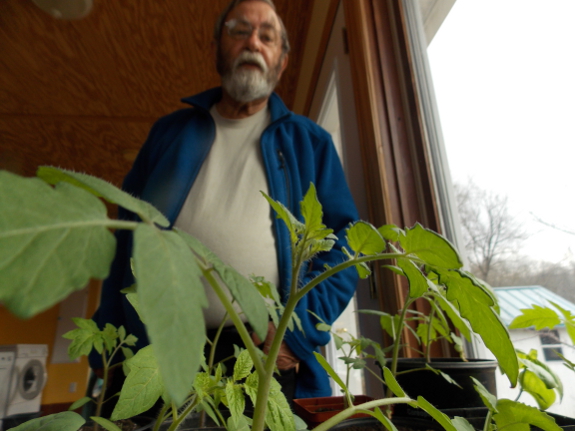
I did get one of the
nicest February tomato plants I've ever seen out of the weekend, though,
plus some cuttings and a rooted sprout from Daddy's Brown Turkey
fig. That brings us up to five fig varieties we're trialling for cold hardiness here at the edge of their range. More on what I'm doing with my new figs in a later post.
A popular chicken hang out
during snow days is under our old camper.
Lucy likes this same spot on
hot summer days for the shade and cool ground.
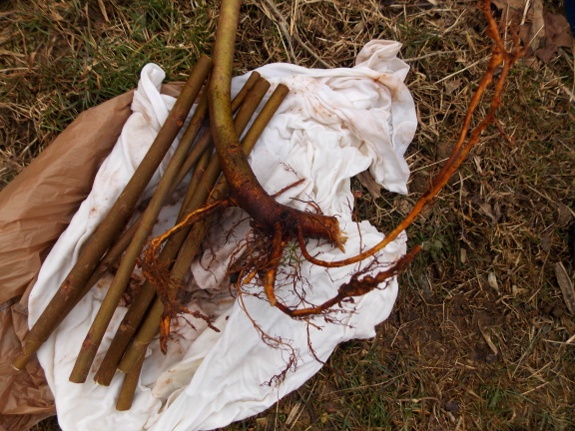
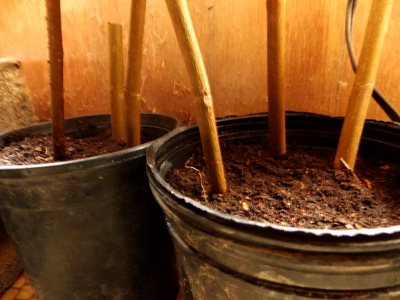 After quite a bit of experimentation,
last year I settled on a very simple (but effective) method of
propagating figs. I take hardwood cuttings and sink them about
eight inches into damp stump dirt
in a pot, put the pot on a heating pad, and ignore it for a few weeks
until I need the heating pad for something else. I water
occasionally during those heating-pad weeks and during the subsequent
weeks, keeping the soil at the moisture level appropriate for
seed-starting (or just a hair drier), and put the pots in a sunny spot
once the leaves begin to push out of the buds. By the end of the
summer, the cuttings are extraordinarily well rooted and are ready to go
into the ground.
 I
treated the Brown Turkey cuttings from Daddy to last year's
methodology, and also potted up the rooted shoot we teased away from the
base of his mature fig bush. The latter will go into the ground
soon after our frost-free date, and I'm thinking of putting it on the
west side of our wood-stove alcove so the fig will enjoy lots of winter
sun and heat while helping shield the trailer from summer sun.
I'll probably keep one of the rooted cuttings as well and then will give
the rest away to blog readers or local friends, so stay tuned for
future giveaways.
I
treated the Brown Turkey cuttings from Daddy to last year's
methodology, and also potted up the rooted shoot we teased away from the
base of his mature fig bush. The latter will go into the ground
soon after our frost-free date, and I'm thinking of putting it on the
west side of our wood-stove alcove so the fig will enjoy lots of winter
sun and heat while helping shield the trailer from summer sun.
I'll probably keep one of the rooted cuttings as well and then will give
the rest away to blog readers or local friends, so stay tuned for
future giveaways.
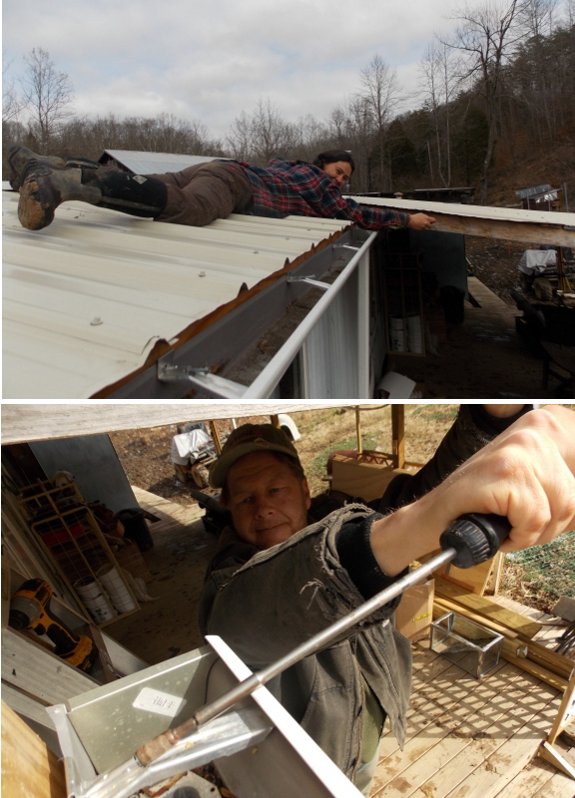
This Snap On extra long ratchet driver made
these hard to reach jobs easier.
It's one of the few tools
I've held onto since my copier repair days.
I'm always of two minds
about the first spring flowers. On the one hand, I really, really
want to see them, not just for myself, but for my hungry bees. But
on the other hand, I know that early blooms on the fruit trees often
mean no harvest that year due to late freezes. So I decided to
poke back through the blog to determine when our peaches and crocuses
have bloomed in past years, and how that relates to the subsequent peach
harvest:
| Year |
First crocus bloom |
Peaches at first pink stage |
Peaches harvested? |
| 2013 |
1/31 |
4/5 |
Yes |
| 2012 |
2/3 |
3/15 |
No |
| 2011 |
2/20 |
3/22 |
Yes |
| 2010 |
3/7 |
4/3 |
Yes |
| 2009 |
2/28 |
3/23 |
No |
 The
first thing I noticed --- late peach blooms do seem to be correlated to
an actual peach harvest that year. But do early crocus blooms
mean no peach harvest? Nope. In fact, the date of the first
crocus blooms seems to have very little bearing on when the peach
flowers open, suggesting that the two plants are using different cues
to decide on the proper time to pop open their flowers. (Last
year's crocus blooms might have been a bit of an outlier, though,
because I had transplanted the bulbs in late winter to a new location.)
This post is all a long
and geeky way of saying --- okay, crocuses, open up those buds!
And, peaches, stay sound asleep as long as you can. Because, of
course my plants listen to my wishes, right? (Maybe I should hedge
my bets by dumping the ice from my maple sap concentration campaign around the bases of our fruit trees.)

We upgraded our grape
shade trellis today.
Thanks to one of our constant
readers Brian we realized the 2x4's we planned to put up would block a
good deal of Winter sun.
It's two loops of 10 gauge
galvanized trellis wire that uses a couple of heavy duty turnbuckles to
increase the tension.
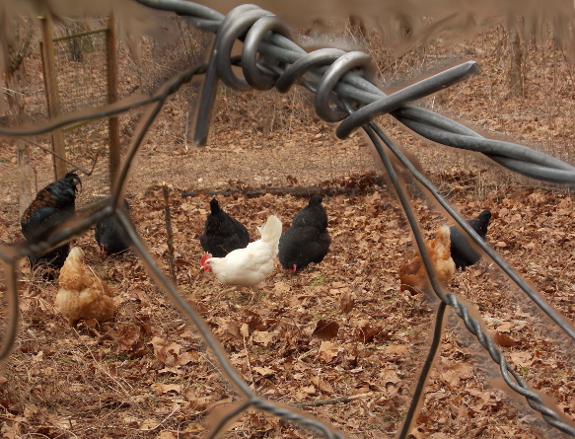
As you may have noticed,
I've been running a bit of an ongoing series here with answers to
questions new chicken-keepers might have. Previous posts included how to hatch homegrown chicks and how to choose the best chicken breeds for homesteaders.
Today I want to touch on a topic that's not so photogenic, but that
needs to be considered by anyone who wants to get into chickens --- how
to protect those delicious morsels from the wild animals who'd love
nothing more than to eat them up.
Baby chicks are most likely to be eaten by rats and snakes, but adult hens tend to succumb to dogs, hawks, raccoons, opossums, and similar predators.
Your first line of defense against predators is to protect your flock
when they're most vulnerable --- at night. A solid chicken coop is
optimal, and if your predator pressure is high you'll want to shut the
birds in each evening (or to invest in an automatic chicken door
to do the job for you). Raccoons, especially, can reach right
through small holes, so be sure your birds' roost is far enough away
from gaps so that a predator can't rip their heads off without even
entering the 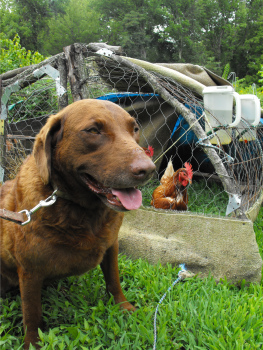 hen
house. To be truly predator proof, the coop will also need to
have a solid base that extends for several inches into the soil to
prevent diggers from entering the coop. Finally, even though I
love giving scraps to chickens, I'm starting to lean away from putting
those kitchen scraps in the coop since the scent attracts predators who
stick around to eat my birds.
What if your chickens are
getting picked off in the daytime instead? If you have a small
run (which you shouldn't), you can beef up the walls just like you did
the coop, then can string fishing line over the top in a woven pattern
to keep out hawks and owls. But if you prefer giving your birds
larger pastures, or even letting them free range, it's going to be
nearly impossible to keep predators out of their daytime living
area. Instead, I recommend adding a rooster to your flock, since
he'll sound the alarm and do his best to fight off any invader during
daytime hours. A good dog (trained to protect, rather than eat, chickens)
is the second line of defense --- our dog comes running as soon as she
hears our rooster's alarm call, and she has managed to chase away a hawk
that had pinned a hen three times over the past winter.
 Chickens
are pretty alert to predators during the daytime, with hawks being
their primary downfall. After a rooster and a dog, I have two more
lines of defense against raptors. First, I make sure that our
chickens roam in areas with lots of bushes and other things to hide
under. Hens often see a hawk coming as the raptor dives down to
dine, so if they have something to scurry beneath, the chickens might be
able to evade capture. Second, I raise dark-colored chickens,
since I've learned the hard way with multiple breeds over multiple years
that letting white chickens free range is like putting up a flashing
neon sign: "Chicken take-out, now hot!"
I'd be curious to hear
from others who have dealt with their own predator problems. Which
predators are the most likely to eat your chickens? What do you
do to protect the flock?
And for those of you in the planning stages of starting your own chicken operation, be sure to check out our chicken waterers, which keep you from having to handle manure and keep your birds from having to drink it.
What would I do differently
when installing another heavy
duty shade trellis?
Use fresh trellis wire. We
used some recycled wire on the first loop and straightening out the
kinks used up most of the tension in the turnbuckle.
The second loop was from a
fresh roll and looks a lot tighter.
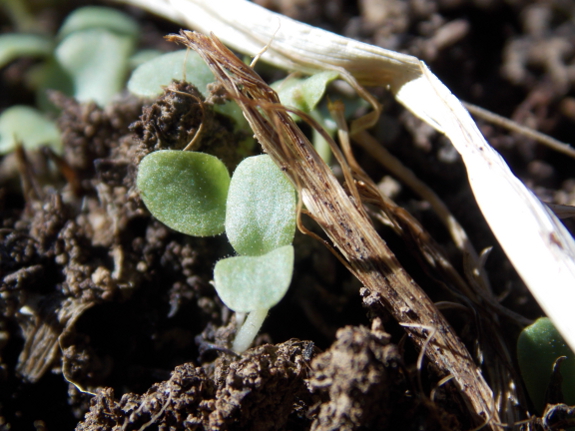
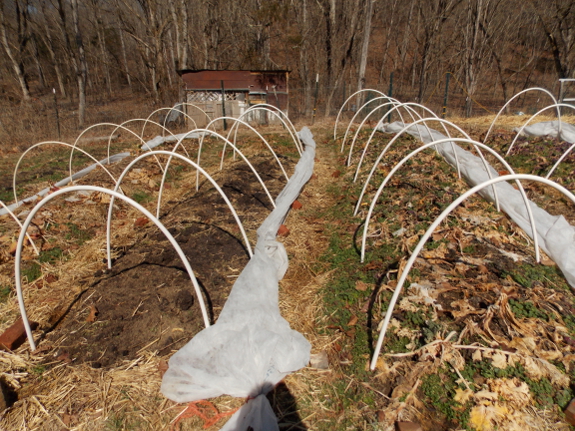
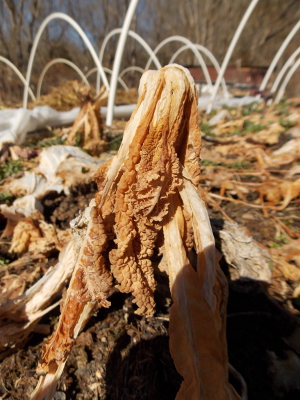 Last year at this time, we were chowing down on kale and lettuce leaves that survived the winter under quick hoops
and started rebounding as the weather warmed up. Not so in
2014. I was able to find a handful of brussels sprouts that had
been protected under the mulch for dinner Wednesday, but otherwise it's a
waiting game right now. The new lettuce I planted a few weeks ago
has sprouted and some of the kale plants survived and are sending out
new leaves, both of which we'll be eating in a few weeks.
In the meantime, Mark is pouting because we're down to butternut squash,
carrots, sweet potatoes, and frozen green beans from last year, and
both of us are used to a more rounded vegetable diet. I'd rather
wait and eat real food than expand the selection out with grocery store
offerings, though.
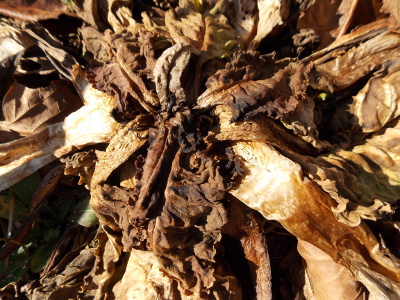 The
positive side of the cold winter is that it helped me get a more solid
handle on the cold hardiness of various greens. Last winter, Fordhook Giant Swiss chard
survived the winter with no protection, so I thought the Swiss chard
might be just as hardy as our kale. Not so. Swiss chard I
protected with quick hoops this winter completely perished, along with
the Laciniato kale, but my troopers (Red Russian and Dwarf Siberian kale) survived the subzero temperatures under their quick hoops.
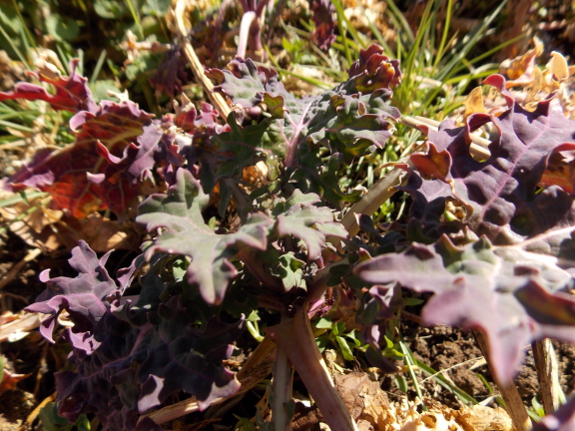
I used to think of Red
Russian as the more delicate of my two dependable kale varieties, but it
turns out that the smaller variety did better during this excessively
cold winter. Those of you in the true north should take note and
plant accordingly, although I'll admit that if we started having winters
like this one more regularly, I'd follow Eliot Coleman's advice and erect a high tunnel over my quick hoops.

We've still been having an
issue with rats in the chicken coop.
I sent one to an early grave
thanks to some help from a box of Rat Shot.
You can find a box of 20 for
around 8 dollars. The small pellets spread out making it easy to hit a
moving rodent while at the same time any extra shot ends up bouncing
off nearby structures.
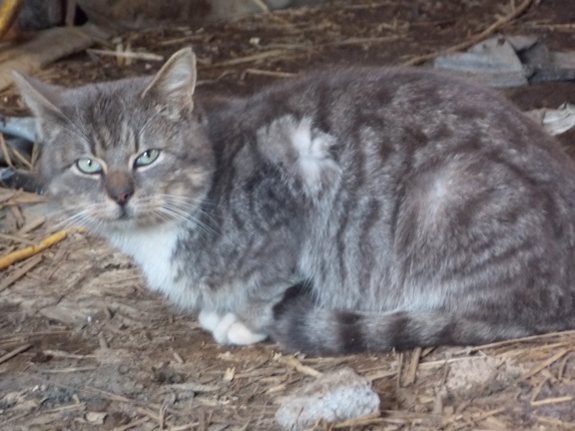
Five years ago, Strider turned up in our barn,
sick and in need of a home. Since then, we've managed just fine
with two cats --- Strider does all the hard work around the farm and
Huckleberry lets us spoil him. But Thursday afternoon, the cat
balance got out of whack.
Another plaintive meow
from the barn turned up this little critter, who is still too scared of
me to let me check its sex. The barn cat looks pretty healthy, but
was starving and quickly downed nearly a quart of dry cat food over the
first 24 hours before starting to slow down to a more normal eating
pace.
I'm not quite sure what
to make of the feline. It meows plaintively at me, begging for
something even when there's still food in its dish, but it's too scared
to come closer than three or four feet away from a human, and that only
when I sit down and look in the other direction.
Two cats in the house is
really more than I can handle, especially when they both want attention
at once. (Mark's more of a dog person.) So Mark and I are
agreed that this little feline wouldn't fit in. But I'm not sure
if I can catch it to give it away, so I'm a little stuck by the cat in
the barn. Does anyone local want a cat in need of serious TLC?
How did the new seed
starting shelf turn out?
Not only does the worn barn
wood look nice but the height is just right to slide the indoor
chick brooder under which is about to be booted up any day now.
 I've always wanted to be able to test the pH
of my soil at home, since that's one soil quality I need to manage
carefully, especially around blueberries. However, the cheap pH
meter I picked up at a big-box store several years ago wasn't even worth
the few bucks I paid for it --- I could never get the device to read
anything when I flipped it to pH. So when Joey got me a fancy pH
meter at an auction, I was thrilled!
The Kelway Soil Tester
certainly feels more impressive than the previous meter I'd been using,
but I'm not really sure I trust its results. In a few spots, the
Kelway Soil Tester read close enough to what my soil reports said that I
figured it was on track --- 6.8 in the blueberries where my 2012 soil
report said 6.5 (and where I wish the pH was much lower) and 6.2 in the
subsoil of the forest garden aisles where my soil report said 6.3.
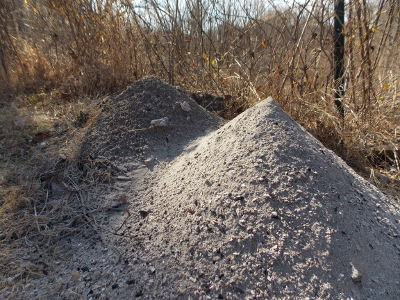
But when I stuck the tester in a pile of leached wood ashes that have
been sitting out in the weather for a month or so, the first test read
5.6. Only after the day warmed up a bit more did that test come
back as 7.4, closer to the alkaline level I would expect from wood
ashes.
 That
got me wondering if temperature could play a role in pH testing. I
know that moist soil is important for getting a meter like this to
read, but lack of water isn't anything our soil suffers from at the
moment. On the other hand, our ground is half-frozen in spots,
despite a sunny week. Does anyone understand the chemistry/physics
of pH testers enough to know whether I need to wait and test when the
ground is warm? Anything else that might make a meter think wood
ashes are acidic instead of alkaline?

Jake's comment on my post
about 22
caliber pest control got me thinking.
Our Phoenix Arms 22 caliber pistol is called a
Long Rifle which I'm guessing means the barrel is rifled to improve
accuracy.
I stood 7 feet away and shot
a cardboard box that showed a pattern about 12 inches wide. What was
weird is right after I did that a rat scurried out of the weeds with
Lucy standing by to see what we were doing. Anna yelled "Get it Lucy!"
and Lucy caught it and crunched it within a few seconds. The term "Good
Girl" is a vast understatement today.
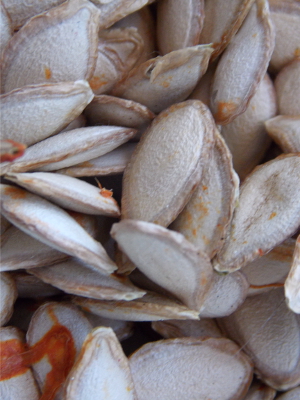 "This year I shared my seed order with a friend to bring the price down. I
never plant 25 of the same plant. I am curious how much you spent of
seeds this year. Also I am curious how many plants of what you are
planning."
Even though it's a little
cheaper to buy all of our seeds at once, I actually plan on two orders
per year --- one in the winter for the main season and one in early
summer for the fall and winter garden. This year, I spent $86 on
the spring order and I spent $27 last summer on the fall order.
Keep in mind that I do buy from a relatively expensive company
(Johnny's) and I buy big packages of many seeds since we grow all of our
own vegetables and since I plant heavily in cold soil instead of
starting many seeds inside. On the other side of the equation, I
do save a lot of our own seeds
and I am sometimes able to eke out last year's packet for another year
even for types of vegetable seeds we don't save. Finally, this
calculation doesn't include cover crop seeds, which probably come to another $25 to $50 per year.
To answer your second
question --- I plan our garden by area, not by number of plants.
For example, I'll put in 8 beds of broccoli this spring and the same
amount again in the fall. Each bed is roughly 15 to 20 square
feet, and I plant using a high-density system, so that would be about 80
broccoli plants for the spring planting and another 80 plants for
fall. As you can see in the table below, since I start most of our
spring broccoli plants outside under quick hoops where germination
isn't as perfect as inside on a heating pad, I went ahead and bought
1,000 broccoli seeds this year so I'd be sure to have plenty for both
spring and fall plantings. My rule of thumb is to have at least
two or three times as many seeds as I need so I can plant heavily and
can replant if the first set doesn't come up, gets scratched up by
Huckleberry, or gets killed by a freak weather event. It's always
cheaper to buy the next size up than to rush in an extra seed order and
pay an extra round of shipping for one package of seeds.
| Crop |
Spring/Summer Beds |
Fall Beds |
Seeds ordered |
| Arugula |
1 |
Saved |
|
| Basil |
1 |
Packet |
|
| Beans, Green |
5 (Succession planted) |
Saved |
|
| Beans, Mung |
2 |
Saved |
|
| Broccoli |
8 |
8 |
1,000 seeds |
| Cabbage |
4 |
2 |
1,000 seeds |
| Brussels Sprouts |
8 |
(Will order in fall) |
|
| Carrots |
2 |
6 |
5,000 seeds |
| Corn, Sweet |
17 (Succession planted) |
1,000 seeds |
|
| Cucumbers |
6 (Succession planted) |
Saved/leftover from last year |
|
| Garlic |
13 |
Saved |
|
| Kale |
12 (Succession planted) |
Saved |
|
| Lettuce |
4 (Succession planted) |
10 (Succession planted) |
1/4 pound (I plant very heavily so we can harvest lots of baby leaves) |
| Mustard |
4 |
Leftover from last year |
|
| Okra |
2 |
Saved |
|
| Onions |
10 (These are bulbing onions from seed. In addition, I have a bed of perennial Egyptian onions for greens.) |
3 (Potato onions) |
1,000 seeds. (In addition, potato onions are planted from divided sets.) |
| Parsley |
3 |
Packet |
|
| Peas, Sugar Snap |
4 |
4 |
Leftover from last year |
| Peppers |
2 |
Packet |
|
| Poppies, Breadseed |
2 |
Saved |
|
| Squash, Butternut |
4 |
Saved |
|
| Squash, Summer |
8 (Succession planted) |
Saved |
|
| Strawberries |
4 (The goal is to rotate our entire planting every three years, so I remove four beds and plant four new ones every year.) |
Started from rooted runners in other beds |
|
| Sweet Potatoes |
4 |
I start my own slips from saved tubers. |
|
| Swiss Chard |
1 |
Saved |
|
| Tatsoi |
1 |
(Will order in fall) |
|
| Tokyo Bekana |
3 |
(Will order in fall) |
|
| Tomatoes |
15 (This is 30 plants) |
Saved |
|
| Watermelon |
4 |
Saved |
I hope that helps you get
a handle on how much of an area to plant and how many seeds to buy for
those of you planning big gardens this year. The table above is
geared toward Mark's and my tastes, of course, so I don't recommend that
anyone precisely mimic what we do. Total acreage (including small
perennials not mentioned here, extensive areas set aside for cover
crops, and aisles) comes to about a quarter of an acre, and the biggest cost for that vegetable garden is the straw we splurge on every year for mulch.
 Our movie-star neighbor lent me a copy of Bees in America: How the Honey Bee Shaped a Nation,
by Tammy Horn, which turned out to be an interesting, if dense,
read. I'll start with the negatives, as usual. Bees in
America is put out by a University Press, which often means the text is
more scholarly than will be appealing to a layman audience. Horn's
book definitely pushes some of those "required reading" buttons, with
more primary citation and repetition than is fun for non-historians to
read.
On the other hand, if
you're willing to do a bit of slogging and skimming, you'll find real
gems within these pages. The rest of this week's lunchtime series
will offer some insight into the history of beekeeping in America, so
here I'll just mention a couple of tidbits that didn't fit anywhere
else. Did you know that bees have been used as political and
social metaphors for centuries, being used to teach that labor is a
virtue and that the lower class is disposable in seventeenth century
England? And how about tanging, that tradition of banging pans or
drums or ringing bells when swarms pass overhead --- did you realize
tanging was originally meant to mark ownership of the swarm, not to make
the bees land in your yard? Stay tuned for other bee tidbits in
later posts.
| This post is part of our Bees in America lunchtime series.
Read all of the entries: |
We changed our mind about
using 28
inch flashing for the Star Plate roof.
A plywood roof will allow us
to crawl on it to install roofing felt and shingles.
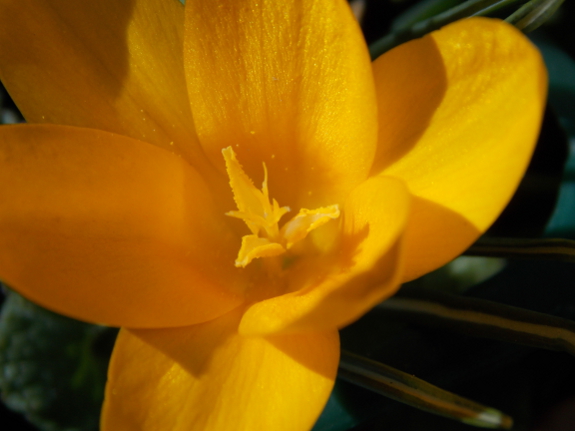
It seems I was looking in the wrong spot for the first crocus of the year.
This beauty turned up Monday afternoon, but the flower was so bold that
I suspect it might have opened over the weekend. The main crop,
slowed down by the mulch under the peach tree, may be another week yet
(or more if the forecast snow storm pans out).
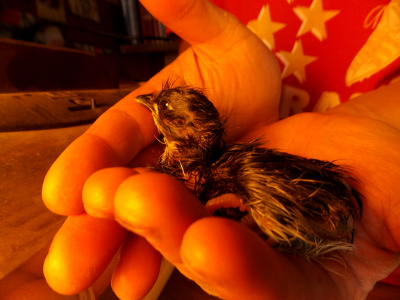 Meanwhile,
another sign of spring started peeping Saturday and popped out of the
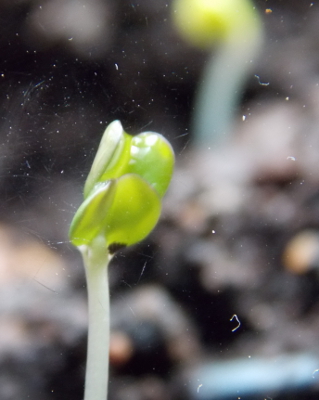
incubator Sunday and Monday. The chick pictured here is number
two, and I'll post a rundown on hatch data next week on our chicken blog for the geekier set.
We start our chicks on Avian Aqua Miser Originals, since the waterers keep the brooder dry, prevent coccidiosis, and are just plain dependable. If you want to follow our lead, we've marked down this premade chicken waterer to $25 (with free shipping) this week!
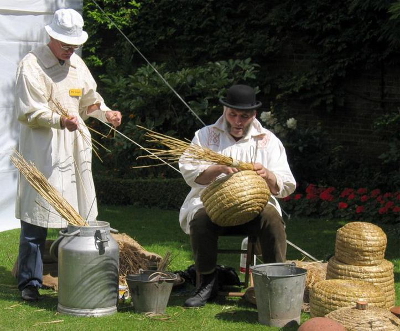 When honeybees came to America, they were brought across the ocean in straw skeps. In Bees in America,
Horn explains that these skeps were originally considered an innovation
in Europe since they replaced heavier logs and clay plots that were
difficult to move. Horn's book includes some interesting
illustrations of how skeps were constructed, and I was especially
intrigued to learn that ekes were often placed underneath skeps when the
bees needed more room, a bit like nadiring a Warre hive.
In addition to skeps,
early American beekeepers were fond of bee gums --- hollow logs used as
hives. Even though the inventor of the Langstroth hive (the
primary beekeeping box today) was an American, Horn reports that
colonists continued using bee gums and skeps long after the Langstroth
hive took over in Europe. Since skeps and bee gums don't allow for
much inspection and manipulation, their use may be one reason the U.S.
saw such a rash of pest and disease problems (which I'll cover in a
later post).
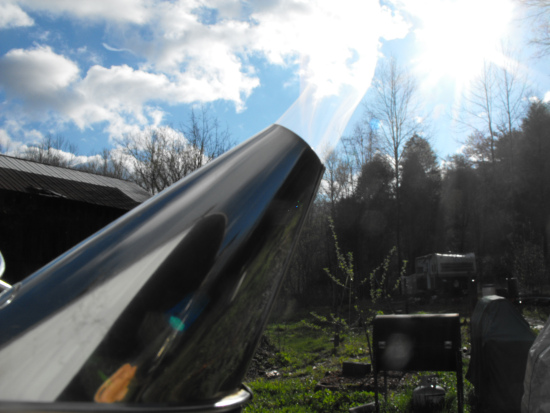 Speaking
of the Langstroth hive, it was one of four inventions that changed the
face of beekeeping in America between 1851 and 1873. During that
period, the bellows smoker, the movable frame hive, wax foundation, and
the centrifugal extractor (along with advances in queen rearing) changed
beekeeping from a hobby into an industry. More on the changing
face of beekeeping in America is to come in tomorrow's post.
| This post is part of our Bees in America lunchtime series.
Read all of the entries: |
We made some more progress on
the Star
Plate chicken coop.
Roof construction got easier
once we figured out a proper place to put the ladder.
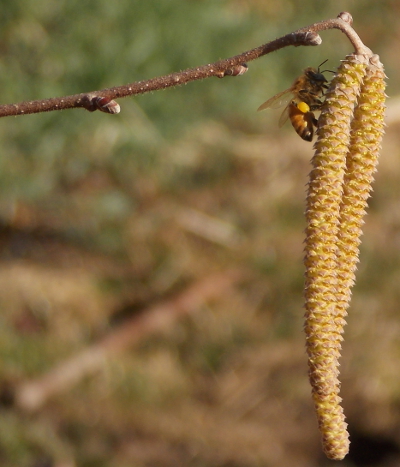 Spring
can't come early enough if you're a honeybee, eating through winter
stores and itching for more pollen to feed your new brood. This is
the first year our hybrid hazel
has really bloomed (albeit only male flowers so far), and the honeybees
are definitely enjoying the early pollen source. Previously,
crocuses have provided the first bit of protein for our bees, so I'm
thrilled to have hazels filling in the gap during such a late spring.
Of course, bees need more
than pollen --- they need nectar too. Many beekeepers feed sugar
water at this time of year to simulate an early nectar flow, thus
prompting the queen to lay more eggs sooner, bulking the hive up fast so
they're ready to take advantage of the tree flowers that will open in a
few weeks.
Previously, I've tried to
only feed our bees in the fall and only then if they didn't look like
they had enough honey to make it through the winter, but I'm relaxing my
standards this spring. We only have one hive left (the barn swarm having finally bit the dust during one of those subzero spells), and I want to be able to split
it this spring. Plus, I'd really like to be able to harvest honey
--- it seems crazy that we've been raising honeybees for so long and
have still been buying (or trading for) nearly all of our honey for the
last few years. Fancy techniques for raising honeybees only make
sense if you get some yield along with the bees.
 Our
movie-star neighbor (aka my beekeeping mentor) recommends spring
feeding only if you commit to keep feeding until there are lots of
flowers around. The idea is that you don't want to get the hive
bulked up, then have a large colony starve because you stop feeding and
the spring flowers aren't open yet. To that end, I've kept a
feeder on the bees full time over the last two weeks, although they've
only eaten about 1.5 quarts so far.
As you can see from the photo above, our hive has a completely empty box
below their main brood chamber to expand into. We removed the
bottom board last week, so now I'll be able to keep an eye on the
colony's expansion and will report back about how the feeding campaign
impacts their spring bulk up. Only time will tell whether the
spring feeding is a good or a bad call, but I'll keep you posted either
way.
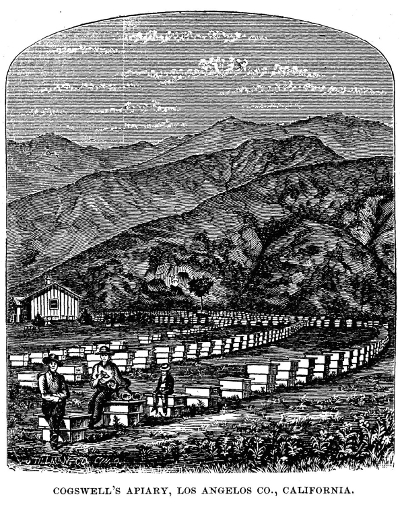 Some of the most vivid imagery in Bees in America
involves honey hunters and migratory beekeepers. Horn reports
that during the colonial era, American honey hunters would search
through the woods throughout the spring and summer looking for wild bee
trees. The journey would usually begin when the honey hunter set
out a plate of flour surrounded by flower petals, attracting and marking
the bees at the same time. By following the path of the now-white
bees through the air (a technique known as coursing), the honey hunters
were able to locate the bee tree, then to mark it with a slash on the
bark to demonstrate ownership. Come fall, when the bee tree was
full of honey, the honey hunter would return, cut down the tree, and
split the sweet profits with the landowner.
Another story that really
captured my interest involved French beekeepers in Maryland and
Pennsylvania in the 1600s. These early migratory beekeepers kept
their hives on flatboats, traveling at night and anchoring beside
flower-filled meadows each day to maximize their honey production.
Later, migratory beekeepers used the
railroad and then trucks to move their bees, being paid for pollination
(in addition to being able to sell their honey)
by the beginning of the 1900s. In fact, by the second half of the
twentieth century, pollination services had become more lucrative than
producing honey, with some beekeepers receiving $32 per hive placed in
almond orchards in the 1990s.
| This post is part of our Bees in America lunchtime series.
Read all of the entries: |
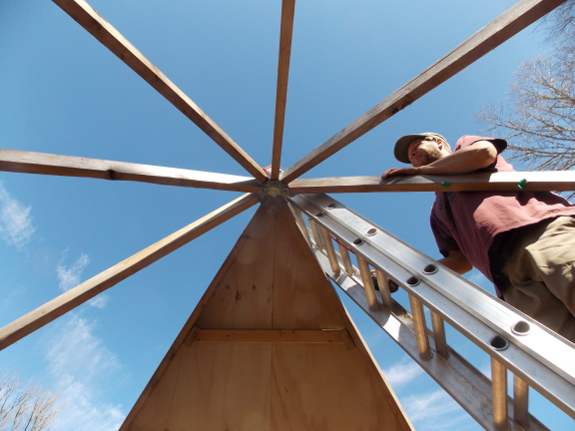
We did the first triangle
with horizontal supports.
Installing a vertical 2x4
down the middle of each triangle gives more support.
The Star Plate has holes to
secure the supports with a lag bolt, but we realized the alternative
smaller holes were easier with long exterior screws.
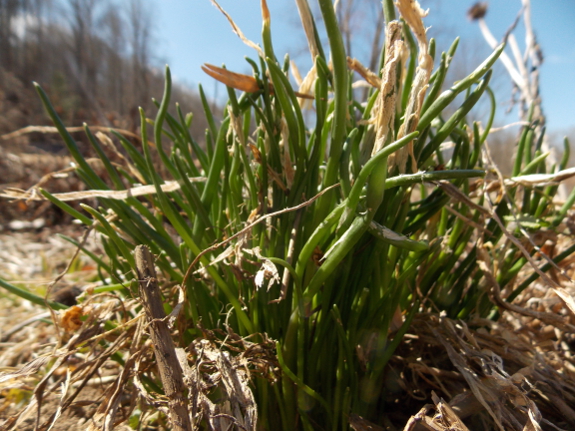
Dividing and replanting our chives
cluster in fall 2012 seems to have been a very good idea. The
three clumps did okay last year, but this spring, they're taking off
early and quickly. I was thrilled to realize this week that I now
have several meals' worth of fresh, oniony goodness 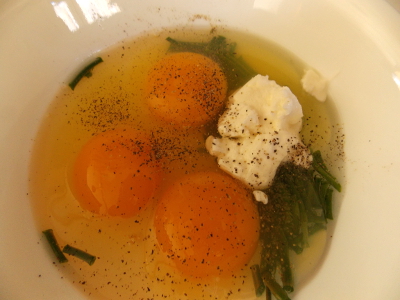 poking out of the ground, with more on the way.
The only thing I would do
differently is to cut back the dead growth this autumn rather than
letting the top matter decay where it falls. The new leaves pushed
up right through the dead stems, so I had to pick a bit of straw-like
material out of the greenery before we could eat it. That didn't
take any of the fun out of a homegrown omelet made from our eggs and
chives and a bit of kefir-cultured sour cream, though. Delicious and simple spring goodness!
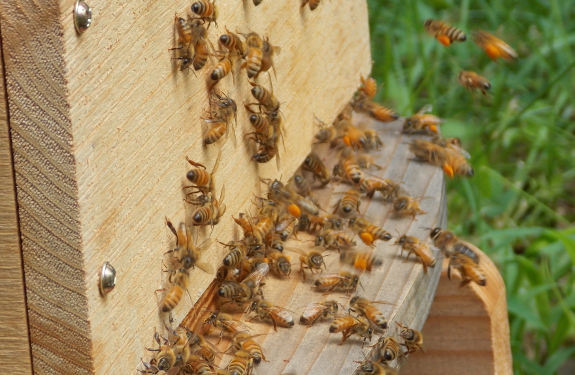
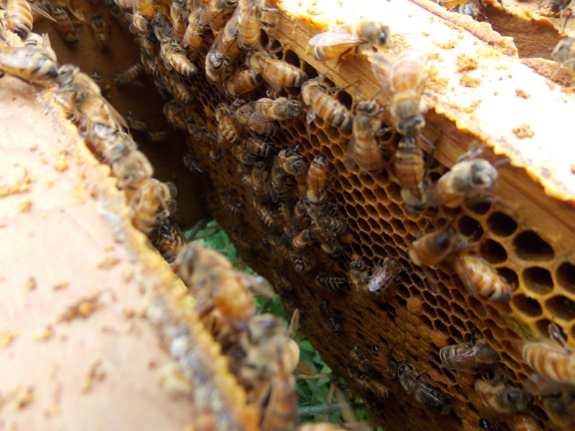 One of the most useful threads running through Bees in America
was the history of pests and diseases that have troubled American hives
nearly from the beginning. Foulbrood and wax moths were the
biggest issues in the early nineteenth century, and damage by the
greater wax moth seems to have been even more extreme that varroa moths
and colony collapse disorder are today. In fact, 80% of the
apiaries around Boston were abandoned by 1809 due to depredations of the
greater wax moth.
Being able to inspect
hives made a big difference in fighting both of these early pests once
Langstroth developed a hive with movable frames, and foulbrood became
even less common after a 1923 law outlawed bee gums and allowed bee
inspectors to burn hives when signs of the disease were apparent.
However, foulbrood remained a major problem among American beekeepers
until antibiotics were developed to fight the bacterium after World War
II. Unfortunately, some strains of the problematic microorganisms
became resistant to antibiotics by the 1990s, which led beekeepers to
begin using Integrated Pest Management, medicating hives only when signs
of foulbrood were evident. A similar strategy was used for varroa
mites, which entered the scene along with tracheal mites in the 1980s.
 Pests
and diseases weren't the only hurdle honeybees had to face,
though. Pesticides drifting from farmer's fields into bee
territory became a major problem around the 1950s, and continued
throughout the second half of the twentieth century. The federal
government developed some methods of remunerating beekeepers for their
dead hives, but cash payouts didn't help the bees themselves.
Eventually, the worst pesticide, which came in grains that looked like
pollen to bees, was outlawed.
Horn's book ended with
the small hive beetle hitting Florida, Georgia, North Carolina, and
South Carolina in 1998, so no mention was made of colony collapse
disorder, which started showing up two years after the book was
published. It's interesting to put our current beekeeping woes in
perspective, though, and to realize that keeping bees in America has
always been a struggle against pests, diseases, and chemicals. As
I'll explain in tomorrow's post, trying out different bee varieties can
be part of the solution when new issues rear their ugly heads.
| This post is part of our Bees in America lunchtime series.
Read all of the entries: |
How does the Star Plate
middle support 2x4 get attached to the top of each wall?
It took a bit of trial and
error to figure out the correct angle, but once we did it was just a
matter of securing 2 long exterior screws through the bottom section of
the wall.
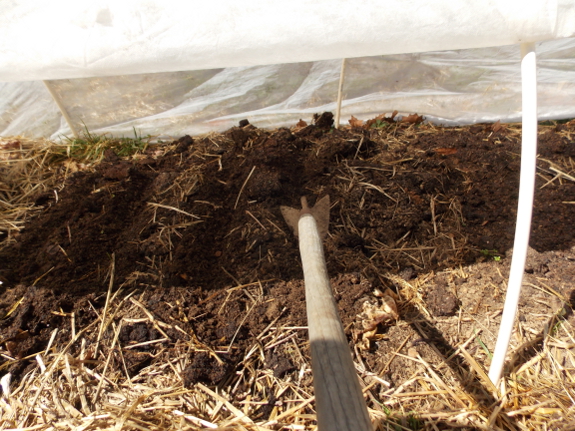
There's nothing like a
cold, snowy night to send me off into the garden with vigor the next
day. I know better than to plant seeds when the ground is that
cold, but I figured I could get away with preparing beds for Friday's
pea and Swiss chard planting, soaking some peas to give them a jump
start, and even putting in broccoli, cabbage, and onion seeds in the
warmer ground under a quick hoop. (Yes, I did already start those last three crops in the house a few weeks ago, but I get better results outside most years. Plus, the main rule of homesteading is: Backups, backups, backups.)
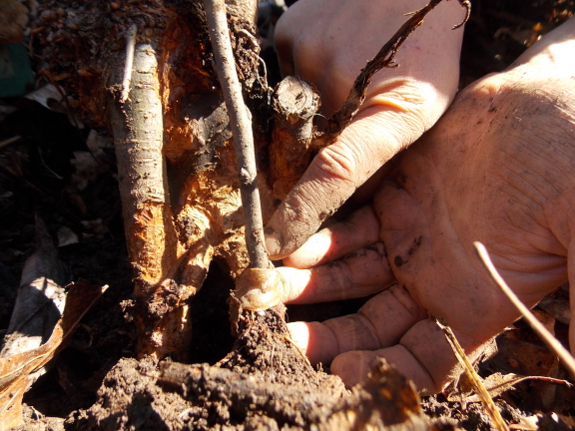
Next, I headed out to the vole-girdled apple trees,
which I've been ignoring ever since seeing the damage. I'd
planned to try a bridge graft, using twigs from each tree to traverse
the gap between trunk and the bark-covered roots. However, after
digging for at least eight inches in all directions, I only found one
rooted area that wasn't all the way girdled. I don't hold out high
hopes for that little bridge graft to take, but I figured there was no
reason not to try it.
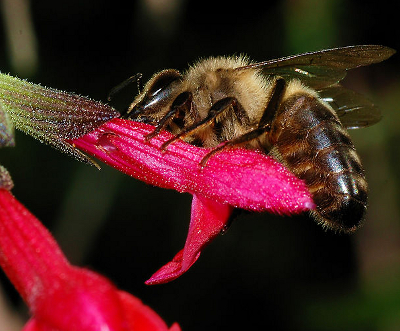 The final thread I enjoyed untangling from Horn's Bees in America
was the history about which types of honeybees were being raised in
American apiaries over the last few centuries. Horn reported that
the first bees to be brought to what would later become the United
States were German black bees. These scrappy bees quickly swarmed
into the wild and spread west ahead of the settlers, although they
needed help crossing the Great Plains.
German black bees
continued to be the primary variety until the same Langstroth who
developed the Langstroth hive was involved in introducing Italian bees
to America. Throughout the second half of the nineteenth century,
many different kinds of bees were imported from abroad, but Italians
soon became the most popular due to their gentleness. However, a
federal law in 1922 outlawed further imports of foreign bees in an
effort to block out the Isle of Wight disease.
For a while, Americans seemed perfectly happy with what they had, but the pests and diseases
that kept cropping up in apiaries made some beekeepers itch to import
new varieties again. Horn reports that, while American bees have
largely been bred to similar genetics for the most efficient honey
production, Europe has a more artisanal approach to honeybees, with lots
of different varieties available for different purposes.
Especially after tracheal and varroa mites arrived in the U.S. in the
1980s, many American beekeepers realized that finding more resistant
bees was a better approach than dousing hives in chemicals, and in 2004,
the federal law against importing honeybees was overturned.
In
the meantime, nature was filling in the gap. Africanized
honeybees (popularly known as "killer bees") are survivors, able to find
nectar in a dearth, to
build up to swarm size quickly, and to defend the hive
aggressively.
The bees were introduced on purpose in Brazil in the 1950s, but they
quickly swarmed
north, resulting in many terrified efforts by the U.S. government to
prevent the influx of so-called killer bees. By the time the
variety reached the Texas border, though, we realized the problem wasn't
as severe as we'd imagined, although policies continue to isolate bees
along border counties to slow their spread. When Horn's book was
published, Africanized
honeybees were only found in California, Arizona, New Mexico, Nevada,
Oklahoma, Kansas, Texas, Puerto Rico, and the Virgin Islands since cold
and
humidity seem to be preventing the bees from spreading further north and
east.
As long-time readers will
know, we've had a lot of trouble keeping honeybees alive without
chemicals, and the only hive that has so far gone the distance is a colony of bees bred in Texas using some Africanized genetics.
Yes, our part-killer bees are a little meaner than any of the other
colonies we've had, but they also seem able to live without any
medications at all (so far). While that's a very small sample
size, it makes me wonder if we should be terrified of Africanized bees,
or if we should embrace the spread of honeybees that seem able to handle
modern problems with aplomb. I'd be curious to hear from others
who have dabbled in chemical-free beekeeping --- do you think a slightly
meaner hive is worth the tradeoff for simpler beekeeping?
| This post is part of our Bees in America lunchtime series.
Read all of the entries: |
We installed the last plywood
triangle today.
Having the roof support done makes it
feel more like a chicken coop.
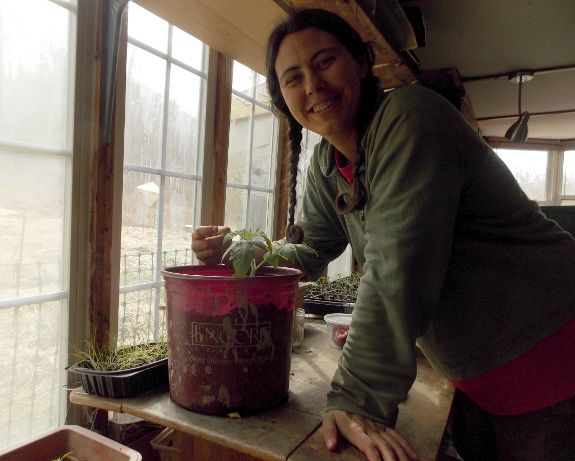
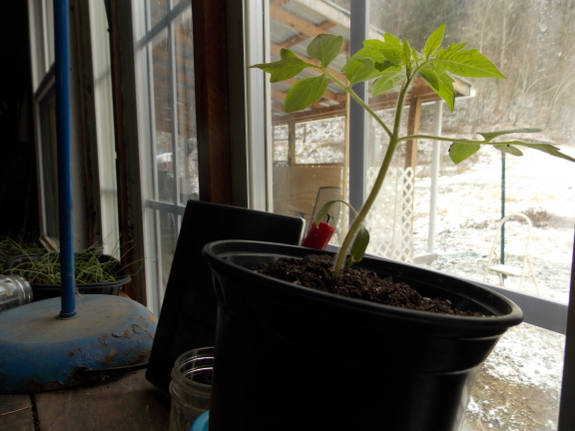
Whatever magic Daddy worked on this little tomato plant,
the effects have been quite impressive. Despite leaving his
climate-controlled sunroom to live in our not-too-sunny trailer where
the night lows can drop into the 30s, the plant has continued to bulk
out and thrive.
Friday, I noticed that
the plant was already sending roots out the bottom of its half-gallon
pot, so I potted it up into a two-gallon container, sinking the tomato
plant deep enough so that the first set of leaves are only barely
visible above the soil line. Tomatoes root well from the stems, so
this will give the plant more root area and will prevent it from
getting leggy, even though the plant doesn't seem to have any problems
in that area.
I'll be very curious to
see how big this little guy gets in the next two months before our
frost-free date, and whether it gives us ultra-early tomatoes.
Daddy plans to upgrade his tomato all the way to a five-gallon bucket
while it's indoors, then to dig the plant a huge hole with post-hole
diggers. I may have to follow suit.
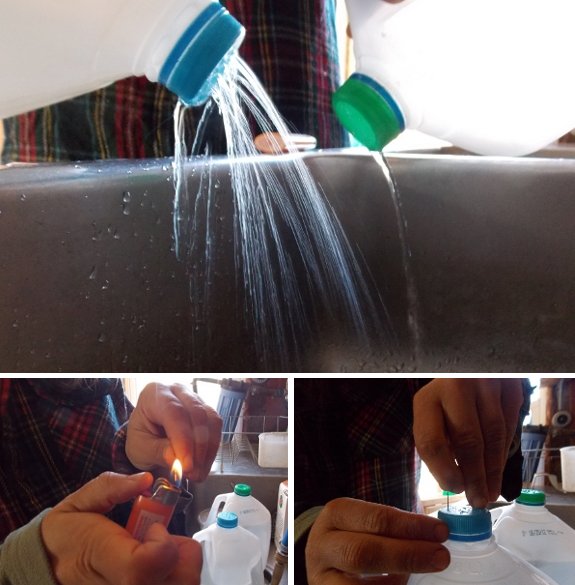
How do you get that slow,
smooth spray from a DIY plant watering can?
Heat a needle and then push
holes through the cap.
A lot easier than going out
to the store to buy one made in China. A smooth spray allows for more
even watering compared to a quick dribble.
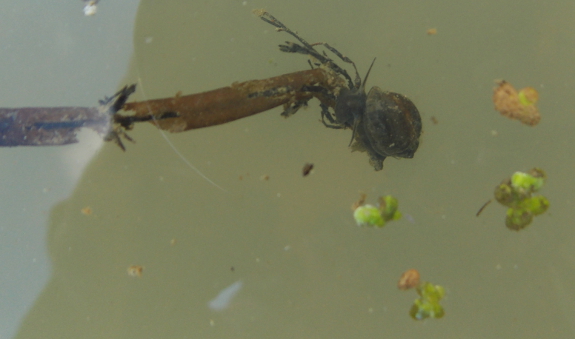
How's the sky pond doing, you may be wondering? (Okay, you probably weren't, but I was.)
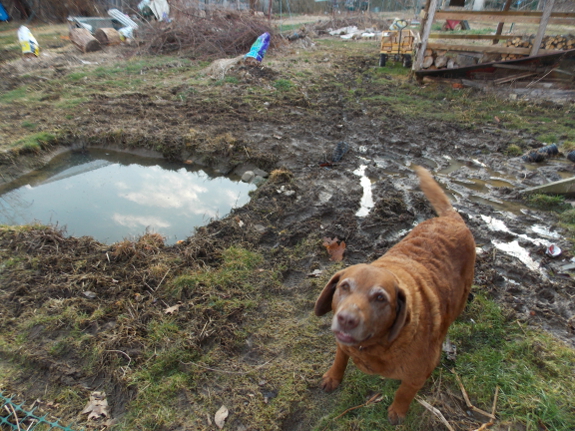
From a distance, the answer would be --- not good. It got too muddy for me to replace the gutter line
Lucy tore up, so the area I was trying to channel water out of is pure
mud. Not very photogenic or efficient to walk through.
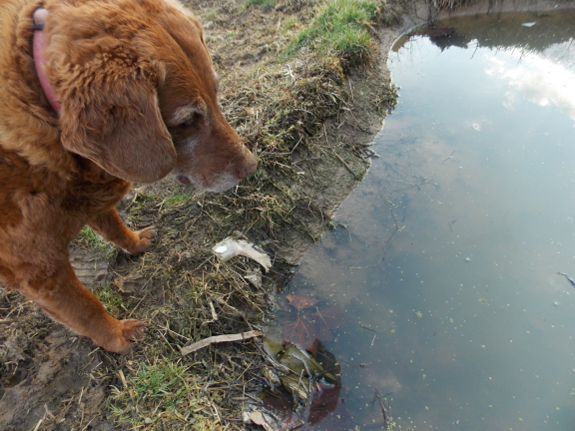
But Lucy reminded me to look closer....
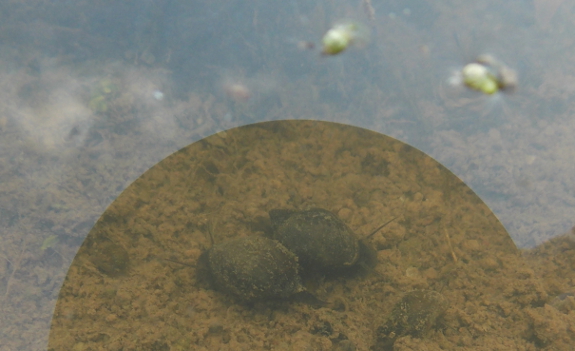
In the pond itself, I was
surprised by the masses of living things waking up from the cold
winter. There are probably hundreds, if not thousands, of these
little water snails lining the walls, eating decaying vegetation.
Last summer, the parrot's feather and duckweed really took off, and most
of the plants didn't survive the winter, so there's plenty of
decomposing vegetation in the pond now to feed the snails. If I
could think of an easy way to harvest them, I suspect I could get enough
protein out of these little critters to feed our flock for a day or
two, leaving plenty of snails behind to repopulate the pond.
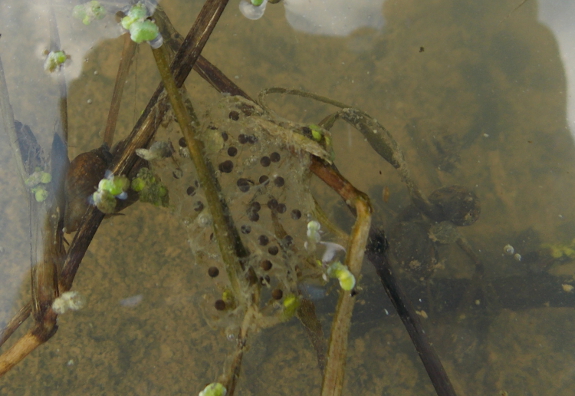
I don't know if the
parrot's feather will come back to life, but the duckweed is already
spreading across the surface. The chorus frogs moved in about a
week ago, and have been yelling in Mark's ears ever since, leaving
behind their little clusters of eggs that will soon turn into
tadpoles. And lots of little water insects are scurrying about in
the water. Maybe Mark's right and this pond could host a goldfish
or two this year.
Pushing the Star Plate triangles above the top creates enough space at the bottom to have room to stand while securing the plywood to the frame.
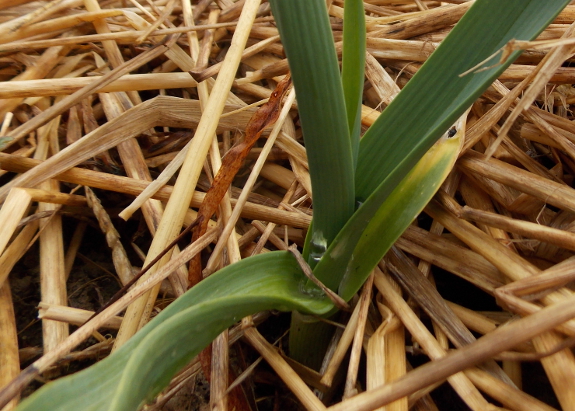
While I wasn't looking,
the garden started to grow. I'd been a bit concerned that our
overwintering garlic couldn't stand this winter's extremes, but the
plants are starting to push out new leaves. The rye cover crop
I have on other beds is also filling in and growing up, and I can see
hints of new leaves amid the strawberries. I try to ignore my
father's South Carolina reports of first asparagus, though --- I don't
expect to see any of that for at least two weeks, if not longer.
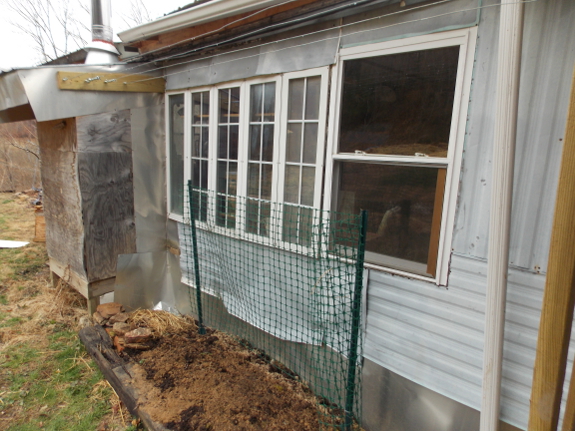
Although I'm planting
little bits and pieces of early crops in the main gardens, my eye is
most drawn to the sunny patch in front of the trailer. Due to Mark's hard work on the gutter and Kayla and my dirt-hauling,
the ground there is finally well-drained enough to grow non-aquatic
plants, so I've put in some peas to begin shading the window before the
kiwi and grapes get their feet under them. The old saying goes
that perennial vines take three years to get established: first they
sleep, next they creep, and finally they leap. During those
sleeping and creeping years, I'll fill in their habitat with something
annual.
 I usually find something negative to say about every book (along with lots of positives), but Herrick Kimball's The Planet Whizbang Idea Book for Gardeners
is an exception. This is self-publishing at its best --- quirky
but polished. If I had to say something negative, I'd beg for an
index, but the table of contents is really specific enough to help you
find projects within its pages. Other than that, there's nothing
not to love about the Idea Book.
The instant you open The Planet Whizbang Idea Book for Gardeners, you'll be drawn in by the simple line drawings that are informative but also fun. Think of Bill Mollison's Introduction to Permaculture
and you've got the right idea. I don't know why, but projects
always look simpler with line drawings. However, if you want
photographic proof that Kimball's projects are possible, you'll also be
pointed toward a hidden website as soon as you buy the book, which
allows you to see plenty of photos of the author's work in action.
I'll write more about the
projects themselves in later posts, but suffice it to say that many
sound quite intriguing. Kimball also did a great job of excerpting
gardening advice from books and magazines of the 1800s, which is a time
when gardening was a serious fact of life for most people. I
thoroughly recommend the chapter by E.P. Roe titled "How to Grow
Strawberries of the Largest and Finest Quality" --- the method outlined
is nearly identical to the one I use, which produces berries so large
and delicious that everyone wants to visit us in May and June.
Okay, I did think of one more negative. Once you buy a copy of The Plant Whizbang Idea Book for Gardeners, you'll realize you need to buy two more to give away as gifts. But that's a good problem, right?
| This post is part of our Idea Book for Gardeners lunchtime series.
Read all of the entries: |
How much weight can a chicken
lift or push through?
We've had a rebellious hen
pushing her way through our home
made dog door to scratch up the garden mulch.
Hopefully these two pieces of
furring strips will be enough weight to stop a hen while at the same
time allowing Lucy to still push through.
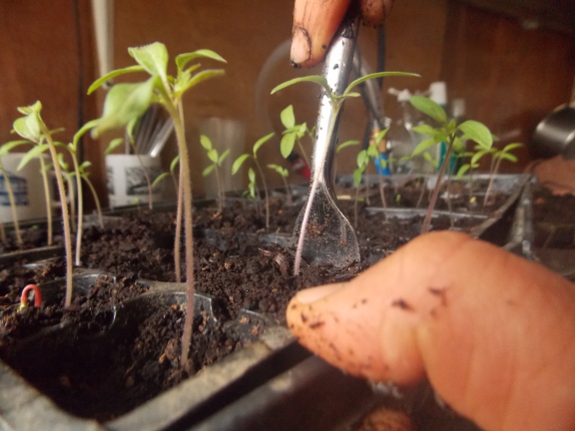
Daddy's rule of soup is:
"Choose your pot wisely, because soup will expand to fill the space
provided." My rule of indoors plants is: "Don't buy potting soil
because your plants will expand to fill the soil available." Since
I found a second stump dirt tree this year, that means I've been having fun starting more seeds inside than usual.
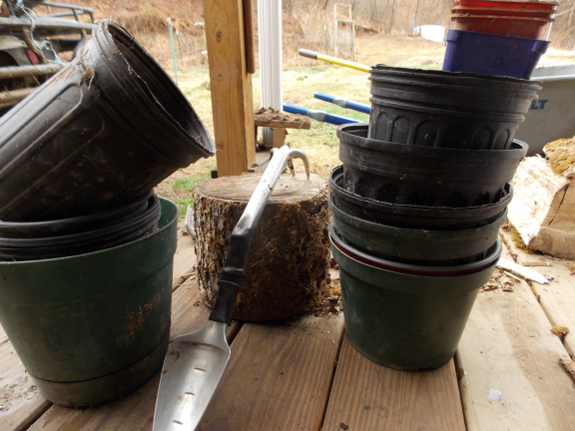
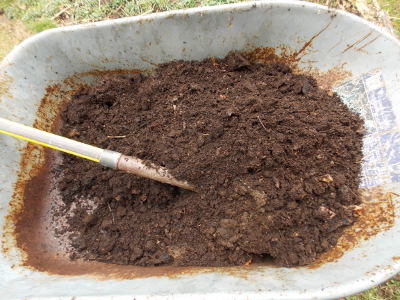 In
a perfect world, seedlings in flats would be potted up soon after they
emerge into larger containers with higher-fertility soil. My
seedlings don't usually enjoy that perfect world, but I figured my
tomatoes deserved a bit of pampering this year. So I mixed an
equal quantity of stump dirt and well-composted horse manure in the
wheelbarrow and used that mixture to fill individual pots for the baby
tomatoes. This way, the plants can keep growing without hitting
any boundaries, which is what keeps seedlings big and strong.
The broccoli, cabbage,
and onion seedlings will go out in the garden much sooner, so I opted
for a lazier approach to their health. Instead of 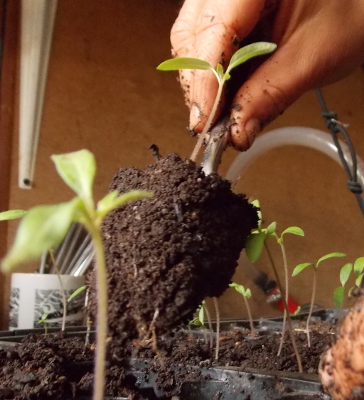 potting
up, I simply soaked some composted manure in water and used that rich
tea to water the seedlings right in their flats. Stump dirt is
relatively low in nitrogen, so this should give the seedlings a boost
without requiring the extra space that larger pots would require.
Of course, emptying out
the tomato flat meant that I had an extra flat on hand, and I had just
enough stump dirt leftover from my weekend walk to fill that flat
up. So I started a few more varieties of tomatoes, some peppers,
Malabar spinach, and even a few zinnias. It's a good thing I've
run out of stump dirt for the moment because I've also run out of space
to put plants in front of sunny windows....
 If I had to pick a single project in The Project Whizbang Idea Book for Gardeners
that is the most useful, it would probably be the shoulder yoke.
Call me crazy, but I've wanted a yoke for years. The idea is that
by balancing a load on a piece of wood that spans your shoulders, it's
much easier to carry heavy things. And while wheelbarrows provide
lower-work hauling on level ground, a yoke would make many of our jobs much simpler during mud season or when wandering through the woods in search of stump dirt.
The trouble with make a
yoke is that the tools are traditionally carved out of a solid piece of
wood, and most of us don't have that skill. Enter the Plant
Whizbang shoulder yoke, which is built by screwing together three pieces
of 1X6, plus a little hardware and padding.
Mark and I are both
itching to give this project a try, so hopefully you'll hear more about
it in later posts. In the meantime, I've included one of Kimball's
drawings to get you thinking about homemade shoulder yokes. (I
highly recommend checking out the rest of the chapter, though, to
simplify constructing your own yoke.) And if you beat us to this
project, I hope you'll send in a photo of your finished project along
with a note about how it works for you!
| This post is part of our Idea Book for Gardeners lunchtime series.
Read all of the entries: |
We decided to use 28 inch
flashing material to cover the Star Plate
plywood.
Each piece gets overlapped by
6 inches and attached with small drywall screws.
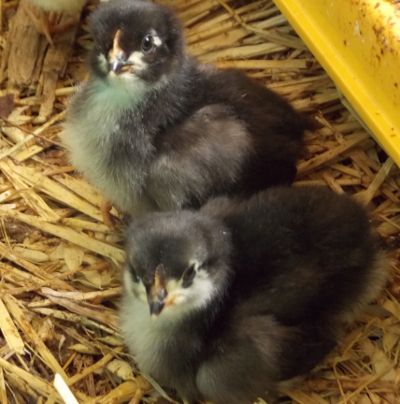 Anna: We had a hatch problem and these guys are supposed to be our replacement layers for next year. What shall we do to fill in the gap?
Mark: How about we buy a few chicks at the feed store to add to our miniature flock?
Anna: Ooh, that sounds like fun! What about ducks?
Mark: Who said anything about ducks?
Anna: Ducks! What a great idea! The feed store has Pekin, or we could buy Khaki Campbell from a local farmer. Pekin are really for meat, so the Khaki Campbell would be a better bet....
Mark: Calm down.
Weren't we talking about chicks? You know, baby chickens that we
already know how to raise and have the equipment for.
Anna: Or I could look
online and see which varieties are available there. Hmmm, let me
look through my books, too, and find out what types my favorite authors
recommend.
Mark: Hello? Are you listening to me.
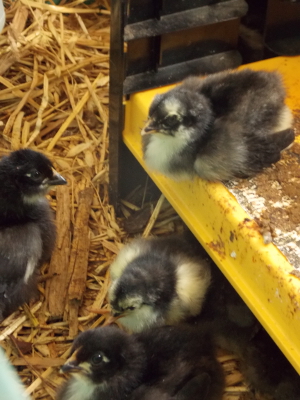 Anna:
Ancona ducks! That's a great idea, honey. We'll order some
Ancona ducks from Cackle Hatchery, and throw in 25 Cornish Cross chicks
while we're at it to explore that meat variety. It's too late to
raise them with our current chicks, so we'll get the chicks and
ducklings near the end of April and skip our usual second homegrown
hatch of the year.
Mark: Where will these hypothetical ducks live?
Anna: In the starplate coop
with our new layers! Ducks grow faster than chickens, so we
should be able to mix the two relatively young. We can collect
rainwater off the roof to make them a little pond. Maybe make it
drain into the swales above the apple trees for fertigation like in The Resilient Farm and Homestead.
Mark: Isn't that a lot of work?
Anna: Well, the new layers were going to go there anyway. And
Cornish Cross grow so big and fast, buying them will really make our
broiler endeavor easier this year. Did you know ducks lay better than chickens do in the winter?
Mark: Is this what you really want?
Anna: Can I have ducks if I don't beg for pigs or sheep this year?
Mark (rolling his eyes): Okay, ducks it is.
(Stay tuned for the more serious explanation of why we're trying ducks on our chicken blog next week. Or mark your calendars for more fluff April 25!)
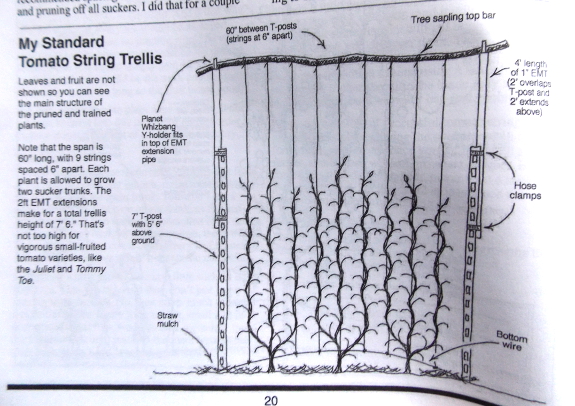
The second project I'm
itching to try out this year is training tomatoes onto a string
trellis. As long-time readers know, fungi thrive in our wet
climate and we're always battling blight on tomatoes. We already stake carefully and prune heavily,
but Kimball's idea of separating out the three stems to each be
supported by one vertical line is a very good one. Since we have
some space below our new grape/kiwi trellis
this year, I'll try two or three tomatoes there using Kimball's string
method, and may also experiment with adding additional supports for my
other tomatoes so I can separate out their three stems more carefully as
well. (In the past, I've trained to three stems, but have tied
them all to one stake.)
While I'm talking trellising, I should add that The Planet Whizbang Idea Book for Gardeners
is full of trellises and other structures based on t-posts. I
have a feeling that Kimball loves t-posts as much as Mark loves 5-gallon
buckets, so if you have an equal affinity for the lowly t-post, you
should definitely give his book a try. You'll find t-posts turned
into grape trellises, pea trellises, hops supports, bird feeder
supports, and much more.
| This post is part of our Idea Book for Gardeners lunchtime series.
Read all of the entries: |
The very top of the Star
Plate roof is hard to reach safely.
Our solution was to fabricate
a 5 sided pyramid cap.
Anna gets a Gold Star today
for figuring out the complicated angles.
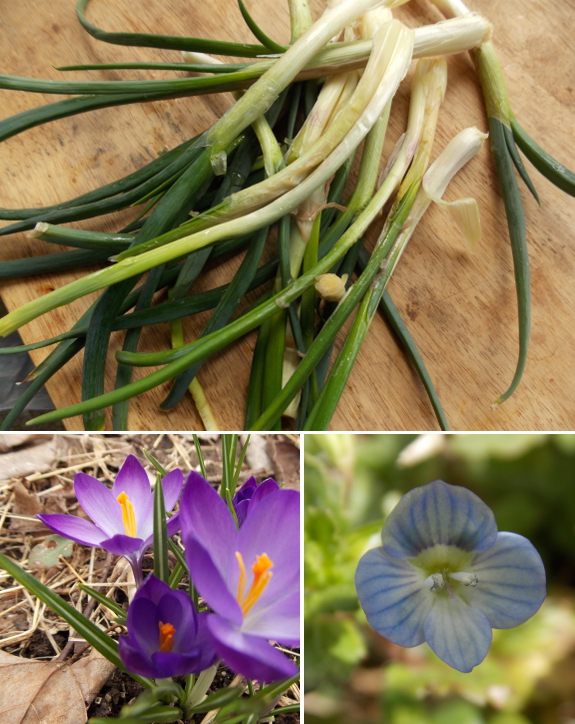
One of my biggest goals for 2014 was to pick one holiday per month that meant something. January, I made up Inflection Day, and we celebrated Imbolc
in February. March is one of the easy months since it has an
obvious holiday --- the Vernal Equinox (aka the first day of spring, for
those less geeky than me).
It's a real joy to wake
at first light at this time of year and still have a couple of hours of
daylight after supper. (We're early diners.) The last week
has featured the first butterflies of the year (a comma or question
mark, plus several spring azures), frog calls have turned into a frenzy,
and the "weedy" wildflowers like speedwell and purple dead nettle are
starting to bloom. I even saw a bat out swooping up the first
spring insects!
The Egyptian onions are growing like crazy, making this a great time to cook up some of the last butternuts into butternut soup.
We've also been enjoying the first kale leaves and will soon be eating
lettuce. The hunger gap is starting to close!
Happy spring!
I enjoyed reading Kimball's chapter on making tire
garden beds not so much because I want to follow his lead, but because I
like hearing about working with tires. I'm still looking for the
perfect use for this waste product on our own homestead, so his ideas
were welcome.
When making garden beds out of tires, Kimball recommends cutting off the
sidewalls with a jigsaw to turn your tire into a more space-saving
container. After removing the sidewalls, he turns the remaining
part of the tire inside out, which makes it a bit more vertical (and
hides the tread). Finally, Kimball learned the hard way that it's
best to sink your tire into the ground if you don't want your crops to
dry out.
Where do I see potential
for using tires on our farm? If I'd been smart, I would have sunk a
processed tire into the ground as a root barrier before planting my
mint. And I could see using tire raised beds to help me build the
soil up in the forest garden, where the groundwater is so close to the
surface that roots often drown. I'll bet you can come up with even
more good ideas for using tires in the garden --- feel free to share
them in the comments section!
| This post is part of our Idea Book for Gardeners lunchtime series.
Read all of the entries: |
We took the afternoon off to
celebrate the first day of Spring.
Exploring a new trail is one
of our favorite kind of day trips.
The new Boody Trail had a
nice mix of low impact river walking along with some flavor of the
downtown portion of St Paul.

 Sugar Hill
is our closest park with good walking trails (at least as the car
drives), but Mark and I haven't been there for a while. We've
already explored the whole place, so we generally want to go somewhere
new.
But we didn't feel like driving far Thursday, and when we showed up at
Sugar Hill we were delighted to discover that a new trail has been added
to the mix! How's that for proof that Mark can manifest anything?

Boody Trail is more of a
city walking trail than a naturalist's
hiking trail, but the length is just right (two miles each way, with
some loop potential), and an easy walk along the river sounded like
fun.
Plus, the Bluebell Trail portion at the east end (bottom of the map
above) is a nice chunk of
floodplain, with beautiful sycamores and Virginia bluebells poking up
through the floodplain sand. Like the rest of the trail, there are
lots of invasive plants present (Japanese Knotweed in the Bluebell portion of the trail), but I was interested to see that native cane
was also being planted --- I'll have to check back and see if the
canebrake can outcompete the knotweed. This one-mile loop is the
portion of the trail I'm likely to walk again.

Another three-quarters of
a mile of Boody Trail wiggles through the heart of St. Paul.
Since I hadn't seen a map at this point, following the little white
signs felt a bit like a treasure hunt, and it reminded me of my days of
walking around another town as a kid. It was fun to pass by my
favorite spot in St. Paul (the library) and to walk on a new little
pedestrian passage under the bridge, but on the way back, we took a
shortcut across the railroad tracks to cut out this portion. Mark
and I agreed that if we had
to live in town, St. Paul, Virginia, might be the town we'd live
in. No way we'd trade in our mud and acreage for city streets,
though.
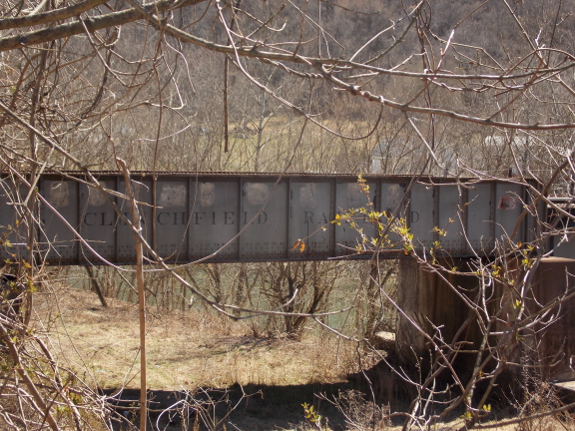
 A lot of the trail ran near the railroad, which provided nice views of old bridges. The one Mark pictured yesterday
was the prettiest, and was dated to 1912. The bridge above,
wasn't as old, but has its own appeal. There's even a caboose
parked along the trail at one point, which I suspect would be of
interest to people with kids. If you're a trainspotter, I
understand that "This is a mega cool spot."
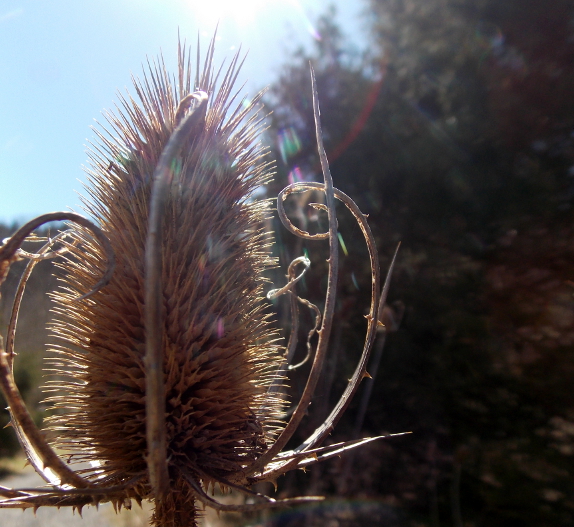
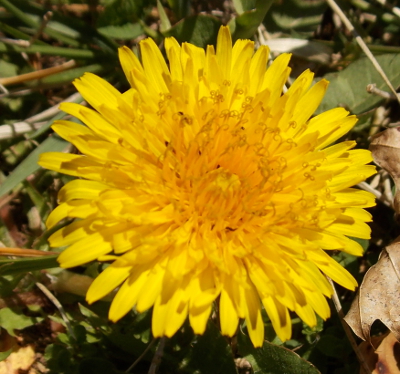 All
in all, Boody Trail made for a fun adventure. No real wildflower
or wildlife sightings, but I enjoyed seeing the first dandelions of the
year along with daffodils in full bloom. Towns are definitely good
places to go if you want to pretend you live a week in the future,
weatherwise.
By the way, in case
you're curious, I believe Boody Trail is named after the road at one of
its trailheads. I'm not sure what the road is named after,
though. If you know, please do comment!
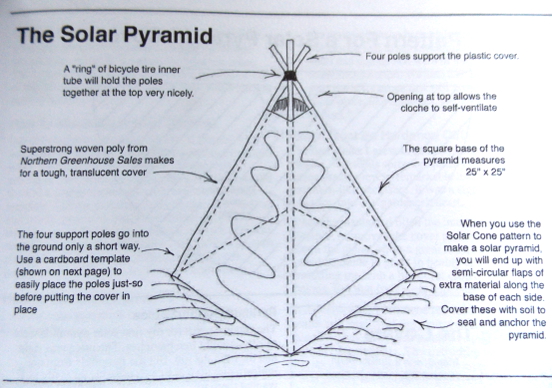
The last set of projects that caught my eye in the Planet Whizbang Idea Book for Gardeners were for season extension. Kimball's caterpillar cloche system is very similar to my quick hoops,
and although I prefer most of my methodology, I might try his technique
of staking a line alone each side of the hoop and attaching the fabric
to the line with clothespins, rather than rolling the fabric in rebar
(my current method).
I also like Kimball's
solar pyramid idea, although I'd probably tweak his design there as
well. He uses an expensive plastic to cover the pyramid, and I'd
instead use some of the scraps of row-cover fabric that have become too
tattered to be used on quick hoops. Maybe a solar pyramid would
allow me to plant out Daddy's huge tomato in April rather than May?
| This post is part of our Idea Book for Gardeners lunchtime series.
Read all of the entries: |
The top of the Star
Plate pyramid is a pentagon cut from a piece of 2x6.
How did we determine the size
and angles of the pentagon?
We guessed on the size and
did an image search for pentagon, printed it on paper and then used it
as a template to trace where to cut.
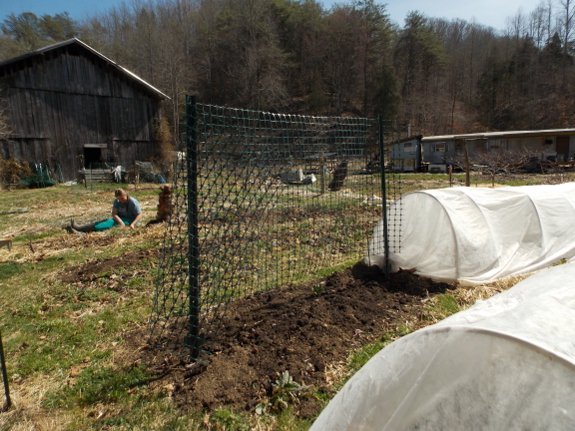
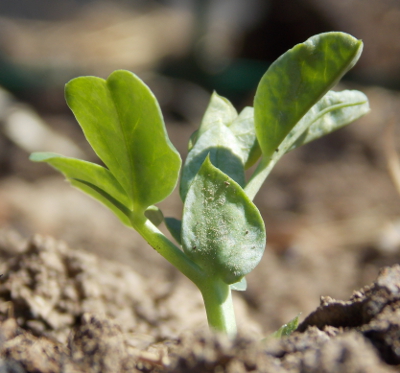 In
March, when the sun shines so bright and you can strip down to a
t-shirt and sandals, weeding is pure bliss. Kayla came over and
helped me pluck the speedwells, dead nettles, and chickweed before they
had a chance to go to seed. We cleaned up around the kale, pulled
running perennial grasses out of asparagus alley,
and started prepping beds for late March planting. Weather
permitting, carrots, parsley, and maybe a few cabbage transplants will
go in next week, then the week after that we'll be busy planting onion
transplants and parsley.
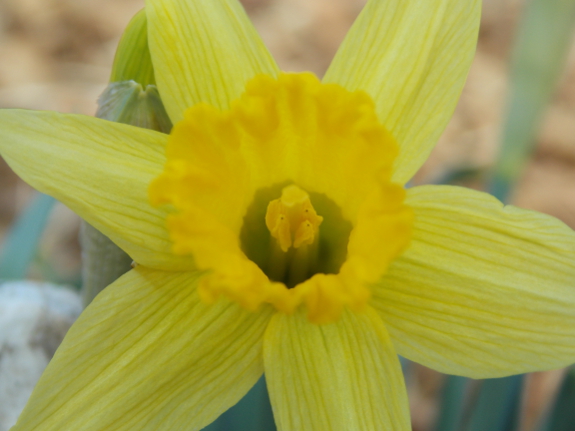
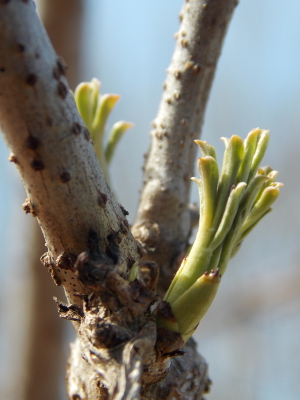 Now that the spring firsts
have started, I can feel the warm season gaining momentum.
Thursday, I saw the first few sprouts from our early planting of peas,
the elderberries are starting to poke out a few leaves, and the first
daffodil opened Friday.
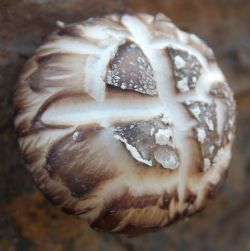
I know that I post photos
of the same signs of life every year, but each glimpse of spring
continues to excite me. I hope I never stop getting a burst of
pure pleasure each time I see new signs of plants and animals overcoming
the winter cold.
We moved our new chicks to
the outdoor
brooder this week.
Lucy is always interested in
what we're doing and keeps her distance when the chicks get brave
enough to forage out from their new home.
 Okay,
yes, I'm aware that werewolves have nothing to do with
homesteading. But reading paranormal fantasy is one of my favorite
leisure-time activities --- I can't always be researching ducks and
permaculture or Mark would go crazy keeping up with all of my flights of
fancy.
So I was thrilled when Wetknee's first partner author
wrote a werewolf novel and let me price it at 99 cents to give our
readers some fun fiction at a very low price. I may raise the
price-tag later once the book gets established, so be sure to snag it
now while it's cheap!
Since Aimee doesn't have many fans yet, I figured a giveaway might help
bribe my readers into giving her a launch-week boost. And the giveaway
is definitely homestead-related, even if the book isn't. We've got a great package of
prizes looking for a good home with one lucky winner:
- A starter culture of kefir ($25 value)
- A Walden Effect t-shirt ($10 value; We're down to M, L, and 2XL)
- A signed copy of either The Weekend Homesteader or Watermelon Summer ($14 value)
- Tried-and-true Walden Effect seed-starter pack ($20 value; Sample-size packets of some of our favorite seed varieties)
That's $69 worth of
homesteading swag, which can be yours if you just take a minute of your
time to plug Aimee's book! Use the form below to enter, and thanks for your help!
a Rafflecopter giveaway
I've tried several different gel shoe insoles in a lot of different work boots, but the combination of soft and hard gels by these new Dr Scholls Memory Fit Work insoles is really what I've been looking for all these years.
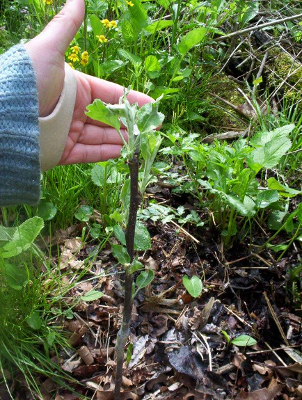 Kayla reminded me that now is the time to check with your local extension service to see if they offer a grafting
workshop. In our neck of the woods, it seems like every county
has one in late March or early April. These workshops generally
provide lots of scionwood
for locally-adapted apple varieties along with a varying number of
rootstocks, plus all the equipment and mentoring you need to attach the
two together. The workshop Kayla and I are going to in a week or
so charges $15 and sends you home with 12 grafted apples and/or pears
--- an excellent deal if you want to start an orchard.
The biggest stumbling
block is...where to put all those new trees? Luckily, you don't
have to decide that right away. Most expert grafters will
recommend planting your newly grafted trees in a flower or garden bed,
spaced just a foot or two apart, for their first year. That way,
you can make sure the trees don't have to compete with weeds and that
they get plenty of water, which should allow the youngsters to grow up
to four feet tall their first summer.
Of course, it's a good
idea to have at least a vague idea where you might eventually install
the trees around your homestead. Chances are the apple rootstock provided will be the popular MM111,
which means a dozen trees would fill up about a tenth of an acre (an
area about 80 feet by 60 feet). If you don't have that much room,
you can always experiment with using pruning and training to keep the trees smaller. I'm pretty confident we can give a dozen apple trees a home since half of our newest pasture isn't spoken for yet, and vole damage
means we're down three apple trees in the forest garden (although I'm
no longer sure that's the best spot for apples, given the high groundwater).
One last piece of advice if you plan to attend a grafting workshop --- do your homework before you go! The last time I went to a grafting workshop,
I didn't know what a lot of the varieties being offered were, so I
chose a bit randomly. This time around, I'll print out my list of disease-resistant apples and storage apples and come prepared.
Thanks for the heads up, Kayla, and for agreeing to go with me!
Our new chicks
have started to venture out a few feet from home.
There's something about
running down a hill that makes you want to fly.
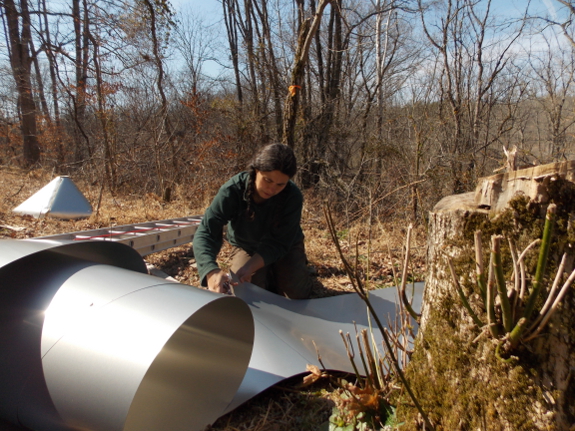
Long-time readers will notice that we went back and forth several times on selecting the roofing material for our starplate coop.
Part of the issue is that the roof is made up of five triangles, which
means that normal metal roofing panels would be difficult to
install. But we also spend some time considering which roofing
materials would work well with rainwater collection since we plan to
gutter the coop and then use the collected water for chicken drinking
water and a small duck pond (frequently emptied).
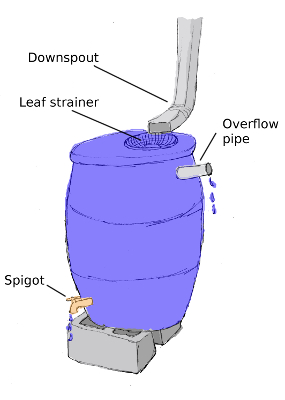 The consensus on the internet about the safest roofing material for rainwater collection is...there is no consensus. The most definitive study, "Effect of Roof Material for Water Quality for Rainwater Harvesting Systems,"
found that the first flush contained the majority of both the microbial
and chemical contaminants, but even after the first flush, water
contained more turbidity, total coliform, fecal coliform, iron, and
aluminum than is recommended by the EPA for drinking water. Water
was tested from metal, tile, asphalt fiberglass shingle, cool roofs, and
green roofs. "None of the roofing materials emerged as clearly
superior to others in terms of the quality of the rainwater harvested
after the first flush," the study's authors wrote, although they felt
that the green roof and shingles produced water that would be
problematic if treated with chlorine.
On the other hand, other
websites veto shingles for rainwater collection, even if the water is
only being used on your garden. The biggest concerns seem to be
copper, zinc, lead, chromium, arsenic, and polyaromatic hydrocarbons
leaching out of the shingles, although the grit that comes off the
shingles is also an annoyance in ran barrels. Other roofing types
that some websites recommend avoiding include galvanized metal (which
sheds zinc), any kind of roofing treated to prevent moss growth (which
sheds copper), and flashing made of copper or lead.
In the end, we settled on
aluminum flashing because it's relatively cheap, is easy to work with
on oddly-shaped surfaces, and probably won't hurt our chickens. If
they all come down with Alzheimer's, though, feel free to say: "I told
you so."
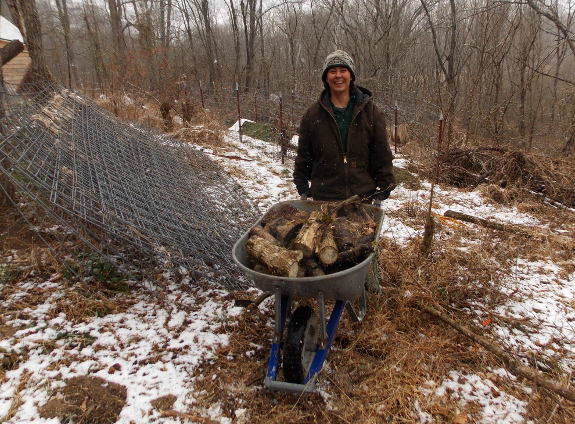
Cutting and hauling firewood for next year had a nice warming effect on me today.
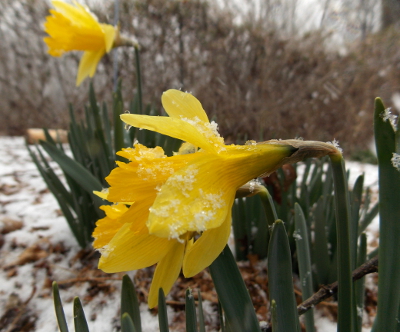
Three times Tuesday
afternoon, the snow fell so hard and fast that half an inch collected on
the ground in just a few minutes. And three times, the sun came
out and melted the snow away in just as short a period.
 Mark told me I was crazy to consider getting up on the coop roof to finish up that project,
so we instead spent a bit of time clearing some of the brush and logs
at the corner of the new pasture that we never quite got to last
year. Mark cut while I wheeled the bounty home to stack in the
woodshed.
Clearing up that corner of the new pasture turned up two new spots for apple trees. It seems that that fitting in a dozen more semi-standard apples won't be any trouble at all!
We finished covering all the
Star Plate roof triangles today.
The Star
Plate pyramid cap is
secured on each side with two exterior screws.
Next up is the overhang
section where we'll be attaching gutters.
The trouble with a cold winter is that you use more of everything.
This is why I try not to put all of my eggs in the same basket and also try to plan on surplus.
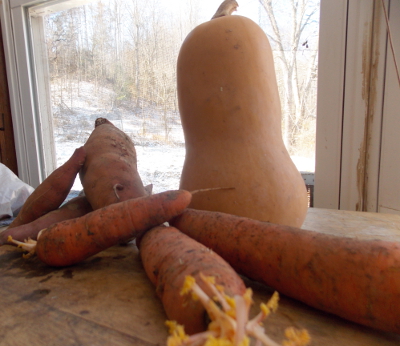 For winter meals, I tend to freeze a lot of vegetable soup and a significant amount of green beans, to stock up on storage vegetables
like carrots, sweet potatoes, sprouting beans, and butternut squash,
and to use quick hoops to protect lettuce, kale, and brussels sprouts
for fresh eating over much of the winter.
Last year, we had such good luck with the last option that I stored less
of the other types of vegetables, but the negative teens killed most of
our over-wintering plants this year. The result? We had to
eat more of our inside stores, running out of soup in February and
eating up the last butternut this week. We've still got a bit of
everything else left, but are very glad the garden is starting to give
us leafy greens again.
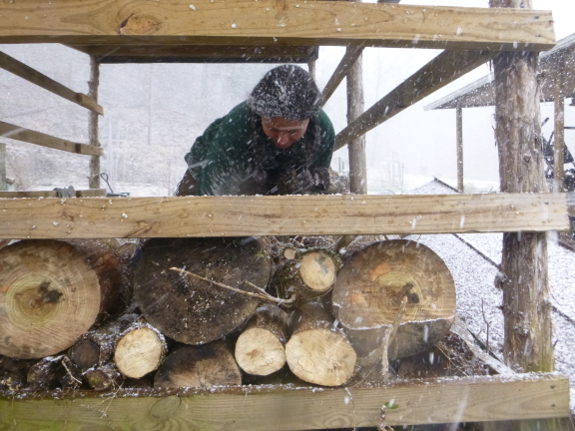
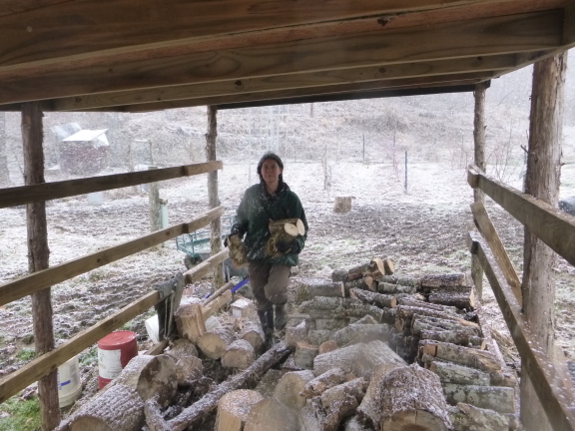
The woodshed also
suffered during this cold winter. We went into the 2013/2014
winter with our shed nearly full, and that was lucky since we went
through firewood like nobody's business. In fact, in January I
estimated we'd run out of firewood by the end of February. But,
luckily, the weather warmed back up to slightly below average (rather
than drastically below average) in February, so we've still got a bit of
wood left even as we start to refill the shed.
In our modern era of
homesteading, if you run out of winter stores, you can buy more.
(Assuming you stocked up on cash the same way you stocked up on wood and
vegetables, of course.) But who wants to eat store-bought
vegetables when you can just tweak your planting to ensure homegrown
goodness? We'll be sure to store just a bit more of everything
this year, and if that means we're still overflowing with vegetables in
April, we'll give some away. Extra firewood will be just that much
drier two winters from now.
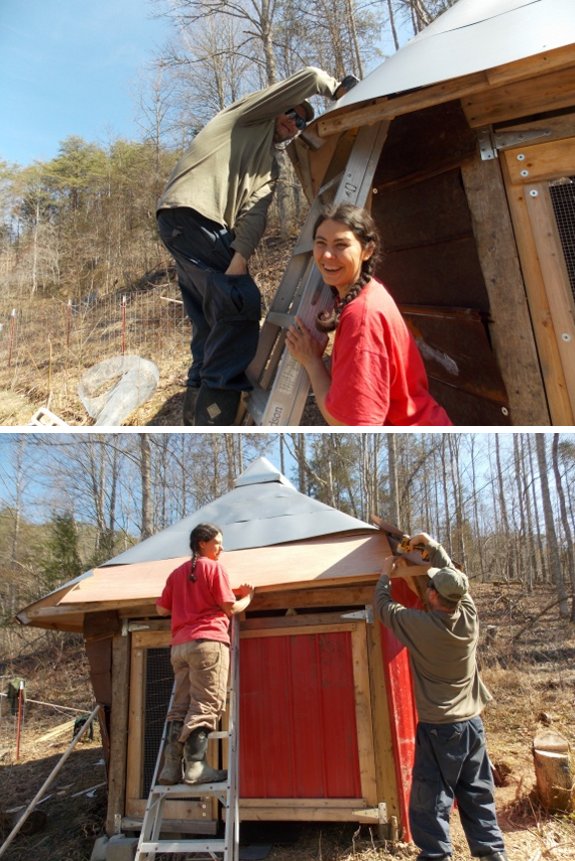
We had to shorten this last
overhang piece a bit to let the door swing open.
Now I need to figure out the
best way to attach a gutter to each side.
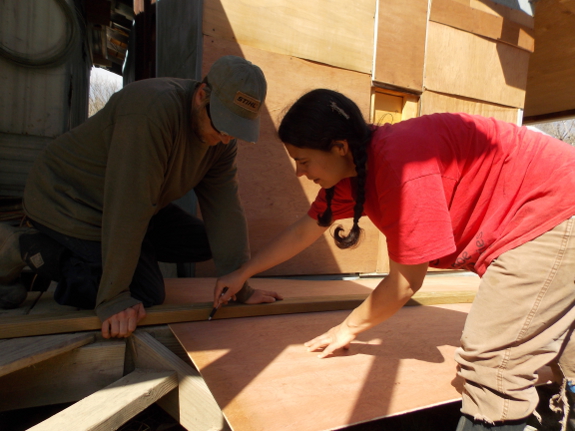
Now that the coop is nearly done,
I'll admit that there were times over the last year when I lost faith
in its eventual completion. Mom says "All ye of little faith"
around me a lot, and while Mark disagrees with her semantics (it should
be second person singular unless you live in the Deep South), he agrees
with the sentiment. Whenever I despair of farm projects, my kind
husband reminds me that he and I together can do anything --- and so far
he's always been right.
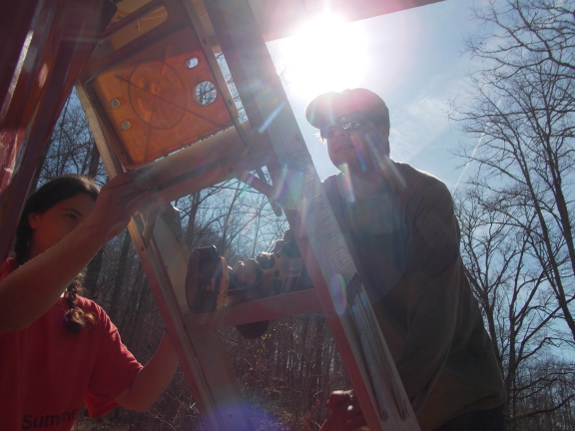
Sometimes, our teamwork
doesn't click, but usually a day spent working with Mark is pure
pleasure. We complement each other very well --- I can measure
things and hold the ladder while he does...everything else.
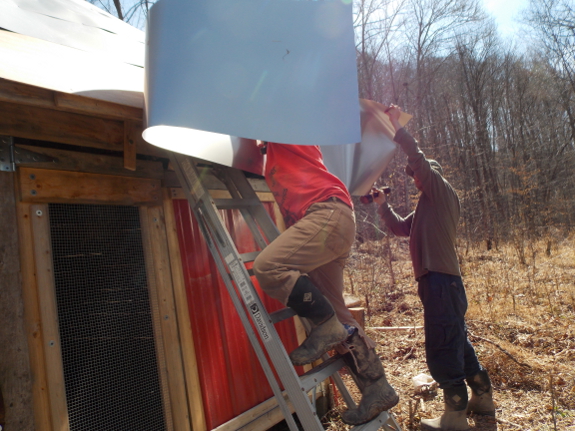
I guess a real pro could
have built this coop entirely by himself, but that seems pretty
tough. That's why the coop languished for most of the summer --- I
was too busy in the garden to pull my weight on the building
project. I guess I really am doing something out there even though
it feels like I'm not helping much.
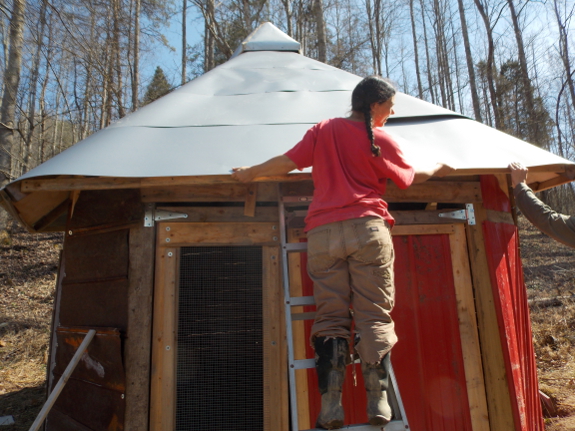
The big picture of the
coop is now completed. All that's left is gutters, a rain barrel,
and filling in some holes to complete the anti-predator campaign.
Our chicks (and then ducks) are going to love it!
We installed a late Summer Taylor Red Raspberry plant today in
our on going effort to have berries all Summer long. Anna ordered it
from Miller, but it shipped from Stark Brothers due to some sort of
merger.
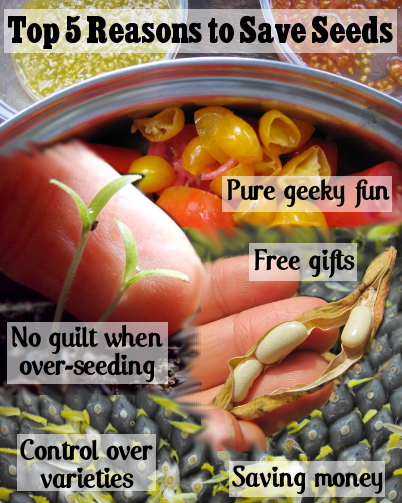 When
I got started with seed saving, I was mostly trying to save
money. But the more seeds I saved, the more I realized the true
benefits go beyond finances. Here are my top five reasons to save
seeds:
1. Pure geeky fun. Letting your garden come full circle is very satisfying, and the seeds themselves are beautiful.
2. No guilt when over-seeding.
If you buy seeds, especially expensive ones like hybrid cucumbers, you
may feel obliged to make each seed count. But when you save your
own, you nearly always end up with way too many seeds. So there's
no reason not to put two seeds in each spot, meaning you don't have any
gaps and can select for the hardiest individual.
3. Control over varieties.
When buying seeds, you're at the mercy of the seed companies. If
you love a variety, but the company wants to replace it with something
they consider more profitable, then you're out of luck. But if you
save your own seeds, you'll always have your favorite varieties on
hand.
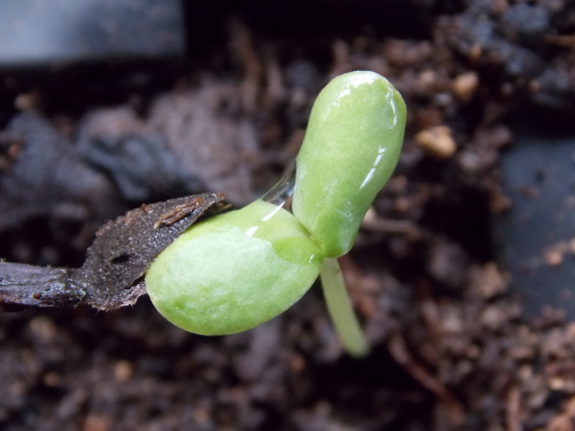
4. Free gifts.
Since you'll inevitably have too many seeds of each type, you'll be
able to give starter packs of your favorites away. Or you can swap
them with friends or strangers.
5. Saving money. Okay, yes, you save money too. We
spend only $100 per year on seeds even though we grow all of our own
vegetables, plant heavily, and buy from an expensive supplier. With a small backyard garden, you could cut your seed costs to pennies.
If you want to learn more about saving the easiest seeds, check out Weekend Homesteader: August. The more advanced seed saver should start with this post. Happy seed saving!
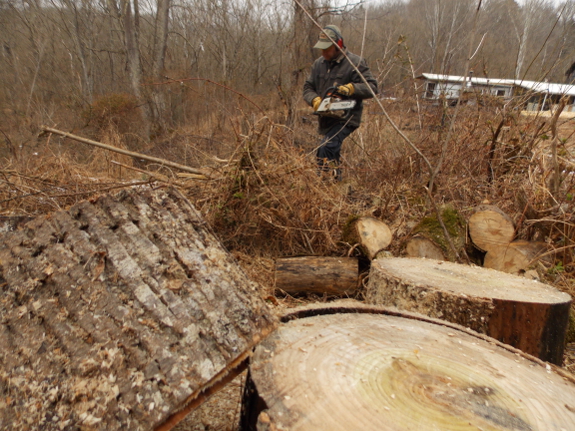
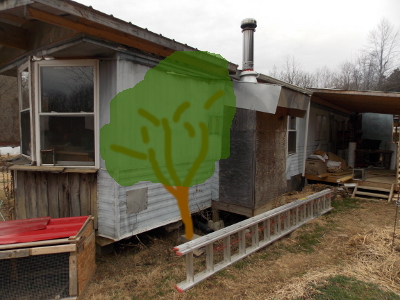
We haven't been able to identify
this type of log to the left.
Maybe it needs more than a
year to age, but each attempt to split it only results in the axe
bouncing off.
I think it may have even been
too tough for the chainsaw. When we got it tuned up
recently the repair guy
pointed out how the piston is scored, which may have been connected to
cutting logs like this one.
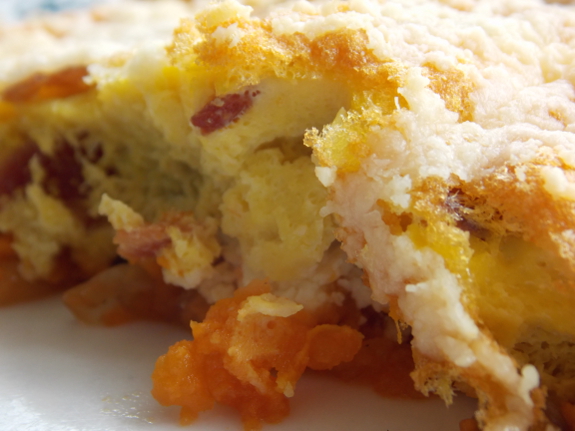
This is the time of year
when our chickens are churning out ten eggs a day, which means eggs have
to fit into our lunches and dinners, as well as breakfast. Kayla
brought me a recipe for Frittata of Sweet Potatoes, Swiss Chard,
Peppers, and Onions, and that seemed pretty good...except this isn't the
time of year for peppers, our Swiss chard bit the dust over the winter,
I don't like separating eggs and only using part of them, and
everything is better with a little parmesan and bacon. So I came
up with the recipe below, which Mark told me to make again --- it's
definitely a keeper!
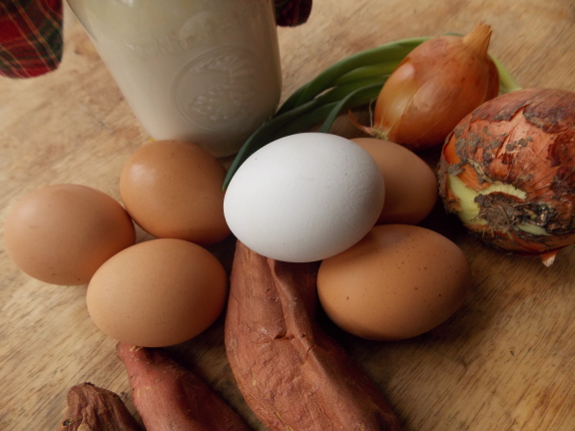
The ingredients:
- 10 eggs
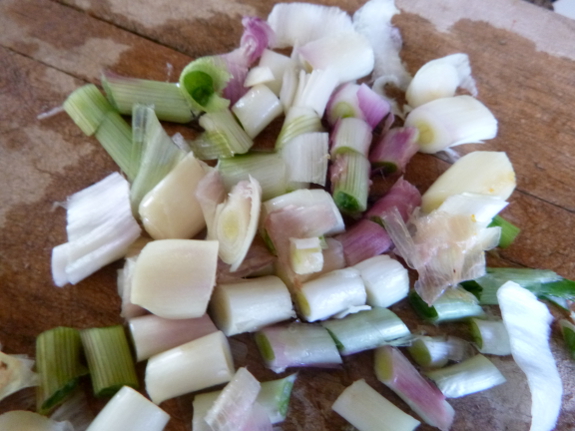
- 1 large onion (or multiple small onions. If your onions have sprouted, just cut up the green part and put it in too!)
- 1 extra large sweet potato (or multiple small ones)
- 1 pint of strained kefir
- Salt and pepper
- A bit of oil
- 6 slices of cooked bacon
- 0.25 cups parmesan cheese
Start a few hours early by throwing the sweet potato in the oven to bake
until it's soft. At the same time, cook the bacon by spreading it out
on a cookie sheet (with sides) and putting the tray on the bottom shelf of
your oven, flipping the bacon once, and removing the slices just as they begin to
turn brown. Let the potato cool until it's easy to peel off the skin,
then mash it up and line the bottom of a 9"X12" casserole dish.
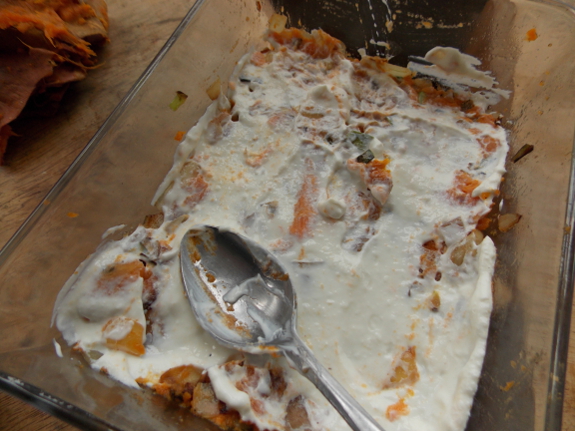
Meanwhile, chop the onion
into small pieces and saute it in a bit of oil until the pieces are
soft. Add the onions, salt, pepper, and bacon (broken into small
pieces) to the top of the sweet potato. Spread the strained kefir
on top of the vegetables.
Use a mixer to blend the
eggs until they're fluffy, then pour them on top of the kefir.
Bake in a 350 degree oven until the eggs are fully cooked and the top is
lightly browned, then sprinkle parmesan cheese over the surface and
cook a few more minutes.
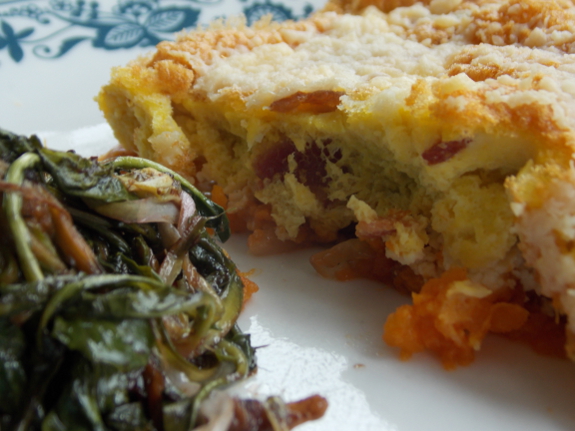
Serve with dandelion
greens that have been sauteed in balsamic vinegar and oil, and you have a
delicious, nearly homegrown dinner for six. Enjoy!
Our first salad of 2014 feels like it's just days away looking at all this green.
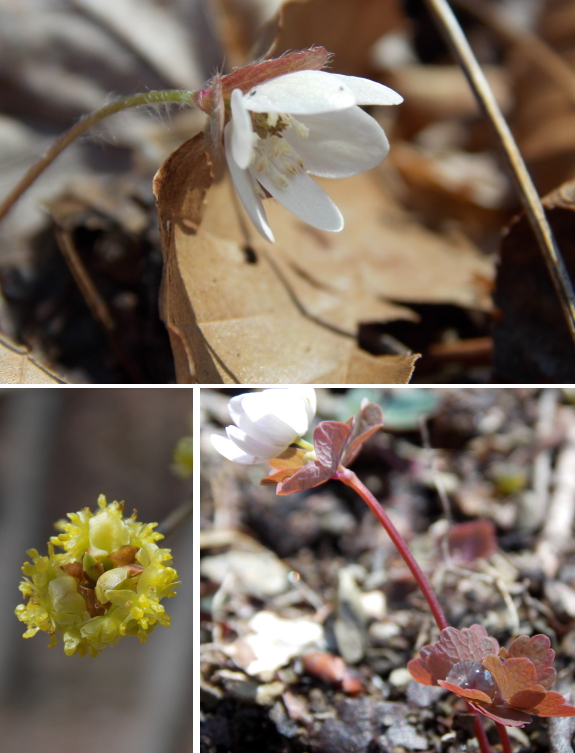
The big question on many
gardeners' minds this year is --- will spring eventually catch up, or
will the cold winter push even our frost-free date further into the
future? Both wild plants and those in the garden are running
behind schedule this year, with most of our earliest spring wildflowers
just starting to unfurl. I finally saw a dandelion blooming in the
yard this weekend, and the grass and clover are beginning to grow, but
it will be another couple of weeks before we can put our chickens into
their pastures.
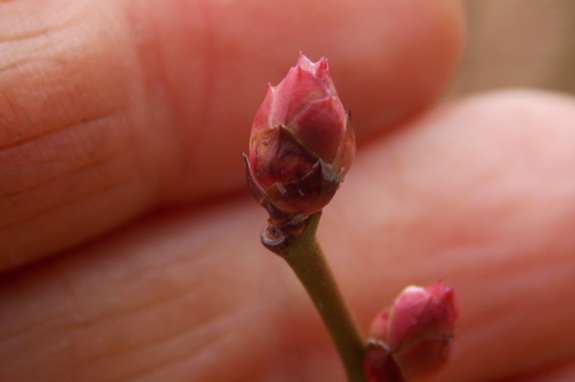
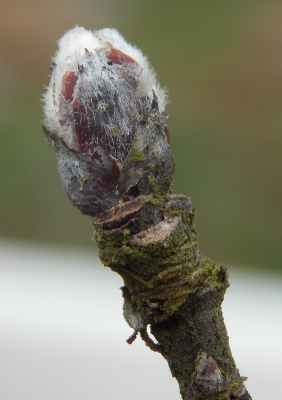 So
far, it's a bit hard to tell whether the dormancy of our perennials is
due to the slow spring or to cold temperatures nipping flower
buds. The blueberries are starting to wake up, but peach flower
buds still look small and shrunken. On the other hand, apple
flower buds are just barely beginning to swell, suggesting that the
apple crop, at least, may come through for us this year.
I thought I'd close with a quote from my weather guru.
"Keep the faith," he wrote. "Spring will come...the April 15 to
May 15 period being CERTAIN to result in a glorious rebirth of the
mountain landscape...as dictated by Mother Nature's Time Clock (even
though everything is running BEHIND the time schedule right now...it will catch up during this dependable period)."
So there, you have it --- a promise of spring! No matter when it comes, spring will get here eventually.
We moved one of our intermediate bulk
containers to the Star Plate coop.
The plan is to collect
rainwater for the chickens and fruit tree irrigation.
Want more in-depth information? Browse through our books.
Or explore more posts by date or by subject.
About us: Anna Hess and Mark Hamilton spent over a decade living self-sufficiently in the mountains of Virginia before moving north to start over from scratch in the foothills of Ohio. They've experimented with permaculture, no-till gardening, trailersteading, home-based microbusinesses and much more, writing about their adventures in both blogs and books.
