
archives for 02/2014
 Many of you have written in to sing the praises of kefir, but others have asked how to get started. Luckily, Brandy
is overflowing in milk kefir grains at the moment, and she's willing to mail
a starter culture (about two tablespoons of grains, enough to culture a pint right away, a $50 value) to two lucky winners
next week. To sweeten the pot, I'm going to throw in a paperback
copy of Lollipops, Garlic, and Basement Salamanders and a Walden Effect t-shirt for each winner. (These will come in a separate envelope, so you'll get two jolts of homesteading happiness if you win!)
How do you enter?
I've decided to try out a rafflecopter giveaway. At the moment,
what we really want to push is for our loyal readers to follow this link to Amazon,
bookmark the page, and use it when you make your usual orders.
We'll get a small cut of each order you place through that link, which
will allow us to mail out care packages like this. (In fact, Mark
wants to get in the habit of having some homesteading goodies to share
every month, but that will depend on how well the Amazon experiment
goes.)
Click on the relevant boxes below to enter! Thanks for reading, and I hope you enjoy the giveaway!
a Rafflecopter giveaway
What's the best way to secure
8 jugs of water to the back of an ATV?
Thread a flat
bungee cord through the handles and secure each end.
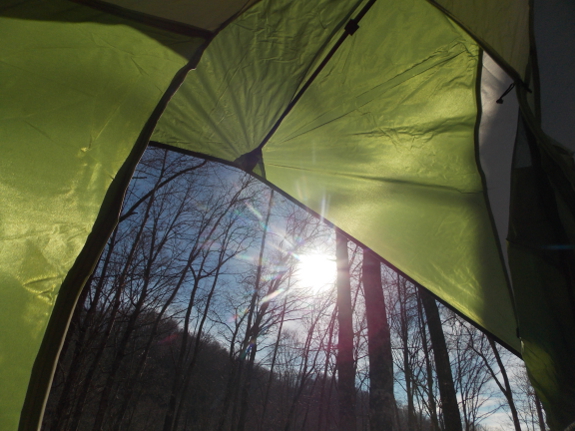
If you're sick of winter, today's the day to celebrate. In some traditional cultures, the February cross-quarter
isn't just a time to watch groundhogs, it's considered the first day of
spring! Countries that are now part of the United Kingdom used to
celebrate today as Imbolc, referring to the pregnancy of sheep.
Some customs that could still be relevant involve lighting candles or
fires to represent the increasing warmth, eating butter and milk to
celebrate the birth of farm animals, and divining the weather.
 Divining
the weather? Yep --- Groundhog's Day probably derived from the
belief that a supernatural hag gathers her firewood on Imbolc to stay
warm for the rest of the winter. If it's going to be an extended
winter, she needs Imbolc to be warm and sunny so she can bring in lots
of wood. That's why if the groundhog (or snake or badger,
depending on who you talk to) sees its shadow, you're in for more cold
weather.
Another tradition
involves holy wells (any small water source with healing folklore
attached to it). Imbolc was considered a good time to visit these
holy wells, leaving offerings, using the water to bless things, and
walking sunwise around the well.
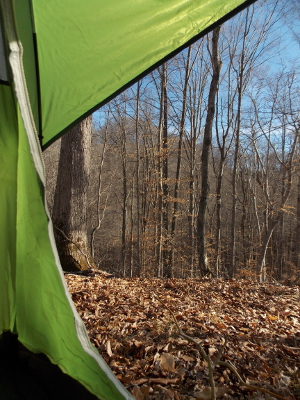
I preemptively celebrated
on Saturday by setting up my new tent on top of Beech Hill and basking
in the sun. The jury's still out on which other celebrations
we'll come up with today.
This post is to document how
thick the tank ice is. 8 inches.
Last night was warm and all
it took to break through was the bottom of the bucket, but on most days
of this January it took a few minutes chipping away at it with the spud bar.
Maybe after collecting a few
decades of this data on Imbolc day it will prove to be some sort of
indicator on how much more below freezing weather we can expect for the
rest of the Winter?
I'm going to take a wild
guess and say years with ice thicker than 5 inches on Imbolc day would
most likely equal a more mild February and March just because Mother
Nature likes to be mysterious when she can.

Upgrading one section of fence
and plugging in the deer deterrent seems to have been sufficient to nip
last month's deer incursion in the bud. It's hard to say how much
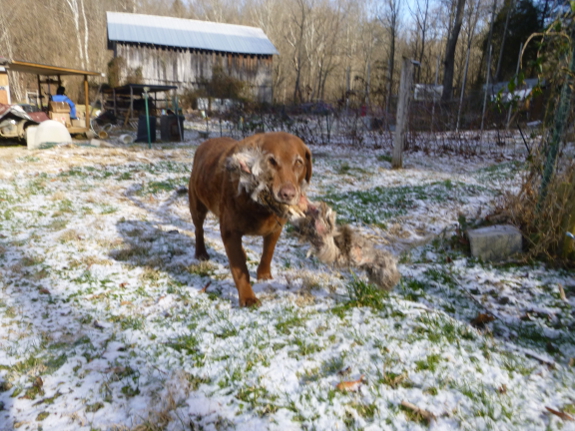
Lucy helps with these problems --- I do sometimes catch her on the game camera barking at the boundaries, but I've also seen deer in the yard with Lucy sound asleep and not noticing.
One of these days I'll
write an ebook on the topic, but for now, here's a rundown on the
utility of various deer-deterrent techniques. We've tried
everything on this list, and I've organized your options from most to
least effective. I hope the summary helps those of you with high
deer pressure. (Just so you know how high our pressure is --- one
neighbor killed 18 deer last fall, I suspect the other neighbor got at
least half a dozen, I got 1, Lucy got or found 1, and there are still deer everywhere.)
- Fences --- Moats,
especially, are multi-purpose, relatively low-cost ways to keep deer
out. A taller, more solid fence would obviously work even better,
but would cost many times more (and wouldn't double as a chicken
pasture!).
- Deer deterrents --- Mark's deer deterrents
are my favorite of the ones I've used, although they wouldn't fly in
suburbia. You really need at least four of these deterrents per
acre (probably more, and moved every few weeks) for total protection,
but the deterrents gave us perhaps 75% protection even before we erected
fences. Other scare-based deterrents we've used have been worthless for large gardens.
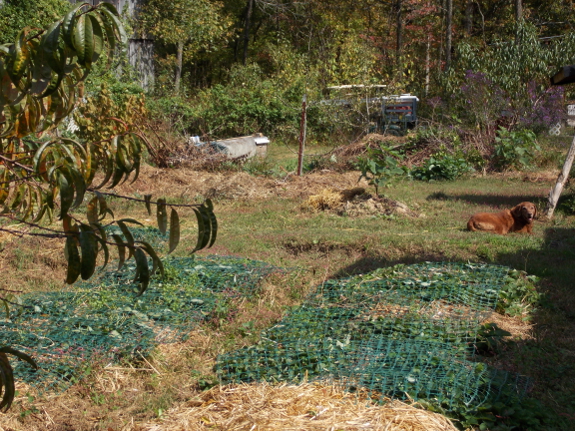 Spot covers ---
As a short-term fix while getting a more permanent solution in line,
plastic trellis material over especially tasty beds (like strawberries)
does work. Similarly, I've had good luck using one fencepost and
some trellis material to make a cage around young trees that are outside
our perimeter.
- Hunting --- This is really
only effective if you're willing to kill deer out of season and to fire
at any animals you see in your yard. Deer are creatures of habit,
and I suspect that when we have a repeated incursion, it's the same
individuals coming in over and over, so killing that problem deer can
make a difference. You can get a kill permit
for shooting deer in your garden out of season, but the permit we got
only lasted a short time and didn't feel worth the hassle.
- Dogs --- Their utility
really depends on the dog. As I mentioned above, Lucy is sweet,
but probably only keeps deer out 15% of the time since she naps most
nights and deer are most active in the dark.
- Sprays, soap, etc. --- These are completely useless in our climate. If you have one prize plant and don't live in rainy climate, this might work better for you, but you have to reapply after each rain on all plants you want protected. Meanwhile, the local standbys of tying smelly bars of soap to a tree or pouring cheap cologne on the ground are completely worthless as well.
Why am I posting about
keeping deer out of the garden at the beginning of February when
nothing's growing? This is the time to figure out your campaign
for the year, because if a deer gets used to coming into your yard in
the winter, it's going to be triply hard to keep it out in the
summer. That's why we ramp up our defenses immediately at the
slightest incursion. Good luck!
 In The World Until Yesterday, Jared Diamond compares
traditional societies with the more-mainstream modern culture in an
effort to answer the question posed by the subtitle --- "What can we
learn from traditional societies?"
Diamond draws upon his extensive experience with the people of New
Guinea (many of whom had no contact with Western society until 1931),
along with data from other researchers about hunter-gatherer groups
around the world, to reach wide-ranging conclusions about how
traditional people interacted, what they ate, and how they lived.
In the process, Diamond doesn't sugar-coat the reality of traditional
societies, admitting that warfare, infanticide, and many other aspects
of these cultures are things we're glad to be rid of. However, he
does suggest other features of traditional societies that we can
selectively incorporate into our own culture to improve our lives.
The book is a bit hit or
miss, with some chapters stating the seemingly obvious, while others
delve deep into fascinating topics I'd never considered. It's also
data heavy, perhaps because the author's Guns, Germs, and Steel
opened Diamond up to wide-spread criticism from historians. What I
only realized after reading this later book, though, is that Diamond is
an anthropologist, not a historian, so his conclusions are more about
broader issues of the human experience than they are about factual
histories.
Later posts in this week's lunchtime series are going to suggest homesteading-related implications of Jared Diamond's The World Until Yesterday.
However, I'll skip over discussing about two-thirds of the book, either
because I don't feel like I have the know-how to rehash certain
assertions (like his parenting tips), or because I don't want to open an
un-homesteading-related can of worms (for example, about Diamond's
analysis of the purposes of religion). Which is a long way of
saying --- if what you read here sounds interesting, this is one book
you'll want to delve into more deeply on your own.
| This post is part of our The World Until Yesterday lunchtime series.
Read all of the entries: |
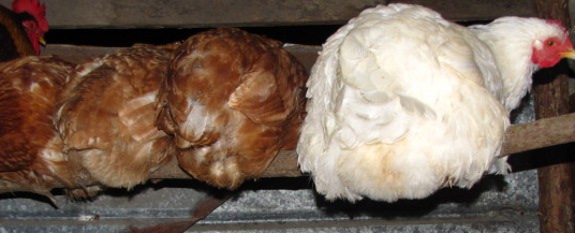
We lost one of our White
Leghorn hens to a predator last night.
It may have been a raccoon.
What
exactly killed our chicken
might remain a mystery, but the link has a list of questions that helps
in making an educated guess on the predator's identity.

A cold winter is proof that we need to plan our spring planting schedule by soil temperature,
not by the calendar. For example, my garden spreadsheet says it's
time to seed lettuce under a quick hoop and start onions in a flat
inside. But, although the latter will be feasible once I thaw the stump dirt I hacked out of a tree in the woods, the former needs to wait. Despite preheating the lettuce bed, my thermometer
is still reading below freezing just beneath the surface there.
The beautiful weekend just past only managed about a quarter-inch
thaw.
 Modern-day
homesteaders try to grow a lot of our own food, but we know we can
always head to the grocery store if a crop fails. Most members of
traditional societies, though, would be faced with starvation if they
didn't find ways to hedge their bets. Diamond
presented a slew of methods these traditional hunter-gatherers and
farmers used to ensure they always had food to eat, and some of these
techniques could be mimicked by modern homesteaders.
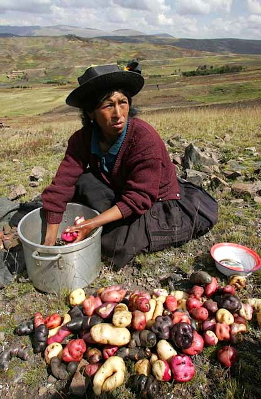
My favorite example came from the Peruvian Andes, where farmers scattered small
garden plots across several
miles. Each farmer owned an average of 17 fields, each about 250
square feet in size, so the farmers were gardening a tenth of an acre
spread across many tiny
plots. To modern farmers, this method seems very inefficient
because the Peruvian farmers spent a lot of their time walking back and
forth between these little plots. However, even though the
traditional farmers produced lower average yields than they would if
they'd just made one big garden, the many plots in different areas
evened out variations in yield due to weather. As a result,
farmers always managed to grow enough to survive and were never faced
with starvation even during bad years.
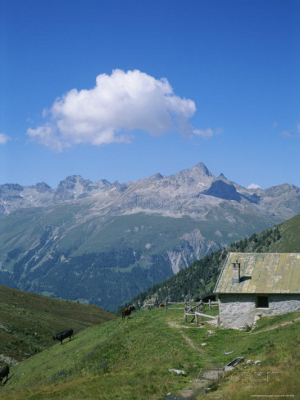 A similar technique involves moving seasonally. For example, farmers
in
the Alps gather together in the valleys for the winter then
disperse across the mountaintops during the spring and summer. On
the homestead scale, I'd love to one day have an orchard on a ridge top
that's more likely to miss late spring frosts.
Other methods that traditional societies use to deal with unpredictable
food sources are less relevant to the modern homesteader. We
probably don't want to share all of our food with neighbors to even out
the supply (especially because we can now just dry, freeze, or can
excess for later). Gorging ourselves in the summer so we can live
off body fat during lean times probably won't go into fashion in America
anytime soon, either. But many homesteaders do use the
traditional method of "storing" excess produce by feeding it to livestock, then eating the pigs or other animals in the fall or winter.
Yet another
response to seasonal food shortages is to expand your diet. When
times are hard, people are willing to eat foods that aren't as tasty or
that need special processing to leach out poisons (such as tannin-rich
acorns). Modern homesteaders take a step in this direction when
they learn to love winter kale instead of craving hydroponic tomatoes
during the cold season.
Stay tuned for more lessons we can learn from traditional societies in tomorrow's post.
| This post is part of our The World Until Yesterday lunchtime series.
Read all of the entries: |
These small
space heaters have a message printed in capital letters warning
against using anywhere but an indoor setting.
It only took a couple of
hours of unauthorized space heating focused on the unburied section to
thaw out our wash waterline.
 Last spring, I had trouble for the first time with damping off.
This fungal disease is evident when seemingly healthy seedlings die
near where their stems meet the ground. When you're itching for
the first seedlings of the year to push forth their greenery, damping
off can be very traumatic for the gardener. (Okay, maybe that's
just me.)
Since I was using the same stump dirt
as in previous years, I felt that the issue last year might have been
problematic fungi colonizing my old seed-starting flats. Sure, I
could have bought new flats, but I thought it would be easier (and
definitely cheaper) to simply soak the ones I have in bleach water for
about half an hour. After that, I filled up the flats and seeded
my onions, then made a control flat out of a rotisserie-chicken
container. (Rotisserie chickens seldom come home with us, but we
had a long day in the big city last week and I was too exhausted to
cook, so Mark bought one as a rare treat.)
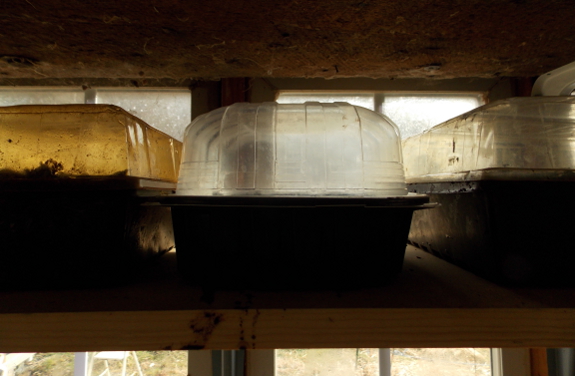
Hopefully I won't see any
damping off at all, but if I see it in the store-bought flats but not
in the chicken flat, I'll know I was right about the flats being the
problem (and wrong about the bleach water curing it). On the other
hand, if I see damping off in all the flats, I'll know the stump dirt
is the problem and will have to consider one of the mainstream cures ---
either buying real potting soil or sterilizing my stump dirt in the
oven. I like to think the bacteria and fungi in my unsterilized
potting soil are good for baby seedlings, but I could be wrong.
Other possible ways to
deal with damping off include tweaking the environment and using
home-made sprays. The fungi involved like cool, damp conditions,
so if you can warm things up (maybe with a heating pad under the flats)
and keep watering to a minimum, you might be able to whip the bad
microorganisms even if they're present. Some gardeners even make
chamomile or garlic tea and pour it over their potting soil to protect
the seedlings. I'll let you know if I have to resort to any of
those extremes, and if so, which ones work. In the meantime, feel
free to chime in about your battles with damping off in the comments.
 The World Until Yesterday
includes an entire chapter on constructive paranoia --- the tendency of
members of traditional societies to assume the worst can happen and to
avoid potentially hazardous situations. I was tickled by this
chapter because Mark applies the same strategy to our farm, although he
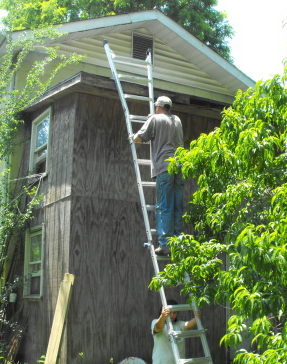
calls it "safety first." We have rules like "No one uses a ladder
when they're alone on the farm." The idea is that, even if I would
probably be fine 99 times out 100 when clambering up a ladder, the
100th time could kill me, especially if no one was around to rush me to
the hospital. Similarly, in traditional societies, camping under a
dead tree might be fine most of the time, but why risk it if a tree
fell on your great-uncle and killed him?
Another tip we can take
away from traditional societies is a different way of looking at trade
items. Diamond notes that members of traditional societies trade
for both useful and luxury items even if the communities could have
easily learned how to make the traded-for items on their own. Why
not be self-sufficient if you can be? Diamond's conclusion is that
trade is really about cementing bonds between the traders just as much
as it is about getting something you really need. In fact,
traditional societies often have a time lapse between gifts, so it's
more like you're building social capital by giving a gift than like
you're bartering. Those of us raised in a money-based society may
find this technique odd, but I feel like using social capital to build
relationships is just as valuable in modern societies as it was in
ancient ones.
| This post is part of our The World Until Yesterday lunchtime series.
Read all of the entries: |
Our drinking water thawed out
today. It's been frozen for weeks.
Just in time to stock up on
back up jugs for this upcoming cold front.
We installed one of those
electric pipe heaters today to the section that's not buried and with
any luck that will keep us unfrozen for the rest of 2014.
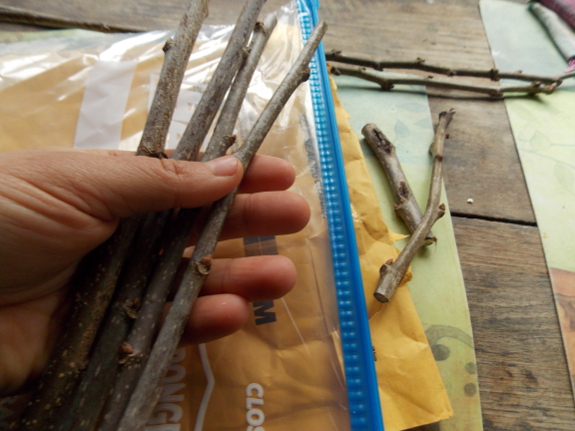
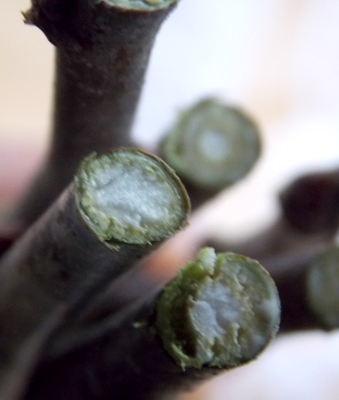 Over most of the U.S., the beginning of February is the perfect time to cut scionwood to be grafted onto rootstocks or existing fruit trees later in the spring. So
the first task on my list
for February in recent years has been emailing scionwood swappers who
I've set up deals with earlier in the winter. We share mailing
addresses and reminders of the scionwood we each want to swap.
If you don't have anyone to swap with, check out this post about my two favorite website for online scionwood exchange. From hanging out with the North American Scion Exchange group, I've also learned that it's better not
to wrap scionwood in wet newspaper. Instead, just cut fresh
twigs, slip them inside a ziplock bag, and add one drop of water. A
wit over there admonished us that if one drop of water really doesn't
feel like enough...and one more. As for shipping --- a padded
envelope seems to be sufficient, which will cost you less than $3 for
small quantities.
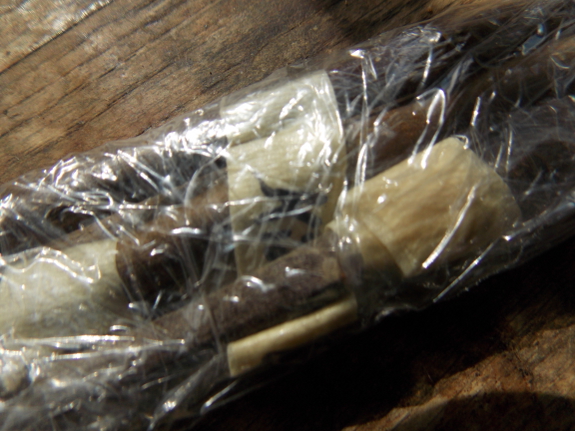
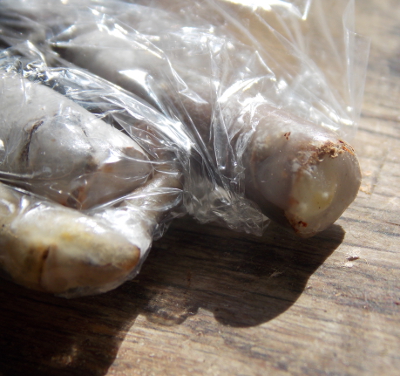 I've
already got a tiny bundle of rare and precious apple scionwood waiting
in the crisper drawer of our fridge for the rootstock to arrive.
The pro who sent it painted beeswax on the cut ends of each twig, then
wrapped the scionwood in plastic wrap. He seemed like an expert if
his extensive list of apple varieties is any indication, so I suspect
his shipping method is also quite effective.
As a side note, I am willing to
swap with newbies who don't have anything I want, but only if you do me
a favor in exchange. The favor usually involves taking a photo of
your experiment so I can share it with future readers. So if
you're interested in a fruit-tree variety you've heard about here, but
don't have an orchard of your own yet, come up with a fun experiment and
email me. Happy swapping!
 One
of the biggest differences between traditional societies and the state
societies you and I are more familiar with is how people both inside and
outside tribes are treated. Unlike state societies, where you
make friends based on shared interests, friendships
in traditional societies are based on kinship, marriage, and childhood
geography. All strangers
are potentially dangerous, so when two people meet, they may spend
hours trying to figure out if they have a relative in common.
(Appalachia isn't too far off from this tribal focus on kinship. I
can't count how many times strangers have asked me if I'm related to
the Hesses in Honaker. For the record, the answer is no.)
Another important
distinction between state and traditional societies pertains to how
disputes are resolved. In state societies, the government has
taken away individuals' abilities to resolve major conflicts (vigilante
justice), which is both good and bad. On the positive side, state
societies have lower death tolls since wrongs in traditional societies
often lead to warfare, which tends to go on indefinitely due to
tit-for-tat justice. On the other hand, members of traditional
societies have much more of an incentive to resolve conflict in a way
that leaves everyone happy since the other option is war.
 So
how are most conflicts resolved? Unlike the American justice
system, which is based on fairness and guilt, traditional societies
resolve disputes in ways that promote a fast, emotional reconciliation
without an emphasis on right and wrong. The goal is to let the two
parties reestablish their previous relationship so they can live
together peacefully in the future. Diamond suggests that this is
something we should strive to mimic, especially in situations like
disputes between divorcing parents and between siblings arguing over an
inheritance. In modern societies, mediation can yield some of the
same results if done properly.
Unfortunately, I feel
like many of the social advantages of traditional societies may be
impossible to recapture in our modern world. While I regret living
a distance away from many loved ones, I also wouldn't want to be forced
to settle in town next-door to our family home. I like the way
modern society allows us to be individuals who don't have to cave to
mainstream beliefs, but at the same time, I feel a bit lonely sometimes
when most of my neighbors live in a very different mental world than I
do. Clearly, most of us have been given the choice about whether
to live a more traditional existence, and we've mostly chosen the modern
route instead.
| This post is part of our The World Until Yesterday lunchtime series.
Read all of the entries: |
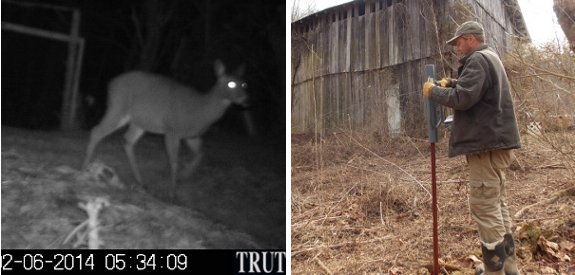
Our trusty
trail camera recorded a
deer intruder early this morning.
Anna's gardening intuition
told her the spot where the fence is mushed down was done by an
escaping deer recently.
We upgraded that section with
an additional post and tightened it up. I had turned the mechanical
deer deterrent off the
other night because I didn't want them to get accustomed to the sound.
Maybe turning it back on tonight will spook our intruder enough to
leave for good.
I wonder if it would be
possible to modify a trail camera to send some sort of message when
these events happen? Then maybe I could wake up in enough time to turn
this intruder into dinner...if of course deer season was in.

The photo above shows a
family friend (far left), me and my younger sister in our mother's lap,
my father, and my brother. But if you look closely, you'll see
we're posing in front of...(wait for it)...our brand new outhouse.
My father was probably proud of the structure and chose the spot.
When explaining this photo to me, Mom added, "This is before all the
[poop] started oozing out from behind the plywood...."
I don't remember the marital strife that seems to have been involved in
(not) emptying out the composting toilet, but I do recall sitting inside
for hours. I wasn't constipated; I was reading.

 More
photos from the same time period illustrate our rustic farmhouse
kitchen. One of Mom's favorite stories from this time period takes
place here, when a rat, dying from poison, entered the kitchen in
search of water and drank out of my younger sister's potty chair.
And I was wondering why my parents didn't decide the farm life was
fun....
More seriously, Mom
mentions "One knife was handmade...made from a sawblade.... Errol
looks tired...and sweaty...." (If you're keeping track at home,
that's my father and younger sister in the top photo and my brother in
the second photo, in front of a metal bucket we used to heat up water on
the stove.)

This is what I was doing
while all that hard work was happening. If I'd been a year or two
older, I would have had a book in my hand, but I wouldn't have been any
more helpful.
 Although I'll leave Diamond's
larger description of religion for you to read about on your own, I did
want to write about one factor that the author believes has made
religion a staple of traditional societies. As I mentioned
previously, it's very important to separate "us" from "them" in
traditional societies since strangers are potentially dangerous, and
religion helps cement that distinction. Religion is usually
expensive either in terms of time or money, so your willingness to jump
through those hoops serves as evidence of your commitment to support
others of your religion.
Why is this relevant to
homesteaders? Diamond reports that intentional communities are
much more likely to stand the test of time if they're based around a
central religion. One study examined the communes that popped up
in the U.S. in the 1970s and found that secular communities dissolved
four times faster than those with a religious focus. Similarly,
religious kibbutzim in Israel have been much more successful than
secular ones.
That observation reminded me of an interesting series of posts on Club Orlov,
assessing which intentional communities survive and which fail.
Both Diamond and Orlov touch on the success of the Hutterites, a
religious group related to the Amish who live in small agricultural
communities throughout the western U.S. and Canada. It looks like I am Hutterite should move its way up to the top of my reading list.
| This post is part of our The World Until Yesterday lunchtime series.
Read all of the entries: |

I moved the trail
camera yesterday and it
proved Anna was right about where the night
time intruder has been
entering our chicken pasture.
The images show her being
startled by the red light activating on the camera, and then moments
later she looks in the direction of the deer deterrent and runs the
other way.

 First of all, don't forget that today is your last day to enter our kefir giveaway! Now, on to the real post....
When I started playing with kefir,
I read all of the instructions on the internet that told me to strain
my kefir each day in a plastic sieve (no non-stainless-steel
metal). That allows you to decant the kefir from the grains very
effectively, and is definitely the best way to manage your kefir.
But...we don't have a
plastic sieve. And the primary hunk of kefir grain is so big, it's
quite simple to scoop out of a bowl of kefir. Sure, I might miss
some tiny off-shoots this way, but what has happened so far is that the
main grain puts out a smaller bud, like the one you can see in the photo
above, and I can either cut that off or just notice it's missing and go
scooping around for it when I want to expand my kefir colony. So
far, we've expanded once, and one of the grains is probably about ready
to split again.
While my non-seiving
method is the height of laziness, I can't help thinking that I'm
probably following the lead of the original kefir culturers. Do
you really think the nomadic shepherds in the Middle East who first
developed kefir had plastic sieves and time to let the liquid slowly
drain out of their fermented milk? I could be wrong, but I'll bet
they were scoopers too.
 Which
is all a long way of saying --- kefir culture certainly can be simple
if you let it be! Once a day, I put in about five minutes
decanting a jar of fermented milk, scooping out the, grains, refilling
the jar, and (the more time-consuming part) doctoring Mark's kefir so it
tastes like chocolate. I thought I had an iron stomach before we
started, but I've noticed my stomach is even stronger now, without even
the rare bouts of flatulence that sometimes came from eating peanut
butter.
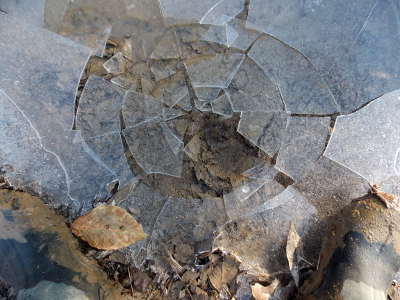
As a side note, kefir
isn't terribly photogenic, so I've included a couple of photos from my
Friday walk in this post. So, don't spend too long trying to
figure out how a hawk and a cracked puddle relate to fermented
milk...but feel free to tell me in the comments if they do.

Anna wanted to see some
pictures of when I was around the age of 5 and my Mom was quick to
reply with these snap shots from the 1970's.
The above photo is from my
third birthday party...just 2 weeks before I was to meet my younger
brother for the first time.
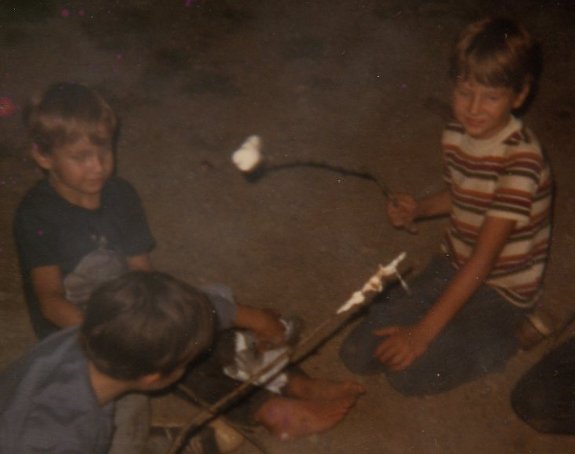
A lot of good memories roasting marshmallows by a campfire. This one is of me around the age of 5 making our own dessert with my brother and cousins. My Mamaw told us more than once that playing in the fire would cause us to pee in the bed that night...I can now confirm she was mistaken and that's just another Mountain Myth.
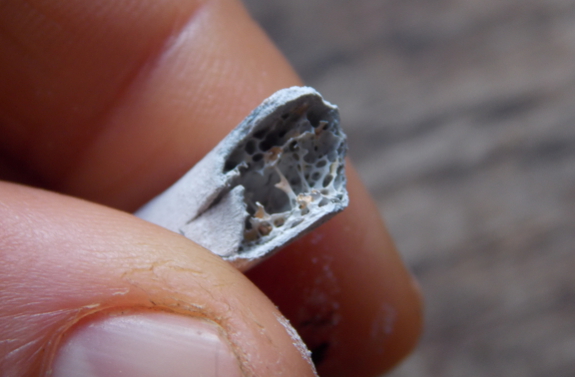
Chicken bones have been a problem on our farm for years. I like to stew them up to make delicious broth,
but after that, the bones are too brittle to be safely fed to
Lucy. And if we put the bones anywhere except deep
underground...Lucy finds them! Some weeks, I'd decide not to cook
one of our delicious homegrown chickens because I didn't want to deal
with the bones.
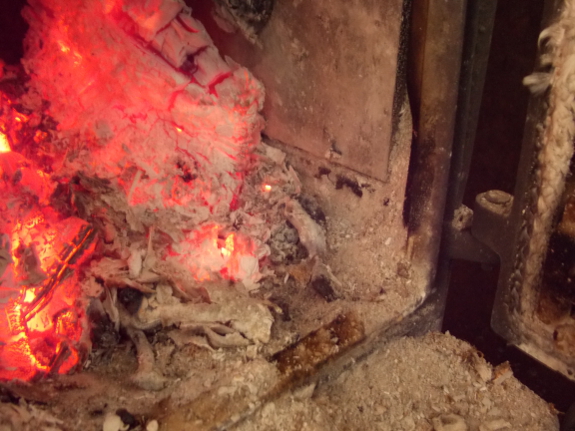
But I recently saw on two different blogs where homesteaders were putting their chicken bones in the fire to make biochar.
Great idea! It turns out that if I throw the wet mass of bones
onto a strong fire in our wood stove just before it's time to damp it
down, the bones quickly turn into a crumbly form that I suspect will
have many of the benefits of biochar (with none of the succulent smell
that attracts Lucy). We always sift our wood-stove ashes to
salvage the charcoal for the garden, so the bone char will be put to
good use.
The solution is so
simple, I can't figure out why I didn't think of it before! I
guess I'd better thaw out one of those chickens in the freezer....
I've heard of some organic
chicken growers using a coconut enhanced feed compared to the
conventional product that relies heavily on corn and dreamed up the
hanging coconut chicken treat experiment.
Turns out the chickens
approve of raw coconut, although I think I'll bake the next one to make
the meat easier to chunk away.
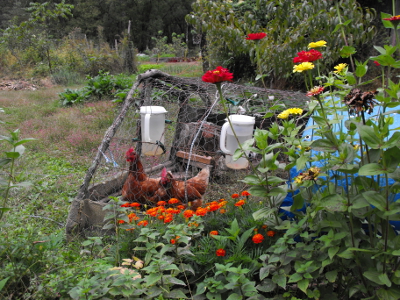 Now
that we have both the Avian Aqua Miser and EZ Miser available (plus kit
forms of each), I often get asked --- which chicken waterer is the best
for my situation? This is the time of year when even folks who
don't have chickens...yet...are interested in the answer, so I figured
I'd post the answer here rather than on our chicken blog.
Our Avian Aqua Miser Original
is my go-to waterer for chicks during their first week of life, for
chickens in a tractor, for broody hens, and for small numbers of birds
in the winter. If you've got a flock of five or fewer hens in your
backyard, you'll love the utility of this little waterer, which stays
perfectly clean due to its hanging nature and is simple to carry inside
on cold nights. Mark's first waterer invention barely takes up any
space, so is perfect for tight spaces, and the Original holds enough
water for up to 25 chicks per day when they're a month or less old.
 On the other hand, we prefer EZ Misers
for broilers as they get larger and for farm-size flocks of
layers. With these larger numbers of birds, you're going to have
to allot more space anyway, so having a waterer that sits on a
cinderblock isn't usually a problem. In fact, it's handy to be
able to set EZ Misers out in pastures where no infrastructure exists to
hang a waterer. Plus, the larger capacity of the EZ Miser means
you don't have to fill the waterer as frequently, which is a boon during
busy summer days when you're catering to two flocks of broilers and a
dozen laying hens. Being able to set the EZ Miser down while
filling saves yet more energy.
The kit version of each
is a way to save money, and also allows you to make a waterer that fits
your farm to a T. For example, this video shows how to turn our Avian Aqua Miser Original kits into a heated waterer that's good down to at least 14 degrees Fahrenheit --- that's what we used in our main coop this winter. And our EZ Miser kits
allow you to install watering spouts into the side of just about any
plastic container --- imagine a 55 gallon barrel set in your pasture
with six spouts around the edges for watering over a hundred birds for
days on end. To tempt you to try out one of these scenarios, we've marked our most popular EZ Miser kit down to $36 this week --- enjoy!
I hope this rundown helps
you figure out the perfect waterer for your farm this year. We'll
be starting eggs in our incubator soon and are looking forward to
fluffy spring chicks, so we'll be suiting words to action shortly.
 I
hope my newest ebook excites you as much as it does me! This is
the time of year when we all really need some garden porn, and picking
the 81 most informative shots of our permaculture garden for this ebook
was a real treat. Of course, I added in plenty of information too,
from a rundown on the ten worst garden pests in the U.S. to tips on
keeping those (and other) invertebrates at a dull roar without spraying
anything. (You can read the full book description here.)
Naturally Bug-Free is only $1.99 on Amazon, and if you subscribe to Amazon Prime, you can borrow the title for free. As usual, it's easy to read my ebook on any device even if you don't have a kindle. And, also as usual, I'll be setting the book free this Friday if you can't afford that price tag.
If you enjoy what you read, I hope you'll take a minute to write a
review on Amazon --- those early reviews really help my books reach
beyond the choir. In the meantime, stay tuned for a week of insect-related tips drawn from the pages of Naturally Bug-Free.
| This post is part of our Naturally Bug-Free lunchtime series.
Read all of the entries: |
Today was the second time
this Winter we've used the well to fill the tank.
We learned the last time it's
better to drain the hose now while it's easy instead of letting it
freeze solid with a half gallon of water somewhere in the middle.
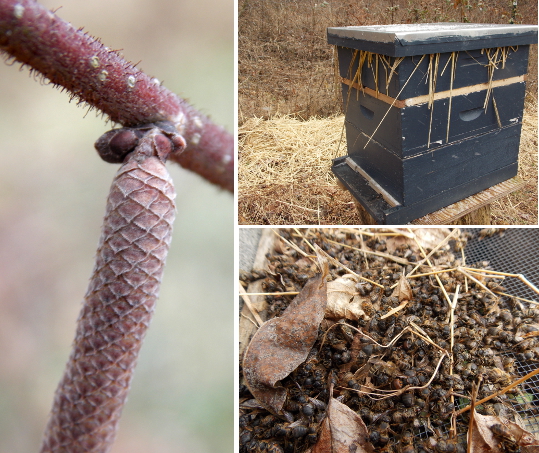
If previous years are any
indication, the first spring flowers will be opening up within two or
three weeks. To the human eye, hazel flowers probably don't look
like much, but they mean high-protein pollen for our bee colonies to
feed to their young. In fact, if I was unkind enough to open our
hives in this dreary winter weather, I'd probably find eggs being laid
as the queens gear up for spring --- if no eggs now, then soon.
Instead of bothering our bees, though, I just gave both hives a tap.
Sure enough, hearty buzzing met my ear in each, despite the pile of
dead bees in front of the strong hive and the fact that the barn swarm
didn't seem to have enough bees to survive this cold winter.
Perhaps the quilt I added to the top of that Langstroth hive has helped the tiny colony stay warm?
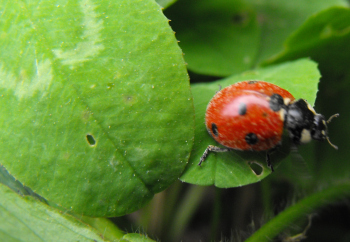 One group of
wholly-positive garden invertebrates is the bugs who consume bad insects.
Spiders, centipedes, dragonflies, mantids (aka praying mantises),
ambush bugs, assassin bugs, lacewings, ladybird beetles (aka ladybugs),
ground beetles, true wasps, digger wasps, hoverflies, and robber flies
all subsist primarily or entirely on other insects during some stage of
their life cycle.
Although many of the species listed above are generalist predators,
eating whatever ends up 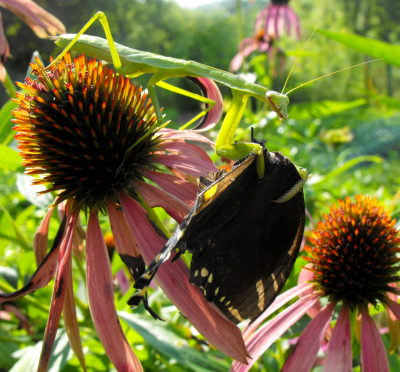 in front of them, all of these insects help keep pest population
explosions in check. For example, I accidentally let the beetles
on my green-bean plants get out of control one summer, and soon
thereafter I saw a pair of praying mantises move in to take advantage of
the bounty. Sure, the mantises might have been eating butterflies
yesterday, but I consider them beneficial insects because they eat at least as
many bad bugs as good.
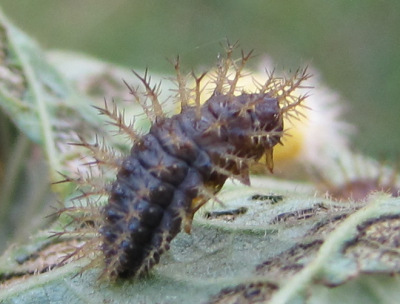 Many gardeners fall in love with the idea of
predatory and parasitic insects and decide to buy some of these critters
to seed their garden. However, I believe that you really need to
encourage all of these species at the ecosystem level. I've heard
of people opening a container of expensive insects, only to have them
all fly away because the garden isn't a hospitable environment for the predators
to live in.
Instead of spending your money on insects, why not
spend a bit of time encouraging the good bugs you already have to stick
around and reproduce? Many depend on flowers during some stage of
their life cycle, so you can encourage them just like you did native
pollinators by ensuring you have copious pollen and nectar sources available
throughout the growing season.
In fact, you might receive double the benefit
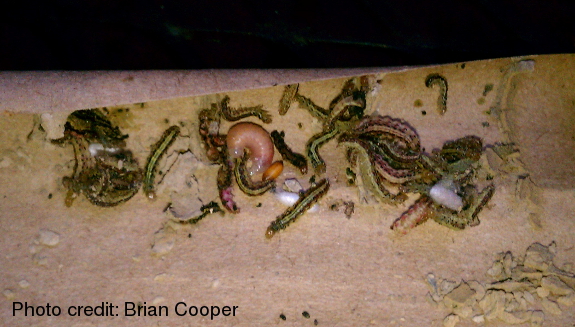
from any nest sites you put out for your native pollinators. Brian
Cooper erected mason-bee blocks in his garden, and ended up encouraging
mud daubers by providing wet mud nearby. Brian wrote: "When we went
to
harvest the bees, we found mud daubers also laid eggs in some of the
unused cells. They collect food for their young inside the cell
before
they cap it with mud. I found one cell that was filled with
caterpillars and a dauber larvae, and another cell with a pupa of the
mud dauber and just bug parts left over."

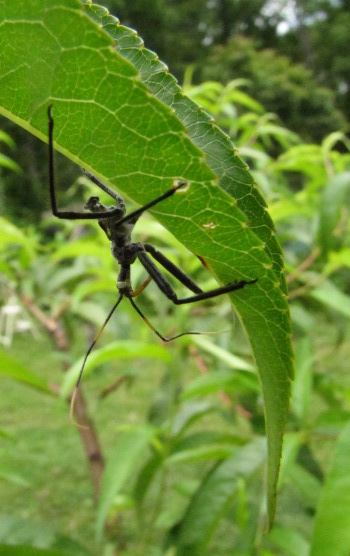 Weedy edges will also encourage predatory insects
since the predators need to be able to find lots of insects to
eat even when your garden pests are under control. In addition,
dragonflies need a pond into which they can lay their eggs, and many
insects will
benefit from having a very shallow body of water from which they can
drink. When attracting predatory insects, it's imperative not to
use any pesticides (even organic ones) and to allow low levels of pest
insects to fly under your radar. If there aren't any bad bugs
around, your predatory insects won't have anything to eat and will go
somewhere else.
In fact, you'll probably sense a theme throughout Naturally Bug-Free. To encourage the good bugs, let nature move into your
garden. Leave things alone and the beneficials will come.
I hope you enjoyed this excerpt from Naturally Bug-Free!
If
so, you can download the ebook for $1.99 on Amazon by clicking the link
above. Or just wait for another excerpt tomorrow on the blog.
| This post is part of our Naturally Bug-Free lunchtime series.
Read all of the entries: |
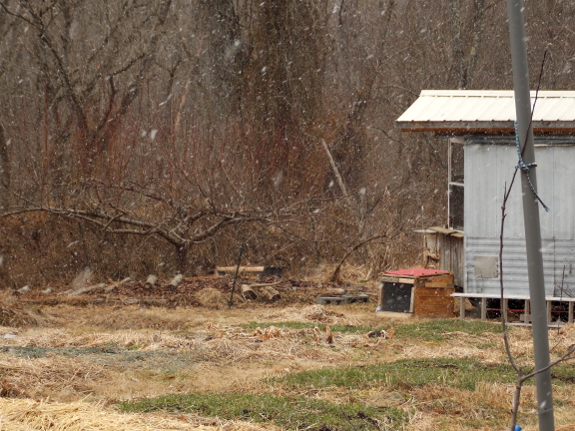
Predictions of 2 feet of snow
prompted Anna to ask me what's the most snow I can remember walking
through and I think a few years in the early 70's created conditions
close to that in Ohio where I grew up.
Today I overheard a
conversation waiting in line at the post office where two older guys
were talking about the Winter of 1947 when the school burned down and
the snow was up to his waist when he was in the First grade.
I remember one of those
Winter days in the early 70's when my Dad took a 2x4 and rolled it in
the snow until it was massive. One of us decided it looked like a whale
and an hour later after much sculpting and a little blue food coloring
we had the only Snow Whale on the block.
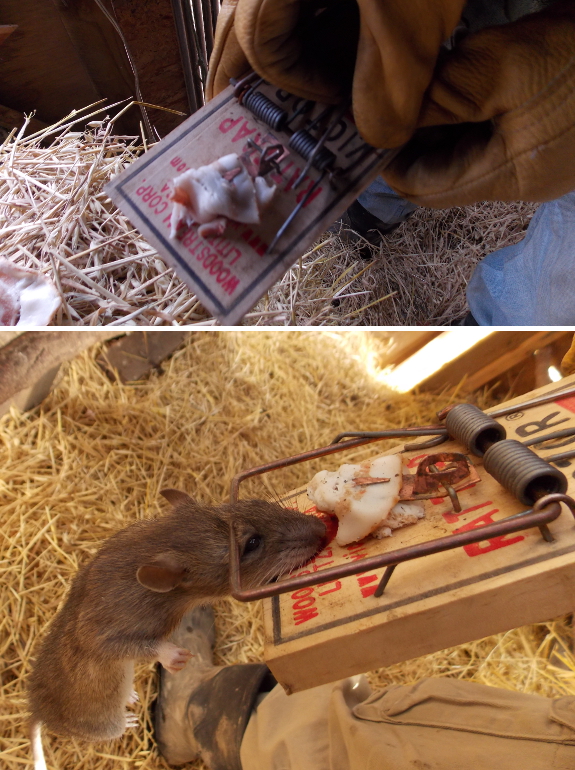
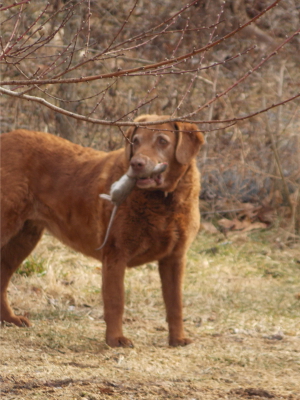 We've been on the trail of the rat living under our chicken coop
for a couple of weeks now. While you'd think rats are a cosmetic
problem, they're actually very dangerous as we get close to chick season
since rats can demolish a flock of fuzzy babies in short order.
I started trying to catch
the rat while Mark was away visiting his parents in Ohio in
January. I stopped after a couple of failed attempts, though,
because I was afraid of hurting Lucy...and was also afraid of snapping
my fingers in the trap. Mark has a certain calm focus that's very
handy when using chainsaws and setting rat traps, so I let him take care
of round 3.
The good news?
Within two hours, the rat was dead. The bad news? An hour
later, Mark saw another rat. This one wasn't interested in
following its coop-mate's path to the happy hunting grounds in the sky,
so we're back to the drawing board. How to catch a now-trap-shy
rat?
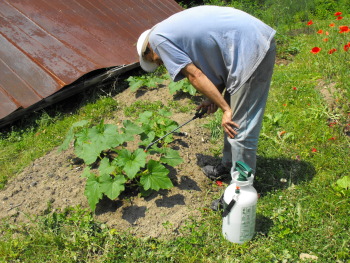 Squash vine borers were our archnemesis during our
early years on the farm, so much so that I even resorted to spraying Bt
on the plants' stems. And I'm glad to say that the Bt didn't
help. Why am I glad? Because if that seemingly innocuous*
spray had proven effective, I might not have figured out less intrusive
ways to keep vine borers in check.
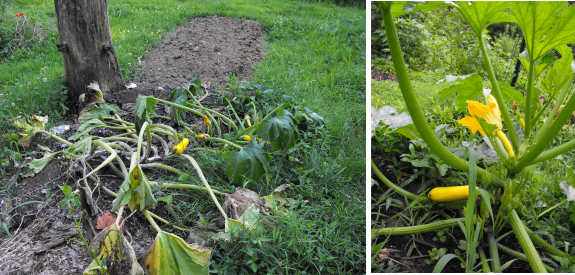
Variety selection was part of my solution, as I'll
explain in a later post, but the biggest reason I started being able
to harvest summer squash is because I learned to succession plant these
speedy vegetables biweekly in the summer garden. Here in zone 6
(last frost: May 15, first frost: October 10), I plant crookneck
(summer) squash on May 1 (a gamble), May 15, June 1, June 15, and July 1
(a slight gamble),
a schedule that allows us to be overwhelmed with tasty squashes despite
heavy vine-borer
pressure and with the use of no other control measures beyond variety selection.
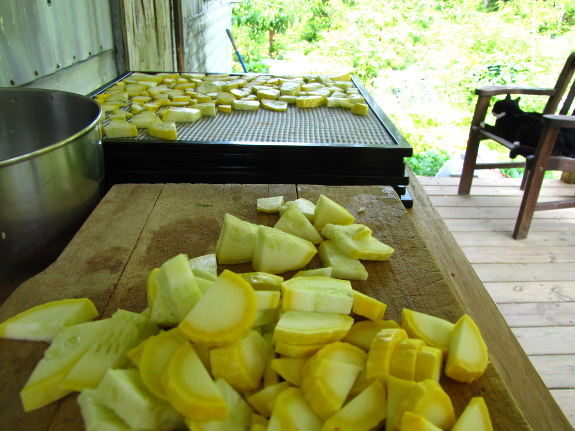 Succession planting is handy with other types of
vegetables as well, although the strategy only works if you choose
varieties that put out a big harvest right away. For example, I
succession plant bush beans rather than growing runner beans since the
former provide lots of green beans before the bean beetles move in to
dine. On the other hand, succession planting wouldn't be a good
choice for tomatoes since even determinate varieties require months of
growth before they ripen their first fruit.
Another benefit of succession planting comes when the
food reaches our table. A few studies have suggested that
cucurbits (and perhaps other vegetables) have more micronutrients on
hand when they mature their first fruits, so the earliest harvest often
tastes best. Some gourmet farmers pull out their squash vines after the first harvest as a
matter of course, figuring it's better to
maximize flavor rather than yield. So maybe the borers are trying
to do me a favor by prompting me to eat the most nutrient-rich and
tasty vegetables possible?
I hope you enjoyed this excerpt from Naturally Bug-Free!
If so, you can download the ebook for $1.99 on Amazon by clicking the
link above. Or just wait for another excerpt tomorrow on the blog.
* The glossary of Naturally Bug-Free suggests some ways in which Bt might not be as safe as many of us think.
| This post is part of our Naturally Bug-Free lunchtime series.
Read all of the entries: |
Anna and I sometimes play
this game where she'll ask me "Do you know where those maple syrup
spouts are that we last used 6 years ago?"
It takes me a few seconds to
process the question, and this time my answer was the barn, but the
guessing part comes when she wants to know how long will it take to
find.
Today my guess was under 10
minutes, which turned out to be closer to 5. A small miracle if you
knew just how unorganized our barn is.
What are we using the spouts
for? An experiment to see if bees will eat the sap.

Mark mentioned in his last post that we were thinking of tapping some sugar maples and feeding the sap to bees.
I can't decide whether this is a great idea or a terrible idea, since
both sides of the argument are well represented on the internet.
On the plus side, an 1870 article in American Bee Journal
reports that the author sweetened three quarts of maple sap with a pint
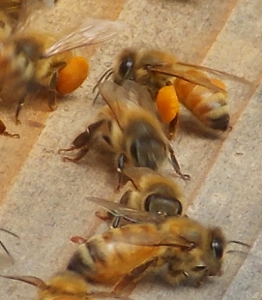
of honey and fed the result to his bees. Various websites also
mention modern observations that honeybees will feed on sap coming out
of gashes in maple bark or from cut stumps if weather is warm enough for
them to fly while sap is flowing.
 On
the other hand, other beekeepers warn that maple sap is too high in
solids and will give bees dysentery. At only 1% to 3% sugar, maple
sap has a much lower concentration of sweetness than is found in the
nectars bees prefer (30% and up). At the same time, there are high
concentrations of potassium and calcium in maple sap, which might be
good for the bees...or might make them sick. I'd be particularly
leery of cooking down the maple sap into syrup, since I suspect that
could cause chemical changes that might be bad for the bees.
Instead, I would be more likely to use the sap as the base for making
sugar water for bees.
Why am I thinking of feeding bees at all? The main impetus is our tiny barn swarm colony, which barely had any honey going into the winter
and surely doesn't have much left now. I'm also trying to figure
out a hybrid method between the purely bee-friendly beekeeping I've been
using in recent years, and methods that produce enough honey to allow a
real harvest. My gut feeling is that a round of spring feeding
might boost egg production early enough that we'd get a harvest this
year, without (hopefully) negatively impacting the integrity of the
colony too much. Of course, I could just feed them sugar water,
but the idea of using a free resource from the farm is enticing.
I'd be curious to hear thoughts from beekeepers in the audience.
Would you feed your bees maple sap adulterated with extra sugar?
If you're a natural beekeeper, would you consider feeding your bees in
the spring to boost production?
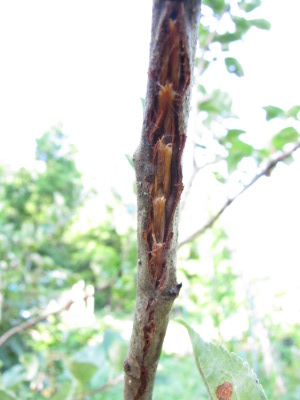 I learned my next lesson on timing the hard
way. In 2012, periodic cicadas crawled out of the ground and
regaled us with their ocean-like symphony. I was intrigued by the
natural occurrence and enjoyed feeding these protein-rich insects to our
chickens, so at first I thought the periodic cicadas were a boon to our
farm. Then I saw this the damage pictured to the left.
It turns out that cicadas lay their eggs in tender
twigs of young trees, and seem to preferentially choose fruiting species
over wild saplings. When the young cicadas hatch from their twig
homes, the nymphs drop to the ground and tunnel down to feed on the
tree's roots. While the root sucking may be a long-term problem,
the real issue is that the nymphs damage fruit-tree twigs so much while
coming out of their eggs that the branches often break off and die.
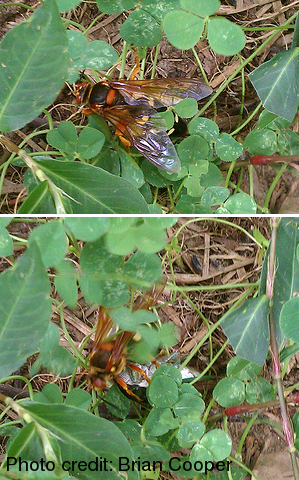 scarce. Every 13 to 17 years, the periodic
cicadas come out of the ground and provide a feast, but by then, the predator
levels are so low that the majority of the cicadas survive untouched. That's why
we have to get a bit more wily when dealing with these insects—periodic
cicadas have outwitted their natural enemies and we can't count on help
from nature.
The short-term solution to cicada damage is to net
adult cicadas away from the twigs as soon as you hear periodic cicadas
calling. But smarter orchardists also plan around cicada
cycles. If you go to
http://hydrodictyon.eeb.uconn.edu/projects/cicada/databases/magicicada/magi_search.php,
you can choose your state and county and then find out when periodic
cicadas have emerged in your region recently. Add the appropriate
number of years to those emergence dates and you'll know when the next
brood will be out looking for baby fruit trees.
In a perfect world, you'd plant fruit trees no more
than two years before cicada-emergence dates since cicadas aren't as
interested in older trees. Orchardists also choose not to winter
prune fruit trees during a year when periodic cicadas are due to emerge,
knowing the cicadas will do some of their pruning for them.
That's true permaculture gardening at work!
I hope you enjoyed this excerpt from Naturally Bug-Free!
If so, you can download the ebook for $1.99 on Amazon by clicking the
link above. Or just wait for another excerpt tomorrow on the blog.
| This post is part of our Naturally Bug-Free lunchtime series.
Read all of the entries: |
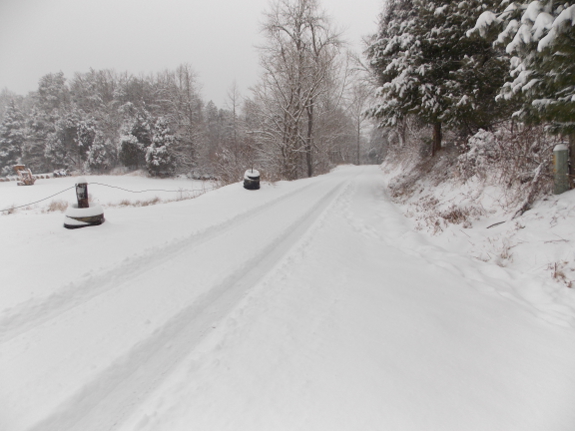
It snowed all night here, but not quite enough to break our snow depth record.
 Perhaps
if we lived in a colder climate, I wouldn't love snow so much. As
it is, our farm is in a perfect spot for snow. We see it every
year, but don't get bored of endless white expanses. Good snows
like this one that are packable and deep
come perhaps once a year. So even though the snow plow skipped
our little road Thursday morning, I'm sure the outside world will be
scraped and clear by Monday at least.
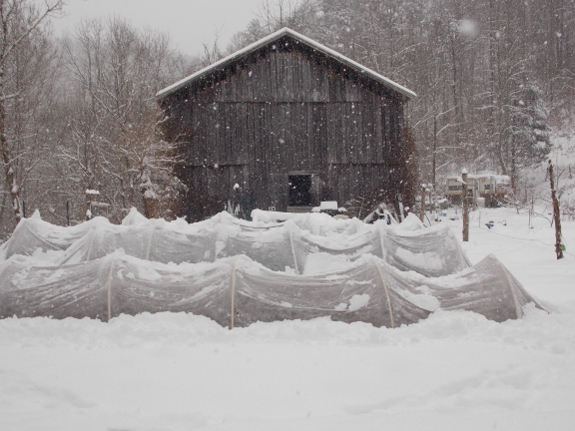
Sure, snow makes a little
extra work on the farm, but not much. I went out this morning to
sweep off the quick hoops and bee-hive entrances. The quick hoops
were mostly in good shape, although I did damage the fabric a bit with
the broom before I got a good handle on how to leave a tiny layer of
snow behind to protect the cloth. The one quick hoop made of 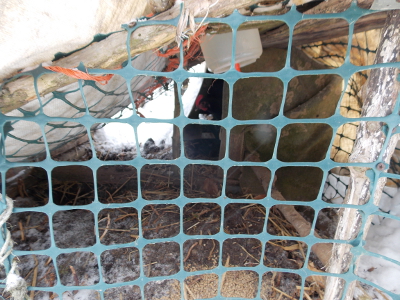 smaller PVC pipes bowed a little under the weight, but sprang back into shape post-sweeping.
Our chickens generally
stay in during snowy weather. Mark is a good farmer who almost
always remembers to toss a tarp over the chicken tractor
before a snow, so they have a bit of bare ground to explore. I
think they spend the day napping, though, and waiting for it to be over.
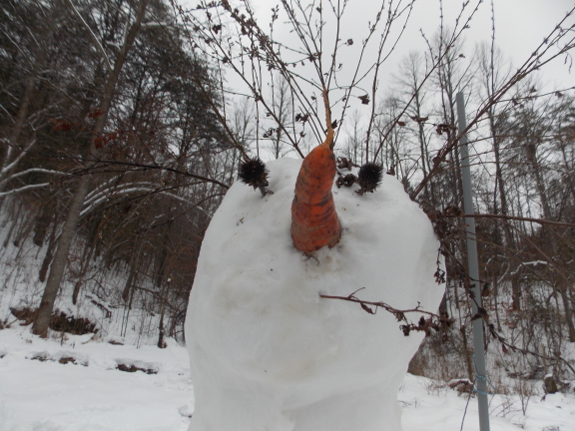
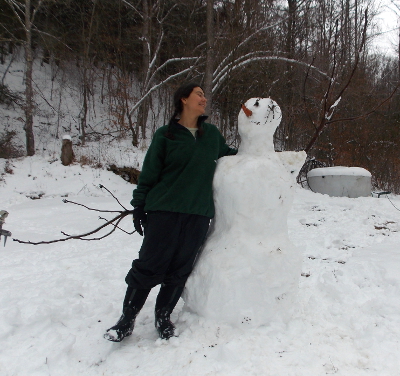
Once my chores were done,
I stole half an hour to make a garden-spirit snow woman. Oregano,
echinacea, red raspberry, and fig detritus gave her some character,
along with a homegrown carrot. Maybe she'll give us a boost for
the upcoming gardening season.
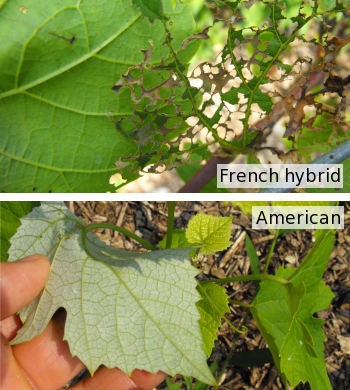 Japanese beetles taught me my first lesson about
variety selection. We had a terrible problem with these invasive
beetles on our grapevines until I realized that French hybrid varieties
are much more tasty to Japanese beetles than are American
varieties. The latter can be distinguished by their thicker
leaves, which are often whitened underneath, and by the relative paucity
of beetles chowing down on the leaves.
In addition to grapes,
Japanese beetles also defoliated our young sweet-cherry tree, but damage
on other plants seemed to stay at low enough levels that the trees
could shrug it off. After switching our small vineyard over to
American grapes and removing our cherry tree, the Japanese beetle
pressure was reduced to the point where hand-picking was sufficient to
keep beetles at bay.
In general, variety selection can be a helpful
strategy in controlling at least five of the dirty-dozen worst garden
pests in the U.S. The table below includes pest-resistant
varieties drawn from several different extension-service websites and
other sources.
| Pest insect |
Insect-resistant varieties |
| Cabbageworms |
Collards, Brussels
sprouts, broccoli, and cabbage are tastier to these insects than are
other crucifers. Within each type of vegetable, vegetables with
dark green, glossy leaves are more resistant to cabbageworms, while
cabbage butterflies sometimes avoid laying eggs on red cabbage
varieties. Resistant cabbage varieties include Chieftan Savoy,
Early Globe, Mommoth, Red Acre, Red Rock, Round Dutch, and Savoy
Perfection Drumhead. |
| Corn earworms |
Any corn with a tight husk will
be more resistant to earworms. Specifically resistant varieties
include Country Gentlemen, Golden Security, Seneca, Silvergent, and Staygold. |
| Cucumber beetles |
In general, cucumber beetles
prefer zucchini-type squash over others and don't like burpless
cucumbers as well as other varieties. Blue Hubbard squash, Ashley,
Chipper, Gemini, Piccadilly, Poinsett, and Stono cucumbers; Early
Prolific, Scallop, Straightneck, and White Bush squash; and
Galia, Passport, Pulsar, Rising Star, and Super Star melons are all
reported to be resistant to cucumber beetles. However, the more important issue is to select a variety resistant to the bacterial wilt carried by cucumber beetles. These wilt-resistant varieties include Connecticut Yellow Field, Harvest Moon, and Howden pumpkins; Waltham butternut; Buttercup squash; Black Beauty zucchini; and Ashley, Chinese Long, Chipper, County Fair, Eversweet, Gemini, Improved Long Green, Saticoy Hybrid, Sunnybrook, and Tokio Long cucumbers. Watermelons are usually resistant to bacterial wilt. |
| Squash bugs |
Squash bugs prefer yellow summer
squash over zucchinis, squash over pumpkins, pumpkins over gourds, and
gourds over melons. Resistant varieties include acorn squash,
butternuts, Early Summer Crookneck, Green Striped Cushaw, Improved Green
Hubbard, Spaghetti, Sweet Cheese, and zucchinis (except for the
susceptible Cocozelle). |
| Squash vine borers |
Varieties resistant to squash
vine borers tend to have thin, tough stems. In addition, vining
types are more resistant than bush types since the former can root along
their nodes and survive moderate levels of borer damage. The most
resistant varieties include butternuts and Green Striped Cushaw,
followed by Dickenson Pumpkin and Summer Crookneck. Other
varieties reputed to have at least some resistance include acorn squash,
Cucuzzi (also known as snake gourd), and Connecticut Field, Dickenson,
and Small Summer pumpkins. |
I hope you enjoyed this excerpt from Naturally Bug-Free!
If so, you can download the ebook for free on Amazon by clicking the link above today. Or drop me an email to receive a pdf copy instead. Thanks for reading, and don't forget to leave a review when you're done!
| This post is part of our Naturally Bug-Free lunchtime series.
Read all of the entries: |
How are the girls in the
chicken tractor fairing during all this snow?
They might be bored having to
stay in the same spot 2 days in a row, but they seem perkier and more
content than the main flock.
Outside, I've had to
admit that our garden is more of a zone 5 garden than a zone 6 garden
this year. That means we don't have anything fresh coming in
except Egyptian onion bulbs, and I'm pushing back my earliest plantings
of lettuce, peas, and poppies until the warm spell next week.
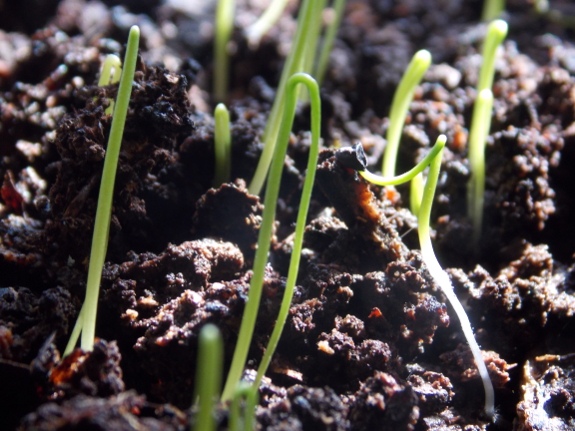
Inside, though, our baby onions are growing like gangbusters. So far, all three flats
are acting the same, although the one closest to the wood stove grows
fastest. When I pointed out the adorable little seedlings to Mark,
he replied, "I can't remember the last time I bought an onion."
It's looking more and more like this will be the year we hit onion independence!
It's been a full year since I
shored up this broken
walnut fence post.
I'll use this method again to
fix a few more fence problems.
 People
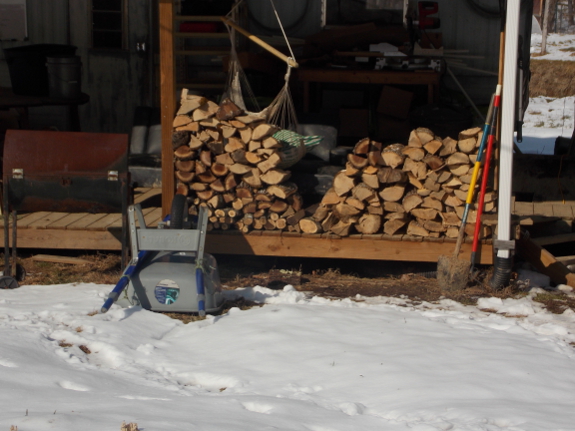
in our neck of the woods know what porches should be used for in the
winter --- firewood storage. Mark and I like to split and stack at
least a week's worth of firewood to sit on the edge of the porch for
easy access to the trailer, and you can tell we're on the upswing of the
season when the pile gets higher every week rather than lower. We
split the same amount of wood, but burn less.
The woodshed, on the other hand, is starting to look pretty sparse. But now that the subzero weather
appears to be behind us, I know we'll definitely have enough of the
good dry wood to last at least until March. If previous years are
any indication, firewood will become more of a treat than a necessity
then, with warmer days heating up the trailer via our south-facing banks
of windows and with weekly lows rarely dipping below the twenties.
In fact, next week is supposed to look a lot like March, but my weather
guru tells us not to get too excited. He forecasts at least one
more cold snap before February is out. Maybe that will be the
impetus we need to start getting in next year's firewood sooner rather
than later.
While developing our new EZ Miser 2 gallon
chicken watering bucket I
got into a habit of leaving a full bucket handy to make it easier to
test each variation.
Turns out it's just the right
height for Huckleberry to drink from, and he seems to
drink more water because of it so we've decided to leave it in place to
further spoil him.
Maybe drinking in this
fashion is easier on a cat's back?
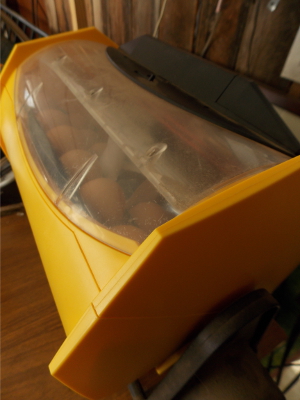 Our first eggs of the season are in the incubator! In 21 days, we'll have new chicks to spice up the farm, and our chicken year will be off to its exciting start. Here are my ten top tips for those of you new to chicken incubation.
1. Start with quality eggs. Old hens, old eggs, dirty eggs, and bad nutrition are all recipes for heartbreak.
2. Figure out dry incubation.
Depending on your climate, it may be appropriate to follow the
manufacturer's instructions about how much water to put in your
incubator. But it might not.
3. Tape the plug and plan for power outages.
Those tiny chicks growing inside their shells can't stand cooling down,
so make sure there's no way you can accidentally unplug your incubator
or turner. If you live in an area with periodic outages like we
do, you'll also want to figure out what you're going to do if the
electricity goes out for a couple of days in the middle of your
incubation run.
4. Mark the dates on your planner.
18 days after you start your incubator, it's time to unplug the turner
and increase the humidity. 21 days after you start your incubator,
chicks will start hatching.
 5. Number your eggs.
This isn't entirely necessary, but good data can help you make each
incubation run a little better than the last. I write a number on
the large end of each egg in pencil, and record the likely mother, date
collected, and whether the egg has any dirt on it.
6. Hang out for the hatch.
Again, this is a bit obsessive, but I like to record the time when each
egg pips (the chick first breaks through the shell). That piece
of data lets me keep an eye on the hatch and make sure that pipped eggs
haven't been rolled upside down by their early-hatching brethren, and
that individual chicks haven't been struggling in the egg for too long.
7. Remove each chick as soon as it's dry.
Some experts recommend leaving the chicks in the incubator for up to 24
hours, but the chicks' chirping says they're much happier if removed to
the brooder as soon as their feathers completely dry off. They're
less likely to harm hatching siblings this way too.
8. Decide whether you're going to help chicks out of the egg. There are major pros and cons of helping chicks, which you can read about here.
The biggest con is that if you help a chick and it's too handicapped to
make it in the flock, you will have to euthanize it. On the other
hand, if a chick is simply pipping at the wrong end of the egg, you can
sometimes help the chick hatch and have it grow up into a happy hen.
9. Prepare the indoor brooder. A rubbermaid bin is a good starter home for your chicks and we use
Brinsea's EcoGlow Chick Brooder to keep our chicks warm
for their first month. You'll also need to buy or make a small feeder for their first few days of life, and will want an Avian Aqua Miser Original for water.
10. Prepare the outdoor brooder.
If you're like me, you'll get sick of the noise and smell of chicks in
your living room after about a week. So you'll want a place close
to the house where they can stay warm and dry but be out of your
hair. The outdoor brooder also allows you to put chicks out on
pasture by the time they're a week old if the weather cooperates.
If this post got you excited and you want to learn more, I highly recommend my ebook Permaculture Chicken: Incubation Handbook for further information. Starting with eggs is definitely
a bit more work than buying mail-order chicks, but the skill opens new
doors for chicken-keepers and is also an inspiring process to
watch. And even if you pay for top-of-the-line equipment like we
did, hatching your own eggs will pay for itself after a few years.
Have fun!
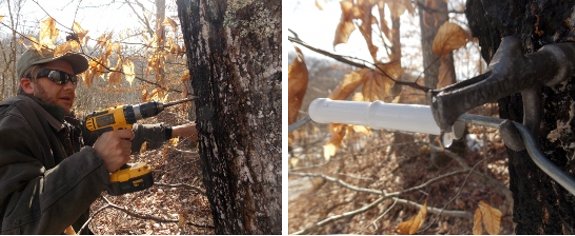
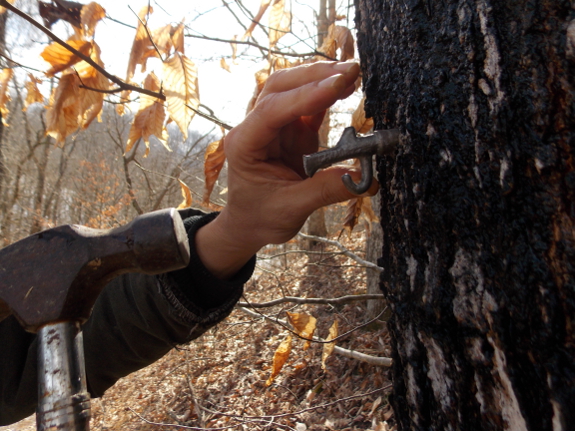
Today was perfect weather for
installing a Sugar Maple tree tap.
We decided to use one of our 2 gallon EZ Miser buckets for sap collection.
The drip rate was somewhat
heavy when we started around 2pm.
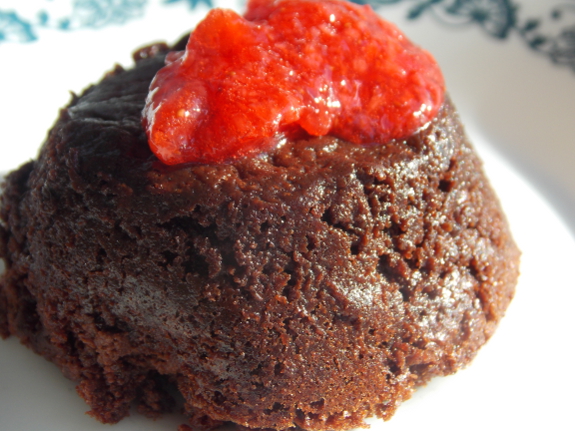
As our kefir grains
expand, we have to culture more milk. While growing a bud to send
to my mother, I ended up with more kefir than we wanted to eat with our
breakfast and decided to use the excess to make individual-serving
chocolate kefir cheesecakes. I decided to keep the recipe grain-
and sugar-free, so I ditched the crust and came up with the recipe below
for the filling:
- 0.5 cups of strained kefir milk and cream. (More on this below.)
- 1 egg
- scant 0.5 cups of cocoa
- 0.25 teaspoons of vanilla
- 0.25 cups of honey
- strawberry freezer jam for the topping
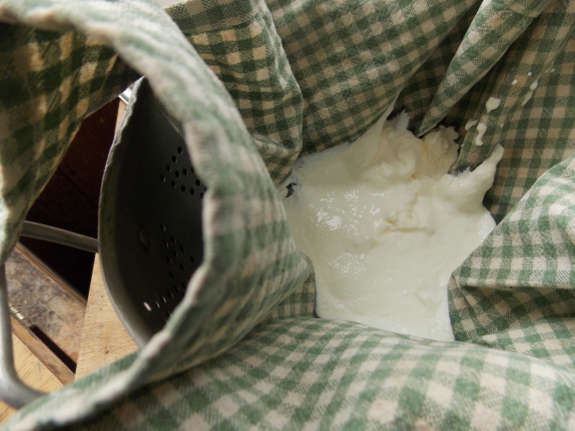
To strain the kefir, I simply took out the grain and put it in a jar to start the next day's culture, then poured the rest of the kefir into a cloth napkin on top of a colander on top of a bowl. Three hours later, quite a bit of clear whey had collected in the bowl. I'm not sure what I'll do with this whey --- worst-case scenario, I'm sure the chickens will enjoy it. The Greek-yogurt-like kefir that stays on top of the napkin is what you use for this recipe.
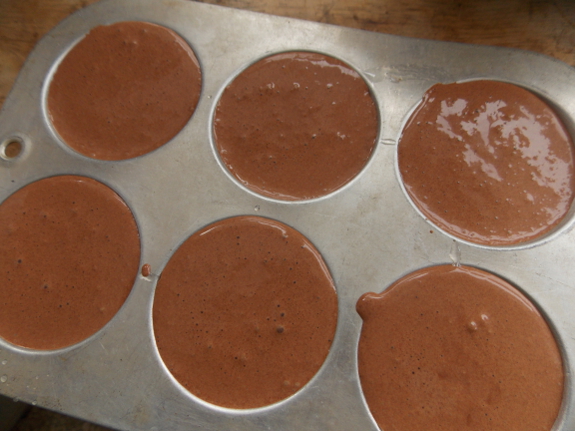
Now preheat the oven to
275 degrees Fahrenheit and beat all of the ingredients except the jam
together. Pour the batter into a greased muffin tin to make six
mini cheesecakes, or into a 9-inch-square pan for one big
cheesecake. Bake for about 35 minutes until the top fluffs up and a
knife in the center of one of the cheesecakes comes out nearly
clean. (You want the cakes to stay a little on the moist side, so I
took them out about five minutes before I would have if they were
normal cakes.)
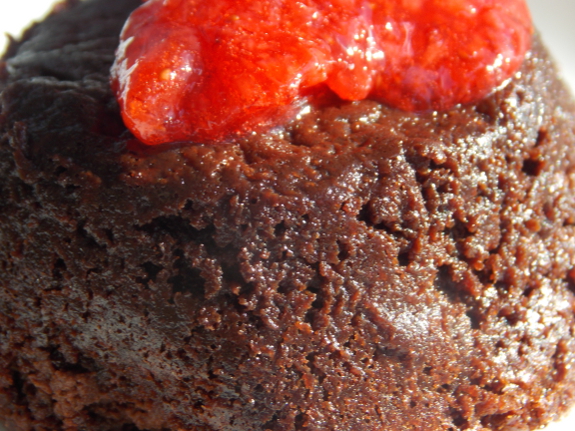
Cool your cheesecakes,
then top them with strawberry jam. Although not precisely paleo, I
think this decadent dessert is at least moderately healthy, and it's
certainly delicious! Plus, it would be pretty easy to source most
of the ingredients on the farm.
We had a problem with the bag
protecting our Sugar
Maple spile from the rain.
Anna fixed it this morning
after dumping out the rain/sap mix, but when I was going to the Post
Office this afternoon I noticed the bag had shifted and the drip was
being guided by the plastic onto the ground.
A piece of Reflectix is rigid
enough to keep the bag from touching the drip area and the bag helps to
keep it in place.
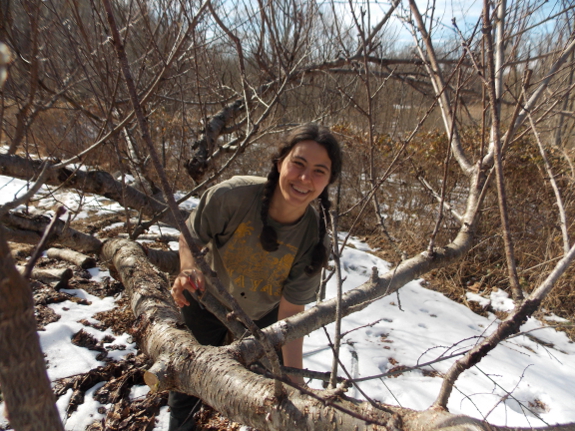
I can still hear our
kitchen peach complaining: "I asked the hairdresser to trim off my split
ends and I walked out of there with a bob!" (Yes, my peach tree
does use vocabulary from the 1920s --- she's that kind of a tree.)
More seriously, our
seven-year-old peach needed a lot of pruning this year for a variety of
reasons. I've always read about winter damage on fruit trees, but
had never seen it until this year --- I guess a low of -14 Fahrenheit is
enough to nip a significant number of twigs. Interestingly, the
winter-killed twigs were mostly those that were in bad positions anyway,
hidden under other branches. Removing the winter-killed twigs
opened up the tree more than I was used to right away, but there was no
getting around that part of the pruning campaign.
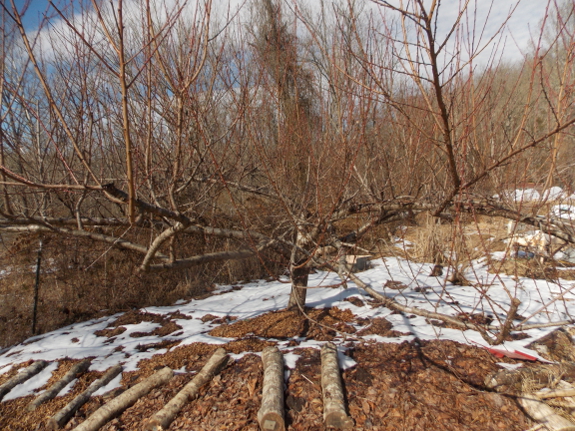
The bigger reason the
tree looks so shorn (before photo above and after photo below) is that I
wanted to lift some of the main branches up out of the fungal zone and
to give them an upward, rather than a downward, slant. My original
goal when I trained the tree was for the scaffold branches to rise at a
slight angle away from the trunk, but heavy fruit harvests have pulled
many of those branches down to horizontal or lower. Branches at or
below horizontal promote the formation of watersprouts, and also need
to be propped up during fruiting, so it seemed worthwhile to do some serious pruning now for the long-term health of the tree.
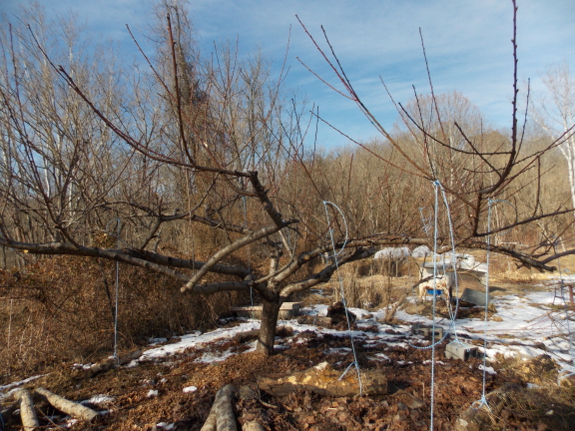
After cutting out
troublesome branches, I replaced the missing scaffolds by bending down
smaller branches to fill in the gaps. As you can see, there are
still a few horizontal scaffolds, but I didn't want to do too much too
quickly. Next year, I can take another stab at rejuvenating the
framework of the tree.
Even though this peach looks very bare in the photo above, there are
still lots of fruiting buds to go around. Barring a late frost, I
suspect we'll see a good harvest despite my heavy hand. The more
likely issue is that watersprouts may come out in spades this summer
since the tree will have more energy than it needs to put into the
remaining branches. I'll just have to stay on top of the summer pruning and hope for the best.
Since its been so cold this
year we decided to rake away the layer of straw mulch protecting our asparagus to let the sun warm up the bed.
When I posted about the potential for feeding maple sap to bees,
two of our readers made the suggestion of utilizing freeze
concentration to increase the proportion of sugar in the sap without
causing bee indigestion by heating the sap to the boiling point.
Mark thought I was breaking the laws of physics until I explained that
freeze concentration is just a method of separating most of the sugars
from some of the water, resulting in a smaller quantity of liquid that's
sweeter than what you started with.
Depending on who you talk
to, you can capture 70% to 90% of the sugars in maple sap in 16.5% of
the volume through one to two rounds of freezing and thawing. If
your area gets below freezing at night, simply leave your sap outside
or, if you're enjoying a warm spell like we are, put a bucket of sap in
your chest freezer overnight. After freezing, let the 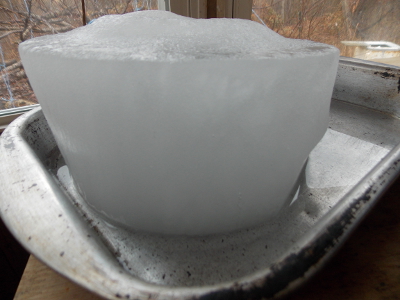 block
of ice sit at room temperature until about a third of its bulk has
melted --- that's the precious sugar portion. Toss the ice and put
the sugary sap back in the freezer for a repeat freeze-thaw cycle, this
time keeping the first half of the melted liquid. The result
should be a liquid that has increased from 1-3% sugar to 5-16%
sugar. (You'll also have some frozen sap-water to turn into Appalachian ice sculptures.)
According to some
sources, freeze concentration is a great way to start making maple
syrup, as well as for concentrating maple sap for bees. Freezing
generally uses less energy than boiling off the same quantity of water
(especially if you can just put your sap outside to freeze), and you
won't have to deal with the excessive steam clogging up your
kitchen. However, scientists recommend planning on utilizing
boiling to turn your sap concentrate into a real maple syrup since the
chemicals that produce the color, flavor, and odor of maple syrup are
formed through the application of heat. Plus, you need to get rid
of enough liquid to bring your sap to at least 66% sugar when making
maple syrup, which would take quite a few rounds of freezing and
thawing.
We'll be trying out our
first batch of maple-sap concentrate on our bees, but will boil the next
batch down into syrup on top of our wood stove. Stay tuned for
more information in later posts.
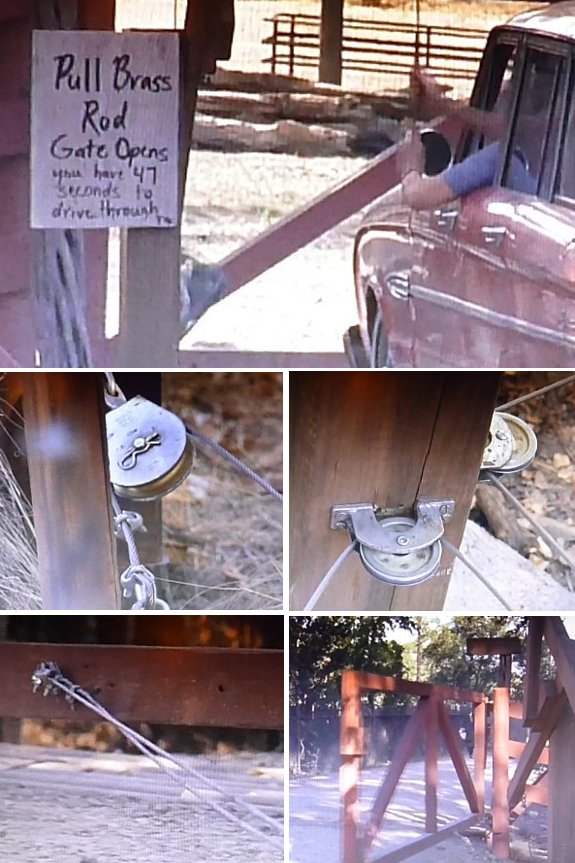
One of my favorite movie
biographies is the inspiring story of Temple
Grandin, whose autistic innovations helped to improve the cattle
industry and people's understanding of autism. 17 minutes into the film
you get treated to a demonstration of an impressive looking unpowered
mechanical gate opener.
I'd like to make one someday
for our ATV/chicken gate, but there's not much information available,
which is why I captured some images of that scene to study.
Figuring out the
counterbalance weights and pulley placement might take some trial and
error. I'd love to hear comments from any readers who may have seen one
of these in action.
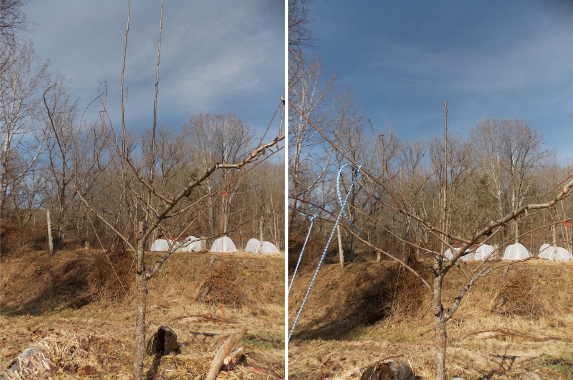
Even though I cut that poor old peach tree to within an inch of her life,
I'm really more of a trainer than a pruner, especially with young
trees. Old-fashioned pruning advice will admonish you to cut a
branch to a twig pointing in the direction you want it to grow, but you
can get the same effect without setting the tree back by using a rope
and weight to tie the branch down into the proper orientation. By
the time you train all the scaffolds, you may just discover there's next
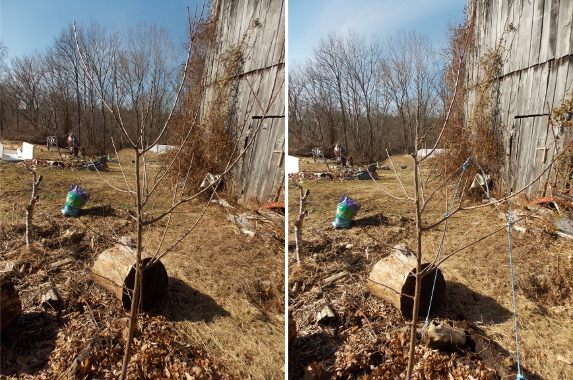
to nothing that really needs to be cut. For example, the pear
tree above, which I frameworked to Seckel a year ago, only needed the top lopped off once I tied down all the branches.
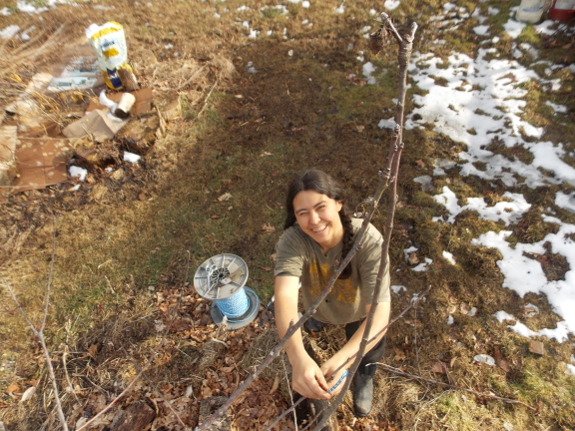
The European plums
I added to our collection a year ago needed a bit more cutting, but not
much. They came with extra scaffold branches, and I let them all
grow the first year. As the tree neared its on-farm birthday, I
figured I should select my favorites and give them a bit more of the
tree's attention by pruning away extra limbs.
Despite using such a
light hand on the pears, apples, and plums, the rest of our peach trees
will probably get significantly more pruning since they grow like crazy
on our farm. But that will have to wait until the next sunny day.

Thank you Roland, M, and
Zimmy for the awesome comments on yesterday's post about making
a contraption to open gates.
Digging around for more
information turned up a free Google book titled Fences, Gates, and Bridges and how to
build them.
It's a jam packed book of
fencing ideas that has a few human powered gate opening options that
may help to inspire a new approach to this puzzle.
 Want some fun weekend reading? Aimee Easterling
(our first Wetknee partner author) is working on a werewolf novel, and
she made a standalone prequel short story available for free! You
can download a pdf copy by joining her email list (and the book will
soon be free on Amazon --- she'll email you a followup when that's the
case for those of you who prefer reading on your kindles).
I know werewolf fiction
is off topic, so I won't bother you with frequent updates here.
All the more reason to join Aimee's list if you're interested! Be
sure to tell all of your paranormal-fantasy-loving friends about the
story as well if you want extra brownie points.
To join the list, just input your data in the form below (or go to Wetknee Books and use the second form on the sidebar). Enjoy!

I think the Blue Ribbon for Best Gravity Powered Gate Opener should go to Alvin E Gandy for
his ingenious system that can still be seen in some parts of Texas and
New Mexico.
The patent was issued in the
1960's and might be a good starting point for someone who wants to make
a more simplified version. A solar powered electric opener would be
easier, but only last as long as the life of the battery and motor
before it would need to be fixed. This mechanical beauty might still be
functional a hundred years from now with some periodic lubrication.
Image credit goes to Google
Patents and Michael Lubke.
Temple
Grandin human powered gate opener.
Unpowered
gate opening part 2.
 After a gushing start, warm nights slowed our maple sap
flow down to a trickle. Still, it's no hardship to collect the
one bucket on my morning walk with Lucy, and it's simple to boil down
the sap post-freezing
on top of the fire I light most mornings to take the chill off.
In fact, I realized that the reason I thought the juice wasn't worth the
squeeze when we first tried maple syruping about seven years ago was
because we didn't have the infrastructure in place to make the process
simply take an extra minute here or there in the course of our normal
day. (That is true of so many homesteading tasks....)
Of course, I'll admit
that, even in the mountains, we're too far south for optimal sugar
mapling --- that's why we're just tapping one tree rather than going
whole-hog with the endeavor. On the other hand, I was interested
to read that the sugar content of sap isn't just determined by
geography, but also by microclimate and time of year. One New
England study showed a range in sap sugar content of 1.8% to 8.4% (the
difference between boiling 36 gallons of sap down to make 1 gallon of
syrup and boiling only 8 gallons of sap down to make that same gallon of
syrup). Here are factors that make some sap sweeter than others:
- Among all trees, sugar content is low in sap at first, quickly rises to a peak, then gradually decreases over the sap run, with another little rise at the end (just as the taste turns "buddy"). So, if you're familiar with your sap season, you could presumably just tap trees during times when the sugar content is high.
 Sun
makes sugar, so those trees with more branches and those trees more
exposed to the sun tend to have higher sugar content in their saps
compared to neighboring trees tested at the same time. We
accidentally picked a winner in this regard since the tree we tapped is
(strangely) on a south-facing hillside at the edge of our parking area,
so the tree gets lots of sun all year.
Sun
makes sugar, so those trees with more branches and those trees more
exposed to the sun tend to have higher sugar content in their saps
compared to neighboring trees tested at the same time. We
accidentally picked a winner in this regard since the tree we tapped is
(strangely) on a south-facing hillside at the edge of our parking area,
so the tree gets lots of sun all year.- Larger trees make more sugar, and so do trees with wider growth rings (meaning they're growing faster).
- Trees that are sweeter than their neighbors continue to be relatively sweeter throughout the season and from year to year. Whether this is due to the factors mentioned above or whether the sweetness is genetic was beyond the scope of the study.
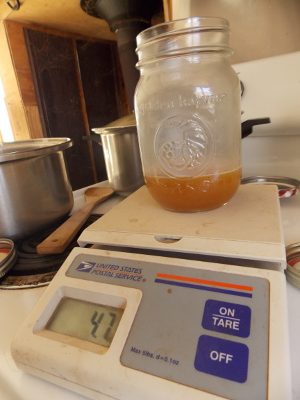 Obsessive
data collecting aside, I'm in love with the process of boiling sap down
into sugar because the partway stage tastes just like vanilla extract
smells. After letting the sap simmer on the wood stove until it
was starting to thicken, I moved four days' supply over onto the
electric stove for the final cookdown Saturday morning (taking over
watch duty from Huckleberry).
There are lots of ways to tell when your maple syrup is done, but I
chose to eyeball it, backing the diagnosis up with a weight test. A
gallon of maple syrup should weigh 11 pounds, so a cup of maple syrup
should weigh 11 ounces. I figure we produced a bit less than half a
cup of syrup, so the weight came out just about right. I also
eked out another tablespoon or so by making hot chocolate in the
cook-down pan, rinsing the syrup off the walls for the only sweetener in
the beverage --- delicious!
 Are
you thinking of getting started with chickens this year, but don't know
which breeds to consider? Mark and I have experimented with a
heaping handful of chicken varieties and have heard reports from our
readers on many others. In the process, we've decided that certain
varieties are better than others for homesteaders.
Why did we choose the
chickens below from the long list of varieties out there? I'm
assuming that if you're a homesteader, you value productivity, meaning
that your chickens should you plenty of eggs and/or meat for the amount
of feed you buy. You'll likely want your chickens to forage so
their eggs have rich orange yolks, and you'll want them to survive the
predators that inevitably pop up in a homestead situation. In
other words, you're looking for one tough chicken.
In contrast,
non-homesteaders often have different criteria for choosing hens.
They might want a really cool-looking bird, especially one who will win
first prize at the fair. Non-homesteaders may be more
interested in a chicken's cuddle potential than in its livestock status,
and they may also be interested in preserving an heirloom breed even if
that bird isn't a prime forager in their region. If any of those
options sound like you, you might still enjoy some of the chickens on
this list, but will also want to do more research before choosing the
members of your flock. To get you started, here's a list of the top 10 breeds by popularity, here are Murray McMurray Hatchery's recommendations, and here are Jenna Woginrich's recommendations.
 Okay, let's get down to brass tacks! If I was going to tell a homesteader to buy three chicken varieties, they would be:
Red Star/Golden Comet/other red hybrid egg-layers.
Different hatcheries have their own proprietary "formula" for optimal
egg-layers, but the red hybrids we've tried have all been excellent
producers and calm birds that forage pretty well. These are top
choices for chicken tractors, especially if you're not going to be
eating any of your birds, but they might be a hair too friendly for
optimal free ranging without ending up pooping on your porch.
Black Australorps.
These are our favorite all-around homestead birds, which we use for
eggs and meat. (The carcass won't look like a store-bought
chicken.) Australorps are extremely hardy and are great foragers,
but they don't lay quite as well as the hybrids mentioned above, nor do
they lay much in the winter. On the other hand, the Australorps
are meatier birds, so they make better broilers --- a jack of all
trades, but master of none.
Cornish Cross.
If you're simply interested in a meaty chicken that will give you a
carcass that looks like the ones in the grocery store with the least
feed consumption, this is the bird for you. I'll admit we've never
actually raised Cornish Cross, but that's because we like to hatch our
own chicks and to keep one flock for eggs and meat instead of two
separate flocks. If we were going to buy 25 chicks planning to put
the adults in the freezer, we'd go straight for Cornish Cross.

Other breeds to consider. Rhode Island Reds will be midway between hybrid egg-layers and Black Australorps in their traits and Plymouth Rocks
will be midway between Black Australorps and Cornish Cross. If
you lean more toward eggs or meat rather than having tastes that run
right down the middle like ours do, you might want to try one of these
alternatives. Buff Orpingtons and Wyandottes also come highly recommended, but I haven't tried either one yet, and there are also laying ducks to consider.
Finally, don't forget to get all of your gear together while you're in the planning stages. Check out these automatic feeder ideas, invest in a quality brooder, and get the chicks off to a good start with clean water. Good luck and enjoy your chicken adventure!
We're still having a problem
with rats stealing our chicken feed.
You can find free plans for a
treadle feeder on the internet that involve cutting out pieces of
plywood, but I wanted to see if I could build a smaller, low budget
version from basic lumber supplies like 2x6's and furring strips.
The next step is to build a
platform for the chickens to step onto that will be hooked to some
linkage that lifts the cover off the food with the help of the weight
of the chicken. When they step off the cover goes back down.
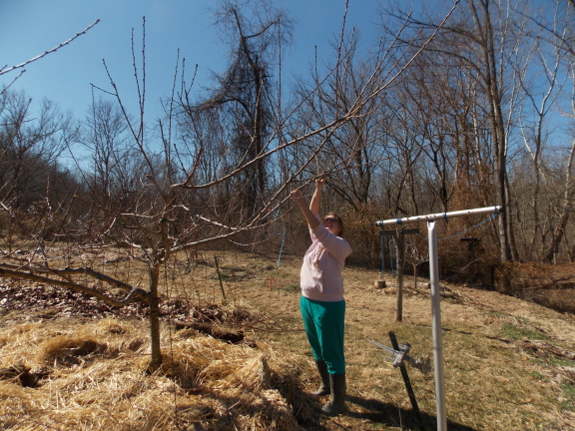
I saved our medium-sized
peach trees to train and prune when Kayla could get across the creek
since she had some of her own in need of attention. I could tell
she was a bit afraid of hurting the tree by doing it wrong, which made
me realize how far I've come in the last few years. It hasn't been
all that long since I pruned with book in hand and agonized over each
cut, but after a few years of pruning and seeing the results, I'm quite
comfortable pruning our peaches.
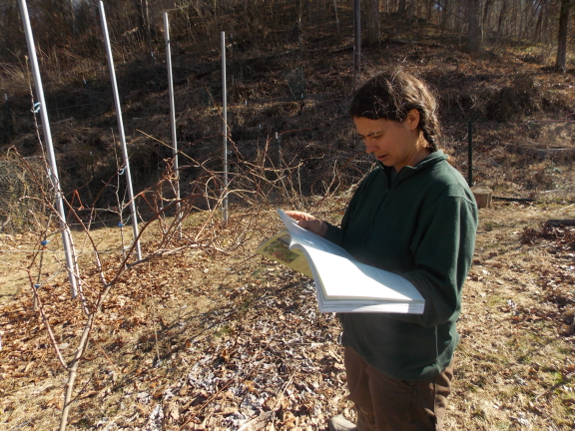
I haven't reached that
point with all of our fruit plants yet, though. I did a lot of
this --- reading over the relevant section in Lee Reich's The Pruning Book and Grow Fruit Naturally and then worrying over each cut. I was especially leery of harming our hardy kiwis since I'd sent some cuttings to a reader
a few weeks ago, and he reported that when they started leafing out, he
saw bloom buds! In other words, if I don't see flowers off the
hardy kiwis this year it's my own fault for cutting the bloom buds
off. Having Kayla present for moral support was very helpful in
this case, even though she knew less than I did --- it made me remember
that cutting usually works out alright.
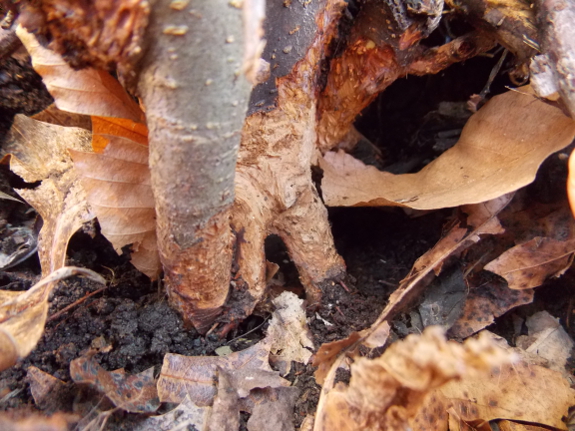
And then there's the huge
problem that I saw last week and have been trying to block out ever
since. All three of our just-ready-to-fruit apple trees in the
forest garden have been girdled just below the soil line and will
probably perish. (The Virginia Beauty, strangely 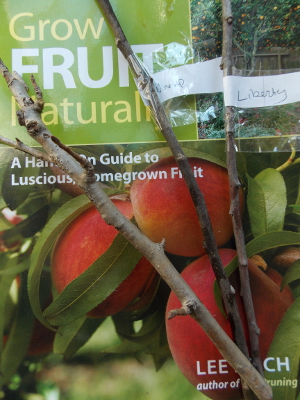 enough,
is fine, even though it's no more than fifty feet away.) I've
never protected the bases of our fruit trees because I'd never seen vole
damage, but I guess I'll have to cross that bridge now. And I'll
also need to consider whether growing sweet potatoes in the forest garden
was such a great idea --- it definitely produced an awesome living
mulch and lots of biomass, but I suspect the tasty tubers might be the
reason for the vole population explosion. Or maybe they just ate
my trees because of this winter's weird weather?
No matter what the cause
is, I don't want to lose the two apple varieties that aren't represented
elsewhere on our farm, so I took some scionwood and will graft them
onto the rootstock that's coming in the mail in March. I guess
it's lucky that the nursery turned out to only sell roostock in larger
quantities, meaning that I was forced to order more rootstock than I
thought I needed at that time. The photo to the left shows two
good pieces of apple scionwood, plus a sad section of pear scionwood
from the tree I planted outside our core homestead. I'll be grafting the pear onto a new rootstock this spring as well.
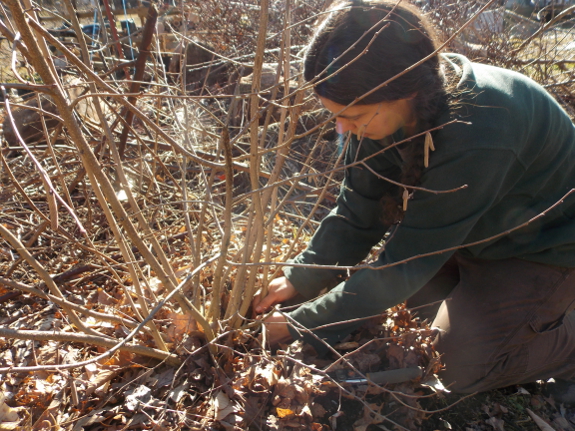
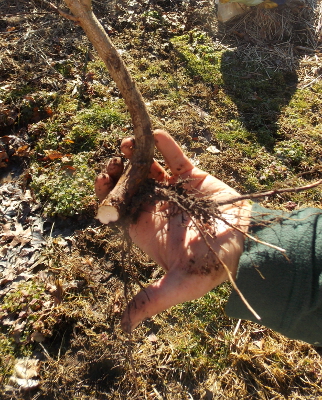 On
a more pleasant note, the pruning afternoon turned into a bit of a
propagation spree as well. Our little hybrid hazel had sent up a
sucker that was far enough away from the parent plant that I could clip
it off and tease out some roots to go with it, and a gooseberry bush
also yielded up several kids. Kayla even found a rooted shoot at
the base of one of our hardy kiwis. I sent all of the babies home
with Kayla to hedge my bets --- if her plants thrive and mine fail, I
can always get cuttings from her to spruce back up our planting.
That seems like the permaculture way to create backups.
Unless I've forgotten someone, every bush and tree in our homestead is
now pruned. Time to move on to the next project on my list!
One of the fulcrum pins on
our Chopper
1 axe fell off and got lost in the mud.
Our Tekton
Camping Axe does a good job with the help of the Bostitch
AntiVibe hammer, but it's more than twice the effort as the Chopper
1.
With any luck the replacement
pin will be in the mail this week.
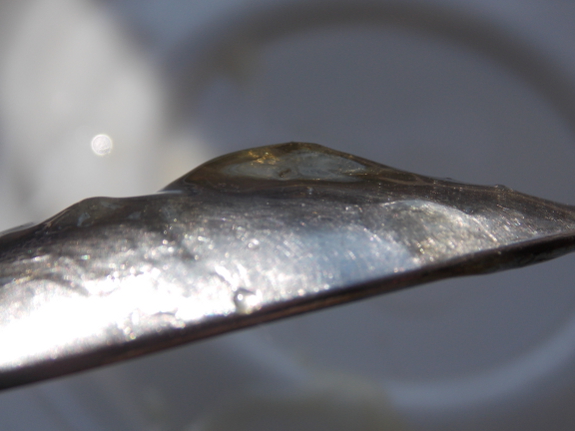
Let's say that --- just
hypothetically --- you put some maple sap on the wood stove before you
go to bed, figuring you're going to damp down the stove so it'll just
cook partway down before morning. But you forget to close the air
vent, so when you wake up, the sap has turned into maple taffy in the
bottom of your pan. At first, you're thankful that it didn't go
further and ruin a perfectly good batch of sap, but then you realize
that you're going to lose a lot of the precious sweetness when you
scrape it out of the pot. What are you to do?
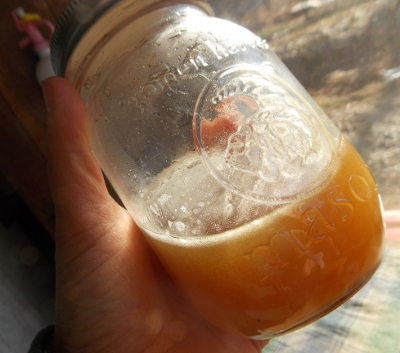 My
solution was to pour on another round of sap and warm the mixture over a
very gentle fire as the cast-iron wood stove came back up to
temperature the next morning. Soon, the maple taffy allowed itself
to be stirred back into the sap, and before long, I had some sap just
waiting to be cooked down into syrup.
That was so successful that I took a look at my previous half-cup of maple syrup
and saw that it had become more the consistency of honey when I put it
in the fridge. So I cooked my second batch down to a bit runnier
of a consistency than you'd usually want, carefully poured the hot syrup
into the cold syrup, swirling to mix (and not pouring enough hot at any
one time to crack the jar), and I ended up with a cup of
perfect-consistency maple syrup. Success!
For those of you keeping
track at home, this cup of maple syrup is the result of about 5 gallons
of sap from a 14-inch sugar maple over the course of one week (four
heavy flow days and three light flow days). That means my sugar
maple sap has a relatively low sugar content of slightly less than 1%,
although possibly my freeze concentration method
loses more sugar than others suggest. What I probably should do
next is boil down a gallon without freezing first to get a more solid
estimate on sugar content of the sap.
Anna asked me to build a new
seed starting shelf today.
It didn't take long to clean
up this piece of barn wood with a steel
brush drill bit.
We both decided the worn wood
look was better than a brand new shelf board.
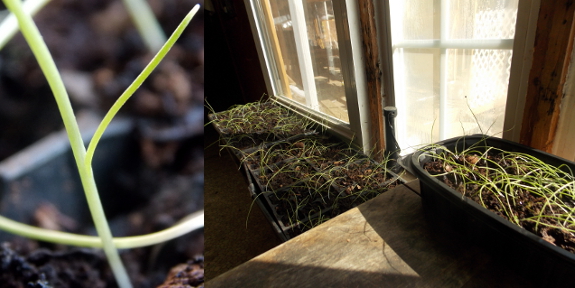
I'm thrilled to be able to say that my simple bleach-soak of the seed-starting flats
seems to have been sufficient to eliminate damping off. Just
about every seed sprouted, and many of the seedlings are starting to put
out their first new leaves. They're a bit leggy, though, so I had
Mark build the youngsters a new shelf near the bottom of the
south-facing windows for more constant lighting over the next month or
so before they hit the garden.
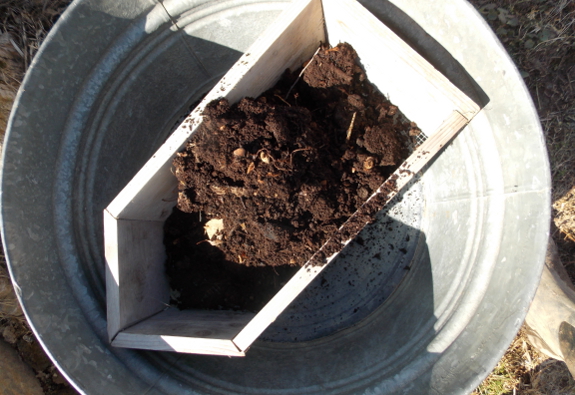
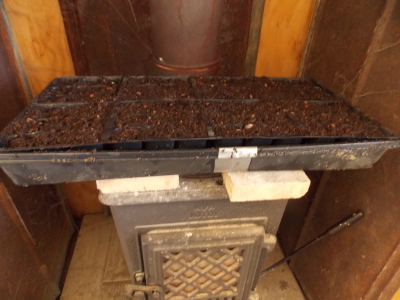 That
left my warm shelf near the wood stove open and ready for the next
round of seedlings --- broccoli and cabbage. Since I didn't plan
ahead and preheat my stump dirt this time around, I sifted out the
frozen chunks, filled the trays, and heated the potting soil the quick
way on top of two firebricks on a damped-down stove. I'll let the
chunks of soil I removed thaw and then will sift again to remove the
nutshells and pieces of wood, which seem to be more numerous in this
stump dirt than the debris has been in previous years. Then the
rest of the stump dirt will go toward the next set of seedlings ---
tomatoes and peppers.
I try not to start too much indoors, so most of the plants we're sprouting here are backups for others that will soon be started under quick hoops.
But after a cold winter, the ground will stay cold for quite a while,
which means it's worth giving extra attention to our indoors starts so
we can have a normal first harvest. Our winter stores are getting a
bit slim and we're looking forward to the first new lettuce and other
food from the 2014 garden.
Needle nose pliers don't have enough torque to bend these cotter pins, but a combination of vise grips and channel locks is just what a Chopper 1 needs to properly replace the fulcrum pin.
 When
we moved to our farm seven years ago, both Mark and I knew the
homestead would be a full-time job and working a "real" job too would
slow things down dramatically. Neither of us come from wealthy
families, though, so we needed a source of income.
About that time, we went to learn how to slaughter chickens at a friend's farm. They had a Whiz-Bang Chicken Plucker and Mark was very taken by its ingenuity. When we looked the product up on the internet and realized that the inventor, Herrick Kimball, was running a small home business based on that (and other products), Mark wondered if we could do the same.
To cut a long story short, Mark ended up inventing a POOP-free chicken waterer
that has reached thousands of chicken-keepers in the U.S. and around
the world. We had to tighten our belts for the first year because
the microbusiness barely brought us above the poverty line, but then
word of mouth helped Mark's invention take off. Soon we had enough
spare cash that Mark was able to hire another local homesteader to help
me in the garden part time, giving him time to work on inventing an even better chicken waterer.
 Imagine how thrilled Mark was yesterday, when his role model wrote about the EZ Miser on his blog.
We'd sent Herrick a review copy just on the off chance he was willing
to give our waterer a try, but his kind writeup went far beyond our
expectations. In fact, Herrick told me he plans to write a review
of Trailersteading shortly as well, which prompted me to remember that I wanted to read and review his recent Planet Whizbang Idea Book for Gardeners.
Stay tuned for more tips from an inventor very much like Mark in a later post. In the meantime, be sure to add The Deliberate Agrarian
to your reading list --- this is one of my top-ten favorite
homesteading blogs and should be required reading for both the aspiring
and established homesteader. Enjoy!
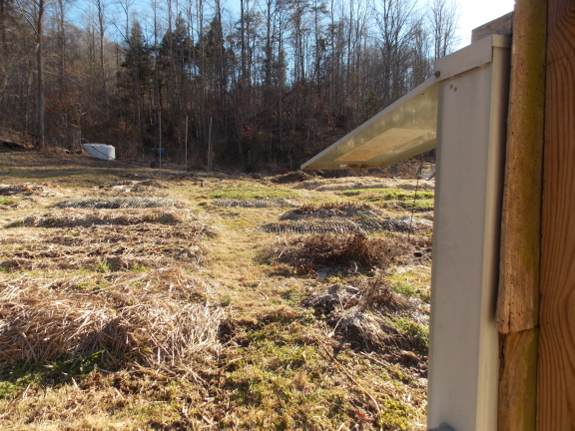
The line from the creek pump to the wash water tank
finally thawed out last week. We thought it was still frozen at
first, but a failure to follow protocol led to fortuitous results just
this once.
We turn on the pump at the
electric box outside the trailer. The rule is to leave the lid
open when the pump is running so we'll notice and turn it off a couple
of hours later. But when we tested the pump Friday, we forgot to
open the lid. So when the pump didn't seem able to push the ice up
the hill, we forgot to turn it off.
Half an hour later, I noticed
water spewing out of the line. We opened the electric box lid as a
reminder and soon had a thousand gallons of wash water on hand.
No more pumping water out of the well and into the tank! Yet another sign that spring is coming to the farm.
Want more in-depth information? Browse through our books.
Or explore more posts by date or by subject.
About us: Anna Hess and Mark Hamilton spent over a decade living self-sufficiently in the mountains of Virginia before moving north to start over from scratch in the foothills of Ohio. They've experimented with permaculture, no-till gardening, trailersteading, home-based microbusinesses and much more, writing about their adventures in both blogs and books.
