archives for 10/2013
I'm very ashamed to
say that I missed celebrating our farm's birthday this year ---
sorry, farm! This is much worse than forgetting
my marriage anniversary because Mark and I have an understanding that we don't do
anniversaries and don't give each other gifts on holidays.
The farm and I, on the other hand, have an agreement that she will
feed me and make me happy and I will notice her at least once a
year.
Our seventh year on
the farm was rough in certain ways, but delightful in
others. The rough patches weren't really blog material,
consisting primarily of Mark hurting his back last fall and not
being able to sleep right for a couple of months, plus the
heartbreak we felt when our
community-building project went south this spring. On
the other hand, those problems were counteracted by the
awesomeness of Kayla
and by a huge influx of homegrown fruit (my favorite food group).
 Looking back at the post I made on the
farm's last birthday, it's astonishing to see how much progress we've made in
twelve short months. (Well, nearly thirteen now.) The
composting
toilet and front
porch have vastly increased our standard of living, and Mark
has enjoyed his ATV
(even though I'm concerned by the amount of damage it's done in
the driveway during a very wet year --- we'll have to attack that
issue soon). My first
paperback hit bookstores and Mark invented a completely
new chicken waterer. And, of course, we kept adding
new perennials to the garden, building soil, and increasing our
pasture area.
And despite the angst I mentioned previously, our tranquility
levels have remained pretty high, perhaps due the ponds
I played with building this summer, but mostly due to Mark's even
keel. I am eternally thankful that my original dream of
sharing my life with a piece of land didn't materialize as
planned, instead turning into a threesome --- me, Mark, and the
farm.
 Those of you who don't
follow our
facebook page probably don't know that Walden Effect is
coming out with a wall calendar this year. Mark's
step-mother makes family-history calendars for her clan and asked
if we'd like her to make one for our readers. We said sure!
The calendar is still
being designed, so I can't tell you anything definitive yet, but
we're envisioning it showcasing the best of our blog photos and
also including a bit of text to keep you on the right homesteading
track each month. I'm writing very short summaries of each Weekend
Homesteader
project, and am also including a list of annual chores and events
based roughly on this
post (but
generalized to only include tasks that are probably relevant to
you). We plan to include phases of the moon, meteor showers
and eclipses, solstices, equinoxes, cross-quarter days, national
holidays, and maybe some birthdays of permaculture-related folks
(and a hobbit or two).
 If we can find a cheap
source of vegetable stickers, we'll also take one facebooker's
suggestion and include a set of stickers so you can easily mark
planting dates. I'm considering including an insert with
first and last frost dates for major cities across the country and
charts showing how to use those dates to figure out your own
planting times.
Anything else you'd
like to see on a wall calendar? I don't plant by the moon,
so don't really feel I have enough experience to add biodynamic
planting suggestions, but just about anything else will at least
be considered.
Calendars will go on
sale here around the first of November, and we're hoping to keep
your cost down to $9.99 per calendar (maybe with $2 shipping per
order?). Right now, I'm thinking of playing it safe and
printing only 200 calendars, so it would help to get a head count
in the comments section, especially if you are thinking of
ordering more than one. The calendar will be glossy and
pretty, a good gift for the gardener on your list!
(And a big thank-you
to Jayne for being the driver behind this calendar project!)
It's been a year since I
first made the deluxe
chicken carrier.
My conclusion is that
chickens cackle less when they are in the dark.
The wire cage we used before
worked, but I remember more cackling, which I'm guessing equals more
stress, which is always something to avoid with poultry.
 The weather is getting
chilly...and controversies over wood stoves are popping up all
over. One came into my inbox and another into my blog feed
last week, so I thought I'd weigh in.
First, from our
regular reader Roland:
woodstove. Mostly as a backup and because of the cozy factor. But after reading the [The Fireplace Delusion and Woodsmoke Health Effects: A Review], I changed my mind."
For those of you,
like me, who hate following links, here's the upshot, excerpted
from the first link:
Meanwhile, various
blogs in the homesteading world are posting rants against the
EPA's new policy that would make it illegal to sell your old wood
stove if it emits more than 7.5 grams per hour (g/hr) of
particulates. Here's a sampling of the headlines to give you
a feel for the tone of the pieces:
"Off Grid Attack: EPA To Outlaw Many Wood Burning Stoves"
 To help explain my take
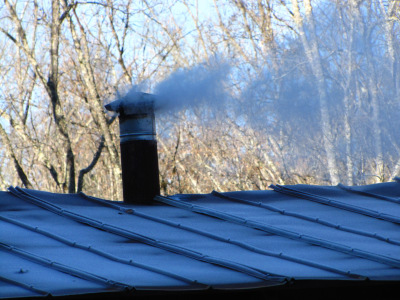
on the matter, let's go back in time. Mark and I started out
with a monstrous
wood stove that spewed forth smoke (see the top photo), and
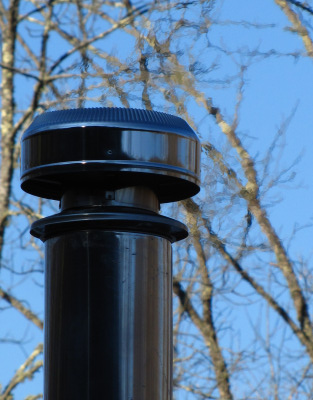
we saved up until we could afford a fuel-efficient
wood stove.
Our current model burns so clean that I can't actually see smoke
once the initial water vapor is driven off. I had initially
reported our Jotul's emissions rate as 5.2 g/hr, but the EPA
website seems
to list it even lower, at 3.4 g/hr.
Am I glad we saved up for the fuel-efficient wood stove?
Very much so! Would I have skipped the intermediate,
polluting step and gone right to the efficient stove? Well,
we couldn't have afforded the efficient stove when we got the
inefficient stove, so knowing what we knew then (not much), we
probably would have just bought an inefficient, used wood stove
locally. It's not as if the EPA is going to send out officers to
look for illegal wood stoves --- their regulations are only going
to be enforced by insurance companies --- so poorer people will
likely keep buying whatever they want used if they can't afford
insurance. I've heard from various people locally that you
can't really insure a home heated solely by wood anyway (at least
around here) unless you install a heat pump and say that's your
primary heat source, so this might not make a big difference.
 How do we feel about
the polluting effect of our current wood stove? Pretty
good. I don't have data to back this up, but I estimate the
minimal amount of particulates emitted by our wood stove is so
well dispersed before the smoke hits our nearest neighbor (roughly
a half mile away) that the effects are negligible there.
Here at the source, I figure we're still breathing cleaner air
than the average urban or suburban American, and we have the
benefit of being able to harvest our own fuel sustainably at a low
cost, enjoying radiant heat and wood chopping, and not worrying
about lack of heat during our sometimes-extended power outages.
In the end, I think the EPA rule is a good thing. The first
place I part company with libertarians is the environment --- even
though our government does a poor job of protecting our earth, I
think we'd do an even worst job without its oversight. Since
the current rule will likely push at least some people who can
afford it to change over to a more efficient stove, while not
unduly harming people who can't afford to make the switch, it
seems like a win-win. I'm sure many of our readers will feel
very differently about the topic, though, so feel free to comment.
We're lucky to have a stone
quarry only 8 miles down the road.
I got a Chevy S-10 truck load
today for 13 dollars.
Driveway repair will be the
theme for tomorrow.
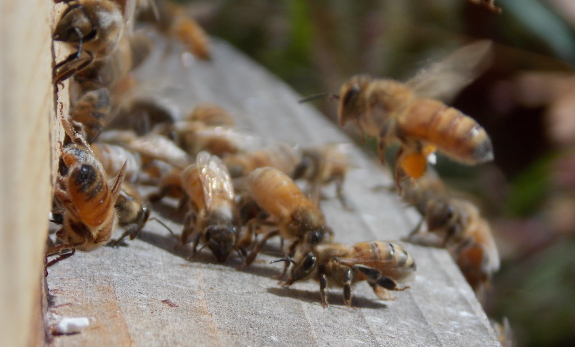
As I wrote nearly a
month ago, two
of our hives have an absurdly low number of varroa mites, but a
three-day-sticky-board count averaged out to 29 mites per day in
the third hive.
Even that relatively-high mite 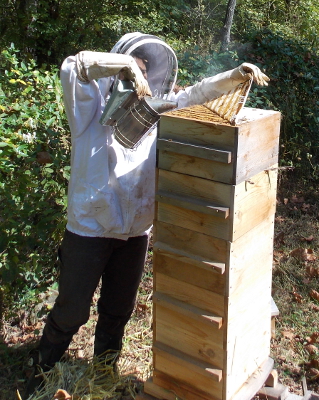 fall isn't so bad, but I've regretted it
before when I've let borderline hives go into winter --- they
often perish. So I decided to use one of safest methods of
mite control, treating the hive with powdered sugar.
Scientificbeekeeping.com
has a fascinating
series of articles on the efficacy of using powdered sugar to
lower varroa mite numbers. The author, Randy Oliver, found
that 50% of the mites in a hive can be removed by adding half a
cup of powdered sugar per shallow (or a whole cup per deep) to the
top box. The sugar falls down through the cracks to coat all
of the bees present, making it tough for mites to keep their
footing. The bees do have to work hard that first day,
grooming off powdered sugar (and mites), but the intrusion is
worth it if you're worried about your mite population since so
many mites fall through the screen in the bottom of the hive and
perish..
In addition to the
intrusiveness of the powdered sugar technique, there is another
downside to using powdered sugar as your sole mite-control
measure. Oliver explains that powdered sugar only removes
the mites currently on bees, and since mites carry out part of
their life cycle inside capped brood, you won't really do much
good if the bees are actively raising young at the time of
treatment. However, when colonies are letting populations
drop to get ready for winter, powdered sugar can really decimate
mite populations. Oliver concludes that properly-timed
powdered sugar applications (plus screened bottom boards) might be
all the treatment you need if you're raising bees that have been
bred to be mite-resistant.
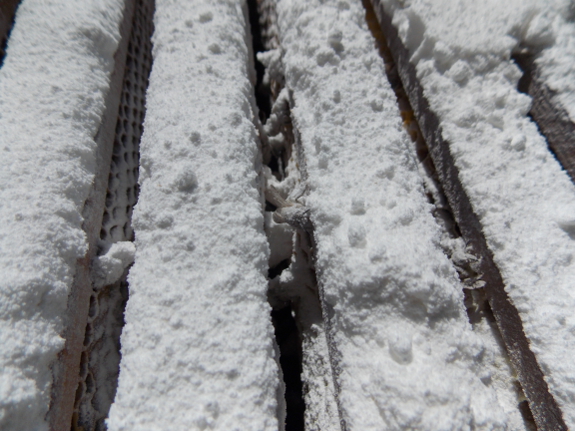
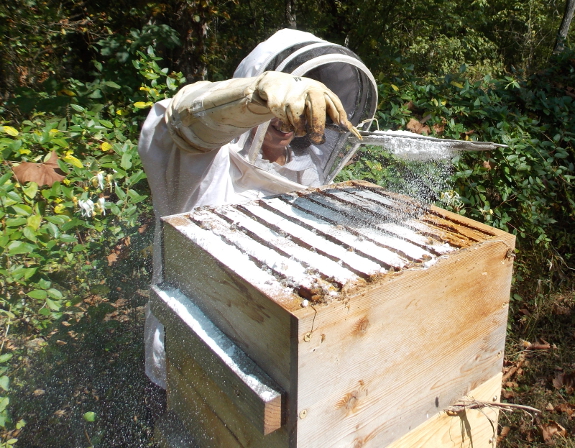
To return to my own
experiment, I smoked our bees gently just to make sure they
wouldn't fly up into the powdered sugar, then dusted the top of
the hive with 2.5 cups (half a cup per Warre hive box). The
sugar that built up on the top bars was easy to push back into the
hive using the bee brush.
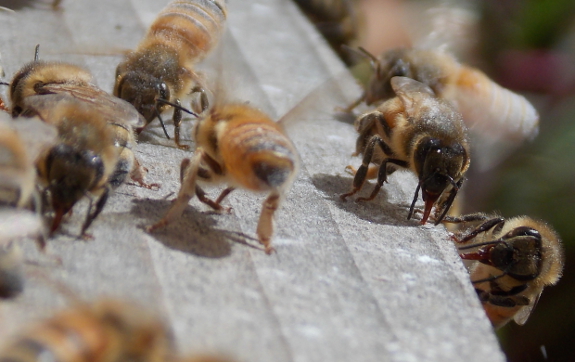
Immediately after
dusting the hive, I could see bees out on the porch licking up
powdered sugar. Although powdered sugar is harder for bees
to consume than sugar water is, our ladies are still able to
convert some into food, and, eventually, honey. So the
varroa mite treatment doubles as a quick feeding boost to lightly
prop up fall stores.
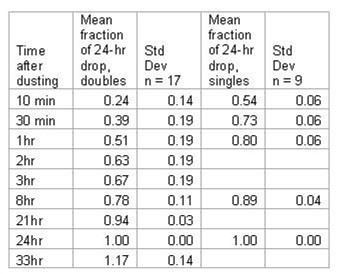 The other bonus of the
sugar treatment is that it gives you a more accurate portrayal of
probable mite levels in the hive, compared to the
potentially-problematic sticky-board counts. Just put the
bottom board in before treatment, take it out a timed interval
later, and count mites. The chart to the left comes from Oliver's
second article about powdered sugar, and the second column
shows what fraction of the total daily mite drop comes during
various intervals right after treatment. I counted 26 mites
on the bottom board of our hive 30 minutes after dusting with
sugar, so if we assume 39% of all the mites that were going to
fall that day had already hit the bottom, and that the treatment
will remove 50% of the mites in the hive, I get a population
estimate of 133 mites in the hive pre-treatment.
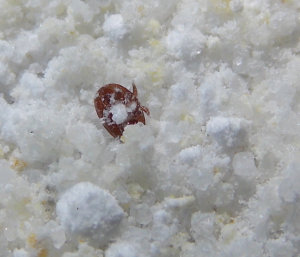 Actually, I think I
probably didn't use quite enough sugar, since Warre hives are so
tall compared to Langstroth hives. So, perhaps my sugar
treatment is only going to remove 25% of the mites from the hive,
providing a pre-treatment estimate of 267 mites in the hive
instead of 133. Either way, that's pretty low, suggesting I
probably didn't need to dust the bees with sugar, but the
treatment is unlikely to have done much harm, and potentially will
help the bees survive the winter since they won't have so many
parasites sucking their blood.
If I remember, I'll
run another sticky-board count in a few days to see what varroa
mite levels are like post-treatment. I haven't decided yet
whether I should treat the low-mite hives, or leave them alone to
go into winter without the day of trauma.
This new bucket configuration
allows me to haul 30 gallons of gravel.
Next would be to dream up
some easier way of lifting each bucket from its crate.
Maybe some kind of crane
structure with a hand cranked winch.
We made a mistake
this year and left our straw
cache out at
the parking area under a tarp. It's been so wet that there
was no easy time to haul the bales in, so we figured we'd just get
them as we needed them. Unfortunately, the wind blew the
tarp back and got most of the bales damp, so they're now extremely
difficult to haul (even though Mark's still carrying through with
the endeavor).
On the plus side,
those slightly-decomposing bales seem to have provided the perfect
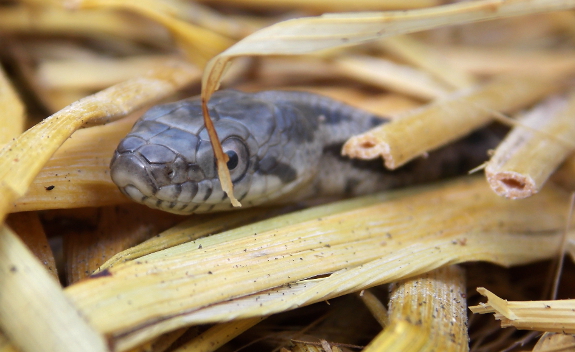
habitat for baby black rat snakes. Mark found some eggs
between two bales in September, and thrust them further into the
pile since he didn't know what else to do with them. The
eggs must have hatched in the interim, because two little snakes
turned up in the straw Thursday. Kayla isn't a fan of
snakes, and wasn't terribly thrilled to have her mulching job
include snake patrol, but I think even she could tell that these
guys are too cute to really be afraid of.
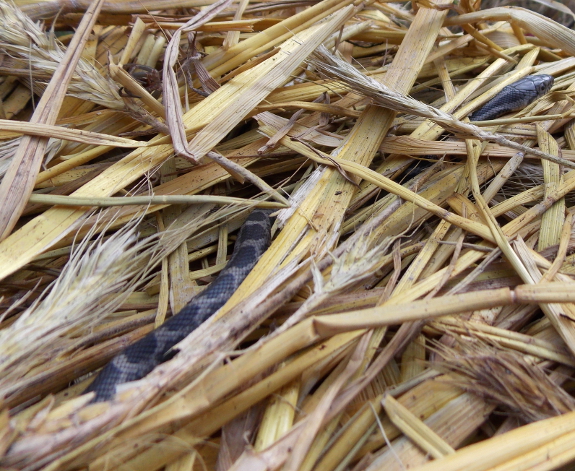
Actually, I thought,
at first, that this was an entirely new species for our farm,
until Kayla keyed the snake out in my field guide and discovered
that baby rat snakes look nothing like adults. Who would
have thought this prettily-patterned snake is going to be solid
black above by the time it gets two feet long?
(By the way, Kayla,
you guessed right --- these guys did just hatch.
Newly-hatched black rat snakes are twelve inches long. Hard
to imagine all that length folded up into a two-inch egg!)
This is the second Warre
hive quilt cover I've attached to a box.
I used pieces of thin plywood
instead of furring strips to secure the fabric.
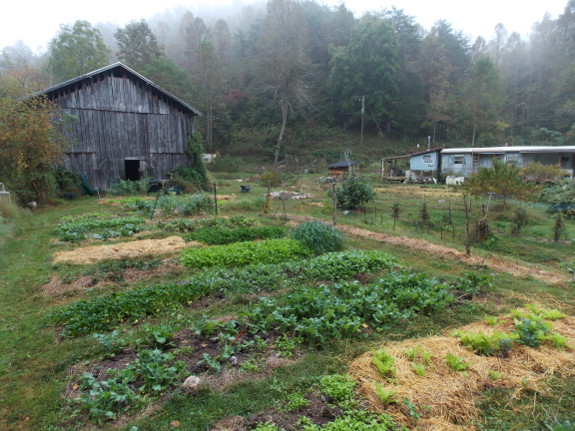
I put off answering
Karen's question because I kept thinking I'd posted about our
average day before, but I couldn't seem to find the page.
So, I apologize if this is a repeat....
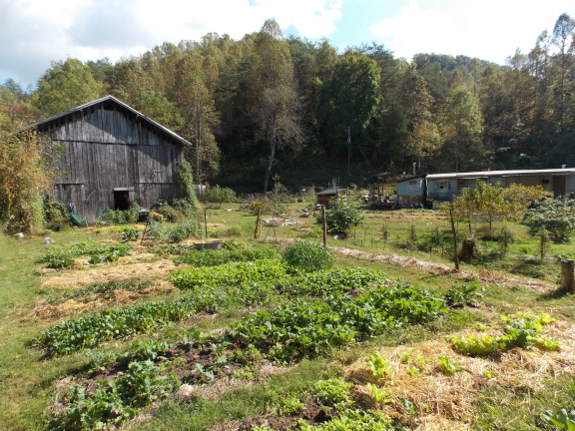
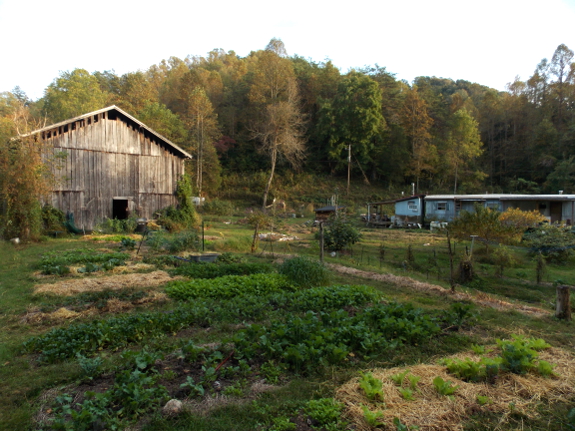
After a couple of
years on the farm, Mark and I came to a compromise we could both be happy
with about working hours --- 9 to noon, then 1 to 4. During
warm weather, we spend the first chunk working outdoors and the
second chunk on money-making tasks (swapping the order in the
winter). You hear about the outdoors portion of our day all
the time, and can probably guess that the other half consists of
making chicken waterers (both of us, or
sometimes various helpers), mailing those waterers (Mark), writing (me), and keeping our online empire running
(mostly me).
Of course, there are
also the parts of the day that don't really count as work (if any
of it does, which is up for debate). I start half an hour
earlier than Mark does so I can feed the chickens and walk
Lucy. Mark takes the afternoon shift, bringing in the
eggs and giving Lucy another training walk after "work."
Cooking doesn't count as work (unless there's a lot of excess to
be preserved), and neither does blogging.
No matter how you
divide up work and non-work chores, Mark and I have a lot of
leisure time to use as we wish. Mark has been enjoying a
post-lunch nap most days lately, and I've always got a book on
hand to fill those free hours (if Huckleberry doesn't need extra
spoiling). Excess time never seems to be a problem, though
--- I would be quite happy if days were 48 hours long --- which I
guess is a good sign that both the work and non-work parts of our
day are fulfilling. I hope you can develop a structure that
feels the same!
I've switched from a water
hose material to nylon rope for training
high density apples.
The nylon is more flexible
and was easier to install.
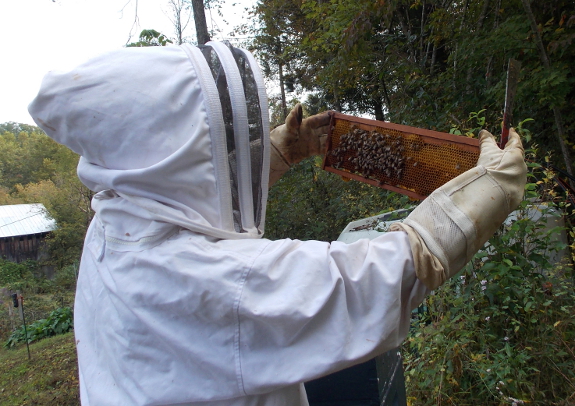
We had such a strong
late-summer nectar flow, I neglected to check the bees in September.
Usually, that's when I decide if I need to start feeding to ensure
the colonies make it through the winter, but how could they need
more honey when I'd fed the two weaker hives all spring and early
summer, and the wildflowers had taken care of the early fall?
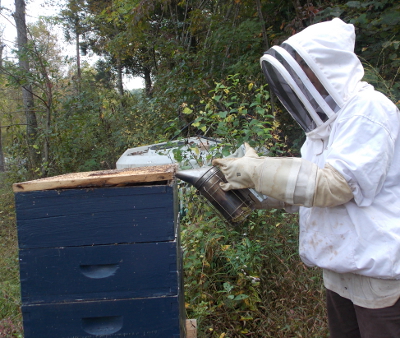 Well, I was wrong.
The barn
swarm was in
the worst shape, having only colonized one super. I knew
that the colony was a gamble since they got such a late start, but
it was still a shock to see the whole hive empty except for six
small frames partly full of brood, pollen, and honey. I
don't know what I could have done differently, except maybe if I'd
kept feeding through the nectar flow, and chances are this hive
will perish over the winter. Still, I'll help them as best I
can, removing the empty brood box, putting the colonized super on
the bottom and the empty super above them just in case they want
the space, then cobbling together a Warre-style
quilt out of an extra super to provide insulation on top of
the hive. And I'll feed as long as they'll take it.
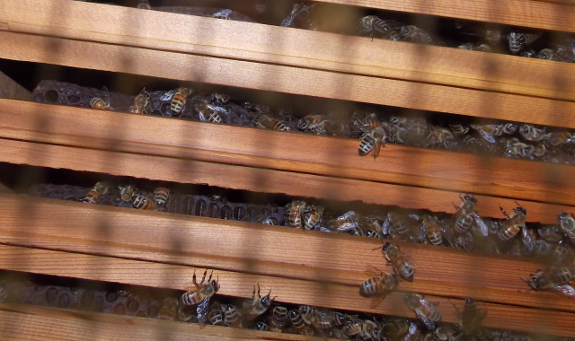
The two Warre hives
are in better shape, but don't have as much honey as I'd
hoped. In fact, the hive I
dusted with powdered sugar this week had three empty boxes
(which I removed)! I had wondered how a hive we started as a
package this spring could have used up so many boxes so fast, but
the boxes on top were full, so I kept adding more. With only
two boxes colonized, I'll start feeding them to ensure they have
enough honey. Meanwhile, our oldest hive, started as a
package in spring 2012 then losing half their workers to a swarm
in spring 2013, never made it into their third box either, so I'll
feed them as well.
The two Warre hives
are in about the same state our
single Warre hive was in last fall, so I'm not terribly
concerned about them making it through the winter (although
feeding until it gets cold won't hurt). And the word on the
street is that all the rain made this a tough year for bees in our
area, so I guess it's not so bad I'm stuck feeding them
again. Maybe next year they'll finally get off the dole and
make some honey for me?
This is the second time this
year we've had to break out the trail
camera.
Deer damage started a few
nights ago, and so far no photographic evidence.
Anna moved the camera, so
hopefully if she comes back we'll record the moment and location where
the midnight invader is getting over the fence.
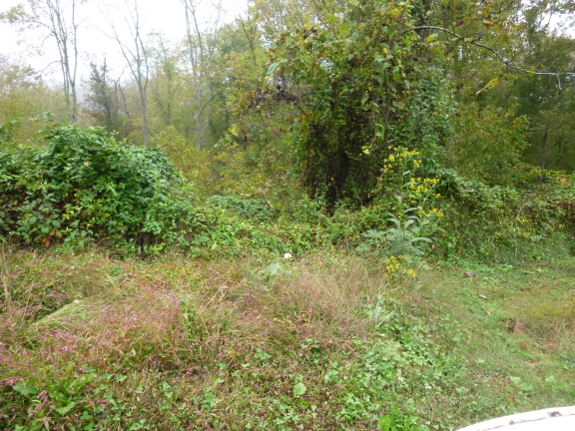
We had a minor
deer incursion Thursday night, the second
one this year.
Once again, the problem was a sagging fence --- in this case,
honeysuckle had bowed the fence down to the point where a deer
could probably step right over it. I'd known about the
danger spot, but figured it was unlikely a deer would walk up the
steep hillside below and enter our farm right outside our back
door. I was wrong.
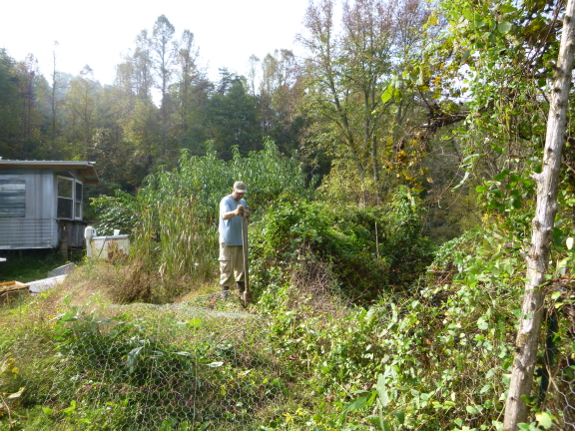
Luckily, Mark's
hard-core deer-deterring actions meant the deer didn't come back
the next day, and has hopefully moved on to easier pickings.
In addition to tearing the vines off the problem fence, Mark added
two cedar posts to the problem area so he could extend the fence
up another four feet. Next, Mark plugged back in the deer
deterrents
(silent for the last couple of months) and moved one right in
front of the incursion spot.
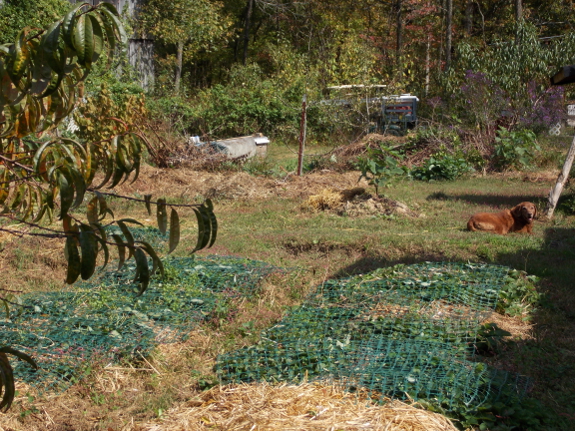
Meanwhile, I covered
up all the strawberries with plastic trellis material. This
stuff really comes in handy for everything from deer fencing to
cucumber and pea trellises, and it also makes it
tougher for a deer to really munch on their favorite plants.
Granted, the deer already ate half the leaves on four strawberry
beds, but shutting the barn door after the horse is gone works
with plants since they regrow (as long as they don't get nibbled
again).
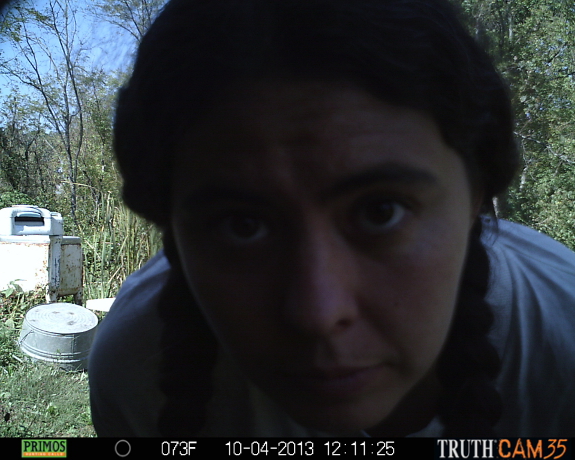
Our last step was to
hook up the game
camera to make
100% sure the deer doesn't come back (or, if it does, to find out
where its new entrance is). The only thing we caught on
camera, though, was me --- taking Lucy for a walk, bringing in the
laundry, and just peering into the lens. I think the words
going through my head were "Does this thing still work?"
We used an old Christmas tree
stand to mount a new EZ Miser chicken waterer.
It only took a few minutes to
attach a piece of decking board to an 18 inch 2x4.
A scrap chunk of 2x4 at the
bottom helps to even it out.
 Despite the fact
that we basically live in a swamp, we don't have a terrible bug
problem. Yes, at dusk, the no-see-ums come out, there's a
mosquito now and then, and the deer flies get bad down in the
floodplain during the dog days of summer. But, generally,
Mark and I can work outside without feeling bombarded by
bloodsuckers.
The dragonflies, I'm
sure, deserve a lot of the bug-control
credit, but so
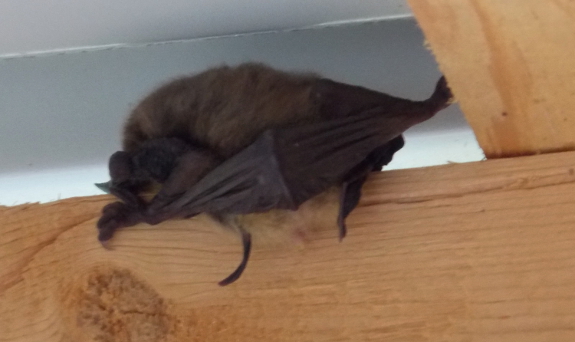
do the bats. That's why Mark and I were so happy to have a
visitor spending a sunny day hidden above the porch rafters.
"Wouldn't it be nice
if we made a bat box and collected the guano underneath?" Mark
mused. My very-limited experience with bat boxes involved
watching how the boxes around the nature center where I worked as
a high school student always stayed vacant, and my boss telling me
that he'd never seen a bat box used. But the idea is so good, I thought I'd ask
around --- have you ever seen a bat box with a no-vacancy sign out
front? If so, what was the bat box's design?

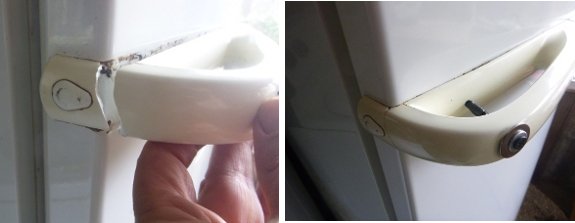
The Nikon
Coolpix L22 developed an
issue with the memory card door where a plastic piece is worn down to
the point of allowing the door to pop open during operations.
I opened that little door
every day for the last two years. It still works good with a piece of
electrical tape holding it shut, but not fun for everyday blogging.
Maybe I'll move it to the glove compartment of the car in case we're
driving and see Big Foot or something else worth taking a picture of.
My new blogging camera is the
Panasonic
Lumix DMC-TS25. It can
take pictures underwater, which means it has a beefier memory card door
that should hold up to heavy usage without breaking. Stay tuned for a
full report on how it's working out once I get a chance to use it a bit
more.
 A few weeks ago, I caught
a stomach bug and spent a few days with absolutely no interest in
food. On our farm, I manage the larder and meals while Mark
does the dishes and grocery shopping, so without me on the job,
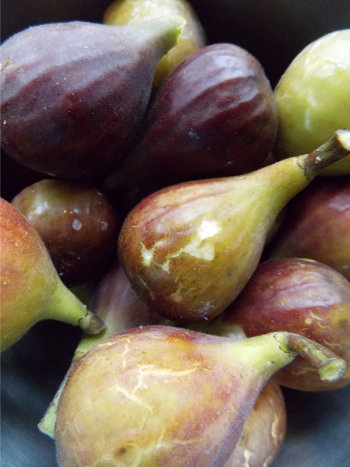
several figs and raspberries rotted on the vine. The waste
was extremely minimal, but it got me thinking about one of the
biggest hurdles non-full-time homesteaders face --- putting in the
daily time to make sure they pluck produce at its peak. That
thought set me pondering which fruit types are best and worst for
the true weekend
homesteader who only has two days a week to visit her
garden.
Even though I think
of them as productive and low work, I realized that most berries
wouldn't be appropriate for the true weekend homesteader.
Raspberries tend to mold in our climate if you go more than a day
(possibly two if it's sunny) without picking, and I discovered
that ripe figs (although not a true berry) won't last much
longer. Strawberries are probably in the fig category, while
blackberries are a bit more resilient and might manage if picked
only twice a week. Blueberries would thrive on this
treatment due to their firm skins that give you a long picking
window (although blueberries do fail the test of producing at a
young age, not requiring nitpicky soil treatment, and being easy
to propagate).
 How about tree
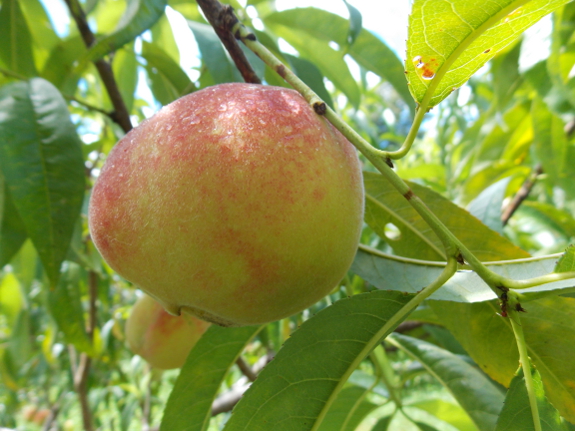
fruits? Only our peaches and apples are producing so far, so
I can't really write from personal experience, but it seems like
(at least in a humid climate like ours) peaches require attention
a few times a week during the harvest season. Apples are
much more forgiving, and a weekend homesteader could easily pick
the bulk of his apple crop during one crisp Saturday, then eat
homegrown apples all week (or month, or winter). From what
I've seen elsewhere, I'd say pears are similar to apples (although
you do have to take them out of cold storage a few days before
eating to allow pears to fully ripen, so that takes a bit more
management). Plums are likely to be similar to peaches, but
I'm guessing a bit less prone to rot (so easier to ignore for days
on end).
On our farm (as long
as I don't have a rare stomach bug), I actually prefer fruits in
the berry category since I like the daily harvest better than the
gushing influx of bushels of luscious orbs to be managed all at
once. (Not that the flood isn't exciting.) But if I
left the farm before sunup, returned after dark, and only had
Saturday and Sunday to tend my homestead, I'd stick to tree
fruits. How about you? Do you have any recommendations
for fruit types that can handle days of neglect and still provide
a bountiful crop?

The Cadillac
worm bins are doing
good...except for this one.
Clearly we should have put a
support brick in the middle for the front and back.
Maybe I can use the scissor jack to raise it up and slide a brick
in to fix it.
I've been reading a
lot of tidbits about root hairs over the last couple of
years. Various sources have explained that root hairs are
the only parts of a root that take up most nutrients. Others
add that root hairs are only formed on the tips of growing roots
and live for just two to three weeks. Presumably, that means
you should time your compost application for the periods when root
hairs are being actively formed.
Michael
Phillips
asserts that fruit trees go through cycles of root growth,
alternating with 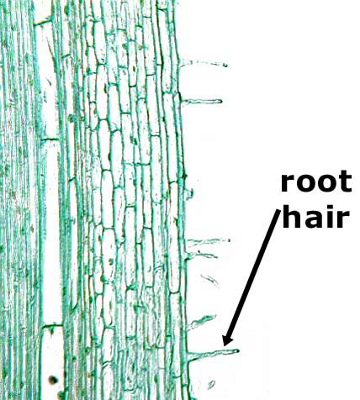 shoot growth, so you
can expect your trees to be actively taking up nutrients primarily
in mid spring, late summer, and fall. Someone else (I think
it was Robert Kourik) explained that tree roots keep growing until
the ground gets below 40 degrees (if my memory serves). By
keeping the soil warm, a good autumn mulch can give your plant
extra growing time, and, similarly, fall-planting (in zone 5 and
warmer) gives trees a jumpstart on the year ahead.
But I felt like I was
missing a critical link in my understanding of root hairs.
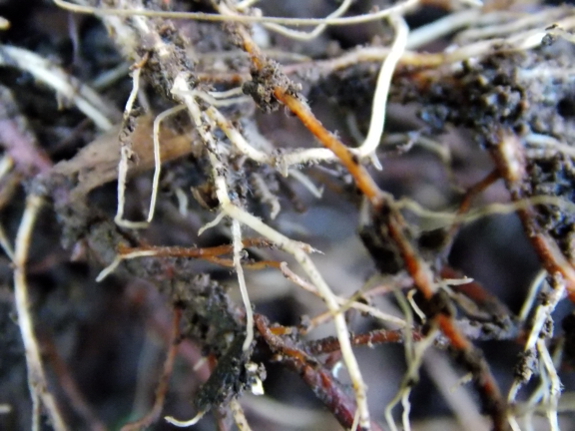
For example, are those white roots in the photograph above (from a
black raspberry) root hairs? Wikipedia suggests not, saying
that root hairs are single cells elongating sideways away from the
main root, and are generally invisible to the naked eye. On
the other hand, since new root hairs are found on new roots, and
new roots are white, I suspect I can use color as a rough estimate
of where root hairs are present.
And can I take
Michael Phillips' assertion about seasonality to be true of all
perennials? I'm sure each species has its own cycle of root
growth --- perhaps the only way to know is to keep an eye out for
white roots in the few instances when I'm messing in the dirt
around my woody plants. If anyone has found a source with
data on root growth seasonality for the common fruiting plants,
I'd love to see it!
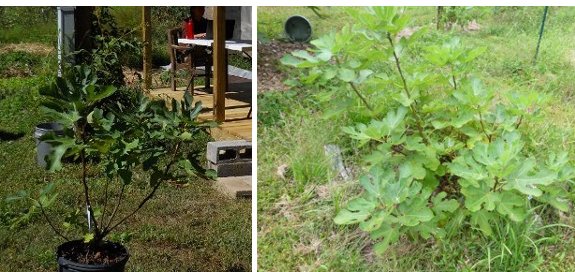
We got this Celeste fig
tree a year ago at Rose's discount store in St Paul.
No figs from it this year,
but the amount of growth is an indicator that it should continue to
thrive in our climate zone.
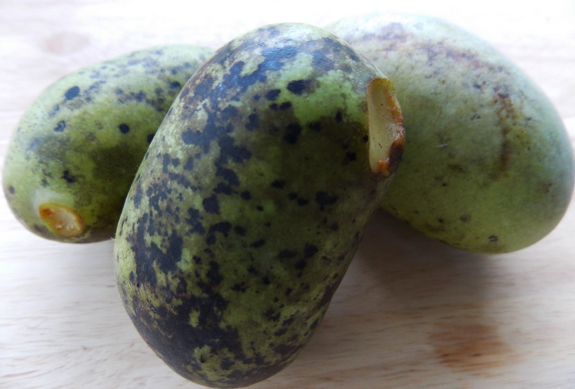
I'm afraid I've
finally found a fruit I really don't like. I used to think
the reason I had odd memories of pawpaws is because (after our
family moved away from the farm), Mom would drive us out in the
country to pick the fruits, and I always arrived carsick.
However, I've been watching a pawpaw along our driveway all
summer, waiting for it to ripen up, and when the first fruits hit
the ground, I took the rest home to taste. There were no
cars involved, so I definitely wasn't nauseous, but the fruits
weren't something I'll seek out again.
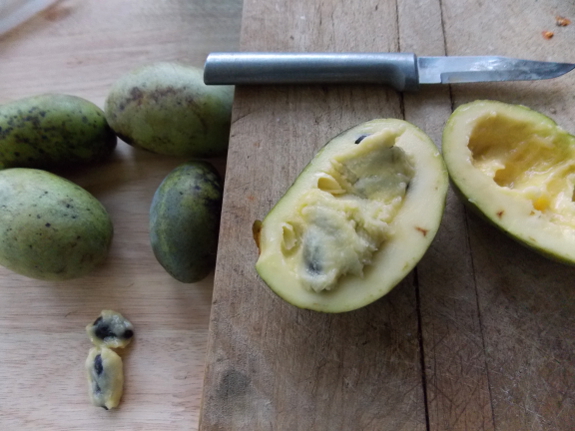
Internet descriptions
of pawpaw flavor range from banana custard to plain banana, mango,
papaya, and pineapple. I'm not sure I know what banana
custard tastes like, but I can tell you definitively that pawpaws
taste nothing like the other fruits, except maybe having a hint of
the unpleasant flavor you get really close to the skin of an
unripe mango or papaya. (I suspect many of the folks
describing pawpaws were confusing flavor with texture --- pawpaws
do have a texture about halfway between a mango and a banana.)
If I had to describe
the flavor of pawpaws, I'd say they're sweet (of course) combined
with a slightly bitter taste and an almost over-powering floral
odor that sets me off the fruit. Perhaps if I'd held my nose
while eating, I would have liked the taste better?
Granted, there are
different varieties of pawpaws, as with other kinds of
fruits. And it's possible some of the cultivated varieties
taste better. But I like my fruits to have at least some
tartness to them, and pawpaws fail that test. That's why my
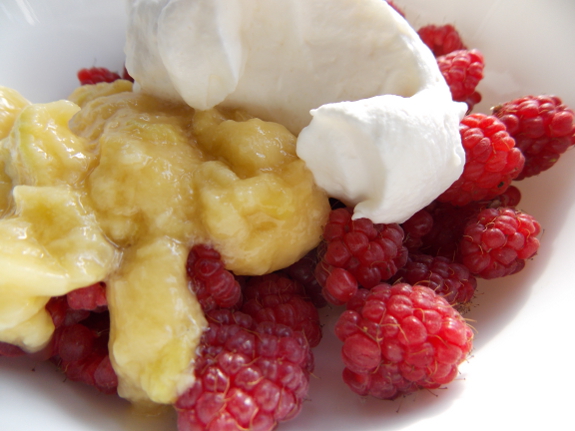
second experiment was to mash the flesh up with some lemon juice
and honey, then add it to our raspberries and whipped cream.
I hate to say it, but that was even less tasty than the flesh we
ate plain, and I didn't mind when Mark picked the pawpaw off his
berries.
I'd be curious to
hear from anyone who's grown named varieties of pawpaws.
What varieties are you growing, and what do you think of their
flavor?
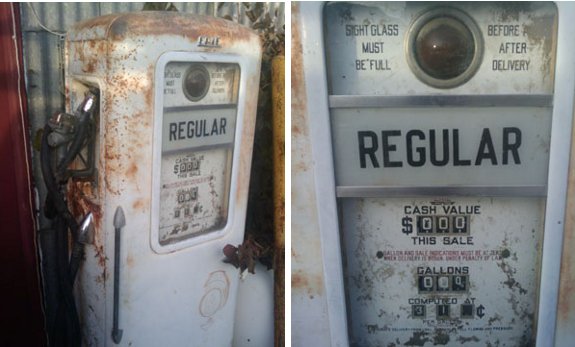
Pure-gas.org
is a list of ethanol-free gas stations in the U.S. and Canada.
The 2 stations that advertise
on their signs in Gate City are on the list.
I still want to do an ethanol
content test the next
time we are in that area.
Image credit goes to Casey Frederick.

Somewhere early in
life, I was told that fuzzy caterpillars can sting. Later, I
discovered that all caterpillars that turn into moths (instead of
butterflies) are fuzzy, but only a few sting. Yet, I kept my
distance anyway.
 I finally got stung by a caterpillar for the
first (and second time) in mid September. This saddleback
caterpillar was hiding in the blueberries and I accidentally
brushed my finger against it while picking. The surprising
pain made me jump away and then forget about the caterpillar, so
the critter managed to sting me again a few days later when I came
back to finish harvesting that spot.
Luckily, the sting
wasn't very bad --- not worth spending decades avidly avoiding an
entire sub-order for. It felt like I'd walked through a
patch of stinging nettles, meaning the pain was intense for a
minute, noticeable for an hour, then quickly forgotten. (To
be fair, though, I have a high tolerance for stings.)
If you live in my
neck of the woods, you
can see all of our poisonous caterpillar species here. Like snakes, I figure it's worth
learning the few poisonous species so you'll know everything else
is harmless. Then you can start enjoying
the beautiful permutations of nature without worrying about your skin.
This post is to remind me when the Dungannon area solid waste center is open.
My parents had a
strict no-sugar policy when I was a kid, so we ate some unusual
desserts. One of my favorites was "golf balls," a
conglomeration of nuts, dried fruit. and fresh lemon that a family
friend came over and helped us make each Christmas in a
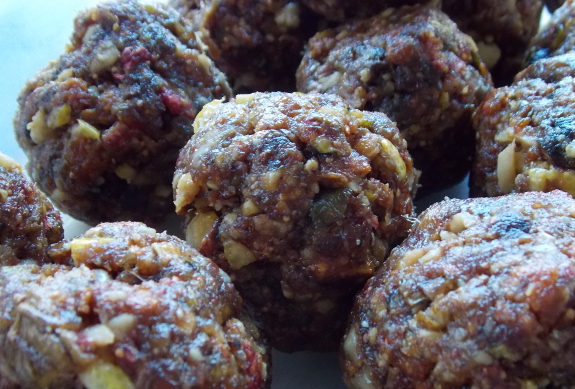
hand-cranked sausage grinder. I decided to try blending my
own version out of our home-dried fruit (and a few purchased
additions), and liked the result enough to share with you.
Here's the original
recipe, as best I can remember it:
- flesh from 1 coconut
- some amount of nuts, all kinds (probably largely pecans and walnuts)
- some amount of dried apricots, dried figs, and dried dates
(roughly equal parts?)
- 1 whole lemon
And here's my
homegrown alternative:
- 8.9 ounces dried Chicago Hardy figs
- 7.2 ounces dried white peaches
- 8 ounces dried dates
- 4.6 ounces English walnuts
- 1 whole lemon (seeds removed)
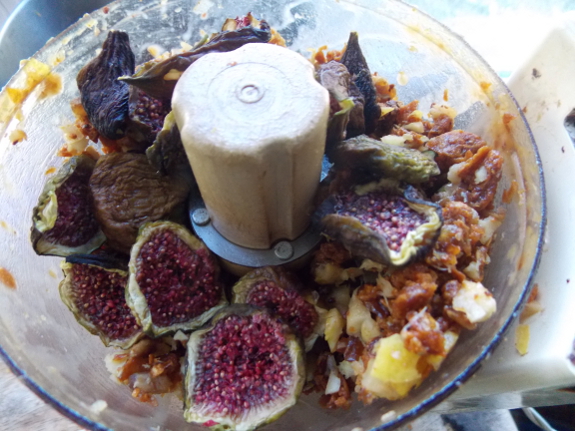
I ground everything
up, a bit at a time, in a food processor, then rolled the dough
into fifteen balls. Without apricots, the fruit balls
weren't as cheerfully orange, but the flavor felt richer (probably
because of the tartness of the peaches). I also observed
that the food processor made a chunky texture rather than a
blended whole, which has its own pros and cons. (I liked the
chunks, but kids would probably prefer the blended version.)
On the whole, I'm
happy with the experiment, although I might try again with coconut
taking the place of some of the nuts. (I didn't leave out
the coconut on purpose --- the one Mark bought for me was
moldy.) The fruit-and-nut balls make me think of a
vegetarian pemmican and are pretty healthy for something that
tastes like a dessert (145 calories per ball, 9% protein, with 15%
of your daily allowance of fiber).
Of course, Mark still
thinks this is one of my crazy family dishes, best avoided.
Maybe if I came up with a better name than "golf balls," he'd give
it another try. Want to help redub the dessert?
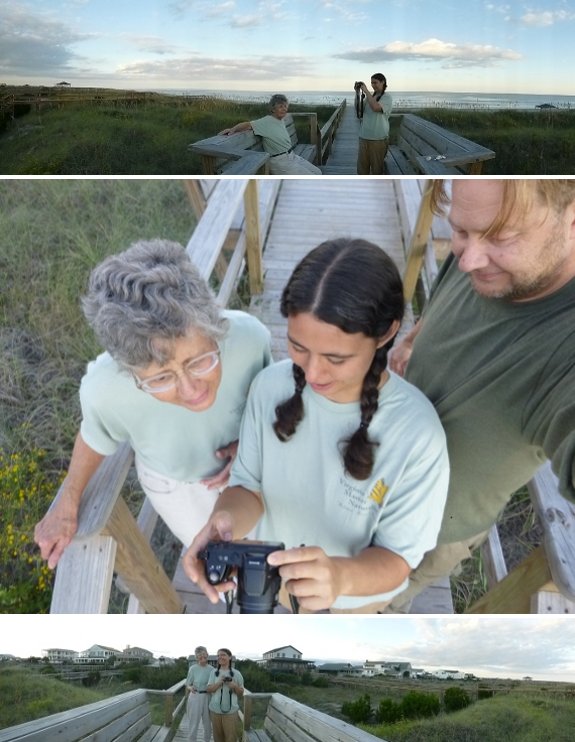
Four days and nights at
Pawley's Island South Carolina was a perfect vacation.
The beach is beautiful but we
started missing our mountains the last day.
Saw the 3D version of Gravity
and thought it was Awesome!
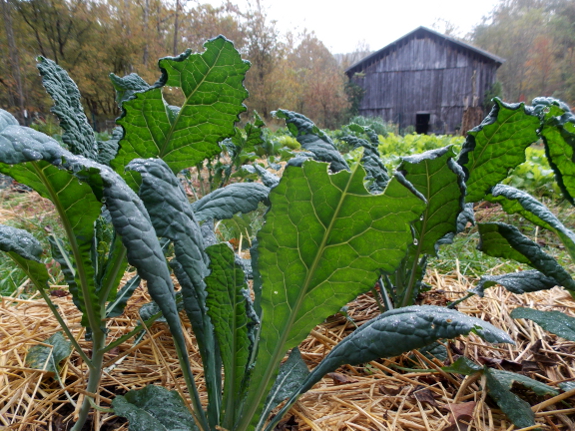
In Your
Money or Your Life, Joe Dominguez and Vicki Robin write that people who live
fulfilling simple lives shouldn't need a vacation. They may
be right, but the truth is that I seem to need a solid break
sometime in October between the rush-rush-rush of the growing
season and the gentler writing period of the winter. Some
years, a staycation does the trick, but in
other years --- like this one --- we seem to crave a more
solid break.
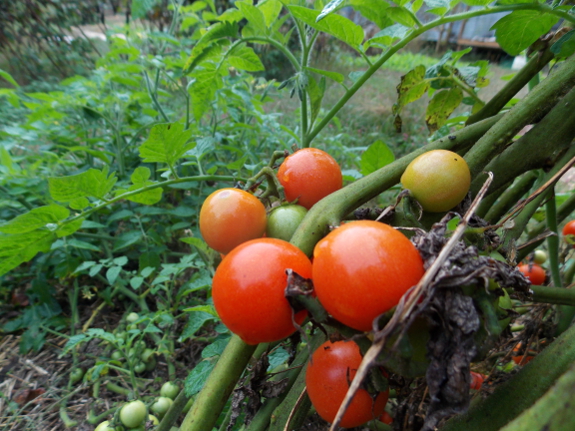
The best thing about
an away-from-farm vacation is how much it makes us appreciate our
everyday life. Coming home to a not-quite-frosted farm, with
newly-vibrant colors and the scent of fallen leaves in the air,
Mark and I both concluded we live in paradise.
How about you?
Do you feel the need for a vacation even if you live in paradise?
(Stay tuned for far
more beach photos than you care to see in this week's lunchtime
series.)
As Mark mentioned, we
snuck away last week to spend four nights on Pawleys Island, and
it was the best vacation we'd ever had. Rather than boring
you with our vacation pictures in one post, I'm going to split
them apart into an elongated lunchtime series and pretend that
makes them more interesting! In fact, I'm even going to add
tips about what made this vacation so perfect for us and pretend
it's educational! Pretty fancy, huh?
(In other words, it
won't hurt my feelings at all if you skip this and the following
only-quasi-homesteading-related (okay, not-really-related-at-all)
posts.)
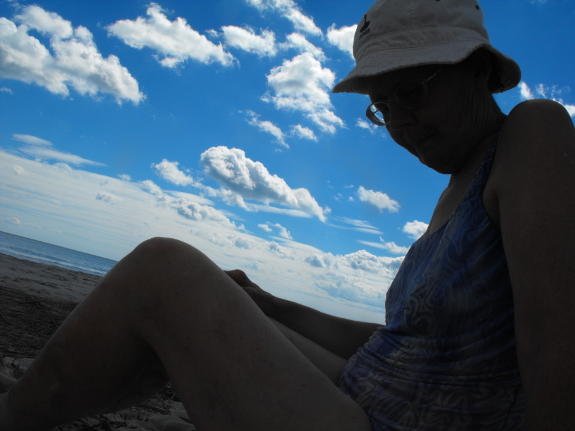
Perfect vacation tip #1: Start with
good company
We talked Mom into
coming to Pawleys Island with us. As Kayla said, "It takes a
pretty special husband to bring his mother-in-law on vacation"
(then she went on to add that she and her husband brought her
parents on their honeymoon). But, lest you think I'm cruel
and unusual, I should add that my husband is so special that
inviting Mom was his idea.
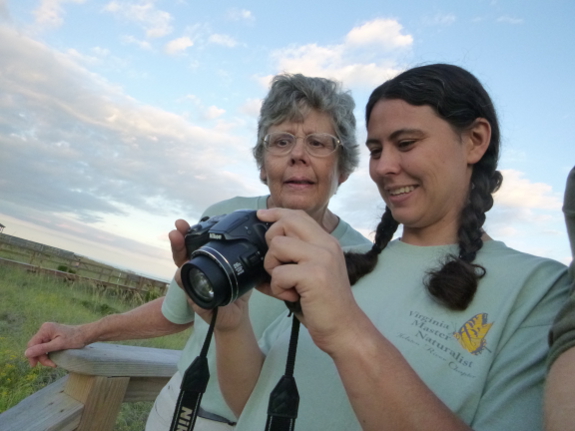
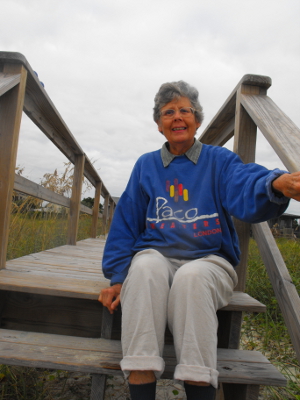 And I can't help feeling that Mom is
what made this vacation the best one ever. Mark likes to sit
still and watch the ocean, but I'm a relentless explorer, and it
was just more fun to explore with Mom's exuberance at my
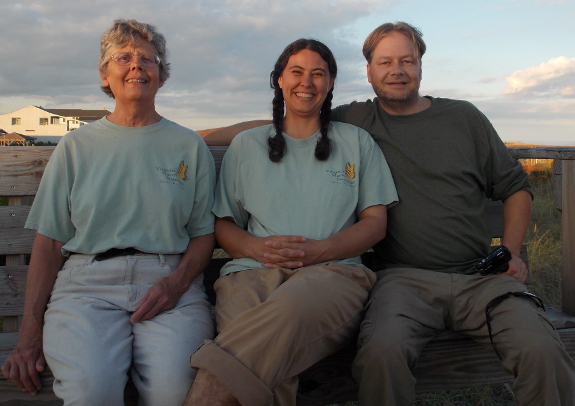
side. In fact, Mom and I are so much alike that we
accidentally wore the same t-shirt for our group photo day ---
oops.
So, pretending this
post has actual merit for its non-family audience, your first tip
for building a perfect vacation is to start with good
company. Mom, Mark, and I made a perfect team, so fun was
had by all.
| This post is part of our Gratuitous Vacation Photos lunchtime series.
Read all of the entries: |
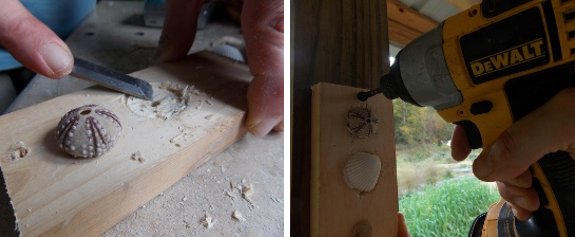
Anna asked me. "How can I
display my favorite sea shells so they won't get broken?"
"I guess I could glue them to
a display board, but there's not enough surface area".
The way I increased the
surface was to chisel away a groove for the bigger shells to sit in,
giving the extra surface area for the glue to bond with the bottom part
of the shells.
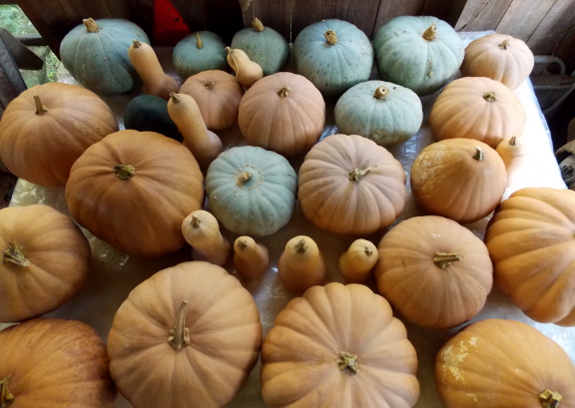
One of our first
years on the farm, Mark and I grew several different kinds of
winter squash and settled on butternuts as both the tastiest and
the most pest-and-disease-resistant variety. Ever since,
we've been a purely butternut farm.
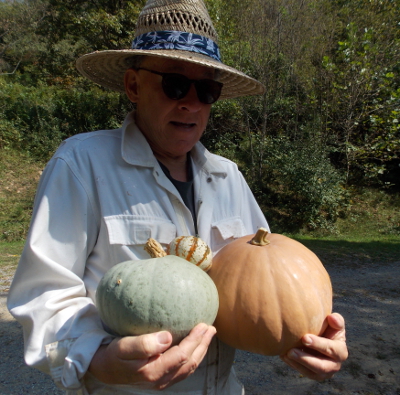 But I love trying new things. So when
my movie-star neighbor offered me some of his homegrown squashes,
I had to give them a try. I've yet to cut into the pie
pumpkin he gave me, but I cooked up the blue hubbard into a
pie Sunday, and it was one of the best I've ever eaten.
Will we start growing
hubbard squash as a result? Well, there are several factors
to consider. If you're a seed saver, you have to think long
and hard before adding new squash varieties to your garden, but it
turns out that blue hubbards wouldn't be very tough for us to
integrate. Butternuts are Cucurbita moschata, summer squash are Cucurbita
pepo, and
blue hubbard is Cucurbita maxima, so I could grow all
three in the same garden without worrying about crosses.
(However, if you're more of a pumpkin person, some pumpkins do
cross with blue hubbard, as do winter marrow, turban squash, and
banana squash).
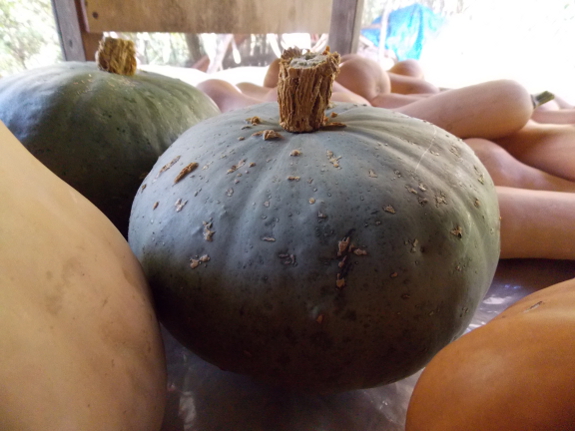
On the other hand,
since we use variety selection as our first line of defense
against squash
vine borers, we probably should skip the hubbards.
Butternuts are among the most resistant to vine borer damage, but
hubbards are so beloved by the insects that they are sometimes
used as a trap crop alongside rows of other types of squash.
Another downside of hubbards compared to butternuts is that the
hubbards are big --- even the smallest in my neighbor's collection
had enough flesh for 2.5 pies, and our small family does better
with the more minuscule butternut.
And, to be honest, I
think the reason our hubbard pie was so delicious is because I
added extra honey since the squash flesh wasn't as sweet as the
butternuts I'm more used to. You can read my
original butternut pie recipe here, and this is the new ingredient list we've
developed over the years:
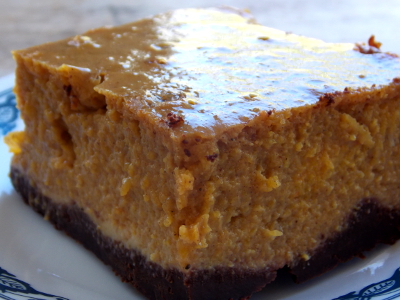 Crust:
- 0.5 cups flour
- 0.5 cups cocoa
- 0.25 cups sugar
- 0.5 teaspoons salt
- 7 tablespoons butter
- a bit of water
Pie:
- 2 cups baked winter squash flesh
- 1.5 cups evaporated milk powder
- 1.25 cups water
- 0.5 cups of honey (or add two tablespoons to that for a sweeter pie)
- 0.5 teaspoons salt
- 1 teaspoon cinnamon
- 0.5 teaspoons allspice
- 0.25 teaspoons ginger
- 2 eggs
Click on the link
above for preparation instructions, and enjoy!
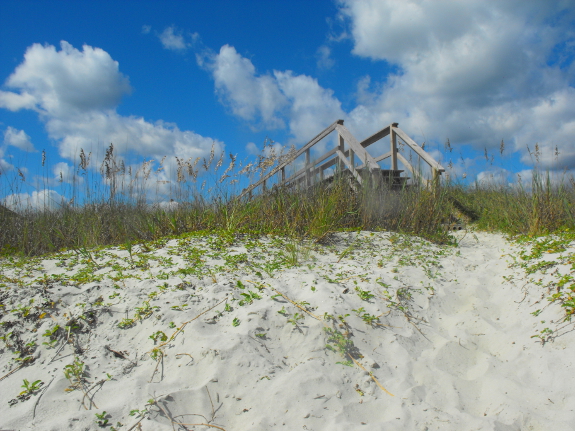
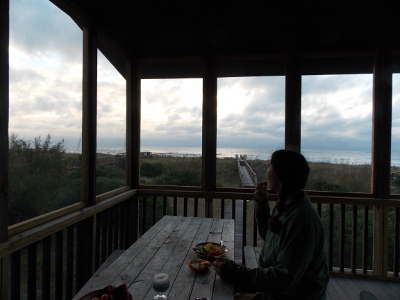 Perfect vacation tip #2: Plan for immersion
When Mark, Mom, and I
decided to go on vacation together, we opted for Pawleys Island
since Mark had gone there as a child. "I always wished we'd
rented a house right on the beach," he sighed. Even in the
off-season, beach-front rentals are more expensive, but we decided
to splurge and give Mark his dream...and I was so glad we did!
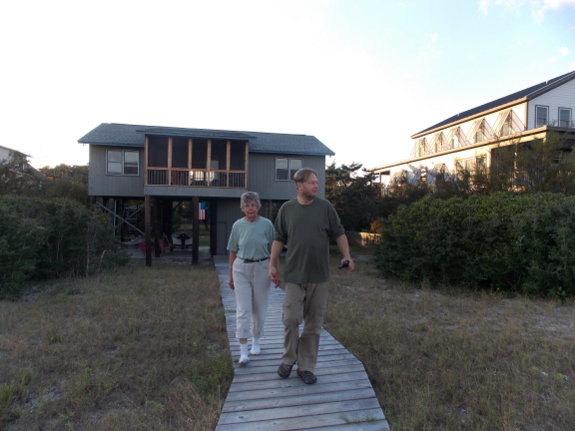
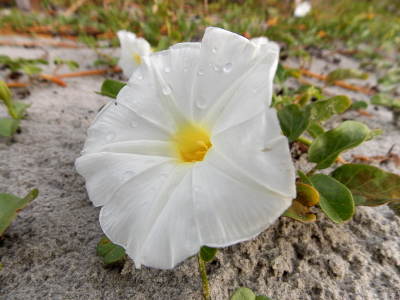 Being right on the
beach meant we could watch the ocean from the screened-in
porch, or wander down the boardwalk several times a day for a walk
or a swim. If I'd had to get in a car, I probably would have
spent more time lazing around the house, but I was so engrossed by
the ocean on this trip that I barely read one fiction book and
didn't even crack Small
is Beautiful,
which I'd brought along for deeper-thought periods. In
contrast, on other vacations of this length, I've often gone
through one or two non-fiction books and three to five fiction
books.
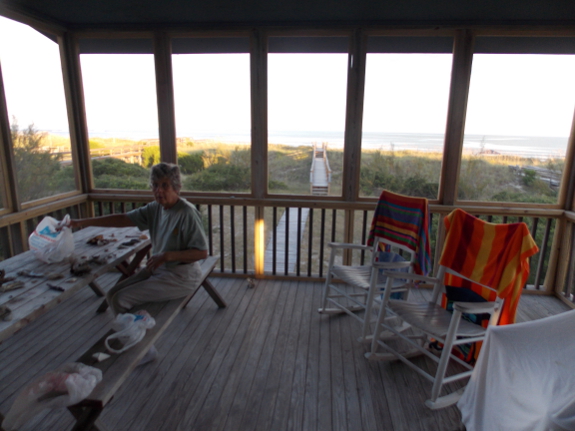
(You'll start to
notice that each perfect facet of this trip was dreamed up by
Mark. Hmmmm.)

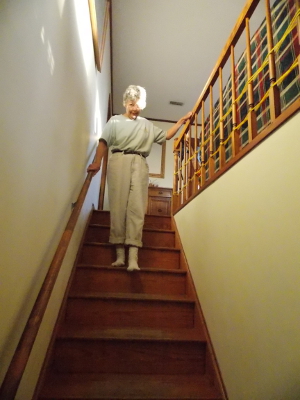
In case you're curious, we rented Knox
Station for
four nights. It was fancier than we needed, but was a
perfect fit for our family.
Being up on stilts gave us perfect ocean views, and Mom only
stumbled on the stairs once when I made her walk down them in the
dark just before dawn so she wouldn't mess up her night vision for
sunrise. As an added bonus, the bend in the stairs smelled
just like my grandmother's attic, so I thought of that deceased
relative every time I passed by.
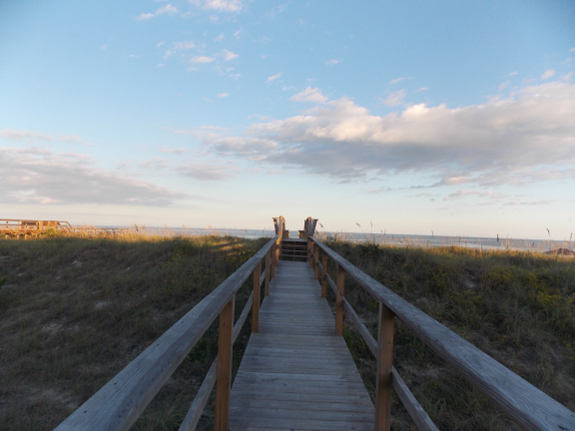
So, to return to the
point, if you can afford it, try to find a vacation spot that
really immerses you in what you came to see. Or, maybe the
moral is really "Pay attention to your husband"?
| This post is part of our Gratuitous Vacation Photos lunchtime series.
Read all of the entries: |
We took Lucy to the vet today
because she had a swollen cheek.
The doctor thinks it could
have been a snake bite, most likely a Black Rat snake.
Antibiotics and an extra Milk
Bone should have her feeling better in no time.
 Several readers recommended that I read Small
is Beautiful: Economics as if People Mattered, by E.F. Schumacher, so
I figured I'd give it a try. Unfortunately, I wouldn't
recommend this book to most of you. I can handle the
academic tone (although sometimes the author seems to be
purposefully adding density to his writing), but none of the
information in the book is useful to the average homesteader.
The trouble is that,
despite the title, this is a book about global-scale problems and
solutions. Schumacher focuses on topics like aid to poor
countries, rather than (as I was hoping) on ethical ways to run a
home business. In addition, the anti-science, pro-religious
sentiment was hard for me to stomach.
In the end, I have to
conclude that Schumacher and I have a major difference of opinion
about how the average person does good. Although I vote, I
tend to believe that someone like me can't really impact global,
national, or even state policies, and if I want to make change, I
have to start in my own life and lead by example.
Schumacher, on the other hand, finds value in philosophizing about
large-scale changes that would make the world a better place, so I
assume he feels that he can actually take part in bringing those
changes about.
But maybe I missed
something? I'll be the first to admit that the social
sciences are my least-favorite subject, and my eyes glaze over
pretty quickly just from the mannerisms of writers in that
field. So, for those of you who have read and enjoyed Small is Beautiful, I hope you'll leave a comment telling me why I'm
wrong, and why this book is important for every homesteader to
read.
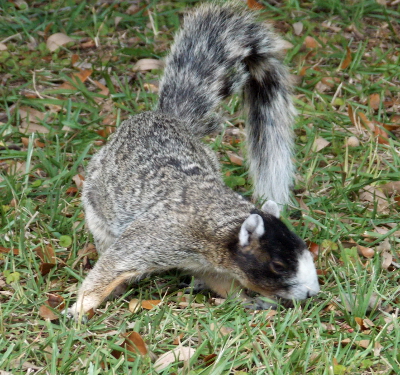 Perfect
vacation tip #3: Make friends
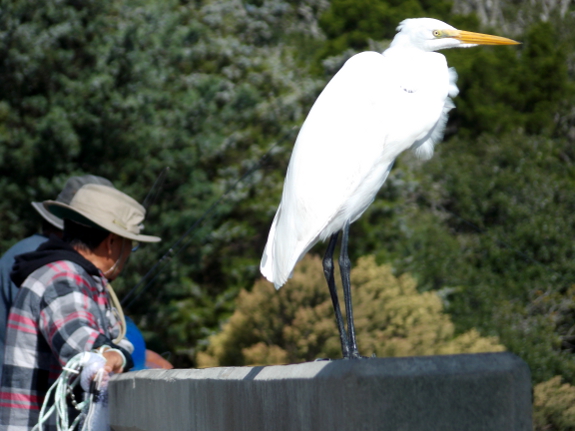
Every time we drove
off the island, fishermen lined the causeway...and one of them had
feathers. It was fun to see the causeway egret every time we
passed by, and even more fun to get cooking advice time after time
from the ex-car-salesman behind the fish counter in the
supermarket. (These pleasant inhabitants even made up for the
excessively-surly waiter the one time we went out to dinner.)
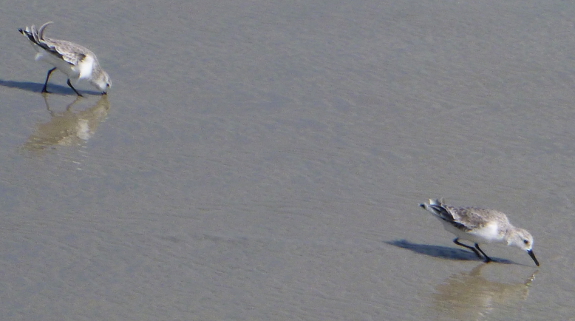
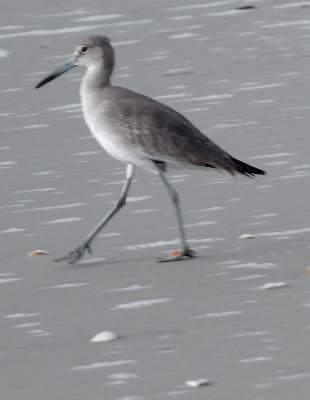 If you don't make
friends easily, it's possible the universe will even plop some
friends down in your lap. Despite the fact that none of
us had discussed our vacation plans beforehand, it turned out
that our next-door neighbors on the island consisted of some
of our favorite folks from back home!
If you don't make
friends easily, it's possible the universe will even plop some
friends down in your lap. Despite the fact that none of
us had discussed our vacation plans beforehand, it turned out
that our next-door neighbors on the island consisted of some
of our favorite folks from back home!Our movie-star neighbor, my ex-boss from the non-profit, my first garden mentor, and a homesteader we'd been wanting to get to know better just happened to rent the neighboring house for the same days we did. What are the chances of that?
I didn't manage to take any pictures of our human neighbors, but we had fun catching up, making an audition tape with our movie-star neighbor, and building a sand monster with our homesteading friend. Having neighbors we knew turned this from a four-star to a five-star vacation!
| This post is part of our Gratuitous Vacation Photos lunchtime series.
Read all of the entries: |
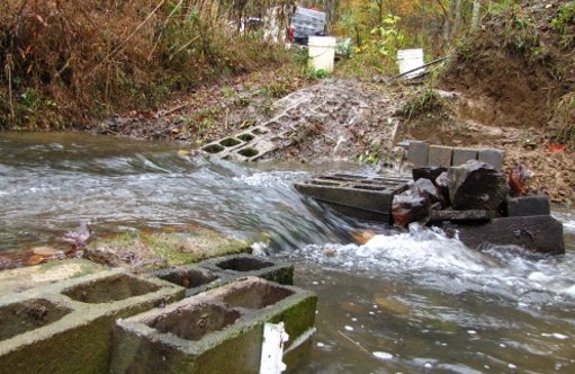
The cinder
block stepping stones are
still in place after 2 years.
A set of stairs for getting
down the sloped side easier might be our next creek crossing
improvement.
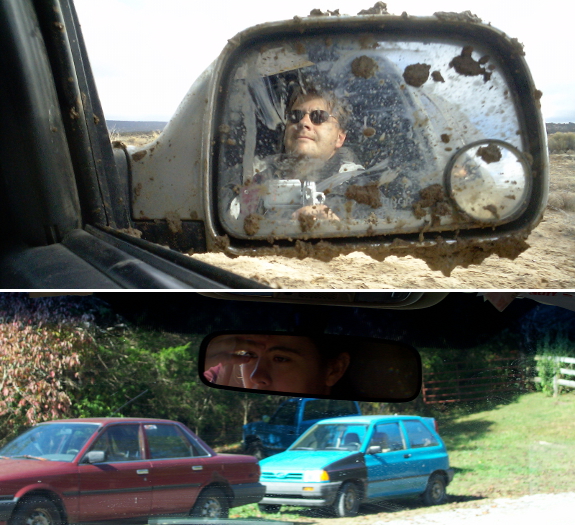
I promised
you all something entirely different for my next ebook, but
the truth is that I got sidetracked into first finishing a project
I'd started this spring. With the working title Walden Effect: The Early Years, this is a fluffy little book about falling
in love with the land and with a man at the same time. I've
excerpted a bit of the beginning below, but before I lose my
hardcore readers, I hope you'll stick around long enough to
suggest a better title. Title suggestions from our readers
turned Trailersteading into a bestseller, and I
suspect you can come up with a much better title for this ebook as
well. Ideas?
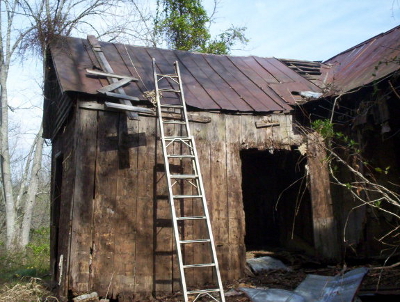 My new neighbors were
perhaps ten years older than me --- in their mid
thirties --- and were clearly bamboozled by this young woman who
planned to move into a southwest-Virginia tract of remote
countryside
by herself. Even getting to my old house required a
half-mile
trek through swamp and across a creek that sometimes flooded over
my
head. And now I didn't seem willing to come down off the
roof to
greet them properly. In part, my hesitance was due to being
tied
to a tree on the other side of the house by a rope around my
waist, but
mostly I was just embarrassed because I'd caught the seat of my
pants on
a nail about an hour ago and had heard a loud rrriiiip. No way was my
introduction to the neighbors going to involve exposed underwear.
My new neighbors were
perhaps ten years older than me --- in their mid
thirties --- and were clearly bamboozled by this young woman who
planned to move into a southwest-Virginia tract of remote
countryside
by herself. Even getting to my old house required a
half-mile
trek through swamp and across a creek that sometimes flooded over
my
head. And now I didn't seem willing to come down off the
roof to
greet them properly. In part, my hesitance was due to being
tied
to a tree on the other side of the house by a rope around my
waist, but
mostly I was just embarrassed because I'd caught the seat of my
pants on
a nail about an hour ago and had heard a loud rrriiiip. No way was my
introduction to the neighbors going to involve exposed underwear.Since the nearest town is home to only 300 people, I'm sure word of my eccentricities got around quickly. But it didn't matter because I nearly gave up on my homesteading dream six months later, only to rekindle the spark when my husband-to-be, Mark, walked into my life. Fast forward ahead five years and Mark was being invited to sit down on the coveted stool in the locally-owned hardware store and chat for a while --- a sure sign of being accepted by the community. At long last, I knew my craziness had been overlooked in favor of my husband's quiet persistence.
That summer day in 2004, though, I was still alight with the joy of owning a farm the way I'd dreamed about since childhood. And now, as I write this nearly a decade after purchasing that farm, I'm once again in love, this time with both the farm and with the husband who made my dream possible. So this is a love story in three parts about how I ended up with much more than I bargained for, and grew beyond the person I thought I'd be.
(Stay tuned for more
of this unnamed book in a week or two.... In the meantime, you might enjoy this
profile Everett recently wrote about us on his blog.)
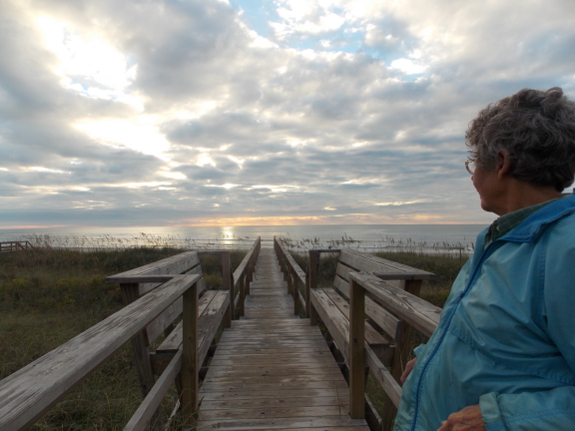
Perfect
vacation tip #4: Go with the tides
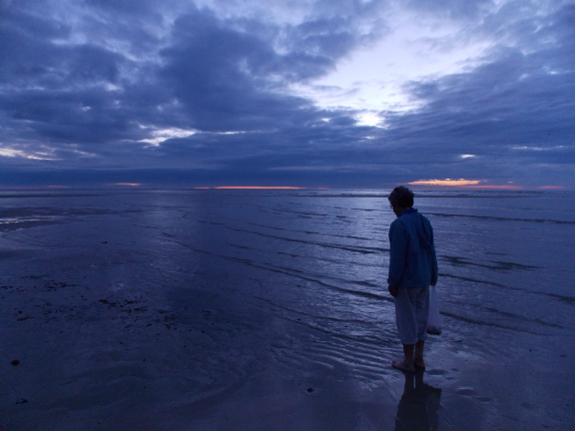
As I'll mention in a
later post, we did go on a few real excursions as part of our
vacation, but mostly we just drifted in the day and ocean's
rhythms. Mom and I seemed to naturally wake with (or just
before) the sun, allowing us to take a stroll up the beach as the
sun rose.
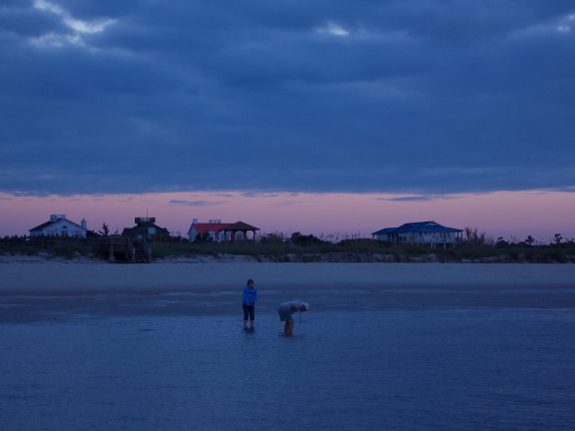
Low tide came in the
early morning, so dawn turned up shells fresh for the
picking. Mom and I were sometimes on the beach before prime
shell-picking time, when dog walkers went out in the
near-dark. By the time we reached the north end of the
island, where the creek behind created an extended shallow area,
there was enough light to pick up broken sand dollars and whole
sea urchins. (We even saw a living sea urchin in the shallow
water our first night there!)
When my stomach
started to growl, the sun was up and the coffee walkers were on
the beach, strolling with mugs in hand. Later, we'd come
back to the beach for a quick swim at high tide.
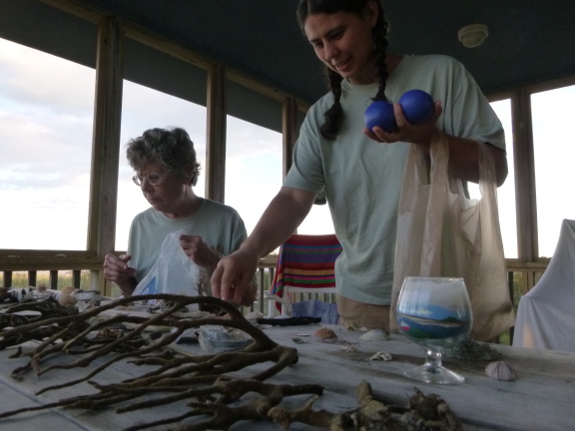
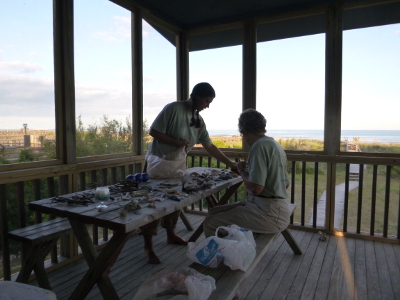 I make it sound linear and regimented, but
the best thing about our beach combing is that it wasn't
either. Only on the last day did I realize that others were
planning their day around the perfect shelling times. Using
Mom's whimsy as a guide, I squashed my Type A need to turn up
perfect shells, and instead found beauty in the colors and
textures of fragments.
On our last day, I
felt a twinge of regret that I hadn't done this or that, but then
I realized that I vastly preferred to go with the tides.
After all, it's better to be thoroughly in the moment than to do
it all.
| This post is part of our Gratuitous Vacation Photos lunchtime series.
Read all of the entries: |
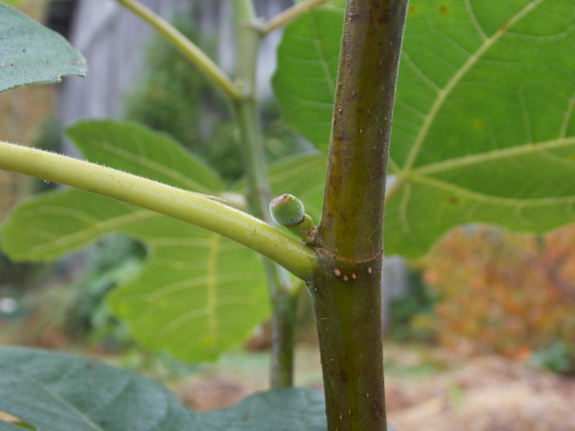
We're still harvesting
figs from the Chicago
Hardy.
Meanwhile, the figs
we started from cuttings this spring are waist-high and are
starting to bloom.
Maybe that means next year
we'll get to taste Dwarf, Celeste, and Black Mission?
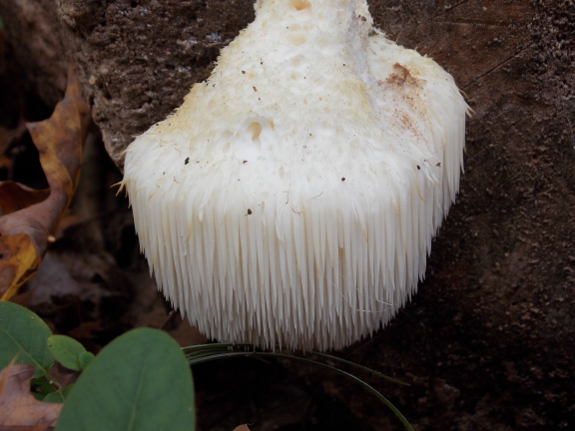
Lion's mane mushroom
has now made it onto my list of delicious and safe fungi to
wildcraft (along with morels
and oysters).
Despite the fact that there are at least three species in the
genus Hericium, all are edible, and the shaggy white mane makes
these mushrooms tough to confuse with anything else. You
might want to stick to the scientific name, though, since 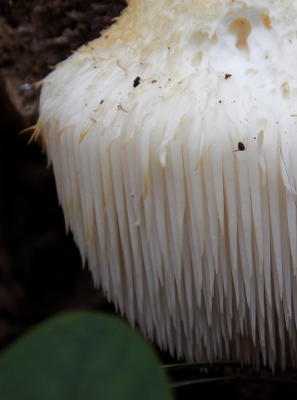 common names are variable and include Bearded
Tooth, Hedgehog, Satyr's Beard, Bearded Hedgehog, and Pom Pom,
along with Lion's Mane.
How about
flavor? The internet reports that lion's mane mushrooms
taste like lobster, but even though I'm not a seafood fan, I
thought they were delicious. Mark (who loves seafood and who
reports that only the texture reminded him of lobster) agreed,
noting that lion's manes are midway on the delectability scale
between oysters and shiitakes. (Actually, some oyster
mushrooms can be as good as shiitakes, but the flavor tends to be
less dependable, so Mark rates them lower.)
I'm actually
surprised I hadn't stumbled across this distinctive edible before,
but I suspect the issue is that I'm a swamp girl and the lion's
mane likes harder wood, like oaks, which tend to grow in drier
forests around here.
Wednesday, I found two lion's mane mushrooms popping out of a
huge, fallen oak that came down in our parking area last
summer. Now I really, really want those delectable, rotting
logs for my forest garden. Too bad they're at least two feet
in diameter and each round weighs a ton....
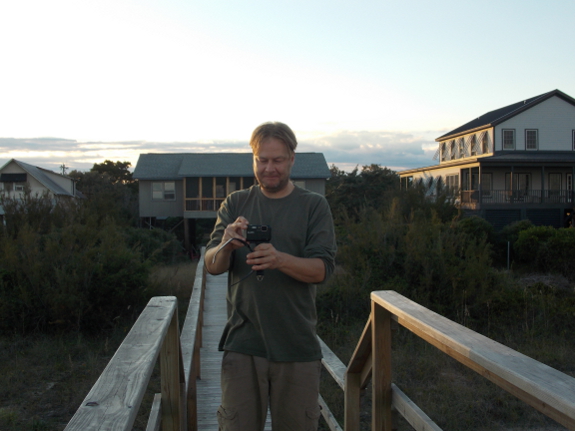
Perfect
vacation tip #5: Take lots of pictures, then turn off the camera
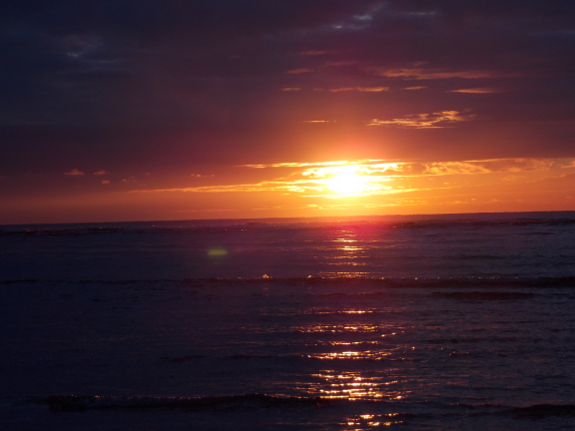
Mark, Mom, and I all
love taking photos (and the photos in this lunchtime series are by
all three of us).
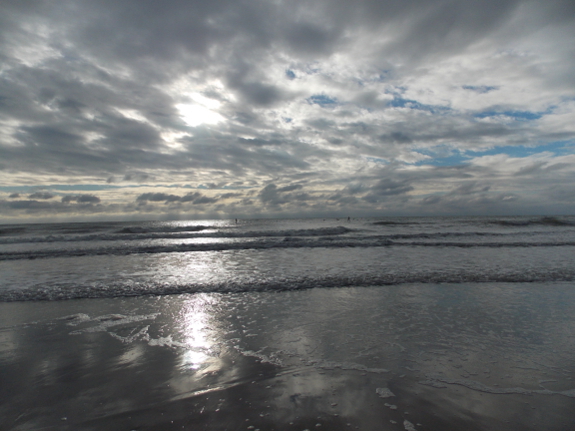
We took tons of
photos during our vacation, but I also left my camera behind on
purpose at certain times.
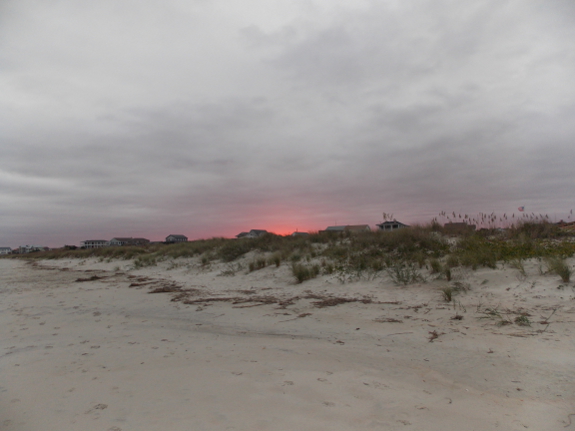
Sure, I missed some
stunning shots, but I was even more present right where I was
without a camera to mediate between myself and the world.
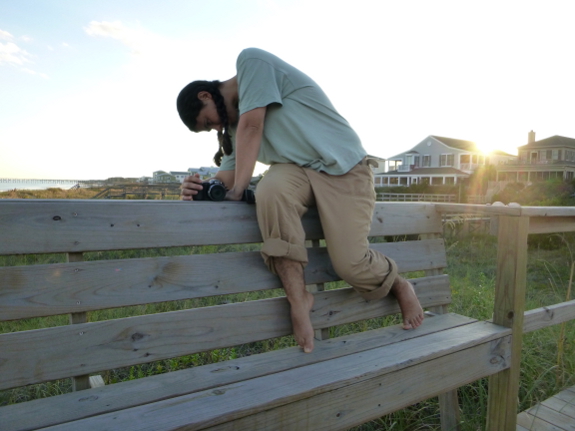
I guess the lesson
from this post is the same as from the last --- being in the
moment is worth the price.
| This post is part of our Gratuitous Vacation Photos lunchtime series.
Read all of the entries: |
Anna put the first quick
hoop of the season up today.
The pay off will be fresh
lettuce in November.
 I've found that being obsessive about oral
hygiene is worth it. The expense aside (and a trip to the
dentist is always pricey), who wants the pain and suffering of a
filling (or worse)? That's why I always ask my dentist if
there's any more preventative care I can add to my routine, and
have come up with the following complex daily regimen:
- Mornings I brush with an electric
toothbrush (better for the gums), then use both a
Listerine-type mouthwash (to kill germs, although I want to
research this more since I read recently that this might be a
bad idea, akin to killing off your good gut bacteria) and an
ACT-type mouthwash (for fluoride, since our well-water is
fluoride-free, and I'm willing to swish with fluoride despite
the potential dangers of drinking it)
- Evenings I floss, and brush
But when I went to the
dentist Wednesday, I reported I'd felt a little twinge in one
tooth recently. Did I have a cavity?
"Did you just start
using a whitening toothpaste?" the hygienist asked. Well,
yes, I guess I did. She explained that baking soda and any
other additives in toothpaste can cause your gums to recede since
the chemicals irritate the skin in your mouth. My hygienist
always recommends the plainest toothpaste you can find, but one
that contains fluoride.
My dentist came in then
and added in her two cents. Since I'm already using a
fluoride mouthwash, she doesn't see why I need to use toothpaste
at all. The mechanical movement of the brush is what cleans
your teeth --- toothpaste just gives you that minty-fresh breath
(and a dose of fluoride).
This is the best dentist
I've ever had, so I'm inclined to trust her judgment. And
who doesn't want to save $12 a year on toothpaste?
Here's hoping that at my next annual checkup, I'll once again be
cavity-free.
Keeping your
chickens healthy starts with clean water.

Civil War soldiers, corn meal machines, clogging, and apples all combine into a wonderful Saturday morning outing.
It's been about five
months since I've eaten a significant amount of store-bought
fruit, and when the Virginia
Beauties finally ran out last week, I went into
withdrawal. (Remember, I'm a fruit snob and think
grocery-store fruit, for the most part, is insipid and barely
worth eating.) We used to have a fruit stand which provided
fruit a notch above the grocery store (if not up to my exacting
standards), but the fruit stand didn't open up this year, so we'd
need to drive over an hour round trip to find moderately-edible
fruit. Or so I thought until I remembered that the little
town twelve miles away had opened up a farmer's market a couple of
years ago.
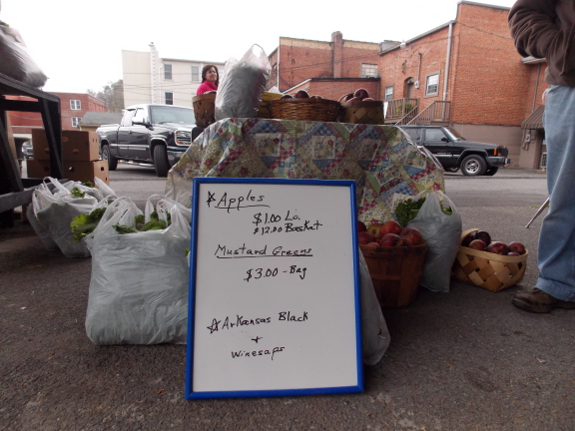
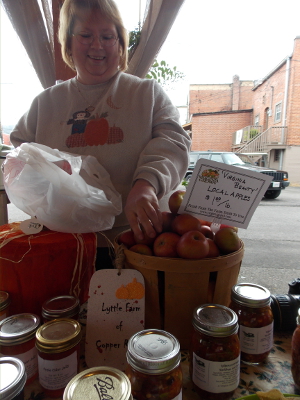
The first thing I saw upon entering the farmer's market was apples
--- jackpot! I browsed through all the vendors and ended up
selecting at least a few apples from each of three sellers.
I've yet to taste the Virginia Beauties from the lady to the left
(I got a pound, curious to see if they taste at all like my
homegrown morsels), but have already sampled two kinds of Winesaps
and an Arkansas Black. The latter is a milder apple than I
usually like, but I'm curious to see how long it will last in
storage (reputedly "forever") and whether the apple-grower is
right when he says the flavor will improve over time.
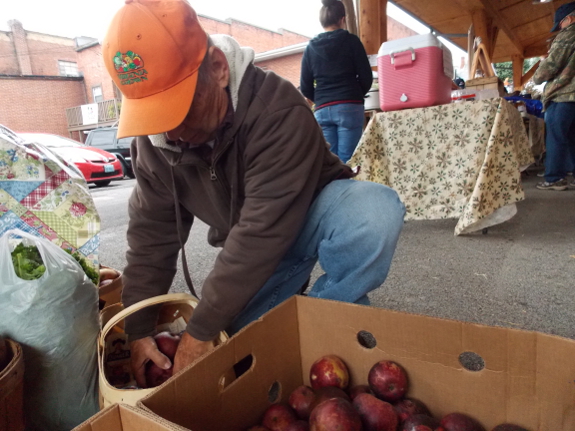
The Winesap
comparison was more interesting. The guy shown above sold us
both Winesaps and Arkansas Blacks, both of which he grows
conventionally (with sprays). And the apples did look
beautiful! But in terms of flavor, they merely matched what
you'd find at a moderate-to-good fruit stand.
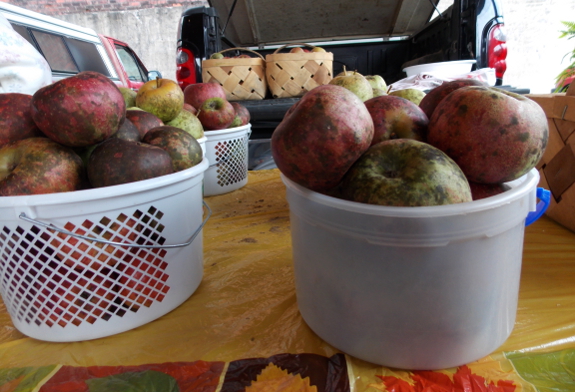
In contrast, the
Winesap apples shown at the top of this post came from an
old-style organic farm, meaning that the standard-sized apple tree
had been there longer than the farmer had owned the land, and that
all he did to the tree was to pick the fruit. Although
smaller and less aesthetically appealing than the sprayed apples,
these old-style Winesaps were delectable and I wish I'd bought
more than one of the $5 baskets pictured. They nearly
matched the flavor of my homegrown Virginia Beauties.
I plan to put our
bushel-plus of apples in the fridge
root cellar and eat to my heart's content for at least the
next month. In the meantime, I clearly need to put more
thought into fruit that does well in winter storage since the more
summer fruit we grow, the less inclined I am to go back to bought
offerings after our homegrown stores run out. Some of the
slack will be taken up by our pears and Virginia Beauty as they
come into their prime, but Mark and I are quite frugivorous and
could probably use some more winter keepers.
Three nesting
boxes...yet we still have
a renegade hen who flies over the fence to lay her egg.
Wing clipping is a whole lot
cheaper than higher fences.
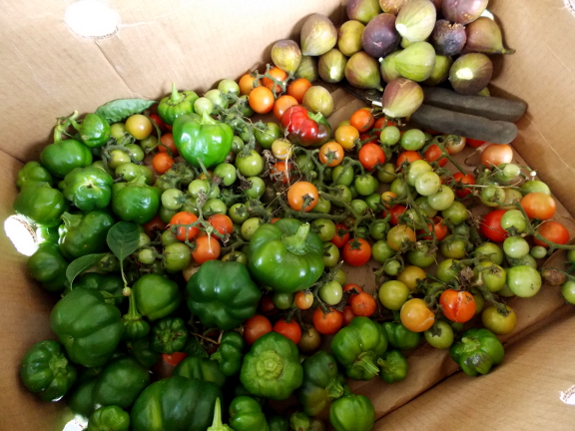
I decided to pick the
last of our tender vegetables (and figs) in preparation for the
frost, and even though it didn't (quite) freeze over the weekend,
I think it was a good decision. Chances are our first frost
will come sometime this week, so I didn't lose much ripening time
by my preemptive action.
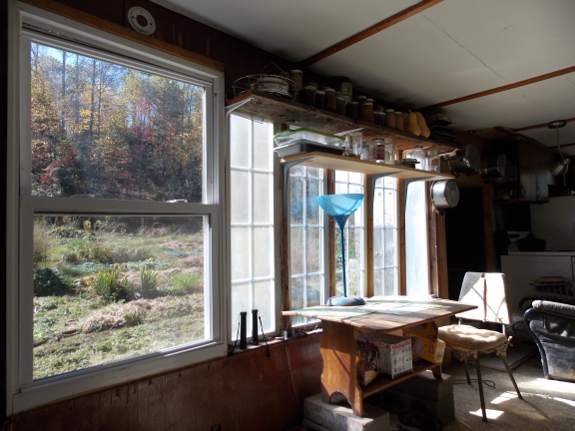
I also treated myself
to the first fire of the winter since the trailer was a chilly 43
when I woke up Sunday morning. That means I also had to
admit our days of living on the porch are severely numbered, so I
cheered myself up about the move inside by cleaning all the
windows. It's astonishing how different indoors life is when
you can peer out through clean glass into the wider world.
Nearly as good as life on the porch...at least once you add in a
warm fire and a happy cat.

Perfect
vacation tip #6: Plan good excursions, but not too many
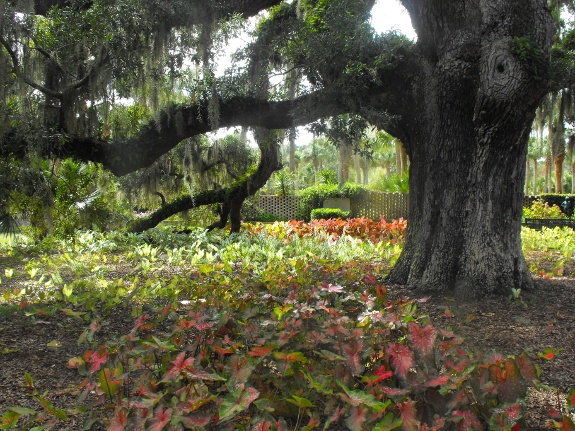
When we decided to go
to Pawleys Island, I started researching area attractions and soon
came up with a short list of half a dozen places I'd really like
to visit.

But when it came
right down to it, I knew we'd want to spend most of our time on
the beach, so I narrowed our main excursion down to one ---
Brookgreen Gardens. (We also made a few forays to the
grocery store, took in a movie, and stopped at the library, book
store, and Audubon store. Oh, and Mom wanted to go to the
consignment shop to get another sweat shirt.)
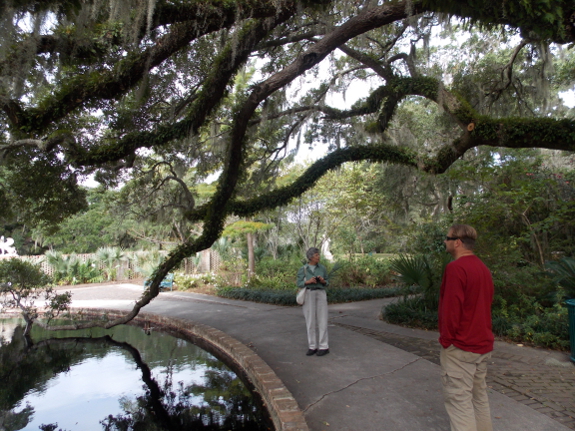

Having one major excursion in the middle was perfect. Our
first vacation day was a "sea day" in which we spent all of our
time at home or at the beach, so by our second day we had plenty
of energy to walk through the sculpture-and-botanical garden.
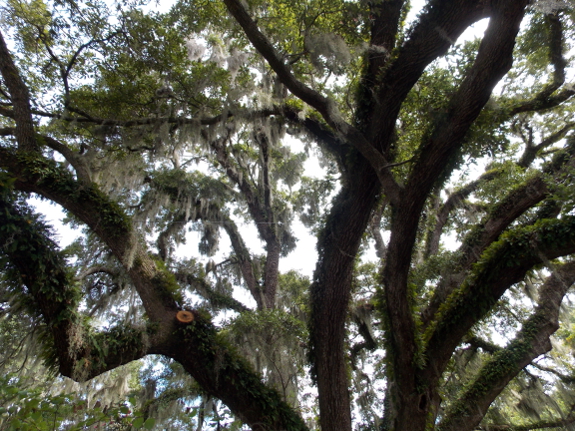

We were stunned by the live oaks and their attendant epiphytes
(Spanish moss and resurrection ferns). And I was
particularly taken by the way the landscapers had worked with
textures and designs that showcased the strengths of each
sculpture.
I highly recommend
this particular outing to anyone interested in plants and/or
art. Vastly better than a museum!
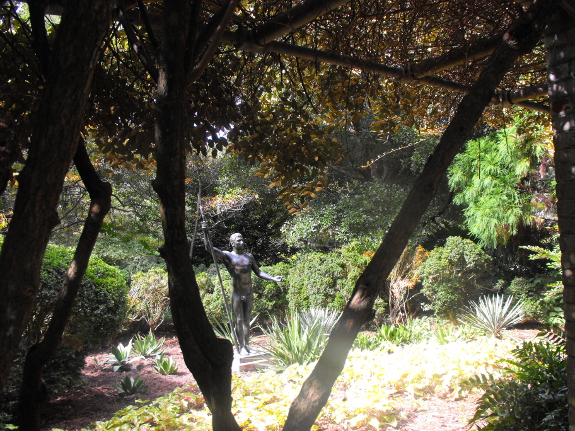

(More gratuitous
photographs. Plus, doesn't the trellis above look very
useful if you wanted to grow kiwis?)
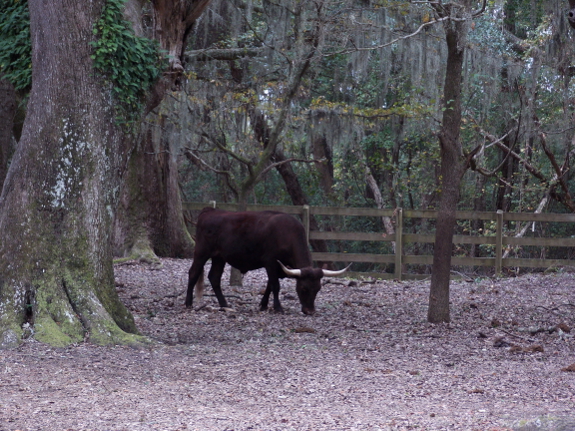
 Perfect
vacation tip #6.5: Don't try to do it all
As the leader of this
excursion, though, I made one mistake --- I dragged my compatriots
past the formal gardens to check out the zoo. I wanted to
learn which heirloom livestock were historically used in the area
(which I'll post about eventually on our chicken blog).
But we ended up footsore and saddened by the caged animals.
Mark and I figured that the livestock would be much healthier and
happier if they were rotationally grazed on the vast lawns, and
the grass would probably be greener there too.
So, my corollary
piece of advice for this post is to pay attention to your energy
levels and not to go see the otter exhibit just because the
visitor center lady said it was not to be missed. If you
don't feel like it, miss it.
| This post is part of our Gratuitous Vacation Photos lunchtime series.
Read all of the entries: |
A wheelbarrow of dried walnut got our firewood splitting season off to a fine start.
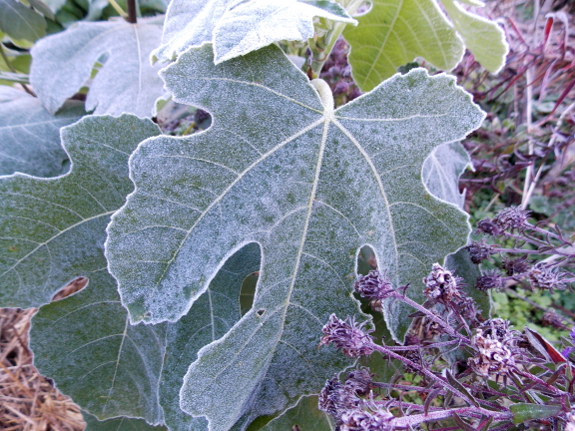
The first fall frost
of 2013 came just a day later then I'd
expected...
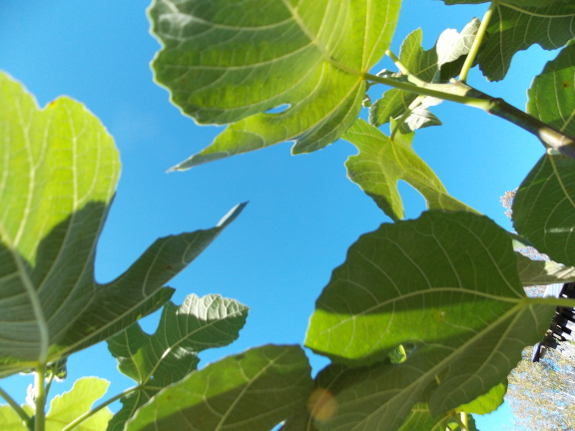
...and with it came
blue skies! We haven't seen much of these for the last six
months or more, and I'd forgotten how beautiful the world is in
direct sunlight. I was starting to think we'd accidentally
moved to the Pacific Northwest.
As a side note
(assuming you were hoping to get a kernel of information from this
post), I didn't realize until I moved to the farm and started
monitoring frosts how important cloud cover is to nighttime
temperature. A cloudy day tends to be cooler, but around
here a cloudy night tends to be warmer because the clouds trap
heat close to the earth's surface. So I guess the frost and
blue skies were related after all.
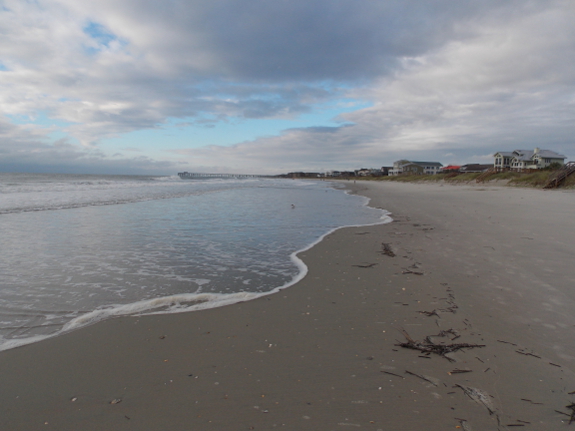
Perfect
vacation tip #7: Go outside your past experiences and be wowed
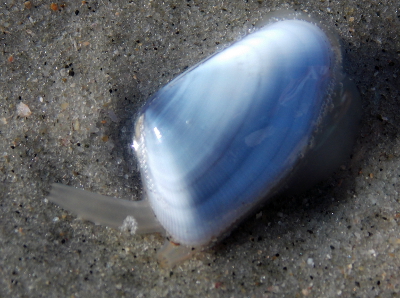 by the ordinary
I think we all have a
tendency to want to recreate past joys, so many of us go to the
same vacation spot over and over again. But I've found that
my second time with the same vacation often doesn't hold a candle
to the first. That's why I was so glad Mark recommended we
go to Pawleys Island instead of my family's traditional beach
haunt of Ocracoke.
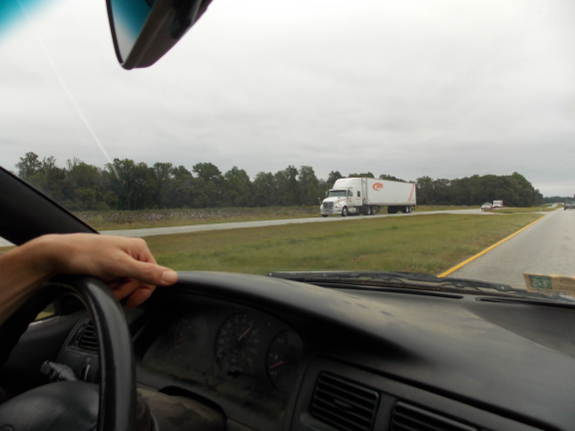
Mom and I got excited
before we even approached the ocean. She had never been this far south
in her life, and I'd only seen a field of cotton once
before. "Look at the cotton!" Mom and I exclaimed as we
whizzed down the highway.
And while my favorite
event of our first vacation day was the instant we got to our
rental house and I walked out on the porch and saw the ocean for
the first time in years, Mom's fondest memory was stopping at a
gas station and walking over to a weedy margin to look at
wildflowers.
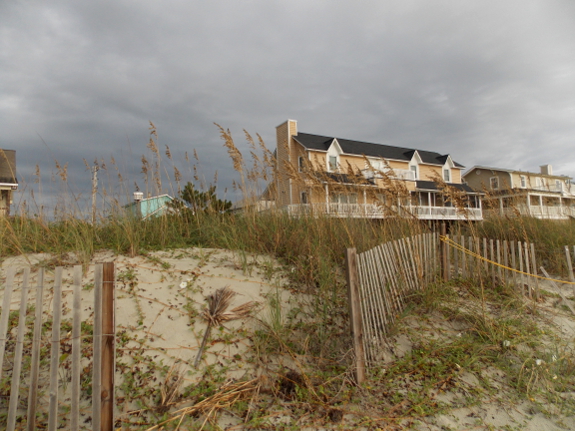
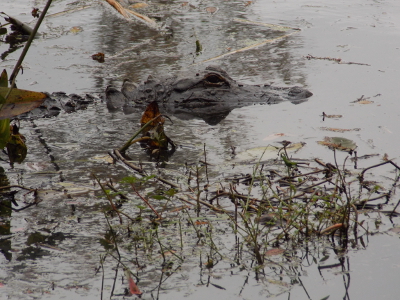
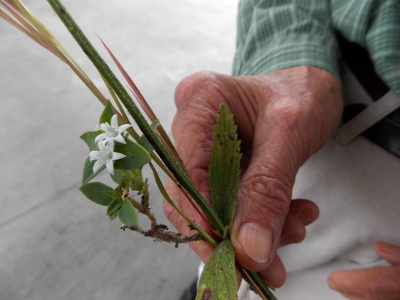
Which isn't to say there wasn't plenty of extraordinary on our
vacation too. But if you get a kick out of the common,
everything else is icing on the cake.
| This post is part of our Gratuitous Vacation Photos lunchtime series.
Read all of the entries: |
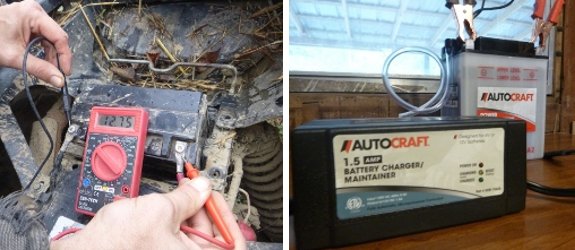
We had some trouble getting
the ATV started.
I took the battery to an auto
parts store for testing. They only measured 90 cranking amps when the
minimum for this size is 190.
The voltage was over 12
volts, which has fooled me in the past before I learned that engine
starting is all about cold cranking amps.
I've spent most of
this week with my brain in 2006, reading back over journals from
that era as research for my
upcoming ebook.
One thing that's struck me is how much rock we've thrown into our
driveway, and how little difference there seems to be between 2006
and today.
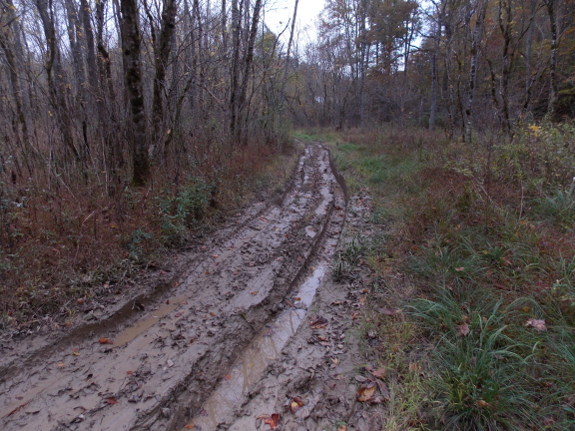
I'd say that our
driveway is moderately dry at the moment, but it still has lots of
water standing in the ruts...and lots of ruts. Part of the
problem is that we focus our efforts on those ruts, and we keep
changing vehicles so the orientation of the ruts keeps changing,
but I think part of the issue is also that we're looking at the
problem with the wrong perspective.
Although we'll
probably fill our current ruts with rock as we've done before, I
thought now would be a good time to experiment with
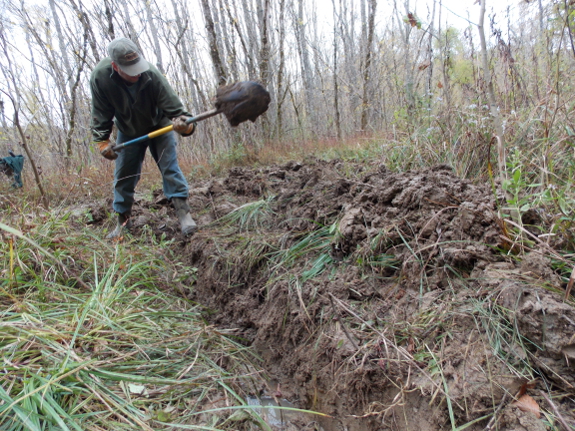
ditching. My sky
pond project
gave me an inkling of how moving water around can dry up certain
areas, so Mark and I went down to the worst spot (pictured above)
and dug a little ditch parallel to the curve on the downhill side
(sloping into the center of the curve), then another ditch
perpendicular to that running further downhill toward the creek
(and sloping downhill).
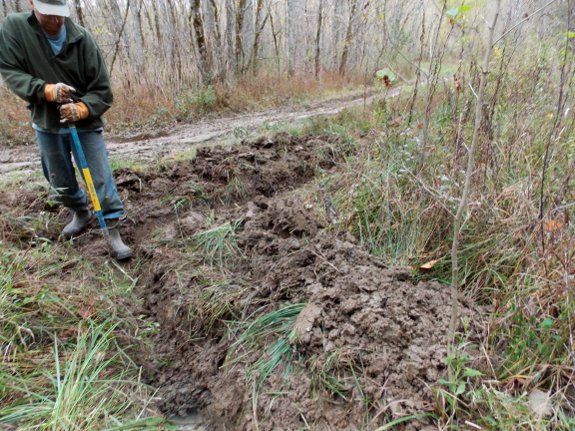
The ditches were
already filling up with groundwater as we dug. In a few days
--- barring rain --- I should be able to see results. Is the
part of the driveway uphill from this ditched zone drier than the
neighboring driveway area? If so, it'll probably be worth
putting in more time this winter on digging ditches since it
doesn't take all that long (although the effort is pretty intense
cutting through the sedges and rushes).
As a side note, does
anyone have tips on what to do with the ditch dirt? I have a
feeling there's a reason to mound it up on one side or the other
of the ditch, but couldn't seem to work that through, so located
it a bit randomly.
 Perfect
vacation tip #8: Learn something, but stay whimsical
If you're following
my advice and going
to a new spot on each vacation, you probably won't know much about your
surroundings. That's a great opportunity to learn new
things, which for me usually means discoveries about the natural
world.
Mom found the
beautiful and informative Tideland
Treasure on our
trip, and that book helped us answer questions we'd had earlier in
our stay. For example, I felt like the waves were much lower
than they'd been in my childhood beach memories, and Tideland Treasure explained that we'd accidentally arrived at a neap tide,
when the force of the moon and earth counteract each other at the
quarter moons and cause lower highs and higher lows. If I
want those raging waves of memory, I need to plan our next trip
for spring tides at the new or full moon.
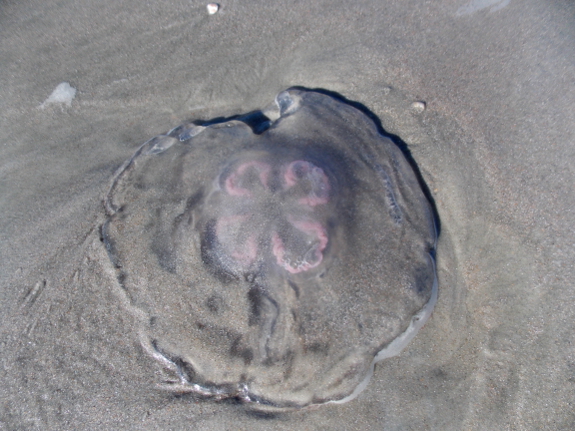
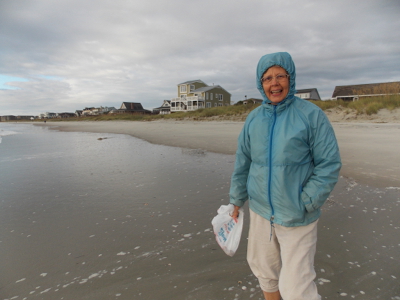 We gleaned other tidbits randomly from folks
we talked to. Mom and I had noticed several huge
jellyfish washed up on the beach, and our movie-star neighbor
mentioned he'd just seen a
piece in the New York Times about these moon jellies. Turning back to the book,
Mom discovered that moon jellyfish are edible, and that jellyfish
of various sorts are often eaten in Japan.
The trick with
learning on vacation is a lot like what I
discovered while beach combing. By looking with your own eyes for a
couple of days before hitting the books (or internet), you'll see
more and not get bogged down in the search for perfection.
(This admonition is only relevant for Type A people, of
course. Type B people probably stopped reading this
lunchtime series long ago because they were straining muscles from
all the eye-rolling.)
| This post is part of our Gratuitous Vacation Photos lunchtime series.
Read all of the entries: |
A new battery did not fix our
ATV
starting problem.
We cleaned the solenoid and
tried starting it bypassed with a jumper cable.
The starter turned at that
point, but just barely...and the jumper got very hot after just a few
seconds. We think this indicates that the solenoid is bad and needs to
be replaced. Any gear head comments would be greatly appreciated if
you've got any experience with this troubleshooting procedure.
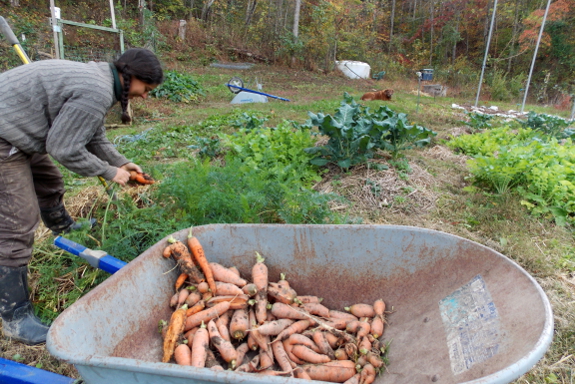
Previously, I've
waited to dig our carrots until November, but this year I had a
reason to move sooner. Rye
did well last year as a late-planted cover crop, so I've
been pushing to find bare ground to finish up my 50-pound bag
before the end of rye-planting season (a few weeks after the first frost). Carrot
beds looked like perfect rye habitat, so out come the carrots and
in go the cover crops.
In case you're
curious, I only made it about halfway through my buckwheat
challenge, but I've already passed that mark in my bag of
rye. It's been a cool, wet year and the spot I most wanted
to improve was too waterlogged for buckwheat. Oh well ---
any extra organic matter is better than none.
Can you tell I got sidetracked less than a third of the way
through the carrot harvest and went to help Mark troubleshoot the
ATV? I'll dig the rest today (barring other pressing
projects) and stock the carrots away in the fridge
root cellar for the winter.
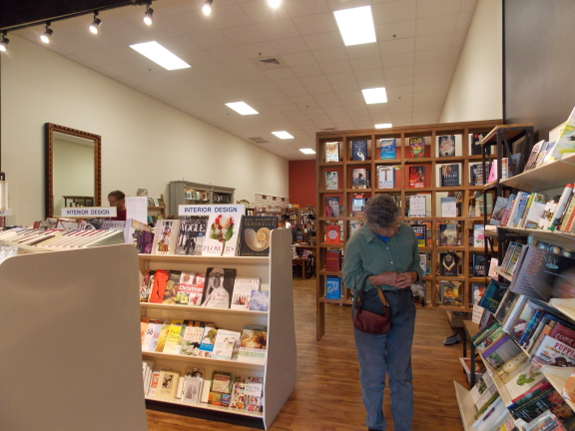
Perfect vacation tip #9: Buy
souvenirs for somebody else
This tip really
speaks for itself. I've always found it's much more fun to
pick one or two gift recipients and buy for them instead of for
yourself. Of course, if you happen to get a book, you can
read it before gifting it....
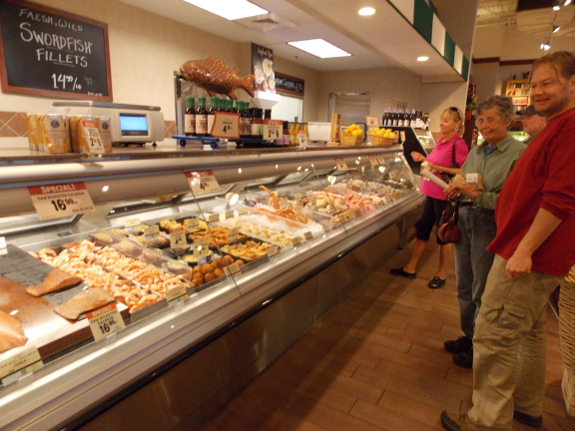
Perfect vacation tip #10: Splurge a
little
One of Mark's fondest
memories of Pawleys Island was going to an all-you-can-eat seafood
buffet. The prices have risen considerably since then,
though, and even eating out at the cheapest of the non-fried
seafood restaurants felt like something we didn't want to do more
than once. However, buying fish from the upscale Fresh
Market was a great compromise, since most selections came prepared
to the point that even a seafood know-nothing like me could cook
them easily. And dinners on our porch overlooking the ocean
were vastly preferable to a restaurant meal for us three
introverts. Given the ambiance, a little splurge felt like
decadence!
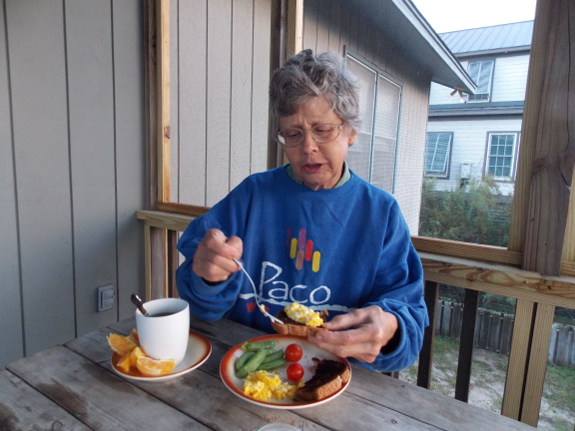
Perfect vacation tip #11: Bring
vegetables from home
"Now I understand why
Mark won't eat vegetables away from your house," Mom said as she
bit into a homegrown tomato. "And these sugar snap peas
might as well be fruit, they're so sweet!"
I packed the car up
with summer squash, peas, tomatoes, apples, and green beans from
home, not so much to save money, as to ensure we had delicious,
nutritious meals on the road. After you start growing your
own, even the vegetables at fancy restaurants seem subpar, and
vacation is all about excellence!
| This post is part of our Gratuitous Vacation Photos lunchtime series.
Read all of the entries: |
This is one of the Lion's
mane logs I hauled in
last week.
It's parked under an apple
tree near the trailer so we can see it everyday.
Watering it with a hose might
help to stimulate more delicious growth.
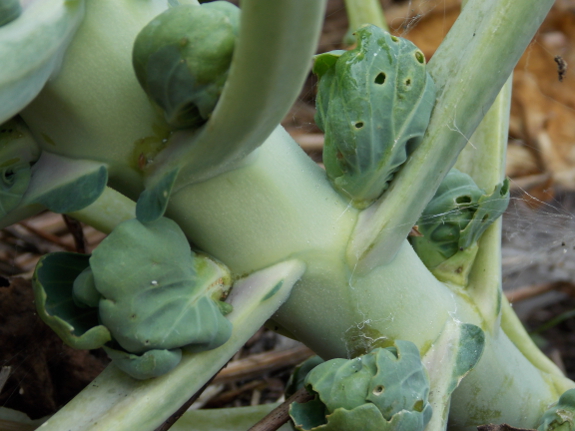
Last year, we
didn't top our Brussels sprouts because it was our first year
growing and we wanted to try the simplest method. But
Throwback
at Trapper Creek reminded me of the possibility, and even
though it's really much later than you should top the plants, I
decided to try lopping the tips off a few.
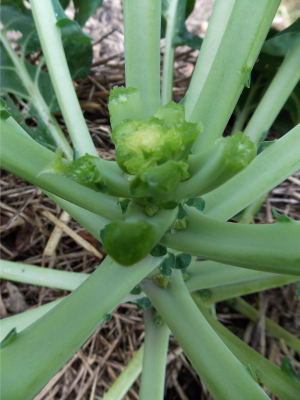 The theory behind topping Brussels sprouts is
that if you cut off the growing tip, the plant stops elongating
(and making new Brussels sprouts) and puts that energy into
plumping up the sprouts that have already started. This is a
bit like the way you might top tomatoes at a certain point so they
ripen fruits faster rather than setting lots of little tomatoes
that won't have time to fully form before the frost.
In the case of
Brussels sprouts, all of the sprouts will keep enlarging until
extremely cold weather sets in, and it's true that the plants will
also make sprouts in the early spring if they over-winter.
However, we found last year that the over-wintered sprouts were
pretty damaged and only moderately worth eating, while the fall
and early winter sprouts were delectable. So even though
topping Brussels sprouts reduces yields by about 30%, I figured it
was worth a try if the 70% we get are much higher quality.
I wasn't entirely
sure it was worth topping so late, though, so I only hit plants
sporadically. The tops came into the kitchen where I sauteed
them in a bit of oil with salt and pepper and relished the first
taste of Brussels sprouts in months. A forecast of
delicacies to come!
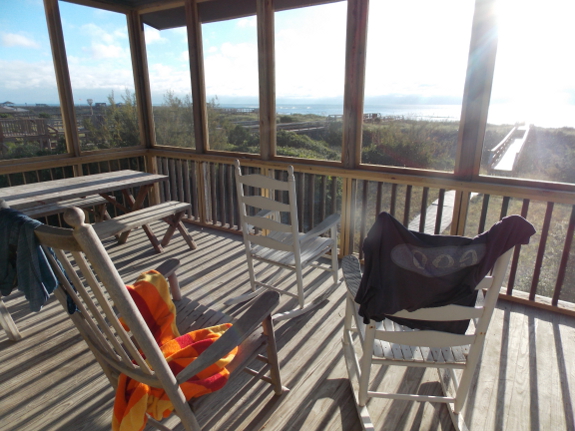
Perfect vacation tip #12: Stay just
long enough, but not too long
Some vacations leave
you feeling like you need a vacation from your vacation, but this
trip instead recharged our batteries. Why? We were
only gone for four nights, which was just long enough to really
get into the zone and then be happy to see home again. (If
you're less of a homebody, you might be able to stay longer.)
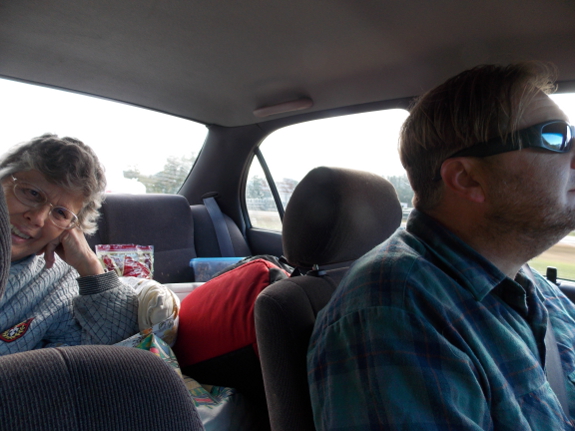
Perfect vacation tip #13: Don't drive
too far
Even though Mark does
all the driving (because I hate it), hours in the car can be a
drag after a while. Seven hours seems close to the maximum
amount we'd want to go, since much further would tempt us to stop
for the night and would make the vacation too long for homebodies.
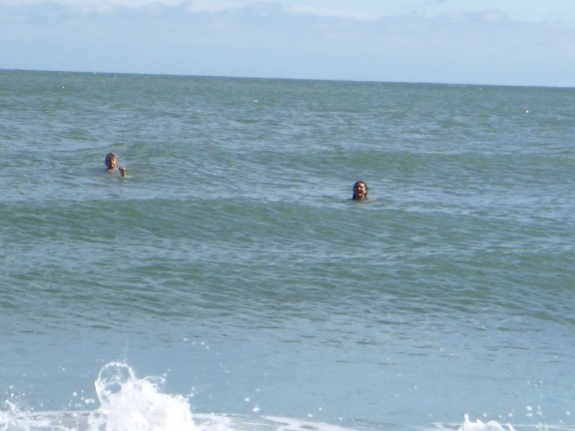
Perfect vacation tip #14: Don't go
too often
 Before this trip, I hadn't been in the ocean
for about ten or twelve years. When I walked out into the
waves, I laughed out loud from delight and suddenly I was the
person I'd been a decade or more ago. I don't think I would
have had such an extremely good time if I'd been to the beach last
month or even last year, so even though Mark, Mom, and I all rated
this trip a 10 out of 10, we probably won't go back to Pawleys
Island right away.
Thanks for looking at
all my gratuitous vacation photos! Before I return you to
your regularly scheduled homesteading posts, do you want to add
any tips you have about creating the best possible vacation?
| This post is part of our Gratuitous Vacation Photos lunchtime series.
Read all of the entries: |
Anna figured out today that
our starter
is good and the solenoid is bad.
She brought in the jumper
cables from the truck this morning, shorted the two main connections on
the solenoid and was rewarded with a healthy sounding starter when she
turned the ignition switch.
Why did Anna do this instead
of me? I'm not quite sure...she sort of did it behind my back. I was
still putting my boots on when I heard that wonderful cranking sound.
Am I upset that she ran ahead to take all the glory? Heck no! A woman
who can fix your dinner and your ATV is a fantasy that most men around
here would trade their favorite deer rifle for.
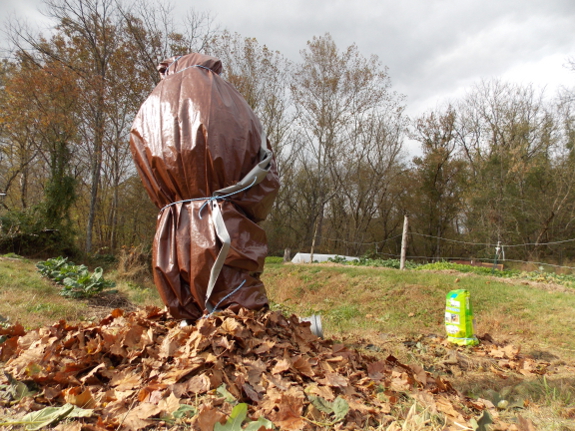
Last year, I didn't
wrap up our fig trees until early November, but the current cold
snap is treating us to unseasonable lows in the lower twenties
(with flurries of snow!), so I decided we'd rather be safe than
sorry. Plus, this cold weather produced a large leaf fall on
the driveway, which made for easy raking, so the time seemed
right.
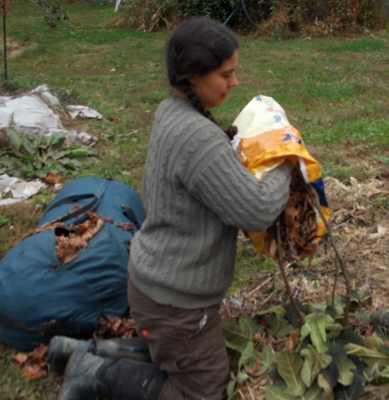 Last year's method of
freeze-protecting a young fig tree worked great, so I repeated the method on
all of our baby fig trees. I wasn't quite as thrilled with my
previous frost-protection of our larger fig, though, for a couple of
reasons. First, last year's tarp tended to blow off the top,
and that plus natural settling matted down the leaves so the upper
third of the tree wasn't protected. I also felt like I
didn't get much of an early (breba) crop because of cutting off so
much of the top of the fig. So, even though I pruned this
year, I left the full height of the branches remaining, and used a
tarp to completely encompass the tree, as you can see in the photo
at the top of this post.
If you live north of zone 7 and still want to give figs a try, you
might want to first read
this post about cold-hardy figs. The bit of winter
protection required, in my opinion, is very much worth it for the
heavy yields from a completely trouble-free plant.
This GFCI outlet stopped
working less than a year after I installed it.
It got invaded by some kind
of mud daubing insect.
I replaced it with the same
type of outlet, but if it happens again I'll have to upgrade it to one
of those outdoor outlets with a door covering the sensitive areas.
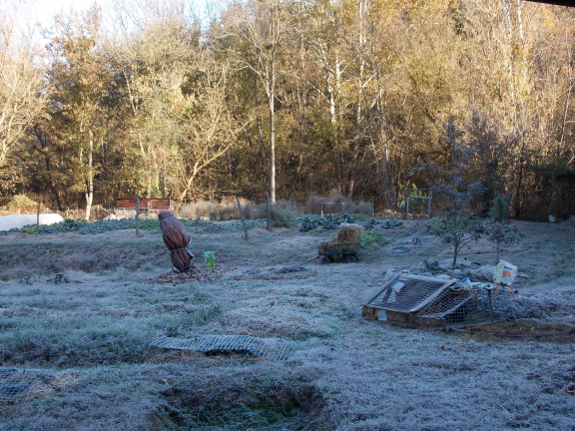
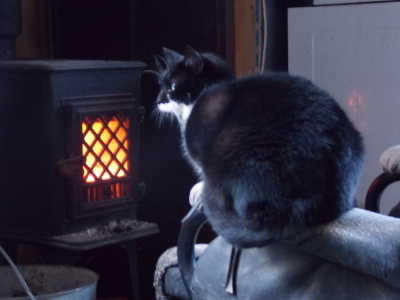 I
woke Saturday morning to a very heavy frost and discovered the low
(forecast to be 27) had dropped to 18. This is an extremely cold
snap for not-even-Halloween --- for the sake of comparison, last year we
didn't get down into the teens until the beginning of December.
If I'd realized it was
going to descend this low, I would have done a lot of prep work ---
covered up a lot more plants (like Asian greens and early lettuce and
maybe even Brussels sprouts) and plugged in the heated chicken waterers and the light bulb in the fridge root cellar. By the time the frost melted, I was outside, worriedly checking for damage.
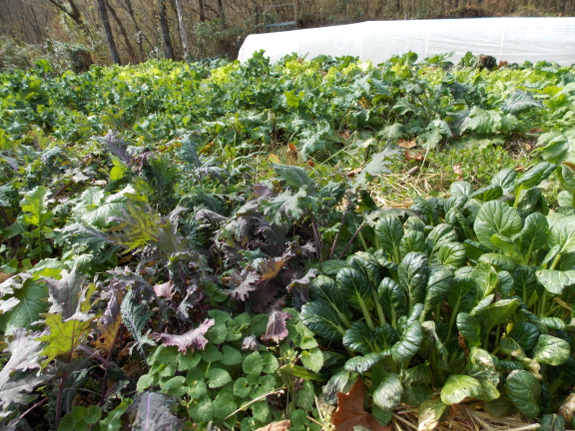
In the process, I found
out that soil temperature is much more important than air temperature
for a lot of these issues. Yes, the chicken waterers were frozen,
but the plants and fridge root cellar mostly weren't. The earth is
still pretty warm from summer sun, so a low that would have killed most
uncovered plants in February just nipped back the Swiss chard, 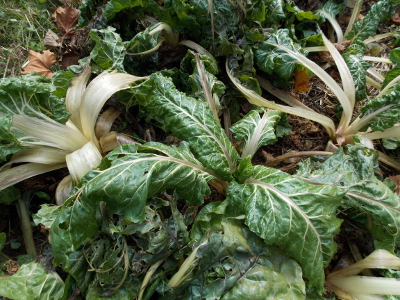 tokyo
bekana, and oilseed radishes a bit, with everything else
thriving. The fridge root cellar only dropped to 39 degrees,
perfect for the carrots and apples therein.
The one thing I did learn
was to start subtracting nine degrees, rather than five, from our local
weather forecast. Our movie-star neighbor has started calling our
farm Little Alaska since we always get significantly colder weather
than his mid-south-facing-slope does, even though we're less than a mile
and a half away (as the crow flies). He only saw lows of 23
during our cold snap, but guessed we would have gone down to 20.
Little did he know, it gets even colder than that here.
A stack of walnuts is all it took to stop our rooster from perching on top of the new EZ Miser waterer.
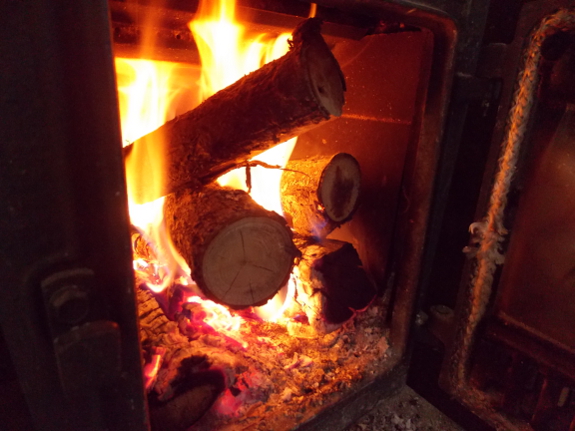
I suspect that in most
parts of the world, firewood looks a lot more like the photo above than
like the big split rounds most Americans are familiar with. These
were some of the smallest trees we cleared out of the newest pasture this spring, and they taught me a lot about the pros and cons of using small-diameter wood for fires.
On the plus side, the sticks were easy to carry home full-length, allowing Mark to cut them with the miter saw
(which feels safer and cleaner than the chainsaw). We left them
uncut in a pile in the yard for most of the summer (due to pure
laziness), so they went into the shed later than the other logs, but the
wood appears to be just as dry (or drier), probably due to the large
surface area per unit volume in the thin branches. And they're
very handy for me to use since I don't need Mark's help splitting them
--- it's easy to feed the little branches into the stove whole.
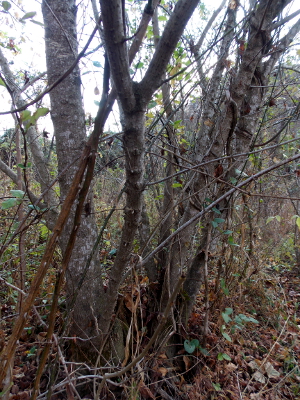 There
are downsides, of course. You'd need an awful lot of
small-diameter firewood to add up to much heat, and they tend to burn up
quickly (due to that big surface area, again), so they won't last the
night. Plus, they're harder to start a fire with since the unsplit
wood seems to repel the first tender licks of flame.
But (especially in our
wet climate), this type of firewood would be very sustainable to
grow. I've been watching our powerline cut ever since the electric
company whacked back the big trees in 2006, and most stumps sprouted
several new stems that became large enough to use for firewood within
two to four years. Now those branches are actually getting a bit
too big to cut with the miter saw, but we never harvested them because
we always seem to be awash in firewood simply due to clearing areas for
new projects. If you had no wooded acreage, though, and needed to
heat your home, an area of coppiced trees like those in our powerline cut might do the trick nicely.
 My newest ebook, Growing into a Farm: Before the Walden Effect, is now live on
Amazon. Thanks to everyone who gave me title and cover
suggestions! If you missed it, you can read the introduction here, and the blurb is below:
Anna Hess spent her early childhood chasing ornery cows back into the barn, eating all the strawberries before they got ripe so she didn't have to share them, and climbing sap-riddled pine trees. The reality of farm life seemed to be summed up in one word --- bliss. So when her back-to-the-lander parents threw in the towel and moved the family to a nearby town, Anna resolved to save her pennies and find a farm of her own, one that she would never have to leave.
A couple of decades later, Anna had bought the property, but soon realized she couldn't make her dreams come true alone. When a friend set her up with a potential mate, Anna went along grudgingly. "To be honest, at the time I was still pretty sure that a farm and a man were incompatible," Anna wrote, "and given the choice I leaned toward the farm." Little did she know that the best partnership was a threesome --- a man, a woman, and a farm.
Full of photos, this book serves as a preface to the popular homesteading blog, Walden Effect.
The rest of this week's lunchtime series is going to regale you
with the first section of Growing into a Farm, but if you want to see
the parts with Mark in it, you'll have to splurge $1.99 on a copy
of the complete book (which can
be read on nearly any device). I'll also be setting the book free on
Friday so my loyal readers can pick up a copy without paying, and
those of you who prefer a pdf copy can email me Friday to get an
emailed copy instead. Thanks for reading (and double thanks
if you find the time to leave a review on Amazon). I hope
you enjoy this light read to round out a busy gardening season!
| This post is part of our Growing into a Farm lunchtime series.
Read all of the entries: |
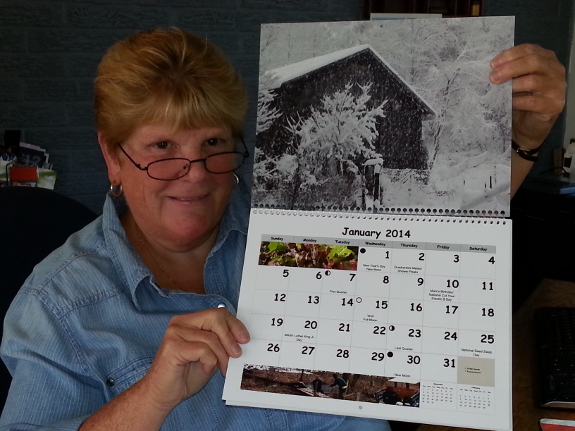
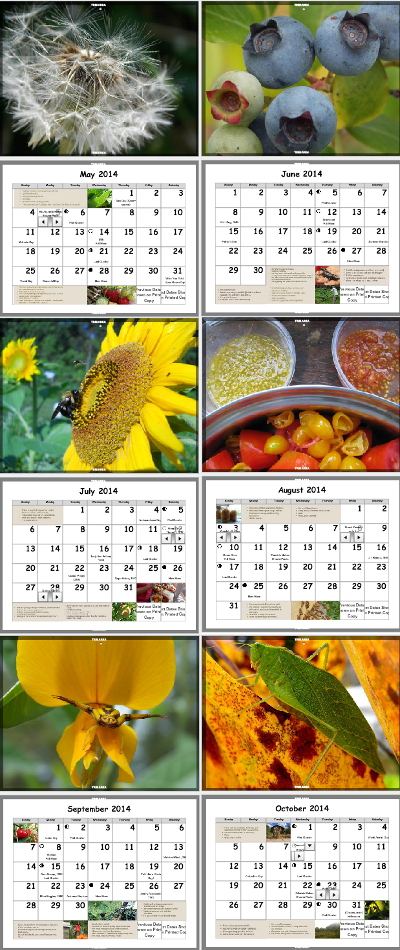
The 2014 Homesteading Calendar is now ready to preorder! You can
see all the pages and read far more than you probably care to hear on its official page. The most relevant points are:
- Mark's step-Mom, Jayne, is 80% responsible for making this calendar a reality. Thank you, Jayne!
- It's pretty! The proof copy is shown above --- the real calendar will look slightly different, mostly in that it will be stitched instead of spiral bound. I liked the proof so much I immediately sent it on to my mother, who was over the moon about it.
- It costs $11.99 plus $2 shipping (with the shipping not increasing
no matter how many calendars you buy). (Sorry we weren't able to
keep the price down to $9.99 --- we went for pretty instead of cheap.)
My only reservation about
this calendar project was my terror that we'd end up with boxes of
perishable product that are suddenly useless on January 1. So I
hope you'll help me spread the word so that all 300 copies find happy
homes in the next two months!
To sweeten the pot, we're
going to draw a name out of the hat and give away a free calendar next
week. To enter the drawing, spread the word in any way you want
--- in person, on facebook, on your blog, etc. --- then leave a comment
with a note on your efforts by midnight November 3, 2013. I'll add
your name into the hat once for every venue you hit, and then I'll use a
random number generator to pick the winner. Be sure to check back
here Monday to see who wins so you can collect your prize!
 (If you haven't already,
you'll want to start with this
excerpt from the very beginning of Growing
Into a Farm.)
My homesteading dream
began nearly as soon as I was born onto another southwest-Virginia
farm owned by my back-to-the-lander parents. When you spend
your early childhood chasing ornery cows back into the barn,
eating all the strawberries before they get ripe so you don't have
to share them, and climbing sap-riddled pine trees, the reality of
farm life seems to be summed up in one word—bliss. The signs
of my parents' rough path through farm ownership were all around
me in their stress-induced arguments, but I only took in the joy
of wading through creeks all summer and catching minnows for my
cat.
When my parents
finally threw in the towel and dragged us to town, I was eight
years old and unwilling to go. Too timid to pull a
My-Side-of-the-Mountain and live up to my threat of running away
to reside on the farm by myself, I still vowed that one day I
would buy a farm of my own that I would never leave.
By the time I
graduated from college, my childhood vision had solidified into a
plan. At that time (2000), property in my part of Appalachia
could still be had for about $1,000 per acre if you selected a
spot in the boondocks, so I figured I should be able to save up
$10,000 and buy ten acres within ten years. I'd pay for the
land with cash and live in my car and tent until I'd saved again,
this time enough to build a small house. My goal was
self-sufficiency—for the farm to provide for enough of my needs
that I hardly had to work in the outside world. Simple and
feasible, right?
Stay tuned for the next installment tomorrow, or read
the entire book here.
| This post is part of our Growing into a Farm lunchtime series.
Read all of the entries: |
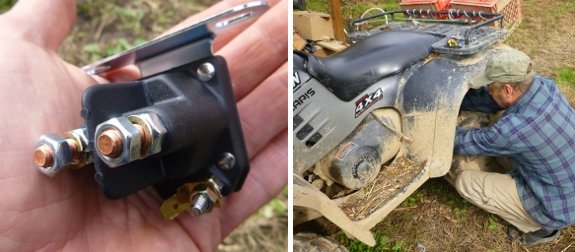
The new ATV
solenoid showed up today and we just ordered it late Friday.
It took a star bit to loosen
and tighten the mounting bracket.
We ordered this part from
Amazon. It's an aftermarket
starter solenoid that fits all Polaris
ATVs except the Expedition.
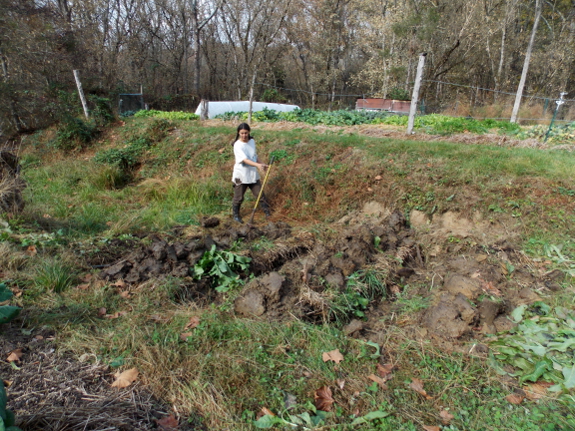
'Tis the season to be terraforming, tra la la la la, la la la la....
That early killing frost
was the bane of my fall garden, but a boon to future gardens. By
nipping back a lot of the current growth, the hard frost made it easy to
dig while it's still early enough that I can probably sneak rye seeds
in to cover the bare ground for the winter. I decided to take
advantage of the opportunity by terraforming the upper quarter of the
gully.
Long-time readers will be
aware that this gully probably formed when previous owners of our farm
let all the topsoil erode away from half of our core homestead.
The result is a swampy, weedy area that Mark has been slowly reclaiming with hand saws, clippers, and weedeaters for the last few years.
By
this time last year, the upper quarter of the gully had changed from
briers to sedges and grasses, so I figured it was safe to throw down a kill mulch
and grow subirrigated tomatoes there this year. The idea made
sense, but I wasn't aware how swampy that part of the gully becomes
during a wet summer, so the tomatoes caught the blight quickly and perished.
My current method for dealing with parts of the garden that make me sad
is to avert my eyes and go somewhere else (not recommended), so I never
weeded the tomato beds after the crop died, and moderate weeds started
coming back in.
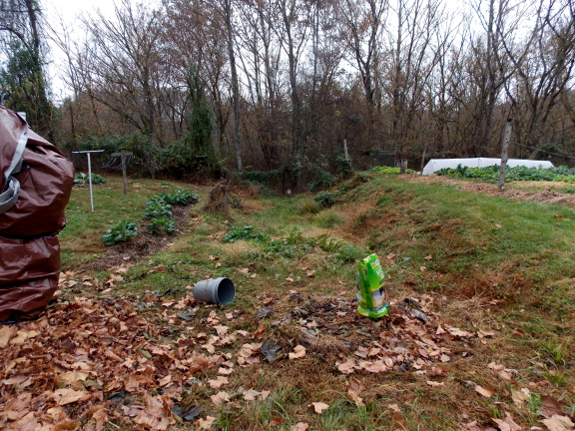
This week's task was to
ensure that the next crop planted in that part of the gully doesn't
drown, achieved by mounding all the topsoil from the aisles onto the
beds. These rows may turn out to be a set of chinampas in wet years, but I'm willing to weed in muck boots if that's what it takes to turn this sunny spot into a productive part of the garden.
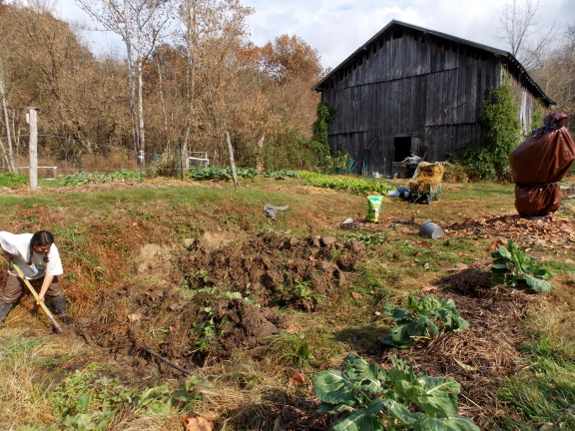
And the results already
thrill me! I shouldn't have been so surprised when each shovelful
of dirt came up dark and rich --- after all, if the topsoil eroded out
of the gardens above, it had to collect somewhere, right? Since
the roots of the plants in these new raised beds won't be submerged in
water any longer, I suspect this might become one of my best growing
areas.
Next up on the
terraforming list is some swales in the newest pasture, and kill
mulching another zone of the gully so it'll be just as easy to dig next
year as this zone was. The gully is definitely shaping up to be
one of our longest-term projects, but worth the tidbits of attention
here and there devoted to the oft-ignored corner.
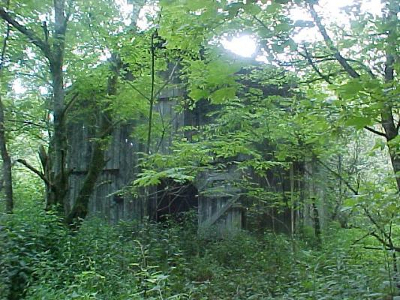 (If you haven't already,
you'll want to start with part
1 and part
2 from the very beginning of Growing
Into a Farm.)
After reading my endless letters about this farm dream (and about
rototillers, seeds, and chickens), my college friend, Melissa,
decided to put me out of my misery. Melissa used her
computer-programming skills to join Amazon.com in its infancy, so
by 2003, her stock options provided a healthy sum she hadn't
expected. "How would you feel if I bought into your farm
idea?" Melissa asked. "We could use my money to purchase it
sooner, I'd own half of it, so the farm could be bigger, and you
could pay me back over the course of ten years with a no-interest
loan."
To anyone else, this
offer would sound almost too good to be true, but I was fiercely
independent back in 2003. I'd held off on dating anyone
since I figured a man would only stand in the way of allowing me
to achieve my dream of roughing it on a farm, and I didn't want to
be beholden to anyone. However, Melissa was (and still is)
one of the few chinks in my armor. The two years we'd shared
at college (before she graduated and went off to help Amazon build
an empire) were some of the happiest of my life, and anything that
made our post-college diaspora likely to reverse, bringing Melissa
closer to my Appalachian stomping grounds, was fine by me.
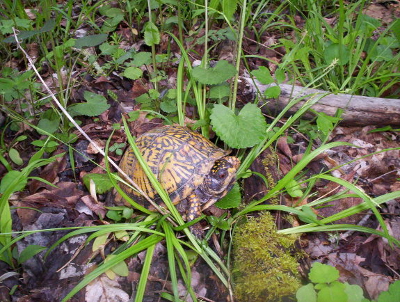 So I accepted Melissa's
kindness and started hunting for property. I knew I wanted
water, at least an acre of arable land, and lots of space between
me and my neighbors— everything else was optional. By the
time I stumbled across an ad for 58 acres on Sinking Creek, I felt
like I'd been on a dozen blind dates with grossly incompatible
partners. There was the mountainside acreage completely
covered in kudzu, the recent hillside clearcut with tree carcasses
littering the ground and soil already eroding away, and the
$300-per-acre tract that was poisoned by runoff from a coal
strip-mine.
When I showed up at
Sinking Creek, I actually walked through the wrong property
first. There was no for-sale sign in evidence—my land-to-be
had been on the market for so long that everyone had forgotten
about it—and the realtor's instructions were vague. But I
finally backtracked and ended up in the right spot, where wood
frogs, chorus frogs, and spring peepers had combined their calls
into a symphony reverberating across the damp floodplain. I
had to park along the county road and trek up a right-of-way for
about half a mile, fording a creek and sinking up to my knees in
the swamp, but I finally came around a bend and saw a huge tobacco
barn towering through the trees.
I was barely able to
push my way through the blackberries and honeysuckle to reach the
old house, half of which had collapsed with age, but once I got
there, the peace was overwhelming. I couldn't see or hear
any signs of human life, although bird songs had joined the frog
chorus and flowers were scattered across the hillsides.
Finally, the far-off rumble of a coal train reminded me that
humanity existed...but at a distance. It was love at first
sight.
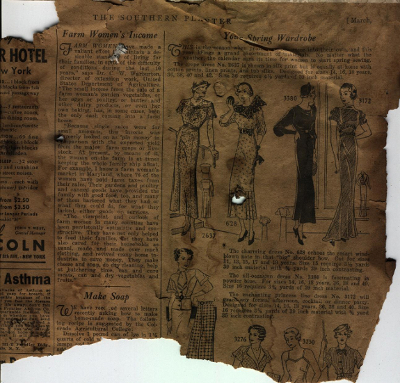 The world's worst
bargainer, I tried to talk the realtor down from the already
low-ball figure of $600 per acre. Despite my rose-tinted
glasses, I was well aware that most of the land was good for
nothing by human standards, and that the long, wet driveway was
going to be a thorn in my side for years to come. For a few
months, I pretended to myself (and to the realtor) that I was
going to go elsewhere, but I didn't look at any other land—the
Sinking Creek farm had already won over my imagination.
By November, I was
planting ginseng seeds on a north-facing slope, and soon
thereafter, Melissa sent me a cashier's check so I could close on
the property. I was $17,000 in debt and 58 acres rich.
I thought I'd reached
the happily-ever-after stage of my love story, but as anyone who's
been in an actual relationship knows, tying the knot is only the
beginning. Luckily for me, my dating experience had all been
in secondhand, book form, so I wasn't jaded enough to foresee the
future. I figured the land and I would work together
seamlessly, I'd be relishing homegrown apples in no time, and jobs
were a thing of the past. Ah, the innocence of youth.
Stay tuned for the next installment tomorrow, or read
the entire book here.
| This post is part of our Growing into a Farm lunchtime series.
Read all of the entries: |
The ATV
garbage hauler broke when I overloaded it with buckets of gravel.
I got this length of angle
iron for 6 dollars and cut it into two pieces.
Wood screws with washers hold
it to each corner making it stronger than before.
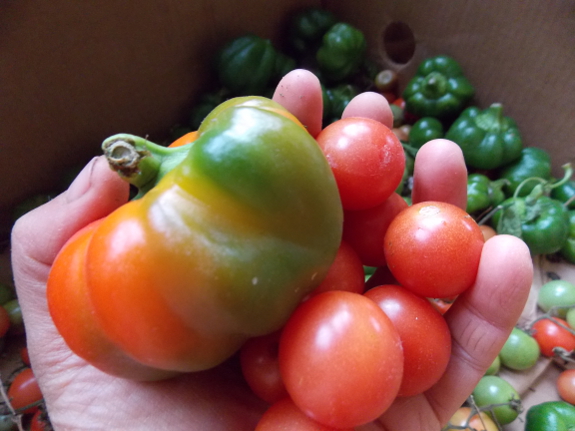
Every year, I say I'm not going to pick the green peppers and tomatoes before the frost and ripen them inside over the next few weeks. And every year I do it anyway --- it's just too hard to let summer go.
I call my this my salad
box since the fruits will go on top of lettuce out of the garden.
The first few fruits to ripen after being take in were as good as the
ones picked off the vine, but I'm already starting to sense a decline in
flavor. Pretty soon, the ripening tomatoes and peppers will taste
like store-bought, at which point they'll go to the chickens.
Still, I guess it's worth getting an extra couple of weeks of salad
toppings, if only for moral support (and prettiness).
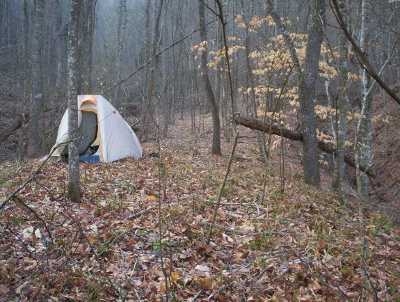 (If you haven't already, you'll want to
start with part
1, part
2, and part
3 from the very beginning of Growing Into a Farm.)
A few days before
closing (October 25, 2003), I wrote in my journal:
"I found a beautiful site for a 169-square-foot, underground, passive-solar-heated house. (No, those last two aren't oxymorons.) And some beautiful forest at least 50 years old. My bedtime reading has mutated from fluffy fantasy to books on building your own home. And I'm planning an orchard."
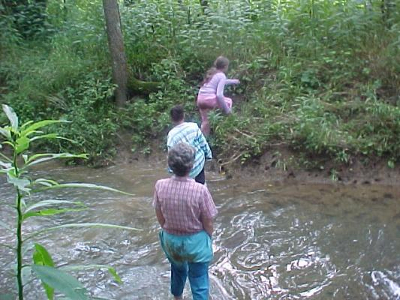 At first, my love affair
with the land seemed to be off to a good start. Sure,
everyone who I dragged out to look at the property warned me away
from such a rough partner, but the price was right and she had
such an engaging twinkle in her eye that I brushed off their
concerns. That first glorious autumn, I pitched a tent every
chance I got and set to work tearing down the old house, carefully
pulling out each nail to be straightened and reused, then setting
the wood aside as building material.
During our honeymoon,
I was cheerfully oblivious to the inevitable setbacks. A
month after closing, I wrote:
Even discovering
that the creek running along the edge of the property flows into a
sinkhole that frequently clogs, causing the water to back up and
flood the entire valley, felt like an adventure that first
winter. In early March 2004, I wrote:
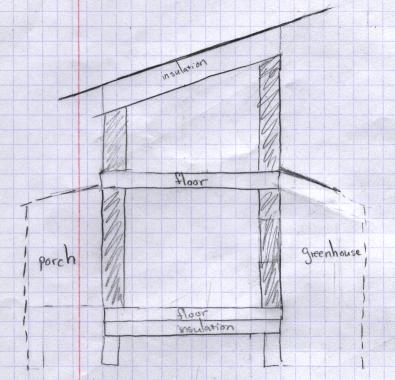 "Daddy had come up from
South Carolina to give the house one more look over. I badly
wanted to be able to salvage one room, to speed my moving in, and
he had promised to look at the house more thoroughly. All
that stood in our way was the creek. The creek—which was
currently over five feet high, overflowing its banks, and racing
along at an amazing clip. I jumped into the water on the
creek's edge, hoping to get across, but even clinging to a
spicebush I nearly got swept away by the cold water.
Downhearted, we turned back (though the brownies I'd brought
cheered people up considerably).
 "I had been told that Sinking Creek rises quickly but falls just as quickly, so we made plans to come back the next day and try our luck again. When we returned on Sunday, after a day of dry weather, the creek had gone down two or three feet. At our usual ford, I could wade across with water only up to my knees. We did so, and Daddy gave sentence on the house— tear it down, he told me. I was saddened, but he said the wide oak planks were very good and that a good deal of the wood can be reused."
My plans for
accommodations shifted with the wind that winter and spring.
At first, I dreamed of going underground, but soon learned that "the groundwater is very
high and an underground house would be more of a boat in that
location." Next, I considered fixing up the best part of the
old farmhouse, but Daddy shot that dream down, so I moved on to
considering a small straw-bale house on two levels, with the
framing lumber salvaged from the farmhouse.
 Unfortunately, my
physical strength and skills didn't live up to the grandiosity of
my dreams. Even though I didn't write about it in my journal
(remember, I was thoroughly in love), the deconstruction work was
already taking its toll. I started waking up in the night
with hands that had fallen asleep and tingled painfully, and I
eventually discovered working in the cold was causing my wrists to
develop carpal tunnel syndrome. I didn't mind (much) when I
camped out on a night so cold my water bottle froze solid beside
me, but when I stopped being able to hold the crowbar, I knew I
was in trouble.
Still, I wasn't
willing to change my dream one iota. Instead, I kept pain
and suffering out of my journal and wrote:
(As a side note, I'm
sitting in that chair I once hauled out of the floodplain as I
type today.)
Stay
tuned for the next installment tomorrow, or read
the entire book here.
| This post is part of our Growing into a Farm lunchtime series.
Read all of the entries: |
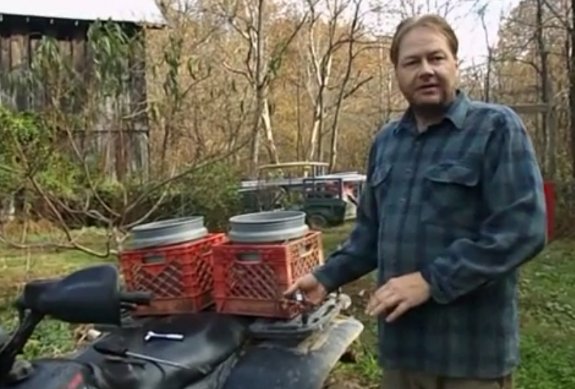
Anna and I made a short ATV
troubleshooting video on
our recent experience with fixing the ATV by replacing
a solenoid.
Want more in-depth information? Browse through our books.
Or explore more posts by date or by subject.
About us: Anna Hess and Mark Hamilton spent over a decade living self-sufficiently in the mountains of Virginia before moving north to start over from scratch in the foothills of Ohio. They've experimented with permaculture, no-till gardening, trailersteading, home-based microbusinesses and much more, writing about their adventures in both blogs and books.
