archives for 01/2013
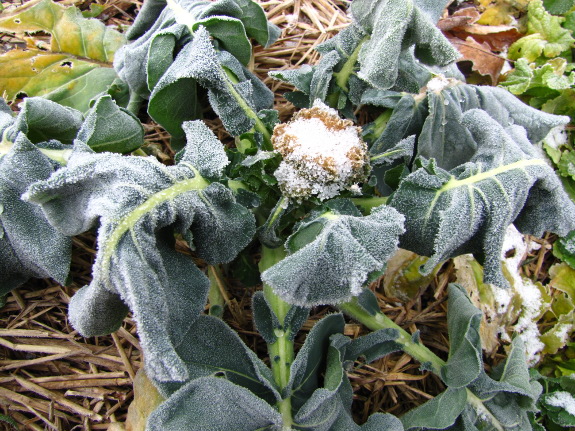
I stopped picking broccoli
side shoots two or
three weeks ago. The plants are still putting out a few little
heads, but they get so damaged by heavy frosts that they're not worth
eating.
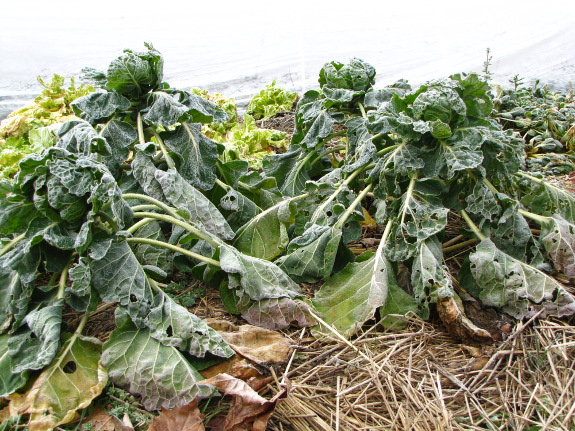
Luckily, Brussels
sprouts seem undaunted by weather in the teens. This is our first
year growing these tasty morsels, and we've found them to be easy
and delicious. There's room for
improvement in my methodology, though.
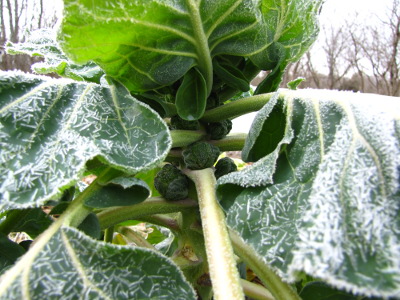 As our new,
experimental vegetable, Brussels sprouts got last dibs on prime garden
real estate after the broccoli and the cabbage. That means only
four seedlings were transplanted into the
garden on July 27, with the rest waiting another week. The
later-planted Brussels sprouts also went into the front garden, which
is far too shady for much production in cold weather since it's nestled
up against a north-facing hill. Small surprise we've only been
enjoying the rewards from those early and sunny plants (although the
late and cold plants are still doing fine and may churn out sprouts in
the spring).
This year, I'm going to
start the Brussels sprouts a week earlier and get them all into the
garden by the middle of July (if I can find room). I'm also going
to put Brussels sprouts near the top of our list of important winter
crops, after kale, lettuce, and broccoli, but before Asian greens,
cabbages, and mustard. Finally, at Mark's request, I'll also be
growing lots and lots more. Maybe next winter, Brussels sprouts
will change from a special treat to a regular occurence on our plates.
Marco and Dirk brought up a good
point on yesterday's post in the comment section about proper blade
choice.
The blade in question was a
multi-purpose wood and metal, and yes it would have done better with a
pruning blade.
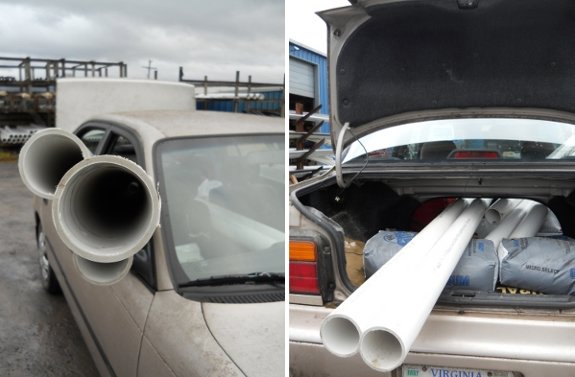
A portable reciprocating saw
like the DW
938 would be handy for cutting PVC pipe in hard to reach
places like under a sink.
I do like the easy unlocking mechanism for switching out blades. Our Skil reciprocating saw requires
a small wrench to loosen and tighten blades, which is a real pain when
that wrench is nowhere to be found.
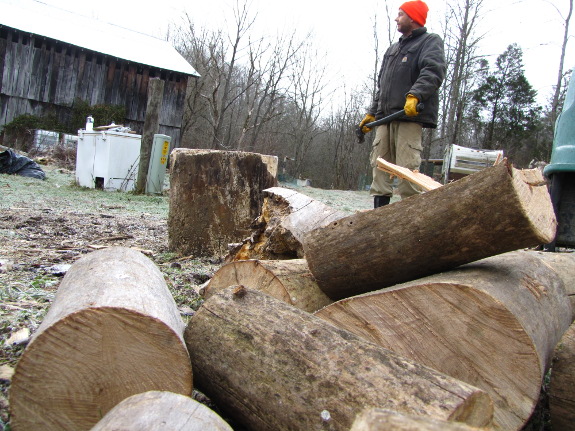
Remember that locust
tree I'd been saving
as firewood insurance? It wasn't what I thought it was.
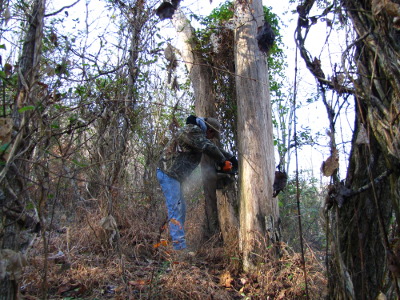 Black
locust is considered to be top-notch firewood because you get 112% as
much heat out of a same-sized log compared to red or white
oaks. In contrast, the most common trees Mark and I cut out
of our woods give only 75% (box-elder) to 83% (black walnut) as much
heat as oak, which means more work for less reward. Effort aside,
oak and locust fires are preferred because they keep going longer into
the night and put off more heat in the process.
Unfortunately, I'm
reanalyzing that standing dead tree and figuring it might be sycamore,
which clocks in at only 80% as good as oak. I'm not sure why I
didn't take the multiple trunks into account before, which is a growth
habit common in sycamores but rare in black locusts. I guess I
thought the way the logs were so darn tough to split meant they were
locust, but it turns out sycamore has a spiral grain that makes
splitting a bear.
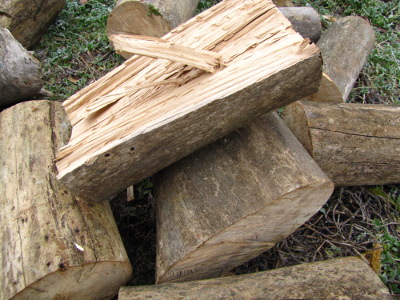 The easiest way to guess how
many BTUs you'll get out of a log of mystery firewood is to wait until
it's totally dry and pick it up. The lighter the wood, the less
heat you're going to enjoy when the wood burns. Bone-dry
box-elder is nearly as light as balsa wood, and our mystery tree isn't
much heavier. Meanwhile, both box-elder and our mystery wood work
great as kindling, which is another sign of low BTU --- harder woods
are tougher to light, unless they're resinous.
The fact I've been
burning light wood all winter would explain why we've been going
through it so quickly. Luckily, the shed's still mostly full, and
Mark discovered sycamore isn't terribly hard to split if you wait until
it's 20 degrees outside. If we ever run out of fallen, dead, or
in-the-way trees and start managing a woodlot, though, sycamore isn't
going to be involved.
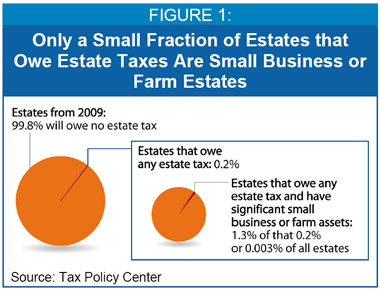 The most interesting part of
this week's selection in Folks,
This Ain't Normal was Salatin's chapter on inheritance taxes.
I'm surprised he didn't add property taxes to the list of money-related
regulations that make it tough for family farmers to keep the land in
agriculture, so I'm going to pretend he did and discuss both issues
today.
Salatin tells us that
his farm, bought by his parents in 1961 for $49,000, is now worth $1.5
million. Although a quick search of the internet suggests there
might be exemptions that would keep him from paying that tax, Salatin
posits that if he wants to keep farming the land after his parents die,
he needs to be prepared to pay $525,000 in inheritance taxes. He
does mention that there are workarounds to inheritance taxes if you get
the ball rolling early enough, but it is worth considering the
worst-case scenario, which often forces the offspring of deceased
farmers to sell the land to developers.
Similarly, I've read on
others' blogs of their astoundingly high property
taxes, often several thousand dollars per year, which make true
on-farm self-sufficiency impossible. For those of you looking for
land, I think it's worth keeping property taxes low by looking for an
ugly duckling property (as I explain in Trailersteading)
and by avoiding thinking of your dwelling as an investment that should
be increasing in value. But you clearly don't have those choices
if you're lucky enough to inherit a family farm.
 Salatin is a libertarian, so he'd say the
solution to these problems is deleting taxes, but I think the issue is
deeper and has to do with ever-rising land prices. For example, in Salatin's
previous chapter, extensive quotes by Benjamin Franklin about the
differences between the young United States and Europe included this
gem:
Franklin goes on to explain that the early United States didn't have big manufacturing businesses because of "labor being generally too dear there, and hands difficult to be kept together, every one desiring to be a master, and the cheapness of land inclining many to leave trades for agriculture." In other words, cheap land made people want to farm rather than working for a boss, and I suspect the same would be true today. If Salatin wants lots of small family farmers back on the land, it seems the obvious issue to pursue is lowering land prices.
What makes land prices rise? I'm inclined to say the larger the population and the higher our standard of living, the more expensive the land, but I'm neither an economist nor a historian. What do you think about inheritance and property taxes (plus zoning and the other issues brought forth in this week's reading)? Is there a way to make it feasible for interested young people to find land to farm and for children to take over their parents' estates with ease?
We'll finish up Folks, This Ain't Normal next Wednesday. Meanwhile, you can read other Salatin-based musings in part 1, part 2, part 3, and part 4 of the book club discussion. Thanks for reading along!

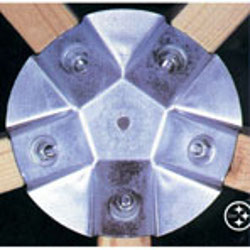
We've been talking about
projects for 2013, and chicken coop upgrade made it to the list.
I'm liking the simplicity of
this StarPlate building
method. If every other triangle flipped up it would make deep
bedding replenishment a breeze.
The StarPlate people claim a 15 percent
reduction in building material compared to a regular stick structure.
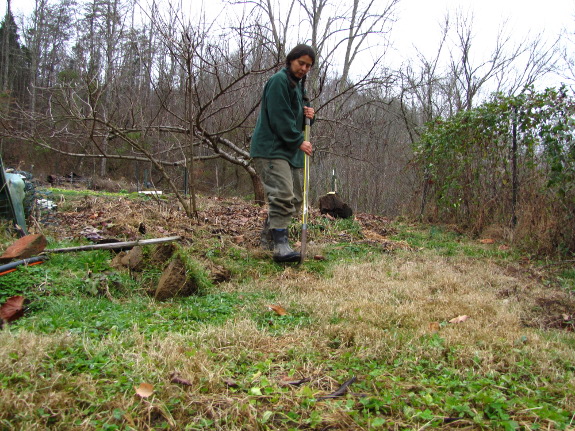
With the first phase of
the powerline
terrace complete, I
decided to move on to our next experimental project --- a greywater
wetland. When I started planning
this project in
October, I was considering installing a liner to turn the wetland into
a pond, but various readers' experiences talked me into keeping it
simple. Chances are, the ground will gley itself after a while
and will hold enough water to keep wetland plants happy. The less
long-term maintenance the wetland requires, the better, and unlined,
earth-filled wetlands seem to be winners there.
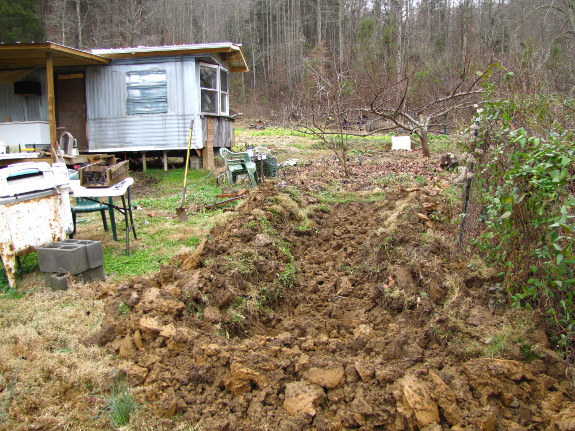
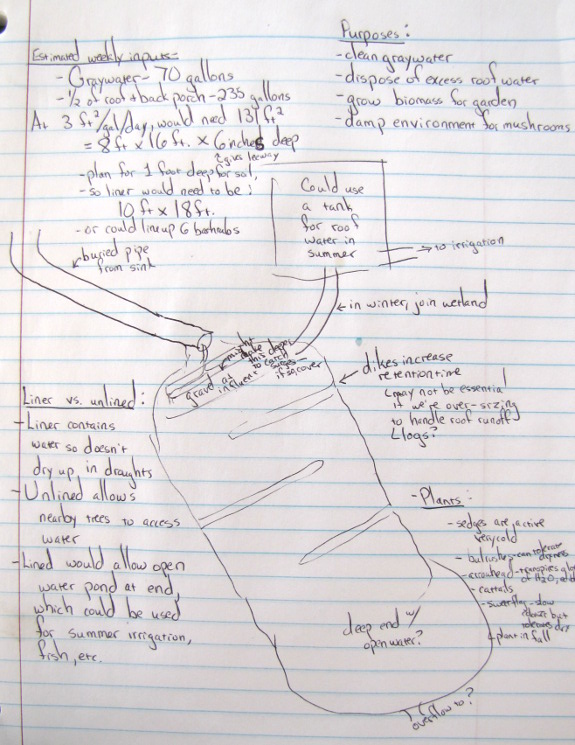 I was feeling more
loosey-goosey than usual, so I just dug and dug and dug with no real
plan for the finished product. Will I install a bricked-in outlet
at the top to keep water from eroding the soil there?
Probably. Will I use logs to divide the flow into a sinuous
pattern and dig deeper areas to make multiple pools? Maybe.
Will I try to make the final slope more than the current 0.5%?
Not sure.
Other things I'm
pondering include building a little deck over the upper end to turn
into a laundry station so wash water can dump straight down into the
wetland (and so Mark doesn't have to mow around the wringer
washer). I definitely want to mash down the walls into a gentle
slope so they will be easy to mow over. We'll see what decisions
the day brings.
Today was the day I stopped
procrastinating on fixing the generator.
I was stuck on how to get the
bad gas out when Anna had the great idea of elevating the entire unit
with a bucket underneath. The gas drains out of the fuel
cut-off valve after unhooking the black rubber hose.
Hopefully some fresh fuel and
a new spark plug will bring it back to life, but I think I'll add half
a can of Seafoam to clean out any of the old fuel
residue.
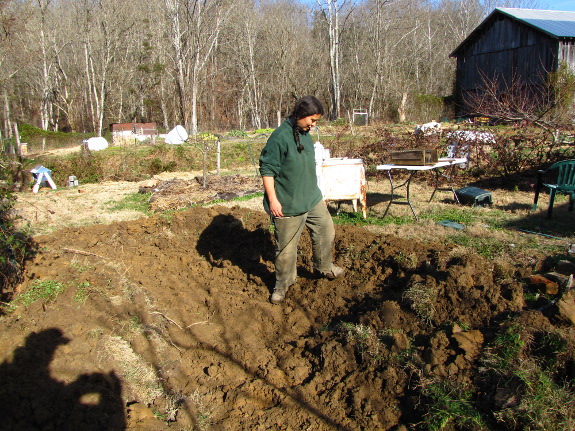
I did a little reading
and pondering overnight and decided to change the shape of my greywater
wetland a bit.
It was approximately three feet wide and twelve feet long at the end of
the day Wednesday, but Create
an Oasis With Greywater recommends a width twice the
length. The upper end of the wetland is hemmed in, but I opened
it out a few feet down to perhaps five feet wide, then stomped on the
walls until they became a more gentle (hopefully mowable) slope.
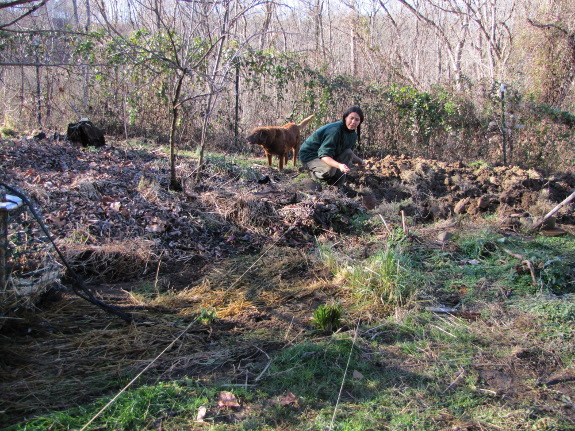
 The
next step was to consider how the water is going to get to the
wetland. We currently have two 3" pipes
running straight down from our kitchen sink. Even though it will
cost more to run both of them all the way to the wetland, keeping our
fast drainage seemed worth the hassle. We'll be using unflexible
PVC pipes that won't curve, so I pulled out some string to make
straight lines between the current sink outlet and the inlet of the
wetland.
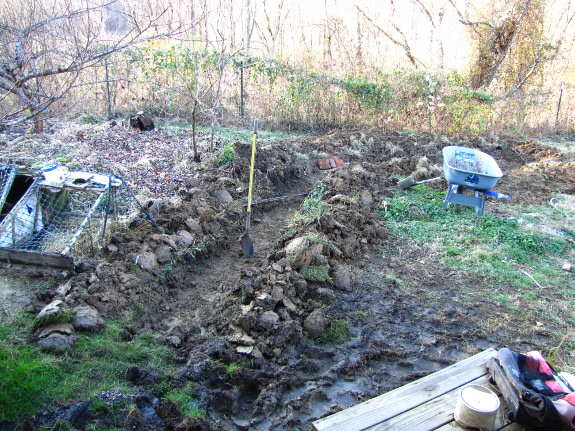
When Mark buried the
waterline, the
project was painful because we wanted to get the lines deep enough they
wouldn't freeze. In contrast, my greywater lines are only being
buried for convenience, so we won't trip over them and can easily mow
over the area. Freezing won't be a problem because the water will
run straight out into the wetland, so my trench is only barely deep
enough to get the pipes underground.
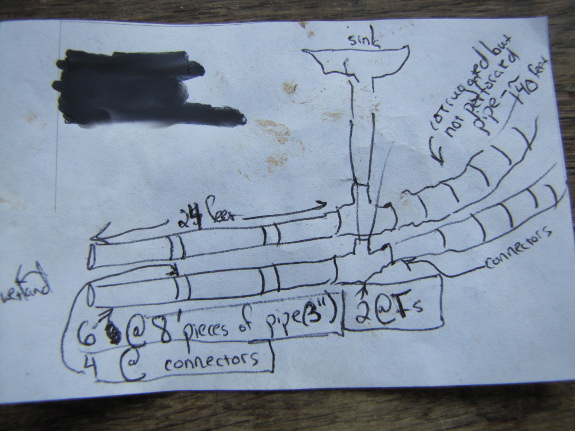
Here's Mark's shopping
list for today. We decided to make a T below the sink and let the
roof runoff come in there rather than running at third line for that
water. Heavy rains will hopefully flush out any gunk that may try
to build up in the lines between the sinks and the wetland.
I actually worked some
more on the inlet area of the wetland yesterday too, but this post is
already long enough, so I'll regale you with those details
tomorrow. Stay tuned!
I think it's been over 10
years since I first bought the Squeeze Wrench at a Flea Market and today it
finally got a chance to prove itself.
The Toyota Corolla seems to
have a misfire, and my first thought was to replace the distributor cap
and rotor.
Adding a small extension to
the Squeeze Wrench made for a near perfect
distributor cap removal tool and flipping it around lets you tighten in
the same cramped position.
The inlet of a greywater
wetland can be
trouble if you don't plan carefully. This is where the most tasty
(from a dog's point of view) gunk is going to land, so you want to
close it in to prevent nibbling. Water will also be gushing out
of the pipes with quite a bit of force here, so it's handy to make a
solid bottom in this area to prevent erosion.
There are lots of
designs for greywater inlets, but I wanted to work with what I have on
hand --- bricks
from the old chimney.
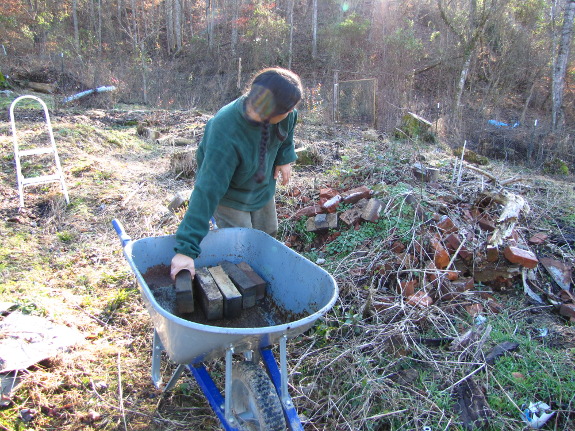
I loaded up a wheelbarrow full of the best ones and brought them down
to my budding wetland.
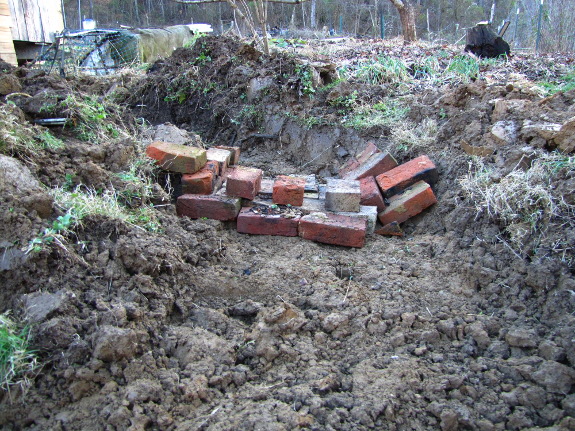
The pipes aren't in
place yet, but they'll be bringing water in from the top-left side of
the picture above. I simply laid bricks loosely on the ground and
put a few on the downhill side to further break up the flow.
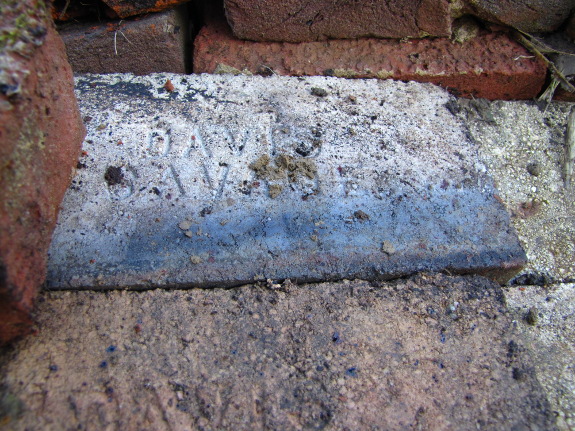
I'd been saving these
fire bricks since they hold their shape much better in freezing, wet
conditions than the bricks that made up the bulk of the chimney.
I assume "Davis Savage," which is stamped on each fire brick, refers to
some long-ago local brick manufacturer. I only had enough fire
bricks to coat the bottom of the inlet, but that'll probably be the
spot that stays wet longest and will need to be strongest.
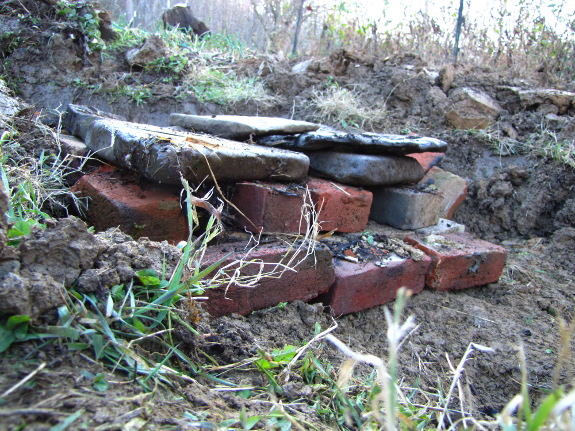
Some river rocks laid
loosely on top may or may not be enough to keep Lucy out. We'll
have to wait and see. I can hardly wait until these bricks moss
over and the greywater trickles down them like a tiny waterfall.
(Can you tell building
the greywater wetland is the most fun I've had all year?)
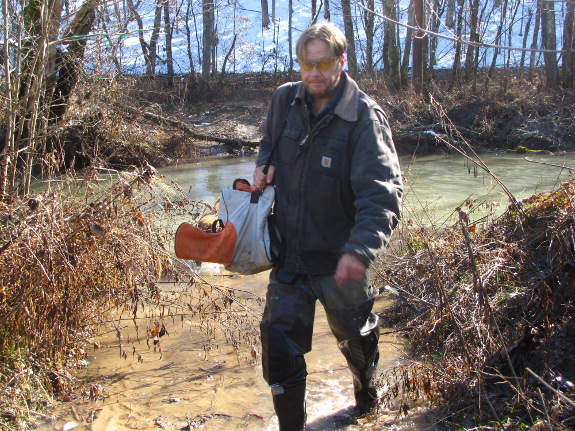
The Pro Line Hip Waders are leaking
at a crease in the material.
I tried a coat of silicone on
and around the cracks, thinking maybe when it dries it might end up
being a more flexible patch.
Another thought I have
concerns proper boot storage. Maybe the crease would have been less
severe if I was in the habit of storing the hip waders on some sort of
upside down manikin?
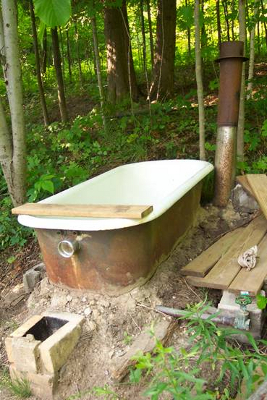 Every year, I plan to install
a bathtub, but I never do because I can't decide what I want it to be
like. Do I want to bathe inside by the fire, with the tub
converting into a padded bench for lounging? Or do I want the tub
outside so I can enjoy the sun on my back on summer days?
Probably we need both options, but this cast-iron rocket-stove
bathtub sounds like it might be a fun compromise.
I emailed the designer
for tips since he included no more information than what you can see in the photo.
He replied to tell me that that the stove is built with cob, and that
that it draws quite well even with the long horizontal chimney
section. "Make sure to have pads under you when you are in the
tub or you will burn yourself," he added.
I'm not sure the thin
metal tub that came with our trailer would work with this system,
though, or whether it would melt right through. Perhaps a layer
of bricks between the stove and the chimney pipe would both decrease
the chance of burning a bare bottom and also keep the tub from
melting. What do you think?
We finally got the drinking
water problem resolved by replacing a clogged UV filter hose. The
delay was due to finding the right brass fittings.
These compression sleeve
parts cost a total of 25 cents at the hardware store.
I think the guy was giving me
a cost break and maybe a reward for repeated visits, but it's still
nice to buy something so useful with pocket change.
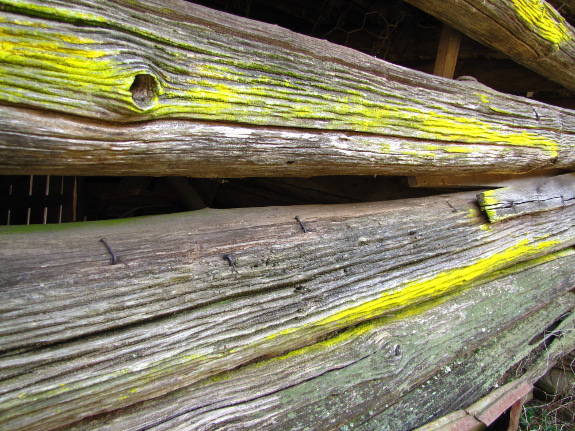
I love old barns.
I hardly remember the house I lived in from birth through third grade,
but the barn is still vivid, as are all of the other barns I've
explored over the years.
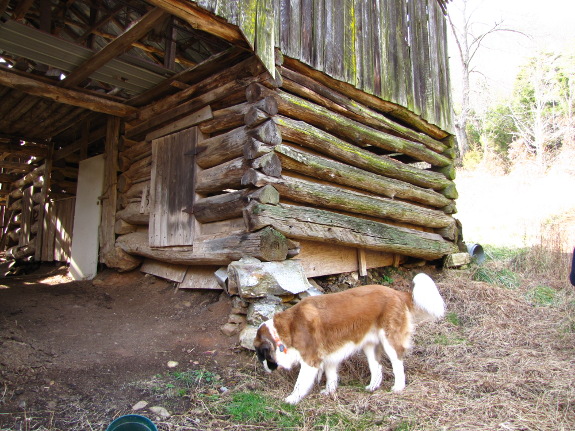
Mark and I enjoyed the
opportunity to visit Sarah's farm Saturday. We had lots
of fun hiking and hanging out, but most of my photos are of the barn.
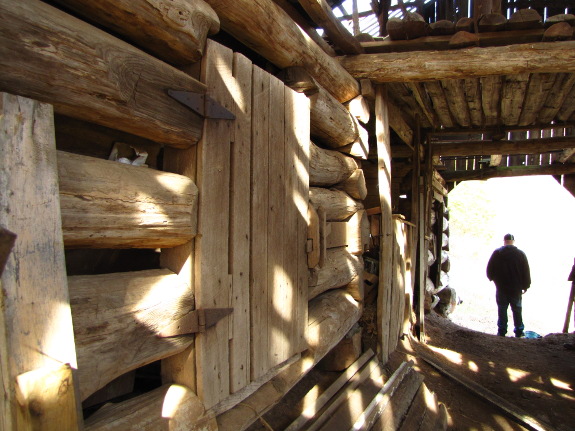
I think this must be the
local style for livestock barns because Sarah's log barn is nearly
identical to the one on my aunt-in-law's farm one county over. I
was very jealous of the old manure still remaining in the stalls on
Sarah's property.

Sarah's corn crib looks
more modern, with its wire hardware cloth inside, but it still has a
very nice sense of style. While researching my root
cellar book, I
learned that corn cribs and root cellars both are probably designs
stolen from the Native Americans, then given a European twist. So
perhaps structures like this have dotted the Appalachian landscape for
thousands of years.
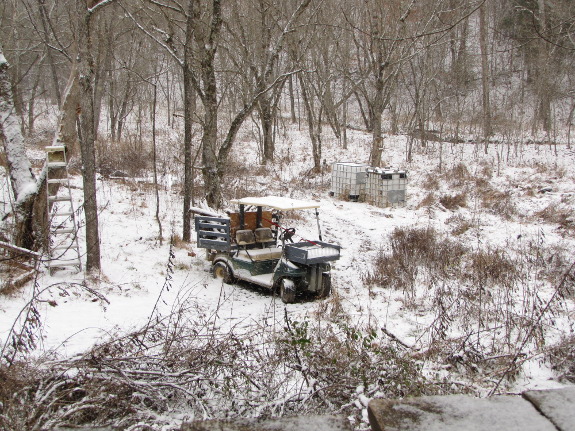
The golf cart
is having more and more trouble keeping a charge.
Coming up the hill by the
barn was too much for it a few weeks ago. We had to run an extension
cord and give it a boost before the golf cart could make it home.
We think the batteries are
six or seven years old. Perhaps it's time for a new set?

Mom found this beautiful
book being discarded from her local library. I can't imagine why
they'd get rid of such a fascinating text --- maybe because In
the Year of the Tiger
didn't fit into the children's section since it's really a
photojournalistic study for adults? I know I probably wouldn't
have gotten much out if it in fourth grade.
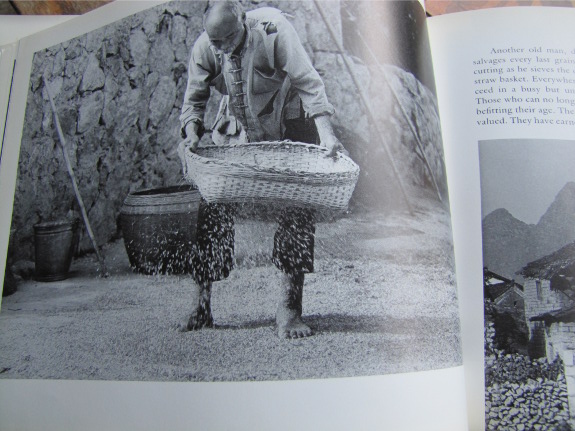
There's no real plot,
just amazing images from a Chinese village in the 1980s with
explanations of what's going on. This page says: "Another old
man, determined to be of uses, salvages every last grain from his son's
new rice cutting as he sieves the dregs through a fine-mesh straw
basket."
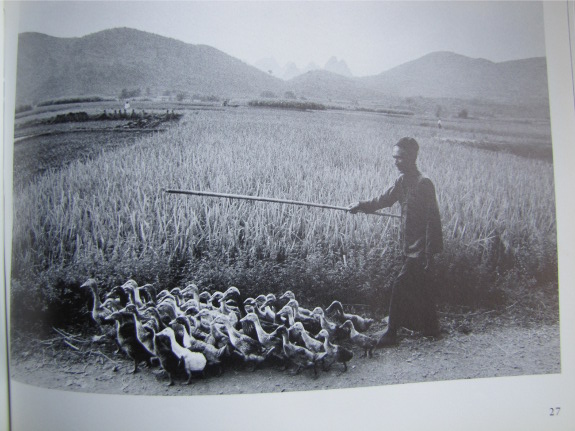
After this great shot of
ducks being herded home, the author explains that chickens are very
common in China but their meat is considered a delicacy despite the
animals' ubiquity. Most of the chickens are layers primarily kept
for their eggs.
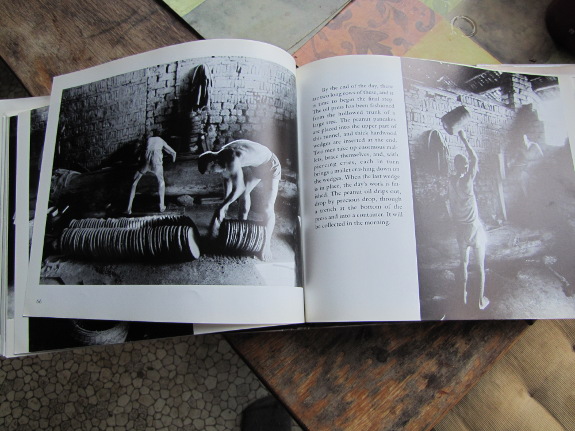
The section on making
peanut oil in a hollowed out log, and then selling the cakes of
leftover peanut fiber for animal feed, was rivetting.
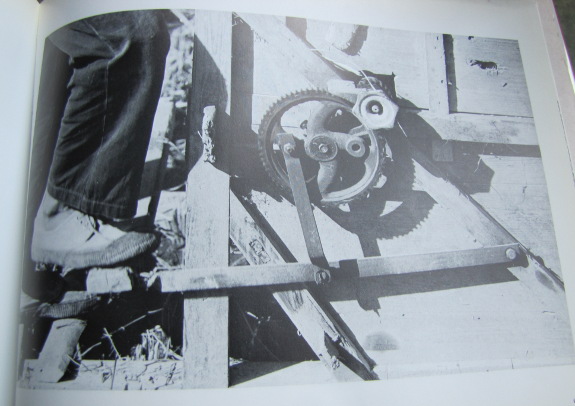
Here's a pedal-powered
threshing machine. One person can stand there and pump the pedal
while feeding in the grain. The same family had a separate
machine for winnowing the rice from the chaff that was very simple ---
just a place where you feed the chaffy grain into a chamber and a fan
pushes the chaff into one chute while the rice falls down another chute.
Overall, the book is
like Farmers
of Forty Centuries,
but more recent and with a lot more photos. I read In
the Year of the Tiger slowly over the course of a
couple of weeks and ended up feeling like I'd enjoyed a Chinese
farm-tour. If you ever stumble across a copy, I highly recommend
giving it a read.
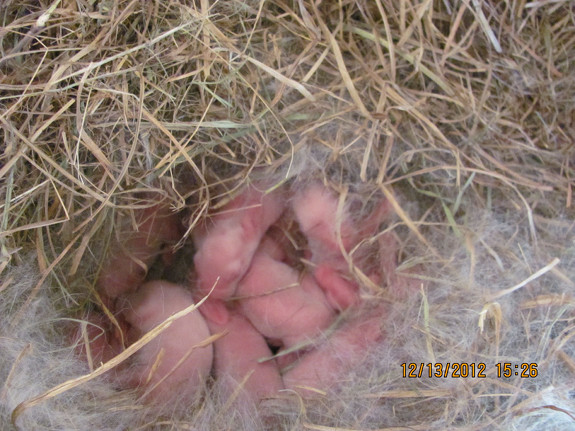
When we last
made a rabbit post, we
were anxiously awaiting a litter of rabbits while mother rabbit was
preparing a nest in her nesting box. Sometime the night of the
post, our doe delivered her first litter. The litter was 11 kits,
one of which we lost the first morning. She delivered on a night
that was pretty cold and we surmised that the kit had wandered away
from the huddled litter and died of exposure. We had wrapped the
hutch in plastic and provided a incandescent lamp as a heat source, but
it wasn't enough. We later swapped out the lamp for a space
heater... probably throwing our cost per pound of rabbit equation off
due to electricity consumption. We had planned the timing of the
litter based on Easter though, so we had anticipated the possible
issues with the cold.
Since that first night we
lost another kit at about 4 days old, we think because it was
accidentally suffocated. It was away from the group and under the
hay, and we think the doe inadvertantly rested on it while tending to
the rest of the young.
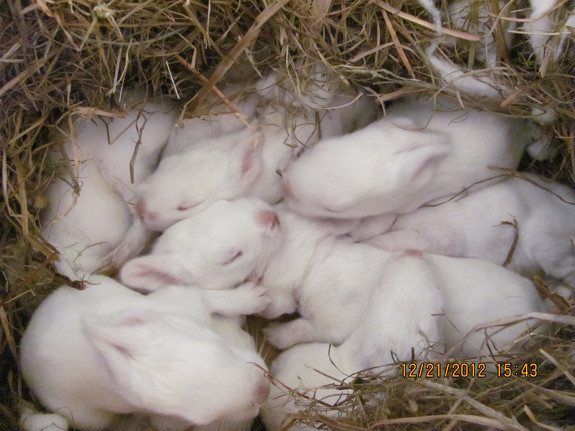
Turns out our speculation in
the last post about the "bird's nest" depression in the hay was
correct. She had the litter exactly where we thought she
might. The kits were also a bit larger than we had expected at
about 4-5 inches long at birth. I think we both expected them to
be about half that size. They have also grown phenomenally
fast! At less than a week, they had beginnings of fur. At
about 10 days, their eyes began opening. At two weeks, they had a
full coat of fur. At less than one month old, they are several
times the size they were at delivery and are weaning themselves by
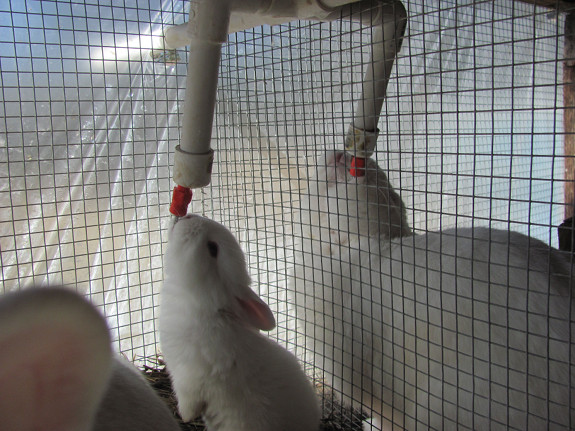
eating hay and rabbit food. They have also started learning how
to drink from the chicken waterer nipple, which is quite a feat when one
considers that they can barely reach it! Next time around, I
think the nursery hutch will have a lower nipple for the young.
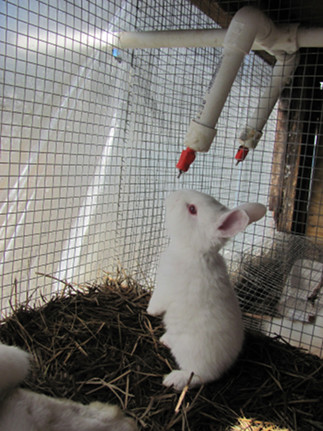 Dawn also discovered it's quite
difficult to count the number of kits in the litter since when they
hear activity in the nest box they start jumping around like
crazy. They won't stop moving enough to be counted since they
think that activity means nursing time and they start actively search
out a mother and a teat.
I'm concerned about the fact
that these things are so cute that it's going to be tough when it comes
time to butcher. I guess time will tell how well we are able to
deal with that process. For now, we're just learning about what
it takes to have a litter of rabbits to care for, especially in the
cold.
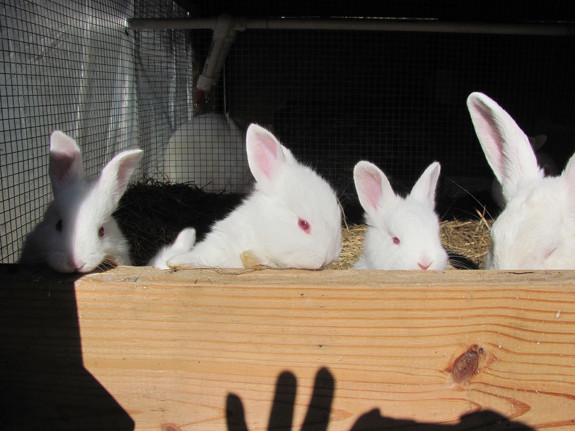
Dawn also discovered rather
disconcertingly that once they were out of the nesting box that they could easily fall out
of the hutch. After a nerve wracking chase of one little fella
around the yard, she added a "rabbit retaining wall" to the door of the
hutch to help retain the frisky kits. Mom can be seen with three
of the kits along with the retaining wall in the photo above.
Shannon and Dawn
will be sharing their experiences with raising meat rabbits on Tuesday
afternoons. They homestead on three acres in Louisiana when time off
from life and working as a sys admin permits.

Aren't you afraid of mosquitoes during the summer? --- Rena
We live next door to a swamp,
but we don't get bitten much. Bats and dragonflies patrol the skies all
summer, keeping the outdoors habitable nearly all the time.
We do have a few insect
problems. In 2011, we started being plagued by deer flies whenever we
go in the woods during the dog days.
Gnats flying into our
eyes are another summer problem. They're not bad enough to keep us
indoors, though.
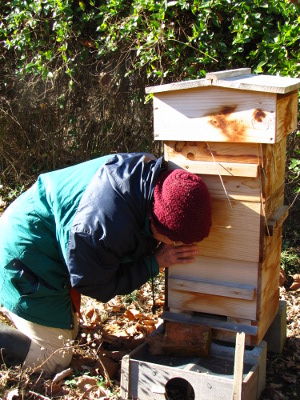 Part of Warre hive
methodology involves opening the hive as little as possible. In
past years, I've performed a winter
hive check on a warm
day to check on honey stores, but this year, I'm instead pressing
my ear up against the hive every week or two to take a
listen. Or, in this case, getting Mom to do it for me.
When you listen to each
side of each box, you can not only determine which box the main cluster
is in, but also where the bees are hanging out within the box. If
you're really good, you can also estimate colony size, but I'm not that
advanced in my bee-listening skills.
The bottom box of this
hive was always nearly empty, so the bees are hanging out in box number
two. Last month, they were toward the back of the box, but now
they've moved to the front.
I figure that's a pretty
good rate of eating through their stores, since the top box should
still be completely full of honey (I hope). In two months, we
should start seeing a few flowers, then everything bursts open at the
beginning of April. I hope our bees can hold on until then!
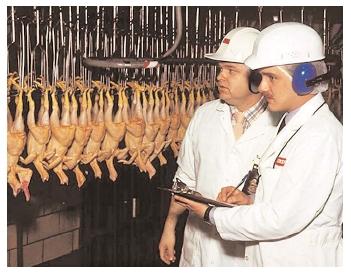 If you got annoyed by
Salatin's preachy writing style, I recommend skipping to the last two
chapters of Folks,
This Ain't Normal to
see the meat of his argument. His thesis is simple --- if our
government didn't regulate food, we'd have healthier dining choices.
Why would lack of
oversight make our food better? The answer is twofold.
First, the current requirements make it very tough for small, local
farmers to break into the marketplace at all. Someone starting a
food-related business may have to buy expensive equipment to create a
federally inspected kitchen before they can whip up brownies for sale
at the local farmer's market, or they may have to adhere to even more
stringent requirements to open up a slaughterhouse and sell cut
meat. Economies of scale mean these issues are no big deal for
industrial food-processing operations, but government requirements sink
many mom-and-pop businesses. As Salatin wrote, "What started as a
regulation to control industry has instead become the tool industry
uses to eliminate innovation in the food marketplace."
 Meanwhile, those happy
USDA-approved stickers on our food make the consumer less inclined to
seek out the truth behind how their food was raised. Salatin
explains that in many cases, USDA-approval is merely about cosmetic
issues, such as the size of your eggs or the absence of tears in skin
of a chicken leg, but the consumer instead assumes the seal of approval
means the chickens were healthy and the food is good for us. If
the government didn't approve or disapprove of food, we would be
responsible for our own choices, which would send many of us out to
hunt down the farmer to see what their operation really looks
like. Once again, lack of government oversight would help the
little farmer, who is often the one passionate about soil and food
quality and is thus growing more nutrient-dense food. "The way we
create popular food literacy is to put people in the driver's seat,"
Salatin concluded.
While I disagree with
many libertarian arguments, the food one has always made sense to
me. I would love to see food become a local, community endeavor,
where neighbors would know the confinement chicken operation wasn't
worth patronizing and where raw milk could be legally peddled at the
farmhouse door. Sure, some people would get sick from an
unmanaged food supply, but maybe fewer than get sick now from
regulations that often amount to window-dressing. What do you
think?
This is my last book
club post for a while, but you can read previous discussions of
Salatin's book in previous posts: part
1, part 2, part
3, part
4, and part
5. If you're
looking for more reading material, check out some of the books on my winter
reading list, or (if
you really get bored), you can even read my
books. Happy
reading!
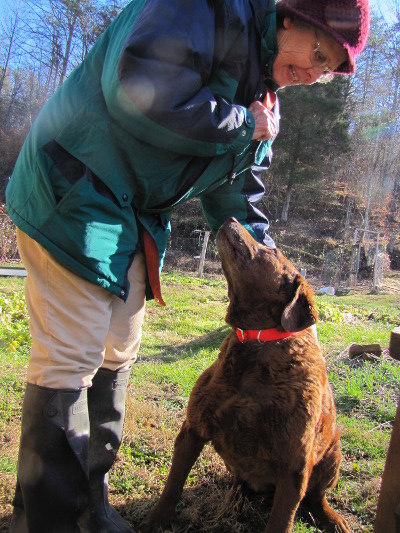
Pantone may think the color of the year is Emerald, but Lucy's fond of
her new orange collar.
Most of the hunters we know are careful to get a good look at their
"deer", but we didn't want to risk Lucy getting shot.
Despite her new styling wardrobe, Lucy's still a tomboy and is always the
first one to the top of the mountain.
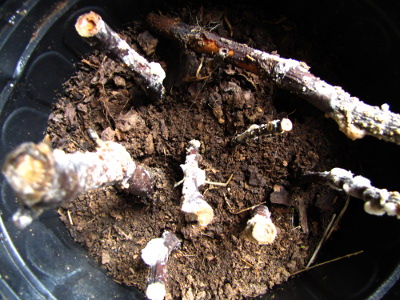 Well, I now know two methods
of rooting fig cuttings that definitely don't work for me --- in
a ziplock bag on top of a heat pad and in a pot of soil on top
of a heat pad. The fungal growth is pretty impressive, but the
cuttings are obviously dead.
Actually, I suspect the
problem started even before I began trying to root the cuttings.
I had to cut the young wood before it was 100% dormant because a hard
freeze was coming and I needed to wrap
up the tree.
Perhaps the branches were too high in sugars (thus the fungal growth)
since they weren't fully asleep yet?
All is not lost.
Three little sprouts rooted the easy way, right at the feet of the
parent plant, and I have two
in my garden and one
in Mom's garden waiting for spring. Since there really is a limit
to how much space I have for fig trees, I suspect this propagation
method will do the trick. I'd still like to learn to root
cuttings just for geekiness sake, but I'm not too heartbroken over this
round of failures.
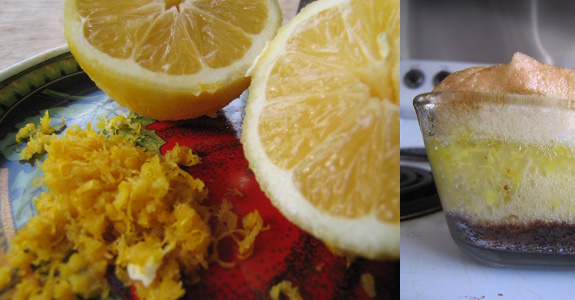
Anna made me a Meyer
lemon pie today for my birthday. The tree had perfect timing
ripening up its first fruit of the winter.
Her favorite pie is cranberry-raisin,
and cranberries are in season right around her birthday.
It got me thinking. Maybe there's a universal pie theory?
Does your favorite fruit pie match up with what's ripe around your
birthday?
 Every winter, I flip through
past planners to make sure I don't forget any seasonal tasks in the
coming year. This year, I decided to spend a little more time now
and save time later by summing up the main events in this post.
Maybe it will help you get your homestead year in order too!
January:
Winter
- Order seeds.
- Taxes.
- Writing.
- Fun projects.
- Mark the year's projects on planner.
 February:
Frog month
- February 1 - start planting.
- Prune fruit trees and berries. Topdress those that didn't get deep bedding mulch this fall. Add mulch as needed.
- Rake mulch off asparagus beds at end of month.
- Cut logs for mushrooms and order spawn if expanding varieties.
- Grafting.
- Fix holes in pasture fences in preparation for chickens to be moved out of woods as grass begins to grow.
- Start saving eggs February 23 to go in incubator March 2.
Test heated brooder and clean outdoor brooder.
- Start cutting next year's firewood.
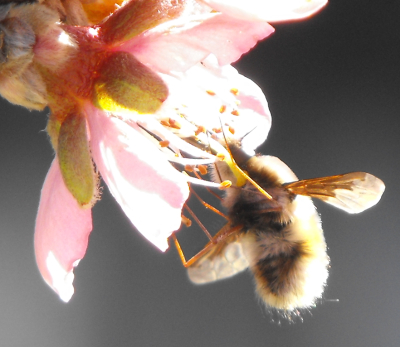 March:
Spring flowers
- Consider running laying flock under fruit trees this month to
kill bad bugs.
- Start serious garden prepping for spring --- weeding and topdressing. Continue planting from garden spreadsheet.
- Take quick hoops off fall crops.
- Check on worm bins.
- Inoculate mushroom logs.
- Chicks hatch March 23. Out on pasture in sunny spot ASAP.
- Wash incubator. Start saving eggs March 23 to go in incubator March 30.
- Consider adding another bee hive. If so, order or build
hive and find bee source.
- Take out bottom board and entrance reducers on bee hives.
Replace straw in quilt.
- Continue cutting next year's firewood.
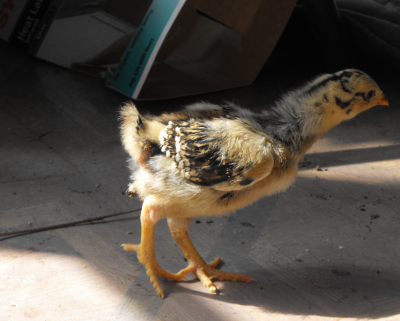 April:
Chick month
- Prepare May garden beds.
- Haul in extra manure.
- Clean up scattered debris in yard and begin mowing.
- Move first set of chicks to coop. Check pastures for holes.
- Install packages of bees if increasing apiary.
- Chicks hatch April 20. Out on pasture in shady spot ASAP.
- Wash winter bedding and extra clothes.
- Set up irrigation.
- Train miniature apples.
- Sweep chimneys.
- Golf cart battery maintenance.
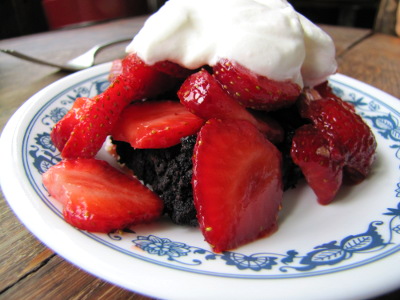 May:
Strawberry month
- Cut rye once blooming.
- Split bee hive(s).
- Major planting push.
- Mowing.
- Weed earliest spring crops.
- Plan summer and fall garden rotation. Order extra seeds.
- May 15 (or whenever last frost is obviously over) --- Uncover
figs and baby persimmons. Move citrus outside and topdress.
- Add new box to hive if necessary.
- Stake up overwintering kale (for seed) and asparagus.
- Train miniature apples.
- Continue winter laundry.
- Strawberry leather.
- Begin pruning and training tomatoes. (Weekly from now on.)
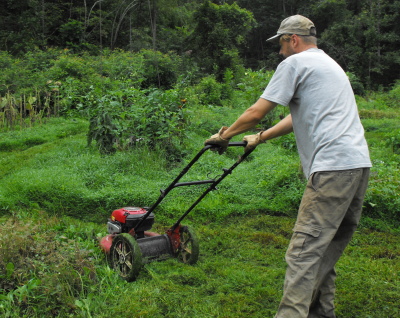 June:
Green month
- Start picking cabbage worms and Japanese beetles.
- Harvest excess honey from last year.
- Strawberry leather.
- Harvest garlic.
- Harvest Eyptian onion top bulbs.
- Start freezing excess produce (broccoli).
- Contact straw source.
- Trellis cucumbers.
- Continue pruning and training tomatoes.
- Weed rest of spring crops.
- Mowing.
- Finish washing winter bedding and clothes.
- Car inspection.
- Start harvesting blueberries.
- Continue planting.
- Fertilize, mulch, and weed small perennials (strawberries, asparagus, rhubarb, Egyptian onions).
- Top off mulch around larger perennials and weed (or kill mulch)
as necessary.
- Finish getting this winter's wood under cover.
- Process chickens third week of June.
- Train miniature apples.
- Summer prune perennials.
- Harvest kale seeds.
- Add new box to hive if necessary.
 July: Dog
days
- Continue picking cabbage worms and Japanese beetles.
- Continue freezine excess produce.
- Continue pruning and training tomatoes.
- Trellis more cucumbers.
- Start saving eggs July 13 to go in incubator July 20.
- Harvest poppy seeds, arugula seeds, and tokyo bekana seeds.
- Continue planting.
- Weed and mulch garden.
- Mowing.
- Save seeds (tomatoes, etc.)
- Continue pinching perennials (blackberries, black raspberries,
kiwi).
- Bring in garlic from drying racks.
- Harvest onions and carrots.
- Haul trash to dump.
- Finish mulching larger perennials.
- Refill worm bins with manure.
- Process chickens third week of July.
- Train miniature apples.
 August:
Tomato month
- Continue picking Japanese beetles.
- Continue freezine excess produce.
- Continue pruning and training tomatoes.
- Chicks hatch August 10.
- Harvest mung beans.
- Bring in onions from drying racks.
- Mowing.
- Weeding, planting, mulching.
- Train miniature apples.
- Replace straw in Warre hive quilt.
- Dig up large weeds (ragweed, etc.) before they go to seed,
especially in pastures.
- Start harvesting butternuts.
- Wash and put away incubator.
September:
Soup month
- Continue freezine excess produce (including lots of soup).
Dry extra tomatoes and make ketchup.
- Continue pruning and training tomatoes.
- Tie up berries.
- Hive check and varroa mite count. Feed bees if low on
winter stores.
- Harvest mung beans, sweet potatoes, and butternuts.
- Install light in chicken coop.
- Mowing.
- Weeding, planting, mulching.
- Train miniature apples.
- Process old hens as young ones start to lay.
- Put away sweet potatoes and butternuts.
- Close up screen door for winter.
- Haul in more sawdust for composting toilet.
- Put away seeds.
 October:
First frost
- Order new perennials for November and December planting.
- Continue feeding bees, if necessary.
- Mowing.
- Weeding, planting, mulching.
- Train miniature apples.
- Staycation.
- Move citrus inside.
- Harvest potatoes and cabbage.
- Start putting garden to bed.
- Rake leaves out of the woods.
- Cut tops off asparagus.
- Move chicks to coop and clean out brooder.
- Change to new side of composting toilet.
- Kill mulch new garden areas for next year.
November:
Fall
- Contact straw source.
- Rake leaves out of the woods.
- Process broilers first week.
- Dig carrots.
- Frost protect figs.
- Finish putting garden to bed.
- Put up quick hoops.
- Winterize - put away five gallon buckets, drain hoses, run
lawnmower and weedeater dry, put heated waterer in coop,
weather-stripping, plug in light in fridge root cellar.
- Install bottom board and entrance reducers in bee hives.
- Hunting season --- kill deer.
- Divide nonwoody perennials. Harvest echinacea roots.
- Mulch perennials.
- Plant new trees and shrubs.
- Plan garden rotation.
December:
Resting month
- Finish anything leftover from November.
- Soil test.
- Writing.
- Fun projects.
If you're a type-A list
maker like me, you might also like to download this
year's planting calendar. I hope it helps keep
you on track!

I got my soil
test results back,
and I'll be looking at them in much more depth than you probably want
to read about next week (and probably the week after) as a lunchtime
series. However, I thought it was interesting to see how
different test results can be from two different labs.
I doubt my soil has
changed very much over the last year, since I haven't added any major
amendments. And yet, this year's results show just about
everything much lower than last year's results showed, except for the
trace minerals, which are mostly higher.
(There are a couple of
mitigating factors to consider. I didn't take any samples from
the spots where I spread the gypsum. But I did take the
samples a little differently, testing deeper into the soil profile in
2012 because Solomon wanted a
six inch test depth for his analyses.)
| Mule 2011 | Mule 2012 | CP3 2011 | CP3 2012 | Back 2011 | Back 2012 | Front 2011 | Front 2012 | |
| pH | 7.55 | 6.9 | 6 | 5.9 | 7.3 | 7.1 | 7.4 | 7.3 |
| % OM | 17.7 | 4.87 | 8.2 | 5.48 | 15 | 7.82 | 14.6 | 8.95 |
| P (ppm) | 523 | 494 | 21 | 44.5 | 556 | 351.78 | 410 | 446.38 |
| K (ppm) | 774.5 | 404 | 351 | 306.5 | 615 | 298 | 875 | 487 |
| Ca (ppm) | 7555.5 | 2889 | 1643 | 1038 | 6801 | 1800.5 | 5772 | 2415 |
| Mg (ppm) | 989 | 441 | 213 | 175 | 926 | 299.5 | 743 | 421.5 |
| CEC | 70 | 20 | 15.6 | 9.88 | 56 | 12.9 | 47.1 | 17.63 |
| % Sat. Ca | 79 | 71 | 64.8 | 52.56 | 78.8 | 69.78 | 77.7 | 68.47 |
| % Sat. Mg | 16.95 | 18 | 13.8 | 14.77 | 17.6 | 19.35 | 16.4 | 19.92 |
| % Sat. K | 4.25 | 5 | 7.1 | 7.96 | 3.7 | 5.92 | 6.1 | 7.08 |
| Al | 6 | 215 | 14 | 402 | 6 | 220 | 7 | 247 |
| B | 1.5 | 0.67 | 0.5 | 0.29 | 1.3 | 0.56 | 1.1 | 0.62 |
| Mn | 22.2 | 41 | 4.5 | 30 | 24.4 | 43 | 19 | 47 |
| Zn | 8.05 | 43.57 | 12.5 | 6.64 | 7.5 | 17.07 | 8.5 | 38.34 |
| Cu | 1 | 3.19 | 0.9 | 2.03 | 1 | 2.8 | 1 | 3.46 |
| Fe | 2.15 | 248 | 2.2 | 153 | 2.1 | 215 | 1.7 | 236 |
| S | 126.5 | 24 | 33.8 | 19 | 109 | 20 | 100 | 19 |
Since these two labs
used different extraction techniques, it's not terribly surprising
their results varied. But you'd think there'd be one right answer
to how much sulfur (and everything else) there is in the soil. I
guess this is why Solomon recommends picking a lab and sticking to it
if you want to be able to tell the changes in your soil over time.
This
Sigma fitness monitor was
around 20 dollars and took less than 10 minutes to install.
It's a good way of keeping
track of elapsed time, average speed and more.
I was thinking the other day
it might also help to estimate power generated once I start
experimenting with pedal
power.
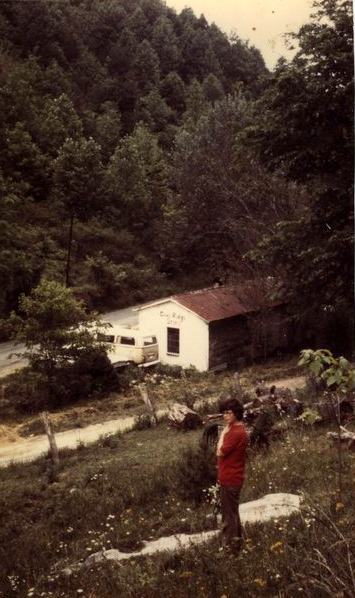 I was interested to see how
my mother's experience meshed with those of the people in Back from
the Land, so I gave
her my copy and quickly got a very negative reaction. "Maybe by
the 70s, the general climate was more disaffection, and just 'dropping
out,'" Mom emailed me, adding: "My own personal odyssey was...the aura
of 'peace farms' that I'd learned of thru Annie Upshure and the
Catholic Worker movement, safe places to try to work for peace."
"Our actual venture was
to establish a commune 'in the heart of the people' (as in 'swim like
fish in the heart of the people')," Mom explained. Although she
wasn't part of the Vista program, my mother came south with several
people who were and she and others considered themselves "to be sort of
'independent Vistas.' We tried to live close to our neighbors,
admittedly only a few of the poorest families, actually ones who were
not farmers with their own land, but who were sharecroppers."
Mom grew up in
Massachusetts, so her first five years in southwest Virginia were all
about "putting down roots.... Because I was politically aware, I
could see my life as part of a bigger picture. And I was helped
by [my neighbors] in believing that learning how to live in the Mendota
area was viable." She added her "own twist" by working with
others on a Helping Hand Community Center, then by opening up an old
country store that served some community center functions.
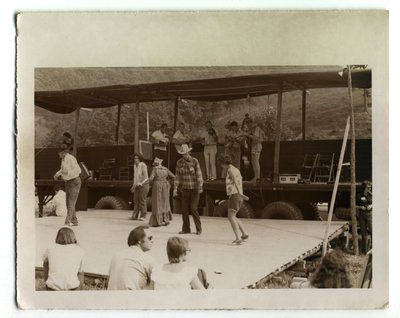 "[Our neighbors] were a real
reason we were able to hang on for the ten years we did," Mom
added. "Because we were not in a commune, we were thrown on our
own resources." One of these days, I'll edit a fascinating video
interview in which Mom tells us much more about those devices, but
that's one of those back burner projects that has yet to see the light
of day.
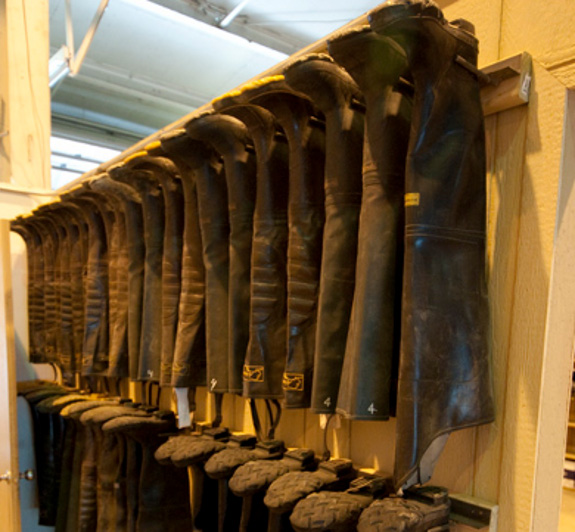
I think we need to build
something like this to store our hip wader
boots in the future to prevent creasing which leads to leaking.
Image credit goes to the
Airforce Elmendorf Outdoor Recreation center where they rent hip waders
for 7 dollars per day.
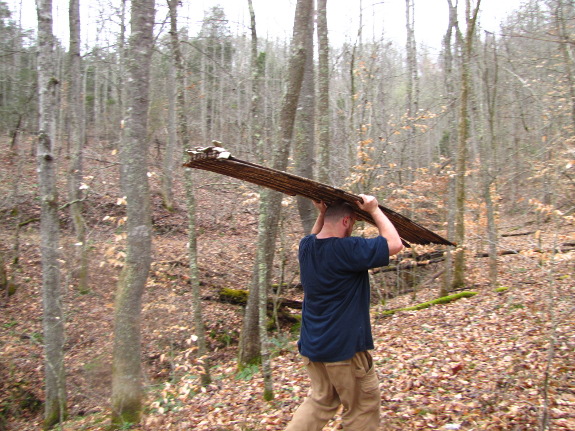
The yurt came the rest of the way
down on Sunday. (I figured if I used the passive voice, our
memory of the event would involve less lugging of waterlogged wood
through the trees.)
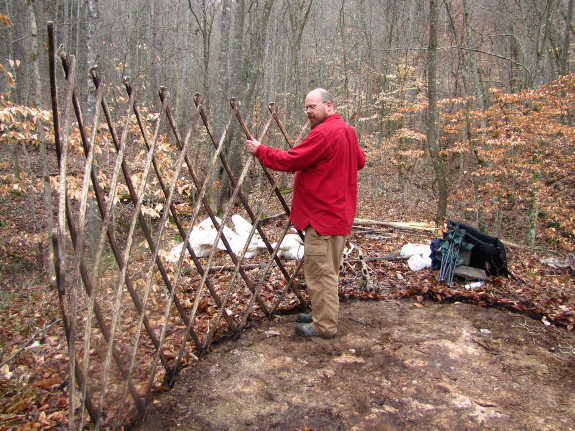
All that was left behind
was a bare circle on the forest floor. Too bad I'm unlikely to
walk by there with anyone who hasn't heard of the yurt --- it would
make a fun, crop circle, April Fool's joke.
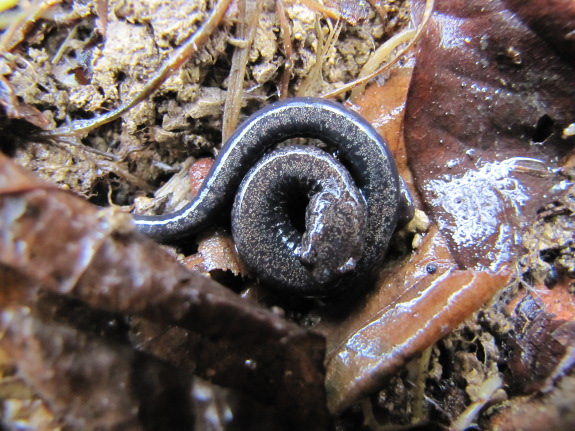
I'm wracking my brain
for something useful to do with that bare patch of earth, but I think
it will just be an experiment in how fast the forest reclaims
ground. I feel like the spot is too shady and too deer-prone to
plant anything edible, but if you've got a bright idea, now's the time
to throw it out there!
 The
Intelligent Gardener,
by Steve
Solomon, is a
fascinating and well-written, if potentially
controversial, explanation of how to grow more nutrient-dense
vegetables
by balancing your soil. If you've heard of William Albrecht
and/or Michael Astera, but didn't feel comfortable wading through old
classics, Solomon's book is the quick and easy way to access the same
data.
Steve Solomon stumbled
across the work of Albrecht after coming to
similar conclusions on his own. He and his family lived for nine
years in Oregon, where they grew most of their own food on worn-out
soil that was deficient in several major nutrients. As a result,
Solomon and his wife began to get sick, with lowered energy levels,
loose teeth, and soft fingernails. A six-month vacation in Fiji
created drastic changes in their vitality, due (Solomon believes) to
the local produce grown in soil fertilized by silt from volcanic
rocks. This experience led him to the work of Weston Price, who
argued that we really need four (or more) times the recommended daily
allowance of calcium, magnesium, phosphorus, iron, and vitamins A, D,
and E for best health. To get those high levels of vitamins and
minerals, Albrecht adds, you must garden in well-balanced soil full of
minerals.
The conclusions Solomon
comes to from studying these older scientists
is in stark contrast to conventional organic gardening wisdom, most of
which derived from texts published by Rodale Press, so many of us might
find parts of Solomon's argument to be heresy. The Rodale way is
to focus on organic matter and pH only, adding compost and lime as
necessary until soil is in good shape. Solomon argues that this
focus on lime (often dolomitic, meaning lots of magnesium comes along
with the calcium) makes sense for  chemical farmers, since their
fertilizers acidify soil and leach calcium, but organic growers need a
more nuanced understanding of soil chemistry. Meanwhile, Solomon
posits that too much organic matter actually unbalances your
soil. (More on his solution to both of these issues in later
posts.)
While The
Intelligent Gardener
is easy to read and presents the data very well, I still have questions
about the kookiness level of the information itself. For example,
all of the reasoning behind remineralizing soil is based on correlative
(not causative) studies, meaning that no one took the time to do a
side-by-side comparison of nutrient density of vegetables grown in
balanced and unbalanced soil. Solomon admits this fact freely,
when he writes: "Despite Albrecht's brilliance, it is quite possible he
succumbed to the same malady many garden writers suffer from ---
succeeding in his backyard and expanding it to include the whole
continent." But the information is worth considering with a
critical eye, so I'll be regaling you with the highlights of the book
as this week's lunchtime series.
This
post is part of our The Intelligent
Gardener lunchtime series.
Read all of the entries:
|
The creek flooded last night,
which made today silicone
patch testing day.
It worked at stopping water,
but a close inspection shows the silicone already starting to break
apart.
The hip waders are still better than the
alternative, especially when you add an outer layer of grocery bags to
your socks.
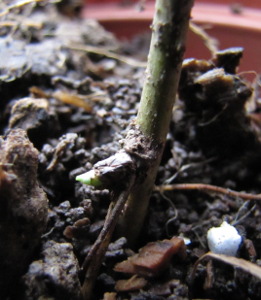 Even though my fig
cuttings kicked the bucket, things are starting to grow
inside. I went ahead and planted my tip-rooted
gooseberry, but have
been saving Mom's and Sarah's until I remember to bring their little
plants to their new homes. The seemingly-dead gooseberry cuttings
have been sitting in a sunny window, and I just noticed that this
little one is starting to leaf out! That means it will have to
wait to go into the ground until after the frost-free date, but also
that it will probably have more roots and will bear sooner than if I
had stuck it outside last fall.
Next door, another pot
of sticks is sprouting leaves. A kind reader (T) sent me some
tindora --- tropical, perennial cucumbers --- to try out, and warm
weather this past weekend tempted one to put out leaves. I'm very
curious 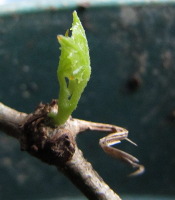 to see whether this cucurbit
will be worth babying over the winter in future years, but it sounds
promising, with recipes available for baby fruits, ripe fruits, and
leaves.
T explained that he
developed this variety by crossing an all-male, ornamental variety with
a female plant on his neighbor's fence. The result was a sterile
variety that he reports is non-astringent, with cucumber-like, small,
green fruit that become soft, sweet, red fruits when fully ripe.
"In the summer, I cut it down in huge swaths to feed to the goats and
birds," he wrote, adding that this variety of tindora "could become a
really good forage for homesteaders and their livestock." We're
excited to try it!
 Yesterday, I mentioned that Steve
Solomon's health improved when he spent six months in Fiji eating
nutrient-dense vegetables. The obvious question
is --- why isn't all soil as good as the stuff in Fiji?
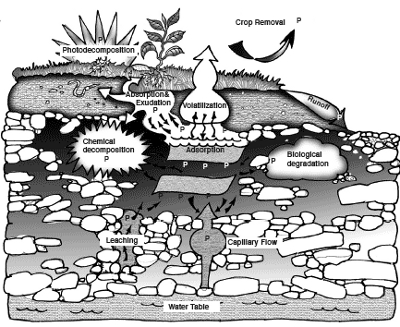
When it comes to soil
minerals, you need to understand both rocks and rain. The bedrock
that slowly dissolved to make up the soil in your garden will determine
which minerals were there to begin with --- some rocks are more
well-rounded than others. But even if your rocks are perfect,
lots of rain can still wash those nutrients out of the earth through a
process known as leaching.
As with rocks, not every
area is equal in terms of leaching potential. Hot, dry areas like
the American southwest have little or no leaching because all of the
water that hits the ground is sucked up by plants and transpired back
into the air through their leaves, or simply evaporates from the
earth's surface. At the other extreme, New England soils are
strongly affected by leaching because cold weather keeps water in the
ground once it hits, so water tends to gush through the topsoil and
into the groundwater, carrying minerals away with it. In general,
most of the soils in the eastern United States have been depleted by
leaching unless careful stewardship has kept organic matter levels high
at all times. (Humus holds onto the same minerals that rain tries
to wash away, keeping them cycling even if soils are flushed with
water.)
 Another factor to consider is
age of your soil. Young soils have lots of minerals, but as soil
ages, the rocks dissolve and stop adding extra nutrients to the
soil. In addition, the cation
exchange capacity of
soils tend to degrade over geologic time. Here's where the
southeast is even worse off than New England --- we haven't had
glaciers down here recently to top off our rock reserves, so many soils
are old and low on minerals.
Assuming you aren't as
lucky as folks in Fiji, you'll need to remineralize your soil to get it
back in balance. This is why Solomon is down on the
compost-cures-all-ills approach to gardening. As he explained:
"Fertilizing a garden by composting local vegetation and animal manures
derived from that same kind of vegetation will only magnify the
regional soil imbalance." Time to get scientific and figure out
exactly what your unique soil really needs.
This
post is part of our The Intelligent
Gardener lunchtime series.
Read all of the entries:
|
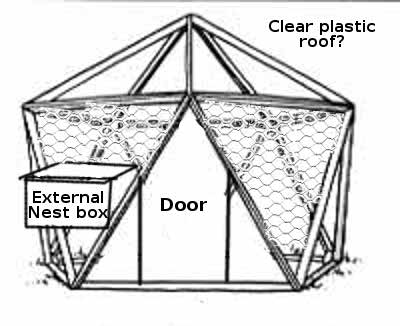
The plans for the new chicken
coop upgrade now include an external nest box.
We might add some removable
panels that can be installed each Winter to block the cold wind.
I'm still undecided on what
type of roofing material to use.
 It's been raining and raining
and raining, so I've huddled inside writing up (and through) a
storm. My root
cellar ebook still
needs a bit more data and photos, but a quick overview of using cover
crops in no-till gardens really wanted to see the light of day
immediately.
Homegrown
Humus: Cover Crops in a No-till Garden probably won't give you much
new information if you've been reading my experiments here on the blog, but it
might be worth 99 cents to have all of the data summed up in one
place. I'm hoping the ebook will inspire folks to see how easy it
is to boost their organic matter levels in a no-till garden.
Here's the blurb:
Cover crops are a simple, cheap way to boost your soil's organic matter, to fight weeds, to prevent erosion, to attract pollinators, and to keep the ecosystem in balance. Unfortunately, most information on growing cover crops is written for people who plow their soil every year and are willing to spray herbicides. You can get all of the same benefits in a no-till garden, though, if you're clever.
Homegrown Humus details three no-till winners in depth --- buckwheat, oilseed radishes, and oats. Profiles of other species suggest gardening conditions when you might want to try out sunflowers, annual ryegrass, barley, rye, Austrian winter peas, crimson clover, or cowpeas as well.
Meanwhile, the book delves into finding cover crop seeds, planting cover crops in a no-till garden, and easily killing cover crops without tilling or herbicide use. Understanding the C:N ratio of cover crops helps determine how long to wait between killing cover crops and planting vegetables, as well as how to maximize the amount of humus you're adding to your soil.
Cover crops are an advanced gardening technique bound to increase your vegetable yields, but are simple enough for beginners. Give your garden a treat --- grow some buckwheat!
Next week, I'll post
excerpts as a lunchtime series. To read the rest,
you'll need to splurge
99 cents on the ebook (which can
be read on
nearly any device),
or wait until next Friday when I'm setting the price to
free so that my loyal readers can pick up a copy without paying.
Those of you who prefer a pdf copy can email me next Friday as well and
I'll
send your free copy that way instead. Thanks for reading (and
double thanks if you find the time to leave a review on Amazon)!
It's your glowing reviews of Trailersteading that inspired me to
whip out this ebook so quickly.
 Before I go further into
Solomon's remineralization strategies, you have to know more about
those minerals I mentioned vaguely in my
leaching post.
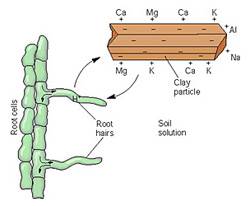
Although there are a slew of minerals plants use in large and small
quantities, Albrecht (and those who have built on his work) are
primarily interested in the calcium (Ca), magnesium (Mg), potassium
(K), and sodium (Na). Albrecht believed that prairie soils
provide optimal crop nutrition, so he suggested we mimic the ratio
found there: 68:12:4:2. Other practitioners have suggested
slightly different values, such as 62:18:4:2 for sandy soil, or
85:5:2-4:1-2 if you're following the work of Victor Tiedjens and think
calcium is of most interest.
If you remember high
school chemistry, you may recall that these four minerals are all
cations, meaning they're positively charged and are attracted to
negatively-charged clay and humus particles. The amount of
negatively charged spots in the soil isn't unlimited, though, so
there's only so much space to go around (measured as the cation
exchange capacity),
and all cations don't cling equally tenaciously to the spots that are
available. Calcium is strongest, followed by magnesium,
potassium, and sodium, in that order, so if you dump masses of lime
(calcium) in the soil, calcium will fill all of the spots, bumping off
the weaker cations. Meanwhile, if you only add a moderate amount
of calcium, only the lowest cations on the totem pole will be bumped
off, so you'll end up with a higher ratio of calcium and a lower ratio
of sodium in the soil.
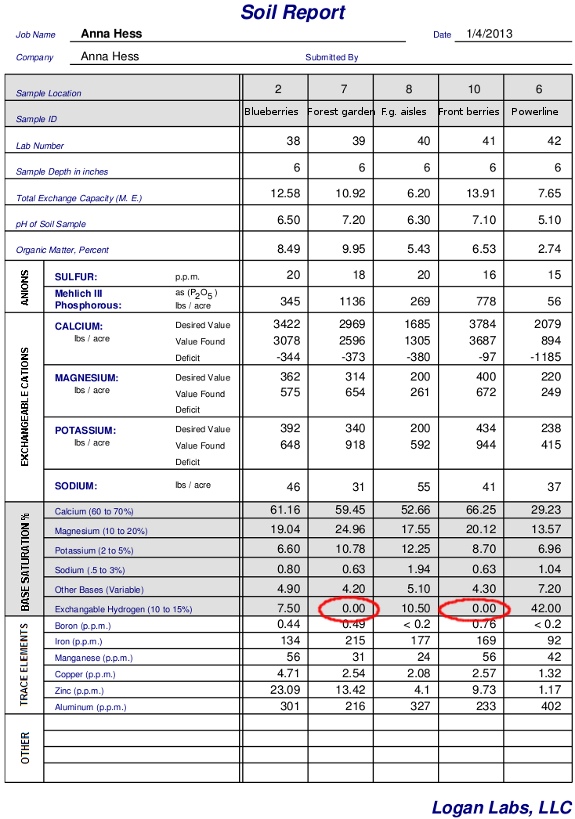
Even though we don't
talk about it much, the lowest cation on the totem pole is actually
hydrogen, which is pulled out of water to fill empty spots if there
aren't enough other cations to go around. If hydrogen has to fill
any negatively charged spots in your soil, that means you're soil is
acidic. Take a look at my soil test results above and notice that
the two samples without exchangeable hydrogen (circled in red) are also
the samples where the pH is greater than 7, meaning
the soil is alkaline instead of acidic.
This is also why adding
lime to your soil raises its pH. The extra calcium in lime knocks
hydrogen ions back into solution where they merge with the carbonate
ions from the lime to create water and carbon dioxide. Without
those extra hydrogen ions hanging around, the soil is no longer acidic.
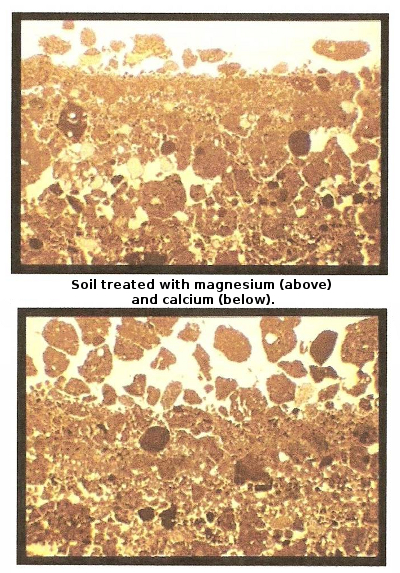 The reason I've spent so long
on this chemistry is because it explains how you can change the ratio
of cations in your soil. Adding a stronger cation creates a
cascade of other cations being kicked off the negatively charged spots
in soil, and as long as you add lots of water to leach the unattached
cations from the water, those cations disappear into the subsoil and
leave the topsoil different than you found it. This can be handy
if you garden on clay (like I do) and if your soil contains too much
magnesium (like mine does), which tightens soil up and makes it
waterlogged. Those of you gardening near the coast who irrigate
with water high in salts will also find this handy since excess sodium
can be even more harmful to soil than excess magnesium since high
sodium levels tighten soil even more and can also be toxic to plants.
Solomon's pet peeve has
more to do with nutrient-density than with soil texture, though.
He's found that leached soils are usually excessively high in
potassium, especially if you add hay, straw, or wood products to your
garden as compost or mulch. High potassium levels make plants
grow fast, but the produce is low in protein, is high in carbohydrates,
and is usually deficient in calcium and phosphorus. Livestock who
eat plants grown on high-potassium soil gain weight but don't breed
well, and people who eat from that type of soil tend to gain weight and
have health problems as well. Stay tuned for more details on how
to rebalance your soil for optimal nutrition.
This
post is part of our The Intelligent
Gardener lunchtime series.
Read all of the entries:
|
My Muck Chore boots are just over a year old.
They're holding up nicely
with zero damage and a high comfort rating.
I wouldn't be surprised if
they last over 5 years at this rate!
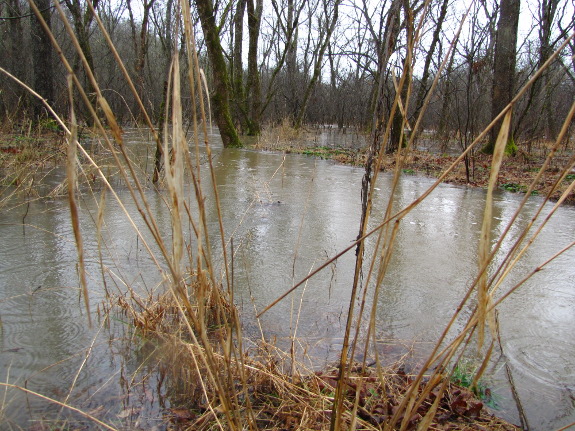
I've stopped reporting
on all the little floods --- it barely impacts our lives nowadays when
the creek hits the top of its banks. But when the water starts
flowing out of the creek and into the floodplain, the power of water is
too inspiring to ignore.
Our movie-star neighbor
wants to help us build a swinging bridge and Shannon got us started on
a zip-line, but the honest truth is that I doubt either of those
projects will ever come to fruition. The reason? I really
like being flooded in.
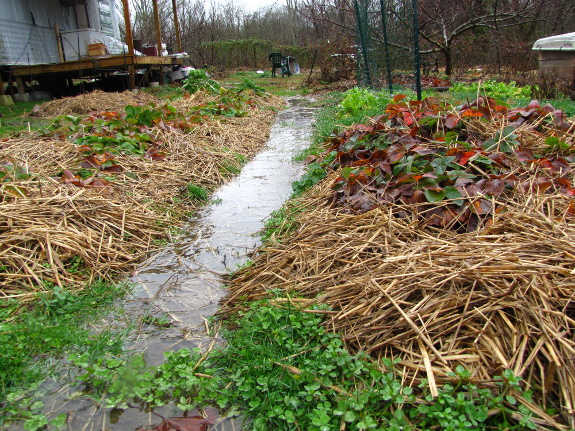
As a side note, the
analytical side of me started wondering if there was a pattern to our
floods. I'm sure I'm missing a few that didn't make the blog, but
here are the big ones I've recorded:
- March 6, 2004
- December
10, 2008 (small)
- December
17, 2008
- January 7, 2009
- September
26, 2009
- December 10, 2009
- August
20, 2010 (small)
- March
1, 2011
- March 7, 2011
- January
12, 2012 (small)
- March 4, 2012
- December
28, 2012 (small)
- January 16, 2013
Isn't it interesting how
the dates seem to cluster together? The second week of January is
flood time, and so is the first week of March.
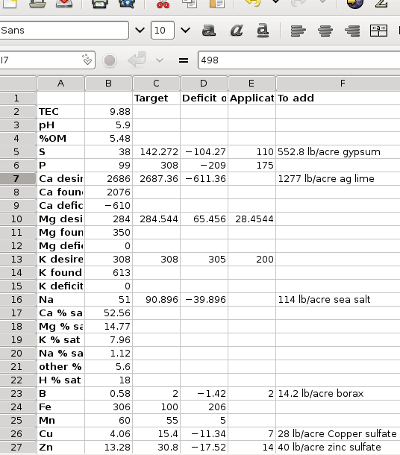 Before I dive any deeper into
soil science, I thought I'd walk you through filling out Solomon's soil
analysis worksheets (which you can download
for free here).
You'll notice there are actually six pages of worksheets in that file,
which consist of two pages each for acidic soils (pH less than 7),
"excess cations" soil (pH 7 to 7.6), and calcareous soil (pH greater
than 7.6). I actually find it much easier to make a
spreadsheet page for each soil sample since the program can do the math
for me, but I'll fill out a worksheet below to help you get an idea of
the process.
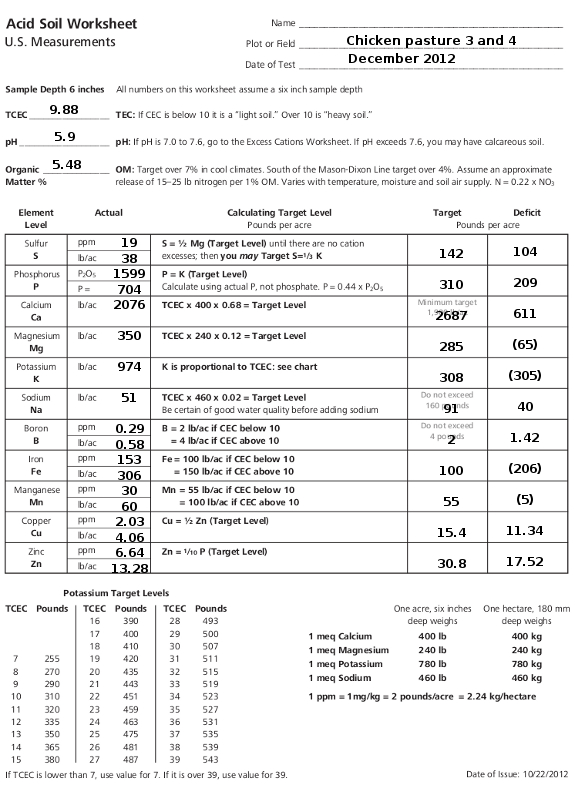
Since I sprang for a
test from Logan Labs, as
Solomon recommended,
it's pretty simple to fill out the column of actual amounts. The
only tricky parts are:
- You need to convert from ppm (parts per million) to lb/acre (pounds per acre) for certain readings. Solomon explains that you simply multiply ppm by 2 to get lb/acre, which I'm a little dubious about. His reasoning is that we sampled our soil to a six inch depth, and soil scientists estimate that amount of earth weighs about two million pounds per acre. When I start cancelling units in the conversion, though, I feel like there should be something factored in to take the atomic weight of each mineral into account, but I stuck to Solomon's math. (Roland, help?)
- Logan labs reports phosphorus pentoxide instead of elemental phosphorus, so you need to multiply their result by 0.44 to get lb/acre for phosphorus.
The target column is a
little more complex, but is mostly basic multiplication. The one
portion that might cause a hiccup is potassium (K) --- you get that
amount from the chart at the bottom-left of the worksheet based on the
TCEC of your sample. Similarly, boron, iron, and manganese
targets are based on TCEC, as is explained in the "calculating target
level" column.
 Finally, you subtract the
actual amount of each element (in lb/acre) from the target amount to
figure out how much excess or deficient you are. Since Solomon
labelled the last column "deficit", I put excesses in parentheses.
The sample I used is a
pasture that has been grazed with chickens for a couple of years with
no other amendments, so I figure it's probably similar to the soil you
might find in a new garden spot. You'll notice the soil is acidic
and a bit low on organic matter, without as much capacity for cations
as you'd like, and it has too much of a few nutrients but too little of
some others. Tomorrow, I'll move on to the back side of this
worksheet to show you how to deal with those excesses and deficits.
This
post is part of our The Intelligent
Gardener lunchtime series.
Read all of the entries:
|
The Swamp Bridge started to float away today, but
got stopped by the now partially submerged golf cart.
This is shaping up to be our biggest
flood since moving here!
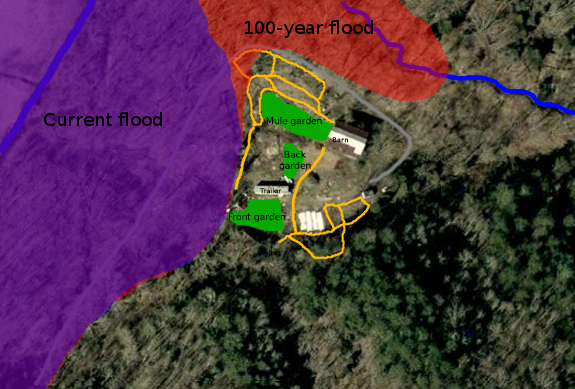
I'm pretty sure our
current flood is the
biggest one since we've moved to the farm, but you shouldn't be alarmed
--- we won't be getting our feet wet any time soon. We live up on
an abruptly-raised plateau that allows us to survey the floodwaters,
but we'd need an astounding amount of rain for the water to get up this
high. In fact, we aren't even at 100-year flood levels yet.
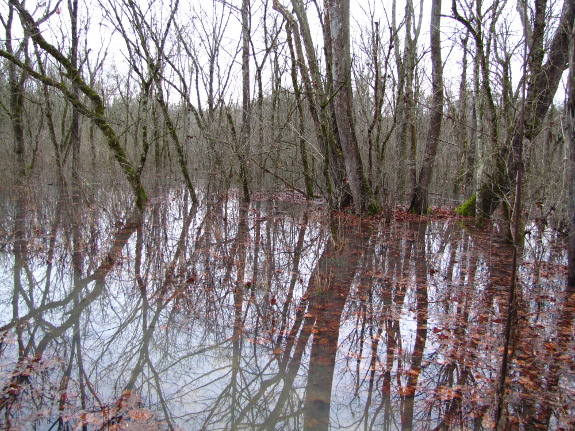
Old-timers in the area
tell me they remember when a flood extended all the way to the old
house, which used to sit on the south side of our front garden. I
can't really imagine that much water, and suspect those old-timers
might have the house confused with another one back in this holler, but
it's possible.
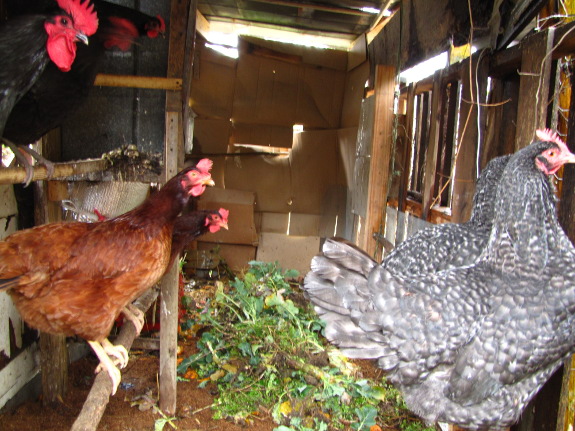
Besides the alligator swamp
bridge floating out
of place (already happened), the most-likely flood event we'd have to
deal with is evacuating the chickens from their current coop to the one
we usually use for broilers. During a break in the rain, our
flock was out foraging at the edge of the floodwaters, but they soon
settled back on their roosts to wait out the storm.
Even chicken-evacuation
is unlikely. Instead, we're hoping the floodwaters recede before
we run out of stockpiled fruit and library books, and before our chicken waterer customers get antsy.
Other than those three things, we're pretty much self-sufficient up on
our island.
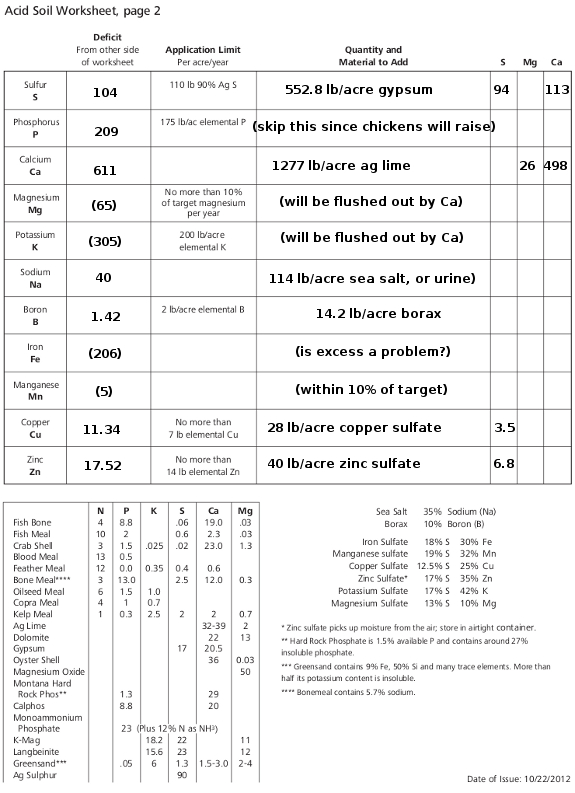
The second page of Solomon's soil worksheet shows how to create a unique
prescription of additives to get your soil back in balance. Once
again, I prefer a spreadsheet to do my math for me, but I'll work
through the prescription for yesterday's soil sample to help you
understand the process.
The first step just
consists of copying the numbers from the last column of the
other side of the worksheet to the first column of this
worksheet. Anything within 10% of the target amount can be left
alone, but we'll need to come up with a plan to decrease larger
excesses and fill up larger deficits. To do so, choose amendments
from chapter six of The
Intelligent Gardener
and add amounts until the final application rate of each element comes
out the way you want it to.
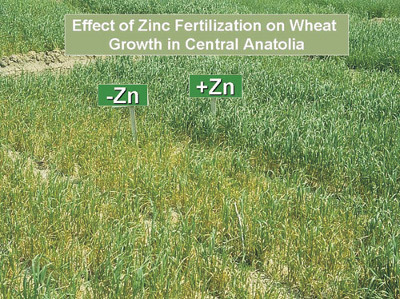
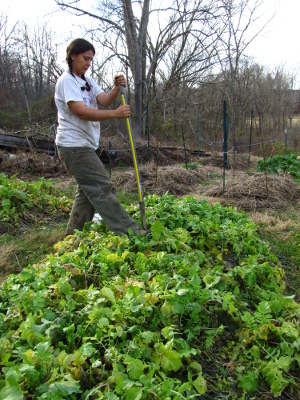 It's
usually best to start at the bottom of the chart since Solomon
recommends using sulfate fertilizers to address any deficiencies in
iron, manganese, copper, and zinc. The sulfur that these
fertilizers bring along for the ride will decrease the amount of sulfur
you'll need to add at the top of the chart in the form of ag sulfur or
gypsum. Solomon has included a handy reference chart at the
bottom of the worksheet showing the percent of each element in various
fertilizers, and the last three columns help you keep track of how much
sulfur, magnesium, and calcium come along for the ride in fertilizers
intended for other purposes.
So, for zinc, you'll
notice I'm 17.52 lb/acre short, but Solomon limits applications each
year to 14 lb/acre. To get that 14 lb/acre, I divide 14 by .35
(the percent of elemental zinc in zinc sulfate, shown in the table at
the bottom of the worksheet), and come up with an application rate of
40 pounds per acre of zinc sulfate. I multiply that by .17 to
come up with the pounds per acre of sulfur that will come along for the
ride, and insert the result (6.8) in the sulfur column as a reminder to
myself that I've already met part of the sulfur demand.
If I were going to apply
phoshorus to this pasture, I'd hit this row next since most sources of
phosphorus also bring along some sulfur. However, I estimate our
ten chickens
will add 47 pounds per acre of phosphorus to these pastures each year,
and I don't mind a slow-but-steady accumulation of phosphorus, so I'm
not going to add any extra. (All of my vegetable garden areas
actually have an excess of phosphorus, suggesting that topdressing with
a layer of horse manure would be another good way to increase the
phosphorus levels in the chicken pasture while also increasing the low
organic matter, so I may consider that if we have extra manure in the
spring.)
 Now I head to the top of the
chart and decide on the type of sulfur amendment. This pasture is
acidic and low on calcium, so I don't want to add ag sulfur (which
would lower the pH further and leach calcium). Instead, I settle
on gypsum. I've already got 10.3 lb/acre sulfur coming with my
zinc and copper fertilizers, so I only need to add another 94 lb/acre
elemental sulfur. Gypsum is 17% sulfur, so I divide 94 by .17 and
get 553 lb/acre as my application amount.
Gypsum also contains
20.5% calcium, so I multiply 553 by .205 and get 113 lbs/acre elemental
calcium, which I add to the far right column as a note to myself.
Subtract that from the 611 pounds of calcium in which my soil is
deficient, and I need 498 more pounds per acre elemental calcium, or
1,277 lb/acre ag lime (assuming a calcium content of 39%).
(Dolomite would be a bad choice for my calcium source since I have too
much magnesium in my soil already, but if I had a cheap source of
oyster shells, they could work to fill this deficit just as well as ag
lime.)
The combination of
gypsum and calcium will flush out excess magnesium and potassium from
the soil, but I'll want to test again at during the same month (and
with the same lab) next year to make sure the soil is getting more in
balance. If I lived in a dry area, I'd also want to water the
soil heavily after applying gypsum to ensure the excess cations moved
out, but lack of water isn't a problem on our farm.
Meanwhile, Solomon's
prescription calls for 114 lb/acre sea salt to deal with my sodium
deficiency, but I'm figuring I can just add urine to increase the
sodium levels. (I'm not so sure it makes sense to try to increase
these levels right now anyway since sodium is lower on the totem pole
than potassium and magnesium and will presumably be washed away at the
same time those cations are.) Finally, 14.2 lb/acre of borax
rounds out the soil prescription.
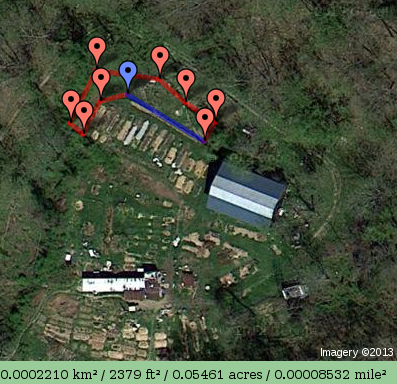 The
final bit of math is to figure
out how large the garden area is and to calculate an actual
amount of each fertilizer to add to the pasture. These two little
pastures add up to a twentieth of an acre, so I'd multiply all of my
amounts by 0.05.
Solomon recommends
mixing anions (sulfur, phosphorus, and nitrogen) into compost before
applying since humus hangs onto these negatively charged particles and
releases them slowly into the soil. Boron is an anion, but it's
very easy to accidentally apply too much of this nutrient, so the best
option here is to mix the proper amount into water and spray it evenly
on the ground. The cations (including copper and zinc)
can be mixed together and spread across the soil surface (or dug in if
you till).
Next week, I'm going to
continue this lunchtime series with analysis of other parts of our
farm, but I do want to add a caveat here. Solomon recommends
adding some fertilizers which aren't organically approved and/or which
might cause short-term harm to your soil microorganisms. Gypsum
and lime seem to be relatively innocuous (as long as you check
application rates carefully), but I need to do some more research
before deciding how I feel about borax, copper sulfate, and zinc
sulfate. On a small scale, choosing dynamic accumulators that
concentrate the same nutrients and using them as part of your compost
pile could be a more harmless solution, and some people use rock dusts
to boost micronutrients (although Solomon thinks they don't provide
enough minerals to make the dusts worth your while). I'm curious
to hear from anyone who has done more research than I have about these
amendments.
Thanks for hanging in
there through all this math. Hopefully the analyses week after next will
have fewer numbers and will help broaden these ideas out so you can see
the big picture. (Next week we're taking a break to talk about cover crops.)
This
post is part of our The Intelligent
Gardener lunchtime series.
Read all of the entries:
|
Anna and Mark have lost power. The last message from Anna during the snowstorm:
8 inches here now! I can hear limbs falling in the woods, but no major crashes like that one year the power was out so long.
Word is the entire county's power is out, and with the flood it could be a while until they're back on this blog. Unless perhaps they get the generator working, or finally set up that Plug and play solar backup.
In the meantime, stay warm! -- Joey
We got the generator working today, but we're low on
fuel.
The current plan is to run it
for about 90 minutes after dinner each night.
No problems with the phone
line, which is why we can keep up the blogging.
Plenty of firewood and food
along with books and cats should keep us warm and happy. The water
seems to be going down and maybe we can get out tomorrow or Sunday for
more fuel and fruit.
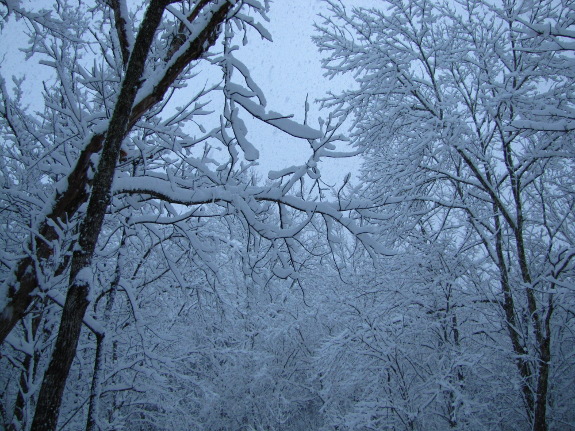
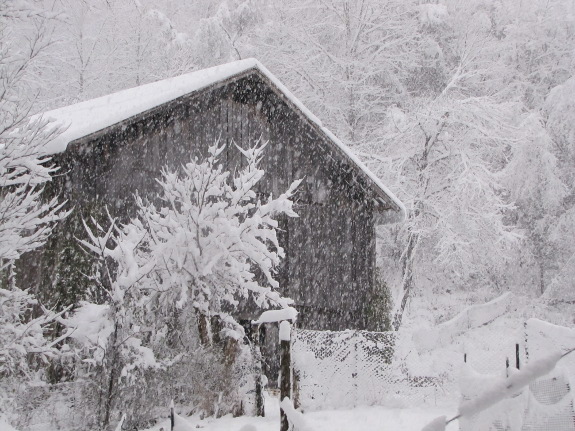
As the eighth inch of
snow hit the ground on Thursday evening, the electric line snapped and
fell into the yard. Out went our power.
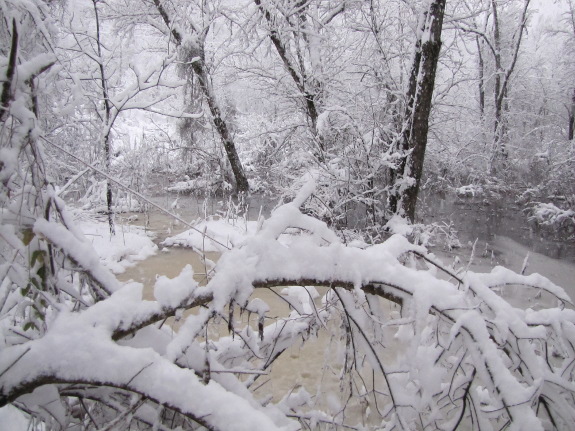
 Our
first step, in the dwindling evening light, was to assess our power
stores. Laptops were shut down, then Mark assembled all of our
rechargeable batteries and lights. Unlike our last major power
outage, we now both have high quality solar flashlights, and Mark
had
several fully-charged drill batteries that go with a fluorescent
light. We even have candles from friends. But we still
hadn't gotten our solar panels hooked up, and we don't have
candlesticks.
For that first night,
light was all we needed. Wood stoves ensured we stayed warm, and
the fridge and freezer would stand one night unopened. More on
phase two of our power outage adventure in another post.
The creek went down enough
today for a trip into our nearby town.
Only one tree blocking the
driveway...a walk in the park compared to the last time it
snowed this much.
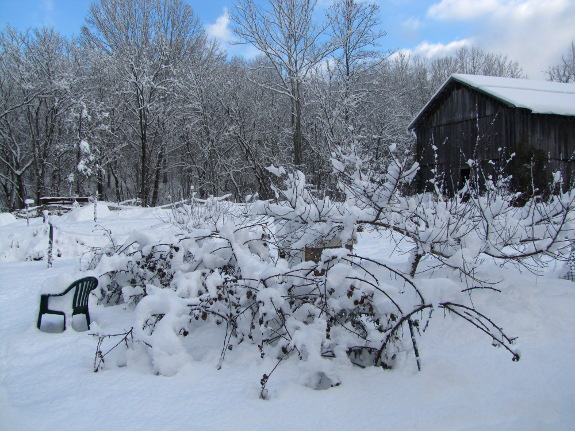
Appalachian Electric
Power's website reported Friday that they had 128,000 customers out of
power, 81,508 of whom were in Virginia. Estimated restoration
time for Scott County is supposed to be Monday night, but we know we're
on the tail end of the list and figure we'll be lucky if we're plugged
back into the grid by Wednesday.
While sobering, knowing
the power will be out for an extended period is much less scary now
than it was three years ago. Then, heat consisted of blasting the
exterior wood furnace and hoping a bit of warm air would trickle in
through the ductwork without a fan. 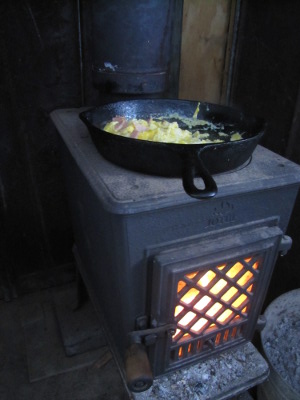 Cooking
was a complicated, outdoors affair, involving shoveling coals out
of
the wood stove (which had an insulative sleeve around it, so we
couldn't cook on top), then refreshing the coals several times to get
things cooked through. We didn't really have enough blankets to
keep warm at night, and it was awfully dark with just a couple of
little flashlights to read by.
Fast forward ahead, and
while we're not as well prepared as we would like, everything is at
least 75% easier. We have two little wood stoves that keep our
living area toasty, it's easy to cook on the burner, and our light
situation is an order of magnitude better. In fact, I feel very
lucky because I suspect most of our neighbors are experiencing a lot
more deprivation than we are.
What's the same is that
we're running the generator
an hour or so per evening to top off the
fridge and freezer, to refill our drinking water reservoir, and to get
online. The cats are terrified of the roar, and I'm not terribly
keen either (which is why I'm actually writing this in the quiet
earlier in the day, to be uploaded to the internet when the generator
keeps thought to a minimum). Mostly, though, we miss having
low-power treats during the course of the day, like internet-on-demand
and laptop-charging. Clearly, that's where we need to focus our
post-outage efforts, before the experience recedes from our memories
and we forget how useful it is to be prepared.
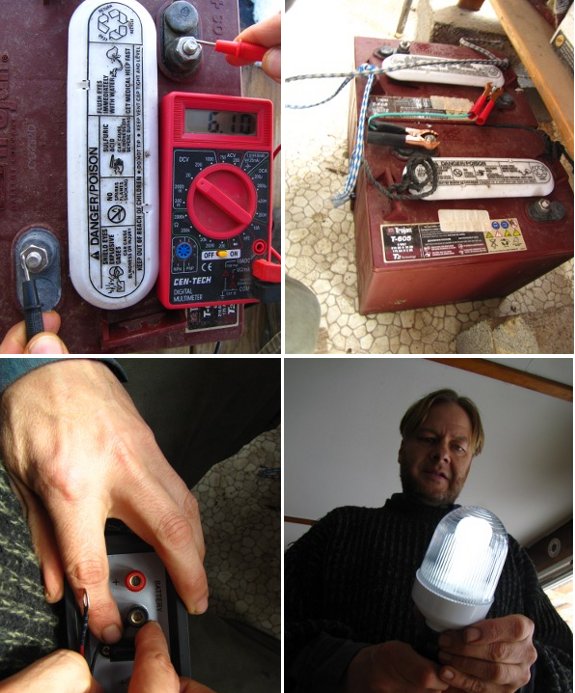 The
Plug
and Play Solar kit came with a pair of 12 volt DC light bulbs. We
haven't mounted the solar panels yet, but the 2 golf cart batteries we
bought this past summer still had enough charge to power a few nights
of reading after dinner.
Hooking up the batteries to a
trickle charger during generator time seems to be topping them off
enough to keep the lights on.
We actually saw an Electric
Company guy today, so maybe we'll be plugged back in before night fall?
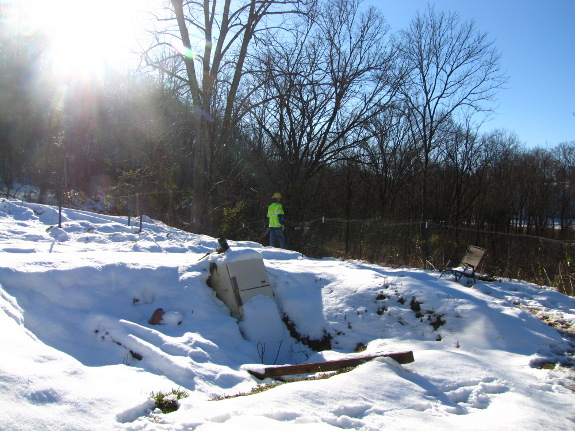
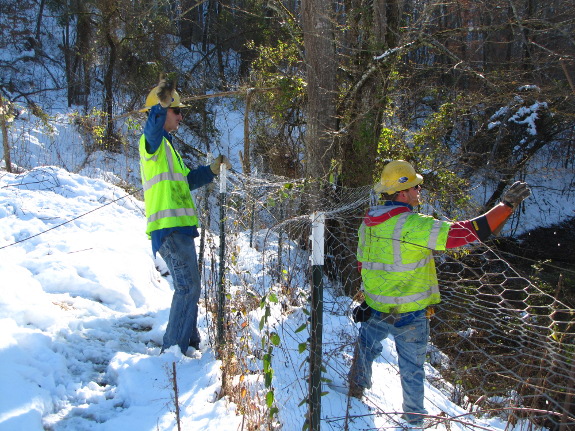
My favorite color (this
week at least) is fluorescent yellow. That's the color of
line-workers coming to hook us back up Sunday.
I honestly wasn't expecting
anyone to drop by until at least today, and Mark and I both remembered
last time when we kept seeing people (and even a helicopter)...then went several more
days without power. But these young men skipped across the (now
very scary) log the barn roofers used last
spring, snapped splices onto the powerline, then quickly cranked the
lines back into place. We ate Sunday dinner cooked on the
electric stove with real lights!
I've got lots more power
outage excitement to relate (like the cheesecake I made on the wood
stove), but I'll save that for the days to come. Later, we'll
assess how we did and what we want to change before the next unexpected
outage, but for now we're a little giddy over on-demand internet.
 Cover crops are plants
purposely sown in the garden to improve the
soil's fertility, to fight weeds, to prevent erosion, and to keep the
ecosystem in balance. These crops are sometimes known as "green
manure," especially if the plants are tilled into the soil. Here,
I'll be considering cover crops that can be managed without tilling in.
During the last three
years that I've experimented with growing cover
crops, my
garden soil has turned darker and yields of many vegetables have
increased dramatically. Both my own honeybees and wild pollinator
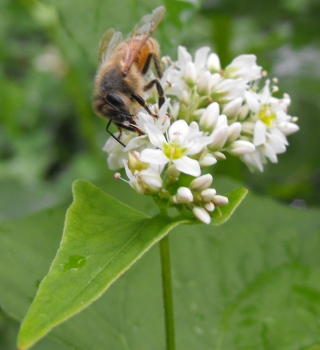
populations have been boosted by the copious nectar produced by
buckwheat
plantings, and my chickens have enjoyed the winter greenery from
oilseed radish leaves. Plus, having cover crops on the ground
during the winter prevents erosion, keeps the soil microorganisms
humming along, and just makes the garden a more interesting place to
be. Nowadays, I can't imagine doing without my beds of buckwheat,
radishes, and oats.
 Planting cover crops is a
quick and easy afterthought in my current
garden, but it wasn't always that way. I experienced a steep
learning curve when I first began growing cover crops in my
chemical-free, no-till garden. Most information on growing cover
crops is written for people who plow
their soil every year and are willing to spray herbicides, and I had
some spectacular failures while
selecting the cover crop species that would do well without these
disturbances.
This week's lunchtime
series and the
ebook which it is excerpted from provide tips for growing
cover crops in a no-till garden. The further you
live from my zone-6, southwest Virginia garden, or the more your
gardening techniques differ from my own, the more of a commitment
you'll need to make to figuring out the best way to slide cover crops
into your fallow periods. Luckily, experimentation is half the
fun,
and my
experiences should at least help you set off in the right
direction, inspiring you to give cover crops a try.
| This post is part of our Homegrown Humus lunchtime series.
Read all of the entries: |
The refrigerator
root cellar dropped as
low as 28 degrees during the recent power failure.
It doesn't seem like the carrots
or cabbage were hurt, but the potatoes might need to be inspected more
carefully.
To play it safe we brought
everything inside due to an upcoming "Arctic Blast" heading our way
tonight. We might need to upgrade the light bulb with a small space
heater in the near future.
There's an art to
managing the kitchen during a power
outage. My
control-freak tendencies thrive there, and Mark wisely stays out of the
way.
Even with the generator to top off coolth, I know
the contents of our
fridge have a limited lifespan. So we focus our meals around
eating the lamb roast I made just before the outage, making squash
pancakes from the butternut pulp that was going to be a pie, and frying
up lots of bacon on top of the wood stove.
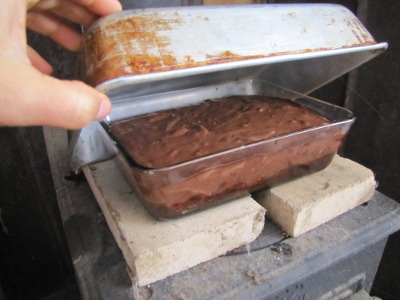 Meanwhile,
my chocolate cravings (and the yogurt, cream cheese, and butter hanging
onto edibility by a thread in the fridge) tempt me to make a chocolate
cheesecake. Two
fire bricks on top of the stove, the pan of
batter, and another pan for a lid create a cheesecake-like
dish eighty
minutes later.
Heating water for dishes
is easy, but I take over that task (usually
Mark's job) because the water tank is only half full and I know my
washing method is more sparing of water. (Don't worry --- Mark is
doing far more than his fair share in other areas.) For the first
few days, we also ration fruit, unsure when we'll be able to reach town
for more.
All told, power-outage
cooking is a fun thought-problem, but everything
does take twice as long (and uses a third again as much
firewood). I read somewhere that being hooked up to the electric
grid is akin to having dozens (or was it hundreds?) of servants at our
beck and call, and while I only feel like I've lost one or two helpers,
the analogy is apt. As Mom handily pointed out on the phone, at
least I have something to do during those hours I would usually be
spending on the internet.
 Shannon
is too busy to regale you with tales of cute
bunnies this
week, so I'm filling the gap with a review of one of the many books I
read while the
power was out.
Hit
by a Farm,
by Catherine Friend, feels more genuine than other farm memoirs I've
read recently, although it's not quite so gripping as some since it's
written like a series of short stories.
Catherine and her partner decide to buy a farm and 100 ewe lambs, while
starting a one-acre vineyard, pasturing chickens, and embarking on
several other
adventures. In the process, their
relationship suffers from farm-related stress and the duo nearly splits
up.
Sheep were an integral
part of the book, and I definitely felt like I
experienced shepherding in all of its glory (and pain). I was
intrigued to learn that guard llamas actually pulled their weight on
Catherine's farm --- I've always considered llamas to be one of the
pyramid-scheme
livestock. (You know, a few breeders make big bucks selling
breeding stock to others, then eventually the market crashes and the
llamas are worthless.) Equally interesting was learning how
essential it was to have a milk goat around to feed orphaned lambs.
On the relationship
front, I think Hit
by a Farm covers
a topic that most homesteaders try to ignore (at their peril). As
Back from
the Land
details, more failed farms seem to stem from broken relationships than
from anything else, so I was heartened to read about one very
established couple who eventually figured out how to stay in love
despite the farm. I don't want to ruin the ending, so I'll let
you read for yourself how Catherine and her partner made farming work
for them.
Even though the carrots are safe inside we thought this cold spell was
a good time to upgrade the light bulb with a small space heater.
The heater comes with a built
in thermostat, but I'm leaving it plugged into the Thermo Cube for a more accurate control of
the temperature.
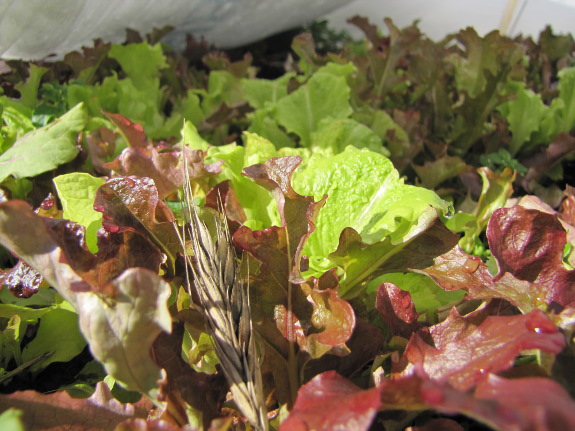
One of the biggest
culinary shocks of our power
outage had nothing
to
do with electricity. We've gotten so spoiled with our quick
hoops
of greens and lettuce that I'm used to trotting out to the garden for
at least one vegetable meal a day even in the dead of winter.
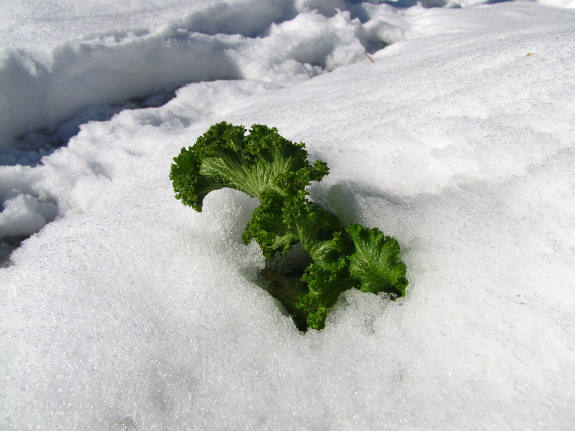
But the uncovered
beds currently look like the photo above.
And, on Friday morning, the quick hoops looked like the photo below.
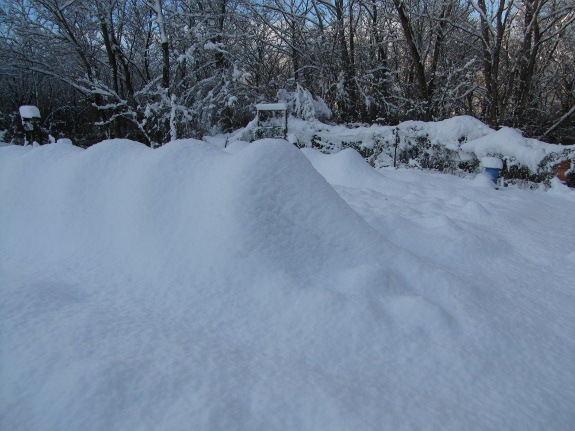
Despite being
inaccessible, the winter greens and herbs do mostly
seem to be in good shape under the snow. However, one of the
three quick hoops collapsed, pulling out a stake and even breaking a
pole:
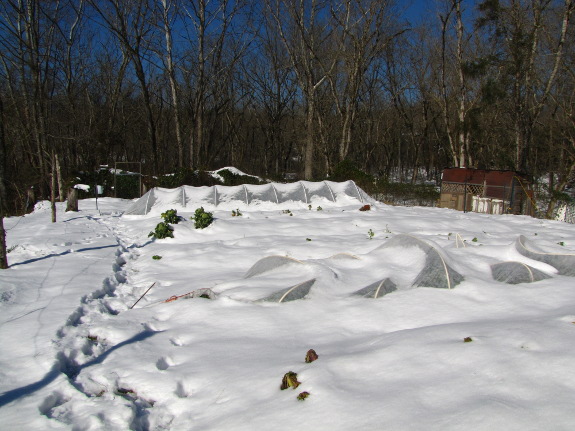
I suspect it's no
coincidence that the collapsee is the quick hoop
covering lettuce, meaning that I've been slipping under the sides of
the structure constantly for the last couple of months. (Our
uncovered kale has been doing so well that I've only broached the other
quick hoops once.) Perhaps if I'd taken the time to reseat the
fabric and to stake and tighten everything down more carefully before
the
snow, even this collapse would have been averted.
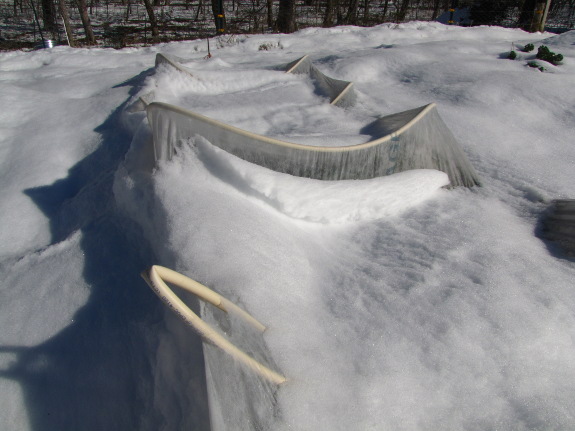
Looking more closely at
the collapsed quick hoop, I see that one pole
bent double and the fabric was breached in a few places, but the
lettuce underneath is still good (as you can see from the first photo
in this post). When I brushed snow off one end, that pole bounced
back from its bent position, so I suspect we may only have to replace
the one bent hoop and do a little fabric mending.
The experience does
remind me that folks in the far north who deal with
snow cover for extended periods of time probably won't be as thrilled
with quick hoops as I am. Sure, the garden protection devices may
stand up under the snow,
and the greens underneath may thrive, but if you can't get to your
lettuce, what's the point? I'm looking forward to this sunny spot
melting away all of its snow so we can continue to enjoy fresh lettuce
and greens every day.
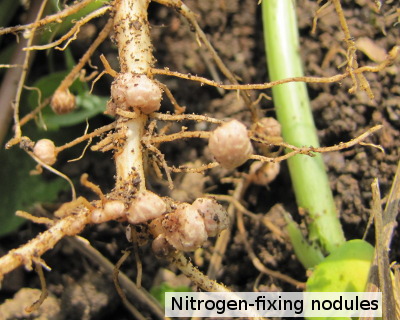 When choosing cover crops,
it's handy to look at broad categories to
find out which one (or ones) best fit your needs. The first
distinction to consider is whether your plants are annuals (meaning
they'll go to seed and die in less than a year) or perennials (meaning
they will live for many years). Perennial cover
crops have a place in pastures or tilled-garden settings, but, for our
purposes, you'll be better off sticking to annuals.
It's also helpful to
break cover crops down into two other categories—legumes
and non-legumes. Legumes are members of the bean family, and
cover crop legumes include clovers,
cowpeas, field peas, vetch, and medics. Legumes differ from most
other kinds of plants because they've teamed
up with soil bacteria to
enable them to pull nitrogen out of the air. As a result, legumes
are able to grow in soil that hasn't been recently dosed with manure,
compost, or other nitrogen fertilizers, and (when managed correctly)
legume cover crops can reduce your need to apply compost to the soil.
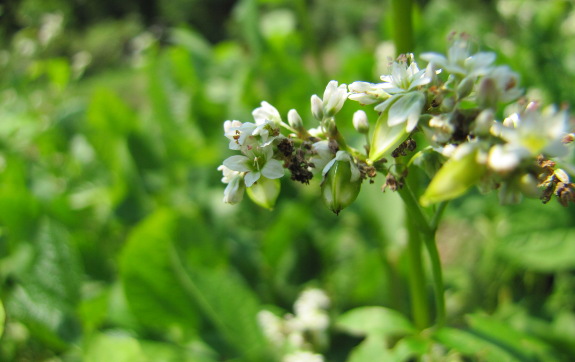
 Non-legumes include all other
types of cover crops, notably
grains and crucifers (the latter of which are members of the same
family as cabbage and mustard). While legumes can make their own
nitrogen and act as quick fertilizers for the soil, non-legumes make
more organic matter and enrich the soil longer-term.
I explain
more about how to maximize the amount of organic matter you get from
your cover crops in Homegrown
Humus, but for now,
it's worth
considering why you want to grow cover crops. Are you trying to
replace the compost or manure used to fertilize your garden
annually?
If so, go for legumes. On the other hand, if you're like me and
are trying to improve the quality of your garden soil, you'll want to
stick to grains and crucifers.
| This post is part of our Homegrown Humus lunchtime series.
Read all of the entries: |
The chainsaw
protective carrying bag
really earns its ticket price on days like Saturday when we needed to
lug the saw all the way to our parking area.
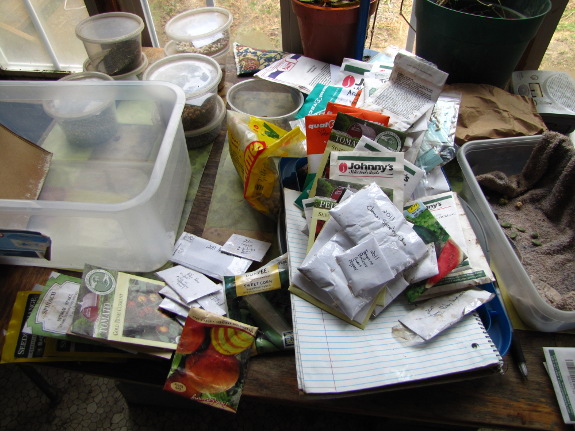
Storebought, homegrown, and gifted seeds all
intermingle in my seed box. Before ordering for the next year, I
always sort through, removing packets that are too old or are filled
with varieties I tried and didn't like. Next, I pull out saved
seeds from two years ago and put them in a to-go-soon pile --- these
are insurance just in case the ones I saved in 2012 don't turn out
quite right.
Meanwhile, I set up a germination
test for seeds that
might no longer be viable. I often buy seed packets that hold
more than one year's supply if I know I like the variety, but it's
worth testing these older seeds to ensure they'll still sprout the next
spring.
With all those ducks in
a row, my seed bill is always under $100 (and often considerably less)
for a vegetable garden large enough to feed us year-round. I do
spend a lot more on straw and cover crop seeds, but we still consider
the delicious food a bargain.
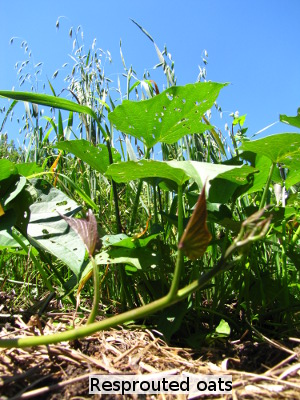 After deciding
between growing nitrogen
and growing organic matter, the other main factor to
consider when
choosing cover crops for a
no-till garden is—how will you ensure your cover crop doesn't keep
growing as a weed and outcompete your vegetables? While you can
dig
up cover crops or till them in if you're desperate, it's better to
choose crops that are easy to kill without disturbing the ground.
In the summer, mowing is
the best way to kill cover crops in a no-till
garden.
Only a few cover crops are easily mow-killed, and even
with those that mow-kill well, you'll want to plan your garden
season so you can allow the crops to reach full bloom (but not set
seed) before cutting them down. Depending on the size of your
garden, you may use a lawnmower or a scythe to do the mowing, or might
simply yank
up handfuls then lay the roots on top of the leaves on a sunny
day. The
latter method is actually my favorite with buckwheat in the summer
garden
since I can often pull up a bed of buckwheat by hand in the same amount
of time it would
take to put the blade on my scythe or to get the gas mower started.
My other favorite method
of killing cover crops in a no-till garden is
to let winter do the work for me. Here's where those of you
gardening
much further north or south than my zone-6 garden will have to do some
experimenting (although Managing
Cover Crops Profitably
does provide zone-related tips on where certain crops will
winter-kill). When I 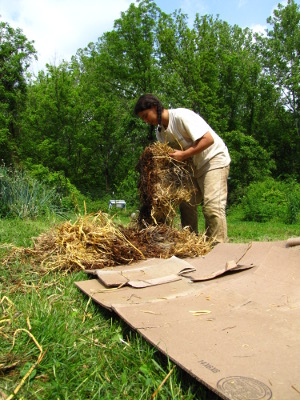 plant
oilseed radishes and oats in the
fall, cold weather naturally wipes out nearly all the plants during the
winter,
producing a mulch that rots into the soil by early spring (for oilseed
radishes) or by early summer (for oats). Homegrown
Humus
provides planting dates for those of you who want to experiment with
winter-killing.
Although mow-killing and
winter-killing are my favorite ways to kill
cover crops, it's worth having a couple of other techniques up your
sleeve in case your experiments don't go as planned. A kill mulch
is an easy way to kill just about any plants as long as you have a
month or two to wait before planting the next crop. Simply mow
your cover crops as close to the ground as you can, lay down corrugated
cardboard (being sure to overlap the edges by at least four inches so
plants can't sneak up between layers), then top it all off with straw
(or another vegetable-garden-appropriate mulch). Lack of sunlight
will kill all but the most ornery plants in short order, at which point
you can either cut holes in the cardboard to plant directly into the
soil, or can move the cardboard to kill mulch a new garden area.
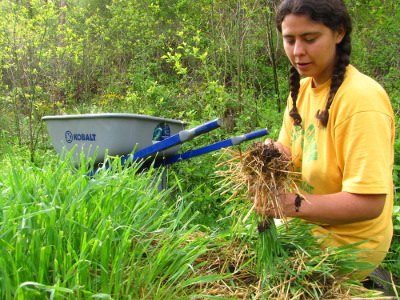 If
you don't have time to kill mulch and you really need to get rid of
those cover crops, you'll be forced to pull them up by the roots.
I actually use this method often with buckwheat, which is very simple
to tear out of the soil, but weeding out most other cover crops will be
a lesson in patience. Good planning ensures you won't need to
pull up cover crops by hand very often.
| This post is part of our Homegrown Humus lunchtime series.
Read all of the entries: |
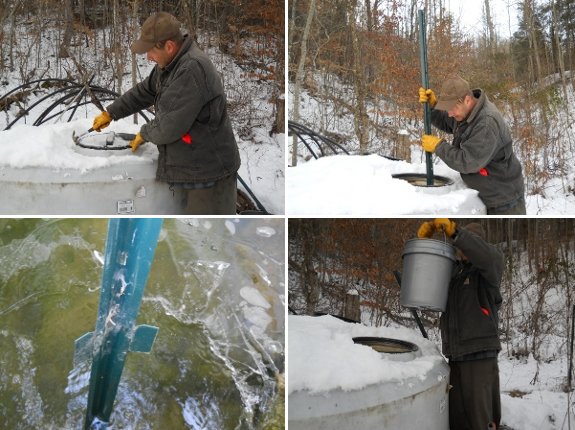
Our tank is only half full,
which made today's water exercise more difficult.
One of these days I might try
to figure out a mechanism that will detect when the tank gets low, turn
the pump on and then off when it fills up.
Like I always say, this
method is still easier than carrying water from the creek.
I write about our
north-facing hillside a lot, but I only realized a few weeks ago that
the term isn't self-explanatory to all our readers. Basically, a
north-facing hillside...um...faces north. That means if you're
standing on the hill and looking down, you're looking to the north, so
in the northern hemisphere, you'll end up with a lot more shade in this
type of landscape compared to on a south-facing hillside. In the winter,
especially, it's much colder the closer you are to the steep slope of a
north-facing hill since the higher land blocks morning and evening sun
for areas at the hill's feet (due to sun
angles).
To illustrate my point,
I walked up on the powerline
pasture terrace and
took some shots of our homestead from above. The first photo in
this post is what we call the front garden, which is closest to the
hillside. A week after the big
snow, this area is
still deeply covered because there's barely been any direct sun hitting
the ground.
The second photo shows
the mule garden and the southern chicken pastures. This is at the
southern extreme of our core homestead, meaning it's as far away from
the hillside as possible. I took both of these photos at the same
time so you can tell that being further away from the hillside is a
major boon in terms of winter sun. (You can also tell that the quick
hoop on the right
has mostly bounced back with a little TLC.)
North- and south-facing
hillsides both have their advantages and disadvantages (and southern
hemisphere readers should, obviously, flip the terms around for their
homesteads). I nestle summer chicken pastures up against our
hillside, but put the winter chicken pastures down in the sunniest
spot, along with our winter garden. Cool-loving plants like
currants and gooseberries enjoy the cool microclimate of the
north-facing hillside, and I keep meaning to try some peaches up there
to see if the cold will retard bloom enough to miss late frosts.
If I had a south-facing hillside, it would be great for solar panels
and fungus-prone plants.
In general, it's easier
to take sun away (with shade trees) than to add sun, so unless you live
in a very hot region, south-facing hillsides are preferred for most
homesteaders. But if you're picking an ugly duckling property,
north-facing hillsides aren't so bad.
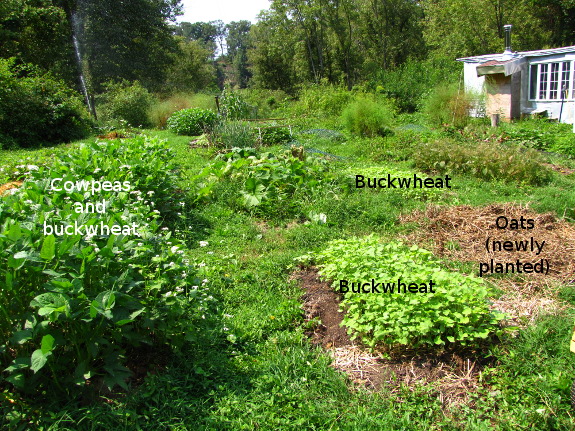
Even if you allot
absolutely no extra growing area to cover crops,
chances are you can slide them into gaps and grow an appreciable amount
of organic matter. I didn't expand my garden after
learning about cover crops, but I soon found I could fit buckwheat
into
summer gaps and oats and oilseed radishes into winter gaps without
taking away space from my vegetables. In fact, as organic matter
levels increased in my garden beds, I realized I was getting higher
yields from the plots in vegetable production, and was able to cut back
my planting area and grow more cover crops. The cycle of
soil improvement continues.
In your own garden, I
recommend starting small until you learn the
intricacies of each cover-crop species you're using. Once you
settle on a few species that work for you, you'll become adept at
keeping
an eye out for garden areas going to waste. Did your cucumbers
succumb to blight a month before you'd planned to pull them out and
seed fall carrots? A perfect opportunity for a round of
buckwheat! Is a bed of green beans eaten up by potato
beetles? Go ahead and pull it out and plant some oilseed radishes
for winter biomass accumulation.
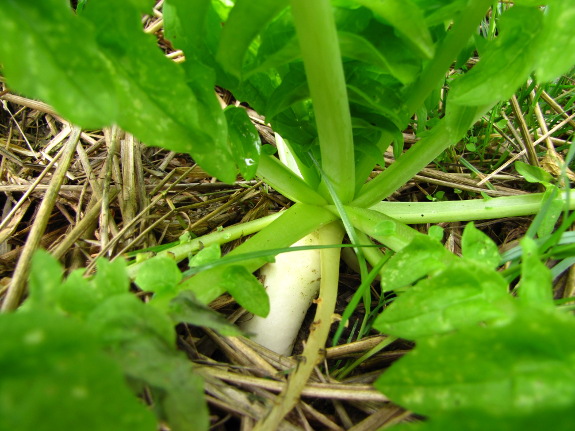
As you add cover crops
to your planting cycle, you'll probably begin to see improvements in
your garden ecosystem that
far exceed the effects of organic matter accumulation. I've
noticed that spring seedlings seem to be healthier in beds that have
grown oats or oilseed radishes over the winter than in beds that have
simply been mulched with straw. Perhaps the reason is that the
living soil web—microorganisms that feed on the sugars put off by plant
roots and, in return, provide micronutrients to the plants—is heartier
in
beds where something has been green and growing recently. Or
maybe the effect is the result of sulfur-related compounds emitted by
radishes that kill nematodes and other bad microorganisms in the
soil. The increase in pollinators around the farm as a result of
buckwheat flowers is easier to decipher, but who knows how many other
relationships like this are active in the garden ecosystem while being
invisible to our untrained eyes?

 As much as I've enjoyed my
cover crop journey over the last few years,
I'm sure I still have a lot to learn. Are there cover crops
chickens will enjoy even more than oilseed radishes? Can I close
the homestead fertility loop by growing my own straw and compost in
addition to using my current, simple methods of increasing organic
matter right in
the garden beds?
Homegrown
Humus sums up my
experiences to date, but I'm sure there's more to learn. Download
the ebook free on Amazon today (or email
me for a free pdf
copy), then send me updates on your own cover crop experiments.
I'm looking forward to updating this draft with many more cover crop
adventures in years to come.
| This post is part of our Homegrown Humus lunchtime series.
Read all of the entries: |
A thick layer of ice on our
new walk way was no match for the wimpy snow shovel.
This coal shovel broke it up
nicely, but turned out to be more work than chopping wood.
Maybe someone should make a
hand ice scraper that snugs up on the toe of your boot? That way you
could kick away at the ice with leg muscles instead of straining the
back.
 Just
in Case: How to be Self-sufficient When the Unexpected Happens, by Kathy Harrison, is a
good introduction to preparedness, especially for those of us who don't
particularly expect an apocalypse and just want to make sure we're
ready for more mainstream disasters. As with any book of this
type, you have to tweak the information to match your own lifestyle ---
I ignored all of the information about teaching your kids to go down
fire ladders and so forth, and I wouldn't use any of her very-grainy
recipes. On the other hand, I especially enjoyed the few tidbits
the author presented about her own childhood, during which children
bathed infrequently and were expected to rinse out their own underwear
and socks in the sink every night. And I think she was wise to
focus on learning skills, since stocking up on emergency supplies does
little good if you don't know how to use them.
I'll make another post
later about some changes we plan to make to our own lives in response
to this book (and to our
recent power outage),
but for now, I thought you might enjoy thinking through which disasters
you're likely to have to deal with. Power outages 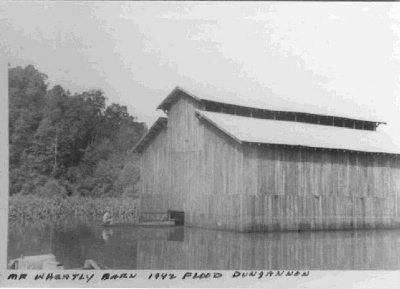 are a matter of course for us
(since we've spent about 1% of our time on the farm in the dark), and a
thousand-year flood could potentially impact our core homestead.
Tornadoes hit our area with moderate regularity (although they seldom
dip down into coves like ours) and house fires are always a
possibility. Other disasters Harrison suggests we consider
(although Mark and I are less concerned about them) include heat waves,
winter storms, wildfires, thunderstorms, landslides, hurricanes,
earthquakes, tsunamis, chemical hazards, nuclear hazards, pandemics,
and terrorism. Which kinds of emergencies do you prepare for?
(The photograph above is
from a neighbor who
reports that a flood in 1977 made it up to our barn. This barn isn't ours, though, but one that once stood across from our mailbox.)
I
went to check on the refrigerator
root cellar upgrade today
and realized the new space heater wasn't turning on.
Turns out there's a switch on
the bottom that prevents it from activating if it's not seated properly.
Maybe this will teach me to
start reading directions more carefully?
 Mark and I have a very
hit-or-miss approach to emergency preparedness. We've covered the
basics --- storing drinking water, making sure we have enough food for
a few weeks, staying warm during outages, and keeping the lights on
without electricity (all of which I write about in more depth in The
Weekend Homesteader).
But each new disaster we face reminds us
of a few ways we'd like to keep comfort levels higher, and Just in Case gave us some extra ideas as
well. So here's our new preparedness plan, which we'll be pecking
away at over the next few years.
Now or soon:
- Make sure we have cash on hand at all times. Like many modern Americans, we use plastic nearly exclusively, but Harrison makes a good point that credit cards don't work without power.
- Check to make sure our car has a spare tire. Neither Mark nor I could recall if we did this when we bought our "new" (1994-model) car a year and a half ago.
- Stock up on toiletries. If we didn't have access to stores for a month or two, we'd be fine in the food line, but we'd run low on soap and toilet paper. Since neither is perishable, it wouldn't hurt to have a couple of extra packages on a shelf in the barn.
- Put up smoke/carbon dioxide detectors. I'm ashamed to admit that we don't have a smoke detector in our trailer. When we moved in, various friends and family members gave us bags-full, but the devices were all cheap and went off whenever I cooked (not even burning anything), so we gave up on them. I suspect that if I get a better model and read up on placement, we could have the benefit of a smoke detector without constant false alarms.
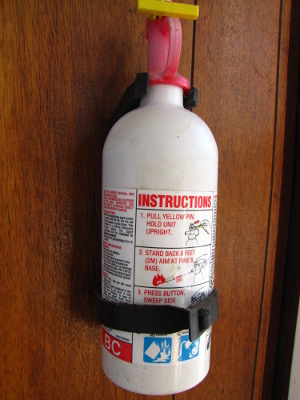 Replace our fire extinguisher
with one rated for class A, B, and C fires. We do have a
fire extinguisher easy to grab in the kitchen, but it's only good for
class B (gasoline and grease) and C (electrical) fires. Granted,
class A (paper and some plastics) fires can probably be put out with
water, but I want to add an extinguisher to the East Wing as well where
there's not water on demand.
Replace our fire extinguisher
with one rated for class A, B, and C fires. We do have a
fire extinguisher easy to grab in the kitchen, but it's only good for
class B (gasoline and grease) and C (electrical) fires. Granted,
class A (paper and some plastics) fires can probably be put out with
water, but I want to add an extinguisher to the East Wing as well where
there's not water on demand.- Buy a cat carrier.
If we had to evacuate with pets, Lucy would be easy, but my usual
cat-wrangling method (just wrap whoever needs to go to the vet in a
towel and then in my arms) wouldn't work with two cats. For our
chickens, we'd probably either turn them loose with extra food, or move
them to the barn.
- Replace my tents.
We've got all the camping gear we would need to spend a couple of weeks
in the woods, except that my twelve-year-old tents have finally bitten
the dust.
Longer term projects
tentatively include:
- Add a hood over our cook stove and redo the cabinets so they're higher up. When researching Trailersteading, I learned that a huge proportion of trailer fires are due to the cabinet above the stove catching fire since it's flammable and too close to the range surface. An ounce of prevention here is worth a pound of cure.
- Get our solar
setup to the point where it fuels ordinary, daily activities.
What's been standing in the way here is that I keep waiting for someone
else (Bradley, Mark, Huckleberry) to do the research and figure out
whether batteries need to be outdoors or indoors, what kind of inverter
to buy, etc. I think I need to buy a good book and learn more
about solar myself --- does anyone have a basic solar book suggestion?
Convert our generator to propane. Having fuel on hand for our generator is tricky since gas goes bad quickly in our humid climate. Although you can add fuel stabilizer to gas, Mark thinks converting the generator over to propane would be a better solution.
- Hook up a second solar setup so we can have one for the main trailer and one for the East Wing.
- This may just be at the dreaming stage, but we're also
considering a little underground
shelter up the hillside, beyond flood range, that could be used
during floods and tornadoes, and as guest quarters and a root
cellar. I probably should get an underground house book to
expedite my research --- any favorites there?
As usual, some of these
plans are quite ambitious, but it helps to have them all laid out from
easy to hard. After all, I know I can buy soap and toilet paper
and take some money out of the bank in small bills this week, putting
us 16% of the way to our goal immediately. What is on your
preparedness list for the near and far future?
 Some people say chickens are dumb,
but I'm not so sure.
I made a post over at Avian
Aqua Miser about Brad
Krueger's pet rooster
alerting him and his wife that the house was on fire.
Maybe chickens have a hidden
skill that can function as a backup smoke detector?
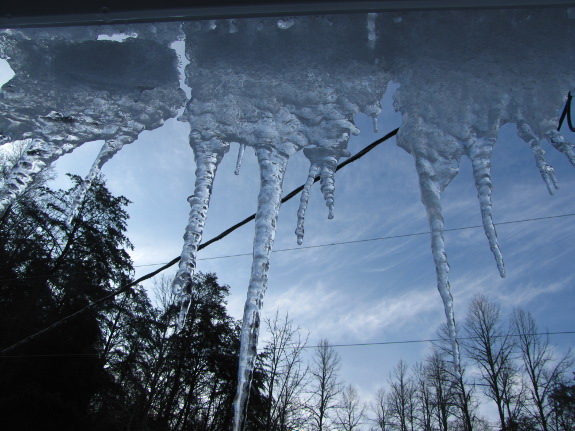
Sometime in January, I
generally recover my love of the garden. In early winter, I
relish the ability to loll in front of a fire reading and writing, but
before long, I've forgotten what it's like to fall behind on weeding in
a blisteringly hot July. I look outside at the snow and ice and
wish I could plant something now!
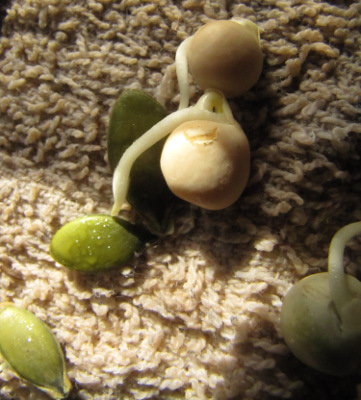 In some years, I do manage to
begin planting on the first of February --- lettuce under quick
hoops. But this year, even the mule garden is still under quite a
bit of snow, and I know the soil
temperature hasn't risen above freezing yet.
Instead, I tide myself
over by checking on my germination
test. The only
seeds that didn't want to sprout were broccoli, parsley, and peppers,
although some others showed reduced germination percentages. (I'll
just seed thicker.)
Rather than tossing the
sprouted peas, I stuck them in a pot to feed me tendrils on our salads in
February. So I guess I did plant something after all.
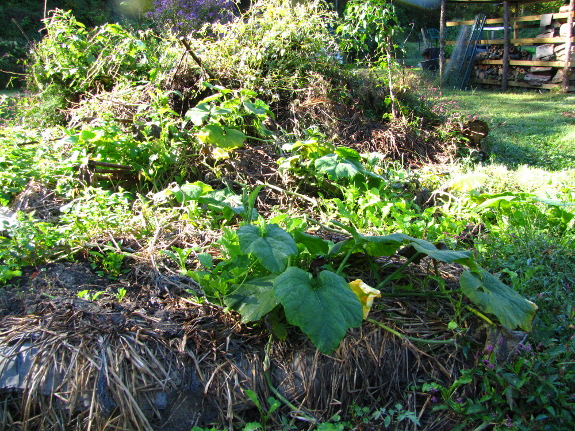 Week before last was the uncritical
summary of Steve Solomon's The
Intelligent Gardener,
but this week I want to look at his claims in more depth. For
example, Solomon wrote that potassium is
found in large amounts in woody stems of trees and in lignified stalks
of grasses, so if you practice hugelkultur or mulch with straw, your
potassium levels are going to be too high. Sure enough, my
potassium levels are higher than recommended, but is it due to the wood
and straw?
To test Solomon's
hypothesis, I compared the forest garden aisles with the forest garden 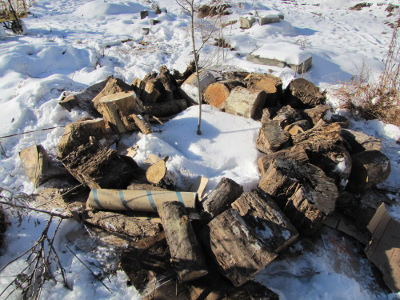 beds. The aisles
haven't been treated in any way except for constant mowing (plus chicken
tractoring from 2006
to 2010, which was also done in the areas that are now beds).
Since this spot is our most waterlogged part of the garden, the beds
were built up above the ground using horse manure, wood chips, rotting
wood, and other odds and ends of organic matter. If Solomon's
hypothesis is correct, the potassium levels in the beds should be off
the charts, with lower levels found in the aisles.
| Aisles | Beds | |
| CEC | 6.2 | 10.92 |
| pH | 6.3 | 7.2 |
| %OM | 5.43 | 9.95 |
| S | 40 | 36 |
| P | 118.36 | 499.84 |
| Ca |
1305 | 2596 |
| Mg |
261 | 654 |
| K |
592 | 918 |
| Na | 55 | 31 |
| Ca % sat | 52.66 | 59.45 |
| Mg % sat | 17.55 | 24.96 |
| K % sat | 12.25 | 10.78 |
| Na % sat | 1.94 | 0.63 |
| other % sat | 5.1 | 4.2 |
| H % sat | 10.5 | 0 |
| B | 0 | 0.98 |
| Fe | 354 | 430 |
| Mn | 48 | 62 |
| Cu | 4.16 | 5.08 |
| Zn | 8.2 | 16.84 |
| Al | 654 | 432 |
As you can see in the
table above, the absolute amount of potassium in the soil is higher in the beds, but
potassium's percent saturation is lower. If your head is
whirling, remember that the cation
exchange capacity
(CEC) determines how many positively charged ions can stay put in the
soil, and CEC is increased by adding organic matter. The higher
CEC in the forest garden beds gives room for many more cations, so even
though using lots of woody amendments increased the absolute amount of
potassium in the bed, the cations are actually more in balance in the
beds than they are in the untreated aisles.
In fact, my new
hypothesis is that organic matter acts as a buffer in the soil, evening
out all kinds of imbalances. I've read that adding lots of
organic matter to your soil acidifies it, but in my own garden, areas
with more organic matter are more alkaline and seem to have a better
ratio of the big three cations. Perhaps the Rodale-based
organic gardening method is right after all?
This
post is part of our The Intelligent
Gardener lunchtime series.
Read all of the entries:
|
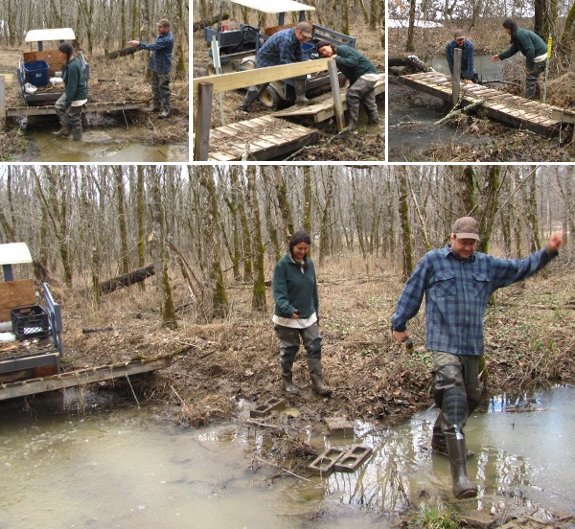
We tried getting the swamp bridge
back in place today.
It was going good until I
stepped in a spot that dunked me past the hip waders.
Brrrrr....I wimped out and
went back for dry socks. Maybe we'll try tomorrow.
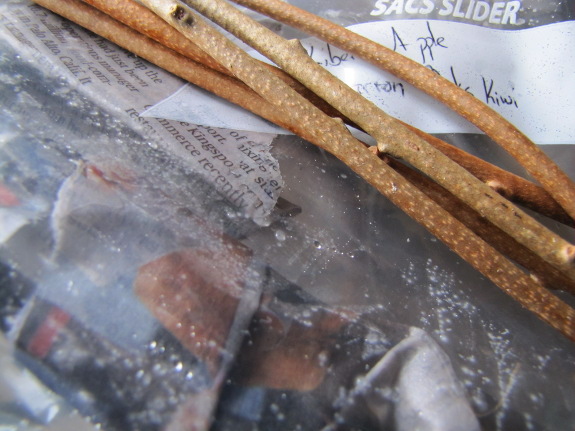
If you read between the
lines in my Homesteading
year post, you'll
figure out that late January or early February is a good time to
collect scionwood. It's handy to cut
scionwood before you start pruning so you take only wood the plant
doesn't need for the year ahead, and, of course, you need to get your
scionwood before buds begin to break.
 I'm swapping scionwood (and
cuttings) with several readers this year and am enjoying the subtly
beautiful colors and patterns. I come in from the garden with
twigs in all my pockets to add to those already in labeled ziploc
bags. So I guess I'm not staying out of the garden in this icy
weather after all (although I did wait until the rime melted off the
twigs before cutting any).
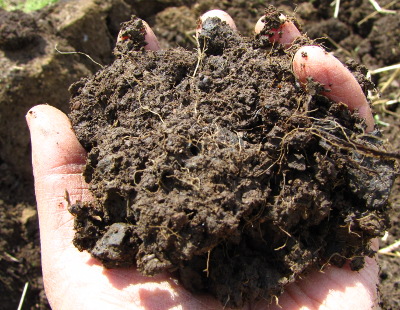 My findings that adding
lots of organic matter actually helped equalize cation levels in the
forest garden leads me into a discussion of the most controversial
part of Steve Solomon's book. He agrees with the organic status
quo to a certain point, recommending that we add organic matter until
our soil contains 4% organic matter in the south and 7% in the north,
and until our CEC is at least 7, levels that are achieved through
topdressing half an inch of compost per year. However, Solomon
argues that after you reach your organic matter goal, you should back
off to topdressing with only a quarter inch of compost per year since
adding too much organic matter unbalances your soil.
Organic matter is
closely linked to nitrogen, and that was my first concern when I
considered Solomon's low-compost policy. Each 1% organic matter
in your soil releases about 15 to 25 pounds of nitrogen per acre per
year, and high-demand vegetables need around 200 pounds per acre.
If you run your garden hard, like I do, you might end up growing two
low-demand crops and one high-demand crop each year, for a total
requirement of 400 pounds of nitrogen per acre, but a more average
yearly demand would be 200 to 300 pounds.
Time for some
math. The 8.95% organic matter already in my front garden (which
is my best soil) would release 179 pounds of nitrogen per acre
annually, but I need another 100 pounds or so. How do I make up
the nitrogen deficit if not with compost? Solomon uses purchased
additions of seed meals, feather meal, and fish meal to bring his
nitrogen levels up to par.
| Location | %OM | pH | Ca % sat | Mg % sat | K % sat |
| Powerline pasture | 2.74 | 5.1 | 29.23 | 13.57 | 6.96 |
| CP5 | 4.27 | 5.9 | 48.26 | 16.23 | 10.63 |
| Mule garden | 4.87 | 6.9 | 70.58 | 17.94 | 5.06 |
| Forest aisles | 5.43 | 6.3 | 52.66 | 17.55 | 12.25 |
| CP3 and CP4 | 5.48 | 5.9 | 52.56 | 14.77 | 7.96 |
| Front berries | 6.53 | 7.1 | 66.25 | 20.12 | 8.7 |
| Back garden | 7.82 | 7.1 | 69.78 | 19.35 | 5.92 |
| Blueberries | 8.49 | 6.5 | 61.16 | 19.04 | 6.6 |
| Front garden | 8.95 | 7.3 | 68.47 | 19.92 | 7.08 |
| Forest garden | 9.95 | 7.2 | 59.45 | 24.96 | 10.78 |
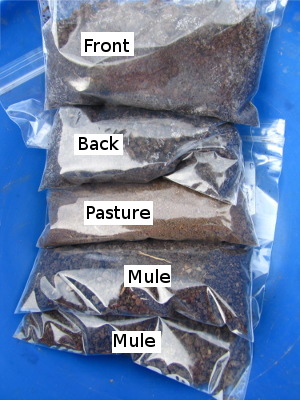 While
I'm not adamantly opposed to buying nitrogen amendments if it would
make my garden healthier, my soil tests bring that assertion into
question. In the table above, higher organic matter levels seem
to match up with sweeter soil and with a better ratio of
cations. The
exception is the mule garden, which I think must have had the organic
matter levels mismeasured this year. My
previous year's results showed the mule garden as
having the highest organic matter levels, and my eyes back up that
claim.
Granted, there is a
limit to how much nitrogen vegetables can use each year, but I estimate
you'd have to raise your soil up to 20% organic matter before nitrogen
would start washing out into the groundwater. I think I'll stick
to my Rodale approach to nitrogen and organic matter until someone
presents a stronger argument for seed meals.
This
post is part of our The Intelligent
Gardener lunchtime series.
Read all of the entries:
|
Fewer people buy chicken waterers in the winter, so we had to
let Bradley return to the real world last fall. While he was
away, he worked on a roofing crew, and in the process he accumulated
quite a bit of roofing metal that was extra and headed to the
dump. When we asked him if he could fix Mark's skylight, Bradley came prepared with
enough free red tin to replace all of the rusty
metal on the roof of the East Wing!
We still had to carry it
in using hip waders because the creek is a bit over knee-high at the
moment. While each sheet of roofing tin might not weigh much, we
were definitely worn out by the end of the day, even with the help of
B.J. --- Bradley's brother's ex-wife's cousin (who, as Gerry
astutely noticed,
took the photos of us working in the swamp yesterday). Mark and I
carried groups of three pieces of metal tied into a tin burrito from
the parking area across the creek, then Bradley and B.J. took them to
our fenceline, and finally we all carried the tin one piece at a time
up the gully to the trailer.
As a side note, Bradley
says he loves installing skylights because he always gets paid twice
--- once when he puts them in, and once when he takes them out.
I'd read lots of reports of skylights leaking back before we installed
ours, but Mark really wanted to be able to lie in bed and gaze up at
the stars. And even though the skylight did have to be removed,
I'm actually very glad we went ahead and gave it a try --- I'd much
rather have tried the skylight than to have Mark always wondering what
it might be like to have a window above his bed. In my opinion, a
failure is only a negative if you didn't learn anything in the process.
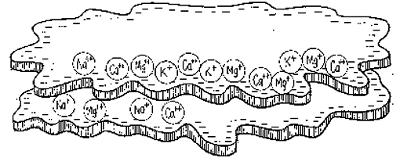 I've been writing about how
organic matter increases your cation
exchange capacity (CEC), but, while that's true, there's more to
the story. Clay also increases your CEC, and some clays have a
higher CEC than others. A very young clay has a low CEC,
middle-aged clays can have a CEC as high as 100, and very old clays
have filled up all of those negatively charged sites with hydrated
aluminum oxide and have a CEC as low as 5.
A good way to figure out
what kind of clay you have is to dig down to your subsoil and do a
separate test of that ground. (This only works if you live in an
area wet enough that the subsoil is clay.) I didn't perform a
separate subsoil test, but both the soil I pulled out of the powerline
pasture terrace and the soil in the forest
garden aisles is
pretty low in organic matter and pretty high in clay, so I thought I'd
take a look:
| Powerline pasture | Forest aisles | |
| CEC | 7.65 | 6.2 |
| pH | 5.1 | 6.3 |
| %OM | 2.74 | 5.43 |
| S | 30 | 40 |
| P | 24.64 | 118.36 |
| Ca found | 894 | 1305 |
| Mg found | 249 | 261 |
| K found | 415 | 592 |
| Na | 37 | 55 |
| Ca % sat | 29.23 | 52.66 |
| Mg % sat | 13.57 | 17.55 |
| K % sat | 6.96 | 12.25 |
| Na % sat | 1.04 | 1.94 |
| other % sat | 7.2 | 5.1 |
| H % sat | 42 | 10.5 |
| B | 0 | 0 |
| Fe | 184 | 354 |
| Mn | 84 | 48 |
| Cu | 2.64 | 4.16 |
| Zn | 2.34 | 8.2 |
| Al | 804 | 654 |
As a side note before we
look at the quality of my clay, Solomon explains that plant roots often
stay out of the subsoil because it's too acidic and generally all out
of whack. My powerline pasture test results support this
hypothesis --- who wants to grow in a pH of 5 with barely any calcium?
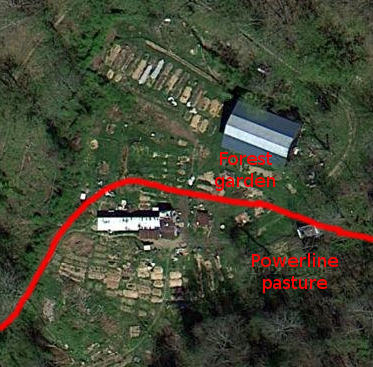 Now, back to CEC and
clay. Interestingly, the powerline pasture has a higher CEC than
the forest garden aisles do, even though the latter are higher in
organic matter and have received more love. Soil surveys show a
dividing line between two soil types just north of our trailer, and the
front garden soil (on the same side of the line as the powerline
pasture) is much higher quality than the back garden soil (on the same
side of the line as the forest garden). Perhaps part of the
reason the front garden is so nifty is that its clay has a higher CEC?
Lest you think this post
is sheer geekery, there is a hands-on point. Solomon explains
that humus also has varying cation exchange capacities, ranging from
100 to 400. He writes that organic matter only changes into humus
if there's some clay available, then he goes on to hypothesize that
higher CEC clay creates higher CEC humus. While Solomon admits
his hypothesis is untested, it makes me wonder whether it would be
worth adding a bit of our higher CEC clay to the worm bin to see if we
can't create even more awesome castings.
As a final note on
subsoil, Solomon recommends that those of us who really want to put
down roots in our garden (both literally and metaphorically) should
focus on rebalancing our subsoil at the same time we fix our
topsoil. Adding gypsum to the topsoil leaches cations down into
the subsoil, where they can increase the pH and bring the soil more
into balance so it's more inviting to roots. Wouldn't it be
fascinating if you could double your growing area by simply making the
subsoil a better place to live?
This
post is part of our The Intelligent
Gardener lunchtime series.
Read all of the entries:
|
We got our 2nd flood of 2013
today.
A good test for the new
red roof.
The only homesteading that
got done today was when Anna climbed up our hillside and snapped this
shot.
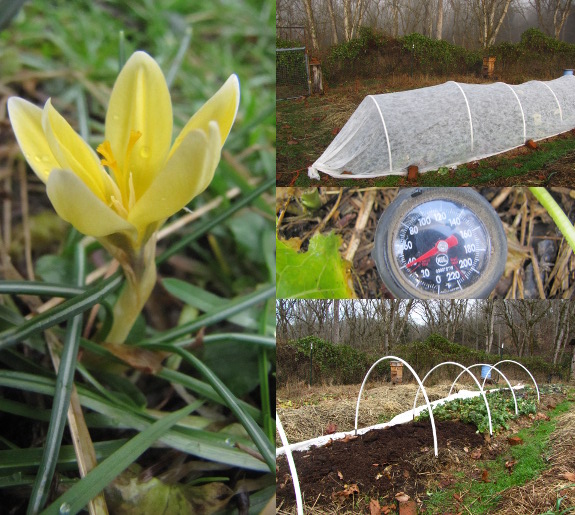
After
posting that it
was going to be too cold to make my traditional
lettuce
planting this week, a warm rain Monday night washed away the
snow. Tuesday morning, soil temperatures under the quick hoops in
the mule garden were 40 degrees! So I cleared out some old kale
(the good leaves went in our bellies, the rest went to the chickens),
added a layer of horse manure (stockpiled last fall), and scattered
some seeds.
And by Wednesday
morning, something had come up...just not in the lettuce bed. The
first crocus of the year! Our crocuses bloom whenever they feel
like it, but I'm pretty sure this is the earliest bloom date since
we've been on the farm. On the other hand, I only see the one
flower --- everyone else seems to have paid attention to the long range
forecast which consists of seasonal weather in the week to come.
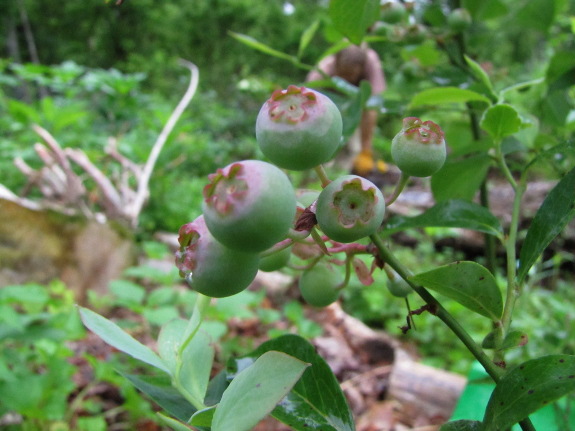
My next thorny question
was --- how closely can I apply Solomon's
soil analysis guidelines to woody plants?
Refreshing my memory of The
Holistic Orchard
suggests most woody plants might enjoy the same soil conditions Solomon
guides us toward. But blueberries are another matter.
Optimal vegetable garden
pH is supposed to be around 6.0 to 6.5, but blueberries like it more
acidic --- 4.5 to 5.5, with 6.0 being permissible for the
easier-to-please rabbiteyes. And despite lots of pine needle
mulch, pine
logs edging the beds,
pine
humus in the root zone, and even sulfur given to half the plants their
first season, the pH
in my blueberry patch is 6.5.
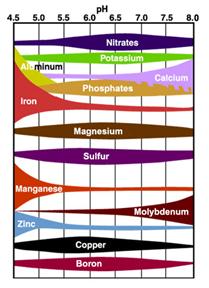 While
6.5 sounds bad for blueberries, Solomon and Phillips both suggest that
higher pH may not be as much of a problem as other writers
suggest. With vegetables, Solomon finds a pH of 7.5 is fine as
long as you even out cation excesses, and he reminds us that the pH of
our soil may appear
much lower to our plants than it does in the testing lab since plant
roots hang out around organic matter and organic matter creates pockets
of acidity. (Microorganisms eat organic matter and exude carbon
dioxide as a waste product, and the gas mixes with water to form
carbonic
acid.) But can blueberries really handle a pH of 6.5 even if the
soil has a CEC of 12.6?
The trouble with high pH
in the blueberry patch is that it makes it tough for blueberries to
find iron, especially if excess calcium is around. Some sources
suggest balancing blueberry soil with less calcium and more magnesium
than you'd allow in your vegetable garden, 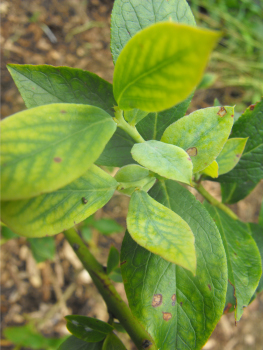 especially since magnesium
can also be hard for blueberries to find. Luckily, my soil
already trends toward low calcium and high magnesium levels, so all I
have to do is leave it alone to achieve that goal.
Iron deficiencies are
usually pretty easy to see in blueberry leaves during the growing
season, as you can see in the photo to the left. I recall
noticing yellowed leaves during the blueberries' first year or two, but
not more recently...but I also tend to ignore the blueberries while the
vegetable garden is calling my name. So I think I'm going to
table this issue for now and check over the patch once the leaves come
back out. I definitely won't be adding any lime to the
blueberries' soil, though, and if I do decide to boost the sulfur
levels, I'll do so with ag sulfur instead of with gypsum.
This
post is part of our The Intelligent
Gardener lunchtime series.
Read all of the entries:
|
The new
space heater is
performing nicely in the refrigerator
root cellar.
It seems to be using less
energy than the light
bulb. This might be due
to the less time it takes to heat up with the help of a fan blowing the
air around.
We did notice a few sprouts
on the carrots that were most likely caused by the light bulb, which is
another reason to choose a space heater for this application.
Want more in-depth information? Browse through our books.
Or explore more posts by date or by subject.
About us: Anna Hess and Mark Hamilton spent over a decade living self-sufficiently in the mountains of Virginia before moving north to start over from scratch in the foothills of Ohio. They've experimented with permaculture, no-till gardening, trailersteading, home-based microbusinesses and much more, writing about their adventures in both blogs and books.

