archives for 12/2012
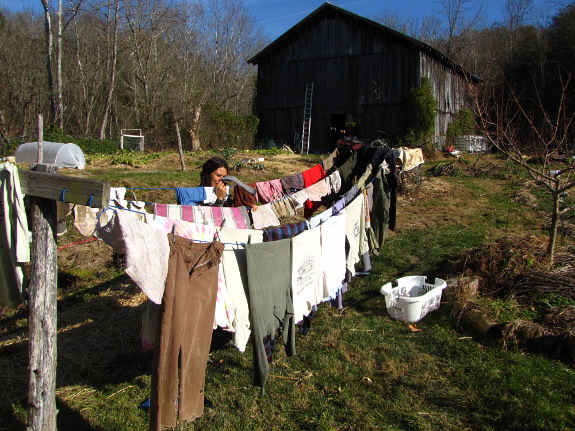 I hear from a lot of folks
who give up on drying
their clothes outside
in the winter. But once you buy a dryer, there's often no turning
back. First you toss your clothes in the dryer on frigid January
days, but soon even an overcast spell in June has you visiting the
indoor energy hog instead of just waiting for pretty weather.
Since I stubbornly
refuse to set foot on that slippery slope, I'm stuck drying our clothes
outside all winter...and it's really no big deal. The waterline
froze the night before I chose to start our November laundry, so I
couldn't fill the wringer
washer until mid
afternoon, but our clean clothes still dripped most of the moisture out
that evening before freezing solid overnight. As soon as the sun
came out, they were sublimating moisture even from their frozen
surfaces, and then the sunny afternoon thawed the fabric enough that I
could flip each item over. That night, I put away all except the
heaviest towels, jeans, and fleece tops, and the next evening
everything was ready to come in.
Yes, it technically took
a bit over 48 hours to dry our clothes, but what's the hurry? Your annual estimated savings from hanging clothes on the line is
$100 for the equipment (depreciating value of the dryer) plus $150 in
electricity, and the extra work during extended winter drying amounts to no more time than you'd spend checking a rising loaf of bread.
Do you dry clothes
outside in the winter? Do you have any tips for folks who want to
try but are afraid of the cold?
These sub freezing mornings
make cinder
block stepping stones unsafe.
Much safer to wear Muck boots and walk through the creek where
the bottom is free of ice.
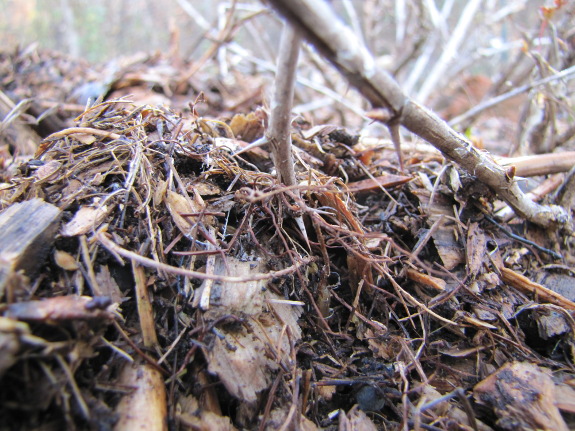
The great thing about
plants that tip layer easily is that you're likely to end up with extra
plants with absolutely no work on your part. Blackberries
and black raspberries
are probably the example you're most familiar with --- if you're not
careful, long canes of each will curve back down to the ground and root
at the end. But, as I learned this year, gooseberries fit into the same category.
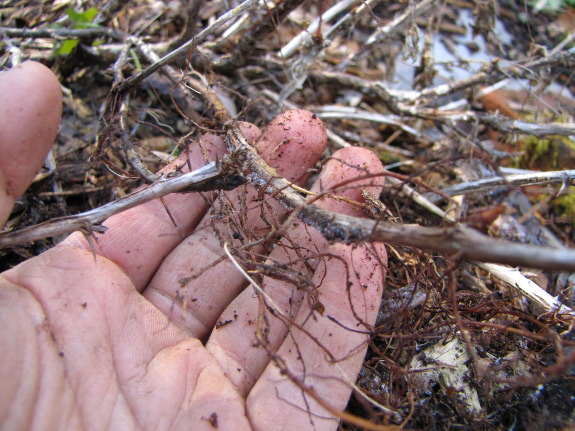
We've been working to
get rid of weeds in our blueberry and gooseberry patch this summer,
which meant repeated weeding and mulching until the unwelcome plants
gave up the ghost. During one round of mulching, I accidentally
poured rotting wood chips on top of a few branches of my Poorman
gooseberry. Coming back around for a last weeding job in
November, I tugged at these branches...and found they'd grown
roots. All I had to do was clip off each branch above the rooted
section and pot it up to turn that into a new plant.
(By the way, Mom and
Sarah, your gooseberries are waiting on your convenience --- don't
forget to take them next time you see me! They're at the southern
limit of their range here, so choose them a cool, damp, partly shaded
site.)
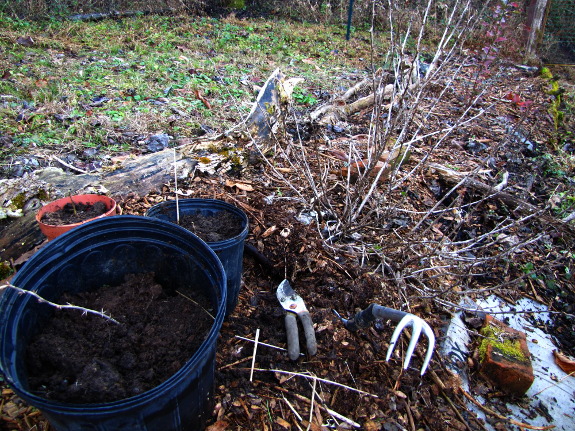
I could have put the
little gooseberry cuttings straight into the ground, but I didn't have
a spot picked out for mine and was a bit afraid such a small plant
would lose its footing in the winter soil's freeze/thaw if I didn't
mulch it extremely carefully. So I slipped the gooseberry pots
into the citrus growing area in Mark's room --- maybe he won't notice?
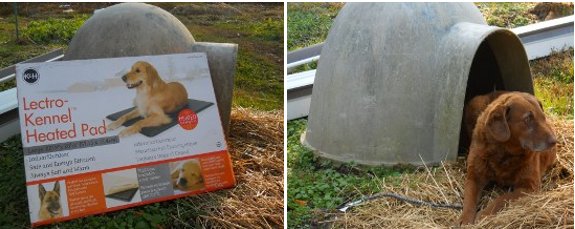
It took Lucy about a week to
figure out her dog house now has a thermostatically controlled heating
pad to take the chill off the really cold winter nights.
The pad won't kick in till it
gets cold enough and uses only 80 watts.
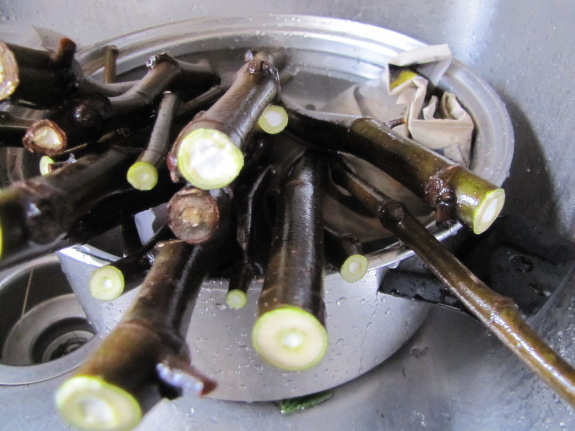
Several folks report
that they root their hardwood
fig cuttings inside
over the winter, so I decided to give it a shot. Step one seems
to consist of wrapping the cuttings in damp 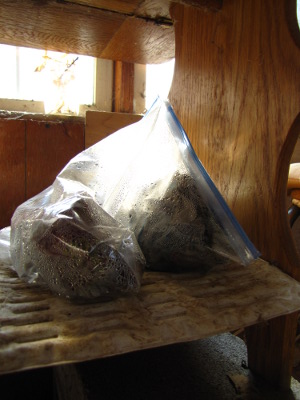 newspaper and then in a
ziplock bag and placing the cuttings in a warm spot for a couple of
weeks until roots begin to form.
"Warm place" is the
operative word. One week into my experiment, with the cuttings on
top of the fridge, the one year old twigs were already starting to mold
instead of sprouting roots and leaves.
I got a little stuck
trying to figure out where in our house stays above seventy degrees day
and night before I remembered the
heating mat I use to grow sweet potato slips in the spring. It'll
definitely use less energy to just heat the cuttings than it would to
keep any part of our living space at "room temperature", and I'm
hopeful a couple of weeks on the mat will get those figs growing.
Any other fig rooting
tips from the experts out there?
We like the Trake garden tool so much we ordered an
extra.
I was using the new one back
in June and somehow lost it, which was a real bummer and often haunted
me when I would walk past the blueberries.
Turns out Lucy must have
"borrowed" it when I wasn't looking and then thought it would be better
to bury the evidence instead of putting it back in its designated spot.
Makes me wonder how many other tools are buried at various places
around the garden?
 The
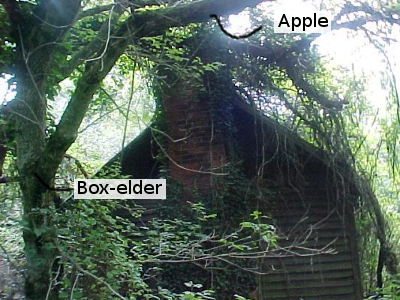
most recent owners of our farm before us had a standard apple tree
growing right beside their house. I figured that a house apple
was likely to be a delicious local heirloom, but although we really
wanted to keep it, the tree was too old and diseased to save. (If
I'd known as much about trees then as I do now, I would have grafted
some twigs onto new rootstocks to safeguard the variety, but hindsight
is always 20/20.)
 Even
though the apple perished without feeding us a single fruit, its body
has been feeding our garden ever since. The wood was too punky to
burn by the time we cut it up, but the rotting biomass has helped
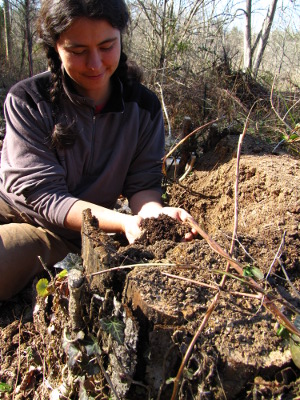
increase the tilth of our blueberry beds. Last winter, I gathered
stump
dirt out of what
remained of the tree to start seedlings inside, and this fall I've
decided to let the rest of the stump become an instant, high quality
raised bed for my gooseberry
sprout.
In many forests, nurse
logs and stumps form natural beds to help along new baby trees, so I'm
just mimicking nature with my action. However, I want nature to
progress a little faster than it would in the wild, so I talked Mark
into cleaning out the deep
bedding in the
broiler coop to add more nitrogen to what is otherwise a low fertility
garden spot.
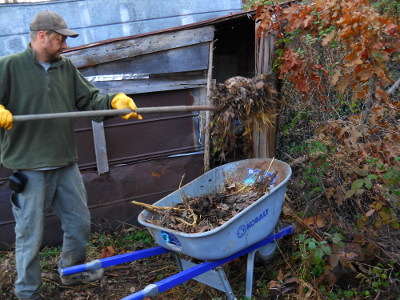 While we were at it, we
spread deep bedding on bare patches elsewhere in the blueberry beds,
probably covering about a quarter of the currently mulched area.
All that high nitrogen chicken manure will probably be enough to feed
the blueberries all summer --- the trick will be remembering those
plants got a fall feeding and not topdressing with more compost come
spring. I clearly need some kind of data-collection to go with my
new haphazard
mulching campaign so
everyone gets a fair shake when it comes to feeding.
 The weather this past
November was a lot more like December, but once the calendar flipped
over, we got a welcome thaw. As the day warmed up, I was
astonished to notice that the ouside world had smells again! I
guess when the ground is frozen, odors have a hard time reaching our
noses.
Although I enjoyed most
of the scents, I was a bit afraid to drop by the new composting
toilet because the
goal there is a complete absence of odor. I shouldn't
have worried. All of that sawdust we've been dropping down the
hole has done its job --- the composting toilet is currently smell-free.
The next test will wait
until summer --- presence or absence of flies. After that, we
won't get more feedback until two years from now when I scoop this
fall's poop under the fruit trees as compost.
That's assuming
something doesn't go drastically wrong. I'll be sure to report if
there's any seepage, slumps, or other disasters.
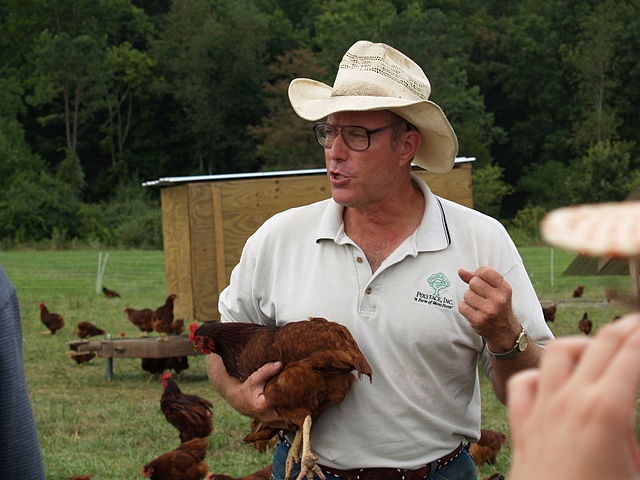 Mark doesn't generally read
along with our book clubs because I tell him the
highlights of every text over the dinner table. As I related Salatin's
pointers from this week's selection, Mark replied, "So, he's a
choir preacher, right?"
I hadn't thought of Joel
Salatin that way (although his scattered chapters do feel a bit like
daily sermons), but in retrospect, I think Mark might be right.
For example, take the essay "No Compost, No Digestion", the thesis of
which is that real food will rot if left on the counter for a couple of
days, while items souped up with preservatives are no better for our
digestive systems than they are for the air-borne microorganisms that
turned them down. If you're not already sold on the idea that
diet soda and ultra-processed food is bad for you, would Salatin's
chapter open your eyes in any way?
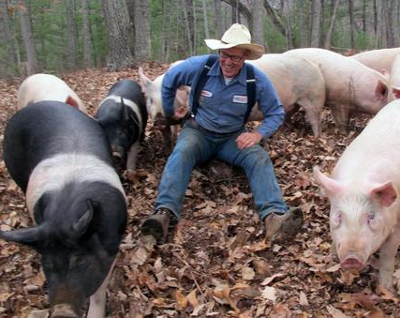 On the other hand, can we
ever do anything other than preach to the choir? I'm curious to
hear how you all (my choir, who I assume probably agrees with most of
my rants or you wouldn't stick around) came around to this point of
view. Was it childhood indoctrination informed by reading and
experimentation (my answer), or did you stumble upon the ideas of
ecological food production as an adult?
If I were Salatin's
adviser, I think I'd recommend that his next book take an entirely
different tack if he really wants to change the world. Include
lots of glossy photos of happy pastured pigs, chickens, and cows and
write a children's picture book with just the facts. Or hire a
publicity firm as Salatin reported one college campus did to train its
students to enjoy chewing pastured meat.
Meanwhile, I'll keep
reading his daily devotionals. Tune in next Wednesday to discuss
chapters ten through thirteen (up through "Grasping for Water"), and
don't forget to read over the interesting
comments on the first week's selection if you haven't already.
Two things I didn't consider when building chicken
coop #1 were easy egg access and deep bedding.
We might replace it with a
bigger coop in the future, but it's hard getting motivated to fix
something that's just a little broken when there's several more
important projects on the list.
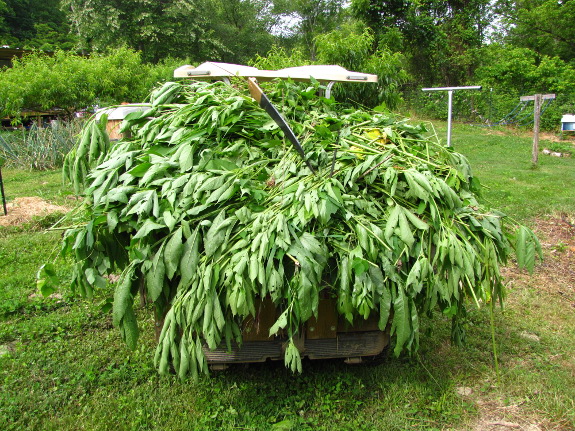
While I'm obsessing over
mulch, I thought you might enjoy seeing a followup about my wingstem
and ragweed mulch
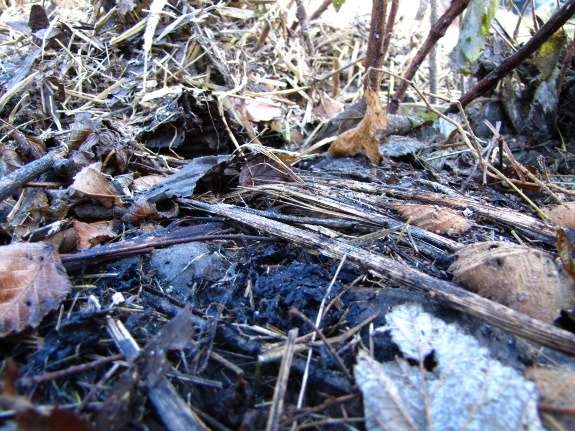
from the middle of June. This is far from a controlled experiment
since three rounds of chicks spent their childhood scratching under the
 so-mulched raspberries and
blackberries, adding extra nitrogen and stirring things up for
ultra-fast composting. So I wasn't surprised to see that all of
the weed leaves had completely disintegrated and even the stems were
quickly disappearing into the dirt.
Without the cardboard
layer underneath, I suspect the mulch wouldn't have held out as long as
it did, but there were actually very few living weeds under the berry
bushes when I weeded this week. And the fall raspberries were
huge, delicious, and copious down there, perhaps just from the chicken
manure, but also perhaps due to the slowly decomposing weed
carcasses. So even though the mulch was a bit short-lived and
needed to be topped off before winter, it's probably worth doing again.
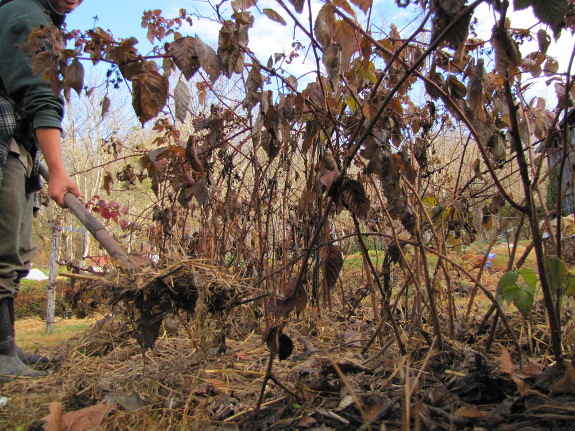
The results in the woods
(the source of the wingstem and ragweed) were equally striking --- no
more tall weeds. This might be a pro or a con, depending on what
you're trying to do with an area. If you want to get rid of tall
weeds so you can grow shorter plants livestock will eat more readily,
it might be a great idea to cut the wingstem and ragweed just before
they bloom in June; but if you enjoy the flowers for your honeybees,
this might not be such a good source of mulch.
I'm not sure the effort
to biomass ratio is good enough to make this a regular part of our
mulching campaign, but I'm going to keep it in the running.
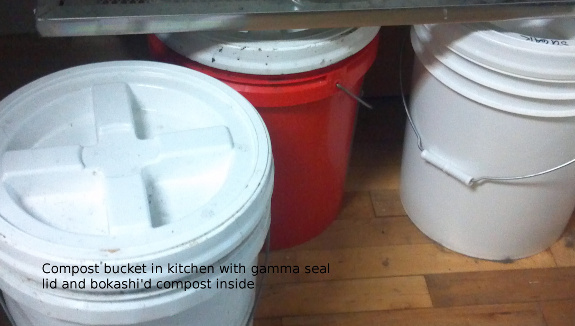
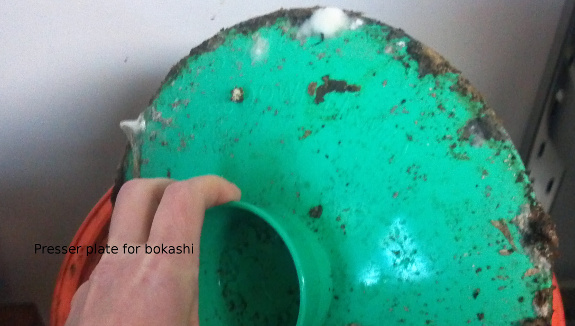
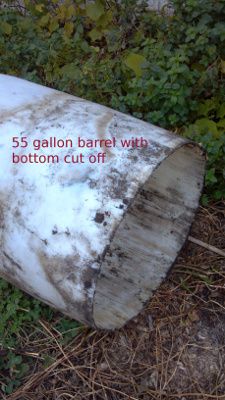 A tip for city dwellers needing
to compost in limited space: I highly recommend 5 gallon pails
with gamma seal lids, bokashi dust on the collect compost, wait two
weeks to a month and then bury it in your garden beds. Or, if you
have an abundance like I do, cut off the bottom of a 55 gallon drum
(skillsaw, sawzall or even a hand saw), dig a nice deep hole, and stick
the drum in about 1/3 of the depth of the drum. The top lid can
be locked or sealed with the metal ring that comes with a proper 55
gallon drum. When you've filled it to soil level, remove bin to
next spot, bury with a couple of reserved buckets of soil.
I highly recommend planting squash and corn.
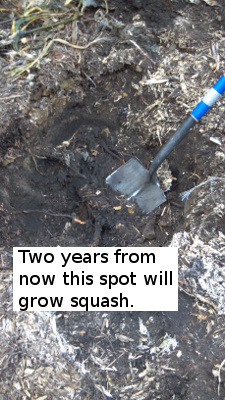 I've a tiny garden on the front
and side of my home, 8 people's worth of compost on a regular basis and
not enough space for a covered, screened compost pile as required by
city regulations. This works even in our zone 4 winters. It
costs the "input" of the bokashi mix but I see that as a fair trade-off
for composting every type of kitchen scrap produced. I pre-dig my
raised garden beds in the fall, reserve the soil in 5 gallon pails to
our porch, and fill with compost and cover over throughout the
winter. I'll plant most anything but carrots in this.
As for varmits, danged,
varmits. We have none interested in our outdoor bins. We
also are the only ones in the neighborhood without a chewed through
garbage cart. Remember, we're in the city and squirrels and
rabbits and pets are what we get the most, minus the odd opossum
(different story there). The squirrels don't smell the "food" in
our garbage anymore and we have a very clean garbage cart now.
The slickness of the bokashi system in the city versus the worm tower,
which I tried and failed with, is that it is an anaerobic process to
start and so if it stays anaerobic just a bit longer till you pull the
bin off and cover with soil, there isn't a problem with smell.
The other nice piece is it allows us to compost an enormous amount,
easily two 5 gallon pails a month, on-site, through frozen ground
winters while still meeting city code requirements.
This is not what I'd do if I
had 10 acres and no city restrictions. But for our circumstances
I'd say it's very useful and others may have similar circumstances.
Editor's
note: The author of this tip chose to remain anonymous, but you can
read more about another
homesteader's experience with bokashi here.
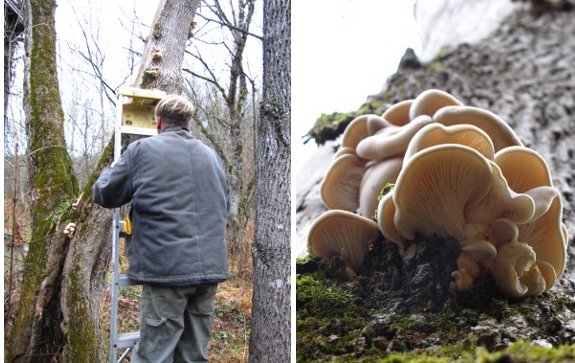
We've got some chorus frogs
here that sometimes get confused on warm December days like yesterday
and let out a few wimpers.
My new wild
mushroom system is to
check familiar spots on these days.
A more scientific approach
would be to monitor local soil temperatures.
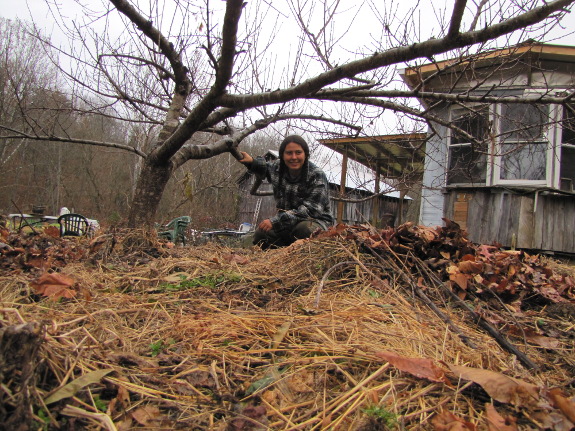
Our pasture trees need a
bit more thought, but the rest of the perennials are finally mulched
down for the winter. I played around with this and that whenever
the urge struck or the materials were on hand, so the ground beneath
our trees and bushes is a hodge-podge of living cover
crops, piles
of dead autumn weeds,
two-year-old composted
wood chips, tree
leaves raked out of the woods, and deep
bedding from the chicken coops.
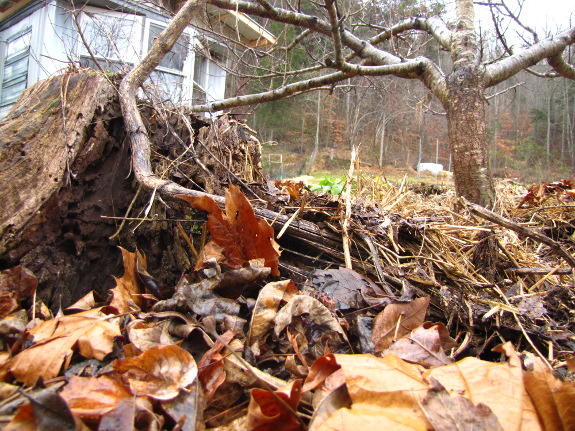
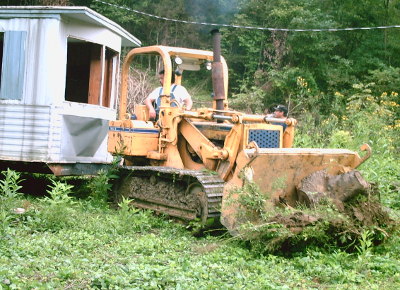 Oh, and I shouldn't forget
the logs and stumps scattered helter-skelter around the bases of my
trees and bushes. This stump in particular has a long and
illustrious history since the bulldozer that hauled in our trailer used
it as a counterweight to make sure the machine didn't tip over when
pulling our ancient mobile home up the ford.
The wood has slowly wasted away into top-notch soil in the nearly six
years since I took the shot below with our two new pets in January 2007.
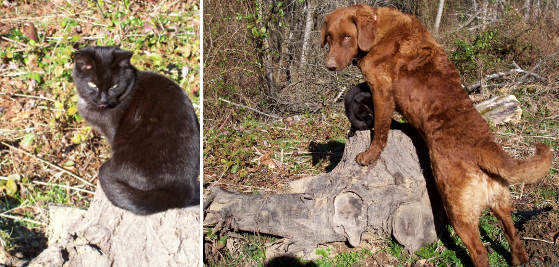
I'm not sure how a post
that was originally going to be about mulch longevity worked its way
around to highlighting Huckleberry, but our ultra-spoiled cat thinks
that's the way things should always be. I'll try to stay on topic
tomorrow.
I figured out an easier way
to drill through the high
density orchard PVC
support post for attaching the guide wire.
At first I was drilling
through the metal of the fence post the PVC sits on, but about 3/4 of
the way through I discovered if you line up the smaller side of the
post with the tree trunk then you can just drill a hole through just
the PVC at the far end.
 "I
was poking around your site the other day and came upon an earlier post
about your Poorman Gooseberry (and I noticed that you have a gooseberry
start to share with Sarah - along with the other perennials we in the
virtual world watched you divide on your blog and then Sarah plant on
her blog.) [Where's mine?]"
"I
was poking around your site the other day and came upon an earlier post
about your Poorman Gooseberry (and I noticed that you have a gooseberry
start to share with Sarah - along with the other perennials we in the
virtual world watched you divide on your blog and then Sarah plant on
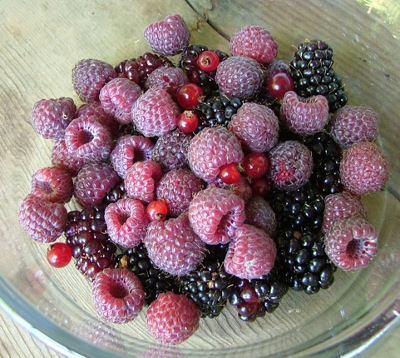
her blog.) [Where's mine?]"--- Charity, who provided this photo of her currants, raspberries, and blackberries
I'm already trading scionwood with a couple of readers and
my three
new gooseberries for
this year have found new homes, but I thought it might be fun to help
our readers swap perennials this winter. To play along, just
follow these simple rules:
- Leave a comment with the perennials you've got extras of this
year and want to trade. I'd like to gear this toward edibles and
permaculture classics (like comfrey), but feel free to offer other
plants and scionwood. Include your wish list too, along with your
email address. (You can email
me to remove your comment once you're swapped out if don't want to
get inundated with requests.)
- Peruse other people's comments until you see someone who has what you want and needs what you have. Drop them an email and make the swap! You'll each have to pay postage, but it should even out.
- To make sure the information stays up-to-date, the swap will end
January 1.
To get the ball rolling,
here's what I've got extras of this year:
- Russian comfrey (cultivar unknown)
- Egyptian onions (bottom bulbs at this time of year)
- Caroline ever-bearing red raspberies (extremely productive, especially in the fall)
- Thornless blackberries (unknown cultivar; it's very vigorous, with huge berries, but dies back one winter in three in our zone 6 climate, so I only recommend it for the south)
And what I'm looking for:
- Scionwood from pears resistant to fireblight (especially Seckel, Dabney, Tyson, Harrow Delight, Honeysweet, Hoskins, and Luscious)
- Sal (Gene strain), Marselles vs Black, and Blue Celeste figs
- All kinds of weird permaculture plants. If you want
something I have, feel free to offer something in trade.
If the swap goes over
well, I'll try to save back some other interesting perennials next
year, like gooseberries, echinacea, chives, and figs. Maybe a
plant swap can be an annual event?
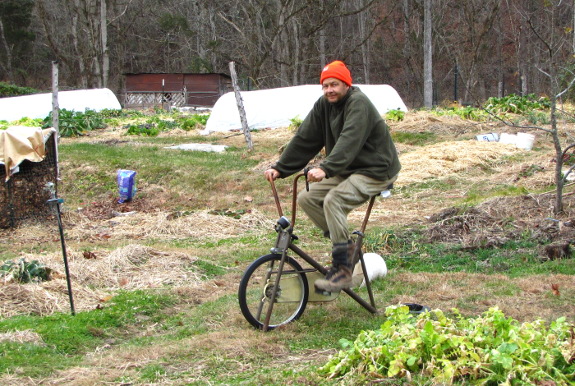
In the winter we usually
shift into a routine where we work on indoor stuff in the morning and
do outdoor activities after lunch when the sun creeps over our little
mountain.
When it's cold we usually
work on less labor intensive items, which I've noticed has an impact on
my mood if I didn't get my core body temperature raised for at least 20
minutes.
A solution that's been
working for me is an old exercise bike (Thanks Mamaw). Doing it with
sunshine seems to double the positive effect, and maybe being in the
middle of the garden adds a nice psychological boost. In the future we
want to add some sort of generator as an alternative method of charging
the solar cell batteries when we get them hooked up.
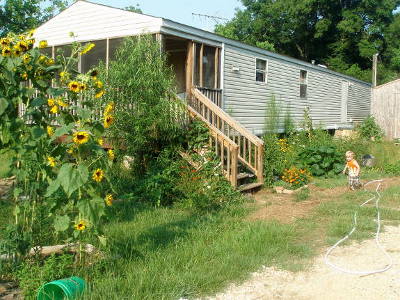 Trailersteading is entering the editing
stages this week, but I've discovered that Amazon's policies have
changed (or maybe just been tightened) so I won't be able to sell it
for 99 cents. As my regular readers know, I think a picture is
worth a thousand words, so I can't seem to talk myself into including
any fewer than 124 images in the book. But pictures make the file
larger, and that means the lowest price Amazon will allow me to set for
the book is $1.99.
So I thought I'd check
with you all and ask which option you think is best:
 Sell the whole book for $1.99.
I'm afraid I might lose some impulse buyers at such a "high" price,
even though this book is as long as three of my Weekend Homesteader
ebooks combined, so it would still be a good value.
- Break it in half and sell each
half for $0.99. I'm not as sure about breaking the book up
because it's really written to be one coherent whole. On the
other hand, I can see a reader being more willing to take a chance on
the first half for 99 cents, figuring if they hate it, they don't have
to buy the second half.
- (I know there's the option of taking out pictures, but I'm just not willing to do it.)
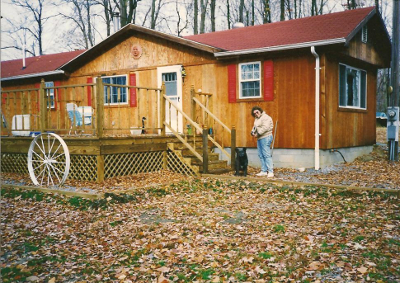 Other than the price issue
(and the sinking suspicion that I'm going to get a lot of bad reviews
due to trailer stigma), I'm very excited about this book. Eight
fascinating trailer-dwellers shared their experiences with great
honesty and depth, and I was intrigued to discover that even energy use
(a mobile home's biggest Achilles' heel, in my opinion) was below the
national average for every homesteader interviewed. I'm taking
the time to edit the ebook within an inch of its life, though, so you
won't hear more for a couple of weeks.
Meanwhile, if you want
to make my day, please consider leaving a review of Weekend
Homesteader: April (equivalent to the first month of the paperback,
with a few bonus pictures). I'm trying not to let it bother me
that half of the reviewers gave it three stars, 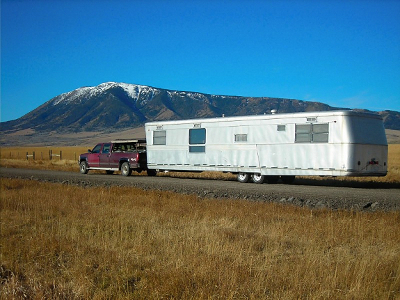 reminding myself that by
reaching beyond my choir, I'm bound to hit a lot more negativity.
(Okay, I'll admit it,
the bad reviews are driving me nuts. I'm quite adept at figuring
all of the really nice reviews are written by people being kind while
the bad reviews are by honest people. So if you honestly liked the first chapter,
your review would cheer me up considerably.)
To thank you all for
your kind input, I'm giving away Weekend
Homesteader: September today on Amazon. Enjoy!
The exercise
bike I've been riding had one major flaw. The seat was old with
very little padding.
I was pleasantly surprised by
this Schwinn over sized seat
for 20 dollars.
A proper seat makes it easier
for me to get past that 20 minute mark and eliminates the numbness
that sometimes lingered a few minutes after some rigorous riding.
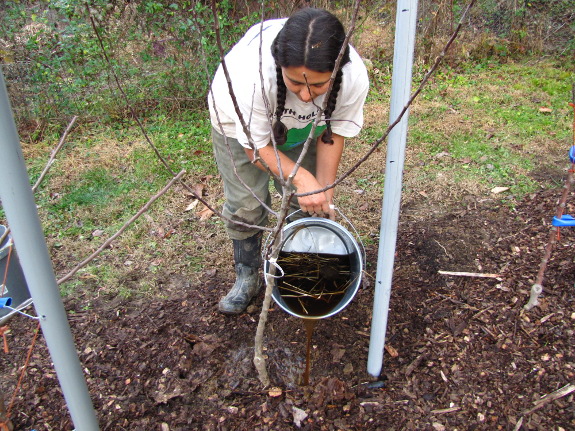
Although Mark and I are
excited about the possibilities of a high-density
apple planting,
we're also well aware of all of the disadvantages of dwarfing
rootstocks. So we're hedging our bets with three apples on M111, trained using similar methods to
those on Bud9.
In case you're not a
rootstock geek, M111 is a rootstock that makes a
semi-dwarf tree, generally reaching a spread of 14 to 20 feet, compared
to 6 to 10 feet for Bud9. I've had at least two apple growers
tell me that they manage to keep semi-dwarf trees down to the size of a
dwarf with careful pruning and training, giving them the benefits of a
more copious root system without requiring the space of a typical
semi-dwarf tree. I hope I can do the same and can include early
bearing in the list of dwarf-like properties of a miniaturized
semi-dwarf.
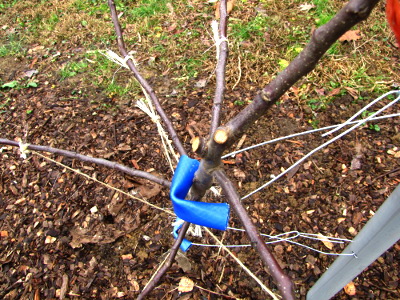 Reality hit when the
semi-dwarf trees showed up and required a lot more initial pruning than
the dwarf trees did. The latter had been trained in the nursery
with a high density system in mind, so they had lots of little branches
("feathers") running up and down the trunk, but the former simply had
two whorls of scaffolds a couple of feet apart. I kept the bottom
whorl (although shortening and training the branches down below
horizontal), then whacked off the top to promote new branching along
the trunk.
To keep this
semi-scientific, I sprinkled the semi-dwarfs amid the dwarfs and was
careful to include one variety that was duplicated on the two types of
rootstock. The experiment obviously won't give me scientific data
good enough to print, but should help me decipher which system works
best on our farm. I'm excited to start playing with training in
earnest once the spring growing season begins!
My Pro Line hip waders
started leaking back in the Summer and duct tape only seemed to slow
the trickle.
I want to guess the times I
used them are somewhere between 20 and 30. Feels like they should have
lasted longer.
One thought I had was to use
some epoxy and glue a piece of rubber inner tube over the hole.
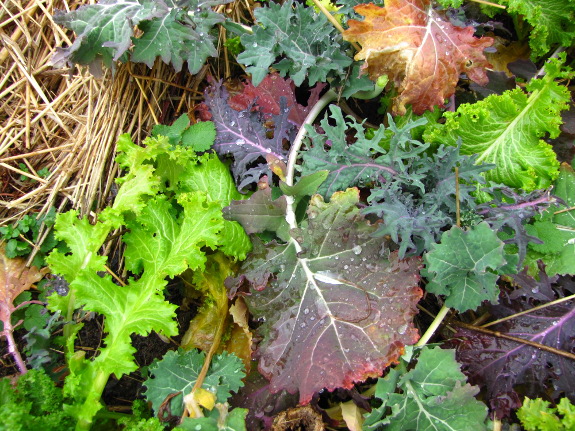
 In
The
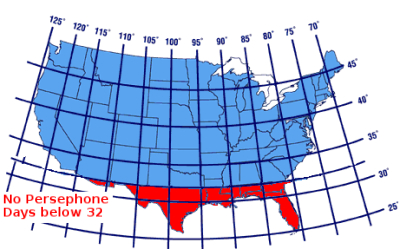
Winter Harvest Handbook, Eliot Coleman posits that
days shorter than ten hours (the Persephone
Days)
put nearly all garden plants into a state of suspended animation.
If we want to harvest greens all winter, we need to get them mature
before the Persephone Days begin and then pick a bed at a time until
the greenery starts growing again in the late winter.
The trouble with this
hypothesis is that it's awfully tough (on the
farm level) to disentangle the effects of day length from the effects
of cold. Do our plants really stop growing because of the short
period of sunlight, or are they just hibernating until warm weather
comes back? Without meaning to, I did a test with my tatsoi
and tokyo bekana this fall, and it seems like these two greens
varieties, at least, are more interested in temperature than in day
length.
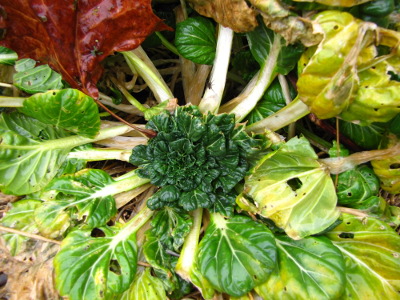 The Persephone Days for our
farm began on November 22, which was right
on Thanksgiving this year. I wanted to serve leafy greens for six
during our Thanksgiving dinner, so I picked the beds hard that
morning. In fact, I figured neither the tatsoi nor the tokyo
bekana would survive the winter, so I might as well cut the tender
hearts right out of them. (I usually try to let my greens
cut-and-come-again by harvesting outside or middle leaves, allowing the
tender new growth to stay put.) But when I came back around with
my scissors last week, I noticed that the harshly cropped tatsoi and
tokyo bekana were both putting out new growth.
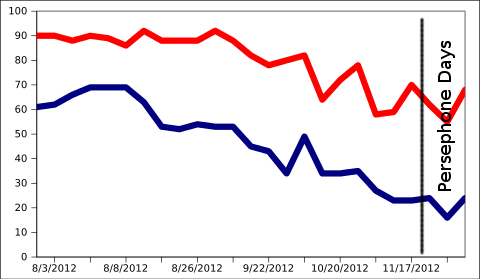
This has been an unusual
early winter because, even though day length is around 9.75 hours at
the moment, we've been
enjoying a warm spell with nights above freezing and days nearly
balmy. And our greens are taking advantage of the weather to grow
and grow.
Of course, I don't know
for sure whether these greens might not go into a
state of suspended animation at 9.5 hours or 9 hours despite the
temperature. Some days, I wish I had a research lab and crew of
grad students at my disposal to get real data, but for now, I'm busy
eating the evidence.
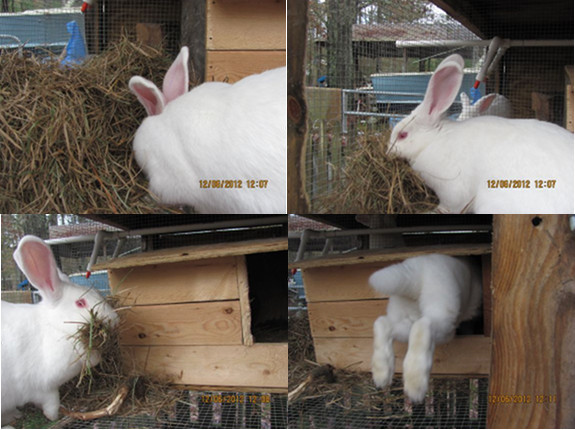
We recently decided it was
time to try
for a litter of rabbits.
Since that time, there have been few noticeable behavioral or physical
changes in our doe. Then...late last week, instinct has been
kicking in and the hay that we have given her has changed from a food
source to a source of material for constructing a nursery inside of her
house/nesting
box. Last week
when Dawn noticed the change in behavior, she quickly grabbed the
camera to catch some photos of her constructing her nest. It's
actually quite interesting to watch. She will sort through the
hay using her mouth, then once she has a bundle she is happy with, she
will shake and rub it side to side with her head. Then, with a
suitable bundle secured, off she goes into the house with her next
batch.
Dawn has read that the doe
should also pull fur from her coat to line the nest with some warm
material. It is said that she should begin doing this at any time
in the week before the litter arrives, though our doe has not begun
doing this yet. We've also noticed that she has shaped a
depression in the hay which is sort of like a bird nest visible in one
of the photos below. We're guessing that this is where she plans
to deliver? Unless it is just a random placement of hay that
we're reading too much into.
We're presently debating if
it will be cold enough that we need to make some accommodations to keep
the kits warm. We just had a cold front pass through today and
our usually mild winter weather has taken a bit of a chilly turn.
We may put up some clear tarp and a heat source if we think it becomes
warranted.
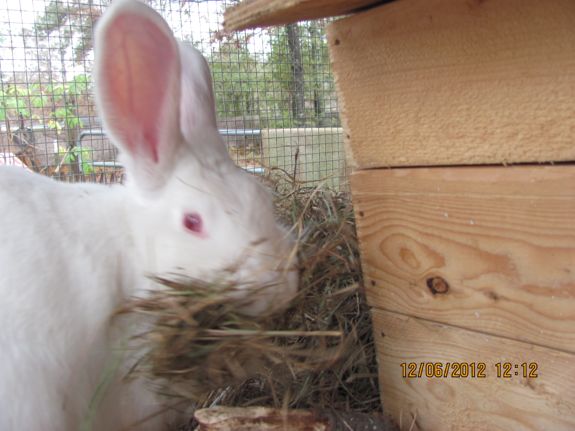
We had hoped that by the
time of this post we would have photos of some kits and stories of how
the doe and kits were doing. However, I guess mother nature has
decided that will have to wait till next time. For now, here are
a couple more photographs.

Shannon and Dawn
will be sharing their experiences with raising meat rabbits on Tuesday
afternoons. They homestead on three acres in Louisiana when time off
from life and working as a sys admin permits.
Thank you Brent for your
comment the other day asking about the results of our experiment to use
home
grown mushroom spawn to
inoculate a magnolia
stump.
It took me till today to go
check. One in the back was a little past being fresh enough to cook,
but the one in the front is almost perfect.
These kinds of results make
me wonder if we shouldn't think about inoculating more stumps.
One of the ideas I got
out of The
Holistic Orchard was
applying
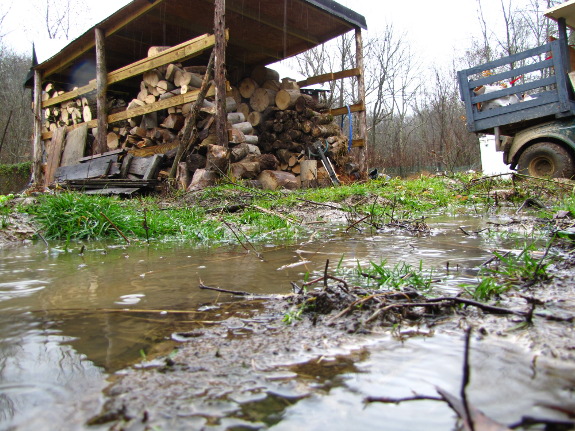
gypsum to improve drainage in the heavy clay parts of our garden. As you can see from
the first photograph in this post, a day or two of rain in the winter
is all it takes to saturate our soil and create puddles here, there,
and everywhere. Gypsum is reputed to increase drainage and boost
calcium levels (which many people believe results in healthier, more
nutritious plants) without sweetening the soil, so I decided to give it
a try.
 When
amending soil, it's generally a good idea to perform a soil
test first, then
calculate how much of the amendment you really need. In many
cases, adding too much is worse than adding none at all, so I was leery
when one
of our readers recommended: "Be very liberal also. It
doesn't burn at all. Also you can used it often."
However, a bit of
research proved him right. One of Clemson
University's soil scientists wrote, "There are no easily accessible
guidelines regarding the application rate of gypsum in a homeowner
situation. It is sparingly soluble and so it is nearly
impossible to over-apply."
I've seen recommendations as high as 2,000 pounds per acre, which is a lot
of gypsum.
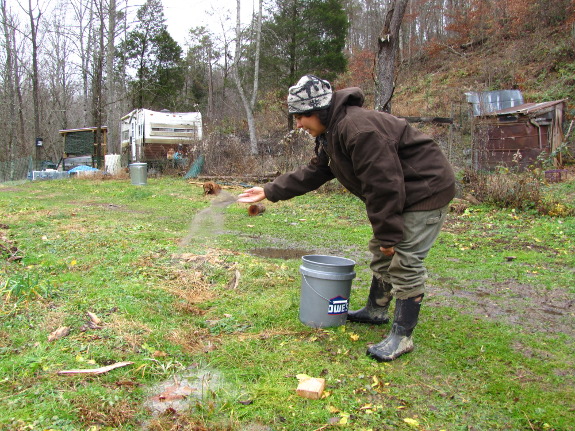
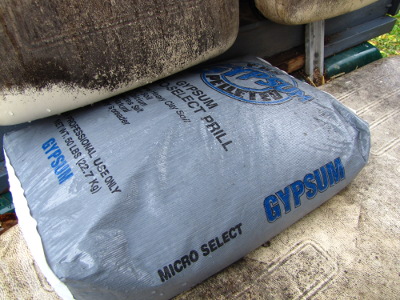
In the end, I opted to
just sprinkle the pellets across wet soil the way I would if seeding a
cover crop, so the first fifty-pound bag covered perhaps a quarter of
the forest garden. The feed store has another 450 pounds waiting
for us, so we'll be spreading that slowly but surely as our car and
golf cart are up to the hauling. Most websites recommend
repeating the application annually for three years, at the end of
which, hopefully, our winter puddles will be less problematic.
 The green revolution, peak
oil, sustainable building, and water stewardship formed the themes for
this week's selection of Folks,
This Ain't Normal.
I found the first to be the most interesting, with Salatin's history of
chemical fertilizers stemming from war-era scientific advances butting
up against Sir Albert Howard's studies of composting in India using
cheap manpower. If you're only going to read one chapter for
ideas and book recommendations, "The Poop, The Whole Poop, and Nothing
But the Poop" would be my top choice so far.
 The other chapters suffered
more from Salatin's general inability to stay on topic and from his
wish to alienate everybody at least once during each essay. But I
did find his theories on both energy and water stewardship fascinating
--- Salatin posited that if we were personally involved in acquiring
energy and water and if systems were designed on small, local scales,
we'd have healthier environments and better societies.
What jumped out at you
in this week's chapters? Feel free to head back to the first and second weeks' selections to comment
as well if your book recently showed up. And don't forget to read
chapters 14, 15, and 16 (up through "Scientific Mythology") for next
Wednesday. Thanks for reading along!
We had a problem this year
with the chickens scratching away precious mulch from our young Mulberry tree.
I'm not sure if these walls
will be tall enough, but as I'm looking at the picture it occurs to me
that an easy way to get a few more inches might be to put a chimney
brick under each corner.
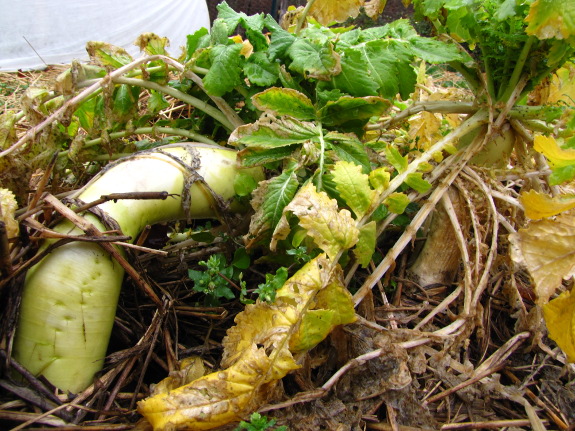
The harshness of
mid-November took its toll and our beautifully yellow-green beds of oilseed
radishes are dying
back early this year.
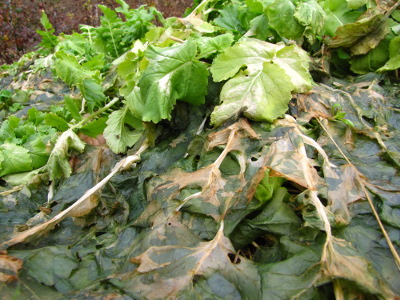 It's fascinating to see which
plants succumb first. The ones on the shaded, north sides of beds
in the least-sun-exposed front garden turned slimey over a week ago,
followed by overmature plants and overcrowded young plants
elsewhere. In stark contrast, the pasture
of oilseed radishes,
although it grew slowly in the partial shade during the fall, is still
looking vibrantly green due to the
mitigating effects of the trees overhead.
For comparison's sake,
we didn't see our
radishes decline
like this until January last year. That means we're probably
getting less biomass bang for our seed buck this year, and will need to
lay down a mulch to keep winter weeds at bay before long. But I
think the oilseeds still paid for themselves even with the shorter
growing cycle.
It
got down to 21 degrees last night, which prompted the Thermo Cube to turn on and use
.04 kilowatt hours of energy.
We've had some serious rain
this week, but no problems with the piled up dirt being eroded.
Makes me wonder if the mobile
home dirt anchors were over kill? Maybe just tilting the whole
thing back on an angle is enough to prevent a wash out?
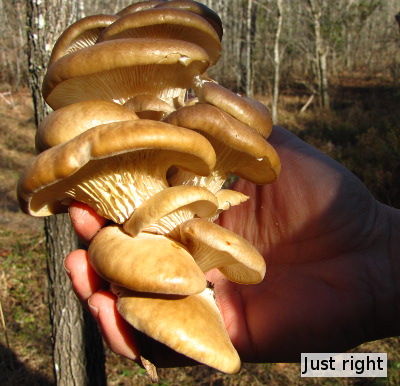 "What determines when to pick
a ripe mushroom? I've noticed you seem to have an eye for knowing
when they are just right or beyond good eating. So what are your
cues?"
With oyster
mushrooms and shiitakes (the ones we know best), the
fruiting bodies are tastiest when they're just shy of totally
mature. That means they've expanded out to full size, but the cap
is still curling under just a little at the edges.
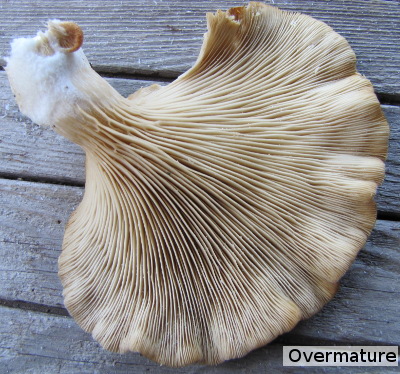 A day or so after reaching
this point, mushrooms are overmature and not nearly as tasty.
Then, the caps are flat at the edges, and the gills underneath have
often started to be gnawed away by insects.
(I don't mind a few
insects in a good mushroom --- just tap the cap lightly against your
palm and the little black beetles will fall out. Any left behind
are bonus protein.)
You can pick mushrooms
too young and they're still quite tasty, but you get much less mass
since the caps haven't expanded yet. I do this often if a really
cold spell is coming, 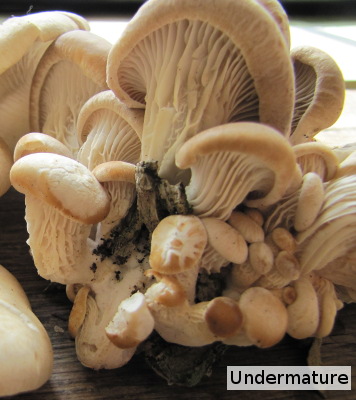 since I figure the mushrooms
will be past their prime by the time warm temperatures tempt them to
expand.
Noticing mushrooms at
peak ripeness has been the entirety of our cultivation effort this
year. There seem to be wild and semi-wild (we inoculated them,
then ignored them) mushroom stumps, logs, and trees all over the farm
now, which makes it easy to pluck mushrooms whenever they appear.
The ones that get away spread spores to inoculate nearby logs and
trees, and the cycle continues. If you live in a damp climate,
it's hard to beat this mushroom-growing method in terms of calorie per
hour!
Our new Rhode
Island Red hens have been a good addition to the flock.
They seem to get along fine
with the rooster, but the other hens have been giving them the cold
shoulder.
Most of the time they're on
the roost with everybody else, just scooted over to the far end with a
gap between, but the other night I noticed they were huddling in the
corner.
That's why I installed yet another roosting station on the other end of
the coop. Maybe giving the original hens some space at night will help
to improve our flock dynamics?
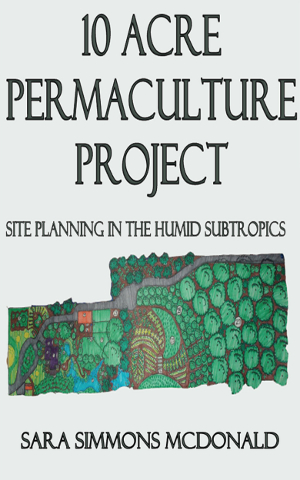 One of my pet peeves about
the permaculture world is that we all read the same books and then we
regurgitate the information. After you see the same idea in print
five times, you assume it works...even if no one's really tried it.
Sara McDonald's A
10-Acre Permaculture Project: Site planning in the humid subtropics begins to fill that
gap. This design plan presents several good ideas for working
around a high water table and producing an interwined permaculture
farm. I particularly enjoyed the beautifully drawn diagrams and
the year-by-year implementation information --- I could have saved a
lot of money and heartache if I'd planted my garden in cover crops for
soil building from year one and waited to plant fruit trees until year
three.
Of course, what I really
want to see is before and after photos taken every year for the next
decade with information on which parts succeeded and failed --- I'll
look forward to buying that followup ebook in 2021. In the
meantime, I hope other non-big-name permaculture practitioners will
self-publish their own plans and followups. I promise, it's very
easy to put an ebook up on Amazon, and if you tell me about your plan,
I'll buy it and review it.
 Jack
Spirko was kind enough to have me on his
Survival Podcast recently where we talked about deer deterrents,
chickens, and using a blog to promote a personal micro business.
I really enjoyed an episode
he did this year with fruit expert Dr
Lee Reich. Jack has a natural way of making his guests feel welcome
while packing in some valuable information.

Scenes in The
Hobbit aside,
thrushes are usually shy, so I was surprised when this Hermit Thrush
showed up in the yard Friday afternoon. Actually, I had forgotten
that we had a 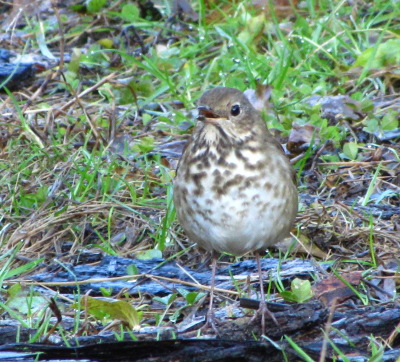 resident winter thrush, so I
was a bit concerned that the bird might have missed the boat on fall
migration. I looked up possible thrush foods, discovering that
insects are preferred but fruits are common in fall and winter, then
scattered raisins around the yard in case the thrush was starving.
Our thrush didn't seem
interested in my raisins, but it did spend half an hour hopping around
and pecking at our damp earth, presumably finding worms and
insects. How magical is it to have a Hermit Thrush taking the
place of a suburban Robin, wandering around the yard?
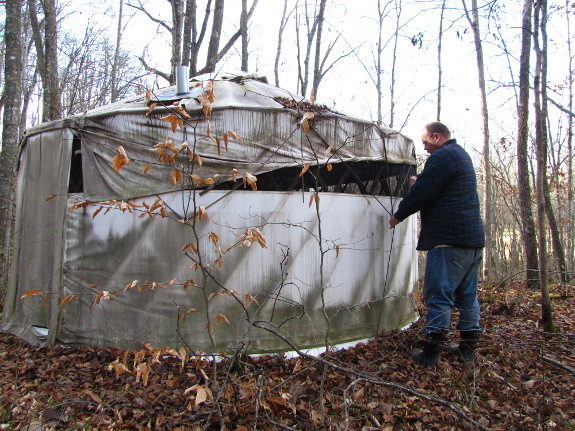
The sad day finally came
--- yurt removal time. My brother Joey bought
the yurt in 2008
when he was living in the city and pondering purchasing land. He
figured he could use it as a retreat on our property whenever he
wanted, then move it to his new land. Mark and I loved having a
visitor who was willing to retreat to his own personal space once our
socializing powers ran out, so we were thrilled when Joey added
a wood stove to made
yurt camping fun even in cold weather.
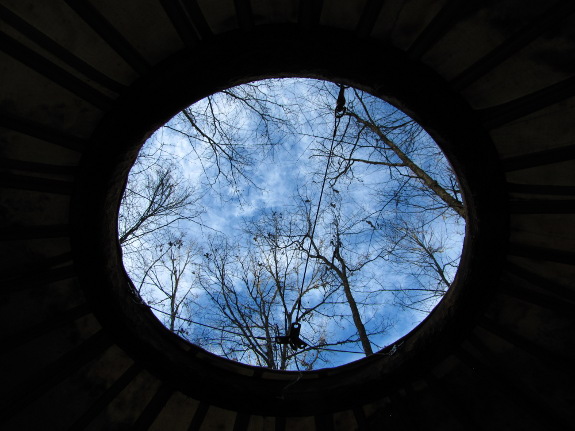
After a couple of years
of joyous yurt visits, though, Joey started renting an underground
house way out in the
country, which fulfilled his yearnings and left the yurt vacant.
We still managed to tempt him over to visit with homegrown meals, but
he returned to his cozy woodland dwelling for the nights.
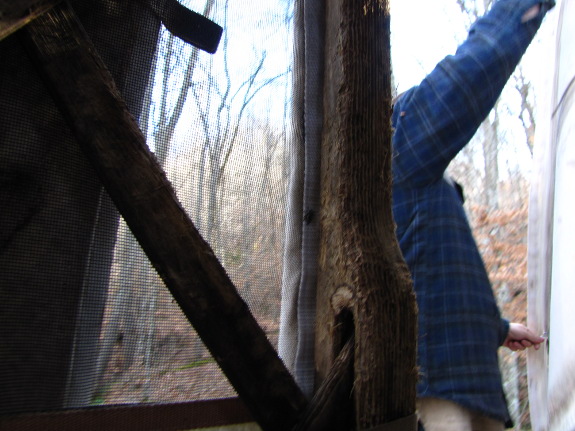
Meanwhile, weather (and
mice) were taking their toll on the yurt. This summer, the
natural canvas fabric making up the roof developed some pretty big
leaks, and the rodents began gnawing at the wooden supports. Joey
figured it was time to take the yurt down while it was still useable
(which hopefully it will be if the roof is replaced).
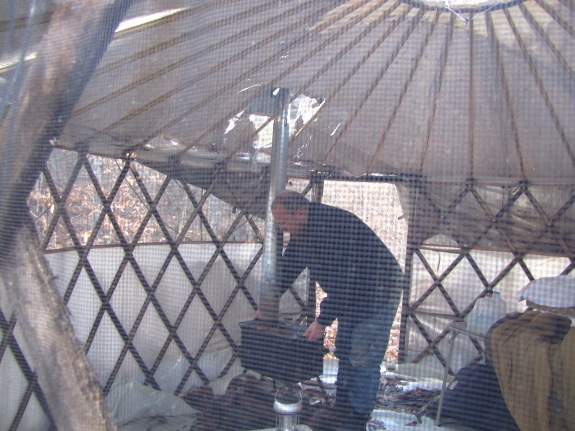
I asked Joey if he'd go
the yurt route again, and he said "Definitely!" Although the
structure wasn't cheap, we put it up in an afternoon and it served him
well for quite a few years.
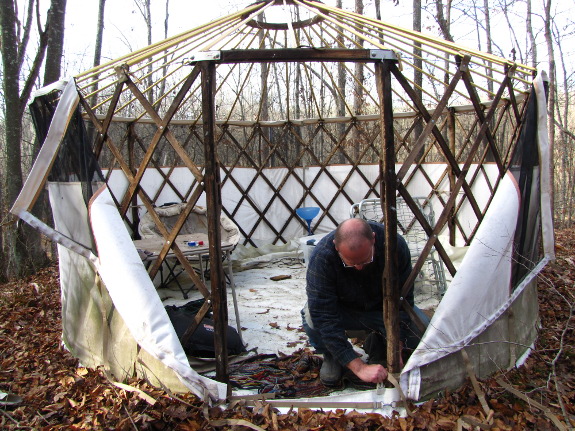
Although I'm sad to see
the yurt go, I have to admit that it didn't make the perfect guest
cottage I'd hoped for. After tromping through the mud to get to
our trailer, I never was able to talk a single guest (except Joey) into
walking another city block through the woods (no mud, though!) to enjoy
our yurt accomodations. Instead, our nearby
intentional community
seems to be the perfect spot to house visitors, complete with modern
conveniences.
Farewell, sweet
yurt! May you rise again elsewhere soon.
One of our winter projects we
started recently is trying to make one of the chicken pasture hillsides
more functional by experimenting with a terrace
system.
The chickens do okay with the
slope, but a few flat places will make it easier for us to cultivate
things like Mulberry
trees and Nanking
cherry bushes.
It should make it easier for
us to control the weeds as well, which I've noticed can get thick
enough to stop most chickens from pushing through.
 Weeds
and What They Tell Us
is a newly-released, lightly-edited version of Ehrenfried Pfeiffer's
book of nearly the same name (without the "Us") from 1970.
Unfortunately, this little book didn't live up to its promise,
especially given the high price of $13 for a 90 page text. I
could ignore the typographical errors, but the arguments are scattered
and somewhat contradictory.
The intriguing part of
the book is pretty much covered by the title. Pfeiffer believed
that the particular weeds found on our farms are signs of improper
management: "Weeds are indicators of our failure." A single plant
doesn't tell us much, but a suite of plants in the same category or an
increase in numbers of a certain plant is a sign of one of three big
problems:
- Acidic soil (often linked to
poor drainage) --- sorrels, docks, fingerleaf weeds, lady's
thumb, horsetail, hawkweed, and knapweed
- Crusted soil and/or hardpan
--- field mustard, horse nettle, penny cress, morning glory,
quackgrass, chamomile, and pineapple weed
- Overcultivated soil,
excessively loose without much organic matter --- lamb's
quarter, plantain, chickweed, buttercup, dandelion, nettle, prostrate
knotweed, prickly lettuce, field speedwell, rough pigweed, common
horehound, celandine, mallow, carpetweed, and thistles
The trouble is that I'm
not sure Pfeiffer's categories entirely work, especially since later
sections of the book suggest certain plants are indicators of other
soil problems. I'm also not a fan of his solutions to weed
problems, which seem to consist of lots and lots of tilling and some
chemicals (along with less problematic but rather obvious techniques
like hand weeding, mowing when flowers are just pollinated, draining
wet ground, planting cover crops, and adding compost and lime if
needed).
In the end, I'm still
waiting for a good book on this topic, so if anyone wants to go out and
observe weeds, I think your treatise would be well-received.
Meanwhile, for the rest of you, I recommend checking this book out of
your library (or just reading my summary above, which hits the
highlights).
These fence posts are now
sunk over 4 feet in the ground.
Will it be enough to hold
back the hill from wanting to smooth out?
If it holds for just a few
years we might have enough cultivated plants with deep roots by then
that will lend a hand in keeping the terrace
in place.
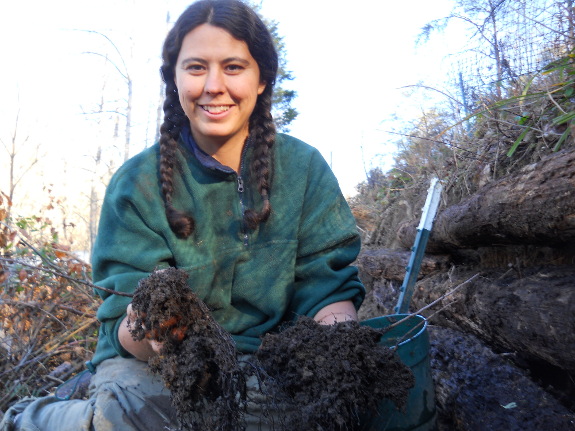
I
wrote in July that I
was going to repot our seedling American persimmons this winter, let
them grow another year, graft Asian persimmon tops to them the
following year, and finally plant them out the year after that.
However, I got to thinking that my original method would be a lot of
time in a pot and multiple transplantings for a species that
has personal space issues surrounding its roots, so I decided to change
gears.
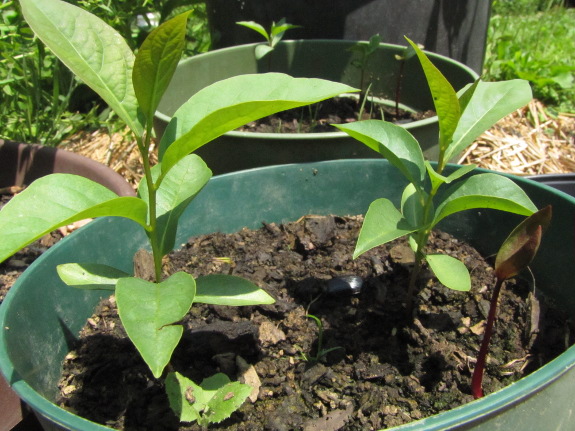 Another factor to consider is
winter hardiness. I want to graft Asian
persimmons onto my
American persimmon rootstocks because many varieties of the former are
naturally dwarfing (so they can go under the powerline) and since I've
heard the flavor can be better than wild persimmons. But Asian
persimmons are only moderately winter hardy here in zone six.
Many people push the envelope by letting the American persimmon
rootstock grow four feet tall before grafting on the Asian persimmon,
figuring that the coldest air will be right near the ground where the
hardier native persimmon can handle it, and I plan to follow suit.
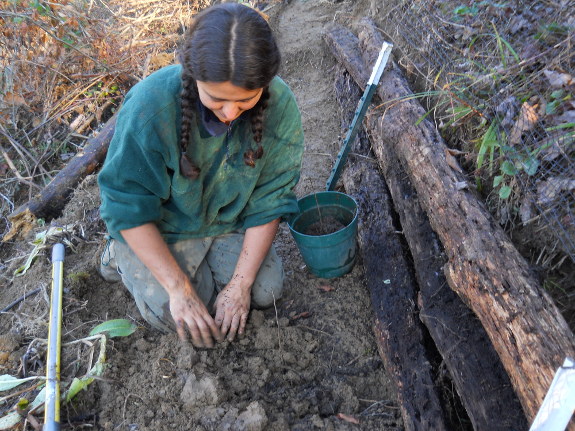
Which is all a long way
of explaining why I planted ten little persimmon seedlings into various
chicken
pastures over the last few weeks. I'm glad I did --- the
persimmons had developed a remarkable amount of root growth during
their first growing season, with many roots already running around the
bottoms of the pots. If I try this again, I should probably plant
one seed per container into small but deep pots, but hopefully my
seedlings will forgive me for the one root-mangling episode.
Now I just need to give
the seedlings a little love as they overcome the trauma of
transplanting, and wait for them to get tall enough to graft on Asian
persimmon scionwood. We're highly unlikely to see any fruits
before 2018 (with 2021 more likely), but the sooner we start, the
sooner we eat.
 Two of the three chapters we
read this week in Folks,
This Ain't Normal
focused on our modern, grain-based, livestock-farming system, so I
thought that would be a good topic for this week's discussion.
Salatin explained that before modern machinery made harvesting and
processing grain a breeze, wheat, rye, barley, and oats required too
much labor to be fed to livestock. This was a good thing because,
in areas where grain production wasn't used sparingly, deserts soon
began to encroach on farmland.
Then tractors and
combines came along, providing cheap tillage and processing, while
chemical fertilizers allowed us to grow massive amounts of grains
without closing the ecosystem loop with enough animals to feed the
soil. Add in cheap fuel to transport those now-copious grains,
and we saw another sea shift in agriculture --- meat and dairy animals
were crammed into CAFOs where they were fed grains and where their
concentrated manure became a waste product instead of a sought-after
source of fertility. Animal cruelty and meat quality aside, the
system is clearly broken from a purely biological perspective.
 Salatin asserts that there is
a better way. Herbivorous meat animals (cows, sheep, and goats)
can be raised entirely on pasture, which when managed correctly can
heal soil that is otherwise valueless for agriculture. If we kept
our animals on pasture, we'd only have to grow grains for people, and
there are a couple of very sustainable approaches to grain production
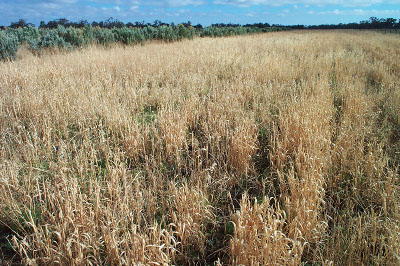
to choose between. Colin Seis, an Australian experimental
farmer, has developed a system of growing grains without tilling within
a traditional pasture, with each plot of land producing grains one year
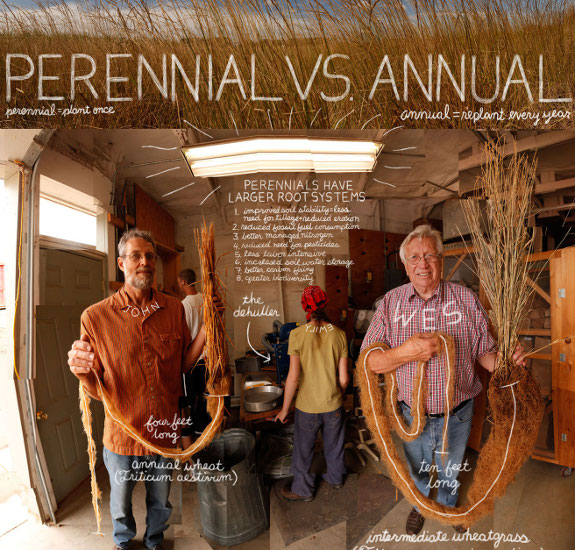
in five. Meanwhile, Wes Jackson is developing perennial
grains that only require the ground to be tilled and planted once or
twice a decade.
Although Salatin doesn't
mention this, the obvious question is --- can these systems be tweaked
so the food is affordable for folks who aren't wealthy? My answer
to this biological-farming question (which is also raised about
permaculture and organic gardening) is: "Who cares how much ethical
food costs? Grow your own and it's cheaper than the mainstream
stuff in the grocery store, which really costs a lot more than you
think if you add in the environmental side effects." But it is
true that cows are a lot harder to fit into a backyard than
zucchinis. What do you think?
We're skipping next week (since I'll be regaling you with a lunchtime series about trailer dwellers), then we'll discuss chapters
17 through 19 on January 2. If you're just tuning in, you might
want to check out part
1, part 2, and part
3 of the book club
discussion. Thanks for reading along!
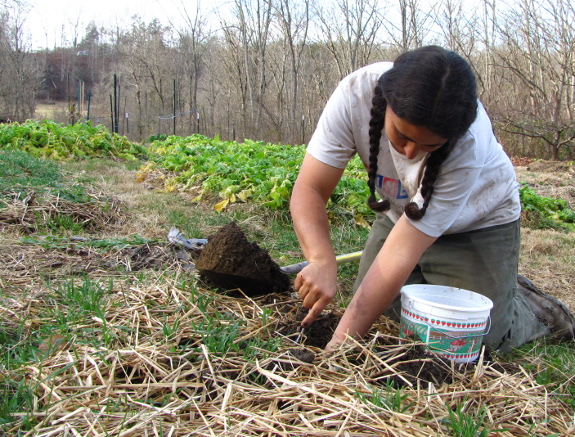
When we tested our soil
last winter, my
analysis was pretty
simple. I just wanted to make sure there weren't problematic
heavy metals in the soil and that all of the useful nutrients were
available in sufficient amounts. Everything looked okay, so I
didn't make any special changes after viewing my results.
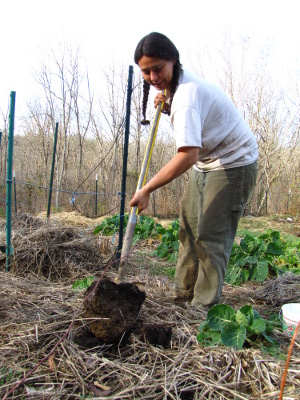 Now
that I'm reading Steve Solomon's excellent book The
Intelligent Gardener,
though, I'm ready to move to a second tier of soil analysis. I
started considering the
ratios of soil nutrients last winter, but hadn't read enough on the
topic to know exactly what I was looking for and how important slight
variations from optimal percentages were. Solomon's book has sold
me on the idea that these ratios are important (more on that when I
write a lunchtime series about The
Intelligent Gardener), and that adding amendments
like gypsum to get those ratios back on
track can produce huge changes in soil characteristics.
The only trouble is that
the information in Solomon's book only works if you use data from a
Mehlich 3 soil analysis. Any kind of soil test will give you
useful results, but you can't necessarily compare results between
different types of tests, and UMass
Amherst, who tested
my soil last year, uses a modified Morgan extractant.
Which is all a long way
of explaining why I'm biting the bullet and testing again, this time
using Logan Labs, which is explicitly
recommended by Solomon. If you want to follow along, I recommend
you learn about the basics of soil testing in Weekend
Homesteader: January,
then get your soil samples in the mail now. I'll be analyzing my
results here in early January (or whenever I finish digesting Solomon's
book), and will be glad to help you do the same.
Anna's calf-high Bogs have been leaking for a little
while now.
I cut out a small piece of
inner tube and tried to seal it over the troubled area with a product
called Seam Grip. It's
clamped down and needs to dry over night.
It took over half the tube to
do the left boot, so I used a cheaper adhesive called Welder on the right side which cost a
fraction of the 18 dollar retail price of Seam Grip.
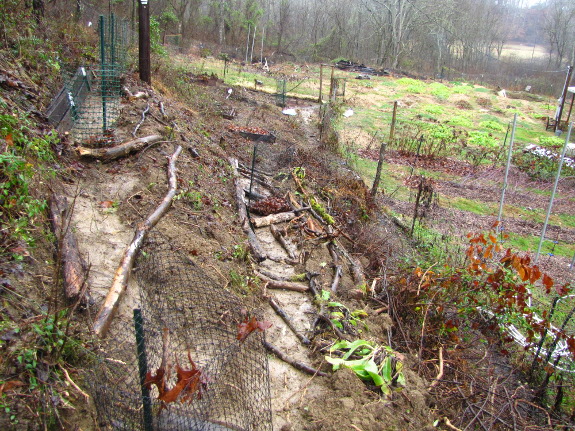
Part of the reason I
thought it was worthwhile to put a lot of effort into terracing
the powerline pasture
is completely unrelated to chickens and instead has to do with
water. The forest garden turns into a swamp during wet weather,
and while I've blamed the excess water on everything from barn roof
overflow to compacted clay soil, I'm willing to entertain the notion
that the powerline cut has something to do with it as well. After
all, wet weather springs pop up at the base of that hillside during
winter rains, suggesting that the lack of vegetation resulting from
cutting trees along the powerline has sped up flow of water, resulting
in a glut down below.
In her new ebook, One
Acre Homestead, Sara
McDonald writes about slowing the flow of energy through a system: "The
flow must be maintained, but catching and storing energy for beneficial
purposes is encouraged." In other words, one solution to my
problem would be to keep water on the hillside longer, where it can
hydrate plants and be transpired out through their leaves rather than
flooding the forest garden below. Many permaculture practitioners
use ponds to slow the flow of water, but I want to keep things simpler
by soaking up excess water with humus.
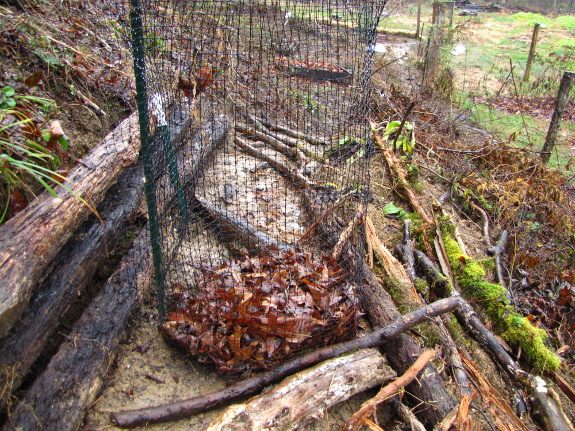
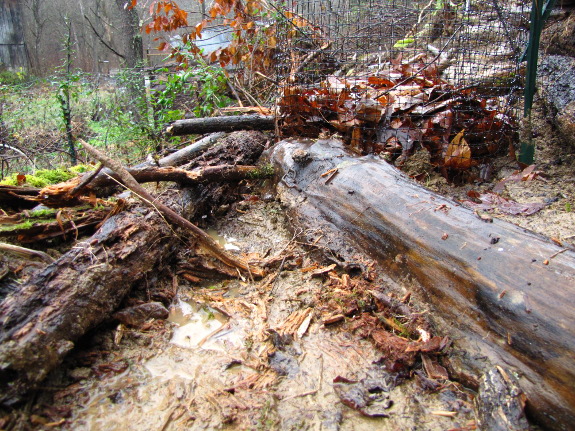
A trip into the nearby
woods turned up plenty of punky sticks and logs already rotting into
the ground. I used the drop test to determine which ones were
ready to move to the powerline cut --- if the wood broke into small
enough pieces to haul when thumped on the ground, I figured it was
ready. Six trips later, the terraces were looking a little less
barren and I was worn out.
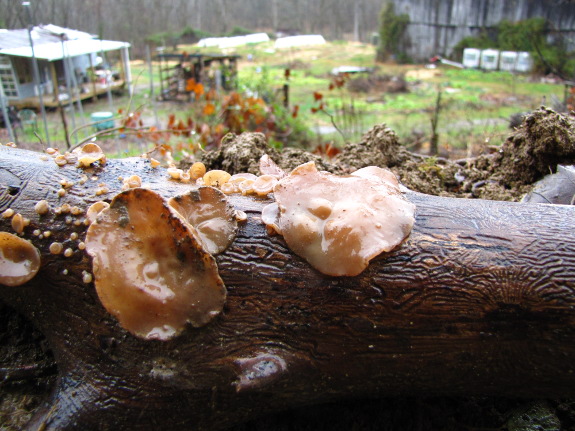
I'll probably add more
wood later, since this is just the bare minimum needed to hold
unvegetated soil in place, but even this little bit should help.
In the immediate future, the logs will force water to pool behind them
during heavy rains, tempting more liquid to soak into the earth rather
than running off, and soon the wood will have rotted enough to suck up
rain and release it slowly during droughts. The wild fungi that
came along for the ride can't hurt either.
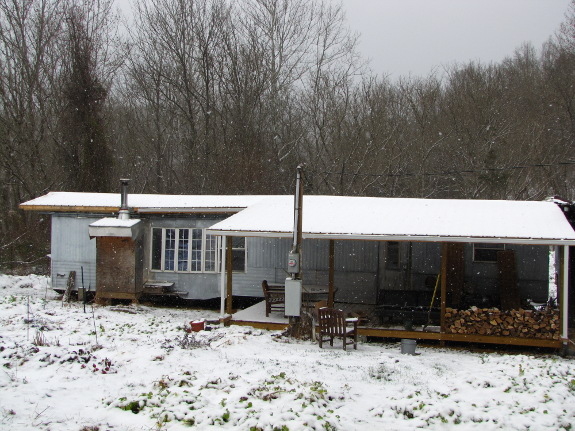
We enjoyed a solstice
snow, which gave me some solid (if non-numerical) data about the value
of the newly
insulated roof.
Mark and I both seem to recall that during previous snows, the frozen
water melted right off in short order, but this time around, it seems
to be sticking and staying. R30 on top of the R13 already in the
roof of the old trailer seems to be doing the trick of keeping heat
inside the house where it belongs.
To read more about
insulating a mobile home, check out Trailersteading, which I'll be writing much
more about next week.
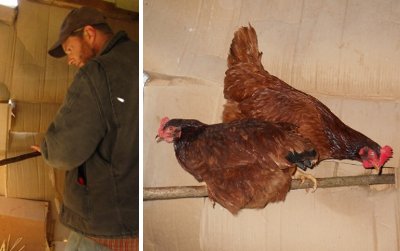 I
wasn't sure this new
roosting option was being used until I snapped this image a few
nights ago with the flash.
5 feet off the ground seems
to be that sweet spot where the hens feel safe, yet still be reached
with an easy jump and a few flaps.
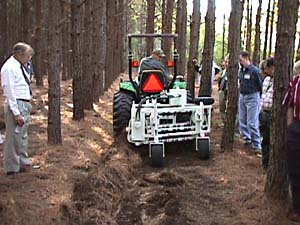 My
favorite part of Sara McDonald's One
Acre Homestead was
the idea of
growing our own mulch by planting a small pine plantation. Sara
notes that a 10-year-old pine forest can produce 125 to 200 bales of
needles per acre, with each bale covering 120 square feet (and with
yields increasing as the trees mature further). You should give
the trees two years off between mulch-gathering, though, so I estimate
my blueberry patch would need the mulch from about 0.3 acres filled
with 21 white pines.
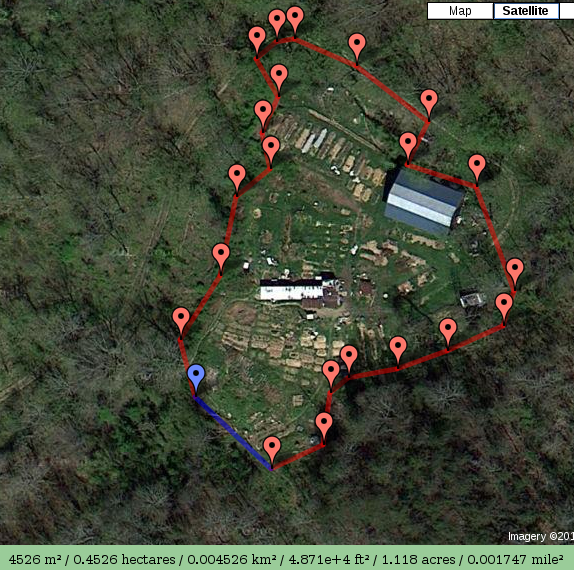 For the last six years, Mark
and I have been focusing on what
permaculture practitioners refer to as zones 1 and 2 and what I call
our "core homestead," which covers a bit over one acre. I do
have visions for forest pastures ringing our core
homestead...eventually...and I could see a pine pasture doing
double duty as mulch producer and shady summer chicken pasture.
On the other hand, we've still got areas within our core homestead that
haven't quite been reclaimed from the weeds and turned into productive
growing space, and those areas always come first.
Still, I'll be adding
the pine tree idea to other options I've tossed around for growing our
own mulch. Oats
as a fall cover crop
work well for the beds they're planted on and chop-'n-drop species are possibilities in
the forest garden. Meanwhile, I'll just keep raking
leaves out of the woods, flagging down the wood chip guys whenever I see them,
and buying straw. What's your favorite
way to complete the loop with farm-grown mulch?
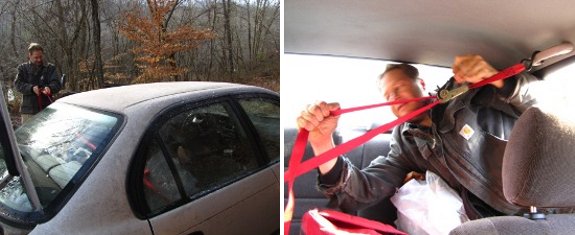
We had a strange problem with
the Toyota this morning.
The doors opened okay, but
something froze that prevented the passenger side back door from
latching shut.
One option we considered was
to wait and see if warming the car up would fix it, but time was an
issue and I felt like this is the exact sort of problem ratchet
straps were invented for.
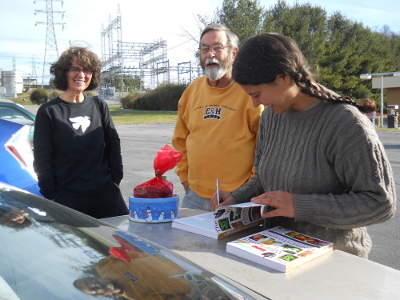 After
getting the car
door ratchet-strapped shut, we headed on down the road
Sunday for my first (and probably only) book signing. Daddy's
partner bought two copies of my
book as Christmas
presents for family members, and Mark commemorated the occasion with
copious photos.
I hope you're taking the
solstice season slow, uncommercialized, but full of family and friends
like we are. Happy major winter holiday of your choice!
 Trailersteading:
Voluntary Simplicity in a Mobile Home is now ready to go on
Amazon! It's my favorite ebook so far, full of stories, facts,
and (hopefully) inspiration. Here's the blurb:
Imagine what you could do with your time if you didn't have to spend $16,000 a year on rent or a mortgage. Old single-wide mobile homes can often be found for free (and installed for a couple of thousand dollars) in rural areas, so trailersteading is akin to dumpster-diving. A trailer allows you to live without debt, to keep your ecological footprint to a minimum with energy bills at or below the national average, and even to blend right in with traditional-house dwellers after a few years.
Trailersteading profiles nine mobile-home dwellers who have used trailers as a stepping stone toward achieving their dreams. Some have spent the cash they saved by renovating their trailer on extra insulation, pitched roofs, classy interiors, and even basements, while the found money has allowed others to go off the grid. Many also took advantage of the low-cost housing option to pursue their passions, becoming full-time homemakers or homesteaders.
In addition to the case studies, the book presents easy methods of minimizing the negative sides of trailer life and accentuating the positive. For example, did you know a single-wide is easy to retrofit for passive solar heating? That a simple plant-filled trellis can break up the blockiness of the trailer's external appearance? Learn which parts of installing and upgrading your trailer are easy for a DIYer and which parts should be left to the experts, along with how to cheaply heat and cool a mobile home.
128 photos and diagrams.
The rest of this week's
lunchtime series is going to sum up the lives
of four of the trailer dwellers we interviewed. To read the rest,
you'll need to splurge
$1.99 cents on the ebook (which can
be read on
nearly any device),
or wait until Friday when I'm setting the price to
free so that my loyal readers can pick up a copy without paying.
Those of you who prefer a pdf copy can email me Friday as well and I'll
send your free copy that way instead. Thanks for reading (and
double thanks if you find the time to leave a review on Amazon).
I hope you enjoy this jaunt into simple living as much as I do!
| This post is part of our Trailersteading lunchtime series.
Read all of the entries: |
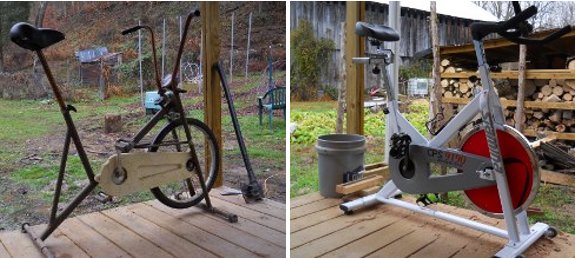
I think I remember Jimmy
Carter being president when my Mamaw got the exercise bike on the left
from Sears. Its held up
nicely over the years and still offers up a good work out, but I wanted
a bike with a heavy flywheel for a future pedal power project.
The current plan is to try to
mount a low RPM generator with a rubber wheel that snugs up against the
flywheel.
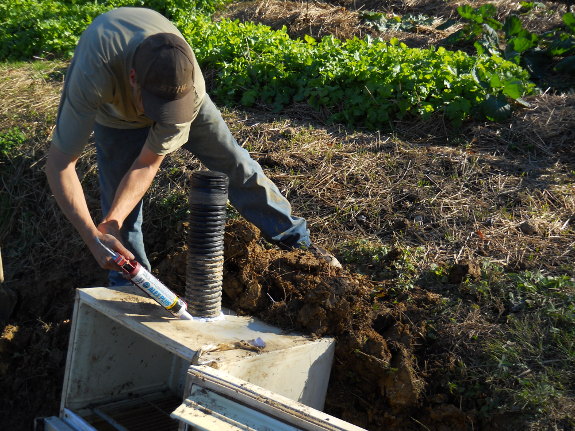
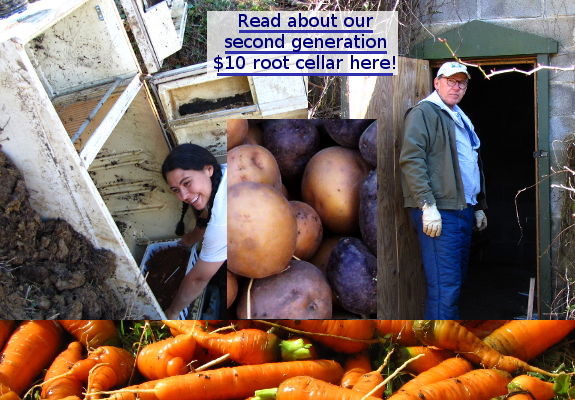
 Mark suggested I write a
short ebook summing up our refrigerator root cellar experiment, and I
thought it sounded like a fun idea. After all, our
youtube video on the
subject has had over 72,000 views, and we've learned a lot since making
it. Granted, a few commenters were less keen on the idea ("omg
thats getto i just lost IQ points"), but I don't mind being a permaculture
redneck if it helps
someone else.
Ebooks always get more
grandiose the longer I spend on them. Before I'd even worked my way
through the basic construction data of our fridge root cellar,
I'd decided to add in information on more traditional root cellars
along with low-tech root-storage techniques (like the potato
clamps we tried
several years ago). But I've only seen so many myself....
Which is where you come
in! If you've got a story to share, feel free to comment and/or drop
me an email.
Photos are much appreciated, and I may quote you in the book if you
don't mind. About root cellars, I'm interested in:
- The basic design you used
- How much time and money you spent building it
- What the temperatures are like inside (average temperature, plus extreme highs and lows)
- Humidity information if you have it
- Anything you would change if you were to do it again
- Where you live (or which hardiness zone you're in)
I'm also interested in
low-tech and/or older methods of preservation. My movie star
neighbor told me he grew up with what was called a "dairy", which was
essentially a root cellar not entirely buried in the ground, often with
a smokehouse on top. A nearby living-history museum has a
springhouse, which is like a root cellar but uses the cold running
water of a spring to keep contents cool. And I've read about
people storing apples between bales of hay in the barn, potatoes in
pits in the ground, and many other techniques to preserve the
harvest. What do people use in your neck of the woods?
To sweeten the pot, I'll
send a free copy of the finished ebook to anyone whose contributions
show up therein, and will mail you a signed copy of my
paperback or a t-shirt (your choice) if I turn your
story into a full profile. Thanks in advance for sharing!
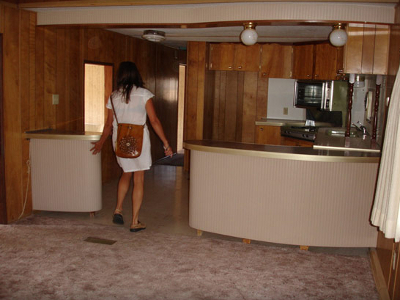 Wendy
Jehanara
Tremayne and Mikey Sklar explained that rehabbing an old trailer was
part of their quest to live an uncommodified life.
"When we noticed an RV
park for sale, we jumped to buy it. The trailer on site had been
left behind,” Mikey said.
"At first we did not
know we were going to live in it," Wendy added. "We considered
hauling it to the landfill. It was old
and crappy. The insurance company valued the jalopy at
$1,000. The cost to haul it to landfill was estimated at
$5,000. New building came at the cost of $200 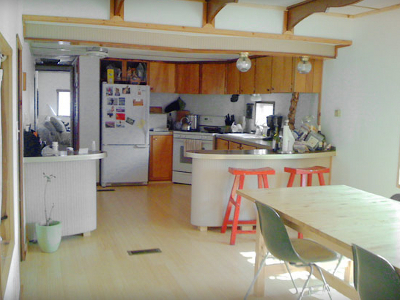 per square
foot. We determined that for $10 a square foot (less than
$10,000) we could remodel it, and so we did."
Mikey said, "We have a saying: 'The greenest house is the one that is
already there.' We didn’t like the idea of hauling a perfectly
usable living space to the dump in order to avoid the stigma of living
in a trailer. Insulation and thermal mass reduce home
utilities. They are not standard issue in trailers. But we
have found that utilities can be reduced by adapting to the
environment. In the winter we wear a sweater and in the summer we
wear shorts."
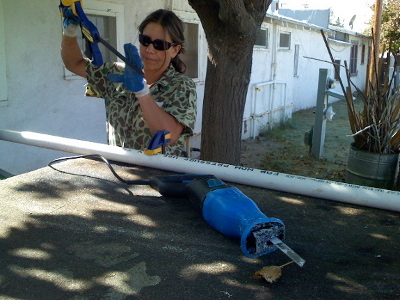 "Because our trailer was valueless (according to the
insurance company, who said it was worth $1,000), it presented us with
a risk-free starting point and an opportunity to
learn new skills," Wendy said. "The renovation taught us to use
tools and work with building materials. Though the trailer may
not last forever, the skills will!"
To read more about Wendy
and Mikey's adventures in uncommodified living, check out their blog, or the rest of their
profile in Trailersteading.
Wendy's first book, The
Good Life Lab, can
already be preordered on Amazon, and you can stay tuned to its facebook page for updates.
| This post is part of our Trailersteading lunchtime series.
Read all of the entries: |
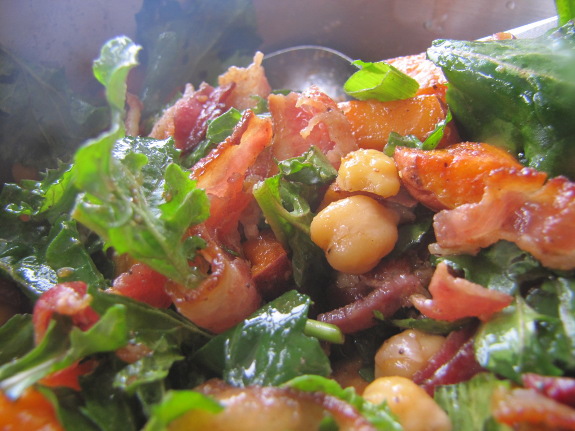
This recipe gets a bad
grade if you want to keep fat out of your diet, but it's delicious and
pretty high in protein (25%), and Mark always seems to want it on the
menu. The ingredients:
- 1 pound bacon (you can cut this back to half a pound if you want
to skimp)
- 1.5 cups cooked chickpeas
- 2 large sweet potatoes
- 1 cup arugula (optional)
- 2 tbsp green onions (you can increase this a lot if you have more
on hand)
- 2 tbsp balsamic vinegar (more or less)
- salt
- pepper
Bake the bacon on a
cookie sheet in a 350 degree oven, flipping once, and taking out the
bacon once the meat is cooked but not very crispy.
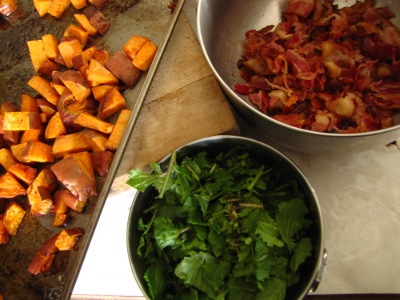 Cut up the sweet potatoes,
sprinkle with salt and pepper, drizzle on the bacon grease, and cook in
the 350 degree oven until the potatoes are soft and moderately
brown. Pour off any excess grease.
Meanwhile, break the
bacon into pieces, then go out into the garden and cut a cup or two of
whatever greenery you have on hand. In the fall, we use a lot of
green onions, but our Egyptian onions have slowed down for the winter,
so this time around we mostly used arugula. Whatever you choose,
cut it up into one inch pieces.
Mix the bacon, sweet
potatoes, greens, and chickpeas together, put on a few dashes of
balsamic vinegar (start slow --- you don't need much), and add salt and
pepper to taste. Serves about eight to ten, especially if you
have a green salad on the side.
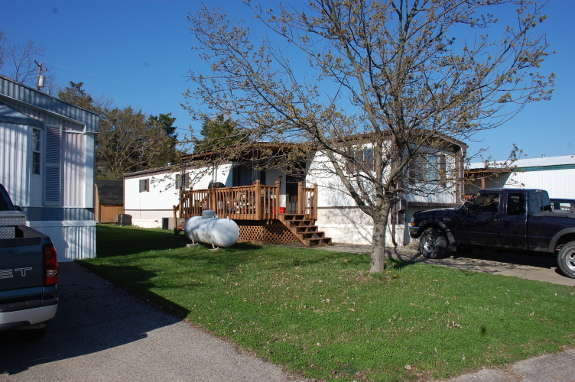
Jonathan and Andrea
proved that a trailer can be a cheap and easy way
to work toward buying your dream homestead. "We spent
the first 10 years of our married life living in various rented
apartments, a townhouse, and even one 'real' house," Andrea
explained. "We had decided that the city we were living in was
getting too big and to live a more sustainable life, and for our
sanity, we needed to get out into the 'country'. We soon realized
that finding both a house and a piece of land that we liked together
was going to be impossible. So we decided to focus on the land
and build a house."
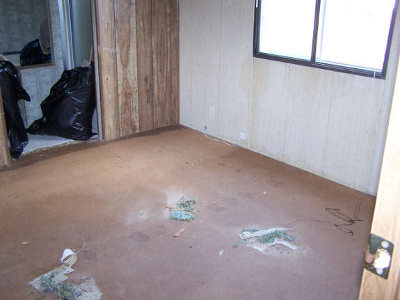 "Andrea had previously indicated that she was not interested in
living in a trailer, but when we decided to move to the country, it
seemed like a good option and she agreed," Jonathan chimed in.
"Building a house was
going to take time, and even longer if we were
not
living on site," continued Andrea. "We looked into small
pre-built
sheds, yurts, small cabins, etc. But none seemed right for our
lifestyle and environment. So we decided to buy a trailer, live
in it till we found land 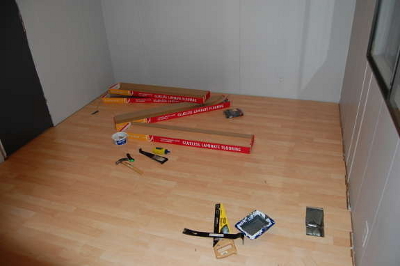 and had the trailer paid off,
then move it to
the land."
The duo found the
perfect trailer for $8,000 in a trailer park with a
lot fee of $215 per month. The 1982 model was old but in good
condition, with 924 square feet of interior space broken up into two
bedrooms, two baths, a kitchen, and a sunken living room.
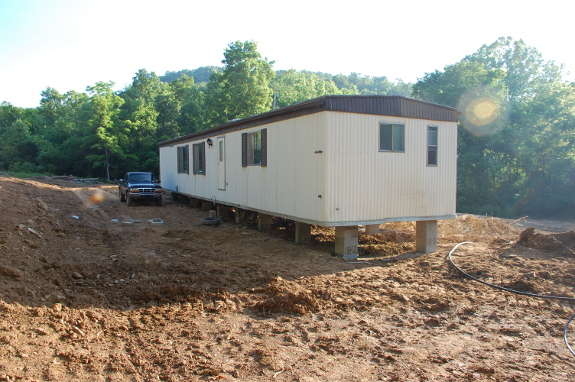
Jonathan and Andrea
appreciated the ability to move out of their
apartment and
into the trailer immediately. Two years later, the perfect
32-acre property
came along and they spent an additional $12,000 having a spot graded for the trailer on their new land, installing a septic tank, and
having the trailer delivered and set up. "[The trailer] allowed
us
to save money on housing
while we searched for the property," Jonathan said, "and now allows us
to take our time
with choosing the spot on our property for building the type of
home we wish to construct, while also allowing us to build at our own
pace."
To read more about
Jonathan and Andrea's adventures, visit Jonathan's
blog, or read the
rest of their profile on Trailersteading.
| This post is part of our Trailersteading lunchtime series.
Read all of the entries: |
If I had found these new cracks
back in the summer I might have been able to block this year's lady bug
infestation.
The internet says the only
thing to do is vacuum them up, but I can't help but to think there
might be an easy, non-toxic way to lure and trap them for relocation to
a chicken coop.
 Keeping storage
vegetables fresh
through the winter is an art as much as a science, and I generally have
to learn the idiosyncracies of each species to get the best
result. We seem to have worked the kinks out of sweet potatoes,
garlic, and butternut squash, which carry us through until spring, and
the carrots in the fridge
root cellar are
currently crisp and delectable and seem likely to last just as long.
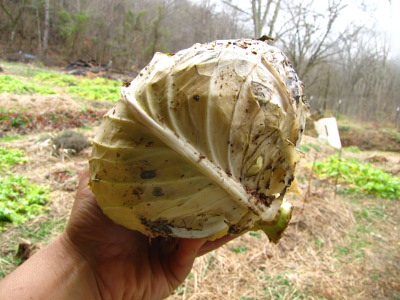
We've got a bit of a
learning curve left with our cabbage, though. I pulled the
second-to-last head out of the fridge root cellar on Christmas, and the
outer leaves were slimey and rotten (although the center was still
good). I suspect the issue there was harvest time --- I wasn't
quite sure what to do with all of our cabbages before we resurrected
the fridge root cellar, so I left them out in the garden during a hard
freeze. The cabbage I 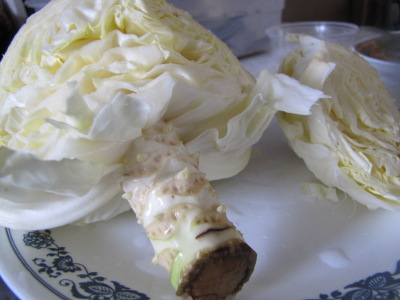 harvested
just before that freeze was top notch, but the one I cut into a few
days later was not quite so crisp or sweet. Next year, I'll be
more careful to take in the cabbages before temperatures drop into the
20s (and to plant more of them since they've made a great addition to
the uncooked veggie side of our winter meals).
We still haven't eaten
much of our preserved produce because the garden is churning out plenty
of lettuce, arugula, kale, Asian greens, Swiss chard, and Brussels
sprouts, in addition to the contents of our fridge root cellar and
kitchen shelves. I can envision a time in the future when we
won't preserve anything at all and will subsist entirely on fresh food
all winter. I'd miss my tomato-based soups though....
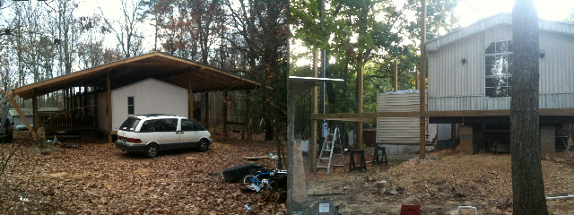
 Lindsey and her husband Keith
live in a "crazy, cobbled-together,
split-level
mobile home" in northeast Alabama with their five children. "We
also have another baby due in February 2013, and we hope to have
several more before my child-bearing days are over," Lindsey
added. At 1,680 square feet, personal space in their
two-trailer combo clocks in below the average size of even a 1950s-era
home, but they find the advantages of trailer life outweigh the
disadvantages.
"We moved from western
Washington state to Georgia in 2002 with our
7-month-old firstborn, hoping to find a place where we could live on
one income and buy some land," said Lindsey. "Being willing to
live in a trailer certainly enables us to live the way we do, on one
income with Mom homeschooling the kids. That was our priority and
we were willing to do just about anything to achieve that."
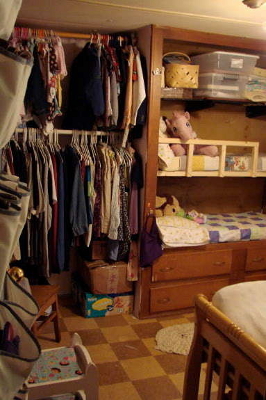 "When we found a real estate
ad for 11 acres with a 'house' for $40,000
we immediately made an appointment to see it," Lindsey
remembered. The house turned out to be a 10-by-40-foot trailer
from the early 1960s with a "poorly-built addition of about the same
size," which they later tore down.
"Our plan was to live in
the trailer/addition combo for 5 to 10 years
while saving money to build a more suitable house," Lindsey said.
"There was always a sort of 'ew, a trailer' attitude between us,
although we didn't look down on other folks who lived in them. We
just figured we'd need something sturdier and bigger for the family we
were hoping to grow."
But the trailer slowly won the family over. "The little trailer
had a really good design that took advantage of
every bit of available space in a relatively attractive way," Lindsey
explained. "Well, we
liked it anyway. And my husband always admired how well-designed
things were for such a small space."
Perhaps because of the
positive aspects of the original trailer, the
couple opted to increase their living area by adding a second trailer,
purchased for $7,500 and moved and installed for another $3,000.
"Our second trailer is a 1998 model 16x80. It's not as well
planned as the older trailer. I think it tries too hard not to
look like a trailer."
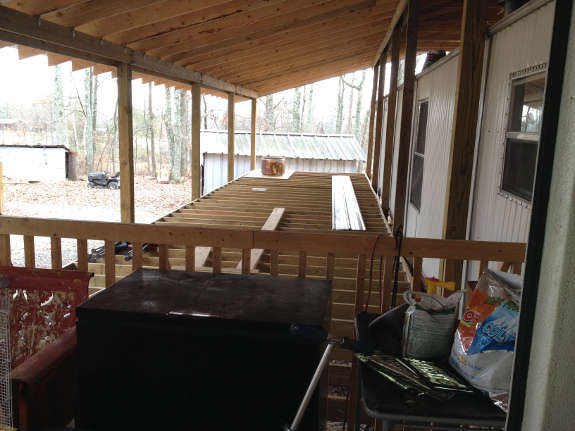
 With the two trailers butting
up against each other, the obvious next
step was to turn them into a single structure with a joined roof.
"The roof is pretty colossal and ended up costing a lot more time,
money, and effort than we initially imagined," Lindsey said, adding
that the final price tag for the roof alone was close to $9,500.
"So we probably could have purchased a place with a more typical home
for the money we've spent, but we wouldn't have the space we have now,
we wouldn't have a unique home (which we like!), and we would still be
in debt instead of having spent the money when we had it, a little (and
sometimes a lot) at a time."
Although Lindsey's
trailers are not as well-insulated as their
neighbors' stick-built houses, the unique roof (and nearby trees) do a
great job deflecting summer heat. "Our pavilion-style roof makes
it a lot cooler in our house
than it would be with a conventional roof," Lindsey said. "We
have friends with a trailer almost identical to our newer one.
They have zero trees and the original roof and they spend a fortune on
cooling it all summer long—for 4 or 5 months—because it just doesn't
keep its cool like ours does."
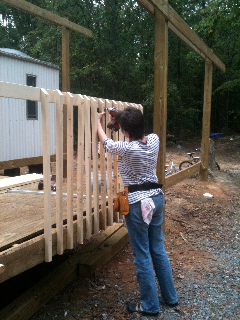 I was fascinated by the way
Lindsey's attitude toward her trailer
changed over the years. "It's been a while in coming but I think
we all like our home," she said. "It's
different, more than a little counter-cultural, so to speak, and that's
how we like to roll.
"Most people hear about
our house and look like they want to move a few
feet further away from me, but once they see it or hear more about it
they tend to think it's actually kind of cool, if not something they'd
ever choose for themselves." She concluded: "A few years before
we finished paying off our land, we realized that
we're actually not 'too good' to live in a trailer, possibly forever."
To read more about
living in a trailer with kids, check out the rest of Lindsey's profile
in Trailersteading.
| This post is part of our Trailersteading lunchtime series.
Read all of the entries: |
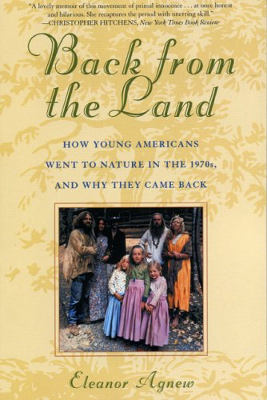 Although
I stole my parents' dream of going back to the land, I don't want
to share the end of their story --- fleeing to town and selling the
farm. So when I heared about Eleanor Agnew's Back
from the Land: How Young Americans Went to Nature in the 1970s, and Why
They Came Back, I
had to check it out.
The reviews for Agnew's
book aren't all glowing, and I can see why
not. She interviews a variety of ex-back-to-the-landers, some of
whom seem to have enjoyed the experience, but Agnew herself has nearly
nothing good to say about her four-year stint on a farm in Maine.
Her book includes phrases like "Building a house from scratch is a
labor from hell," and, although she doesn't use these exact words, I
can tell she thinks current homesteaders and adherents to voluntary
simplicity are naive. However, it's worth reading a more
pessimistic view of the movement in the interest of preventing history
from repeating itself, and the book is well written and easy to read if
you don't give yourself a tension stomachache taking it all personally
the way I did.
Who
they were
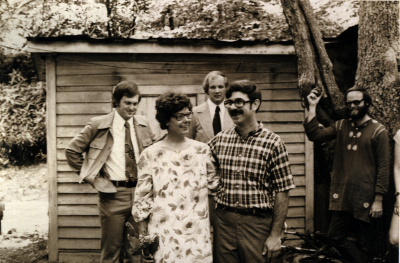 As Agnew sees it, most of the
four to five million back-to-the-landers
who existed by the end of the 1970s were young, white, middle class,
and educated. Reading between the lines, it sounds like they were
also philosophers who envisioned genteel poverty on the land as
requiring little work and lots of fun.
Their reasons for going
back to the land were similar to those of
today's homesteaders in many ways, but there were striking
differences. Many 1970s back-to-the-landers joined up because
they liked the idea of being part of something larger than themselves,
and many more ended up in intentional communities or communes than do
today. The 1970s back-to-the-landers also seem to have been more
dogmatic and less willing to compromise --- for example, Agnew seems to
have thought that everything from hooking up to the electric grid to
getting a white-collar job equated to selling out --- and
they also were more isolated and had fewer job opportunities in the
days before the internet.
Why
they left
Differences between the
two movements aside, I think modern
homesteaders should take note of the reasons 1970s back-to-the-landers
fled to cities. For some, the issue was a simple dislike of the
reality of homesteading, whether that was cold weather or slaughtering
meat animals. Chores like carrying water that had at first seemed
so romantic turned into inconveniences, and the hard work left little
time for the creative pursuits many had fled the rat race to
puruse. Agnew (and many others) eventually concluded "if it's
simplicity I want, it's simpler to play along with the system."
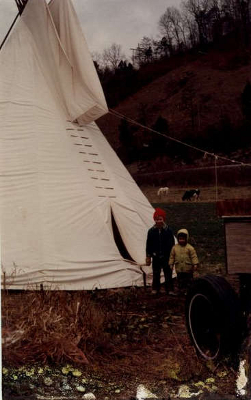 Another common theme was being torn down by
relentless poverty.
Sources like the Nearings (who actually had an annual
writing and
speaking income that would translate to $17,000 to $55,000 in today's
dollars) caused these young people to drastically underestimate the
amount of capital required to keep a farm going, so they thought they'd
be able to make a good living selling fruits and vegetables or arts and
crafts (something I preach against in Microbusiness
Independence).
When that didn't pan out, they tried to get traditional jobs, but rural
areas had few opportunities that paid above minimum wage, so the
back-to-the-landers spent
more and more time off their farms trying to make a living.
A reason for failure
that seems just as prevalent in today's
homesteading community is relationship ills. Often one partner
was more interested in the homesteading gig than the other, and they
never learned to compromise their work ethics and coordinate their
dreams. The period was also marked by a belief in the importance
of individual fulfillment, and that, along with a lack of personal
space, stress over money, and exhaustion from hard work, caused many
couples to fall apart. When a couple split, at least one of them
inevitably left the land.
Lessons
learned
 Although I found Back
from the Land
to be a handy cautionary tale, I think that most of us have a better
chance of success than our parents did, especially if we're able to
compromise. Now more of us believe we can choose to be part of
society on our
own terms without losing sight of the goal we're striving toward.
We can take advantage of the power of the internet to make a living,
can hire local craftspeople to help us improve our living conditions,
and can still enjoy the benefits of homegrown food and a debt-free
existence.
Meanwhile (and as
usual), I think there's also another book waiting to
be written about the flip side of the coin. I know of at least
one couple in our county who went back to the land in the 1970s and
still lives the dream today, so there must be other examples out
there. If you're one of those success stories, I hope you'll
comment with your tips for the next generation.
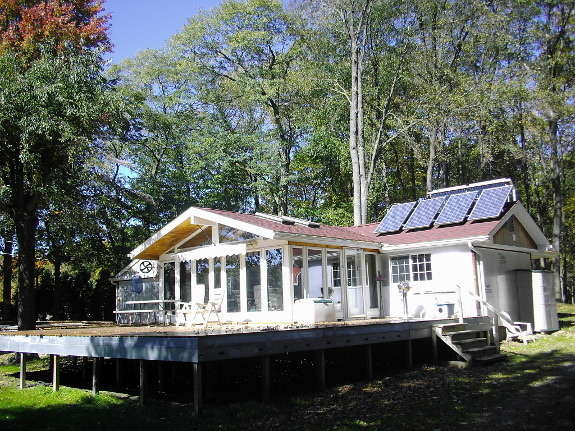
 "I
almost never tell anyone that we live in a trailer because, with a
normal gable roof and a full basement, we both consider it a normal
stick-built house," David said. "Although if a
visitor happens to
mention that we have a very nice place, I will then tell them it was at
one time a 'mobile home' now converted to real estate."
Over the past three
decades, Mary and David have created a vibrant
homestead, due in part to the low cost of their initial housing
choice. After two years in a trailer park, they bought seven
acres of land and moved their trailer into place (at a cost of $350
plus a lot of their own labor). A few years later, they had saved
enough to hire a cousin to add a roof onto their trailer and to
pour loose insulation
into the attic.
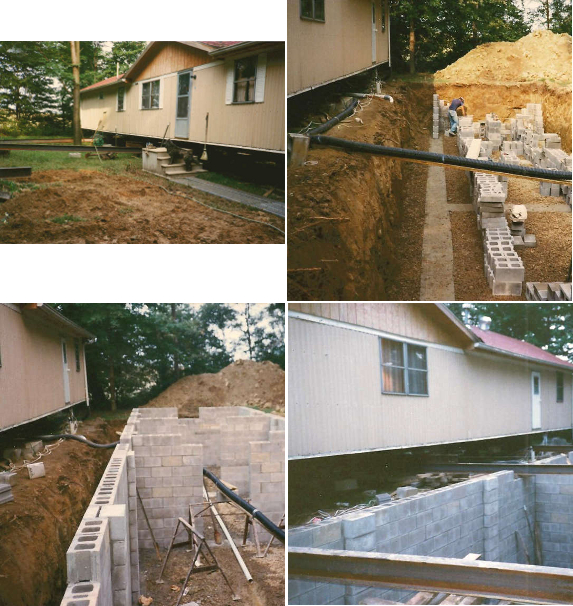
Next came a full
basement, constructed for $9,000 in 1985 or 1986,
along with double-glazed windows and redwood siding. "We loved
the looks of the siding, but it needed constant maintenance
with oil wood preservative," David remembered. Meanwhile "the
wood
boring bees loved to get behind the aluminum gutters and bore holes
into the fascia boards. I wasn't going to let some insect destroy
our
home. We also wanted more insulation in the walls, and the only
way to
accomplish that was to put the insulation on the outside."
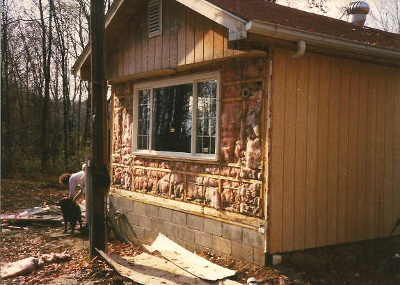 The trailer itself had about three inches of fiberglass insulation in
the walls, to which David added foil-faced foam boards for extra
heat-holding power. He "taped all the seams with aluminum tape
and used special nails to hold the foam board in place."
About the same time,
Mary and David hired a contractor to install
aluminum
fascia under the gutters and on the rakes of the roof, along with vinyl
perforated soffit to protect the attic insulation from moisture.
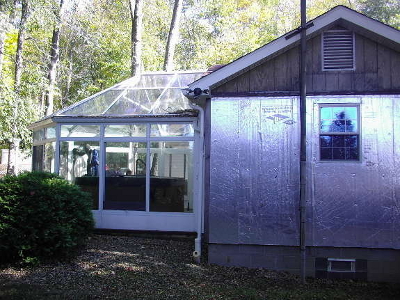 "As you can see from these photos, we have come a long way since the
original metal-sided, metal-roof trailer that we had before," David
said. "You can also see a well-insulated house, but no siding, a
large deck, but no railing, no lattice, and most of the decking isn't
fastened down."
I asked David if he
agreed with the mainstream attitude that it doesn't make sense to put
large amounts of cash into a mobile home, and he replied by telling his
own story of building as you go. "If we had bought a big fancy
house with a big mortgage
instead of the trailer, we 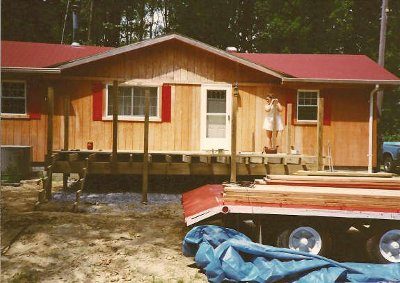 probably would have lost it
back to the bank
because, two weeks after moving the trailer to our new property, I lost
my job and was out of work for two years because of the bad economy,"
David said. "So
living in a pre-made structure with wood heat and land contract was
cheap living again.
"So let's say after two
years I get back to work and money is flowing
again, so we decide to build, or contract out the construction of a new
house while we lived in the trailer. Would the house be 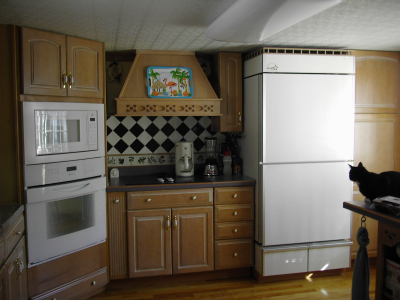 what
we
wanted, or would it be what we thought
we wanted?
"If I were to build a
house now, I know exactly what I want in a
house. I know the type, quality, and placement of windows; I know
the thickness of the walls and insulation type; I know the orientation
of the structure and placement on the property; I know the roof
material; I know on what side of the house utility and low-use rooms
should be placed. These are things I didn't know back 30 years.
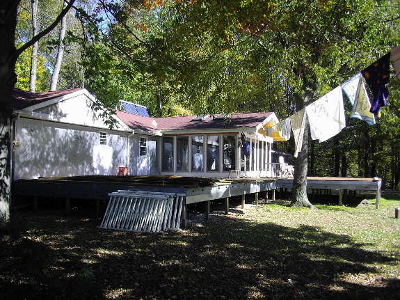 "The mobile homes now are
much better quality than our 1974 vintage
trailer. Young people (or old people) now can buy a mobile home
with 2x6 walls and a regular shingled gabled roof, and vinyl
siding. I say if a person can find a good quality used mobile
home and move it out to their property, that would save them money,
time, and effort. Then they can direct their efforts toward
something more productive, like a more self-sustainable lifestyle."
If
you're inspired to give mobile home living a try, or just want to
read more about our trailer dwellers' adventures, Trailersteading
is free
on Amazon today only.
Now's also your chance to email me
with
your request for a free pdf copy if you'd rather read the book in print
or on a device that doesn't play well with kindle formatting.
There are no strings attached, but if you find time to leave a review
on Amazon, I'll be eternally grateful. Thanks for reading!
| This post is part of our Trailersteading lunchtime series.
Read all of the entries: |
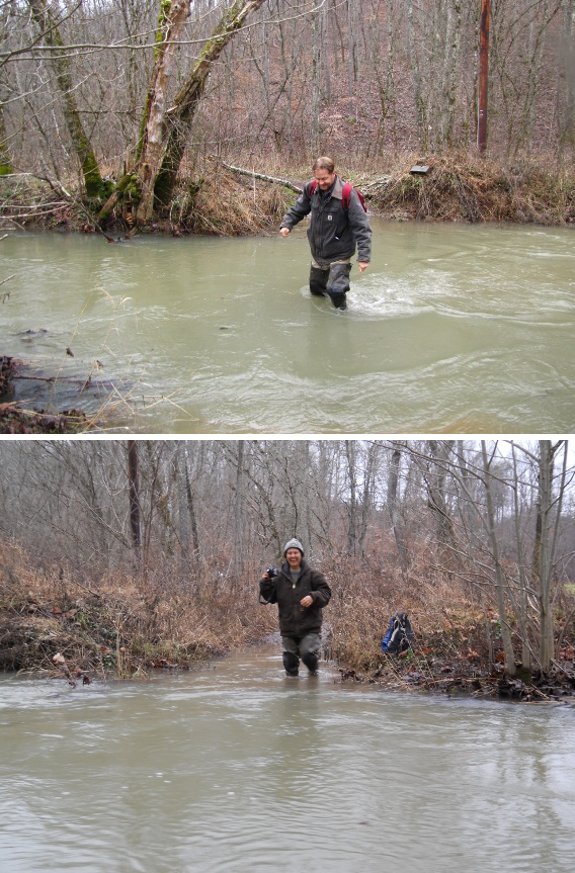
We were planning on having a
visitor over yesterday, but the flooded creek is a challenge most
people would choose to skip, so we decided to meet my
cousin half way at
Applebee's for lunch.
 If
you live in a swing state, memories of the October and November rash of
glossy campaign fliers are probably still fresh in your mind.
They drove me nutty since I couldn't use them as firestarters, couldn't
mulch with them, couldn't put them in the worm bin. But there is
a silver lining --- the angst pushed me over the edge into putting an
end to the catalogs coming into my mailbox.
Without really noticing
it, I seem to have gotten onto dozens of
gardening catalog mailing lists. This is pretty funny because I
only order seeds and plants online and only from about three companies
--- clearly
someone sold my information far and wide. Equally clearly, our
society hasn't become advanced enough to put an "internet customer
only" notice beside my name.
At first, I was manually
removing myself from each list. If
you're prepared with the Customer ID number (usually close to your name in a blue box
on the mailing label), you can get off a list after about three minutes
 on the phone. A few companies won my approval by having automated
catalog-removal buttons right on their websites, and I've also sent
emails to customer service addresses (although I'm less confident that
last technique will work).
But the catalogs kept
coming! Not from the same companies
(although 30 seconds of each three minute phone call is usually an
explanation that they print catalogs months in advance, so you may get
two or three more editions before you're off the list for good).
So I
decided to try Catalog Choice.
This non-profit didn't win my approval four years ago when I last
visited them because they
hadn't heard of many of the catalogs I was receiving, but the internet
hive mind seems to have done its job well in the interim --- my
post-Christmas armload companies were all present and accounted for.
I know that a few of you
probably enjoy your gardening porn, but I hope this will remind others
to get rid of junk mail before it starts.
Not only will you prevent waste, you may also find you've developed a
more healthy relationship with your mailbox when the only contents are
letters from old friends and Christmas cards from the neighbors.
I'm afraid I don't know
how to get off those political mailing lists, but I've got another four
years to figure that one out....
 "Oh, no, honey, I'd never ask
you to handle humanure," I reassured Mark when we came to the final
stages of negotiation for our composting
toilet. I
could tell he was seething over the term "humanure" (which he considers
sneaky), so I went on. "The system I'm thinking of is designed so
you don't touch the human waste until it's had at least one solid year
to compost. It's really totally safe!"
With some grumbling,
Mark gave in and let me have the composting toilet I'd been campaigning
for. So I expected some snide remarks when I came to him on
Friday for help revising a flaw in the system. The spaces between
the wooden slats (which Mark had said were too far apart, but which I'd
said needed distance for air flow) had allowed a raccoon to reach in
and pull out some half-rotted chicken
entrails, along with
toilet paper and, um, humanure.
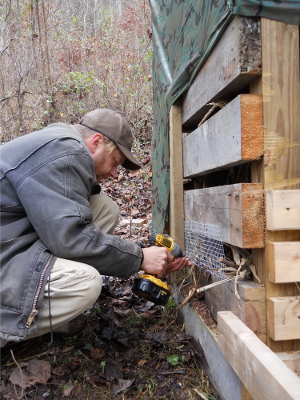 There was no "I told you so,"
but only because Mark is a true gentleman (and a long-suffering
husband). I scooped up the debris to stuff back into the
composting chamber while Mark screwed hardware cloth over the offending
holes.
Word to the wise ---
lots of carbon isn't sufficient to keep vermin out of your composting
toilet chamber if you live out in the wilds. The author of The
Humanure Handbook
doesn't mention this problem even though he threw all of his household
food scraps down the hole, but I think he also lived in suburbia where
pesky racoons are probably much less common.
One pest-control option
would be to line the entire chamber with hardware cloth, but that might
rust into a mess in a few years. Another option would be to use
more, smaller boards spaced closer together for the slats so you have
just as much air flow but less space between each board. We'll
wait and see if filling in the most problematic holes with hardware
cloth is sufficient, and I may go back to plan B, which keeps anything
food-like out of the compost chamber. I'll keep you posted.
We used a few walnut trees as
fence posts almost 6 years ago back when the Mule Garden was the
location of our failed orchard nursery.
One of them started falling
recently, threatening our new mulberry
tree.
It was one of those
situations where starting up the chainsaw would be about the same
effort as applying some extra elbow grease to the Felco
600 pruning saw. I'm also
leery of cutting with a chainsaw in such an awkward and above the
shoulder fashion and concluded that the Felco was the safer choice.
After we finish
dicussing Folks,
This Ain't Normal
next week, I'm going to take a break from the book club and
work through my winter reading list instead. Although I won't
break these books apart by week, I'll definitely be posting about each
one after I finish it, so you're welcome to read along. Here are
the
books that piled up all through the growing season:
- The
Intelligent Gardener. (I've actually already read this, but
will wait to post about it until I get my soil test reports.
Highly recommended.)
- How to Grow More Vegetables
- Small-Scale
Livestock Farming. (I'm about halfway through this one and
it's pretty basic, but I'm hoping I'll find a few useful tips.)
- Storey's
Guide to Raising Pigs. (We're still pondering whether pigs
will
be a project for 2013.)
- Hit
By a Farm. (Just for fun.)
- Gaia's Garden. (I decided it was time for a reread.)
- Just In Case
- The
Reference Manual of Woody Plant Propagation
- Meat: A Benign Extravagance
- The Resilient Gardener
- Paradise
Lot. (It's not out yet, but once it hits my mailbox, I suspect I'll
read this first.)
It's a pretty ambitious
reading list for what's left of the winter,
especially since I always find more books that really, absolutely must
be read right now to sneak into the
pile.
Hopefully I'll have time to read most of these books before the spring
gardening bug hits, though.
What's on your winter
reading list?
The DeWalt hammer drill came with an 18 volt
reciprocating saw. It works good on small pieces of lumber, but
disappointed me as a pruning saw.
It's heavy, and it doesn't
take long to deplete the battery when the cutting gets tough.
I would dare say myself armed
with the Felco 600 pruning saw could
outperform someone using the DeWalt 18 volt reciprocating saw with 10
fresh batteries standing by.
Want more in-depth information? Browse through our books.
Or explore more posts by date or by subject.
About us: Anna Hess and Mark Hamilton spent over a decade living self-sufficiently in the mountains of Virginia before moving north to start over from scratch in the foothills of Ohio. They've experimented with permaculture, no-till gardening, trailersteading, home-based microbusinesses and much more, writing about their adventures in both blogs and books.

