
archives for 11/2012
 With
lots of help from Sarah, the monthly ebook versions
of Weekend Homesteader are now available in their
revised format on Amazon!
With
lots of help from Sarah, the monthly ebook versions
of Weekend Homesteader are now available in their
revised format on Amazon!
(As a side note, Sarah
is the Bradley
of the digital world, and she works long distance.
Having just quit her job, she's available if you've got photography,
editting, or formatting work you'd like done. I'm a bit afraid to
tell you how awesome she is since she might get too busy for us
just like Bradley did. Sarah cleaned up my ebooks in ways I
didn't even know to ask for, and she might even work for Silver Fox rabbits
and Chocolate Turkeys....)
 If you've been waiting
to get the revised ebooks, now's your chance to snap up all
twelve. Meanwhile,
if you've bought some or all of the ebooks in the past, you should be
getting an email from Amazon within the next month or so asking if you
want a free update to the revised editions --- say yes. We moved
things around and revised each chapter to match the paperback, plus I couldn't help adding
in more photos that didn't fit into the print version. I've also
created the twelfth month --- Weekend
Homesteader: April
--- so you have access to every project that's in the print book.
If you've been waiting
to get the revised ebooks, now's your chance to snap up all
twelve. Meanwhile,
if you've bought some or all of the ebooks in the past, you should be
getting an email from Amazon within the next month or so asking if you
want a free update to the revised editions --- say yes. We moved
things around and revised each chapter to match the paperback, plus I couldn't help adding
in more photos that didn't fit into the print version. I've also
created the twelfth month --- Weekend
Homesteader: April
--- so you have access to every project that's in the print book.
And as a final side
note, my publicist has been having me churn out guest posts right and
left to increase the buzz during the upcoming paperback launch.
You can read two of my favorites here:
Links to the monthly
ebooks are below. Thanks for reading!

This post is to remind me
next year at this time to check our mushroom logs.
These Shitake
mushrooms would've been yummy last week.
Maybe a daily chart of soil
temperatures would provide some insight into predicting when a Shitake
log might be ready to pop some fruit out?
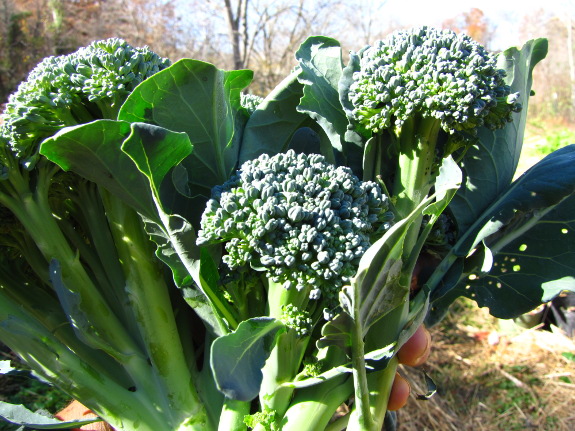
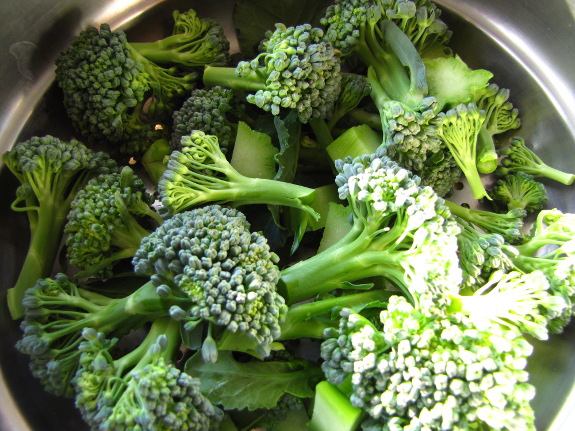
October did turn out to
be the
month of the broccoli.
Every day or so, we'd have a huge helping and eat every sprig and chunk
--- nothing tastes better than homegrown broccoli in season.
In the spring, I cut my
broccoli heads low, peel off the woody skin near the stalk base, and
cook up the whole kit and caboodle. In the winter, though, I
don't have anything else 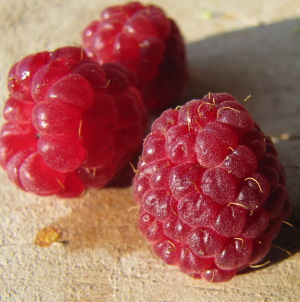 begging to fill the broccoli
space, so I cut the heads high, leaving most of the stem behind.
Within a week or two, side shoots come popping up, which I cut and eat
just like the original head.
begging to fill the broccoli
space, so I cut the heads high, leaving most of the stem behind.
Within a week or two, side shoots come popping up, which I cut and eat
just like the original head.
This endless broccoli
crop continues until the first killing frost --- and since we've dodged
even a light frost so far this fall, that might be a while! The
lack of frost means we're still eating raspberries too, and they're
even better in cool weather. Dare I suggest we may still be
enjoying fresh berries at Thanksgiving?
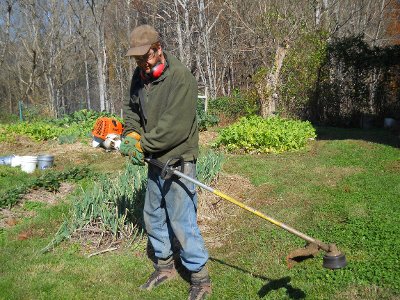
Forgetting about mushroom
logs yesterday helped me to remember that the weed eater and mower
will like me better in the Spring if I don't let fuel sit in the tank
all winter.
With any luck this post will
help me to not forget next year.
 I
don't know if the distinction is variety or age, but Celeste went dormant over a week
ago, while Chicago
Hardy is still in
the act of losing his leaves. I figured I'd go ahead and protect
our fig youngster just in case cold weather comes calling before our
elder fig is ready.
I
don't know if the distinction is variety or age, but Celeste went dormant over a week
ago, while Chicago
Hardy is still in
the act of losing his leaves. I figured I'd go ahead and protect
our fig youngster just in case cold weather comes calling before our
elder fig is ready.
Since I read up a bit on
fig
cold protection,
I've decided to tweak my technique a bit. I started out by tying
the stems on the young fig tree together so they'll stay in the center
of my insulation, then I stuffed a cat food bag with freshly raked
autumn leaves.
Mashing the leaves a bit
opened up a hole in the center, which let me drop the leaf-filled bag
on top of the little fig tree.
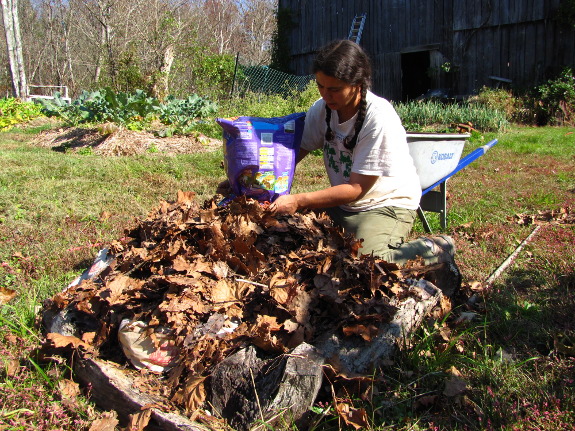
I tied the bag at the
base to hold it in place and used the rest of my leaves to mulch the
bed heavily.
I'll keep my eye on
Celeste to see if the bag starts to come loose --- I was tempted to
push in a metal fence post to tie the bag to, but figured I might not
need it. I'm hopeful this method will work better than my previous
one since the cat
food bag should keep the leaves dry and in place. We won't know
for sure until May!
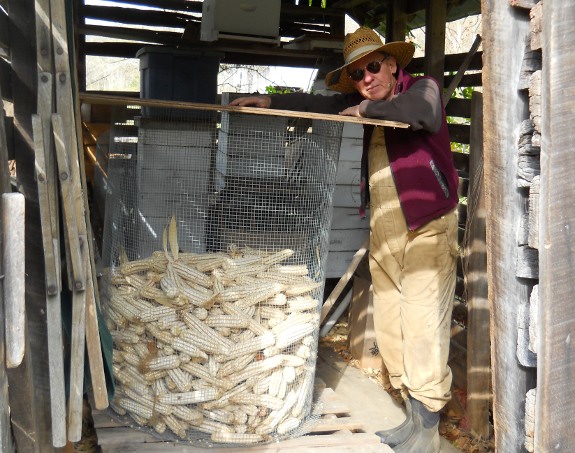
Our neighbors made this
hardware wire corn crib to keep raccoons and other critters out.
Last year was the first test
and it yielded not one kernel.
After it dries a bit more
they usually take it somewhere that grinds it into corn meal.
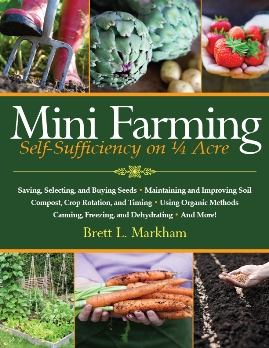 I've been curious about Brett Markham's Mini
Farming: Self-Sufficiency on 1/4 Acre mostly because it's been
topping the charts in Amazon's Sustainable Living category for about a
year (or more). Mini
Farming is
another one of those beginner gardening books (with the bonus of a
section on chickens and one on preserving), and I'd probably recommend
it to new gardeners before I'd send them to Square
Foot Gardening.
I've been curious about Brett Markham's Mini
Farming: Self-Sufficiency on 1/4 Acre mostly because it's been
topping the charts in Amazon's Sustainable Living category for about a
year (or more). Mini
Farming is
another one of those beginner gardening books (with the bonus of a
section on chickens and one on preserving), and I'd probably recommend
it to new gardeners before I'd send them to Square
Foot Gardening.
I appreciated Markham's
focus on economics and the inclusion of information on composting and
cover crops. On the other hand, I wasn't so keen on his Solomon-like
seed meal fertilizers
and had to stop reading for two weeks when I butted up against his
nutrition chapter. (Chapter summary: Potatoes are a vegetable, so
look how little space it takes to grow your own!)
In general, I think
Markham is one of those farmers who toes the organic line but doesn't
spend enough time promoting holistic health of his crops (although I
admit that if we were growing enough to sell, chances are we'd lower
our standards too). For someone just starting out, they could do
worse than to begin with a relatively mainstream book like this and
then slowly branch out into more permaculture techniques once they've
gotten their feet wet. Plus, Markham's cost-benefit analysis may
tempt some folks who otherwise wouldn't even consider gardening to try
their hand, so this might be the book to give to your in-laws if they
think your homesteading bug is crazy.
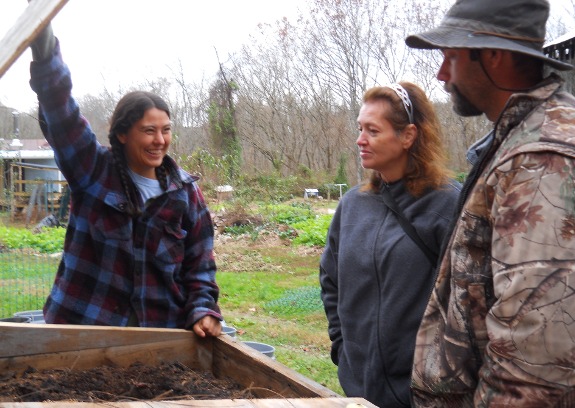
Some friends who were hiking
the Appalachian Trail dropped by today for a visit and a tour of the
garden.
Shannon and Dawn are the
folks who have been sharing their meat
rabbit adventures in the form of Tuesday guest posts.
Yes...horse manure with worms
really makes Anna that happy.
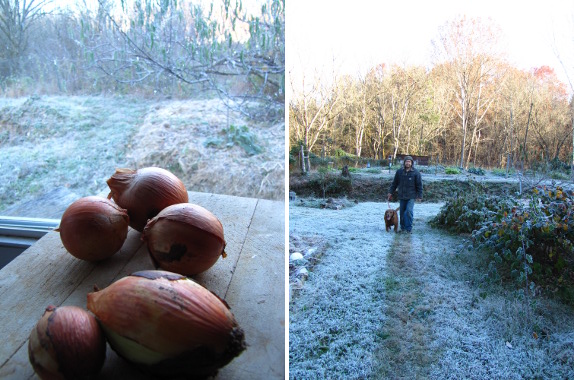
 This past weekend was a time
of endings and beginnings. A heavy frost (nearly a killing
freeze) marked the last of the summer produce Saturday morning, and I
chopped up some of our final homegrown onions to enjoy in a chicken
soup with friends.
This past weekend was a time
of endings and beginnings. A heavy frost (nearly a killing
freeze) marked the last of the summer produce Saturday morning, and I
chopped up some of our final homegrown onions to enjoy in a chicken
soup with friends.
It was great to welcome Shannon back to the farm, and to
meet Dawn (and their well-travelled dog Downey). We sent them on
their way with oilseed radish seeds to try in their clay soil, and they
left us some Malabar spinach seeds, since the plant has thrived in
their Louisiana heat.
Now that they're safely
home with their rabbits, we can expect to hear more
from our southern correspondents soon. (Yes, Shannon, that was a
hint.)
Last year, I
summed up all of the chicken experiments I'd been posting about
throughout the year on our Avian Aqua Miser site, and I thought you might
enjoy seeing the highlights again this year.
 One of the most timely
experiments I wanted to mention involved letting
our chickens free range in the woods over the winter. I was fascinated to
see that the flock concentrated most of their attention around the
bases of big trees, where they scratched through the mulch in search of
invertebrates. They only foraged over about three quarters of an
acre, probably because the flock had to stay close enough to the hen
house so that ladies could drop by at intervals to lay their eggs.
One of the most timely
experiments I wanted to mention involved letting
our chickens free range in the woods over the winter. I was fascinated to
see that the flock concentrated most of their attention around the
bases of big trees, where they scratched through the mulch in search of
invertebrates. They only foraged over about three quarters of an
acre, probably because the flock had to stay close enough to the hen
house so that ladies could drop by at intervals to lay their eggs.
The
forest worked as a good escape valve in the summer too, when the grasses stopped
growing and the ground began to look bare in their rotational
pastures. I think this system really depends on a quality
rooster, though, since when I tried the same trick with some  half-grown broilers, they
just sat on the other side of the pasture fence and begged to be let back
into their home turf.
half-grown broilers, they
just sat on the other side of the pasture fence and begged to be let back
into their home turf.
If you start
young chicks free ranging from week one and keep them close to the
house, they're the very best chickens to let run semi-wild. Having
trees or bushes available to hide in makes chicks (and
adult hens, for that matter) feel safer, so they spend more time
hunting wild food.
 There
are reasons we don't let our main flock free range all the time, though. The book Free-Range
Chicken Gardens
gives some tips for helping chickens coexist with a garden during the
growing season, but we like to keep the garden extremely productive, so
the chickens get relegated to pastures after they reach two months
old. We were forced to clip
a couple of chickens' wings (and then eat one of them)
when they didn't toe the line and thought the garden was still fair
game during the summer months.
There
are reasons we don't let our main flock free range all the time, though. The book Free-Range
Chicken Gardens
gives some tips for helping chickens coexist with a garden during the
growing season, but we like to keep the garden extremely productive, so
the chickens get relegated to pastures after they reach two months
old. We were forced to clip
a couple of chickens' wings (and then eat one of them)
when they didn't toe the line and thought the garden was still fair
game during the summer months.
I don't feel like we
have much more experimenting to do with free range chickens. Our
system just works!
| This post is part of our 2012 Chicken Experiments lunchtime series.
Read all of the entries: |
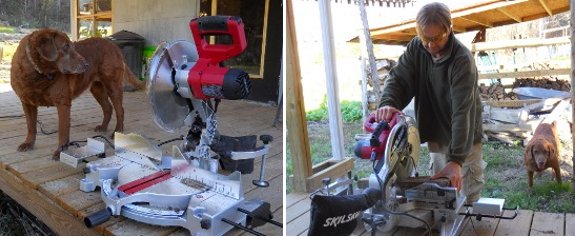
Day 1 of the new Skil 15 amp
circular saw started today.
Cutting logs of purchased
firewood in half will be the main application.
It cuts like a hot knife
through butter and highlights the cutting area with a laser.
 I promised myself that I
wasn't going to start a political debate about the election, but I did
want to remind our readers to do their civic duty and go vote.
And in the process I realized I had a lot of nonpartisan (but still
very controversial) voting advice I wanted to share.
I promised myself that I
wasn't going to start a political debate about the election, but I did
want to remind our readers to do their civic duty and go vote.
And in the process I realized I had a lot of nonpartisan (but still
very controversial) voting advice I wanted to share.
Vote. Yes, even if you're
disappointed in all the candidates, it is worth going out and
voting. Do your research first, though, so you'll know who
all the little guys are because...
Your
vote makes more of an impact locally. Even though it seems
like who wins the presidency is the most important aspect of today,
your state and local elections will actually have more of an influence
on your day-to-day life. Plus, your vote has more likelihood of
swaying the results of elections closer to home (and the issues are
easier to understand fully too). (Speaking of which, I am going to plug one candidate
--- if you live in Virginia's ninth congressional district like we do, I
have been on Anthony Flaccovento's farm and can personally vouch for
his farming techniques, along with his stances on other key
issues. Vote for Anthony!)
Don't
choose your political leaders based on charisma. This is my pet peeve,
so I'll try to be brief. U.S. elections have turned into a cult
of personality, which is why the only candidates who get elected
anymore are those with deep pockets who can make themselves look like
movie stars and turn their families into storybook characters.
Unfortunately, to get that much capital, nearly all of them have to
toady up to the big industry lobbyists, so none of them are ever going
to vote in such a way as to help the little guy. If you don't
approve of the cult of personality, make it a habit not to look at
photos or videos of your candidate or to listen to them speak --- you
may think this won't sway you, but it will. Figure out which
issues are important to you, then look up your candidates' voting
history (many websites provide this information on various issues) or
do some other primary research to figure out who is going to represent
the values you espouse, then vote accordingly.
Don't
vote selfishly.
There are so many people (and plants and salamanders) who have no say
in the election but whose lives will change drastically based on the
outcome, so I try to vote for what will make these disenfranchised
populations happier and healthier. Your personal bottom line
should not be the deciding factor in who you vote for.
 Before voting for a third
party candidate for president, please understand
the electoral college system. I hear so many people
saying they're going to vote for a third party candidate for president,
and it always makes me sad. Yes, I think anyone who runs for
president with the full support of the Democrat or Republican party is
crooked (see point number three), but you're literally throwing away
your vote if you select anyone else. A candidate has to receive
the majority of the popular votes in a state to get a single electoral
college vote, so unless you think 50% of the people in your state are
going to select the same third party candidate, your vote is
worthless. If you care about this issue, there are many people
working to reform our system --- for example www.nationalpopularvote.com --- but simply voting for a
third party candidate is putting the cart before the horse. Your
vote for a third party candidate makes a lot more sense at the local
level, though, especially if you talk your neighbors into doing the
same.
Before voting for a third
party candidate for president, please understand
the electoral college system. I hear so many people
saying they're going to vote for a third party candidate for president,
and it always makes me sad. Yes, I think anyone who runs for
president with the full support of the Democrat or Republican party is
crooked (see point number three), but you're literally throwing away
your vote if you select anyone else. A candidate has to receive
the majority of the popular votes in a state to get a single electoral
college vote, so unless you think 50% of the people in your state are
going to select the same third party candidate, your vote is
worthless. If you care about this issue, there are many people
working to reform our system --- for example www.nationalpopularvote.com --- but simply voting for a
third party candidate is putting the cart before the horse. Your
vote for a third party candidate makes a lot more sense at the local
level, though, especially if you talk your neighbors into doing the
same.
So how's that for a
political rant that 99% of our readers are bound to disagree with at
least partially? (And I didn't even have room to complain about all these glossy fliers showing up in my mailbox that aren't appropriate for kill mulches, worm bins, or even the wood stove!)

 This year's experiments with
chicken pastures were mostly a streamlining of the process that we
started to hammer into shape in 2011. In general, our trials this
year had to do with improving wild pastures vegetated with whatever
sprung up after we cut the plants too tall for chicken beaks.
This year's experiments with
chicken pastures were mostly a streamlining of the process that we
started to hammer into shape in 2011. In general, our trials this
year had to do with improving wild pastures vegetated with whatever
sprung up after we cut the plants too tall for chicken beaks.
I found that mowing
the pastures as high
as possible (which isn't very high with our mower) after the chickens
are rotated to the next pasture cuts back the weeds that the flock
ignored. That gives chicken-friendly plants more space to
grow. It seems to be necessary to come back through with clippers
once in the summer, too, to
hit weeds along the fenceline that outgrew the mower. I can tell that this
simple maintenance duo is going to have our sunnier pastures
grass-filled in just a couple of years.
 The three pastures under
heavy tree canopies are going slower at the grassing up process, so I
decided to take the opportunity to improve what's currently pretty poor
soil. I planted
buckwheat in one this summer, then replaced it with oilseed
radishes this
fall. The cover crops aren't thriving in this shade, but they are
producing some biomass. Hopefully we'll find time to take the
problematic trees down this winter and start replacing them with more
chicken-friendly bushes that are spaced far enough apart that they let
the grasses grow.
The three pastures under
heavy tree canopies are going slower at the grassing up process, so I
decided to take the opportunity to improve what's currently pretty poor
soil. I planted
buckwheat in one this summer, then replaced it with oilseed
radishes this
fall. The cover crops aren't thriving in this shade, but they are
producing some biomass. Hopefully we'll find time to take the
problematic trees down this winter and start replacing them with more
chicken-friendly bushes that are spaced far enough apart that they let
the grasses grow.
 Meanwhile, I tried to convert
two other relatively barren pastures (also in the shade) over to
pasture plants that chickens enjoy. The trouble is that I
planted cover crops along with the grasses and clovers as a nurse crop,
and the former outcompeted the latter. I
did get some perennials to come up in one spot, but it was impossible to
keep the chickens off the tender growth this summer, and I think I
wiped my hard-won grass and clover out. I'm hopeful that the bare
ground left behind by the oilseed radishes will give me a good spot to
try again, but I'll have to commit to keeping the flock completely out
of that pasture until 2014.
Meanwhile, I tried to convert
two other relatively barren pastures (also in the shade) over to
pasture plants that chickens enjoy. The trouble is that I
planted cover crops along with the grasses and clovers as a nurse crop,
and the former outcompeted the latter. I
did get some perennials to come up in one spot, but it was impossible to
keep the chickens off the tender growth this summer, and I think I
wiped my hard-won grass and clover out. I'm hopeful that the bare
ground left behind by the oilseed radishes will give me a good spot to
try again, but I'll have to commit to keeping the flock completely out
of that pasture until 2014.

The one thing we did
right was to (mostly) prevent
overgrazing of the pastures this year. It really
helped to figure out temporary
fencing (and the free
range escape hatches
I posted about yesterday) so that we weren't forced to keep chickens on
over-used ground simply because we had nowhere else to put them.
As usual, I also spent a
lot of time peering at our poultry to see what they were actually
eating on pasture. I learned that (despite what the books say) winter
cover crops of oats and field peas  were ignored by our picky
flock, as were sweet
potatoes I tried to feed them whole and raw. On the other hand, winter
rye and mustards were pecked right up.
were ignored by our picky
flock, as were sweet
potatoes I tried to feed them whole and raw. On the other hand, winter
rye and mustards were pecked right up.

In a surprise
about-face, our chicks this year enjoyed both comfrey and oilseed
radishes (both of
which were on the no-good list for previous flocks). Cicadas and jewelweed
seeds were other new
hits.
I've got plenty of
experimentation ahead for improving our pastures, and an ebook in the
works to help others follow our lead without muddling through all of
our mistakes. Stay tuned to our chicken blog for a blow-by-blow, or wait
until next year's sum-up over here for more details.
| This post is part of our 2012 Chicken Experiments lunchtime series.
Read all of the entries: |
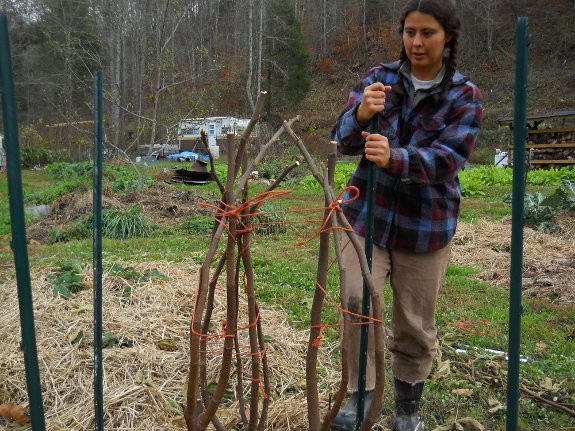
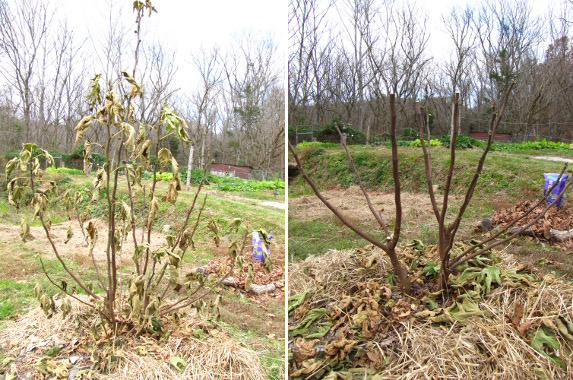
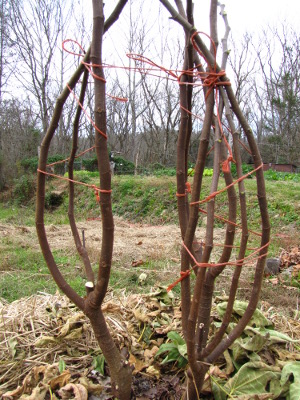
We trimmed it back to 3 feet and tied the branches together.
I'm already looking forward to the 2013 fig harvest.
As Mark
mentioned last night,
our larger fig was ready to be swaddled just like his
younger sister.
The idea is that figs aren't really winter hardy here in zone 6, but
with some careful variety
selection and a
little love, you can
see get lots of fruits without babying a house plant.
 I'd
read that Chicago Hardy figs do best if cut back drastically to three
main trunks each winter, but when I pulled out the clippers, I suddenly
couldn't decide if that meant three main trunks with all of their side
branches or just three sticks coming out of the ground. So I went
for a moderate approach where I removed any tiny branches and ones that
would be shaded, but left multiple branches on each trunk.
I'd
read that Chicago Hardy figs do best if cut back drastically to three
main trunks each winter, but when I pulled out the clippers, I suddenly
couldn't decide if that meant three main trunks with all of their side
branches or just three sticks coming out of the ground. So I went
for a moderate approach where I removed any tiny branches and ones that
would be shaded, but left multiple branches on each trunk.
Next, I cut the tree
down to about three feet high. Some people keep their figs tall
and wrap the whole thing up, but it was awfully nice having fruits I
could pick without a ladder, and I can protect what's left better if I
shorten this year's growth. By carefully bending and then tying
the branches together, they formed a compact bundle, giving me plenty
of room to stuff leaves around them within an enclosure I made out of
lightweight fence posts and trellis material.

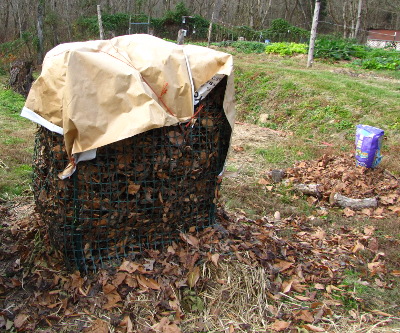 I topped it all off with a
cheap tarp that came on our roofing
tin. I felt
like last year's
frost protection
lost some efficiency when rain pounded down the insulating leaves and
exposed the tips of the fig branches. Hopefully this year's tarp
will prevent moisture entering my fig enclosure from above.
I topped it all off with a
cheap tarp that came on our roofing
tin. I felt
like last year's
frost protection
lost some efficiency when rain pounded down the insulating leaves and
exposed the tips of the fig branches. Hopefully this year's tarp
will prevent moisture entering my fig enclosure from above.
I saved nearly all of
the small branches to try rooting next year, and three of them already
had little roots forming (since I cut those 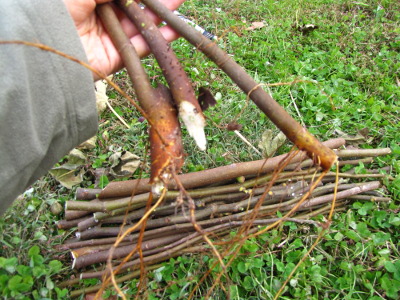 branches
off below the mulch line). Usually you gather
scionwood in the late winter, but it was necessary to chop our fig
down before wrapping it, so now I'm stuck trying to decide how to store
these cuttings in a cool, damp, but not freezing spot all winter.
We're really going to have to try to excavate our fridge root cellar
soon....
branches
off below the mulch line). Usually you gather
scionwood in the late winter, but it was necessary to chop our fig
down before wrapping it, so now I'm stuck trying to decide how to store
these cuttings in a cool, damp, but not freezing spot all winter.
We're really going to have to try to excavate our fridge root cellar
soon....
 At least in our area, stone
fruits can be very problematic because they succumb to the fungal
disease brown rot.
In addition, many of them tend to lose flowers during frosts that come
behind spring thaws, so you may spend several years watching a
beautifully trained peach tree bloom without harvesting any
fruits. Assuming you don't have just the right microclimate to
keep them happy (early morning sun to dry the dew, low humidity in the
summer, and a full-sun site that's shaded during the winter),
you're once again stuck choosing varieties that will handle your
conditions without the necessity of chemical intervention.
At least in our area, stone
fruits can be very problematic because they succumb to the fungal
disease brown rot.
In addition, many of them tend to lose flowers during frosts that come
behind spring thaws, so you may spend several years watching a
beautifully trained peach tree bloom without harvesting any
fruits. Assuming you don't have just the right microclimate to
keep them happy (early morning sun to dry the dew, low humidity in the
summer, and a full-sun site that's shaded during the winter),
you're once again stuck choosing varieties that will handle your
conditions without the necessity of chemical intervention.
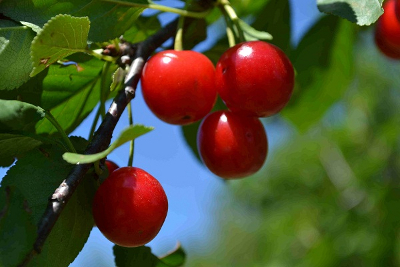 Sour cherries
are perhaps the most disease-resistant of the stone fruits, especially
if you select a variety like English Morello or Meteor. I've also
read about Mongolian-cross bush cherries (Valentine, Carmine Jewel,
Romeo, Juliette, Rose, and Crimson Passion), which are reputed to have
big fruits with lots of sugar, to be tolerant of clay soil, and to
fruit by the fifth year. Unfortunately, the sweet
cherries
I adore are very prone to getting frost-bitten, to
losing their fruits to brown rot, and to perishing in clay. (We
ripped out our dwarf sweet cherry after the Japanese beetles ate all
the leaves multiple years in a row and the few fruits rotted
away.) If you live in a damp climate like ours and have had good
luck with a sweet cherry, I'd love to hear about it.
Sour cherries
are perhaps the most disease-resistant of the stone fruits, especially
if you select a variety like English Morello or Meteor. I've also
read about Mongolian-cross bush cherries (Valentine, Carmine Jewel,
Romeo, Juliette, Rose, and Crimson Passion), which are reputed to have
big fruits with lots of sugar, to be tolerant of clay soil, and to
fruit by the fifth year. Unfortunately, the sweet
cherries
I adore are very prone to getting frost-bitten, to
losing their fruits to brown rot, and to perishing in clay. (We
ripped out our dwarf sweet cherry after the Japanese beetles ate all
the leaves multiple years in a row and the few fruits rotted
away.) If you live in a damp climate like ours and have had good
luck with a sweet cherry, I'd love to hear about it.
Peaches are more tolerant of
wet feet than cherries, but are very prone to lose fruit to bacterial
spot and brown rot. Disease-resistant varieties include:
- Early Redhaven
- Ernie's choice --- reputed to taste like a nectarine
- Garnet Beauty
- Harbrite
- Harcrest
- Harrow Beauty
- Harrow Diamond
- Glohaven
- Elberta
- Madison
- New Haven
- Raritan Rose
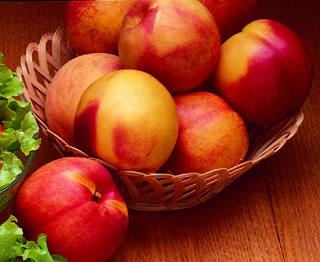 Nectarines
are simply a hairless peach, but most are especially prone to insect
and disease damage (as we found in our own garden). However
Hardired, Mericrest, Midglo, and RedGold have at least some disease
resistance.
Nectarines
are simply a hairless peach, but most are especially prone to insect
and disease damage (as we found in our own garden). However
Hardired, Mericrest, Midglo, and RedGold have at least some disease
resistance.
Although the beautiful
golden fruits of apricots
always tempt me in nursery catalogs, it sounds like I'd be better off
keeping my distance if I don't want to baby trees with little
reward. Of all the stone fruits, apricots are most likely to lose
their ultra-early flowers to frosts, they have no tolerance for wet
feet, and they get all the usual stone fruit diseases. Selecting
late bloomers like Alfred, Goldcot, Harcot, Harglow, Hargrand,
Harlayne, Harogen, Jerseycot, Precious, and Sugar Pearls will at least
weigh the odds in your favor.
(By the way, in case
you're wondering why so many frost- and
disease-resistant stone fruits have names starting with "Har", these
were developed at the Harrow Research Station in Ontario.)
 Finally, we come to the plums, which are really two
species --- European plums (Prunus
domestica) and
Asian plums (Prunus
salicina).
The latter are less hardy, with zone 6 being their most northern
limit, require light soil, and need warm, dry summers. European
plums are better for most low-key gardeners since they can handle clay
and bloom later, so they skip some spring frosts, but they're less
likely to be disease resistant (with Seneca and Imperial Epineuse being
the only resistant varieties I saw listed). Disease-resistant
Asian plums include:
Finally, we come to the plums, which are really two
species --- European plums (Prunus
domestica) and
Asian plums (Prunus
salicina).
The latter are less hardy, with zone 6 being their most northern
limit, require light soil, and need warm, dry summers. European
plums are better for most low-key gardeners since they can handle clay
and bloom later, so they skip some spring frosts, but they're less
likely to be disease resistant (with Seneca and Imperial Epineuse being
the only resistant varieties I saw listed). Disease-resistant
Asian plums include:
- AU Roadside
- AU Rosa
- Methley (which is what we have, but it's not thriving in our clay)
- Satsuma
You can also check out
the more cold hardy Asian-American crosses, as
long as you're willing to work harder to get them pollinated.
Disease-resistant and hardy varieties include Alderman and Superior.
As usual, I'd love to
hear about the stone fruits you've grown without
chemical intervention. Be sure to mention your growing zone and
general region since many varieties do much better in certain areas
than others. I have a couple of spots that I might be able to
cram another tree into, and your tips will help me decide who makes the
cut.
Next week, we'll finish
up The
Holistic Orchard
by talking about
berries, but in the meantime you might enjoy previous posts about beginning
a holistic orchard, techniques
for designing a holistic orchard, orchard
soil health, managing
fungi in the orchard, and disease-resistant
pears. After that, we'll take a week off, then will start
reading Joel Salatin's Folks
This Ain't Normal,
which won the vote by a landslide!
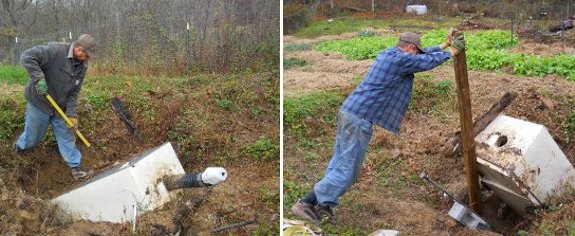
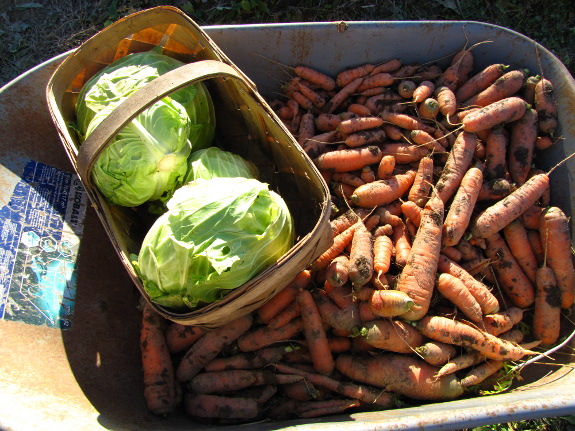
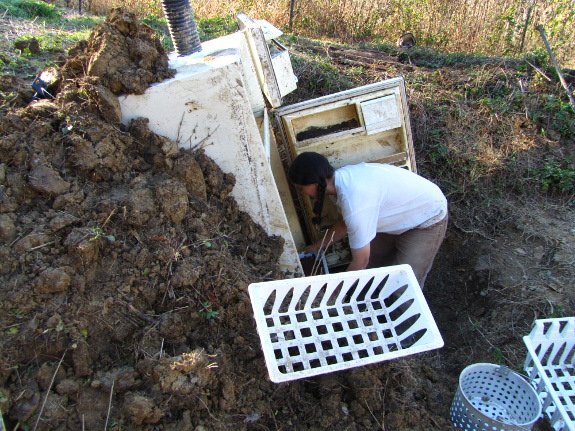
An upcoming carrot harvest
pushed us into fixing the refrigerator
root cellar today.
It took some digging and
prying, but it's now sitting up straight.
Next we need to figure out a
way to anchor it in place and then build a roof that will divert the
water. The parsnips from 2009 were nowhere to be found.
 Long-time readers will be
aware that I'm always trying to sneak new livestock onto the farm and
Mark's always reining me in. "Whoa, there!" he says. "Are
you ready for such a big commitment? Remember how much time the
garden and fruit trees and berry bushes and laying flock and broilers
take up, not to mention all this writing you're always poking away
at. Do you really think we have time to milk
a goat or fence
in an acre for sheep?"
Long-time readers will be
aware that I'm always trying to sneak new livestock onto the farm and
Mark's always reining me in. "Whoa, there!" he says. "Are
you ready for such a big commitment? Remember how much time the
garden and fruit trees and berry bushes and laying flock and broilers
take up, not to mention all this writing you're always poking away
at. Do you really think we have time to milk
a goat or fence
in an acre for sheep?"
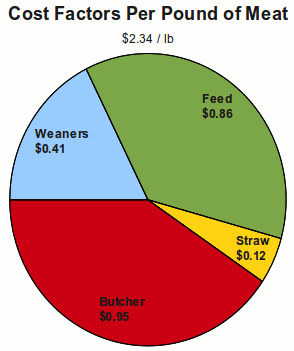
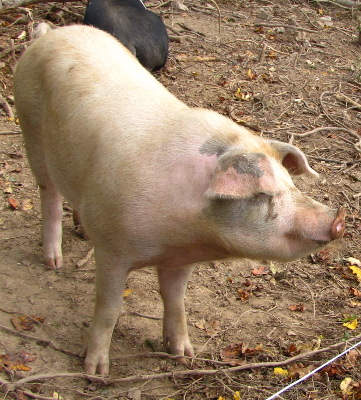
I think I may have found
the perfect middle ground, though --- fattening a pair of hogs. This
fascinating page
suggests that you can raise a pair of pigs from 40 pounds (when they're
weaned) to 200 pounds for $500 ($1.39 per pound) if you do the
butchering yourself. The great part is that the whole process
only takes four months, so if we decide we hate swine, we only have to
live with them for 120 days.
 (Even if we weren't pinching
pennies, we'd have to do the butchering on-farm. The idea of
walking a pig half a mile down our floodplain to the parking area and
then loading it up in our car to get to the slaughter-house sounds
tougher than skinning, gutting, and cleaning the hogs ourselves.
Bradley remembers killing hogs with his family as a kid, so I'll bet we
could get him to help us, and how much harder could it be than a deer?)
(Even if we weren't pinching
pennies, we'd have to do the butchering on-farm. The idea of
walking a pig half a mile down our floodplain to the parking area and
then loading it up in our car to get to the slaughter-house sounds
tougher than skinning, gutting, and cleaning the hogs ourselves.
Bradley remembers killing hogs with his family as a kid, so I'll bet we
could get him to help us, and how much harder could it be than a deer?)
In addition to providing
top-notch meat for $1.39 per pound, spending the summer with a pair of
pigs could be the first step toward reclaiming more quality pasture for
chickens (or other animals). As colonizing
livestock, pigs can
be living bush hogs if you leave the rings out of their noses, and all
of the areas we've considered expanding into would need a year or two
of this work before anything else could happen there.
As an added bonus,
there's always the
manure to
consider. Plus, increased diversity on a homestead usually seems
to lead to increased efficiency, in this case resulting from the pigs
eating some garden waste the chickens aren't interested in. And I
just love experimenting with new things.
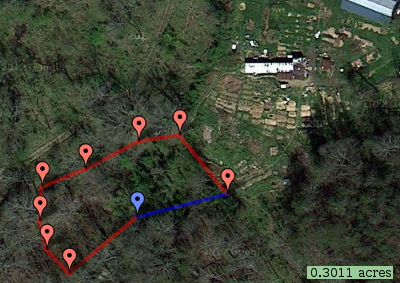 My
reading suggests that a third of an acre divided into four paddocks
would be sufficient pasture for a pair of growing swine. I've got
the perfect spot in mind too --- a little plateau just southwest of our
core homestead with lots of scrubby growth that can come out and two
big oak trees that would stay put and drop mast (acorns) into the
pasture. The question is, how crazy am I to want to spend $1,550
on a livestock panel fence that will last the rest of our lives and
allow us to graze anything we want in there forever, versus a small
fraction of that sum on electric fencing?
My
reading suggests that a third of an acre divided into four paddocks
would be sufficient pasture for a pair of growing swine. I've got
the perfect spot in mind too --- a little plateau just southwest of our
core homestead with lots of scrubby growth that can come out and two
big oak trees that would stay put and drop mast (acorns) into the
pasture. The question is, how crazy am I to want to spend $1,550
on a livestock panel fence that will last the rest of our lives and
allow us to graze anything we want in there forever, versus a small
fraction of that sum on electric fencing?
And, of course, is
raising a pair of weanling pigs much more work than I imagine?
I'd be curious to hear from others who have tried a similar small-scale
operation. If we figured out the fencing and housing over the
winter, would day-to-day pig care drive me nuts during the busy garden
season?
(What do you think,
Mark? Are you sold?)
 When we moved our chickens
from tractors to a coop and rotational pasture system, we had to deal
with manure for the first time. Deep
bedding was the
perfect solution, but we did run into a few minor problems this year.
When we moved our chickens
from tractors to a coop and rotational pasture system, we had to deal
with manure for the first time. Deep
bedding was the
perfect solution, but we did run into a few minor problems this year.
The real cause of the
trouble is that it's tough to find enough high carbon biomass to fill
the coops (and to keep filling them as manure builds up). Autumn
leaves are may favorite, and I've tried a bit of the sawdust we
bought for the composting toilet, with good results.
But when I ran low on optimal bedding, I decided to try treating
the coop floor as a compost pile.
The positive side is
that I was no longer creating bare patches in the pastures where I
threw our food scraps. Unfortunately, the scent of sweet corn
cobs was irresistable to the neighborhood raccoon, who came for the scraps and
 stayed for a chicken
dinner. The hen he was hunting got away, but it took us weeks of
effort to make our flock feel comfortable in the coop again. Now
corn cobs go in the worm bin, and the raccoon seems willing to stay in
the woods.
stayed for a chicken
dinner. The hen he was hunting got away, but it took us weeks of
effort to make our flock feel comfortable in the coop again. Now
corn cobs go in the worm bin, and the raccoon seems willing to stay in
the woods.
The issue of never
having enough high carbon materials is one we run into in the garden as
well, and I've got all kinds of ideas for solving the conundrum.
Maybe we'll commit some open areas along the sides of our homestead to
growing rye for straw, or we'll plant a high quality leaf tree (sugar
maple is my favorite) in a pasture that stays mowed so raking leaves
will be easy. We're also pondering chop 'n
drop plants,
although that will probably be less helpful for the chicken coop than
for the garden.
But these issues aside,
deep bedding has been a boon to our farm. Having that high
quality mulch/compost to topdress the berries with this spring was
worth every minute of coop maintenance!
| This post is part of our 2012 Chicken Experiments lunchtime series.
Read all of the entries: |
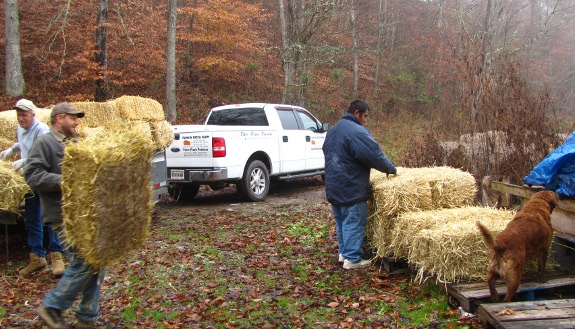
29 bales delivered and stacked for 145 dollars.
It might be enough to get us through the Autumn mulching frenzy.
 One
of the most exciting things for me about having a book in print is the
idea of my loyal blog readers stumbling across it in their library,
bookstore, or Tractor Supply. The
Weekend Homesteader is already available in some bricks and mortar
sales locations and should be hitting most of them this coming week, so it's
time for a scavenger hunt!
One
of the most exciting things for me about having a book in print is the
idea of my loyal blog readers stumbling across it in their library,
bookstore, or Tractor Supply. The
Weekend Homesteader is already available in some bricks and mortar
sales locations and should be hitting most of them this coming week, so it's
time for a scavenger hunt!
It's easy to play (and
you may even win a prize). Just snap a photo of yourself with my
book, whether in your bedroom or out in the world, and email
it to anna@kitenet.net,
post it somewhere else and link to it in a comment below, or put it on our
facebook page by
Sunday (November 18) at midnight. I'll pick one photographer at
random and mail you a signed copy --- there aren't many of these
floating around because I'm not selling them, only giving them to my
favorite people.
Meanwhile, if you'd like
a bit more substance, check out my
Destiny Survival Radio Interview. (I'm actually afraid
to listen to it since I'm not a very good public speaker, but at least
you'll hear my Appalachian accent before I get confused halfway through
the phrase "your eyes are bigger than your stomach.") Readers
might instead like this guest post about when
emergencies are a fact of life better. Or check out two of my favorite book reviews so far, one by my sister, and one on About.com.
Thanks for reading (and
scavenging!)

Last year, I faced a lot
of growing pains when it came to hatching our own chicks and keeping
them alive, but now I feel like an expert. Hatch rates this year
ranged from 80% to  95%, and survival rates (how
many chicks lasted through their first month of life) were always right
at 95%.
95%, and survival rates (how
many chicks lasted through their first month of life) were always right
at 95%.
To get there, I perfected my choice
of eggs to go in the incubator, tweaked my dry
incubation
technique, and learned
how to leverage my specific incubator. I also prevented a
lot of second-guessing by figuring out how
to tell if eggs left in the incubator on day 22 were late-hatchers or
duds. More
basically, I started taping
my incubator and turner plugs to the wall socket to prevent accidental
unplugging.


Once the chicks made it
out of the egg, we continued to have good results with an Ecoglow
Brooder instead of a
heat lamp. Mark built me an outdoor
brooder that did a
great job to keep
the chickens happy outside as early as week 1, which saved my sanity and
also let them enjoy
free ranging much
earlier in life. Turning the plexiglass toward the sun helped
heat up the brooder in the early spring, then flipping the window side
to face north (and  putting the brooder in the
shade) prevented overheating for our summer flocks.
putting the brooder in the
shade) prevented overheating for our summer flocks.
I feel like I've finally
got chick care figured out, which is why I wrote Permaculture
Chicken: Incubation Handbook to jumpstart others'
journeys. If you want to see more cute chick photos without
spending 99 cents, you might also want to check out this
post.
| This post is part of our 2012 Chicken Experiments lunchtime series.
Read all of the entries: |
I bought the small stainless
steel anchor at Walmart in the RV section.
When we got it home it
started to look too weak for the refrigerator
root cellar.
The bigger black anchor is
what people use to secure a mobile home to the ground. I found ours
today at a mobile home supply store in Coeburn for 8 dollars a piece.
It was a struggle to sink it all the way in to our clay ground, which
is a good sign that it's stuck in place and won't budge.
The real reason I moved
our refrigerator
root cellar resurrection to the top of the list is
that lows have hit 22 and there's no more room in our real fridge for
the rest of the cabbages and carrots. If I didn't want them to
freeze and ruin in the garden, these crops needed to find some cool,
damp storage immediately.
It's a bit risky to fill
the refrigerator root cellar up with valuable crops when we don't know
for sure if it'll hold
above-freezing temperatures (and refrain from falling
over again).
On the other hand, you can look at this a bit like putting tomato
plants in the forest garden --- a wheelbarrow load of
carrots is going to ensure I pay attention to our new experiment.
If there's a problem, we won't be waiting three years to fix it this
time.
Usually, I sort my
carrots, putting the few that are broken, nibbled, starting to rot, or
excessively small on top for immediate consumption. But I don't
really know the intricacies of our fridge root cellar yet, so I opted
to leave the carrots all mixed together. That way I'm hedging my
bets --- if one area doesn't work right, all of my best carrots won't
happen to be there.
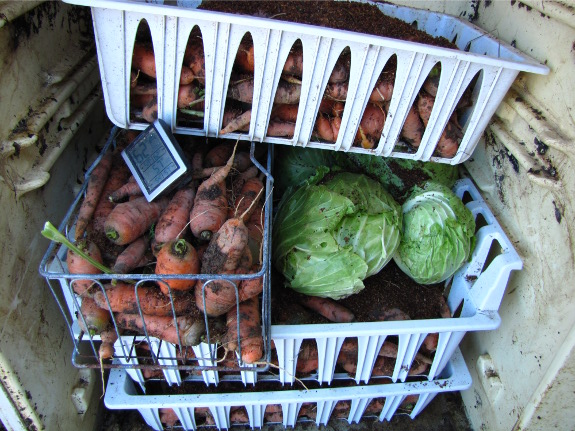
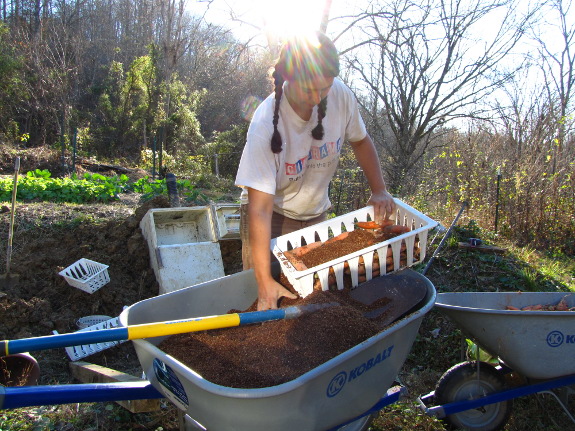
I packed some of the
carrots in sawdust and left some plain as an extra experiment.
While the keeping quality of the crops will be the real indicator of
root cellar function, Mark also tossed in a max./min.
thermometer. I'm ordering another analog
version since I have
a feeling the digital one won't last long in the damp conditions.
If the fridge works as
planned, I can see another one in our future. An afternoon's work
filled our current unit halfway up, and I haven't even moved our white
potatoes and fig scionwood out there yet. And once we start
having apples, we'll want to keep them in their own unit so the
ethylene given off by the fruits doesn't spoil the vegetables. So
many exciting experiments ahead!
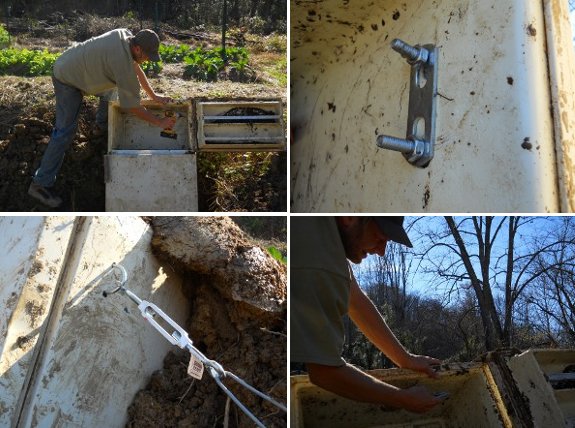
The refrigerator
root cellar has 2 anchor
points. One on the right side and the other in the back.
I chose to use a medium sized
U-bolt, but it's possible two holes big enough to loop some 12 gauge
wire through might be enough.
Each point in the ground is
lower than the refrigerator anchor, giving it a downward tug along with
the side ways tension.
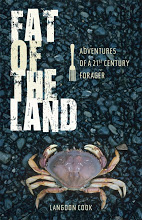 Fat
of the Land was a
fun read, but I'm afraid it only provided one tidbit of wildcrafting
information I might use (baking with dandelion petals). Instead,
the series of essays follows the hunt for one wild delicacy after
another, most of which are seafood and require extreme feats to
harvest. (Those of you who live closer to the shore are more
likely to get useful factual information from the book.)
Fat
of the Land was a
fun read, but I'm afraid it only provided one tidbit of wildcrafting
information I might use (baking with dandelion petals). Instead,
the series of essays follows the hunt for one wild delicacy after
another, most of which are seafood and require extreme feats to
harvest. (Those of you who live closer to the shore are more
likely to get useful factual information from the book.)
Even though it's only
moderately educational, the book is beautifully written and
inspirational. I found it fascinating to follow the culinary
journey of a mainstream American who admits that his cooking prowess
mostly consisted of opening cans before he started hunting down wild
food. I'd definitely add Fat
of the Land to
the homesteading-beach-read genre.
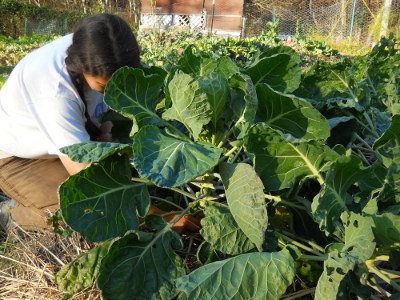 I'm not sure how many
Brussels sprouts we'll get before extreme cold wipes the plants out,
but our first harvest netted rave reviews from Mark. I tossed
them with olive oil, salt, and pepper and roasted them in the oven
until they turned bright green. "These are even better than roast figs!" proclaimed my kind husband.
I'm not sure how many
Brussels sprouts we'll get before extreme cold wipes the plants out,
but our first harvest netted rave reviews from Mark. I tossed
them with olive oil, salt, and pepper and roasted them in the oven
until they turned bright green. "These are even better than roast figs!" proclaimed my kind husband.
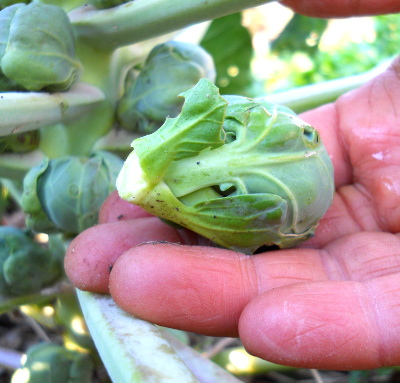
Of the bulkier crucifers
(exempting the leafy greens), broccoli is the most frost tender.
Even though ours are still churning
out side shoots,
these are less crisp and I can tell the harvest is coming to an
end. Our cabbages survived hard freezes in the garden, but I
opted to move
them to the root cellar to ensure they don't die
before winter feasts use them up. Meanwhile, the Brussels sprouts
seem largely unaffected by lows that have nearly hit 20.
 The extra cold hardiness is a
boon because Brussels sprouts take forever to ripen up. We
planted ours at the same time as the cabbage and broccoli, and have
only had a small handful to eat. I'm hopeful that we'll get more
sprouts all the way through to December, and if not, I'll just plant
earlier next year --- I'm starting to get the impression Mark could eat
Brussels sprouts every day in November just like we enjoyed broccoli in
October.
The extra cold hardiness is a
boon because Brussels sprouts take forever to ripen up. We
planted ours at the same time as the cabbage and broccoli, and have
only had a small handful to eat. I'm hopeful that we'll get more
sprouts all the way through to December, and if not, I'll just plant
earlier next year --- I'm starting to get the impression Mark could eat
Brussels sprouts every day in November just like we enjoyed broccoli in
October.

 Our customers have turned DIY kits into an astonishing number
of efficient and beautiful waterers over the last year. Some of
them won prizes for their efforts (and if you're a chicken keeper, you
should be aware that our automatic
chicken feeder contest
is still in effect until November 16). Others simply shared their
designs for the joy of it.
Our customers have turned DIY kits into an astonishing number
of efficient and beautiful waterers over the last year. Some of
them won prizes for their efforts (and if you're a chicken keeper, you
should be aware that our automatic
chicken feeder contest
is still in effect until November 16). Others simply shared their
designs for the joy of it.
The photo to the right
shows Robert's
no-perch chicken waterer and the image at the top of
the page is a chicken
waterer that fills automatically from rainfall on the coop roof. (The inventor of the
latter tweaked
his design to work in tractors too.) Meanwhile, Michael
performed an awesome experiment to determine the exact angle at which
our nipples begin to leak.
Other favorite customer
experiments include a
waterer made out
of a five gallon bottle, a funnel
and hose technique
to make our premade
waterers easy to fill from outside the
coop, and a drip
tray so the coop
floor always stays dry even if you  have
a messy drinker.
have
a messy drinker.
Closer to home, Shannon
tentatively determined that our waterers might work for rabbits too, and Mark streamlined our heat
tape bucket waterer to stay thawed down into the teens.
We're looking forward to
seeing more beautiful designs (and chickens) over the next year.
Be sure to stay tuned to our chicken blog or facebook
page if you want to
know about upcoming contests in a timely manner.
| This post is part of our 2012 Chicken Experiments lunchtime series.
Read all of the entries: |

I discovered today that the
golf cart can haul 10 bales of straw.
While going up the ford I
noticed the LED indicator dimmed and the motor felt like it was
struggling.
Maybe it could've handled
another load with 10 if it had a full charge, but I decided to play it
safe and reduce the amount of bales to 7 per trip.
We barely got them all in the
barn before a storm started pouring down on us. My guess is this is the
start of our winter raining season which might last till early summer.
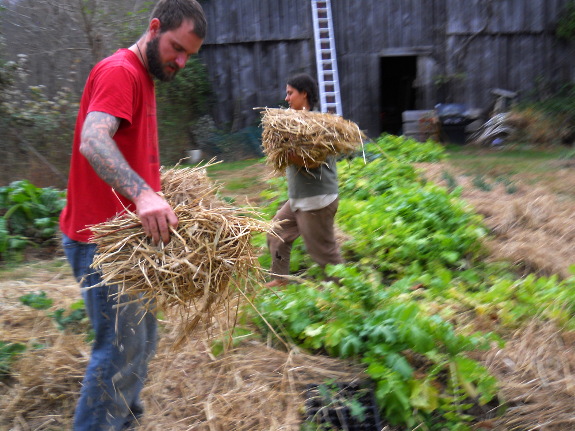
The last weed and mulch
episode in the garden is never at the top of my priority list, but I
know from experience that every hour's work now saves two hours during
the next growing season. So we took advantage of a handy visitor and some barefoot weather to
finish slipping straw around the greens in the mule garden.
All that's left to mulch
is about half the perennials, then we'll be going into winter more
ship-shape than ever before. I generally run out of warm weather
before I run out of weeds, but not this year!
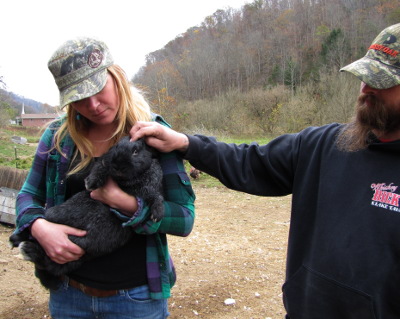
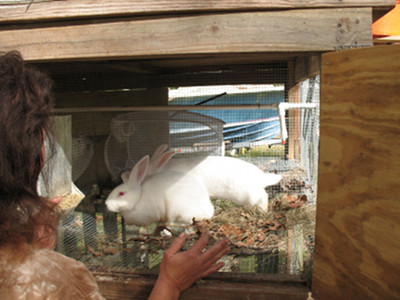
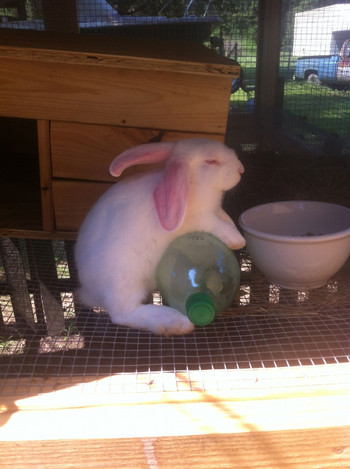 We started with our first
rabbit, a New
Zealand White, sometime during the late spring. (He's the one
in the picture to the right relaxing on a bottle of ice water during
our summer heat.) He was a young male that was purchased from a
local feed store and was the only meat rabbit they had left.
We started with our first
rabbit, a New
Zealand White, sometime during the late spring. (He's the one
in the picture to the right relaxing on a bottle of ice water during
our summer heat.) He was a young male that was purchased from a
local feed store and was the only meat rabbit they had left.
While we were searching out other available rabbits in the local area,
our new neighbors who had just moved in offered us a pair of New
Zealand Whites. The rabbits were apparently a gift for their son
but they weren't too keen on keeping them around. The rabbits
were both a bit older than our first rabbit, and I'd estimate they had
a full 6-8 weeks in age on our young buck. This turn of events is
how we ended up with two males and one female. Obviously not the
ideal mix of male-to-female ratio, but hey... two of them were
free.
When we discussed breeding,
we considered the possibility that the free pair from our neighbors
were likely closely related and possibly siblings. Some
literature Dawn read from the library actually encourages inbreeding of
rabbits, but that seems so counter to everything we have learned in the
past that we will likely shy away from that. So, we decided we'd
breed the storebought male with the donated female. Later we'll
find another female (possibly a Californian) to breed with our other
male. That will give us a 50/50 mix and two breeding pairs.
 Sometime in the last month or two our
purchased male finally reached maturity, so the question became when
did we want to breed them and have our first litter arrive?
Ideally, we'd have the arrival timed when we are both around. I
travel a bit for work, and we didn't want to time it for when I'd be
gone. Also, we wouldn't want to time it during potential holidays
or vacation time (like our recent NC & VA trip when we visited
Anna & Mark). So, this past weekend ended up
being the "big date" for our rabbit pair, constrained by our schedules.
Sometime in the last month or two our
purchased male finally reached maturity, so the question became when
did we want to breed them and have our first litter arrive?
Ideally, we'd have the arrival timed when we are both around. I
travel a bit for work, and we didn't want to time it for when I'd be
gone. Also, we wouldn't want to time it during potential holidays
or vacation time (like our recent NC & VA trip when we visited
Anna & Mark). So, this past weekend ended up
being the "big date" for our rabbit pair, constrained by our schedules.
If all goes well, our doe will have a litter sometime around December
10th. I'm hoping that the entire process will be uneventful and
require little from us other than providing some bedding and cleaning
of the hutch. Cold weather might be a concern, but we'll see how
it goes. Winters are typically pretty mild around here and if we
have to we can insulate or heat the hutch. If we're lucky, the
weather will be fine and temperature will not be a concern.
 The process of breeding was
fairly uneventful. We rounded up the female, removed the box from
the male's hutch so that there'd be more room, and then placed the
female on his side. Generally, the female should always be
brought to the male. The other way around apparently can turn
violent as the female will often defend her turf.
The process of breeding was
fairly uneventful. We rounded up the female, removed the box from
the male's hutch so that there'd be more room, and then placed the
female on his side. Generally, the female should always be
brought to the male. The other way around apparently can turn
violent as the female will often defend her turf.
Female rabbits are reflexive ovulators and some of the reading that
Dawn has done suggests that they should be bred multiple times in the
course of a day or two. We tried this, but "date #2" didn't go as
well as the first time around. She wasn't having any of it the
second day, so we will see if this was a successful pairing or
not. When we first placed the female in the male's hutch, there
was a bit of chasing, but there was no fighting. We were a bit
concerned about whether or not there would be a battle but they seemed
to be pretty well behaved as they did what comes naturally.
One thing we will have to do
to prepare over the next couple of weeks is to modify the nesting box
so that it has a hinged top allowing access to the litter. Dawn
is the expert here as she's done all the reading on the topic.
She's also the one who built the boxes for our rabbits and probably
will be the one to modify the female's nesting box.
 We'll need to decide quickly what
kind of nesting material we will place in the hutch. There are
several options; some are readily available materials (hay, grass,
leaves), while others are available commercially (bagged cellulose,
etc.) The literature claims that when she is preparing to have a
litter, the doe will use available nesting material and combine that
with fur which she pulls out of her coat. When cleaning the
netsting box they say to change the hay (or other material) and put the
fur back with new nesting material.
We'll need to decide quickly what
kind of nesting material we will place in the hutch. There are
several options; some are readily available materials (hay, grass,
leaves), while others are available commercially (bagged cellulose,
etc.) The literature claims that when she is preparing to have a
litter, the doe will use available nesting material and combine that
with fur which she pulls out of her coat. When cleaning the
netsting box they say to change the hay (or other material) and put the
fur back with new nesting material.
 I'm sure we'll make some
discoveries along the way and will learn in the process. With any
luck, we'll have some cute bunny pictures to share soon. We've
just got to stay unattached to the cute fuzzballs so that we cannot
feel bad when it comes time to put them in the oven!
I'm sure we'll make some
discoveries along the way and will learn in the process. With any
luck, we'll have some cute bunny pictures to share soon. We've
just got to stay unattached to the cute fuzzballs so that we cannot
feel bad when it comes time to put them in the oven!
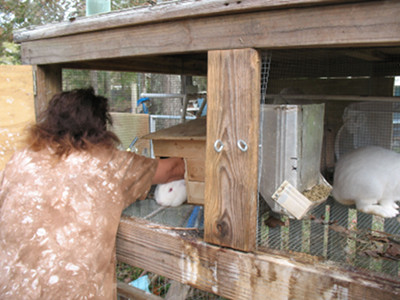
Shannon and Dawn
will be sharing their experiences with raising meat rabbits on Tuesday
afternoons. They homestead on three acres in Louisiana when time
off from life and working as a sys admin permits.
 I once tried to use a shop vac
hose to divert our sawdust into a 5 gallon bucket, but it only lasted a
week before it came loose.
I once tried to use a shop vac
hose to divert our sawdust into a 5 gallon bucket, but it only lasted a
week before it came loose.
What I should've done was to
order one of these collection bags that came with the new 15 amp
saw.
The price is 10 to 20 dollars
for the small, and it's much less painless than trying to re-invent the
wheel.
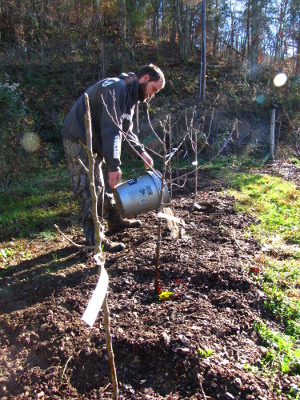 The first set of dwarf trees
for our high density apple planting has arrived! (We ordered from
two different nurseries, so a couple more trees are yet to come.)
After soaking the roots all morning, Everett and I put them in the
ground...and then I pored over websites to figure out how to prune and
train my new trees.
The first set of dwarf trees
for our high density apple planting has arrived! (We ordered from
two different nurseries, so a couple more trees are yet to come.)
After soaking the roots all morning, Everett and I put them in the
ground...and then I pored over websites to figure out how to prune and
train my new trees.
The North
Carolina Cooperative Extension Service warns:
In other words, this isn't a guess-and-try-again system. I need to have all my ducks in a row from the get-go if I want to eat homegrown apples in 2014.
Understanding the goal
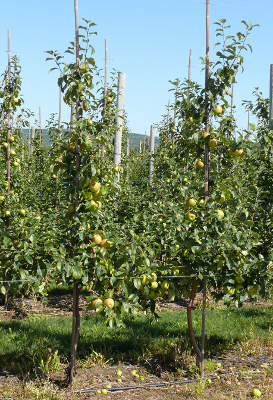 Although this post is really
about how to prune and train high density apples for their first year
of life, it's always essential to understand the final form you're
looking for. If left to their own devices, dwarf apple trees can
grow 10 to 15 feet tall and 12 to 16 feet wide, spending lots of energy
on vegetative growth and not fruiting for several years. Our goal
is to create a tree that tops out at 8 to 10 feet tall, fruits the
second year after planting, and doesn't bother its neighbor three feet
down the row.
Although this post is really
about how to prune and train high density apples for their first year
of life, it's always essential to understand the final form you're
looking for. If left to their own devices, dwarf apple trees can
grow 10 to 15 feet tall and 12 to 16 feet wide, spending lots of energy
on vegetative growth and not fruiting for several years. Our goal
is to create a tree that tops out at 8 to 10 feet tall, fruits the
second year after planting, and doesn't bother its neighbor three feet
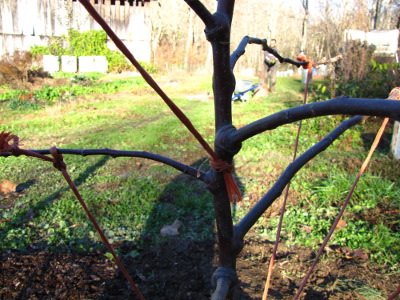
down the row.The perfect high density apple tree is a lot like a normal central leader tree, but more compact. Branches start 24 to 32 inches off the ground and continue to the top of the tree, spaced only about six inches apart and growing no more than four feet long. After three to five years, some of these branches may need to come out, but we're not worrying over that during year one.
In order to support the weight of apples (and to keep the tree upright on nonvigorous rootstock), a permanent stake or trellis must be attached every 15 to 24 inches along the entire trunk. We're still deciding what to use for our support, but the main choices among large-scale orchardists seem to include 10 foot lengths of one inch metal pipe (or a slightly larger treated wooden post) sunk two feet in the ground, or hefty trellises.
Pruning and training the new tree
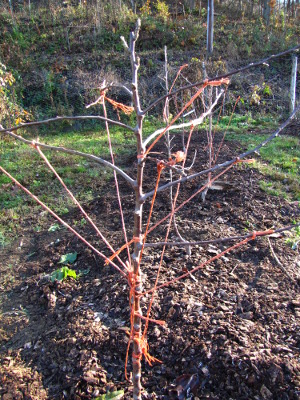 Okay, now that the big
picture is firmly engrained in our minds, let's look at what we want to
do to our tree during its first year of life. I've written
previously about planning
out the orchard, so
let's assume your trees are in the ground, with the graft union three
to four inches above the soil surface, and staked in some way.
Okay, now that the big
picture is firmly engrained in our minds, let's look at what we want to
do to our tree during its first year of life. I've written
previously about planning
out the orchard, so
let's assume your trees are in the ground, with the graft union three
to four inches above the soil surface, and staked in some way.The North Carolina Extension Service has another relevant admonition for this early stage: "Research has shown that any pruning of young trees will reduce or delay fruit production early in the life of the orchard." In other words, even though our main goal is to keep these trees small, we don't want to cut away much (if any) wood --- instead, we're focusing on training to keep the tree in line. The only branches worth cutting are damaged, are located less than 18 inches above the ground, or are more than half the diameter of the main trunk. (If you didn't spring for a well-feathered tree and are instead starting with an unbranched whip, you'll have to do some cutting, but that's a topic beyond the scope of this post.)
While your pruning shears are verboten, you do need to commit to training the tree right away and then monthly throughout the summer. Using toothpicks, clothespins, and/or tie-down strings, you want to spread all side branches down close to horizontal right away, then continue to spread them (and any secondary branches) level throughout the year.
 Different sources recommend
different final orientations, ranging from just above horizontal to a
bit below horizontal. Usually, more vigorous trees and those
planted closer together have their branches pulled lower, which serves
to "calm" the tree --- meaning that the leader grows tall, but the side
branches spread more slowly and focus on making flower buds instead of
vegetative growth. Regardless of which orientation you choose to
train to, you want to keep an eye on new twigs all through the summer
and pull them downward then they reach three to four inches long.
Different sources recommend
different final orientations, ranging from just above horizontal to a
bit below horizontal. Usually, more vigorous trees and those
planted closer together have their branches pulled lower, which serves
to "calm" the tree --- meaning that the leader grows tall, but the side
branches spread more slowly and focus on making flower buds instead of
vegetative growth. Regardless of which orientation you choose to
train to, you want to keep an eye on new twigs all through the summer
and pull them downward then they reach three to four inches long.Since flower buds on apples are formed in July, it's essential to give your trees lots of love right away if you want fruits their second year. That's why we're planting in fall and committing to water starting with the first spring dry spell, hoping for early fruits. If you don't live in a wet-winter area, you might want to water all winter long.
Maintenance training and pruning
For now, we'll have plenty on our plates keeping our new dwarf trees happy and in line, but we also need to look ahead to the future. By the end of their second year, the trees should be about eight feet tall, at which point we'll need to choose a method of slowing their upward yearnings without promoting vegetative growth. This website gives a great year-by-year tutorial on planting and maintaining high density apples, and I'll be referring back to it frequently in the years ahead.
Our chicken waterer is the low
maintenance solution to chicken-care, allowing you to spend time on
fiddly dwarf apples.
 If the endless talk of pests
and disease in the rest of The
Holistic Orchard
didn't scare you away, you probably felt the same relief I did when you
hit the Berries chapter. Not only do many brambles and bush
fruits bear much sooner than trees, they also tend to be more resistant
to problems, allowing you to make selections based on taste and
regional location.
If the endless talk of pests
and disease in the rest of The
Holistic Orchard
didn't scare you away, you probably felt the same relief I did when you
hit the Berries chapter. Not only do many brambles and bush
fruits bear much sooner than trees, they also tend to be more resistant
to problems, allowing you to make selections based on taste and
regional location.
I've written extensively
about brambles in Weekend
Homesteader: February,
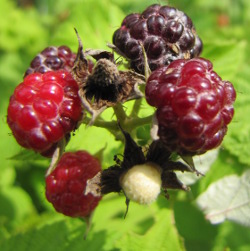
and Phillips agrees with me on most points. Blackberries and
raspberries are easy and delicious --- select among the many varieties
based first on your growing zone and you'll be golden.
 Blueberries
are tougher for those of us without highly acidic soil, but Phillips
offers some fascinating holistic advice there. First, he reminds
us that the main issue with alkaline soil is that it makes iron less
available to the blueberry roots, which tend to hunt for minerals right
at the mulch/soil interface. So adding greensand (rich in iron),
acidifying sources of nitrogen (such as cottonseed meal), old nails, or
sulfur (for fast acidification, in
a pinch) right below the mulch is much more effective than struggling
to change the pH of the whole rooting zone. Lots of organic
matter is very helpful long term too. Another issue blueberries
have with high pH is excess calcium blocking their taste for magnesium,
which can be fixed by boosting levels of the latter. Finally, if
you don't live too far north, southern highbush blueberries or (even
better) rabbiteye
blueberries are less
sensitive to high pH.
Blueberries
are tougher for those of us without highly acidic soil, but Phillips
offers some fascinating holistic advice there. First, he reminds
us that the main issue with alkaline soil is that it makes iron less
available to the blueberry roots, which tend to hunt for minerals right
at the mulch/soil interface. So adding greensand (rich in iron),
acidifying sources of nitrogen (such as cottonseed meal), old nails, or
sulfur (for fast acidification, in
a pinch) right below the mulch is much more effective than struggling
to change the pH of the whole rooting zone. Lots of organic
matter is very helpful long term too. Another issue blueberries
have with high pH is excess calcium blocking their taste for magnesium,
which can be fixed by boosting levels of the latter. Finally, if
you don't live too far north, southern highbush blueberries or (even
better) rabbiteye
blueberries are less
sensitive to high pH.
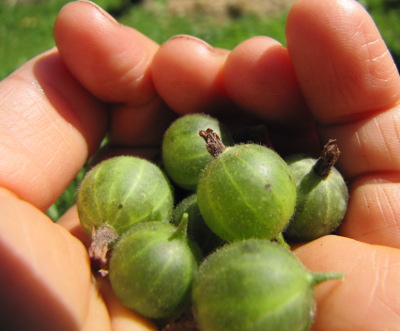 Gooseberries
and currants don't
like high heat, but that same personality trait makes them some of the
few fruits that will produce in the shade. We chose gooseberries
in our garden since we like fresh fruits much more than preserves, but
jelly-eaters might prefer currants. Disease is more likely to be
a problem with these plants than with other small fruits, though, so
select carefully to ensure you get both resistance and flavor.
Gooseberries
and currants don't
like high heat, but that same personality trait makes them some of the
few fruits that will produce in the shade. We chose gooseberries
in our garden since we like fresh fruits much more than preserves, but
jelly-eaters might prefer currants. Disease is more likely to be
a problem with these plants than with other small fruits, though, so
select carefully to ensure you get both resistance and flavor.
Interestingly, Phillips
doesn't throw in many unusual fruits, but does devote a whole section
to elderberries. I think this choice is due to his wife's
profession (herbalism) and to elderberries' healing powers. In
our garden, wild elderberries come up everywhere, and I mostly root
them out, but I have let one shrub grow up beside our biggest
peach. The bush attracts lots of pollinating insects, but the
fruits didn't pass my raw taste test.
 Meanwhile, I was sad to see
that Phillips skipped grapes --- they're not technically berries, but I
could have used some holistic advice about these fungus-prone
fruits. And I think strawberries merit a place even if they're
not woody plants --- they certainly bear like crazy with few issues.
Meanwhile, I was sad to see
that Phillips skipped grapes --- they're not technically berries, but I
could have used some holistic advice about these fungus-prone
fruits. And I think strawberries merit a place even if they're
not woody plants --- they certainly bear like crazy with few issues.
Which fruits did you
wish had made the cut? Do you find some of the small fruits
listed more or less hardy than Phillips suggested?
I appreciate you all
hanging in there through a mind-bending couple of months considering
fruit trees. Those of you who haven't been reading along might
want to check out older posts about beginning
a holistic orchard, techniques
for designing a holistic orchard, orchard
soil health, managing
fungi in the orchard, disease-resistant
pears, and no-spray
stone fruits.
Meanwhile, the consensus
is for Joel Salatin's Folks,
This Ain't Normal to
be our next book club read. We'll skip Thanksgiving week, then
dive right into chapters 1 through 3 on November 28. Salatin is
bound to provoke lots of opinions, whether you agree with him or not,
so be sure to find a copy so you can join in the discussion!

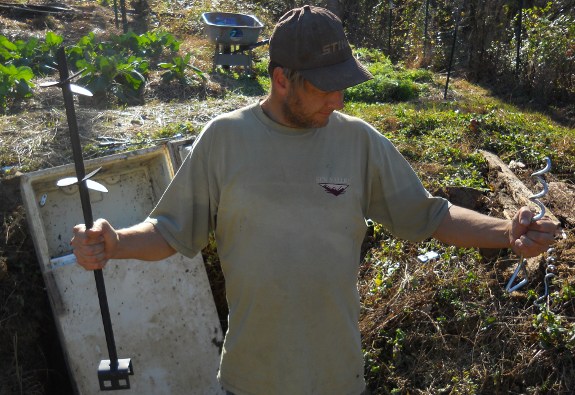
A good
pry bar threaded through
the top holes works good for driving in these mobile home dirt anchors
for the refrigerator
root cellar.
It took a good 10 minutes of
heavy turning to get it sunk in where I wanted it.
Makes me wonder if these
anchors would hold on tight enough to help winch a truck from being
stuck? I know...sounds like a terrible idea that could end in a
horrible mess if the truck pulled the anchor out and it catapulted
towards an innocent bystander.
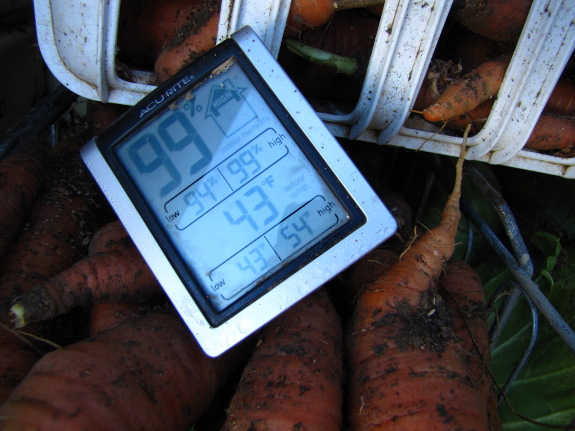
I'm not sure we can
believe the report of 99% humidity in our refrigerator
root cellar, but the
temperatures recorded over the last week (high of 54 and low of 43) are
probably accurate. Since we've had outside temperatures between
20 and 70 during that time period, the low-cost root cellar seems to be
doing its job admirably!
We had a nice heavy
rain, too, which is at least a partial test for the tie
downs. In 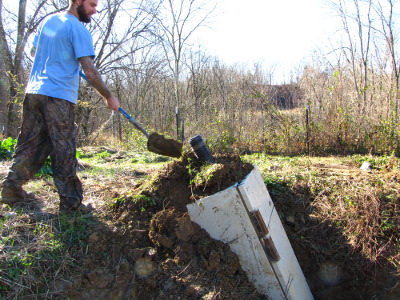 retrospect, I think two other
design changes make it much less likely for our fridge to collapse again. First, we
slanted the fridge back into the hill for version 2.0, and (perhaps
more importantly) we left off the retaining
wall wings.
retrospect, I think two other
design changes make it much less likely for our fridge to collapse again. First, we
slanted the fridge back into the hill for version 2.0, and (perhaps
more importantly) we left off the retaining
wall wings.
I suspect the wings were
the real cause of the initial root cellar slump. All of the loose
dirt on either side of the fridge pushed against the retaining wall,
which pushed against the fridge, so how could it help falling
over? This time around, we're just mounding dirt as far as it
will go with no walls. Tuesday, Everett helped cap off the fridge
with yet more dirt to keep temperatures steadier inside, and I threw
down some rye seeds to hold the soil in place. If all goes well,
we'll keep eating carrots, cabbage, and potatoes out of our $10 root
cellar all winter.
 The final chicken topic we
spent a lot of time experimenting with in 2012 was raising heirloom
chickens as meat birds. We continued learning how to cook
heirloom chickens to
highlight their extra flavor while dealing with more chewiness than
you'll find in a grocery store bird, and we also got more sophisticated
in our
methods of eating up tough old hens. (The trick is slow,
moist heat.)
The final chicken topic we
spent a lot of time experimenting with in 2012 was raising heirloom
chickens as meat birds. We continued learning how to cook
heirloom chickens to
highlight their extra flavor while dealing with more chewiness than
you'll find in a grocery store bird, and we also got more sophisticated
in our
methods of eating up tough old hens. (The trick is slow,
moist heat.)
In fact, we got so good
at eating homegrown chickens that we ran out in October --- I can't
wait for our last set of broilers to hit their Thanksgiving kill
date! I chose to part
out all 28 broilers
we grew this spring and  summer so I could cook their
carcasses into stock to form the base of a winter's worth of
soups. So we haven't consumed all that chicken goodness yet, but
I don't want to dip into our soup stash until we really need to.
summer so I could cook their
carcasses into stock to form the base of a winter's worth of
soups. So we haven't consumed all that chicken goodness yet, but
I don't want to dip into our soup stash until we really need to.
As you can see from the
photo to the right, our broilers produced extremely rich broth.
Part of the reason for the bright color is that I let our meat birds
have access to unlimited feed this year, which means my
feed conversion rate
was worse than last year, but the birds grew bigger during their three
month growth window.
 My
goal in taking a less managed approach to feed was to lower my stress,
but I think it was worth it. Fat from pastured poultry is full of
omega-3s that keep my familial tendency toward depression at bay, and I
really did feel happier this year eating all those fatty
chickens. Although my eventual goal is still to lower our
dependency on storebought feed, I think continuing to diversify our
pastures and work toward growing
more of our own feed
is better than walking
the tightrope to keep chicks nourished while restricting their intake. Preventing
spilled feed will
also help decrease feed costs.
My
goal in taking a less managed approach to feed was to lower my stress,
but I think it was worth it. Fat from pastured poultry is full of
omega-3s that keep my familial tendency toward depression at bay, and I
really did feel happier this year eating all those fatty
chickens. Although my eventual goal is still to lower our
dependency on storebought feed, I think continuing to diversify our
pastures and work toward growing
more of our own feed
is better than walking
the tightrope to keep chicks nourished while restricting their intake. Preventing
spilled feed will
also help decrease feed costs.
 Another avenue I want to
explore is variety selection. We gave away our Light
Sussex last year
because they were just too
friendly, which
means they spent less time foraging and more time hanging around
waiting for handouts. Our Black
Australorps are
good, hard workers, but they don't grow quite as fast as our Australorp
X Marans hybrids, and they aren't laying as well as the Golden Comets
I remember so fondly. We picked up three new Rhode
Island Reds this
fall and I'm looking forward to seeing what their genes do to our mutt
flock.
Another avenue I want to
explore is variety selection. We gave away our Light
Sussex last year
because they were just too
friendly, which
means they spent less time foraging and more time hanging around
waiting for handouts. Our Black
Australorps are
good, hard workers, but they don't grow quite as fast as our Australorp
X Marans hybrids, and they aren't laying as well as the Golden Comets
I remember so fondly. We picked up three new Rhode
Island Reds this
fall and I'm looking forward to seeing what their genes do to our mutt
flock.
Experiments aside, it
definitely feels good to be producing nearly all of our own chicken
meat on-farm starting with eggs laid by our hens and fertilized by our
rooster. Plus, it's delicious!
| This post is part of our 2012 Chicken Experiments lunchtime series.
Read all of the entries: |
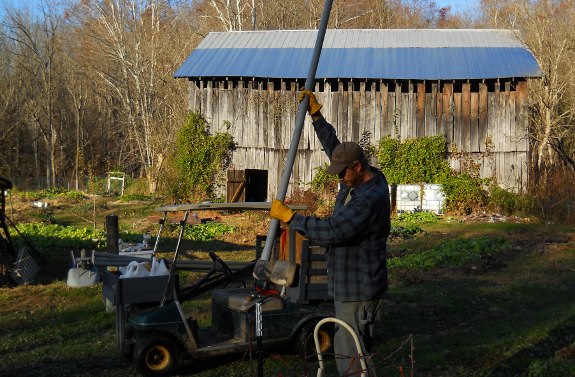
What's the best way to erect
a 10 foot high stake for high
density apple growing?
Our solution was to pound in
a heavy duty fence post and slide a 10 foot long 1 1/2 inch diameter
PVC pipe over top.
"Will it hold a bushel of
apples?" was Anna's first question.
Heck yeah! It's very solid
and feels like it will last at least 100 years.
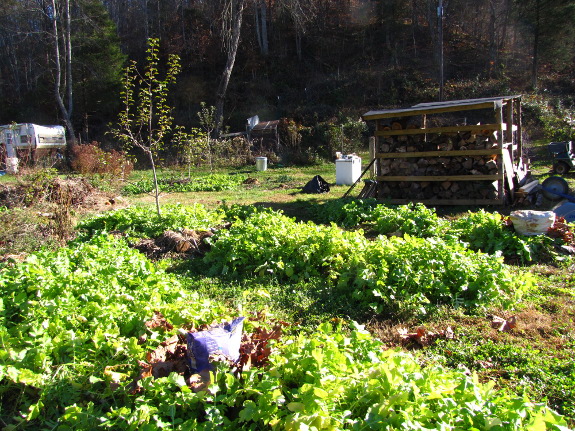
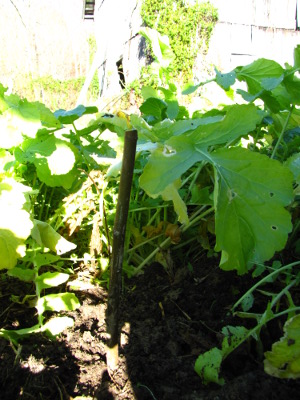 Two
more figs have found their way into our forest garden, due to Daddy's
suggestion that we
go ahead and plant our rooted cuttings so they can spend the winter
getting established. You can see them in the photo above as plump
bags of leaves nestled amid the oilseed radishes.
Two
more figs have found their way into our forest garden, due to Daddy's
suggestion that we
go ahead and plant our rooted cuttings so they can spend the winter
getting established. You can see them in the photo above as plump
bags of leaves nestled amid the oilseed radishes.
Since I wanted to give
the figs established garden soil raised well above our high groundwater
(and since our extension of Figlandia is earmarked for tomatoes
next year), I gave up two sites that I was considering for perennial
mulch-producing plants.
Yes, I'm one of those people who plans dessert before the main course
--- I just couldn't talk myself into planting a chop 'n
drop mulch-producer
when I could use the same space for two Chicago Hardy figs.
Now for the really tough
decision, what should I name these two youngsters since I can't just
call them by their variety descriptor? Mark's rule is that we
don't name chickens on our farm, but he never told me I couldn't name
the trees....
 Despite
spending two weeks regaling you with the highlights of the 2012 chicken
season, there's still plenty to experiment with in 2013. I'm not
sure if we'll get to it next year, but Mark and I both feel our
coops are due for an upgrade
to match our specific needs. (This is really more for the sake of
the chicken-keepers --- our flock is extremely flexible and the birds
are quite happy as-is.)
Despite
spending two weeks regaling you with the highlights of the 2012 chicken
season, there's still plenty to experiment with in 2013. I'm not
sure if we'll get to it next year, but Mark and I both feel our
coops are due for an upgrade
to match our specific needs. (This is really more for the sake of
the chicken-keepers --- our flock is extremely flexible and the birds
are quite happy as-is.)
Similarly, we want to
lick the Lucy-cutting-through-the-pasture problem. As Mark
mentioned, our dog
door in the pasture
had growing
pains and needs an
upgrade to keep me from having to chase chickens out of the garden in
the summer.
Of course, the most
interesting experiments (in my opinion) always have to do with
plants. Mark had the great idea of pollarding
our mulberry
so it stays bush-like, and using the  cuttings to add a lot more
mulberries to our pasture. Meanwhile, I've got a bunch of
seedling American persimmons I also want to add to the pasture, and
I hope to graft Asian persimmons onto the American rootstocks in
2014. (I've read that in cold climates, it's best to let the
American persimmon rootstock grow three or four feet tall before
grafting on the scionwood so that cold snaps close to the ground are
less likely to nip the tender Asian persimmon twigs.)
cuttings to add a lot more
mulberries to our pasture. Meanwhile, I've got a bunch of
seedling American persimmons I also want to add to the pasture, and
I hope to graft Asian persimmons onto the American rootstocks in
2014. (I've read that in cold climates, it's best to let the
American persimmon rootstock grow three or four feet tall before
grafting on the scionwood so that cold snaps close to the ground are
less likely to nip the tender Asian persimmon twigs.)
Meanwhile, I'm itching
to terrace
the steepest pasture,
plant comfrey as a soil-holder on the vertical faces, and seed cover
crops to start improving that problematic soil. The idea is to
prevent what's bound to be an erosion problem when chickens repeatedly
scratch bare spots on the sloped ground, and also pave the way for some
more trees and shrubs in the future.
I'll be posting on our
chicken blog as these new experiments go into place, and will be sure
to sum up here again in fall 2013. Thanks for reading!
| This post is part of our 2012 Chicken Experiments lunchtime series.
Read all of the entries: |

We got 4 more 10
foot high density apple stakes installed today. I could only
squeeze 5 in the car and that had to be done with PVC sticking out the
back window on both sides. The plan is to pick up the other 5 next week.
High
density apple training
involves securing the trunk of the tree to the stake every 15 inches.
We threaded some 14 gauge galvanized wire through pieces of old water
hose to protect the trunk.
I drilled 1/4 inch holes
through the PVC and the inner metal fence post and then threaded the
wire through the hole in a figure 8 fashion.
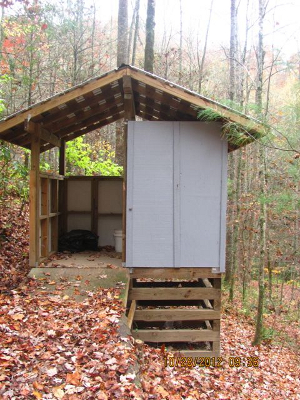 During their jaunt on the
Appalachian Trail, Shannon and
Dawn ran across a
composting toilet, so (of course) they took photos to share with
me. Here's the explanation from the sign:
During their jaunt on the
Appalachian Trail, Shannon and
Dawn ran across a
composting toilet, so (of course) they took photos to share with
me. Here's the explanation from the sign:
This composting system is maintained by the Nantahala Hiking club of
Franklin, NC. Proper disposal of human waste is one of our
primary concerns in the backountry. Pleaase help us run this
system effectively:
- Pee in the woods. This will help keep odors in the outhouse down and provide the proper moisture balance for full decomposition.
- Pack out your trash. Including tampon applicators, maxi pads, food waste, paper, etc.
- Throw in a cup of dry duff or leaves. This also keeps odors down and assists in the decay of the waste.
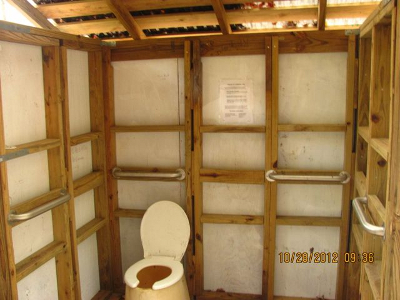 In this privy, redworms and
other common soil microorganisms decompose the waste mass of mixed
leaves and human manure in aerobic conditions (using oxygen) above the
ground level. This is why the outhouse is elevated.
Pathogens are destroyed by bacterial and invertebrate competition.
In this privy, redworms and
other common soil microorganisms decompose the waste mass of mixed
leaves and human manure in aerobic conditions (using oxygen) above the
ground level. This is why the outhouse is elevated.
Pathogens are destroyed by bacterial and invertebrate competition.
Shannon added in:
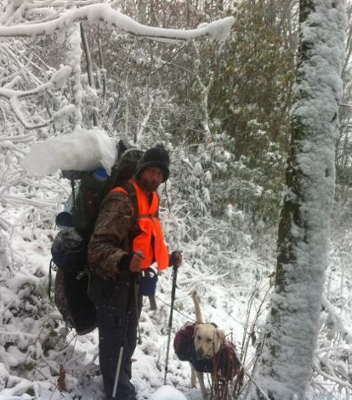 "There's an interesting story about the
privies in the trail. There was a handicapped man who hiked part
of the AT. He was wealthy and his only complaint was that the
privies were not ADA compliant. So, on the AT through NC, he
funded helicopter drops of the supplies to build ADA compliant
privies. At least this is what we were told by the folks that run
the inn that did our shuttle. So, there are hand rails and
wheelchair accessible privies on the AT now."
"There's an interesting story about the
privies in the trail. There was a handicapped man who hiked part
of the AT. He was wealthy and his only complaint was that the
privies were not ADA compliant. So, on the AT through NC, he
funded helicopter drops of the supplies to build ADA compliant
privies. At least this is what we were told by the folks that run
the inn that did our shuttle. So, there are hand rails and
wheelchair accessible privies on the AT now."I find the similarities between their privy and our composting toilet intriguing. Speaking of which, the latter has been waiting in a nearly completed fashion for weeks since Bradley's trailer broke down and we didn't have another way of getting roofing tin from the store to our farm. With Everett's help, the tin is ready to install, so we'll be posting more about our own composting toilet system soon!
Our chicken waterer makes it easy to leave town
for the weekend without worrying about your flock.
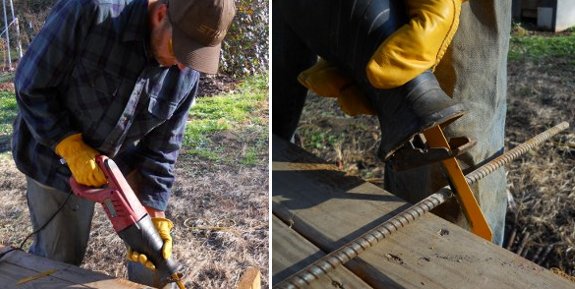
One casualty in the barn
organization project this past summer was the quick
hoop stakes. I looked and
looked and can't seem to find where I put them.
It's not easy cutting through
rebar with a reciprocating
saw. Anna holds down one
end while I operate the saw. Expect to need a fresh blade after only 7
to 10 cuts. I was able to stretch that number when I figured out you
can just cut less than half way through and then break it off.
Hopefully this post will
remind me to store these rebar stakes in a more obvious spot when we
put them away in the Spring.
 A lot of you seemed
interested in hearing how I roasted
Brussels sprouts, so
I thought I'd attempt to make the side dish into a recipe. This
time around I added carrots and cabbage since there weren't really
enough Brussels sprouts to make a full two servings --- you could leave
out either, and could also add in broccoli.
A lot of you seemed
interested in hearing how I roasted
Brussels sprouts, so
I thought I'd attempt to make the side dish into a recipe. This
time around I added carrots and cabbage since there weren't really
enough Brussels sprouts to make a full two servings --- you could leave
out either, and could also add in broccoli.
Take an equal quantity
of Brussels sprouts, carrots, and cabbage. Leave the sprouts
alone, but chop the carrots into rather large, bite-size chunks, and
the cabbage into fist-sized wedges. (The idea is to have each
chunk of vegetable roughly the same mass so that one doesn't end up raw
while another gets burnt. So, don't break that wedge of cabbage
apart into individual leaves until later when you're getting
ready to serve.)
Spread the vegetables
out on a baking tray so none are on top of each other, drizzle on olive
oil, sprinkle on salt and pepper, and roast in a 350 degree oven for 30
minutes until the vegetables are cooked but not mushy. You'll
need to take the pan out a couple of times in the middle and shake it
so the oil coats all of the vegetables evenly.
Delectable and totally
in season! I think Mark liked this more complex incarnation even
better than the previous one.
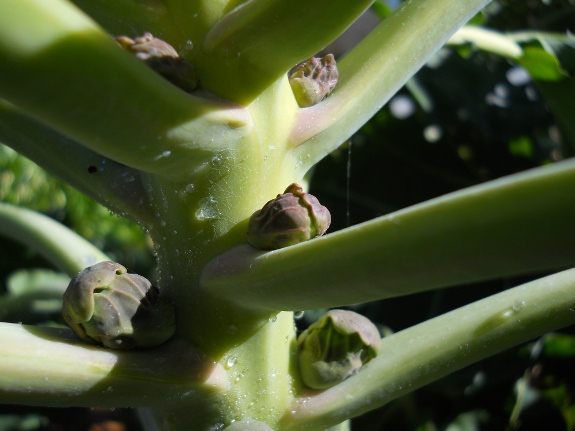
An abundance of broccoli, kale, and Brussels
sprouts has made this
fall the sweetest one yet.
I never would have imagined
10 years ago that roasted
vegetables and greens
could get me so excited with mouth watering anticipation.
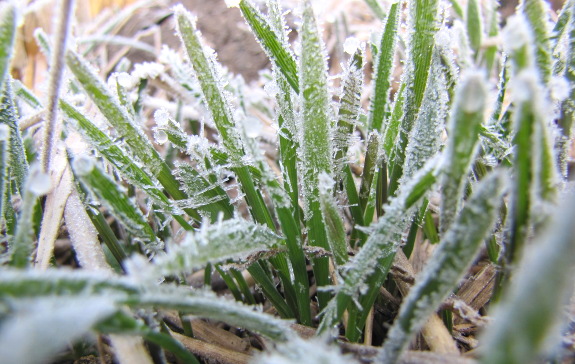
The prize for most cold
hardy annual in most gardens goes to rye. Not only will the
plants grow during warm spells throughout the winter, they'll germinate
right down to one degree above freezing.
With that exciting data
revving me up, I might have gone a little overboard on my rye
cover crop planting,
making it more of a commitment than an experiment. I sent Mark to
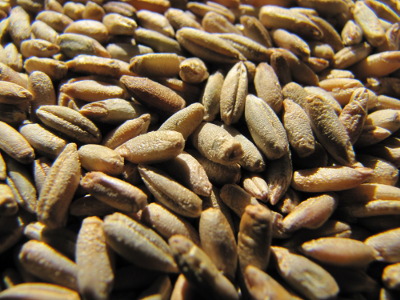 the feed store with "10
pounds of rye seeds" on the list, and he came back with a 50 pound bag
--- I guess there weren't enough farmers buying smaller quantities to
make it worth their while to break apart a bag. So I planted and
planted and planted, filling up about half the vegetable garden, gaps
in the forest garden, and even a bit of bare ground in a chicken
pasture. Yes, I used all 50 pounds.
the feed store with "10
pounds of rye seeds" on the list, and he came back with a 50 pound bag
--- I guess there weren't enough farmers buying smaller quantities to
make it worth their while to break apart a bag. So I planted and
planted and planted, filling up about half the vegetable garden, gaps
in the forest garden, and even a bit of bare ground in a chicken
pasture. Yes, I used all 50 pounds.
The rye seedlings look
beautiful on frosty mornings, but I'll be in quite a bind if the plants
aren't easily killable. I planned out my garden rotation early to
make sure I'd have non-rye spaces for all of the earlier spring
plantings, but I'll need those rye beds by June 15 at the latest.
Keep your fingers crossed!
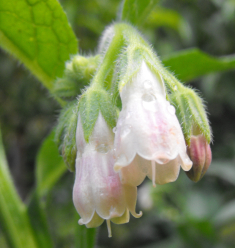 In English, the word comfrey is
used for all Symphytums. The same term has been in
use since at least the 1st Century A.D. Pliny, a Roman, called it
conferva. This later became cumfria, then (Old French) confrie, and finally the English
spelling of today.
In English, the word comfrey is
used for all Symphytums. The same term has been in
use since at least the 1st Century A.D. Pliny, a Roman, called it
conferva. This later became cumfria, then (Old French) confrie, and finally the English
spelling of today.
Symphytum
officinale or Common
Comfrey with white or cream to yellowish flowers also has a red to
purple flowered variety S.officinale var. patens. Other species of Symphytum cover the full range of colours
from white through to yellow and blue through to purple.
The Common Comfrey was
introduced to North America as early as the 17th Century, Josselyn
(1672) calling it comferie. Symphytum is derived from Dioscorides, who
was contemporary with Pliny, his Greek word for it being variously
reported as Syumphuo, Sumphutum, Sumphuton,
and no doubt other similar words. He recognised and used more
than one species. This is not surprising, about 40 have been
identified (native to most of Europe and Western Asia) with 18 in
Turkey alone, so presumably nearby countries have at least several of
these.
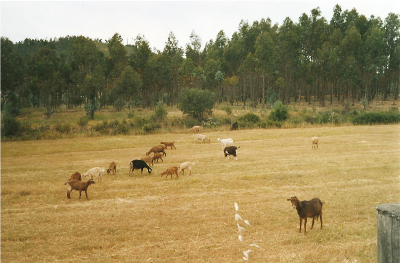 Of most interest to those people
wishing to use
comfrey for plant and livestock feeding are hybrids of the species Symphytum x uplandicum, known as Russian
Comfrey, a cross between
S.officinale and another Symphytum. S. x uplandicum
is a naturally occurring hybrid, the original being found in Uppland,
Sweden, and not Russia. Later discovered hybrids were from
Russia. These hybrids rarely set seed, but will provide the
pollen to cross with S.officinale and give yet another
variation.
Of most interest to those people
wishing to use
comfrey for plant and livestock feeding are hybrids of the species Symphytum x uplandicum, known as Russian
Comfrey, a cross between
S.officinale and another Symphytum. S. x uplandicum
is a naturally occurring hybrid, the original being found in Uppland,
Sweden, and not Russia. Later discovered hybrids were from
Russia. These hybrids rarely set seed, but will provide the
pollen to cross with S.officinale and give yet another
variation.
Borage, Borago
officinalis,
can also provide pollen to produce a hybrid. Both Borage and
Comfrey are, of course, in the family Boraginaceae. When an
unsorted mixture of varieties of S. x uplandicum
was sent to North America in the 1950s there was a Cold War between the
USA and Russia, so it was given the name Quaker Comfrey.
 The most common cultivar in use
amongst livestock people is S. x uplandicum
'Bocking 14' but some, such as myself, use 'Bocking 4'. Together
with all the other Bocking cultivars, at least 21, these were first
identified by Lawrence
Hills from amongst a large assortment of
collections from various people and places.
He called each collection a strain or mixture after the people or
places where they originated. He did not breed or develop the
cultivars as is often reported; they already existed. In this
context, please note that a lot of current internet sites replicate
other sites in their supposed information. Lawrence Hills warned
against such repetitiveness long before the Internet was invented.
The most common cultivar in use
amongst livestock people is S. x uplandicum
'Bocking 14' but some, such as myself, use 'Bocking 4'. Together
with all the other Bocking cultivars, at least 21, these were first
identified by Lawrence
Hills from amongst a large assortment of
collections from various people and places.
He called each collection a strain or mixture after the people or
places where they originated. He did not breed or develop the
cultivars as is often reported; they already existed. In this
context, please note that a lot of current internet sites replicate
other sites in their supposed information. Lawrence Hills warned
against such repetitiveness long before the Internet was invented.
All comfreys only actively
grow in summer in temperate climates, dying down in the autumn. S.officinale sets seed that germinates very
easily. So do some of the other Symphytums. Stick to the Russian
hybrids if you want to control the size of your plot.
Some herbalists believe that
S.officinale is the preferred, or even only,
species for
safe medicinal use. Officinale means "of the (herbalist's)
shop." Gerard in his Herball
gives an unusual use for the root juice in ale; it is "given to drinke
against the paine in the back gotten by wrestling, or overuse of women."
Alan
McDonald has been experimenting with comfrey on farms around the world
for 15 years. His new book, How Not to Make
Millions --- But Still Enjoy a Rich Rural Life is available
for 99 cents on Smashwords, and you can also read about his adventures
for free on his blog. Stay
tuned to this blog for more of his comfrey experiments tomorrow.

The refrigerator
root cellar has been
doing a good job lately keeping the carrots from freezing during nights
in the low 20's, but just barely. The thermometer we put inside was
showing the low temperature to be 34, which was telling us if it got
much colder the carrots might be exposed to freezing conditions.
I installed a
thermostatically controlled outlet today known as a Thermo Cube with a light bulb plugged in.
When the inside temperature
reaches 35 the light will come on and shut off when it warms up to 45.
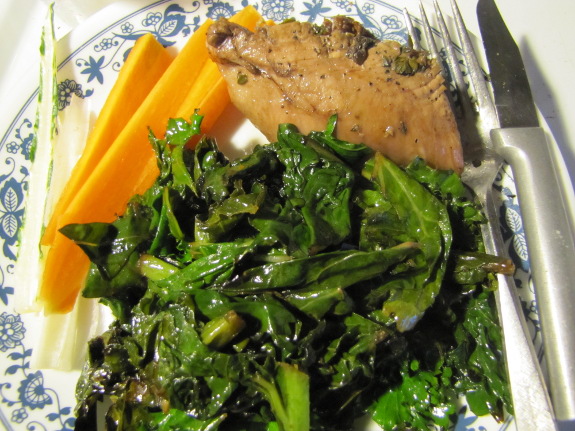
Moderately
gory pictures ahead! Please go elsewhere
for the day if you're squeamish.
Yes, you guessed it,
deer 4.0 bit the dust back behind the blueberries
Monday morning. This was the smoothest operation yet --- Mark
looked out the window and spotted a button buck, I offered him the
kill, but he let me get the rifle and sneak up through the garden,
kneel down, and take the shot.

Mark thinks I'm a better
marksman than he is, but the truth is that I
missed, as usual. As you can see from the butchering photo, my
bullet didn't go in right above the shoulder where I was aiming.
But the deer only ran for about fifty feet before keeling over, so all
was well.
After dragging the deer
home, we took a deep breath and went back
inside to read over the extremely helpful comments on last year's deer
butchering post.
As a result, I opted to hang the deer head down, as most folks
recommended, which did seem to make skinning and gutting a breeze
(albeit an hour-long one).
Another hour with Mark
and me working together to cut the meat into two
hams, a backstrap, and lots of boned flesh, followed by a final hour of
just me running the latter through the grinder, and we had 18.3 pounds of
pastured meat for the price of two bullets. (No, we hadn't shot
the rifle since killing
two deer last year.
Yes, I did put another shot in the deer's head when I found it since
the animal was still moving slightly.) As a bonus, I stewed up
the bones to create a gallon of quality broth, and ended up with
another quart of meat picked loose after cooking. Assuming our
previous three deer paid for the gun, that's some ultra-cheap pastured
meat.
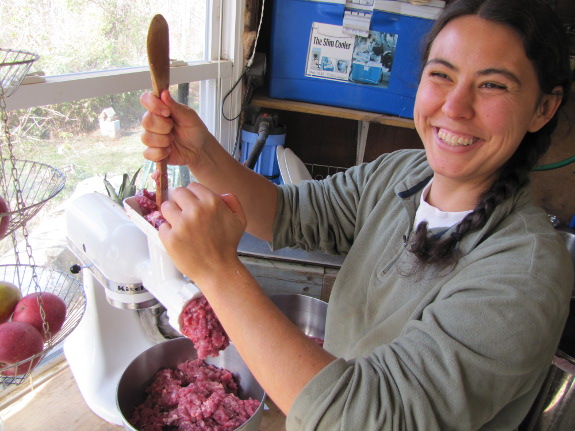
In the past, I haven't
been impressed by the gestalt of the livers that
came out of our deer, but this little guy was one healthy youngster and
his liver was a deep maroon with no blemishes. I've also never
had a liver dish I liked, but a simple pate (rendered chicken fat,
onions, garlic, thyme, salt, pepper, and a splash of cooking sherry)
changed my tune. We've also already cooked up half of the
backstrap (using my garlic-thyme
chicken leg recipe...without
the chicken legs, of course), and it was similarly top notch. Our
tastiest deer to date!
Meanwhile, we decided to
split this deer down the middle in terms of
ownership. Previously, I'd killed two deer and Mark one --- yes,
Mark is definitely keeping count. (I'm not --- who needs
a tally when you're obviously ahead?) Since Mark spotted 4.0 and
I slaughtered him, I figure we're now up to 1.5 to 2.5 deer,
respectively. Given the
ease with which this deer went into the freezer and the flavor of the
meat, I suspect Mark may keep his eyes peeled to even the score.
 When I farmed in the North of
Scotland prior to moving to Portugal, I
had Bocking Nos. 4 and 14, together with a large number of plants of
unknown species or varieties that I had collected from various
people. I operated a commercial free-range egg enterprise on this
When I farmed in the North of
Scotland prior to moving to Portugal, I
had Bocking Nos. 4 and 14, together with a large number of plants of
unknown species or varieties that I had collected from various
people. I operated a commercial free-range egg enterprise on this
farm, using mobile night
shelters holding either 80 or 120 hens, with a
total capacity of close to 2000 birds, and the hens had free access to
the comfrey beds. They ignored all the plants.
This is not unusual, and if
you want to offer comfrey to poultry you
might have to cut and wilt it first, possibly even chaffing it. I
understand this particularly applies to No.14. Poultry apparently
find the higher potassium content of this cultivar distasteful when it is growing or offered freshly
cut, although some poultry keepers find their hens will eat it fresh.
I was not interested in
feeding it to hens. I bred meat rabbits
until the increasing egg enterprise meant I had to cut back on the
workload I had, but almost all the rabbits had taken readily to most
comfrey leaves they were offered. Some did not.
I brought a couple of
crown-sets of No.4 with me to Portugal because my
aim was to feed it to livestock during the normal summer drought, the
14 with its higher potash being preferred for plant food --- in
compost, as a mulch, directly in the ground underneath potatoes, and as
a liquid fertiliser.
 I keep a small goat herd of up to
20 does, and they have never been
fond of comfrey, usually pulling the leaves out of the feeders to taste
and then discarding them. I tried several times each summer with only a
few does and kids being interested. Consequently I used most of
the crop each year as compost or mulch.
I keep a small goat herd of up to
20 does, and they have never been
fond of comfrey, usually pulling the leaves out of the feeders to taste
and then discarding them. I tried several times each summer with only a
few does and kids being interested. Consequently I used most of
the crop each year as compost or mulch.
This year has been
particularly dry and therefore no fresh grazing, as
I was unable to irrigate, and very little browse. As a last
effort, and as a complement to the green corn and cobs I was feeding
(corn being low in calcium and high in phosphorus, whilst comfrey is
the reverse, and also much higher in protein), I decided to give them
one last try. Most of the goats took to the comfrey by about the
end of July, and all of them eventually. My limited supply had to
be fed very sparingly until I decided I had to stop cutting in mid
October to give the plants a chance to build up reserves before winter.
Alan
McDonald has been experimenting with comfrey on farms around the world
for fifteen years. His new book, How Not to Make
Millions --- But Still Enjoy a Rich Rural Life is available
for 99 cents on Smashwords, and you can also read about his adventures
for free on his blog. For
background information on comfrey, check out yesterday's post "Types of
comfrey."

It took 5 pieces of 10 foot
long tin to finish the composting
toilet roof.
I was planning to get a brown
tarp for the privacy wall, but the local feed store was selling these
camouflage tarps that seemed to be more appropriate.
Now the structure can double
as a hunting blind, and actually looks down on a known deer path.
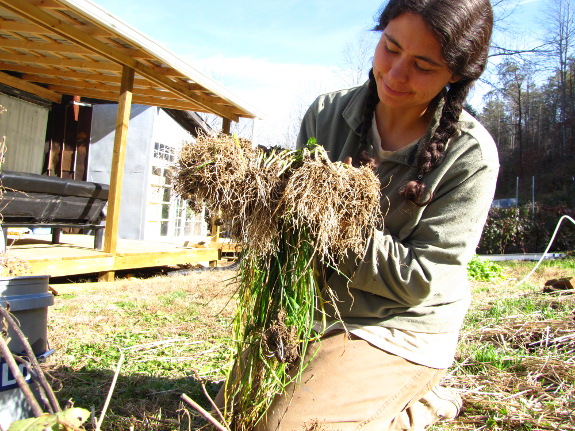
I can't quite explain
why I love plants so much, but part of it is pure skinflintery.
You can start with one plant, then a couple of years later, you have a
dozen.
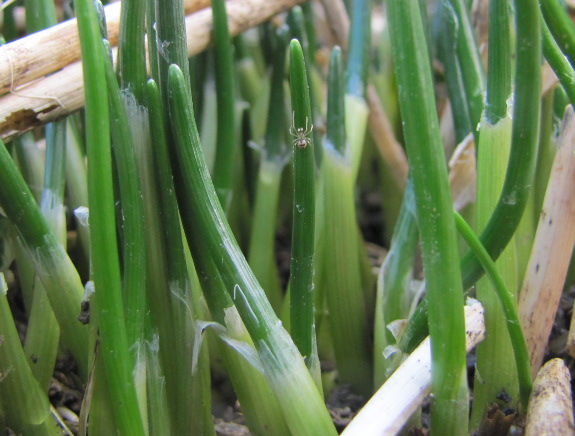 With herbaceous (nonwoody)
perennials, the easiest way to replicate your plant is often simple
division --- dig up the roots, break (or cut) the clump in half, and
you have two plants for the price of one. Not all perennials
respond well to division, but many do.
With herbaceous (nonwoody)
perennials, the easiest way to replicate your plant is often simple
division --- dig up the roots, break (or cut) the clump in half, and
you have two plants for the price of one. Not all perennials
respond well to division, but many do.
The photo at the top of
this post shows the several large clumps of chives I ended up with for
the price of one seed. Yep, that's right --- I planted a single
chive seed in this spot in 2008, it grew and thrived, and now I've got
a heaping handful. If I really wanted to, I could tease apart
each bulb and probably have a hundred or more chives, but I don't need
that many, so I'll just plant them back by the hunk.
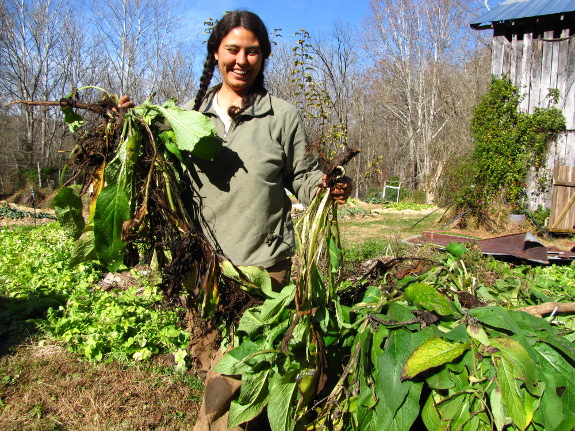
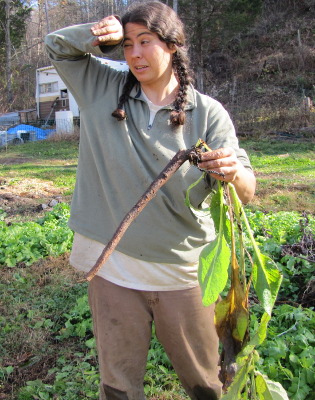 Of
course, the king of division is comfrey. I'm guessing our plants
are Russian
comfrey since they
don't produce seeds, but they sure do divide easily. In fact, you
can't get rid of a clump once you've started it somewhere.
Of
course, the king of division is comfrey. I'm guessing our plants
are Russian
comfrey since they
don't produce seeds, but they sure do divide easily. In fact, you
can't get rid of a clump once you've started it somewhere.
The photo to the left
illustrates two important points. The first is how I scrunch up
my face when I think about trying to eradicate comfrey from a spot
where it's become established. More seriously, I wanted to show
how pieces of comfrey that seem to lack root hairs will still grow and
thrive. You can hack a clump of comfrey to within an inch of its
life and every little root bit will spring to life. This long
root will thrive, but I wouldn't expect the same from most other
species.
Monday, I dug up what
used to be four plants in 2008 (a quarter of what was once three plants
in 2006). I filled an entire wheelbarrow, and I'm confident there
will be enough pieces of root left behind to refill the old spot in the
spring.
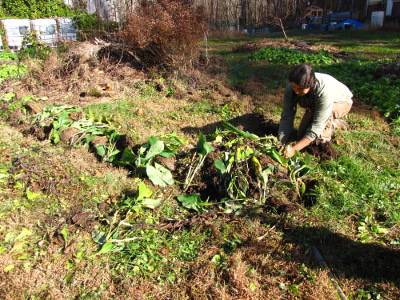 Meanwhile, the comfrey pieces
I pried out of the soil formed a border for a new part of the forest
garden I want to begin reclaiming from the "lawn" in 2013. (You
can read
my plans here.)
I've got at least as many plants left to go elsewhere --- maybe to hold
soil in the powerline pasture if we get around to playing with it this
winter.
Meanwhile, the comfrey pieces
I pried out of the soil formed a border for a new part of the forest
garden I want to begin reclaiming from the "lawn" in 2013. (You
can read
my plans here.)
I've got at least as many plants left to go elsewhere --- maybe to hold
soil in the powerline pasture if we get around to playing with it this
winter.
Now's the perfect time
to divide most perennial herbs. Go forth and multiply!
 Folks,
This Ain't Normal is
Joel Salatin's first book put out by a mainstream publisher.
Previous self-published works, with titles like Everything
I Want to Do I Illegal
and The
Sheer Ecstasy of Being a Lunatic Farmer, have helped make Salatin a
household name in homesteading circles, and I suspect his newest book
may make his celebrity less of a niche obsession.
Folks,
This Ain't Normal is
Joel Salatin's first book put out by a mainstream publisher.
Previous self-published works, with titles like Everything
I Want to Do I Illegal
and The
Sheer Ecstasy of Being a Lunatic Farmer, have helped make Salatin a
household name in homesteading circles, and I suspect his newest book
may make his celebrity less of a niche obsession.
Or maybe
"anti-celebrity" is a better word. Salatin works hard to disagree
with everybody, which is why I think adding his new book to our club
will stir up lots of interesting ideas. Salatin's primary thesis
is put forth by Allan Nation in the foreword: "A policy of
one-size-fits-all regulation means that a regulation that is a minor
nuisance to a large industrial processor is a farm killer for a farmer
trying to sell directly to a customer."
To Salatin, this policy
issue is really about families, raising your kids right, and making a
living while helping the earth. He explains his book as being "a
story of carbon, soil building, ecological innovation, and a lifetime
of swimming the wrong way." In six short pages of introduction,
we meet his entire clan, from grandparents to grandkids, and that sets
the stage for an engagingly written, highly personal narrative that is,
at the same time, relevant to every American reader.
We'll be discussing the
first three chapters (up through "Hog Killin's and Laying in the
Larder") next Wednesday, so go hunt down your copy and start
reading. Folks,
This Ain't Normal
isn't in our tiny library, but is more likely than many of the other
books I've recommended to be available for checkout if you live in a
moderately sized or larger town. I'm looking forward to hearing
your take on Salatin's lunacy.
 The
heating element in our oven stopped working today.
The
heating element in our oven stopped working today.
I felt lucky when our local
hardware store had a replacement, but I failed to realize part of the
connector was touching the frame and when we turned the power back on
it melted the connector making the element worthless.
The second trip to a hardware
store within the same hour is tough on my ego. Luckily there was one
more left, along with a new connection tip to replace the melted one.
When I put the second element in I made sure to modify the frame to not
allow any more sparking. I was feeling kind of down on my stove fixing
skills and I think Phil the guy who owns the hardware store was picking
up on it. He said "That happens to a lot of people Mark" with a tone
that made me feel 10 times better.
Echinacea
purpurea (also
known as Purple Coneflower) is one of the few herbs Mark and I
imbibe. If we're going to be travelling or hanging around small
children, we'll take a bit of echinacea the day before, the day of, and
the day after to help our immune systems know  there will germs to fight
off. As a preventative, it's hard to say whether the echinacea
helps, but it certainly doesn't hurt.
there will germs to fight
off. As a preventative, it's hard to say whether the echinacea
helps, but it certainly doesn't hurt.
In the past, we've
bought echinacea from the drug store, but my own little plant (a gift
from a friend when we moved to the farm) is finally old enough to divide and harvest. Although
some people use other parts of the plant, it sounds like you'll get the
most medicinal qualities out of the roots harvested a week or two after
the hard frosts kill back most of the top growth of the plant. In
addition, it's best to wait to harvest until your echinacea plants are
at least two or three years old, and then to only harvest 20% or less
of the roots per year, so you don't kill the plant.
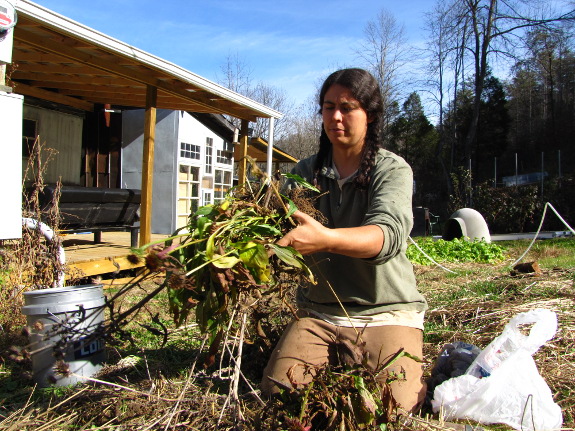
Since it had been six
years since this plant went into the ground, I was able to gently pull
the clump apart into three sections at the same time I harvested the
roots. One section will go back in place, another will move into
the forest garden, and a third will hedge our bets by going to a friend.
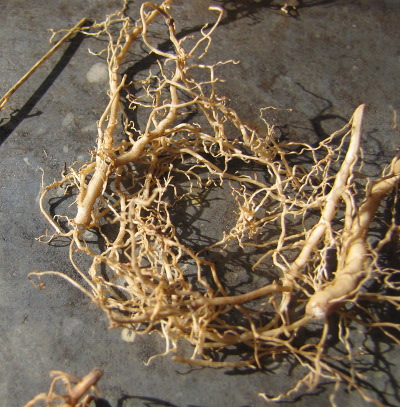 I only cut some of the small
feeder roots since we don't use much echinacea (and since the herb is
only good for about a year). After rinsing them carefully, the
little roots dried in the sun for a few hours to get rid of most of the
wash water. Next, I cut them with scissors into half inch pieces,
which will ensure that the roots dry within two to four days (giving
them no time to mold). The final step will be to store the
echinacea roots in a dark, air-tight container, then to brew up a
decoction by boiling them for 30 to 60 minutes as needed.
I only cut some of the small
feeder roots since we don't use much echinacea (and since the herb is
only good for about a year). After rinsing them carefully, the
little roots dried in the sun for a few hours to get rid of most of the
wash water. Next, I cut them with scissors into half inch pieces,
which will ensure that the roots dry within two to four days (giving
them no time to mold). The final step will be to store the
echinacea roots in a dark, air-tight container, then to brew up a
decoction by boiling them for 30 to 60 minutes as needed.
My plantain
salve has come in
handy, and I realized I use more of these medicinals when I have them
in processed form on the shelf. So hopefully the echinacea will
also hit the spot.
Did
you know that the average American today has as much living area to
him- or herself as an entire family of 3.3 did in 1950? I've been
thinking about small houses lately, both because of working on my
Trailersteading
ebook and because
we've been the lucky recipients of a
variety of out of town guests. I suspect that many
Americans build large homes for the sole purpose of housing guests or
hosting gatherings two or three times a year. But isn't there an
easier way?
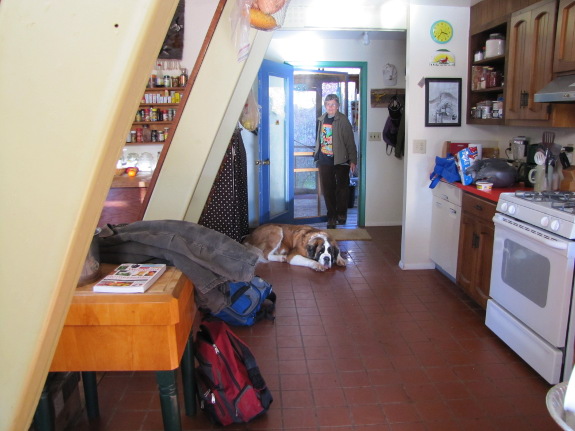
For us, there definitely
is. It turns out that the intentional
community a mile
down the road rents out their community house for a
small fee and is happy to put up our house guests (and to host our
Thanksgiving
dinner). To
me, this is a no-brainer since our
entire farm is my personal space and I can't handle having people other
than Mark nearby for more than three or four hours a day once or twice
a week.
But even for the less
antisocial, renting space for guests makes
financial sense. We're able to use the community house for an
entire week for $100 --- just think how many guests we'd need to
channel through here before it would make sense to move the guest
quarters to our own land. Plus, if one community house could take
the pressure off ten or twenty families, that would mean a slew of
trees that didn't need to be cut down to build guest rooms and tons of
coal that didn't need to be turned into elecricity to heat
usually-empty spaces.
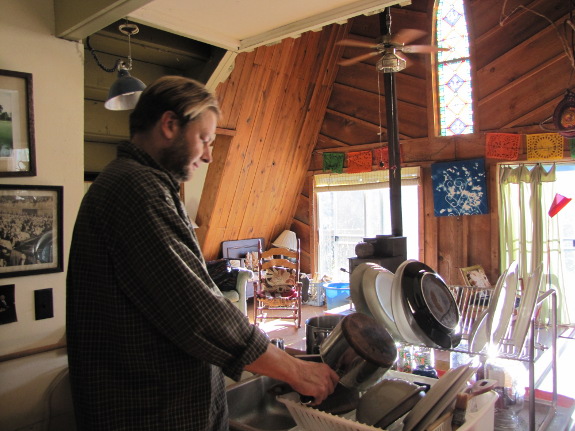
I suspect that if the
Tiny House movement wants to reach beyond the
small, vocal choir, our communities need to have facilities like this
available to take the edge off. What do you think?
 MamaHomesteader made a nice comment
on my oven
repair post that her
in-laws elected to buy a new stove instead of replacing the heating
element and that got me thinking that maybe it's not as obvious to most
folks that it's far easier to replace the element then to go shopping
for a new stove and scrap the old one.
MamaHomesteader made a nice comment
on my oven
repair post that her
in-laws elected to buy a new stove instead of replacing the heating
element and that got me thinking that maybe it's not as obvious to most
folks that it's far easier to replace the element then to go shopping
for a new stove and scrap the old one.
First make sure the oven is
unplugged. The element is held in place by two screws on the back wall.
Remove those two screws and the element will slide out a bit.
Disconnect the two wires and take the old element to the store to match
it up with a replacement. The new element might be slightly different,
but if the distance between the two screws is the same it should be
able to work. Sometimes bending of the ends that stay behind the oven
wall are needed to make it fit without touching the frame, but it might
be easier to modify the frame.
 A
three-trunked, dead black locust used to stand just outside our core
homestead. One trunk fell
in spring 2009, and
another fell during the heavy snows the
following winter.
I'd left the remaining trunk as an insurance policy --- standing snags
are generally pretty dry and can be cut and used for firewood nearly
immediately. But I knew the wood couldn't stay good indefinitely.
A
three-trunked, dead black locust used to stand just outside our core
homestead. One trunk fell
in spring 2009, and
another fell during the heavy snows the
following winter.
I'd left the remaining trunk as an insurance policy --- standing snags
are generally pretty dry and can be cut and used for firewood nearly
immediately. But I knew the wood couldn't stay good indefinitely.
We didn't buy any wood
this year, opting instead to pay Bradley to come over and cut various
trees, one of which was the locust snag. I was amazed at how much
firewood that one tree created --- probably enough for a month of fires
--- and by how dry the wood was. I had originally planned to put
the locust in the shed for a month, but Bradley thought it could be
used right away, and he was correct. The splinters that came off
the extremely hard-to-split logs were top-notch kindling, and the logs
themselves felt drier than wood that had been sitting in the shed since
last year.
Now we've got lots of
piles of wood sitting around waiting to be ferried up to the wood
shed. A day and a half of Bradley's hard work probably created
enough wood for the rest of this winter and part of next, which makes
firewood-gathering look awfully easy until you realize he's been
brushing up on his chainsaw skills since he was eight.
 It takes a half inch drill bit to
make a hole just big enough to feed a standard extension cord through
the wall of our refrigerator
root cellar.
It takes a half inch drill bit to
make a hole just big enough to feed a standard extension cord through
the wall of our refrigerator
root cellar.
I didn't want to open a new
tube of silicon for such a small application and decided what was left
of the Shoe
Goo should be good enough to seal up the gap between the cord and
the wall.
 The
Tiny Book of Tiny Houses is a fun little book with no
room for long-winded explanations of why we should all live in tiny
houses. Instead, the author assumes we're on board and zooms in
on seventeen small dwellings, ranging from 32 square feet to a bit over
200 square feet.
The
Tiny Book of Tiny Houses is a fun little book with no
room for long-winded explanations of why we should all live in tiny
houses. Instead, the author assumes we're on board and zooms in
on seventeen small dwellings, ranging from 32 square feet to a bit over
200 square feet.
Granted, very few of
these tiny houses were full-time, long-term residences, but I enjoyed
the history behind Sunday houses (used by farming families who spent
the weekend in town shopping and going to church) and refugee shacks
(built after the 1906 San Francisco earthquake and later moved
throughout the city to be turned to other uses). I was also
interested to see that occupants of older tiny houses often got around
space restrictions by moving kitchens, outhouses, and bathing
facilities outside.
While I was picking up
my books, the librarians threw in their own two cents' worth on the
tiny house movement. "I don't think I'd like to live in a really
tiny house," one said. "But maybe a space 600 square feet or so
would work." I tend to agree with him --- our domicile was 500
square feet before we tacked on the East
Wing, and that
original area felt a little small once we moved our business out of a
tent and into the house.
I'm curious to hear from
our readers. What's the smallest space you've lived in? Did
you feel comfortable there?
Edited to add:
Trailersteading tells how to enjoy all the
advantages of a tiny house at a fraction of the cost by living in a used
mobile home. Now available for $1.99 on Amazon.
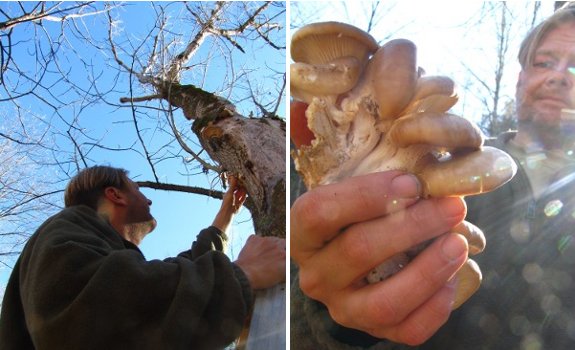
Anna spotted some wild
oyster
mushrooms high up
in a tree by the barn this time last year, but we could tell from the
ground that
they were a few days past that prime point of yumminess.
Today we harvested from the
same tree the above oyster mushroom cluster and it looks and feels
perfect. Maybe they just popped up yesterday or maybe the cold had a
preserving effect but a few minutes climbing up a ladder was well worth
the reward.
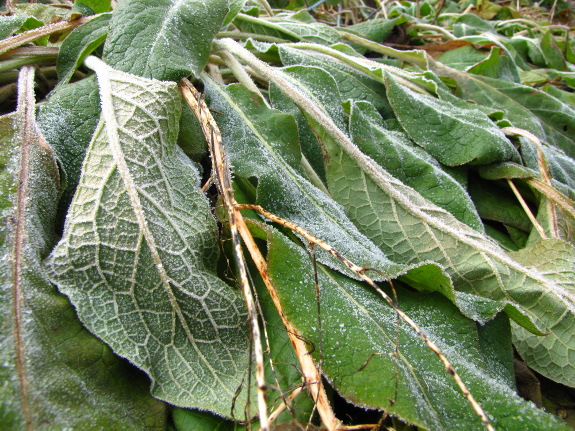
I hear that this is
going to be a cold winter, and the season is doing its best to keep us
on our toes already. Saturday night dropped down to 12 on our
farm, which is quite unusual for November (and, actually, for any
time). The floodplain froze solid, and so did the chicken waterers (even the heated
one) along with our
own water line (although I did leave the hose
door open, so that's
not a fair test).
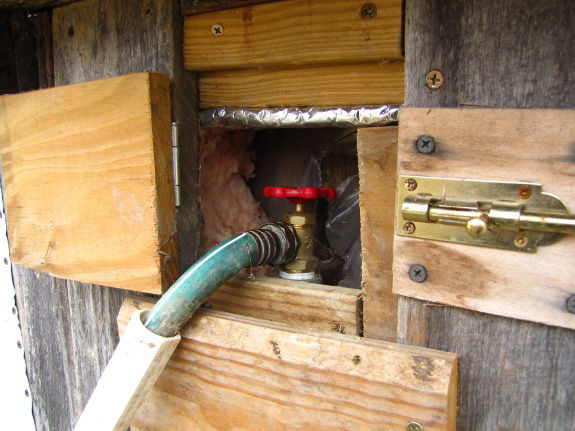
On the other hand, the fridge
root cellar held
steady at 34, which is the perfect temperature for our overwintering
carrots, cabbage, and potatoes. I'm not actually sure whether the
light
bulb came on to
mitigate the cold or not, but whatever happened, it worked.
 I've also been keeping track
of the night lows in the trailer, something I wish I'd done last year
so I could compare pre- to post-roof temperatures. On cold
nights, I generally get the fire in our little Jotul blazing, stuff it chock full
of wood around 8:30 or 9, then damp the stove way down so the logs are
just barely smoldering. Come morning, all that's left is enough
coals to make the morning fire spring back to life.
I've also been keeping track
of the night lows in the trailer, something I wish I'd done last year
so I could compare pre- to post-roof temperatures. On cold
nights, I generally get the fire in our little Jotul blazing, stuff it chock full
of wood around 8:30 or 9, then damp the stove way down so the logs are
just barely smoldering. Come morning, all that's left is enough
coals to make the morning fire spring back to life.
I've been aiming for
morning lows at or above 40 since we store butternut squash and sweet
potatoes in the kitchen, and that's what we've been seeing every night,
even this ultra cold one --- 40 degrees inside when I woke up.
I'm pretty sure it would have dropped to freezing in the trailer
Saturday night if not for our new R-30 roof.
I hope you're staying
warm!
 I started out my forest
gardening education with the two volume set of Edible
Forest Gardens,
which is so full of information that I've recently
been considering refreshing my memory with a reread. Instead, I
settled on trying out a different point of view --- Creating
a Forest Garden by Martin
Crawford.
I started out my forest
gardening education with the two volume set of Edible
Forest Gardens,
which is so full of information that I've recently
been considering refreshing my memory with a reread. Instead, I
settled on trying out a different point of view --- Creating
a Forest Garden by Martin
Crawford.
Creating
a Forest Garden
is a very different book from Edible
Forest Gardens,
and I think I'd recommend the former for nearly
all beginners. Crawford describes forest gardening in a very
simple way that still manages to hit all the highlights of the whys and
hows of forest garden theory. While Jacke and Toensmeier revel in
complex landscape design theory, Crawford cuts through to the
ecological basics.
Unlike the authors of Edible
Forest Gardens,
who are essentially consultants working with other people's forest
gardens,
Crawford has been managing a two acre
forest garden of his own for two decades. As a result, his book
is full of more depth
and more realistic long term information, countered by less breadth
(especially with regard to gardening outside England).
On the down side, about half
of Crawford's book is species lists, which (in my experience) should
not be
read during the initial planning stages --- you'll get too excited by
the possibilities and lose your focus. (Plus, be sure to look at
the zones listed --- perhaps half of the plant species aren't cold
hardy enough for our farm.) The price tag is also pretty high
since the book was published outside the U.S., and I have several
nitpicks about the information itself (which I'll mention later).
But, overall, Crawford's book is worthy of five stars.
This week's lunchtime
series hits the highlights of Creating
a Forest Garden
from the point of view of someone who has already been wowed by the
awesomness of forest gardening elsewhere. If you're just hearing
about
forest gardens for the first time, you might start with this post
and work your way back through the links to bring yourself up to speed,
and if you're a long-time forest gardening experimenter, I hope you'll
chime in with your own experiences!
| This post is part of our Creating a Forest Garden lunchtime series.
Read all of the entries: |

Our well pump started having
problems this weekend.
It only wanted to stay on for
a few minutes, which made me think it was over heating and nearing the
end of its life.
The local hardware store had
a more powerful FloTec pump priced at 109 dollars that
seems to be doing a good job so far. Anna noticed a break in the power
cord of the old pump during this operation. We'll fix the cord and keep
the old pump as a back up.
 "Have
you looked into permies.com and the rocket mass stove that is advocated
there? They talk about how damping a fire down makes the stove
less efficient. And their design lets it burn hot but slowly
release the heat."
"Have
you looked into permies.com and the rocket mass stove that is advocated
there? They talk about how damping a fire down makes the stove
less efficient. And their design lets it burn hot but slowly
release the heat."--- Phil, in response to yesterday's post
We actually get this
question a lot, so I thought I'd answer in a post so I can point later
readers here. For those who aren't familiar with rocket stoves, they were developed as an
efficient cook stove for countries where folks still largely heat their
food with wood. The design channels all of a fire's heat into a
very specific area around a pot and uses preheating
of the combustion air and insulation to achieve high efficiency
with low cost materials. One of these days, we may build a rocket
stove for summer cooking, but since I spend so much time processing all
of our homegrown produce, I don't think I'd have the patience to use a
higher work stove at the moment.
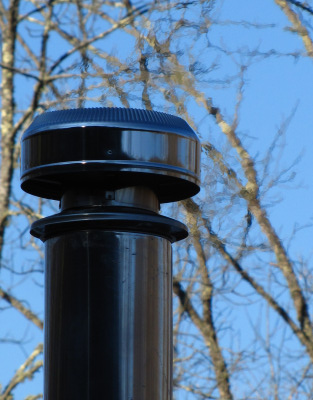 Of
course, that's not what Phil was talking about --- he wanted to know
why we don't heat our home with a rocket stove. While I don't
have the data to back this up, I suspect that our scientifically
designed, high
efficiency wood stove
is a more effective space heater than any homemade rocket stove we
could come up with. Our little Jotul uses the same preheating and
insulation concepts as the rocket stove, and I can attest to the fact
that the smoke coming out the chimney is usually completely clear as
long as I'm burning dry wood. We also burn a fraction of the wood
our neighbors do.
Of
course, that's not what Phil was talking about --- he wanted to know
why we don't heat our home with a rocket stove. While I don't
have the data to back this up, I suspect that our scientifically
designed, high
efficiency wood stove
is a more effective space heater than any homemade rocket stove we
could come up with. Our little Jotul uses the same preheating and
insulation concepts as the rocket stove, and I can attest to the fact
that the smoke coming out the chimney is usually completely clear as
long as I'm burning dry wood. We also burn a fraction of the wood
our neighbors do.
On the other hand, Phil
is completely correct that you get more efficiency from any fire if you
burn it hot rather than damping it down --- that's why we chose a small
wood stove that fits
our small space and burns little chunks of wood on "high" all
day. However, heating with a wood stove overnight requires you to
damp the stove down (unless you buy a pellet stove, which doesn't seem
very sustainable to me). A rocket stove would be a very bad
option for overnight heating since the ones I've seen require you to
feed small pieces of wood into the stove very frequently --- I prefer
to damp her down and sleep.
 What does
make sense for overnight wood heating is adding more thermal mass
around any kind of stove. This is how the rocket mass stove (the
heating version) works --- a huge mass of masonry stores heat while the
stove is running during the day, then radiates that warmth back into
the room when the stove burns down. Our trailer has weight
restrictions, so we can't go overboard with massive cob-type stove
surrounds the way some folks do, but one of these days I do plan to
tile the living room floor to capture the great passive solar heat
coming in our south-facing windows on winter days. Our slow but
sure progress on insulating our space will also help.
What does
make sense for overnight wood heating is adding more thermal mass
around any kind of stove. This is how the rocket mass stove (the
heating version) works --- a huge mass of masonry stores heat while the
stove is running during the day, then radiates that warmth back into
the room when the stove burns down. Our trailer has weight
restrictions, so we can't go overboard with massive cob-type stove
surrounds the way some folks do, but one of these days I do plan to
tile the living room floor to capture the great passive solar heat
coming in our south-facing windows on winter days. Our slow but
sure progress on insulating our space will also help.
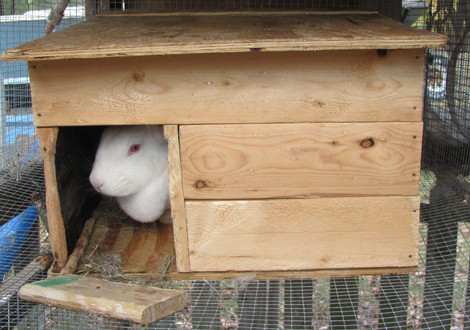 Since
we
decided to bring about our first litter of baby bunnies, one of the things on our
must-do list has been to rework our doe's house. We are in the
midst of some unplanned house remodeling at present, so I guess it's
only fitting that our rabbits get a remodel at the same time too.
At right, you can see our doe peeking out of what was her first
house. However, this house probably isn't ideal for caring for a
newborn litter of fuzzballs. So Dawn quickly went to work
modifying the original accommodations to better support our doe and her
future litter.
Since
we
decided to bring about our first litter of baby bunnies, one of the things on our
must-do list has been to rework our doe's house. We are in the
midst of some unplanned house remodeling at present, so I guess it's
only fitting that our rabbits get a remodel at the same time too.
At right, you can see our doe peeking out of what was her first
house. However, this house probably isn't ideal for caring for a
newborn litter of fuzzballs. So Dawn quickly went to work
modifying the original accommodations to better support our doe and her
future litter.
 One thing we have learned about
our rabbits is that they will chew on nearly anything we give them,
especially wood. Ample supplies of things to chew on helps with
boredom, but it also helps keep their teeth in shape. With only
rabbit food to eat, their teeth can get to the point where they need
trimming. A generous supply of branches and pieces of
(untreated!) lumber helps to keep them from chewing on the hutch and
housing. As is evident from the photo, though, they will still
chew on whatever suits their fancy at the time.
One thing we have learned about
our rabbits is that they will chew on nearly anything we give them,
especially wood. Ample supplies of things to chew on helps with
boredom, but it also helps keep their teeth in shape. With only
rabbit food to eat, their teeth can get to the point where they need
trimming. A generous supply of branches and pieces of
(untreated!) lumber helps to keep them from chewing on the hutch and
housing. As is evident from the photo, though, they will still
chew on whatever suits their fancy at the time.
 Dawn began reworking the house by
pulling it apart with what we call a "Wonder
Bar", an indispensable
tool for disassemblage of any carpentry work. She removed first
the roof, then front of the house. She planned to modify the door
so that it was on the upper portion such that there would be a
protective barrier on the bottom to prevent the newborn bunnies from
falling out of the house to certain doom. If they were to come
out of the house we'd feared that they would fall through to the ground
below or injure themselves on the wires of the hutch.
Dawn began reworking the house by
pulling it apart with what we call a "Wonder
Bar", an indispensable
tool for disassemblage of any carpentry work. She removed first
the roof, then front of the house. She planned to modify the door
so that it was on the upper portion such that there would be a
protective barrier on the bottom to prevent the newborn bunnies from
falling out of the house to certain doom. If they were to come
out of the house we'd feared that they would fall through to the ground
below or injure themselves on the wires of the hutch.
Dawn took the opportunity to
replace some of the more extensively chewed parts of the house like the
one in the second photo in this post. It's obvious how much these
bunnies like to chew on things when looking at this former piece of the
door frame.
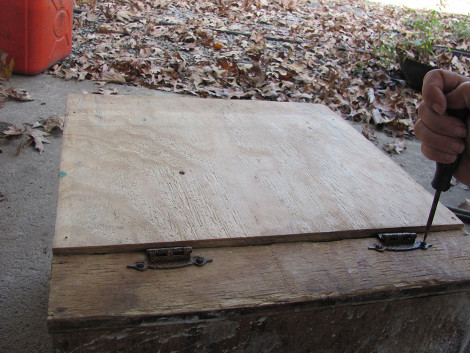 With the front of the house and
roof removed, she rotated the front 180 degrees and reattached
it. This provided the protective sill along the bottom.
Every bit as important as the protective sill is a hinged roof which
will allow us to check on the kits and replace soiled hay and
bedding. Dawn recycled some hinges off of an old cabinet door and
fitted them to the roof and house. This allows the easy access
needed.
With the front of the house and
roof removed, she rotated the front 180 degrees and reattached
it. This provided the protective sill along the bottom.
Every bit as important as the protective sill is a hinged roof which
will allow us to check on the kits and replace soiled hay and
bedding. Dawn recycled some hinges off of an old cabinet door and
fitted them to the roof and house. This allows the easy access
needed.
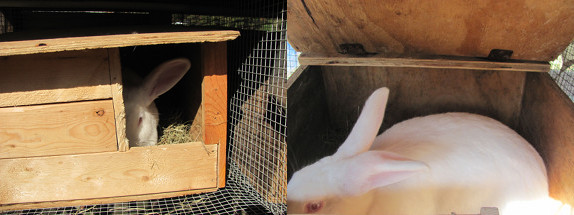
You can see the finished
product above. Our doe immediately took to the modifications when
the house was returned to the hutch and she had no issues hopping
inside through the modified doorway with its sill plate.
Hopefully the modifications Dawn made to her housing will provide a
trouble free home for the new kits expected in about two weeks or
so. I'm hoping that by the time of our next post we have some
news to report on that front.
Shannon and Dawn
will be sharing their experiences with raising meat rabbits on Tuesday
afternoons. They homestead on three acres in Louisiana when time off
from life and working as a sys admin permits.
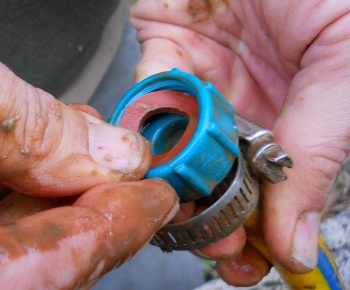
I've noticed that the main
reason a water hose starts leaking is failure of the rubber washer.
Most new hoses come with a thin black washer that seems to get squeezed
to a point where it won't bounce back.
These red rubber washers are
thicker and made from a better quality material. You can get a small
bag for around a dollar.
 If Wikipedia is to be
believed, Sarah Susanka's The
Not So Big House
(published in 1998) is responsible for the birth of the tiny house
movement. The
book I reviewed last weekend came out five years
previously, so I'm a bit dubious about that historical assessment, but
I can definitely see how Susanka's book could inspire upper middle
class and upper class Americans to consider something other than a
McMansion.
If Wikipedia is to be
believed, Sarah Susanka's The
Not So Big House
(published in 1998) is responsible for the birth of the tiny house
movement. The
book I reviewed last weekend came out five years
previously, so I'm a bit dubious about that historical assessment, but
I can definitely see how Susanka's book could inspire upper middle
class and upper class Americans to consider something other than a
McMansion.
The photos in The
Not So Big House
are beautiful and the author's thesis is simple --- extra large houses
are "designed to impress rather than nurture," with their numerous
rooms, bigger spaces, and vaulted ceilings. Counterintuitively,
people tend to feel more comfortable in smaller dwellings, especially
if you ditch the rarely-used formal spaces, use the kitchen as a focal
point, and add personalized, beautiful details.
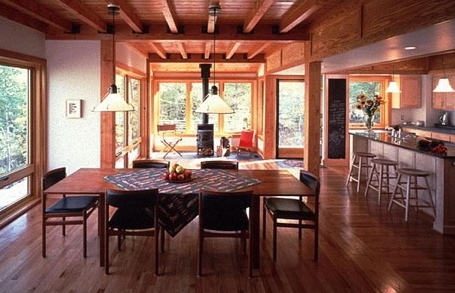 On the other hand, I'd be
hard-pressed to call any of the houses in Susanka's book "tiny."
A later book in the series, Creating
The Not So Big House,
presents actual house sizes, and by my math the average square footage
therein is 1,839. While smaller than the current average American
house (2,700 square feet), Susanka's houses are still nearly three
times the size of our living space.
On the other hand, I'd be
hard-pressed to call any of the houses in Susanka's book "tiny."
A later book in the series, Creating
The Not So Big House,
presents actual house sizes, and by my math the average square footage
therein is 1,839. While smaller than the current average American
house (2,700 square feet), Susanka's houses are still nearly three
times the size of our living space.
I realize sound a bit
like Goldilocks: "This house is too big, and this one is too
small...." Maybe the newly published Tiny
Homes: Simple Shelter
would be just right, but our library system doesn't have a copy, so I
guess I'll go back to writing about our own trailer approach to simple
housing and let the tiny house movement wander its own way.
Edited to add:
Trailersteading tells how to enjoy all the
advantages of a tiny house at a fraction of the cost by living in a used
mobile home. Now available for $1.99 on Amazon.
 I promised that Joel
Salatin's Folks,
This Ain't Normal
would have something for everyone to disagree with, and the first three
chapters are no exception. Each essay dives right into something
Salatin believes is wrong with modern American society, in this case:
I promised that Joel
Salatin's Folks,
This Ain't Normal
would have something for everyone to disagree with, and the first three
chapters are no exception. Each essay dives right into something
Salatin believes is wrong with modern American society, in this case:
- Our kids no longer have chores, and we actually don't let them work if they want to. "By denying these opportunities to bring value to [kids'] own lives and the community around them, we've relegated our young adults to teenage foolishness."
- We've forgotten that animals are part of sustainable ecosystems, vilifying all meat-eating rather than focusing on outlawing CAFO operations. "In a desire to get rid of the cow, they want to substitute plants that require tillage. No long-term example exists in which tillage is sustainable. It always requires injection of biomass from outside the system or a soil-development pasture cycle."
- We've outsourced our food supply to far-away, consolidated places and aren't scared by the fact that the average town contains a mere three days' supply of food. "The average person is still under the aberrant delusion that food should be somebody else's responsibility until I'm ready to eat it."
I actually agree with
all of Salatin's points this time around (even though I did enjoy my
chore-less, layabout childhood consuming a book a day). How about
you?
Since Salatin's writing
is so enjoyable and quick to read, I thought we'd discuss sixty pages
per week (unless you comment to say that's too much). So next
Wednesday we'll focus on chapters four through nine (ending with "No
Compost, No Digestion"). Don't forget --- Salatin's book is
probably available in your library, so you've got nothing to lose by
joining our book club!
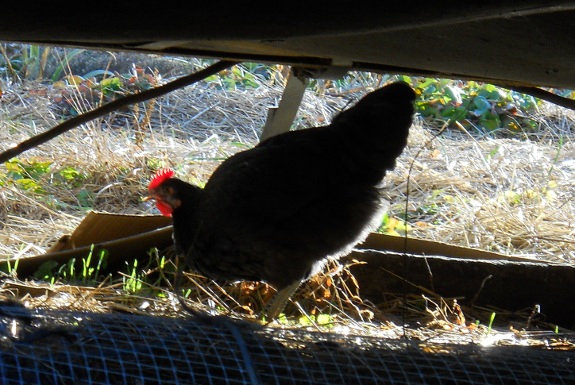
We've been processing our 15
broiler chickens this week.
5 on Monday, 5 yesterday, and
4 today.
Why just 4 today? Because the
above rooster managed to bust out of the holding coop just as I was
grabbing him. He exploited a weak spot in the plastic fence and just
pushed his way through to freedom.
We tried sneaking up on him,
but decided it would be easier to wait a few hours and catch him when
he goes in the coop tonight.
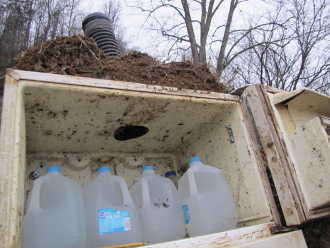
Experimentation is my
favorite part of homesteading, so I hope you don't mind these endless
updates on our refrigerator
root cellar project.
With the well
pump back in action,
I was able to fill up a bunch of empty milk jugs with backup drinking
water, following Rena's
advice of adding
more thermal mass within the root cellar itself. Meanwhile, I
plugged a Kill-a-watt
meter behind the
thermocube and light bulb so we'll know if that backup freeze
protection turns on.
Unfortunately, I didn't
make these changes until after our 12 degree night, so I'll have to wait until
the next real cold spell to report back. Stay tuned!
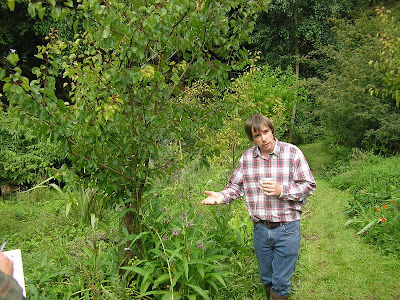 My favorite part of Creating
a Forest Garden was Crawford's simple numerical explanation of how
to create a closed loop garden with nitrogen-fixing
plants interspersed among your fruit trees. His rule of thumb
is to fill about 40% of your canopy with nitrogen fixers if your forest
garden is made up of high demand fruit trees (with lower percentages
possible if you're willing to truck in fertility or use lower-yielding,
less mainstream types of fruits). The nitrogen will make its way
from these trees, shrubs, and herbs to your fruit- and nut-producing
plants when the former lose their leaves, discard feeder roots, or hook
into the mycorrhizal network, and you can expedite nitrogen movement
by cutting branches and laying them underneath your high value plants
as a nutritive mulch.
My favorite part of Creating
a Forest Garden was Crawford's simple numerical explanation of how
to create a closed loop garden with nitrogen-fixing
plants interspersed among your fruit trees. His rule of thumb
is to fill about 40% of your canopy with nitrogen fixers if your forest
garden is made up of high demand fruit trees (with lower percentages
possible if you're willing to truck in fertility or use lower-yielding,
less mainstream types of fruits). The nitrogen will make its way
from these trees, shrubs, and herbs to your fruit- and nut-producing
plants when the former lose their leaves, discard feeder roots, or hook
into the mycorrhizal network, and you can expedite nitrogen movement
by cutting branches and laying them underneath your high value plants
as a nutritive mulch.
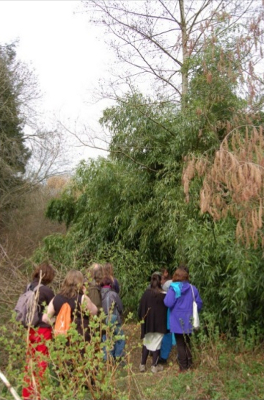 Let's do some fun nitrogen
math! First of all, you have to consider whether your
nitrogen-fixing plants are growing in full sun, partial shade, or full
shade --- the plants need full sun for peak nitrogen-fixing ability,
with the amount of nitrogen sucked out of the air declining linearly as
the plants are subjected to more and more shade. In full sun, an
average nitrogen fixer will make available 0.033 ounces of nitrogen per
square foot of canopy area, meaning that a hefty alder 16 feet in
diameter would fix about 6.6 ounces of nitrogen per year.
Let's do some fun nitrogen
math! First of all, you have to consider whether your
nitrogen-fixing plants are growing in full sun, partial shade, or full
shade --- the plants need full sun for peak nitrogen-fixing ability,
with the amount of nitrogen sucked out of the air declining linearly as
the plants are subjected to more and more shade. In full sun, an
average nitrogen fixer will make available 0.033 ounces of nitrogen per
square foot of canopy area, meaning that a hefty alder 16 feet in
diameter would fix about 6.6 ounces of nitrogen per year.
Meanwhile, heavy feeders
(including apples, peaches, and most of the mainstream fruit trees)
need about 0.026 ounces of nitrogen per square foot of canopy. So
a semi-dwarf apple tree with a canopy spread of 15 feet would need
about 4.6 ounces of nitrogen per year. It's easy to see how
planting one nitrogen-fixing shrub (like the alder detailed above) per
fruit tree could do the trick.
 Crawford included numbers on
alternative source of nitrogen too, such as 0.18 ounces of nitrogen per
cutting for one comfrey plant, 0.20 ounces of nitrogen from each peeing episode, and 0.096 ounces of
nitrogen per pound of manure applied. I'm a bit disappointed that
he didn't make the distinction that comfrey is not a nitrogen-fixer, though,
and that although you can cycle nitrogen with its leaves, the
plant has a tendency to suck that nitrogen right back up in poor soil. On the other hand, if
you plant comfrey beyond the eventual canopy spread of your fruit
trees, fertilize the comfrey with urine, and cut leaves regularly, the
dynamic accumulator could provide quite a bit of nitrogen and organic
matter for your fruit trees.
Crawford included numbers on
alternative source of nitrogen too, such as 0.18 ounces of nitrogen per
cutting for one comfrey plant, 0.20 ounces of nitrogen from each peeing episode, and 0.096 ounces of
nitrogen per pound of manure applied. I'm a bit disappointed that
he didn't make the distinction that comfrey is not a nitrogen-fixer, though,
and that although you can cycle nitrogen with its leaves, the
plant has a tendency to suck that nitrogen right back up in poor soil. On the other hand, if
you plant comfrey beyond the eventual canopy spread of your fruit
trees, fertilize the comfrey with urine, and cut leaves regularly, the
dynamic accumulator could provide quite a bit of nitrogen and organic
matter for your fruit trees.
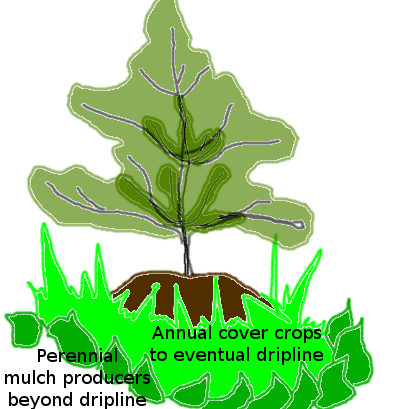 My other complaint with the
fertility section of the book is that it doesn't consider mulch, which
seems to be a much more time-consuming trucked-in component during the
establishment stages of a forest garden than nitrogen is. (If you
include
animals in your forest gardening system, nitrogen is pretty easy to
come by.) I suspect that this lack is due to Crawford gardening
on high quality soil where he can begin to use herbaceous plants to
keep weeds at bay under trees within just a couple of years --- in the
sad soil of my forest garden, I'm not so sure I'll ever be able to
plant inside the dripline without negatively impacting my trees.
Instead, I'm considering planting chop 'n
drop plants between
the eventual canopies of the fruit trees for building organic matter.
My other complaint with the
fertility section of the book is that it doesn't consider mulch, which
seems to be a much more time-consuming trucked-in component during the
establishment stages of a forest garden than nitrogen is. (If you
include
animals in your forest gardening system, nitrogen is pretty easy to
come by.) I suspect that this lack is due to Crawford gardening
on high quality soil where he can begin to use herbaceous plants to
keep weeds at bay under trees within just a couple of years --- in the
sad soil of my forest garden, I'm not so sure I'll ever be able to
plant inside the dripline without negatively impacting my trees.
Instead, I'm considering planting chop 'n
drop plants between
the eventual canopies of the fruit trees for building organic matter.
Any handy rules of thumb
out there on what percent of the growing area should be devoted to chop
'n drop mulch producing plants? I'm also still taking suggestions
for top perennial species, even though I'm focusing on annual cover
crops at the moment.
| This post is part of our Creating a Forest Garden lunchtime series.
Read all of the entries: |
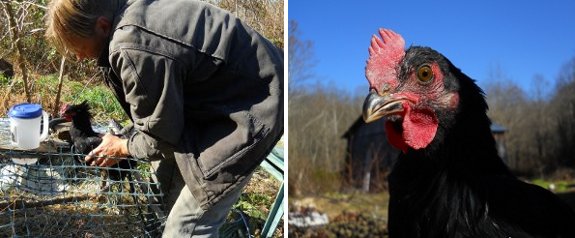
He spent his extra day of
freedom foraging under the trailer, and then made his way towards the
brood coop to lodge for the night.
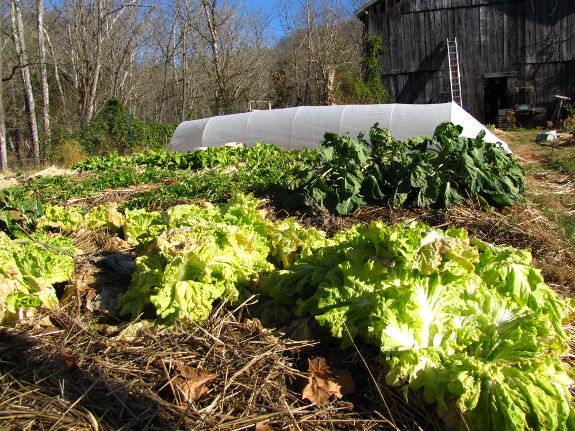
Our second winter
focussing on leafy greens and quick
hoops, I still feel a bit like I'm making it up as I go
along. We
covered one long row (about four beds) of lettuce and two long rows of
kale with quick hoops in the middle of November, and ever since I've been
vacillating about the 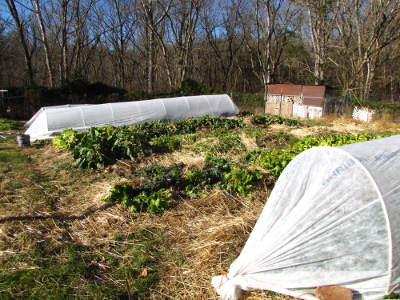 fourth
quick hoop. Should I put the frost protection over the tatsoi and
tokyo bekana row? Over a row of kale? Over the mustard?
fourth
quick hoop. Should I put the frost protection over the tatsoi and
tokyo bekana row? Over a row of kale? Over the mustard?
In the end, I returned
the final quick hoop to the barn to wait for spring. My
experience last year suggested that tokyo
bekana, mustard, and tatsoi aren't hardy enough to
survive late into the winter even under quick hoops, so we might as
well eat them up now while they're sweet and delicious.
Meanwhile, the last row of kale got a bit overmature due to the warmth
of early fall, and I don't think it would overwinter well either, so
those greens also got earmarked for early winter dinners.
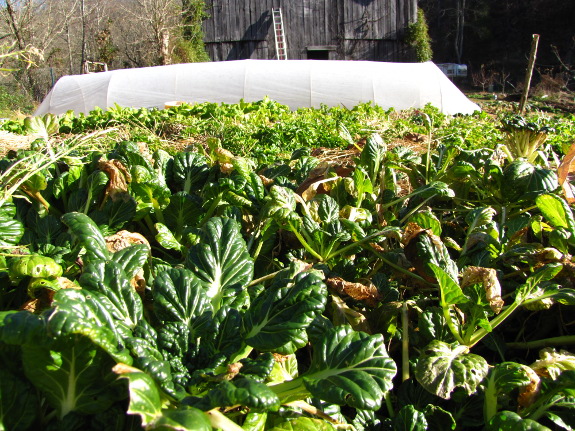
Focussing our harvesting
attention onto the uncovered beds allowed the plants in the covered
beds to continue growing until the Persephone
Days hit. Now,
they're just waiting to feed us leafy greens in late December through
January, after the uncovered beds give out.
All of this leafy greens
geekery (and the refrigerator
root cellar) means we've barely thawed any vegetables out of the
freezer so far this winter. It's such a delightful change to be
eating fresh vegetables deep into the cold months!
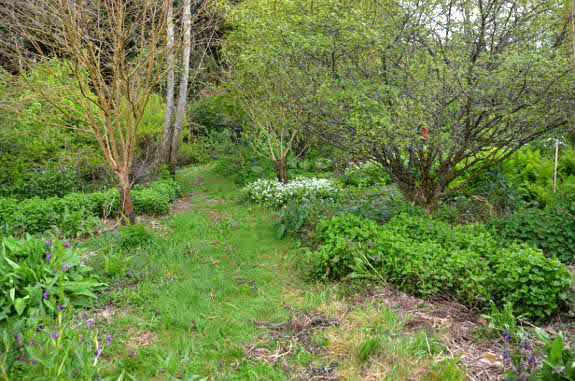
Although I geekily
enjoyed the numbers in the
fertility chapter,
what I wish I'd read four years ago was Crawford's simple advice for
starting a forest garden from scratch. First of all, he
recommends that you kill all of the weedy perennials (like brambles and
trees) before doing anything else --- that tip alone could have saved
me lots of pain and suffering. Simply mowing regularly for a year
or two usually does the trick.
 Assuming your blank slate
consists of a grassy field, Crawford recommends planting the canopy
trees, then slowly kill mulching bands of earth to be filled with
smaller plants a year later. On Crawford's large scale, plastic
landscape fabric makes sense as the kill layer, but for most of us, I'd
instead recommend simple kill mulches made of cardboard and woody
mulches as a way of boosting our soil fertility and keeping
microorganisms happy. Regardless of what you use to kill the
grass, Martin's technique is a bit like the "islands that merge" pattern in Edible
Forest Gardens,
which I've adopted as my own method of building a forest garden.
Assuming your blank slate
consists of a grassy field, Crawford recommends planting the canopy
trees, then slowly kill mulching bands of earth to be filled with
smaller plants a year later. On Crawford's large scale, plastic
landscape fabric makes sense as the kill layer, but for most of us, I'd
instead recommend simple kill mulches made of cardboard and woody
mulches as a way of boosting our soil fertility and keeping
microorganisms happy. Regardless of what you use to kill the
grass, Martin's technique is a bit like the "islands that merge" pattern in Edible
Forest Gardens,
which I've adopted as my own method of building a forest garden.
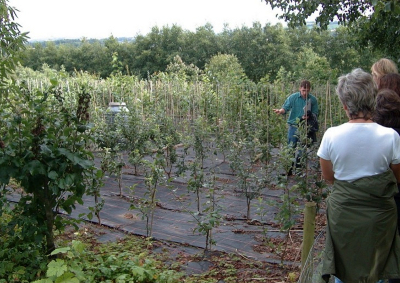 The benefit of this
a-bit-at-a-time system is that you can slowly propagate all of the
extra plants you need, filling in one area per year, while maintaining
the parts you haven't gotten to yet with a few yearly rounds of
mowing. Alternatively, you can till the space up and plant a
perennial cover crop to take the place of grass in areas waiting to be
planted with the permanent understory. (Or grow vegetables there.)
The benefit of this
a-bit-at-a-time system is that you can slowly propagate all of the
extra plants you need, filling in one area per year, while maintaining
the parts you haven't gotten to yet with a few yearly rounds of
mowing. Alternatively, you can till the space up and plant a
perennial cover crop to take the place of grass in areas waiting to be
planted with the permanent understory. (Or grow vegetables there.)
Using this technique,
Crawford estimates you'll need to devote about 5.5 days per 1,000
square feet of forest garden during the design and establishment
phase. (Maintenance takes him another 2 days per 1,000 square
feet per year.) Your final forest garden will have all the pieces
in place after two to ten years, and he tells us not to worry if the
forest garden doesn't look like much at first. Photos on the
internet of Crawford's garden suggest that it's quite possible to
create a beautiful and productive space using his methods if you just
keep plugging right along.
| This post is part of our Creating a Forest Garden lunchtime series.
Read all of the entries: |

Every now and then I would
look over towards our coop before going to bed and notice the supplemental
light still on.
At first I thought maybe the
chickens figured out how to work the timer, but eventually settled on
some kind of intermittent failure in the mechanical timer.
I suspect the mechanical
timer was intended for indoor use only and might behave differently
when it gets frozen. I'll post an update in a month or so to check on
the performance of the new digital timer.

Or explore more posts by date or by subject.
About us: Anna Hess and Mark Hamilton spent over a decade living self-sufficiently in the mountains of Virginia before moving north to start over from scratch in the foothills of Ohio. They've experimented with permaculture, no-till gardening, trailersteading, home-based microbusinesses and much more, writing about their adventures in both blogs and books.