archives for 08/2012
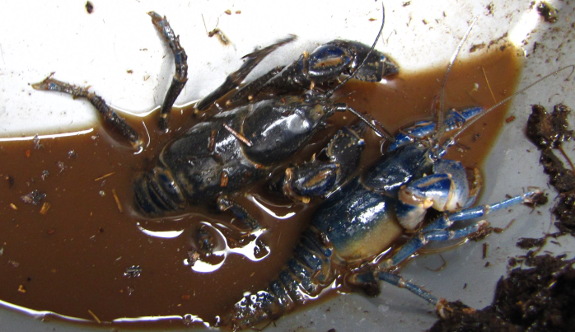
 Crawdads (known to most of
the world as crayfish) show up in the garden if the spot is already
troubled. Only our back garden, with its high groundwater and low
topsoil, shows signs of crawdads, but there the crustaceans can cause a
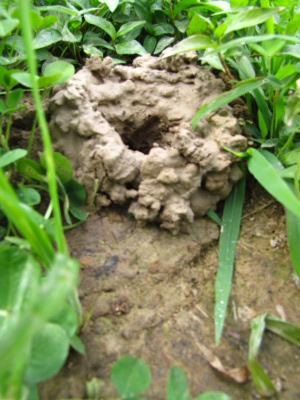
bit of trouble. They aren't actively eating my plants, but they
do send up new chimneys to excavate their underground burrows from time
to time, and the piles of mud tend to squash seedlings.
I'm far from an expert at crayfish, but I once had a scientist identify
our brilliantly blue crayfish as Upland Burrowing Crayfish (Cambarus dubius). This
species is one of the few that spends nearly all of its time
underground (rather than living in a creek or pond), although the
crawdads do come out at night to eat decaying organic matter and
insects.
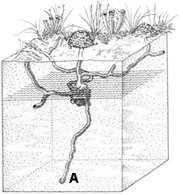
 The point of the burrow isn't
just protection from predators --- the caverns dip down into the
groundwater so that these crawdads can keep their gills wet enough to
breath even during droughts. This particular species builds
pretty big burrows, sometimes extending three feet into the earth and
with up to five entrances, and several crawdads can live in each
one. No wonder they kick up so much mud into my garden.
I've been trying to find the positive side of crawdads in the garden
ever since I moved into their habitat. My first thought was that
the crustaceans should be good for chickens to eat, but our hens ran
away from the crawdads we caught for them. (Bradley suggested
that his cats won't eat the burrowing crawdads but do like the ones in
the creek, so I might try again with creek dwellers later.)
I've now decided to think of burrowing crawdads as dynamic
accumulators who are helping build the problematic back garden
soil. After all, they aerate the ground with their burrows and
haul organic matter down to improve the earth at lower levels.
I'll keep telling myself that every time the burrows slaughter a
vegetable seedling and maybe I won't get so angry.
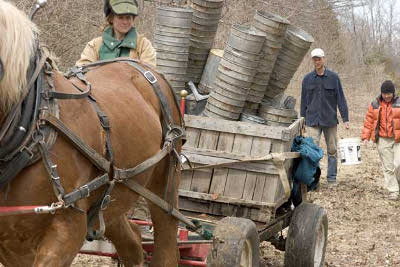 "A farm is a manipulative
creature. There is no such thing as
finished. Work comes in a stream and has no end. There are
only the
things that must be done now and the things that can be done
later.
The threat the farm has got on you, the one that keeps you running from
can until can't is this: do it now, or some living thing will wilt or
suffer or die. It's blackmail really."
"A farm is a manipulative
creature. There is no such thing as
finished. Work comes in a stream and has no end. There are
only the
things that must be done now and the things that can be done
later.
The threat the farm has got on you, the one that keeps you running from
can until can't is this: do it now, or some living thing will wilt or
suffer or die. It's blackmail really."In The Dirty Life, Kristin explains how she and her husband-to-be spent their first year "building a wildly complex farm all at once." Mark (hers, not mine) had the vision of creating a CSA that provided a full diet, from meat and dairy to grains and vegetables...and he wanted it up and running by August. Since the duo only moved onto the farm that winter and planned to work the ground using draft horses, they faced extremely long, back-breaking days to make their dream a reality.
 One of the hardest lessons I've learned on
our homestead is the issue of pacing. You can see throughout The
Dirty Life how
biting off nearly more than they could chew stressed Kristin and Mark
almost to the breaking point, and the quote at the top of this post
explains why it's so hard to scale back your vision once you've started.
One of the hardest lessons I've learned on
our homestead is the issue of pacing. You can see throughout The
Dirty Life how
biting off nearly more than they could chew stressed Kristin and Mark
almost to the breaking point, and the quote at the top of this post
explains why it's so hard to scale back your vision once you've started.Eventually, Mark and Kristin settled on a "no-farming-on-Sundays rule", but they could have saved a lot of heartbreak if they'd been less ambitious from the get-go. Kristin wrote about an early winter blizzard-turned-planning-day:
"We spent the day in a fit of joyful
enthusiasm, mapping out the next year of work.... We filled in
the days and weeks with our ambitions, which even then we must have
known were too big to be contained in the boundaries of a single
year. The first week in February was reserved to FIGURE OUT
GREENHOUSE---BUILD IT! In the second week of that month, we would
aim to BUILD DISTRUBUTION AREA and also, somehow, cut and split the
next year's FIREWOOD. The day in October when we planned to get
married Mark had written WEDDING, and below that, on the same day's
square, 50 CHICKS ARRIVE.... The following week he had written
HONEYMOON and also, neatly, EXTRACT HONEY FROM THE HIVE."
Of course, the obvious take-home message is "don't marry a Swarthmore graduate" --- I suspect Kristin's Mark and I have more in common than our overambitious plans, and we do make tough spouses. But if teaming up with a Swattie wasn't in the cards anyway (or if it's too late to back out now), I think even folks homesteading on a small urban lot should think twice about how much time they really have when planning the year's garden and selecting starter livestock. My new rule of thumb is to figure everything will really take at least twice as long as I think it will, which pads our schedule against inevitable emergencies and lowers my stress levels considerably.
For those of you who have been homesteading a while, did you bite off more than you could chew during year one? And, for everyone, what strategies have you used to lower your ambitions down to realistic levels?
Those of you new the book club might want to check out last week's post about part one of The Dirty Life. We'll be discussing part three next Wednesday, and my copy of the book is now up for grabs --- whoever emails me first gets it. (Congratulations, Irma! You're the winner.)
Meanwhile, I wanted to give you a heads-up so you could hunt down the next book club read in a timely manner. "Radical Homemakers is about men and women across the U.S. who focus on home and hearth as a political and ecological act, and who have centered
 their lives around family and
community for personal fulfillment and cultural change. It explores
what domesticity looks like in an era that has benefited from feminism,
where domination and oppression are cast aside and where the choice to
stay home is no longer equated with mind-numbing drudgery, economic
insecurity, or relentless servitude." We'll start discussing on
August 29, which should give you plenty of time to hunt down the book
on interlibrary loan.
their lives around family and
community for personal fulfillment and cultural change. It explores
what domesticity looks like in an era that has benefited from feminism,
where domination and oppression are cast aside and where the choice to
stay home is no longer equated with mind-numbing drudgery, economic
insecurity, or relentless servitude." We'll start discussing on
August 29, which should give you plenty of time to hunt down the book
on interlibrary loan.My paperback includes three chapters not found in the original ebooks, all of which focus on less hands-on lessons like pacing.
I tried giving the Sensor
Plug a sharp blow to the the side of the case by slamming it into a
table top like Zimmy suggested in a comment last week.
That brute force cure worked
at bringing life back to this product. Now the Sensor Plug will eventually turn
whatever is plugged in off, and then turn it back on when movement is
detected. I'm just not sure yet what the interval length is.
Not sure if that proves it
must have a mechanical relay or maybe the adjustment potentiometer was
damaged and the jolt brought it back to a proper state of providing
variable resistance.
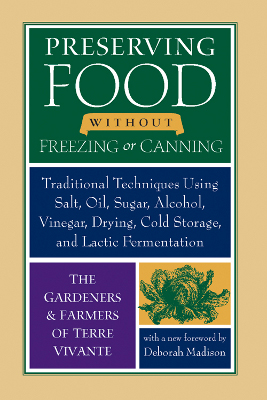 Preserving
Food Without Freezing or Canning is a fascinating and
thought-provoking book that has an entirely different feel from most
modern homesteading books. The project started when a French
gardening magazine asked its readers to share old-fashioned fruit and
vegetable preservation recipes, so the resulting compilation feels a
bit like an oral history turned into a cookbook.
When you find a copy, I
recommend that you start by flipping to the appendix, which in many
ways is the most valuable part of the book. I've spent years
slowly figuring out which preservation technique works best for each
fruit and vegetable, and the authors of this book have created a quick
tabular view of that information. For example, they show that
onions are best stored whole on the shelf, but that you can also
preserve them by drying, lactic fermenting, or adding vinegar.
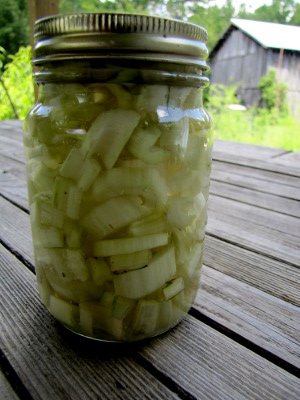 In general, the authors
recommend drying fruits and lactic fermenting most vegetables --- I
definitely agree with the former and might have to get over my
anti-pickle sentiment enough to try the latter. In fact, after
reading through the entire lactic fermentation section, I settled on
Swiss chard ribs as a good starter recipe since the authors of the
recipe note "Swiss chard ribs are not acidic. Our children dread
lacto-fermented green beans, but they love the milder taste of Swiss
chard." I'll let you know if Mark and I feel the same way once
our first lactic fermentation experiment is ready at the end of August.
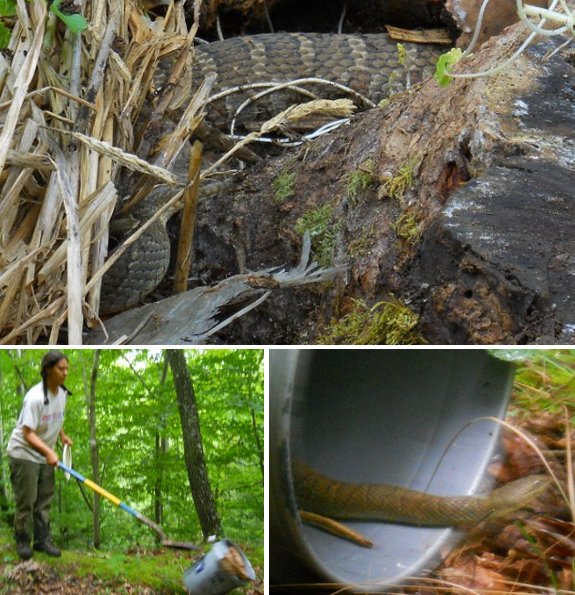
Today we had what we're
pretty sure was a copperhead
snake living underneath a piece of cardboard near Lucy's house which is
also near the garden.
We briefly debated the option
of killing it. Neither of us liked the idea of destroying something so
beautiful, so we decided to carefully coax him into a 5 gallon bucket
with a tempting piece of cardboard to hide under.
Once we had the lid on tight
we walked him to a place pretty far away across the creek and tipped
the bucket over.
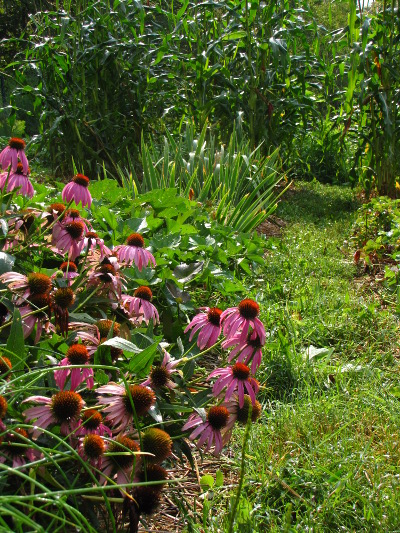 As
soon as the calendar flipped over to July, I could feel the slow
descent into winter begin. I was already planting fall
crops, and the
scorching heat in June made our normal summer temperatures in July feel
relatively cool.
August seems even more
like the beginning of fall. I spent all morning Thursday setting
out broccoli and Brussels sprouts seedlings (a little late for both,
but I hope they'll make it, perhaps with a little frost
protection). This week also marked the first round of oilseed
radishes, planted in
beds that will now be fallow until spring, along with the last seeding
of a summer crop (one more bed of crookneck squash.)
Despite seeing winter on the
horizon, our summer crops are coming in with a vengeance. I sent
 Mark to town Tuesday with two big bags of squash and cucumbers --- "and
don't come home until they're all gone!" (He foisted the
vegetables off on appreciative librarians.) I'm saving seeds and
freezing winter soup as fast as I can too, of course.
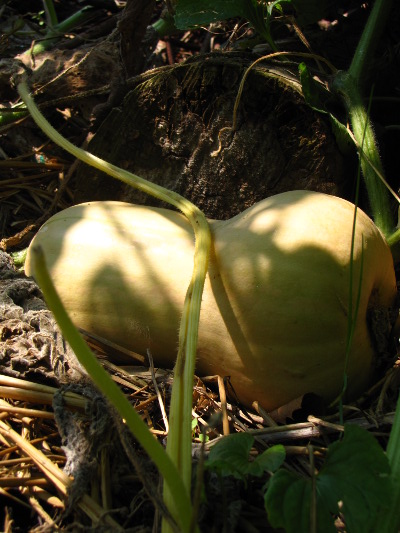
Even the winter
keepers are starting to ripen. The earliest-planted butternut
squash are turning brown, and the leaves are beginning to lose their
vibrant summer form.
It's hard to believe
that we only have five frost-free months to grow all of these tender
vegetables, but somehow it all gets done (and they all get
eaten). Good thing we budget time to simply enjoy the bounty!
I've been using this new Discovery Expedition vented fedora hat for a few
months now.
The extra shade it provides
compared to a regular hat makes it worth every penny of its 30 dollar
price, but the real advantage in my opinion is the all around screen
material on top. Combine 360 degrees of venting with the small space
the fedora shape creates between the top of your head and the top of
the hat and you've got some serious cooling of your noggin.
I'm guessing the additional
surface area of the brim has over twice the sweat absorbing power as a
conventional baseball hat. It's made in Sri Lanka and comes with a neck
strap that I deleted.
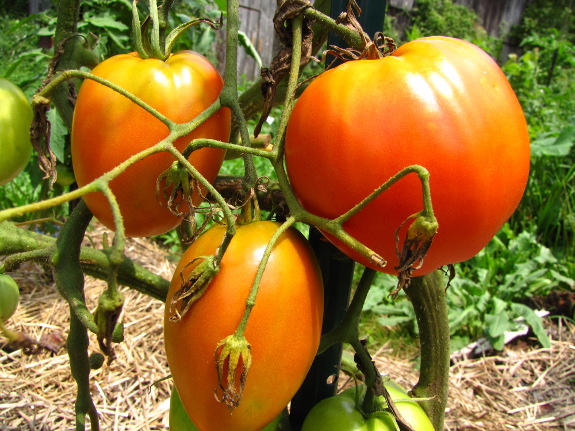
This year, I decided to
try out two tomato varieties I'd never grown before. To my
surprise, I ended up with four new kinds of tomatoes in my garden,
three of which were duds.
- Gold Rush Currant --- For the past few years, Blondkopfchen has been our favorite tommy-toe. The variety is prolific and tasty, but tends to succumb to fungal diseases before anyone else, so I figured it wouldn't hurt to try out a different type of cherry tomato. Unfortunately, Gold Rush Currant succumbed even faster and didn't taste good --- we won't be growing it again.
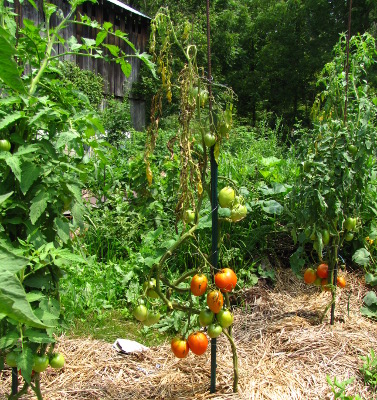 Amish Paste --- Most of
our tomatoes are romas, which we turn into soups,
sauces,
or dry.
I'm actually very happy with Martino's Roma, but so many people were
glowing about Amish Paste that I had to give it a shot. Amish
Paste turns out to be very similar to the Russian Romas we tried in our
early years on the farm --- huge, juicier than most roma tomatoes, but
extremely blight-prone. I don't mind spending a bit more time
processing my romas if they don't keel over in our damp climate, so I
ripped out the Amish Paste tomatoes this week before they could spread
their fungi to the rest of the planting.
Amish Paste --- Most of
our tomatoes are romas, which we turn into soups,
sauces,
or dry.
I'm actually very happy with Martino's Roma, but so many people were
glowing about Amish Paste that I had to give it a shot. Amish
Paste turns out to be very similar to the Russian Romas we tried in our
early years on the farm --- huge, juicier than most roma tomatoes, but
extremely blight-prone. I don't mind spending a bit more time
processing my romas if they don't keel over in our damp climate, so I
ripped out the Amish Paste tomatoes this week before they could spread
their fungi to the rest of the planting.- Japanese Black Trifele
--- Usually, we just eat Stupice as
an early and prolific slicing tomato. But during our early years,
we grew a variety that was supposedly Cherokee, and it was the tastiest
tomato imaginable (although blight-prone). Since I was given the
variety by a friend, I wasn't terribly surprised when images on the
internet didn't match the tomato I was growing, and extensive searching
showed that my tasty tomato was probably Japanese Black Trifele
instead. I bought some seeds of this new/old variety, and the
fruits do indeed look like the tomatoes I grew in 2007. However,
they taste watery and lack the flavor burst of whatever we grew then,
so Japanese Black Trifele will join the other duds on this year's
tomato trial list. (Unlike the previous two varieties, though,
I'll keep this one in the 2012 garden and will just cook with the so-so
fruits.)
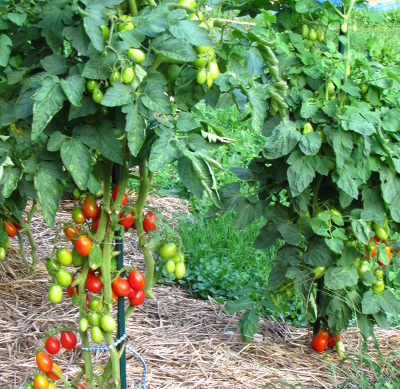 Unknown small, indeterminate roma
--- My final new variety for this year is who-knows-what! Since
volunteer tomatoes come up all over my garden from compost (some of
which is our ex-neighbors'), I can't be sure that this seedling wasn't
from a storebought tomato our friends ate last year. However, the
sport came up in the row with the Martino's Romas, which makes me think
that it might be either a seed of another variety accidentally slipped
into the packet, or a rare instance of a naturally produced hybrid
tomato. No matter where it came from, I like the unidentified
variety so far. It fruits just as prolifically as Martino's Roma
(although with smaller tomatoes), and is indeterminate, which means it
might end up giving us more tomatoes in the long run. The little
red roma does seem to be a bit more blight-prone (as you can tell by
how high up I've cut leaves on the stem), but once the rains slacked
off, the plant began to hold its own, unlike the first two varieties
profiled in this post. I'm saving
seeds and will try this variety out in more numbers next year.
In case you're curious
what that leaves us with, our regular tomato varieties are Martino's
Roma, Yellow Roma, Stupice, and some tommy-toe --- maybe we'll go back
to Blondkopfchen for next year? It's fun to try out new
varieties, but I'm glad I put most of my eggs in the old-standby basket.
Relocating
that copperhead snake
reminded me how that hillside seems more prone to wild mushroom growth.
We spotted this Amanita parcivolvata on our way
back, also known as a False Caesar's Mushroom.
It's unclear if these are
okay to eat. I won't be risking a taste test unless we get more
conclusive data.
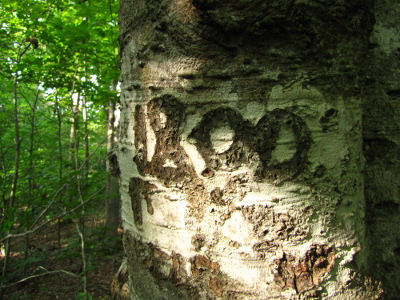 The carving on this boundary
tree (which I'm pretty sure isn't really 200 years old) reminded me of
a story our mechanic's brother related this summer. He told us
that he remembered when a preacher lived in the old house that used to
stand in our core homestead area, and that folks walked in from all
directions to be married here. I found the tale interesting
because I'd wanted to get hitched at home, but knew that very few of
our friends and family would feel up to the short trek (about a quarter
of a mile through moderately rough terrain) from the parking area to
our trailer.
Meanwhile, I've been
pondering how far is too far to hoof it because we want the Walden
Effect Annex to be
within walking or biking distance. We're currently looking at a
tract four miles away, up over a ridge and down the other side. I
suspect that a hundred years ago, this property would definitely count
as being within walking distance, but I'm not sure if I consider it
such. (The steep hill would make it a bear to bike, but I guess
you could coast down the other side.)
 Of
course, if you went as the crow flies, the property is really only
about a mile and a half away, and if you followed the old roads (which
are now private property), it's more like two and a half miles.
When I visited England in 2000, I was impressed by the network of foot
paths that made it easy to get from village to village, remnants of a
time when everyone walked or rode a horse. The same sort of paths
still exist in our neck of the woods, but are no longer public
property, presumably since they weren't worth maintaining to car
standards.
So what do you consider
walking distance? Presumably it depends on how hilly your terrain
is, and whether the roads are even safe to walk along. (We could
hike to our nearest town, but it would be along a country highway with
no room to walk outside the car lanes, so we don't risk it.) I'm
especially interested in hearing from the quarter of our readers who
reside outside the US --- is a seven mile walk par for the course in
India? Do you Brits really use your foot paths? How about
the large contingent of you in the Phillipines?
Exploring a bit further past
the Amanita
parcivolvata yielded a
large crop of fresh wild oyster mushrooms.
I'd like to report they were
yummy, but I think we found them a day or two late for gourmet results.
Too bad there's not a gizmo
that can detect when a log is in mushroom mode and transmit some sort
of FM signal back to base camp.
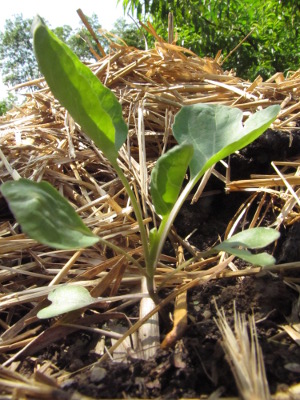 Now that we have a porch,
starting fall seedlings "inside" is much less fiddly than
previously. I set the flats
of broccoli, cabbage, and Brussels sprouts on the edge of the porch
where they'd get plenty of light, so I didn't have to worry about
legginess and hardening off to the scorching summer sun. And
since the flats were right next door to the hose and the floor is water
resistant, I could just sprinkle them lightly whenever I thought about
it.
Having transplants makes
it even easier to fill gaps
in the summer garden with fall crops. After using up the
spots that had been home to problematic
tomatoes with
broccoli and cabbage, I had enough seedlings leftover to devote half a
dozen more beds to fall crucifers. I'm hoping for bountiful late
fall harvests to tide us over on fresh produce further into the cold
season.
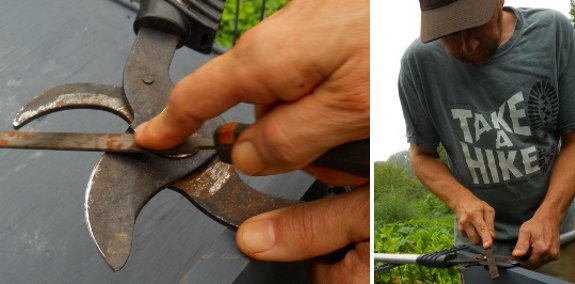
These loppers stopped cutting
all the way through.
Closer inspection reveals the
edge to have bent over due to the hundreds of cuts we've made with it
over the last 7 years or so.
A few minutes of filing was
all it took to put a sharper edge on both cutting surfaces.
 Even though you're not
supposed to poke around in the Warre hive more than once a year, you
are allowed to take off the lid and quilt and observe the layer of
burlap that covers up the bees' living quarters. You're not
exposing the colony to the outdoors, so there's no need for protective
equipment or a smoker as long as you stand behind the hive (always a
good idea) rather than in the bees' flight path. Saturday as I
was lazing around the yard, I decided to pop the hood and take a look.
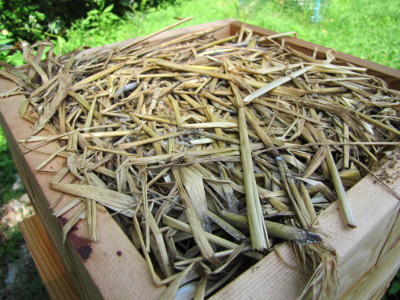
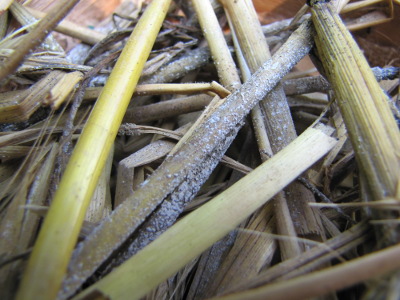 The first thing I noticed was
that the straw in my quilt box was starting to mold. The purpose
of the biomass in the quilt is to capture moisture coming out of the
hive while insulating the interior from climate extremes, so mold isn't
a very unusual occurrence there. However, discoloration generally
means its time to refresh the bedding, so I'll do that this week.
I carefully pried up the
quilt to take a look at the next layer down, and there I saw more of a
problem --- ants everywhere! A quick search of the internet
suggests that ants can be common in 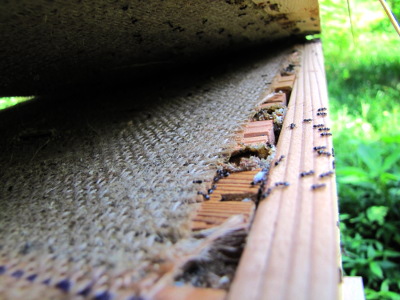 Warre hives, and I see
why. The quilt creates a safe, mostly dry habitat that bees can't
get into to clean, but into which ants can often squeeze.
Presumably, the ants also pop down through the burlap between the quilt
and the hive and help themselves to the honey stores.
Some beekeepers make a
wooden stand for their hive and place the feet in containers of water
or oil to keep the ants from climbing up. I may have to resort to
that, although I did see a skink in the quilt box that might have been
busy eating up the problematic ants. I'm curious to hear if
anyone else has found ants in their Warre hive quilt --- what did you
do about it?
Cut once down the middle and
then on each side at the 12 inch mark for some cheap and flimsy 8 foot
long shelf boards.
How cheap? A bit over a
dollar for each 8 foot section.
It only took Anna and me a few
minutes to rip each board.
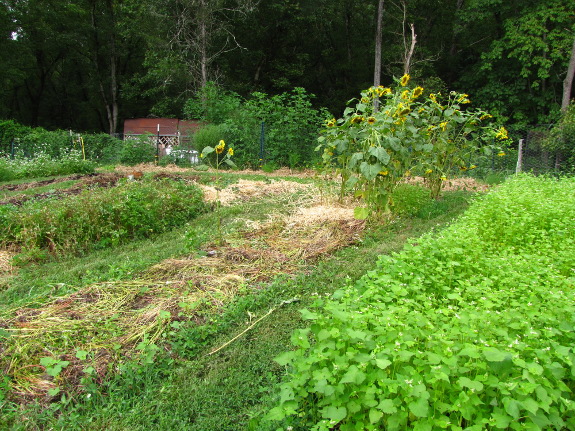
--- Kathleen
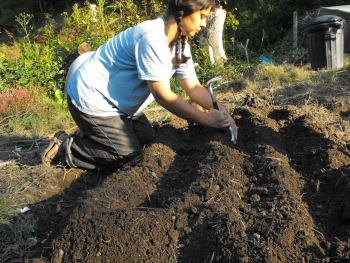
I don't really think I'm
a professional, Kathleen, but I'll answer your question as best I
can. We do own a rototiller, although it hasn't been fired up in
years. Before I knew about no-till gardens, we started garden
patches by tilling
up the ground and shovelling the topsoil from the aisles onto the beds. (Now we start new
beds by simply laying down a kill mulch, which still raises the soil,
but not by as much.)
If you use the tilling method
of starting a new raised bed, I recommend against putting anything
along the edge to hold the soil in place. Yes, without sides, a
raised bed will turn from a rectangle to a hump over time, but it's a
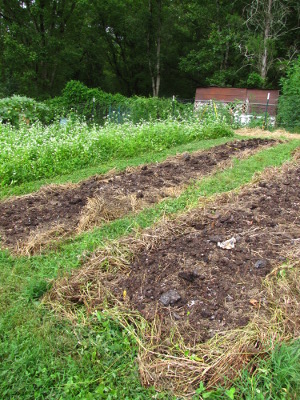 pain to try to rip out perennial weeds that have gotten their roots
under logs or boards between your raised bed and the aisle. We've
gone both edged and edgeless, and I've ended up pulling out all of the
edging (except in our sloped blueberry patch, where I figure the
mini terraces that result are worth the effort of
weeding around logs).
I've compared
the pros and cons of grassy and mulched aisles previously. Each method has a
place, but in our situation, grass seems to be less work and money than
mulch. If you have a free source of mulch, though, and live
beside a road, you might be better off with wood chips in the aisles.
Rocks are something I
can't speak as knowledgeably about because we just don't have
any. I seem to remember that Mark found a rock last year, and he
was so excited, he called me over to look. But my educated guess
is that rocks aren't really a problem in a no-till garden. When
tilling and digging, stones mess up your tools, but if you're not doing
either, you'd think rocks would simply add micronutrients to the soil
and increase drainage.
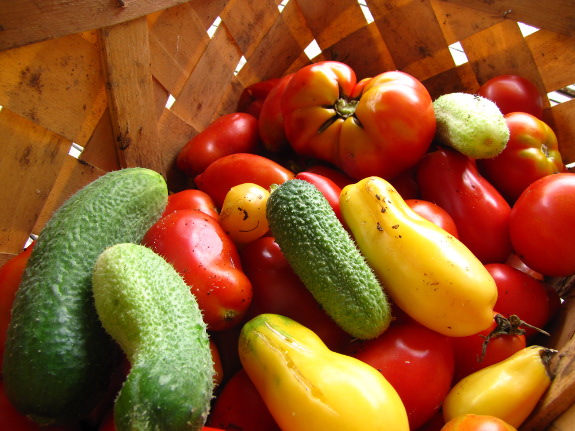
The last unanswered part
of your question is about whether you can go straight to no-till in
problematic soil. For experimental purposes, I'm glad that parts
of our garden 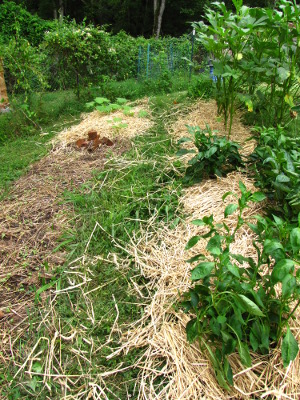 have terribly heavy,
waterlogged clay soil while other parts have light, loamy soil
(although, of course, as a gardener, I wouldn't mind if my garden were
entirely the latter). Since I've worked with both soil types, I
can tell you definitively that tilling isn't going to help your clay
and might actively harm it, while no-till methods will improve the
ground slowly but surely. What clay really needs is lots of
organic matter to fluff it up, and the fastest way to get there is by
growing cover crops whenever possible. I
highly recommend oilseed
radishes as a fall
cover crop (you can plant them right now in most parts of the U.S.)
since they can handle awful soil and will show appreciable results in
the first year.
I hope that helps get
you off on the right foot! In case you haven't read it, I'll plug
Weekend
Homesteader: May,
which includes a section on garden planning as well as one on kill
mulching. Some of the tips there on bed and path layout might
also be handy for you, even though you didn't specifically ask about
them. Good luck!
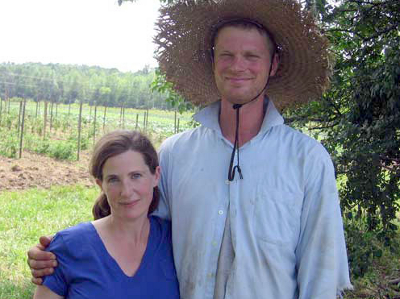 "As the farm began to take
form, Mark and I argued fiercely over everything. We discovered
that we had different desires, different visions for the farm. We
were both way too stubborn. We lost whole precious daylight hours
fighting over how to build a pig fence or whether the horses should
spend the night inside or out....
The most obvious theme
threaded through The Dirty Life is the effect that a farm
has on a relationship. I don't know whether it's harder to dive
in together as Mark and Kristin did and bump your way through the early
relationship years at the same time you're learning to grow things, or
whether it's worse to move to a farm when you're already in an
established relationship, only to learn the hard way that your dreams
don't match up with your spouse's as well as you'd thought.
Either way, I think the unnamed farmer who "said
that organic farms most commonly failed not from bankruptcy but from
burnout or divorce" was right on track.
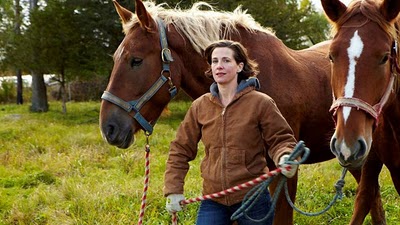 On the other hand, if you can
figure out how to work together without killing each other, striving
with your partner toward a "clear joint purpose" can bring your
partnership to another level. One of my few complaints with The
Dirty Life is
that Kristin only gave us a few brief views into a happier future, like
this one:
This week's discussion
question is: if you've ever combined a romantic relationship with a
joint endeavor, how did you survive? Personally, I chalk all of
our relationship successes up to my husband, who always knows that it's
better to work an issue out than to get farm work done, no matter how
pressing the latter seems. Like the Kimballs, we often divide up
chores and we each have specialties that the other doesn't micromanage
very much, but we also try to plan bigger picture projects
together. How about you?
 Those of you new the book
club might want to check out previous discussions that covered learning
that real food is imperfect and pacing
yourself in the early years. We'll be discussing the rest of
the book (three parts, but they're all short) next Wednesday, so I hope
you'll keep reading. And don't forget to hunt down Radical Homemakers, which we'll start
discussing on August 29.
The
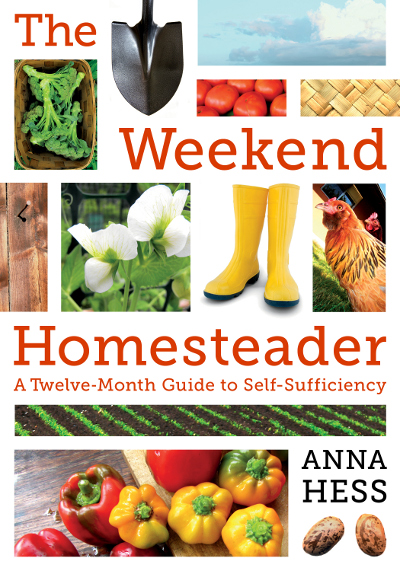
Weekend Homesteader provides
tips for becoming more self-sufficient one weekend at a time.
We had some trouble with the leaf
spring upgrade on the
golf cart.
It's possible we got a set
that was designed for a different model Club Car even though we ordered
them through a proper dealer. The problem was the springs would shift,
which would decrease the clearance and cause a rubbing sound.
Our local mechanic was able
to fix it by adding a large U-bolt to each side.
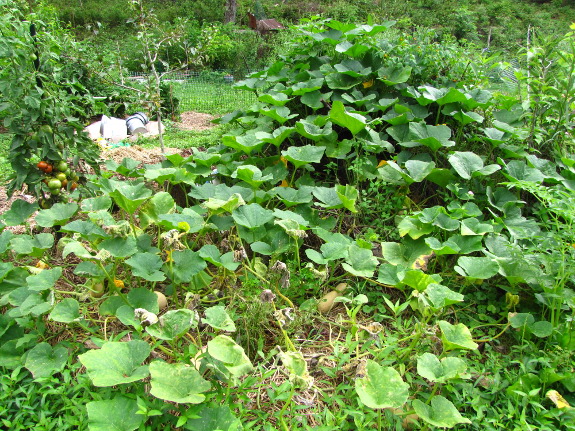
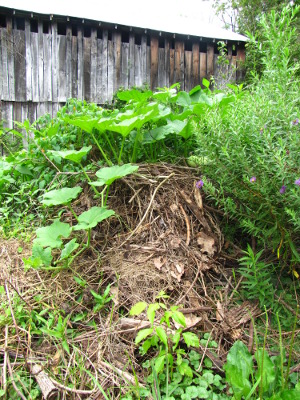 The
butternuts have taken to the forest garden like ducks to water.
The first photo shows the north side of the brush
pile and the second
shows the south side --- the butternuts have gone all the way up one
side and down the other!
The
butternuts have taken to the forest garden like ducks to water.
The first photo shows the north side of the brush
pile and the second
shows the south side --- the butternuts have gone all the way up one
side and down the other!
If the plants weren't
already starting to ripen their fruits and die back for fall, I might
worry about our naughy butternuts taking over the world.
We get a lot of ragweed
invading our perimeter.
It's a good thing neither of
us is allergic, but it doesn't take long before it grows high enough
to shade parts of the garden.
Wikipedia recommends pulling
up ragweed in the late spring when the roots are not as strong,
something we might try next year. Mowing is not good enough because if
just a half inch sticks out above the ground it will grow back even
stronger within 2 weeks of non freezing conditions.
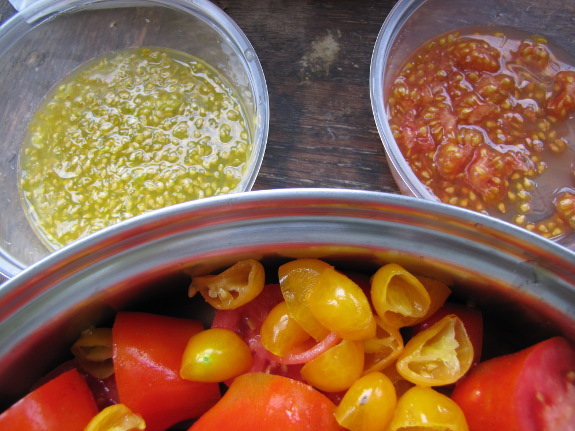
I've touched on saving
tomato seeds before, but realized I'd never made a real post on the
topic. Since I like to save tomato seeds as early as possible in
the year to make it less likely 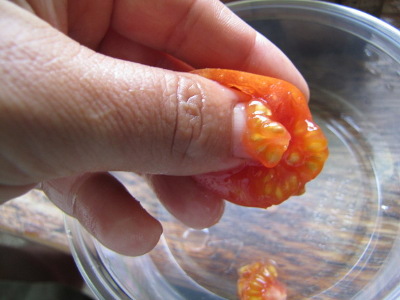 that fungi will hitchhike
into next year's garden via seed packets, I thought now would be a good
time to remind you all to get out there and save some seeds!
I wrote in great depth
about hybridization issues in Weekend
Homesteader: September,
so I won't repeat that information here. The short version is:
tomato-leaf tomatoes very seldom cross-pollinate, but currant tomatoes
and potato-leaf tomatoes do cross-pollinate with plants within the same
group. So, if your garden contains ten varieties of tomato-leaf
tomatoes, one potato-leaf tomato, and one currant tomato, you can save
seeds from all of them without getting unintentional hybrids.
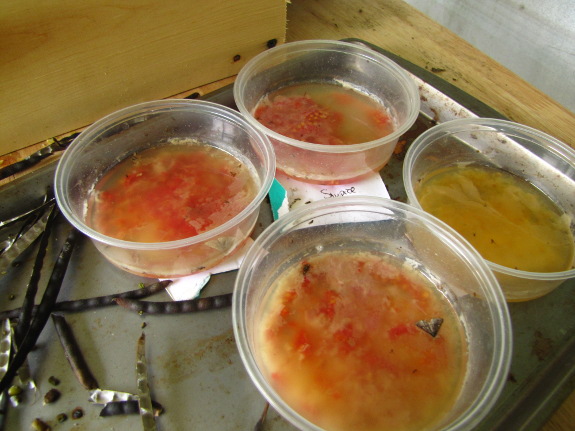
Inbreeding depression (a
fancy name for the effect you see if you marry your brother) is much
less of a problem in tomatoes than in other plants, but I do try to
pluck at least two fruits from different plants in each variety to keep
genetic diversity as high as possible. Then I head back to the
kitchen to squeeze the guts out of each tomato, setting the flesh aside
to be turned into soup or sauce.
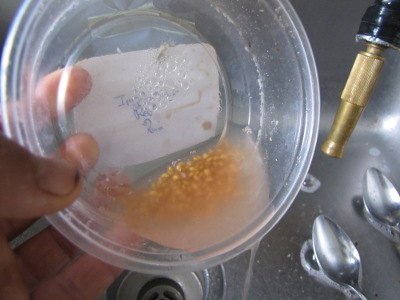 Tomatoes and cucumbers are relatively unique
because the seeds are enclosed in gelatinous sacs that need to be
fermented away before the seed can sprout. The process is a bit
smelly, but is otherwise very easy. Just add about an inch or two
of water to each small container of tomato seeds, then set it aside for
a week or so. Soon, you'll see mold forming on top of or in the
liquid, and the whole thing will start to stink. (Mark was
thrilled that I was able to ferment my tomato seeds on the porch this
year rather than on top of the fridge.) That's your sign that
your tomato seeds are ready to process and dry.
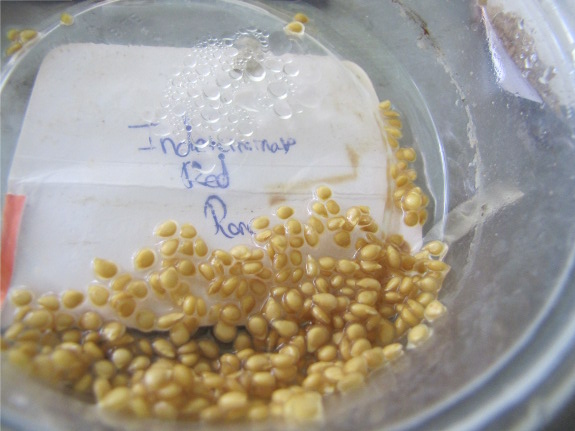
The simplest way to
separate seeds from moldy water is to add some more water, stir with a
spoon, let the tomato seeds settle back to the bottom of the container,
then pour off the foul liquid. I fill the container back up with
water two or three times to rinse off the seeds, then they're ready to
dry. If processed correctly, the seeds will look pale and fuzzy
within twenty-four hours, at which point you can put them in packets
for next year's garden.
A mild storm last night took
down one of our large walnut trees.
Nice of it to fall away from
the driveway instead of over it.
Anna did a quick root mass
autopsy which revealed a rotted out tap root. I'm guessing this will
provide enough firewood to keep us warm for a couple of months or more.
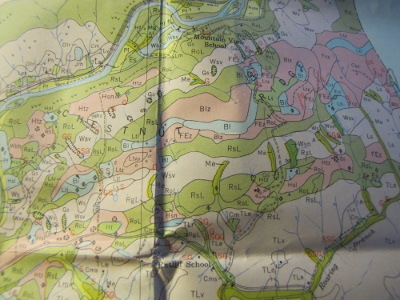 I've
been writing recently about some of the steps you should take to learn
about a property you're interested in before buying it --- a title
search, figuring
out where the boundaries are, and seeing
if the listed acreage is accurate. Assuming you're
planning to use the property for homesteading purposes, it's also
essential to get an idea of your soil type.
In the United States,
the NRCS has laboriously mapped every little pocket of earth, so you
can learn a lot by simply looking at maps. The modern way to do
this is to go to the Web
Soil Survey and find
your property using their interactive mapping tool, but that website
doesn't seem to be playing nice with my computer and I have an ancient
copy of my county's soil survey, so I decided to go old school.
(You can probably get a free copy of your region's soil survey at the
closest NRCS office, and some of you can download a
scanned version online.)
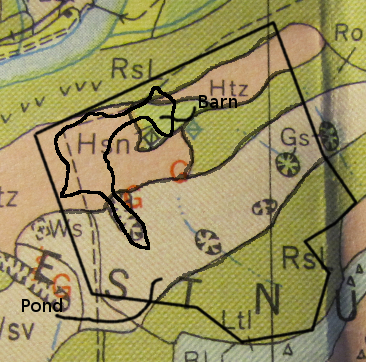 My county soil survey is an
ancient book with four maps stuck in a pocket inside the back
cover. The hardest part is locating your property on the soil
survey maps since they only include roads, houses from whenever the map
was produced (1951 in my case), and large rivers and streams. I
did this the easy way by photographing the relevant section of the map
and then scaling it in the Gimp until the shape of the nearby river fit
with the same river curve on my aerial photo. Since I had the
boundaries as a separate layer in my map file, I could soon see which
soil types were found on the property and how they related to the one
cleared field (the irregularly shaped blob in the northwest corner of
the image above).
There's a key on the
side of the soil map that helps decipher the odd codes on the soil
survey. We live in a karst region, so there are lots of sinkholes
(the ovals with pointy teeth), and people have farmed our hilly land
too hard so there are gullys (red Gs). The other letters on the
map refer to the soil type: Hsn for the pink zone that includes most of
the current field, Ws for the paler area south of that, and so forth.
In our soil survey,
there's a separate fold out sheet of paper that turns the soil codes
into real words, then you can look up that soil type in the book to
learn much more about it. Here's what I discovered about the
cultivated areas on the property shown above:
|
|
Soil type |
Slope range |
Internal drainage |
Parent material |
Productivity and class |
Acres per animal unit |
|
Hsn |
Hagerstown silt loam; Rolling phase |
8-15 |
Medium |
Residual material from weathered limestone |
High; First |
1.5-2.4 |
|
RoL |
Rolling stony land (limestone material) |
3-30 |
Medium to slow |
|
Medium to moderately high; Fourth |
4.0-5.8 |
|
Htz |
Hagerstown stony silt loam; Steep phase |
15-60 |
Medium |
Residual material from weathered limestone |
Medium; Fourth |
2.3-3.3 |
|
Ws |
Westmoreland silt loam |
30-60 |
Medium |
Residual material from weathered limestone and shale mixed |
Medium; Fourth |
2.4-3.8 |
Of course, all of this
mapping should be taken with a grain of salt --- or rather, a shovel
and a day on the ground. For all I know, the prime topsoil in the
Hagerstown silt loam has all eroded away, but if it hasn't, that area
is clearly the best spot for vegetable gardening, while the poorer soil
on the east and south ends of the field could use some soil-improving
grazing. Taking a look at the real state of the ground is a good
thing to add to the list for a site visit!
It's
that time of year when we start saving eggs for another incubator
run.
I picked up some fancy
organic store bought eggs yesterday thinking they might make a decent
breakfast substitute.
When we first started out
with chickens I remember not being able to tell the difference between
our eggs and store bought.
There might be a lot of
things to explain the change, but I suspect our early chicken
tractor experiments didn't give the birds enough pasture and now
they spend all day foraging for worms and bugs.
These eggs still make a good
meal, but now I think I appreciate our pasture fed flock even more
thanks to this commercial taste comparison.
 "Sooooooo,
I've read all of your posts on the potato
onions, and let's
say you've won me over. It looks like I'm getting these this
year. Have you finally cooked one? How does it taste?
Oniony? Garlicy?"
(This is also the reason why planting a big potato onion results in
several smaller onions the next year, while if you plant a small onion,
you get one big onion back.)

I've sometimes wondered if there was an easy way to automatically count
your chickens at the end of each day.
A little bit of searching
today turned up an exciting project that is working on using an
ordinary webcam
to identify and count chickens in a coop.
Most of the time chickens stay in a flock and when one goes in they all
follow, but not always. This system would be a nice addition to an automatic
coop door opener if the software could actually deliver on such a
lofty technical goal.
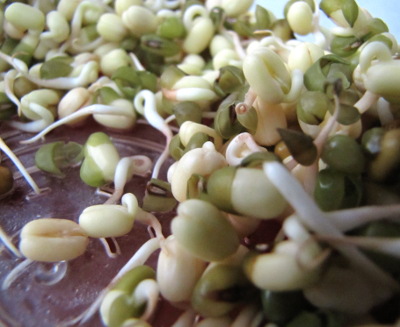 Mark and I both enjoy the
flavor of bean sprouts, so of course we wanted to produce our
own. First I experimented with urd
beans, which grew
beautifully and turned out to be semi-self-shelling, but were iffy to eat ---
the duds went rock hard and tended to get mixed in with the sprouts,
damaging teeth.
Since mung beans are the
variety you see in most stores, I figured they might be a better
option. Finding the seeds was tough...until I realized that I
could simply buy some beans for sprouting and germinate them in the
soil instead of in the kitchen.
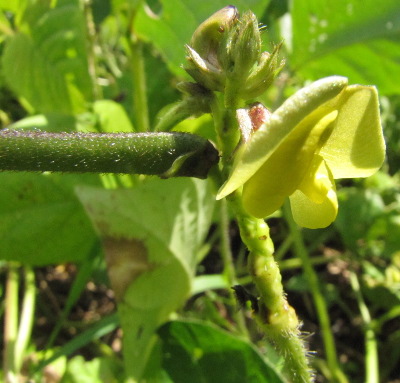 I'm glad I changed varieties
because our mung beans have been even more productive than the urd
beans were. (It's not really a fair comparison, though, since the
urd beans got nibbled by deer and the mung beans didn't.)
The one flaw in mung
beans at the growth stage is that they tend to sprawl out across the
aisles, suggesting that a small trellis might come in handy for next
year's planting. Otherwise, mung beans are one of our easiest
crops since they don't seem to have any pests and just keep plugging
right along while the cucumbers wilt, the tomatoes blight, and the
green beans get eaten by beetles. (Don't worry, we're getting
good harvests of other vegetables despite these problems --- it's just
restful to look over at the mung beans after struggling with certain
other crops.)
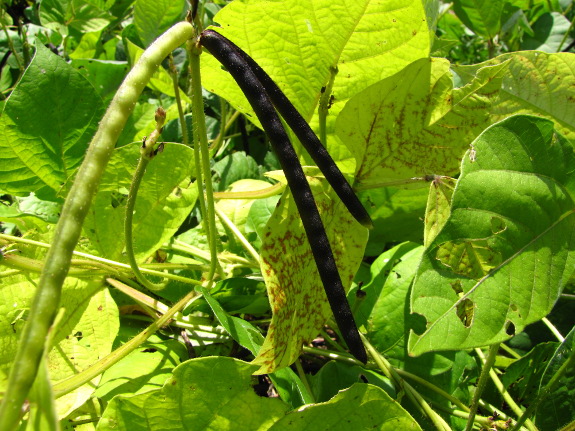
I do have a couple of
tidbits to help those of you who want to try growing mung beans.
First is during the harvest phase --- try to pick ripe (black) pods
once a week if you live in a damp climate so none of the beans mold.
After picking, I just
spread the beans out on a tray for a couple of days to dry the dew off,
then shell them. Mung beans will self-shell like urd beans, but
the miniature explosions make me feel like I live at a shooting range, 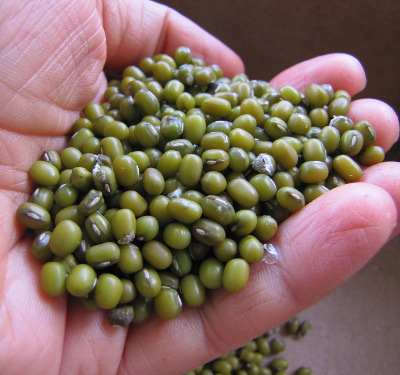 and the beans tend to get
strewn around in all directions, so I generally end up taking the beans
out of the pods by hand. (Yes, I can shell beans while I read.)
The other tricky part
about growing sprouting beans is eating them. Luckily, mung beans
don't seem to produce the rock-like non-sprouters that urd beans do (or
maybe I've just gotten better at sorting them out during the harvest
stage). But you need room temperature conditions to get the beans
to sprout before they mold. I kept trying to sprout beans in the
winter, because that's when we crave fresh produce, but the truth is
that in our non-climate-controlled trailer, the warmer seasons are a
better time for sprouting.
We've been enjoying
eating up last year's mung beans, but this year's harvest is even
bigger --- two cups so far with more on the vine. Looks like I
need to get creative about cooking with sprouts.
 Create
an Oasis with Greywater seems to be the primary text
available on
the subject, so if you want to deal with wastewater in an alternative
manner, you'll need to get your hands on a copy. The book is
self-published, but the only negative I can come up with is that the
interior layout isn't very enticing --- too little white space on the
page. However, I think that Art Ludwig chose the design
intentionally so he could fit 300 pages worth of information into a 144
page book, thus cutting down fewer trees and selling the book for a
more reasonable price.
That small caveat aside,
Create
an Oasis with Greywater is a masterpiece. The
fifth edition is completely polished, easy to read, and full of useful
information for everyone from the ramshackle DIYer (that's me) to folks
living in mansions who want to hire someone to create a high tech lawn
irrigation system connected to their washing machine outflow hose.
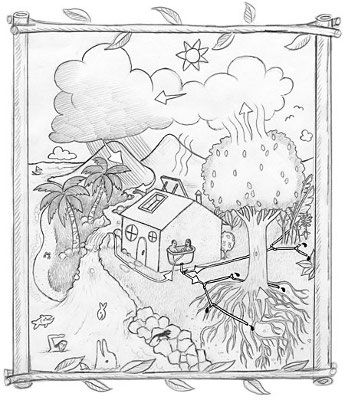 In case you've never run
across the term before, "greywater" is all of the waste water coming
from your house except from the toilet. The water flowing down
the drain of your kitchen sink is definitely not potable, but is
generally pretty low in harmful bacteria and can be easily and safely
treated with low tech options that irrigate your plants at the same
time. In addition to helping your plants, channeling your
greywater to a separate location from your blackwater means you
use less energy to treat the latter, which is good for the environment.
To make the best use of
greywater, you'll need to be careful with what you put down the drain
(something you should be doing anyway), and to understand your specific
site conditions and climate. The rest of this week's lunchtime
series will cover a few of the greywater treatment methods that
appealed most to me, but I highly recommend finding this book for
yourself if you want to delve deeper into greywater systems.
| This post is part of our Create an Oasis with Greywater lunchtime
series.
Read all of the entries: |
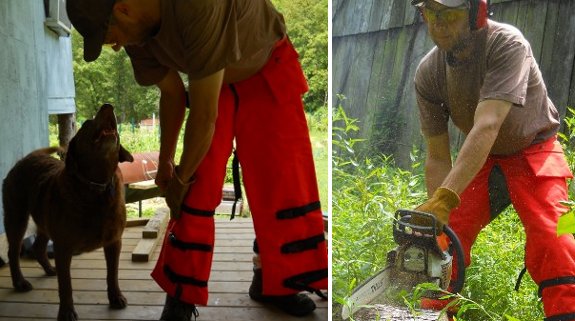
I tried out the new chainsaw
chaps today while we cut up some firewood.
They sort of feel like
wearing wet jeans with all the extra weight, and they hold in heat, but
the increase in safety feels worth the decrease in comfort.
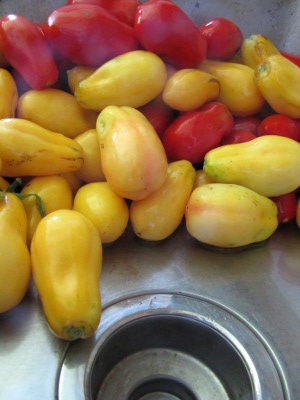 August
is the month of the tomato on our homestead. Unless we have a
very dry summer (unusual for us), I spend almost a fifth of
my August garden time battling
the blight.
I've (mostly) learned not to
get my blood pressure up as the dead leaves progress up the stem, and
to simply make the best of the fruits our plants do ripen.
Inevitably, the blight wins, but not before we've filled our larder
with enough rich, red pulp to feed us until next year.
Meanwhile, half my time
in the kitchen revolves around the
tomato too. This year, we've been pushing soups as hard as we
can,
since that seems to be our favorite kind of preserved bounty during the
cold months (and does triple duty, putting away green beans and corn as
well as tomatoes). This weekend's haul, though, was so extreme
that I
first pulled out the prettiest romas to slice in half and dry, made a
few gallons of soup, and then ended up with 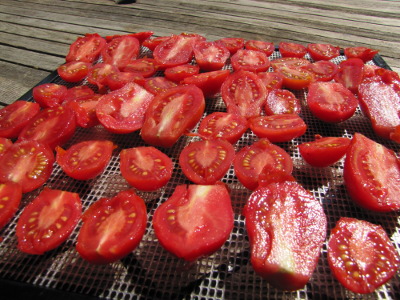 a bowlful of leftover
tomatoes to turn into ketchup.
Of course, the garden is
also churning out lots of other produce --- watermelons, cucumbers,
summer squash, basil, parsley, cutting celery (a new experiment for us
this year), mung
beans, sweet corn,
green beans, okra, Swiss chard, fall raspberries, and probably a few
other things I've forgotten. But tomatoes draw my attention the
way I've been told exposed breasts attract the male eye --- it's hard
to look at anything else when the plump, round orbs are on display.
 The
simplest type of greywater system is what Art Ludwig calls the drain
out back. In other words, you take the pipe from your sink or
bathtub and run it to an out-of-the-way location to leach
directly into the soil.
We only have running
water in one location in the house (the kitchen sink), and our original
treatment system
soon devolved into a drain out back when I didn't have enough wood
chips on hand to replace the mulch. As long as your outlet isn't
close to a stream or to a direct route into the groundwater (such as a
sinkhole), this low tech solution really isn't so bad. Yes, the
ground gets a bit swampy there, but the soil microorganisms make short
work of nutrients and germs in the water, and by the time the liquid
seeps down into the groundwater, it's pure. In most states, new
systems of this type are probably illegal, but even the regulators
don't really care as long as your system is grandfathered in and
doesn't bother your neighbors.
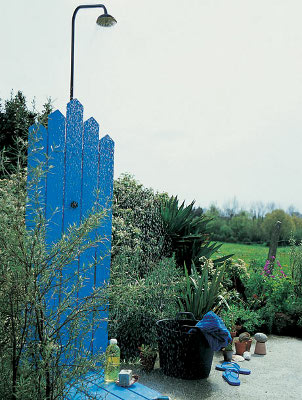 An alternative extremely low
tech solution is what Art Ludwig calls "landscape direct". We use
this technique by setting our wringer
washer in the middle of the yard and simply dumping the used wash water
into the ground. A more elegant incarnation is the bathing garden
illustrated in Create
an Oasis with Greywater,
which consists of a raised, cobbled mound on which you shower,
underlain by sand to expedite drainage, and surrounded by plants to
soak up the water.
The main problem with
low tech systems like these is loss of
efficiency. If you live in a very dry climate, every drop of
water is precious, so it's worth spending a bit more effort to ensure
your greywater ends up feeding plants. Stay tuned for the rest of
the lunchtime series (picking back up Thursday after our regular book
club discussion) for slightly higher tech, and more efficient,
greywater options.
| This post is part of our Create an Oasis with Greywater lunchtime
series.
Read all of the entries: |
We decided to dig up our
wineberry patch today.
The berries are beyond
delicious, but if they decided to bloom we typically only got enough to
fill a small bowl.
It was a tough decision, but
deleting it gives us a new spot to try something different. The goal is
to find varieties that can handle our climate without being
temperamental.
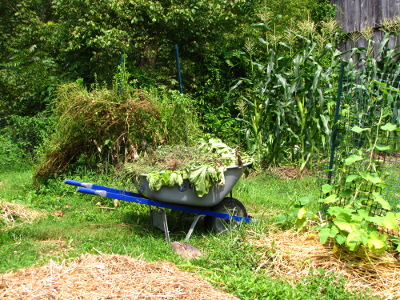 Other than "tomato, tomato,
tomato!", the
primary topic on my to-do list this month is fall
cover crops.
I've learned that although I can seed oilseed
radishes anytime
between August 1 and September 7, every week that passes lowers the the
amount of biomass produced appreciably. That's why I wander
through the garden with an eagle eye throughout the early and middle
parts of August, looking for things to be pulled out.
For example, giving
away excess cucumbers
was a lot of fun in July. But by August, it seems to make more
sense to rip out still-producing cucumber plants and scatter radish
seeds in their place. Sweet corn gets cut to the ground as soon
as I pluck the least ear, and next week I'll be pulling out dead
butternut squash and watermelon vines. (I may remove some living
summer squash plants too --- we've dried our winter quota and can't eat
all of the fruits being produced.)
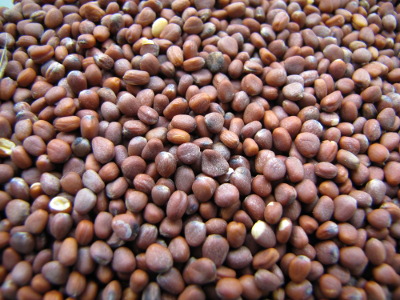 I like planting fall cover
crops because they produce organic matter at an off-time for the
garden. We've got a few more beds of kale and lettuce to plant
along with a lot of garlic, but other than that, any beds that come
open from here on out are going to be sitting around twiddling their
thumbs until spring. I'd far rather put a cover crop there and
capture winter sunlight than let that solar radiation go to waste.
But how much good do
cover crops do? The amount of organic matter produced by a cover
crop will depend on a lot of factors, such as your soil conditions and
planting time, but I dug up these figures for optimal dry matter
production per acre for my three favorites:
- Oilseed radish --- 7,000 pounds per acre
- Buckwheat --- 6,000 pounds per acre
- Fall-planted oats --- 4,000 pounds per acre
To put that in
perspective, adding half an inch of compost to your garden per year
requires about 68,000 pounds. Roughly half of that is water, so
the bare-minimum level of top-dressing in an organic garden provides
34,000 pounds of dry compost per acre. Cover crops don't approach
that figure, but providing a fifth of your annual organic matter with
no shoveling is nothing to sneeze at.
The big question is ---
how much of the organic matter added actually turns into humus and
stays in your soil, and how much is quickly degraded? As you may
or may not realize, the soil food web is constantly working on breaking
down organic matter, which is a good thing since the output feeds your
plants. But those microorganisms do work counter to my goal of
building soil structure.
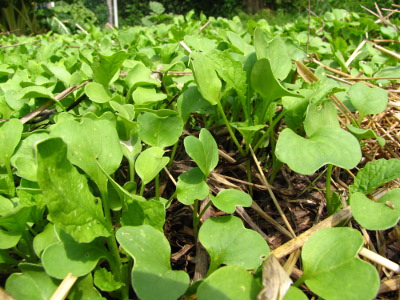 In fact, if you don't add
anything to your soil (especially if you till), your soil's organic
matter content will decline each year. An
interesting study showed that organic matter levels of soil increased
from 5.2% to 5.5% when 30 tons of dairy manure were applied per acre
for eleven years, stayed steady at an application rate of 20 tons per
acre, and dropped to 4.8% at 10 tons of manure per acre.
Meanwhile, in the cover
crop world, experts suggest that woodier
debris is more likely to turn into humus (a stable form of organic
matter) than succulent plant matter is. That's why I wait to kill
buckwheat until it's in full bloom, and why tough-stalked oats may
actually produce more long-term organic matter than oilseed radishes
do. Perhaps pulling mature oilseed radishes and composting them
would be a better way of capturing their full potential than letting
them rot in the ground?
I may try that eventually, but for now, I'm quite happy with the
ever-darkening soil in the beds that I commit to winter cover crops.
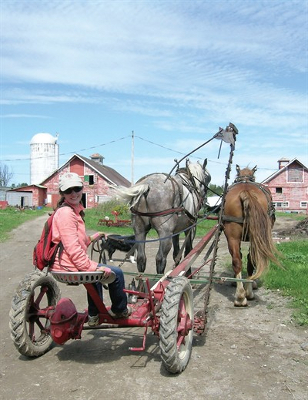 When we first meet Mark
Kimball in The Dirty Life, he forces Kristin to live
in a fully wired house without turning on the electricity (to her
chagrin). A year later, they have a freezer and fridge.
Similarly, they plan their farm to be cultivated with horse power, but
do have a backup tractor that sees some use.
Choosing your own level
of appropriate technology is an important but difficult task for most
homesteaders. Do you carry the water from the creek or pay the
startup costs and electricity bill to irrigate your crops? Do you
try each time-saving device you read about in Mother
Earth News, or do
you remember that energy is used and waste produced for every item you
buy?
On our own homestead,
Mark's a gadget guy and I'm a skinflint, so we often have to negotiate
compromises. I'm curious to hear from other homesteaders --- how
do you decide what consists of appropriate technology? When you
were reading The
Dirty Life, did you end up dreaming of
a farm with draft horses, or did the runaway horse episode cure you of
that romantic notion in a heartbeat?
 Those of you new the book
club might want to check out previous discussions that covered learning
that real food is imperfect, pacing
yourself in the early years, and working
together without killing each other. Since we've come to the
end of The Dirty Life,
now would also be a good time to comment with anything that really
jumped out at you from the book that I haven't mentioned here.
We'll take a week off, then will jump into Radical
Homemakers on August 29.
The
Weekend Homesteader provides
tips for becoming more self-sufficient one weekend at a time.
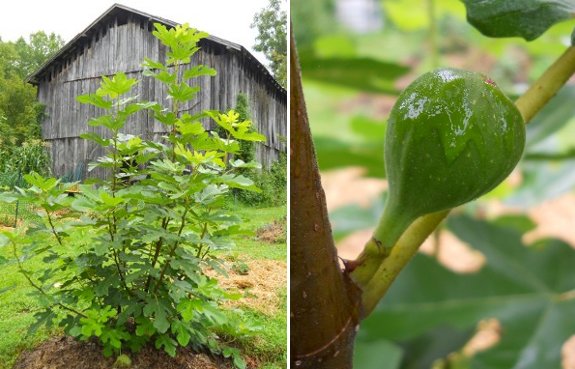
Our Chicago
Hardy Fig will be 2 years
old this November.
Anna predicted it would be
2012 when we would first see some fruit and it looks like there should
be a respectable amount depending on how soon our first major frost
happens.
Neither of us have tasted
fresh figs and we have been looking forward to fig harvest day since we
saw the first buds.
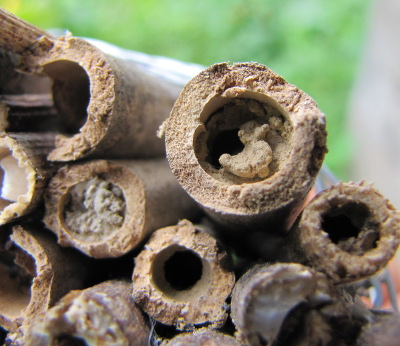 Last winter, I played around
with making nest sites to attract
native pollinators.
I figured there wasn't really much need since we have plenty of habitat
just a stone's throw away in the woods, but I was curious to see if
anyone would move in anyhow. Sure enough, several native bees
took advantage of the in-garden accomodations!
But first, I should tell
you what didn't work. The insects ignored my large and small
nest blocks, which I
figure is probably my own fault. The books recommend drilling the
holes with a very sharp bit, and I didn't have one 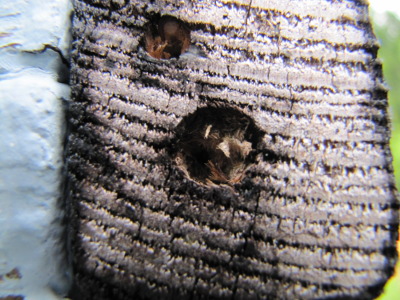 on hand, so the interiors of
the potential nest chambers were full of burrs of wood.
Meanwhile, I put all three of my experimental nest blocks in exposed
locations, meaning that rain could potentially drip in, which probably
also made the cavities less enticing.
On the other hand, my stem
bundles saw a lot of
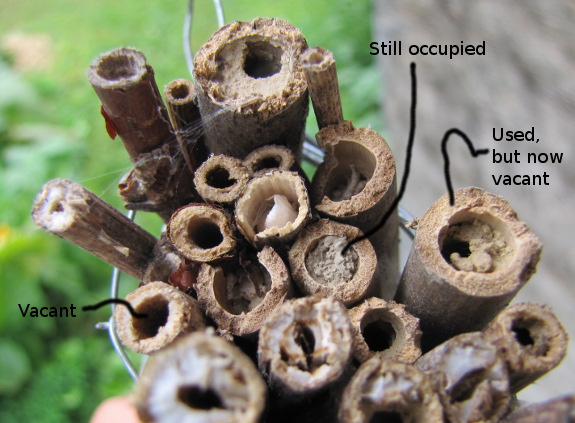
activity. You can tell if a native bee has moved into a nest
because you'll notice dried mud plugging the end of the cavity, perhaps
with a round hole in the mud if the inhabitants have already grown up
and flown away. The photo below illustrates the difference
between used, unused, and still occupied stems, all in the same bundle.
Since only about a third
of my stem bundles were used, I got a good idea of which sites the
insects preferred. Exposure to the elements kept bees away from
all except one stem in the peach tree hotel, but many more of the ones under
the awning of the wood stove roof showed signs of use. Bamboo
seemed to be preferable to drilled-out elderberry twigs, probably again
because my drill bit wasn't sharp enough to provide an interior as
smooth as the natural bamboo walls. It's also possible that the
bees liked the more solid ends created by the bamboo stem joints
compared to the twigs that I blocked off with mud.
I'd be curious to hear
from readers who have experimented with building nest habitat for
native pollinators. What worked and didn't work for you?
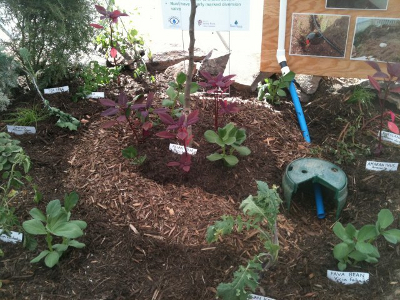
Art Ludwig's favorite
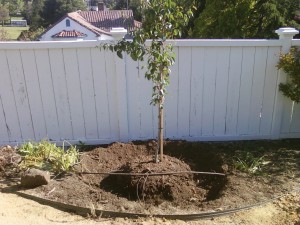
method of using greywater in the landscape is called the mulch
basin. Installation can be nearly as simple as creating a drain
out back, with the
addition of digging a donut around your tree, piling the soil on the
outside to form a moat, and filling the depression with wood chips (and
your grewater outlet). The soiled water goes directly to a
thirsty plant, who also benefits from the nitrogen content of kitchen
scraps and other debris.
 Although the mulch basin is
much more efficient than the drain out back, you also have to go to
more short and long term effort to make the greywater system work
properly. Create
an Oasis with Greywater walks you through building
branched systems to channel water to multiple trees and ensure no
single plant gets swamped, but even if you plan watering amounts
accurately, you still need to make sure the plant being watered can
handle daily infusions of dishwater.
Of the greywater
tolerant plants Ludwig lists, very few live in our climate and none of
those are active in the winter. That means you need to have an
alternative greywater system in place during the dormant season, which
I'll talk about in tomorrow's post. Meanwhile, if you'd like to
make a mulch basin to put your greywater to use in the summer,
potentially useful temperate-climate plants include blackberries,
elderberries, currants, bamboo, and (to a lesser extent---be careful of
waterlogging) peach, plum, apple, pear, and quince. Those of you
who live in California (like Ludwig does) will want to start with
bananas and branch out into mangos, avocados, citrus, pineapple guava,
and figs.
 The final issue with the
mulch basin is that it requires annual maintenance. Ludwig
recommends redigging your moat walls every year or two, which sounds
like effort that might not quite happen on our farm. (I'm not so
sure it would hurt to just let the tree get its bonus water close to
the trunk for its entire life, though.) On the other hand, I've
been hitting more than missing with my hugelkultur
tree mound expansions,
so maybe expanding a mulch basin would happen too.
I'm curious to hear from
anyone who's tried a mulch basin, but especially from those who live in
an area with winter. What would you add to the pros and cons I've
listed above?
| This post is part of our Create an Oasis with Greywater lunchtime
series.
Read all of the entries: |
The new 12
amp circular saw is just under 3 months old and is already acting
like it wants to retire. The problem is an issue of needing to tighten
the blade every few cuts. It's possible it may have been over tightened
which might damage the bearings.
To be fair I think we under
estimated our usage and should have chosen the next level up.
I think it might be the right
saw for someone who doesn't cut treated lumber, but I now know we need
the next size up.
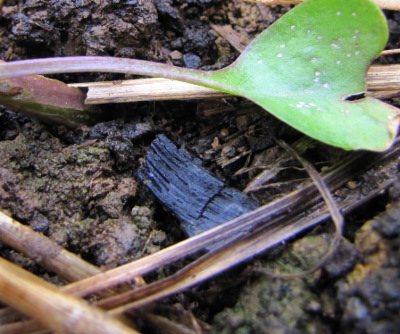 Several readers have asked
what sort of on-the-ground results we see from our biochar
experiments.
Over the last couple of years, I've applied the winter's charcoal
(separated from the ashes and activated with urine) to half of various
garden beds, keeping notes on the location. The idea is that I
should be able to compare the biochar half to the control half and get
some pretty good anecdotal evidence of the changes biochar makes in the
soil.
The trouble is that both
halves of the beds look the same. And it occurred to me, as I
went out to monitor each one, that biochar's ability to expand the soil
microorganism population could carry over into the untreated half of
the bed. Soil fungi can send their hyphae quite a distance
through the earth, so maybe the control half of the bed gets similar
benefits to the biochar half?
If that hypothesis was
correct, I should be comparing the growth of plants in the biochar beds
to plants in neighboring beds. The trouble is that our garden is
extremely diverse, and no two beds get the same treatment.
Depending on what's planted there, a bed might get one, two, or three
top-dressings of manure per year, or --- if I have some on hand --- the
soil may instead benefit from worm compost. It might get kill
mulched with cardboard if it gets too weedy, or might just keep a
gentle coat of straw. I might grow three rounds 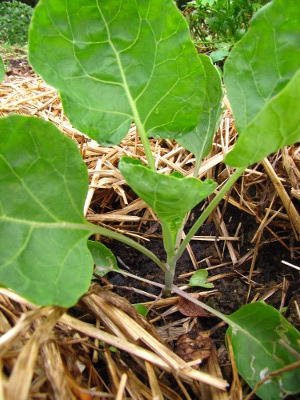 of buckwheat between spring
and fall vegetables, might plant oats or oilseed radishes after summer
cucumbers die back, or might plant no cover crops at all. And, of
course, the actual vegetable grown in each bed can affect the soil,
with greedy corn depleting many nutrients but kind beans giving some
nitrogen back. This is the reason I'd hoped to do a within-bed
trial --- comparing the effects of biochar between beds is nearly
impossible.
So, my conclusion is no
conclusion. Biochar either doesn't help, or it does. (It
definitely doesn't seem to hurt.) Since we have nothing else
pressing to do with the waste from our wood stove, I'll keep adding
biochar to our soil and maintaining notes on the locations, and maybe
I'll see long term effects that aren't visible after a mere year and a
half.
How about you? Do
you have solid evidence of the effects of biochar in your garden?
If so, how did you process and apply the charcoal and what was its
original source?
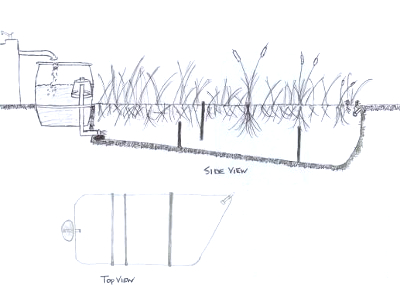 Although greywater will
probably continue to flow to a mulch
basin in the winter,
you risk drowning dormant trees. Instead, the system that looks
most efficient for greywater treatment during temperate winters is a
constructed wetland.
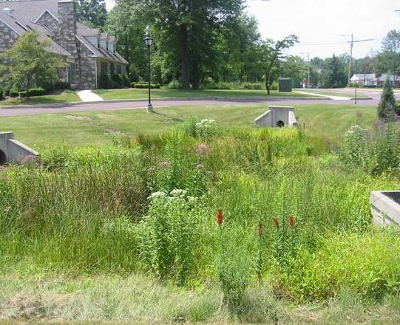
In general, it's much
more sanitary to filter greywater through soil than to allow the water
to pool on the surface, so most constructed wetlands for treating
greywater are more like bogs than like ponds --- in other words,
there's no standing water. Greywater enters the system through a
drain at the top, then percolates down through gravel and sand until
clean water flows out the bottom (possibly into a pond).
 In cold climates, Create
an Oasis with Greywater recommends planning about 1.5 to 3 square
feet of wetland per gallon of greywater produced each day. For
best results, the width should be about half the length, ensuring that
water has to travel a good distance before treatment is complete.
Since I estimate we use about 20 gallons of water per day at the
kitchen sink, we'd need a roughly six foot by ten foot wetland to
delete our swampy drain
out back.
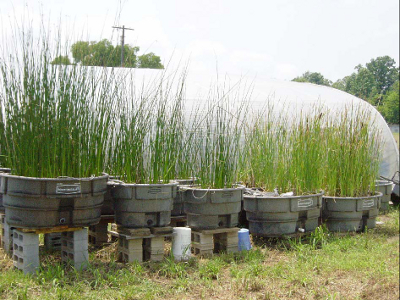
Constructed wetlands get
around the issue of waterlogged soil by using aquatic plants that are
well suited to the environment. Ludwig doesn't suggest any
particular species (noting that selections are region specific), but I
suspect cattails, horsetails, sedges, water plantain, and sweet flags
would do well in our region since they live in nearby swampy
ground. Perhaps we could even cut the leaves once a year to
create mulch or deep
bedding for the chickens?
 Fixing our greywater system
isn't a top priority, but I suspect it'll make the list sometime in the
next year or two since our new porch brings traffic to an area that
used to be hidden by weeds. I'm going to hang onto Create
an Oasis with Greywater to refer back to once we hit
the planning stage for that project, and meanwhile I highly recommend
the book for anyone who wants to build a sustainable greywater
treatment system. Be sure to leave a comment if you've created a
greywater system different from the ones described in this week's
lunchtime series --- I'm always interested to see other DIY options.
| This post is part of our Create an Oasis with Greywater lunchtime
series.
Read all of the entries: |
 Tomato hornworms can do some
serious damage if left unchecked.
The Braconid wasp can do even more
damage to the hornworm by attaching white egg sacs to its body.
Maybe the work we did this
last winter to attract
native pollinators helped
to increase our parasitic wasp population?
My post about walking
distance got me
thinking about changes in our area over time. I wanted to go back
and look at some old USGS maps, and was surprised to learn that you
can now download all of the maps from your region as pdf files for free! (The last time I
played with topo maps, about six years ago, you either had to buy a
paper copy from the USGS or snag screenshots from various websites that
were trying to sell paper maps.)
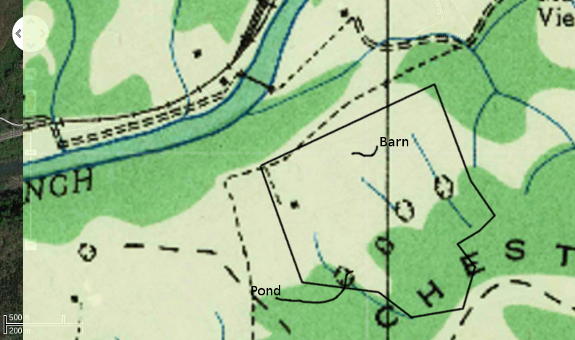
For our area, the maps
available were from 1935 (first map) and 1957 (second map), and I also
took a screenshot of google maps' current satellite photo (third map)
for a more up-to-date view. Then I layered them all together in
the Gimp. I cropped a bit of the 1935 map off and made the top
map slightly transparent in the first image in this post so you can see
what I'm talking about when I refer to layering.
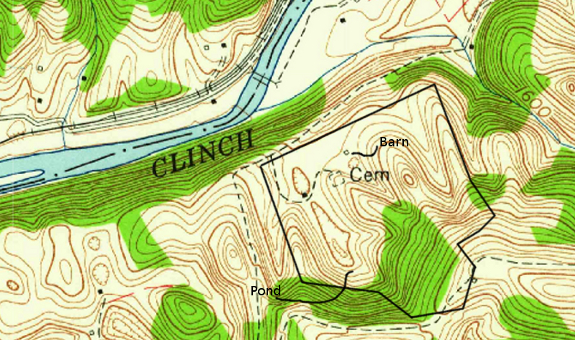
The property I'm taking
a look at here is the
same potential Walden Effect annex I mapped the soil for. I was interested to
see that, except for the ridge (south end of map), the propery was
entirely devoid of trees between 1935 and 1957.
Solid black squares on a
topo map represent houses, dotted lines are small roads or trails, and
outlined squares are generally barns or other large, non-residential
structures. With that information in mind, you can see that
someone was living on the property during both 1935 and 1957, probably
grazing animals or possibly growing corn and tobacco on most of the
acreage.
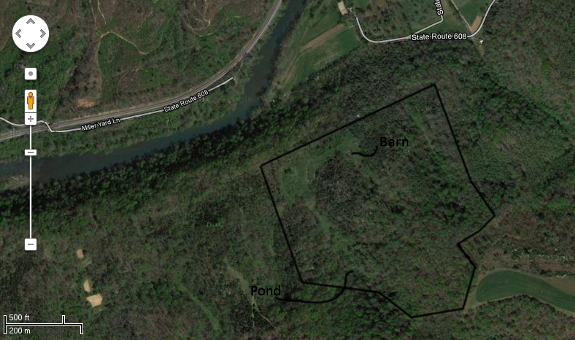
Between 1957 and the
present, the majority of folks stopped farming in our region and
started getting jobs in town. Although it's sad that people were
no longer living off the land, the earth rejoiced by sprouting up trees
everywhere. Only a few acres on the northwest side of the
property remained clear of trees by the time of the 2011 aerial photo.
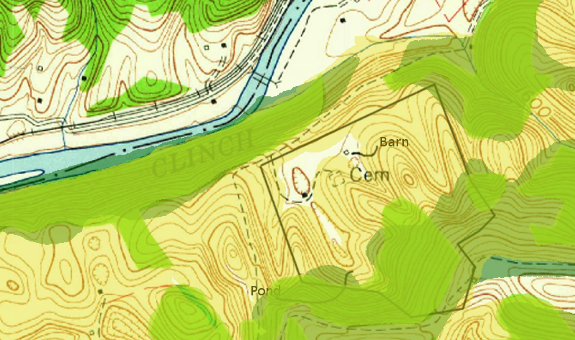
I merged all three of
these maps together to create the version above,
which gives a rough estimate of canopy cover over time. The
lightest
color is areas that are currently forested, the bright green represents
1957
trees, and the dark green is 1935 trees. (I didn't bother with
the area on the other side of the river, and you'll notice some
irregularities between 1935 and 1957 forest borders that are probably a
sampling error due to the low resolution on the earlier map.)
Why does it matter which
areas had trees in the past? It's handy to know that the woodland
is at least 77 years old on the ridgetop, because that kind of forest
will be chock full of plants and animals found in few other places and
is best left alone. On the other hand, twenty-plus years of
farming on the rest of the property may mean the topsoil has been
eroded away, and definitely means I'll feel less guilty about clearing
spots for sustainable agricultural purposes. And, of course, it's
just plain fun to guess what the land was like decades in the past.
Have you discovered even
better sources of historical maps or aerial photos online? Since
it's the weekend, I can probably sink my teeth into some more....
We had one of our sweet
potato beds to flower on us this week.
The first one since 2009.
Back then we had plans of saving the seeds to see if the new version
was any better, but we eventually decided the variety we have is
delicious enough.
If the seeds do mature we
could mail them to an interested reader who might have the time, extra
space, and inclination for an experiment in sweetness? The only thing
we'd ask in return is some sort of status report so we could share the
results.
 Usually, my non-fiction
reading consists of whatever captures my fancy (and is available), but
this summer, I've been focusing on books I'd been meaning to read for a
while. That focus has resulted in me mining a lot of "beginner"
books in search of possible gaps in my knowledge. I always find
at least one or two tidbits in these basic texts, but some stand up
better to being read by an intermediate audience, and I'm sad to say
that Worms
Eat My Garbage isn't
one of the latter.
I suspect that when Mary
Appelhof put out the first edition of this book in 1982, it contained
earth-shattering information, but now vermicompost is old hat for
many. I've dabbled in worm bins for a few years (getting much of
my introductory information from the internet and from Worm Cafe), and I found little to
provoke thought in Appelhof's book. I was also a bit turned off
by the writing style --- it's very basic since the author comes from an
education background and clearly wants teachers to be able to use it
with school kids. On the other hand, if you're just getting
started with worms, this book probably is the one to read to learn all
of the nuts and bolts that we figured out the hard way.
Despite being a bit
disappointed in Worms
Eat My Garbage, I
did learn a few things:
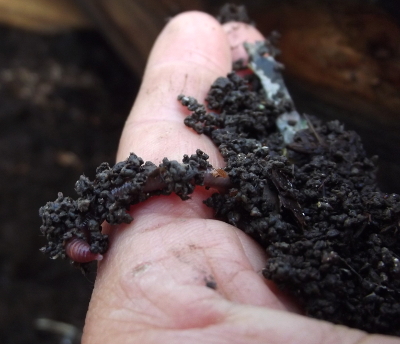 Vermicompost is different from
worm castings. The latter are produced if you let your
worms keep plugging away at the same materials until they die out as a
result of living in their own waste, while the former contains lots of
bits of compost that haven't gone through a worm's gut. The
information I presented in a previous post about not
using pure worm castings on plants (probably because of
concentrated salts) doesn't apply to vermicompost, only to castings.
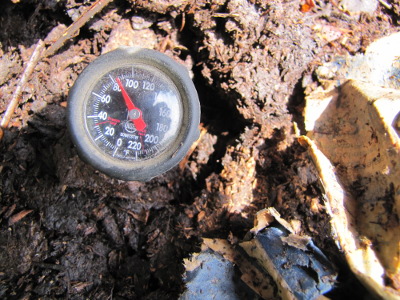 Water manure two days before
adding worms. I learned this the hard way very recently
when we filled a bin with relatively fresh horse manure, soaked the
bedding, added worms, and watched
them die. Appelhof notes that two days is sufficient time for
the manure to heat and cool down, making it safe to add worms.
Water manure two days before
adding worms. I learned this the hard way very recently
when we filled a bin with relatively fresh horse manure, soaked the
bedding, added worms, and watched
them die. Appelhof notes that two days is sufficient time for
the manure to heat and cool down, making it safe to add worms.- You use different techniques to
raise worms or produce compost. When I
accidentally left our worms eating the same food for a long time, I
was using the lowest maintence technique of
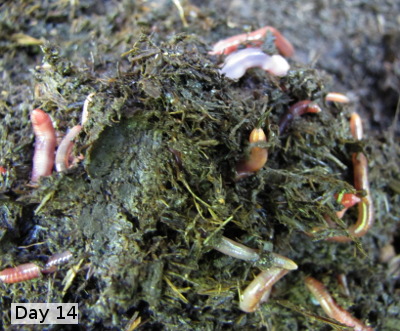 filling a bin and letting it sit
for at least six months, which produces pure castings at the expense of
your worm population. At the other extreme, folks breeding worms
to sell tend to move their stock to fresh bedding every two or three
months, leaving behind unfinished compost. Most people will
prefer to use a middle of the road technique where they let worms work
compost for about four months before moving the worms to a new bin (or pushing
old bedding to one side and filling the other half with fresh bedding).
This third method strikes a balance between producing compost and
keeping your worms happy, and is the one I want to work toward.
My final analysis?
As a beginner book, Worms
Eat My Garbage is
worth a read, but there's still space out there for an in-depth text
geared toward a popular audience. Maybe you'll be the one to
write it?

Mark
and I spent a long weekend in California at my brother's wedding.
I took a lot more photos of the forest garden than of
the people, but I did manage to snag these shots of family old and new.
(And stole the one below from Myriam Joire since I didn't really have any
of the happy couple.)

Thank you, Jay and
Timnah, for planning the most beautiful and fun
wedding I've been to! I really appreciated you letting me be a
best man instead of a bridesmaid and for picking out a costume I
actually liked. The ceremony was evocative, the view was
delectable, the food was top notch, and the strangers were worth flying
across the country to meet.
And, for our readers who
care nothing about a family wedding, stay
tuned to hear all about the father of the bride's forty year old forest
garden in a later post.
I'm thinking this might be
the last time I'll be using an iron until someone else I know decides
to get
married.
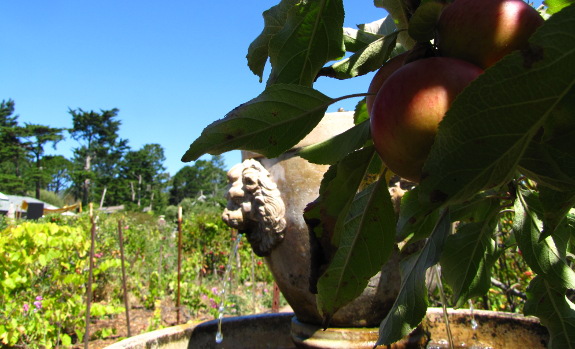
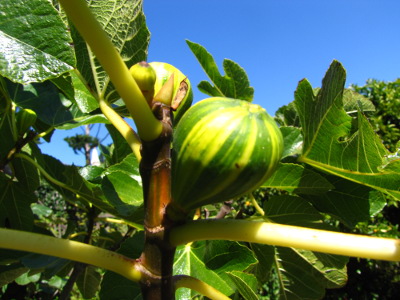
The food at my
brother's wedding
was superb, but I'm afraid I didn't eat much.
You see, I'd filled up
on apples, trying to sample every currently-ripe variety in the father
of the bride's forest garden.

 Ira
Steinman has been
forest gardening in the San Francisco Bay area for
forty years, and the result is a masterpiece that will inspire those of
us nurturing our first little trees. I'm afraid I was only able
to grab him out of the crowd for a few quick questions, but in many
ways the garden spoke for itself. Come along and we'll walk
through together!
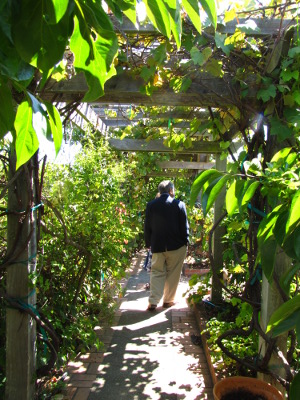
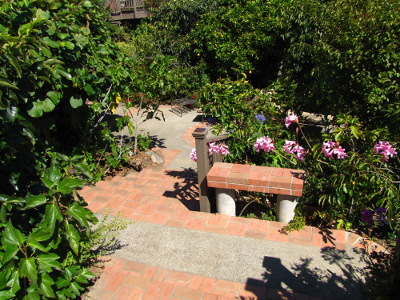
Ira had clearly put a
lot of thought into structural elements --- I could tell because I
barely noticed anything except plants until after I got home and
started flipping through the photos. Instead of jumping out at
you, paths, arbors, and steps drew you down into the garden and enticed
you to explore.
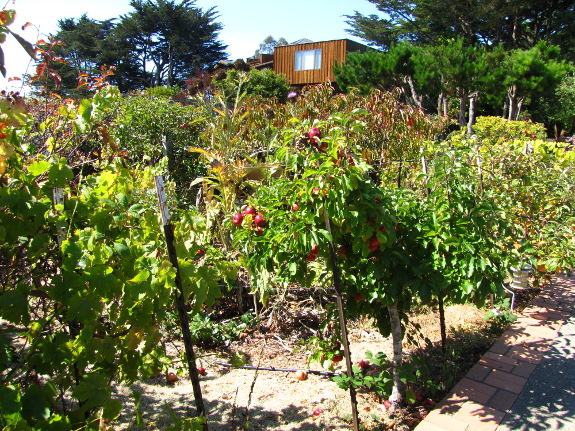
 The property boasts a stunning view of the San Francisco
Bay (or perhaps more technically the San
Rafael Bay, but it's all connected). Not wanting to block the view, Ira
planted dwarf apples in the upper part of the garden, then graduated
into what I'm guessing are semi-dwarfs further down the hill.
The garden location that
permaculturalists would call zone 1, right outside the house, was a
more formal area with benches, a lawn for gatherings (and marrying off
their kids), and huge buddhas brought home from Asia to inspire
conversation. Just as tree size increased as you ventured further
from the house, so did the garden become less formal and more wild.
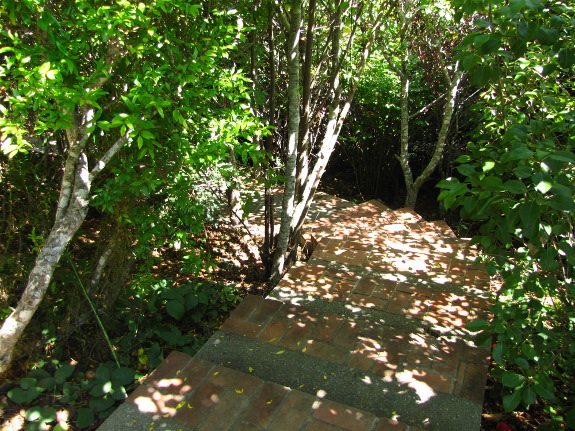
 I liked the fact that Ira
stuck to brick pathways throughout, even in the less formal
areas. Despite being located in zone 8 in a microclimate that
hasn't seen a killing frost for 22 years, the Bay area garden still has
to contend with cool summer temperatures that can make ripening summer
fruits a challenge. I suspect that capturing heat with these
stone pathways helps the summer garden, even though Ira reports his
citrus still tend to be on the sour side. (Most citrus fruit need
summer heat to pack away sugars, which is why dwarf
Meyer lemons are
likely to give those of us growing citrus indoors better results than
most other choices will.)
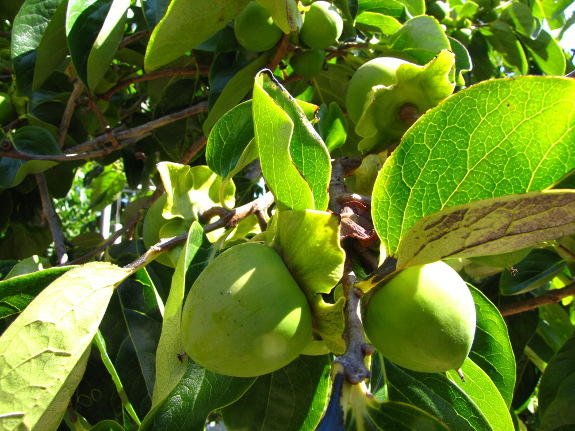
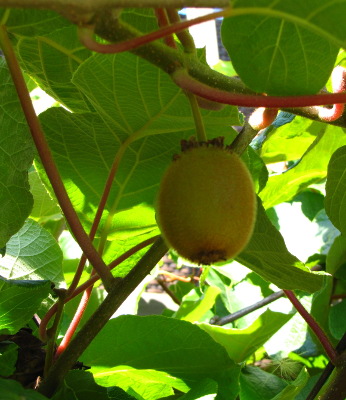
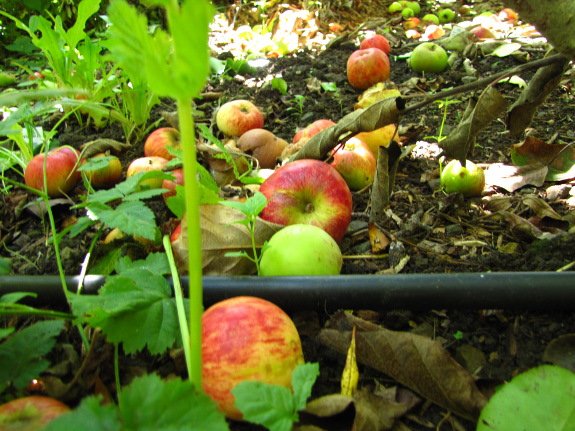
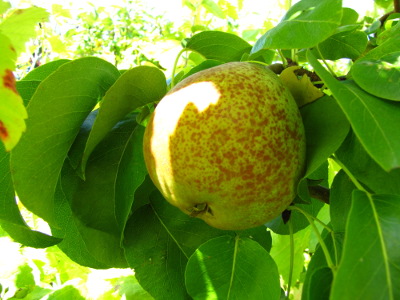 So
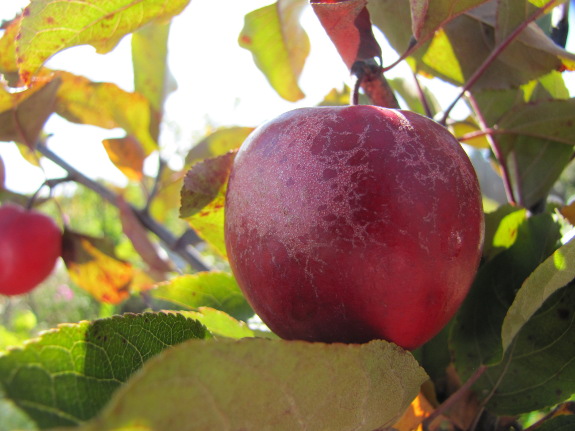
what's growing in this stunning forest garden? The apples are
what captured my eye and what seemed to be doing the best, perhaps
because Ira had chosen most of them from a nearby heirloom apple
nurseriest who knew just what would thrive north of San
Francisco. But there were also lots of Asian persimmons, pears,
and figs sporting unripe but luscious-looking fruit.
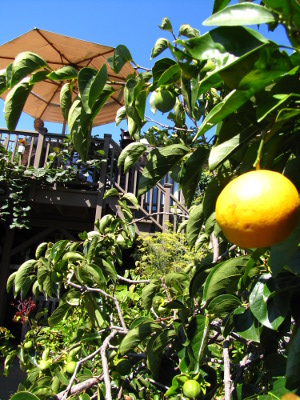 Ira's
garden was also dotted with ripening citrus orbs. I couldn't
identify them all, but Ira pointed out an Algerian mandarin
as he passed by doing his hostly duties, and a friend of the family
shared a pomelo, which was a bit like a grapefruit.
The sheer quantity of
fruit being produced by this 1.5 acre garden was astonishing. I
could tell from the apples littering the ground that the bounty was
more than Ira could handle, and I fed lots of guests hand-plucked fruit
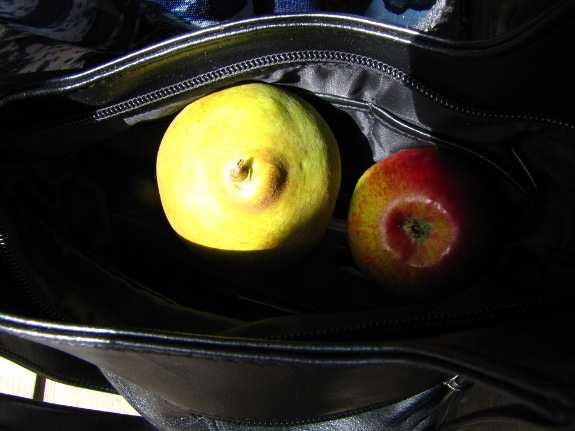
without seeming to make a dent in the wares on display. In fact,
my stepmother stuck a few fruits in her purse to snack on later, and I
suspect she wasn't the only one.
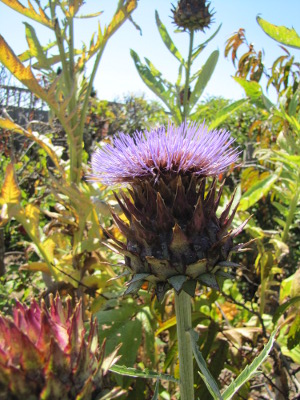 One of the things I liked the
most about Ira's forest garden is that the trees were clearly
king. I think that many of us who read the forest
gardening literature come into our gardens thinking that we can
fill all five levels with delicious edible trees, shrubs, and herbs
that won't compete at all. But Ira didn't read any of those books
(perhaps because they didn't exist when he got started), so he focused
on trees in most of his garden, separating herbs like this Roman
artichoke out into sunny clearings. Knowing your priority
in each part of a garden helps you mix and match secondary plantings
without lowering yields from the plants you care about the most.
Despite focusing on the
trees, Ira's landscape still felt like a forest garden, not like an
orchard. Trees were planted close enough together than they
produced a nearly closed canopy, and grapes, kiwis, ornamentals, and
shrubbier plants like figs were interspersed. (Guests who had
been to the garden before it was manicured for the 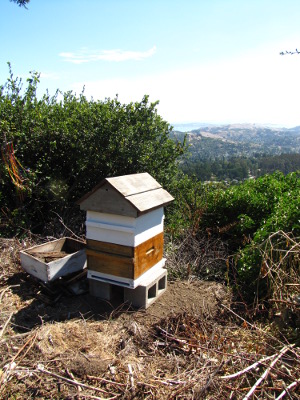 wedding also told me that our
ability to stroll down the paths is a new affair --- I suspect the
garden had more of a jungle feel previously.)
I left the garden with
more questions than answers. What did the early stages of the
garden look like? Did Ira have to amend the soil heavily?
Does he water his trees with drip irrigation? How long did it
take before the forest garden began overflowing with bounty? Did
he face special challenges due to his location? Are there species
and varieties he particularly recommends for the Bay area?
The specifics aside,
though, the garden itself told me everything I needed to know.
Forty years later, a forest garden does look like a forest while being
as productive as a garden. The idea has merit --- let's plant
some more trees!
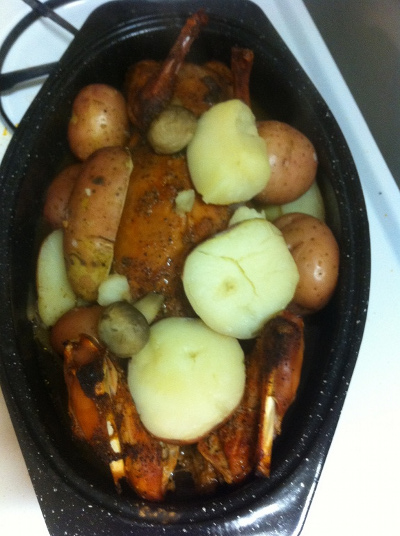 I've
been considering raising rabbits for quite some time as an
inexpensive source of meat for consumption. I had pet rabbits when I
was a toddler and teen, but haven't really had much experience with
them
since then. Rabbits can be a good source of protein, and they are
generally easy to raise. I've eaten rabbit in the past (both wild and
domestic), so I know I like the taste of the meat.
Many homesteaders choose to
raise chickens as a protein source; however,
personally, I don't eat many eggs. I've wondered if I have an egg
allergy of some kind. I've noticed for a number of years that when I
consume eggs, I often don't feel well afterwards. A couple of years ago
I was discussing this with my mother, and she claims to have the
same symptoms. I haven't researched it, but I wonder if there is a
genetic trait that causes intolerance to a protein in eggs?
So, if one doesn't plan on
consuming eggs on a regular basis, this
makes raising chickens a lot less appealing. The alternatives to
chickens and other fowl on a small homestead that I can think of are goats, sheep, pigs, rabbits, and perhaps a handful
of more exotic livestock. Rabbits seem to me to be easiest to raise of
this list, and perhaps require the least amount of preparation and
planning.
One strong advantage to
raising rabbits is the fertile manure one ends
up with in a concentrated area. This can be used to significantly
enrich poor soil, of which we have 3 acres worth. Our soil here
is quite poor, so anywhere we garden has to be enriched. This
sometimes means a pickup load of garden soil from the local nursery,
but we hope to do this less in the future as we start to bring in horse
and rabbit manure. We'll cover rabbit manure much more in a future
post.
And so begins our adventure
into rabbit husbandry. We hope
you'll enjoy reading about our experiences as we tread off into unknown
territory with meat rabbits.
Shannon and Dawn will be
sharing their experiences with raising meat rabbits on Tuesday
afternoons. Shannon and Dawn homestead on three acres in Louisiana when time off
from life and working as a sys admin permits.
A little chicken coop repair
seems to have cured my lingering feelings of jet lag from our trip out
west.
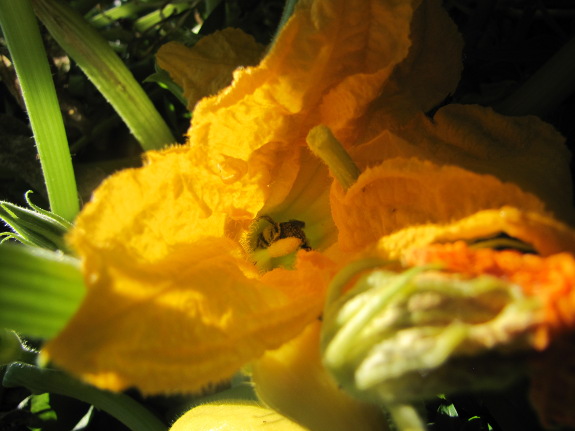
I'm always astonished by
how much the farm can change in just a few days.
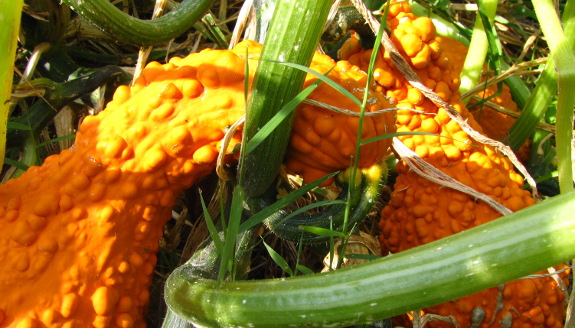
The year
of the cucurbit is
suddenly at an end, with the butternuts nearly mature, the cucumbers
blighted, and the summer squash I'd let go to seed turned orange and
warty.
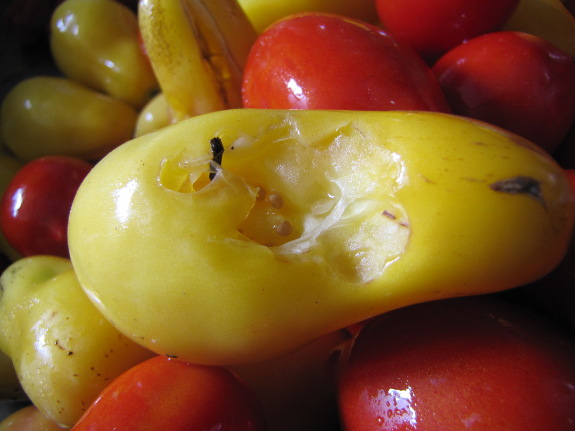
The chickens broke out
of their pasture while we were gone (with some help from Lucy, whose
boredom prompted her to gnaw a hole in their fence). They didn't
do much irrepairable damage, but did scratch half of our mulch into the
aisles and pecked holes in lots of tomatoes. Good thing I don't
mind eating after chickens, once I cut out the damaged portion and boil
the rest into soup for a good long time.
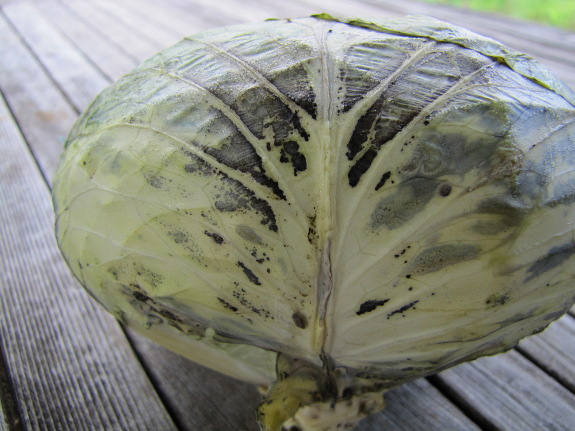
Speaking of soup,
despite the turn of seasons, we're still cooking up winter dinners like
mad. I cut into the last spring cabbage after peeling back four
outer leaves gone thin and mildewed. The inside was still crisp
and delicious, and I wish I'd grown more. Good thing the fall
cabbages are already getting some size on them.
I can feel the pendulum
begin to swing over to the fall garden. We ate our first lettuce
in months and the winter cooking greens now have true leaves.
Fall carrots have filled out enough to shade most of their beds, and
oilseed radishes are coating fallow garden spots. In the woods,
dog-day cicadas are dropping to the ground while katydids take their
place. Here's hoping we'll enjoy this early fall for a long time
rather than seeing a premature killing frost.
 After dipping into the first
few pages of Radical
Homemakers, I can
tell that the exact reason I had originally avoided this book is the
same reason I'll get a lot out of reading it. The term
"homemaker" brings up all kinds of negative images for me, not least of
which is the dependent housewife devoting her life to making her more
important spouse happy. But Shannon Hayes' book begs the question
--- isn't a homesteader just a rebranded homemaker, and can't you make
a home without turning in your feminist credentials?
As part of our book
club, we'll be discussing the preface, introduction, and chapters one
and two on Wednesday, August 29. Since we've been out of town, I
haven't read ahead, but the first few pages definitely sucked me in, so
you needn't be concerned this is another Walden.
I'll look forward to hearing what you think next week!
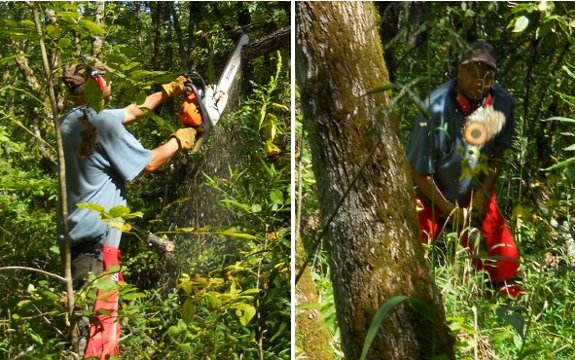
We cut up almost half of the
small branches on the downed
walnut tree.
Usually I wouldn't cut on a
branch above my head, but this tree fell in a way that crushed a weaker
box elder and is now balanced on its stump.
Cutting a little bit on each
side should help it stay balanced and safe.
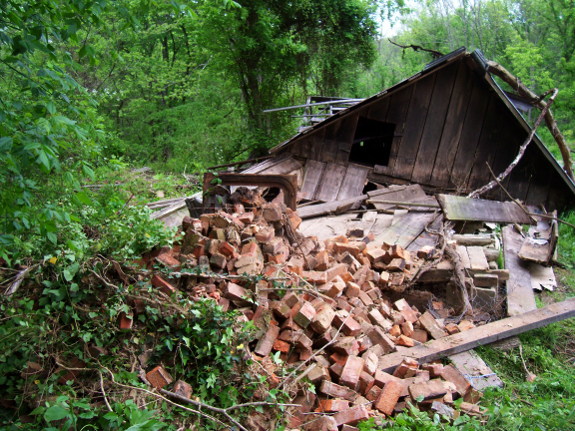
I've been trying to
decide on a good use for the bricks from the old chimney ever since we
winched the structure down in May 2008.
 Over
the years, I've used a few bricks in the garden to weigh down the sides
of quick
hoops and emergency
row covers.
But these chimney bricks are handmade and too crumbly to be included in
anything structural.
I'd tossed around the
idea of making a brick path in front of the trailer to delete the mud
pit that develops there each winter. But laying bricks sounded
like a lot of work when I could just put on boots.

The perfect use for our
bricks presented itself when a spot in the driveway started bogging
down the golf cart. Usually, we'd go get a load of rip-rap from
the quarry, but we don't have a truck at the moment. Could a golf
cart load of bricks serve the same purpose?
Yes they can! Now
that pile of bricks looks like an opportunity, not a weed-heap.
Our new friend Marvin helped
us haul out some garbage while bringing in 3 truck loads of horse
manure today.
Whew!
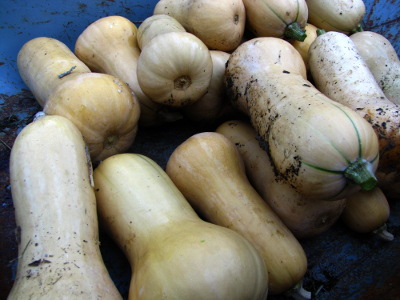 I've been meaning to bring
the onions in from the curing
racks, but I've been
cooking them up into soup so fast that it hardly seems worth it.
Blighted tomatoes aren't quite as sweet as tip-top homegrown should be,
so I double the onions in our harvest soups to raise us up to the sugar
levels we prefer. As a result, we've used up nearly half of the
year's onions just a month after harvesting.
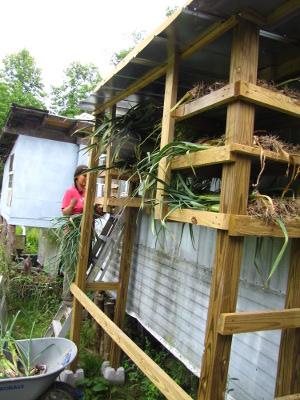 Meanwhile, the first butternuts
are ready to come off the ground and get some airflow before being
packed away for the winter. So squash have taken the place of
onions on two of our six shelves, and more will be moving to the drying
racks next week.
Which is all a long way
of saying --- there's been no vacancy on the garlic curing racks ever
since they were built. They continue to be one of the best farm
innovations of this year.
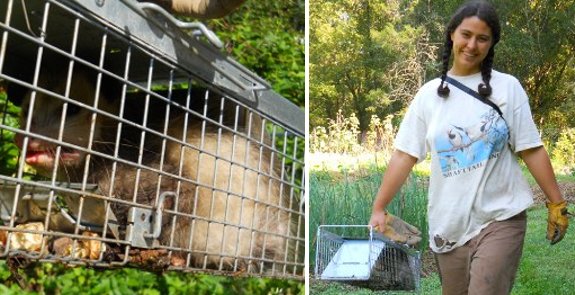
We've been curious about meat
rabbits lately and I've
been seeing several run around doing their thing and thought maybe we
could get lucky and trap one.
Anna did some research and we
decided to go with a live trap that stays open at both ends. Rumor has
it that rabbits will be more likely to go into a trap if they can see
out the other end.
No rabbits yet, but we caught
a possum today. The poor little guy was spooked pretty bad, so we tied
Lucy up for a brief moment and walked him out to the woods and set him
free.
 The Bucolic
Plague is a
well-written, gripping book...and I hated it. The Beekman
Boys' reality is
like a twisted version of Mark's and my lives, too similar for me to
suspend disbelief and ignore their life choices, but too different for
me to identify with. The book read like a cautionary tale, making
me very glad that we bought the cheapest bit of land I could find and
never tried to scale up our business faster than it could comfortably
grow on its own.
Although they professed
to be embracing a simple life, Brent Ridge and Josh Kilmer-Purcell
bought a million-dollar piece of property three hours outside New York
City and continued working their jobs in the Big Apple Monday through
Friday. Each weekend, they'd hop on a train and make the long
commute to their mortgaged mansion, which they hoped to turn into a
Martha-Stewart-inspired homestead. (By the way, in case you think
I'm exaggerating, the neighbors and author do call their home a mansion
and Brent worked for Martha Stewart at the time.)
Meanwhile, Brent and
Josh launched a goat-milk-soap business in the least micro fashion
imaginable. Rather than doing all of the work themselves, they
outsourced the goat-milking and the soap-making, spending their time on
marketing and order fulfillment (some of which they later hired
employees to do as well). With the help of a plug on Martha's
show, they were soon rolling in business...but the duo continued to
work full time because they were spending so much cash on employees and
scaling up that they weren't actually making a profit.
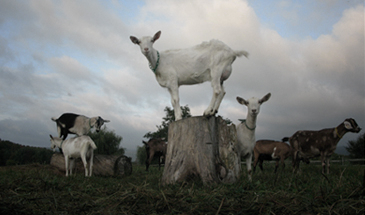 The
Beekman Boys' blogging (as reported in the book) seemed to be similarly
grandiose and inauthentic. Josh wrote about spending an afternoon
picking apples from their trees, but rather than enjoying the pursuit,
he struggled to find a bowlful of unblemished fruits to be photographed
for the website. He and his partner worked so hard adding
"sparkle" to the virtual version of their homestead that they seemed
unable to embrace the reality of that life, and their relationship
suffered accordingly.
The bottom line is --- The
Bucolic Plague
represents a Hollywood version of homesteading. The author does a
good job of honestly portraying at least some of the pitfalls, but I
was disappointed that he never realized the root of his problems lay in
buying into the same consumer culture that homesteaders strive to break
free of. Unless you're thinking of buying a million-dollar
"homestead" and need a wake-up call, I don't think I can recommend The
Bucolic Plague to
anyone.
This is the maximum amount of
buckets we can fit in a truck or trailer.
I was thinking the other day
on the possibility of using square buckets to take advantage of that
space in between.
Square buckets can cost as
much as 3 times or more what a round one goes for, and they'd have to
be mail ordered, which would add even more to the price tag. The
increase in loading capacity might be worth it to some, but I would
want to see how well they stacked on to each other when empty before
taking such a plunge.
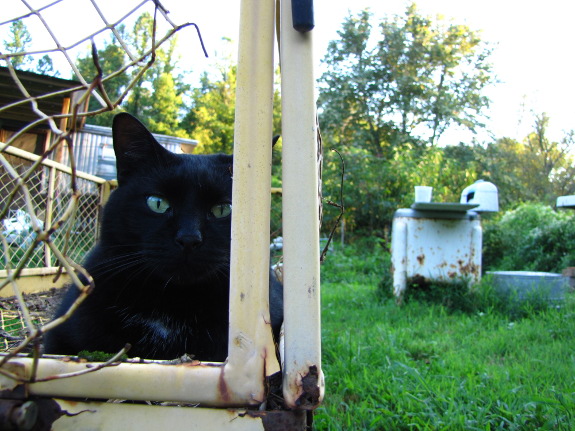
 Mark and I split the
household chores down the middle. I cook, he does the
dishes. I harvest and weed, he splits wood and mows.
Unfortunately, neither
of us is a big fan of cleaning. So things tend to pile up until
we get a special visit from someone like my favorite cousin-in-law.
Ben's visit tempted me
to to wash up the futon cover and catch up on laundry. Is it
still spring cleaning if it's nearly fall?
According to wikipedia there
are molecular mechanisms within copper that can control a wide range of
molds, algae, fungi, and microbes.
We've been cutting off new
tomato flowers to divert energy to fruit and I thought it might be a
good time to try an old wives tale I heard down at the hardware store a
few years ago.
If it slows down the blight
even a little it'll be worth the effort.
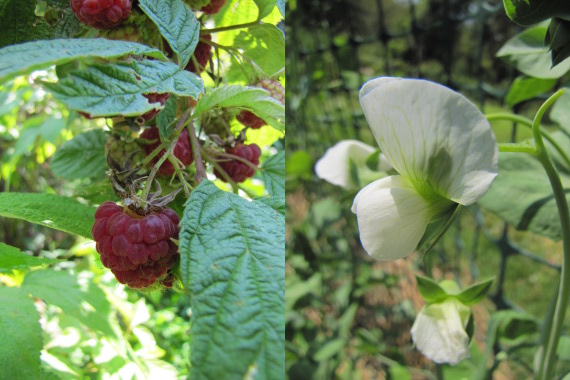
Even as the summer crops dwindle, the fall garden is
beginning to pour forth its bounty. Ever-bearing raspberries
picked back up in mid August after taking a few weeks off, and I just
noticed that the snap peas are starting to bloom.
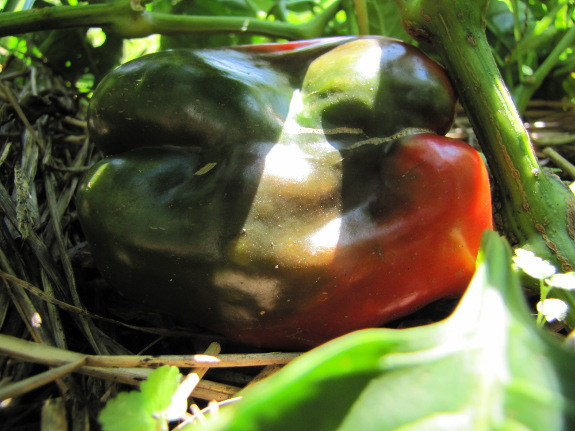
Early fall is my
favorite time of year for salads. We don't baby peppers the way
we do tomatoes, so we only have ripe, red fruits for a couple of months
between mid-August and the frost. During that time, salads
consist of lettuce, baby kale and tatsoi, tomatoes, cucumbers, peppers,
sprouting beans, snap peas, and probably more ingredients I'm not
remembering at the moment. Such a treat to pour so many colorful
vegetables onto our plates!
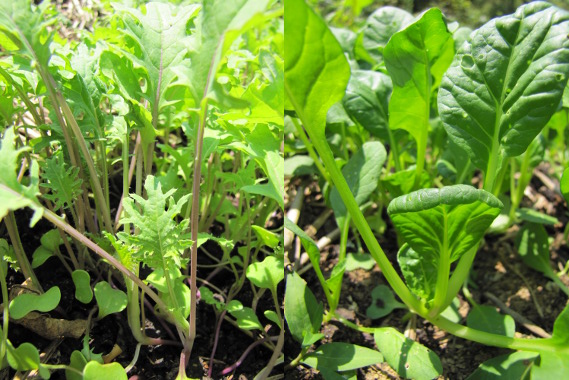
Another highlight of the
garden this week is the beds of Dwarf Siberian and Red Russian
kale. I knew the seeds
I'd saved this
spring were viable because patches of baby kale started popping up
around the parent plants in July, but I wasn't entirely sure that the
two varieties wouldn't hybridize. I planted them
separately and am thrilled to see that the two leaf shapes are quite
distinct --- no gene-hopping there. (By the way, the photo on the
right is tatsoi, not kale.)
Despite all of these fun
fall crops, though, I'm still knee deep in tomatoes and loving it. I read
about a frost in the Pacific Northwest last week and I'd like the world
to know we're not
nearly ready.
Anyone know a good anti-frost dance?
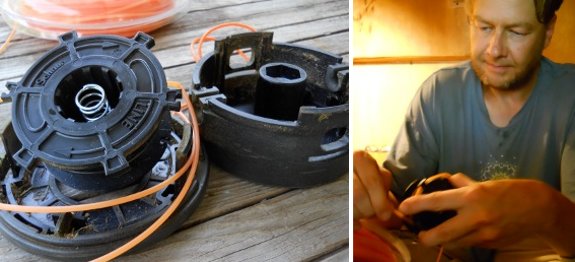
I've sort of dreaded the day
when our Stihl
FS-90R trimmer would need to have its spool restrung.
Turns out to be easier than I
thought thanks to an informative 3 minute video from Youtube user donyboy73.
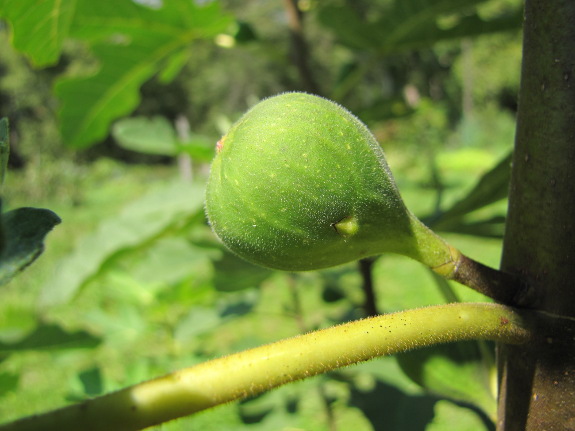
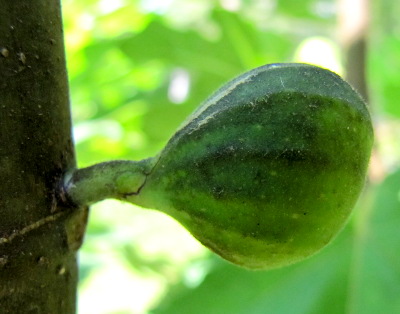
I've been watching
our fig tree with an eagle eye for months, hoping to taste a fresh
fig. As the branches elongated, more and more little green figs
popped up in the leaf axils, but none showed signs of ripening.
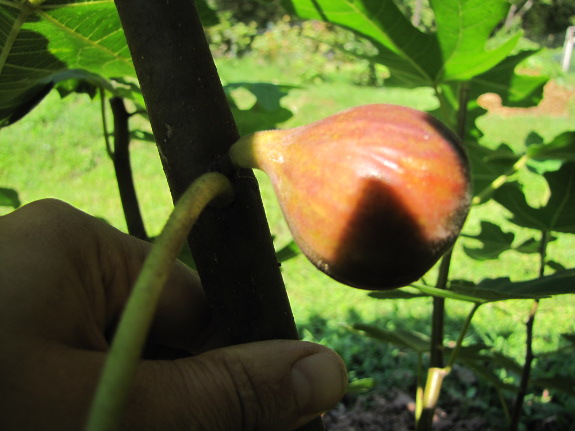
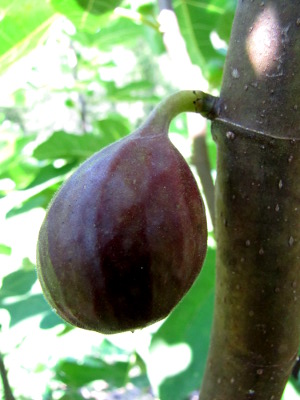
Then, seemingly
overnight, a fig doubled in size, started to turn brown, and began to
wrinkle and droop on its stem. A fig that is no longer sticking
straight up, but is instead hanging down nearly horizontal to the stem
is a sure sign of a ripening fig. But was that
first fruit ready to test?
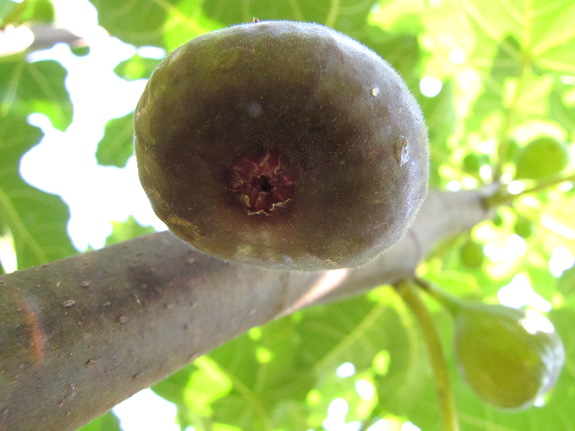
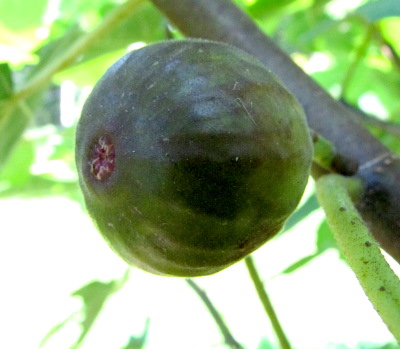 According
to online experts, there are a few other characteristics to pay
attention to if you don't want to pick your first fig too soon.
In addition to color (our Chicago
Hardy fig will turn
brown, but some varieties stay green when ripe) and orientation of the
fruit, a truly ripe fig will show a widening hole at the end opposite
the stem. As peak ripeness approaches, juices will begin to ooze
from that hole, and the skin will tear slightly near the stem.
Although our ripest fig
is looking plump and delicious, the leaf scar end is still fully closed
and there's no sign of dripping nectar or tearing skin. So I'll
keep my eyes peeled and wait another few days for our first ever
homegrown fig.
 When thinking about keeping
meat rabbits, one of the first things that
came up is which breed should we start with?
I've had New Zealand Whites and that seems to be a popular breed for
meat. This rabbit variety is also noted for the pelts since they are
pure white. I'm not sure, but I would guess the fur could be dyed,
too, which might make them popular with the buyers of pelts.
We're not really going down this path to sell the pelts, but we also see
that
as a learning opportunity and a potential offset for expenses, or even
as a source of profit. We plan to learn about preserving and/or tanning
the skins as we go as a side project.
Back to breeds. Another popular breed seems to be Californians. We're not
too familiar with these, but are considering crossing a New Zealand
buck with some Californian does. We'll see where we end up.
For now, we've started with New Zealand Whites. We currently have two
bucks and one doe. Not exactly an ideal male to female ratio, but we will
explain in a later post how we ended
up in that situation. There's also more to say about other breeds in a later
post.
Shannon and Dawn will be sharing their experiences with raising meat rabbits on Tuesday afternoons. Shannon and Dawn homestead on three acres in Louisiana when time off from life and working as a sys admin permits.
What happened to those polycut
attachment fingers you were trying out last year?
Tom Campbell-Houston, Texas
Thanks for the question Tom.
I liked the polycut
fingers when I first
tried them, and I think they still have a place when clearing heavier
stuff in the chicken pastures, but for day to day trimming around
raised beds and fruit trees the string seems to do a cleaner job of
cutting weeds off at the ground level.
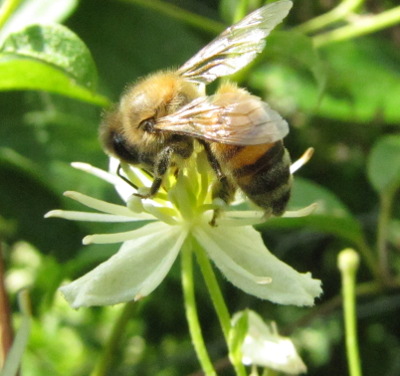 In our region, the summer is
a bit of a lull for bees, with few uncultivated plants in bloom.
If you have fields of white clover or buckwheat, your colony may
thrive, but otherwise, the bees are likely to eat through a lot of
their spring honey and come into the fall with few stores.
Luckily, asters,
goldenrod, ragweed, virgin's bower, and other plants start blooming in
late August and help the bees stock back up. But the beekeeper
still needs to be proactive because the window for fall
feeding closes
rapidly as daytime temperatures plummet, making it too chilly to
dehydrate sugar water into honey. So now's a good time to be
thinking about the hive's winter honey, which led me to research how
much honey a Warre hive needs to get through the
winter.
Beekeepers report that
the more insulated design of Warre hives reduces the bees' need for
honey when compared to a Langstroth hive, but by how much? The
official word on Warre hive care comes from the method's founder who
left 26 pounds of honey (one of his smaller hive bodies full).
However, American beekeepers need to keep in mind that Warre lived in a
mild, European climate, meaning that most of us will probably need to
ensure our bees have more winter honey.
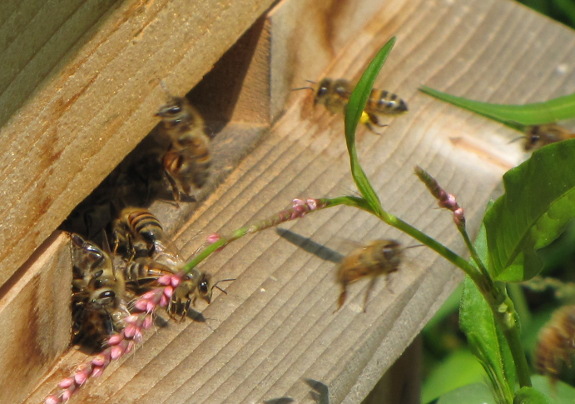
A search of the internet
turned up a few solid data points from American Warre beekeepers.
An apiarist in Portland (zone 8b) leaves a single box of honey per
colony, like Warre does, while a zone 5 beekeeper adds a second
box. Both report that they overwinter with one box of brood below
the one or two boxes of honey stores.
To play it safe in our
zone 6 climate, I'm going to follow the lead of the zone 5 beekeeper
and make sure our bees have at least two full boxes of honey going into
winter. What I haven't decided is when to delve into the hive and
estimate their honey stores before deciding about whether or not to
feed. Suggestions?
 The most striking part of the
first quarter of Radical
Homemakers was
Hayes' explanation of how the concept of being a housewife entered our
lexicon. I'm going to skip the prehistoric information since it
sounded a bit too good to be true, and move on to the thirteenth
century when Europeans coined the term "housewife".
According to Hayes, this
period saw the rise of a middle class, distinct from serfs and lords
because they owned their own homes and little plots of land.
These medieval homesteaders were named "husband" --- a merging of
"house" and "bonded" --- and "housewife". Although they
tended to have gender-specific roles, husband and housewife still
worked together toward a common aim of feeding and clothing the family.
 It wasn't until the
Industrial Revolution when the husband left this partnership for a job
outside the home, relegating all of the household tasks to the
housewife. Thus, "housewife" stopped meaning half of a
self-sufficient team and took on the modern connotations.
With the end of the
medieval partnership came the beginning of what author Betty Friedan
termed "housewife's syndrome". "American girls grew up
fantasizing about finding their husbands, buying their dream homes and
dream appliances, popping out babies, and living happily ever after,"
Hayes explained. But in reality "countless women suffered from
depression and nervous breakdowns as they faced the endless meaningless
tasks of shopping and driving children hither and yon. They never
had opportunities to fulfill their highest potential, to challenge
themselves, to feel as though they were truly contributing to
society...." Friedan's solution (which became the feminist ideal)
was for the wife to leave the home and join her husband on the career
track.
However, although an
independent income and source of achievement helped many women, the
household chores still had to be done. In these two-salary
households,  food-making, cleaning, and
childcare were either relegated to menial laborers or were outsourced
to corporations who sold the hard-working wives time-saving but
expensive gadgets and prepackaged food. Soon, it became necessary
for both husband and wife to work outside the home if they wanted to
squeak by financially, all while consuming lower quality food and
turning their kids over to childcare facilities.
While there were many
other thought-provoking questions raised in the first quarter of Radical Homemakers, I
thought we'd start out by discussing the history of the problem as
presented by Hayes. I'm especially interested to hear from folks
like Ikwig and Heather who have thought about history more recently
than the eleventh grade. (History isn't my strong suit....)
Do you think Hayes was cherry-picking facts to come up with such a
cohesive story, or does your understanding of events match hers?
For the non-historians, were you as surprised as I was to learn that
"housewife" was merely the female version of "husband", and to see how
recently the current connotations arose? Does it change
your feelings toward homemaking when you consider households  in which both the husband
and wife are house-bonded?
We'll be discussing
chapters three and four next Wednesday, and there's still plenty of
time for newcomers to join the club. As usual, feel free to chime
in with your
observations about the first section of the book even if they seem off
topic. I'm looking forward to hearing your take on this
thought-provoking book.
The
Weekend Homesteader guides
you on the path to self-sufficiency with one fun and easy project for
each weekend of the year.
We decided to insulate the new porch roof in an effort to decrease the
heat that radiates from the toasty tin.
The plan is to use this as an
experiment to see if we want to do a similar thing on the first
porch.
One downside is the sound of
rain drops on our tin roof being muffled, which is no small thing to
delete. Doing this porch first will help us to determine just how much
of the natural rain drop melody will be sacrificed for a little thermal
efficiency.
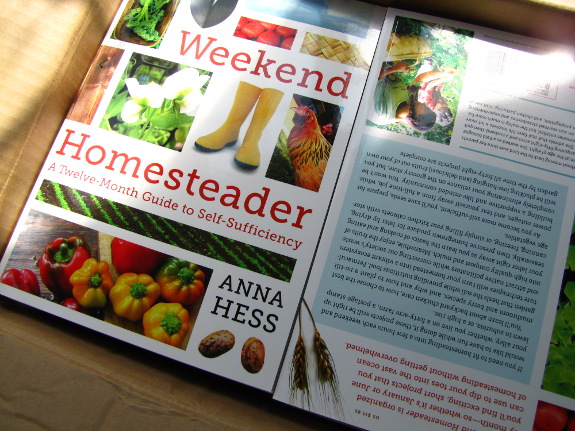
 The
bibliophiles among you probably know how wonderful it feels to have a
box of new reading material show up in your mailbox. (To be
honest, I get the same dragon-sitting-on-my-gems rush when I bring home
a dozen library books.)
Well, just imagine how
it feels to open a box full of your very own book. Yes, I did
ignore chores and spend the afternoon yesterday flipping through the
book I sweated over all winter, and each page looked much better than I
remembered.
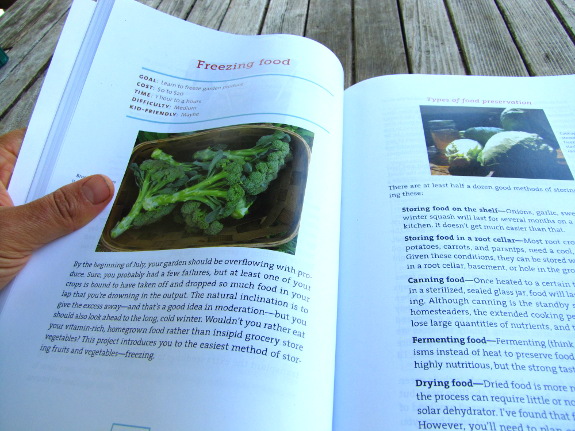
I'll post some relevant
facts later, so stay tuned for information on a giveaway of autographed
copies, when preordered
books are likely to
arrive, opportunities for bloggers to get a free review copy, and so
forth.
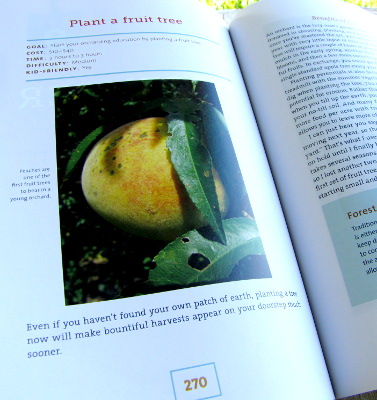 If you want to glean
something for your own life from this post, here's my bit of hard-won
wisdom --- excitement fades, so seize the day. If you're itching
to learn to dry tomatoes, make the time to do so while it sounds like
fun and before it turns into a chore.
I'm not sure how
flipping through the pages of my book could ever seem like a chore, but
I'm taking my own advice and curling up with my treasure right
now. And trying to decide whether the close family and friends
who will be enjoying the contents of this first box would like their
books written in or pristine. What do you think?
We've been having trouble
with one of our hens flying over the 5 foot high pasture fence.
It's the first time we've had
to clip a chicken's wing, and we both considered this a last option, but
she's had more than one second chance.
Some folks say to just clip
one side, which prevents flight due to imbalance but still gives them a
few extra inches of feather punch on the other side if they have an
encounter with a predator. If she keeps flying over we'll clip the
other side.
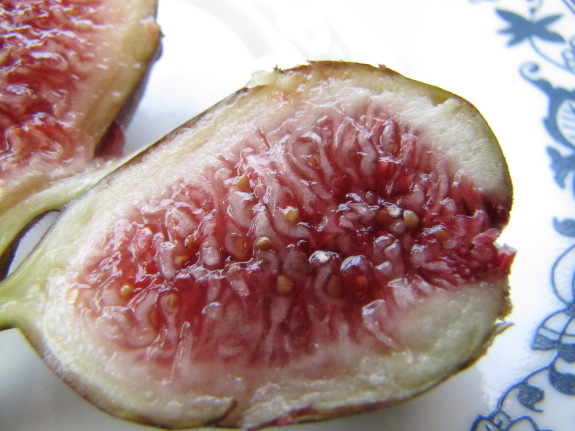
I might have plucked the first fig too early, but the ants were
starting to carve gullies in the skin, so I figured I should beat them
to it. No drops of nectar, though, and the hole at the end didn't
look as open as in the photos I've perused online.
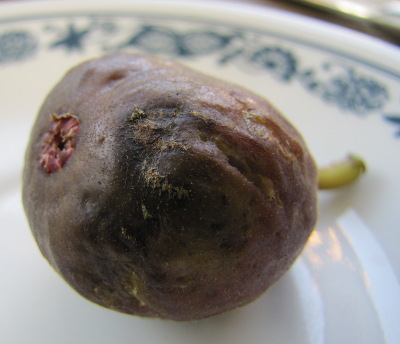 Perhaps that's why our first
fig was tasty, but not the flavor explosion I'd hoped for. What
do you seasoned fig-growers think --- is this fig ripe, or should I
have waited a few more days?
This didn't turn out to
be our first
real fig taste,
though, because Mark and I were treated to lightly roasted figs at my
brother's wedding.
Wow!
From a search of the
internet, roasting a fig sounds as simple as
cutting it in half, drizzling on a bit of olive oil, and roasting at
425 for 10 to 12 minutes. That's a recipe I'll definitely be
trying as more of our figs ripen up.
Little
Miss. Independent flew the coop again.
Clipped her other wing today
and so far it's working.
Did the same thing to one of
her sisters.
Maybe chickens are more
susceptible to peer pressure than other livestock?
Want more in-depth information? Browse through our books.
Or explore more posts by date or by subject.
About us: Anna Hess and Mark Hamilton spent over a decade living self-sufficiently in the mountains of Virginia before moving north to start over from scratch in the foothills of Ohio. They've experimented with permaculture, no-till gardening, trailersteading, home-based microbusinesses and much more, writing about their adventures in both blogs and books.
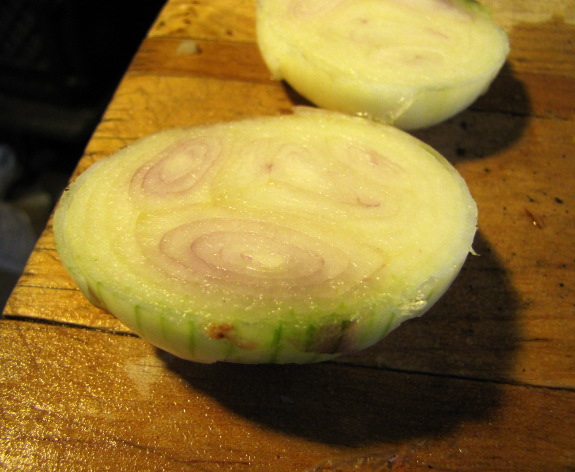
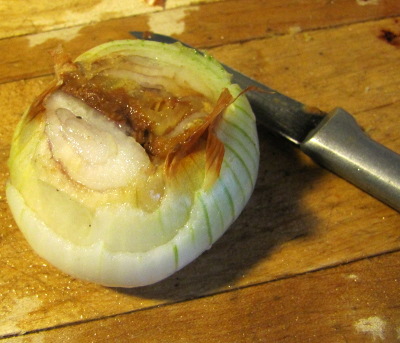 I
discovered the root of the problem when I cut the bulbs open. The
big potato
onions were really multiple smaller bulbs mashed together rather than
one solid circle, and the rot did seem to concentrate between the small
bulbs.
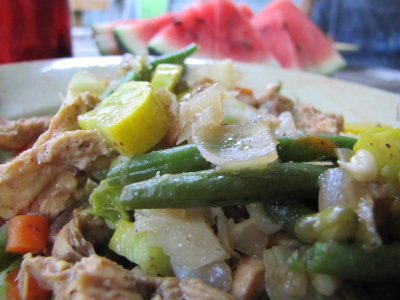 sweeter than the ones I
generally grow from seed. We definitely won't have a hard time
cooking with potato onions.