archives for 06/2012
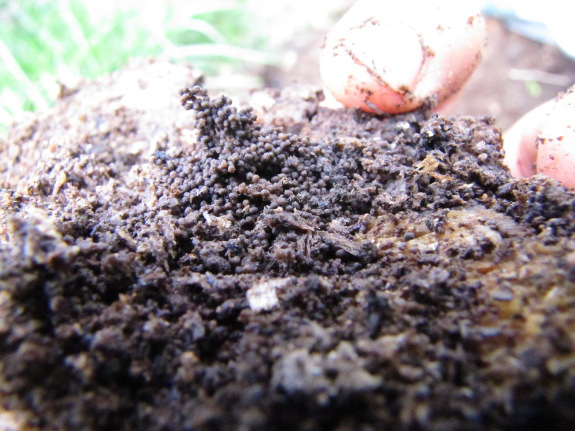
I love using
stump dirt as potting soil, and last year I concluded
that this
miraculous substance was probably mushroom compost. Now I'm going to
guess again --- maybe beetle castings?
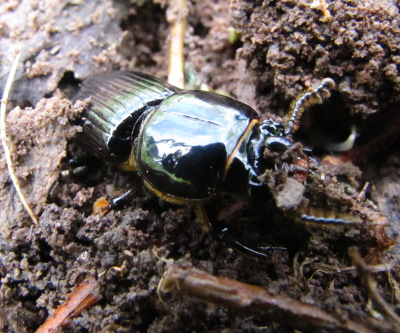 Three weeks after Mark cut
down a very
decayed stump, I
started piling the debris in my wheelbarrow to move to a new hugelkultur mound. Imagine my surprise
to find the rotting wood literally wiggling with life!
The most obvious living
things in the stump were these impressive beetles. At least half
a dozen were present, which is typical of the Horned Passalus (Odontotaenius
disjunctus) since
the species is subsocial, with several adults sharing the duties of
childcare.
The Horned Passalus eats
"decaying wood and/or fungi" (according to Bugguide.net), and 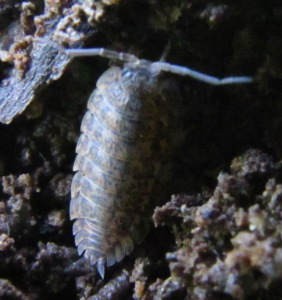 I realized that the round
pellets that make up stump dirt do look a lot like castings (aka
poop). I wonder if beetle castings have the same near-mythical
properties as worm
castings?
Of course, it's not
really fair to assume the beetles are entirely responsible for creating
stump dirt. The log was also home to wolf spiders, slugs, sow
bugs, wood cockroaches (hiding in galleries in the less decomposed
wood), tiny snails, and much smaller inhabitants that I could barely
make out with the naked eye. So the jury's still out on who or
what produces stump dirt.
It's funny how an open space
makes you think of possibilities.
Anna's first idea when she
saw our new
barn floor was how it would make a nice dance area. For me I saw
enough elbow room for a pool table.
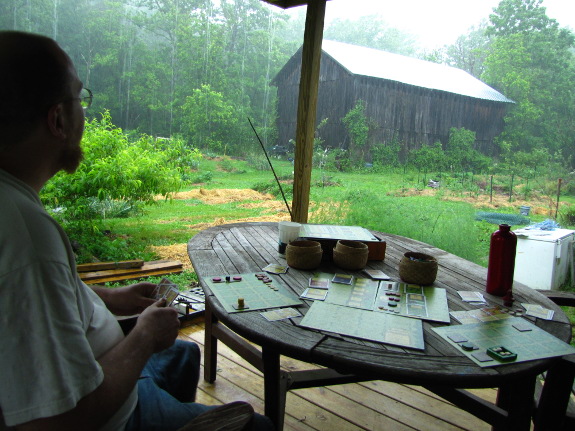
I'm not good at taking
Mondays off, so we worked on Memorial Day. But a rainy
Friday? Sounds like perfect weather for virtual
homesteading.
The porch continues to be one of the
best investments we've made since moving to the farm. On a hot
afternoon, surveying my domain from the porch makes me feel like I'm on
a cruise. And playing a board game with my brother while the rain
pounds on the metal roof reminds me of several happy childhood (and
young adult) experiences all rolled into one.
 Just a couple of years ago,
though, I don't think I would have enjoyed the porch so much.
We've been making an effort lately to spend a bit of energy and money
deleting stressors around the farm, and the attention is really paying
off. First was the barn
roof project, then
Mark took the ninja
blade to the
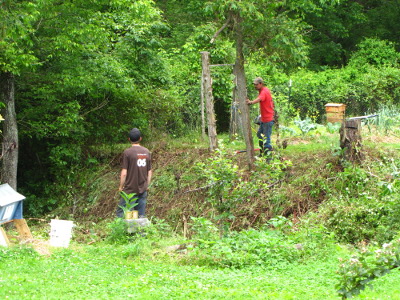
sinkhole, and last week our helper and his stepson cleaned up the rest
of the gully. Mark's fences around
our perimeter also remind me that nothing beyond the fenceline is my
problem.
Now when I look out the
window or off the porch, all I see is beauty and I can relax. I'm
glad Mark has mitigated my idealism enough that I can (mostly) quash my
guilt at hiring in a bit of help and simply enjoy the results.
The new DeWalt hammer drill has a
surprising amount of power.
Switch it to hammer mode and
you'll get a pounding action that makes short work of concrete and
other masonry material.
What I like better than the
extra power is the addition of a handy work light just above the
trigger. Why has it taken so long to come up with this obvious
improvement?
Every garden year is a
little different, which keeps me from getting bored. For example,
during the last few springs and summers, I've been madly picking asparagus
beetles, but 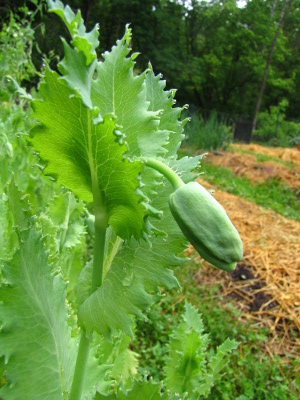 I've only seen a single
asparagus nibbler in 2012. I squashed it, looked ferociously for
more, then shrugged and moved on to other tasks.
On the other hand, I
usually plant seeds for the summer garden and forget about them for a
few weeks until they're ready to be weeded and mulched. Not this
year. Something or other is happily eating my seedlings as soon
as they come out of the ground, not snipping the stems at the base the
way cutworms do, but nibbling off the cotyledons so that sad little
sticks are left behind with no energy with which to grow. Despite
three seedings, I have a total of two cucumber plants in the garden ---
I guess we won't be awash in crisp cucumbers this year. Other
summer vegetables have also been affected, although less
markedly. Luckily, the unidentified nibbler seems to have gotten
sated at last --- my most recent succession
plantings are doing much better.
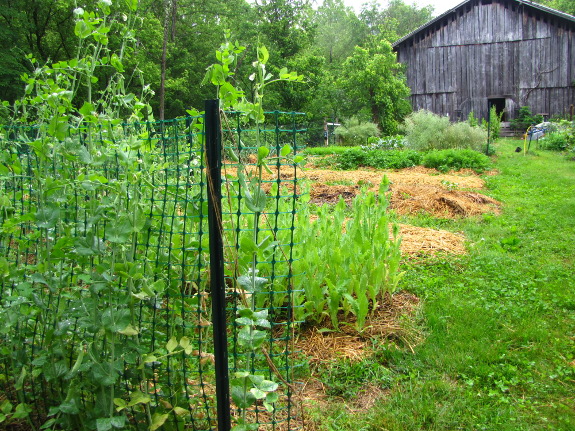
 Meanwhile, a hot spring has
caused problems with early crops. I try to get my broccoli into
our bellies and freezer before the cabbage worms hatch, but that wasn't
possible this year. So I'm picking green caterpillars out of the
broccoli heads (the latter of which are smaller than usual) and hoping
Mark won't notice the missed insects that end up on his plate.
(Note to spouses of gardeners: it's very endearing to find a bug on
your plate and shrug it off as "extra protein".)
 But the hot spring has a
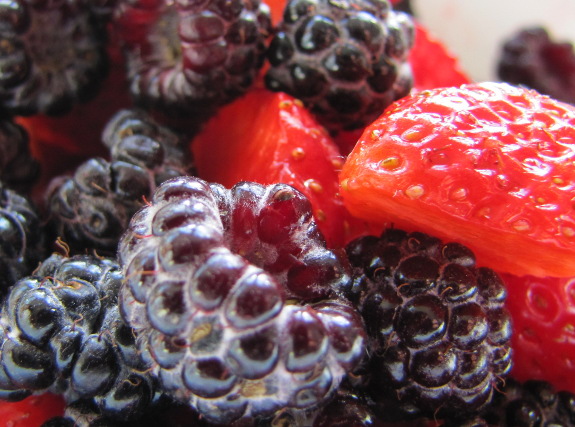
silver lining. Mark and I enjoyed a bowlful of black raspberries
Friday, a treat we usually don't partake of until the end of
June. We're gorging on sugar snap peas, crunching up baby carrots
I thin out of the vibrant carrot
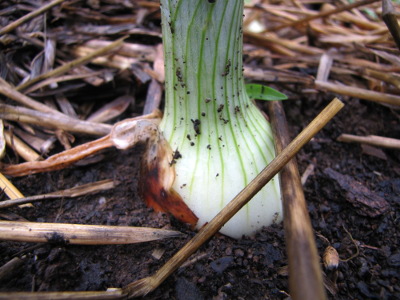
bed, and watching onions plump up for later harvest. And, of
course, the tomato plants are growing like gangbusters --- one currant
tomato is already the size of a pea. Maybe this will be the year
we eat our first tomato in June?
I've decided that the
trick to a successful garden is to plant such a wide variety of
vegetables that no single failure will leave you hungry. That,
plus learning to shrug off problems and to learn from your mistakes,
turns every year into a good garden year.
The battery
powered deer deterrent started slowing down yesterday, which
prompted us to tinker with the idea of charging the battery with a
solar cell.
If you take apart one of
those solar powered garden lights you'll most likely find a AA battery
with a circuit board.
I'm guessing the electronic
parts prevent the battery from being over charged. I know the amps are
different on a D cell compared to AA, but I thought it was worth a try due to the fact that both batteries put out the same 1.5 volts.
The modification was simple. Just pull out the metal battery connectors
with pliers, strip the ends and thread each one through the hole where
the screw usually fits. Snip off the plastic portion where the screw
bites into and then you'll be able to put it back together with just
one screw and the other two deleted.
The other end of the wires get hooked up to the D cell battery.
Drilling a 3/4 inch hole at an angle allows for easy mounting of the
unit while optimizing the solar angle a bit better than just having it
point straight up. I'm thinking the LED light that comes on at night might need to be bypassed to save more juice for deer deterring.
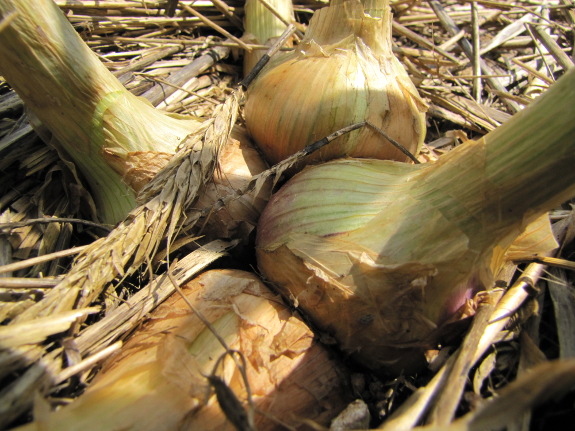
From the number of times
I've posted about them, you'd think that potato onions are a mainstay
of our diet. To follow our adventures from the beginning, read
the posts in this order:
- Potato onions (October 2009)
- Different
kinds of perennial onions (December 2009)
- Potato onion cultivation (June 2010)
- When
to plant potato onions (September 2010)
- Potato
onion bulb size (January 2011)
- Potato
onion failure (June 2011)
- Growing
bigger potato onions (September 2011)
As you can tell if you
follow all those links, potato onions were a cool idea that didn't really pan
out...until now!
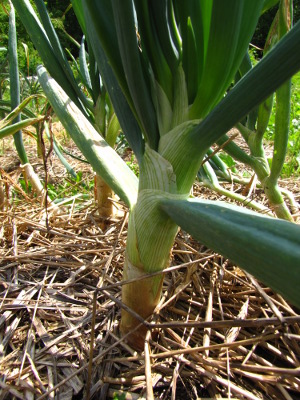 The new variety we planted
last fall --- Yellow Potato Onions from Southern Exposure Seed Exchange
--- are acting more like the books say they should. About a
quarter of the plants simply made one big bulb, and the other 75% have
divided into clusters of four to ten smaller bulbs. Most
important, every bulb looks big enough to be worth peeling, even the
smallest ones.
The great thing about
perennial vegetables is that once you figure them out, they're much
easier to grow than annuals. Take our garlic, for example ---
we'll be pulling
the heads out of the ground this week, curing
them, then planting
the biggest cloves in the fall. That's the sum total
of the garlic workload for the year (except for occasional weeding and
mulching, of course). I want onions to be that simple!
So we won't eat a single
potato onion in 2012. They'll all go back in the ground, where
the big bulbs will (hopefully) turn into lots of smaller bulbs and the
small bulbs will (hopefully) turn into one or a few big bulbs.
Maybe next year (or the year after) there will be enough to eat and I
can stop fiddling with transplanting tiny onion seedlings in the early
spring.
 There are three free book
opportunities today, so be sure to skim all the way through this post,
even if it's boring.
I never heard from
Jason, the winner of last week's free book, so I'm moving on down the
list.
Yesterday's
experiment to power the mechanical deer deterrent with a small
outdoor solar light only helped a little.
I measured an increase in
voltage from 1.21 in the morning to 1.36 just before dinner.
Roland made a good point in
the comment section concerning the danger in charging Alkaline
batteries. The new plan is to try some rechargeable AA batteries we've
got laying around. Eric in Japan suggested two in a parallel circuit
and I think that's the direction I'll start out with.
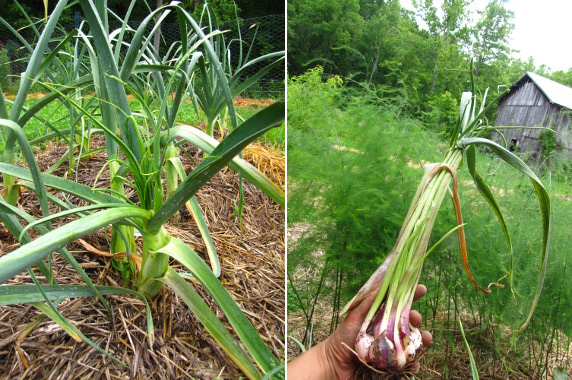
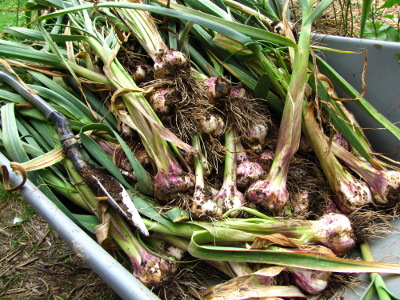 If your garlic looks like the
photos above, harvest it last week!
Don't have a time
machine? Right now will work.
Strange leaves poking
out of the garlic plant's stalk are a sign that the cloves have already
broken through their outer wrapping and sprouted, so the garlic won't
store as well as you would have liked.
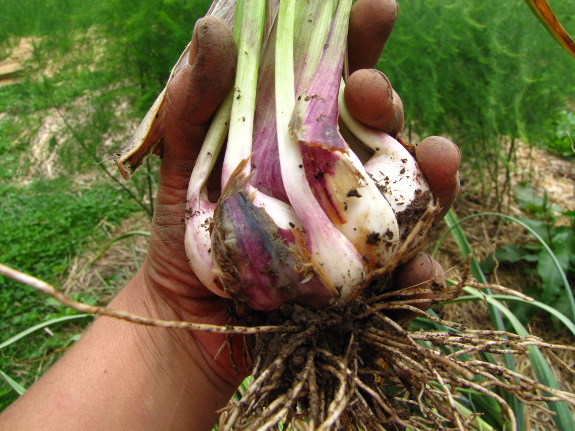
This year, the garlic
harvest snuck up on
me. Usually, we don't dig our garlic until mid to late June, but
a mild winter and hot spring matured the heads early.
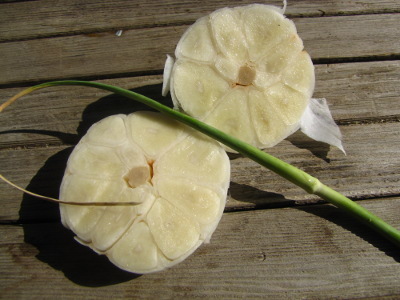 Only
the softneck varieties were precocious, though. That's what
really kept me from digging a test bulb two weeks ago when the garlic
leaves started to look ratty. We hadn't seen any garlic
scapes, so no way
the garlic could be ready, right?
Wrong. Even though
Music (hardneck) and Silverwhite Silverskin (softneck) usually mature
at the same time in our garden, clearly the two varieties handle early
springs differently. So about a third of our softneck bulbs are
going to have to be eaten soon after curing, rather than saved for the
winter.
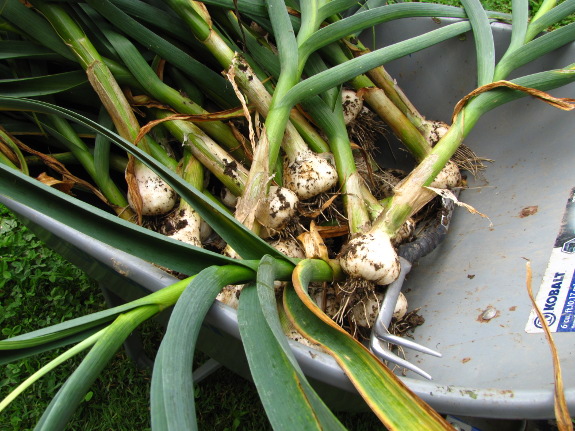
Since I know someone's
going to ask this in a comment --- yes, you can just leave the garlic
in the ground to resprout and grow as a no-work perennial, but I don't
recommend it. If you don't split the cloves apart before
replanting them, a dozen little plants will be 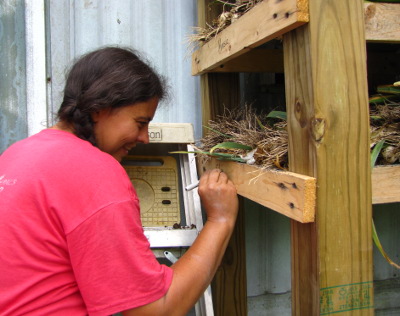 competing with each other in
the same spot and you won't get a good yield next year.
Plus, you can't just go
out in the garden throughout the year and dig a head whenever you want
it. That spicy garlic flavor matures as the bulbs cure over the course of a month
or so out of the ground.
Stay tuned for a later
post about how well our new garlic
curing racks worked!
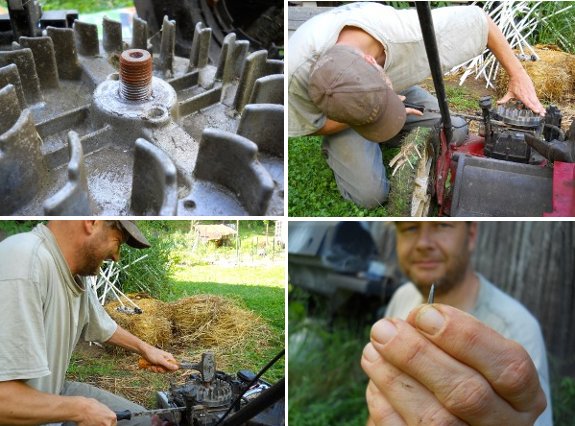
24 inch Pittsburgh pry bar: $4.99
Bostitch AnitiVibe hammer: $23.49
Bag of flywheel shaft
keys: $6.99
Knowing I can do this
operation in the future instead of packing the mower to a local
mechanic: Priceless!
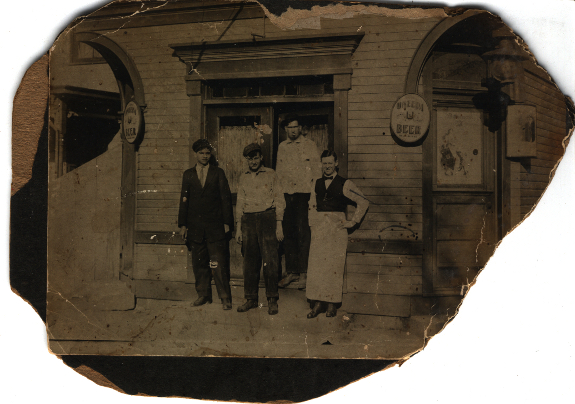
My oldest brother (not
the one you've met here on the blog) is getting married in August, and
he asked for a family geneology as a wedding gift. So I've been
engrossed in old photos and history for the last few weekends.
I'm struck by how
everything is just a story with no clear line between fact and
fiction. Here's a typical tale from my father:
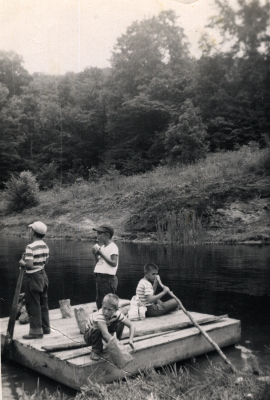 My
great Uncle George, Grandad's brother,
was a noted storyteller, and, some would say, liar. He told me once
about visiting Grandmother Hess's relatives down at the Kentucky
border, the patriarch of whom was Devil Anse Hatfield. I haven't a
clue if what he said was true or not. He told of seeing sun
glinting from rifle barrels as he traveled up the hollow to the
homestead.
My
great Uncle George, Grandad's brother,
was a noted storyteller, and, some would say, liar. He told me once
about visiting Grandmother Hess's relatives down at the Kentucky
border, the patriarch of whom was Devil Anse Hatfield. I haven't a
clue if what he said was true or not. He told of seeing sun
glinting from rifle barrels as he traveled up the hollow to the
homestead.I always took Uncle George's stories with a big grain of salt. He said the Hatfields planted their potatoes in a row going straight up the hill. It was so steep that to harvest them they just dug at the bottom and held a basket when they came pouring out.
But George showed me bear tracks on the riverbank near where he had his garden and showed me how to bake corn in the husk in fire coals. And he told about visiting Devil Anse in front of Grandmother and she didn't deny it.
Daddy also told me about
my great, great grandfather, Hector Horatio Hess, pictured in the first
photo in this post. Hector Horatio was a butcher, baker, and candle-stick-maker...I mean lawyer and
restaraunteer. He was reputed to be able to write two different
letters at the same time, one with each hand, from dictation.
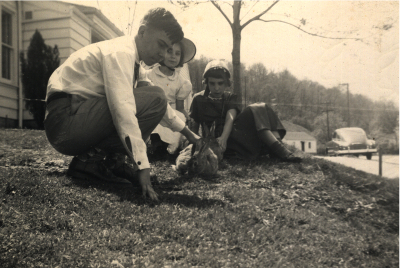 Are these larger than life
characters actually real? Perhaps because my
grandfather on the other side was an engineer, my forays
into geneology are giving me an uncontrollable urge to go measure
something.
(For family members and
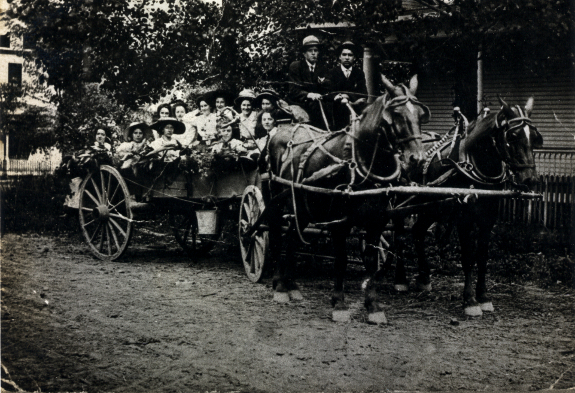
anyone else interested, here are the photo credits: Hector
Horatio Hess is the one in the apron, pictured in front of his
restaurant. The second photo is Daddy as a child with some
friends --- he's the one with the pole. The third photo is my
great grandfather John Hess (the driver on the right). The last
photo is Daddy, Aunt Joyce, and Aunt Jackie in their Easter clothes.)
 In the most relevant section
of this week's Walden passage, Thoreau is caught out in the rain and
takes shelter in what he thought was an uninhabited hut. However,
since he had last been there, "an Irishman, his wife, and several
children" had moved in. Rather than thanking them for their
hospitality for letting him come in out of the rain, Thoreau proceeded
to lecture them about simple living.
I've excerpted the most
relevant portions below (adding in my own line breaks because Thoreau
doesn't believe in short sentences or paragraphs, but I do):
"...That I did not use tea, nor coffee, nor butter, nor milk, nor fresh meat, and so did not have to work to get them; again, as I did not work hard, I did not have to eat hard, and it cost me but a trifle for my food; but as he began with tea, and coffee, and butter, and milk, and beef, he had to work hard to pay for them, and when he had worked hard he had to eat hard again to repair the waste of his system...."
"I told him, that as he worked so hard at bogging, he required thick boots and stout clothing, which yet were soon soiled and worn out, but I wore light shoes and thin clothing, which cost not half so much, though he might think that I was dressed like a gentleman (which, however, was not the case), and in an hour or two, without labor, but as recreation, I could, if I wished, catch as many fish as I should want for two days, or earn enough money to support me for a week.
"If he and his family would live simply, they might all go a-huckleberrying in the summer for their amusement."
 I believe that this passage
strikes to the heart of the problem with the voluntary simplicity
movement. The man whom Thoreau was lecturing had immigrated from
Ireland not long before with his family and probably was in debt as a
result. He (presumably) had no nest egg that would allow him to
buy a plot of land, nor did he have wealthy friends like Thoreau did
who might let him squat on their land for free. What he did have
was several dependents, which added up to a lot more required fish than
Thoreau was reckoning on. (If you read the reviews on Amazon for Possum Living, you'll see similar
complaints about this more modern day manual of simple living.)
I believe that this passage
strikes to the heart of the problem with the voluntary simplicity
movement. The man whom Thoreau was lecturing had immigrated from
Ireland not long before with his family and probably was in debt as a
result. He (presumably) had no nest egg that would allow him to
buy a plot of land, nor did he have wealthy friends like Thoreau did
who might let him squat on their land for free. What he did have
was several dependents, which added up to a lot more required fish than
Thoreau was reckoning on. (If you read the reviews on Amazon for Possum Living, you'll see similar
complaints about this more modern day manual of simple living.)Although Mark and I tightened our belts in a lot of ways most middle class Americans wouldn't consider (for example, choosing in favor of trailer life and not to have kids), we also got lucky. I was about halfway through saving up the $10,000 I reckoned I'd need to buy ten Appalachian acres when a friend of mine came through with a no interest loan that allowed me to purchase a much larger acreage. My friend didn't ask for regular payments while we were spending every penny getting the farm up and running, so we only paid off the last of our debt this year, by which time local land prices had risen precipitously.
So here's the thought question for this week. Can you live simply if you're not at least culturally middle class? Anyone who wants to do further reading might consider the very readable Nickel and Dimed, which explores how hard it really is to live on minimum wage
 if you're starting from
square one. I'll be curious to learn what you all think.
(And, as usual, feel free to also comment on other aspects of the
chapters not mentioned here.)
if you're starting from
square one. I'll be curious to learn what you all think.
(And, as usual, feel free to also comment on other aspects of the
chapters not mentioned here.)If you're new to the book club, you might want to check out the thought-provoking comments on chapter 1, chapter 2, chapters 3 and 4, chapters 5 and 6, and chapters 7 and 8. We'll be discussing chapter 11 (Higher laws) and chapter 12 (Brute neighbors) next Wednesday, and anyone is welcome to join in.
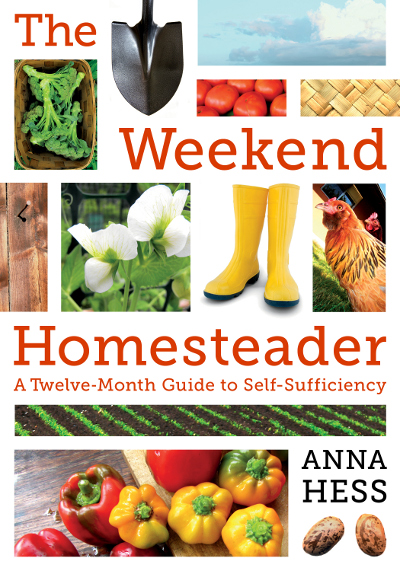
The paperback edition of Weekend Homesteader is full of fun and easy projects that guide you onto the path of self-sufficiency.
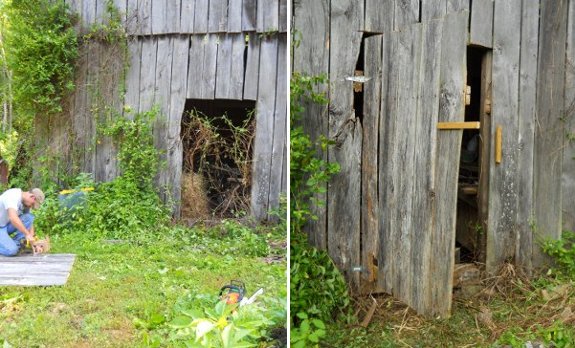
It only took our hired helper
about an hour to cut out and fabricate the above awesome barn door.
Now we can more easily store
straw bales in the barn where they'll feel more comfortable.
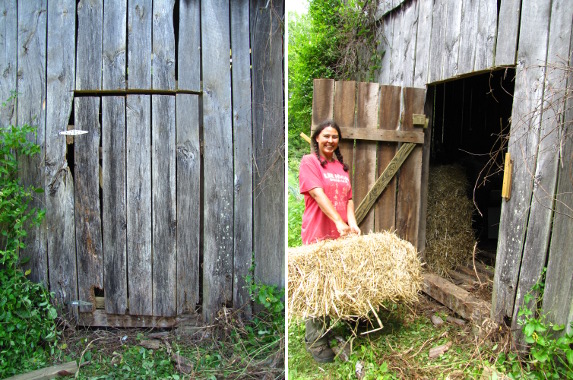
I love straw...
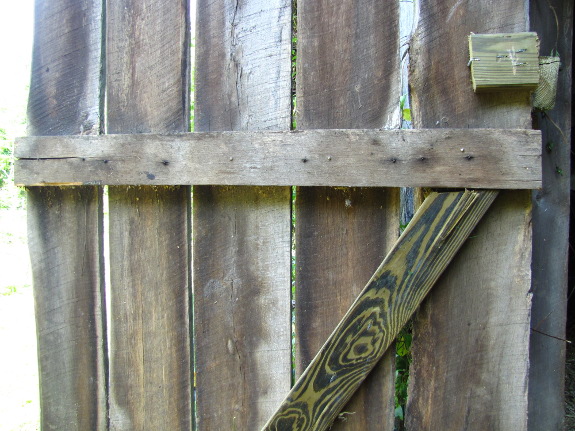
...and I love my new straw door. I call it the Secret
Door because our helper cut it straight out of the wall of the barn, so
the boards line up and you can hardly tell a door's there.
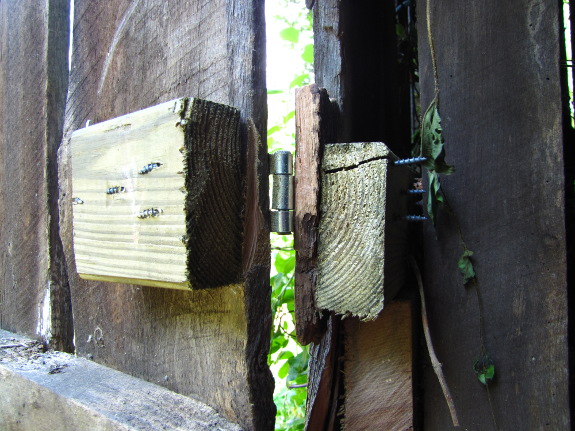
He added a few screws,
two hinges, a bit of a furring strip (for the latch), and a two by four
(to add structure and give the hinges someting to bite into).
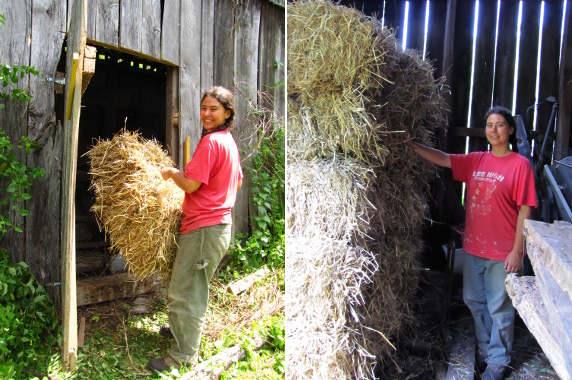
Now I can stack my straw
inside and access it easily for the garden. (Or stockpile it for
later.)
 It's been dry enough to haul,
so we're actually trying to stockpile all kinds of supplies. Our
helper told us about a straw opportunity that's presented a bit of a
conundrum, though.
His friend has dozens of
bales worth of loose straw in his barn to give away. The cows got
in and broke the bales apart and the friend just wants the biomass
gone. Sounds awesome, right?
The problem is that the
straw was grown in rotation with tobacco, which means it's probably
full of tomato
blight. I
honestly don't know enough about the blight fungi to determine how much
would be present on straw --- the fungi only live on members of the
tomato family, but they also stick around in the soil and could have
splashed up onto the straw during a rain. I also don't know how
far I'd need to keep the straw away from a tomato-growing area to
prevent adding more blight to our mix, or how deep in a kill mulch I'd
have to hide it.
So, do I want the free
biomass or not? I'm a bit too giddy with my straw door to think
straight right now. Maybe you can help me decide?
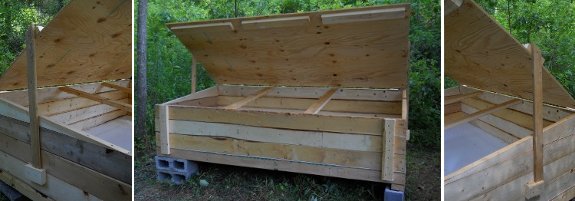
Those green
house tables will live on
as the Cadillac of worm bins.
The above worm enclosure went
together in about 3 hours.
We decided to put a layer of
shower board on the bottom, and a slanted lid should help the water run
off it better than our first
version that had a flat
top.
 Mark
estimates that our
new garlic curing racks might save us about a week
of labor over the course of the next fifty years. I figure he's
not far off.
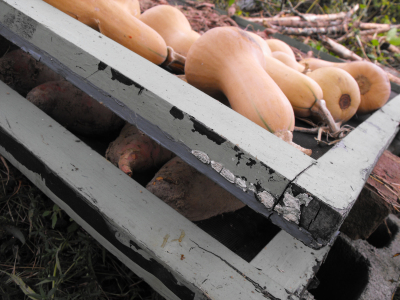
In previous seasons,
I've spent a lot of time hunting around in search of an area to cure
garlic, onions, sweet potatoes, and butternuts. I generally rig
something out of old screens my mom found by the side of the road, in
which case the trouble is ensuring the vegetables don't get rained on.
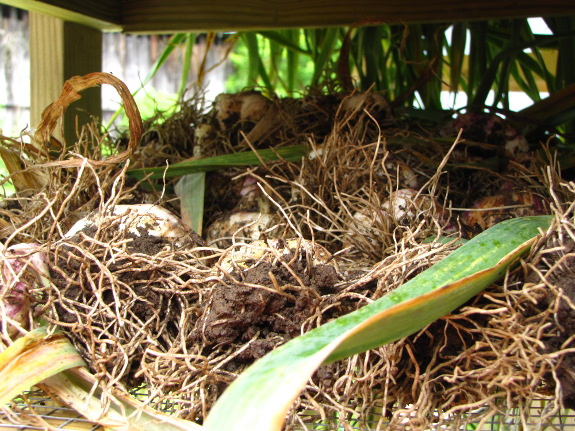
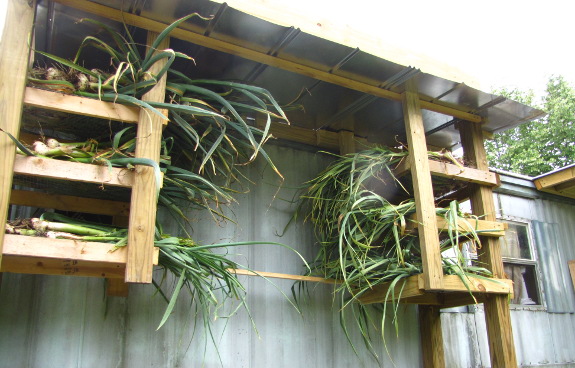
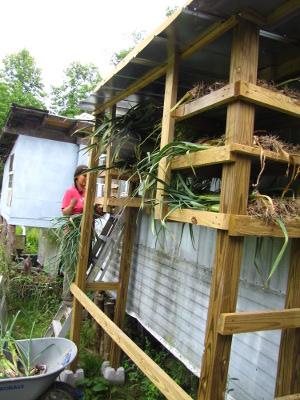 The drying racks our helper
built for us in the solar
tower take all of
the hunting and setup out of vegetable curing. The hardware cloth
bases are strong enough to hold quite a few heads of garlic, while
still allowing for plenty of air circulation, and the roof keeps out
the rain. (We very rarely have blowing rain --- if you do, you
might need to extend the roof.)
The only thing that
didn't quite work as planned is the two by four rungs that I planned to
climb up to put the vegetables in place. It was much easier to
simply lean a ladder against the side of the trailer and go up that
way, which felt much less precarious when I had an armload of garlic.
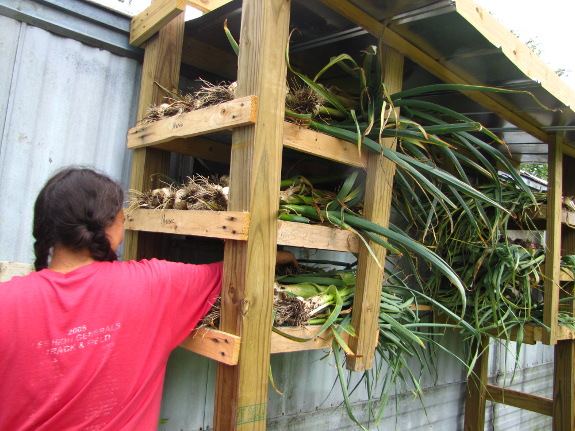
I'm not yet sure whether
we'll have enough surface area for all
of our crops, though. The garlic filled all six racks up to the
brim, and I
might need to cure onions before the garlic is ready to go into
bags.
We'll cross that bridge when we come to it.
It's a genuine thrill to have
all our blueberry
rows layered with cardboard and heavily mulched with 2 year old
wood chips.
Back when we installed
our package
of bees, a reader
admonished us to "FEED, FEED, FEED". The biggest question with a
package is...when to stop feeding. Our reader (Mike)
made the argument that you need to feed for at least seven weeks, since
that's how long it may take for the newly laid eggs to hatch out,
finish their duties as house bees, and then go out into the world to
gather nectar.
Other potential stopping
points some beekeepers use include:
- When the bees stop taking sugar water. This is dicey since some bees will keep sucking up sugar water even if there's a nectar flow.
- When the bees start to produce capped honey. I've used this guideline in the past, but it doesn't work so well for a Warre hive since I can't look inside to tell if there's capped honey.
- When you see the first orientation flight of new worker bees. Despite Mike's math, I started seeing new worker bees going out to forage about four weeks after package installation.
 When you're in the middle of a nectar
flow. Our area has a summer lull at this time of year,
so if I used that standard, I might have to keep feeding until the
asters begin to bloom, or at least until my planted buckwheat
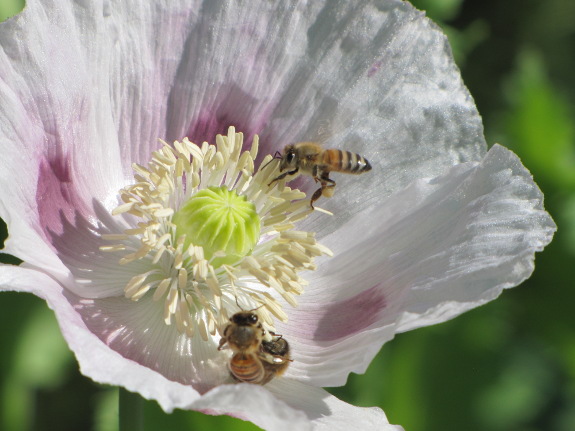
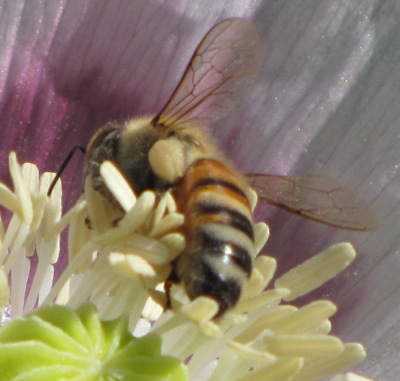
flowers. As you can see from the photos in this post, our bees
are currently going ga-ga over breadseed
poppies, but the bees are only getting pollen from that source.
With so many
contradictory opinions on when to stop feeding bees, I thought I'd
submit the question to the internet hive mind. When do you take
away the sugar water and let your new package fend for itself?
In the past I've sometimes had 8 foot sheets of plywood cut
in half to make for an easier haul back to our home.
Our new helper clued us into
the side mount method. It only takes a minute to set up if you have the
right bungee cords and scrap wood.
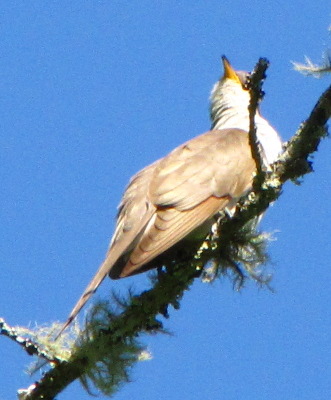 Our readers are very kind not
to call us cuckoo for overbuilding
our worm bin when we
intentionally
underbuild so many
other parts of our farm. (Yes, that sentence is an excuse to
include this bird photo I took while trying to tempt our more skittish
cat out of a tree on
Friday.)
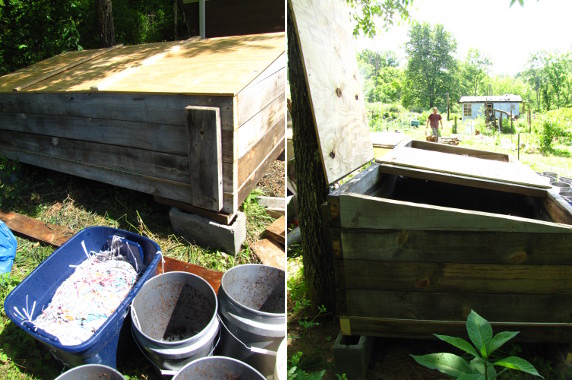
The main incentive for
building an elegant worm bin that will last a hundred years is that we
had some hefty,
free lumber lying
around. But we also decided to take the opportunity to correct
the problems we've noticed in midscale
worm bin version 1.0 over the last year. That's the great
thing about underbuilding the first time around --- you generally get a
second stab at the problem a few years later once you've figured out
exactly how you want to tweak the project to fit your own needs.
(Verison 1.0 is still in
use, by the way --- the Cadillac is merely an expansion of the
vermiculture operation. I'll give you more details of what's
going inside both bins in a later post.)
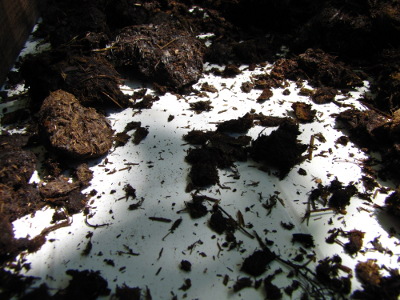 You can see a
supply list and construction notes for our first midscale worm bin here. Version 1.0 was
quick, dirty, and cheap and it (mostly) worked, but the design was
clearly flawed. I thought I'd be able to collect
worm tea, but in
reality, this large worm bin didn't make any liquid (or at least not
enough to collect), so we ditched the false bottom when making our
second bin. Meanwhile, Mark got the bright idea of adding
showerboard to the floor of version 2.0 in hopes of delaying wood rot
in this dampest portion of the bin. Since we didn't want to
pierce the showerboard, that left us without aeration
 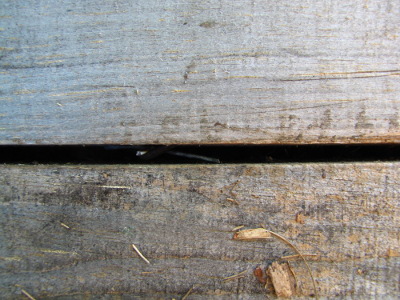 holes, so our helper
suggested spacing the boards that make up the sides about a quarter of
an inch apart to give lots of room for air movement.
From a purely ergonomic
standpoint, I seldom opened version 1.0 because an 8 by 4 foot sheet of
plywood was simply too heavy and ungainly for me to easily handle, even
on hinges. So our helper split the lid on this new worm bin into
thirds, adding braces to the inside of the bin to prevent the second
lid problem we'd noticed --- warping of the plywood. (You can see
the lids well in the top right photo in this post.)
 So
far, the only slight problem I've had with the bin is opening the
middle lid --- my arms aren't quite long enough to really open it all
the way. I suspect we'll find more flaws as we use the bin, and
will make version 3.0 even more efficient. For the moment,
though, Mark and I are both so pleased with our Cadillac worm bin that
we go visit it from time to time and I even dreamed about it Thursday
night. Quite a lot of excitement for our quiet farm!
Imagine how ecstatic we'll be when we actually seed the bin with worms.
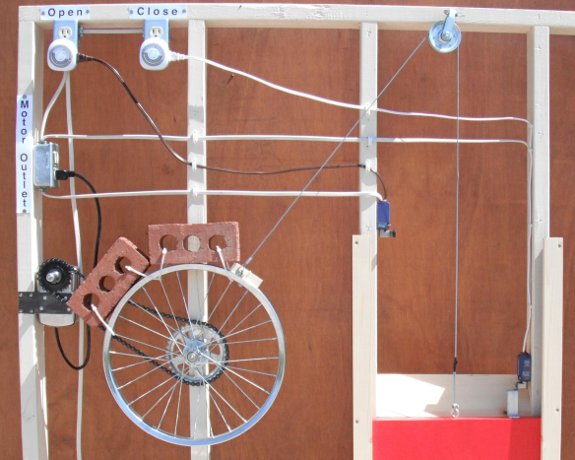
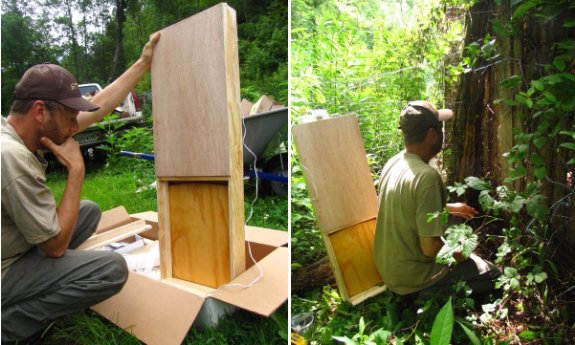
Our pre-made
automatic chicken coop door
is coming up on its one year anniversary next month and is still going
strong.
I noticed a new DIY approach
this morning from Phillip Reed that captures my attention for
multiple reasons.
1. Parts are common and low
cost.
2. Design seems solid, safe,
and long lasting.
3. He offers detailed
instructions in Ebook or paperback.
In my opinion Jeremy at AutomaticChickenCoopDoor.com is still the best option for
those who want an out of the box solution that is ready to go in
minutes, but the above design might be a good place to start for those
do it yourselfers who have a little extra time to tinker on such a
project. I would imagine Phillip Reed's instructions could end up
saving 4 or 5 hours of trial and error depending on building
skills.
--- Maurice Grenville Kains in Five Acres and Independence
We don't have this
problem (except possibly during strawberry
week). Even
the hungriest city dweller is generally deterred by the alligator swamp.
Luckily, I'm becoming
better and better at tempting true friends to make the trek, bringing
me closer to my goal of never leaving the farm but still keeping in
touch. Heather is one of our favorite
visitors, and I totally lost track of time while chatting with her on
Saturday. (We both just thought it was getting cloudy...not dark.)
Thanks for coming,
Heather! And don't forget that guest post you promised me about
books for the beginning gardener.
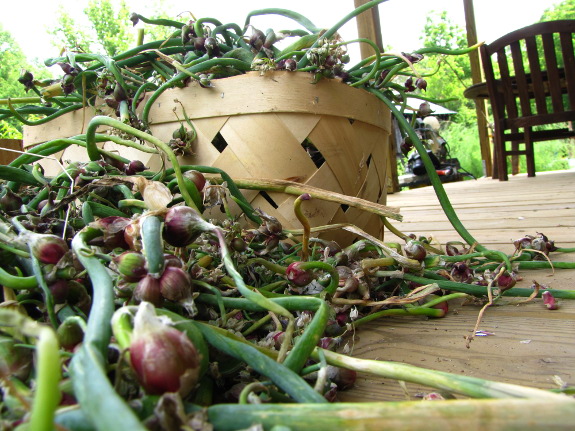
It's that season again
--- time to send Egyptian onion top bulbs out to take over the
world! I've already given away two brimming bagsful, but as you
can tell, there are still plenty left.
(If you've never met
these delightful perennial onions, you can read more about
them here.
There are no purchase buttons on that page because I think I'm going to
save all of  the onion bulbs to give away
this year, unless my readers get sated and stop taking them.
Speaking of which, if you're someone I see in person and would like
some Egyptian onions for your garden, just drop me an email and I'll
set aside some for you before I give the rest away.)
To be entered in our
Egyptian onion giveaway, download
Microbusiness Independence from Amazon today, then leave a comment
on this post to let me know you've entered. I've set it up so our
oldest ebook is free today
and tomorrow, so
this is a great opportunity to learn our tips on becoming financially
self-sufficient.
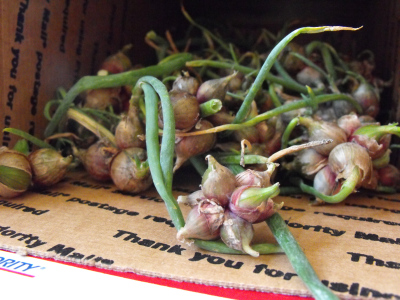 Rather
than selecting only one winner, I'll choose five commenters at random
to win a small flat rate box full of Egyptian onion top bulbs.
This is enough to feed a large family all of the green onions they can
eat, or to spread some starts around to your gardening buddies.
Be sure to comment by
midnight on Tuesday, June 12, and then check the comments on Wednesday
to see whether you won. Our Egyptian onions are looking forward
to exploring their new homes!
The Stihl FS-90R trimmer/weed eater has been with us for about a year
now and still starts on the first or second try. We made a bit more
progress on reclaiming
the gully today thanks to its power.
I recently considered
upgrading the grip to what Stihl calls a "Bike handle". I heard
there was a conversion kit, but our local Stihl dealer said that for an
extra 40 dollars from what the kit cost you could buy a whole trimmer
with the bike handle installed and ready to go.
She also told me that bike
handle grips are good for level situations where you find yourself
"mowing" for long stretches of time, but if you've got hills then the
two handed grip tends to wear on your back more than the loop handle.
We've got plenty of elevated weeds here, which is what convinced me to
forget about the bike handle.
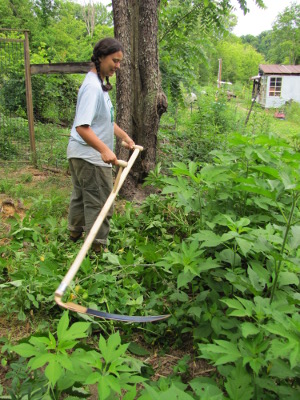 A lot of people buy an Austrian
scythe because they want to replace their weedeater and/or
lawnmower with a hand tool. Why use gasoline when you don't have
to?
Although I agree with
that logic to some extent, Mark has turned me into a realist when it
comes to homesteading tools. If a hand tool takes a significant
amount more muscle than a power tool, I might choose the power tool.
On the other hand, I
also factor in the long term effort involved. If I'm afraid of
the power tool, can't get it started easily, or can't fix common
ailments myself, I might find it simpler in the long run to use a hand
tool. That's why our
tool kit contains a mixture of power and hand tools, into which the scythe slid
gracefully.
So which power tools
does the scythe replace, and when? Pros use their scythe to mow
the lawn, but I have to admit that I find the lawnmower much easier in
that respect. On the other hand, the scythe is great on rough
terrain or when cutting tall weeds that would bog down the mower.
There, Mark would turn to the weedeater, but that tool fails all
three of my power tool tests, so I stick to the scythe. (Despite
being scared of the weedeater, I wouldn't try to use my scythe for the
tasks Mark turns his ninja
blade to --- really
heavy duty brush is a job either for power tools or for slow and steady
work with loppers and a hand saw.)
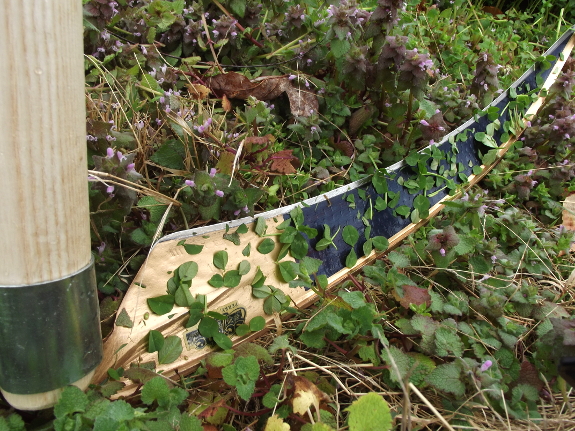
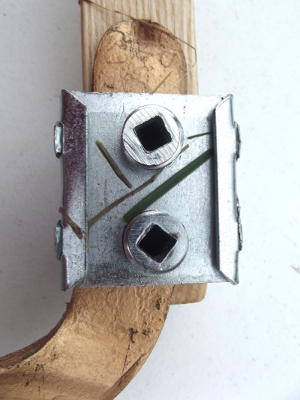 Even if you like your
weedeater, you might find a scythe handy in certain situations.
Scythes cut right where you tell them to without shredding the severed
plant to bits, so they're great for harvesting grain and cutting
comfrey for mulch.
My scythe also makes it easy to mow with more discernment, a boon in my
complicated forest gardens and pastures, where I might want to leave a
berry plant to finish fruiting, mow red clover at six inches but
ragweed right at the ground, and be able to feel that I'm hitting a
fallen branch before damaging my tool.
(I can't say for sure
that a weedeater can't do all those things --- I've hardly used
one. But I can tell you for sure that it's easier for me to
scythe my complex pastures than to explain to Mark how I want them cut.)
Now for the downsides of
the scythe. You need to commit more time to learning the craft,
paying special attention to sharpening the blade. On the other
hand, while you can just start a weedeater and let her rip, you'll
still have to take the tool in for a tuneup from time to time if you
can't figure out how to clean the air filter, change the spark plug,
etc. 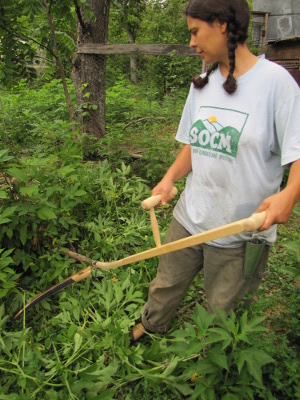 In the long run, I think that
a scythe requires less knowledge to keep the tool running at its best
than a weedeater does, unless you're already an expert at small engine
repair.
I was also disappointed
to discover that scything is very wrist intensive. I'm prone to
carpal tunnel flareups, which is why Mark splits all the wood around
here. While not nearly as bad for my tendons as splitting wood,
half an hour of scything is really all my wrists can handle before they
begin to protest. This is a problem because scything is extremely
addictive and fun, and it's hard to make myself stop once I've started!
I'm sure I'll discover
additional pros and cons of the scythe as I use it more. I
haven't quite put in the eight hours required before I need to peen the
blade yet, so take my advice with a grain of salt. Maybe other
scythe-users will chime in with the times they choose to (and not to)
use their scythe.

A small breeze on a hot day
can sometimes feel like a gift from the wind gods.
I was a bit dubious of the
clip on solar hat fan, but it looked so cool I decided to get two.
The fan is weak, but you do
feel wind blowing right up close where it counts the most. The sound
might annoy some folks, but a loud lawn mower and ear plugs can fix
that. A wide brim hat allows for 360 degrees of placement choices, but
it also works with a more conventional baseball cap.
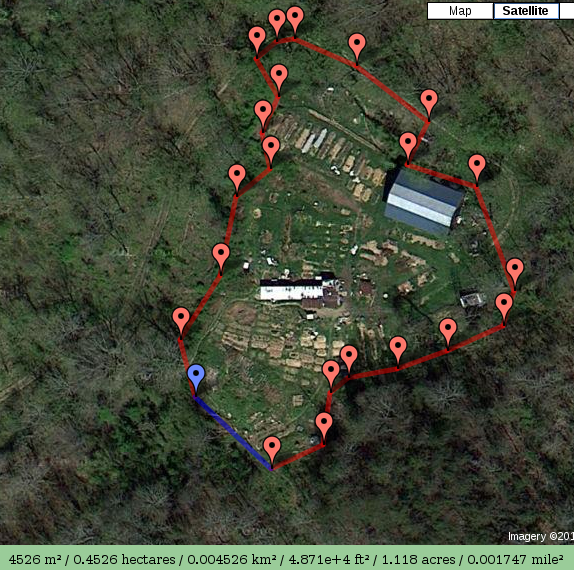
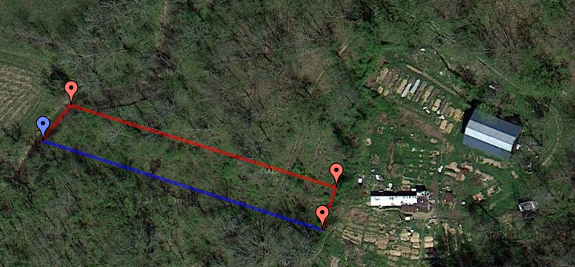
Thanks to google planimeter (and some awesome new maps,
updated this April!), I can answer Roland's
question about how much land we use to grow our own food. The map above shows
our total footprint on the land (minus our driveway, hunting area, and
woodlot, but including the house and barn) --- 1.118 acres.
Here's a breakdown of
the purposes to which we put that land:
| Use |
Acres |
Pastures:
|
0.1371 |
Vegetable gardens (including
strawberries and potatoes):
|
0.23275 |
Forest garden:
|
0.16535 |
Berries
|
0.04779 |
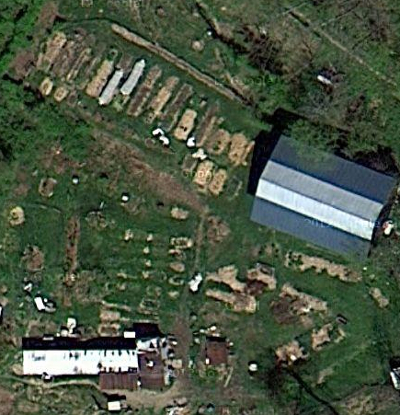 These
numbers only add up to about half the total acreage of our core
homestead because they don't include areas like the gully, trailer,
barn, woodshed, water tank, etc. That said, I have included
paths, both for people and for the golf cart.
These
numbers only add up to about half the total acreage of our core
homestead because they don't include areas like the gully, trailer,
barn, woodshed, water tank, etc. That said, I have included
paths, both for people and for the golf cart.I did some extra math, which I'll post on our chicken blog next week, and came to the conclusion that we outsource 0.36486 acres of growing land to the producers of our chicken feed, and perhaps that or a little more to the growers of our straw. Since you get both straw and grain from the same field, I'm not counting the straw figures into our land area. Nor am I counting the acreage on which the horses who give us our manure graze since manure is considered a waste product of their operation.
 We still buy a lot of fruit,
but that's because our orchard is young. I think our current forest garden
and berry patches will sate even my frugivorous appetite once
everything is mature. We will probably expand our berries a bit
more to fill in gaps, though.
We still buy a lot of fruit,
but that's because our orchard is young. I think our current forest garden
and berry patches will sate even my frugivorous appetite once
everything is mature. We will probably expand our berries a bit
more to fill in gaps, though.More relevantly, we buy red meat from a friend, and I don't have any data on how much land and grain she uses to produce that meat --- maybe another half acre? I'm not going to factor in the small amount of dairy products, flour, peanut butter, nuts, cocoa, sugar, and spices we get from the store --- that's beyond my math skills and we could do without if need be. (Except the chocolate -- can't do without that!)
So, to answer Roland's question, if we grew our own chicken feed but stopped eating everything else from the store, we'd be using just shy of half an acre (0.2 hectares) apiece to feed ourselves. This is the exact amount of arable land per person Roland estimates the world currently contains. I'm pretty sure whoever came up with those numbers didn't include steep grazing land in their arable land figures, so Mark could probably get away with adding in his red meat by raising sheep on the hillside. (Actually, I'm not so sure that any part of our property was included in the arable land estimate.)
I was thrilled by the
interest in our Egyptian onion giveaway! Zoe, Charity, Jeff,
Denise, and Jeremiah --- please drop an email to anna@kitenet.net and I'll put
your onions in the mail to you Friday.
For everyone else who
entered, I'll see how many onions are left once I box those up and will
consider another giveaway. My father has kindly offered me his
top bulbs (from descendants of my onions, of course) to spread the
species yet further, so we may have enough between us for another
giveaway. Stay tuned!
 There's
so much to talk about in chapters 11 and 12 of Walden that I'm not quite sure
where to focus my energy. I could take the easy way out and write
about chapter 12, how the mouse that Thoreau befriended is like the
tree frog that lives beside our spigot and the phoebes we watch heading
into the barn with bugs for their chicks. Or I could go in the
opposite direction and tear apart Thoreau's belief that "all sensuality
is one; all purity is one", by which he means that in order to be
spiritually pure, we have to mortify our senses with plain food and
drink and complete chastity.
But I'll instead take
the middle road and write about a tangential topic that I found more
interesting:
 "...when some of my friends have
asked me anxiously about their boys, whether they should let them hunt,
I have answered, yes, --- remembering that it was one of the best parts
of my education --- make them
hunters..."
"...when some of my friends have
asked me anxiously about their boys, whether they should let them hunt,
I have answered, yes, --- remembering that it was one of the best parts
of my education --- make them
hunters...""We cannot but pity the boy who has never fired a gun; he is no more humane, while his education has been sadly neglected. This was my answer with respect to those youths who were bent on this pursuit, trusting that they would soon outgrow it."
 In fact, Thoreau believed
that he owed his own deep appreciation of nature to a boyhood spent
with a gun in his hands. He wrote that hunting and fishing "early
introduce us to, and detain us in a scenery with which otherwise, at
that age, we should have little acquaintance."
In fact, Thoreau believed
that he owed his own deep appreciation of nature to a boyhood spent
with a gun in his hands. He wrote that hunting and fishing "early
introduce us to, and detain us in a scenery with which otherwise, at
that age, we should have little acquaintance."Long-time readers of the blog will know that I've gone through an extensive series of thought processes about hunting. When I was in elementary school and lived on my parents' farm, our closest neighbor would go out and kill turkeys and deer, and we kids would vilify him for it, calling him Gargamel. (Gargamel is the evil enemy of the smurfs, in case you didn't watch the same cartoons I did as a child.)
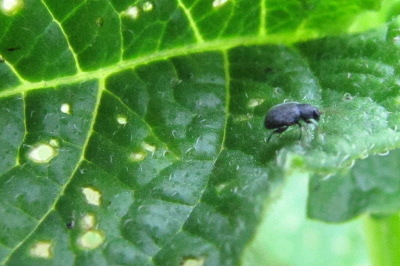 Soon
after college, I spent a few years wandering around peoples' land
telling them what plants and animals they had, and I began to realize
that the hunters I bumped into were (usually) more in tune with the
wild areas than the city folks who came out to enjoy my interpretive
hikes. The latter liked the easy and fun ecological stories, but
the hunters had a deeper appreciation for the entirety of the
ecosystem, along with a vested interest in the land that made them want
to protect it. (I also decided that hunting was an excuse for
macho men to spend time looking at butterflies and flowers without
being deemed sissies, but that's not as relevant to this post.)
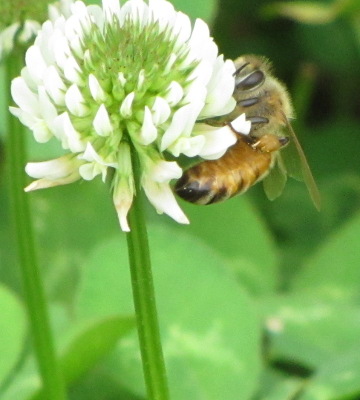 Years later, I learned to kill, gut,
and cook deer that
wandered into our garden. I slowly morphed from being a pure
preservationist who believed that the best thing humans could do to
nature is to fence it off and leave it alone, to a permaculturalist who
believes that humans are a part of nature --- still bound to protect
it, but from within, not from without. In the process, I felt
like I developed a deeper appreciation for wild things, and an
acceptance that nature doesn't have to resemble a museum-perfect
painting to be valid.
Years later, I learned to kill, gut,
and cook deer that
wandered into our garden. I slowly morphed from being a pure
preservationist who believed that the best thing humans could do to
nature is to fence it off and leave it alone, to a permaculturalist who
believes that humans are a part of nature --- still bound to protect
it, but from within, not from without. In the process, I felt
like I developed a deeper appreciation for wild things, and an
acceptance that nature doesn't have to resemble a museum-perfect
painting to be valid.While those epiphanies probably would have come anyway if I'd never picked up a gun, I suspect that Thoreau is right that hunting can help speed the nature appreciation process along. What do you think? Would you rather have Junior playing video games on the weekend, or out hunting squirrels on the back forty? Is nature better appreciated from within, or from without?

If you're new to the book club, you might want to check out the thought-provoking comments on chapter 1, chapter 2, chapters 3 and 4, chapters 5 and 6, chapters 7 and 8, and chapters 9 and 10. We'll be discussing chapter 13 (House-warming) and chapter 14 (Former inhabitants; and winter visitors) next Wednesday, and anyone is welcome to join in.
The paperback edition of Weekend Homesteader is full of fun and easy projects that guide you onto the path of self-sufficiency.
The current chicken
pasture I'm working on is a challenge due to 90 percent of it being
on a steep hill.
It should make it harder for
deer to find their way down to us. I would guess over half of all our
deer incursions came from this direction.
We planted a cherry bush in
this area which is looking good and should be an excellent source of
protein for our flock once the cherries start dropping.
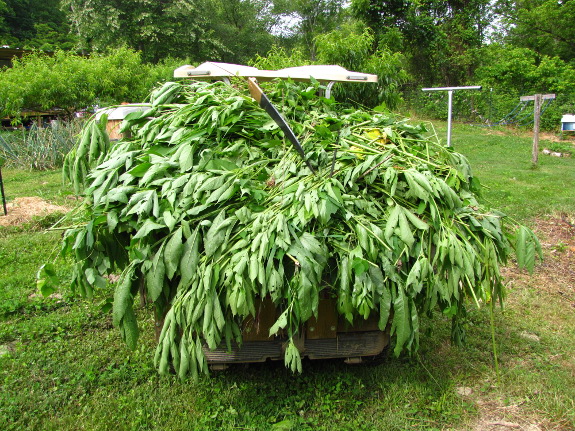
Our farm grows wingstem
and ragweed better than anything
else. Although our honeybees visit the flowers, we don't get
any other products from these acres and acres of
wildflowers...until now.
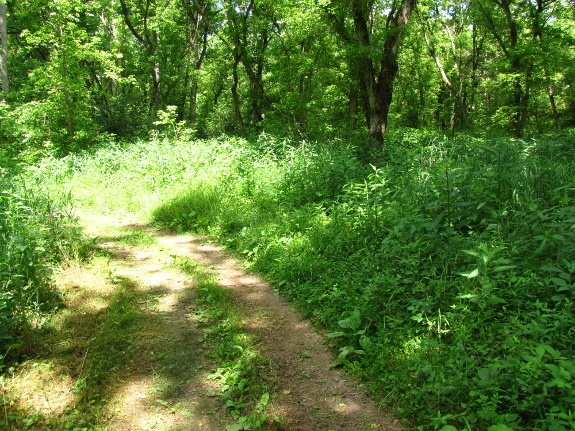
 The tall weeds that line our
driveway have always looked like an opportunity, but I never could
figure out what they were an opportunity
for. One winter, I gathered the dead stalks and sent them through
our shredder/hammer
mill, but the
process took forever and I was worried that the seedy mulch would cause
problems.
At this time of year,
though, ragweed and wingstem are shooting up fast and have no flowers
or seeds in sight. Add in the scythe and a bed of raspberries
that the chicks had scratched nearly bare, and I thought I might have
figured out my opportunity.
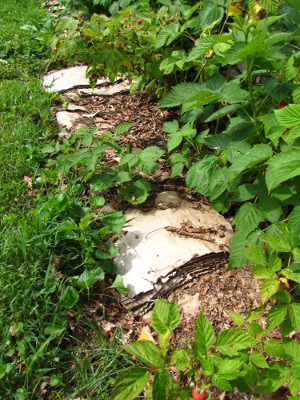
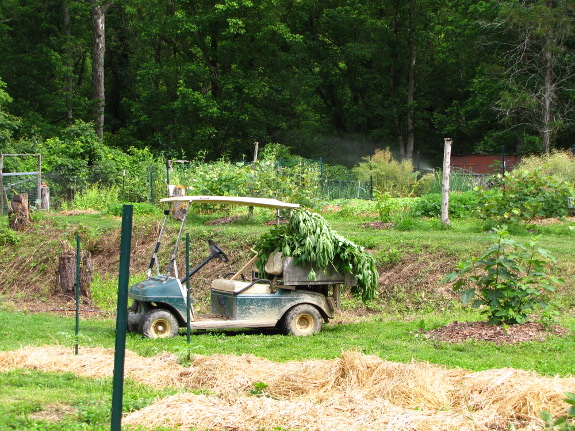
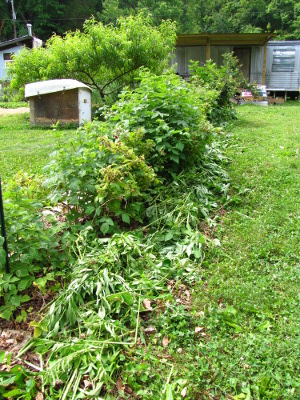
It took me about an hour
(and two big golfcart loads) to cover up the cardboard of my kill mulch
with a new organic layer. I mulched very thickly since I know the
weed leaves will wilt down to nearly nothing, but I hope the stems will
be enough to provide a long-lasting mulch. That means it took
just a bit longer to mulch the row than if we'd hauled buckets
of composted wood chips from the parking area, but only about half as long
as raking
leaves out of the woods.
 The trick to speedy weed
gathering was to hit spots right along the driveway where partial shade
keeps the vines down and allows the scythe to make short work of the
weed stalks. Actually, I spent a lot more time collecting the
weeds off the ground than cutting them down, meaning that if I wanted
to build a grain
cradle for the
scythe, I could probably become significantly more efficient.
I also suspect that I'd
get more biomass for my effort if I waited another few weeks until the
weeds were starting to bloom. At that stage, they'd be higher in
carbon, which would make the mulch last longer while encouraging
beneficial fungi in the soil. Right now, the shaded wingstem and
ragweed in the woods are between three and five feet tall, but they'd
be bigger at bloom time.
I'll try to remember to
report back once I get an idea about how well the weeds work as
mulch. I'll probably repeat the experiment in a few other patches
in the meantime --- scything combined with the golf cart is too much
fun to pass up.
The chicken
cherry pasture got a little bit more fenced in today.
I started out this morning
using the solar
clip on hat fans, but took them off because of the noise. It's not
that the fan is really all that loud, but it's very close to your ear and it
makes it hard to hear if someone is talking to you. It was also messing
with my normal, tranquil, happy feeling by reminding me of a brief job
where I worked at an extremely loud spring factory in Xenia Ohio.
My conclusion is that the
solar clip on hat fans are awesome when mowing or running similar
equipment where the fan noise gets drowned out by a louder machine.
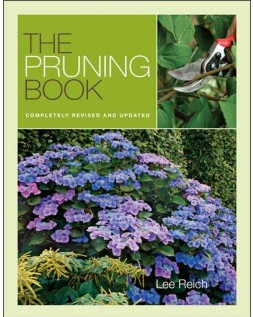 Lee Reich's The
Pruning Book is
worthy of a lunchtime series, but it's summer, so you'll just get a
review with a few choice tidbits. I thoroughly enjoyed the book,
from the structure (30 pages on pruning basics, then sections on each
type of plant you might want to prune) to the visuals (which include
both informative drawings and photographs). I've always liked Lee
Reich's method of researching and presenting facts, but still inserting
bits and pieces of personal experience, and this book was no exception.
None of the information
in The
Pruning Book is particularly earth-shattering, and you can find most or
all of it on extension service websites. In fact, that's how I've
been garnering my pruning information so far --- in bits and pieces
from short articles. However, reading the same information in
book form, I connected dots I hadn't realized needed to be connected,
for example realizing that pruning a hedge follows many of the same
rules as pruning a fruit tree. In both cases, you need to start
training the plants during the first year, and to prune so that light
hits all parts of the plant. (As a side note, The
Pruning Book has more information on
hedges, pollarding, and espaliers than I'd found anywhere else.)
Do you understand why a
heading cut makes plants bush out while a thinning cut merely redirects
energy to existing limbs? Did you know that thinning young fruits
not only ensures the remaining fruits are larger, but also that the
tree doesn't decide to skip fruiting next year? I'll regale you
with more tidbits as I summer prune our orchard and berry patch over the course of the next week.
Although I suspect I'll
outgrow this book in two or three years, at the moment it's found a
place on my permanent bookshelf. Now, if I could just find an equally good book about grafting....
It felt good to finish up the
fencing on the new chicken
cherry pasture today.
I think I've got all the
bottom gaps closed up, but the real test will be to let the flock forage through it to see if any of them get out.
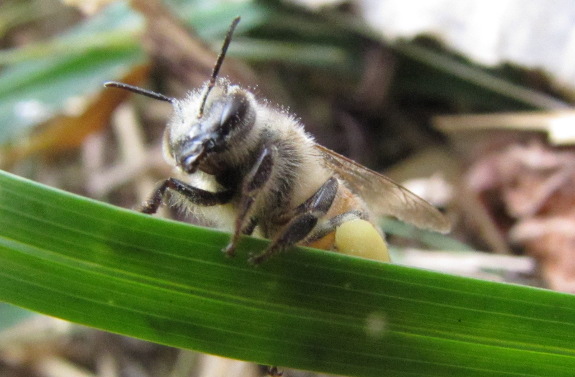
Although we've only had
it for a short while, I can tell the Warre hive is good for my beekeeping
skills. I never even considered taking
photographs through the screened bottom of my Langstroth hives
because I knew I could just take the boxes apart whenever I felt like
it, but the camera and I have been making regular visits to the Warre
hive to see what's going on inside. Lately, I've taken to
pressing my ear up against each box too, which gives me an indication
of where the bees are actively working. All of this data without
bothering the bees at all!
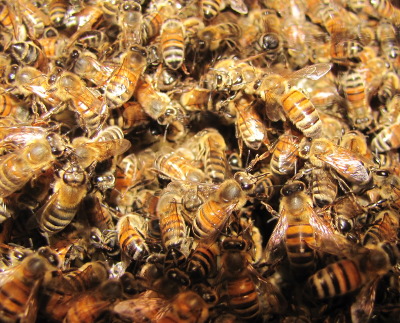 Just this week, the colony
has finally moved down into the new
box we gave them three weeks ago. The slow movement
downward tells me that my weight-based guess was right --- the bees
hadn't worked on the top box yet at the time we nadired a new box
underneath.
Listening at the hive
Friday morning, the bottom box roared with bees building comb, the
second box roared with bees feeding brood, and the top box produced
more of a gentle growl. I suspect that the bees are using their
attic to dehydrate nectar into honey, thus the lower activity levels up
top.
In other bee-related
news, I never did make a decision about how
long to feed our package of bees. As a result, I'm
splitting the difference between the two extremes by letting the colony
wait a day or two after each infusion of sugar water. The white
clover is blooming pretty well, but it's been awfully dry here for the
last couple of weeks, and I'm just not sure how much nectar the flowers
are producing. My first buckwheat cover crop will probably start
blooming in a week or so, at which point, I might cut the bees off
their sugar water.
Our flock was a bit timid
about exploring their new free
range chicken pasture this morning, but after an hour of coming out
and running back in it seems they've decided to make themselves at home.
External deadlines make
me nervous, so I try to avoid them at all costs. When I was in
college, I was the one who wrote my paper the weekend before even
though it wasn't due  until Friday, and I now weed
and topdress new garden beds the week before they're supposed to be
planted so that the seasonal deadline doesn't creep up on me.
But sometimes you can't
avoid deadlines, and this weekend is one of those times. My
editor emailed me the final draft of The Weekend
Homesteader for
corrections, due Monday. Sure, I could have argued that I wrote
into my contract that I had a month for this stage (mostly because I
thought they'd mail proofs and I was afraid a flood might slow things
down). But I'd rather have the manuscript zip over to China ASAP
so the presses will start rolling.
 So I've broken one of our
farm's cardinal rules and am working during the weekend.
(Watering the forest garden by hand too, to give me a break between
chapters.) Now that I'm 75% of the way done, the stress of an
external deadline is finally lifting off my shoulders, but I don't
think I'll have any extra deep thought to spare once I get the book off
my plate.
Which is all a long way
of saying --- we're taking a week's vacation from Walden.
I hope you don't mind the extension. Go enjoy your garden instead!
Still no no signs of deer
damage to the garden this year.
I finally got around to
upgrading the solar
powered deer deterrent from the Alkaline D cell to a pair of
rechargeable AA batteries just in case we need a mechanical deer
deterrent on short notice.
The batteries were a little
undercharged at only 1.2 volts, but I'm trying a series circuit which
will double that to 2.4 volts DC. My thinking is that the motor stops
turning just under 1.3 volts, and even though it turns a bit faster
with 2 batteries it's not too fast and the increase should help boost
the longevity factor.
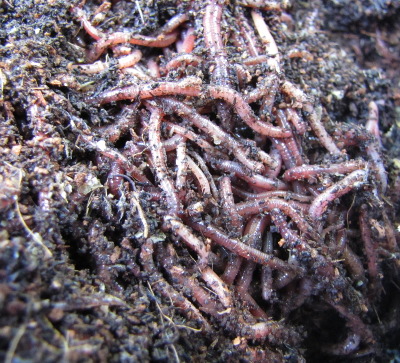 You
may recall that we've done several experiments with worm bins. In
2009, we had a small,
under-the-sink worm bin, which dwindled away because
we gave all of the worm-worthy scraps to the chickens, except for the
one thing chickens won't eat --- citrus peels. Unfortunately,
citrus peels also turned out to be the one fruit scrap that kills worms.
We started again last
year with an ambitious project of collecting food scraps from a local
school to feed a larger worm bin. That
project failed for various reasons, so we filled the bin back
up with horse manure and  bedding, which resulted in
some great
worm castings this
spring. (We got another ten buckets of castings between the time
I wrote that post and the time I'm writing this one.)
But, once again, I made
some mistakes. We located our large worm bin out by the parking
area --- perhaps a third of a mile from our core homestead --- because
we wanted to be able to put food scraps into it from the school even
when the driveway was impassable. In permaculture terms, I think
of the parking area as zone 3 or 4, and a worm bin is more of a zone 1
or 2 project. Worms don't need as much care as your chickens or
vegetables, but good vermiculturists probably open the lid at least
once a week.
The result of placing
the bin so far from home is that it got neglected. I should have
refilled the bin early this spring with fresh manure, which would have
tempted the worms to reproduce and expand from their small winter
population. Instead, they were looking for food in their own
waste, and the number of worms dwindled yet further. There were
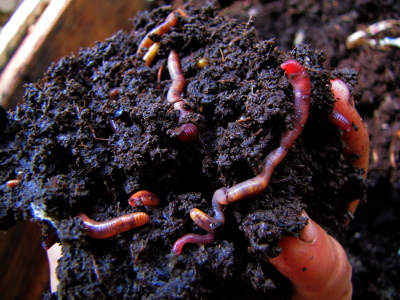
still enough  worms present to seed the new
manure we added to the bin a couple of weeks ago, but not enough worms
to move some to our new
Cadillac worm bin.
So we bought more
worms. We'd lost the contact information for our
local supplier, so
settled on buying two pounds of worm castings online. That's not
nearly enough worms for such a huge bin, but I don't really need the
castings until next spring, so I figure they've got plenty of time to
fill the space. I also added some soaked, shredded paper since
the horse manure smelled a bit like ammonia, a sign that it doesn't
have enough carbon and is outgassing precious nitrogen into the air.
(I also figured the paper would give the worms a safe place to hide if
the relatively fresh manure gets too hot for them.)
Meanwhile, Mark talked
me into building more worm bins (with the number yet to be determined)
as a way of stockpiling compost so that it improves with age. We
never 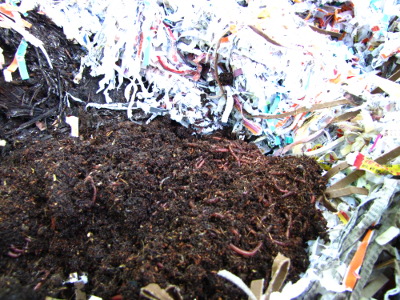 know when we'll be able to
drive biomass in and when we won't, so it's a good idea to work ahead,
but it's just sad to see last year's manure piles sink into the ground
before they can feed the garden.
Even Mark blanched,
though, when I told him it would take at least ten big worm bins to
ensure I had enough compost for a solid year. Maybe we'll just
build another one or two for now....
We had our helper build
another worm
bin today.
He took some initiative and
improved the lid so it can easily be held up with the above side pieces.
It's the best worm bin yet,
and we still plan to build more.
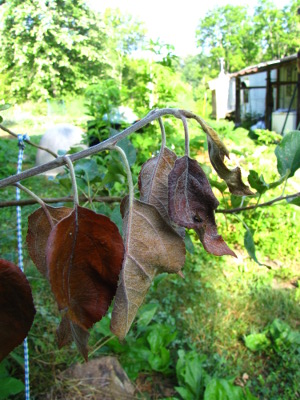
My topworked
pear trees were a
spectacular failure. The trees came down with fireblight, and I
stuck my head in the sand so long they managed to pass the bacteria on
to the apple trees.
I started out blaming
the scionwood source since we'd never had fireblight on our farm
previously. However, some research made me rethink that and start
pointing the finger back at myself. It turns out that extremely
heavy pruning makes it far more likely you'll get fireblight in your
trees, and my topworking involved some very heavy pruning. (I'm
surprised the information I read on topworking pears didn't include
that warning, but I guess the websites were geared at commercial
orchards who spray antibiotics.)
 Meanwhile, something about
the spring weather also seems to have promoted fireblight. My
sister called me to say that her pear trees 90 miles away are so badly
fireblighted, she might have to cut them down. Like me, she'd
never seen fireblight on her farm before, and she didn't do any crazy
topworking. So it's possible that the disease would have struck
whether I pruned heavily or not.
Better late than never,
I pruned out all of the damaged branches. But I still might have
to cut my pear trees down too since the trunks have lesions all the way
to the ground. I'd just assumed one of our cats was using the
trunk as a scratching post, but closer examination suggests the wounds
are more likely to be another symptom of fireblight.
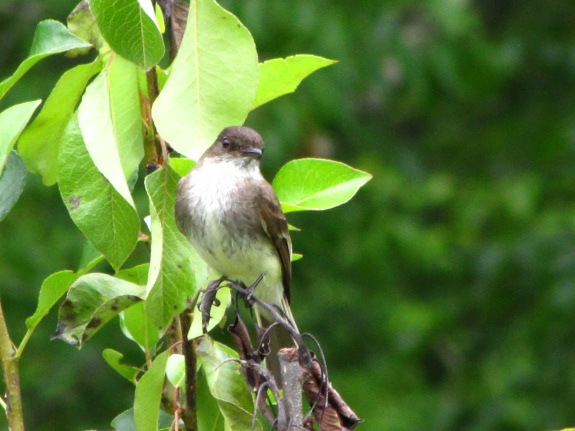
The good news is that
the phoebe pictured at the beginning of this post seems to be taking a
major dent out of our Japanese
beetle population
this year. A pair of the insect-eating birds is nesting in the
barn, right next door to our grapes (also known as "Japanese beetle
mecca"). In previous years, I've picked huge numbers of beetles
off the row of grapes, but this year there only seem to be a few
beetles...and lots of bird droppings. If only the phoebes would
head over to the raspberries and continue their good work!
Our helper Bradley was kind
enough to bring his gun cleaning kit over today and gave us a crash
course in proper cleaning procedures.
I've heard some folks say you
can use WD-40 to clean a gun. Bradley says that will work in a pinch,
but WD-40 tends to attract dust and lacks a teflon component that most
gun oils have.
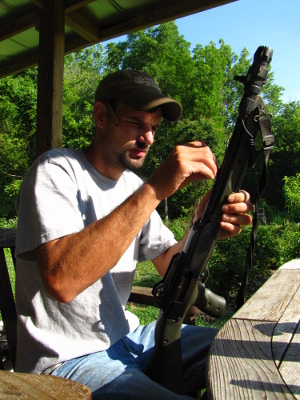 Although I've killed
two deer, I wasn't
raised with guns and have a sinking feeling I'm missing some important
safety points. So I was thrilled when our new helper (who said we
can start using his name: Bradley) brought his
gun-cleaning kit and
showed us how to keep our tools in good working order.
Except for needing some
special lubricants and a $20 cleaning kit, the procedure didn't look
all that daunting. Bradley wiped the guns down, cleaned out the
barrels (both with a soft swab and with a twisted wire brush that gets
powder out of the grooves), and sprayed a bit of lubricant inside to
sit overnight. He told me that (with a plain old rifle, not a
muzzle-loader), he cleans his guns twice a year when they're not in
use, then quickly cleans the barrel after every tenth bullet or so.
Bradley had good advice
for improving my marksman skills as well. I hardly practice
because the bullets for our 40 caliber rifle are expensive, so he
recommends a 22 rifle for target 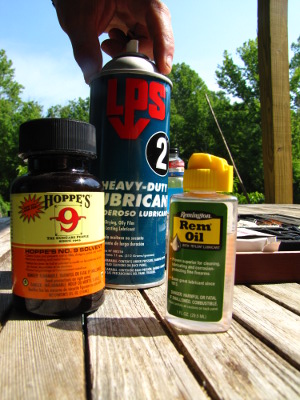 shooting. He also
promised to come by the next time we shoot a deer and teach us the
field dressing methods he learned at his father's knee, which get the
meat in the freezer in 15 minutes flat.
In other blood-thirsty
news, a couple of weeks ago, we saw a rabbit in the garden for the
first time in years. The rabbit got scared and ran into the
chicken pasture, where the poor thing battered itself against the
corner in vain. I wanted to kill it and see what rabbit meat
tastes like, but wasn't sure if that was legal out of season.
I emailed the Virginia
Department of Game and Inland Fisheries with my question, and they
wrote back:
The issue of
out-of-season rabbit hunting is actually up for interpretation in
Virginia due to the complexity of the rule book, but if the officials
say I can kill rabbits out of season on my land any way I want, I'm not
going to look that gift rabbit in the mouth. The next bunny in
the garden will have to beware. (We'll probably try to live trap
it instead of shoot it, though. I don't think I'm a good enough
shot to kill a running rabbit.)
 My
Side of the Mountain
by Jean Craighead George was one of my favorite books twenty-some years
ago. Since I'm taking a quick vacation from
Walden, I couldn't
resist rereading this fictional account of a boy who follows in
Thoreau's footsteps and carves a livelihood out of the woods.
With adult eyes, I see
that the author was purposefully referencing Thoreau. In fact,
her book seems to capture many of the best parts of Walden without descending into
long-winded philosophizing. 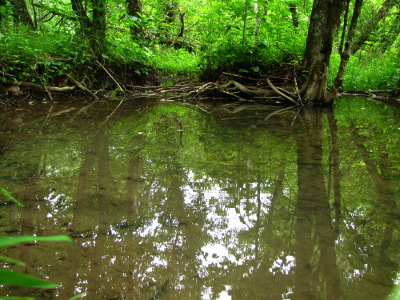 And,
unlike most kids books I reread, My
Side of the Mountain seems to have improved with age.
So, if you're one of my
many readers who started Walden and then gave up in disgust, here's a
book I can whole-heartedly recommend to take its place. Wild
edibles, animal snares, hiding from authorities, and much more.
Just as inspiring now as when it was written over fifty years ago.
Plus, I just realized there's now a sequel!
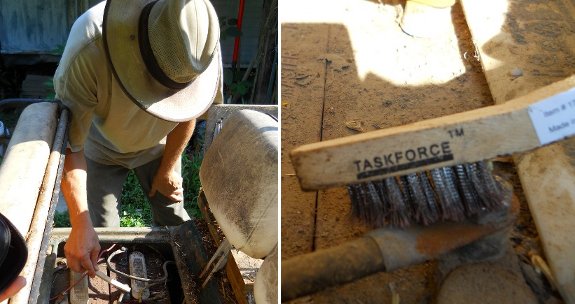
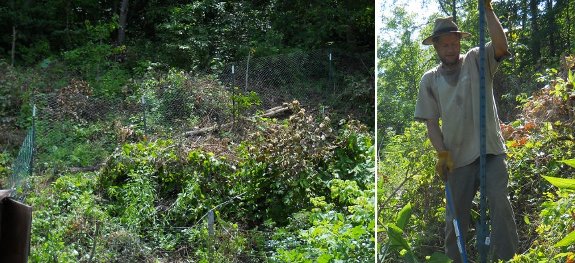
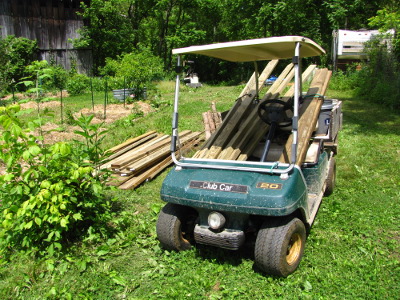
Regular golf cart terminal
brushing can prevent battery acid cavities.
We've been trying to brush
off the gunk build up before it starts to weaken the metal.
I think it's going to help
extend the life of the battery wires.
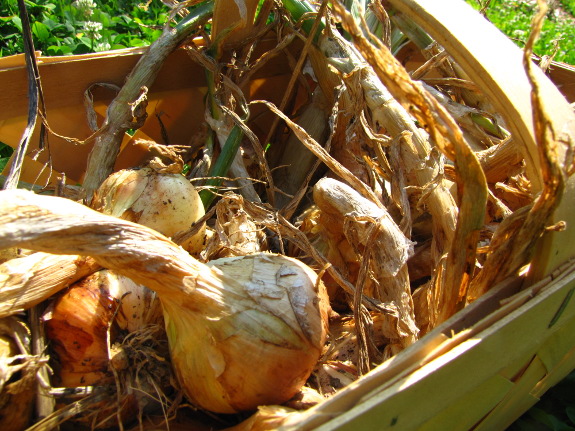
 They'll lose some weight once
they cure and I cut off the leaves, but right now I'm very pleased with
the yield from our potato
onions. I
started out with 8 ounces...and ended up with 8 pounds.
All are going back in
the ground this fall. If they grow as well next year as this
year, we should harvest 128 pounds of onions and be able to stop
starting the vegetables from seed. Maybe in two years, I'll have
potato onions to give away to my favorite blog readers.
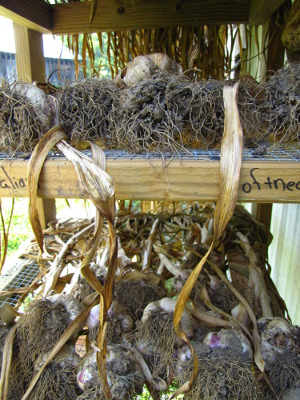
The garlic isn't quite
ready to bag, but is dry enough that I felt okay about doubling up two
racks to give our potato onions a spot to cure. Our seed onions
need a few more weeks in the ground, so by the time that harvest comes
in, our curing
racks should be
empty and ready to reuse. Now I'm looking forward to the harvest
rather than dreading the chore of finding curing areas!
In the beginning we used 12
gauge galvanized wire for trellis support because someone had given us
what was left of a roll.
After several years of
experimentation I'm ready to say 14 gauge wire is easier to work with
and seems to be more than strong enough.
I might switch back to 12
gauge if our rows were longer, but we don't have any large scale
orchard plans like that.
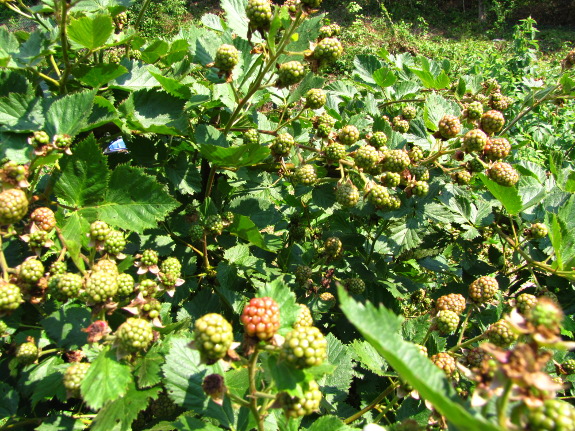
As
you can see, we're
working on getting our perennials back in good order this month.
The brambles quickly expand out of their allotted rows if we're not
careful, but a bit of tip-pruning and tying up sets them
straight. I'm actually in awe of the effects of tip-pruning since
the blackberry canes I snipped last year have turned into compact
shrubs nearly solid with berries --- I'll try to remember to take
another photo in a couple of weeks when the berries are ripe so you can
get a better idea of what the plants look like.
Working with our trees
in the summer still gives me fits, though. The Pruning
Book didn't present
much information about summer pruning, and I haven't found many tips on
the topic in The
Holistic Orchard
either. (I've only poked through the index of the latter, though,
not read the book from cover to cover. I can tell it's an
eye-opening book, but haven't had the brain power to settle in for a
solid read this week.)
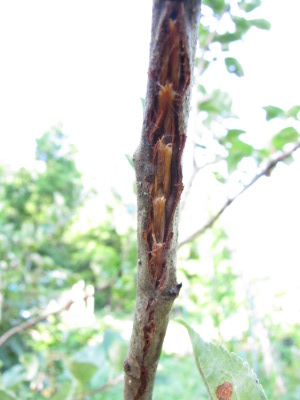 One
thing I'm sure of --- I should prune out diseased or insect-ridden wood
whenever I see it. The dead peach twig tips from oriental
fruit moth are easy
to distinguish, but I got stuck on what to do with them after
cutting. I'm hoping that if I drop the twigs to the ground and
cover them up with a healthy dose of wood chip mulch, the larvae inside
will perish due to lack of nutrition. I may regret taking this
lazy way out, though.
Meanwhile, I'm
second-guessing my diagnosis of fireblight. Although the symptoms
looked right on the pears and apples, I saw identical bark lesions on
the peaches and noticed dead twigs and leaves that looked the same on
the blueberries. Since fireblight isn't supposed to hit those
other species, I'm a bit stumped. Could the issue be as simple as
frost damage after all? But if so, why did it spread?
Then there are
watersprouts. I learned from The
Pruning Book that
it's best to yank out the entire watersprout, getting the base so that
it doesn't regrow. I couldn't seem to develop the knack for
ripping the twigs without stripping the bark on the branches left
behind, though, so I simply pruned watersprouts off as close as I
could. I do feel better about this method than about my
previous crazy technique of cutting the watersprouts off a few inches
above the branch ---
that type of heading cut just makes one big watersprout turn into five
small watersprouts.
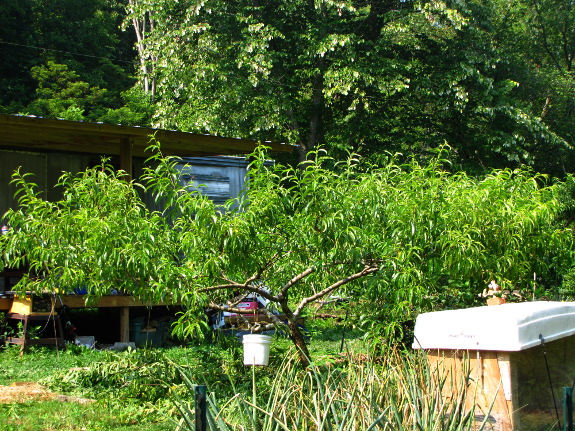
 Still, my peach trees look
awfully naked with their tops cut off. I'm only about 45% sure
I'm doing the right thing there, so please do your own research before
following suit. A few more years of trial and error may be
necessary to figure out the best methods of summer pruning peaches.
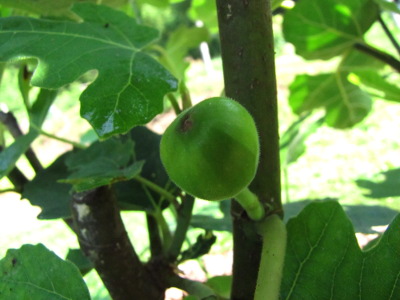
(P.S. Look!
It's the year of the first homegrown figs on our farm! Assuming
nothing happens to the cute little fruits before they ripen, that is.)
I've often felt like this
front area space could be better utilized.
We had our helper Bradley
fabricate the above front end box to further increase our hauling
capacity.
He's also upgrading the
springs to handle more weight and the home
made golf cart dump box
is getting some improvements. Stay tuned for a complete post on how
that operation went.
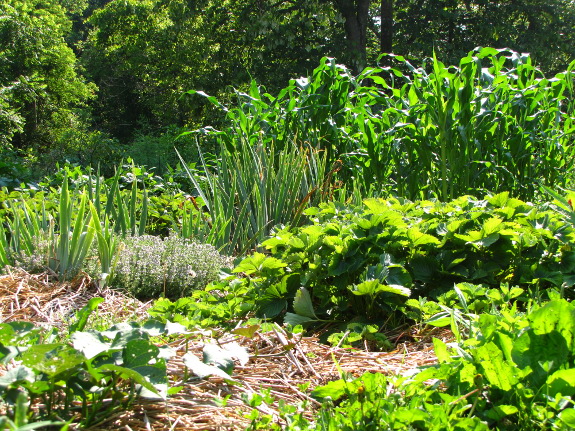
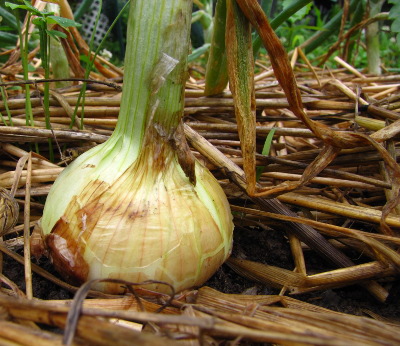 I celebrated the solstice
with a Walden Effect shower. Here's how to play along at home.
(Yes, I know this is a
bad idea, so don't sue me if you get struck by lightning. But it
sure is fun!)
First, move to a farm
out in the middle of nowhere so you have no neighbors.
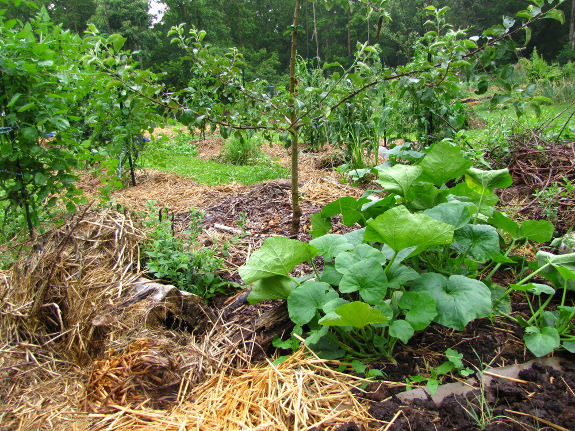
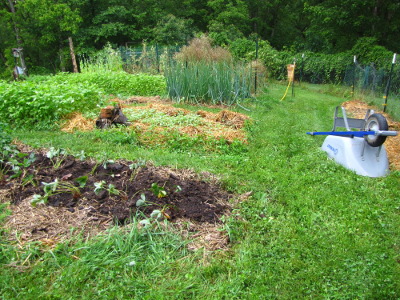 Now wait until a thunderstorm
is getting ready to roll in. Grab those strawberry
transplants you
pulled out of a bed earlier and head out into the garden with a trowel
and bucket of water. As the wind picks up, stick strawberry
plants in the ground and wet them well --- every gardener knows that
watering your garden is a sure-fire way to make it rain.
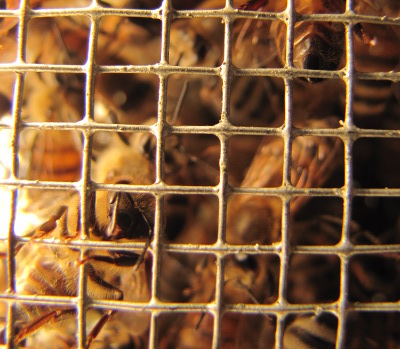 Once the skies open up, rush
back to the porch. Shed clothes and grab shampoo as water begins
gushing off the roof and onto your head.
You might have to hop to
the side a bit if a gust of rain moves your water supply. It's
always a good idea to egg on the storm at this point, too, and to tell
it how good of a job it's doing (or to remind it that it can rain
harder!) Even your long-suffering husband won't hear your crazy
hoots over the din of water hitting a metal roof.
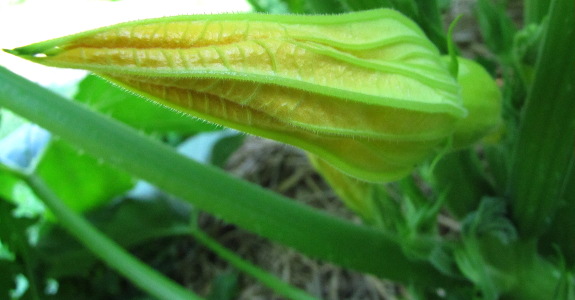
If the rain stops before
you're clean, hose off and head inside to listen as the thunder rolls
away into the distance. You should now be totally relaxed and
ready to spend a blissful evening watching lightning bugs.
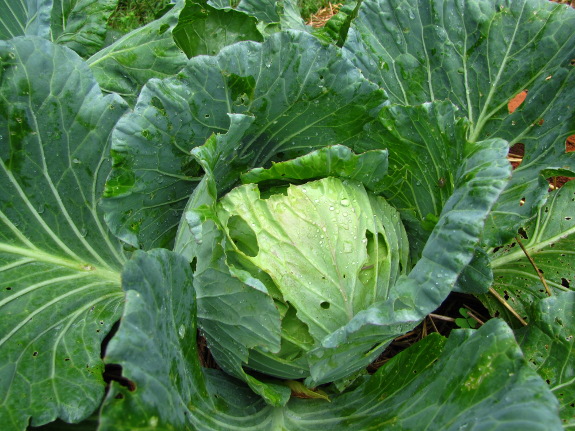
Since my mother would
have a heart attack if I included any relevant photos, I've instead
inserted shots of the summer garden before and after the storm.
We'll be eating summer squash, green beans, (caterpillar-nibbled)
cabbage, and blackberries within the week, and are still enjoying Swiss
chard, carrot thinnings, parsley, basil, thyme, cucumbers, red
raspberries, and the last of the lettuce, snap peas, broccoli, and
black raspberries. The bounty doesn't quite feel like an
overflowing summer feast yet, but it's getting close.
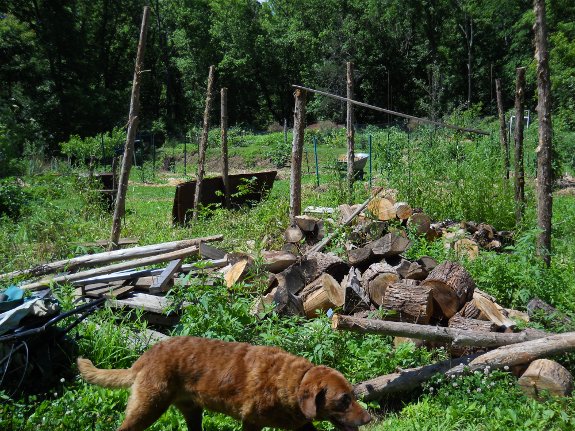
We were trying to expand the
size of our woodshed this week, but had to stop half way through due to
several angry wasps.
Funny how an overdue summer
Solstice storm decided to
strike on the week we started this project.
Luckily we have all summer
for the wood to dry back out.
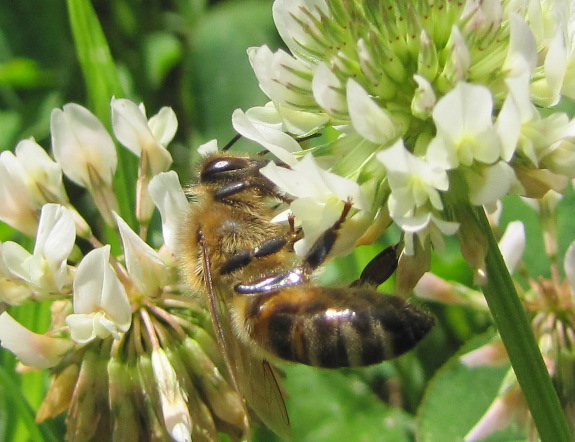
I suspect my
gut feeling about the white clover was right, specifically that dry
weather made the plants slow down their nectar production. My
data is simple --- few bees on the 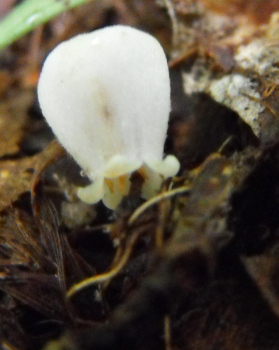 clover last week, then a buzzing clover patch
after four thunderstorms dampened the soil more recently.
Meanwhile, the first
feeding frenzy for our Warre hive has
begun. I don't think most of the bees zipping in and out are
going to clover, though --- sourwood
petals on the path denote the bloom period of one of our
bees' favorite plants. With my buckwheat buds starting to burst open too, I finally feel confident I can stop feeding the bees, at least for a while.
Some friends of ours have
harvested all they can handle from their blueberry crop and called us
up to see if we could find a home for these tasty treats.
We picked and picked and then
picked some more.
The current plan is to save
some back for dessert through the week, share some, and make the rest
into our first batch of blueberry fruit leather.
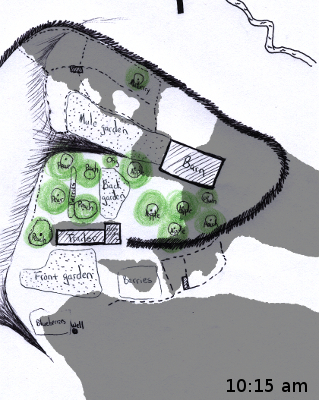 They sell fancy gadgets to
map the sun patterns in your yard, but it's not too tough to simply jot
down shade outlines on a map a few times a day. I opted to
measure at 10:15 am, 1:30 pm, and 4:30 pm to get a good overview of the
peak sun hours. (Well, to be honest, I forgot I'd planned to make
a sun map or I would have drafted an earlier morning map as well, and
by supper-time, I wanted to be done with the project.)
My goal was to figure
out which parts of the yard count as full sun, partial sun, or full
shade around the summer solstice. When gardeners talk about full
sun, they mean an area that receives at least 6 hours of direct
sunlight during the peak sun period (when you'd want to be wearing
sunscreen): between about 10 or 11 am and 4 or 5 pm. Partial
shade/partial sun generally refers to 3 to 6 hours of sun, with less of
an emphasis on getting that sun during peak hours. (In fact, some
partial shade plants 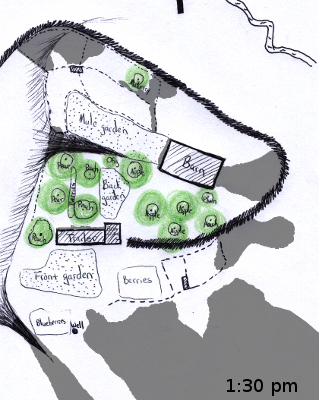 might burn to a crisp in
bright afternoon sun.) Full shade generally means that an area
only gets light dappled through trees, perhaps with a couple of hours
of direct sunlight.
When naming the type of
sun in your garden, though, you also have to take your distance from
the equator into account. There's a reason that growers in
equatorial areas came up with the concept of forest
gardening and placed vegetables under their trees --- scorching sun
in Mexico might be so extreme that "full sun" plants would prefer quite
a bit of shade during the early afternoon. On the other hand, if
you live in Alaska, I'm not so sure that an hour of sun around noon
would even count as half an hour of full sun.
Finally, there are more
complex issues to consider. Plants prone to fungal diseases (like
tomatoes) really should get hit with
sun early in the morning to dry off their leaves. 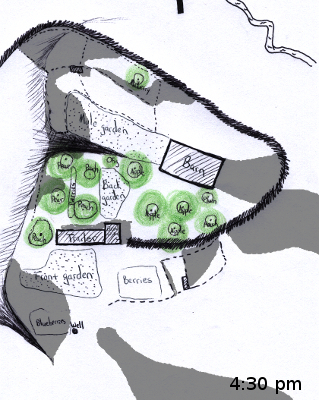 Meanwhile, I'm considering
planting a peach or two in an area with only afternoon sun to slow the
trees down in the spring so their flowers don't get nipped by
frost. And partial shade can be handy for eking spring crops out
in the summer heat, especially if the vegetables are only bearing
leaves. (Leafy vegetables, in general, need less sun than
vegetables who will be asked to produce fruit.)
If you have a graphics
program that allows layering and transparency (I use the free program
GIMP), it's simple to merge all of your day's maps together and decide
which parts of your yard get what kind of sun. As you can see
from the composite image below, our clearing in the forest gets full
sun only in the very center, with the east end shaded by trees in the
morning and the west end shaded in the afternoon. The powerline
cut provides a bit more 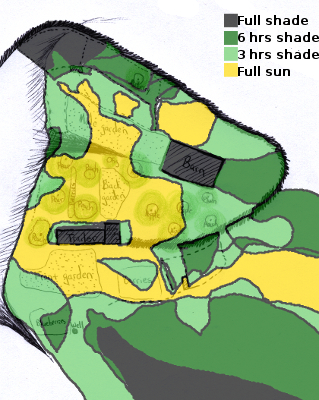 of
a full sun zone, and the spot behind the barn where we recently felled
some trees to dry up the barn wall has a little pocket of full sun as
well.
Of course, the patterns
change dramatically throughout the year, so I'll make another map at
the winter solstice, if I remember. (Maybe at the equinoxes
too.) I know
from the melting pattern of snow that the sunniest winter areas are quite different from the
sunniest summer areas, with most of the warmth being concentrated in
the mule garden. (There's a big hill on the south side of our
core homestead, so when the sun dips lower in the winter sky, it
doesn't reach the southern parts of the yard much. On the other
hand, leaves are off the trees during the winter, so the forest giants
edging our core area block less light.)
Hopefully getting a
better handle on sun and shade patterns
will help me fill in the gaps in our homestead most efficiently.
Already, I'm eying that area behind the barn for some kind of plant,
and am realizing that the coop for the poor broilers is in the sun all
day long. Aren't maps fun?
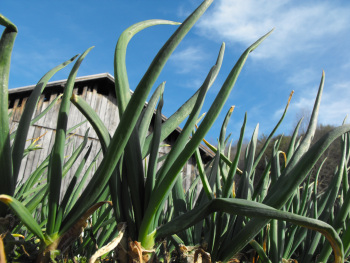 There
was so much interest in our last Egyptian
onion giveaway that
I decided to do another one! I'm not positive whether I'll be
sending prizes to two, three, four, or five winners until I box up all
of the top bulbs, but some of you will definitely be expanding your
perennial collection.
Here's how to enter:
- Spread the word about our blog, our chicken waterer, or my books (whatever you care about the most). You can do this any way you want: emailing your friends, posting on your blog, tweeting or telling your facebook buddies, etc.
- Count up how many ways you spread the word, then leave a comment
on this post telling me how many times to enter you in the random
drawing. Deadline: Wednesday at midnight.
- Be sure to check back Thursday at lunchtime to see if you won!
Thanks for spreading the
word! Our onion offspring are looking forward to taking over the
world.
The Excalibur food dehydrator is quickly becoming one of our
favorite appliances, but it tends to put off a good deal of heat, which
is why we decided to relocate ours to the new porch.
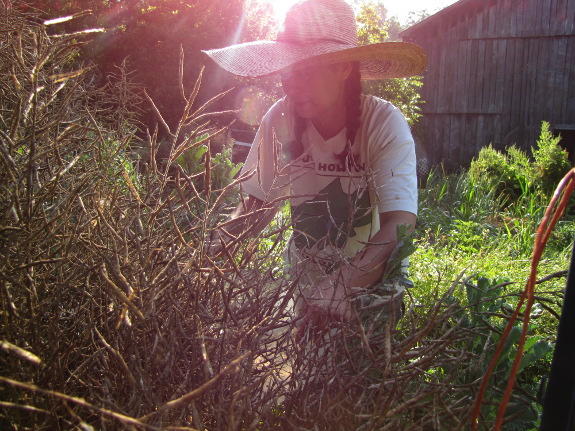
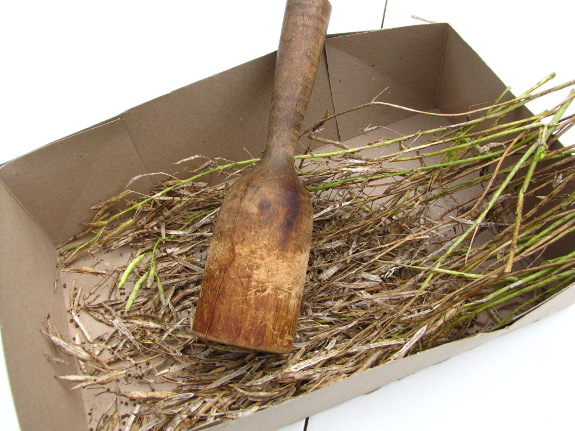 I've been learning to save a
lot of different kinds of seeds over the last few years, and the most
difficult part seems to be figuring out the best processing technique
to get seeds out of their fruits or hulls. With the first
crucifer I processed (tokyo
bekana), I gathered
the whole top of the plant and pounded it with a big wooden pestle to
break the seed cases apart. My new method with kale seems to be
even more streamlined.
Seed
to Seed warned me
that kale fruits ripen a few at a time over the course of a week or
two. If you rip up the whole plant, you'll either lose some seeds
due to premature shattering (opening) of the early pods, or you'll
harvest seeds that won't sprout since they're not fully mature.
So I set off to break the ripest-looking kale pods into a container,
figuring I'd come back in a week to harvest the rest.
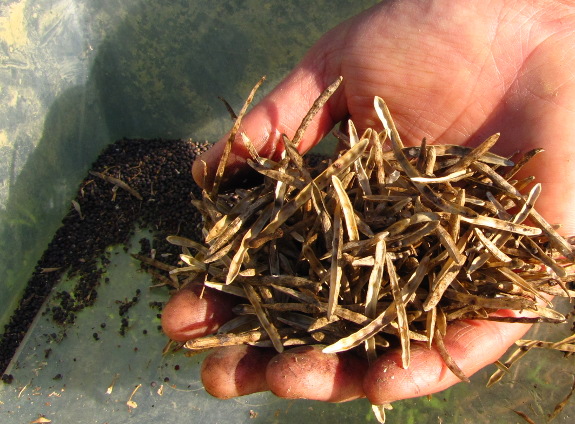
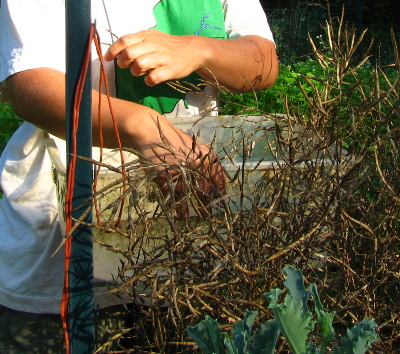 As I worked, I realized that
it was even easier to simply thresh the ripe pods directly into my
container than to break off clusters of pods. Running a fruiting
head through my hand resulted in lots of seeds and some pod bits making
their way into my box, which meant the threshing and winnowing stage
was as simple as shaking the box so the seeds settled to the bottom,
scooping out most of the pod bits, and then blowing the rest away.
This week was my second
round of harvesting, and a few minutes' work netted half a pound of
kale seeds! Kale seeds are good for three to five years, so I
shouldn't have to save seeds again for quite a while. Now I just
have to wait and see if the information I was given on kale
hybridization is
correct (meaning that I should end up with two unsullied varieties, the
same as I grew last year) or if my Red Russian and Improved Dwarf
Siberian interbred (meaning that these seeds will turn into the kale
equivalent of an alley cat).
It's amazing how a little horizontal space can improve a room.
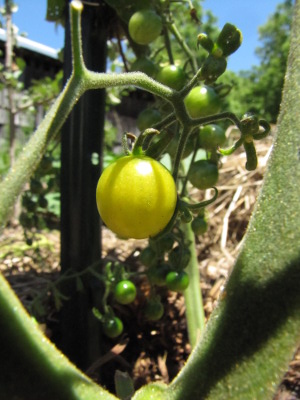 It turns out, I've been
begging the wrong tomato plant to ripen up. In the past, Stupice has been
our first ripe tomato of the year, but we're trying out a new
variety --- Gold Rush Currant --- and the tommy-toe looks like it's
going to win the prize this year. Maybe by the end of the
week? It will be a delicious shock if we eat our first tomato
before the end of June!
Meanwhile, we chowed
down on the first new potatoes and green beans. Mix up my favorite green
bean and potato salad
and add in some chickpeas, cucumbers, and a storebought avocado, and
you'll have a nearly homegrown feast!
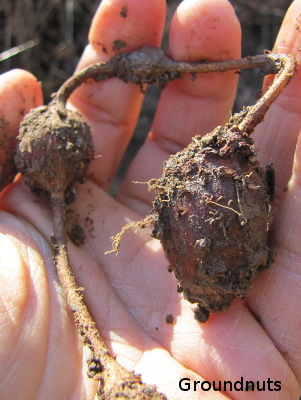 I
wrote in a previous post that I thought Jean Craighead George was
purposely referencing Walden during several parts of My
Side of the Mountain.
So it was a pleasant surprise to open up the next chapter of Walden and find a description of
Thoreau's wildcrafting experiences, which sounded a lot like
Sam's. Thoreau gathered wild grapes, feral apples, American
chestnuts (which he considered a bread substitute), and rhapsodized at
length about groundnuts:
Although I enjoyed the rest of chapter 13 (all about Thoreau's firewood experiences), I think wild-crafting makes a more fun thought-question for our readers. What's your favorite wild-crafted food? When do you look for it? How do you harvest it, cook it,
 and/or
preserve it?
and/or
preserve it?If we're sticking to the plant and fungal world, my favorite would have to be oyster mushrooms (and see this post, and this post). But I want to remember to check on the cattails at the right time of year to pluck their young flower stems, which one of our readers (Eric in Japan?) talked about last year in such a way that he made my mouth water.
I suspect some of you would rather talk about the woodpile that Thoreau looked at "with a kind of affection", or perhaps about the former inhabitants of his forest. Feel free to comment with any thoughts you had when reading the most recent chapters, of course!
If you're new to the book club, you might want to check out the thought-provoking comments on chapter 1, chapter 2, chapters 3 and 4, chapters 5 and 6, chapters 7 and 8, chapters 9 and 10, and chapters 11 and 12. We'll be discussing chapter 15 (Winter animals) and chapter 16 (The pond in winter) next Wednesday, and anyone is welcome to join in.
 Finally, we're nearing the
home stretch of Walden, and it's
time to start thinking about whether or not we want to have another
book club. Gaia's
Garden was in
second place when we voted originally, but more recently a reader had
suggested Rosemary Morrow's Earth
User's Guide to Permaculture as an alternative
introductory text. Or maybe we should counteract Thoreau's
stilted prose with a homesteading beach read like The
Bucolic Plague, Coop, The
Blueberry Years,
or The
Dirty Life. Please leave a
comment with your thoughts (including whether you're sick of our summer
book club or would like it to contiue). I've enjoyed bouncing
literary ideas off my readers, but don't want to pretend I'm
participating in a book club if everyone else has bowed out.
Finally, we're nearing the
home stretch of Walden, and it's
time to start thinking about whether or not we want to have another
book club. Gaia's
Garden was in
second place when we voted originally, but more recently a reader had
suggested Rosemary Morrow's Earth
User's Guide to Permaculture as an alternative
introductory text. Or maybe we should counteract Thoreau's
stilted prose with a homesteading beach read like The
Bucolic Plague, Coop, The
Blueberry Years,
or The
Dirty Life. Please leave a
comment with your thoughts (including whether you're sick of our summer
book club or would like it to contiue). I've enjoyed bouncing
literary ideas off my readers, but don't want to pretend I'm
participating in a book club if everyone else has bowed out.The paperback edition of Weekend Homesteader is full of fun and easy projects that guide you onto the path of self-sufficiency.
The new golf
cart front storage box is
a great improvement with only one drawback.
Turns out the vision space
got reduced to an uncomfortable level in the immediate front area.
It's not uncommon to see a
toad jump in your path or a box turtle digging her annual egg laying
hole in the middle of the road. We like to yield the right of way to
these critters and the above wire shelf made for an easy upgrade that allows us to see a bit more of the ground.
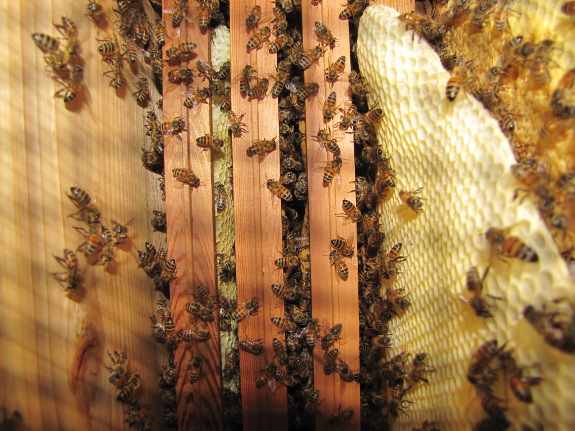
Less than two weeks
after the
bees moved down into their third box, it's time to nadir
again! I suspect the fast progress is a result of the sourwood
nectar flow.
 I've actually been trying to
snap a shot inside the hive for several days now, with no luck.
There are so many bees working in there that morning is no longer a
good time to monitor hive activity --- the bees tend to be hanging out
on the comb and floor waiting to go out, which obstructs the camera's
view of the hive infrastructure. This less than informative shot
is from four days ago.
I finally got the bright
idea to wait until the heat of the afternoon, when most workers are 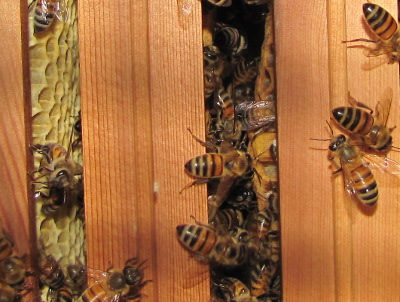 busy outside the hive.
My new strategy allowed me to see that the third box is fully drawn
except for three frames. You can even see capped honey in the
upper right hand corner of the first photo in this post! When I
zoomed in, I could also look up through the crack into the hive box
above and tell that there's capped brood there.
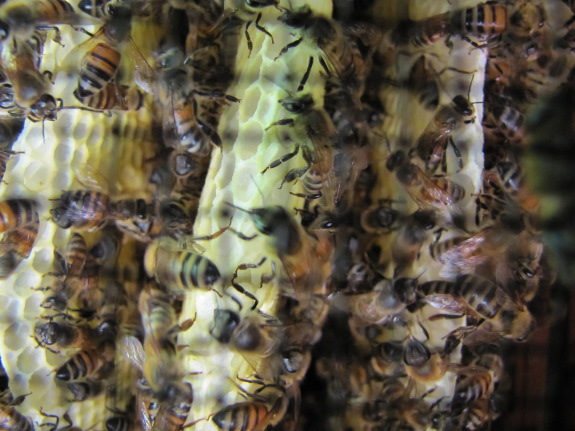
I suspect I'm going to
have to enlist the help of two strong men to nadir this time.
Mark and I had no problem lifting two Warre hive bodies between us a few
weeks ago, but at that time, the top box was empty and the second box
was only full of brood. This week, I think weight is going to be
more of an issue.
Luckily, our amazing
helper Bradley has beekeeping experience along with his many, many
other talents. Hopefully when I ask him to help with nadiring,
his response will be the same as always: "That's no problem."
He's already promised to build us some more boxes for a fraction of the
cost of the online offerings.
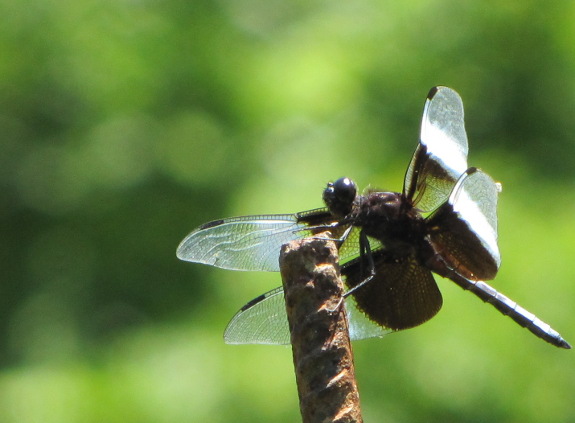
Between them, Anna and Errol
rustled up 9 boxes full of Egyptian
onion top bulbs, so
nearly everyone was a winner.
Paul, Heath, Vicki, Tracy,
Barb, Monica, JT, Stan, and Rick, email anna@kitenet.net with your mailing address and
we'll put your onions in the mail to you right away.
Thanks to everyone for
spreading the word. And a special thank you to Errol for saving
his onions to share with our readers.
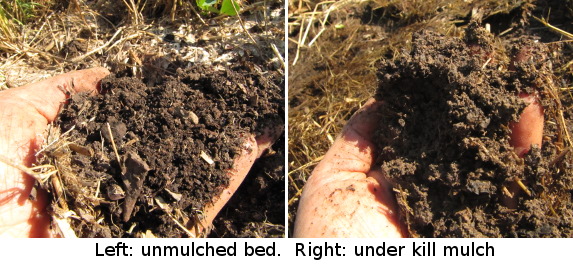
A month ago, I laid
down a kill mulch over an annual ryegrass cover crop that I wanted to turn into
bare ground for this week's planting. The results were inspiring.
We've had very little
rain during that month, and even though I water most of the vegetable
garden, I've opted to leave this plot unirrigated in 2012. A
nearby bed that wasn't kill mulched is dry as a bone when I dug into
the top few inches, but the soil under my kill mulch had just the right
moisture content for planting.
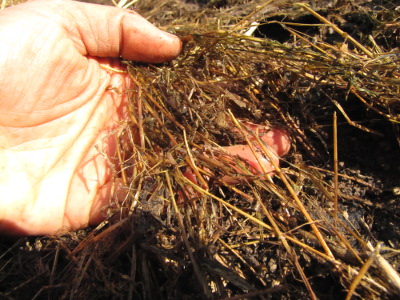 The photo at the top of this
post makes the kill-mulched soil look a little cloddy, but it's really
not. Instead, the dirt is held together with just enough fungal
bonds that it keeps its shape, but when I pulled the hoe through to
make a planting furrow, the earth split like the red sea.
Under the kill mulch,
just about all of the ryegrass had died due to the absence of light,
leaving a thin layer of dead leaves on the soil surface. Lower
down, the roots had rotted and created a loose, crumbly soil totally
unlike what this awful area used to be like.
In case you're curious
about what to do with the cardboard and straw from a temporary kill
mulch like this --- it's all reusable. I raked back the straw,
carefully lifted the layers of cardboard off and transferred them to a
new plot of ground, then put the straw back on top. A few pieces
of cardboard tore, but the layer is just blocking grass and clover in
its new location, so I suspect it will do its job all over again.
(I wouldn't put secondhand kill mulch cardboard over serious weeds.)
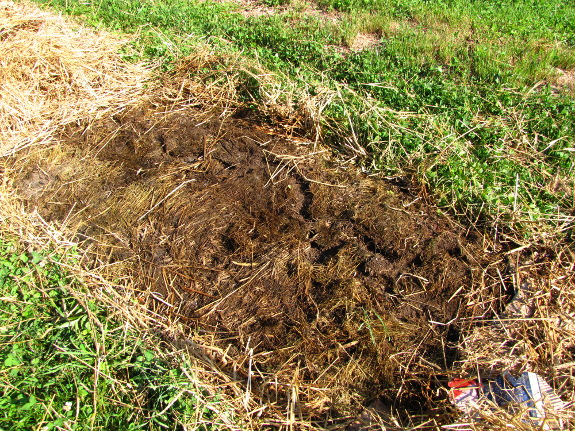
The one potential
problem amid all this glory of kill mulching is small mammals.
Burrows of voles, moles, or shrews are obvious as soon as I lift up the
cardboard, and a few gardeners report these little guys harm their
crops. However, I've yet to see any damage from my furry kill
mulch neighbors, which makes me think my garden may only be home to the
insectivores (moles and shrews) rather than the herbivores
(voles). I'll let you know if I start seeing nibbled carrots and
potatoes.
 Although the comments were
divisive, I found our previous Walden discussion, about whether
hunters appreciate nature more fully, very
thought-provoking. For those of you who don't obsessively
read the comments like I do, I want to draw your attention to a few
comments (both on the blog and off) that delved deeper into the
issue.
First, Chris L. started
us off the right foot with his statement:
Ikwig retorted:
 "Personally,
I spent my childhood pretending to be a pioneer woman, running barefoot
through the fields, streams, and woods all around our home. I got
quite good at recognizing plants, insects, and birds, and could tell
the time by the position of the sun. No one needs a gun in order to learn about
the natural world."
And my father sent me a
thought-provoking email about his own experiences:
"I remember how my father introduced me to nature: picking berries, gathering hickory nuts, cracking beech nuts for their tiny fruit, hunting the perfect Christmas tree, fishing on the creek bank, walking thru woods to find paw paws and telling me about the great chestnut trees he knew as a boy, growing a garden, digging with a harness mule and picking up potatoes on shares when he was on strike."
 And Everett gave us a vegetarian
alternative for partnering with nature:
What I found most interesting is that the commenters who delved beyond their knee-jerk reaction to the issue were all suggesting ways of partnering with nature, not merely being a tourist in the woods. Sure, we all got a lot of simple pleasure out of playing outside as kids, but the experiences that really changed us involved creative problem-solving in the outdoors --- figuring out how to build houses out of branches, herd minnows into a bucket, or collect delicious blackberries without getting scratched up or accidentally swallowing a stink bug. I'll bet those are nature-appreciation experiences we can all agree on.
Our chicken waterer keeps the coop dry and hens
happy.
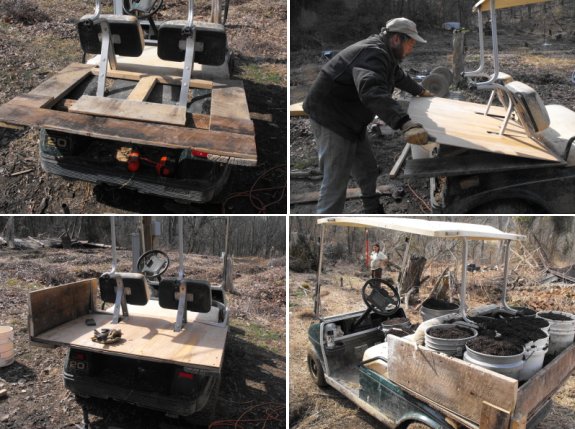
It's been over 2 years since
we first modified
the Club Car golf cart with a rear DIY hauling bed.
The original plywood crumbled
away recently and our helper Bradley had some great ideas on improving
the structure in addition to the front
storage box.
We decided to go with a high
quality paint and primer combination that was a little pricey at just
over 30 dollars, but should be worth it if it's as good as the lady at
the store claims.
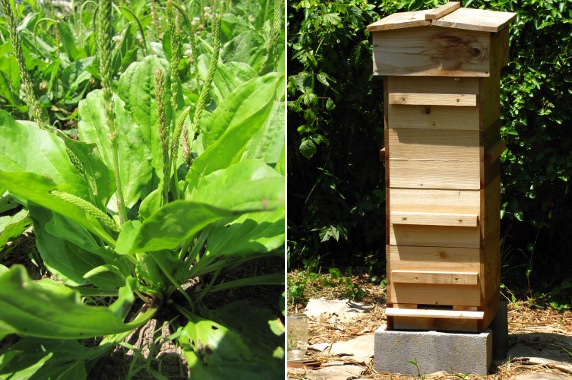
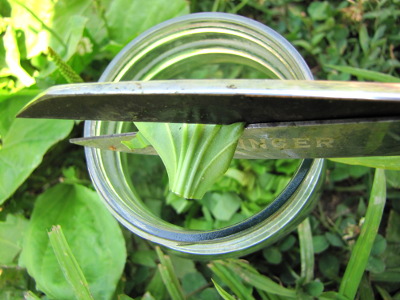 The time has finally come for
me to learn to make herbal salves. I'll tell you the recipe
below, but first I have to regale you with the reason for the treatment.
Bradley, Mark, and I set
out to nadir the
Warre hive Thursday,
but I'm afraid I got cocky. Last time, nadiring went so smoothly
that I didn't smoke the hive and didn't even feel like we needed to
wear veils. Lazily, I decided to leave my veil off this time
around, which meant that neither of my male helpers felt they could don
a veil. (Perhaps they were just lazy like me, but it makes a
better story to say it was the testosterone speaking.)
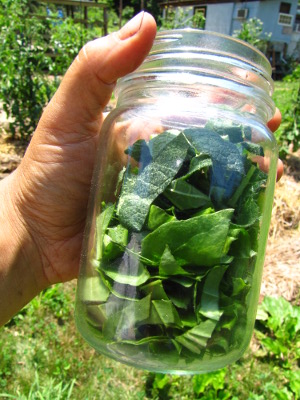 I
really should have known better because bees are always getting caught
in my braids, even when I'm just out weeding the garden. Sure
enough, as soon as Mark and Bradley had the hive off the ground and I
bent down to slide a new hive body underneath, a confused worker
tangled herself in my hair. Her angry buzzing riled up the rest
of the bees, and before we'd left the apiary, I had a sting on the
bridge of my nose, Bradley had a sting on his lower eyelid, and the
pasture fence was a bit bent down where our helper had hurdled the
chicken wire to escape. (Mark came through unscathed. I can
only conclude my husband's calm temperament warded off the bees.)
Stings on your face hurt
more than ordinary stings, so I decided mine needed treatment. No
problem --- just snag a bit of broadleaf plantain out of the yard, chew
it up, and dab the green goo on my face.
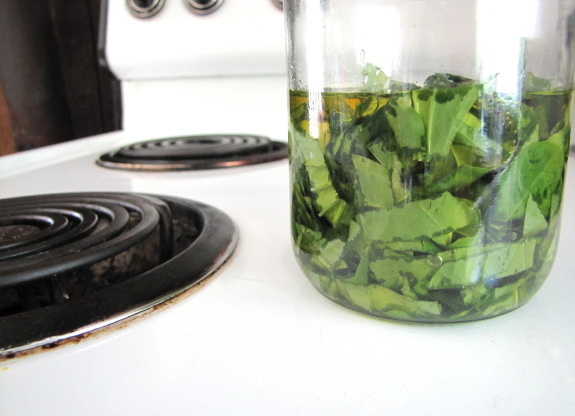
Luckily, I realized just
in time that you can't spit in the eye of your helper and then expect
him to come back, so Bradley's sting went untreated (except for having
the stinger removed). The poor guy wandered around the farm in a
daze all afternoon, favoring his wounded eye. "It wouldn't be so
bad," he told us, hamming it up for all he was worth, "Except this is
my fishing eye, and I'd hoped to go to the river this evening."
 Even though Bradley was only
joking, I figured it couldn't hurt to have a salve on hand for similar
situations in the future. (Having this
blog post show up in
my RSS feed Friday morning helped make the decision for me too.)
I'm very new to making
herbal salves, but from my early research, the project seems remarkably
simple. Cut up the leaves of the plants you're interested in,
stick them in a jar full of olive oil, put a cloth on top, stir
occasionally for six weeks or so (being prepared for your plantain
concoction to start smelling like pepperoni), strain out the leaves,
then add in a bit of melted beeswax. (I included a bit of comfrey
for long-term healing along with the plantain for short-term sting
relief.)
Some people speed up the
steeping process with heat, but I'm in no hurry. After all, next
time we work with the bees, we're all wearing veils.
Want more in-depth information? Browse through our books.
Or explore more posts by date or by subject.
About us: Anna Hess and Mark Hamilton spent over a decade living self-sufficiently in the mountains of Virginia before moving north to start over from scratch in the foothills of Ohio. They've experimented with permaculture, no-till gardening, trailersteading, home-based microbusinesses and much more, writing about their adventures in both blogs and books.
