
archives for 05/2012
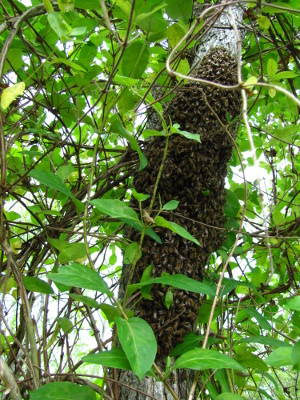 The
bad news is --- the package
of bees we put in
the top bar hive Friday absconded
Monday. They only ate half as much sugar water as the other hive,
which should have tipped me off that something was wrong, but I didn't
realize there was a problem until I saw that the hive was empty and all
of the bees were clinging to the trunk of a nearby tree.
The
bad news is --- the package
of bees we put in
the top bar hive Friday absconded
Monday. They only ate half as much sugar water as the other hive,
which should have tipped me off that something was wrong, but I didn't
realize there was a problem until I saw that the hive was empty and all
of the bees were clinging to the trunk of a nearby tree.
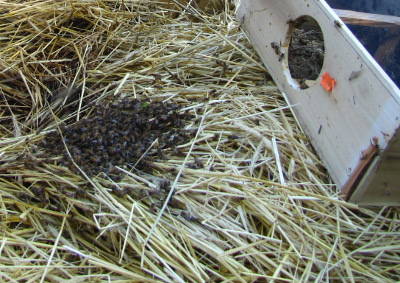
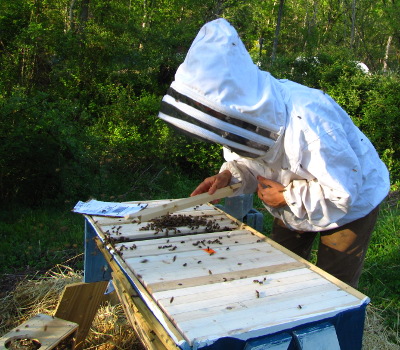
We tried to brush the
mass of bees (technically not a swarm, but they act like one) into a
bucket to be rehived, but I suspect the queen took flight because all
of the bees flew right back out and disappeared. So, we're down
to one hive and I'm trying to figure out why our bees flew the coop.
Searching around the
internet, I ran across these possible causes for absconding:
- Frequent disturbance.
I thought that since opening the observation
window didn't mess with the hive, I could look as often as I
wanted. But now I'm wondering whether the light coming in during
my frequent viewings didn't bother the bees and make them think their
colony was unsafe. Similarly, I left the screened
bottom completely open for ventilation, but that made it pretty
bright inside the hive --- perhaps I should have closed the bottom and
minimized my viewings for the first couple of weeks?
- Top bar hive. When
I read The
Barefoot Beekeeper, I remember the author recommending against
packages as a way of starting top bar hives.
But packages are the most prevalant way of getting new bees in the
U.S., so I ignored the author's advice. My internet searches,
however, turned up lots of top bar hive beekeepers with absconding
package bees. Something about the hive seems to make package bees
discontented, although there are workarounds to keep your bees in
place. Some keepers wire a few frames of wax to top bars, while
others spread wax and/or propolis along the inside walls. Others
just hunt down a nuc.
- Overheating. Mark's gut feeling is that the hive got too hot in the scorching sun. It's in the same location where our Langstroths once lived and is a paler color, so I didn't think that would be a problem, but we're going to put a thermometer inside the hive to test his hypothesis. Since poo-pooing his hypothesis, I read internet reports that overheating will cause a colony to abscond, so he may be on the right track.
- Africanized honey bees. Our packages came from Texas, and the proprietors of the apiary admit that their bees may have partial Africanized genetics. I didn't think it would be a problem since the beekeeping company has bred the meanness out of their bees, but I did read a report that Africanized honey bees are far more likely to abscond than European honey bees.
- Flight path obstructions.
I turned the top bar hive to face away from the center of our homestead
so they wouldn't be buzzing into us as we worked in the garden. A
chicken wire fence sits just a couple of feet away from their entrance,
which I wouldn't think would be a problem, but I have read that bees
prefer hives without flight path obstructions.
Other common causes of
absconding that aren't relevant to my disappearing package include:
lack of food, lack of space, and presence of parasites or
diseases. Bad odors can also drive bees away, and I did feel like
straw in my kill mulch under the hive was giving off a strong smell, so
that's a slight possibility.
If we can't find a nuc
to refill our top bar hive and have to wait for a new package next
year, I'll do things a bit differently. In addition to leaving
the bees strictly alone, I'll reduce the opening more, perhaps even
making a queen includer to fit over the entrance for the first week,
forcing the matriarch to stay put.
And three hours after
losing our colony, I realized what I really should have done --- called
in our beekeeping mentor for hands-on help. I was afraid that if
I delayed, the swarm would fly to a less accessible location, so I
muddled through trying to catch it myself and failed. But I'll
bet my mentor would have made short work of rehiving those bees.
Twenty-twenty hind-sight!
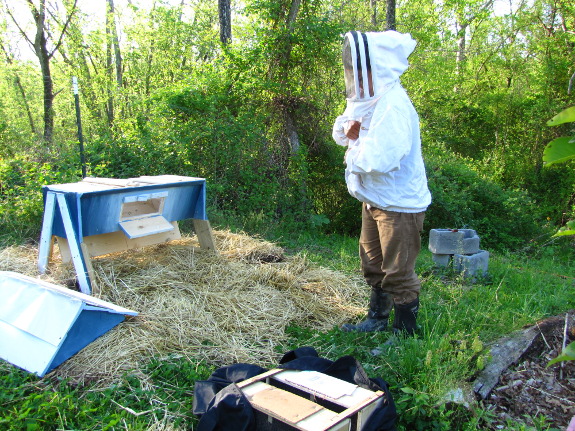
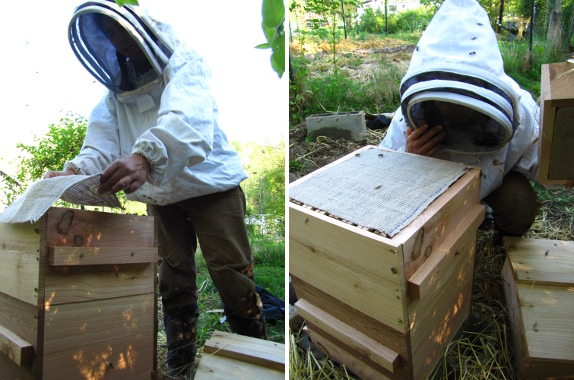
Yesterday, you learned what
a package of bees is,
so today I'm going to walk you through installing a package into a
hive. Evening is the best time to hive a package since the coming
night makes bees more likely to stay in their new home. If your
bees arrive early, put them in a room-temperature, quiet place to await
the hour before sunset. (A closet, garage, or spare room works
fine.)
 Meanwhile, you should be
gathering your supplies. All you really need to hive a package is
a hive tool and a nail or piece of wire to puncture the candy in the
queen cage, but you might find some other equipment handy.
Meanwhile, you should be
gathering your supplies. All you really need to hive a package is
a hive tool and a nail or piece of wire to puncture the candy in the
queen cage, but you might find some other equipment handy.
Bees in a package are
very gentle, but they're also confused and will land all over your
head, hands, and arms. I recommend wearing a veil at the least,
and you might feel more comfortable in a full bee suit. If you're
able to allow bees to settle on your bare skin without batting at them,
this is one procedure that works much better without gloves, but go
ahead and wear hand protection if you're going to be nervous without.
Other tools you might
use include:
- Scissors (in case your queen cage is attached to a fabric strap)
- Spray bottle of sugar water (in case the bees freak you out and you need to sedate them)
- Screw and screwdriver or staple gun (in case you need to attach the queen cage to a top bar)
- Bee brush (to move
addled bees out of the way when closing the hive back up)
 With
your tools assembled, take another few minutes to prepare your
hive. Each type of hive is prepped differently, and I'll cover
the specifics for Warre hives and top bar hives in later posts.
If you're installing a package into a Langstroth hive, I recommend
doing a little additional research to find out those details. At
its most basic, hive preparation consists of making a space into which
you can pour bees.
With
your tools assembled, take another few minutes to prepare your
hive. Each type of hive is prepped differently, and I'll cover
the specifics for Warre hives and top bar hives in later posts.
If you're installing a package into a Langstroth hive, I recommend
doing a little additional research to find out those details. At
its most basic, hive preparation consists of making a space into which
you can pour bees.
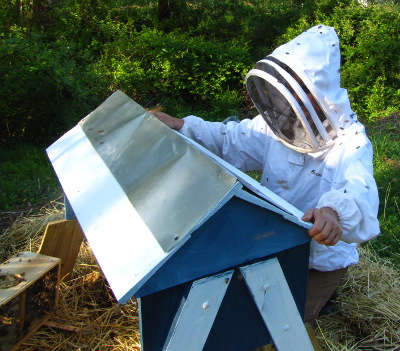
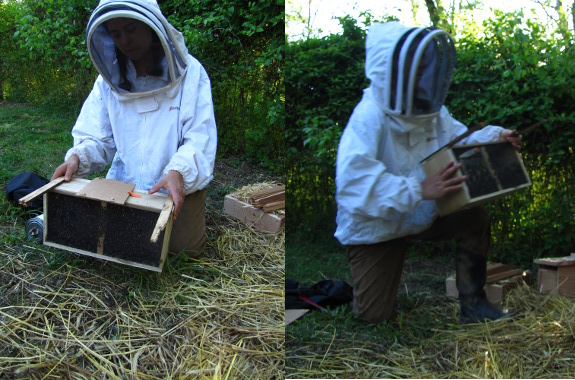
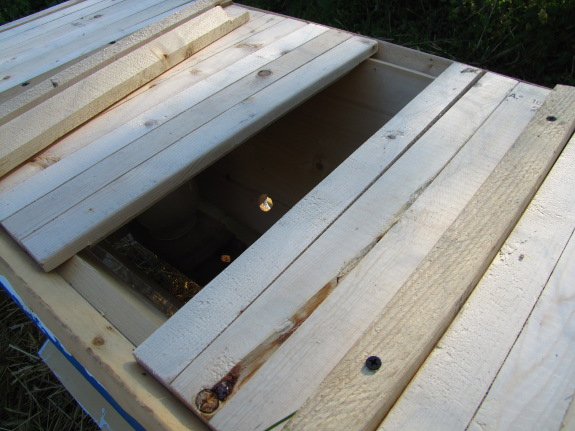
Now you can start to pry
your package apart. If you ordered more than one package and they
were mailed as a single unit, use your hive tool to separate the
packages. Next, pry off the cardboard or plywood cover on top of
one package, as is shown above.
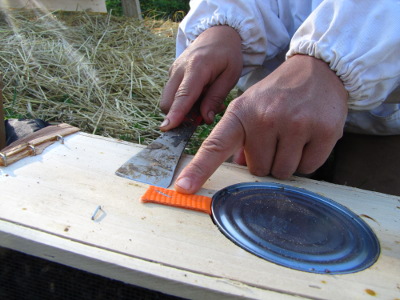 Underneath the cardboard or
plywood lid, you'll see the top of the can of syrup. There will
also be a strap --- either fabric or thin metal --- that attaches to
the queen cage. It's very important that you don't knock the
queen cage off this strap and that you don't let the queen cage fall
into the package of bees. Both mistakes can be remedied, but
beginners will do better to prevent them.
Underneath the cardboard or
plywood lid, you'll see the top of the can of syrup. There will
also be a strap --- either fabric or thin metal --- that attaches to
the queen cage. It's very important that you don't knock the
queen cage off this strap and that you don't let the queen cage fall
into the package of bees. Both mistakes can be remedied, but
beginners will do better to prevent them.
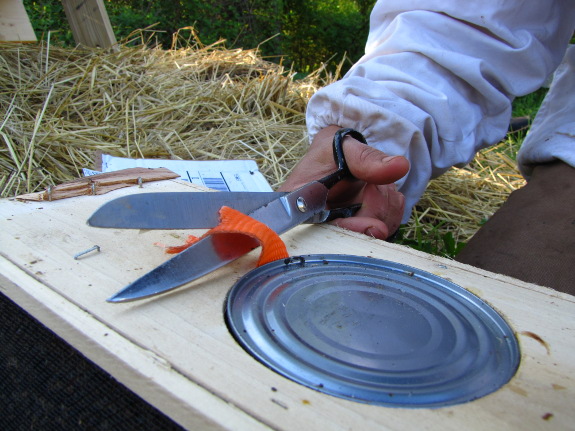
 If the strap is metal, you
should be able to pry it loose from its staple, but I had to cut my
fabric strap. I was careful to leave enough strap that I could
hold onto the remainder while pulling out the can of syrup.
If the strap is metal, you
should be able to pry it loose from its staple, but I had to cut my
fabric strap. I was careful to leave enough strap that I could
hold onto the remainder while pulling out the can of syrup.
You'll notice that you
really need three hands for this procedure, but you'll find a way to
make do with two. Using the hive tool, pry at the top of the can
of syrup until you can get a grip on it. Then hold onto the queen
strap with one hand while pulling out the can of syrup with the
other.
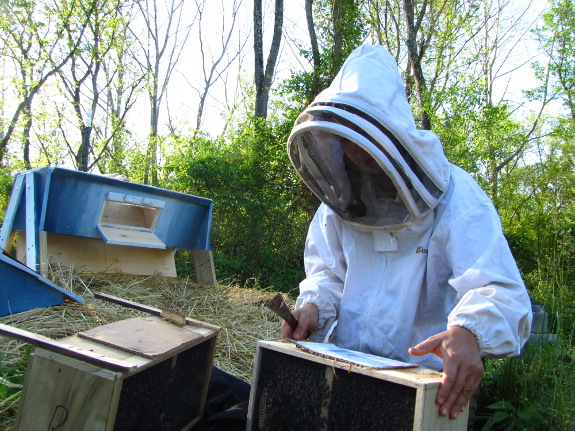
Set the can of syrup
aside while pulling out the queen cage and placing the cardboard or
plywood lid back on the package so bees don't stream out. (Yes,
some bees will escape during this procedure --- don't worry about it.)
 What you should be focusing
on now is the queen cage.
If the weather is chilly, brush off attendant bees and stick the queen
cage in
your pocket until you're ready to deal with her. If it's warm,
just set her aside while you get the tools for the next part of the
procedure. But don't lose her!
What you should be focusing
on now is the queen cage.
If the weather is chilly, brush off attendant bees and stick the queen
cage in
your pocket until you're ready to deal with her. If it's warm,
just set her aside while you get the tools for the next part of the
procedure. But don't lose her!
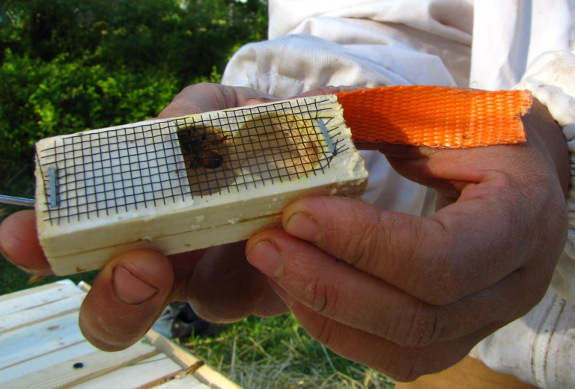
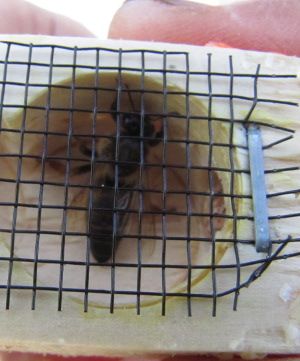
You'll notice that the
queen cage has corks on two ends, one of which leads directly into the
queen's living area (right side of the above photo) and the other of
which goes into the candy plug (left side of the above photo).
Beginners should leave the cork on the living area side alone and
instead focus on removing the cork that leads into the candy.
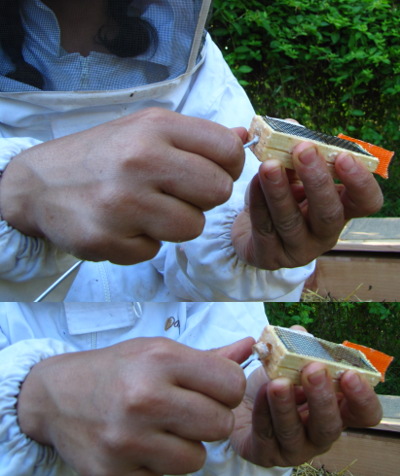
You can take out the
cork with anything you want. Pros often use the corner of their
hive tool, but I found it much easier to spear the cork with a piece of
wire and pull it loose.
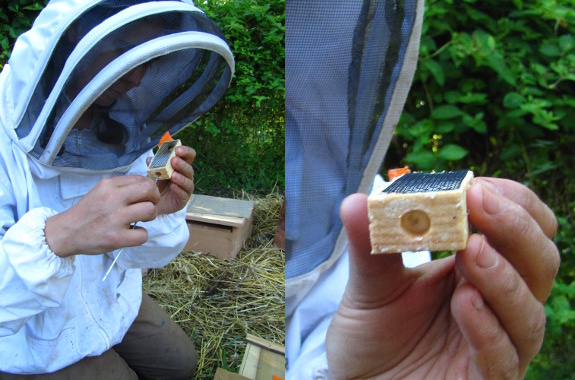
 Underneath
the cork is a plug of candy. You want to make a hole in the candy
large enough for the queen's scent to waft through, but not so large
that the queen herself can crawl out. The queen should have to
chew for a day or two before she can escape.
Underneath
the cork is a plug of candy. You want to make a hole in the candy
large enough for the queen's scent to waft through, but not so large
that the queen herself can crawl out. The queen should have to
chew for a day or two before she can escape.
To get this effect,
pierce the candy with a nail or wire. Be careful that you don't
skewer the queen!
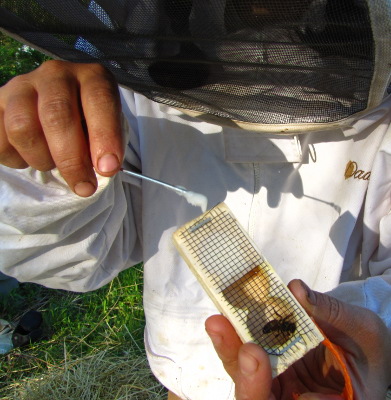
The candy in one of my
queen cages had partially melted (see the photo on the right).
It's not the end of the world if your hole doesn't really work --- you
can let the queen out in a few days if she hasn't escaped on her own.
Where you put the queen
depends on what kind of hive you're using. Do a little research
on your own or read my posts about top bar and Warre hive installation
(coming soon for those reading this post as I write it, or linked at
the bottom if you're reading this post later). I'm assuming
you've installed the queen before you move on to the next step below.
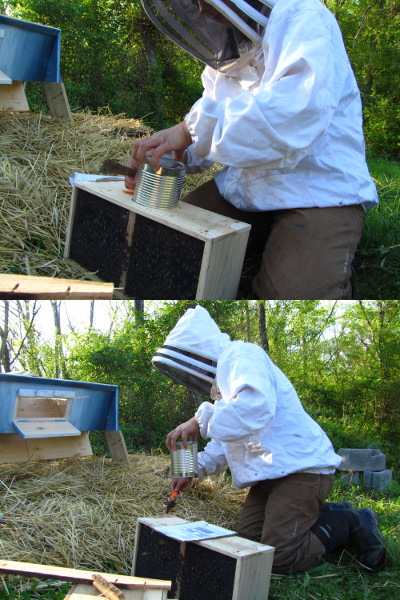
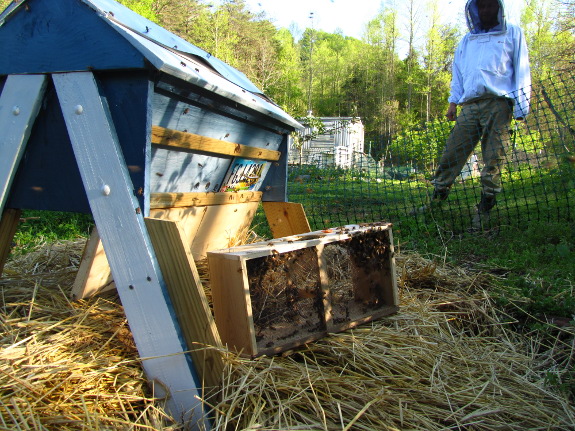
Now for the fun (read:
scary) part --- pouring the bees into the hive! Bees in a package
tend to cluster near the top, and you want them loose and
pourable. If you're scared of your bees, spray them with sugar
water now (but that's not really necessary --- I didn't). Next,
tap the box of bees solidly on the ground to knock them loose, take off
the lid, then quickly upend the box over top of the open hive.
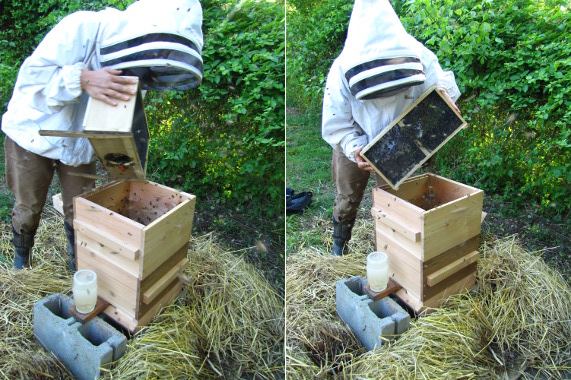
Pouring worker bees out
of a package takes a bit of skill. You'll end up tilting the box
from side to side so bees drop out the entrance hole, and you'll
probably stop several times to tap the box again and knock bees
loose. This is when bees will fly all around and scare you, but
remember that hiveless bees are gentle and very unlikely to sting.
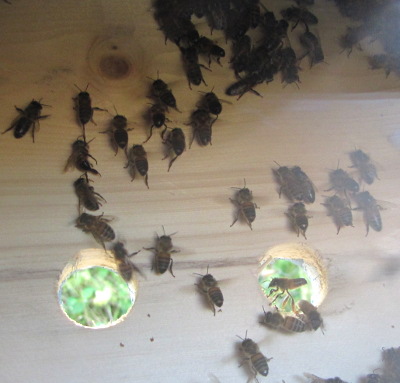 Later posts will tell you how
to close your hive and make sure your
package install was a success, but I've got a bit more advice for
the installation phase. First, don't worry about all those bees
buzzing around in the air. As soon as the workers in the hive get
their feet under them, some will go to the entrance and start fanning
air full of queen pheremone out to attract stragglers. (You can
see one bee fanning in the photo here, taken through the observation
window in our Easy Hive.)
Later posts will tell you how
to close your hive and make sure your
package install was a success, but I've got a bit more advice for
the installation phase. First, don't worry about all those bees
buzzing around in the air. As soon as the workers in the hive get
their feet under them, some will go to the entrance and start fanning
air full of queen pheremone out to attract stragglers. (You can
see one bee fanning in the photo here, taken through the observation
window in our Easy Hive.)
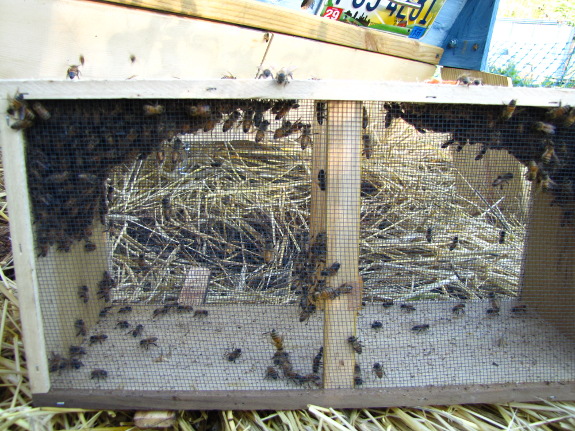
 The bees stuck in the package
are more problematic. If you're a better thumper and shaker than
I am, you might get them all out the first time, but I find that it's
easier to wait until ten or fifteen minutes after the hive has been
closed up and everyone has settled down, then to come back and check on
the package. Chances are, you'll see bees clustering in the upper
corners, as in the photo above.
The bees stuck in the package
are more problematic. If you're a better thumper and shaker than
I am, you might get them all out the first time, but I find that it's
easier to wait until ten or fifteen minutes after the hive has been
closed up and everyone has settled down, then to come back and check on
the package. Chances are, you'll see bees clustering in the upper
corners, as in the photo above.
 A couple of thumps and shakes
are all it takes to knock most of the remaining bees out onto the
ground, which will make it easier for the bees to find their way to the
hive. Place the package in front of the hive, hole-side-up, and
nearly every bee will be in the hive come morning.
A couple of thumps and shakes
are all it takes to knock most of the remaining bees out onto the
ground, which will make it easier for the bees to find their way to the
hive. Place the package in front of the hive, hole-side-up, and
nearly every bee will be in the hive come morning.
Weekend
Homesteader is full of fun and easy projects to help guide you onto
the path to self-sufficiency.
| This post is part of our Bee Package lunchtime series.
Read all of the entries: |
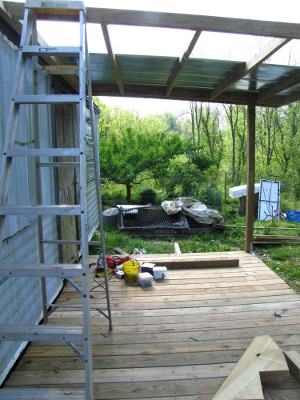
We've been putting off
building a porch for the back of our trailer since we moved in, which
meant we could only use that door with extreme caution.
Last fall we managed to buy
enough lumber for an 8x16 deck, but getting started proved to be a
challenge due to other pressing projects.
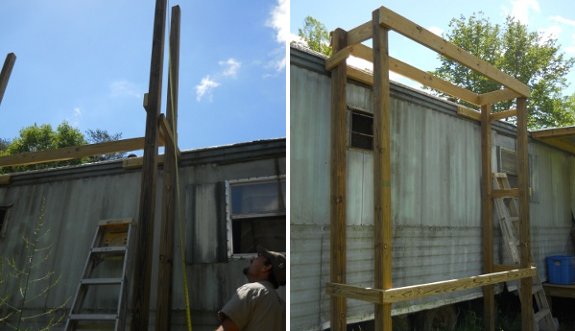
Today we got half way there
with the help of a carpenter named Bradley. We were so happy with his
work we decided to hire him to also do a roof for the porch. He's
charging 100 dollars for the 5 hours of labor required for the deck,
and he doesn't mind the long walk across the creek!

Looks like we're in for
a round of periodic
cicadas this
year! I was sorry to miss them in 2011, but it looks like the
17-year Brood 1 does live in our area, despite
usually being restricted to upland parts of the Blue Ridge (about 80
miles east of us). The red-eyed cicadas started popping up all
over the farm Monday, and I snagged each new arrival to
feed our chickens.
Maybe we'll eat the next ones ourselves?
(No, the cicada didn't
do that to my thumbnail. I've now learned not to roll my eyes
when Mark tells me bungee cords are dangerous. The bruise doesn't
hurt any more, but it was sore for two days and did
restrict my weeding for a whole week!)
If you want to install a
package of bees into a top bar hive, I recommend that you start
by reading my general instructions for bee
package installation.
This followup posts gives the specifics for top bar hives --- how many
bars you use, where the bees go, feeding, etc. --- but assumes you
understand the basics of hiving a package.
If you're installing a
package of bees into a brand new top bar hive (like our Easy Hive),
you should start by placing ten to twelve top bars between two follower
boards in the center of the hive. Those of you who are using a
golden mean top bar hive might give the
bees only eight to ten top bars for their initial living area since the
golden mean hive is more capacious.
Alternatively, if your
entrance is at the end of the hive, you can use a single follower board
an appropriate number of top bars from the end. Either way, you
might as well install the rest of the top bars on the other side(s) of
the follower board(s), even though the bees won't be using them right
now.
Now that you've put all
of the top bars in, it's time to take some out. I removed two top
bars in the center of the bees' new living area, but wished I'd taken
out three or four to make it easy to pour bees in.
 Next,
consider how you want to feed your bees. A new package will have
to be fed for some variable amount of time to get them off to a good
start. (I hope that more experienced beekeepers will leave a
comment telling me how long they feed new packages of bees since I've
seen very conflicting advice on the internet.) You can read my
post about cooking up sugar syrup here, but you still have to make
a decision on how to get that sugar to the bees.
Next,
consider how you want to feed your bees. A new package will have
to be fed for some variable amount of time to get them off to a good
start. (I hope that more experienced beekeepers will leave a
comment telling me how long they feed new packages of bees since I've
seen very conflicting advice on the internet.) You can read my
post about cooking up sugar syrup here, but you still have to make
a decision on how to get that sugar to the bees.
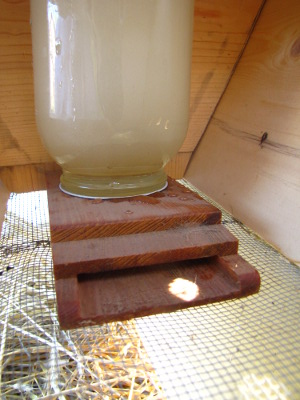
Most people seem to make
baggie feeders by filling a ziplock bag with sugar water, then pricking
tiny holes in one side and placing the baggie in the bottom of the top
bar hive. I don't like disposables, and I have these entrance
feeders leftover from our Langstroth hive days, so I started out by
putting an entrance feeder in the living area of the top bar
hive. I suspect I'll want to make a hole in the bottom of one of
the follower boards 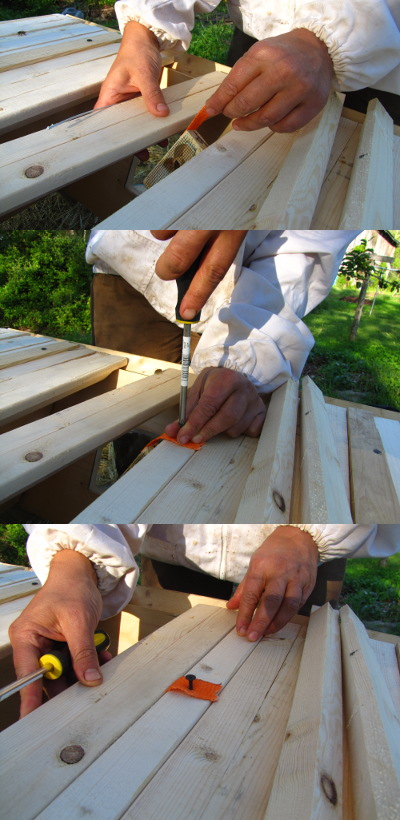 soon so that bees won't build
comb around the feeder (and so I can refill it without disturbing the
girls).
soon so that bees won't build
comb around the feeder (and so I can refill it without disturbing the
girls).
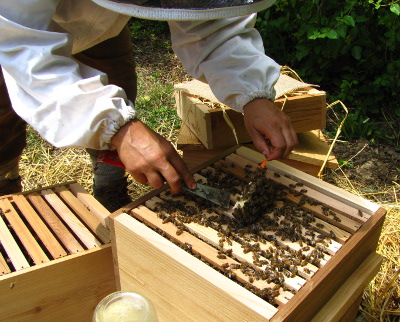
Next, open up the
entrance holes leading into the new living area, and get ready to
install your package of bees! The queen cage goes between two of
top bars in the living area. You can usually just bend a metal
strip over and not worry about attachment, but my fabric strip needed a
screw to hold it in place.
If you have an
observation window, don't make the mistake I did. Face the open
side of the queen cage toward the window so you can watch her escape.
Once you install the
queen cage, push the top bars on either side back into place, leaving a
hole into which you can pour bees.
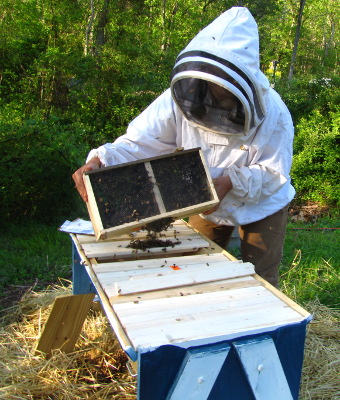
In this photo, you can
see why I recommend taking out more than two top bars to prepare for
the worker bees. I ended up dumping more bees than I wished onto
the top bars rather than into the hive cavity. This wasn't a big
deal (and would have been even less of a big deal if I'd had my bee
brush handy), but the operation will go more smoothly with a larger
opening.
Now you can replace the
top bars you removed to pour in the worker bees. I ended up
gently blowing bees out of the way since I didn't have a brush on
hand. A few bees ended up stuck on top, but I suspect they'll
escape through cracks in the cover.

Put
the lid on and you're done! Well, until you check on the bees and
take out the queen cage in a few days, which I'll explain in detail
Friday.
This is my first package
install into a top bar hive, so I hope those of you who are more
experienced with the hive will weigh in. Are there any steps
you'd change in my description? Any additional tips?
Don't
know where to start with your homesteading adventure? The
Weekend Homesteader will guide you on your way.
Edited to add: After writing this
post, our bees absconded (flew away) from our top bar
hive. I don't think my installation method had
anything to do with it (see the linked post for ideas on what the
culprit was), but I can't be sure.
| This post is part of our Bee Package lunchtime series.
Read all of the entries: |

I learned two golf cart
lessons this morning.
1. You can haul more lumber
when the load is better balanced.
2. Entrance and exits are
easier when you use the front door.
Now we have enough materials
for the rest of the porch
project and a roof to go
over it.
 Bradley says he's only going
to charge us $175 for all of his hard work building an 8 by 16
covered porch.
We're trying to talk him up to $200....
Bradley says he's only going
to charge us $175 for all of his hard work building an 8 by 16
covered porch.
We're trying to talk him up to $200....
Meanwhile, Mark and I
have been dropping by and watching him work as we take breaks from our
own regular tasks. If it wasn't planting month, I'd be tempted to
have us both "help" him for the whole project, because I can tell
Bradley has a lot of experience to impart despite his youth. Here
are a few pointers I've picked up already:
Building
with all new materials goes fast if you know what you're doing. It looks like it's
going to take Bradley only about nine hours to build the entire porch
with no help. I estimate that Mark and I, working together, would
have taken twice that long (which means four times the
man-hours). With scavenged materials, we'd probably multiply our
time by two again, but we would have saved a lot of cash --- we spent
$660 on materials for this project.
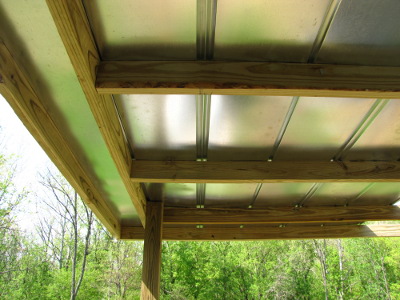
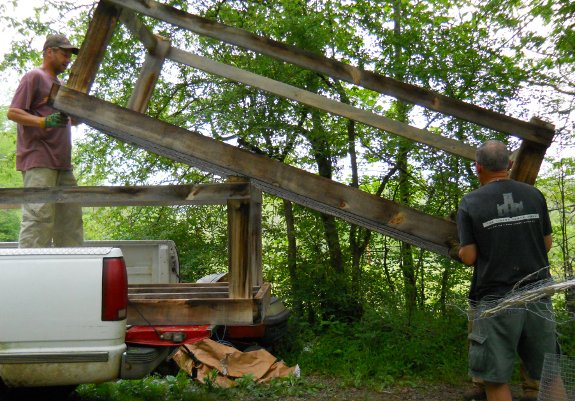
To
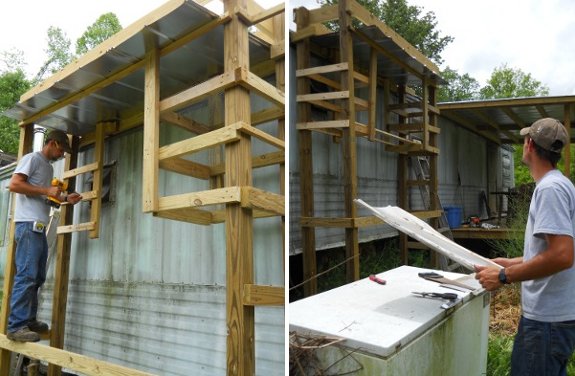
save on supplies with a metal roof, make your rafters run cross-wise. The first two photos
in this post show how Bradley made the roof rafters run the opposite
direction from what you'd expect, which saved quite a bit of wood and
was still plenty sturdy enough for him to walk on.
Use
scabs and brackets to turn a two person job into a one person job. Mark kept asking
Bradley if he needed help with daunting tasks like setting the four by
four posts upright, but Bradley had it 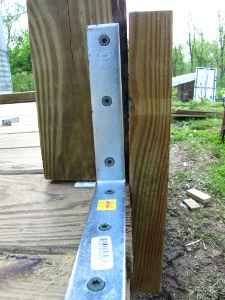 covered. He used wooden
scabs and brackets to hold the posts erect until he'd built a box on
top to provide structural integrity.
covered. He used wooden
scabs and brackets to hold the posts erect until he'd built a box on
top to provide structural integrity.
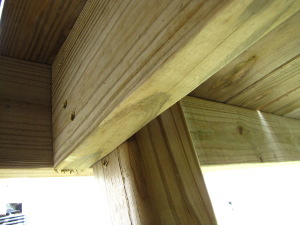
Plan
ahead so you don't need to double up. Although he
envisioned the 8'x16' porch as two 8'x8' squares attached to each
other, Bradley got by with one joist where the squares join by building
directly onto the side of the central four by four legs. (See
above.)
We'll share more shots
of the porch when it's done!
 If you understand the basics
of bee package installation, putting a package into a Warre hive is absurdly simple.
You'll want to start with two boxes, with top bars in place in the
bottom box and absent in the top box. Set aside the cover and
quilt for now and get your package ready.
If you understand the basics
of bee package installation, putting a package into a Warre hive is absurdly simple.
You'll want to start with two boxes, with top bars in place in the
bottom box and absent in the top box. Set aside the cover and
quilt for now and get your package ready.
After prepping your
queen cage, simply lay it flat on the top bars of the bottom box.
You don't want to set the queen cage on the bottom of the entire hive
because she'll need bees to cluster around her for warmth during the
first couple of nights before she chews her way free, and the bees will
prefer to hang out above the ground.
Now pour the worker bees
into the empty top box. This procedure becomes much more complex
if you made your Warre hive
in the traditional manner, with fixed frames. In that case, you
either
have to pour bees into an inverted top box and flip it into place, or
run
the bees up a  white sheet or towel into the
box. Luckily, Mark
installed pins in my Warre hive so I can move the frames as
needed.
I'll still keep my hands off as much as possible to maintain
the integrity of the hive.
white sheet or towel into the
box. Luckily, Mark
installed pins in my Warre hive so I can move the frames as
needed.
I'll still keep my hands off as much as possible to maintain
the integrity of the hive.
With the queen and
workers in place, you can replace the bars in the upper box. This
would be a good time to have a bee brush on hand, but it also works to
just lower top bars slowly enough that bees can escape out from under
them.
Blowing is another
method of getting bees out of your way as you place the burlap inner
cover, then the quilt
box on top of the hive.

 We filled our quilt box with
straw, but you can use any insulative material. (It's best to do
that before the bees are buzzing around your head.) The roof
slides right down over top of the quilt, sealing the insulative
material in with an inner mouse board, but allowing air to flow under
the eaves.
We filled our quilt box with
straw, but you can use any insulative material. (It's best to do
that before the bees are buzzing around your head.) The roof
slides right down over top of the quilt, sealing the insulative
material in with an inner mouse board, but allowing air to flow under
the eaves.
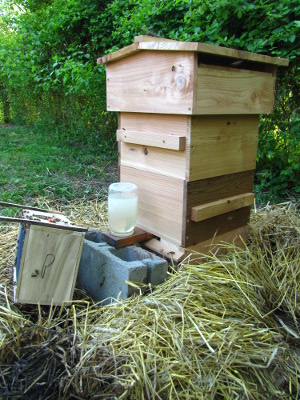
The entrance feeder for
my Langstroth hive fit into the mouth of the Warre hive once I put a
cinderblock underneath to support it. This narrows the entrance
quite a bit, so I'll probably find another place for the feeder once
the bees are really up and running, but it'll be good enough for now.
Stay tuned for tomorrow's
post, which covers removing the queen cage and making sure the first
combs are being built straight.
Meanwhile,
don't forget to preorder
a copy of my paperback, chock full of projects to make your
homesteading adventure a success.
| This post is part of our Bee Package lunchtime series.
Read all of the entries: |
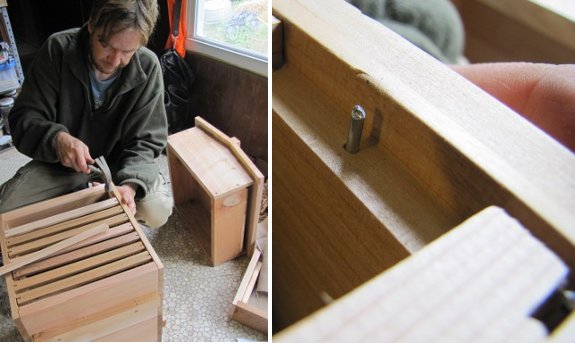
Warre hive
vertical top bars need a pin to keep them secure.
I didn't have any nails that
size, so we made our own pins by cutting small sections of 14
gauge galvanized wire and hammering them into pilot holes.
Pay extra attention to the
space between the bars. It might help to mark all the holes before you
actually drill.

The saying that you
spend 90% of your time carrying out 10% of the tasks in an average job
is true in the garden too. Taking a few minutes to root out
inefficiencies really pays off, even though it seems hard to budget the
hours when putting in your spring garden.
This year, we've been
focusing on making it easier to mow
the garden aisles. Clumps of tall
fescue, like the one
I'm digging out in the top photos, bog down the mower and take several
extra seconds (and quite a bit of brute force) to trim down. It
doesn't sound like much, but once you've hit ten clumps of fescue, the
time (and hassle) adds up. We're slowly but surely rooting out
these problem grasses, leaving the more well-behaved bluegrass
and white clover to
take their place.

 Meanwhile, I'm also slowly
fixing the crazy quilt of a front garden, parts of which I hand-dug
during our first couple of years on the farm. At the time, I'd
never worked in a garden with permanent beds, so I assumed lots of
cross aisles would make my job easier. The truth is, I almost
never walk down those cross aisles, and it's very tough to maneuver the
mower around to cut the grass in them. (It would be a bit easier
if my aisles were wider like in the mule garden.)
Meanwhile, I'm also slowly
fixing the crazy quilt of a front garden, parts of which I hand-dug
during our first couple of years on the farm. At the time, I'd
never worked in a garden with permanent beds, so I assumed lots of
cross aisles would make my job easier. The truth is, I almost
never walk down those cross aisles, and it's very tough to maneuver the
mower around to cut the grass in them. (It would be a bit easier
if my aisles were wider like in the mule garden.)
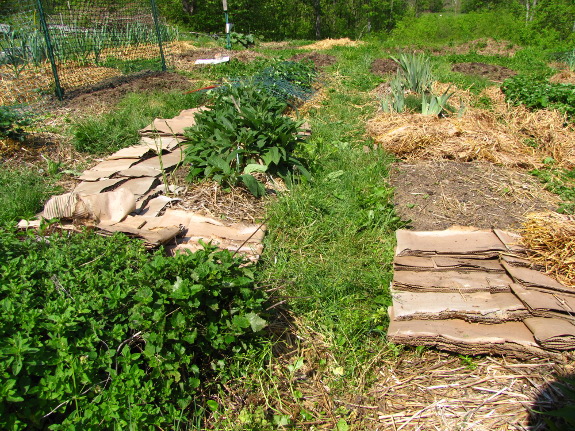
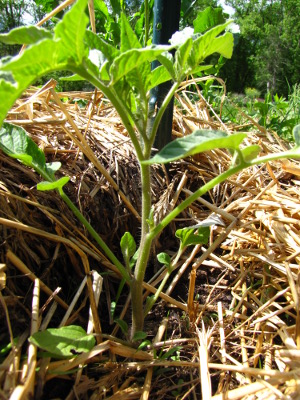
So I'm spending a few
extra minutes to lay down a kill mulch and turn the cross-aisles into
part of long, linear beds. This year, I'll just let the grass die
back under the cardboard, then this fall I'll plant an oat cover crop
to start building the soil up in these new garden spots. I figure by next year, I'll be
able to plant vegetables, increasing my growing area while also making
the garden easier to maintain.
The only slight
disadvantage of my bed merger is that now I'm going to have to add
decimals to my numbering scheme. It already has negative numbers
--- how geeky can you get?
Weekend
Homesteader: May contains a whole chapter on tricks for planning an
ergonomic garden. The chapter has been expanded and moved to
April in my new
paperback.
 After installing
a package of bees
into your new hive, you can sit back and relax...for a couple of
days. Most beekeepers recommend that you reopen the hive after
two to three days to make sure the queen has escaped from her cage,
removing the cork from the non-candy end and letting her run out if
not. I've usually had to help the queen escape, so you probably
will too --- just work over the hive and be extra careful that the
queen doesn't fly away or fall into the grass. After she's been
released, take the queen cage away with you rather than leaving it in
the hive (where bees will build funny comb
After installing
a package of bees
into your new hive, you can sit back and relax...for a couple of
days. Most beekeepers recommend that you reopen the hive after
two to three days to make sure the queen has escaped from her cage,
removing the cork from the non-candy end and letting her run out if
not. I've usually had to help the queen escape, so you probably
will too --- just work over the hive and be extra careful that the
queen doesn't fly away or fall into the grass. After she's been
released, take the queen cage away with you rather than leaving it in
the hive (where bees will build funny comb 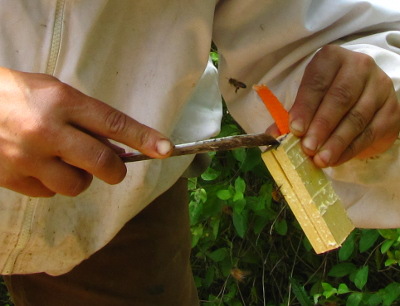 off it) or around the hive
(where the queen pheremones still on the cage could make your workers
think she's leaving the hive).
off it) or around the hive
(where the queen pheremones still on the cage could make your workers
think she's leaving the hive).
As one of our readers
wrote, the other important followup task is to feed, feed, feed.
Even if you're trying to keep bees as naturally as possible, a new
package is the one instance where you really do need to feed your bees
since they require that sustenance to draw out comb and nurture
babies. I
asked readers for advice on what to feed our bees, and the best answer I got
was that it's safest to simply feed a new package sugar
water --- only give 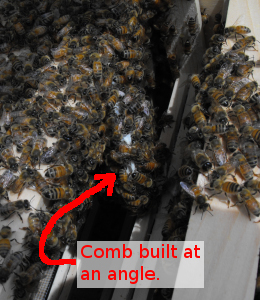 honey
to bees from the same colony that made that honey (which you clearly
can't do with a package). As for how long to feed, it sounds like
the colony will need 6 to 8 weeks to get new workers flying around and
searching for nectar, so you may want to continue to feed your bees for
that long. Other people stop feeding as soon as the bees
start to producing capped frames of honey.
honey
to bees from the same colony that made that honey (which you clearly
can't do with a package). As for how long to feed, it sounds like
the colony will need 6 to 8 weeks to get new workers flying around and
searching for nectar, so you may want to continue to feed your bees for
that long. Other people stop feeding as soon as the bees
start to producing capped frames of honey.
Finally, if you're using
foundationless frames (nearly always in a top bar or Warre hive and sometimes also in a
Langstroth hive), it's important to make sure those first combs are
built straight. Bees line up future combs of wax parallel to the
first one they build, so if that one is crooked, your whole hive will
be full of crooked comb. Beekeepers will either cut out a bad
piece of wax or correct its orientation to get the bees off to a good
start.
Now you're ready for the
really hard part --- leaving your bees alone! We'll see how long
I can go before the urge to look into my Warre hive becomes unbearable.
Don't
miss my
paperback, full of
48 fun and easy projects to help you embark on your homesteading
journey without becoming overwhelmed.
| This post is part of our Bee Package lunchtime series.
Read all of the entries: |

The folks at wireless deer fence.com
asked us if we would give their battery operated deer deterrent a try
and we said sure.
It runs on 2 AA batteries and
comes with a pack of scented sections of rubber hose that fits on top
of the blue center piece.
I pointed the trail camera
towards the area, and maybe if were lucky we might catch some of the
electric excitement. Their website mentions how they'll pay for video
footage of the wireless deer fence in action. You get 3 stakes, plus
the attractant for 60 dollars and that includes shipping. It comes with
a 2 year unconditional guarantee. We just put them in today, so stay
tuned for a full report on how we think it works at keeping those
garden nibblers away from our vegetables.
 This has been a strange year
since we've had cash to pay experts to make some capital improvements
on the farm.
This has been a strange year
since we've had cash to pay experts to make some capital improvements
on the farm.
The barn
roof repair job was
definitely worth every penny, but it's only the beginning of a long
project of barn reorganization.
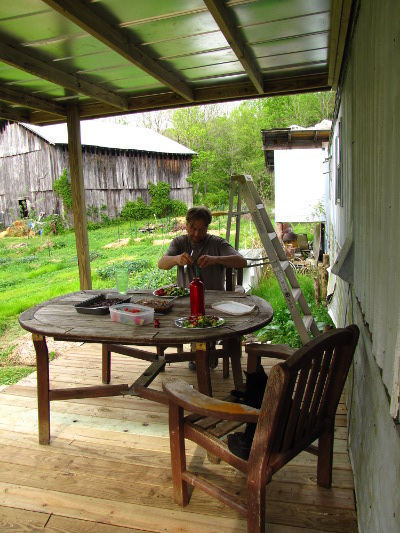
The porch, on the other
hand, is pure luxury.
Dining out in the open
air on a hot summer afternoon feels just as luxurious as sitting in
front of the wood
stove does in the
winter.
Both the wood stove and
the porch cut back on our electric bill, but they're really all about
enjoying life. You can tell an improvement is decadent when
Huckleberry moves right in.
Some friends of ours found a
free green house on Craigs list and asked us if we wanted the wooden
plant tables.
"Heck yeah!" was my response.
We've already got a short
list of possible project ideas, with aquaponics near the top. Thank you Frankie, Jim, and Dudley
for the delivery and helping with unloading.
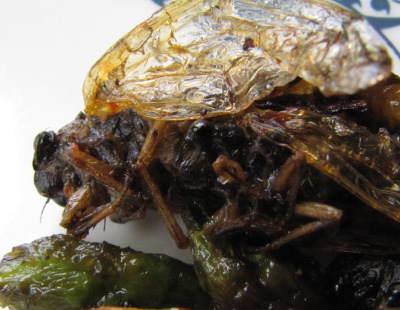
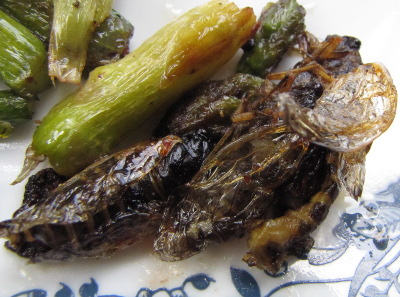 I easily gathered eight cicadas while going about my morning
chores on Thursday, and I popped them all into the freezer so they
would perish quickly and then be ready for a lunch taste test.
You can eat cicadas raw, but I needed all the help I could get to
overcome the "I'm eating a bug" factor, so I sauteed them in a bit of
vegetable oil, salt, and pepper for about ten minutes until the
exoskeletons were pretty crunchy. Then I served the wildcrafted
treat up, four cicadas per plate.
I easily gathered eight cicadas while going about my morning
chores on Thursday, and I popped them all into the freezer so they
would perish quickly and then be ready for a lunch taste test.
You can eat cicadas raw, but I needed all the help I could get to
overcome the "I'm eating a bug" factor, so I sauteed them in a bit of
vegetable oil, salt, and pepper for about ten minutes until the
exoskeletons were pretty crunchy. Then I served the wildcrafted
treat up, four cicadas per plate.
I couldn't talk Mark
into eating a single one --- he said he might try a cicada another time
if I removed the wings. Adding the insects to a stir fry (and not
telling the recipients)  might be another good way of
tricking non-believers into taste-testing cicadas. And, to be
honest, I had to look in the other direction while popping the bits of
invertebrate flesh into my mouth, a bit like what I do when I get a
shot. (If I can't see it, the scary thing isn't there and I can
focus on my real senses.)
might be another good way of
tricking non-believers into taste-testing cicadas. And, to be
honest, I had to look in the other direction while popping the bits of
invertebrate flesh into my mouth, a bit like what I do when I get a
shot. (If I can't see it, the scary thing isn't there and I can
focus on my real senses.)
So, what do cicadas
taste like? Actually, when I could ignore the fact that I was
eating an insect, they were delicious. Keep in mind that I
taste-tested what's known in culinary circles as "soft-shelled cicadas"
--- youngsters who have just popped out of their nymphal skins and
haven't yet hardened up their exoskeletons.
I didn't detect the
almond or pistachio flavor reported on the internet. Instead, the
texture (and flavor, actually) was like the flesh from the one lobster
tail I've tasted, but without that faint hint of fishiness, and with a
little crunch when my teeth hit the wings. (I really liked the
cicadas wings-on and don't recommend removing the appendages.)
Since there are several species of periodic cicadas, I wouldn't be at
all surprised if each one tastes a little different.
 On a scale of 1 to 10, I'd
give these sauteed cicadas a 9. In addition to tasting good, the
insects also really agreed with me --- as I started writing this post,
my mouth watered and I snuck one of the cicadas I'm saving into my
mouth for a snack. On the other hand, it probably would have
taken all day to gather enough cicadas to serve as the protein source
for a whole meal, so I'll just keep snagging the delicacies as I pass
them by.
On a scale of 1 to 10, I'd
give these sauteed cicadas a 9. In addition to tasting good, the
insects also really agreed with me --- as I started writing this post,
my mouth watered and I snuck one of the cicadas I'm saving into my
mouth for a snack. On the other hand, it probably would have
taken all day to gather enough cicadas to serve as the protein source
for a whole meal, so I'll just keep snagging the delicacies as I pass
them by.
Which is all a long way
of saying --- I recommend them! If you've got cicadas crawling up
out of the ground, now's a perfect time to see if you like them as much
as I do.

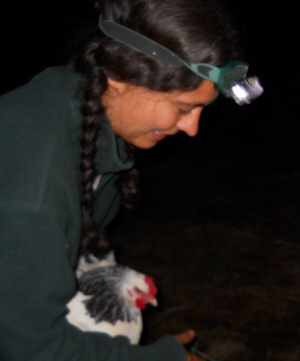
The easy way to catch a chicken is to wait till it gets dark and pick
them up off their roost.
We each got spelunking head
lamps back when our power went out
for 2 weeks, and quickly discovered how awesome a head mounted
light source can be.
My advice is to pay a little
extra for the higher end model that allows you to adjust the angle
where the light shines.
 I thoroughly enjoyed
everyone's thoughts on chapter
1 of Walden, even
though I didn't comment much, so I hope you all had time to read
chapter 2 --- "Where I lived, and what I lived for". I'm going to
write about two themes that caught my eye in this chapter, but, as
usual, feel free to comment on whatever you found the most interesting
instead.
I thoroughly enjoyed
everyone's thoughts on chapter
1 of Walden, even
though I didn't comment much, so I hope you all had time to read
chapter 2 --- "Where I lived, and what I lived for". I'm going to
write about two themes that caught my eye in this chapter, but, as
usual, feel free to comment on whatever you found the most interesting
instead.
Buying land
What struck me first is
how similar the beginnings of my and Thoreau's journeys were...and how
different the endings. "At a certain season of our life, we are
accustomed to consider every spot as the possible site of a house,"
Thoreau wrote, and went on to tell about all of the properties he
toured, one of which he came within a hair's breadth of buying.
I also went through a
land-yearning stage in which I drew maps of how I'd turn real and
hypothetical properties into vibrant homesteads, and I ended up happily
married to our plot of land. On the other hand, Thoreau decided
that the wiser course is to love and leave the land. "As long as
possible live free and uncommitted," he advises us. "It makes but
little difference whether you are committed to a farm or to the county
jail." Similarly, in the first chapter, he wrote about "young
men, my townsmen, whose misfortune it is to have inherited farms,
houses, barns, cattle, and farming tools; for these are more easily
acquired than got rid of."
This reminds me of Mike's
comment on my
previous Walden post in which he reminds us that no one can be free of
the economy, even if you buy a plot of land outright, grow your own
food, and need nothing else. Thoreau was thinking
more of the upkeep of a farm than he was about property taxes and a
mortgage, but both points have merit. So, my first discussion
question is --- do you think voluntary simplicity can be achieved if
you own land?
The news
 The second thing that struck
me in this chapter was more of a side note than a theme. Mark and
I have come to belief this over the last few years, but have had a hard
time articulating the premise, so I'll let Thoreau do it for me:
The second thing that struck
me in this chapter was more of a side note than a theme. Mark and
I have come to belief this over the last few years, but have had a hard
time articulating the premise, so I'll let Thoreau do it for me:
I've had several people
tell me that that it's somehow ethically imperative to stay up to date
on the world's news, but I've come to consider it all a
distraction. Yes, I do my homework and figure out the issues when
the time comes to vote, but I don't see any point in being emotionally
involved in the day to day running of the world if I can't do anything
about it. Which brings me to my second discussion question --- do
you consider all news gossip, or do you think we're morally obligated
to stay up to date on current events?
Chapters 3 and 4
Unless I hear that it's
a hardship for anyone, let's plan to talk about "Reading" and "Sounds"
next Monday. Now I'm looking forward to hearing what you have to
say about chapter 2!
(As a side note, I might
not be able to pull your comments out of moderation until this evening,
so don't despair if they don't show up as quickly as usual. I
promise I'm not weeding out comments I don't like --- everyone except
clear spam always makes it through moderation.)
My
new paperback includes fun and easy projects for every weekend of
the year to help guide you onto the path to self-sufficiency.

Our chicken
pasture/moat perimeter is coming close to completion.
Sometimes I like to recruit a
tree to function as a fence post, like this small walnut.
It saves time and money, but
it also looks more natural, which in my opinion increases the already
high level of beauty around here.

We left our beloved porch Sunday and Monday to see my
favorite little sister graduate from Berea College.
Congratulations, Maggie!
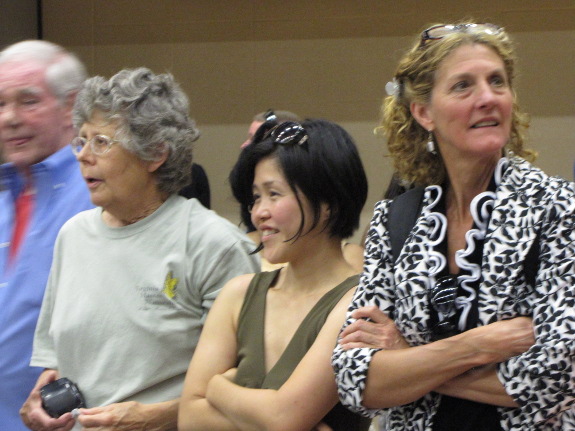
 I
call the photo above "Three Mothers". We were waiting for the
first appearance of our graduate....
I
call the photo above "Three Mothers". We were waiting for the
first appearance of our graduate....
Here she comes!
The photo below depicts
Mom's first sighting.


Walking across the
stage....
Her rooters below.

Then cookies and punch
in the quadrangle.

My favorite grand-nephew
seemed more interested in the brownies than in the dry-roasted cicadas I brought just for him.
What are kids coming to these days?

We're so proud of you,
Maggie!

Cornish
Cross broilers are usually eaten at 8 weeks. We give our
heirlooms an extra month
since they grow slower, but the deadline is still fast approaching.
We killed the rooster
last week and have four of last year's broilers left in the
freezer. Looks like we'll be eating a lot of chicken dinners in
May.
John
Little is a regular reader who lives in Japan and shared the following
fascinating data about differences between colony collapse disorder
there and in the U.S. I'll let him tell you the story in his own
words.
 On a different subject, bees
and CCD [colony
collapse disorder],
I recently came across some local (Japanese) information which seems,
on the face of it, to confirm the neonicotenoid connection. At an
apple growers meeting a couple of weeks back, one of the members
brought along a pre-release version of a documentary on DVD called "A
message from the bees".
On a different subject, bees
and CCD [colony
collapse disorder],
I recently came across some local (Japanese) information which seems,
on the face of it, to confirm the neonicotenoid connection. At an
apple growers meeting a couple of weeks back, one of the members
brought along a pre-release version of a documentary on DVD called "A
message from the bees".
Basically, there were
two critical points which differentiate the experience of
CCD here in Japan from
what is generally being seen in Europe and the U.S. The first is
that beekeepers here are
seeing different symptoms. Instead of empty hives, they're
finding piles of dead and incapacitated bees on the bottom boards and
in front of the hives. In the majority of cases, the deaths have
been correlated to local spraying of neonicotenoid-based insecticides
60 days before.
The second piece of
interesting information is that the spray dosage levels in Japan are
much, much higher than
in most of the rest of the world. For the common insecticides
used by fruit growers, the allowable levels (in ppm) are 20 to 300
(yes, three hundred!) times those mandated in Europe or the U.S.,
leading researchers here to the conclusion that they have identified a
"smoking gun".
As one old beekeeper
from the coast of Nagasaki-ken (in southern Japan) put it, "The centre
of Tokyo is now the safest place to raise bees. The air there is
cleaner than any part of the Japanese countryside".
Scary information
(especially for those of us who are involved in agriculture). And
the "message" from the bees? "You're not just killing us (bees),
you're killing
yourselves, too".

We decided to consult our new
porch
builder for some advice on shoring up the water damage in the barn.
He's had some experience with
barns like this and made short work of securing the above 4x4 with a
couple well placed 2x6 scabs.
 Phillip Meeks, an extension agent in
southeast Kentucky who works with a number of beekeepers, emailed me to
share his experiences with packages
of bees. He
wrote:
Phillip Meeks, an extension agent in
southeast Kentucky who works with a number of beekeepers, emailed me to
share his experiences with packages
of bees. He
wrote:
Because of this, I've begun to steer my own beekeepers away from the packaged swarms, trying to persuade them towards nucs instead. They're a bit more costly, but I've had great luck with the last one I bought, as have many of my beekeepers.
I don't know WHY the performance of packages has gone downhill, but it seems to be a consistent issue.
Anyway, just wanted to toss in my two cents -- not that it's any help to you now. I hope you can at least take it as encouragement that [your absconded package] probably isn't beekeeper error!
I'd be curious to hear
from those of you who have had packages abscond. Has the
experience only begun in the last few years, or did you see the
behavior previously?

Turns out some of the structural
damage to our barn was due to poison ivy vines.
The vines were exposed to
falling water, which got conducted to various spots for what I'm
guessing is decades.
It wasn't a problem for our
new hired hand. He's been immune to the effects of poison ivy since he
was a kid.
I like to save
seeds from my own tomatoes, but last year I got the
idea that perhaps saving seeds is one of the reasons blight always shows up in my
plantings. I think it's more likely that tomato blights simply
thrive during our warm, humid summers, but I figured it wouldn't hurt
to experiment by buying tomato seeds for 2012.
Now I wish I
hadn't. I'm struggling to fill my tomato beds with romas this
year, despite planting two flats and a quick hoop full. Before I
complain about the seeds, though, I have to be fair and say that part
of the problem was my own fault.
I put tomato seeds in
the quick hoops too early since it was so warm in March, and they came
up just before a serious cold spell. The quick hoops weren't
enough to repel frost when the outside temperature dropped into the
teens, so the tomato seedlings got nipped. I replanted the garden
beds in early April, but by then it had gotten so hot that the soil was
bone dry. In retrospect, I should have waited to plant my tomato
seeds in the quick hoops until April 1 no matter what the weather was
doing, and I should have taken the covers off on a warm day to let the
sprinklers hydrate the ground and get the tomatoes up and growing.
 Good
thing I decided to hedge my bets by starting some seedlings inside,
right? Unfortunately, this is where problematic seeds came into
play. I figured stock from Seed Savers Exchange would be as good
or better than any seeds I could save on my own, but now I'm not so
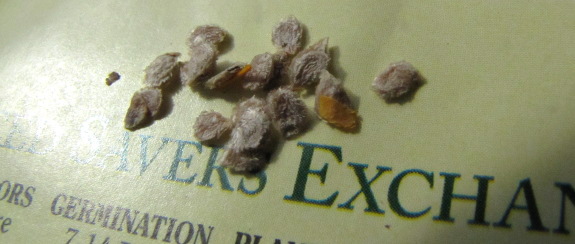
sure. The seeds in one packet looked dusty gray when they
arrived, almost as if the seeds were covered in mold, and I had a lot
of germination issues that got worse with each planting (suggesting
that the seeds were already near the end of their energy reserves when
they reached our farm). My second flat showed only 25% healthy
seedlings, and many of the plants came up headless, with cotyledons
seemingly pinched off by a hard seed coat. (This is very
different from damping off, which would have showed up as the stem
withering at the base.)
Good
thing I decided to hedge my bets by starting some seedlings inside,
right? Unfortunately, this is where problematic seeds came into
play. I figured stock from Seed Savers Exchange would be as good
or better than any seeds I could save on my own, but now I'm not so
sure. The seeds in one packet looked dusty gray when they
arrived, almost as if the seeds were covered in mold, and I had a lot
of germination issues that got worse with each planting (suggesting
that the seeds were already near the end of their energy reserves when
they reached our farm). My second flat showed only 25% healthy
seedlings, and many of the plants came up headless, with cotyledons
seemingly pinched off by a hard seed coat. (This is very
different from damping off, which would have showed up as the stem
withering at the base.)
Steve
Solomon wrote that most seeds sold to home gardeners are of poor quality, but that we blame
ourselves for seeds that don't sprout. I can see his point --- I
can't be confident this year's tomato dilemma is due to bad seeds and
not to some issue on my end. Regardless, I won't be planting as
many tomatoes as I'd hoped (although still more than last year), and
there will be more slicers and tommy-toes than usual since they
sprouted better than the romas.
That said, it's hard to
complain when the first few survivors are already nearly at the bloom
stage. And maybe at least the blight situation will be better
this year?
Edited
to add: See this
followup post which
probably exonerates Seed Savers Exchange.
The plan is to mount our solar
cell panels on the top
and build drying racks for curing garlic and sweet potatoes towards the
middle area.
 "Scythes are cool!" our
readers
admonish us every time we talk about our weedeater.
I used to be in love with the idea of scything once upon a time...and
then I was given a scythe.
"Scythes are cool!" our
readers
admonish us every time we talk about our weedeater.
I used to be in love with the idea of scything once upon a time...and
then I was given a scythe.
At the time, I didn't
know much about the tool, so I wasn't wise enough
to turn down the bulky American scythe and to save my pennies for a
quality Austrian scythe instead. I also trusted my father when he
told me that one size scythe fits all. That may be true if you're
a normal-sized man, but as a short woman, I spent all of my energy just
trying to keep the scythe blade from digging into the earth. I
gave up on the tool in disgust.
But then I stumbled
across Harvey
Ussery's scything page,
and was tempted once more. Ussery
explained that Austrian scythes cut with blades curved in three
dimensions, so they glide over the surface of the ground. In
contrast to the traditional American scythe blade --- which is stamped
out by a drop-forge press and has to be heavy to keep from breaking ---
Austrian blades are hand-forged by a blacksmith, so they are sharp,
light, and dent rather than shatter if you hit a rock. In fact, The
Scythe Book explains
that "over half the [Austrian scythe] blades
which begin the twenty-six stages of manufacture are rejected along the
way", which is why the blades are of such high quality (and cost so
much).
Then there's the handle,
known as a "snath" in scything circles.
Austrian snaths are typically very light, and both types of snath can
be fitted to your unique body. If you're an absolutely raw
beginner like me, you can order a scythe from The Scythe Supply
that's suited exactly to your proportions since you give them your
height, your handedness, the number of inches from ground to hip, and
your cubit (the distance from your elbow to your out-stretched middle
finger). The company will be sure the handles go in the right
places so you're not straining anything as you mow.
 While you're making your
decision, you'll also need to choose a kind and length of blade.
Your main choices are between bush/brush blades, which are short and
thick so they won't break when you whack at young saplings, and grass
blades, which are lighter and won't wear you out when you're cutting
softer plants. (A ditch blade is a bit of a hybrid, halfway
between the graceful grass blade and the hefty bush blade.) Grass
blades can be long or short, with longer blades being handy for
harvesting vast fields of wheat and shorter blades being more useful
when mowing small lawns with lots of edges. I think the raw
beginner could do worse than picking a middle of the road grass blade
--- I chose the 24 inch grass blade pictured here.
While you're making your
decision, you'll also need to choose a kind and length of blade.
Your main choices are between bush/brush blades, which are short and
thick so they won't break when you whack at young saplings, and grass
blades, which are lighter and won't wear you out when you're cutting
softer plants. (A ditch blade is a bit of a hybrid, halfway
between the graceful grass blade and the hefty bush blade.) Grass
blades can be long or short, with longer blades being handy for
harvesting vast fields of wheat and shorter blades being more useful
when mowing small lawns with lots of edges. I think the raw
beginner could do worse than picking a middle of the road grass blade
--- I chose the 24 inch grass blade pictured here.
With all of that in mind, I begged Mark to let me splurge on a hunk of
wood and metal, and he did. I'm here to tell you that the
difference between an American scythe that doesn't fit an an Austrian
scythe that does fit is like night and day. But this post is
already too long, so you'll have to wait to hear more about what
scything feels like and how to maintain a quality scythe blade in later
posts. If you want to learn more now, I highly recommend this
video my mom tracked down, which somehow manages to be inspiring and
hilarious all in a two minute time frame.

Golf cart jousting is a
modern twist on a 15th century popular past time that replaces the
horse with a golf cart and the traditional lance with a couple of 4x4's
bungee strapped together.
 Once
you start playing with cover crops, bare soil jumps right out
at you and begs to be planted. Last fall, we tore
a bit more of the old house down, exposing a big patch of
earth in which all plant life had been shaded out. It was too
late to plant anything else, so I just scattered a bunch of rye seeds
on the ground and proceeded to ignore it.
Once
you start playing with cover crops, bare soil jumps right out
at you and begs to be planted. Last fall, we tore
a bit more of the old house down, exposing a big patch of
earth in which all plant life had been shaded out. It was too
late to plant anything else, so I just scattered a bunch of rye seeds
on the ground and proceeded to ignore it.
The rye sprouted and
turned into a lawn-like coating before winter hit. Then, this
spring, the grain shot up and started to bloom.
If I was ready to use
that plot of earth, I'd cut the rye now and let the straw fall as
mulch. But there are still huge floor joists to be moved before
the footprint of the old house can be turned into garden, and we have
no time for projects like that at this time of year.
So I'm allowing the rye
go to seed to give me some more time before I need to make a decision
about that bit of earth. Truly a do-nothing
grain patch, I
haven't tilled, fertilized, or done anything else to the rye.
We'll probably feed any grain we get to the chickens, but what I'm
really salivating over is the hefty stalks for mulch.
Recently we gave a neighbor a
bag of extra lettuce and he turned around the next day and gave us a
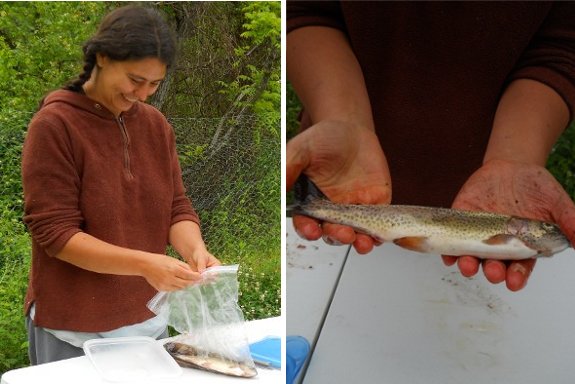
bag of fresh trout.
Anna is not a lover of
seafood like myself, but she didn't hesitate to clean up these three
trout for dinner the other day so I could have a treat.
It was delicious. Makes me
wonder if raising trout in an aquaponic
setting might be possible for
us.
 A few weeks ago, Everett asked us what we do during
our weekends
of non-work. I
always look a little shame-faced when people inquire about our leisure
hours because the cultural norm is to fill that time with activities
outside the home --- hiking, going to a movie, or whatever.
A few weeks ago, Everett asked us what we do during
our weekends
of non-work. I
always look a little shame-faced when people inquire about our leisure
hours because the cultural norm is to fill that time with activities
outside the home --- hiking, going to a movie, or whatever.
In contrast, a blissful
day off in Anna-land starts with gathering a big jar of cicadas
for the tweens, then
morphs into a quiet morning reading on the porch while listening to a catbird
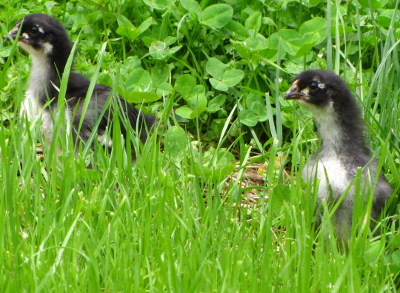
singing from the walnut or watching the three week old chicks learning
to forage in the lawn. I'll probably spend a little extra time
making something fancy for lunch, then will gravitate from non-fiction
to novel-reading in the afternoon. If I'm feeling crazy, I might
have my mother over for tea. I'm simply a boring person.
Which is all a long way
of saying that chapter 4 of Walden really spoke to me.
Thoreau wrote:
 I think that one of the major
benefits of living in paradise is that you don't feel the need to spend
much money on expensive leisure pursuits. As Joe Dominguez and
Vicki Robin wrote in Your
Money or Your Life,
the goal of voluntary simplicity is to turn your life into a vacation
so you don't need to take a vacation way from home. It has taken
several years for Mark to bring me around to this way of life, but I'm
now eternally grateful that he invented weekends.
I think that one of the major
benefits of living in paradise is that you don't feel the need to spend
much money on expensive leisure pursuits. As Joe Dominguez and
Vicki Robin wrote in Your
Money or Your Life,
the goal of voluntary simplicity is to turn your life into a vacation
so you don't need to take a vacation way from home. It has taken
several years for Mark to bring me around to this way of life, but I'm
now eternally grateful that he invented weekends.
That said, Walden's chapter 3 went right over
my head, and also made me wonder if my rants against TV sounded like Walden's rants
against easy reading. In this day and age, most people think
they're feeding their minds if they crack open a bit of chick lit or
flick on the History Channel, let alone "read Homer or Aeschylus in the
Greek".
So, what did you think of
this week's installment of Walden? Unless I hear some
"no!"s, I'll plan on us all reading chapters 5 and 6 (Solitude and
Visitors) for next Monday. If you're new to the book
club, you might want
to check out the thought-provoking comments on chapter
1 and chapter
2 as well. I
appreciate you all giving me the impetus to spend some time thinking
about this classic!
Want
more reading material? You can peruse my revised rant against
television in The
Weekend Homesteader.

We started out with one of
these bags leftover from Anna's
year abroad with a Watson fellowship.
Now we've got 6 of the same
oversized bags.
They mainly get used to carry
out boxed up chicken waterers, but have several other uses including leaf
gathering.
 I was going to title this
post "Fruitless" and talk about how Blackberry
Winter wiped out all of the tiny fruits on the peaches, apples,
pears, cherries, gooseberries, and plums. The tale wasn't going
to be all doom and gloom since blueberries, raspberries, grapes,
strawberries, and blackberries either missed the frost or bloomed over
a long enough time frame that we should enjoy quite a lot of fruit this
summer. And yet, even that isn't the full picture.
I was going to title this
post "Fruitless" and talk about how Blackberry
Winter wiped out all of the tiny fruits on the peaches, apples,
pears, cherries, gooseberries, and plums. The tale wasn't going
to be all doom and gloom since blueberries, raspberries, grapes,
strawberries, and blackberries either missed the frost or bloomed over
a long enough time frame that we should enjoy quite a lot of fruit this
summer. And yet, even that isn't the full picture.
The truth is that I tend
to go in the opposite direction of most folks, telling you about all of
our failures but only focussing on the biggest successes. There
are simply so many garden achievements every year, you'd be bored stiff
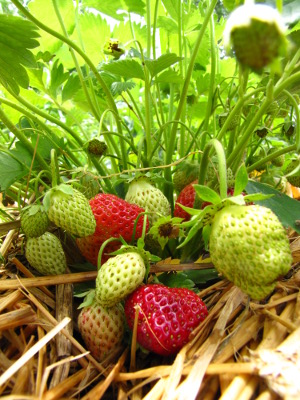
if I regaled you with the first snap peas (Sunday), the first real meal
of non-frost-nipped strawberries (last week), and so on ad infinitum.
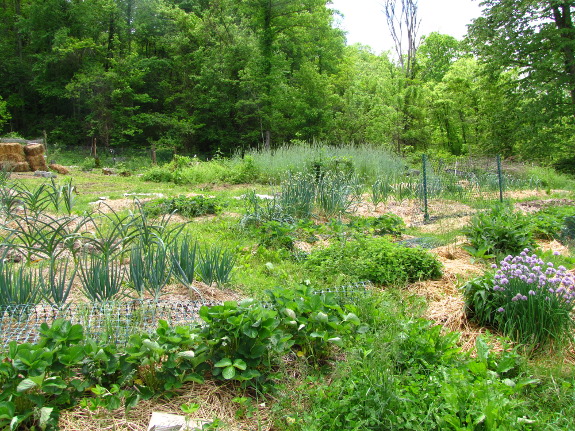
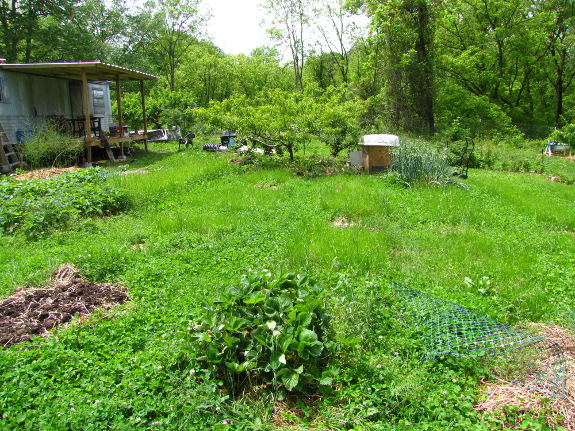
 It occured to me that you
can't walk around our garden --- prettier this year than ever before
--- and see it for yourselves. So here it is in all of its mid
May glory!
It occured to me that you
can't walk around our garden --- prettier this year than ever before
--- and see it for yourselves. So here it is in all of its mid
May glory!
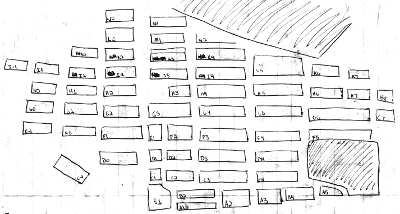
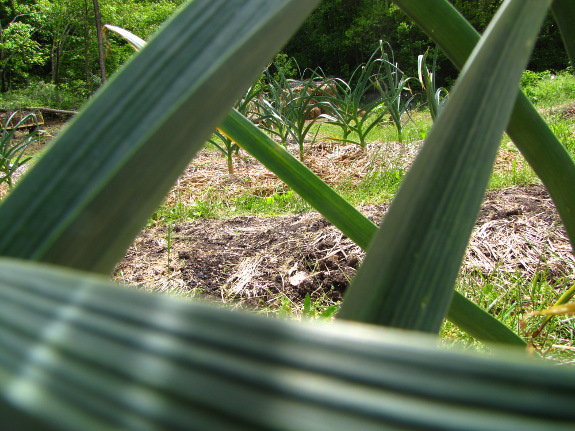
The photo above was
taken in our front garden, the oldest vegetable patch on our farm,
where the soil is the best, the sun the worst, and the aisles
in need of streamlining. I set out most of our
garlic there last fall, along with a bed of Egyptian onions, some chives, and our experimental potato
 onions, so the area
feels like one big mass of Amaryllidaceae.
onions, so the area
feels like one big mass of Amaryllidaceae.
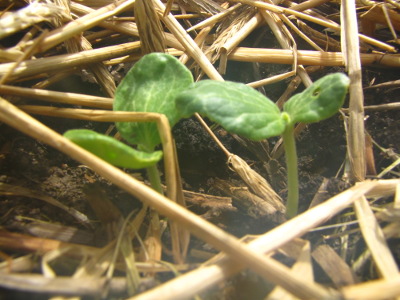
The empty beds are
filling up fast with summer crops, many of which have already popped
up. Once we put in our second planting of things like green
beans, corn, and squash this week, the front garden will be pretty much
full.
The back garden (shown
below) is nearly all coated with annual
ryegrass in an
attempt to repair the waterlogged, topsoil-less ground. Mark's
been doing a great job of mowing the 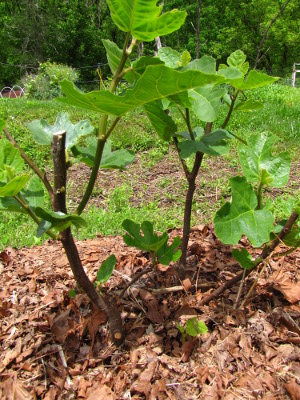 garden beds each time he cuts
the aisles, which maximizes the grass's growth and means lots more
organic matter works its way into the soil. That one bare bed is
coated with tiny basil seedlings, and you'll notice I snuck
strawberries into the back garden despite this being its fallow year.
garden beds each time he cuts
the aisles, which maximizes the grass's growth and means lots more
organic matter works its way into the soil. That one bare bed is
coated with tiny basil seedlings, and you'll notice I snuck
strawberries into the back garden despite this being its fallow year.
Meanwhile, the chick
brooder is hidden behind our second oldest peach tree. Even
though we won't be enjoying luscious peaches this year, at least the
tree provides some much-needed shade.
And, at the bottom of
the back garden, our Chicago
hardy fig only died
partway back this past winter. I pruned the bush to three stems,
cut off the dead tops, and am hoping to taste figs for the first time
this fall!
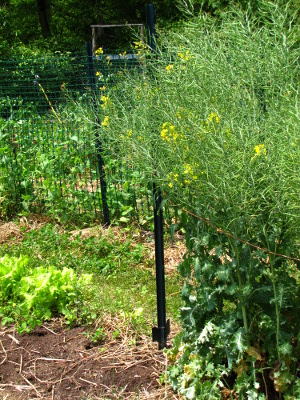
Moving on, I forgot to
take a picture from afar of the forest garden, home to this year's
tomatoes, but the photo below pretty much sums it up.
 And then there's the mule
garden, from whence most of our meals are coming at the moment.
I've been putting all of my energy into getting the front garden ready
for summer crops lately, so the mule garden is looking a little ragged
around the edges, but not so much that the crops are suffering.
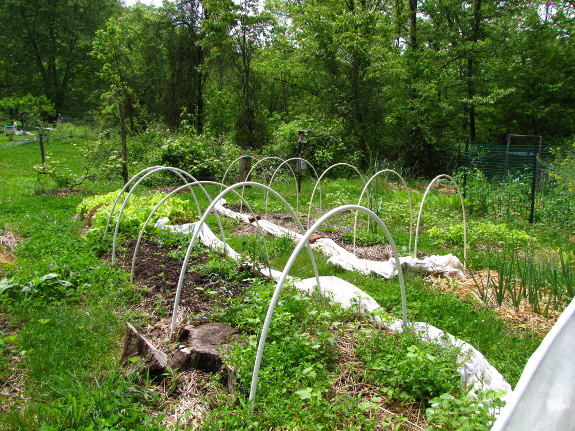
This week, I'll be starting my next pass through, taking down the last
quick hoops, weeding the seedlings who were too small to work around a
month ago, and adding more mulch.
And then there's the mule
garden, from whence most of our meals are coming at the moment.
I've been putting all of my energy into getting the front garden ready
for summer crops lately, so the mule garden is looking a little ragged
around the edges, but not so much that the crops are suffering.
This week, I'll be starting my next pass through, taking down the last
quick hoops, weeding the seedlings who were too small to work around a
month ago, and adding more mulch.
I'm already thinking
ahead to fall since this sunny garden is the best spot for
overwintering greens. Soon, I'll plan where all the late summer
and autumn crops will go, and will probably set aside a lot of the mule
garden beds to be planted in wave
after wave of buckwheat. That will prevent me
from sneaking summer crops into areas slated for the fall garden, and
will build organic matter at the same time.
Another alternative is
to let some of the spring crops go to seed. Every year, I add one
or two more vegetables to my list of easy to save seeds, and the new
experiments this year are kale and Swiss chard (the latter
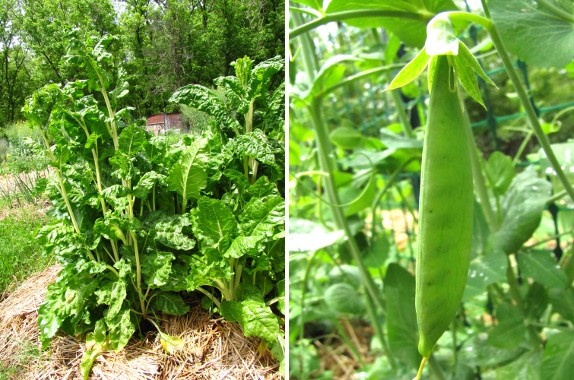
of which is shown below on the left.)
I hope you enjoyed your
garden tour! If you were here in person, you would be snacking on
a sugar snap pea and a juicy strawberry by now, but hopefully you'll
get the gist photographically. 2012 is far from fruitless!
Garlic will be the first test curing, but that's still weeks away.
 I didn't contact Seed Savers
Exchange about my potentially
bad tomato seeds
because I wasn't 100% sure the problem was their fault. But one
of their employee's --- Tom Wahlberg --- stumbled across my post and
emailed me in concern. He told me that, "like we state on each
packet, we really do mean Satisfaction Guaranteed, and have credited
your account for these two packets."
I didn't contact Seed Savers
Exchange about my potentially
bad tomato seeds
because I wasn't 100% sure the problem was their fault. But one
of their employee's --- Tom Wahlberg --- stumbled across my post and
emailed me in concern. He told me that, "like we state on each
packet, we really do mean Satisfaction Guaranteed, and have credited
your account for these two packets."
While the refund was
appreciated, I was more intrigued to hear about how Seed Savers
Exchange grows, processes, and tests seeds. Wahlberg explained:
 Depending on the length of time
of fermentation it is possible the Organic would have a higher level of
fungal activity, but also would retain more of the normal fuzzy
exterior which could also be what you are seeing. The
Conventional by contrast will have been processed via acid extraction,
which is not a seed treatment, but rather a method commercial growers use to break down the
gelatinous membrane around the seed without the delay inherent with the
fermentation process. That would also explain the difference in
the shade between the two varieties.
Depending on the length of time
of fermentation it is possible the Organic would have a higher level of
fungal activity, but also would retain more of the normal fuzzy
exterior which could also be what you are seeing. The
Conventional by contrast will have been processed via acid extraction,
which is not a seed treatment, but rather a method commercial growers use to break down the
gelatinous membrane around the seed without the delay inherent with the
fermentation process. That would also explain the difference in
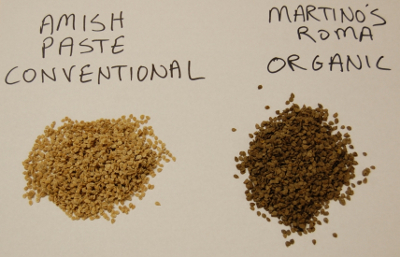
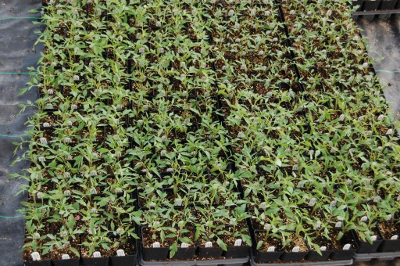
the shade between the two varieties.As for germination, we utilize Midwest Seed Services for independent analysis, and the most recent results are as follows:
| Variety |
Date of test |
Germination |
Lot# |
| Amish Paste --- Conventional |
01/12 |
96% |
107-1824 |
| Amish Paste --- Conventional |
02/12 |
98% |
107-1911 |
| Martino's Roma --- Organic |
11/11 |
96% | OG259-381 |
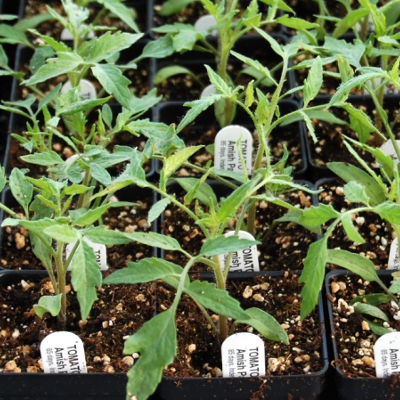 Wahlberg went on to
tell me that Seed Savers Exchange has started hundreds of Amish Paste
plants in the greenhouse this year (some of which you can see in this
and the previous photo). "In light of your observations, we will
also start a flat of the Martino's for evaluation."
Wahlberg went on to
tell me that Seed Savers Exchange has started hundreds of Amish Paste
plants in the greenhouse this year (some of which you can see in this
and the previous photo). "In light of your observations, we will
also start a flat of the Martino's for evaluation."He finished by telling me:
I thought I should set the record straight, and will let you know what Wahlberg finds out about the Martino's Roma seeds.

So I was on my way to get
some horse manure this morning when the truck all of a sudden stopped
and wouldn't start back up.
The local dealer was just a
short hike down the road...Gulp.
It was only 50 dollars to
have them go back and fetch our truck with the above bigger truck. They
won't look at it till tomorrow.
Dealerships have always made
me nervous. I think I might rather walk down a dangerous dark alley,
but sometimes they're the best mechanical choice. I'll spare you the
wallet munching stories that have helped me to form this opinion. So
far today's experience is working out to change my mind at least a bit.
This dealer is in Castlewood...city for us, but most people
would consider it a country dealership, which feels like an advantage.
Maybe that's why the people working there seem so much friendlier than
the last dealer I was at?
 Even though staking up plants
seems absurdly simple, we've gone through a lot of trial and error
before finding techniques that work for us. But first --- why tie
up plants at all?
Even though staking up plants
seems absurdly simple, we've gone through a lot of trial and error
before finding techniques that work for us. But first --- why tie
up plants at all?
We stake plants in our
vegetable garden for their own good and to make our lives easier.
Staking tomatoes (combined with pruning) keeps the leaves drier,
which holds off blight in hot, humid climates like ours. After
you stop picking your asparagus, the tall fronds can easily become top
heavy and snap off during windy or wet weather, and I've found the same
is true of plants like kale when you let them fruit in order to collect
the seeds. Then there's the fact that it's annoying to have to
lift up those tall plants sprawling across the aisle every time you
want to push a wheelbarrow or mower through.
 We've tried lots of different
materials and methods for staking plants, and my favorite by far uses
light-weight metal fence posts. (These are often called "U-posts"
because they're shaped like a U in cross-section.) Heavy T-posts
are too hard to pound in (and to take back
out when you need to move your stakes), while free materials like
branches and bamboo have a tendency to rot and break at just the wrong
moment. Although fence posts are expensive when bought in large
quantities, they also last a very long time if you're nice to them ---
we expect ours to keep going for a decade or two.
We've tried lots of different
materials and methods for staking plants, and my favorite by far uses
light-weight metal fence posts. (These are often called "U-posts"
because they're shaped like a U in cross-section.) Heavy T-posts
are too hard to pound in (and to take back
out when you need to move your stakes), while free materials like
branches and bamboo have a tendency to rot and break at just the wrong
moment. Although fence posts are expensive when bought in large
quantities, they also last a very long time if you're nice to them ---
we expect ours to keep going for a decade or two.
If your soil's soft, you
can push your posts in by jumping on the pegs at the bottom (imagine
the fence post is a pogo stick). Alternatively (especially in
hard soil), you can pound the posts in with a mini sledge hammer.
I usually ask Mark to pound in the posts 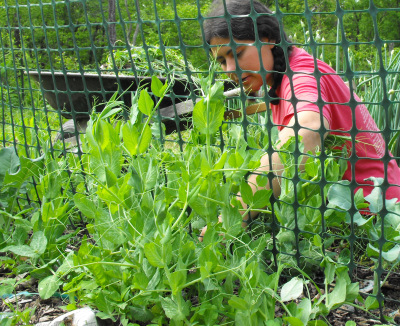 very solidly if they're going
to be in place all summer, but I just push them in the easy way for
more temporary applications.
very solidly if they're going
to be in place all summer, but I just push them in the easy way for
more temporary applications.
I've written before
about how to make a pea
trellis --- we still
make our trellises exactly the same way three years later because the
method works so well. (Well, we did invest in some taller U-posts
so we don't have to add the stick extensions, and we often put the
posts a bit closer together now.) We use the same kind of trellis
for cucumbers, and would use it for green beans too if we didn't grow
bush varieties.
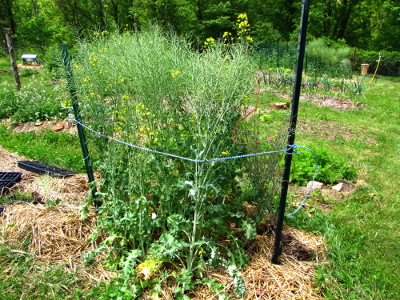 For
asparagus or other plants that grow in a big mass, I generally put a
post at each corner of the bed and tie a piece of wire, plastic baling
twine, or rope all the way around the plants. For my flowering
kale, I cut corners a bit and just used two posts per bed --- I figure
I can get away with this method since the kale will be done blooming
and will be ready to harvest in a few weeks.
For
asparagus or other plants that grow in a big mass, I generally put a
post at each corner of the bed and tie a piece of wire, plastic baling
twine, or rope all the way around the plants. For my flowering
kale, I cut corners a bit and just used two posts per bed --- I figure
I can get away with this method since the kale will be done blooming
and will be ready to harvest in a few weeks.
The
only other thing we stake up regularly is tomatoes. For my tall,
indeterminate varieties, I slip an eight foot piece of rebar into the
groove in the U-post, making sure the rebar extends at least a foot
into the ground for stability. Then I simply tie the tomato to
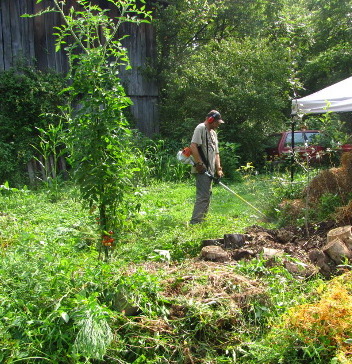 the post (and then rebar) whenever the top of the plant starts wanting
to bend down. A tomato vine in late summer can be very heavy, so
be sure to use heavy-duty ties --- like wire or plastic baling twine
--- rather than organic baling twine, or you'll have a tomato collapse.
the post (and then rebar) whenever the top of the plant starts wanting
to bend down. A tomato vine in late summer can be very heavy, so
be sure to use heavy-duty ties --- like wire or plastic baling twine
--- rather than organic baling twine, or you'll have a tomato collapse.
My final word of advice
is --- stake early! If you wait until your plants are starting to
bend down into the aisle, you'll risk breaking them off and will take
twice as long erecting stakes. Nowadays, I simply put the the
trellises and stakes in place before planting a single seed or set.
As if the beauty and
maneuverability of a well-staked garden isn't enough, I've discovered
that our fence posts have yet another advantage. Bluebirds and
phoebes love to perch on top of the posts, eating insects while
depositing droppings right where I need the extra fertility.
Thanks, guys!
Our new hired helper went a
few extra miles today by bringing his utility trailer along for some
emergency manure hauling.
"It won't be a problem" was
his reply when we asked him.
I'm thinking it went a bit
smoother loading buckets onto a trailer compared to the higher up truck
bed which is still at
the dealer.
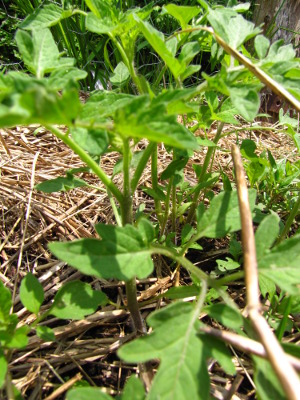 Sometimes I feel like all I
have to do is tell the farm that I need something, and it
provides. There's really nothing mystical about it --- you just
have to focus on what you want and then keep an open mind so you notice
the solution when it looks you in the face.
Sometimes I feel like all I
have to do is tell the farm that I need something, and it
provides. There's really nothing mystical about it --- you just
have to focus on what you want and then keep an open mind so you notice
the solution when it looks you in the face.
You'll recall that I
posted earlier this week about being
low on roma tomato transplants. While weeding asparagus alley Thursday, what did I find
but a big patch of healthy volunteer romas!
There are always lots of
volunteer
tomatoes in our
garden, but it's usually tough to tell which variety they are until
they fruit. Since we fertilize our garden with horse manure to
which kitchen scraps from someone else's household are added, volunteer
tomatoes could be just about anything. One year, I babied a
volunteer tomato, only to find out that it was some kind of grocery
store variety that won't get past the pink, hard stage before the
fruits rot off. So I swore off keeping volunteer tomatoes ---
it's just too much of a gamble in our setting.
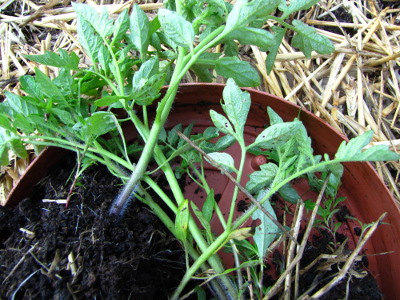 However, Thursday's
volunteers were all growing from one spot which just happened to be
where the yellow romas lived last year. I'm 85% sure a fruit fell
there and rotted in the midst of the summer garden frenzy, which would
explain why there are so many tomato plants popping up out of the same
spot but none on either side. So I thanked the farm, then
transplanted those yellow romas into my empty tomato beds. I can
taste those extra sun-dried
tomatoes already!
However, Thursday's
volunteers were all growing from one spot which just happened to be
where the yellow romas lived last year. I'm 85% sure a fruit fell
there and rotted in the midst of the summer garden frenzy, which would
explain why there are so many tomato plants popping up out of the same
spot but none on either side. So I thanked the farm, then
transplanted those yellow romas into my empty tomato beds. I can
taste those extra sun-dried
tomatoes already!
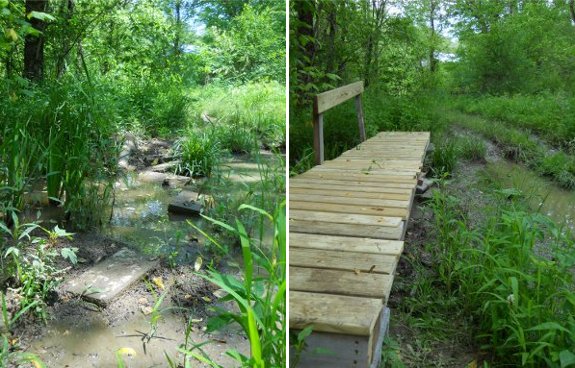
Those
green
house tables were 10 feet long. We used 4 of the top sections along
with some decking boards to make this new swamp bridge.
It's a huge improvement over
the previous cinder block system.
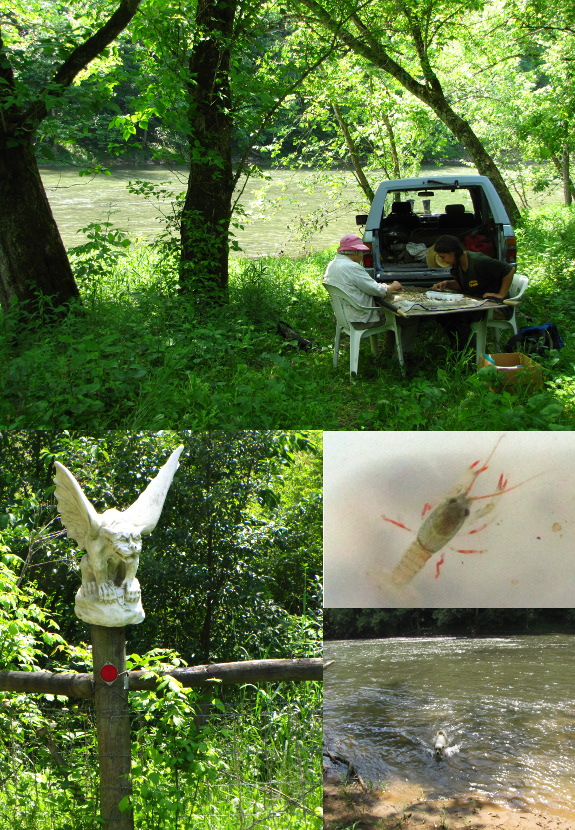
Even though the gargoyle
was guarding the river, our stream
monitoring session
still turned up results in the Gray Zone. That means our site on
the Clinch River is neither good nor bad, probably due to upstream
straight pipes and cows. Splashing around in the water on a hot
afternoon, on the other hand, was 100% good.
(Photo credits for the
top and bottom right photos go to our movie
star neighbor.)
 Once upon a time 4 or 5 years ago
a man or woman could buy a 13 amp entry level circular saw for 40
dollars.
Once upon a time 4 or 5 years ago
a man or woman could buy a 13 amp entry level circular saw for 40
dollars.
Those days are over.
12 amp is now the best you
can get at that entry level price.
We got this 40 dollar Skil circular saw last week and it
seems to be just as strong as its 13 amp counter part, but it's sort of
an unfair comparison seeing how the new saw had a fresh and sharp
blade. Time will tell if the downgrade in motor capacity will have a
noticeable effect. Our use will be low to medium, so we won't be the
best gauge, but I plan to update this review in a year or two because
power tools are beautiful and photogenic.
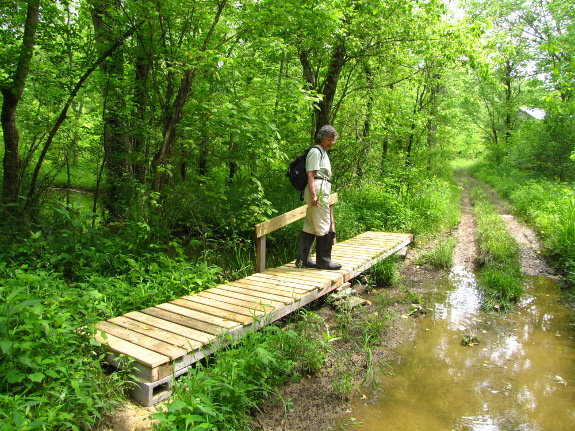
 Mom
came over to inaugurate our new boardwalk (and to coo over the porch and eat
chocolate
strawberry shortcake).
Mom
came over to inaugurate our new boardwalk (and to coo over the porch and eat
chocolate
strawberry shortcake).
While she was at it, she
brought me a t-shirt response to my statement that "I'm
simply a boring person." The quote, attributed to an Amish
farmer, goes:
"I just said, 'We farm.'
"He understood what I meant.
"He was intelligent."
What's your favorite kind of at-home entertainment?
Our chicken waterer lets us leave town for the
weekend without worrying about our flock. Mostly, though, we
prefer to stay home.

A little more research helped
to guide us towards a system that will allow the angle of the solar
panel tower to change for
different times of the year. More complex systems have a new position
for each month, but we might settle for a new angle for each season to
keep it simple.
What will be more challenging
is changing the position during the day. We've considered using a heavy
duty swivel so it can turn from the East to West.
Once it's all put together we
can either move the swivel by hand at different times of the day or
figure out a motorized option.
 Before I delve into chapters
5 and 6 of Walden, I want to get a head count
to see who's still reading. I don't mind at all having folks who
haven't read the book comment, but sometimes I can't quite tell if
anyone else is still reading or if we should switch books. So,
please leave a comment if you're still with me! (And, if you're
not, leave a comment to tell me whether you might rejoin the club if we
switched over to something lighter.)
Before I delve into chapters
5 and 6 of Walden, I want to get a head count
to see who's still reading. I don't mind at all having folks who
haven't read the book comment, but sometimes I can't quite tell if
anyone else is still reading or if we should switch books. So,
please leave a comment if you're still with me! (And, if you're
not, leave a comment to tell me whether you might rejoin the club if we
switched over to something lighter.)
This sentence from near the beginning of chapter 6 sums up much of the
gist of this pair of chapters. The themes included being alone
without being lonely, and at the same time making human interactions
more meaningful. I was especially struck by the first theme since
it's one I've wrestled with throughout my life, and I feel is essential
for a homesteader to conquer.
 I hear these same words all the
time, but I seldom come up with as good a reply as Thoreau's:
I hear these same words all the
time, but I seldom come up with as good a reply as Thoreau's:
I think Thoreau and I have two character traits very much in common ---
we're both introverts and neither of us takes friendship lightly.
Although most people don't have the luxury of acres of trees
surrounding their homestead as a buffer, I wish everyone could live the
way we do. I feel like it's much easier to be genuine and kind to
the people I do come in contact with when they're not breathing down my
neck on a regular basis.
Again, I couldn't agree more. We don't get trick-or-treaters,
salesmen, or people trying to convert us to their religion due to our moat, and the mud
definitely separates the wheat from the chaff. In fact, our
choice to keep employing Bradley after he built
our porch was based largely on the fact that he wore quality
waterproof boots and had no problem tromping through the mud.
So, what did you think of chapters 5 and 6? Did different themes
speak to you? Did you find this chapter duo as enjoyable as I did?
Meanwhile, if you're new to the book
club, you might want
to check out the thought-provoking comments on
chapter
1, chapter
2, and chapters
3 and 4. I'll wait to post a "reading assignment" until
tomorrow, at which point I should have an idea of whether we're all
still getting something out of Walden or would like to move on.
Weekend
Homesteader provides
48 fun and easy projects to guide you on the path to
self-sufficiency. Yes, that means I skip Thoreau-style projects
like hewing logs for your cabin with an ax.
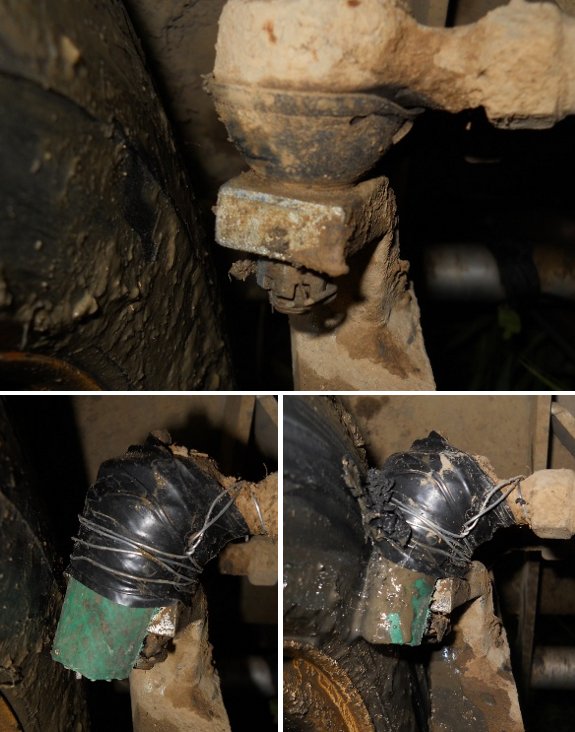
The golf cart front wheel bearings started making an awful grinding
sound that created a situation where the tire was rubbing against the
corner of the steering thingamajig.
We really wanted to haul in
some more lumber, so I came up with the above garden hose band aid to
protect the tire.
It bought us about 2 miles
worth of hauling before the bearing started giving out in a different
spot.
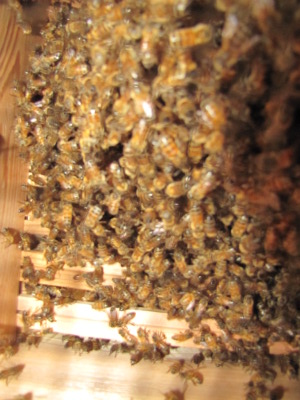 From my paucity of apiary
posts lately, you would be forgiven for thinking that when my bees
absconded, my
beekeeping enthusiasm left with them. However, the truth is that the
package we installed in our Warre hive has been bulking up nicely
--- I've just been following the rules and leaving the hive closed.
From my paucity of apiary
posts lately, you would be forgiven for thinking that when my bees
absconded, my
beekeeping enthusiasm left with them. However, the truth is that the
package we installed in our Warre hive has been bulking up nicely
--- I've just been following the rules and leaving the hive closed.
Due to the wonders of
modern technology, though, I can refrain from cracking open the hive
and can still get an idea of what's going on inside. Once a week,
I snap a shot through the screened bottom board. The photos are
generally subpar in terms of quality, but do let me keep an eye on the
bees' progress.
We installed the package
on April 27, and the first photo in this post shows what the bees
looked like two days later. They were simply a tight cluster of
bodies enclosing the queen, who was still trapped in her cage.
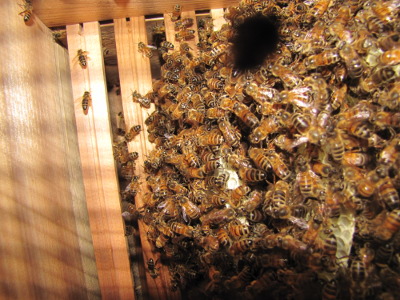
Eleven days after
installation, my non-intrusive inspection showed a little bit of comb
being built. If I'd opened the hive, I would have been able to
see whether the queen was laying, and on the off-chance she wasn't,
could have ordered a replacement queen. With a Warre hive, you
have to simply hope for the best (and pay attention to the hive's mood,
smell, and sound).
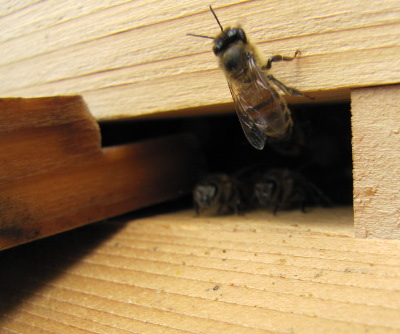 Sixteen days after
installation, I could have discovered a lot by opening the hive.
The presence of eggs would tell me the queen was still alive and well,
and now I could look at the capped brood to determine whether she had
been properly inseminated. (Lots of drone
brood and little
worker brood could be a sign of a queen who didn't have sex with enough
drones during her mating flight.) However, when I received an
improperly mated queen three years ago, I chose to let the workers supersede her and turn one of the eggs
into a queen of their choice, so the truth is I wouldn't have done
anything if I'd seen too much drone brood in the two week old hive
anyway. Of course, since I was working with a Warre hive, I
didn't even have this decision to make --- I could still see comb in my
photos (too blurry to share), and the workers were definitely bringing
pollen in, so I chose to assume all was well.
Sixteen days after
installation, I could have discovered a lot by opening the hive.
The presence of eggs would tell me the queen was still alive and well,
and now I could look at the capped brood to determine whether she had
been properly inseminated. (Lots of drone
brood and little
worker brood could be a sign of a queen who didn't have sex with enough
drones during her mating flight.) However, when I received an
improperly mated queen three years ago, I chose to let the workers supersede her and turn one of the eggs
into a queen of their choice, so the truth is I wouldn't have done
anything if I'd seen too much drone brood in the two week old hive
anyway. Of course, since I was working with a Warre hive, I
didn't even have this decision to make --- I could still see comb in my
photos (too blurry to share), and the workers were definitely bringing
pollen in, so I chose to assume all was well.
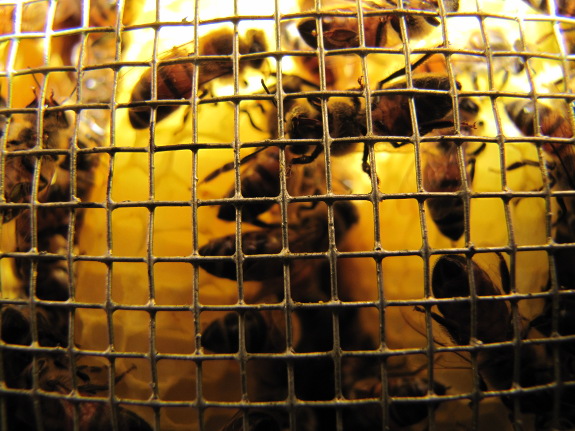
Twenty-three days after
installation (this past Sunday), I finally saw something within my hive
that required work on my part. The bottom box was starting to
look nearly full up! 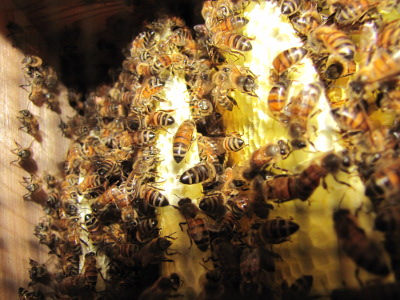 Assuming the queen is laying
well, this is about the time the first new workers should pop out of
their cappings, which means the colony could grow even more quickly
from here on out.
Assuming the queen is laying
well, this is about the time the first new workers should pop out of
their cappings, which means the colony could grow even more quickly
from here on out.
Since I started the hive
with two boxes, I can't tell whether the bees have filled the top box
as well, but there's no reason not to hoist the bees up and put another
box underneath (known as nadiring). This process preserves
the hive scent and temperature, and is the least intrusive
method of increasing a bee colony's living area. Looks like it's
time to build another box this week and take our first real peek inside
the hive since we took
out the queen cage!
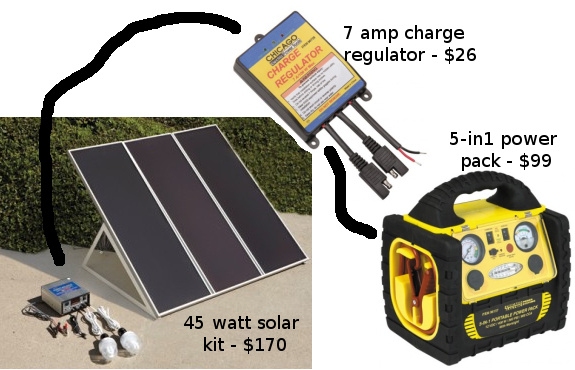 Regular
readers will recall that we got excited about a potential plug
and play solar setup
a couple of years ago. Unfortunately, as many of our commenters
suspected, the battery
packs had very
little longevity and have already died.
Regular
readers will recall that we got excited about a potential plug
and play solar setup
a couple of years ago. Unfortunately, as many of our commenters
suspected, the battery
packs had very
little longevity and have already died.
We still want to start
small with what we can pay for now rather than buying a
full-house-style solar setup on credit. But we also want to make
sure the batteries go the distance this time around, so I've put some
time into researching our choices. Here are the options I've come
across:

- Car batteries are not recommended. Yes, they are cheap, but car batteries are designed to discharge a lot of energy at once and then recharge slowly, while a solar setup needs just the reverse --- a battery that will recharge quickly and discharge slowly (known as deep cycle). Experts say you'll get a few months of life out of a car battery hooked up to solar panels, but that's it.
- RV or marine batteries are the next cheapest, but still aren't recommended by experts. They're usually easy to find locally and they do last a bit longer than car batteries, but probably will die within a year. They also have a tendency to explode if not cared for well.
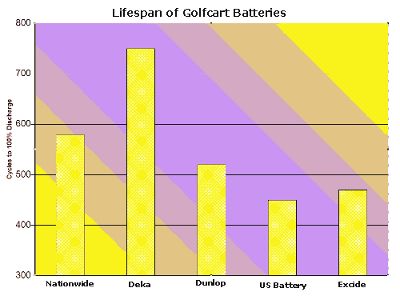 Golf cart batteries are
considered the minimum acceptable batteries by solar experts.
They are generally 6 volts, so you'll need to buy them in pairs and
wire the batteries together to create a 12 volt system. Golf cart
batteries usually last two to four years when connected to solar
panels, and one site claims that Deka batteries will last 5 to 10 years
and another lists Trojan T-105 batteries with the same cycle life.
Golf cart batteries are
considered the minimum acceptable batteries by solar experts.
They are generally 6 volts, so you'll need to buy them in pairs and
wire the batteries together to create a 12 volt system. Golf cart
batteries usually last two to four years when connected to solar
panels, and one site claims that Deka batteries will last 5 to 10 years
and another lists Trojan T-105 batteries with the same cycle life.
- Gel cel or absorbed glass matt (AGM) batteries make it easier to design your battery box since they don't need to be refilled and don't vent explosive gases, but they cost about 30% more than a similar capacity golf cart battery and don't last any longer.
- Fork lift batteries ---
Only one website mentioned these batteries, but the author glowed over
their life expectancy. Otherwise, they're similar to golf cart
batteries, only much more expensive.
We also have a source
for used bulldozer batteries, but I have a feeling these are going to
be like car batteries, just higher capacity. What do you think?
I'll go into how many
batteries I think we need in a later post, but I hope to hear from our
experts (Roland, Zimmy, etc.) to critique this stage of my
research. At the moment, I'm leaning toward golf cart
batteries. Which would you choose and why?
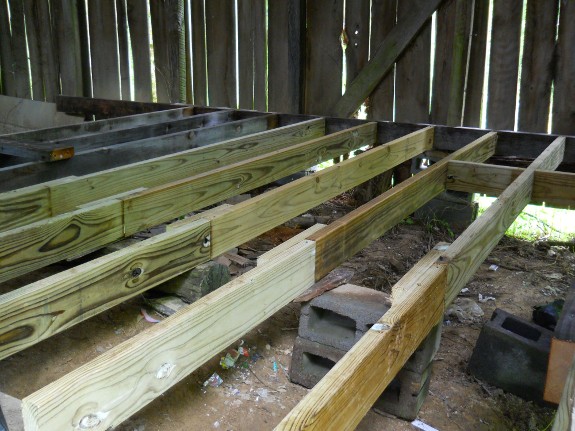
We put some more of those green
house tables to good use
on the new barn floor project.
The floor panels will have to
wait until the golf cart parts show up so we can shuttle them back the
easy way.
I might even have them cut in
half to make the hauling a bit easier.
My brother Joey (yes, he
who does all the of behind the scenes stuff on this blog) is running a
kickstarter program!
He's only asking for $3,000 to make an already awesome piece of free
software user friendly. If you like the idea of Dropbox and
clouds but would rather use a freeware version that doesn't lock you
into doing things the corporate way, Joey's app is just what you're
looking for.
We'll be donating
shortly, and I hope you will too. He has until June 12 to reach
his goal, but I'd like to see him funded by the end of the day.
(He's also looking into
the recent sporadic downtimes. Hopefully it'll be fixed soon.)
 Sometimes,
I like to ponder how I would make different decisions if I was truly
forced to be self-sufficient. My scenarios range from the
fantastical --- we fall back through a time portal and are hacking our
living out of the wilderness --- to the prosaic --- we simply can't
afford storebought goodies.
Sometimes,
I like to ponder how I would make different decisions if I was truly
forced to be self-sufficient. My scenarios range from the
fantastical --- we fall back through a time portal and are hacking our
living out of the wilderness --- to the prosaic --- we simply can't
afford storebought goodies.
Strawberry week is one
indulgence that would definitely go if I had to
be truly self-sufficient. Since strawberries are my favorite
fruit, I spend the first week of full harvest gorging to my heart's
content. We have strawberries breakfast, lunch, and dinner (and
for dessert, of course), and I don't worry one bit about preserving a
berry for later.
If I was counting on our
own stores of fruit to get us through the winter, though, strawberry
week would go. Especially in a year like this one where an early
bloom combined with a late frost wiped out the first berries,
shortening our usual month of strawberries to more like two or three
weeks. Even with unlimited fruit at the grocery store, I wouldn't
treat myself to so many berries now if I didn't have the option of
storebought winesap apples from the fruit stand to get
me through the winter.
 As it is, we've only filled
the food
dehydrator with the
fixings for strawberry
leather once so far,
and I suspect we may fit in one more batch before the berries start to
dwindle. Homegrown strawberry leather really perks us up in
February and March when there's nearly nothing fresh coming in from the
garden. But not so much that I want to eliminate strawberry
week....
As it is, we've only filled
the food
dehydrator with the
fixings for strawberry
leather once so far,
and I suspect we may fit in one more batch before the berries start to
dwindle. Homegrown strawberry leather really perks us up in
February and March when there's nearly nothing fresh coming in from the
garden. But not so much that I want to eliminate strawberry
week....
 I
appreciate everyone weighing in with their pros
and cons about the Walden book club. Even though the votes
were approximately evenly split, I think we're going to carry on, with
a couple of subtle changes. First, I'll start making my sum-up
post at lunchtime so we're not watering down the koolaide. And,
since I'm telling you this so late in the week, I think the deadline
for next week will be Wednesday instead of Monday.
I
appreciate everyone weighing in with their pros
and cons about the Walden book club. Even though the votes
were approximately evenly split, I think we're going to carry on, with
a couple of subtle changes. First, I'll start making my sum-up
post at lunchtime so we're not watering down the koolaide. And,
since I'm telling you this so late in the week, I think the deadline
for next week will be Wednesday instead of Monday.
I have to admit that the
decision to carry on is entirely selfish. I know I won't finish
Walden without you, and I hate to stop reading books in the
middle. Plus, I'm really getting a lot out of hearing analyses
from people who disagree with me.
Those of you who gave up
in disgust might consider just skipping the beginning and starting with
chapters 7 and 8 (The Bean-field and The Village). I feel like
the book is gathering steam as we pass the halfway point, and you don't
need to worry you missed anything.
Let the reading begin!
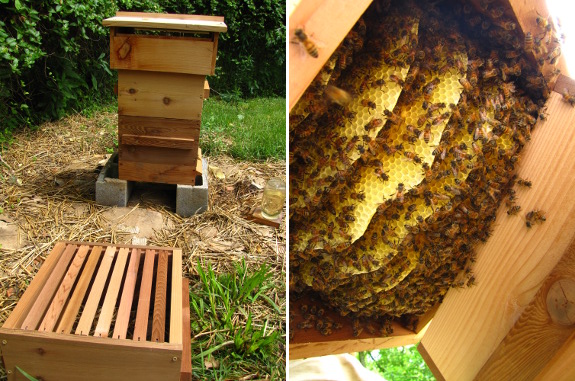
Nadiring is a fancy bee
keeping word for installing a new brood box on the bottom.
The bees were nice about the
brief operation. We paused for just a minute while I balanced the box
and Anna ducked under for the above hive inspection photo.
We were both suited up in
protective gear, but we skipped the smoker and gloves due to the calm
nature of these bees.
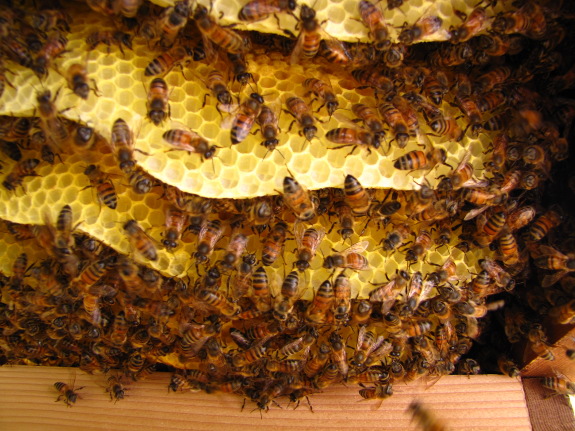
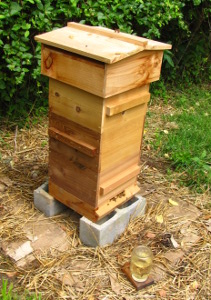 When
we nadired
our Warre hive
yesterday, I couldn't resist asking Mark to rest the upper boxes on the
corner of the new box so that I could peer up into their living
quarters. I kept my inspection quick, but could still see a bit
of capped brood along with lots of very well built comb. The thin
wedges of wood extending down from the top bars in our Warre hive had
clearly done a very good job as comb guides.
When
we nadired
our Warre hive
yesterday, I couldn't resist asking Mark to rest the upper boxes on the
corner of the new box so that I could peer up into their living
quarters. I kept my inspection quick, but could still see a bit
of capped brood along with lots of very well built comb. The thin
wedges of wood extending down from the top bars in our Warre hive had
clearly done a very good job as comb guides.
From the light weight of
the two boxes we lifted on top of the new box, I suspect the colony
hasn't built much in the top box yet. I was tempted to place the
presumably empty top box on the bottom instead of using a new box
during the nadiring procedure, but I'm sticking to the letter of the
law with Warre hives --- only take off the lid once a year. Worse
case scenario, the bees are cleaning and sanitizing an attic that
they're not using, which isn't such a big deal in the summer.
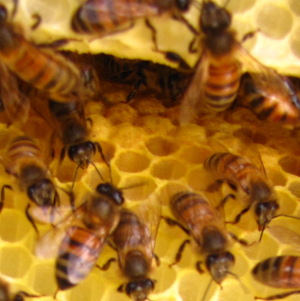
I've been seeing more
worker bees around the garden this week, which is another good sign
that our bees are taking off. Maybe they'll need another box in a
week or two? Meanwhile, I'm still feeding them all the sugar
water they can eat. Those light boxes had little or no honey in
them, and I don't want our new package to starve.

 Our golf
cart problem means that
the barn floor project might need to wait.
Our golf
cart problem means that
the barn floor project might need to wait.
"That won't be a problem" was
our new hired helper's response.
He brought along a rear wheel
drive ATV and made short work of hauling back the barn floor panels.
 Most
people start sizing their solar setup by figuring out how much energy
they use in their home, then choosing enough panels and batteries to
provide that much juice. We're coming at the issue from a
completely different direction.
Most
people start sizing their solar setup by figuring out how much energy
they use in their home, then choosing enough panels and batteries to
provide that much juice. We're coming at the issue from a
completely different direction.
We plan to buy
a few solar panels
now and then as we can afford them, to hook up the appropriate number
of batteries, and to slowly work various
parts of our household off the grid. For example, our first
panels might be just enough to power our laptops and a couple of
lights, so we'll wire those gadgets directly into the solar setup,
sticking to DC if possible. Since it's a bad idea to hook old and
new batteries together, we'll probably keep each little system
separate, which will cost a little more but will provide backups.
Which is all a long way
of saying that we have two 45 watt solar panel kits (each of which
consists of three 15 watt panels) and we're trying to figure out how
many batteries we need to support those panels. My first step is
to determine how much energy we're likely to get from the panels on an
average day.
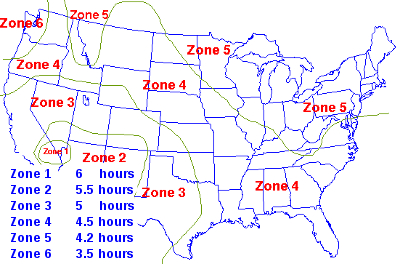 You can either size your
system based on the average peak sun hours (which will give you an
over-estimate for the winter and an under-estimate for the summer) or
based on the winter peak sun hours (a worst case scenario). If
you wanted to ensure you had enough power even during the shortest days
of the year, you'd want to use the winter peak sun hours in your
calculations, but I think it makes more sense in our system to use the
average peak sun hours, which is roughly 4.2 for our area.
You can either size your
system based on the average peak sun hours (which will give you an
over-estimate for the winter and an under-estimate for the summer) or
based on the winter peak sun hours (a worst case scenario). If
you wanted to ensure you had enough power even during the shortest days
of the year, you'd want to use the winter peak sun hours in your
calculations, but I think it makes more sense in our system to use the
average peak sun hours, which is roughly 4.2 for our area.
The amount of energy
your solar panels will produce per day can be calculated using this
simple formula:
Solar panel output = Solar panel rating (watts) X Sun hours
Solar panel output = 90 watts X 4.2 hours
Solar panel output = 378 watt-hours
Most solar systems
recommend that you multiply your solar panel output by by 3 (or 4 or 5)
when sizing your battery bank so that you'll still have juice after
several days of cloudy weather. Since we're not planning on going
off-grid anytime soon, I think I'll stick to the bare minimum figure
above, though, and just plan on plugging our appliances back into
on-grid power when our batteries get low.
Next, you can calculate
how many watts the battery of your choice will hold. Batteries
are generally rated by volts and amp-hours, which allows you to
calculate watt-hours as follows. (This example is a typical golf
cart battery: 6 volts and 200 amp-hours.)
Battery watt-hours = 6 volts X 200 amp-hours
Battery watt-hours = 1,200
That sounds great,
right? I'd just need one battery for three days!
Wrong. Deep cycle batteries lose a lot of life if you discharge
them below 30 to 40%, so the amount of usable energy in the battery is
more like:
Usable watt-hours = 720 watt-hours
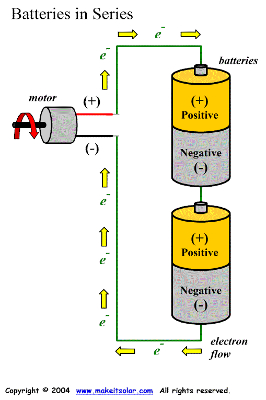 It's still looking like one
golf cart battery would be enough for nearly two days, but there's one
more factor to consider. Since we want to plug 12 volt DC
appliances directly into the system rather than losing efficiency by
converting from DC to AC, we need our battery system to be 12 volts,
not 6 volts. That means we need two batteries wired together in
series to boost the voltage.
It's still looking like one
golf cart battery would be enough for nearly two days, but there's one
more factor to consider. Since we want to plug 12 volt DC
appliances directly into the system rather than losing efficiency by
converting from DC to AC, we need our battery system to be 12 volts,
not 6 volts. That means we need two batteries wired together in
series to boost the voltage.
As a side note, we got
an advertisement from Harbor Freight as I was researching, and the
company wants to sell me a "solar battery" for $75. Was it a good
deal? The battery is rated at 12 volts and 35 amps, so it would
hold 420 watts, or 252 usable watts. The benefit of the battery
is that it is already 12 volts, but I'd still need two of them since
the battery isn't even enough to soak up the energy from our solar
panels for one day. If I'm doing my math right, the Harbor
Frieght battery would cost 30 cents per usable watt, versus 21 cents
for the golf cart battery (using a rough estimate of $150 for the cost
of the golf cart battery). Of course, I'd need to factor in
longevity to really get an idea for which set of batteries would be a
better deal, and there's no information about Harbor Freight's battery
life span on the internet. Since our nearest golf cart battery
supplier is closer than our nearest Harbor Freight, we'll probably
settle on the former.
If you obeyed the
instructions on most seed packets, you'd plant your herbs and
vegetables too thick, then come back through and laboriously thin out
the seedlings that sprouted too close together. I don't do
that. Not only are you throwing your money away when you thin out
seedlings, you also have to either put them somewhere else or endure
the heartbreak of composting a perfectly good plant.
But if you plant your
seeds the proper distance apart from the get-go, you often end up with
patchy germination. (Or, in this case, the cat
scratches up a third of the bed soon after the seeds sprout
and kills them.) My solution is to transplant a few seedlings
from an area where the seeds fell too thickly, using those extras to
fill in empty spaces.
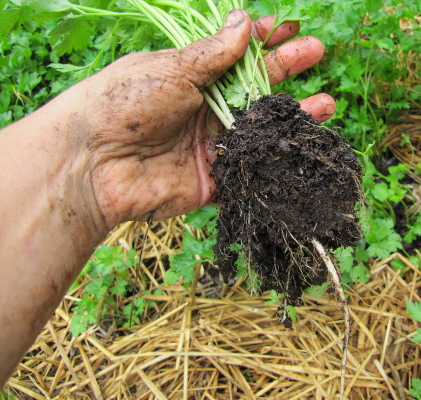 To be able to transplant
seedlings into those gaps, I do seed a bit thicker than necessary, but
only a little --- not so much that if everyone comes up, they'll be
overcrowded. I'm also careful to transplant when the seedlings
are very young. The parsley plants shown here are really too old
to transplant --- my goal is to be able to scoop up all of the plants'
roots and not disrupt their routine at all when I move them into the
gap.
To be able to transplant
seedlings into those gaps, I do seed a bit thicker than necessary, but
only a little --- not so much that if everyone comes up, they'll be
overcrowded. I'm also careful to transplant when the seedlings
are very young. The parsley plants shown here are really too old
to transplant --- my goal is to be able to scoop up all of the plants'
roots and not disrupt their routine at all when I move them into the
gap.
That said, there are
times that I purposely seed too thickly and thin. Carrots seem to
be a bit problematic to germinate if the soil is hot and dry, so I
often spread the seeds pretty thickly on the soil surface. Once
the roots are just barely big enough to eat --- half an inch in
diameter or less --- I start harvesting the carrots that are too close
to their neighbors, carefully wiggling out dinner without bothering the
keeper plants. That way, I get an extended harvest and ensure
that the main crop of carrots isn't overcrowded as the plants mature.
One final factor to
consider when you're thinking about thinning is the longevity of the
crop. Since we eat our parsley plants for about eleven months,
it's worth making sure they cover the bed well (and something like
asparagus that will feed us for years is even more worthy of
transplanting). But if my lettuce bed is a bit patchy, I just
ignore it --- I'll be ripping out the bed and starting to eat a new
patch of salad greens within a month.
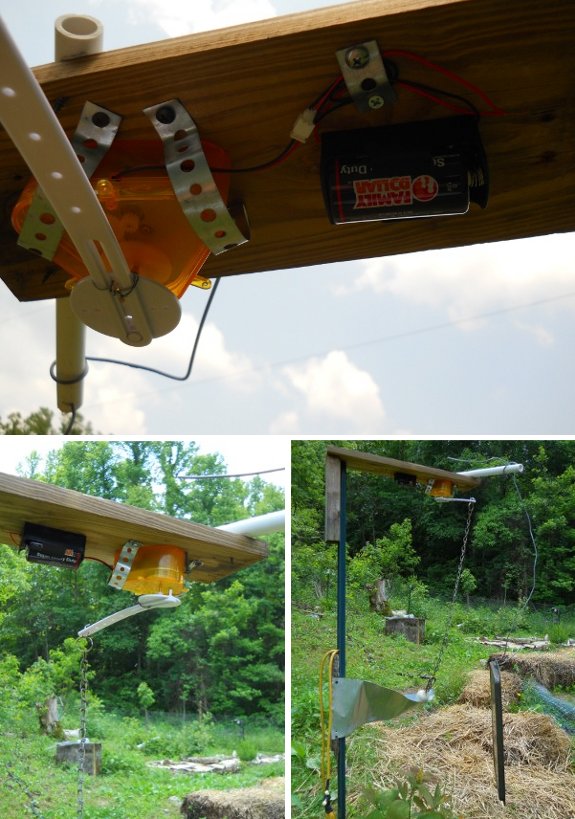
One of the biggest negative
comments I got on Youtube concerning our mechanical
deer deterrents was how having an extension cord cluttering up the
yard was just unacceptable.
The above handsome, battery
powered motor is a new discovery. (Thanks Mom!).
It runs on a single D cell
battery and comes with a nice plastic support arm that attaches to the
shaft of the motor with a stainless steel screw. Stay tuned to see how
long the battery holds up under these conditions. There hasn't been any
deer damage yet, but it was this time last year when the nibbles
started, which is what motivated me to put this together on a Sunday.
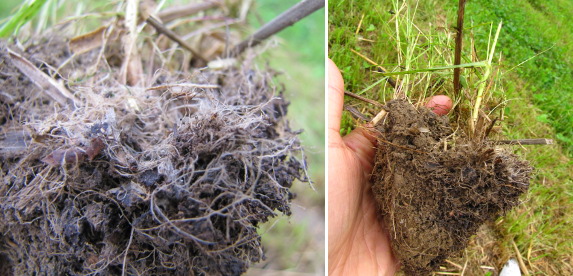
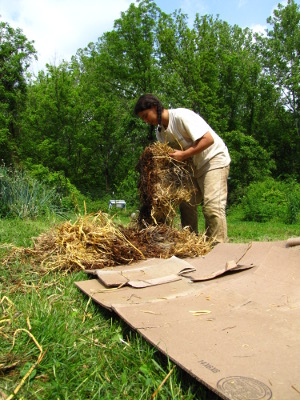 The
good news is --- I'm very happy with my annual
ryegrass cover crop.
The bad news is --- I really couldn't manage to keep all those beds
fallow for more than three months. I just wanted extra this and
that, and decided to steal back about half the fallow space for
succession planting in the midsummer garden.
The
good news is --- I'm very happy with my annual
ryegrass cover crop.
The bad news is --- I really couldn't manage to keep all those beds
fallow for more than three months. I just wanted extra this and
that, and decided to steal back about half the fallow space for
succession planting in the midsummer garden.
We haven't been managing
the ryegrass optimally, but it has held up well under some abuse.
You're supposed to let the grass grow pretty tall (just short of bloom)
and then mow the plants down to four inches, but I've been letting Mark
treat the ryegrass like part of the lawn. That means he cuts the
ryegrass pretty short at pretty frequent intervals, but it has always
bounced back.
As you can see from the
photos at the top of this post, the root structure of annual ryegrass
is pretty inspiring. People often use the plant to hold soil in
place after construction projects, and I noticed the brilliant
yellow-green along our country roads in a few places last fall
once I knew what to look for. I'm always guessing at the effects
of cover crops since I'm too lazy to measure organic matter content in
the beds before and after, but I know these copious roots can only help
my problematic clay as they decompose.
Since I'll need some of
the ryegrass beds in about a month, I waited until after Mark mowed,
then laid down a simple kill
mulch of cardboard
and straw. I consider kill mulches 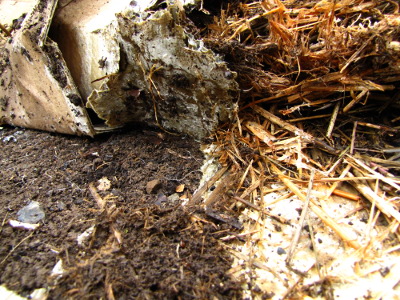 a tool for the lazy gardener
since they're so easy, but (unlike most things we do out of laziness),
kill mulches really pay off in the health of the soil. This last
photo shows a weed-covered bed I kill mulched instead of weeded a
couple of months ago --- the cardboard has degraded enough that I can
tear right through it, there's mycelium everywhere, and the worms fled
by the dozen as I cleared a path for sunflower seeds. If my
ryegrass beds look half that good at planting time in a month, I'll be
thrilled.
a tool for the lazy gardener
since they're so easy, but (unlike most things we do out of laziness),
kill mulches really pay off in the health of the soil. This last
photo shows a weed-covered bed I kill mulched instead of weeded a
couple of months ago --- the cardboard has degraded enough that I can
tear right through it, there's mycelium everywhere, and the worms fled
by the dozen as I cleared a path for sunflower seeds. If my
ryegrass beds look half that good at planting time in a month, I'll be
thrilled.
 I've been meaning to read a
beginning permaculture book or two, just to make sure I haven't missed
any of the fundamentals through my hit or miss learning approach.
But skimming through all of the information in a beginner book in
search of a few gems annoys me, so I put the task off.
I've been meaning to read a
beginning permaculture book or two, just to make sure I haven't missed
any of the fundamentals through my hit or miss learning approach.
But skimming through all of the information in a beginner book in
search of a few gems annoys me, so I put the task off.
Last week, though, I
learned that one of the perks of signing on with a print publisher is
that they'll send you free copies of their books to review even before
they're released. Sign me up! The Ultimate Guide to Permaculture
by Nicole Faires sounded like it might fill that (potential) gap in my
permaculture knowlege-base quite well, so I spent all weekend drifting
through the text's pretty pictures.
The
Ultimate Guide to Permaculture is geared toward beginners,
and I think it would do a fine job of opening the eyes of someone who
might have heard the word "permaculture" once or twice but who knows
little else. I can't really compare it to the big two in that
category (Hemenway's Gaia's
Garden and
Mollison's Permaculture:
A Designer's Manual)
since I only skimmed the classics a few years ago, but I suspect
Faires' book is written on a more basic level than both, is more
enjoyable to read than Mollison's book, and has more of a textbook
style than Gaia's
Garden.
(What I'm trying to say here is that The
Ultimate Guide to Permaculture is written on a sixth grade
level, which drives me nuts, but is a style that clearly is preferred
by the majority of magazine-reading Americans.)
I also have several
bones to pick with the information presented in The
Ultimate Guide to Permaculture, but upon further
reflection, I decided that my nitpicks are more about permaculture as a
movement than about this book in particular. For example, while
it sounds good to say that edges promote biodiversity and that you
should make all of your garden beds wavy-edged for that reason, my
experience has shown that straight lines are much easier to
maintain. I think that all of the disagreements I have with
permaculture ideals like this stem from the lack of hands-on experience
of many permaculture philosophers.
Which is all a long way
of saying --- I recommend you give this book to your neighbor or mother
if they look at you in confusion when you say the word
"permaculture". Nicole Faires goes out of her way to keep the
book mainstream, her goal being to launch  permaculture beyond the
"hippies and hipsters" who she thinks often advocate permaculture in a
manner that turns off the suburban housewife and traditional farmer.
permaculture beyond the
"hippies and hipsters" who she thinks often advocate permaculture in a
manner that turns off the suburban housewife and traditional farmer.
I'd recommend that my
regular readers check this book out of the library. I got two or three
good ideas from the book and thoroughly enjoyed the refresher course on
permaculture zones.
But it's not staying on
my bookshelf...which is your gain! Leave a comment on this post
today, and I'll select one lucky winner tomorrow to receive The
Ultimate Guide to Permaculture in the mail next week.
Hopefully you'll find it just the right home!
 My
Mom gave us these pet grooming gloves thinking we could try them out as
chicken pluckers.
My
Mom gave us these pet grooming gloves thinking we could try them out as
chicken pluckers.
Today was retirement day for
7 chickens we picked out last night and I think the gloves decreased
our processing time.
We first used the DIY
low tech chicken plucker
from last year for the primary pluck, and the gloves did well at
getting spots that the board plucker missed.
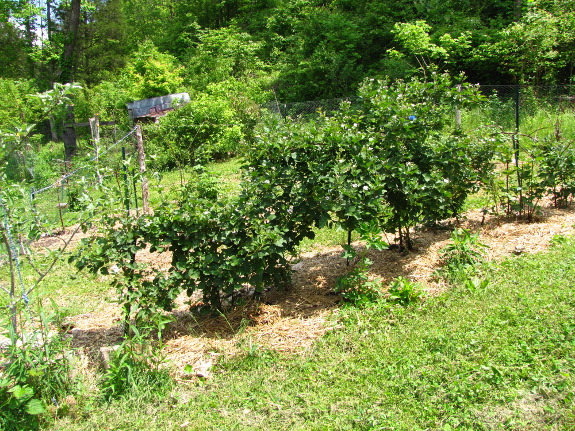
Most permaculture texts
admonish you to plan beds so that they run perpendicular to the slope,
so why did I plant my bramble patch in the opposite
orientation? The real answer is --- because it's one of the first
things I put in when we moved here and I didn't know any better.
However, in retrospect, there are reasons to fly in the face of
permaculture teachings and site your garden beds parallel to the slope.
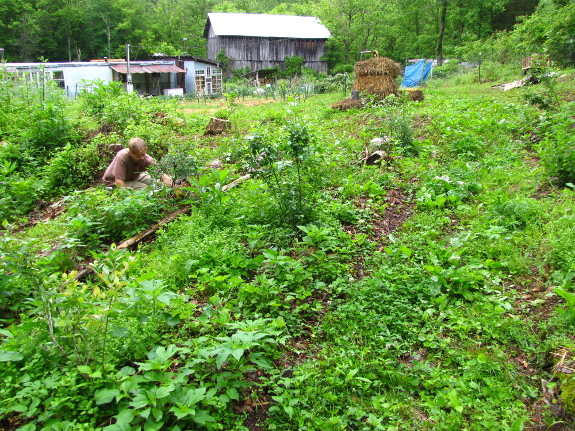
But first, why do the
books tell you to make your rows run like contour lines on a map, as is
shown in our blueberry patch above? This type of orientation
prevents erosion --- gullies can form when heavy rains hit tilled soil
with rows running from the top to the bottom of a hill. Even with
a permanently mulched, no-till garden, it can be handy to keep your
rows perpendicular to the slope since the raised beds and aisles
together act like swales, slowing water and letting
more of the precious liquid soak into the root zone of your plants.
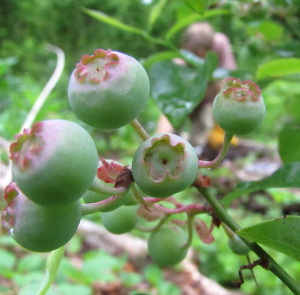 But what if you live in a
really wet climate and don't want all that water swamping your plants'
roots? I'm actually glad that I planted the bramble patch in a
counterintuitive fashion since that area has very high groundwater that
tends to pool just downhill. If I'd created swales with my rows
of berries, the waterlogged soil might have been too much for my
berries to handle.
But what if you live in a
really wet climate and don't want all that water swamping your plants'
roots? I'm actually glad that I planted the bramble patch in a
counterintuitive fashion since that area has very high groundwater that
tends to pool just downhill. If I'd created swales with my rows
of berries, the waterlogged soil might have been too much for my
berries to handle.
On the other hand, my
blueberry patch is more well-drained (if less well-weeded --- Mark's
currently working on that). We don't irrigate our woody plants,
so the blueberries can only drink the rain that falls from above and
gets stored in their mulched beds. With dry, well-drained soil,
conventional wisdom makes sense.
I'd be curious to hear
from others who have intentionally planned garden beds perpendicular to a
slope. What did you think of the experiment?

This will be the last picture
taken of our beloved truck.
The dealer traced the problem
to a bad injector pump. The price for such an operation was so high I
can't bring myself to print it here.
We talked about several
options. Rebuilt pump, take the old pump to get rebuilt in Bristol,
sell truck on Craigs list. In the end we took the easy way out and had
it towed to a local crusher.
Of course I took the Super Winch wire harness off
along with both batteries and the tailgate. I just couldn't stand the
thought of that sexy, red tailgate getting crushed like a pancake.
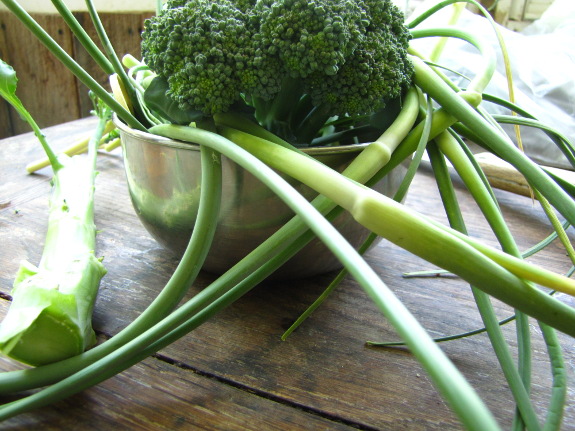
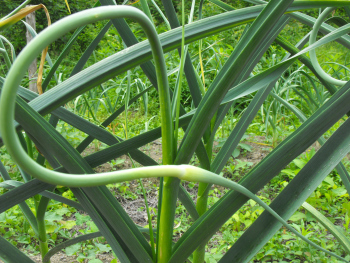 When
we first grew hard-necked garlic, I read that the scapes are a spring delicacy.
However, the ones I tried were woody and sharply pungent, so I just
composted the scapes I removed in later years. (If you don't
pluck off the scapes, your garlic plants will put energy into growing
scapes instead of into bulb production, resulting in a smaller harvest,
so don't just ignore them.)
When
we first grew hard-necked garlic, I read that the scapes are a spring delicacy.
However, the ones I tried were woody and sharply pungent, so I just
composted the scapes I removed in later years. (If you don't
pluck off the scapes, your garlic plants will put energy into growing
scapes instead of into bulb production, resulting in a smaller harvest,
so don't just ignore them.)
This year, I learned the
error of my ways in avoiding such a delicious food. As I started
cutting off scapes Tuesday morning, I got lazy and pulled on one
instead of snipping it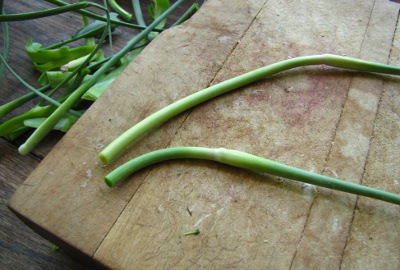 . A long, tender scape
base came loose from deep inside the plant. Just like the grass
leaf bases you get the same way, this central core of the scape was
sweet and gentle on the tongue. So that's
what people were glowing over!
. A long, tender scape
base came loose from deep inside the plant. Just like the grass
leaf bases you get the same way, this central core of the scape was
sweet and gentle on the tongue. So that's
what people were glowing over!
A few taste tests proved
that color is a clear indication of the border between sweet and tender
(white) and spicy and tough (green) portions of the scape. On the
youngest scapes, I cut off and discarded the green tips starting at the
bulbous portion, but on older scapes, I cut where the white began to
show a lot of green. Depending on your palate, you might want to 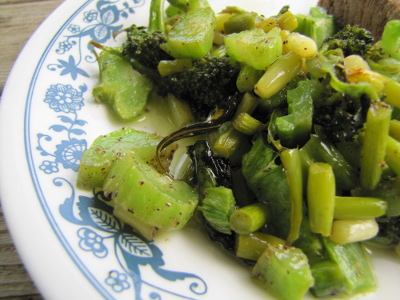 include more or less of the
green portion in your meal.
include more or less of the
green portion in your meal.
Since our garden also
served up the first head of spring broccoli on Tuesday, I broiled the
broccoli and scape bases together, resulting in a delicious lunch
treat. Next year, I'm going to keep a closer eye on the scapes so
I can harvest them all at their peak!
 Although
Thoreau (as usual) layered meaning upon meaning, the theme I found most
interesting in chapters 7 and 8 pertained to how Thoreau filled his
days when he had no external demands on his attention. I suspect
that many of our readers are working toward exactly that state, and I
know from experience that it's not as easy as it looks to be happy when
you're in charge of managing your own time.
Although
Thoreau (as usual) layered meaning upon meaning, the theme I found most
interesting in chapters 7 and 8 pertained to how Thoreau filled his
days when he had no external demands on his attention. I suspect
that many of our readers are working toward exactly that state, and I
know from experience that it's not as easy as it looks to be happy when
you're in charge of managing your own time.
I've noticed that most
people who enjoy this freedom (rather than fleeing from it) settle into
a routine, perhaps like the one that Helen and Scott
Nearing developed
--- four hours of physical labor, four hours of mental labor/artistic
expression/fun, and four hours of community work. The schedule
that has worked best for me and Mark is to work from nine to noon on
farm chores, from one to four on writing/chicken waterers, and from 4
until whenever on blog posts. We swap the indoor and outdoor time
periods in the winter, and spend an extra half hour before (me) or
after (Mark) the work day for chicken care and walking
Lucy.
Thoreau had his summer
routine as well. First, he hoed beans (his cash crop) from 5 am
until noon. As he chopped weeds, Thoreau watched birds,
dug up salamanders, ignored
the advice of neighboring farmers, and listened to festivities in the
nearby town. But, mostly, he revelled in the work itself:
Come noon, Thoreau
jumped in the pond, then did whatever he liked for the rest of the
day. I was surprised to read that his preferred activity every
day or two was walking into town --- maybe he wasn't an introvert after
all.
For those of you who
already get to plan your own days, what sort of schedule do you
choose? And for the avid readers (especially Sam), what
unmentioned part of these chapters jumped out at you?
If you're new to the book
club, you might want
to check out the thought-provoking comments on
chapter
1, chapter
2, chapters
3 and 4, and chapters
5 and 6. We'll
be discussing chapter 9 (The ponds) and chapter 10 (Baker farm) next
Wednesday, and anyone is welcome to join in. I suspect that you
could jump right into the discussion without wading through the
difficult early chapters, so please don't let a late start deter you.
The
paperback edition of Weekend
Homesteader contains three bonus chapters not found in the ebooks,
two of which cover the relevant topics of setting homesteading goals
and learning to enjoy what you've got.

When you total up all the
parts that make up a Club Car
golf cart front wheel bearing assembly you'll discover that it's
only an extra 17 dollars to just get the whole unit ready to go.
Our shaft required some minor
filing before the new unit would slide on.
I went with a synthetic
grease just because I've heard it's worth the extra money.
Jason is the winner of our
recent permaculture
book giveaway.
If you're reading, Jason, please drop an email to anna@kitenet.net with
your US Postal Service mailing address and we'll put the book in the
mail to you Friday. We're glad it found a new home!
(I've got some more
books to clear out, so the rest of you shouldn't feel
downhearted. Stay tuned....)
The 17-year
cicadas are finally
on the down-swing. They started flying erratically through the
yard about a week ago, and soon thereafter I began to see dead cicadas
on the ground.
Slowly, the nearly
deafening afternoon roar diminished. The silence started on the
hillside to the north of us where the first cicadas began their chorus,
then worked its way around to the shadier areas. There are still
some cicadas out and about, but I suspect by this time next week,
they'll all be gone.
 But not forgotten. As
you can see from the color of the broth we extracted from our first
set of broilers,
that insect nutrition is going to continue to work its way through the
food chain for months to come. Maybe trickle down economics makes
sense after all?
But not forgotten. As
you can see from the color of the broth we extracted from our first
set of broilers,
that insect nutrition is going to continue to work its way through the
food chain for months to come. Maybe trickle down economics makes
sense after all?

We finally got the parts
Festiva free thanks to our hired helper bringing along the above
portable winch.
It's designed to fit over a
hitch ball for pulling a boat onto its trailer. It worked like a charm
for this application where we secured it to a nearby tree.
I was starting to wonder if
we would ever get that car unstuck.

Or explore more posts by date or by subject.
About us: Anna Hess and Mark Hamilton spent over a decade living self-sufficiently in the mountains of Virginia before moving north to start over from scratch in the foothills of Ohio. They've experimented with permaculture, no-till gardening, trailersteading, home-based microbusinesses and much more, writing about their adventures in both blogs and books.