archives for 04/2012
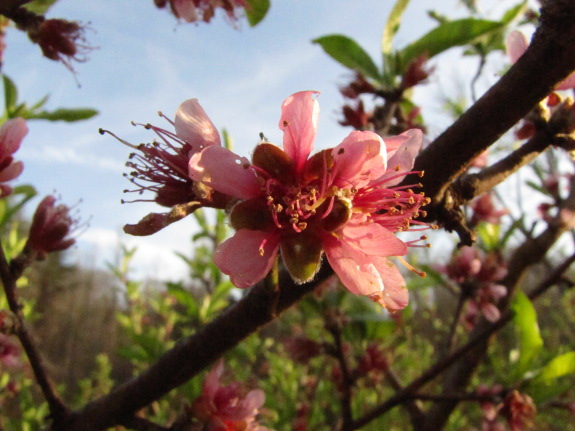
 The
peach
flowers are mostly
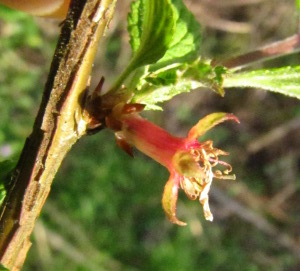
done. A few are still pretty and pink like the one shown above,
but most are starting to "undress", with dried up petals slipping off
of fuzzy young fruits.
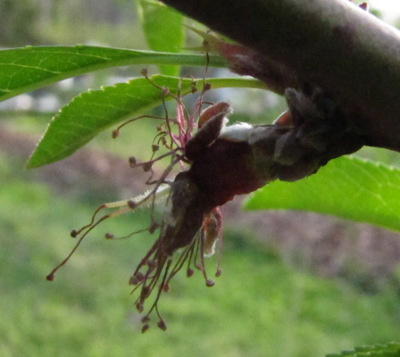
If you can see the
ovaries left behind when the petals drop away, you know the tree has
decided to mature the fruit. Even if you can't quite make out of
the ovary, it's a good sign if you notice "dead" flowers clinging to
your fruit tree twigs after the petals are gone. Of course, late
freezes, self-thinning, and all kinds of other
things could result in a fruitless year even if you see ovaries at this
stage, but we can always dream.
 Our plum tree did drop all of its flowers,
as I suspected it might since this was its first bloom year, but the nanking
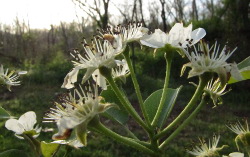
cherry bushes seem to be keeping theirs. So do the lower
limbs of the pear trees, despite my topworking.
Still lots of floral
excitement left to come in our perennial plantings this spring.
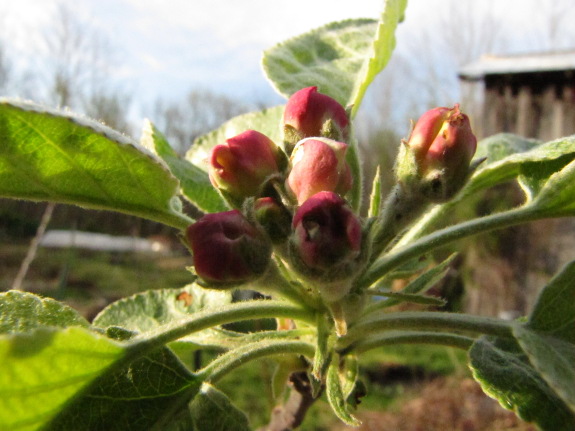
Our 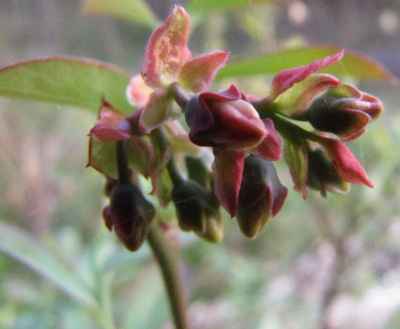 Virginia Beauty apple opened
up a few flowers this week, and several clusters are still in the bud
stage. Meanwhile, one of our gooseberries is also well laden.
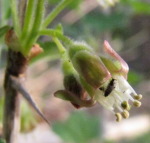
Next up, blueberries!
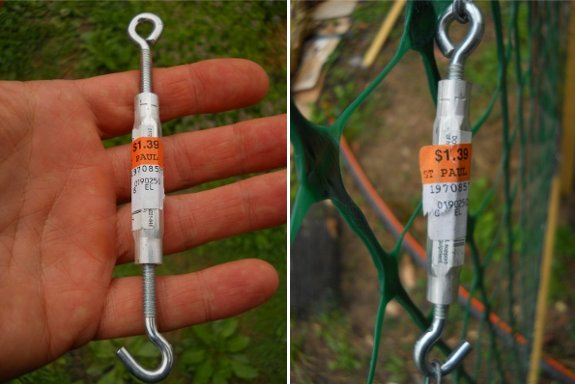
One problem I noticed when
using 14 gauge electric
fence wire as a diagonal support is the difficulty in backing off
the tension if you tightened it too much.
The first alternative I
thought about was nylon rope, but I'm guessing the galvanized wire
would win that longevity race.
Maybe I'll use nylon rope on
the next gate so we can get a side by side comparison.
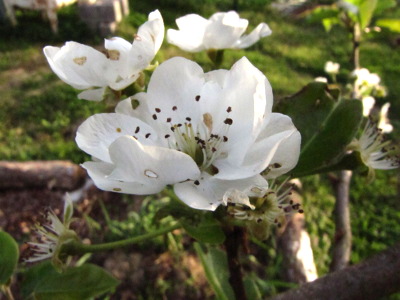 Last week, I mentioned that our
pear flowers were mostly being overlooked by pollinating bees, with all
of the buzz centering around the peaches instead. Since then, the peach
flowers began to decline and the pears opened more fully, which did
attract a few more bees to the pear blooms. But beetles were
still the primary pear pollinators.
As with most of ecology,
the story is complex. It turns out that nectar has varying sugar
concentrations depending on the plant species, with one source listing
the following averages:
- Apple - 46.2%
- Peach - 28.9%
 Plum - 25.8%
- Sour cherry - 23.5%
- Pear - 9% (with other sources listing 4% to 25%)
Of course, sugar
concentrations vary by variety as well, and are also affected by
weather. Low humidity leads to more sugar in nectar while high
humidity waters down the kool-aid.
But all else being
equal, you can see why a bee might prefer a peach flower to a pear
flower (and why lack of pollination is a problem in many pear
orchards). That said, pear flowers produce large quantities of
pollen, so honeybees rearing brood might spend time on there.
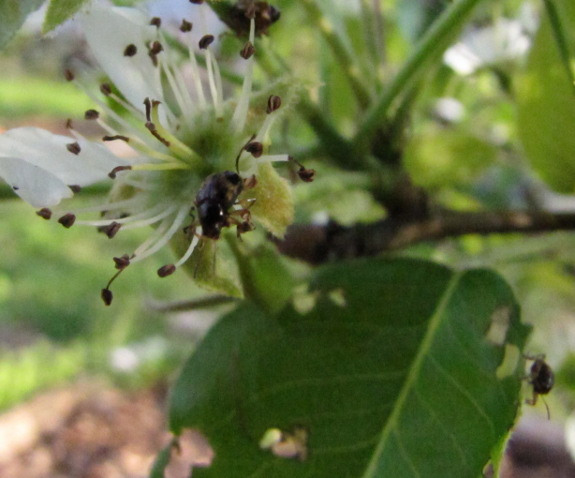
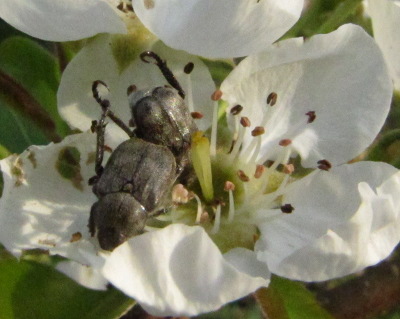
Beetles don't seem to
mind the lower sugar content of the pear blooms, perhaps because most beetles visit flowers primarily for pollen. Whatever the reason, I continued to see lots of
different kinds of beetles on my pear flowers, along with the holey
petals and leaves 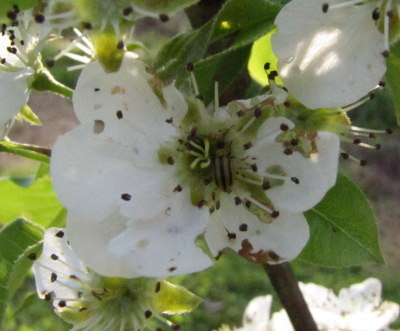 that are the by-product of
these "mess and soil pollinators".
Bugguide.net users
tentatively identified the beetles in my second photo as Hoplia (usually considered a pest
since it eats rose blossoms, but seemingly doing pollinating work here)
and those in the third as Paria. I didn't try to ask
for an ID on this last beetle because I couldn't zoom far enough in.
As a side note, I was
interested to read that fire blight bacteria are hindered by high sugar
concentrations in nectar, which is probably why pears are the most
frequent victims of the illness. Perhaps pear varieties resistant
to fire blight have sugar concentrations greater than the threshold 20
to 30%?
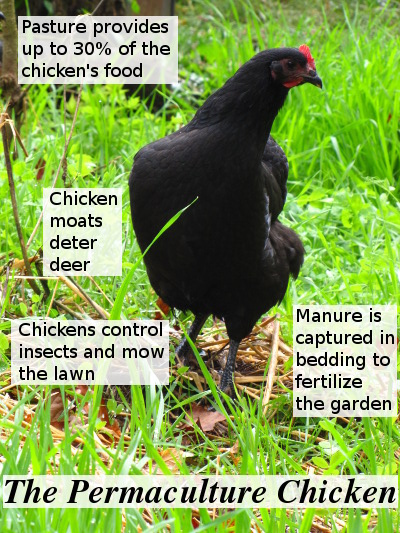 The
vote was tied, so I
decided to write both Permaculture Chicken and Garden Ecology at the
same time, splitting the books up into bite-size segments and churning
them out in whatever order suits my fancy. The topic I was most
excited to write about first was incubation...which may be why this
ebook kept expanding until it was twice the size of my Weekend
Homesteader ebooks. Who knew there was so much to write about
cute chicks?
Permaculture
Chicken: Incubation Handbook is now available for 99
cents from Amazon's Kindle store. If you have Amazon Prime, you
can also borrow the book for free. No matter how you read it, many
thanks in advance if you can find the
time to write a brief review. I don't know if you realize
it, but it's your reviews and early purchases that have helped my
ebooks reach thousands of new eyes.
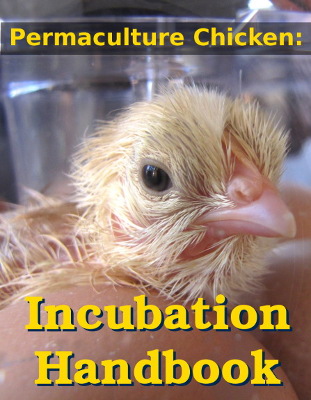
Stay tuned at noon all
week as I hit the book's highlights as this week's lunchtime
series. But there is way too much in my Incubation Handbook to
fit into a few short posts, so I hope you'll give the whole thing a
read, if only to enjoy the 90 plus photos and the chapter on pasturing
young chicks.
 This post is part of our Chicken Incubation lunchtime series.
Read all of the entries: This post is part of our Chicken Incubation lunchtime series.
Read all of the entries: |
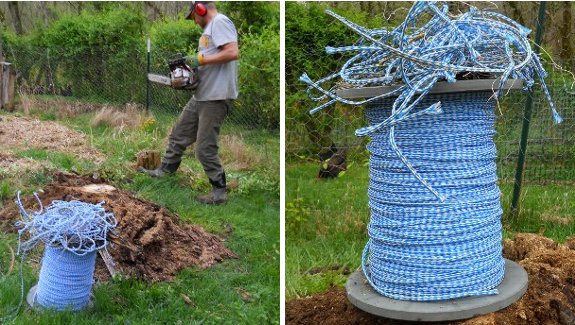
I posted
yesterday about the
possibility of using nylon rope instead of 14 gauge electric fence wire
on our next gate.
Turns out that was a creepy
suggestion that should be avoided for this particular application.
The main reason I was
considering nylon was because we have a massive spool of it. (Thanks
Mom)
A timely comment from Roland
was what set me straight. The nylon rope would more than likely stretch
over time due to the constant stress of the turnbuckle. The material
science term for this influence is known as creep. A word that creeped
its way into the music industry not once but three times in recent
history thanks to bands like Radiohead, TLC, and Stone Temple Pilots.
 We're nearly at the end of last fall's
carrots. I
thought there were so many, but we've been enjoying eating them with hummus this winter, as well as in
the usual cooked dishes. Good thing spring carrots are already in
the ground to replace them.
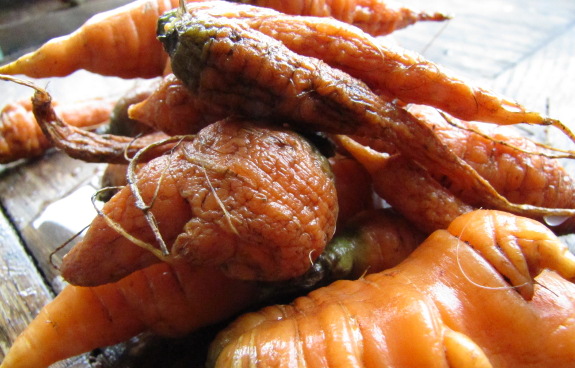
I saved back the carrots
that still look plump for raw eating, but decided all the
less-then-perfect carrots at the bottom of the crisper drawer needed to
go into a soup. We bought another pastured
lamb recently and
asked the butcher not to discard the bones, so we had just what we
needed to make high  quality
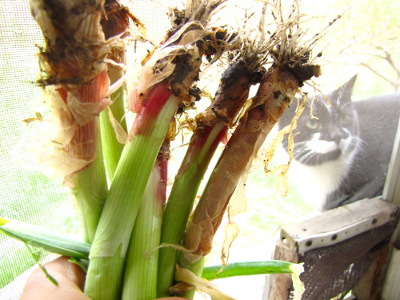
broth. That rich liquid, plus the meat picked off the bones, a
heaping handful of shriveled carrots, several fresh Egyptian onions, and a bit of thyme blended
into a delicious spring soup.
If you're interested in
my theory behind in-season soup-making, check out this
post, or the longer
version in Weekend
Homesteader: July.
Soup is one of the easiest things to cook without a recipe!
 While
we'd love our favorite hens to stick around forever, chickens
have a limited shelf life. A hen begins to lay when she's about
six months old, and she does her best work by the time she's a year
and a half old. Depending on how hard-nosed you are, you might
keep your laying hens one year, two years, or three years, but after
that, you're feeding large amounts of grain to an animal who has
basically become a pet.
If you want to replace
those old hens who are no longer laying
enough
to pay for their feed, you've got several options. You might be
able to find someone local who is selling point-of-lay hens (pullets
just beginning to churn out eggs). More likely, you'll order
chicks from a hatchery. Or, if you're willing to put in a little
extra effort, you can incubate your own chicks from homegrown eggs.
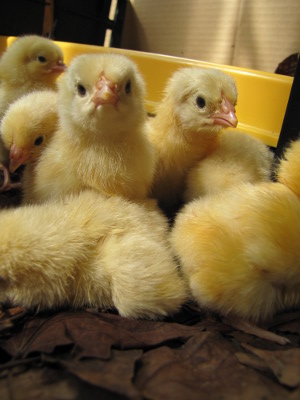 Raising new members of your
flock at home has several
advantages, the first of which is that you can incubate as few or as
many eggs as you want. In
contrast, hatchery raised chicks usually require a minimum order of 25
birds to ensure that the
youngsters produce enough body heat to survive two or three days in
a mail truck. Backyard chicken keepers will be hard pressed to
find room for such a large flock.
Even more important from
a permaculture point of view is the ability of
the incubating homesteader to tweak the genetics of her flock.
Hatcheries that sell to the general public focus first on breeding
birds well
suited to surviving in a hatchery setting, often aiming for
appearance as
the second priority. If you want to breed a bird that's able to
hunt for its own food, you'll be much happier if you can select your
best birds and raise their young to become your next generation.
 As a final point in favor of
incubating your own chicks, you're the
one in
control of the process from start to finish. You don't risk
diseases from the hatchery or from someone else's farm coming along for
the ride. Your chickens don't have to deal with the trauma of
being shut up in a box or cage for an hour or two days as they make
their way to your farm. And you can start chicks at whatever time
of
the year matches your schedule. Plus, you get to enjoy the
Lifetime Channel version of Chicken TV --- the miracle of new chicks
pushing their way out of their shells.
This
week's lunchtime series is excerpted from Permaculture
Chicken: Incubation Handbook. I hope you'll splurge 99 cents
to read the whole thing!
 This post is part of our Chicken Incubation lunchtime series.
Read all of the entries: This post is part of our Chicken Incubation lunchtime series.
Read all of the entries: |
We recently upgraded our chicken waterer labels from
black and white to color and the first shipment arrived today.
We're both thrilled with how
vibrant the colors turned out.
Feels kind of nice to
immortalize a member of our original flock this way.
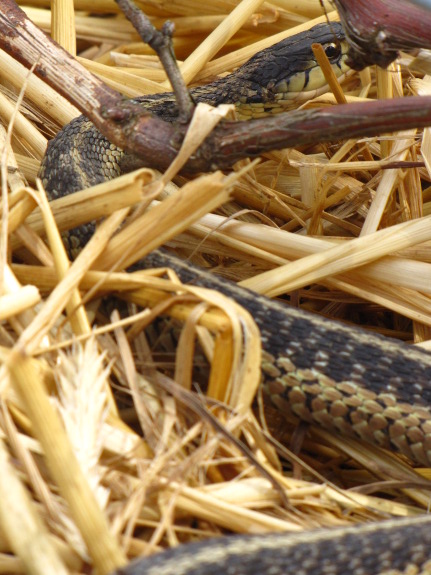 I've
been dipping back into Edible
Forest Gardens recently because when I first read the two volume
set, it was like drinking from a firehose --- a lot of the best
information went right past me. On further perusal, a throwaway
line in appendix 5 caught my interest: Garter snakes are "not as
beneficial to gardens as believed".
The authors didn't
provide any extra information, so I've been turning
the phrase over and over in my head ever since. Jacke and
Toensmeier did mention that earthworms make up 80% of a garter snake's
diet, so maybe the dislike is due to garter snakes eating beneficial 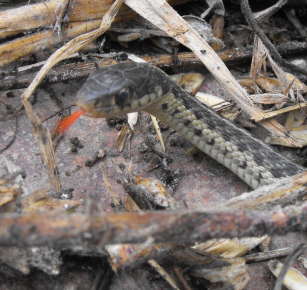 invertebrates?
If that's the case,
though, surely they would have said the same thing about worm snakes.
Since a garter snake
model kindly posed for my photo shoot Monday, I
thought I'd toss the question out at our readers. Why do you
think garter snakes are "not as beneficial to gardens as believed"?
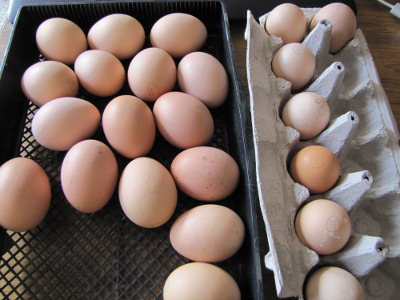 If
you want a perfect hatch, you need to start with perfect eggs.
Factors that influence an egg's hatchability include whether the egg
was fertilized, whether the shell is in good shape, and how the egg was
stored. Below, I've included the section on seasons and parentage
from Permaculture
Chicken: Incubation Handbook --- be sure to check out the
book to learn more about selecting eggs with a good shape and shell
quality, how to store eggs before they go in the incubator, and what to
expect with mail order eggs.
Time of year deserves
consideration as you plan your hatch.
I
prefer to
incubate chicks in February and March so they're out on pasture during
the peak grass-growing season of March through June, then I start
another batch in late summer to take advantage of the secondary pasture
peak in September through November. If you're revitalizing your
 laying flock, it's important
to have chicks out of the shell by
early to mid April to ensure they are old enough to lay before days
shorten in the fall. Otherwise, you'll be feeding non-laying
pullets all winter.
However, chicken biology
dictates a slightly different hatch pattern. As you can see in
this chart, eggs tend to be most fertile in March through June,
with a secondary peak in fertility in September and October.
Don't feel obliged to follow the chart's lead, but do be aware that
your results won't be quite as good if you're trying to raise chicks in
the dead of winter.

A related issue is the
health of the eggs' parents. Older poultry
manuals admonish you to keep your breeding stock out on lush pasture,
since the high nutrition forage results in eggs that are more likely
to hatch. In my own experience, I've found that breeds of
chickens that produce brighter yolked eggs (meaning that the hens ate
more bugs and greenery) have higher hatch rates.
 While we're on the topic of
parents, feed isn't the only important
factor. Hens and roosters who have just become sexually active or
who are more than two years old will produce fewer fertile
eggs. I once tried to hatch eggs from four year old hens and
had abysmal results, convincing me that even if these hens are still
laying, most of the embryos aren't viable enough to mature.
Of course, you must have
a rooster if you want chicks (even though a
hen will lay unfertilized eggs when no males are around). Some
chicken keepers report issues with their roosters not mating frequently
enough to ensure that all eggs are fertilized, but I've never had that
problem. On the other hand, I keep fewer hens than the
recommended dozen per rooster, so my flock's patriarch doesn't have to
work too hard to do his job.
Inbreeding is a more
tricky issue for the backyard chicken
keeper. You may need to trade roosters with like-minded friends
every year, or buy a round of straight run chicks to
raise a new rooster annually, ensuring that your hens aren't
mating with their brothers or fathers. Inbreeding tends to lead
to lower hatch rates and to a higher proportion of sick chicks out of
the
eggs that do hatch.
 This post is part of our Chicken Incubation lunchtime series.
Read all of the entries: This post is part of our Chicken Incubation lunchtime series.
Read all of the entries: |
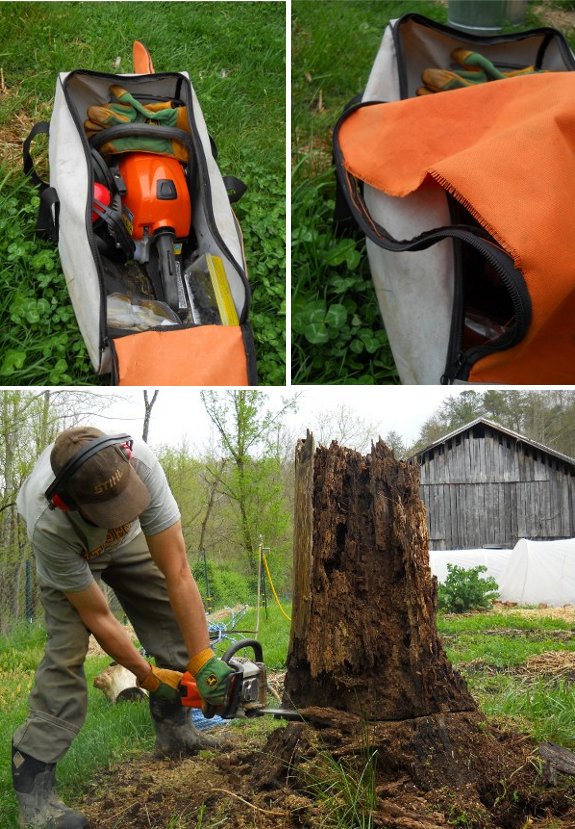
Its been almost a year since I
started using the new chainsaw
protective carrying bag,
and I'm ready to report that it's definitely worth 20 dollars.
The zipper is less than
perfect, but not really needed as long as you don't hold your bag in an
upside down fashion.
I like the feeling of having
all my chainsaw gear in one place, and it's nice to just grab the bag
and know you've got most of your safety gear ready to go. Which reminds
me that I need to get around to ordering a pair of chainsaw chaps.
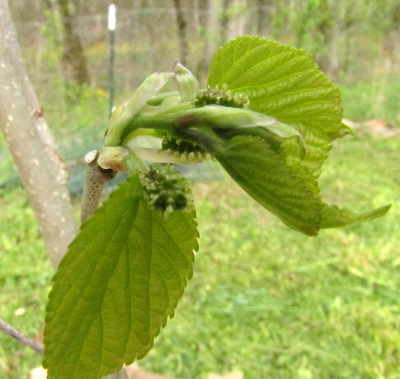 We started planting Illinois
Everbearing Mulberries
in our chicken
pastures a couple of
years ago as future chicken feed. Despite a lot of neglect, one
of the trees from 2011 looks like it's going to make a few fruits this
year.
Lee Reich likes to say that the
mulberry genus name Morus refers to the plant's
tendency to flower late so it's seldom nipped by frost. Since my
grasp of Latin is nonexistant, I'm going
to assume he's right. But is the beginning of April actually
late? Or is my mulberry tree more closely related to the Greek
definition of Morus --- "idiot"?
 After choosing
your eggs, it's time
to start
incubating. The instructions that came with your machine will
help
you set the temperature to 99.5 degrees for a forced air model or 102
degrees for a still air model, at which point it's a good idea to let
the incubator run empty for a day while you monitor the temperature and
humidity and ensure it's working properly. If there's any chance
someone in your houshold will accidentally unplug the incubator in the
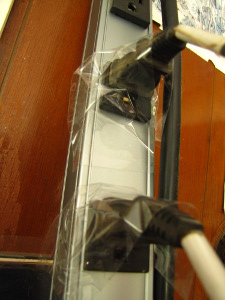
next three weeks, tape the cord into the electric socket as
insurance. (Yes, I
learned this the hard way.)
The main choice you have to make at the beginning of the incubation
process is how to arrange the eggs --- vertically like they'd sit in an
egg carton or horizontally the way they'd lie in a hen's nest.
Although the latter option sounds more natural, in practice I've had
slightly better results with vertical incubation. As the embryo
grows, the highest point in the shell becomes an air pocket which
the  chick will poke its beak into
shortly before hatching. If
this air pocket develops at the pointy end of the egg, the chick will
find it difficult or impossible to hatch without help. Setting
the eggs vertically with the blunt end up helps ensure that the chick
will be situated the right way inside the shell.
If your incubator only
allows you to lay your eggs horizontally, I wouldn't worry too much
about it. That said, some incubationists set their eggs
inside an egg carton with the top cut off to allow them to incubate
vertically even in a simple incubator. More complicated
incubators, like the Brinsea
Octagon 20 I
recommend, often have
removable dividers that let you choose how to align your eggs.
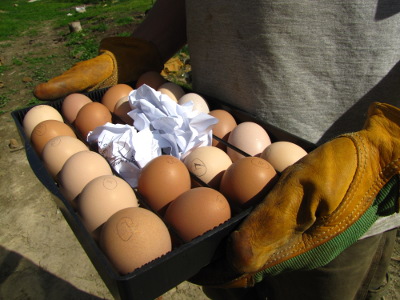 No matter how you arrange
them, you don't want your eggs shifting
and hitting each other. Egg turners that hold individual eggs
make this point moot, but I find it helpful to add a piece of crumpled
up paper in small gaps between less solidly touching eggs in our
Brinsea Octagon 20
incubator. This ensures that I have room to lay all of the eggs
flat on the tray during the hatch, but that the eggs don't roll against
each other and risk cracking as the turning cradle rotates the
incubator.
The
decisions you make during the early incubation period have a strong
effect on how many healthy chicks eventually pop out of their
shells. Permaculture
Chicken: Incubation Handbook covers deciding whether to candle,
tips on turning the eggs,
ways to keep the internal humidity at the proper level, and what to do
if the power goes out. Check out the 99 cent ebook and become a
real incubation expert!
 This post is part of our Chicken Incubation lunchtime series.
Read all of the entries: This post is part of our Chicken Incubation lunchtime series.
Read all of the entries: |
Dave V commented yesterday on
how he was thinking of getting a plastic hard case to carry his
chainsaw around in and if I thought there might be some advantages to
this over my fabric
chainsaw carrying bag.
First off let me be clear
that the bag I got is not an official Stihl product although the color
combination is a good imitation.
I think the biggest advantage
to a hard case is the added protection. If you carry your saw in the
back of a truck it might be wise to use a plastic case, but I rarely
take ours off the farm.
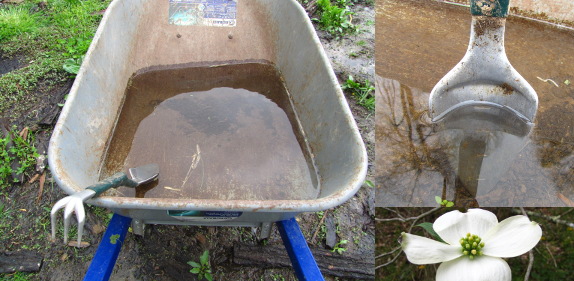
 If I'd been watching the
weather with my usual eagle eye, I wouldn't have set out two-thirds of
our broccoli seedlings this week. But I was too intent on looking
at the rain percentages and hoping we wouldn't wash away in recent
thunderstorms to notice the forecast lows. (I only left the
wheelbarrow out overnight to get the photo above!)
Which is all a long way
of saying that frost is on the forecast for tonight and again for early
next week. So I'll be repeating my quick
and dirty frost protection, trying to ensure that cold
temperatures won't harm fruit plants that are even further advanced
than last time. Here's hoping we'll see just as little damage.
 The most exciting part of the incubation
process can also be the most
traumatic if you don't know what you're doing. This final post in
the lunchtime series
tells you what to expect during hatch time, but the
99 cent ebook from which the post is drawn covers much more
information. I hope you'll splurge a buck if you want to learn
more about preparing for the hatch, helping chicks out of the shell,
troubleshooting incubation problems, and getting your youngsters off to
a healthy start.
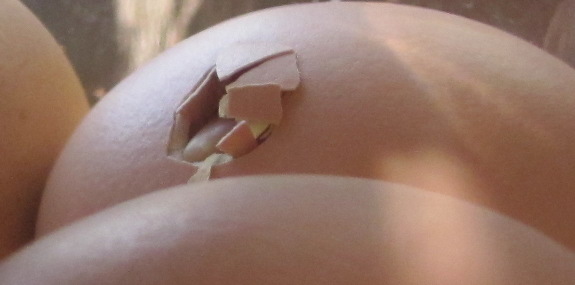 You'll probably see at least
one chick pipping (pecking the initial
hole into its shell) on day 19 or 20. I like to record the date
and time each egg pips to give me an
indication of whether chicks are having trouble. I explain how
and when to help chicks in another section, but for now, just be aware
that it's very normal to see a delay of 8 to 12 hours between pipping
and unzipping (when the chick severs the blunt end of the shell and
breaks its way free). But if a chick has pipped but not begun to
unzip 24 hours later, it might be in trouble.
 If you've done a good job
with all of the early incubation steps, your
chicks will probably pop right out of their shells one after another
with no help from you. Some manuals recommend leaving your chicks
in the incubator for an entire day without lifting the lid to allow the
youngsters to
dry off completely, but I've had much better luck plucking chicks out
of the incubator within 45 minutes of hatching and either plopping them
into the brooder to finish drying off or placing them in a smaller
incubator.
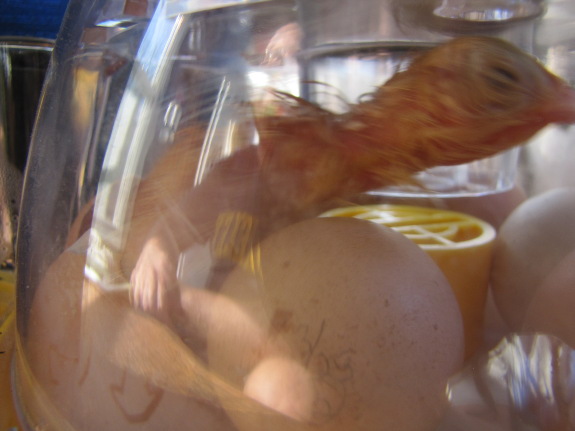 The trouble with leaving
chicks in the incubator after they hatch is
that the baby birds will stumble around madly, rolling eggs and (in the
worst case scenario) spearing partially hatched chicks with their
claws. In my experience, newly hatched chicks are upset by not
having
anything soft to snuggle into, so they keep hopping around even though
they're exhausted. Once I pop a newly hatched chick under our
brooder, it stops peeping shrilly and soon falls
asleep.
 There are two downsides to
removing chicks from the incubator one at a
time throughout the hatch process. Chicks
come out of the shell soaked to the skin and can easily catch a chill,
especially if you're hatching in cold weather. Forty-five minutes
in the incubator is just long enough that the chick's feathers are
(mostly) dry, but is not long enough that they puff up into the
protective
ball of fuzz most of us think of when we envision a chick. In
warm weather (and even in cold weather if there are at least two or
three other chicks in the brooder for the newly hatched youngster to
snuggle into), this level of dry off is enough. However, if your
first chick comes out of the shell when your room temperature is below
about 50 degrees Fahrenheit, you should either put up with the
problems caused by leaving the chick in the main incubator until at
least one
more chick hatches and dries, or should place the newly hatched chick
in a
spare incubator for a few hours. You'll be able to tell if you
put a too-wet chick into a too-cold brooder because it will keep
chirping frantically rather than quieting down after a minute or two.
 The other issue with
removing chicks from the incubator one by one is
that every time you lift the lid, the incubator cools slightly and the
humidity levels drop. You can counteract this problem to some
extent with speed --- open the lid with one hand while you snag the
chick with the
other. If it's pretty cold in the room, I like to heat up some
water until it's steaming and top off the wells when I take off the
incubator lid since the hot water will keep the temperature in the
incubator high and will also increase the humidity drastically.
Using an evaporating cloth (explained in another section) also helps
keep the humidity within the incubator at a high level.
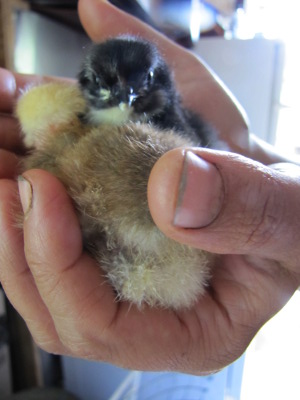 Even
though it's not 100% necessary, I open the lid a second time after
the new chick is safely ensconced in the brooder, this time to tidy up
the interior of the incubator. I remove large pieces of eggshell
so chicks won't cut themselves on the sharp edges and I roll any
disturbed eggs over so their pipping holes are facing up.
(Sometimes, a chick will stumble across a neighboring egg and turn that
chick face down, which makes it harder for the down-turned chick to
hatch.)
Finally, I quickly move eggs around so that ones likely to
hatch soonest have a little more open space around their blunt
ends. As with removing the chick, I work quickly to ensure I
don't lower the temperature and humidity in the incubator enough that
it doesn't rebound a few minutes after I close the lid.
 This post is part of our Chicken Incubation lunchtime series.
Read all of the entries: This post is part of our Chicken Incubation lunchtime series.
Read all of the entries: |
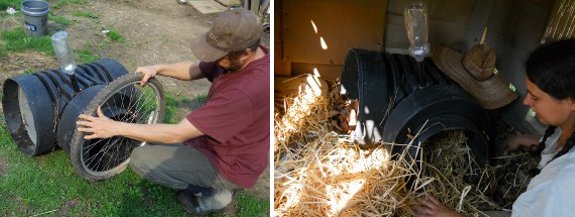
It works good as the new
nest area, and it seems
that our hens like it, but I think she's lost that broody feeling.
I've been trying to think of
methods to stimulate broody behavior. The first one is to record the
sound of a broody hen and play it back for one of her sisters while
she's comfortably tucked into her nest.
Not sure if it would work,
but it would be nice to shift some of the chick rearing workload
towards our feathered friends.
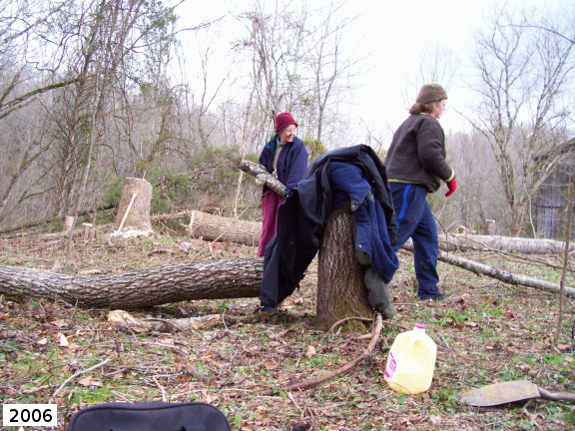
Mark's been cutting out
stumps off and on all winter to make our yard easier to mow. I
come along behind him and gather up the rotting wood (some of it nearly
stump
dirt) to add to my hugelkultur
donuts around fruit
trees in the waterlogged forest garden.
In general, the smaller
stumps rot faster, just as you'd expect. In fact, I've pulled
several four inch in diameter stumps out of the ground by myself after
wiggling them like loose teeth for a few seconds. But this week's
stumps didn't follow the trend.
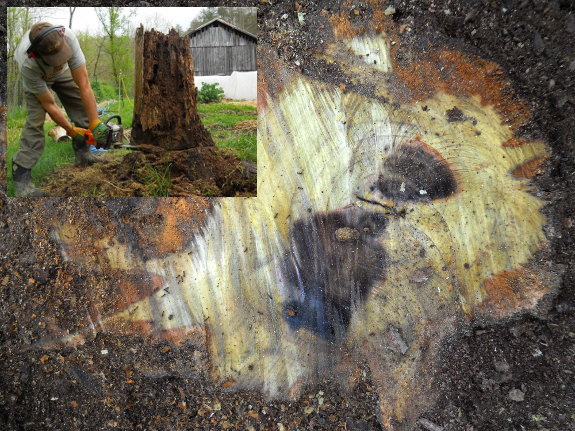
The biggest stump was
well rotted despite being nearly three feet in diameter. When
Mark's saw made it all the way through, I could tell that the tree
(probably a black walnut) had grown quickly in its then-pasture
location, creating growth rings about an inch in diameter.
Perhaps the fast growth contributed to fast decay?
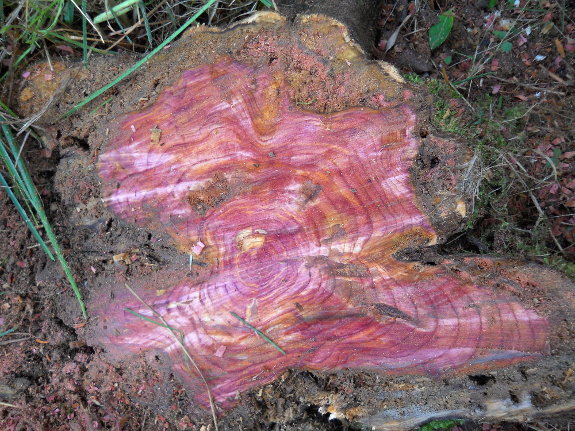
In contrast, the
littlest stump had barely decomposed at all. We both knew why as
soon as the saw bit into the wood --- the odor of red
cedar quickly filled
the air. I wonder how long that red cedar stump will sit in the
ground before it disappears?
The barn
roof repair project got
wrapped up yesterday!
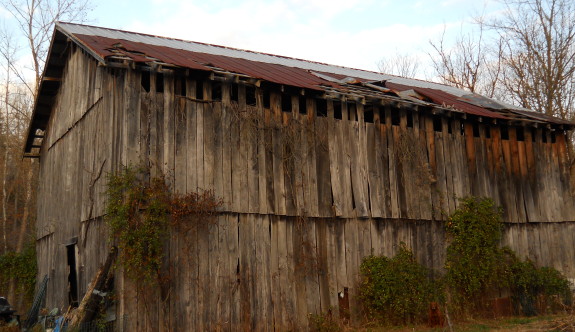 We couldn't be happier...giddy is a more
accurate description of the feeling I get when I walk by and look up at
a fully intact roof.
It went so well we decided to
hire the same guy to install a gutter on one side. The other side
drains downhill towards the creek.
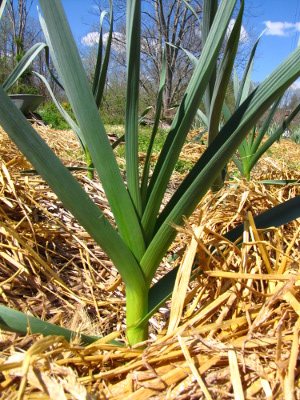 As
I wrote last year, April
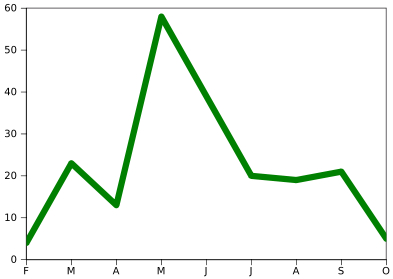
is weeding month on our farm. My graph below shows
how many beds need to be planted between February and October --- April
is clearly the calm before the storm, a chance to clean up
early-planted beds (or overwinterers, like this garlic) and get a head
start on the May rush.
Even though I started
weeding in earnest around the end of March, I already feel a bit
behind. The crazy spring heat made everything grow much faster
than normal, so the early spring beds all need to be weeded and mulched
ASAP.
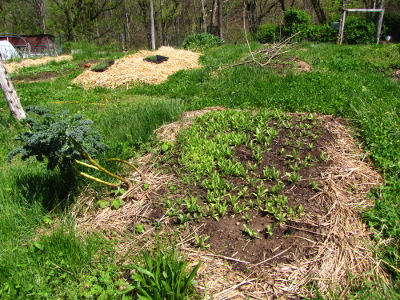 I
don't thin much, but there is a little of that on the April agenda
too. I managed to overseed the breadseed
poppies (despite cutting back my seeding rates from last year) and
Swiss chard always needs to be played with since more than one plant
germinates from each "seed".
On the plus side, my
strawberries and garlic are in much better shape than they were last
spring --- a heavy fall mulch did its job. After a fiddly hour of
weeding around tiny seedlings, I like to give myself a break by ripping
out the few chickweed and dead nettle plants that came up in a garlic
bed. So satisfying to weed a whole bed in under a minute!
Maybe that's what all of my weeding jobs will be like in a decade when
my soil is rich, my mulch deep, and the weed seeds few.
Our new Stihl MS
211 chainsaw is about to turn a year old.
The smaller size really comes
in handy for stump removal, and the newer engine has about half as much
exhaust fumes to breath in.
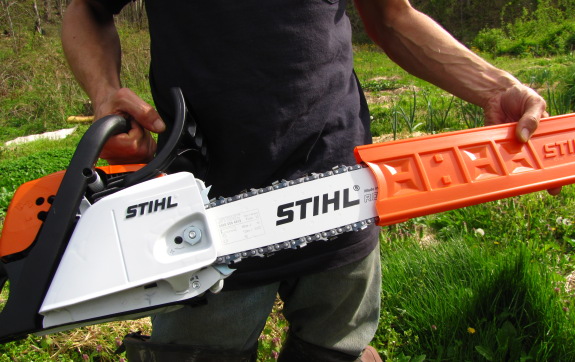 I've had a few instances where I
felt like it was underpowered, but that was more the fault of a dull
chain, and I had a small learning curve with the starting procedure. It
took me a while to figure out when you push the choke all the way down
it sometimes springs back up if you're not paying attention.
 Are you struggling with a
thorny garden problem and can't figure out why your cucumbers keep
dying or what that pesky weed is in your pasture? Maybe you're
more interested in breaking free of your job and need some tips to turn
your microbusiness idea into a reality. Or perhaps you've just
moved to your dream homestead and are trying to decide where to put the
chicken coop and which of those sticks in the yard are fruit trees and
bushes.
We're here to
help! One lucky reader will win a free consultation to smooth
their path to homesteading independence. Two hours of email
answers from me and Mark can save you weeks (maybe even years) of trial
and error, and we promise you'll get your money's worth. Use it
up all at once, or have Walden Effect as your on-call mentor all summer.
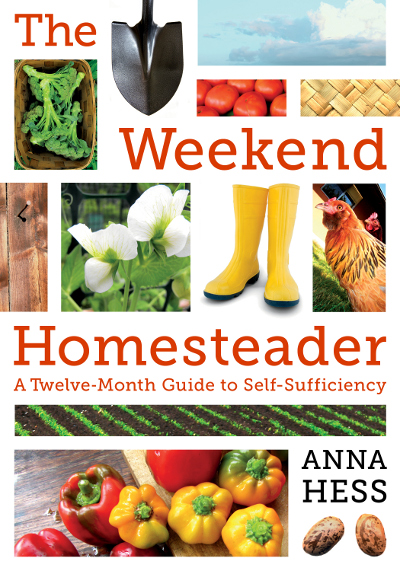 What do you have to do to
enter our giveaway? The paperback
edition of Weekend Homesteader is now available to preorder
(yay!), and we need help spreading the word. This more polished
version of the monthly ebooks I've been publishing for the last year
contains 368 pages of full color photos and text to guide you on the
path to self-sufficiency. Even if you've read all of the ebooks,
I suspect the $11 paperback will be worth a second read since I've
added in dozens of sidebars and three all new chapters. The
Weekend Homesteader won't be in print until October, but you can
preorder now and be the first on your block to hold a copy of the book
in your hands.
To spread the word,
choose one or more of the following options, then leave a comment below
telling me how many times to enter you in the drawing. (Each way
you spread the word equates to one entry.)
- Preorder the book on Amazon.
- Tell your friends via facebook, google plus, your blog, email, twitter, or even plain old face-to-face chatting.
- Leave a review on any of my ebooks on Amazon. (You can see them all in one place on my author page, or just search for my name. Please only leave reviews on books you've read.)
- A very easy freebie for all of you --- click the "like" button on the Amazon page of my paperback.
- Some other ingenious way of spreading the word --- you decide!
So, if you preordered
two copies of the book, posted on facebook and
your blog, and left two reviews, you'd be entered six times! The
more times you enter, of course, the more likely you are to win.
(Just be sure to leave a comment on this post before midnight on April
13 to tell me how many times to put your name in the hat.) Thanks
so much in advance for entering and helping spread the word!
 Mark
and I were looking forward to expanding our horizons at the ACRES USA
conference this
winter, but after attending the pre-conference, we were quickly citied out
and fled back to the farm. The
good news is that ACRES has a policy of giving you half your conference
fee as a credit at their store if you're unable to attend, which was
enough to purchase a "free" audio version of the entire conference to
enjoy at our leisure!
I love to read, but have
a harder time buckling down to listen to audio, so I didn't crack the
first mp3 file until chicken waterer orders started to heat up in
March. Since then, I've been listening to one or two lectures per
week as I build do it yourself kits, skipping over the less interesting
topics but finding lots of intriguing information in others.
 This week's lunchtime series
is a summary of the first four of those interesting lectures ---
biodynamics, cover crops, plant secondary metabolites, and brix.
I found some lectures a bit kooky, just as Roland suspected, but there
was at least a bit of tantalizing information in each. Stay tuned
for those tidbits at noon all week, and then for more summaries
throughout the spring and summer.
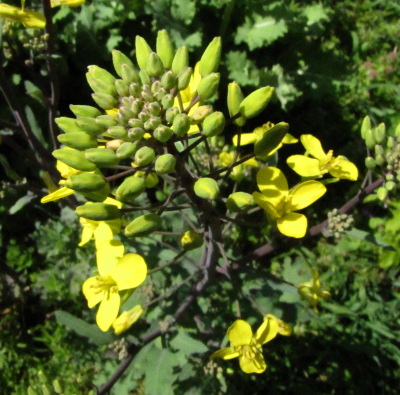
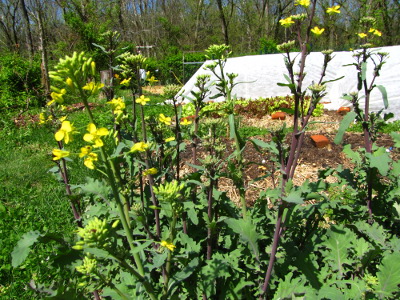
(As a side note, these
photos are totally irrelevant to the lunchtime series. I'm
enjoying how beautiful the kale is as
it starts to go to seed.)
| This post is part of our ACRES conference lunchtime series.
Read all of the entries: |
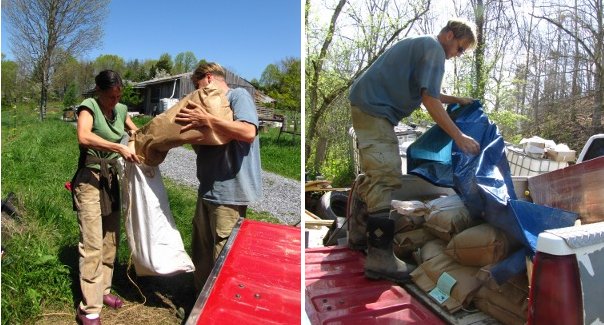
I've asked at least 3
separate feed store clerks if I could get my chicken feed non-medicated.
Without exception each of them gave me a look as if I was asking them
to break a law of physics.
I stopped asking and just
took what they had to offer, and then some friends of ours who have a pastured
livestock operation invited us to join their bulk chicken feed
purchase.
A place called Sunrise
Farm sells non-medicated feed for just a little more than the feed
store prices. Anna's got the details of the high
quality chicken feed ingredients over on our Avian Aqua Miser blog.
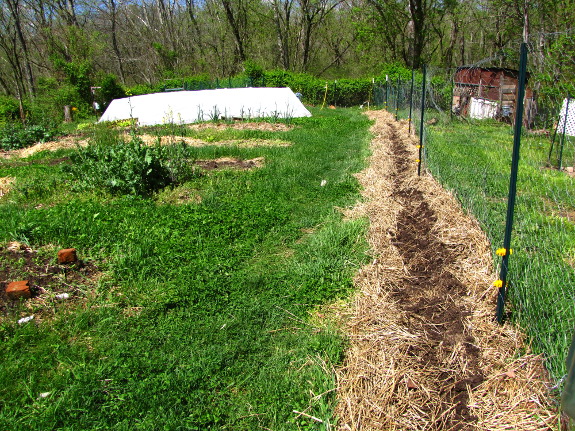
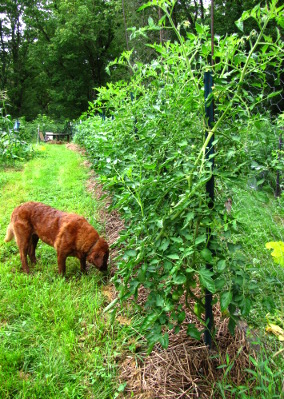 Remember
last year's tomato
alley? We
lined most of these juicy morsels up against the fence between the mule
garden and the chicken pasture since that's the sunniest spot in our
vegetable garden. This year, we're rotating the tomatoes into the
forest garden and renaming that long row "asparagus alley".
We currently have about
thirty asparagus plants that are just starting to be old enough to pick
heavily, but the beds produce late because I sited them in the part of
the garden that's shaded by the hill all winter, keeping the soil
cold. On the one hand, planting the asparagus on the shady side
of the garden makes sense since the perennials can handle less than
full sun in the summer. But on the other hand, it means we didn't
get our first real flush of large spears until Friday --- pretty late
considering how warm our spring has been.
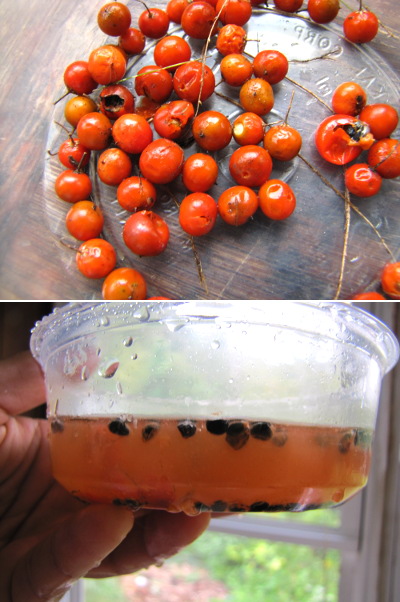 I had planned to expand the
planting anyway because thirty asparagus plants isn't really enough for
two people hungry from a long winter with only leafy greens as our
fresh produce option. One of our "all-male"
asparagus plants
turned out to be a female, so I collected its fruits last fall,
fermented out the seeds, and dried them for spring planting.
Planting asparagus from
seed might be a bit slower than buying roots, but it's vastly cheaper
(free if you save your own seeds). And many folks believe that
you lose a year when setting out roots due to transplant shock,
resulting in full production at the same time from seeds or transplants.
 I'm looking forward to even
earlier (and more abundant) asparagus in four or five years. I
think the ferny fronds will look nice along the chicken pasture fence
too, and will give our flock a bit of summer shade. Maybe the
chickens will even munch on passing asparagus
beetles?
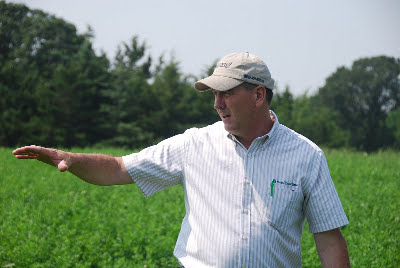 Karl Dallefeld spoke at the
ACRES USA conference about "capturing maximum value from diversity of
plant species on your farm", mostly in relation to mixtures of cover
crops. Dallefeld has experimented extensively with cover crops on
his eastern Iowa farm, and much of his talk consisted of a who's who of
top cover crops for various applications. His recommendations by
category include:
- Scavenging nitrogen - rye, sorghum-sudangrass, radish, rapeseed, ryegrass
- Nitrogen fixation - legumes (especially clovers)
- Quick spring cover - buckwheat, sorghum-sudangrass, berseem clover, medic
- Late planted winter cover
- annual ryegrass, rye, oats, radish, rape, turnips
- Erosion control - barley, rye, sorghum-sudangrass, cowpeas
- Building soil - rye, sorghum-sudangrass, sweetclover, woollypod and hairy vetch
- Loosening compacted soil - radish
- Suppressing nematodes - brassicas (only if tilled in)
- Dealing with high pH - mustard, berseem clover, ryegrass, vetch
- Fighting weeds - rye, oats, buckwheat, radish, berseem clover, chickling and other vetches, cowpeas, subclover
- Quick, temporary pastures - annual ryegrass, oats, wheat, sorghum-sudangrass, berseem clover, crimson clover, white clover, red clover
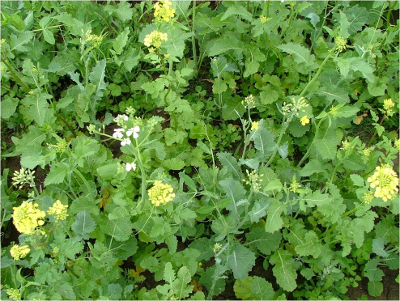 You'll notice that most
categories include several options, and Dallefeld prefers to mix lots
of species together when planting cover crops. His goal is to
include at least one legume, one grass, and one non-legume forb (aka
everything else) in each mixture, on the assumption that a more diverse
cover crop assortment will do its job better. For example, he
might plant mustard, berseem clover, ryegrass, and a vetch all at once,
figuring that the clover and vetch will add nitrogen to the soil, the
mustard will feed pollinators and reduce the number of nematodes, and
the ryegrass will build organic matter.
I was particularly
struck by Dallefeld's explanation of when to kill cover crops depending
on your goals. He explains that young, succulent plants (like
buckwheat at the bloom stage) provide quick nutrients while lignified
(aka mature and woody) cover crops tie up nutrients at first, but end
up building humus in the long run. That's why we use
buckwheat in the summer in short windows between vegetables and save
oats for over-wintering, since the latter have time to rot down a
bit before we plant into them the next year.
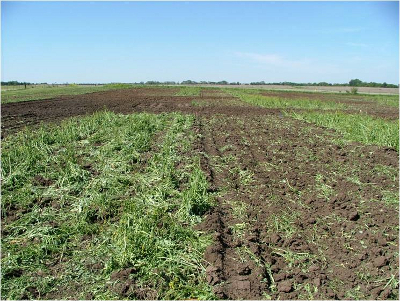 Dallefeld's experiences are
with cover crops in their mainstream, large-scale application.
Generally, he sows cover crops into newly tilled fields and then tills
them back into the ground before planting a vegetable, so you should be
careful about using his favorite varieties in a no-till garden.
Still, we can all take his wisdom to heart --- more diversity in the
garden is nearly always better. Maybe I need to continue
expanding my selection of cover crops beyond the tried and true.
| This post is part of our ACRES conference lunchtime series.
Read all of the entries: |
We put together a storage
shed this afternoon.
It's one of those plastic
resin Rubermaid kits.
Total cost was around 360
dollars. Anna worked 3 hours and I came along at the end and helped for
an hour. It comes with a nice 37 page instruction book and it all fit
in a box the size of a coffin.
We talked about maybe
building something out of wood, but our recent high
grade chicken feed
purchase put us in a spot where we needed storage fast, and this was
the quick and easy route.

Let's all wish Joey a happy birthday
today! You may not have the same fond memories I do of walking on
the train tracks on the way home from school, a book under your nose
and your big brother on the rail in front of you. But we all owe
Joey a huge thank you for making the technical side of this blog possible. Most
recently, he coded a plugin to allow you to sign up for email
notifications of responses to your comments --- have you noticed?

 We celebrated Joey's birthday
a couple of days early with a picnic at Natural Tunnel State
Park. The wildflowers are currently in full bloom on the trail
above the tunnel, and if you live in the area, this is a walk not to be
missed.
Three turkey vultures
treated us to a shadow light show that's impossible to describe, but
was breath-taking in person. I also spent far too long peering
through the zoom lens of my camera (since I forgot my binoculars) to
figure out what those strange birds were roosting on the cliffs.
Yup, those are aptly named Rock Doves...aka the kind of pigeons you see
in city parks. Boy was I embarassed when I realized I hadn't
recognized pigeons (but intrigued to see them in a semi-natural
habitat).
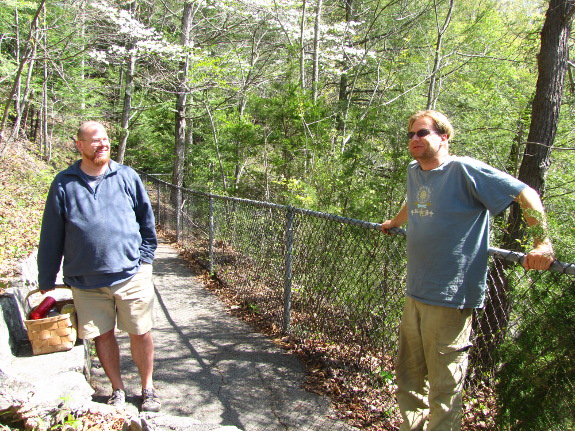
 Joey went on to embrace
his Hobbit side
while we zipped on down the road to pick
up chicken feed.
More photos of cute livestock soon!
Don't
forget to preorder your copy of Weekend
Homesteader for tips on fitting a self-sufficient life into your
busy schedule.
 One of the things I'd hoped
to get out of the ACRES USA conference was an opportunity to answer
questions like --- is biodynamics kooky or is it a valid method of
increasing the biological stability of a farming ecosystem? After
listening to Gena Nonini's "Biodynamic journey" presentation, I'm
leaning toward the answer --- biodynamics is both.
Nonini grew up on a
conventional (aka chemical) farm in California, so her journey in the
biodynamic direction wasn't well received by her family and
neighbors. She leased 90 acres of wine grapes from her parents in
1991, and soon realized that chemical farming was terrible for her
health, and wasn't going to allow her to make a living either.
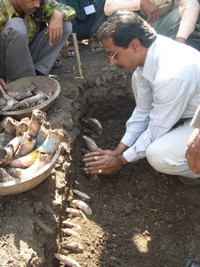 Nonini's response was to
slowly but surely start focusing on organic inputs and on diversifying
her operation. She followed the biodynamic principle of creating
"preparation 500" --- filling a cow horn with cow manure and burying it
in the ground to age for a few months before applying the compost to
her soil. She also added citrus trees and vegetables to the farm,
figuring the biodiversity would help prevent pests organically and
would also ease the financial strain if one crop failed.
In her lecture, Nonini
argued that the health of biodynamic farms can't be explained by
"substances", but instead by "forces". (Yes, she even talked
about communing with the gnomes.) This is where she lost me, and
why I've considered biodynamics kooky in the past. I'm quite
willing to believe that preparation 500 might be very valuable to soil
--- maybe the horn acts a bit like biochar and increases microorganism
populations dramatically in the enclosed manure. But creating a
spiritually-based agriculture system seems like a copout to me. I
always want to know how things operate so I can decide when to use them
and how to make them work even better.
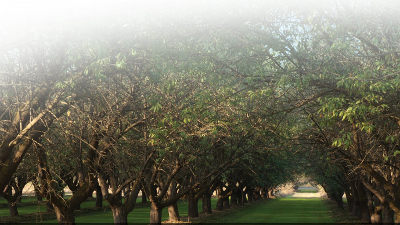 Biodynamic agriculture has
developed a large following as the term "organic" continues to be taken
over by large agriculture companies that care more about the bottom
line than about the health of the farm ecosystem. However, I'm
afraid I'll stick to the term "permaculture" for now if Nonini is a
typical example of the biodynamic movement. I've got another
biodynamic talk to listen to, though, so maybe I'll change my tune in
the next ACRES lunchtime series.
| This post is part of our ACRES conference lunchtime series.
Read all of the entries: |
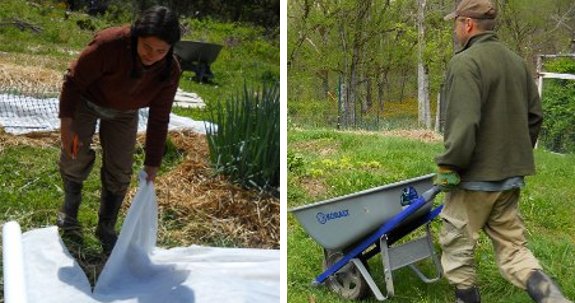
Mother Nature is threatening
to equalize our unseasonably warm Spring with some below freezing
temperatures tonight.
We covered vulnerable crops
with Agribon material and weighed it
down with old chimney bricks.
Brrrrrrr.
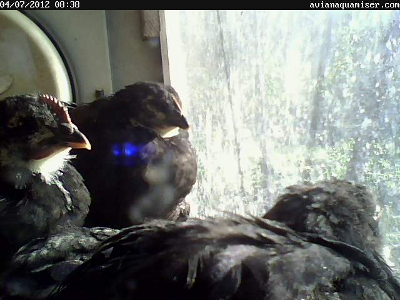 We
reveled in spring. We watched the flowers with joy, started crops
way too early, and basked in the warm sunshine.
And now it's time for
our comeuppance. As you can see from this webcam shot, the chicks weren't
pleased when Friday morning temperatures were in the mid to high
20s. I wasn't either --- the weather forecast had promised me a
low of 36 and I'd only half-heartedly covered a few strawberry beds.
I don't even want to
start telling you everything that got nipped last weekend, because I
suspect more kicked the bucket last night. We went ahead and covered the rest of the strawberries
Wednesday, along with broccoli, cabbage, Swiss chard, and carrot
seedlings.  In some cases, this equates
to closing the barn door after the horse has bolted, but I figured we
were better off safe than sorry.
I'm more concerned about
a fruitless summer than spring setbacks, though. The kiwi leaves
turned black after Friday's freeze and some of our new grape leaves
were slightly nipped. Only time will tell whether last night's
(and tonight's) cold hit the tree fruits.
And then there are the
wild trees. No, it doesn't make any difference to our livelihood,
but I remember how depressing it was to walk around in the woods all
summer six years ago when a late frost nipped back the young buckeye
leaves. Here's hoping the woodland microclimate will prevent at
least that!
 Jerry
Brunetti's lecture was titled "Achieving the holy grail of crop health:
Plant secondary metabolites". That probably sounds a bit
yawn-worthy if you're not a plant geek, but it turns out his talk was
my favorite from the conference so far. (In the interest of full
disclosure, though --- I am a plant geek.)
So, what are plant
secondary metabolites, and why should we care about them?
The term refers to every chemical that makes up a plant except for the
big three --- carbohydrates, fats, and proteins. The scent of a
flower, the spiciness of a pepper, and the color of an apple are all
plant secondary metabolites. So are the chemicals released by
caterpillar-nibbled trees to warn the next tree down the lane to build
anti-caterpillar chemicals proactively, as well as the attractants
emitted by plant roots to tempt soil microorganisms to stop by.
The
chemicals that give plants intriguing tastes are all plant secondary
metabolites, and so are compounds like lycopene and salicylic acid,
which help prevent prostate cancer and heart attacks,
respectively. Brunetti explains that there are tens of thousands
of plant
secondary compounds produced for reasons that include attracting
pollinators and seed dispersers, defending the plant from ultraviolet
light and herbivores, and communicating with plants, insects, and soil
microorganisms.
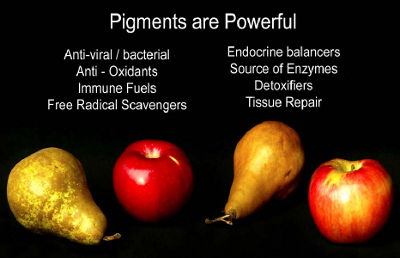 The fact that so many of the
compounds impact our health (positively or
negatively) is merely a side effect from the plants' point of
view. Plants create secondary metabolites because the chemicals
make their lives easier --- since a tree can't run away from problems
or travel to find true love, it has to repel the one and attract the
other. (Sounds like my life on the farm....)
But production of these
chemicals comes at a cost. Plants
constantly have to weigh the pros and cons of using their limited
energy to make carbohydrates, fats, and proteins --- allowing them to
grow and reproduce --- or to make secondary metabolites of various
sorts. In the wild, plants usually create a bit of both, focusing
on secondary metabolites more when they're subtly stressed, but not so
injured that they're wilting away.
In an agricultural
setting, the stakes are different. Farmers try to protect
our crops from all problems, which means the plants have little reason
to produce secondary metabolites and can simply grow big and
tall. While that means more pounds of vegetables on our plates,
the lower concentrations of secondary metabolites make the food less
tasty and nutritious. Maybe that's why vineyard keepers believe
the best wine comes from grapes that had to struggle a little?
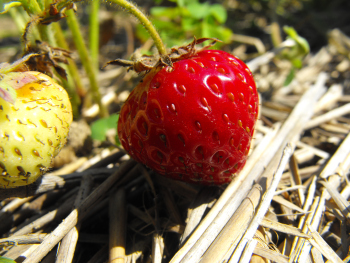 In
addition to lacking the incentive to make secondary metabolites, some
cultivated plants also lack the ability. Micronutrients like boron, copper,
aluminum,
manganese, and zinc are all essential for the production of secondary
metabolites but chemical farmers figure crops can get by without
micronutrients as long as they're well dosed up with some
10-10-10. I guess that's why I
was able to taste a micronutrient
deficiency in my strawberries --- the lack of minerals
relates
directly to the secondary metabolites that we
  perceive as flavor.
So how do you grow
the most delicious and nutritious fruits and
vegetables possible? Simply feed the soil well-rounded organic
amendments like compost and mulch, and don't wipe out every last
disease and pest. You'll get lower yields, but what you do grow
will be richer in flavor and nutrition.
Learn to grow healthy plants from the ground up in Weekend Homesteader.
| This post is part of our ACRES conference lunchtime series.
Read all of the entries: |
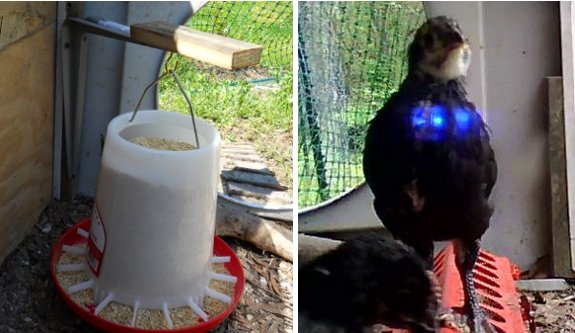
Our new chicks have outgrown
their small
automatic feeder.
The new one cost around 15
dollars.
A large shelf bracket with a
mug hook is all it took to rig it so it can be suspended off the ground.
We had a small debate on the
issue of making a lid for it. It didn't come with one, but now that I'm
looking at this picture I'm thinking I might need to think about one if
they figure out how to roost on the bracket.
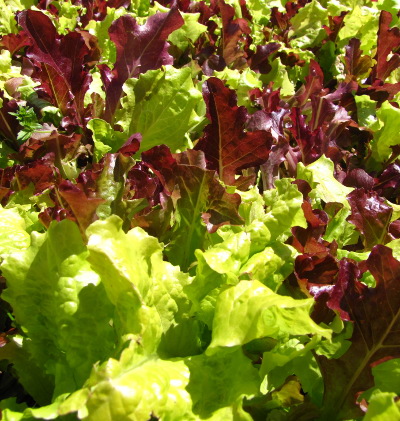 Do
you want to grow a variety of gourmet salad greens? Seed mixtures
are available, but they're generally quite expensive, and can also be
problematic in the garden. I've also found that the lettuce
varieties that come in seed mixtures aren't as tasty as the ones I've
hand-picked to suit our palates and garden.
On the other hand, who
doesn't enjoy a diverse array of colors, shapes, and flavors on their
plate? Here are my tips for making your salad bowl gourmet the
Walden Effect way:
- Plant non-lettuce salad greens in a separate bed. Many seed mixtures include non-lettuces like arugula, spinach, and Asian greens for an extra flavor burst. However, these salad greens tend to grow differently than lettuce, maturing at a different rate, so they do better in their own garden bed. It's easy to snip a few leaves of arugula to add to your salad bowl while you're in the garden collecting dinner, and separating out the non-lettuces also allows you to add more or less of the spicy plants depending on your guests and meal plan.
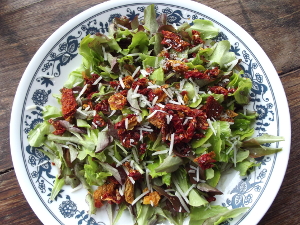 Mix lettuces by hand. When I was
ordering seeds this spring, the cheapest salad seed mixture at Johnny's
was $14.65 per quarter pound. In contrast, my favorite green leaf
lettuce (Black-seeded Simpson) was $7.45 per quarter pound and the
equally delectable Red Saladbowl was $9.30 per quarter pound. I
bought the red and green leaf lettuce seeds separately, mixed them as I
tossed the seeds in the bed, and saved 43%. (I could also have
given each lettuce its own bed, but different varieties of lettuce play
well together, so there was no real reason to segregate them.
However, some unusual lettuces like escarole might do better alone.)
No matter where the
seeds come from, leaf lettuce is the very first crop I'd recommend
beginning gardeners plant, as long as they hurry up and do so before
summer heat kicks in. Plant your lettuce today and you can be
eating it within a month, and that dollar's worth of seed could feed
you up to 60 meals! Now that's low cost gourmet food.
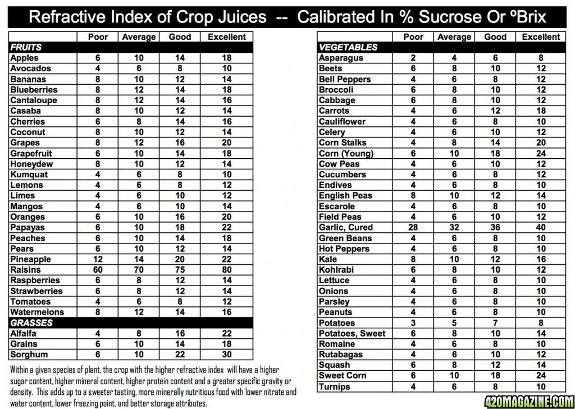
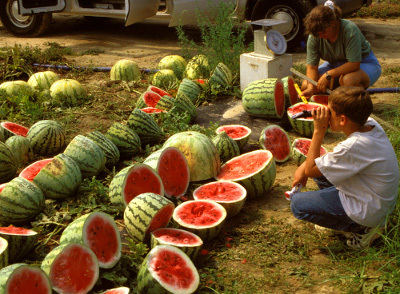 "Brix" is one of those terms
tossed around by folks in alternative agriculture circles that I
considered a little kooky in the past. The idea is simple --- you
use a meter to determine the percent by weight sugar in a plant, which
gives you a rough estimate of the nutritional quality of the food since
more nutritious crops are usually also sweeter.
Even though I agree with
the theory behind brix, I used to roll my eyes at the
implementation. I can taste the difference in brix between my
homegrown vegetables and the ones in the grocery store, so why buy a
$100 meter?
Glen Rabenberg's talk on
"Improving crop quality using readily available tools" helped me
realize that my understanding of brix in the garden is overly
simplistic. He doesn't just check the brix of crops being
harvested; he monitors plants at various stages of their life span to
prevent disease and insect problems.
 Rabenberg asserts that at
increasing levels of brix, farms become healthier in a holistic
fashion. Disease fungi and thrive at a brix below 7, but when the
leaves of a plant reach a brix of around 10 to 11, Rabenberg sees
drought resistance in the crops and fewer weeds nearby. At 13 to
14, he begins to see resistance to pest insects. Having recently
seen in a scientific source that the fire blight
bacteria are deterred by high levels of sugar in pear nectar, I'm willing to believe that
there's some truth to Rabenberg's ideas.
So, how do you raise the
brix of your food? As with plant
secondary metabolites,
the key is balanced soil. Rabenberg believes that most soil
problems can be remedied by focusing on five minerals --- calcium,
phosphorus, and (to a lesser extent) potassium, magnesium, and
sulfur. If Rabenberg sees low brix, he performs a soil test and
usually adds calcium and/or phosphorus on the theory that a more
nourished plant will produce more sugar and be more resistant to
problems. In his experience, potassium is actually often too
high, leading to weed problems --- if that's the case, you need to
round out your fertilizing campaign to prevent a buildup of the
important, but easy to overdo, nutrient.
 I know I've said "asserts"
and "believes" a lot of times in this post --- it's not because I don't
think Rabenberg is on the right track. However, I want to read up
more on the topic before I take his word as gospel, and suggest you do
too. Still, perhaps Rabenberg is right and I need to start
collecting data on the brix levels of our crops (and on the electrical
conductivity of our soil, a topic which will have to be its own post at
a later date). Perhaps if I noticed when tomato plants were
most at risk, I could head blights off at the pass?
Find out how to test your soil and
interpret the results in Weekend
Homesteader.
| This post is part of our ACRES conference lunchtime series.
Read all of the entries: |
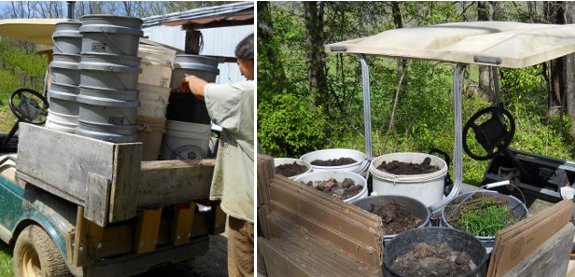
Seems like we have a lot of
buckets, but I think about 10 more will get us close to being complete
on a 5
gallon level.
Mark
insinuated last year
that my goat
dream (or sheep
dream) was really a
rare instance of my biological clock ticking. At the time,
I protested too much, but in retrospect, I think he was partially right.
I came out of the goat
haze slowly around the same time I became pregnant with Weekend
Homesteader.
Giving birth to a paperback seems to have circumvented the urge to
raise our own grazing animals.
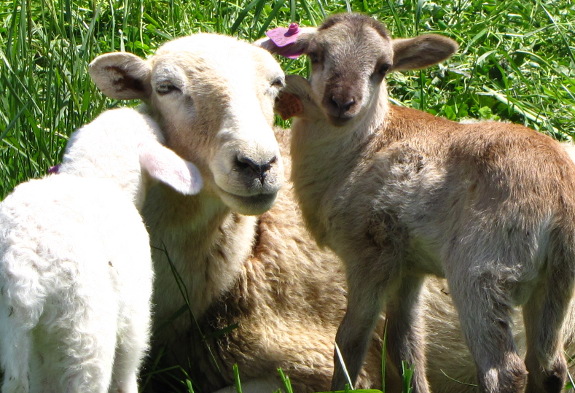
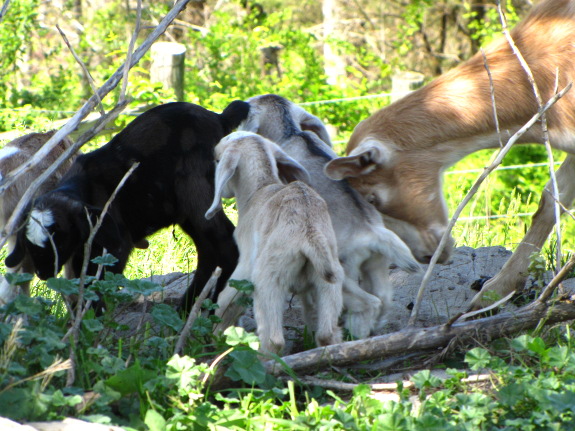
Which isn't to say that
I don't still think that I might like to try a milk goat --- some
day. I get a little flutter in my stomach when I look at photos
like these (taken while picking
up our chicken feed).
Maybe that's what normal women feel like when they coo over the scent
of a newborn human? (I'm glad to have an immunity to that
reaction.)
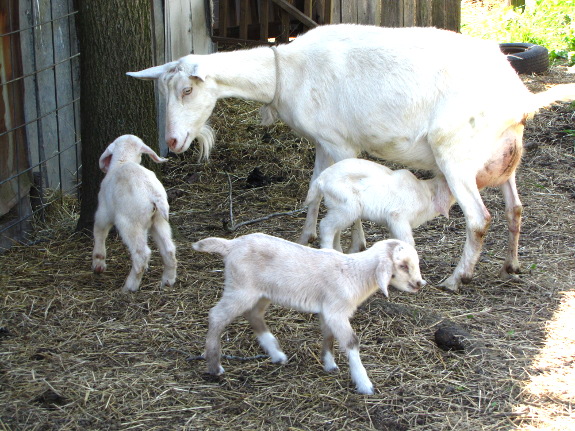
Luckily, the milk goat
dream has no deadline attached to it. So I can wait a decade or
two until the garden is weed-free and the chicken pastures have turned
into complex layers of trees, shrubs, and herbs. Maybe I'll wait
so long, I'll grow right out of it....
We put off collecting the
rest of our neighbor's scrap
cardboard all Winter and
part of the Spring in hopes of things drying out a bit.
It finally felt dry enough
yesterday, which is a good thing because the new owners start moving in
next month, and our agreement was to get it out of there before that
happens.
We're going to miss trading
eggs for manure, but I'm already hunting alternative sources close
by.
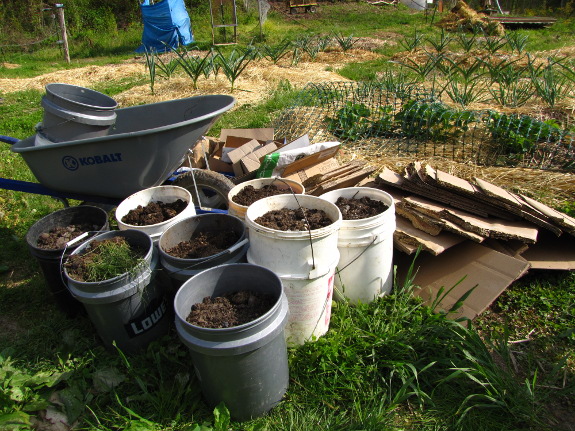
We nearly never work on
the weekends, but a passable driveway means all bets are off.
Despite weeks of dry weather, the extremely wet winter means we can't
drive the truck in, yet the golf cart floats over the mud as long as
it's not overloaded. So I spent two delightful hours hauling in
biomass.
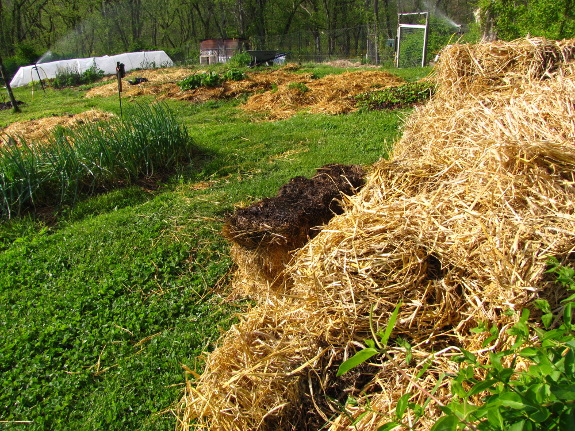
All winter, 80 bales
of straw have been
sitting out at our parking area, waiting for a ride to the core
homestead area. The bales that had been in contact with the
ground began to rot, which is actually a plus since partially
decomposed straw is a perfect mulch around seedlings, and we have lots
of spring seedlings in need of mulch. I offloaded little piles of
straw here and there throughout the garden for use within the next two
or three weeks.
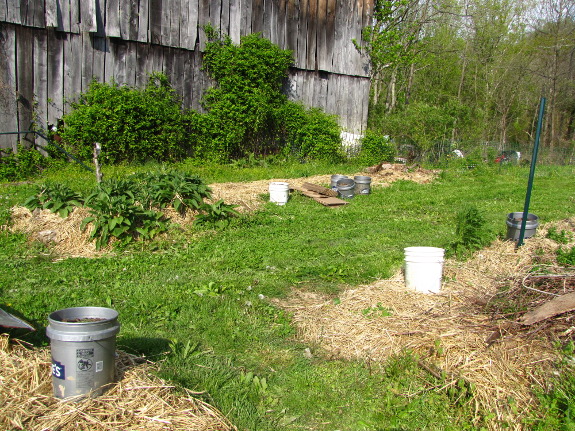
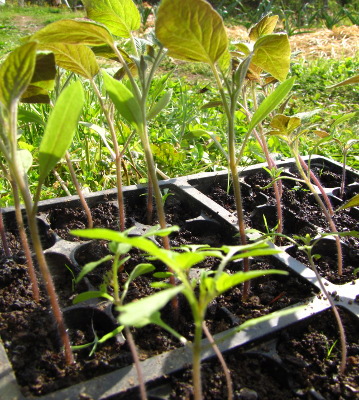 As I unloaded biomass, I was
thinking ahead to the late April and early May garden. The
tomatoes I started inside on March 16 now have two true leaves, which
means I either need to repot them or set them out. Even though
our frost-free date is a solid month in the future, the ten day
forecast has no lows below 43, so I'm hardening the tomatoes off for
planting around April 23 (if the weather stays warm).
Which is all a long way
of telling you that Mark's buckets
of horse manure already have designated spots in the garden.
The buckets in the photo above represent future tomato homes in the
forest garden, and the rest of the manure is earmarked for broccoli and
potatoes.
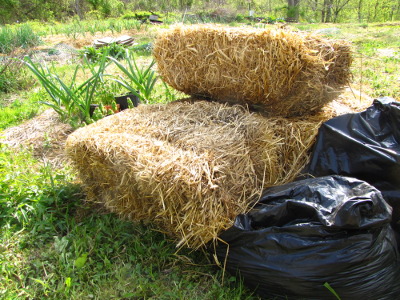 Everything was going
swimmingly until my inherent ability to break things finally kicked
in. On golf cart load six, I piled on the bales of straw and went
to turn the key to head home...only to discover that the key was
gone! Even though it seems highly improbable, my best guess is
that the straw bale I'd heaved into the front seat somehow plucked the
key from the dashboard. (No one else was present, and I went
through my pockets on the off chance I'd decided it was a good idea to
take the key out of the ignition then forgotten about it.)
I sifted through the
loose straw on the floor of the golf cart and even tore that bale apart
in search of the key, but it was like looking for a needle in a
haystack (or, rather, a key in a 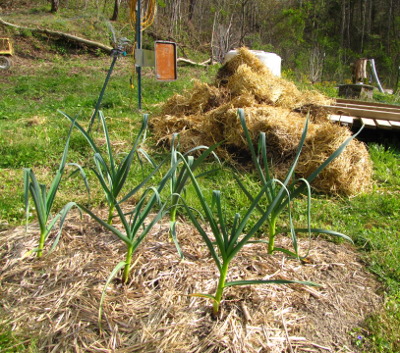 straw
stack) --- no dice. The good news is that all Club Car golf carts
manufactured after 1983 use the same key, so I was able to order two
online for $11 (shipping included). The bad news is, we're going
to have to wait until the spare keys show up before we haul in the rest
of the straw, the IBC tanks, chicken waterer construction materials, and
extra cardboard.
Still, I can't find it
in me to be unhappy since I now have enough biomass to get me through
until May. Mark said the other day that some women like men who treat
them like dirt and I corrected him gently. "No, honey, we like
men who treat us to dirt --- in other words, who
give us lots of biomass!" I'm one contented woman.
Our friends Everett and Missy are getting into building and
selling top bar hives, and we've agreed to help them with some field
testing.
We considered building one
ourselves, but with the Spring garden rush we couldn't seem to find
enough spare time.
They're still working out the
website details, but if you want to experiment with a top bar hive, Easyhives.com can save you a lot of time at a
price much lower than the competition.
 This is a scattered,
book-keeping post, so please take a minute to at least skim the
headlines.
Giveaway: Thanks to everyone who
helped spread the word last week and entered our consulation
giveaway!
Fostermamas was the winner --- please drop me an email and we'll start channeling
wisdom your way.
Reading
material: There's
no lunchtime series this week, but Weekend
Homesteader: September
is free on Amazon today and tomorrow to make up for it. The four
projects include spicing up your cooking, canning tomatoes for the
winter, saving seeds for
next 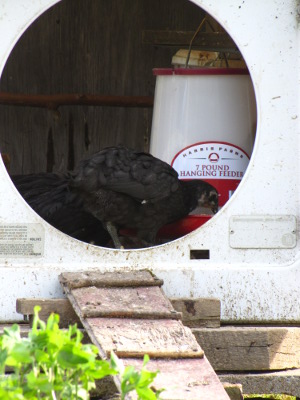 year's garden, and building a
homesteading team. As usual,
you can email me if you'd rather receive a
pdf copy.
Free
paperback: My
publisher asked me if I knew of anyone who might be interested in
reviewing Weekend
Homesteader, so I
thought I'd ask my favorite readers. (That's you!) This is
your chance to receive a free copy of my book, quite possibly before
anyone else! If you work-for/run/have-an-in-with a TV or radio
show, newspaper, magazine, or website and are interested in reviewing Weekend
Homesteader, please drop me an email with your contact info
(name, email, phone number, and mailing address) so I can pass it on to
my publisher. I won't promise anything (because I don't entirely
know what to expect myself), but I will definitely put you on the list.
Reading
club: I thought
I'd test the waters to see if any of you are interested in
participating in a summer reading club. I have a huge backlog of
books that I always mean to read, but don't, generally because they're
lighter or more philosophical than my usual non-fiction fare.
Maybe if we read them together and discussed them on the blog, I'd have
an incentive to buckle down! If you're interested, please leave a
comment to let me know which of the following books sounds intriguing
(or to suggest your own), and to give me an idea of how many pages you
think you'd like to read per week:
- Walden
--- Yes, I'm embarassed to say I've never read the whole book.
Mark's the one who named the blog. (Available for free download and is
also almost
 certainly at your
library.)
 - Ishmael
--- This book has been recommended to me multiple times, but I've been
scared off by the subtitle "An Adventure of the Mind and Spirit".
It's in my tiny library, so is almost certainly in yours.
- Radical Homemakers --- I think I need to get past the term "homemaker" in the title and focus on the radical part.
- The Bucolic Plague --- Looks like it would be fun.
- The Dirty Life --- Another book on the pure fun front.
- Folks, This Ain't Normal --- Salatin's first maintream-published book...and I'm scared off by the mainstream part.
- Small is Beautiful: Economics As If People Mattered --- Sounds dense but worth thinking about.
- Just in Case: How to Be Self-Sufficient When the Unexpected Happens --- I'm curious about the disaster preparedness world, mostly because we prep for (and experience) little disasters on our farm all the time.
- Gaia's Garden --- A basic intro to permaculture which I've avoided because I was afraid it might be too basic.
- Introduction
to Permaculture --- By one of the movements' founders.
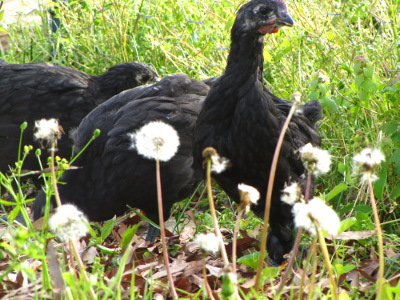
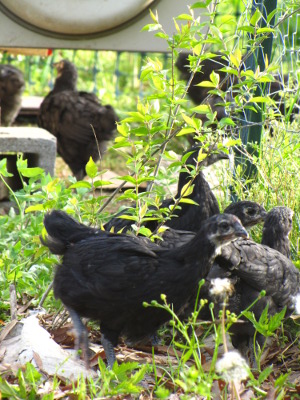
Pretty
pictures: Are
courtesy of our growing flock, who have enjoyed their upgrade to a bucket waterer and larger pasture!
The new
automatic chick feeder is
a huge improvement over the first small
plastic chick feeder we
tried.
It's easier to load, and Anna
feels like there's less waste.
I found a lid to fit on the
top, but there's still a problem with chicks roosting on the bracket
where the feeder hangs. I'll get around to fixing that one of these
days.
 I'm sure you're all itching
to hear what came of the forecast
hard freeze last
week. When I woke up Thursday morning, the frost was so thick,
the leaves of the kitchen peach were bowed down under the weight, but
I'm a bit confused about how cold it actually got.
I love to record daily
highs and lows, but I've been operating without a good thermometer for
a year now. The problem is that the cheap ones we'd been buying
at Wal-mart die in a year or less, and I just couldn't talk myself into
purchasing another throwaway product. (If you can recommend a
high 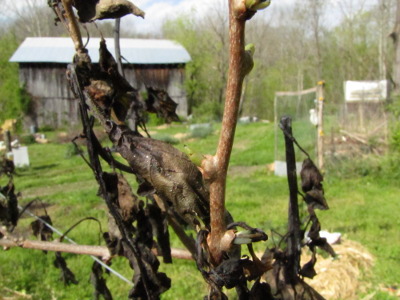 quality thermometer that
records highs and lows, can handle outdoor conditions, and lasts
several years, I'll snap it right up!)
Mark had a little
interior thermometer, so I set that out on the golf cart for the night
since there was no chance of rain. At 7:30 am, I checked the
thermometer, and it read 14 degrees Fahrenheit! Since the
forecast low was 26 and the air didn't fell all that frigid, I just
didn't believe it --- surely the reading was a sensor
malfunction. So I pulled out a mercury thermometer and set it on
the golf cart as well. My analog backup also read in the teens
(19 this time, probably because the sun was already beginning to warm
the yard by the time I read it half an hour later).
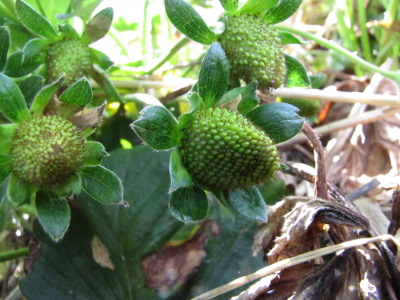
 If
we really had a low of 14, everything should have died. I would
have expected the lettuce I left uncovered to be nipped at around 25,
and the uncovered onion seedlings to die soon thereafter...but they all
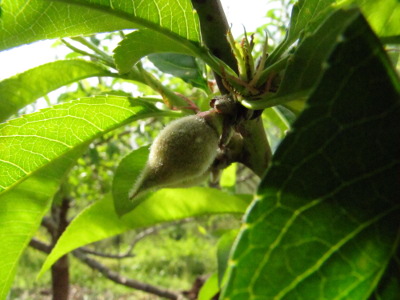
looked untouched. My peaches also seem to have come through
virtually unscathed, if these pretty fuzzy ovaries are any indication.
On the other hand,
strawberries (even under
row covers) were
severely nipped, with lots of blackened centers. Any kiwi leaves
that survived the previous frost were completely decimated, as were
mulberry and grape leaves. In the woods, spicebush leaves were
moderately damaged and the Japanese stiltgrass seedlings turned brown
(yay!), but everything else looked okay.
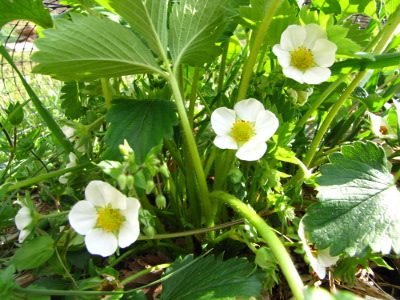 My best guess is that the
cold temperatures were very spotty. They probably rolled down the
holler toward us, sticking to the low points (where the strawberries
live) and passing by the peaches (which are on more of a slope).
Maybe cold air pooled just uphill of the trailer, leading to the
remarkably low reading on the golf cart outside our front door.
I'm just glad the damage
wasn't more extreme. The strawberries that had grown into little
fruits look like they're going to make it, and the plants are already
opening up new flowers. Even the badly nipped kiwi has green
buds. Looks like we survived dogwood winter nearly unscathed.
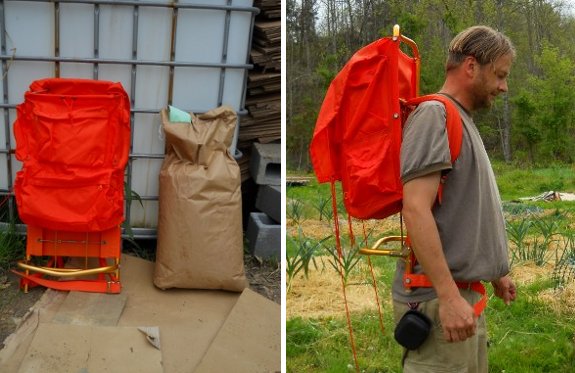
These old external frame
backpacks have a top and bottom compartment. Cutting out the canvas
divider makes an area barely big enough to handle a 50 pound bag of
chicken feed.
I've only done one trip
loaded with feed, but I can already tell it's going to be a huge
improvement over the old method of pouring out half the bag so it would
fit our smaller back packs.
We found our external frame
backpack on Ebay for around 30 dollars.
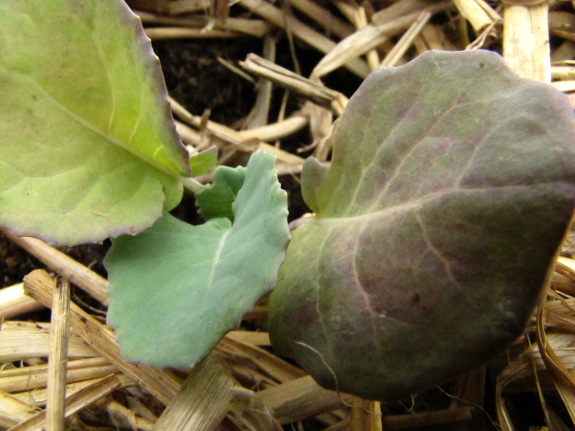
Even though the purple
and yellow tinges on the leaves of our broccoli seedlings are pretty,
any non-green coloration is generally bad news on vegetable
leaves. (That's assuming you didn't select a variety with colored
leaves, of course.)
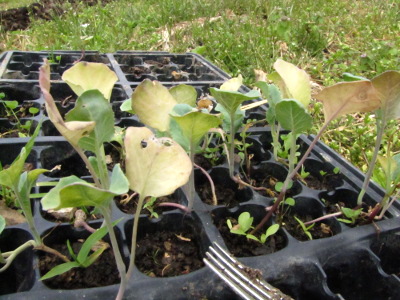 In this case, I know exactly
what the problem is --- I left broccoli seedlings in a flat for two
weeks longer than I should have because cold
weather was nibbling
at the garden and I didn't want the babies to freeze. You often
find broccoli seedlings in the same state at big box stores, the result
of a manager ordering more seedlings than the store could sell within a
reasonable length of time. If you really don't pay attention to
seeding rates, you could see similar symptoms in your garden as a
result of overcrowding, especially if combined with under-fertilizing
and under-watering. Finally, mulching with high
C:N materials (like office
paper) can have the
same effect.
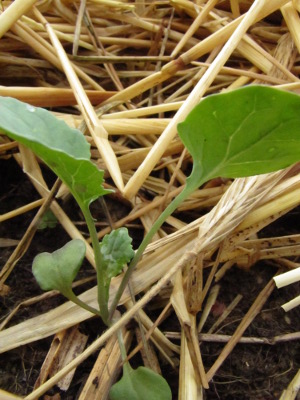
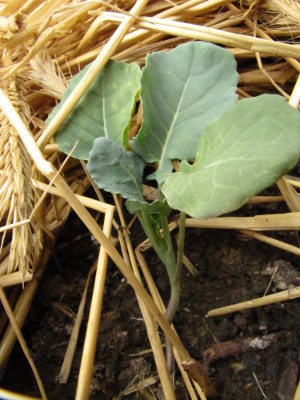 The broccoli seedling to the
right had a different problem. Notice that the older leaves are
faded looking, not quite so yellow as the stunted seedling leaves
above? This was one of the broccoli plants I set out before the cold snap and didn't
protect with row cover fabric. The older leaves were burned by
the cold, but the vibrant little plant has since put out two new leaves
that look a very healthy blue-green.
So, how concerned should
you be if you see weirdly colored leaves on your vegetable
seedlings? It all depends on what kind of plant you're looking
at. Broccoli is at the more vigorous end of the spectrum and
generally bounces right back from bad treatment, but tomato seedlings
have been known to sulk after even moderate stunting.
If you're at the store
and notice that all the available seedlings have off-colored leaves,
you might go ahead and take your chances with more vigorous types of
vegetables. But I wouldn't buy a tomato seedling that had seen
better days --- you might as well just start your own from seed.
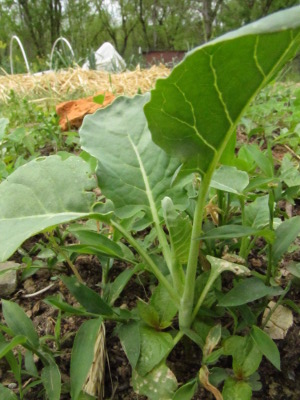 In my garden, I'll replace
stunted seedlings if I have spare healthy seedlings of the same size or
a bit smaller on hand, but otherwise, I let nature take its
course. I do, however, make a note and try to prevent the problem
from reocurring next year.
Notice how happy
(although in need of weeding) this little broccoli plant is? This
last photo shows one of the seedlings I started directly in the garden
rather than nursing
along in a flat.
As usual, the in-garden seedling starting technique produced healthier
results nearly as quickly as fiddling with indoor plants. I did
see much lower germination rates in the ground since I was too lazy to
erect a quick
hoop, but the health
of the seedlings is unparalleled. I guess I should put my spring
energy into quick hoops, not flats, in the future.
 I'm
excited that so many of you are interested in a homesteading book
club! Walden won by a landslide, so we'll
start with that and then decide on the next book if folks are still
interested.
Since Walden is so easily accessible (for free download, free online with
copious footnotes,
or in book form at your library), I thought I'd just give you the rest
of this week to rustle up the book, a week to read the first chapter
(about 50 paperback pages), and then start the first round of
discussion on April 30. But please leave a comment if you think
that's nuts and I can slow things down.
I haven't read any of
the book yet, but I did poke around on the web to come up with some
facts and ideas you might want to ponder as you embark on your literary
adventure:
- Philosophical perspective --- Henry David Thoreau "hoped his book would establish him as the foremost spokesman for the American transcendentalist movement." According to Wikipedia, transcendentalism was a 19th century American movement that rebelled against institutions like organized religion and political parties and instead believed we should each be self-reliant and independent. "For the Transcendentalist, the secret of successful living was to hold oneself above material concerns as much as possible and focus on the spiritual." Ralph Waldo Emerson, one of the founders of the movement, was Thoreau's mentor and loaned Thoreau the land on which he built his cabin beside Walden Pond at the age of 28.
- Historical perspective
--- Thoreau spent most of his life in Cambridge, Massachusetts, during
a period when his region was shifting from an agrarian to an industrial
focus. He worked in his family's pencil factory and understood "how
dependent industrialization was on the exploitation of cheap labor",
an understanding that was also colored by his family's involvement in
the Underground Railroad.
- Living simply --- One of the goals of Thoreau's two year sojourn in the woods was to figure out if he could make a living by working only one day per week. His book didn't do well when it was initially published in 1854, but became much more popular when the Great Depression forced many people to live simply.
Keep in mind I just read
a few websites to come up with that background information. More
literary folks should feel free to comment here and set us all
straight. For everyone else, don't forget to hunt down Walden and start reading!
Our Energy Star chest freezer is going to breathe a big sigh of relief on that day.
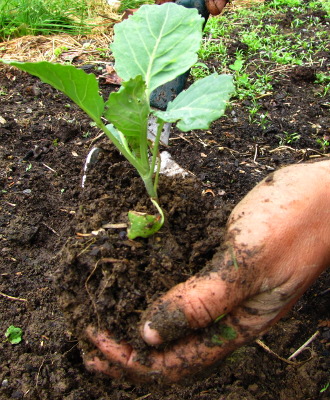 Some damp days, we rearrange
our calendars and focus on indoors work. But other times, we take
advantage of the wet.
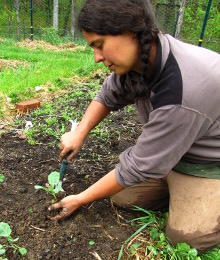
Wednesday was one of
those happy-to-be-wet days. I needed to move some Swiss chard,
broccoli, and cabbage seedlings around to even out the spacing, and a
drippy day promised to minimize the transplant shock. Not only
did I not have to water in the rearranged seedlings, the cloud cover
meant they got a day of rest before having to deal with bright sunlight.
Don't try this at home,
though, unless you're willing to get soaked and covered in dirt from
the waist down.
It took a little over 5
months, but we finally got all the straw
bales hauled back and ready for garden mulching today.
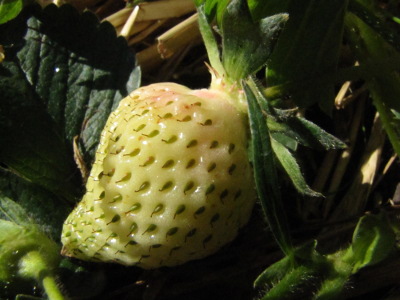 Mom emailed me that she
picked the first strawberry out of her garden nearly a week ago.
Even though she lives only an hour and a half away (23 miles as the
crow flies), the pavement in her urban location and the lower elevation
means she's considerably warmer than we are.
Our strawberries are
nowhere near ready --- this photo depicts the one that's furthest
along, sporting a tiny hint of color. The rest need probably two
more weeks before they'll even begin to ripen.
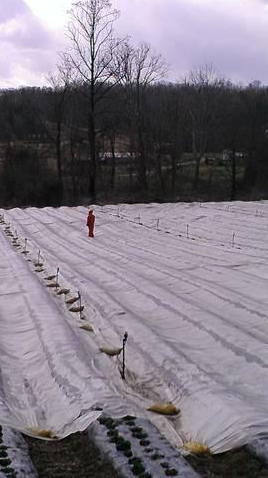 Ten miles down the road in
the other direction is a huge strawberry farm that serves all of the
surrounding grocery stores. They use row cover fabric and black
plastic and their berries tend to ripen up when Mom's do, so I have a
feeling Mark could pick me up a whole flat of local fruits at the
grocery store today if I asked him nicely. (Actually, I checked
out the farm's website and they had berries starting April 14.)
But do I want to break
my strawberry fast on chemical-fertilized red nuggets, or wait for the
real deal?
Keep in mind that
strawberries are my very favorite fruit (and fruit is my very favorite
food group. Yes, even before chocolate.) I don't eat
berries out of season, so it's been a very long eleven and a half
months. Sure, I've been self-medicating with strawberry
leather pretty
heavily throughout the winter, but I just don't know if I can wait two
more weeks!
Will I, or won't I?
(If you'd like some
actual content today, check out my
interview on RDG's blog.)
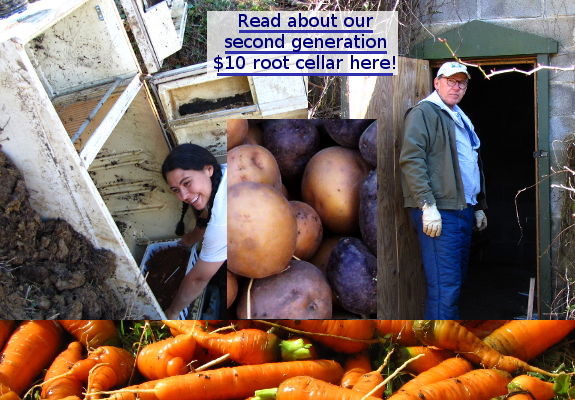
It's been a little over 2
years now since the refrigerator
root cellar got washed out of place by a big storm.
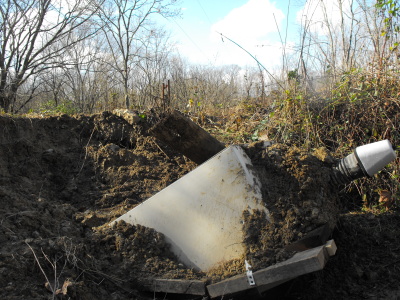
We don't eat as many potatoes as before and our apple trees are still a
few years from production, which is our main excuse for not digging it
out and building a proper roof to prevent future wash outs.
 I
had to go to the doctor Thursday to flush a huge mass of wax out of my
ears, and it got me thinking about my version of healthcare.
Except for preventative checkups, I've only been to the doctor four
times in the last twelve years --- three times for ear wax removal, and
once for a urinary tract infection. Mark's got me beat, having
only been in once for Lyme disease (assuming you don't count his elective surgery).
Which isn't to say we
never get sick, just that we work hard to dose ourselves at home if
possible. If we feel a bit low, I'll treat us to some kind of garlicky meal with freshly
sauteed leafy greens
on the side (often with the addition of pastured red meat).
Relatively major scrapes heal right up after a few applications of
homegrown comfrey poultices, and most viruses
flee in the face of my Emergen-C plus homemade chicken soup combo
(imbibed separately). Simply taking a day off to relax will often
fix minor complaints.
 Infections that need
antibiotics get dosed with echinacea or goldenseal (both of which we
grow). My doctor sister advised me that the former is better
above the belt (ie, for head colds, etc.) and the latter below the belt
(for female complaints), and I've been following her advice. I
also freeze enough cranberries each holiday season that I can fix them
throughout the year to stave of further urinary tract problems.
It's true that these homegrown medications don't nip illnesses in the
bud as quickly as prescription drugs, but they seem to help my body
build up a resistance so I don't have to run back to the antibiotics
nearly as often.
The trick to eating your
way to good health is to make sure that all of
these medicinal foods are easily available at all times. I keep
pints
of chicken soup (made from stewing
hens for extra
nutrition) in the
freezer for easy access and most of our herbs are right in the front
yard. Being the kind of family who only goes through a bottle of
painkiller once every six years helps, as does the internet's amazing
ability to diagnose most ills.
What's your favorite
home remedy? Do you run to the doctor, or self-medicate?
What kind of medicinal herbs do you grow?

What makes this automatic chicken coop door opener special is the
additional option of having a light come on for 4 hours after the door
closes to keep hens laying in the winter.
It's also the one with the
most proven track record. Johan and Barbara have had it going since 1998!,
which tells me their method of having the door close 45 minutes after
dusk is a good benchmark for the rest of us trying to figure out that
bedtime interval.
Our automatic
chicken coop door opener
made it through the winter with no problems and is still going strong.
We got our door from a nice
guy named Jeremy at automaticchickencoopdoor.com. He's got a helpful section to
his website that highlights several automatic chicken coop door
installations his customers have completed.
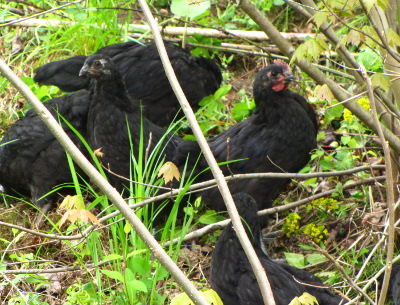 When dealing with the natural
world, it's often better to deter than to prevent. Our
experiments with keeping deer
and pets
out of the garden
are one example, but so are our methods of
constraining chickens to their pastures. Unfortunately, when
you're only deterring behavior you don't want, sometimes animals slip
through the cracks. At that point you have to decide between the
Fort Knox approach and the kid glove approach.
I've been thinking of
these two types of animal deterrence because we
had dozens of chicken escapes last week. First, I moved the six
week old chicks
out of the forest garden and into a pasture full of lush grasses
and clovers. They hated the change. When the first few
chicks started flying over our temporary
fencing, I beefed up
sagging spots, but I soon realized that it was
just plain silly (and nerve-wracking) to keep chickens on grass if they
want a more forested environment. So we transferred them to their
grown up coop with its forest pasture,
and suddenly everything was serene again.
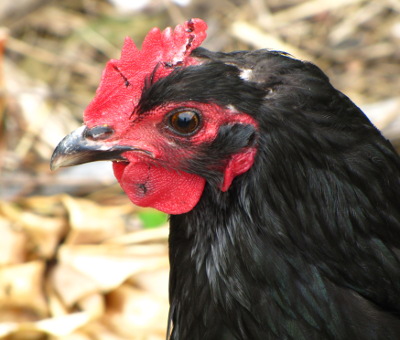 The
problem with our adult chickens is going to take a bit more
fixing. Two weeks ago, I noticed that one of our Australorp hens
was perching in the coop all day long, and after spending an afternoon
weeding the garden and keeping an eye on the flock, I figured out why
--- our rooster was molesting her. Yes, chicken sex never looks
elegant to the human eye, but this was clearly different. Our
usually kind-hearted rooster was chasing this hen down, mounting her,
chasing her, mounting her, pecking viciously at her head, and only
stopping when she lay nearly dead on the ground. We removed the
pecked-at chicken from the flock and put her in an isolation
coop, but after she
bounced back and started laying again, we
returned her to the main flock. Not only did the rooster start
picking on her again, he also took a dislike to a second Australorp
hen, and the two downtrodden biddies started flying over the fence and
into other pastures to escape.
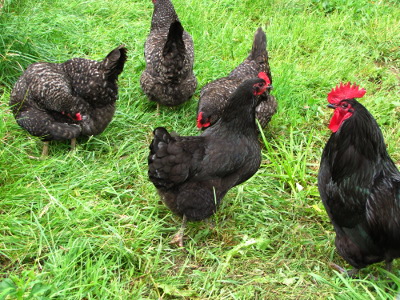 The
Fort Knox approach would be to clip the hens' wings or add another
strand of fencing, but as you can tell from the chick example, I prefer
listening to what the animals are telling me, then trying to fix their
problem, not just my
own. Their problem is clearly Mr. Rooster, who may have outlived
his welcome on our farm. He was a perfect gentleman all winter,
guarding the girls as they free-ranged
in the woods, but
something about the confined environment of the
pastures (fewer trees? less room for the girls to run away?) flicked a
switch and turned him from an asset into a liability.
The obvious solution is
to eat the rooster and simply save back one of
the current batch of broilers to replace him. The new cockerel
will be just old enough in August that he should 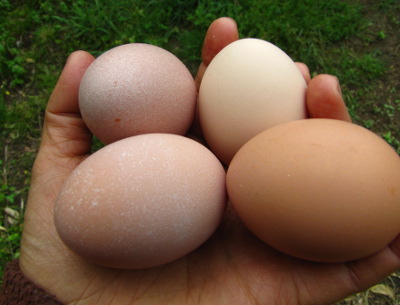 be able to fertilize
the fall round of hatching eggs, and then he can guard the girls all
winter long. Yes, he'll be related to whichever of our current
hens is his mother (and to his sisters if we save a few to expand our
laying flock), but I'm willing to deal with a bit of inbreeding to give
our downtrodden hens a couple of months off from rooster molestation.
This is all assuming
that the eggs currently in our incubator will
hatch well despite the power outages they experienced. I'm
keeping my fingers crossed and dreaming of rooster stew.
We've got a wild flock of
turkeys in the woods behind us, and sometimes we can hear them gobble.
Turkey season started in our
area this week, and just for the fun of it I researched "How to catch a
turkey" for a few minutes.
First off, I'm pretty sure
there might be some laws against catching a turkey, which is what
stopped me from actually trying it, but if you find yourself in a
survival situation the most easy and simple method involves a 50 gallon
drum.
Bait the drum with some
crushed corn sitting on top with the bottom up. Check on it
a couple times a day, and replenish the corn when needed. Do this
everyday for 3 or 4 days, and on the 5th day flip the drum around. The
turkey won't be able to see the new opening and will flop right in. Not
having enough space to spread its wings will keep it there till you
next check on the trap.
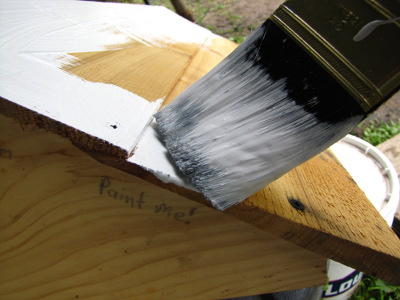 Even
though our Easy Hive came with hand-written
instructions straight out of Alice in
Wonderland, the
first question I researched was not how but whether to paint my new
hive.
Should
I paint my hive?
The question isn't as
crazy as it sounds --- after all, honeybees had been living happily in
unpainted trees for generations before we took them under our
wing. It turns out the reason we paint our hives has more to do
with the beekeeper than the bees. Unpainted hives tend to rot
sooner, so we add paint to the outside as a waterproofing layer.
In some cases, you may
not need to waterproof your hive at all. In addition to our new top bar hive, we're also trying out a Warre hive this year, and the version
we bought is made out of Western Red Cedar. Cedar and redwood
hives are naturally rot resistant, so many beekeepers leave the wood
completely untreated. We'll probably follow suit since the hives
were back-ordered and are due to arrive on the same day as our
bees. (Yikes!)
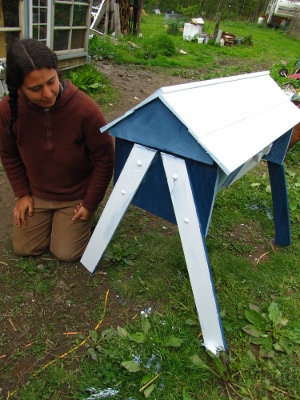 What
should I paint onto my hive?
Cheaper lumber is
usually soft pine, and will rot pretty quickly if not waterproofed in
some way, so we chose to protect our top bar hive. You can use
exterior latex paint, raw linseed oil (not boiled or the chemicals will
affect your bees), tung oil, or a heated mixture of linseed oil and
beeswax. I wanted to try raw linseed oil since I suspected an
oiled hive would outgas moisture better than a painted hive, but none
of our local stores carried the item, so we went with paint.
What
color should I paint my hive?
The most common question
you hear from new beekeepers is --- what color
should I paint my hive?
The traditional answer is "white", but the real answer is a bit more
complex. Bees don't particularly care what color their hive is,
but pale hives will reflect the sun and keep the colony from
overheating in the winter. On the other hand, if you live in a
cold climate, you might want to soak up the sun's rays, in which case
you should choose a dark color.
If you're going to have
several hives close to each other, it's a good idea to paint each one
with a different color and/or pattern to prevent the common problem of
bees getting lost and going home to the wrong hive. In apiaries
with rows of identical white hives, beekeepers notice that the colonies
on the ends tend to be stronger than those in the middle of the line,
due to the tendency of worker bees to "drift" --- the workers think
they're going home, but ending up in the next hive over. This
issue is less relevant if you are scattering hives around a complex
landscape, and bees are unlikely to drift between different styles of
hives.
How
do I paint my hive?
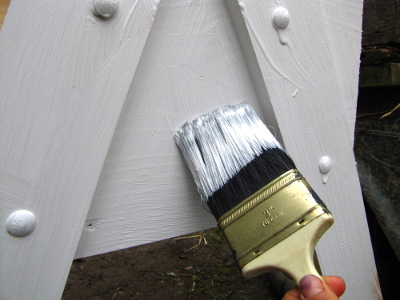 Assuming you've chosen to use
paint to waterproof your hive, your next choice is whether to add a
primer underneath, or just to use multiple layers of paint. If
it's going to bother you when you can see a bit of wood grain beneath
your paint, go ahead and paint on two layers of primer (drying in
between), then three layers of paint. Most beekeepers skip the
primer, though, and simply apply two layers of paint. (If you're
using a waterproofing oil, don't use a primer.)
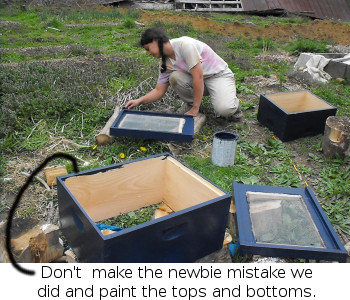 No matter which type of
waterproofing you choose, you should apply it only to the outside
surfaces of the hive, both to keep the chemicals away from the bees and
because your livestock will prefer to coat the inside of their hive
with disease-resistant propolis instead. Most beekeepers
recommend that you don't paint the top and bottom edges of Langstroth
hive bodies since paint on these surfaces tends to stick together when
the boxes meet. The rule of thumb is --- paint where rain falls
or splashes, not where bees walk or wood joins.
My last tip is --- try
to paint your hive several days before the bees arrive! Bees
don't like chemicals of any kind and that new paint smell isn't going
to help them settle in (and stay healthy.)
I've seen some beautiful
photos on the internet of uniquely painted bee hives. If you've
gone the extra mile to make your ladies' home stylish, I hope you'll
leave a link or photo in the comments!
 Those
of you who are taking the slow and steady approach to reading the
first chapter of Walden are finally making your way
out of the philosophical part of the chapter and into the nitty gritty
--- what a relief! Meanwhile, the fast readers who are waiting
for the rest of us to catch up might be interested
in the essay titled "Thoreau" by his friend Ralph Waldo Emerson.
Mom recommended the
additional reading material, which is really a heart-felt eulogy and
character sketch. I'm glad she did. The 21 page essay is
easier to read than Walden, and it made me like Thoreau
a lot better. You can read the essay online (or download it) here --- skip ahead to page 207
to find the part I'm talking about.
Here are some teaser
quotes:
"I love Henry," said one of his friends, "but I cannot like him; and as for taking his arm, I should as soon think of taking the arm of an elm tree...."
No college ever offered him a diploma, or a professor's chair; no academy made him its corresponding secretary, its discoverer, or even its member. Perhaps these learned bodies feared the satire of his presence....
There is a flower known to botanists, one of the same genus with our summer plant called "Life-Everlasting", a Gnaphalium like that, which grows on the most inaccessible cliffs of the Tyrolcsc mountains, where the chamois dare hardly venture,
 and which the hunter, tempted by its
beauty, and by his
love (for it is immensely valued by the Swiss maidens), climbs the
cliffs to gather, and is sometimes found dead at the foot, with the
flower in his hand. It is called by botanists the Gnaphalium
leontopodium, but by the Swiss Edelweiss, which signifies Noble Purity.
Thoreau seemed to me living in the hope to gather this plant, which
belonged to him of right. The scale on which his studies proceeded was
so large as to require longevity, and we were the less prepared for his
sudden disappearance.
For those of you who are
waiting until the last minute, you've still got a week before we'll
start discussing chapter one of Walden. Don't forget!
We decided to split our top bar
hive bottom door into two sections.
The logic being that two
doors will give us more control over the inside temperature.
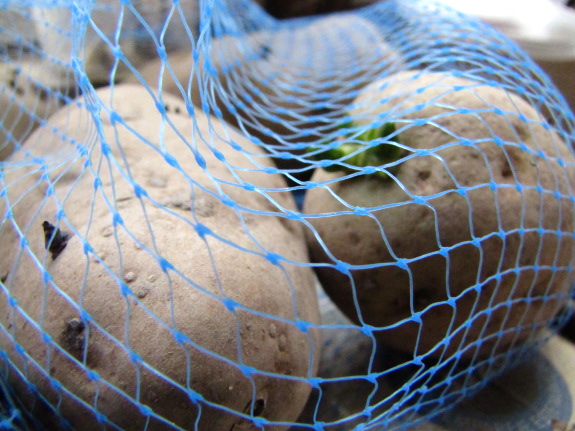
One of the best
decisions we made during the early years on the farm was to splurge on
$45 worth of seed garlic. Yes, that sounds like
an excessive amount of money for two pounds of garlic, but the high
quality bulbs grow like crazy and have provided all the garlic we could
eat for the last three years. Meanwhile, we've given away starter
garlic to all and sundry, so I really can't calculate how many pounds
of garlic those first two pounds turned into.
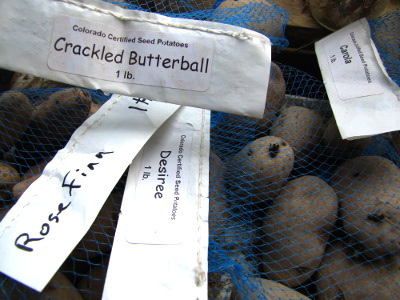 With that success in mind, I
decided to try out four new varieties of potatoes this spring, even
though the seed potatoes cost $5 to $7.50 per pound at the Potato Garden (from whence the
descriptions below came). Here are the varieties I chose after
reading the descriptions for all 55 types of potatoes offered on their
website:
- Carola - "This yellow
from Germany is heralded by potato lovers as one of the best. Produces
an abundant basket of tubers under each hill. Oblong to round tubers
with smooth yellow skin and flesh that has the texture, moisture and
taste of a new potato even after months of storage in the root cellar.
Boils, bakes, mashes and hashes that are out of this world as well as
makes some of the best scalloped potatoes around. Shows some scab and
disease resistance, also excellent storage qualities."
- Cracked Butterball - "A
2008 German Butterball x Agria cross by Verlin Rockey. This is a great
way to get the German Butterball taste in a larger potato. With a
unique characteristic of a crackled skin, it is easily washed with a
vegetable brush."
- Desiree - "The most
popular “red” potato in Europe. Round to oblong tubers, satin-like
pinkish/red skin and gourmet quality creamy-yellow flesh. Prolific
yields of excellent all-around cooking potatoes. Very resistant to
common diseases. An easy and very reliable gourmet potato to grow."
- Rose Finn Apple Fingerling - "A rosy colored skin with deep yellow flesh and a waxy, firm texture. A great roasting potato, very popular and fun to grow. Delectable flavor and a fine keeper with vigorous vines. Many chefs are finding that these potatoes cooked and pureed lend themselves well as a soup thickener for sauces and gravies. A fine keeper with vigorous upright vines. Mid-Season variety."
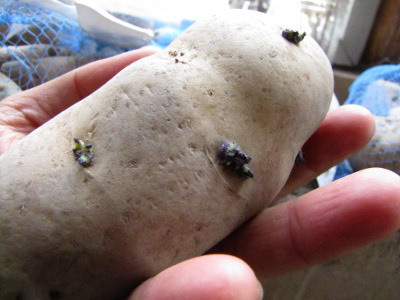 As you can tell, I'm focusing
on good keepers because I want to be able to plant the offspring of
these potatoes for many years to come. We don't eat many potatoes
any more, so I figure the ones we do eat should be the very best!
Stay tuned for a taste test this fall.
Most people plug up the
entrance holes of a top bar
hive with champagne
corks, but we were fresh out.
I started to cut a piece of
wood to size, but then imagined the warping that will surely happen
after exposure to the elements.
We used furring strips to
secure the expired license plate and act as a rail for it to slide on.
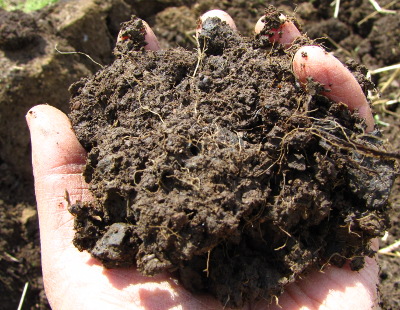 If you grew up with
conventional gardening methods --- tilling up the soil every year ---
you might have a hard time wrapping your head around what happens in a
no-till garden over time. So I thought you would like to see a
bed that's been managed using no-till methods for the last five years.
I dug up this bed
Tuesday to enable me to plant my potatoes. We started the bed in
spring 2007, before I knew what a kill
mulch was, so initial soil preparation consisted of having Mark
till up the ground and then me shovel
the topsoil from the aisles to form raised beds. The bed
housed strawberries for a few years, then garlic (which necessitated
minimal digging for planting and harvest), then corn. Last fall,
I planted the bed in oats --- you can still see some oat roots not
quite deteriorated in the hunk of earth above.
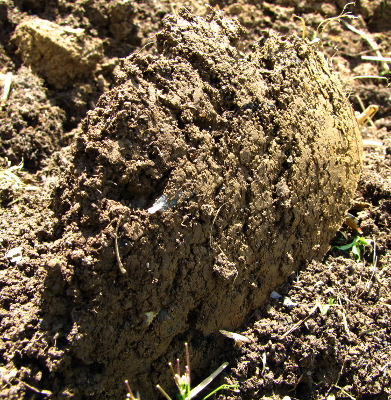 The
first thing to notice is that the soil is divided into horizons, just
like natural soil in a forest or meadow. (This photo shows a
shovelful of earth laying on its side, so envision it turned 90
degrees.) About six inches down, the B layer is mostly clay;
above that, the A layer is rich topsoil; and a thin coating of
partially decomposed organic matter (the O layer) sits on the top of
the ground. Since I don't disrupt their activity with tilling and
chemicals, there are plenty of worms in the earth to move organic
matter down into the A layer, which is why that topsoil is so dark,
rich, and crumbly.
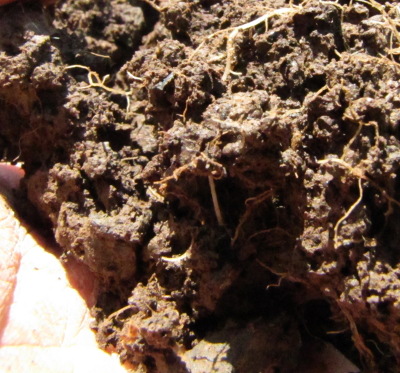 No-till garden soil doesn't
have the same cake-crumb consistency you'll see in newly tilled earth,
but it also is far from compacted. (You can tell your soil is
compacted if it's hard to shovel.) When undisturbed, soil
microorganisms glue crumbs of earth into larger conglomerates, leaving
air pockets in between. When I break apart a hunk of my no-till
soil, it feels a lot like a bunch of
wood chips attached to each other by mycelium, tearing easily into
irregular chunks.
Keep in mind that my
no-till garden consists of permanent garden beds that receive nearly no
traffic (except for an occasional dog footprint, but even Lucy is
pretty good about staying off them). The type of no-till farming
practices in conventional agriculture circles will likely lead to soil
compaction since they run heavy tractors across the earth and kill off
the worms with herbicides. In contrast,
no-till management in a backyard garden leads to rich, healthy soil
that grows great food.
The Stihl FS-90R polycut
attachment is in my
opinion a huge improvement compared to using traditional string.
It's easy to replenish the
plastic fingers, but no so forgiving when it comes to getting too close
to chicken wire.
I might be switching back to
string for the chicken pasture perimeter. The swap can be done in less
than a minute once the turning head is locked down by inserting a
screwdriver in the hole on top and recognizing that it's threaded on in
a reverse fashion.
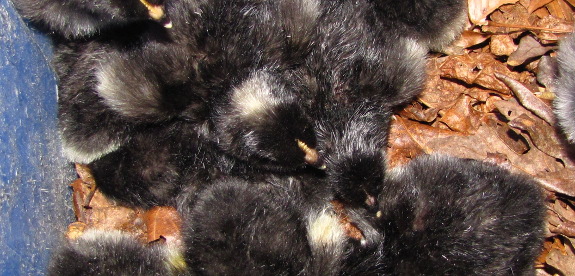
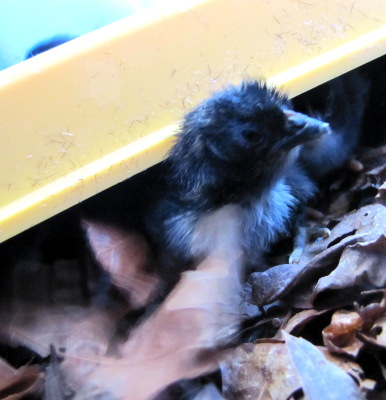 I
can't decide whether our most recent cold spell (one semi-serious frost
and a few days of chilly weather) counts as blackberry
winter or not.
The dewberries (a groundcover version of blackberries) are blooming
along the sunny driveway, but the real blackberries back in our
homestead area just have buds. Not that the semantics really
matter, but superstition holds that if this is blackberry winter, then
it's our last real cold spell of the spring.
Our chicks popped out of
the shell right in the middle of the chilly weather Tuesday, but we now
know what
to do if 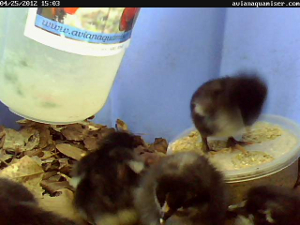 we
have to put damp chicks in a cold brooder, so there was no
drama. I moved the webcam inside so you can enjoy
watching the youngsters take their first steps, learning to eat and
drink. Don't worry if you notice chicks keeling over, though ---
narcolepsy is quite normal for day old chicks.
How
do you attach burlap material to the quilt box of a Warre hive?
Some people use staples, but
that felt a little sloppy for this application.
We ended up cutting furring
strips and then screwing them to the inner wall.
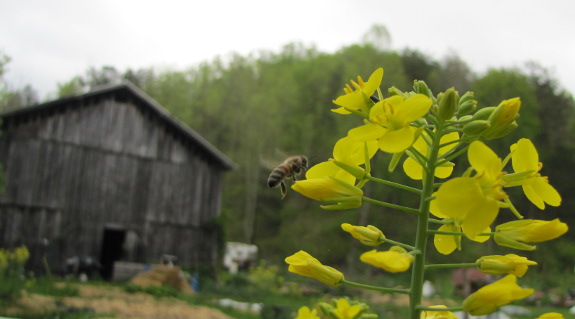
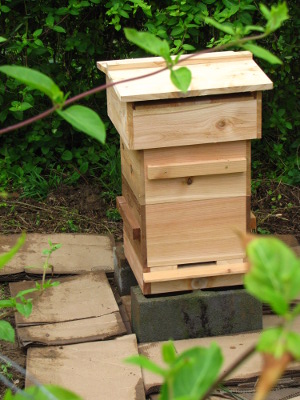 If
all goes as planned, our two packages of chemical-free
bees should arrive
today. Next time, we're going to plan further ahead so we're not
putting the finishing touches on our hives the night before!
We've still got one
major decision to make, and I'm hoping experienced beekeepers will
weigh in. New package bees have to be fed, and I've got quite a
bit of honey leftover from the
hives that died of colony collapse disorder last fall. But I can't decide if
it's safe to feed the honey to our new bees.
As a data point, our
neighbor's bees have been robbing those hives ever since our original
bees died. I should have just harvested the honey, but it's tough
to get honey out of the comb during cold weather, so I only took a bit
at a time. Alternatively I should have blocked off the hives, but
I never thought of it except when I saw the bees robbing, and I didn't
want to shut the workers in.
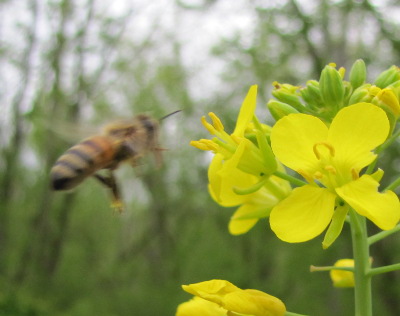 80% of my neighbor's bees
died over the winter, and without an autopsy, the cause of death is
uncertain. Even if my neighbor's bees died of the same thing as
my bees, both apiaries could have come down with the problem
independently simply due to living in the same region. They might
have died of different things entirely. Or my honey might have
killed them.
So, my question to you
is --- which of the following would you feed new package bees:
- Sugar water just to play it safe (even though it's less nutritious)
- Honey from my dead hives (most of which is crystalized due to being extracted during cold weather)
- Honey-filled comb from my dead hives (which has the benefit of
containing pollen, but the disadvantage of being the most likely to
carry disease)
While you're at it, if
you want to tell me your favorite way of feeding bees in Warre and top bar hives, I'd appreciate it.
Thanks for your wisdom!
Our new
bees started off in Texas, and made it as far as Louisville
Kentucky at around 1am this morning.
At noon today we got a call
from our nice UPS driver saying he was ready to get rid of these bees!
We plan to install them later
this evening after dinner.
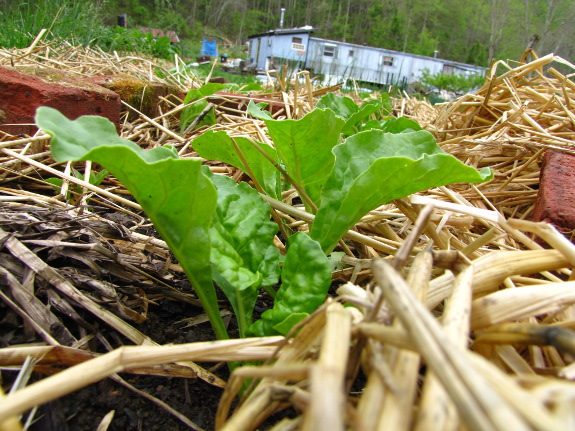
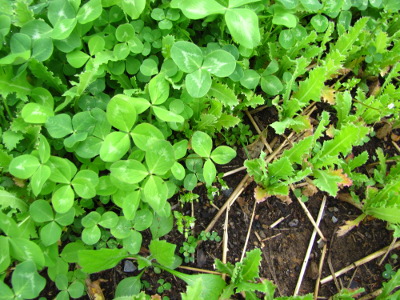 Four weeks ago, April
seemed to stretch out so long and open before me. An early
spring!, I
enthused. More fresh garden produce even earlier --- I could
almost taste it.
And
now April is pretty much over and I'm just as behind in garden chores
as I always am at this time of year. Yes, despite copious mulch,
there's still a need for a lot of spring maintenance. An
unfortunate number of the beds that I direct-seeded this spring, now
look like this --- weeds nearly overtaking their contents, itching to
be weeded and mulched.
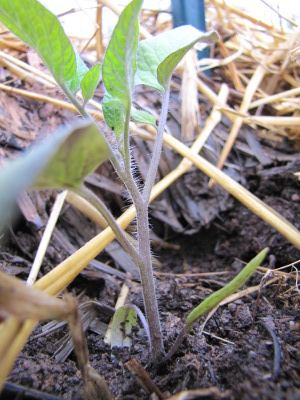 I figure a solid week of
maintenance would catch me right up, but, of course, next week is May. In case you don't put
out a big summer garden, I guess I should explain that May is when we
plant a quarter of our crops. Vegetables slated to go in the
ground next week include basil, green beans, sweet corn, cucumbers,
mung beans, okra, peppers (transplanted), summer squash, and
watermelons.
Since the 10 day
forecast looks warm and I
started some tomatoes inside early, I'll also be transplanting
some of our tomatoes, although I won't put out the last half until
after the frost free date. In fact, I set out two tommy-toes and
two slicers Wednesday in hopes of extra-early fruit.
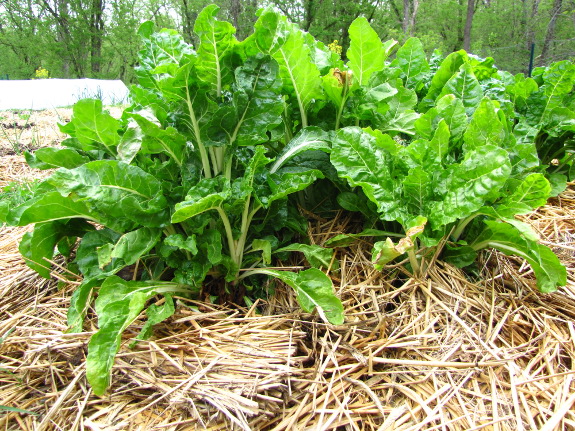
The good news is that
the same warm weather that made the weeds grow so fast has also spurred
on my early spring
crops. As you
can see in the first photo in this post, this year's Swiss chard is
nearly big enough to eat, and we've already taken two cuttings from our
tokyo bekana. That means I can set aside the over-wintered Swiss
chard (pictured above) to save for seed and still enjoy fresh greens.
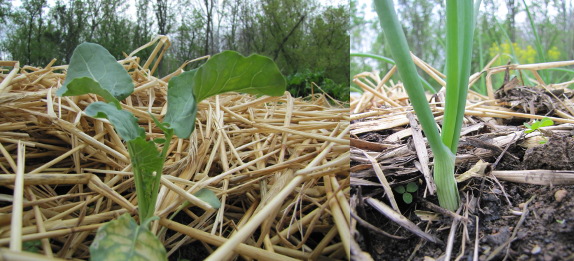
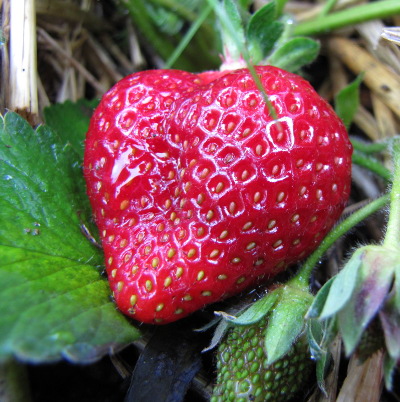 We're
floating in a sea of lettuce and arugula and the peas look like they
might bloom pretty soon. Broccoli bounced right back from frost-nipping, and the onions we started
from seed are suddenly growing like crazy.
And then there's this
strawberry I've had my eye on. There are only two berries in the
whole garden with even a blush of red, and I'm waiting for a sunny
afternoon so we can enjoy the most ripe one at its peak. Do you
think Mark would notice if it went missing? Maybe he was looking
forward to this day when he taught me that shared food tastes better.
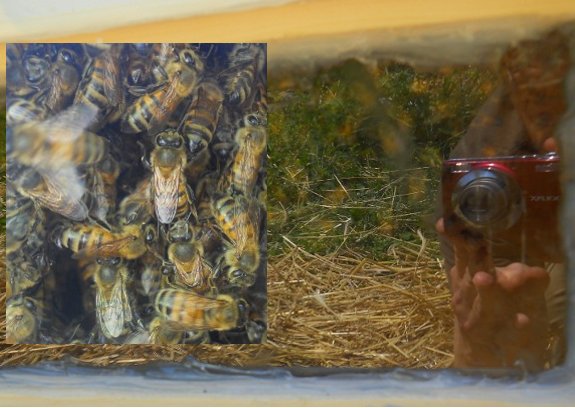
Our new bees are safely
tucked in and making themselves a home.
The top bar
hive has a neat
observation window that's allowing us to see a healthy cluster around
the queen cage.
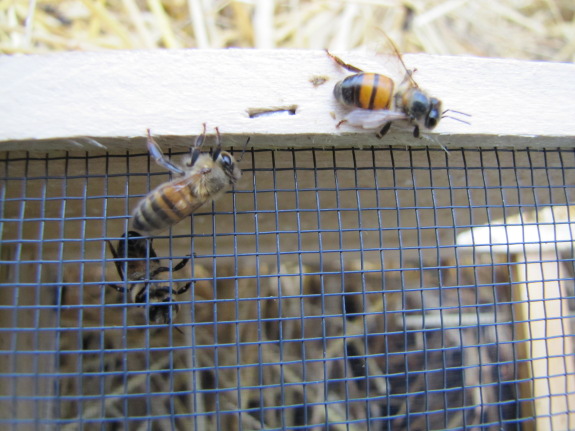
I'll regale you with all
the details (and dozens of photos) of our package installation as this week's
lunchtime series, but I can't resist writing about how happy I am to
add another 20,000 head of livestock to our farm. I missed having
honeybees in the yard over the winter, and I'll admit that I woke up at
dawn on Saturday to check on our new colonies.
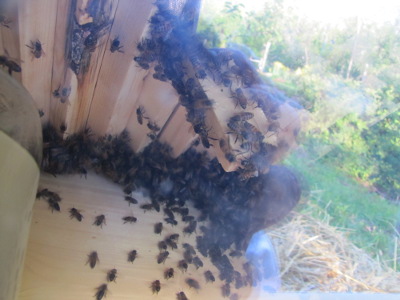 Right after installation, the
new bees in the top bar hive were mostly huddled in one
corner, with only a few settling onto the queen cage (as you can see in
this terrible photo). An hour later, many more bees had found the
queen, and dawn showed nearly every bee in the hive merged together
into one mass of insect feet, wings, and backs.

As the sun came out, so
did our bees:
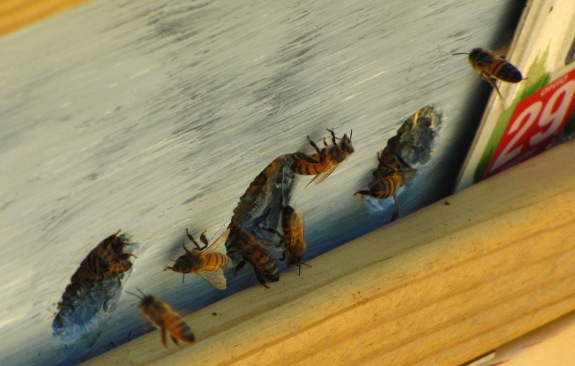
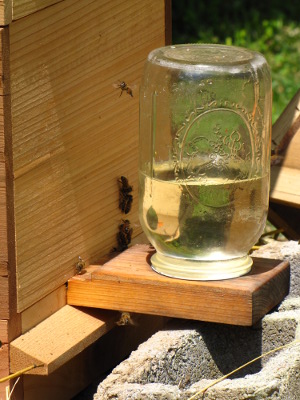
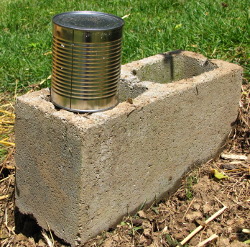
I opted to feed the top
bar bees inside their hive, but an entrance feeder fit into the Warre hive pretty well. The bees
were sucking down the sugar water so fast, I had to send Mark to the
store for more Saturday afternoon despite the bees also enjoying
leftover canned syrup from their packages.
I'm excited to be trying
out two new types of beekeeping this year, and am already loving the observation
window in our Easy Hive. You'll probably be
hearing far more about bees than you'd like for the next little while,
but at least they're photogenic. Feel free to just look at the
pretty pictures if you get bored.
Our Hardy
Kiwi looks like it might spring back to life with a little luck and
a few more weeks of non-freezing nights.
 As
I read through the first chapter of Walden ("Economy"), I
alternated
between noting down quotes that spoke to my own experience...and
rolling my eyes at Thoreau's folly. I'm going to keep the
eye-rolling in this post to a minimum because I'd really rather hear
what you each thought of the book than hear myself opine at
length. To get the ball rolling, I'll sum up some of the more
quotable moments.
Thoreau's two year
adventure was an experiment in "voluntary poverty"
--- he wanted to know how little time he could spend working and still
keep body and soul together. Or, in his own words: "Instead of
studying how to make it worth men's while to buy my baskets, I studied
rather how to avoid the necessity of selling them."
Not counting
the building of his house, Thoreau's income and expenditures for an
eight month period are summed
up in the chart below (with the last column containing my own math to
help you
envision what he spent in today's dollars).
| Thoreau's
actual income or expense |
Adjusted to
2010 dollars |
|
| Expenses: |
||
| Farming | -14.725 | -342.062 |
| Food | -8.74 | -203.030 |
| Clothing | -8.4075 | -195.306 |
| Oil | -2 | -46.46 |
| Total | -33.8725 | -786.858 |
| Income: |
||
| Farming | 23.34 | 542.188 |
| Day labor | 13.34 | 309.888 |
| Total | 36.78 | 854.399 |
| Net
profit: |
2.9075 |
67.5412 |
In addition to the
figures above, Thoreau spent $28.125 building a 150 square foot house,
which comes to $4.34 per square foot in today's dollars. (For the
sake of comparison, Mark
and I built the East Wing for $6.65 per square
foot.)
Thoreau
believed that we only truly need four things: food,
shelter, clothing, and fuel. He went even further to remind us
that we only require the simplest version of each --- "Beware of
all enterprises that
require new clothes," he warned, then went on to note that "in modern
civilized society not more than half the families own a shelter", in
large part because modern houses are fancy and expensive. He
rejected the gift of a door mat because "it is best to avoid the
beginnings of evil". And, in the end, Thoreau concluded that it
is our
obsession with material possessions that requires us to spend "the best
part of [our] life earning money in order to enjoy a questionable
liberty during the least valuable part."
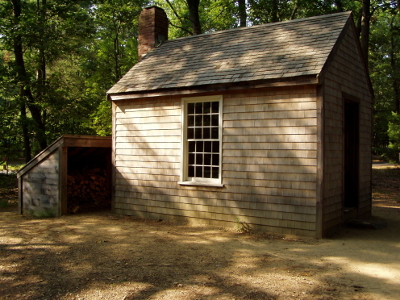 But at the same time, Thoreau
came from a wealthy, educated class, and
showed a disdain for certain levels of poverty. "None is so poor
that he need sit on a pumpkin," Thoreau wrote. "That is
shiftlessness." He also bought a "shanty" and tore it apart to
haul the building supplies to Walden Pond and turn into his own cabin
rather than moving into what would have been an even simpler (and
cheaper) structure. I'd go so far as to hypothesize that if
Thoreau lived in this modern age, he'd repeat the accusation we've
heard multiple times --- that living in a trailer turns us into poor
white trash.
So, what do you
think? Does Thoreau's experiment still ring
true? Do you consider a certain level of genteel poverty
ethically sound, but another level "shiftlessness"? Or did
something else entirely catch your eye in Walden's first chapter?
As you comment, I hope
you'll also take a minute to let me know whether
you're still on board for reading the next 50 pages for May 7 --- that
would be chapters 2 through 6. I'm looking forward to hearing
what you thought of this classic text!
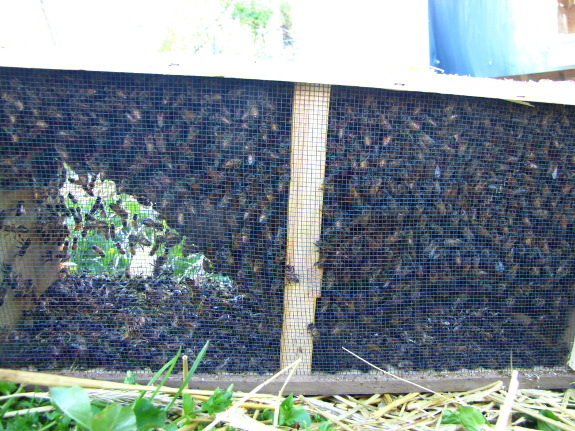
The first task for most
beginning beekeepers is to install a package of bees. It feels
like trial by fire, with bees whirling and buzzing around your
head. But if you know what to expect, hiving a package is
actually easy and fun. This week's lunchtime series walks you
through installing a package of bees into a top bar or Warre hive, and this post starts with
the very basics --- what is a package?
If you order bees
through the mail, they'll almost certainly come in what's called a
"package". A package consists of a screened box full of a bunch
of worker bees, a queen bee, and some sugar syrup to keep them all
alive until they reach your house.
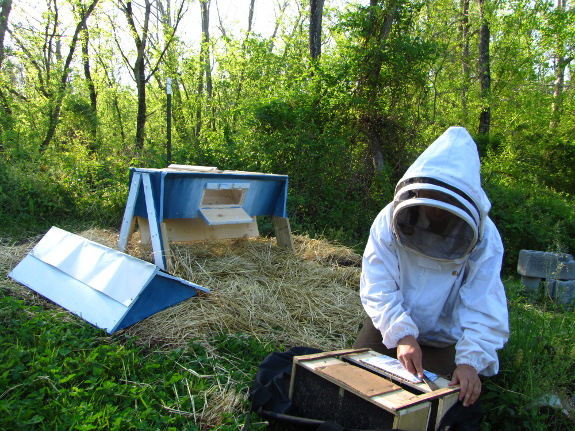
Yes, the package ships
as is, with bees separated from the outdoors only by the mesh sides of
the container. (If you order more than one package of bees, they
may arrive attached together, as is shown in the photo above.)
Postal employees seem much less charmed by packages of bees than they
are by boxes of chicks, so it's especially important to call your post
office or UPS guy
and set up a delivery plan the day before your bees arrive. You
don't want the bees to be set outside on a sunny, windy, or rainy
delivery dock while they wait for you to pick them up.
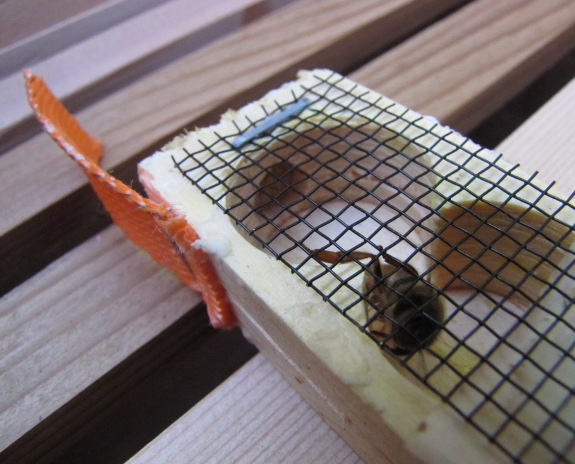
In the U.S., most
packages are 3 pounds, which simply means you get three pounds of
worker bees (10,000 to 12,000 bees). Don't be too concerned if
you see up to an inch of dead bees in the bottom of the package ---
it's hard for bees to be shipped across the country, so apiaries put in
enough workers that your hive will be able to take off despite moderate
losses.
In addition to the
worker bees, your package also contains a queen, who is housed in a
cage like the one shown above. At large apiaries, queens are
raised separately from the worker bees, so the 12,000 bees loose in
your package haven't been fully acquainted with the queen by the time
they arrive at your homestead. In other words --- the workers
want to kill the queen. After two or three days, the workers will
become used to the queen's scent and will (hopefully) be ready to take
her into their midst, but until then, the matriarch stays segregated
with some semi-solid sugar candy to nibble on.
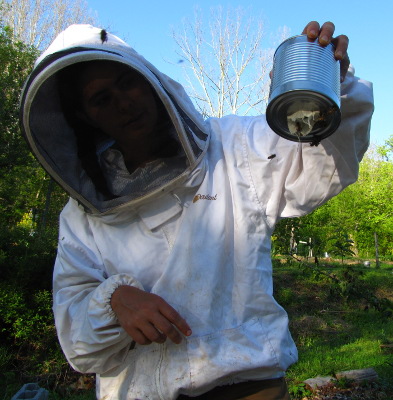 Here's the can of syrup, the
final component of your package. Depending on who you buy from,
the can may have holes punched in the bottom with a nail or might
contain a fabric feeding entrance (as is shown here). Either way,
the idea is that the bees can get a little bit of sugar-water at a time
without drowning.
That's all there is to
the physical package of bees, but you should also take a minute to
understand the psychology of your new friends. A package  mimics a swarm --- bees hunting for a home
--- which means they're going to be gentle and only interested in
hanging out around their queen. Stay tuned for tomorrow's post in
which I'll show you how to put these new livestock in a hive!
Does raising honeybees sound too
daunting? Learn easy ways to attract native pollinators in Weekend
Homesteader.
| This post is part of our Bee Package lunchtime series.
Read all of the entries: |
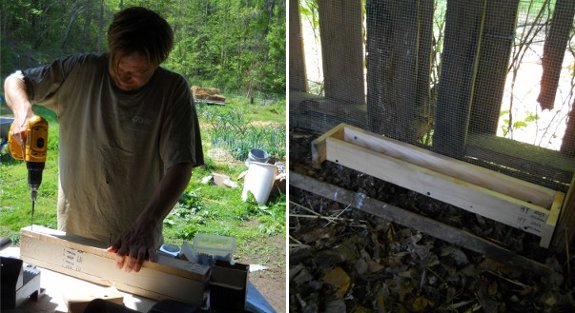
A simple chicken feed trough
can be built with furring strip sections and 10 drywall screws.
This cheaper quality wood
demands the use of a pilot hole when drilling near the edge, otherwise
you run the risk of cracking it.
Want more in-depth information? Browse through our books.
Or explore more posts by date or by subject.
About us: Anna Hess and Mark Hamilton spent over a decade living self-sufficiently in the mountains of Virginia before moving north to start over from scratch in the foothills of Ohio. They've experimented with permaculture, no-till gardening, trailersteading, home-based microbusinesses and much more, writing about their adventures in both blogs and books.
