Mushroom rafts and totems
 When we got started with
mushroom logs, we read that you need to soak your
logs to tempt them to fruit.
For the last two years, I've soaked our logs in batches of three or
four, sometimes getting a flush of mushrooms and sometimes not.
Tradd's talk helped me see why I was often doing more harm than good by
soaking my logs, and how I can keep our mushroom logs hydrated using
easier alternatives.
So what's wrong with
soaking mushroom logs? Like animals, fungi need to breath, so
when you dunk your logs in the water, they have to hold their
breath. Usually, the fungi in your logs will have no trouble
holding their breath for about a day (although during hot weather when
the dissolved oxygen levels of the water are lower, they might have
trouble), but if you forget and leave your logs soaking for two days,
you'll probably  kill your fungi. The
main benefit of soaking mushroom logs over some of the techniques I'll
outline below is that you determine when you want your logs to fruit,
but if your memory is as bad as mine, you probably shouldn't risk it.
Tradd has developed
several methods for keeping your logs moist by allowing them to soak up
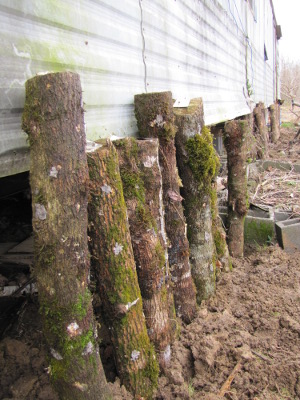
water out of the ground. One option is to dig a trench on the
north side of a building (or under a tree's canopy), turn your logs
upright, and bury about a third of the length in the ground. If
your house has gutters, you can channel the water to soak your
mushrooms. I've rearranged our best logs in this manner and will
see how they do this summer.

Another option is to
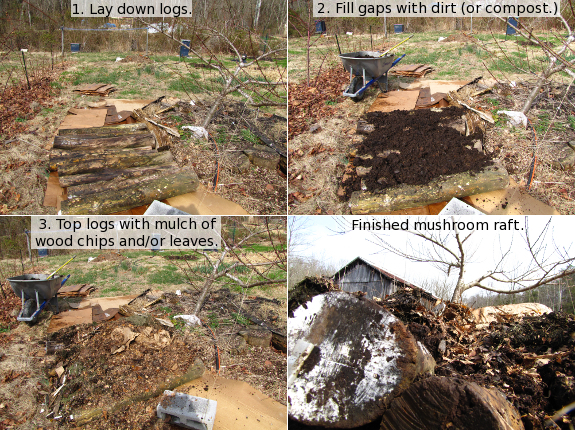
create rafts by burying your logs horizontally in the ground. If
you create a raft using logs that have all been inoculated with the
same strain of fungus, the mycelium will run through the mulch and soil
and turn your logs into one huge fungal body. This large body
will be more resilient and will be able to send up mushrooms anywhere
along the raft using the energy stored within all the logs. I
used a modified version of this technique (with a layer of cardboard to
kill grass and adding composted manure to feed the nearby tree) to turn
the logs that I drowned and the ones that are contaminated with turkey tails into mushroom-rafts/hugelkultur-mounds/lasagna-beds in the forest garden.
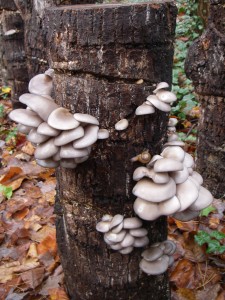
 A last option is to create
totems, which are a bit like the upright logs I mentioned earlier but
are even easier to inoculate. Cut your logs into shorter segments
and stack them, layering sawdust spawn between the layers. With
no drilling or waxing, you'll still end up with the equivalent of a
mushroom log, and the mycelium will join the small rounds together just
like they join the logs in a raft together.
Before you get too
excited about these alternative methods of mushroom hydration, I have
to throw in a few words of caution. Burying your logs partly or
all the way into the soil increases your risk of contamination by wild
fungi (although oyster mushrooms can probably hold their own) and also
makes your logs rot a bit faster. You also won't be able to plan
your harvest dates as carefully, although in my experience, if mushroom
logs aren't in the mood to fruit, just soaking them isn't going to
jumpstart the process. But if you're looking for a low-work
method of growing mushrooms in your backyard, these techniques are a
great way to start.
| This post is part of our Low Tech Mushroom Cultivation lunchtime
series.
Read all of the entries: |
Want more in-depth information? Browse through our books.
Or explore more posts by date or by subject.
About us: Anna Hess and Mark Hamilton spent over a decade living self-sufficiently in the mountains of Virginia before moving north to start over from scratch in the foothills of Ohio. They've experimented with permaculture, no-till gardening, trailersteading, home-based microbusinesses and much more, writing about their adventures in both blogs and books.
Want to be notified when new comments are posted on this page? Click on the RSS button after you add a comment to subscribe to the comment feed, or simply check the box beside "email replies to me" while writing your comment.

To get your shiitake logs to fruit use some ice in your stock tank. Bringing the water temperature down to about 45 degrees for a few hours and letting the logs soak overnight is all you should need.
Great series, thanks!