Mid-scale worm bin management
Binet Payne's method of
worm bin management is quite complex, but it can be summed up as
follows:
 Only add
as much food as your bin can handle. The first step is to
audit your food waste over the course of a month and then build an
appropriately sized bin that you stock with the right number of
worms. Then weigh your food waste each day as you put it in the
bins to make sure the amount of food is close to the daily
average. If you get a sudden glut of food waste, use the extra in
a traditional compost pile or feed it to your chickens rather than
overwhelming the worm bin (and promoting fruit flies.)
Only add
as much food as your bin can handle. The first step is to
audit your food waste over the course of a month and then build an
appropriately sized bin that you stock with the right number of
worms. Then weigh your food waste each day as you put it in the
bins to make sure the amount of food is close to the daily
average. If you get a sudden glut of food waste, use the extra in
a traditional compost pile or feed it to your chickens rather than
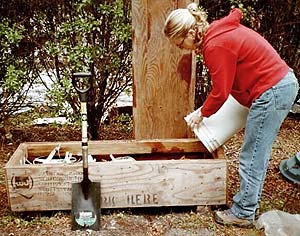
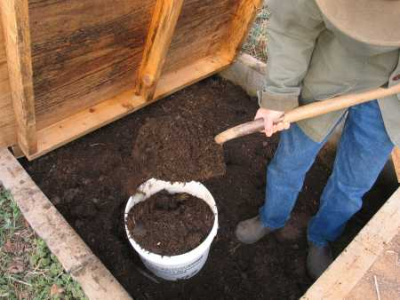
overwhelming the worm bin (and promoting fruit flies.)- Keep food under cover. Every day when Binet's students add new food to her bins, they dig a trench across the width of the bin, put in the food, break up any large pieces of food with a shovel, then completely cover the food with bedding.
- Turn bins at least once a week
to double the compost speed. If you use the complicated
filling method I'll outline below, you'll need to turn each section
separately so that you don't mix old and new food waste together.
- Give your worms six weeks for the first round of composting. Binet Payne splits each of her four bins into eight sections and fills alternate sections every day, so she has completely filled the 32 sections in her bins at the end of six weeks. Although the method is complicated, I can see the utility --- you don't overload one bin all at once, and worms can move between areas with lots of fresh food waste and areas with fresh bedding as necessary to keep themselves healthy.
 Tempt
your worms to migrate to fresh bedding after six weeks.
After the first six weeks passes and each of the sections in her four
bins are full, Binet Payne rakes the contents of each bin to one side,
leaving three quarters of the bin bare. The bare part of the bin
is filled with fresh bedding and is then divided into six sections,
which she will fill with food waste in the same alternate manner she
used to fill the bin the first time. Meanwhile, worms will be
migrating out of the older composting materials and into the fresh
bedding as they finish composting the older section.
Tempt
your worms to migrate to fresh bedding after six weeks.
After the first six weeks passes and each of the sections in her four
bins are full, Binet Payne rakes the contents of each bin to one side,
leaving three quarters of the bin bare. The bare part of the bin
is filled with fresh bedding and is then divided into six sections,
which she will fill with food waste in the same alternate manner she
used to fill the bin the first time. Meanwhile, worms will be
migrating out of the older composting materials and into the fresh
bedding as they finish composting the older section.- Move nearly completed compost to the finishing bin. Five to ten days after raking the old material to one side of the bin, begin to move those castings to a finishing bin. The worms should have migrated sideways and down out of the top two inches of the old material, so you can rake that part off wth a hand rake. Wait a day and rake two more inches and repeat until you're near the bottom of the bin. The last bit of material may be chock full of worms, in which case it is scattered across the new material in the rest of the bin to speed up decomposition.
- Use castings only from the
finishing bin. The finishing bin is like another worm bin,
but the materials inside are nearly or completely done
composting. Binet Payne found that compiling all of the finished
castings into one bin made it easy for other members of the school to
use them in gardening projects and science experiments without
bothering the busy worms in active bins.
 When I first read Binet
Payne's method, it felt overly complex, but as I sum it up for you, I
can see the importance of each step. For anyone who's not an
obsessive list-maker, though, I suspect this sytem would be tough to
stick to, which makes me think somebody needs to invent a system that
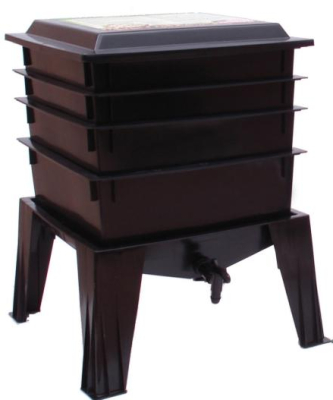
does all of the thinking for you. I've seen worm bins where you
fill the bottom bin up, stack on another bin which you fill up and into
which worms migrate as they finish the bottom bin, and so forth, but
this would be a very bulky system on any scale larger than a few cubic
feet. I'm sure we can come up with something better. Any
suggestions on how to scale this idea up to a farm-sized version?
| This post is part of our Worm Cafe lunchtime series.
Read all of the entries: |
Want more in-depth information? Browse through our books.
Or explore more posts by date or by subject.
About us: Anna Hess and Mark Hamilton spent over a decade living self-sufficiently in the mountains of Virginia before moving north to start over from scratch in the foothills of Ohio. They've experimented with permaculture, no-till gardening, trailersteading, home-based microbusinesses and much more, writing about their adventures in both blogs and books.
Want to be notified when new comments are posted on this page? Click on the RSS button after you add a comment to subscribe to the comment feed, or simply check the box beside "email replies to me" while writing your comment.

I like the bathtub worm farms, a bit like this one:
http://www.ecofilms.com.au/2010/08/08/building-a-worm-farm-in-a-bathtub/
There are lots more examples around the web. The nice thing is you can harvest the worm wee as a liquid fertiliser. I don't think I'd have enough food to keep one running, though, with pigs, chickens, ducks, guinea pigs and compost bins already screaming for more!
I like the idea of bathtub worm bins a lot for the medium scale, especially because of that handy drain for worm tea. I wish there was a way to tweak them, though, so that they did a lot of the managing for you --- I think you'd probably have to manage a bathtub worm bin with all of the intricate steps Binet Payne uses in her bin.
I totally understand your feelings that you wouldn't have enough scraps for a bathtub worm bin. If we can't tap into the community's food waste in some way, our dreams of worm bins are going to end fast...
Another setup is the "flow-through" or continous flow type systems. Food scraps and bedding go on top and castings/compost is harvested from the bottom. These can be made in all scales & sizes. There are many great examples on the web and i'll list a few below.
http://www.redwormcomposting.com/worm-bins/mark-and-his-oscr-worm-bin/
http://vermicomposters.ning.com/group/continuousflowflowthroughwormcomposting