How to hatch homegrown chicks
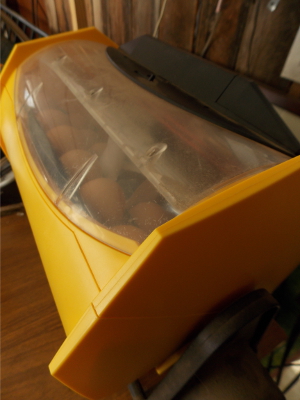
 Our first eggs of the season are in the incubator! In 21 days, we'll have new chicks to spice up the farm, and our chicken year will be off to its exciting start. Here are my ten top tips for those of you new to chicken incubation.
1. Start with quality eggs. Old hens, old eggs, dirty eggs, and bad nutrition are all recipes for heartbreak.
2. Figure out dry incubation.
Depending on your climate, it may be appropriate to follow the
manufacturer's instructions about how much water to put in your
incubator. But it might not.
3. Tape the plug and plan for power outages.
Those tiny chicks growing inside their shells can't stand cooling down,
so make sure there's no way you can accidentally unplug your incubator
or turner. If you live in an area with periodic outages like we
do, you'll also want to figure out what you're going to do if the
electricity goes out for a couple of days in the middle of your
incubation run.
4. Mark the dates on your planner.
18 days after you start your incubator, it's time to unplug the turner
and increase the humidity. 21 days after you start your incubator,
chicks will start hatching.
 5. Number your eggs.
This isn't entirely necessary, but good data can help you make each
incubation run a little better than the last. I write a number on
the large end of each egg in pencil, and record the likely mother, date
collected, and whether the egg has any dirt on it.
6. Hang out for the hatch.
Again, this is a bit obsessive, but I like to record the time when each
egg pips (the chick first breaks through the shell). That piece
of data lets me keep an eye on the hatch and make sure that pipped eggs
haven't been rolled upside down by their early-hatching brethren, and
that individual chicks haven't been struggling in the egg for too long.
7. Remove each chick as soon as it's dry.
Some experts recommend leaving the chicks in the incubator for up to 24
hours, but the chicks' chirping says they're much happier if removed to
the brooder as soon as their feathers completely dry off. They're
less likely to harm hatching siblings this way too.
8. Decide whether you're going to help chicks out of the egg. There are major pros and cons of helping chicks, which you can read about here.
The biggest con is that if you help a chick and it's too handicapped to
make it in the flock, you will have to euthanize it. On the other
hand, if a chick is simply pipping at the wrong end of the egg, you can
sometimes help the chick hatch and have it grow up into a happy hen.
9. Prepare the indoor brooder. A rubbermaid bin is a good starter home for your chicks and we use
Brinsea's EcoGlow Chick Brooder to keep our chicks warm
for their first month. You'll also need to buy or make a small feeder for their first few days of life, and will want an Avian Aqua Miser Original for water.
10. Prepare the outdoor brooder.
If you're like me, you'll get sick of the noise and smell of chicks in
your living room after about a week. So you'll want a place close
to the house where they can stay warm and dry but be out of your
hair. The outdoor brooder also allows you to put chicks out on
pasture by the time they're a week old if the weather cooperates.
If this post got you excited and you want to learn more, I highly recommend my ebook Permaculture Chicken: Incubation Handbook for further information. Starting with eggs is definitely
a bit more work than buying mail-order chicks, but the skill opens new
doors for chicken-keepers and is also an inspiring process to
watch. And even if you pay for top-of-the-line equipment like we
did, hatching your own eggs will pay for itself after a few years.
Have fun!
Want more in-depth information? Browse through our books.
Or explore more posts by date or by subject.
About us: Anna Hess and Mark Hamilton spent over a decade living self-sufficiently in the mountains of Virginia before moving north to start over from scratch in the foothills of Ohio. They've experimented with permaculture, no-till gardening, trailersteading, home-based microbusinesses and much more, writing about their adventures in both blogs and books.
Want to be notified when new comments are posted on this page? Click on the RSS button after you add a comment to subscribe to the comment feed, or simply check the box beside "email replies to me" while writing your comment.
