Filling the incubator
 After choosing
your eggs, it's time
to start
incubating. The instructions that came with your machine will
help
you set the temperature to 99.5 degrees for a forced air model or 102
degrees for a still air model, at which point it's a good idea to let
the incubator run empty for a day while you monitor the temperature and
humidity and ensure it's working properly. If there's any chance
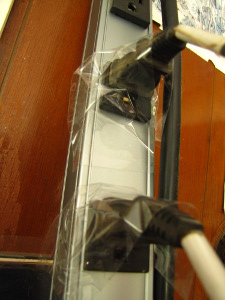
someone in your houshold will accidentally unplug the incubator in the
next three weeks, tape the cord into the electric socket as
insurance. (Yes, I
learned this the hard way.)
The main choice you have to make at the beginning of the incubation
process is how to arrange the eggs --- vertically like they'd sit in an
egg carton or horizontally the way they'd lie in a hen's nest.
Although the latter option sounds more natural, in practice I've had
slightly better results with vertical incubation. As the embryo
grows, the highest point in the shell becomes an air pocket which
the  chick will poke its beak into
shortly before hatching. If
this air pocket develops at the pointy end of the egg, the chick will
find it difficult or impossible to hatch without help. Setting
the eggs vertically with the blunt end up helps ensure that the chick
will be situated the right way inside the shell.
If your incubator only
allows you to lay your eggs horizontally, I wouldn't worry too much
about it. That said, some incubationists set their eggs
inside an egg carton with the top cut off to allow them to incubate
vertically even in a simple incubator. More complicated
incubators, like the Brinsea
Octagon 20 I
recommend, often have
removable dividers that let you choose how to align your eggs.
 No matter how you arrange
them, you don't want your eggs shifting
and hitting each other. Egg turners that hold individual eggs
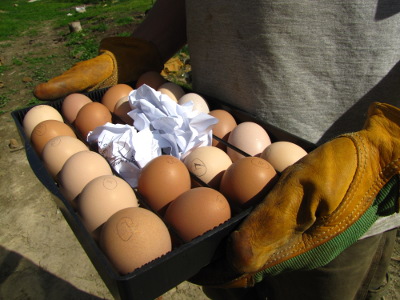
make this point moot, but I find it helpful to add a piece of crumpled
up paper in small gaps between less solidly touching eggs in our
Brinsea Octagon 20
incubator. This ensures that I have room to lay all of the eggs
flat on the tray during the hatch, but that the eggs don't roll against
each other and risk cracking as the turning cradle rotates the
incubator.
The
decisions you make during the early incubation period have a strong
effect on how many healthy chicks eventually pop out of their
shells. Permaculture
Chicken: Incubation Handbook covers deciding whether to candle,
tips on turning the eggs,
ways to keep the internal humidity at the proper level, and what to do
if the power goes out. Check out the 99 cent ebook and become a
real incubation expert!
 This post is part of our Chicken Incubation lunchtime series.
Read all of the entries: This post is part of our Chicken Incubation lunchtime series.
Read all of the entries: |
Want more in-depth information? Browse through our books.
Or explore more posts by date or by subject.
About us: Anna Hess and Mark Hamilton spent over a decade living self-sufficiently in the mountains of Virginia before moving north to start over from scratch in the foothills of Ohio. They've experimented with permaculture, no-till gardening, trailersteading, home-based microbusinesses and much more, writing about their adventures in both blogs and books.
Want to be notified when new comments are posted on this page? Click on the RSS button after you add a comment to subscribe to the comment feed, or simply check the box beside "email replies to me" while writing your comment.

I loved the incubation handbook. I have never done it, there are so many things I never considered. It was so through, fun and easy to read!
Thank you!
I saw on FB that we can pre-order your book. (YEA!) Do pre-orders count towards you making it to the top 100? I want you to launch up the charts.
Anonymous --- I'm gad I could help! Sounds like you'll be ready to hit the ground running.
Emily --- No worries about the duplicate comments --- I cleaned them up.
Thank you for saying that about the incubation handbook! If you want to really make my day, you could copy and paste your review onto Amazon to tempt strangers to read it, but don't feel obliged.
Pre-orders definitely do count toward launching us into the top 100 in Sustainable Living! We were up to #54 yesterday, but drifted back down off the list today. Hopefully we'll poke back up onto the list soon!
I'm going to be really launching the book on the blog Monday, but for anyone who wants to get a head start, you can see my Amazon page here. I've been blown away by the kindness of our readers to preorder even before the preview feature comes up!! Thank you!