
archives for 03/2016

One of our readers
dropped me an email Monday to tell me about the root cellar she and her
husband want to build on their Vermont farm. The couple plan to give the
off-grid 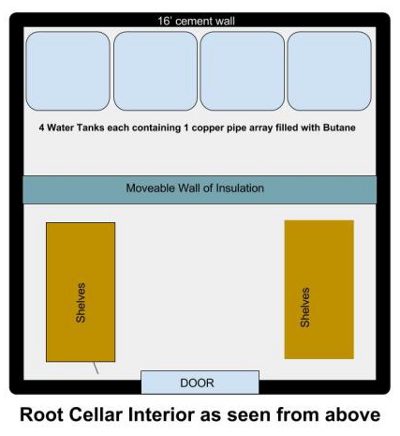 cooler
extra oomph in the summer months by storing ice in the back, using
copper pipes full of butane to passively stockpile winter cold for
warm-weather use.
In essence, they're hoping to combine the idea of an ice house with the
idea of a root cellar. If it works, they'll have achieved an
electricity-free, four-season temperature-modified area, allowing the
couple to feed themselves and their CSA customers all year
long...without the hard work of chipping blocks of ice out of the pond
every winter.
Will the ice-house/root-cellar combo go the distance? Donate to their Indiegogo campaign at the $15 level and
you'll get two years of temperature records in digital format to answer
that question. In the meantime, I'd be curious to hear your thoughts on
this innovative root cellar that's different from any I've ever seen
before.
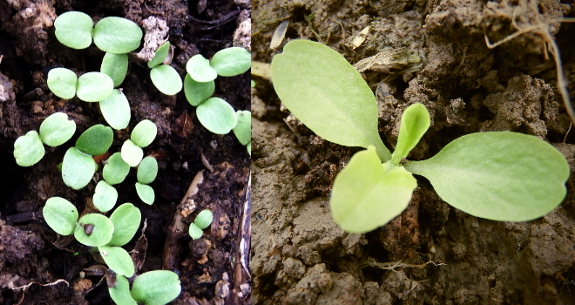
One-week-old lettuce and peas transplanted successfully
out into the February garden. But how did they fare --- even protected
by quick hoops --- when outside temperatures fell into the mid twenties?
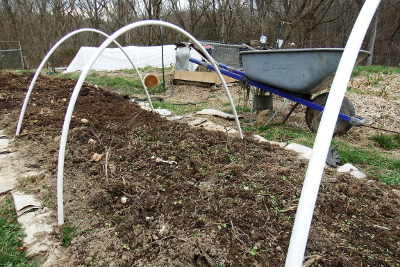 The
lettuce brushed off the cold as if it was nothing and kept right on
growing. The photo above shows lettuce started inside February 12 then
transplanted outside February 19 (on the right) versus lettuce
direct-seeded on February 19 (on the left), both photographed after
eleven days in dirt.
The difference is
striking. The transplanted lettuce will be ready to eat in a week or two
at this rate! (Yes, I snip the first leaf lettuce very young.) Of
course, transplanting lettuce is pretty fiddly compared to broadcasting a
handful of seed so densely that the crop provides a complete
weed-buffer once the second set of true leaves emerge. But transplanting
a small area looks very much worth it for extra early salads.
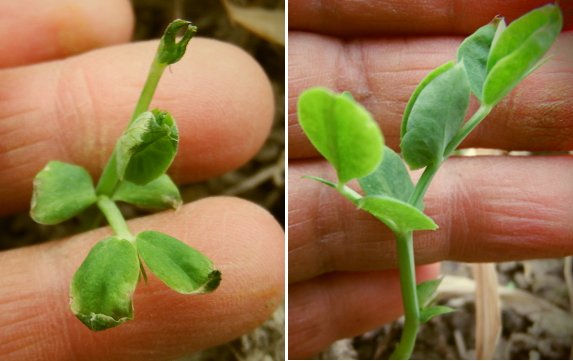
How about the pea
seedlings? Results there were a little more spotty. The direct-seeded
control area hasn't come up yet, and among the transplants some
seedlings got a bit burned by the 25-degree night even with a quick hoop
to protect them. On the other hand, other seedlings seem just as
vigorous and happy as always. Looks like my planting calendar --- which
told me to direct-seed a large area of lettuce and arugula under quick
hoops this week but to wait two weeks for the main pea planting --- was
spot on.
Today's the day we started
broccoli and cabbage seeds.
We like Blue Wind broccoli.
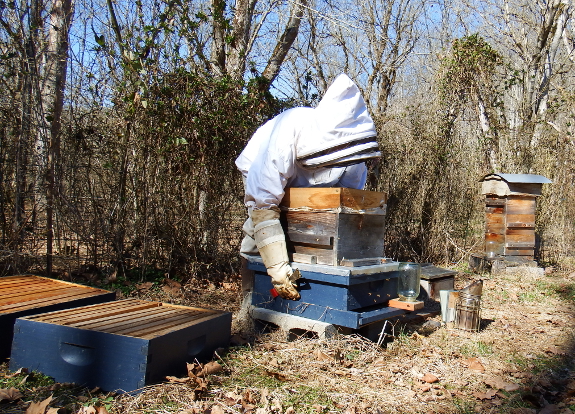
Natural beekeepers would strongly frown upon opening up the winter hive, even if the day's high was 66. But natural beekeepers would also frown upon feeding a healthy hive in late February just to boost colony size and prompt maximum honey production. Since I'm committed to doing the latter, I need to do the former as well --- more bees need more space or they'll soon swarm.
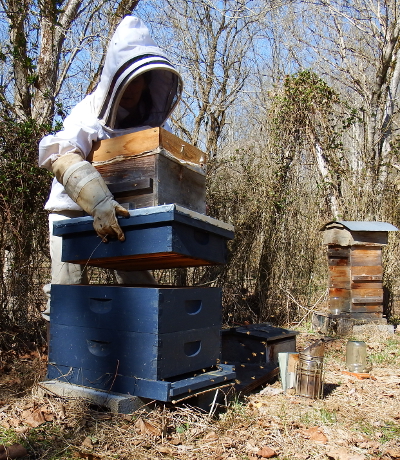 I am sticking to the Warre method of nadiring
rather than using the Langstroth method of supering, though. In part,
this is because I'm trying to get the bees out of the Warre hardware, so
I'm hoping they'll build down and finally let me remove that last Warre
box (hopefully full of honey) this summer. But nadiring also makes
intuitive sense for spring expansion.
To that end, I dragged
Mark out to help me lift the existing hive up in preparation for
slipping new boxes underneath. But the hive (minus roof) was just barely
light enough that I could manage it on my own without straining my
back. I didn't take the boxes apart because I was trying to minimize my
intrusion as much as possible, but the moderate weight seemed pretty
good for this time of year, suggesting that there's at least a little
bit of honey left inside for the bees to consume as they wait for true
spring.
Now, if I can just remember to buy sugar in bulk, we might have our first good honey harvest since 2010....
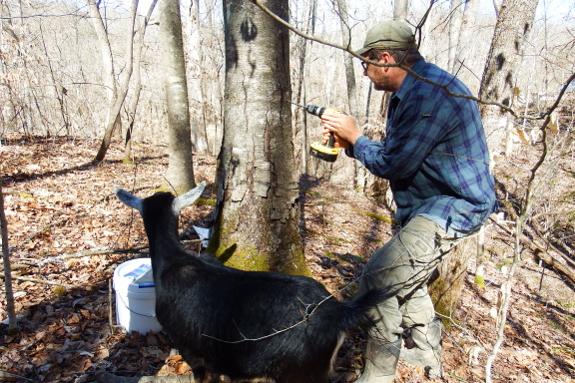
Despite the initial dripping when we tapped a black birch Monday, it turns out the first week of March is too early for significant accumulation after all. Four days later, we'd only racked up a quarter of a cup of frozen sap --- no wonder since the daytime highs have only 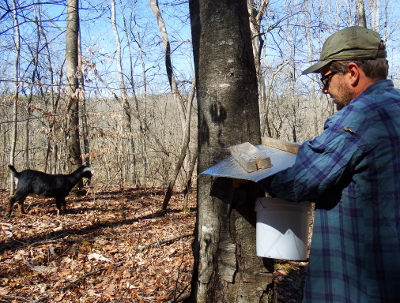 been reaching the low forties.
With another warming
trend on the horizon, I'm hopeful we'll get more sap soon. There are
half a dozen sizable birches in that same area, actually, so the tricky
part will be deciding whether I want to tap them all or keep our project
on the fun, hobby level.
Of course, since I can take the goats out with me to both tap and
collect sap, the fun quotient may well remain high even if I tap all
half dozen. Every project is more fun with goats.
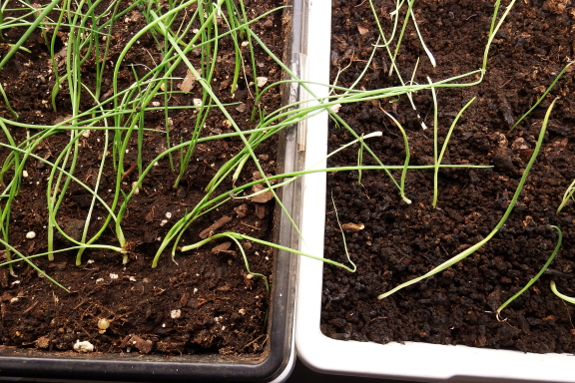
I love stump dirt, but my
onion seedlings apparently aren't nearly so keen. I ran a side-by-side
comparison of stump dirt versus store-bought potting soil...and the
latter won by a landslide.
Despite my disappointment
that the homegrown organic matter failed the test, I can guess the
reasons. Stump dirt does a great job holding moisture and looks like
rich, fluffy ground. However, if the product really is simply beetle castings, I might be seeing the same problem that those who use straight worm castings with seedlings see --- excess salts keep the baby plants from thriving.
Either way, I'll squash
my urges to go entirely homemade and will start my next round of seeds
in store-bought potting soil. After all, the final crop is the goal and
I'll take whatever path I need to in order to achieve that destination.
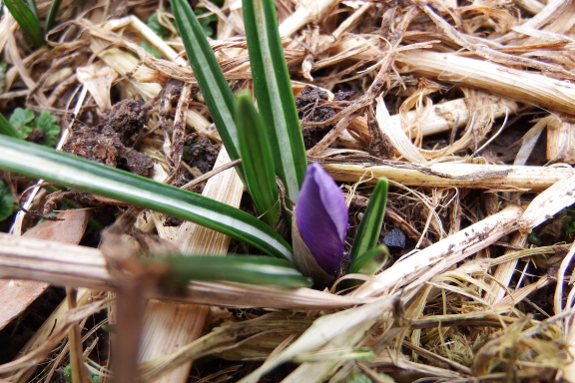
The crocuses are running late this year...which apparently means nothing at all. But I sure hope it makes the tree flowers run equally late!
Finding ways to harvest
tree fruits despite late spring freezes is one of my thought projects
for the year. Possible solutions I've come up with include:
- Easily coverable espaliers so I can protect opening flowers from hard freezes.
- Espaliers along an earthen bank so the thermal mass of soil can do the job for me.
 Planting late-blooming varieties.
- Planting standard-sized apples in hopes the blooms near the top of each tree won't get nipped. (We don't have tree-free room to try this...yet.)
- Finding less frost-prone pockets on our property, perhaps the
south-facing hillside across the way. Unfortunately, this would require
considerable tree removal.
One option I've read about that doesn't seem to work here is:
- Planting trees on the north side of a building or hillside to slow
down their bloom cycle. That's where our high-density apple planting
is...and they still persist in getting nipped each spring.
I'd be curious to hear
from others who regularly see tree flowers in March when you still have
ten weeks of cold weather to go. Have you found any solution to the
frost-nipped blossoms and fruitless years that result?
Several of you made thoughtful and thought-provoking comments on my potting soil vs. stump dirt post (both on and off blog). So I thought it deserved a followup post.
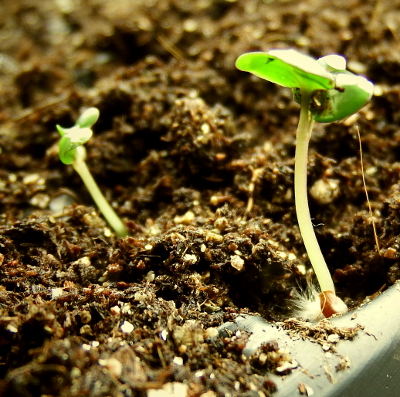 John
asked whether veggies started in stump dirt might grow slower but then
do better in the long run. This is a valid hypothesis --- I'm always a
proponent of starting seedlings off in low-nutrient areas at first so
they'll develop good root systems. That said, the issue with stump dirt
tends to be seedling death, not slow growth, which suggests the problem
isn't low nutrients at all.
But I'm not giving up on stump dirt entirely. I've had great luck
using the homegrown amendment for potting up
tomatoes, peppers, and other seedlings that
spend quite a bit of time indoors. I'm just disillusioned about stump
dirt's efficacy at getting plants from the seed to the two-true-leaf
stage
--- the area where I've traditionally had the most failures in the past.
I'm hopeful that starting them off in potting soil then moving up to
stump dirt will eliminate that issue while also keeping costs low for my
always over-ambitious indoor spring garden.
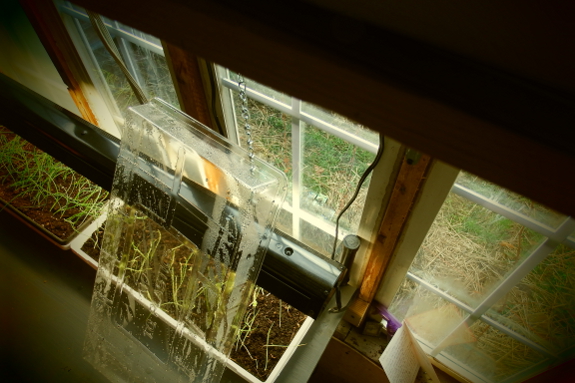
We suspended our kitchen
counter with two heavy duty spring
loaded snap links.
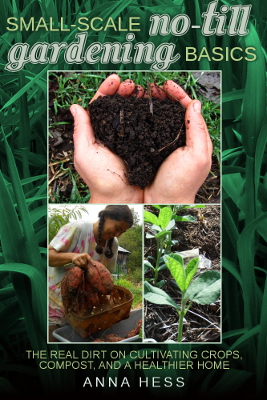 I've been blown away by the preorder interest in Small-Scale No-Till
Gardening Basics. Clearly, the topic has hit a
nerve! Here's hoping that everyone enjoys the writing inside now that the book is live.
If you haven't snapped up your copy yet, you can do so today on any of the following platforms:
And while I'm regaling you with book news, part three in the series ---
Balancing Soil Nutrients and Acidity --- is up for preorder as well.
Once again, I'm
giving you a couple of days to nab the ebook at 99 cents before it goes
up to its real price of $2.99. So if you want to learn about the science
behind remineralization, along with information on how to mitigate soil
deficits and problematic pH using chemicals, cows, goats, chickens,
mushrooms, cover crops, dynamic accumulators, and more, then here are the links for
you:
Finally, just as a reminder, these ebooks are sections of the print book The Ultimate Guide to Soil,
which is currently up for preorder and will be hitting bookstores and
libraries in July. So if you'd rather wait a few months and read on
paper, that option is available as well.
Thanks so much for
reading! Your support lets me spend my days experimenting with kill
mulches, goats, and cover crops, then reporting those results to you on
the blog. So I hope you know I appreciate everyone who buys a copy,
tells their friend, shares this post on social media, or leaves a
review. You are why I write.
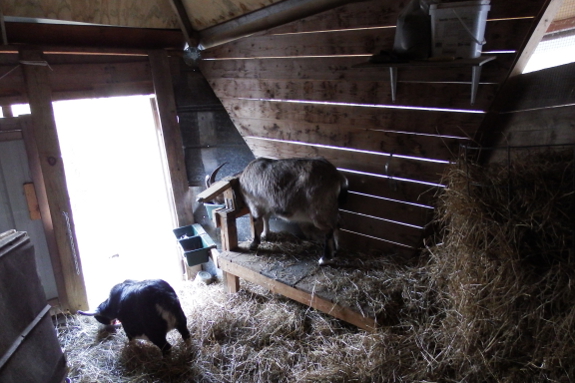
Good news! Artemesia is pregnant. I've been feeling under her belly right in front of her udder like Karla
suggested...feeling nothing. Then, Monday morning, a kick! Actually,
Artemesia's little parasite(s) were very rambunctious that morning,
kicking repeatedly...which is handy since I might have otherwise
considered that first movement a fluke. So now I can go back to
wondering what sex, what color, and how many.
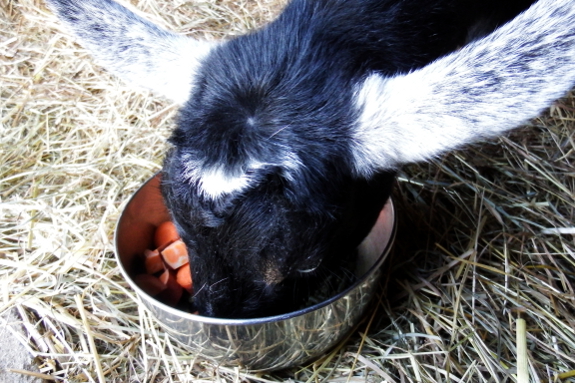
The bad news is,
Artemesia is no longer in tip-top health. About a week ago, I started
noticing her fur losing its shine and a bit of dandruff cropping up.
Granted, both of our goats are also shedding their winter fur at the
moment, which gives them a bit of a scruffy look...but Artemesia just
looked scruffier than she ought. A peek at her inner eyelids determined that they were quite a bit paler than Abigail's, a sure sign of anemia and a likely sign of worms.
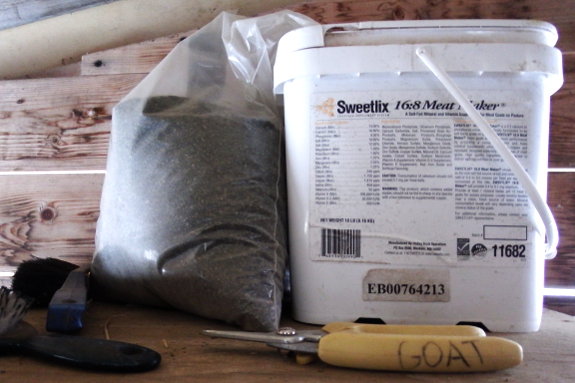
 Just as when this last happened, I first took a look at the kelp feeder. It wasn't precisely empty...but
goats are a lot like cats. You know how cats will look at the last two
tablespoons of kibble, turn up their noses, and beg for more as if
they're starving to death? Apparently, that's a goat's take on the dregs
of kelp as well.
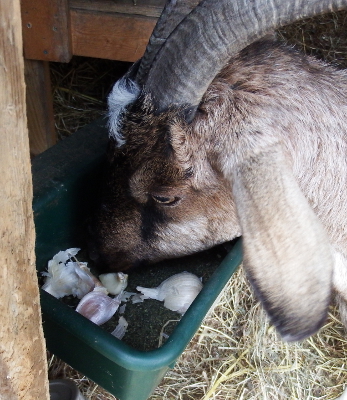
So I topped up the kelp
feeder and started the herd on a daily garlic campaign as well. I've
tried chopping up garlic and putting it in our goats' feed...and they
have a fit. Rightly so --- who wants a big bite of raw garlic when
you're expecting sweet potatoes? However, I soon discovered that goats
are quite willing to eat an after-dinner mint garlic
out of the kelp feeder. In fact, they've been going through a head of
garlic a day between them --- I'll have to cut them off soon!
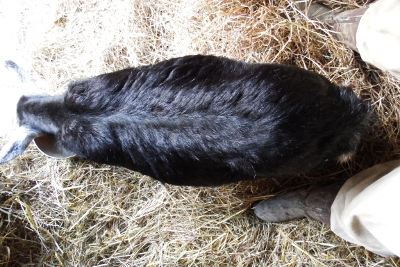 Within
four days, Artemesia's fur started shining again. But her eyelids still
aren't as bright as Abigail's. I'm kicking myself for not looking at
Artemesia's eyelids when she seemed in tip-top health since individual
goats can have different baselines. Instead, I'm ordering some chemical
dewormer just to be on the safe side...and I'm also going to pull out
our microscope and see if I can get an assessment of worm load in her
poop. Mark's going to love our dinner-table conversations this week....
We had some big logs that
required a bump up from the battery
powered saw.
The Stihl tech in Gate City at
Broadwater feed store tuned up our old 039 and is now the only place
I'll go for future service.
Mark and I snuck away to
visit the McClung Museum in Knoxville Wednesday. It was a long drive ---
4.5 hours round trip and probably a bit beyond what I'd usually
consider a fun day trip. But I was feeling in need of an adventure and
Mark is always willing to oblige my infrequent impulses to leave the
farm.

The really impressive
exhibits were about the geology and archaeology of Tennessee. But I need
to digest a bit before I regale you with lessons learned from those
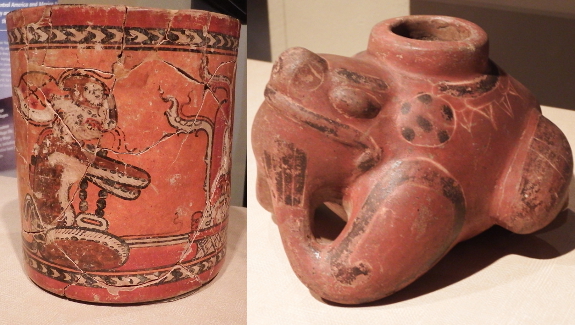
rooms. So, instead, I'll just show you a couple of shots from the Mayan
exhibit. A lot of the Mayan artifacts were actually reproductions, but a
few --- like the toad and rabbit pots at the top of this post --- were
the real deal.
We returned home half an
hour before sunset, and I was already itching to get back to my darling
goats, my spoiled cats, and my impatient garden. I guess I got that
travel-lust out of my system just in time --- 6.5 weeks left until
milking season!
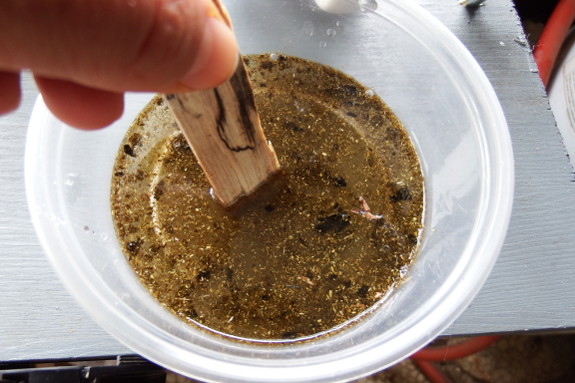
As with our bees, I hate
the idea of pumping chemicals into our goats unless I'm positive they
have a problem with worms. The solution to this dilemma is what
scientists euphemistically refer to as a fecal exam and what I call a
goat poop analysis. Basically, you're looking for eggs of the parasitic
worms that give your herd such a hard time, then you use the number of eggs to decide whether to deworm.
"Okay, Anna. You just lost me," says the random reader. "How am I going to see microscopic worm eggs, let alone count them?"
 Well,
gentle reader, I'm glad you asked! It's pretty simple --- first you
follow your goat around staring at their butt until they poop. Next, you
gather three fresh pellets and mash them up in a solution of water
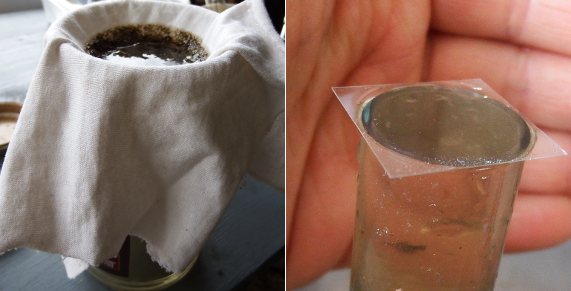
saturated with epsom salts. Then you strain out the non-microscopic gunk
using a clean rag and pour the remaining liquid into a test tube. Fill
the tube to the brim with a bit more of your epsom-salt solution, place a
cover slip on top so it's fully touching the liquid, wait 20 minutes,
and the worm eggs should float to the surface and adhere to your cover
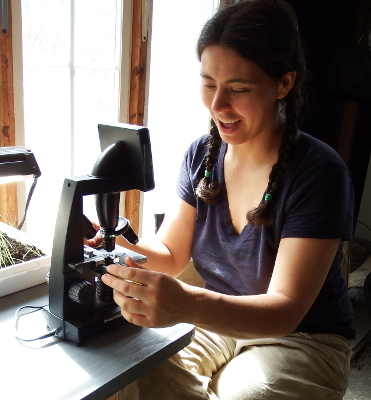
slip. Then it's just a matter of examining the resulting slide under a
microscope to see if you find any worm eggs.
(Yes, I glossed over a lot of factors in that paragraph. This website contains the most scientific and, at the same time, home-user friendly explanation I've run across.)
The biggest problem I've
had with this experience so far is the obvious --- the watched goat
never poops. The easiest way to get your goat to defecate on command is
to wait until she stands up. The trouble is, Artemesia is such a people
pleaser, she jumps to her feet as soon as I step out the door. So I did
finally get some pellets Thursday....but they came from Abigail.
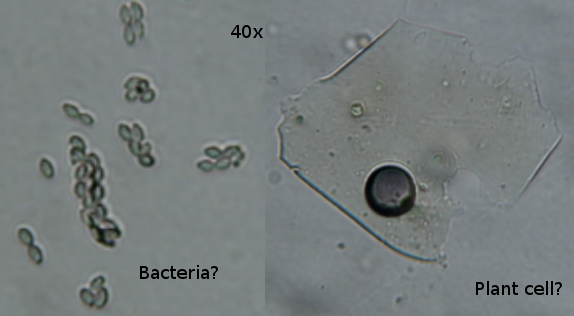
I figured I'd go ahead and try my hand at analysis anyway, even though Abigail's not the one I'm worried about. So I wasn't surprised that I didn't find anything I was sure were worm eggs. (This site
has some good images of various goat intestinal parasites. But,
basically, you're looking for ovals with circles inside.) Instead, I
mostly found lots of debris, one colony of what I think is probably
bacteria, and a few of what I think are probably plant cells that didn't
get entirely digested.
Now I just need to watch
Artemesia's butt a little longer and see what I find in her poop. In the
meantime, I've increased her concentrates in case she's anemic because
of growing kids instead of intestinal parasites. And I'm also taking the
time to sit with her while she eats so Abigail can't bully our first
freshener out of the last of her ration. Here's hoping by the time I
catch some fresh pellets from our darling doeling, Artie will be in peek
health and my anemia scare will be a thing of the past.
This basketball floated down
to our ford
and decided to just hang around.
He's been here almost a week!
I've started calling him
Wilson each time I walk by on my way to our parking area.
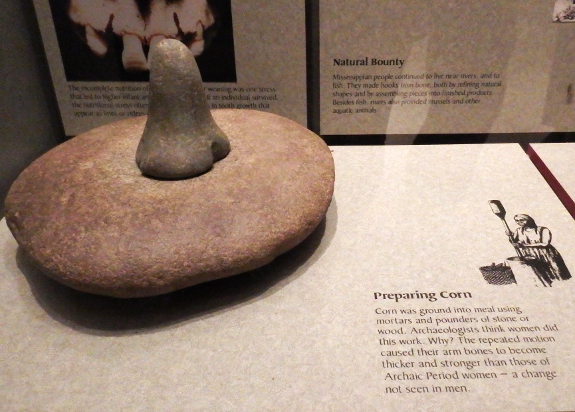
You'll be unsurprised to learn that my favorite exhibit at the McClung Museum
was the Native American wing. Not only is this one of my favorite
topics to learn about, but the exhibit was also based on archaeological
sites and artifacts from Tennessee, making the information very close to
home.
I particularly enjoyed
the way exhibit creators focused on how-we-know as well as what-we-know.
For example, from the exhibit above: "Corn was ground into meal using
mortars and pounders of stone or wood. Archaeologists think women did
the work. Why? The repeated motion caused their arm bones to become
thicker and stronger than those of Archaic Period women --- a change not
seen in men."
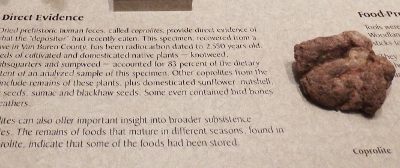 Or,
more succinctly, take a look at the coprolite to the left. Yes, that's
fossilized human poop used to analyze our ancestors' diets. I'd heard of
coprolites before, but had never thought of them in relation to our own
species. I mean, how exactly does human excrement become fossilized?
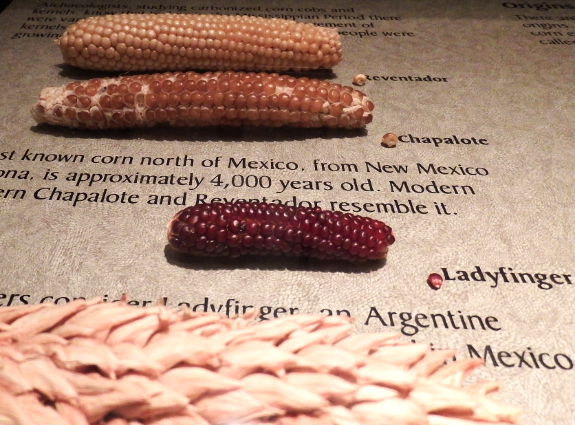
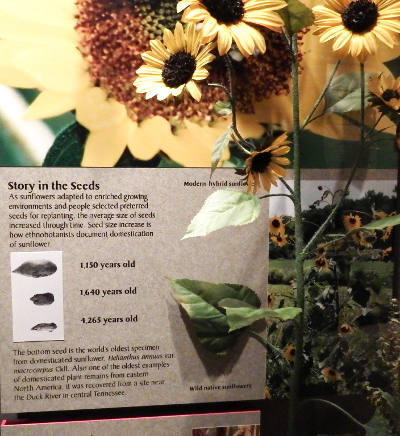 Much of the rest of the Native American agriculture exhibit contained information I'd read previously in books like 1491 and in more scholarly texts or at museums like Sunwatch. But I was particularly taken by one map (not shown here) that focused on North American cucurbits.
Guess which type of currently cultivated squash evolved very close to where we now farm? The crookneck squash...which just happens to be the one summer squash I find easy to grow organically in our bug- and fungus-rich environment.

 Of
course, the exhibit wasn't all about field corn and summer squash.
There were plenty of cultural tidbits as well, such as clay figurines
like the one above and ornaments like the one shown to the left.
Interestingly, the pendant is supposed to represent the Cherokee myth of
the water "spider," which brought fire on its back across the water
from gods to humans.
I put "spider" in quotes
in the previous paragraph because, from the image, I think this
particular pendant actually represents a water strider. Yes, both water
spiders and water striders do exist. Of the two, I think the latter is
more likely to carry fire over long distances since they skim rather
than scurry across the water.
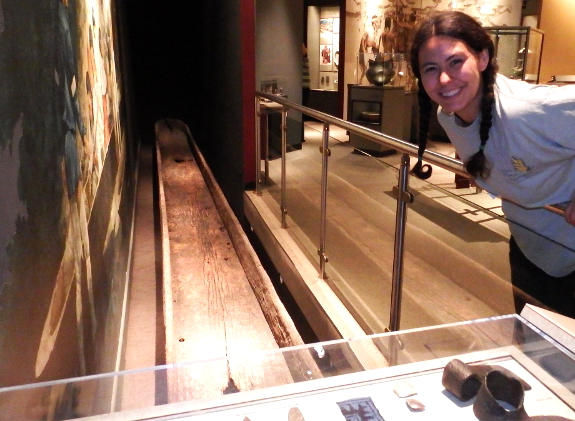
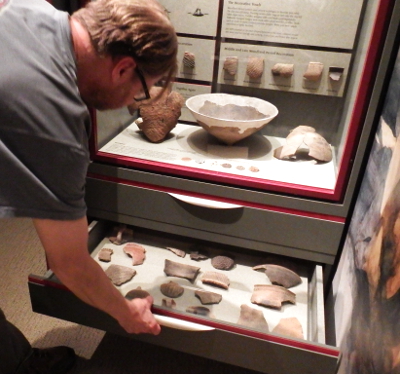 There
were other fascinating artifacts, too, like this 32-foot-long canoe
that was found drifting in the Tennessee River. Mark and I both
scratched our heads over the ungainliness of such a tremendous vessel
until I decided it must have been used like a Uhaul moving van. My guess
will have to stand since the exhibit gave no indication of the canoe's
real use.
Overall, the McClung Museum's "Archaeology & Native Peoples of Tennessee" exhibit
may be the best I've seen on the topic. I only wish I'd skipped the
Mayans so we could have hit the room with my brain fully fresh. In fact,
if it wasn't such a schlep to get to Knoxville, I would have used up
all of my museum brainpower on that one room alone. If you're in the
area, I highly recommend giving it a try!
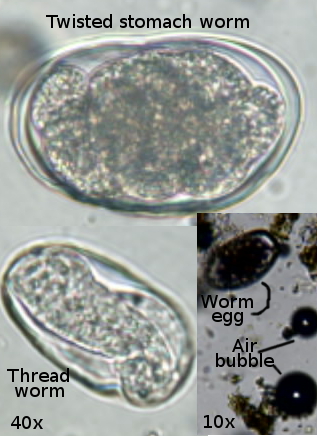 Good news --- finding worm eggs in a goat fecal sample
is pretty easy. Just focus on the air bubbles at 10x and look for oval
shapes on the same level that are just a little larger. Zoom in to 40x
to confirm your ID and figure out the species. Thread worm is
distinctive because you can actually see a little worm wriggling around
inside the egg, while most other eggs look more like the top picture to
the right (which I may or may not have identified correctly to species).
Bad news --- Artemesia's
worm load is indeed too high. I counted about 50 eggs on my slide,
mostly thread worm but some (probably) twisted stomach worm as well.
That count might equate to about 2,500 eggs per gram, which is higher
than is optimal.
While I'd love to stay
organic with Artemesia, I don't want to risk her health during
pregnancy. So I went ahead and treated her to a dose of Safe-guard
(fenbendazole), which is supposed to be okay for use during pregnancy. I
also changed her over to our other winter pasture since thread worms
enter a goat's system through the hooves in wet ground. Looks like that muddy spot
that offended my sense of order (and Abigail's dignity) also offends
Artemesia's health. Time to think of a solution for winter goat lounging
near the gate.
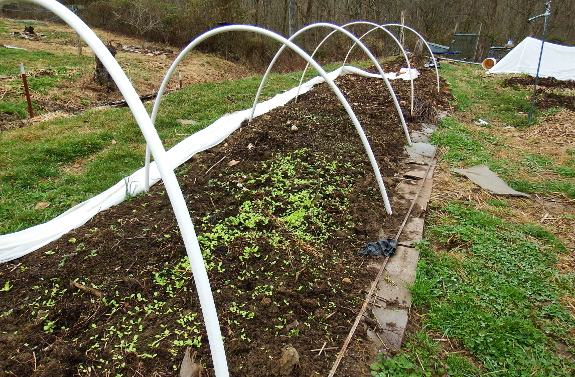
In early March, the grass
is just barely starting to grow and there's not very much to see yet in
the garden. But, despite the brownness of winter, this is still a
pivotal time of the growing year. Not only am I making new beds like the
one shown here, I'm also planting annuals and nurturing perennials.
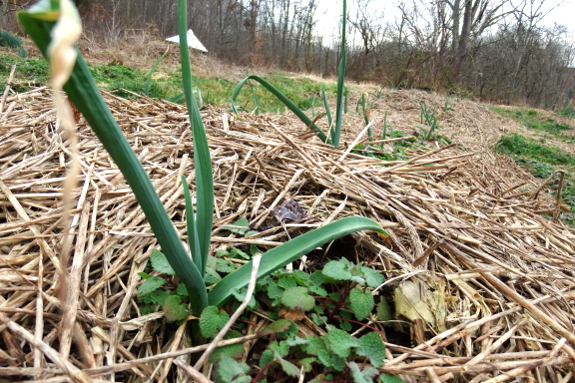
On the list for the month
--- weeding around the garlic, which is starting to grow like
gangbusters now that the serious cold has fled. A newspaper layer
beneath the straw did a great job keeping weeds at bay everywhere except
around the plants themselves. But it's still better to yank that dead
nettle before it goes to seed!
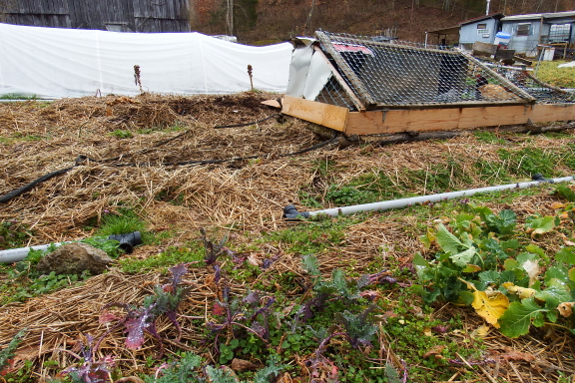
Other overwinterers won't
be around long, so I'll wait to deal with weeds until it's time for the
next crop. Above, you can see the tiny bit of kale that survived the
winter under a quick hoop. Now exposed to spring rains, the leaves are
slowly but surely beginning to grow again.
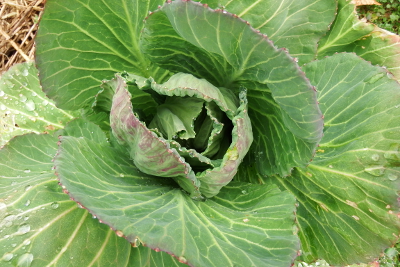 The
cabbage shown to the left was more of a surprise. I can't recall
whether it was just a small plant that didn't have time to head up last
fall or a plant that resprouted after I harvested the main head. Either
way, it accidentally got covered by a quick hoop due to its proximity to
the parsley. And when I took off the cover, the crucifer started to
regrow. I guess we'll have one ultra-early cabbage this year!
Most of my attention,
though, is focused on March, April, and May plantings. To that end, I'm
spreading various types of compost on spring beds. I'm not 100% happy
with any of my homegrown compost...yet. But that's okay because a little
extra time in the dirt works wonders toward mitigating high-nitrogen
chicken bedding and high-carbon garden-weed compost. Here, I'm
topdressing beds that won't be planted until the first of May, giving
the compost plenty of time to mellow in the interim.
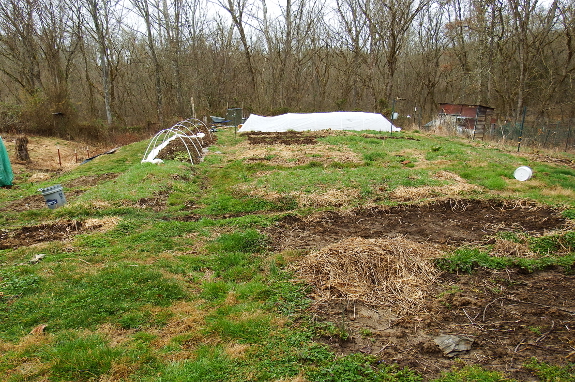
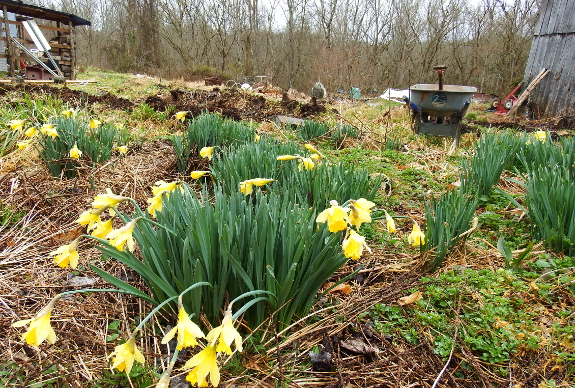
This final shot shows the
results of my February garden-redesign campaign. I shoveled all the
good dirt from shady beds to make one long new bed on the left side of
the photo in an area that enjoys full sun. The topsoilless areas in the
foreground will be seeded in oats and clover so goats can enjoy a nibble
as I work in the garden.
There are a few more
areas I want to redesign too. But now that spring is here, I suspect
those beds won't be remade until the fall. Oh well, my garden is now and
always a work in progress!
We installed two goat decks to give our girls a place to lounge during the day.
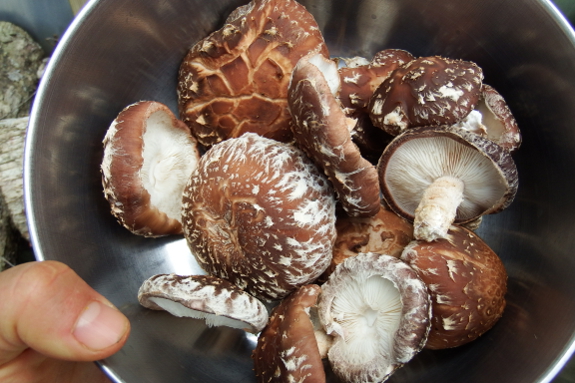
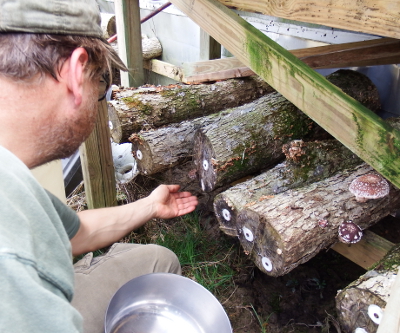 A year ago, Mark and I plugged oak logs with shiitake spawn.
This is our second round of shiitakes, but our first logs didn't last
as long as we thought they should have. So we put in a bit more effort, building the fungi a station up off the ground in a shady spot and watering them during droughts (or rather, when I remembered).
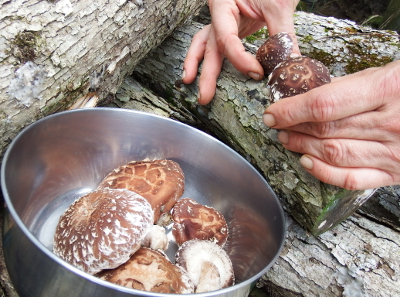
Fast forward ahead twelve months, and we harvested a bowlful of Native Harvest and Snow Cap
mushrooms! There's about that many unexpanded buttons to be harvested
later in the week too and many more to come in the years ahead.
 As a side note, the first miniature mushroom log to
fruit is providing quite a good crop --- three medium-sized mushrooms.
Mark and I both think these little logs would make great gifts for
homesteaders to give suburbanite friends who have neither the space nor
the energy levels to move larger logs around. The minis don't fruit any
faster than the big logs (despite my hopes), but they do seem to produce
a good-size crop in a very manageable package. The next question will
be --- do minis last as long as the big logs?
I'll end by sending you to my ebook Weekend Homesteader: March for step-by-step instructions about turning trees from your woodlot into easy edible fungi. Now's the time to plug logs, so best get crackin'!
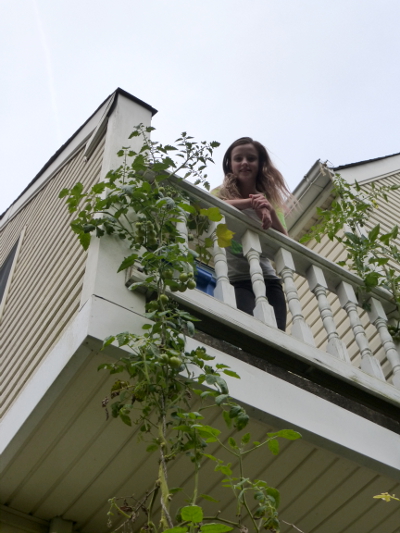 I
can still remember where I was when I first saw it --- a picture of a
man harvesting tomatoes from the top of an extension ladder. Louis Ver
had grown a 23-foot-tall plant a few decades earlier in a town only 45
minutes drive from where I lived in Pennsylvania. Best of all, he had done it
organically and picked over 200 tomatoes from the plant over the course
of the season! I couldn't wait to try it for myself.
I loved the colors and flavors of heirloom tomatoes, but was sometimes
disappointed by the yield. I was pretty sure that this was the answer to
my problems. In the years since, I have continued to read and
experiment in an attempt to achieve maximum yields on my tomato plants. I
would like to share a few quick tips that will help you to grow more
tomatoes as well, even if you don't want to leave the safety of the
ground.
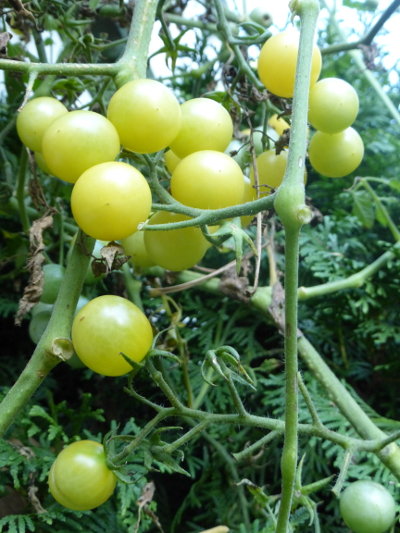 Tip #1: Provide constant moisture.
If a plant has all of the sunlight and fertilizer in the world, and a
wealth of perfect soil beneath it, its growth will still be frustrated
if it doesn't have the moisture it needs. Ruth Stout once had me
convinced that rich soil and a good mulch would retain all of the
moisture that my plants needed. But even when I gave my tomatoes an
occasional gallon of "irrigation tea," per Louis Ver's recommendations, I
ended up realizing that I was dwarfing the plants due to insufficient
moisture.
Here is the easiest and most efficient way that I have found to water a
very big plant. Drill a hole in the side of a 5 gallon bucket, right
where the bottom and side of the container meet. Set it 1 to 2 feet from
the base of the tomato plant, with the hole aimed toward the plant, and
fill it once weekly, letting the water drain out slowly over 5 to 10
minutes. If you don't have a supply of rain or pond water, let tap water
age in a bucket for a day or more before dumping it in the bucket with a
hole to give any chlorine time to evaporate and the water time to warm
to outdoor temperatures. This slow trickle will create a reservoir of
water in the soil directly beneath your plant that it can draw from over
the course of the week.
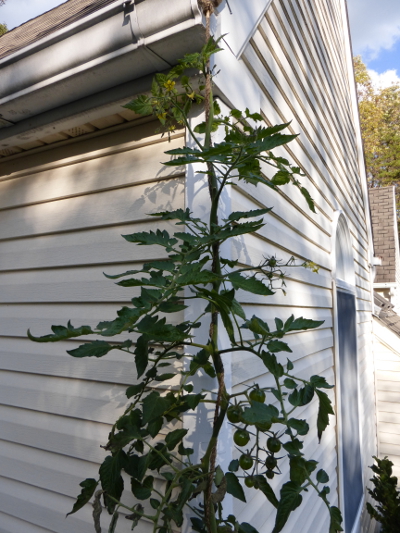 Tip #2: Provide constant fertility.
I've learned that spreading compost around your plant once at the
beginning of growing season is a bit like giving a child a seven-course
meal as soon as they are born and never feeding them again. Of course,
organic fertilizers are known for being slow-release, but this doesn't
mean that they don't lose potency as the elements leach away their
nutrients. It was my pole beans that first convinced me that the "once
and done" plan was foolish. Every year bean production would peter out
at some point, after which I would place a few shovels of compost in a
bucket of water, mix it up, and dump along the row. Within two weeks the
plants were pumping out beans at a machine gun pace again! At some
point I thought, "Why don't I just do this every two weeks all season
long?"
I was on the right track. I soon read about experts who do something
very similar, as Eliot Coleman spreads a "side-dressing" of compost
around each tomato plant monthly and Steve Solomon "fertigates" his
larger plants with a 5-gallon bucket of compost tea every other week. I
often use a method that is a hybrid of the two, slowly dumping a few
gallons of my compost "stew" (compost left in, as with the pole beans)
around the base of the plant twice a month in addition to my watering
schedule. It really doesn't take much compost to maintain fertility in
this manner as long as you planted in good soil or spread 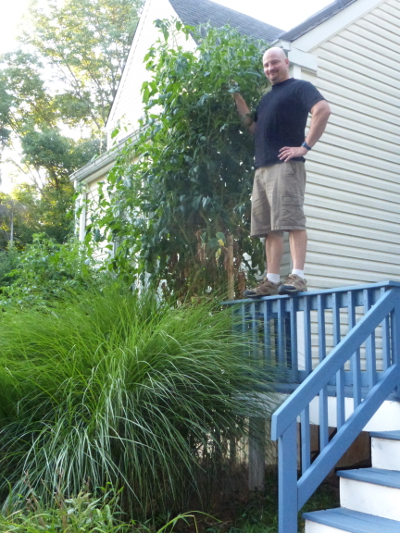 an inch of compost in a two foot wide circle around your transplant; a trowel scoop per gallon of water seems to be adequate.
Tip #3: Give your plant room to grow.
Years ago, I planted my tomatoes pretty closely, lopped off all suckers
in an attempt to channel the nutrients into that one precious vine, and
trained them up twine to a trellis. I later realized that I was
severely limiting productivity. This method is fine if you have to grow
20 varieties in a twenty foot garden bed, have lots of time for pruning,
and a trellis to train all of your single vines up to, but you won't
get much from each plant. I could have grown more tomatoes with four
plants per bed and my current techniques.
Here are two methods that work best in most situations:
- Giant tomato bush. First, plant your tomato in full sun at least five feet from any other large plant. Next, go to a hardware store and buy two sheets of re-mesh (used to reinforce concrete). Back at home, fasten the ends of one sheet with wire, and you will have a cage 3 1/2' high to set around your tomato plant. Do the same with the second, and then put it on top of the first, wiring it securely in place. Tie the cage to one or two stakes that are pounded in securely to prevent the contraption from tipping when the plant gets big. You now have a 7' tall cage, which will hold your giant tomato "bush" securely for the season, as the vines will have to reach at least 14' in length in order to grow over the top of your cage and back down to the ground. Best of all, most of you will be able to reach all of the tomatoes without even standing on your toes! (The one in the picture is just about to flop and head downward after growing out the top of a 10 1/2' cage.)
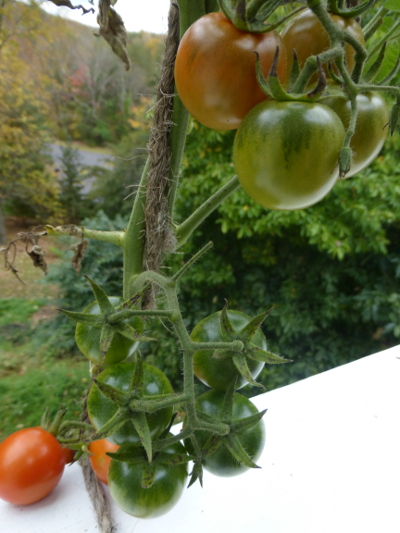 Sky-high climbing vines.
For this method, you'll need to plant your tomato in full sun beneath a
second-story balcony, window, or chimney. Next, buy a rope at least 25'
long made of rough, natural material (I've used sisal.) Third, tie the
rope to something (the balcony railing, chimney, etc.) up on the
second story, and the other end gently to the base of
the tomato plant (wait until it's not too small and tender). Then,
as the plant grows, twist its trunk gently around the rope. You'll need
to get up on the ladder weekly to trim suckers with this method,
but can allow about 4 vines to climb the rope without everything coming
undone, and without limiting your plant's height or productivity. I
harvested 500 cherry tomatoes from a single vine when I first tried
this, and each additional vine can produce just as many!
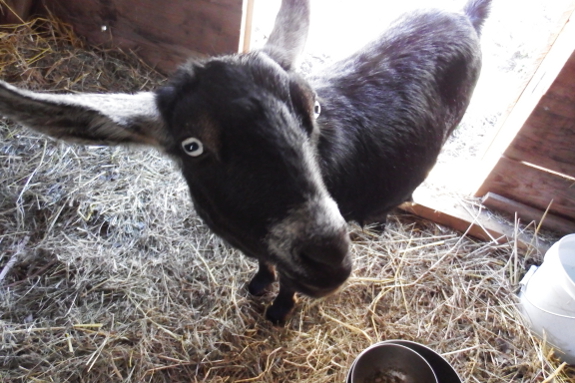
Never in my life have I
spent as much time on personal daily hygiene as I've spent lately
grooming our pregnant goat. My goal isn't really to make her look
pretty, though. Instead, I 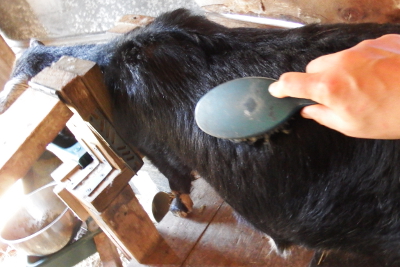 have a couple of more constructive points on my daily agenda.
The first is to keep
myself occupied while Artemesia eats her morning and evening ration at a
snail's pace. I realized a few weeks ago that Abigail was getting the
lion's share of Artie's food (as well as all of her own) since our
horned goat eats at lightning speed then bullies our smaller, hornless
goat away from the rest of her dinner. So now I lock Abigail out of the
goat shed while Artemesia nibbles on her alfalfa pellets and roots.
And even though it sometimes seems like a long time to wait on a busy
morning, I'm actually glad Artie is a slow eater. That trait means I
won't have to overfeed the doe just to keep her occupied while milking
the way I did with Abigail.
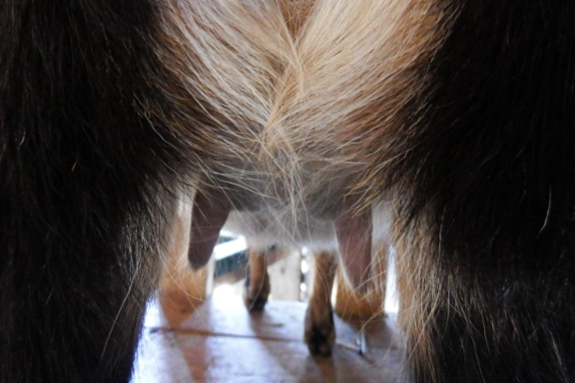
So I brush our goat to
keep myself from getting bored while Artie eats, right? Well, not
entirely. I'm also trying to get her used to being touched all over long
before the kid(s) arrive. I have a feeling that if I'd done this with
Abigail, it wouldn't have been such a hassle (especially at first) to drawn down her milk.
Of course, Artemesia is
much more malleable and people-oriented than her herd mate already. But
even she flinched and tried to tuck her hindquarters the first few times
I gently felt at her expanding udder. After a couple of weeks of
personal attention, though, she's still not entirely thrilled at being
felt up but she accepts it as a necessary part of eating her 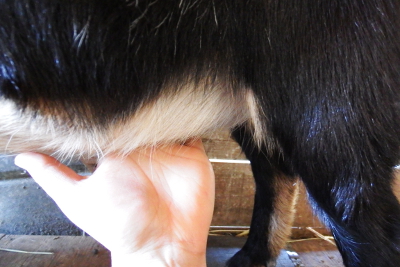 daily carrots.
While I'm messing around
down there, I also press up gently on Artemesia's belly. About 90% of
the time, Aurora (or her brother) kicks back. I have a feeling that if I
was more experienced, I'd be able to guess how many kids are in there
using this push test, but I can never seem to remember exactly where the
last kick happened well enough to know if more than one kid is nudging
its mother's insides.
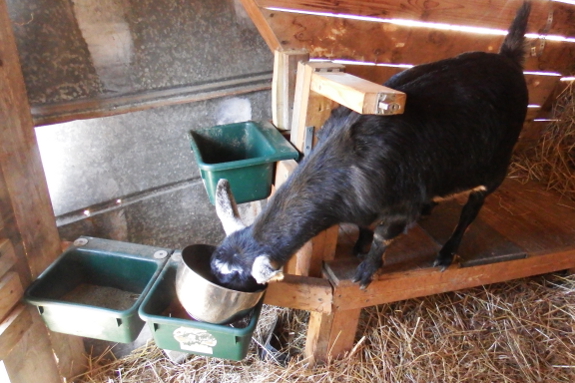
If I run out of goat to
brush and prod, I move on to giving our darling a pedicure. I'm very
glad to see that her hooves are suddenly growing a rate more
commensurate with her food intake --- a good sign that the wormer
might have licked her parasite problem. The insides of her eyelids
might also be getting a little pinker, but that's harder to tell since
my camera tends to misread colors in closeups of Artie's dark face.
As you can tell, though,
I'm not entirely teaching our first freshener good habits. Once she's
done with the food in the stanchion, she moves on to licking out the
bowl. Oh well --- a beloved goat needs to be at least a little bit
spoiled, right?
Sometimes I go outside
with the camera to take a picture of one thing...but a closer look
points out that something else entirely is going on.
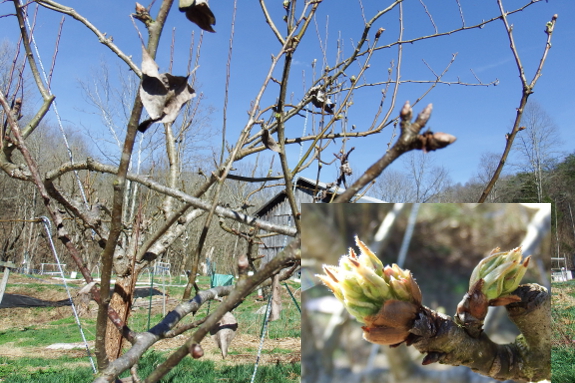
For example, I've been noticing pear buds beginning to break dormancy over the last few days. "Slow down!" I told the tree.
But when I took a second look, I realized that only the branches of the original variety on this topworked tree
were opening up. The grafted-on variety --- shown slightly out of focus
in the foreground of the main photo --- is still holding tight. Looks
like the new varieties I chose for flavor might also be better at
resisting late frosts as well.
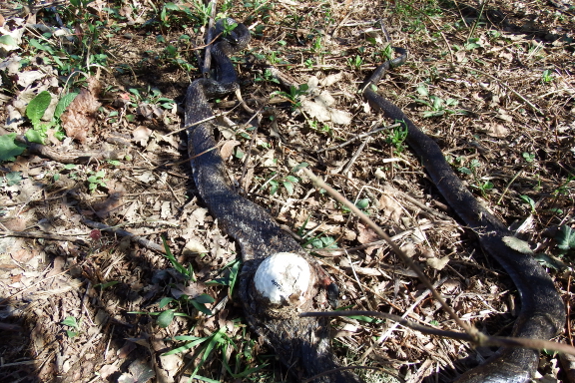
Less pleasantly, I
watched Lucy kill this black rat snake while I was pruning the
blueberries Monday. I always beg her not to attack rodent-eating
reptiles, but our usually well-behaved dog goes tunnel-vision when she
smells a split tongue.
It turns out that just
this once, the snake she was after was actually a villain. No, not
poisonous --- a nest-egg robber! We keep golf balls in our chicken nest boxes to give dim-witted birds the impetus to lay in an easy-to-gather spot. The snake must have swallowed one of these fake eggs, then learned the hard way that plastic doesn't digest the way shells and yolk do.
I still would rather Lucy
didn't lay down the ultimate punishment. But I felt a little less
guilty when that big white ball popped out of the snake's belly.
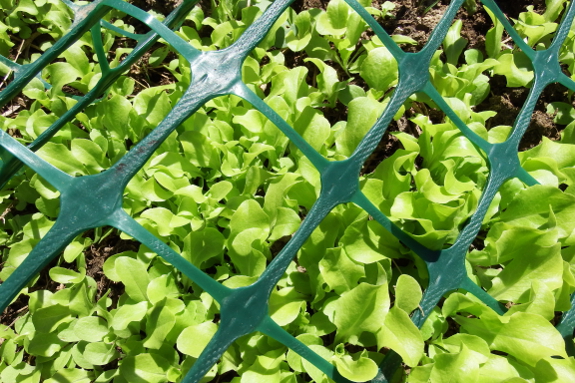
I'm a big fan of this green plastic trellis material.
I use it every year with a few U-posts for supporting peas --- easy to erect and easy to dismantle.
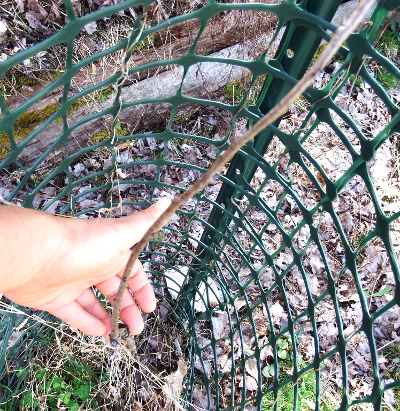 I've used it in the past for temporary pastures for young chickens (although in recent years they've been a bit too flighty to contain that way).
I use it in the winter to protect strawberry plants at their most vulnerable from irregular but devastating deer attacks.
I use it in the spring to save seedlings when freshly planted ground looks extremely attractive to our naughty cats.
And I use it around young
trees in chicken pastures. The trellis material isn't strong enough to
keep out goats or deer, but chickens will leave anything within it
alone.
I'd give you an Amazon
link, but I can't seem to find the product online and figure shipping
would be prohibitive anyway. But if you're in Lowes, why not pick up a
roll? Even using my neglectful methods of piling the trellis pieces on
the ground beside the barn when I'm not using them, I've seen no decline
in quality of our stash over the last eight years.
We recently upgraded to a heavy
duty tripod by
Fancierstudio.
It's very well built and
comes with an extra camera plate and a nice carrying bag.
Wanna hang out with the cool kids? A writer friend and I joined up to create a super secret facebook hangout for other homesteaders (and homesteaders-to-be).
This is a spot where you
can chat with each other rather than listening to me ramble on
indefinitely about Artemesia and organic matter. There've been some
inspiring photos and great posts by our initial members and I look
forward to seeing what you have to say.
Want to join in? Just
follow the link above and click the "Join" button. Either Jill or I will
let you in as soon as we notice your request. Looking forward to seeing
you over there.
It was a year ago this week
when we made our
first cold frame.
Today it's brimming with
fresh greens.
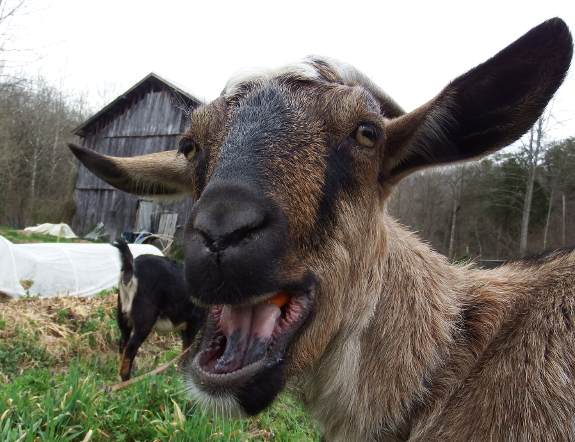
Do you need an
inexpensive starter goat for a pastured dairy herd? Abigail's going to
be available as soon as Artemesia's kids are born in a month. Perhaps
you'd like to take her home with you?
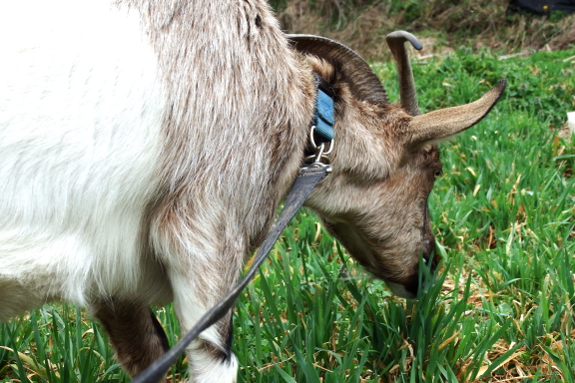
Here are some stats:
- She's an unregistered Saanan x Nigerian cross.
- She's in her milking peak (3 years old).
- She can be bred in spring or fall (and is actually in heat today).
- Milk production is uncertain --- I was learning while milking her last year and know I lowered production a lot. You can see her lactation curve here.
- Milk flavor is very good. I haven't had anyone tell me it tasted
goaty, although my brother thought it was almost too rich to drink
straight.
- She's never been wormed and seems to have both parasite-resistant behavior and genes. (She won't touch any food on the ground, for example.)
- She's never been fed grain (well, except for a head of sorghum once in a blue moon for a treat) and keeps her weight on well with alfalfa pellets, roots, and hay.
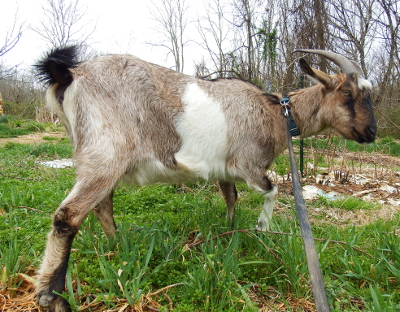 She's
moderately well trained. She'll jump up on a milking stanchion on
command and only grumbles a bit when you trim her hooves or milk her.
She'll walk on a leash (although she pulls a bit if she gets excited)
and comes when she's called (as long as there's not something tasty
within reach). She follows off leash as long as you're not close to the
garden. She handles being tethered well, knows not to get her horns
stuck in cattle panels, and understands electrified poultry netting. In
her previous life, she was herded with dogs. (Okay, this sounds like
she's really well trained. But
you haven't met Artemesia --- when our other goat gets ready to chomp
down on a raspberry leaf, I just say her name in a moderately stern tone
of voice and Artemesia generally obeys me and moves over. My standards
are abnormally high.)
She's
moderately well trained. She'll jump up on a milking stanchion on
command and only grumbles a bit when you trim her hooves or milk her.
She'll walk on a leash (although she pulls a bit if she gets excited)
and comes when she's called (as long as there's not something tasty
within reach). She follows off leash as long as you're not close to the
garden. She handles being tethered well, knows not to get her horns
stuck in cattle panels, and understands electrified poultry netting. In
her previous life, she was herded with dogs. (Okay, this sounds like
she's really well trained. But
you haven't met Artemesia --- when our other goat gets ready to chomp
down on a raspberry leaf, I just say her name in a moderately stern tone
of voice and Artemesia generally obeys me and moves over. My standards
are abnormally high.)- We paid $125 for Abigail and aren't looking to make a profit.
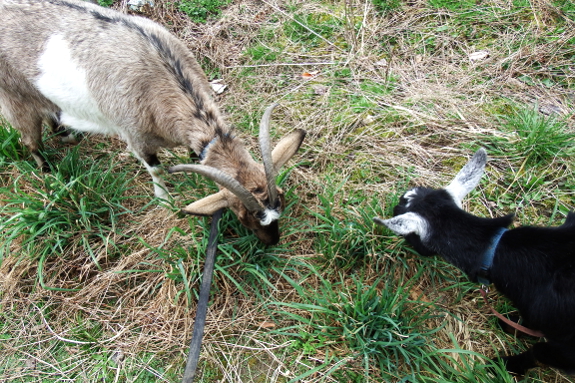
And some stats you might find less enticing:
 Both
of the times she was bred, Abigail produced a single kid. (This isn't
necessarily a bad thing, especially if you want to maximize
milk-for-people.)
Both
of the times she was bred, Abigail produced a single kid. (This isn't
necessarily a bad thing, especially if you want to maximize
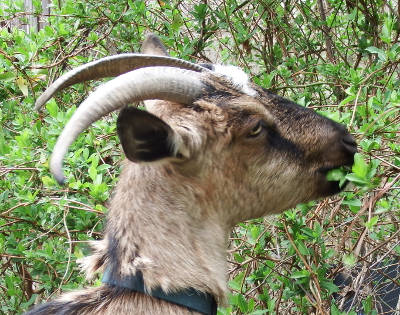
milk-for-people.)- She has horns and uses them on other goats (although never on
humans). This would actually be a plus if you kept Abigail in a large
pasture that could see predator pressure. (She's very alert at fending
off potential dangers.) But this is a minus if you want to keep her in a
very small herd (like ours) with a hornless goat of a submissive
variety. Basically, she can be a bully to smaller, weaker animals. (Yes,
this is why we're moving her on.)
Still interested? Then drop me an email at anna@kitenet.net.
I want to line up up someone who's willing to take her as soon as
Artemesia's kids are born, so that means you'd need to have your
infrastructure in place and at least one companion goat for Abigail.
(No, she can't live without goat companionship...and you wouldn't want
her to since she'd cry like crazy!)
So, what do you think? Ready for some pastured dairy of your very own?
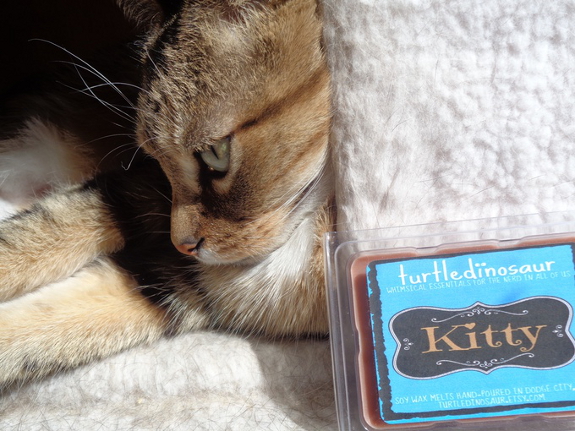
Do you like scented candles and wax melts? Author Lindsey R. Loucks has
joined her love of story-telling with creative, eco-friendly candles,
wax melts, lip balms, and other products with her company
“turtledinosaur.” Her candles and wax melts are made with renewable,
American grown soy, and include such whimsical names as Make Friends
With Vampires, My Mermaid Tail Is Better Than Yours, and Book Boyfriend.
Each candle and wax melt comes with a short story to explain the name.
When asked what tips she'd give to other aspiring candlemakers, Lindsey answered:
"For example, Book Boyfriend is a mix of oud wood, leather, musk, and a scent called Fierce. It took a while to get the proportions right, but once I did, BAM! Book Boyfriend was created! I knew ahead of time kind of how I wanted it to smell, and I got it!"
One lucky reader is going
to get it too! Comment below with your favorite candle scent and you'll
be put in a drawing for a free sample of Make Friends With Vampires wax
melts.
Don't want to wait for luck to smile on you? Then check out Lindsey's Etsy shop and Kickstarter campaign today. Because who wouldn't want their house to smell like a mermaid's tail?
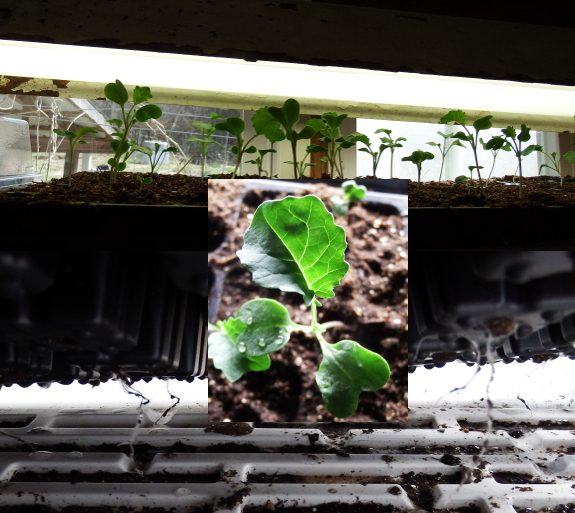
I'm still in the learning stages with my new high-tech, indoor seed-starting setup.
But so far, I've been very pleased with my results. In fact, seedlings
that usually wouldn't be ready to set out for another two weeks are
begging to be transplanted. Here's hoping that after this current cold
snap, I'll feel comfortable putting cabbages, broccoli, and onions in
the ground.
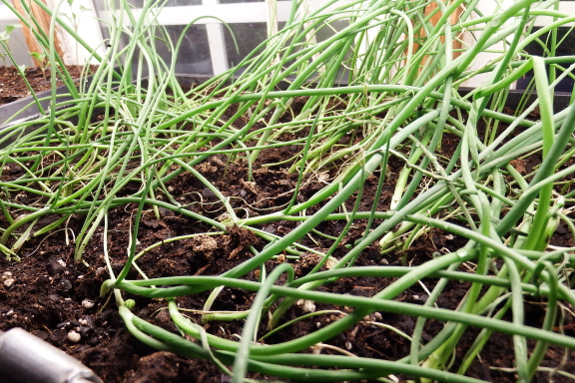
Speaking of onions, I'm
beginning to see why this has always been my hardest crop. While other
seedlings have been doing a little better in the store-bought potting soil than in the stump dirt,
the difference in growth among the onions is like night and day. I'm
guessing onions are particularly sensitive to salts and I'd been putting
majorly subpar specimens in the ground in years past.
Of course, there are still growing pains. I set the fan
too close to the seedlings at first and nipped back some of those onion
seedlings. Now I've settled on 18 inches away as a good distance to
keep air circulating and harden off the baby plants a bit without
desiccating tender leaves. Live and learn!
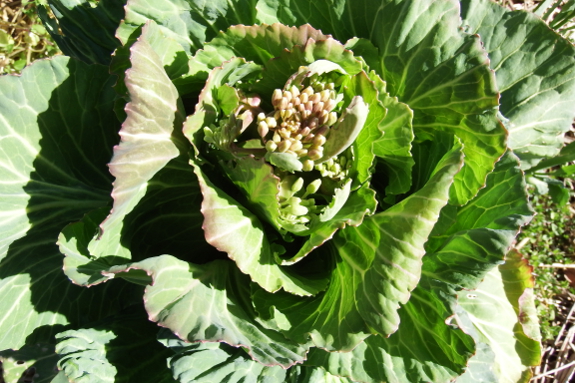
Sure enough, our overwintering cabbage is sending out flower buds.
Since we only have one cabbage and it's a hybrid, we'll enjoy the shoots as cabbage raab.
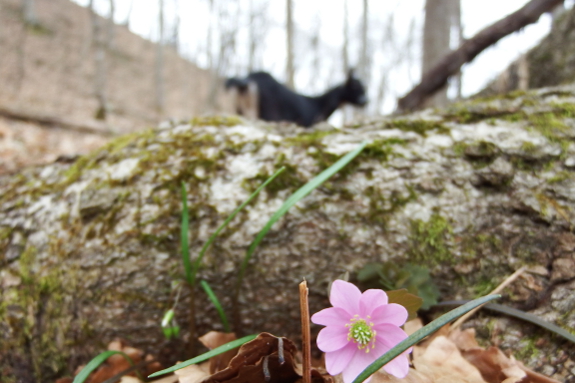
As usual with goats and worms, the result of my second fecal analysis on Artemesia was a case of good news/bad news.
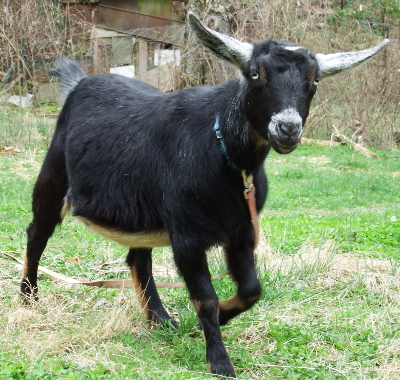 The
good news is that the worms that were really overloading her --- thread
worms --- had a 100% kill rate from Safe-guard. I still feel the kid(s)
kicking in her belly on a regular basis too, so hopefully the
supposedly safe dewormer really did have no negative effects on her
pregnancy.
The bad news is that the
other species present (possibly twisted stomach worm) wasn't killed at
all, meaning that it's resistant to this common dewormer. In fact, that
species' numbers might have risen slightly after the dewormer reduced
competition for Artemesia's gut space. At 21 eggs in one slide from four
pellets during round two, the other worm's populations are right on the
edge of dangerous...but I'll take a wait-and-see approach there and
test again in a week.
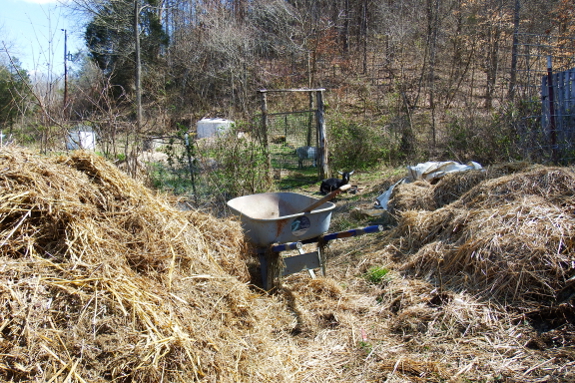
With 20/20 hindsight, here's what I've learned from my first foray into chemical dewormers:
- Identify your worm eggs to species every time you do a fecal exam and then do your counts by species. I wish I had real data (not just a gut feeling) on whether or not the second worm species increased in numbers post deworming.
- Would a probiotic supplement after deworming have prevented the rise of worm species two? I don't know, but it's worth a try.
- Clean out the barn before deworming. I don't want to use the
manure that fell post-deworming in the vegetable garden in the near
future, so I gave our most recent barn cleaning its own composting zone.
The trouble is, I hadn't cleaned out the barn for in a few weeks
beforehand, so I "lost" more organic matter than I would have liked in
the process.
Live and learn!
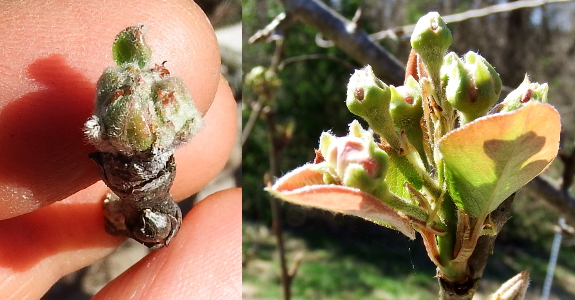
Although hard freezes
once the garden year starts are always a little dicey, I'm actually glad
a cool spell came along to slow spring down. 21 degrees now while apples vary from silver tip to green tip and pears from green tip to tight cluster
means a small thinning effect on our hypothetical fruit crop. 21
degrees when flowers are fully open would mean yet another year with no
fruit.
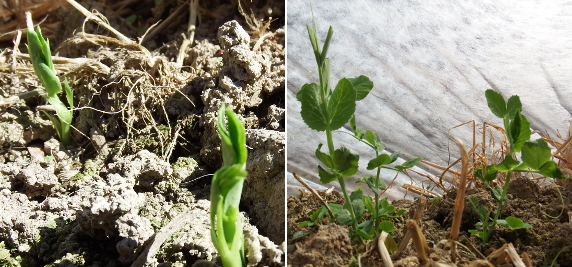
The vegetable garden is
similarly unfazed by the return of winter. Baby peas from my second
planting are just barely poking out of the ground, and I actually didn't
even cover them before the predicted cold spell. I was counting on the
fact that the young plants were very close to the earth, which had been
warmed well by weeks of summery sun. Sure enough, both the uncovered
baby peas and the larger transplanted peas under cover came through the
cold snap with flying colors.
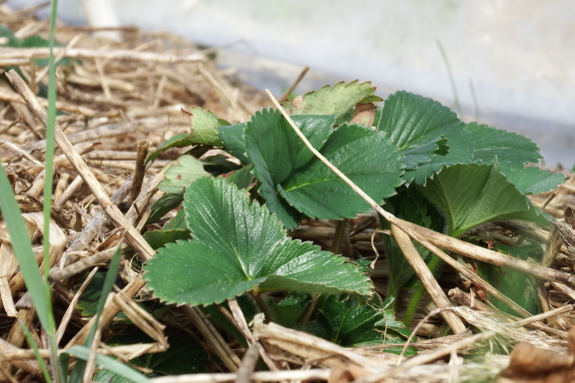
In one part of the
garden, though, I'm speeding things up rather than letting the cold slow
things down. About a month ago, I erected quick hoops atop one row of
strawberries. And, at long last, new growth is finally starting to pop
up underneath. In contrast, uncovered plants nearby are still largely
dormant.
Of course, I could do a
lot more if I wanted ultra-early strawberries. A farm down the road
keeps their plants under row-cover fabric all winter and uses black
plastic mulch to keep down weeds and heat the soil around their roots.
As a result, their fields are already blooming...and in great danger
from hard freezes like this. A combination of sprinklers and row cover
fabric will probably keep their crop safe. Still, I prefer to walk the
middle road and speed my strawberries up a bit...but not too much.
We started up our creek irrigation system today to give our Spring garden a boost.
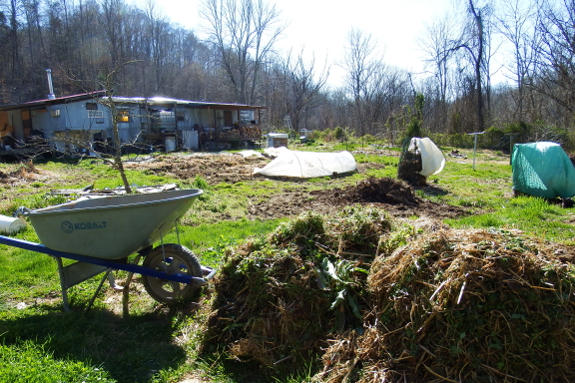
Last year's pile of garden-weeds-and-kitchen-scraps compost
is pretty much empty. You can see what remains of it in front of one of
the covered fig trees in this photo. Basically, a few okra stalks and
squash vines weren't entirely composted, but everything else has been
spread on the garden to feed spring carrots and summer tomatoes.
The next round of garden fertilization will come from goat-barn leavings,
but I'm already building the third installment in the series. The pile
in the foreground of the photo comes from beds cleared to make way for
broccoli and cabbage...and maybe the resulting humus will feed more
broccoli and cabbage in the fall?
Circles and cycles.
Closing the fertility loop is a bit like saving seeds. You have to think
months ahead, but once you get your plans down pat there's not much
extra effort involved.
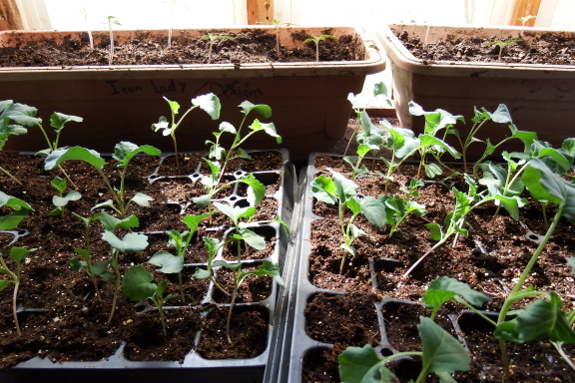
Three weeks ago, these broccoli and cabbage were my babies. I loved them and cooed over them and urged them to grow.
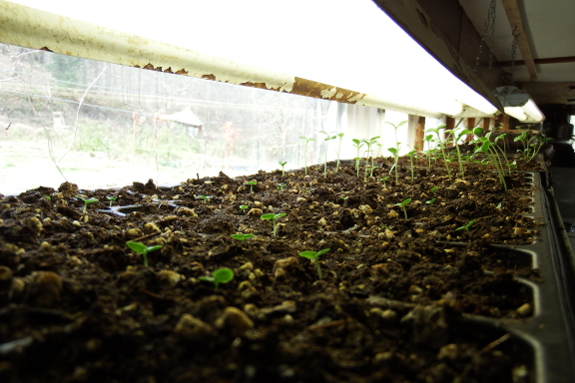
Now they've been
supplanted in my heart (and under the grow lights) by tomato, pepper,
zinnia, and basil seedlings. So, despite several likely freezes in the
forecast, the crucifers have been moved to the garden to sink or swim.
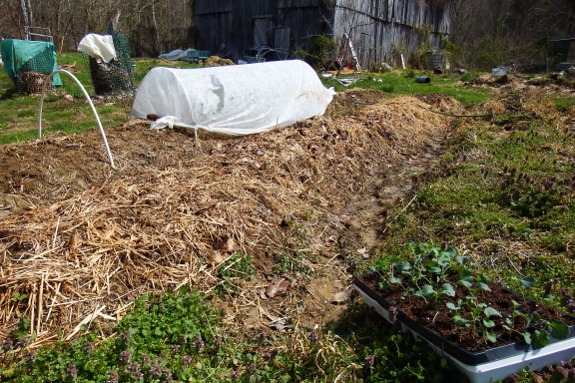
To give them the best chance of survival, I saturated the ground
beforehand with three hours of sprinkler action. Then, after setting
the babies out and watering them in again, I covered each bed up with
row-cover fabric. Crucifers like these can handle lows in the high
20s...but not while they're getting their feet under them. Plus, we've
had a strange bout of wind for the last two weeks and the sun is pretty
intense at the moment too. All of that adds up to the need for a bit of
additional protection.
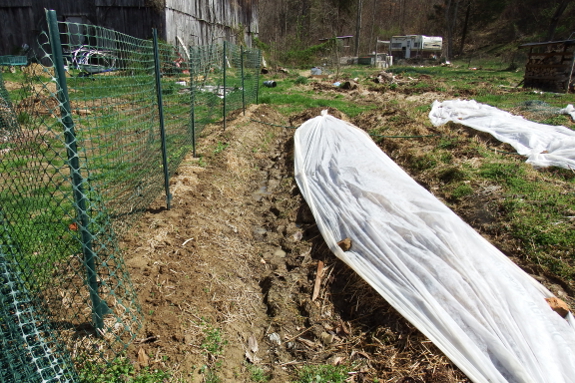
Will they survive? I hope
so. If not, I've got about a third as many extra seedlings waiting in
the wings. Hopefully Mom and/or Kayla will take those babies off my
hands next week if this set of transplants survives. (Hear that, ladies?
You've been warned --- get the garden space ready!)
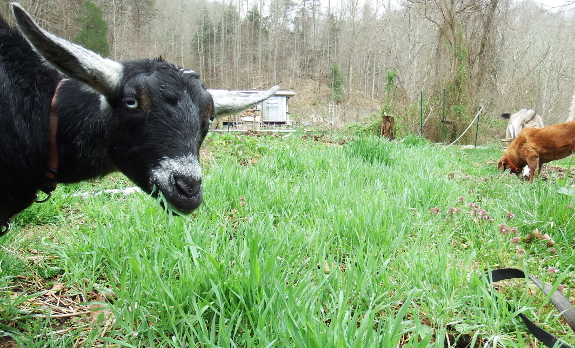
Artemesia seems to spend more time lounging now that she has a bun in the oven.
Artemesia still has four weeks to go. But as you probably noticed in Mark's post yesterday,
she looks very, very pregnant. I'm pretty sure she's got at least twins
in there because I felt kicking at the same time this week in belly
areas about eight inches apart. But I have a sinking suspicion she might
be carrying triplets.
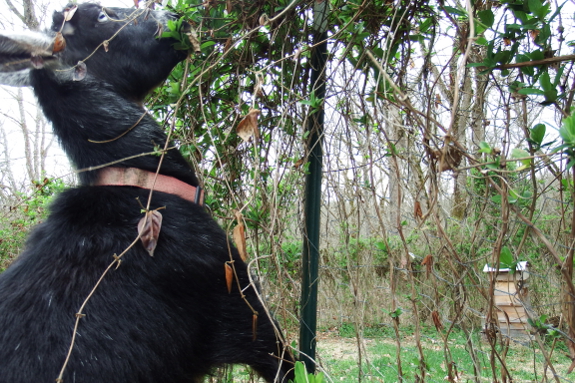
Between the worm scare
and her growing kids, Artie needs a lot of high-quality nutrition. The
trouble is, there literally isn't room in her belly any more for her to
eat much at any one time. So I have her on a three times a day feeding
schedule. Concentrates in the morning, as much fresh greenery as we can
muster this early in the season at lunchtime, then concentrates in the
evening. On hotter days, she doesn't really want to eat at noon, though,
so I have to move everything a little later.
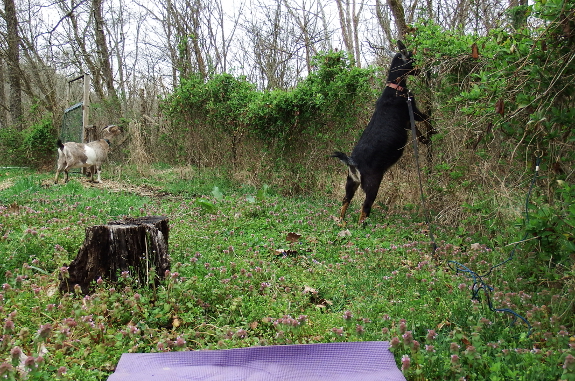
(Yes, I do obsess over our dear little goat. How could you tell?)
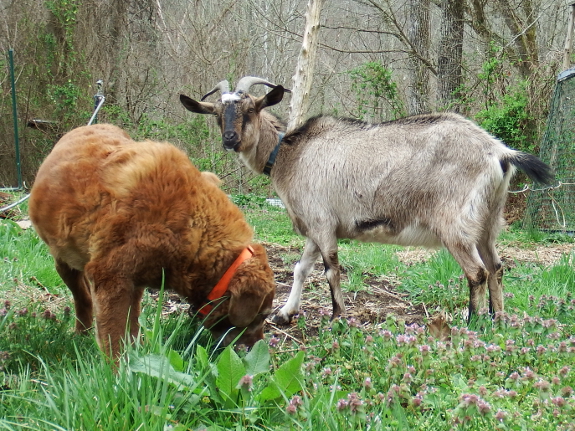
In other news, no one nibbled at my goat-sale post,
so it looks like Abigail will be going to the butcher in about a month.
From a purely financial perspective, I think that's actually the better
choice since Abigail will provide quite a lot of high-quality pastured
stew meat. Whether I cry when we drop her off remains to be seen.
We've been having the same
debate for a few years now.
Fix the old chicken tractor
or build a new, more modern tractor.
Now that I've got the nest
box fixed it might last another year.
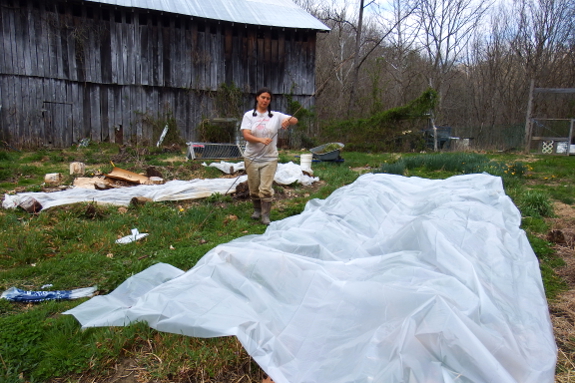
Is it too early in the year to get the high temperatures necessary for solarization? Will these translucent drop cloths work as well as last year's transparent ones?
Only time will tell. But
it's fun to at least imagine I'm preparing large areas of summer garden
space by shaking out a sheet of plastic and weighing down the edges with
rebar.
We had a perfect hike yesterday along the 300 million year old sandstone cliffs of The Guest River Gorge.
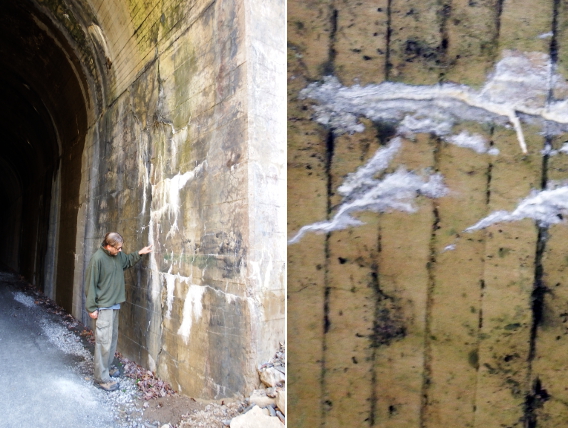
Have you ever been on a cave tour
and been told not to break off the stalactites because they grow an
inch every two hundred years? Then you wonder how exactly scientists
came up with that figure?
At the Guest River Gorge
this weekend, we were treated to a view of baby stalactites in action.
These guys clearly grew faster than average since the little stalactites
on the ceiling were already a few inches long and the "cave" in
question was a train tunnel built in 1922.
Mark figured that at the
rate calcite-laden wader was pushing through the cracks in the vaulted
ceiling, the whole thing would start collapsing in about 150 years. I
guess we're going to have to keep eating lots of kale if we want to be
around to test that hypothesis.
We had a problem with our
newspaper layer of mulch last week.
It all blew away with some
heavy Spring winds.
The new plan is to wet it
first to make it conform to the ground more.
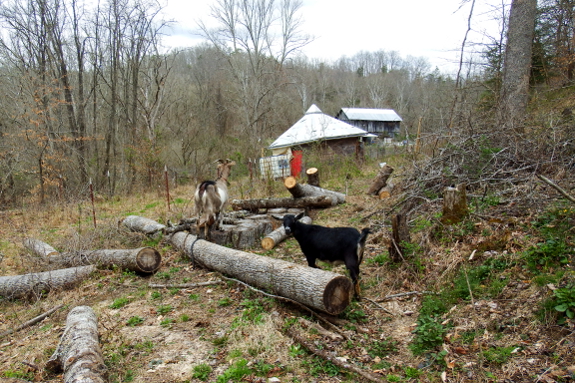
We cut at least twice as
many tulip-trees last summer as we needed for 2015-2016 firewood. The
trees are so tall that it just made sense to fell all the ones we wanted down while we had the pasture fences out of the way.
Now we're getting ready
to put those fences back up so Artemesia will have a completely
worm-free pasture for the weeks immediately following kidding. That
means cutting those huge logs into manageable sections and hauling them
up the hill to the logging road turned log landing. Once there, we can
take our time turning the trunks into firewood and hauling the wood home
since we learned last year that five months of seasoning is sufficient for this relatively soft wood.
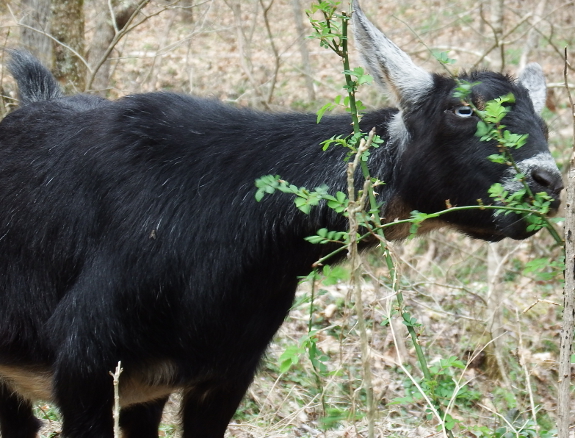
I took advantage of the
canopy-free zone last fall to seed a much larger area than we can
currently afford to fence with orchardgrass and clover. Maybe by the
time I come up with another round of fencing money, the goat-friendly
forage will be tall and luxurious?
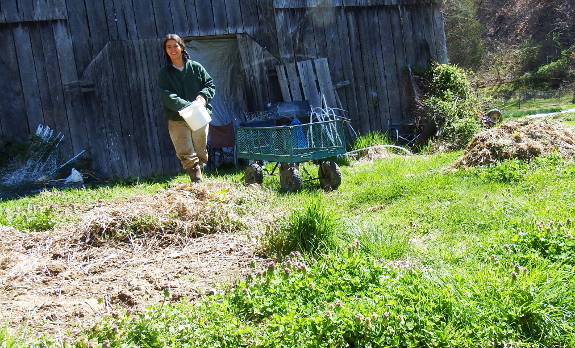
Over the winter, I
took topsoil from the beds close to the barn and the woods on either
end of the mule garden and created a new bed in a sunnier spot. That
left me with several patches of bare subsoil which are kinda-sorta an
erosion risk. Not really since they're surrounded by solid sod...but the
bare patches still offended my ecologist's eye. So I decided to seed
them in goat-fodder crops so Artemesia and kid(s) can graze in the shade
while I weed the mule garden. Sounds like paradise in the making,
right?
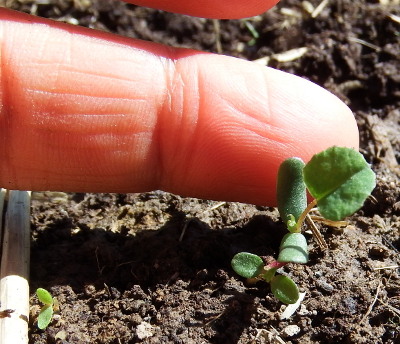 I
started by sprinkling some leftover clover seeds that I'd bought for
the pasture last fall into the bare patches. I could have put in grass
seeds along with the clover, but I didn't want to wait so long for grass
to get established. So instead, I waited until the first true leaves
came out of the clover seedlings, then I added oats to the mix. (I make
this sound intentional --- actually, it took us that long to get to the
feed store and pick up the grain.)
Will the fast-growing
oats overpower the slow-growing clover and make the legume seeding
worthless? Will spring oats suit our goats' palates as well as fall oats
do? You'll have to come back this summer to check out the answer to
this nail-biting, homesteading cliffhanger.
Stretching some top wire to make a height extension for a chicken pasture fence.
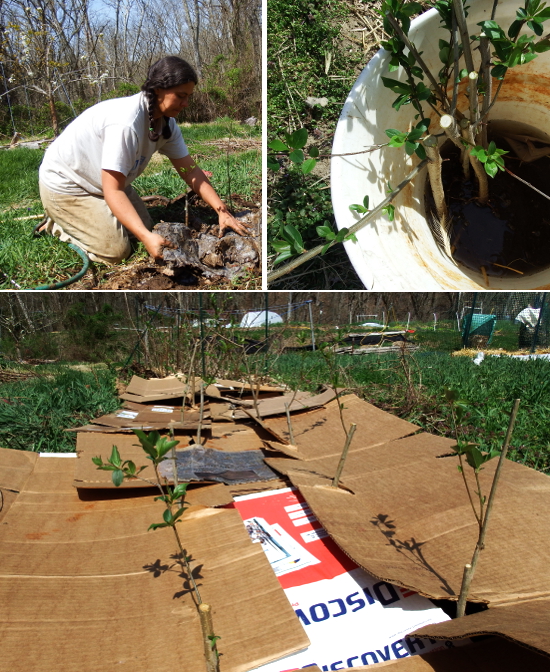
My apple-rootstock stool only produced six rooted shoots for use this spring, but my plum stool
is a major overachiever, cranking out nine husky suckers plus four
smaller shoots that I left behind for later. I set the former out in my
nursery bed just outside the back door where I can keep a close eye on
them.
(After taking the photo above, I added some straw on top of the kill
mulch, and I soaked the ground underneath first...just in case you were
worried.)
My goal is to really learn bud grafting
this year since dormant-grafted plums only had a 25% success rate last
year. Hopefully with nine rootstocks to work with, at least a few will
show success.
Want more in-depth information? Browse through our books.
Or explore more posts by date or by subject.
About us: Anna Hess and Mark Hamilton spent over a decade living self-sufficiently in the mountains of Virginia before moving north to start over from scratch in the foothills of Ohio. They've experimented with permaculture, no-till gardening, trailersteading, home-based microbusinesses and much more, writing about their adventures in both blogs and books.
