
archives for 01/2016
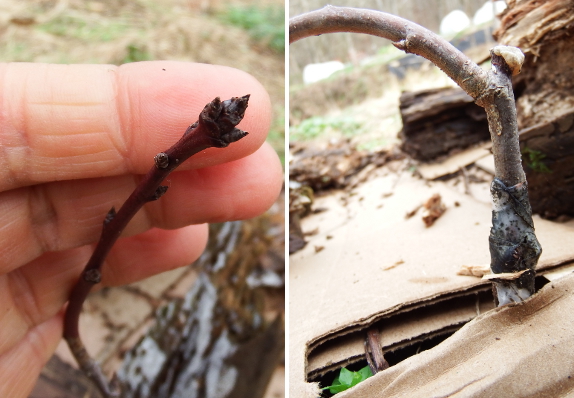
Grafting is an easy
choice if you're trying to propagate a fruit-tree variety that's not
available for sale, either because it's too rare or because you bred the
variety yourself. On the other hand, if you're just trying to save money with grafting, then your success rate will determine whether or not you should pull out the knife.
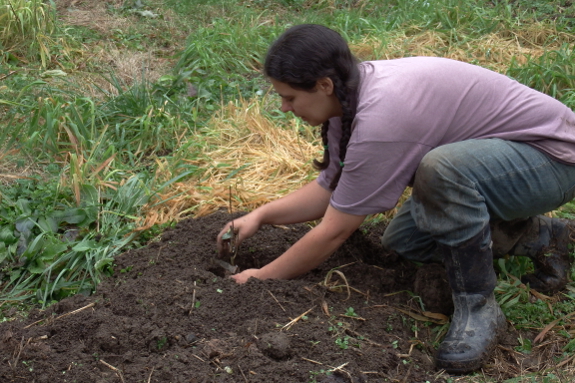 With apples,
grafting is generally a no-brainer for me. Even when I set out my new
graftees in too shady of spot this past spring, I still saw a 90%
success rate, meaning I would've ended up paying only about $3.33 per
tree even if I hadn't gotten the rootstocks ultra cheap as part of a grafting workshop. Usually, my apple grafts take closer to 100% of the time.
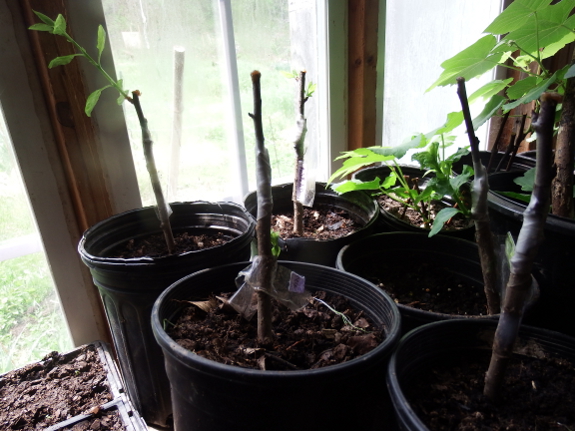
My pear success rate was
considerably lower (40%) this year, mostly because I put a third of the
baby trees too close to a rhubarb plant that promptly shaded them out
and then forgot to weed the rest for half the summer. Even so, the resulting trees cost only $7.50 apiece, which isn't bad for an heirloom variety.
 I did considerably worse with my plums, though. I dormant-season grafted instead of using the recommended summer bud grafting on these stone fruit because I was trying to save two plum trees that were splintered by heavy snow falling off the barn roof last winter.
The good news is --- the tree that entirely perished will remain on our
farm after all since its grafted scionwood survived and thrived. The
bad news is --- with a success rate of only one tree out of five, I
probably would have been better off just buying a replacement tree.
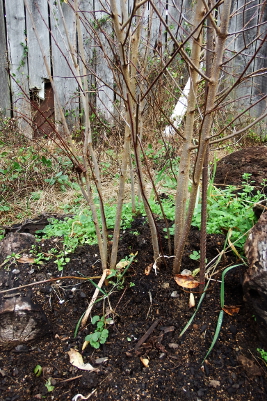 That
said, I love having useful skills, so I plan to persevere and try to
get better at grafting stone fruits. And the second damaged plum tree
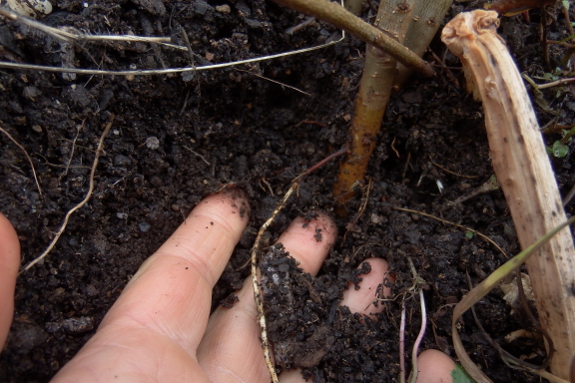
told me she'd be glad to help fund the endeavor. While the top of the
tree completely broke off after its snow deluge, the roots sent up
copious new growth, which I then stooled
over the course of the summer. And, sure enough, the buried portion of
the new growth promptly grew roots, turning each sprout into a potential
new rootstock for future trees.
Good thing too since the
surviving plum tree wiggles when I push it with my hand --- not a good
sign for its long-term prospects. I plan to try a few different grafting
techniques this year with my copious plum rootstock and will hope I
work the kinks out of the procedure in the process. No matter how I cut
it, though, I might as well try. After all, any trees that result from
this experiment will be 100% free.
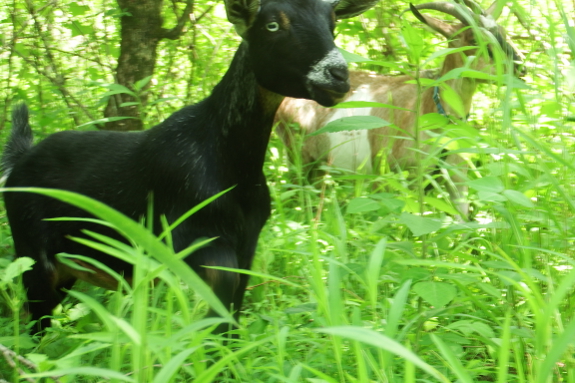
I finally sat down with our blog archive
on New Year's Day to reflect upon the twelve months past. I was shocked
at how much we'd accomplished when my memory of the year mostly
consists of lounging in the summer woods with the goats, weeding with
Kayla, and making huge pots of soup to freeze for winter. The blog
doesn't lie, though. So, without further ado, here's the best of 2015 in
case you missed it the first time around.
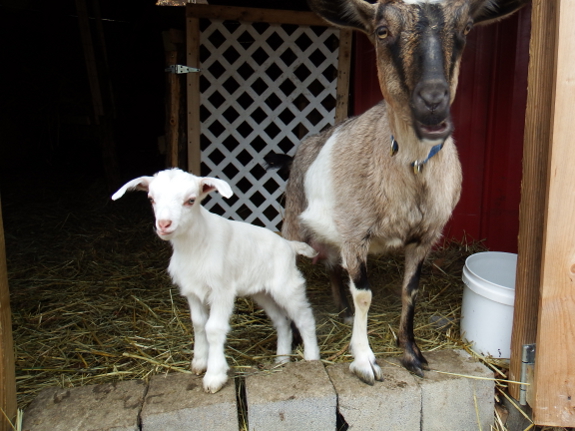
 Goats top the list again for the second year running. In 2015, Abigail gave birth to our farm's first four-footed baby, Lamb Chop. We played with him and loved him...then ate him.
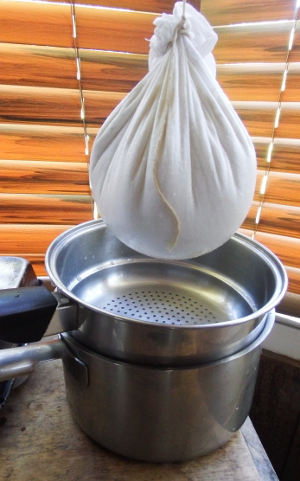
As a result of our first kidding, I also learned to milk and to make cheese --- chevre, ricotta, and mozzarella. The process was surprisingly easy (especially since I didn't try any aged cheeses).
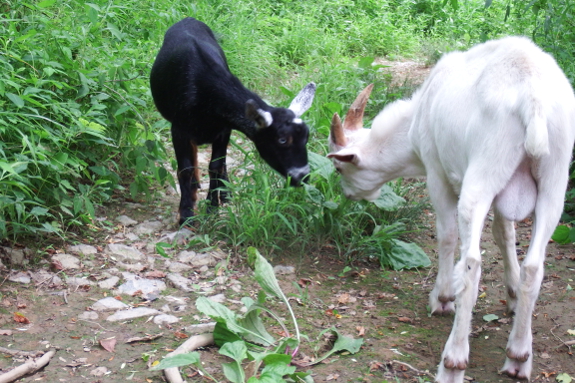
Despite all of that
education and homegrown deliciousness, though, the most wonderful part
of the goat year was simply remembering how to relax outside at the end
of a long summer day without worrying about any of the items on my to-do
list. It was truly a joyful season!
Meanwhile, we plugged some new shiitake logs
and (more importantly) created a better home for the fungi to live in.
That project included an IBC-tank rain barrel, which not only provided
water to the logs but also helped dry up an extremely soggy spot. And,
speaking of mushrooms, we added a new wildcrafted fungal species to our
repertoire as well --- chicken of the woods. Yum!
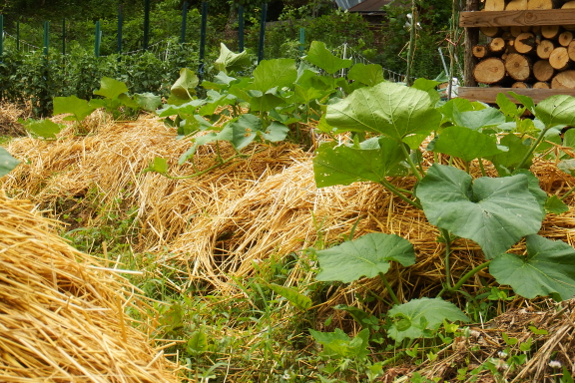
In the garden, Kayla and I redug the a very soggy area to create a series of very high raised beds,
bringing the root zone up out of the groundwater. The results were so
much better than I could have predicted! Years of soil-building that
largely went to waste due to waterlogging paid off with huge cabbages,
massive numbers of butternut squash, and a pretty good crop of tomatoes
(despite our usual blights). An inspiring success that I wrote about in
the book I spent much of the year researching and writing --- The Ultimate Guide to Soil.
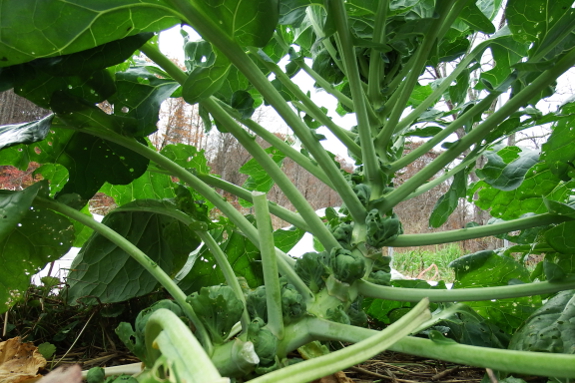
There are always positive
and negative sides of the harvest, but this year was a
particularly fine one for brussels sprouts, hazelnuts, and the crops
mentioned in the previous paragraph. That makes for a great 2015 since
brussels sprouts are Mark's favorite vegetables and I'm a nut I love nuts!
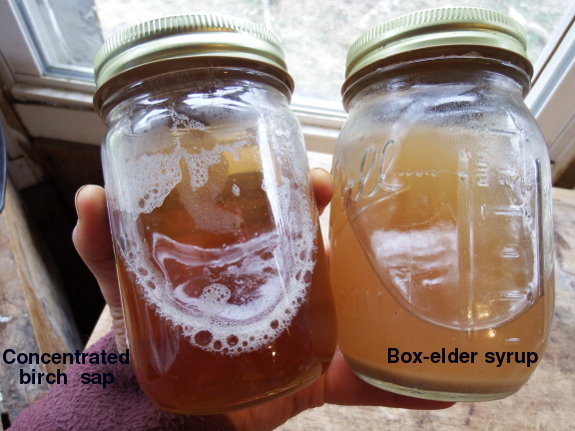
It was also a pretty sweet year because we spent the late winter tapping box-elders, sugar maples, and black birches.
In the process, we decided that the last species (although the most
painstaking to boil down) provides by far the best product.
The garden was mostly on
an even keel in our ninth season of growing most or all of our own
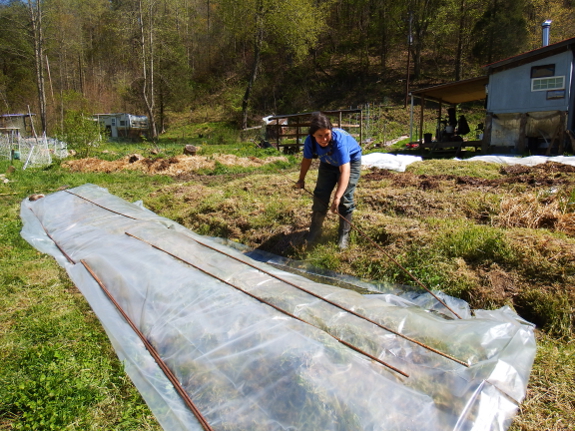
vegetables, so there's not much to say there. But I did try out solarization and fell in love with this no-till weed-control technique. I can tell solarization will be a major time saver in the future.
When I let him loose from helping me keep the outdoors in line, Mark significantly improved our kitchen. He added a range hood (for safety and utility), better shelving, an oscillating fan on the ceiling, and a magnetic door latch. This winter, he plans to hit the opposite side of the room and continue bringing us closer to modern living here on the trailerstead.
Mark would also be the first to tell you that one of the year's highlights came almost twelve moths ago today when our movie-star neighbor helped us pull out the truck that had been stuck in our driveway for about half of the previous year. Such a huge relief!
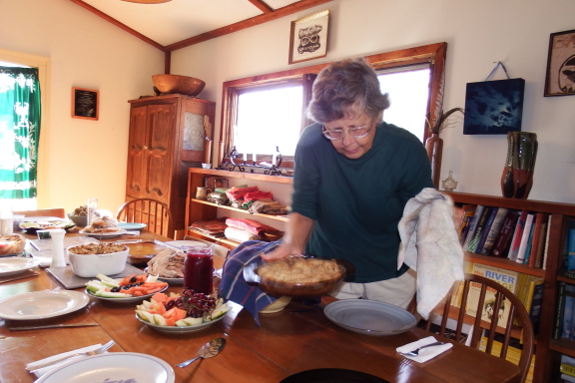
I'll end by saying that (by my standards) this was also a very social year. Mom and I took a ride behind a steam locomotive and Mark and I hosted a big Thanksgiving celebration for the whole family. Mark took a film class that inspired and rejuvenated him
and the two of us explored several fascinating local attractions with
or without friends. Finally, the year's firewood harvest turned into a
fun treat when we hired Kayla and Andy to join us in the task and Kayla and I enjoyed a grafting workshop, multiple dance workshops, and lots of wonderful days together on the farm.
I hope your 2015 was equally joyful and that 2016 is even better for all of us. Have a wonderful homesteading year!
To the untrained eye Huckleberry
seems like a cat focused on napping.
Today I caught him in work
mode removing a vole from the garden.
Lucy does the same thing but
ends up destroying vegetables in the process.
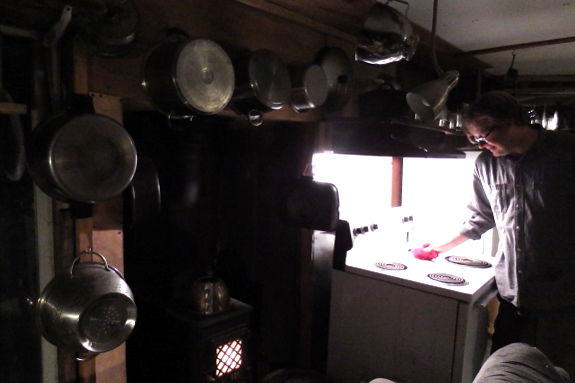
I mentioned in yesterday's post
that Mark put a lot of work into the south half of the kitchen last
year. I very seldom post interior shots because housekeeping and I don't
get along, but I thought you might like a rare glimpse into our home
life. The photo certainly isn't going to grace the cover of a design
magazine any time soon, but Mark's hanging pots always make me
smile...and they're also very easy to keep track of and to use.
Want other tips on living
large in a small space (and creating a house out of junk for nearly
nothing)? The expanded print edition of Trailersteading
will be hitting bookstores and mailboxes within the next month! My
publisher seems to send the books to Amazon before they send them even
to me, so if you want the very first copy, you'll want to preorder now.
(Yes, I did preorder a copy for myself so I wouldn't be blindsided when
readers start talking about a book I haven't seen yet.) Thanks for
considering giving it a try!
We decided to get our 2016
chick order in today based on how busy the hatchery was last year and
how they run out of some breeds.
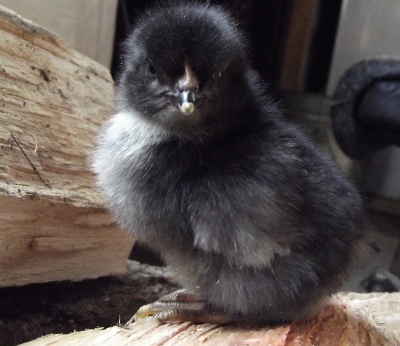
The order was for 15 black
australorp hens and 1
rooster to be delivered in late March and we pushed up our broiler
delivery date to August so they don't have to finish on weak November
pastures.
We've tried refreshing the
flock at 2 and a half years and decided 18 months is a better fit for
us.
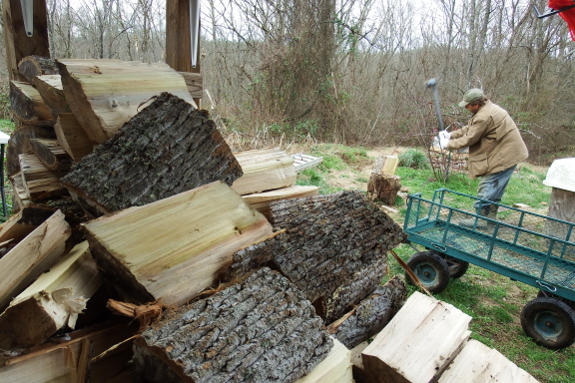
When we first started
heating with wood, we sited our chopping station as close to the
woodshed as possible. While that made intuitive sense at the time, our new location
this year is a thousand times better. We have to pull the wood further
the first time in the wagon, but after that it's just a matter of hand
delivering split firewood over short distances. Step one --- stack the
wood on the edge of the porch. Step two --- carry an armload through the
back door and five steps to the wood stove.
If
you're currently siting your chopping station, you'll want to consider a
couple of other factors as well. Unless your ground freezes solid over
the winter and stays that way for months at a time, mud around the
chopping block can turn into a major issue as you churn up the ground
cover with your busy feet. Not only is the mud messy and annoying to
work in, but your firewood also gets damp --- a no-no for optimal
burning. So try to site your block high and dry.
My final admonition ---
flying chunks of wood can also be a hazard to nearby plants, animals,
and structures. I've knocked over whole raspberry bushes with badly
placed firewood-chopping sessions. Don't repeat my mistake!
Mark's always improving
the ergonomics of our daily life like this so we work smarter rather
than harder. Of course, as our current chores get easier and easier, I
start thinking of other things to add to our work load. Better be
careful with the streamlining, Mark, or I may bring home a baby
elephant!
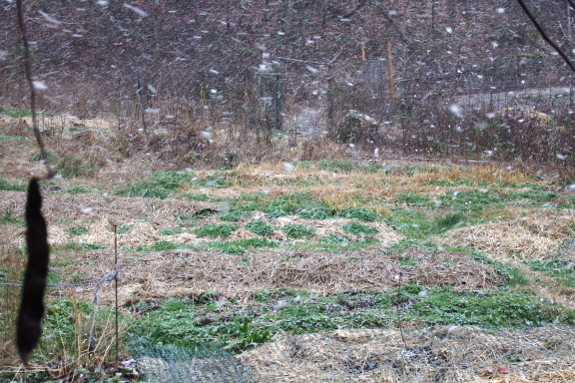
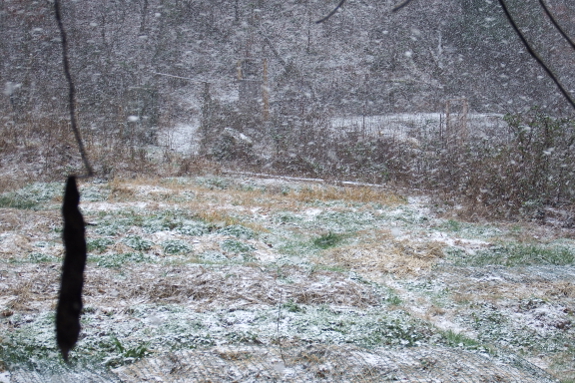
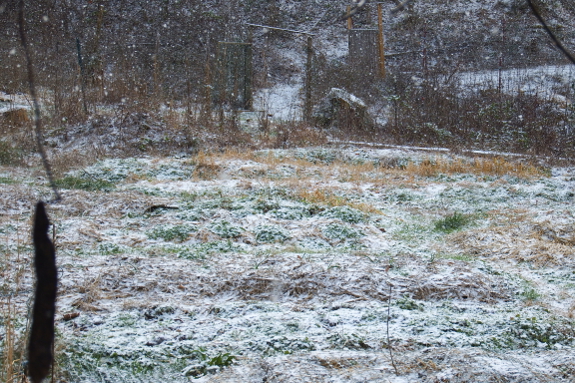
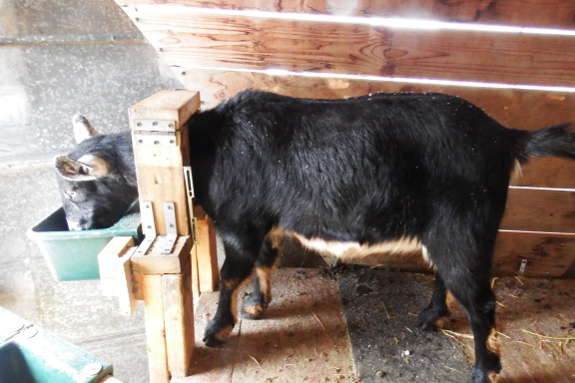
 When we first brought home our caprine herd fourteen months ago, trimming hooves
sounded like a difficult hurdle I might not be able to surpass. Books
make the procedure seem so complicated...but trimming my own fingernails
would probably sound just as scary if I read a description having never
seen the art done.
The hardest part turned
out to be training our herd to be willing to separate from each other
and then eat happily in the stanchion while I played with their legs.
With that infrastructure in place, hoof trimming became simple,
especially if I chose a damp day when their nails were soft.
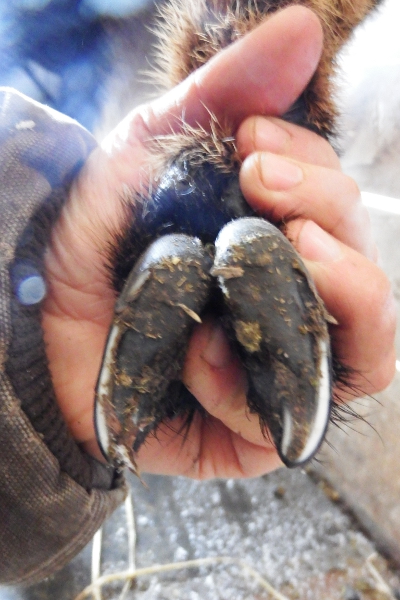
Artemesia especially is a breeze because she barely eats any
concentrates, so her hooves grow pretty slowly. Plus, she came to me at
four months of age with perfect feet, so my monthly trimming sessions
ever since have consisted of just keeping them the way they were. If I
hadn't let our first freshener put her foot down in some manure between
trimming and taking the photo to the right, in fact, you'd think her
hooves were pretty pristine.
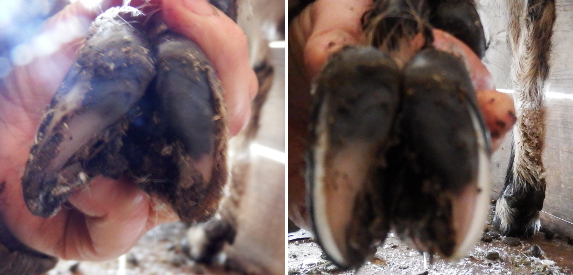
Abigail is a bit more
complicated because her feet were never perfect. As a milker, she gets
more concentrates, and that means her hooves grow faster and manure
tends to get packed up inside the excess growth. So I spend a couple of
extra seconds excavating any gunk, and I also tend to have to trim a bit
of growth off the soft pad at the heel (which seldom needs cutting on
Artemesia's feet).
Slightly more worrisome,
Abigail's hooves tend to get jaggedy, almost like a person who bites her
fingernails. There doesn't seem to be much I can do about this other
than trim the long parts and let the jaggedy parts grow back. Still, I
suspect these imperfect feet may be why Abigail won't step in even the
slightest hint of water while Artemesia doesn't seem to mind foot
dunkings.
All told, it probably
took me longer to write this post than to trim both of our girls' feet.
Hoof care is a fun activity for a snowy day, when I don't want to spend
too much time outside but do want to enjoy my daily dose of caprine
charm. And since the girls get extra alfalfa pellets at trimming time,
they also look forward to this part of their month.
This post is to let people
know that our phone is now working.
Turns out the trouble was a
nest of lady bug beetles in the junction box.
Thumbs up to our Phone
Cooperative for sending out a repair guy so fast based on an email Anna
sent out last night. We both felt bad the guy had to get his feet wet,
but we informed the office in Anna's email that a creek needed to be
crossed to access the box.
I'm excited to announce that Personality Tests For Your Soil is now live on:
When I started writing this first quarter of my upcoming soil book,
I challenged myself to stick to soil science that gardeners can see,
feel, or easily sense in their own garden. Yes, knowing each stage of
the nitrogen cycle can be interesting, as can reading about the various microscopic
components of the soil food web. But there are lots of books out already
with a factual, textbook approach to dirt. I wanted to provide just as
much information as those other books, but to help gardeners learn in the
way we feel most comfortable --- hands on.
If you try out a copy and
think I lived up to the challenge, I hope you'll take a minute to leave
a review on the retailer of your choice. Your purchase really helps
keep our homesteading experiment afloat, but your early reviews actually
help even more since they tempt readers who haven't heard of me to take
a chance on an unknown author. So thank you in advance for reading,
reviewing, and/or spreading the word!
What's coming down the pike next? The second installment --- Small-Scale No-Till Gardening Basics --- delves even deeper into the hands-on tricks we use on our own farm to turn soil black and keep veggies happy. Once again, I'm giving you a chance to nab a copy during the first week of preorder for 99 cents:
Thanks for reading and for your support!
We found a discounted cabinet a few weeks ago and decided to upgrade our kitchen design around the new modern look.
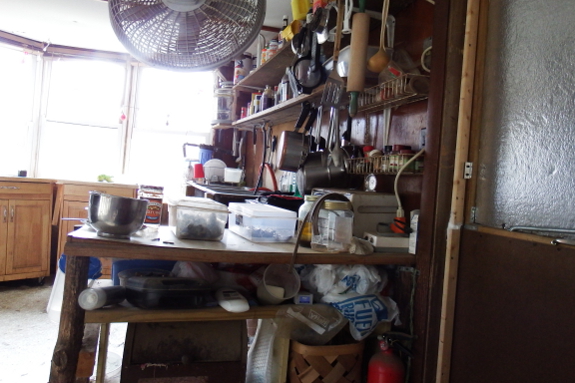
One of Mark's wish-list
projects for the winter was remodeling the part of the kitchen shown
above. This ramshackle conglomeration of warped counter, old sticks, and
bookshelf came about when I proudly decided to tackle home repair on my own
while Mark was busy elsewhere. It long ago became a part of the scenery
that I didn't even notice, but it drove my poor husband crazy. So I
gave him $60 and said, "Let's see what you can do with that!"
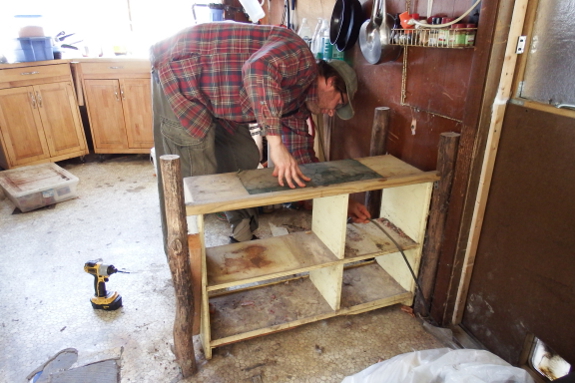
The first step was
tearing apart all of the old kitchen area. I moved supplies elsewhere,
then Mark made short work of the screws and brackets.
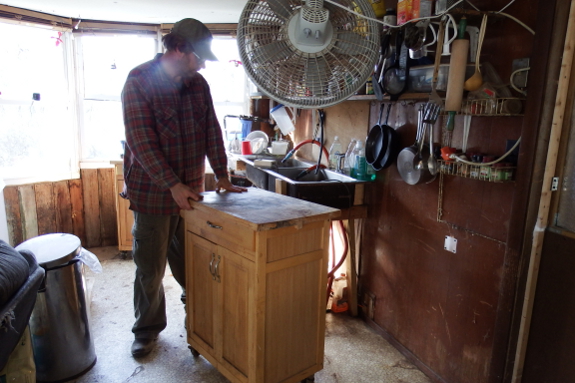
Before heading to Lowes, we measured the newly opened space, figuring we'd move one of our rolling islands in to fill part of the area. Mark took off the towel rod and hinged counter-extender, then the island fit perfectly as-is.
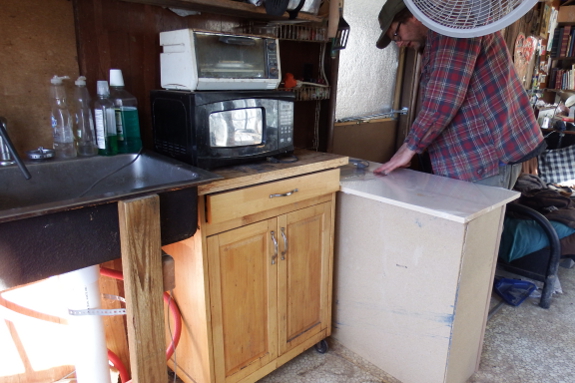
The real score was the
little cabinet Mark's looking at in the photo above. It was slightly
chipped and was thus marked down to 50% off. Take away Mark's additional
10% veteran's discount and he was able to also include the quality
counter-board he has his hand on within my proposed budget as well.
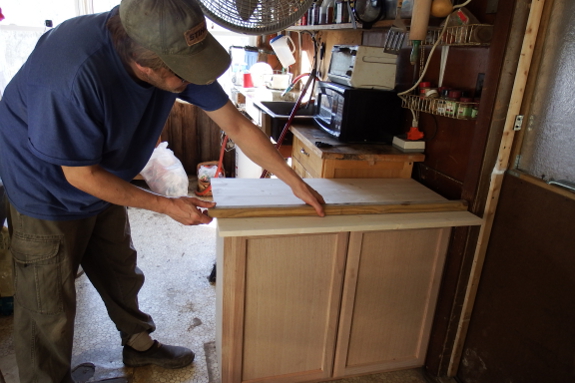
I believe the board was
$15 before Mark's discount, and it's a nice, hefty piece of wood well
worth the price. Real home remodellers would stain both the counter and
the cabinet, I know, but Mark and I are pretty simple. We don't put use
this particular counter for cooking --- more for utensil storage and
dirty dishes stacking --- so it should be fine as untreated wood. We
did, however, cut off a few inches so I wouldn't bang my hip into the
corner every time I came in the door.
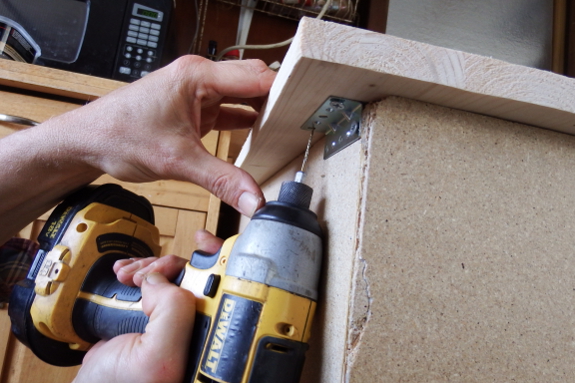
Finally, Mark attached
the board to the cabinet with a few brackets, then it was time to start
putting kitchenware and food away. All told, phase one of the project
only took us about two hours, and most of that time I was standing
around twiddling my thumbs. (By the way, you can see the cosmetic damage
to the cabinet that caused the price reduction in the photo above.)
We still need to find
spots for a spice rack and a few pots that Mark had to move out of the
way to install our new cabinets, but that's a project for another day.
In the meantime, I'll enjoy the sight of fresh, clean cabinets...until
they fade back into the scenery and I forget about them once again. I'm
hoping Mark's hedonistic adaptation goes more slowly so he gets his full sixty dollars worth.
 If
you've got some spare energy for the garden while the ground is frozen
in January, there's one obvious solution --- harvest some biomass. With
over 50 acres of woodland circling our core homestead, there's a nearly
unlimited supply of leaves
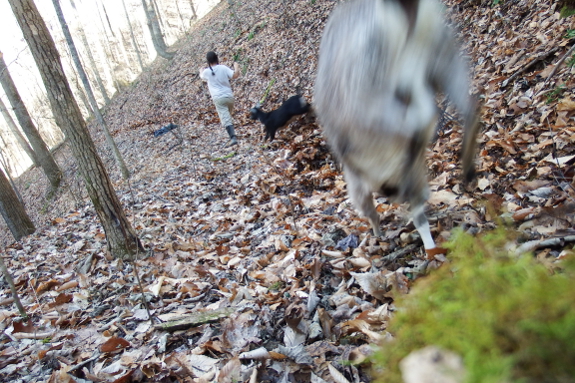
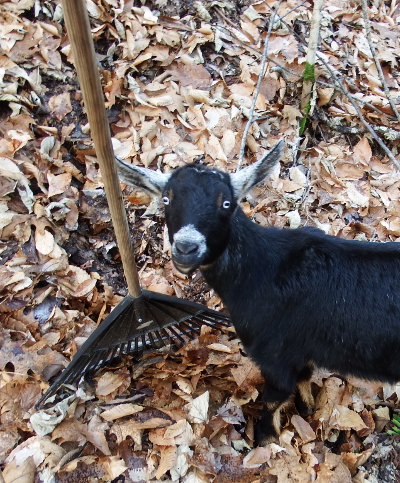
just waiting for my rake in the winter. Add a couple of goats and a
trusty dog and a biomass-harvesting expedition turns into a winter
treat.
Back home, the question
becomes --- who could use those leaves most? Monday's harvest went into
the chicken coop, and that's definitely the spot where I recommend
utilizing high-carbon amendments first. With our deep bedding suitably
refreshed, I next turned to our hazel bushes to use up leaf bags two and
three.
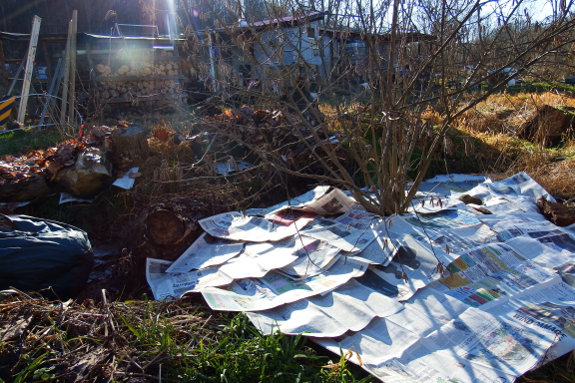
The ground is too frozen
to weed before I mulch, but I still have plenty of newspaper stockpiled.
So I laid down two-sheet thicknesses then used old logs to weigh down
the edges and form a sort of moat to keep leaves from blowing around.
Finally, I filled the container up with leaves.
If we get a good soaking rain or dense snow before our next windstorm
(not a bad bet since we only see breezes down in our holler maybe once a
month), the leaves will mat down and should keep our hazel bushes well
mulched for the rest of the winter and spring. And the rotting biomass
will slowly feed the bushes too, providing low-nutrient fertilizer that
will simulate the leaf mold found in a woodland setting. Hopefully 2016
will be another good year for nuts!
What do you do with that
wasted space above a door frame?
Attach a wooden dowl to 2
scrap pieces of 2x4 for a primitive spice rack.
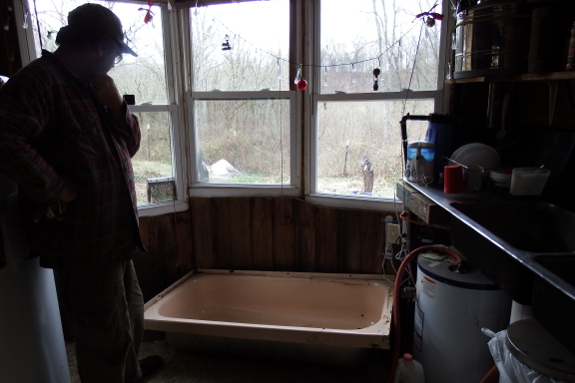
Mark and I work well together on building problems. I'm good at measuring the box, then Mark thinks outside it.
Case in point: next
week's kitchen-renovation project. Our bathtub trials are a long story,
but the short version is we've finally decided to put a conventional
bathtub on one side of the kitchen right beside the hot-water heater. In
a small space, though, you don't want to waste ten square feet with a
one-use object. So we plan to make the bathtub convertible --- kitchen
counter by day, bathtub by night.
I measured everything out
and decided that, of the two bathtubs we possess, the smaller one that
came with the trailer is the only one that will really fit the space. I
figured we'd make some kind of hinged counter to go above it, but I
didn't want the counter to fold up since it 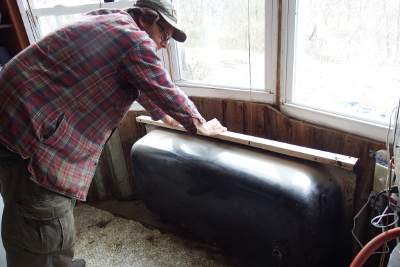 would
block my view while bathing. On the other hand, there's limited space
for the counter to fold down, meaning the cooking work space would have
to be less wide than the tub. Stubbed toes were bound to ensue.
So we cleared out the
area in question and brought in the tub for Mark to look at. He poked
and prodded for about half an hour, then came up with an ingenious
solution. How about if the bathtub folds up when not in use? Stay tuned
for next week's posts in which Mark (hopefully) turns that vision into a
reality.
 Six years ago, Mark and I were both prime.
This year, Mark and I once again share prime ages.
And, in another six years, we'll be prime together for the last time until eighteen years hence.
Can you guess how old Mark turned today?
(I actually have no idea
if this math problem is possible to solve using only the information
presented here. But I'll be curious to see if Roland tries!)
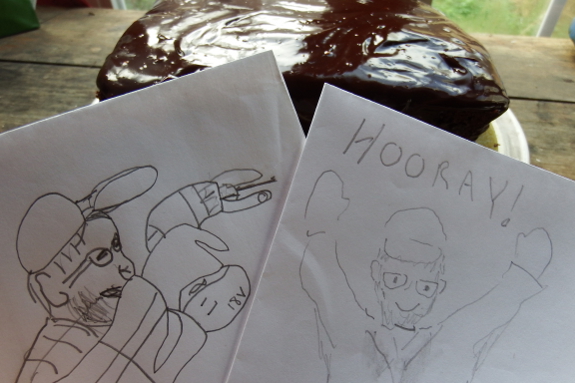
Anna makes the best chocolate Birthday cake.
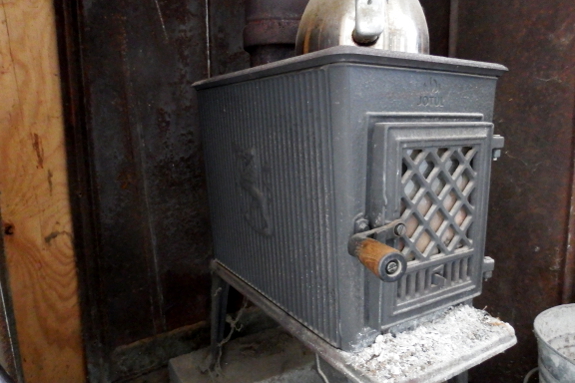
Our darling Jotul
has rivaled Artemesia for providing me with the most joy per hour
during its stay on the farm. Unfortunately, this winter, our well-sealed
wood stove seems to have sprung a leak. Now I can just barely smell a
tinge of smoke in the air when the stove is running, which means it's
time to reseal the stove.
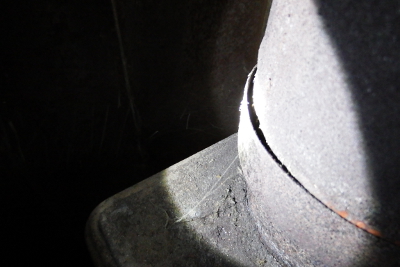 The
first step is searching for the leak. Since we haven't lit a huge fire
in a stone cold stove, chances of there being a crack within the stove
itself are slim. Instead, Mark pointed me toward the junction between
stove pipe and stove. Sure enough, there appears to be a small gap where
the pipe fits into the stove's sleeve.
Next up --- get some high-temperature caulk
and seal that leak, then hope the smoky scent goes away. If that's all
the repair our stove needs after five years of hard work, I'll be highly
impressed!
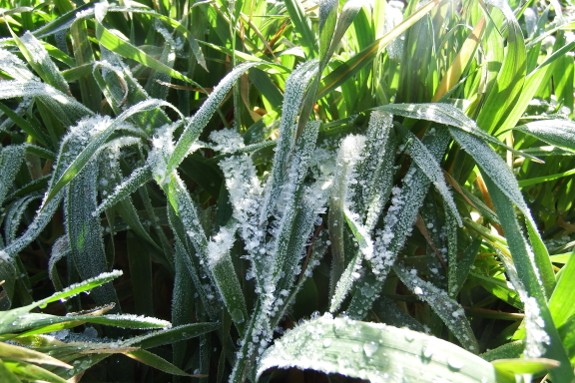
I didn't realize until
last year that there are not only many different varieties of oats, but
there are actually whole different species to contend with. In addition
to hullless oats (which tend to be grown for grain instead of pasture or biomass), there are two main types of oats you can find being grown in the U.S.
Common Oats (aka Spring Oats, Avena sativa)
are the most widespread and are generally what you'll find if you buy
seeds at the feed store that were meant to be fed to animals. On the
other hand, Red Oats (aka Southern Oats, Avena byzantina) are often planted for pasture or hay in the southern United States.
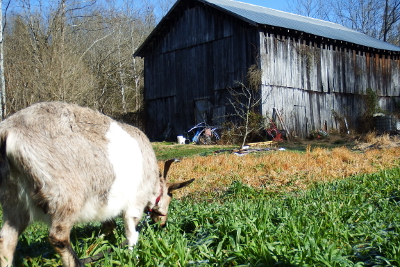 The question becomes --- is species or timing of planting and grazing responsible for the fact that some of my oat cover crops have failed to winterkill
both last year and (so far) this year? Unfortunately, most of my oat
seeds came from a feed store with no label, so I can't know for sure
which species they belonged to. So I only have three real data points:
- Ogle --- A. sativa --- not grazed, winterkilled
- Noble --- A. sativa --- grazed, did not winterkill
- Common --- A. sativa --- grazed, did winterkill
- Unknown feed store oats --- ??? --- not grazed but planted late, didn't winterkill
- Unknown feed store oats from a different year --- ??? --- not grazed and did winterkill
Perhaps some of you have
kept more meticulous notes on the variety and/or species of oats you
planted and on what happened in your own garden? If so, I hope you'll
comment and share your wisdom since my results are thus far
inconclusive.
This post is to remind us to harvest
carrots a little earlier next year.
Turns out there was some sort
of grub that got into a few, and then spread when we had them stored in
the refrigerator root cellar.
A half hour of scrubbing and
cleaning was needed to weed out the yuck.
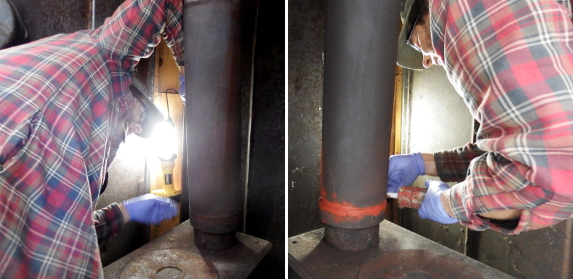
The good news is --- I'm pretty sure we defeated the smoky wood stove. I don't actually know if the problem was ashes building up on the baffle causing draft problems or smoke 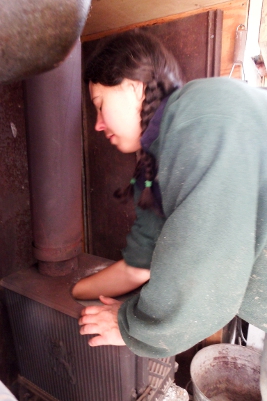 leaking
out the gap in the stove pipe. But we dealt with both potential
problems at once and one or the other (or both) did the trick.
The bad news is --- that
awful scent you get when you fire up a brand new wood stove for the
first time? It must come from the heat-resistant sealant. When we stoked
up the fire Monday evening after Mark sealed the pipe for me, the
trailer filled with such an awful odor that I opened the door and
windows even though it was below freezing outside.
It took about twenty-four
hours for the scent to burn off, but now we seem to have a tight,
smoke-free wood stove once again. Moral of the story --- if your stove
begins to smoke when you fire it up the first time in October...don't
put off the problem until the weather is so bitter cold you can't keep
the windows open for more than half an hour at a time. Instead, learn
from our mistakes and seal your stove in warm weather so you can off-gas
in safety.
Our trusty Chopper 1 axe
broke a fulcrum pin today while chopping firewood.
Luckily we ordered a set of
pins back in 2009 when
we discovered a Chopper 1 at a yard sale missing a pin and even luckier is
me finding that extra pin in our hardware tub 6 years later.
If you have any doubts about
the Chopper 1 read some of the comments people have left over the years
on the original yard sale post. I'm not the only one who thinks this is
worth the hassle of a few moving parts.
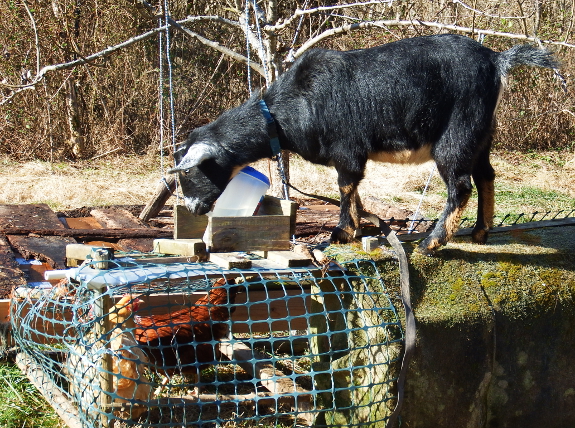
Although Artemesia is
(hopefully) six weeks into her first pregnancy, she's still a kid at
heart. So while her herdmate munched on oats and honeysuckle, Artemesia
jumped up on the tractor to take a gander at the chickens, then she wandered over to check out our 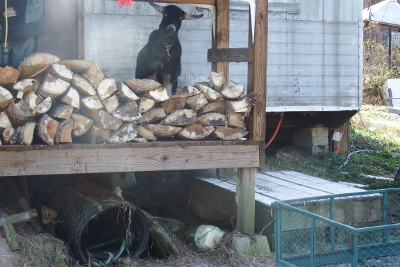 split-wood supply.
Abigail, on the other
hand, kept her head down and ate as fast as she could. Although dried
off now, a summer and fall of milking took a lot of weight off our doe's
bones and she's only started putting the fat back on in the last week
or two.
So I guess each goat knows what she needs. Abigail needs fresh, undried
nutrition, while Artemesia needs fun to refresh the sweetness lamp she
shines so gracefully over our farm. Good thing a half an hour out of the
pasture can easily provide both!
Happy Birthday Adrianne....who is also starting a prime year on Saturday.
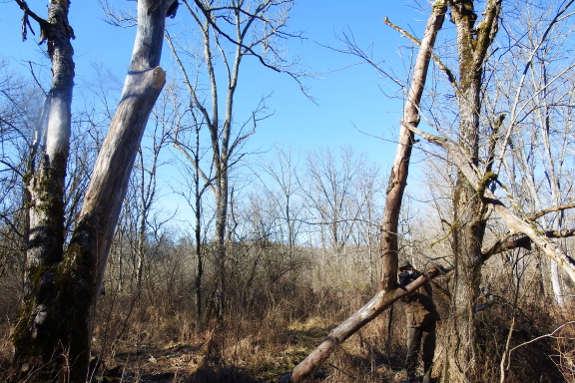
When you heat with
homegrown firewood, you're perpetually on the lookout for dead trees
close to home. This massive specimen is just at the bottom of our goat
path, meaning we have to haul the wood home by hand but the journey is
pretty short.
We'd been saving the snag
for a particularly cold winter, but a freak windy spell knocked down
one big branch and moved us along on our harvesting journey a bit
prematurely. Before the nice, dry wood could become saturated in our
swamp, we set out to cut it into haulable lengths and then turn it into
firewood.
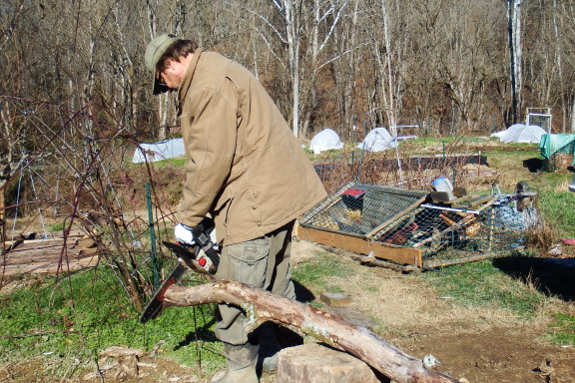
Mark sawed and I carried, and soon we had the whole mass up at our chopping station. Our electric chainsaw
is a perfect fit for this kind of project since you don't have to
struggle to start a bear of a saw for a few cuts. We did only get one
segment cut to length, though, before the battery hit the recharge
point. I'd say one more charge will let us finish the job.
We broke the bottom part of our cake carrier and had to use an old dehydrator tray and some packing tape to secure Adrianne's cake for travel.
We got bogged down in our
bathtub project for a few different reasons. First, the weather turned
cold, so we had more staying-alive issues to deal with (firewood, frozen water). 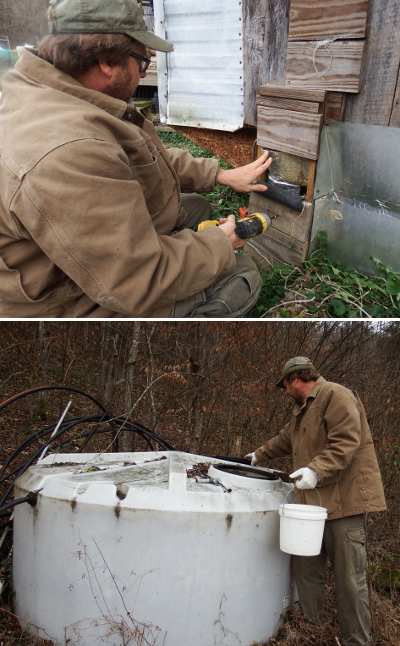 Second,
home renovation doesn't involve living things, so I don't tend to
prioritize it (lazy garden-obsessed homesteader!). And, finally, we had
so many interesting comments on my planning post that I needed to digest for a while.
We plan to get back to
work on the bathtub next week (weather permitting). But I thought I'd
share the photos above of a 100+-year-old folding bathtub that proves
our wacky idea is nothing new. (Thanks for the heads-up, Kris!)
Speaking of dragging our
heels, I guess I should give you at least the cliff notes version of why
we don't currently have a working bathtub. One came with the trailer,
of course, but when you start from scratch with untraditional
home-plumbing, it simply makes more sense to concentrate all of the
influent and effluent at a single location. In our case, the chosen
location was the warmest spot in the winter trailer --- the kitchen,
where we use water constantly for dishes, cooking, and washing. As a
result, we ripped the entire bathroom out and turned that area into chicken-waterer-building central.
So how have we been
bathing for the last decade? In the summer, a hose outdoors is top notch
(says Anna --- Mark prefers his water to be more temperate). In the
winter, though, I go for water heated on the stove and poured into a
galvanized washtub while Mark prefers bird baths. As you can tell,
anything we build will be a major step up.
Okay, now you're back up
to date on the next building project. Time to start thinking of the
newest bathing apparatus once again!
If I need to reapply caulk again in five years I'll remember to do it in the Summer to see if a few months of curing would reduce the caulking odor.
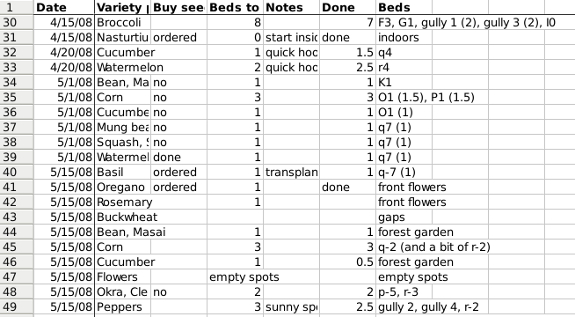
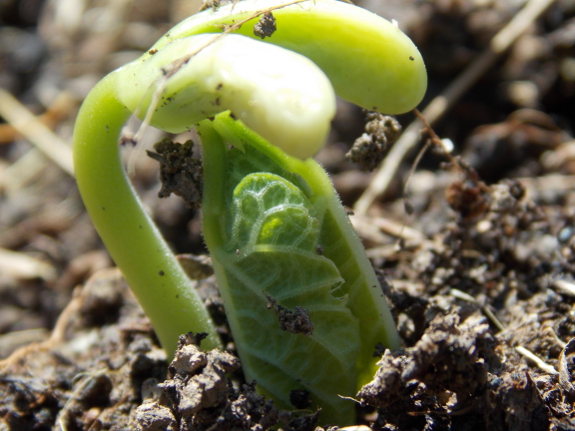
If you push the garden
envelope with freeze protection and indoor seed-starting, then January
is the time to plan out the growing year. After all, we'll be putting
our first seeds in dirt on February 1!
 I
keep a separate spreadsheet each year for my plan and for my actual
garden plantings. This technique makes it easy to copy and paste last
year's plan into next year's spreadsheet, at which point I take a good
hard look at which plantings worked out and which didn't. If I'm smart, I
also insert notes into the spreadsheet as the garden year progresses
--- simple reminders like "Plant tomatoes inside 3/15 instead of 3/1
next year" make a huge difference nine months later when the time comes
to get the my spreadsheet in order. But sometimes I just remember that
succession planting summer squash every two weeks was really too much
--- once a month would be quite sufficient.
I've uploaded my 2016 plan
just in case you want to use it as a jumping-off point for your own
garden. (One bed is approximately equal to 15 square feet in the
spreadsheet linked to above.) This is for the ambitious gardener who
wants to feed two humans on vegetables that nearly entirely come
from your own land for twelve months out of the year, so please 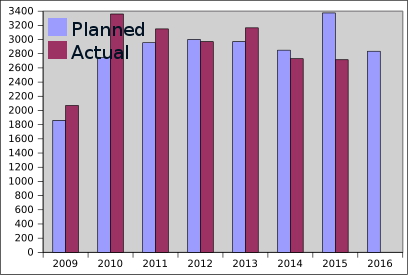 do scale back if you're a beginner. (The Weekend Homesteader gives tips on which crops are easy to start with if you've never grown a garden before and on designing a bite-size garden.)
Interestingly, you'll
notice from the square footage chart to the left that we're slowly but
surely scaling back our own garden's planting area. The blue lines are
my winter dreams; the purple lines are that year's reality. Since 2013,
we've been on a slow downward trend despite the fact that we grew masses
of concentrates for the goats last year (meaning our actual harvest was
much larger than ever before). That's the beauty of improving soil
--- you can grow more food in less space with less elbow grease. On the
flip side of the coin, though, if your dirt is impoverished and you
haven't had time to bring it back to life yet, you might need to
increase the square footage recommended on my chart to feed your own
family of two.
We've only had to carry water
from our tank once this Winter due to frozen pipes.
I think carrying 2 gallon
buckets are easier and safer than their 5 gallon counterpart.
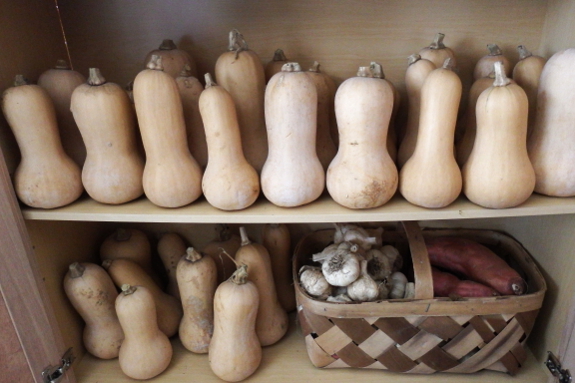
If you grow a year's supply of storage vegetables --- potatoes, winter squash, carrots, and so forth --- your job isn't done when you haul them out of the ground, cure them properly, then pack them away under just the right temperature and humidity conditions.
Instead, around midwinter, you've got one task left --- checking
through your stores to make sure one bad apple doesn't spoil the barrel.
Even though the task is
important, though, I don't mark storage-vegetable rotation time on my
calendar. Instead, I just keep an eye out during harvest until I notice
the first sign of spoilage. At that point, I go through the lot, pulling
out fruits and roots that aren't quite 100%. Now that we have goats,
those troubled vegetables are earmarked to turn into animal fodder ASAP,
but in previous years I've relegated them to human soups.
 Either way, while you're poking through your stores, you might also decide to change the vegetables' location too. Our butternut closet
did an awesome job in the fall and early winter. But now that serious
cold weather is hitting, the closet is really a little too cold for
optimal "warm vegetable" storage. So I moved the butternuts into our new cabinet
in the kitchen and filled the closet up with the containers that
recently held frozen food. Come summer, those containers will go back
into the freezer, leaving the closet space free for the next round of
butternuts.
I'll end with an
obsessive Anna-count of our butternut stores. We started out the season
with about 100 of them, and we certainly haven't been sparing in the
interim. I think I've given away about a dozen, the goats have gorged,
and we've eaten some too. (Although the warm fall means we haven't
actually put many butternuts in our belly --- brussels sprouts and kale
and lettuce just seemed more tasty at the time.)
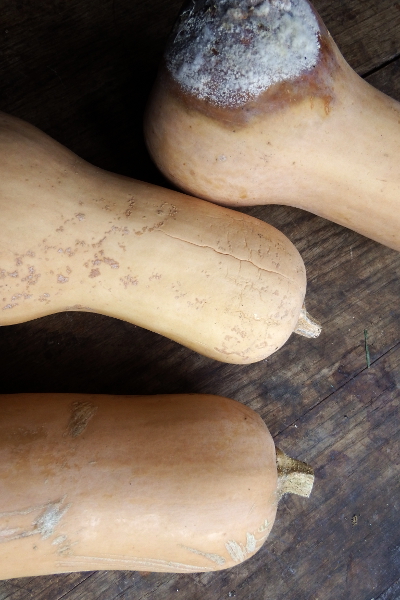
Now that we've passed the inflection point
and are heading into spring, how many squash are left? The photo above
shows how I made my decisions --- only the bottom butternut passed the
test since wrinkled skin is enough to put a squash in the goat category
in my book. Using that measurement of quality, we ended up with 50 prime
specimens plus another 10 that need to be fed to the goats in the next
week or two. Not bad! Looks like we should grow about the same number
next year, assuming Mom and Artemesia maintain their taste for the rich,
orange flesh.
We picked up a nice glued board when we bought our new kitchen cabinet and fabricated a DIY dinning table to upgrade the old coffee table on cinder blocks we've been getting by with all this time.
 "I
came across your blog maybe a month ago, random link on reddit, but I
was so intrigued by what you are doing that I have been nonstop reading
for about a month, until I made it through the whole archive from start to finish....
"I
came across your blog maybe a month ago, random link on reddit, but I
was so intrigued by what you are doing that I have been nonstop reading
for about a month, until I made it through the whole archive from start to finish....There were a some loose ends that you haven't tied up yet, just a couple stuck with me that I wanted to ask you about, so thought I would email. What happened to your Osage oranges you planted a few years ago, did any germinate? Have you been cooking/eating the ducks or did I miss that? How were they?"
I'm always impressed when
I get these emails that start "Just read your whole blog." Thanks for
diving in with two feet, Jeffry! I hope you don't mind that I excerpted
part of your email here --- I figure others may be wondering about those
loose threads too.
I'm afraid the
osage-orange experiment was a dismal failure. Our world is just so rich
and full of life here in southwest Virginia that the idea of planting
seeds in the wild and expecting any 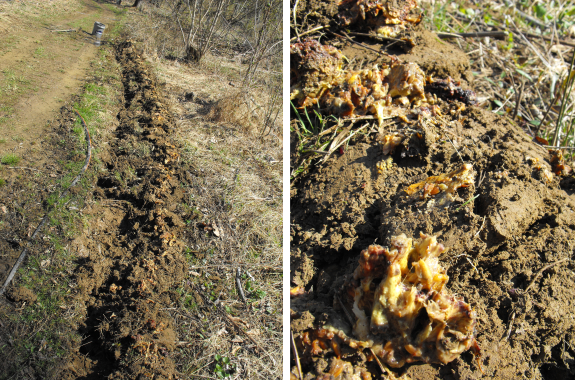 to
survive sounds much better on paper than it works out in reality.
Unfortunately, native plant life took over so quickly that any seeds
that did germinate didn't make it past the cotyledon stage. If I decide
to try the idea out again, I'll instead start seedlings in pots or in a
garden bed and then transplant into a well-mulched area once they're
large enough to compete.
to
survive sounds much better on paper than it works out in reality.
Unfortunately, native plant life took over so quickly that any seeds
that did germinate didn't make it past the cotyledon stage. If I decide
to try the idea out again, I'll instead start seedlings in pots or in a
garden bed and then transplant into a well-mulched area once they're
large enough to compete.
The ducks were a slightly
more successful experiment. We have indeed been eating them and the
consensus is...they're okay. I suspect we'd be singing the praises of
duck meat from the rooftops if we'd gone for a meat-specific breed and
then taken the time to pluck rather than skin. As it is, I consider duck
to be a bit below the quality of an old hen --- with less impressive
pastured fat and requiring long, slow cooking
for ease of gnawing the meat off the bones. In other words, we won't be
raising ducks as a meat animal again in the near future.
I also appreciated all of
the comments I didn't include in this post. Specifically, I hope your
family's adventure is exciting and smooth when you move onto your
homestead in eighteen months. Good luck!
I just wanted to give you a quick heads up to let you know that Mark's back in school and will be playing hookie from the blog on Tuesdays and Thursdays once again.
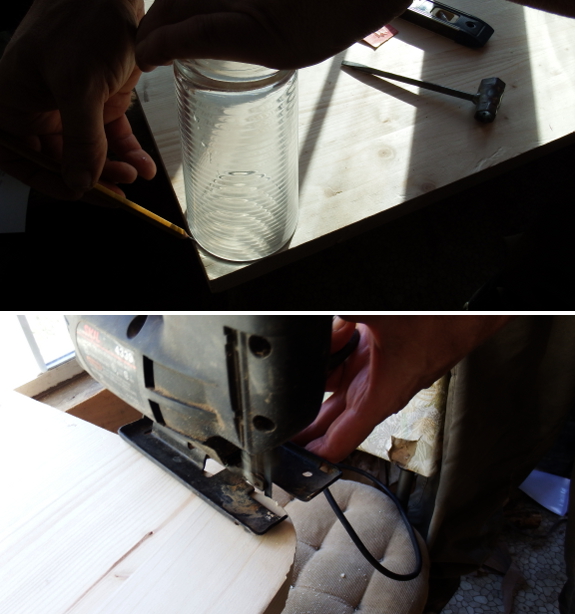
But, since you're here now, I thought you might enjoy the clever method he came up with yesterday for rounding off our new table's corners. Drawing a circle with a glass before cutting with the jigsaw provided near perfect results. Impressive!
One of our oldest
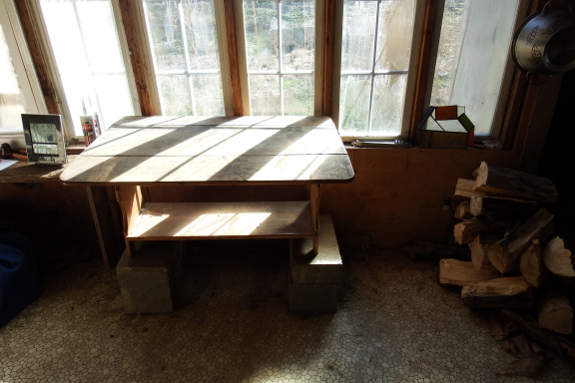
eyesores is this "dining table" configuration --- a coffee table propped
up on some cinderblocks so it's closer to the proper level. I have to
admit that this one even annoyed me a little since you can't put your
feet under the table when you eat. So when I asked Mark what bite-size
project we could fit into a cold Monday afternoon and he begged to
redesign the dining table, I gave in easily.
After tearing out the old
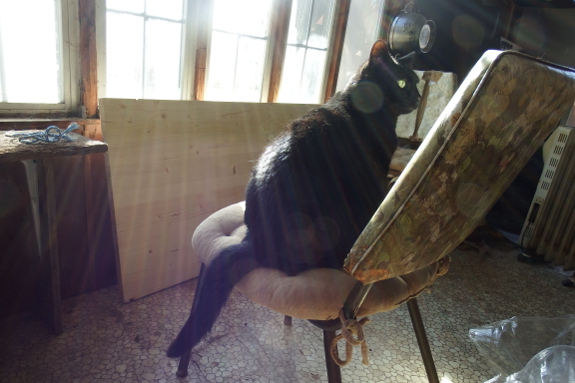
table, Huckleberry moved into the prime sunny real estate. "I've heard
that some cat lackeys build their feline overlords extensive play
palaces," he hinted.
"Sorry, Huckleberry. We
need that space for eating," I replied. "But when Mark's not looking,
you're welcome to jump up on the new table and nap in the sun."
"Hmph," said our feline overlord.
Ahem. Back to business,
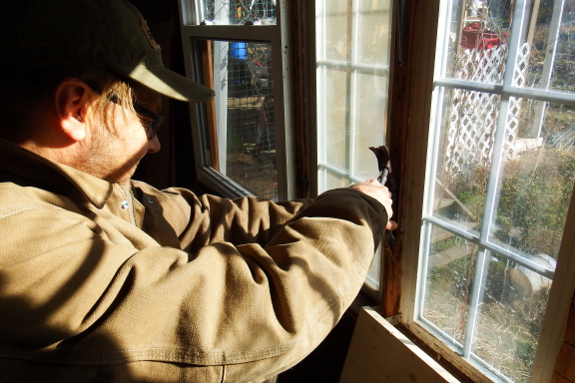
Mark chiseled off some siding that was still sticking to the repurposed
two-by-twos we'd used to frame up this bay of south-facing windows.
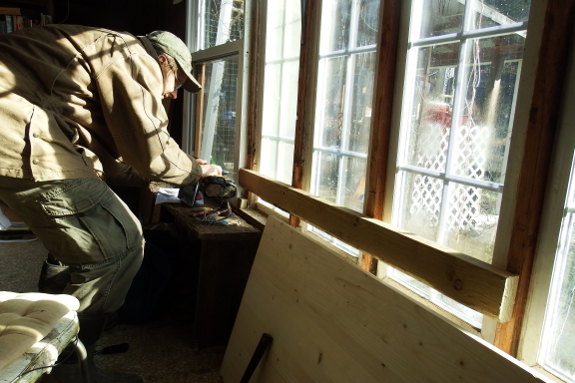
With everything moderately flat, he made short work of mounting a two-by-four to hold up the back edge of the table top.
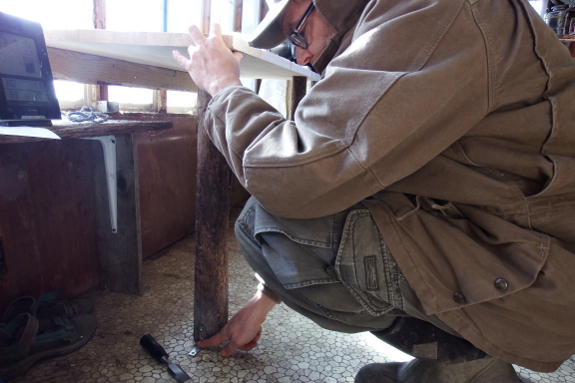
The front edge was supported by old branches that had spent the last five years holding up my ramshackle kitchen counter.
The worst two branches were cut up into firewood, but Mark said these
two were worth reusing. A couple of brackets on each one held them in
place.
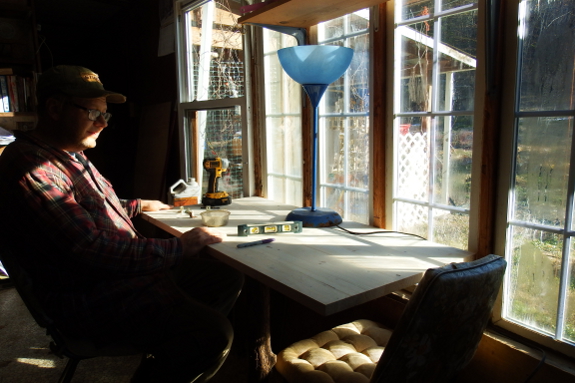
We haven't actually
attached the top board to its supports yet since, after the external
temperature rises above freezing, we plan to stain the board for easy
spill removal. And the photo above doesn't show the rounded corners we added on at the last minute.
But it does show how Mark's legs can actually fit under the new table
--- amazing! And, since the chairs can also slide underneath when not in
use, this table takes up less square footage than the previous
iteration despite having a larger surface area. Success! And all for
about $25 --- not too shabby.
These new Atlas
gloves do a great job keeping my hands warm and dry.
The double dipped coating
decreases dexterity a little, but it's a nice trade off compared to
days like today when I would normally get regular gloves wet.
Thanks Jayne.
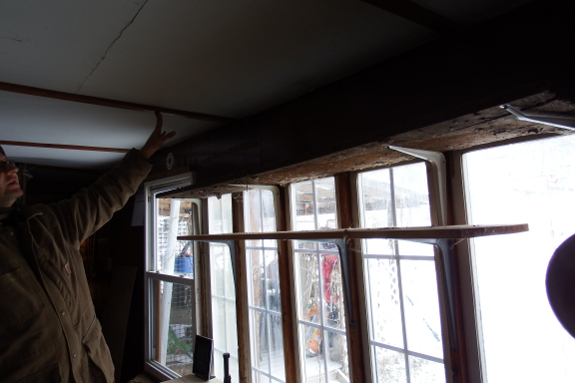
The weakest link in our
current gardening year is seed starting. We often lose seedlings to
damping off or just to general legginess, to the extent that I sometimes
miss whole planting windows due to lack of transplants.
The crazy part is that
I've known the source of the problem for years; I've just been too
stubborn to use electricity to fix it. Here's the deal: even right up
against our south-facing bank of windows, seedlings just don't get
enough light inside in the winter months due to cloudiness and short
days. And without enough light, they fail to thrive.
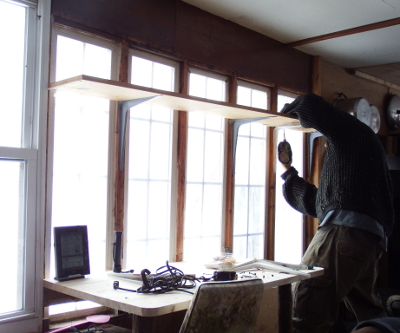 About
five years after figuring this out, I told my husband. Within two days,
Mark had determined just the right spot to place a plant shelf while
leaving space above to mount shop lights and a fan for optimal results.
I suspect once he reads
this post and finds out that I'd get even better results if I expanded
beyond the single heating pad grudgingly purchased a few years ago for jumpstarting sweet potato sprouts, I'll wind up with even more electricity use in my seed-starting area.
Yes, it feels
not-quite-sustainable to be using electricity to start seeds. On the
other hand, given the huge quantities of food we grow and the small
addition we'll likely be adding to our monthly electric bill, I think
this compromise probably makes sense.
And now I'm dying to sprout some seeds!
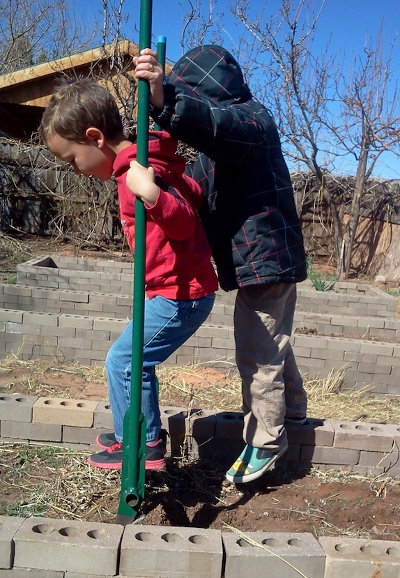 Our broadfork business began on a beautiful
July evening at our neighbors’ place, Plum Forest Farm. About fifty
people gathered around farmer Rob, who stood on a sunny slope,
surrounded by flowers, explaining his approach to growing produce.
It’s not easy to raise robust vegetables in our glacial till. Rob
is a soil expert; he understands soil biota, organic matter, and
building fertility over time. “I always use a broadfork to loosen
the soil and let the organic matter circulate,” he said.
“Where can I get one of those?” asked a
class participant. “Bob Powell makes them,” said Rob. Fifty
people turned their heads to look at my husband Bob. He looked around
at their expectant faces. “Sure, I could make a few more,” he
said.
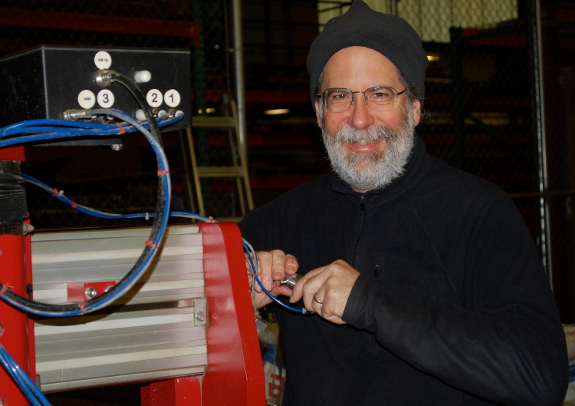
Bob with his Omax machine.
Bob’s an inventor. A computer engineer by
training, he’s always loved making things out of metal. His
lifelong hobby became a business in 2007, when he acquired a
water-jet cutting machine and started fabricating tools and making
parts for artists and builders.
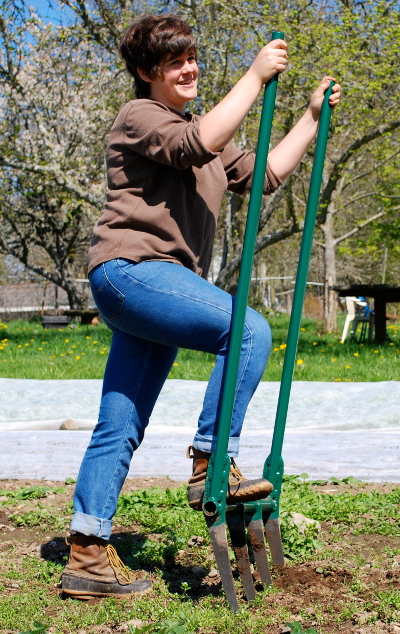
We live on Vashon Island, near Seattle.
Farms here are extremely small-scale, and local growers do a lot of
work by hand. One neighbor asked Bob to fix a broadfork, then he
built a couple for our neighbors who needed one that wouldn’t
break, and after this class we had nine orders. So he refined the
design, and made some broadforks, and we sold them to people that we
knew, for cash or barter for vegetables. I used mine to cultivate the
raspberries and prep a squash bed. It made it easy to weed, and
helped the manure get down to the roots, and the plants did great.
We got some feedback on the design. Could
the tines be curved? The original tool was a bit heavy. Bob realized
he could cut the parts more efficiently, too. He changed the pattern,
made it lighter and easier to use, and put them up on his web page.
As it turned out, plenty of people want a sturdy broadfork.
Different-size people need different-size forks; we ended up with
three models, the smallest weighing just 15 pounds.
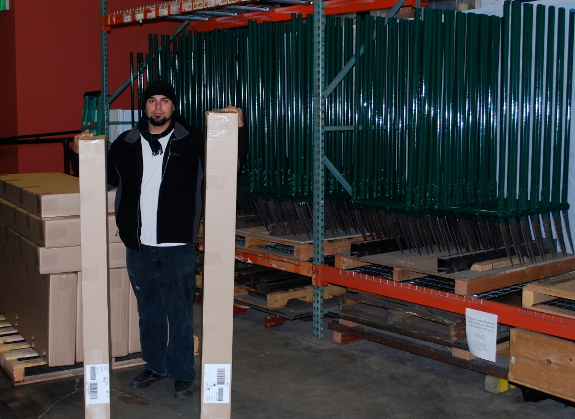
Jared with broadforks ready to ship.
So then we had a business. We got busy
designing packaging, logo, web page, advertising – it never ends.
If you’re starting a manufacturing business, my advice is to hire
professionals for the parts you don’t know about, and expect to
spend a lot of time negotiating with your shipper.
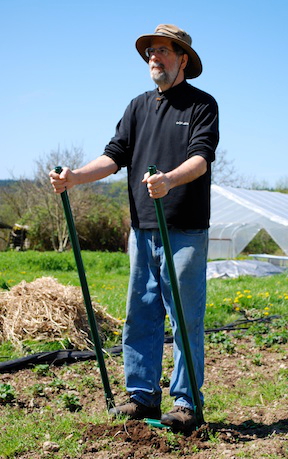 We still build our Meadow Creature
broadforks on Vashon Island, paint them by hand, and ship them all
over the US. They’re made of steel, remarkably easy to use, and
will break up the hardest hard pan and loosen the rockiest soil. We
also make the Avalon cider press, and soon we’ll have a farmstand
cash box ready to go.
One of my favorite parts of our business is
our broadfork donation program. All over the country, people are
learning to grow their own food, teaching each other to garden, and
raising food for people who need it. We’ve donated over 100
broadforks to school gardens, community gardens, food banks, and
congregations. I love hearing from the people who are growing food in
cities, on old ballfields, in suburban neighborhoods, next to small
town libraries, and in remote hamlets. It’s empowering, practical,
and fun; one of the sanest things going in our country right now. To
request a donation, see our MeadowCreature.com
FAQ page for details.
I use my broadfork to cultivate the
blueberries and raspberries, pull out broom and other invasives, turn
grass turf into garden beds, dig out dock, loosen the beds in spring
so the compost will get into the soil, and harvest garlic and
carrots. If you’d like one of your own, find us online at
MeadowCreature.com, or give us a call (360-329-2250).
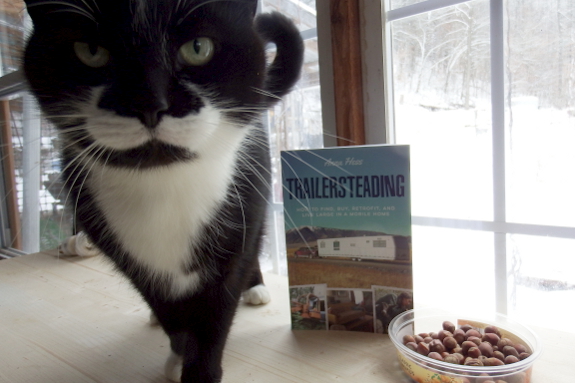
Trailersteading
is here! Actually, there's another story that goes along with the first
copies of the book, involving Kayla, an ill-fated zumba class, ice
cream, hostage negotiations, three lighters, way too many flashlights, a
trio of tired, freezing menfolk, and law enforcement with a
blood-pressure cuff. But rather than going there, I thought I'd ask our
feline overlords for their first impressions of my newest paperback.
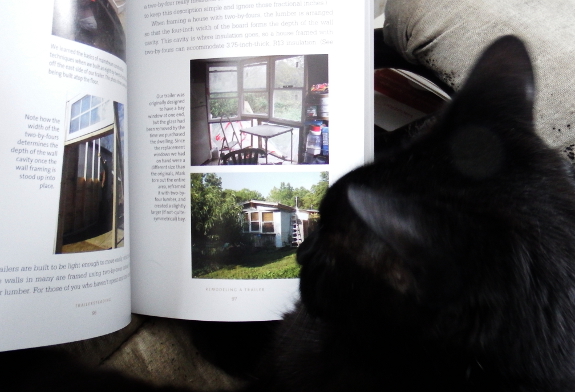
"Hmm," said Huckleberry.
"Let's see. I count one, two, three, a billion photos of Mark, a couple
of toddlers, a bulldozer, a goat, a chicken, a bug for crying out loud,
and zero shots of what really matters --- cats. I'd give this one two thumbs down. You really coulda done better, Anna."
And here I'd been excited
about how well the profiles of the other eight trailersteaders looked
in print and how engagingly the book was laid out. Oh well ---
everyone's a critic. "Thanks for your opinion, Huckleberry," I answered.
"Let's see what Strider thinks."
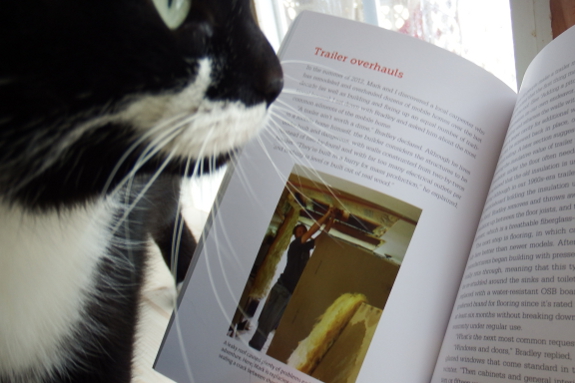
Our younger cat gave his
analysis the good old college try. He sniffed and poked and watched as I
turned the pages. Then Strider stated his opinion.
"Well, I don't really
understand what all those little black squiggly things are --- ants? But
the pictures are bright and pretty. And Huckleberry's wrong --- I saw a
cat. So I'd say it's okay."
So there you have it --- Strider says my newest book is...okay. For $11.38 on Amazon,
how could you go wrong? I hope you'll give it a try and let me know how
your feline overlords rate this overview of an alternative approach to
voluntary simplicity. Thanks in advance for giving it a try!
This post is designed to help me not forget to put a tarp over the chicken tractor when serious snowfall is predicted.
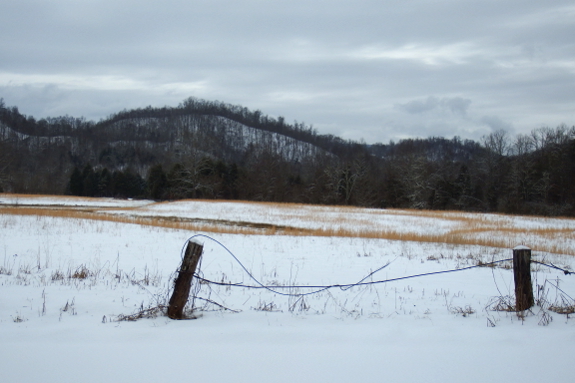
I know it's a bit
childish to love the snow as much as I do. After all, heavy snowfalls
often make the power go out. Ordinary people have to drive to work,
risking life and limb on icy roadways in the process. And everything
outdoors takes three times as much energy when there's snow on the
ground.
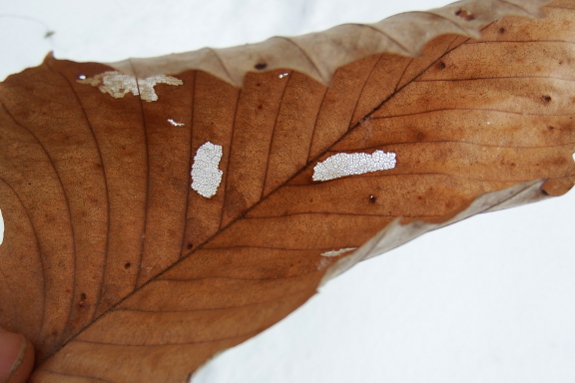
But walking through a
snowy landscape makes me feel like I've invaded an artist's pen-and-ink
canvas. Tree trunks rise out of nothingness, lonely blades of grass look
like quick strokes of a pen, and even the ordinary appears
extraordinary when viewed against the blank slate of a good coat of
snow.
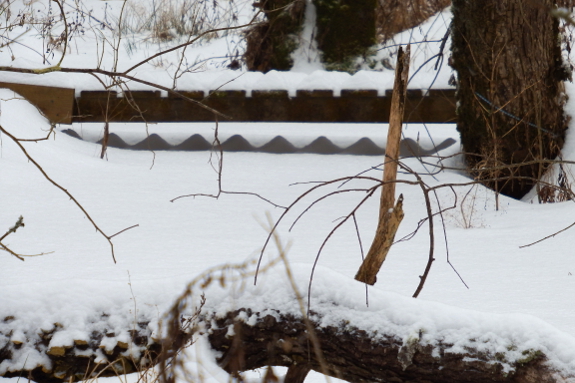
Surprising layers of light and dark appear, like this wave pattern beneath our footbridge.
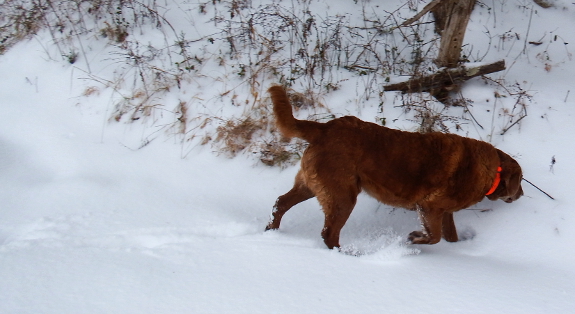
And the truly important
parts of our landscape --- the living beings who usually blend in with
brown winter leaves --- stand out exactly the way they ought.
So I'm afraid you're due
for a few more pretty-snow-picture posts in the days ahead. This series
is from Friday morning, after Wednesday's two inches had mostly melted
and been replaced by another 4.6 inches Thursday night. I hope you're
enjoying the beauty of your snow (if you have any) as well!
Lucy's
heated kennel pad stopped working in the middle of this cold snap.
It lasted for about three
years....maybe I can fix whatever went wrong?
A regular
heating pad sandwiched between a blanket on Lucy's porch couch
seems to be a good solution for now.
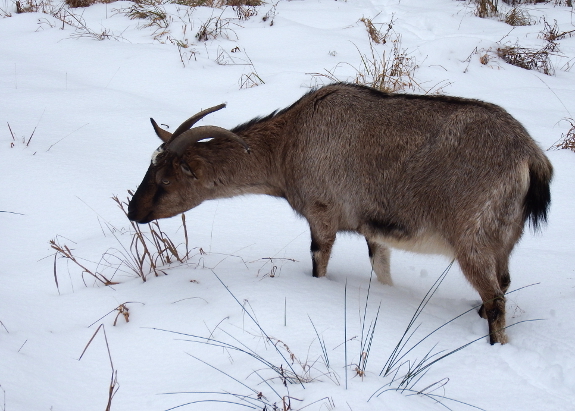
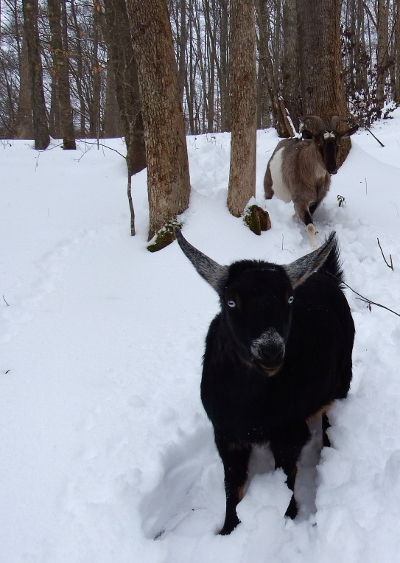
Is it cruel and unusual to take your goats out for a walk in the snow? I
asked our pampered darlings to give me the lowdown on whether frozen
water is as nasty as liquid water and here's what they said:
Abigail: Really? You want me to go out in that. Really?
Artemesia: Sounds like fun! Let's go!
Abigail: Oh, whatever. But you break trail this time.
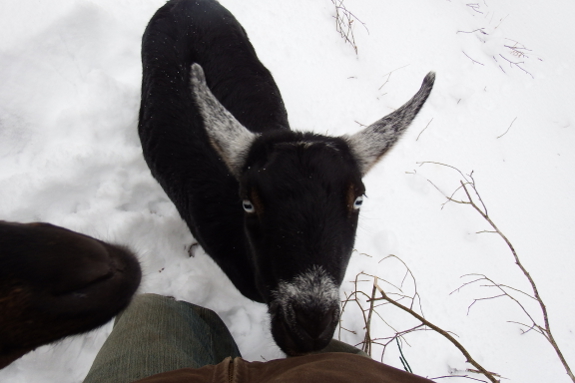
On the downside, there's
not as much to eat in the snowy woods as usual, so the girls beg a bit
more. I swear Artemesia sucks in her stomach and lays her hair
completely flat when she wants a clementine peel, making her look about a
third as wide as previously.
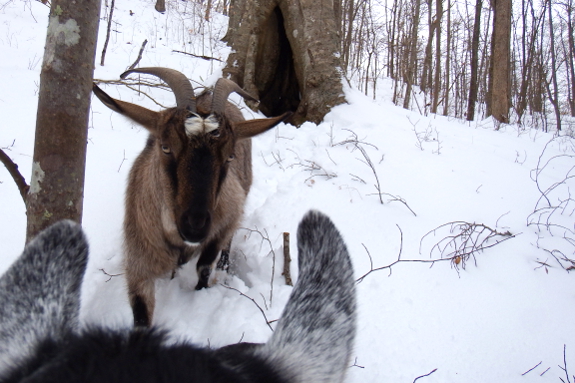
On the plus side, a few
inches of snow actually makes it easier to walk on our steep hillsides.
Your foot doesn't slide downhill as easily when it's encased by a boot
of snow.
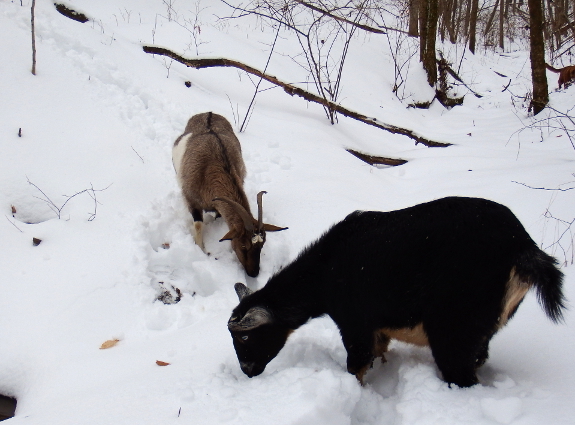
I guess I can add snow days to the long list of goat-friendly weather. Thanks for deigning to come on a walk with me, girls!
We decided to go with a 20
dollar fluorescent shop light for the new plant shelf.
It might be interesting to
line up a similar
LED shop light to see which is better?
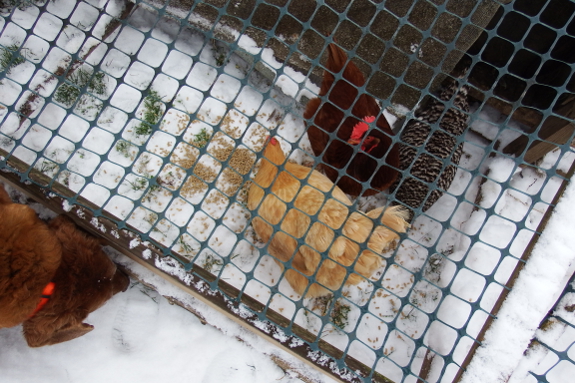
We have both a stationary
coop and a chicken tractor. The former houses the majority of our
birds, while the latter gets the mavericks who like to fly over fences
and scratch in the garden. If we didn't have a tractor, these ladies
wouldn't be back in the coop...they'd be in the pot.
I used to worry about
tractored hens in the winter, but as long as you manage them carefully
they don't seem to suffer at all from their more exposed conditions. Our lay rates are actually superior in the winter tractor
despite having no lights, perhaps because the tractored hens eat about
40% more laying pellets than the coop birds do. (Other possibilities ---
higher-laying hens are more likely to fly fences; tractored hens just
don't have much to do other than lay eggs. It's hard to tease out the
reasons on such a small scale.)
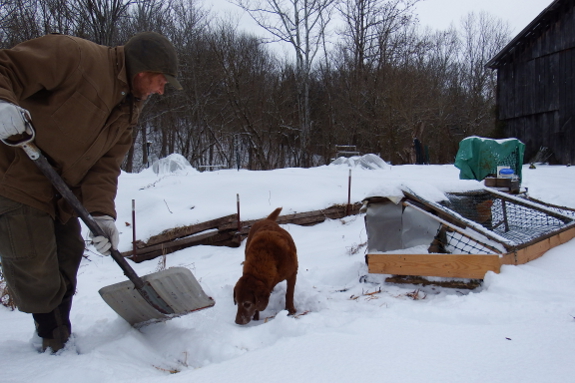
All of that said, tractoring chickens in the winter is a bit more work. If we had snow cover all winter, we wouldn't do it since there's be no point --- the tractor would just be a small stationary coop. Even in our zone 6 climate, we still have to change out waterers daily in freezing weather in the tractor rather than using a heated waterer, which adds to the daily work load. So, no, tractors aren't quite as easy as cooped up birds.
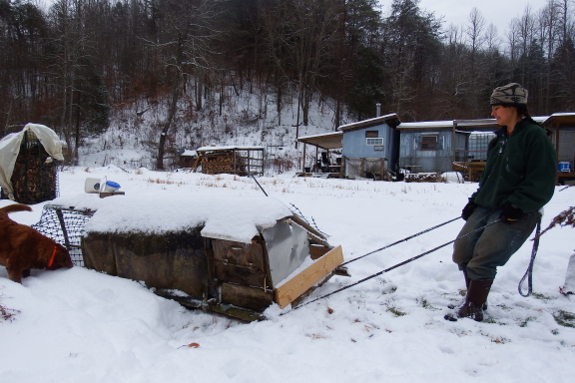
On the other hand, it's
handy to be able to fertilize the garden directly with a tractor during
the fallow season. As I mentioned earlier, it's nice to be able to
ground bad birds slightly less permanently than if we ate them. And Lucy
thinks it's particularly nice to get her daily dose of chicken manure
when I move the tractor. (Yes, I move the tractor every day, unless it's
snowing.)
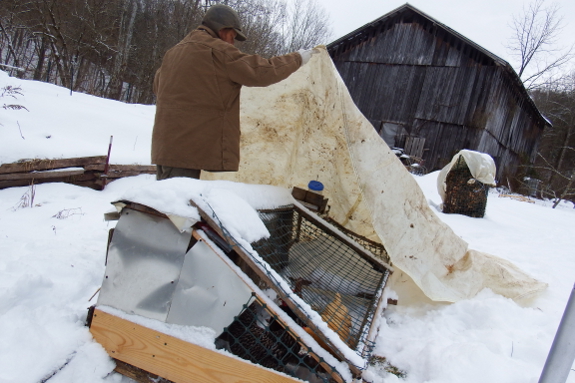
Just remember to put a tarp over the tractor before it
snows rather than afterwards and you'll be all set. And if you're going
to have to leave your tractor in one place for more than a few days,
treat the hens to some leaf bedding. Oh, and do be sure to keep them on
dry ground if at all possible.
Do all of those things and you'll have happy, healthy hens even in January.
Our new bathtub will fold up
flat against the wall when not in use.
We bored out one of the
mounting holes to attach a small section of chain.
 It's
completely irrelevant to anything functional, but I started wondering
what Artie's kid(s) will look like. It turns out that goat color genetics is pretty darn complicated. And since I only know what Artemesia, her mother, her father, and Monte look like, I'm stuck with guesses.
Eyes are the easy part.
So-called blue eyes (which really look almost white on Artemesia) are
dominant in goats. Artemesia is heterozygous in this trait and Monte is
either heterozygous or homozygous, so 75% to 100% of her kids will have
blue eyes.
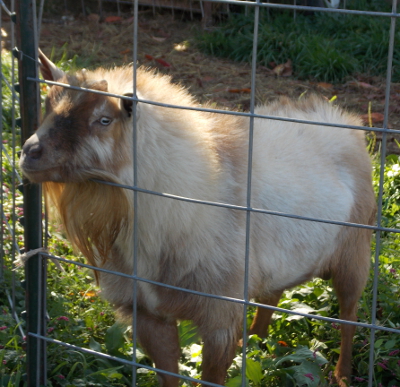 In
terms of coat color, there are two proteins that determine color (while
lack of either protein makes a white goat). Eumelanin can be black
(like Artemesia's primary color), chocolate, or red, and phaeomelanin
can be almost white, gold (like Artie's father and her mate), or all the
way up to a dark reddish-brown.
There are various pattern
possibilities that show where on the body the eumelanin and
phaeomelanin turn up. It's likely that both Artie's father and Monte are
heterozygous for Awt , which produces goats solid in the phaeomelanin color (gold in their case). In contrast, Artemesia and her mother have the At
phenotype, which produces orange on the belly and on parts of the legs
with a eumelanin-based color everywhere else. The recessive alleles
carried by Artemesia's father and mate, though, are unknown.
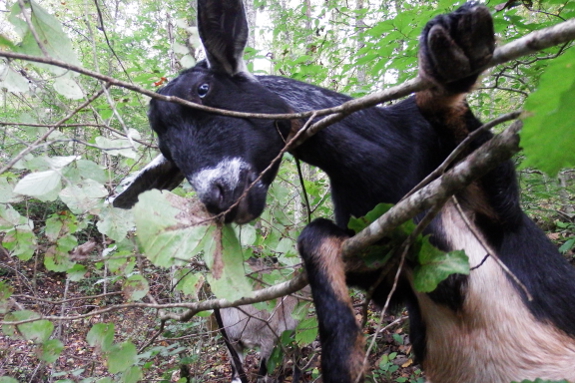 What does this mean for Artemesia and Monte's kids? Since Artemesia can't be carrying the more dominant Awt
(or she wouldn't be black), 50% of her kids will likely have her
pattern (or the pattern of her father's father or one of her mate's
parents). The other 50% will likely inherit Monte's solid, pale-gold
coloration.
Finally, there's the
issue of true white, which can be found on Artemesia's "frosted" muzzle
and ears. This is a dominant trait, but I don't think Artemesia's mother
had this phenotype and I'm pretty sure Monte doesn't, so our goat is
heterozygous and will likely only pass the frosting on to 50% of her
kids.
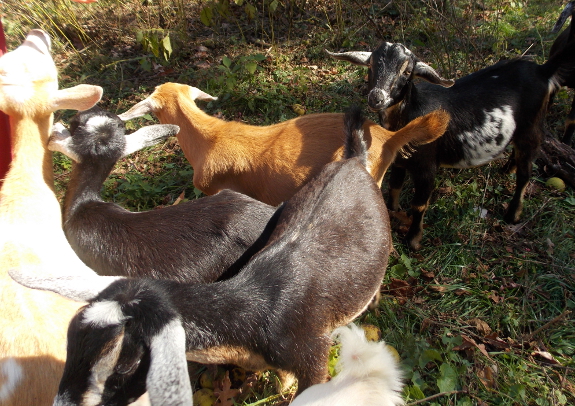
So, that's my analysis
--- mostly blue eyes, half with pale-colored hair like Monte, the other
half with who-knows-what darker pattern, and half with white frosting.
If you're not confused yet, go read the article I linked to above and I
promise you will be 100% confused by the end. Then look at the photo
above of Artemesia and her cousins and figure most of her kids will
probably look at least a little bit like them. I guess that was the easy
answer to my question....
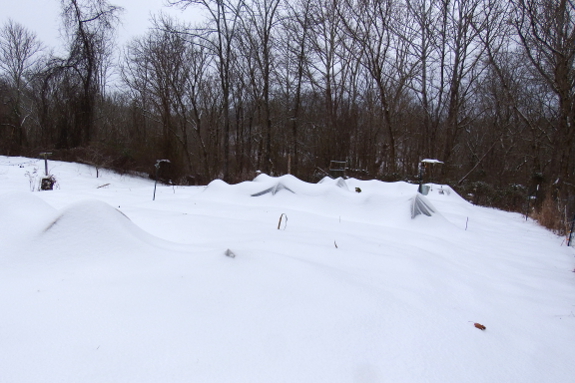
In years past, we've had some problems with quick hoops in the snow.
Eliot Coleman recommends covering the hoops with clear plastic if you
live in a snowy climate, and he's not wrong. Row-cover fabric can tear
under heavy snow loads. And since the snow sticks rather than sliding
off, the PVC hoops can bend and break as well.
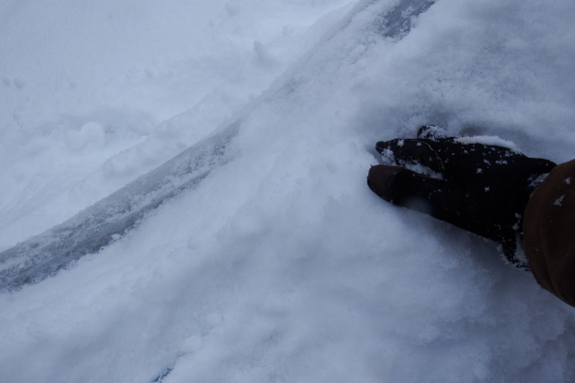
If your snow doesn't come
down in bucketloads all at once, though, it's pretty easy to just brush
off the top of the fabric every three to five inches. Don't use a
broom, though --- I tried that last year and it tore through the
row-cover fabric. Gloves are soft enough to be safe as long as you're
gentle.
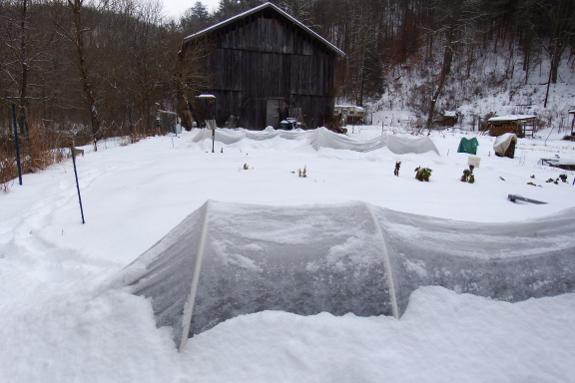
9.4 inches of snow in the last week and no broken fabric or hoops yet. Success!
 I love saving seeds
from heirloom vegetable varieties. But when it comes down to a choice
between saving free seeds from potentially problematic plants or
annually purchasing seeds of dependable hybrids, I always choose the
latter. It's just a better use of time and money to spend five bucks on
seeds and know I'm going to harvest a bountiful crop rather than ending
up spending fifty or a hundred bucks over the course of the year buying
that vegetable at the grocery store.
Our annual seed order
went in this week, about $90 spread across two companies (Johnny's and
Jung) to get the exact varieties I know have done well here in the past.
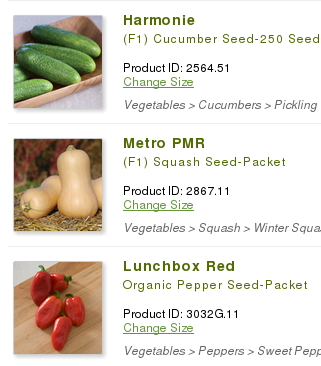
Hybrids I felt were worth paying for included Pontiac onions, Lunchbox
Red peppers, Bolero carrots, Metro butternut squash, Vision corn,
Harmonie cucumbers, and Diablo brussels sprouts. The other dozen
vegetable varieties will be planted with either home-grown seeds or
leftover packets from last year where I ordered too much but know from
experience the seeds will still sprout.
Now it's your turn to
chime in. Which hybrid varieties do so well in your garden that you're
willing to order the seeds every year?
 We've
been having fun with amateur furniture-making this winter and are
learning a lot in the process. For example, what's the optimal board
thickness for a table- or countertop? The answer seems to depend on how
the board will be supported. Atop our marked-down cabinet,
we easily got away with a 3/4-inch-thick board because the thin
countertop is supported over nearly its entire lower surface with the
cabinet edges. Even a half-inch board might have worked as well.
On the other hand, a 3/4"
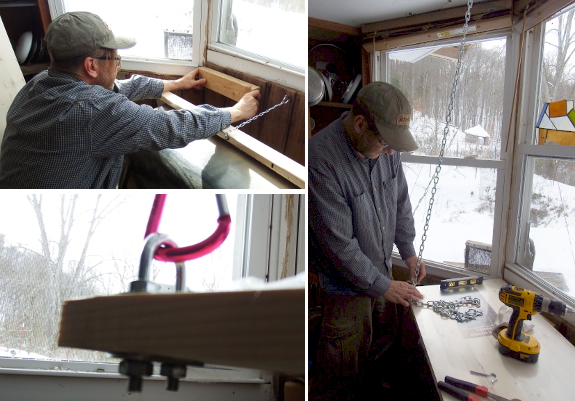
board wasn't good enough for our bathtub counter project (pictured at
the top of this post). We got the whole thing pretty much assembled,
then had to take it back apart when we realized that a board hung from
chains (for easy removal when the tub flips down) needs to be considerably thicker than three-quarters of an inch. I didn't even go so far
as to test the countertop with our heavy stand mixer --- just Mark
pressing down in the middle proved we'd either need a thicker board or
would have to build a frame underneath to prevent bowing.
 How about our 1-inch-thick tabletop?
That board has done very well supported on the back edge plus on two
legs along the front edge despite being a full four feet long by two
feet wide. So that's definitely a thick board that will go the distance.
Here's hoping using a similar product for our hanging counter will do
the trick as well.
We spotted this handsome Blue Heron at Oxbow lake today during a Winter hike.
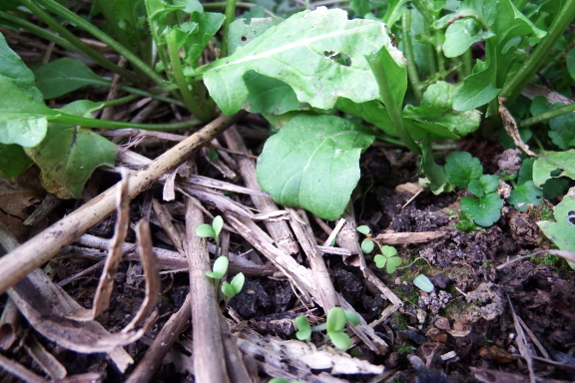
In an un-Anna-like fit of passion, I sprinkled some lettuce seeds into gaps within our cold frame sometime in (maybe?) early January. The planting wasn't on my list and I didn't mark it on my spreadsheet. But the weather was warm enough that I had a feeling the seedlings would sprout.
 Fast
forward ahead to Friday. The cold frame had been under a thick coat of
snow for the last week plus, first due to the actual snowfall, then to
thick mounds of snow that slid down and plopped off the nearby roof
throughout the last three days.
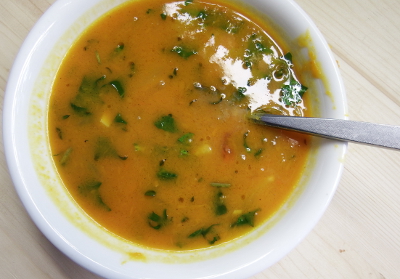
Finally, the glass was clear, and I wanted to pick a few baby kale leaves to add to a butternut-squash soup. But, oh, wait --- what is that? Baby lettuce seedlings! Hope for spring.
Plus, excellent arugula
and kale for the soup too. Mark noted that the cold frame was worth it
just for the homegrown salad harvested from the protected zone in early
January, but I'm going to add these lettuce seedlings and soup seasoning
to the gratitude list too. One cold frame tucked up against the
sunniest side of the house a thin wall distant from the wood stove is
definitely a good move.
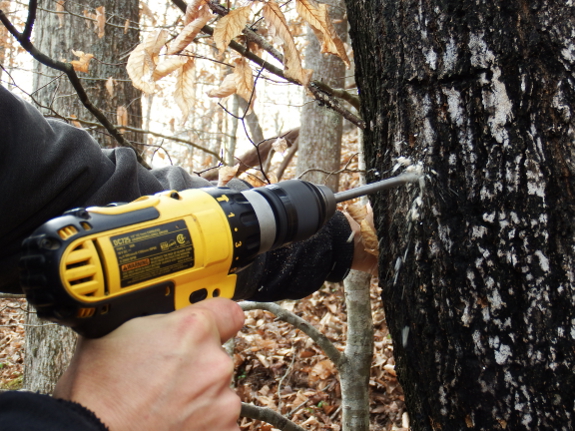
We started tapping one of our easier to get to Sugar Maples this time last year but learned from our Black Birch and Box Elder experiments that we prefer Black Birch and have a few closer to home than the Sugar Maples.
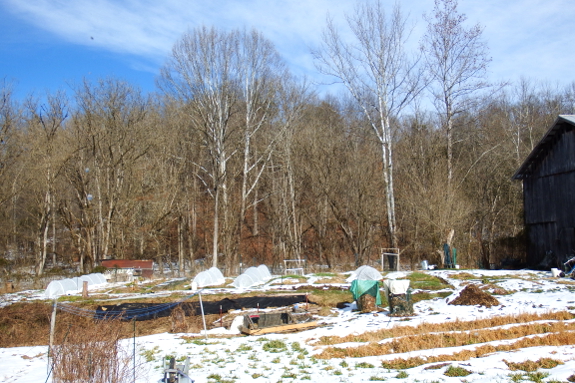
I reveled in the snow.
I enjoyed walking through the untrammeled surface during the first
couple of days, knowing that no one and nothing had set foot on that
patch of earth except me since the snow fell. I loved watching the way
tree shadows on the hillside made stark bands of black against the snow.
And, later, I enjoyed seeing how the first episodes of melt changed the
texture and color of the snow, how tiny bird and mammal tracks began to
mar each surface until it was no longer a blank canvas but one marked
upon by all the wild and not-so-wild inhabitants of our little farm.
But after about a week, I was ready for the snow to melt.
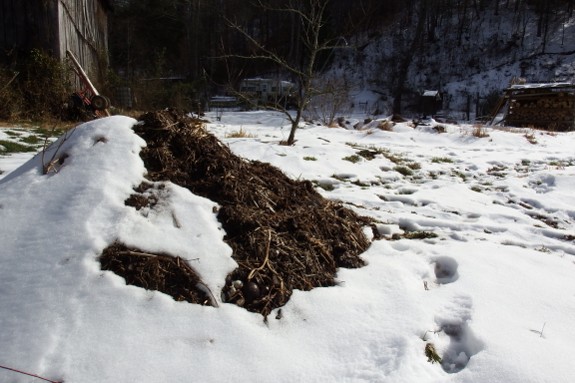
Obediently, the sun came
out and began carving the frozen water away. South-facing surfaces
thawed first while everything closer to our north-facing hillside
maintained a heavy coating of snow much longer.
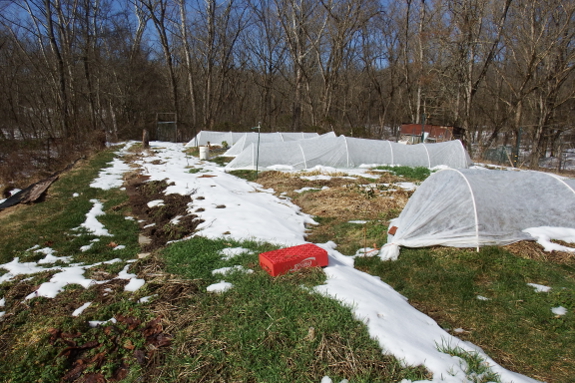
The mule garden --- our
sunniest patch --- was nearly snow-free by Saturday afternoon when I set
out with the camera to take these photos. Our cooped chickens live in
this same zone and had finally come out of their house for the first
time in over a week that morning. But when I got to this point later in
the day, I heard yet another sign of life...bees.
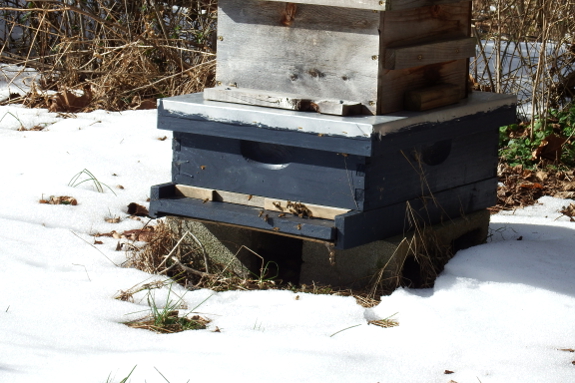
Both hives were very
busy, with workers flying in and out to release a month worth of poop
onto the snow. I'm glad to see such active colonies in the middle of the
winter and am seriously considering giving each hive a new box and a
bit of sugar water in February to get them moving. It sure would be nice
to get some homegrown honey this year....
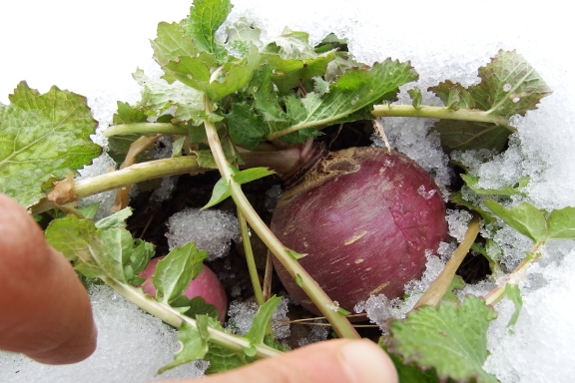
I wonder who planted root crops in our little city park?
Want more in-depth information? Browse through our books.
Or explore more posts by date or by subject.
About us: Anna Hess and Mark Hamilton spent over a decade living self-sufficiently in the mountains of Virginia before moving north to start over from scratch in the foothills of Ohio. They've experimented with permaculture, no-till gardening, trailersteading, home-based microbusinesses and much more, writing about their adventures in both blogs and books.

