archives for 10/2015
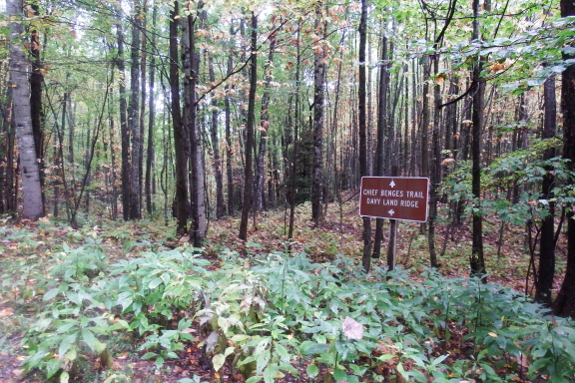
The Chief Benge Scout
Trail has been calling my name for the better part of a decade. It's a
21ish-mile hike (if you tack on the optional addendums at each end) that
begins on the top of a nearby knob and runs down nearly to the valley
floor. A fascinating high-elevation ecosystem combined with the fact
that you can easily divide the trip in half added to the appeal. So why
haven't I hiked it yet?

In the first place, the
logistics have daunted me a bit in the past. While the trail is very
close to our farm as the crow flies, it's at least a 40-minute drive up
winding forest-service roads to get to any of the trailheads. And then I
started figuring in the extra time it would take to leave a car at one
trailhead while being dropped off at another, and the adventure suddenly
seemed like less fun.
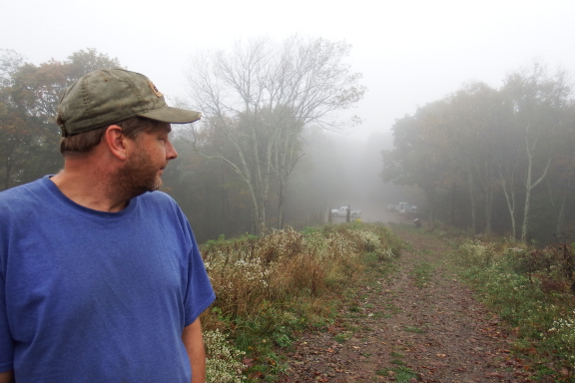
Enter my long-suffering husband, who volunteered to not only drop me off, but to pick me up too. How could I refuse?

Oh, yeah, there is
the fact that I haven't gone on such a long hike in many years. Sure, I
used to log about eight miles a day while carrying a 50-pound pack as a
matter of course...when I was 22. But could I still go the distance? Tune in for tomorrow's post to find out.
(In the meantime, if you're local enough to want actual information about the Chief Benge Scout Trail, here's an excellent map and description of the west half.)
 This is just a quick post to alert you to two special deals. First the freebie --- we ended up with three more boxes of Egyptian onion top bulbs. The first three people to email their mailing address to me at anna@kitenet.net
will be the lucky winners of this delicious and easy perennial
vegetable! (Unfortunately, we can only mail these within the U.S. ---
sorry to our international readers.) The onions are now claimed!
In other news, my $10 Root Cellar ebook
is marked down to half price today only. In addition to the project
that led to the title, the book includes tips on growing roots, feeding
roots to livestock, and much more. I hope you enjoy it!
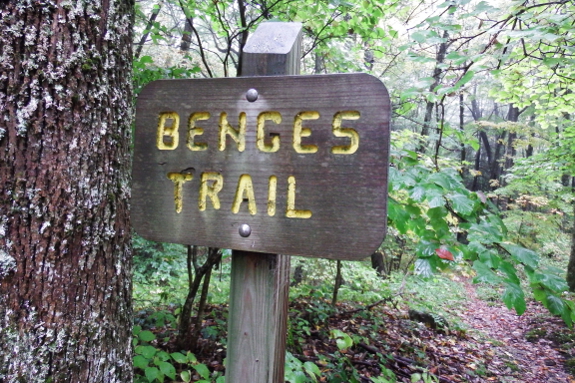
Mark made the excellent point that if I was going to challenge myself to a long hike
that might push my capabilities, it was best to start as early as
possible. To that end, I milked Abigail by flashlight before dawn, and
we hit the top of High Knob a bit after 8. The mists were very heavy, so
I didn't get to enjoy sunrise from the tower. But I was too excited to
care.
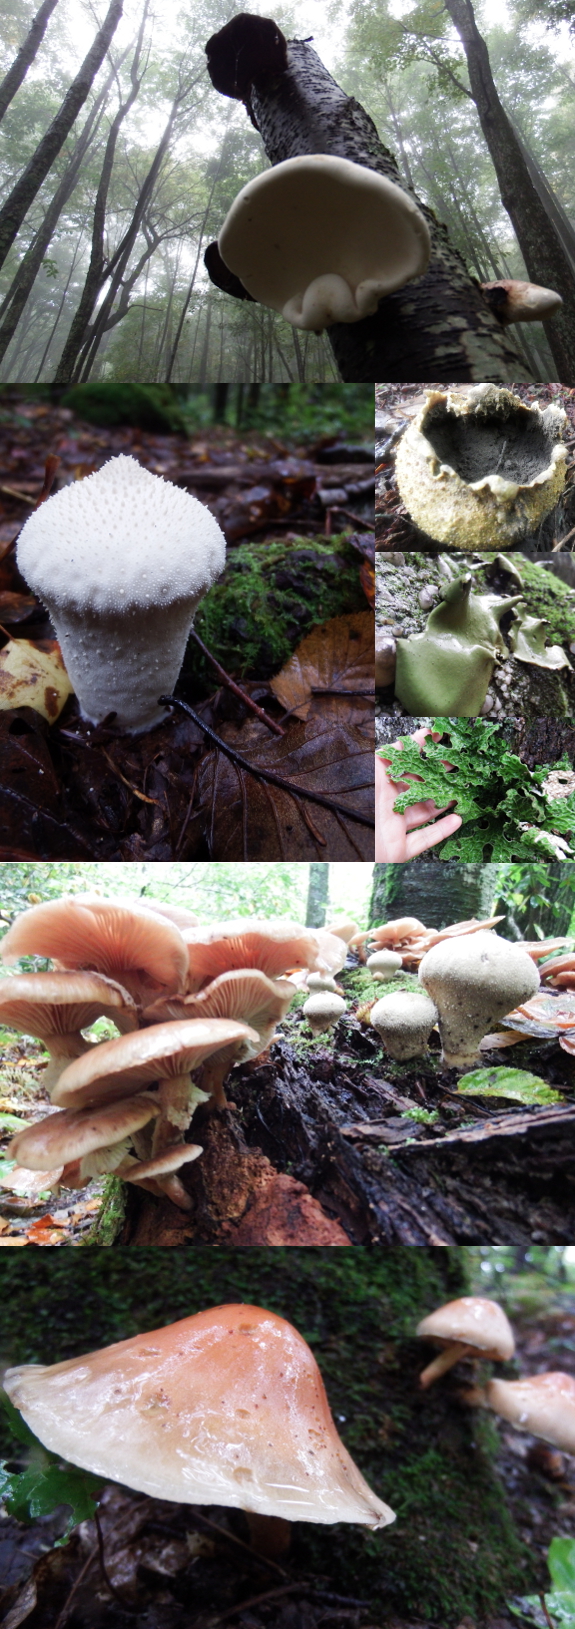
Instead I walked with a
big grin on my face...and photographed fungi. We've had a relatively
rainy week down in our valley, but I could tell that High Knob is much
wetter than even our soggy farm. How can I tell? I measure overall
precipitation for an area by fungal proliferation, and High Knob
definitely won out in that department.
(The astute naturalist
will notice that there are two lichens above...or at least I think that
one in front of my hand is a lichen. But they're related to fungi, so I
included them in the collage. Also, don't miss the high-elevation birch
polypore in the top shot!)
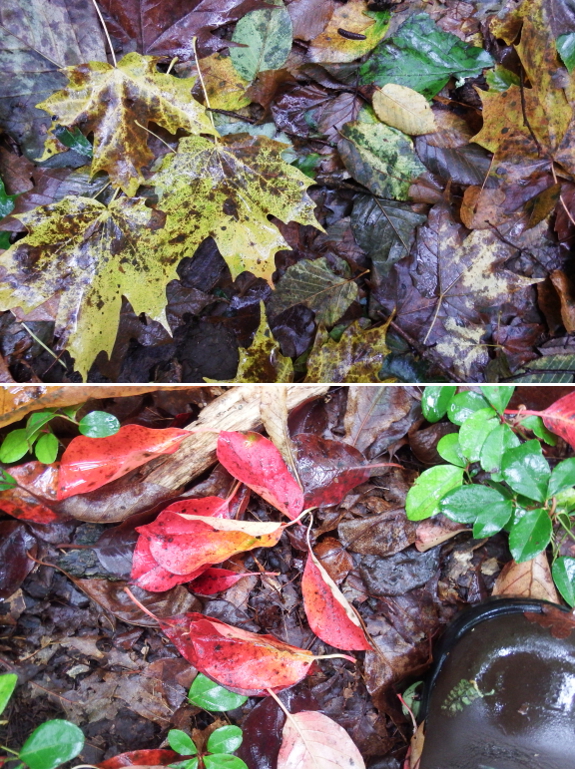
I also enjoyed the fact
that high-elevation trees are already starting to sport their fall
foliage, making the hike particularly beautiful. In fact, I was able to
measure my downhill progress by the leaves beneath my feet. Up high,
sugar maple leaves coated the forest floor, but I eventually dropped
down into the land of tulip-trees, and then walked up onto a drier ridge
where blackgums dominated.
 (And, hey, look --- a newt! I actually saw seven of these along the trail.)
My hike was going
swimmingly. After a couple of miles, my can-I-do-it? jitters had washed
away. My first lunch of two peanut butter apples and my second lunch of
homemade mozzarella with peppers, tomatoes, and snow peas hit the
spot...especially when washed down with a thawing quart of goat milk.
And I could tell that my planned timing --- 2 miles per hour, plus a
spare hour for wiggle room --- was going to get me to the destination
just a little early. Perfect!
And then I got lost....
We went to see "The Martian"
on our last day of staycation.
Science + space travel +
humanure = an awesome movie adventure.
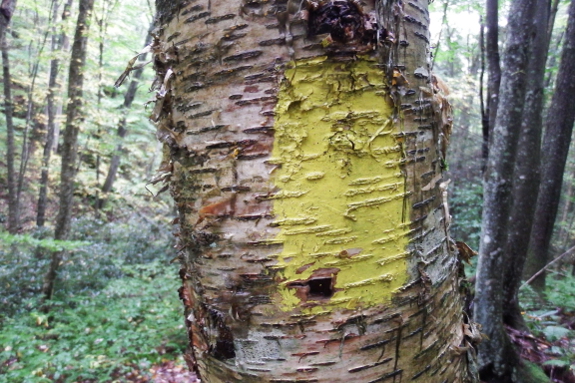
Before I started on my hike, Mark admonished me "You'll stay on the trail, right?"
"Of course I will," I promised. And I really did mean to. The trouble was the blazes.
Actually, I was highly
impressed by how well the trail was marked at first. If you understand
blazes --- pay attention to the color and look for double-blazes to
alert you to an unexpected turn --- following the trail from the High
Knob Tower to Edith Gap was child's play.
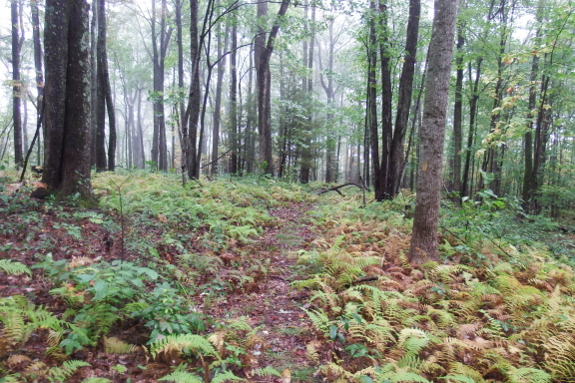
Okay, yes, I'll admit
that as I got closer to Edith Gap, the trail got slightly trickier.
Orange blazes joined the yellow as a horse trail cohabited with my
walking trail. And, in some spots, only orange blazes existed to mark
both avenues. But after I figured out what was going on, I was okay with
that.
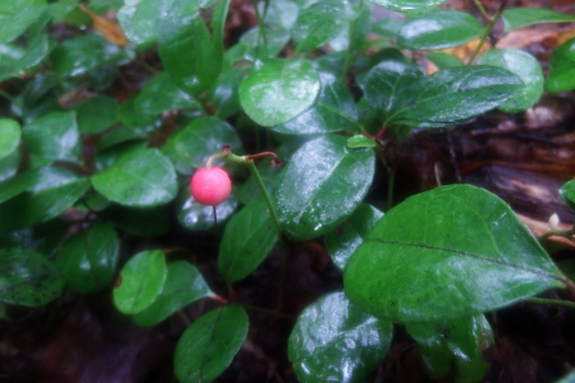
The trouble happened when
my trail crossed the next forest-service road...and seemed to
disappear. While the higher-elevation portions of the Chief Benge trail
could just as well have been located in a National Park, this region
shows the reality of trail-building in the National Forest ---
clearcuts. Through some oversight, a clearcut had been smacked down
right in the middle of the trail, meaning that I was suddenly walking
through a thicket of five-year-old trees with no blazes in sight. Gulp.
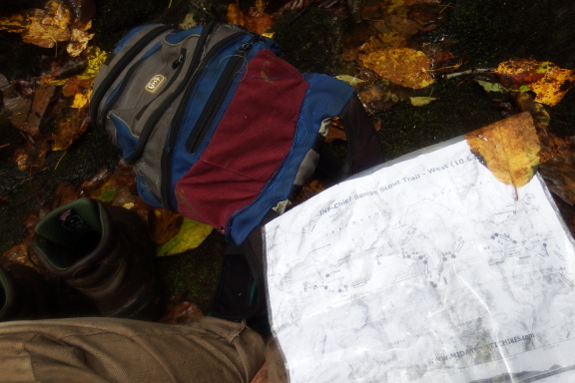
Enter my handy, dandy
map. When walking over new ground, I try to bring along a high-quality
topo map at all times. And here's why --- the visual helped me figure
out how to bushwhack in just the right direction so I could meet back up
with the trail less than half a mile downstream. Success!
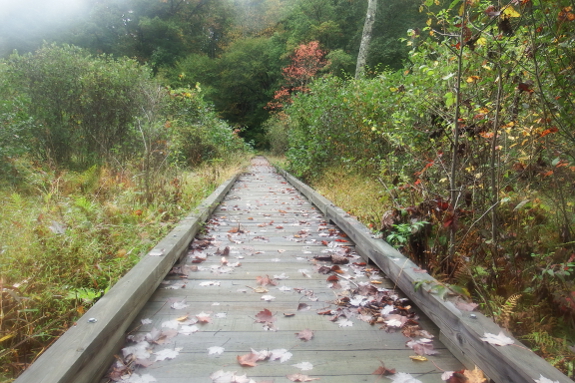
I think I probably used
more calories during my fifteen minutes being lost than I did during the
whole rest of the hike. And since the blazes were suddenly scanty from
there on out, I tired myself out yet more wondering if I'd actually
found the right trail and was heading in the right direction. Boy was I
glad to see this boardwalk at the upper end of Bark Camp Lake, proving
that I'd not only guessed correctly, but was also on the home stretch.
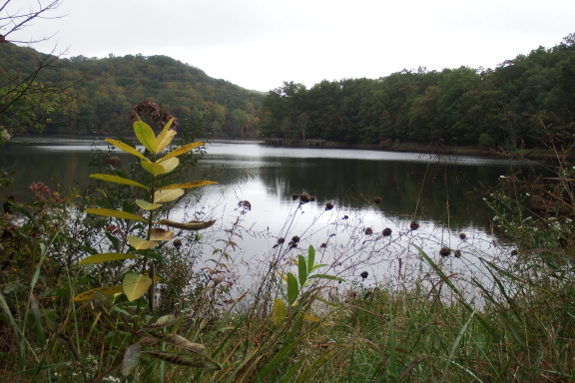
I'll admit that I wouldn't have wanted to walk longer, and I did end up with tired muscles and sore feet. But I learned that a hike of that magnitude is definitely not beyond my means, which is an empowering feeling.
I do think I'll wait a while before hiking the other half of the Chief Benge trail, though....
Our new hens started laying two weeks after we installed Christmas lights.
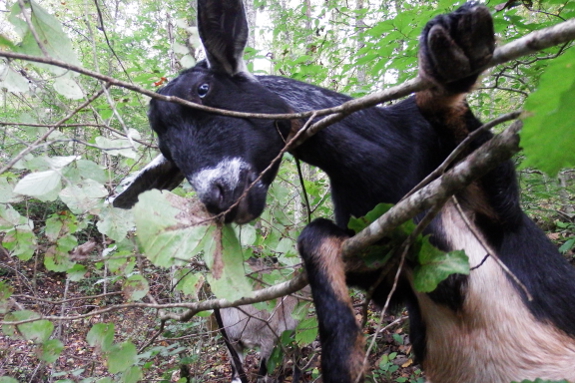
So, I've been tearing up the virtual pavement trying to find Artemesia just the right date.
There was that nice Mini-Nubian buck who wanted her to come stay over
for a month...but Abigail and I begged our darling doeling not to go
since we would have missed her too much. A high-class Dwarf Nigerian
offered to meet Artemesia for a quick hookup, but he never told us his
phone number and didn't call back after he saw her online profile. (Poor
Artie felt so jilted.) Then there was the blue-collar guy who I was
trying to set her up with...until I took a closer look and decided maybe
I needed to be thinking about another sort of date entirely.
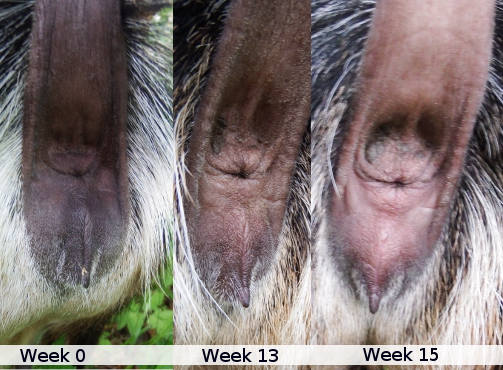
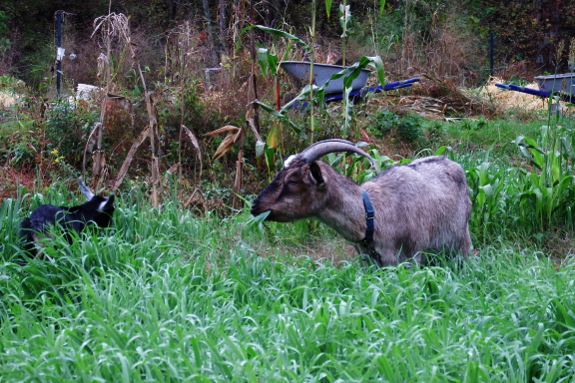
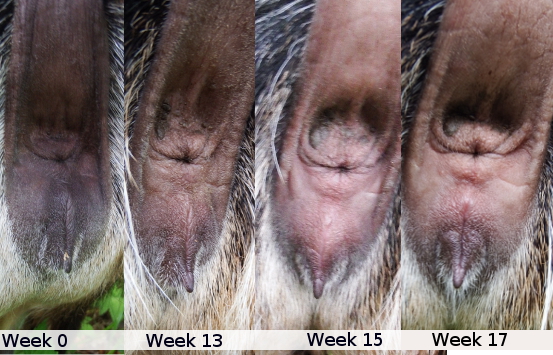
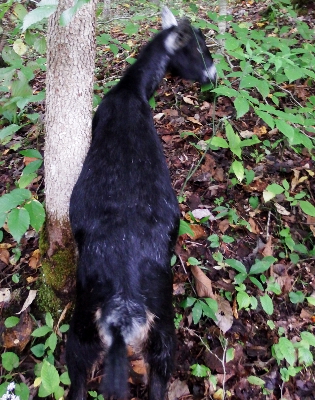 Two weeks, ago, the pooch test
appeared negative. But now, considering this lineup of goat butts, I'm
suddenly 50% sure Lamb Chop actually managed to do the deed in June
after all. Meanwhile, my post on a goat forum resulted in two expert
opinions, both in favor of Artemesia being knocked up.
Artemesia is
a lot rounder lately too, but she and Abigail have been eating more hay
since the weather turned wet and I cleared the old stuff out of the
manger. I'd say our doeling appears just as big on the right side as the
left side at the moment --- inconclusive.
The biggest point in
favor of a possible pregnancy is that Artemesia doesn't seem to have
come into heat at all this fall. Abigail has --- our usually quiet goat
yelled like crazy this week and sported mucous under her tail. But Artie
--- usually the chatty one --- has been mild-mannered and quiet for months.
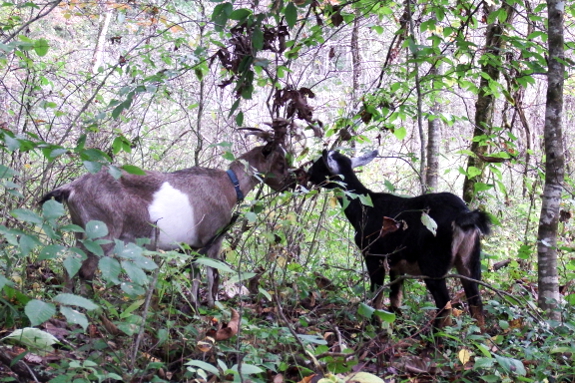
So maybe I have a first
freshener on my hands, not a doeling after all? This would be wonderful
news --- winter milk starting up just about the time Abigail dries off,
plus a doeling who will kid while fat and happy on summer browse.
Depending on whether a
Mini-Nubian counts as a standard breed or a miniature breed, Artemesia
would be due between November 5 and November 10. Gulp. I'd better start
training her to enjoy butternuts and carrots if I want to keep that
healthy layer of fat on her back. And if the signs of pregnancy continue
to look positive, we can buckle down for the next step --- guessing how
many kids will pop out.
Our flock of Fall broilers
are growing like weeds.
We're both impressed with the
foraging skills of Red
Rangers.
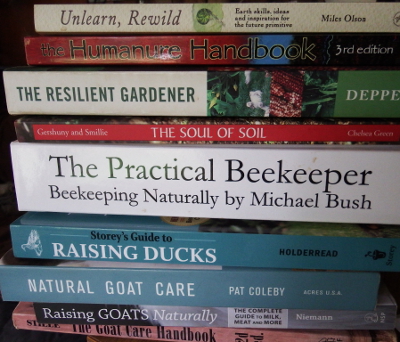 It's
that time of year again when I purge my bookshelf of books I'm no
longer reading so I can make room for new interests. Many of this year's
texts come highly recommended --- I've just milked all of the knowledge
I can from them and am ready to pass the carriers of information on.
Want free books of your very own? Head over here and take my four question survey about your reading habits
and you'll be given a link to the rafflecopter form to enter the
giveaway. I'm going to give away the books in groups of three or four to
allow more people to win, so be sure to take a minute to decide which
books you want the most now. Your options include:
- Unlearn, Rewild
- The Humanure Handbook
- The Resilient Gardener
- The Soul of Soil
- The Practical Beekeeper
- Storey's Guide to Raising Ducks
- Natural Goat Care
- Raising Goats Naturally
- The Goat Care Handbook
- Understanding Roots
- The Market Gardener
As you'll be able to tell
from my survey, I'm trying to decide whether to stick with Amazon's KDP
Select program, which requires me to keep my books exclusive with them
if I want readers to be able to borrow the titles for free using Kindle Unlimited.
So consider this post a warning as well as an oportunity. If you were
thinking of borrowing my books but haven't gotten around to it, you
might want to do so now in case I start pulling them out of the program! Happy reading.
We've had the Minox
25 Liter stainless steel drinking container for almost three years now.
Our pump sends water from the
well through a sediment filter and UV light where it gets stored in the
Minox which is elevated on a shelf for gravity assistance.
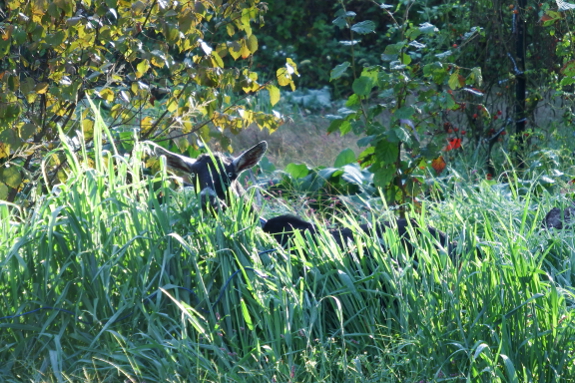
Our staycation coincided
perfectly with a week of seemingly endless rain. Then, when Monday told
us to get back to work...the sun came out! The change in weather gave
everyone on our farm the gumption to jump back into outside tasks joyfully.
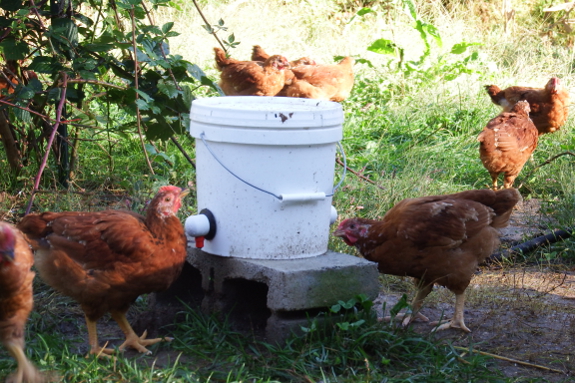
Mom asked what we're up
to now that our staycation is over. I've still got a few beds of garlic
and lettuce to plant this week, but mostly we're in renovation mode to
make sure that this year's garden weeds don't get away from us the way
they did last year. In fall 2014, the only straw we had on hand was seedy, so our mulch was worth than useless. This year, our straw is great and we've also got time to plant a rye cover crop
in bare beds. Just gotta get rid of the results of last year's laxness
before the ground becomes too cold for my tender fingers!
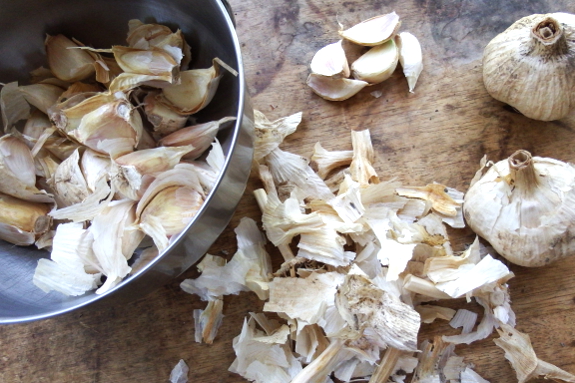
How much garlic do we plant to feed the two of us all year? Now that we've entirely converted over to huge, hardneck Music heads,
we get by with 96 plants. About 15 of those are our "seed" garlic,
which I split up to plant at this time of year (rejecting the smallest
cloves). The other 81 heads of garlic feed us well and also act as an
occasional dewormer for our goat herd. We give a little bit away, too,
and always have a few extra heads when the time comes to pull in next
year's harvest in June.
On the other hand, if I
were like my brother, who mentally translates "clove of garlic" into
"head of garlic" in all recipes, I'd have to plant a lot more. But for
more normal eaters, I'd say 40 heads of garlic a year per person is a
pretty good amount.
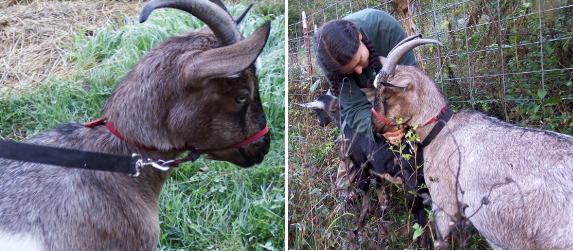
Ever since we started letting our goats eat oats again, Abigail has been very ornery on the way back to her pasture. She doesn't want to leave those tasty cover crops behind!
Anna got tired of dragging Abigail when she'd lie down and refuse to walk, so we found Lucy's old gentle leader. The harness makes it easy to win the battle of wills with our ornery goat, so now Abigail goes where we want her to.
We change back to a collar
after walking to or from the garden, though. Even though the gentle
leader doesn't make it impossible for a goat to open her mouth, we
figure Abigail might as well be comfortable during her leisure time.
And maybe, as with Lucy, a few weeks training is all it will take before the gentle leader can be retired once again.
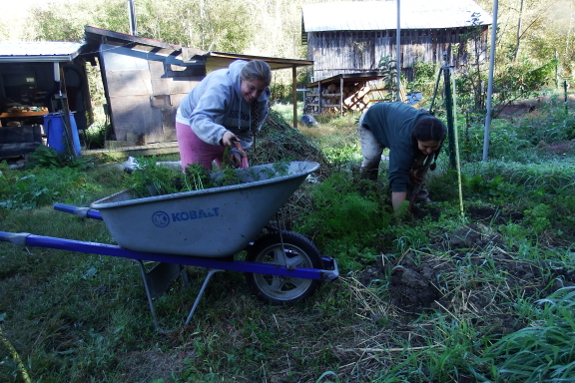
Our last big harvest of the year is always carrots. I actually dug a few beds in September to spur along my garden renovation,
but there were still several more beds to go. Good thing Kayla was
willing to come over and turn a chore into a long morning of fun and
gossip.
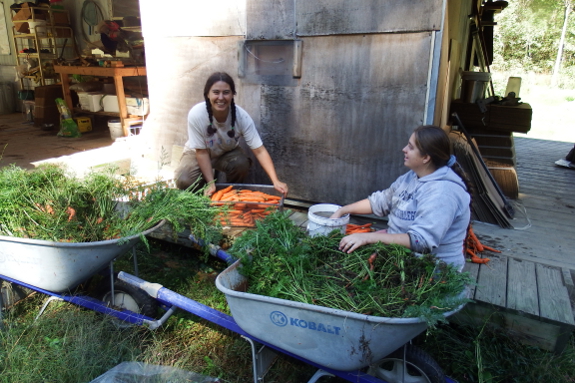
We dug, washed, and
sorted nearly a bushel of carrots in a couple of hours, which leaves me
perhaps a third that much to work up today. That's a lot of carrots, but
only the cream of the crop will go to two-leggers, with the goats
eating up the remainder.
Assuming, of course, that I can teach Artemesia to eat anything other
that wild food, hay, and alfalfa pellets. Our littlest goat actually
nosed the butternut squash out of her dish yesterday morning even though
I drizzled molasses on top to sweeten her disposition.
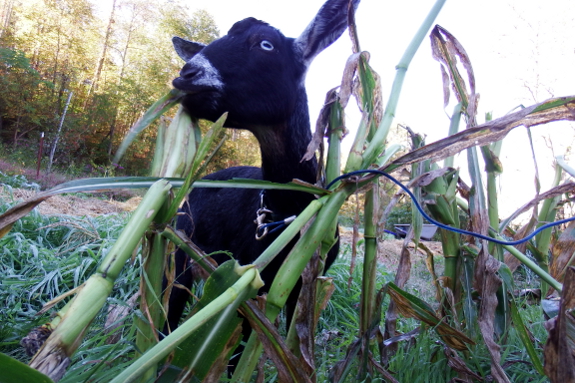
"I think she's already sweet enough," said Kayla, patting our darling doeling in the head.
"Yeah, but I'm worried she might not be getting enough carbs to keep her kids fed if she really is pregnant," I replied. And then I proceeded to tether our spoiled first freshener amid the sweet corn stalks.
"Now that's carbs worth eating," Artemesia proclaimed. Munch, munch, munch.
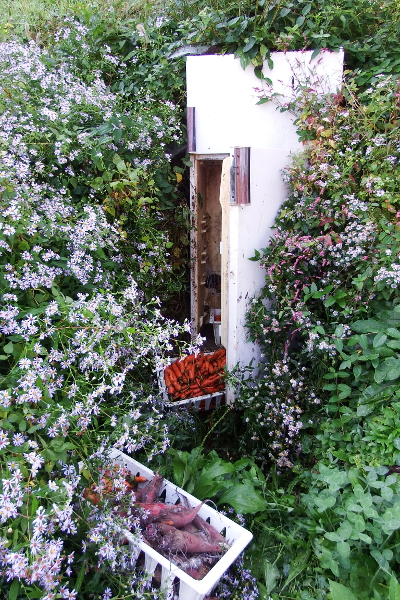 The very best carrots ended
up in the crisper drawer of our electrified fridge (which we use nearly
100% for that purpose). The rest were deemed goat carrots and headed
over to the unelectrified fridge root cellar.
Which forced me to admit
that we might actually run out of room in our fast, cheap root-cellar
alternative this year. Because there are lots of mangels in the garden
that will need to be harvested before our first hard freeze, and the
carrots alone nearly fill our in-the-ground fridge up.
Of course, I'm still not sure whether Abigail will lower her standards enough to eat a mangel,
or whether I'll end up giving them all to my mother, who said the
fodder beets were at least moderately suitable for human consumption.
Yes, I'm well aware that this paragraph makes it abundantly clear to
the whole world that my mother is less spoiled than my goat.
We moved our broiler
flock into a big bird coop this week.
I can carry two chickens and
Anna has sometimes managed three.
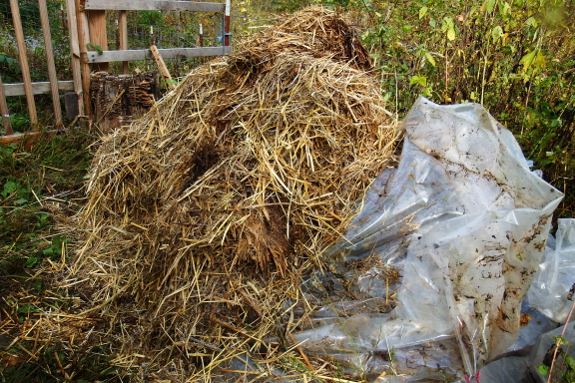
Summer 2014 was too wet
to allow us to haul in horse manure for 2015, so we spent most of this
year using homegrown fertility sources instead. Good thing we got goats!
I used manurey bedding nearly as quickly as our animals made it all
season, but now I'm starting to bank compost piles for next year.
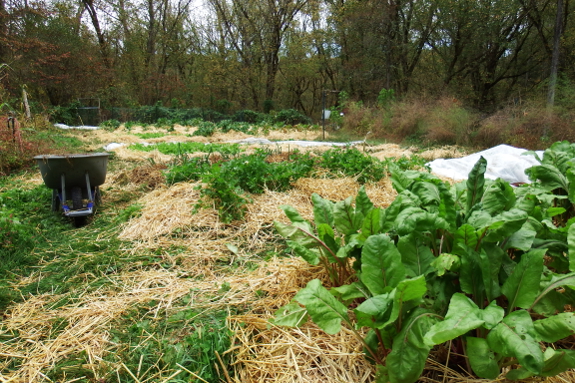
The photo above shows the
result of three goat-shed cleanings. On the right, I forked two
cleanings-worth into one small pile after the bedding had been rained on
a few times, then I covered the composting organic matter with plastic
to prevent nitrogen leaching away during winter rains. The new pile to
the left is this week's addition, which will be treated the same way
once the straw hydrates and begins to rot.
Between goat and chicken bedding and garden weeds,
I've now got three little compost nooks spread around our core
homestead. Hopefully by the time spring rolls around, we'll have enough
well-composted organic matter to make 2016 a better garden year!
Today we learned about life in the late 1700's from authentic living history actors.

A huge thank you to the 217 readers who took my survey
last week! Four of you won my discarded paperbacks (and two of the
winners haven't gotten back to me yet with their mailing addresses...so
check your email). I thought I'd go ahead and share the results here
because I know many of you are interested in microbusinesses, and
self-publishing ebooks on Amazon has actually turned into about half of
our annual income in recent years. So if you're thinking of publishing a
homesteading-related ebook, this market research might help you get off
to a good start.
I'll begin my analysis with Kindle Unlimited. You can read my early thoughts on the program here.
After writing that post, the large quantities of borrows meant that
Amazon dropped their payout to about $1.30 per book read to the 10%
mark...which was still a very good deal since so very many of my books
were borrowed so very frequently. I loved what those in the industry
call KU1.
Then KU2 came around in summer 2015 and started paying authors per page read rather than per borrow. I manage Aimee Easterling's novels,
and they soared under the new program. Unfortunately, my how-to books
were penalized for being short on words and long on pictures. Under KU2,
I ended up getting only about 45 cents for a book read all the way
through. And to make matters worse, many readers used my books as
references and only read the pages they were interested in, lowering my
borrow income yet further. In the end, I had to admit that the income
from KU borrows wasn't making up for the fact that I had to commit not
to sell my ebooks on any other retailer in order to be part of the
program.
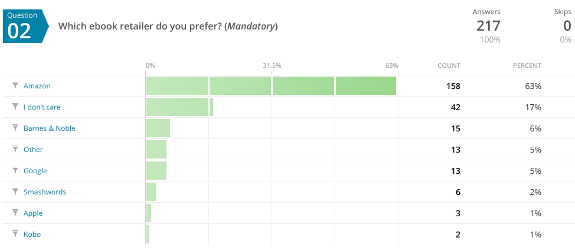
Luckily, survey results
proved that I won't be making too many readers angry by pulling out of
Kindle Unlimited. Among my blog and email list audience, only 11% of you
read much non-fiction using Kindle Unlimited while 20% of you actually
prefer a non-Amazon ebook retailer. Looks like I'll better serve my
readers by going wide (as indie authors refer to pulling their books
from KDP Select and uploading to all retailers) rather than offering my
titles through Kindle Unlimited. So I'm in the process of making that
switch with my most popular titles now.

In the meantime, another
survey question gave me something entirely different to chew on. I've
come around to reading almost all fiction on my kindle, but I have to
admit that I still prefer to read non-fiction on paper. So I wasn't
surprised to find that 62% of you felt the same way. Lately, I've been
focusing on expanding and polishing one or two titles per year to hit
real, physical shelves, and it looks like that will continue to be my
annual goal going forward.
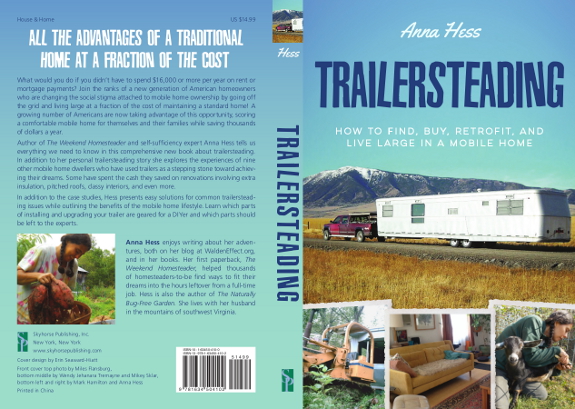
To that end, long-time readers are probably aware that Trailersteading is already up for preorder
on Amazon. I got the finished cover file this week and am highly
impressed by the designer's awesome job. My favorite cover yet!
 In other book news, I'm about 70% of the way done writing my all-new and straight-to-paperback The Ultimate Guide to Soil,
which will probably go up for preorder this winter. (Don't worry: there
will be an e-version too.) I've been having so much fun writing this
book, especially since I've forced myself to leave out any science
geekery that gardeners can't feel, smell, or easily impact in their own
dirt. The result is an entirely hands-on soil book that I hope will be
perfect for those of you who like to get your hands muddy.
When I first wrote about The Ultimate Guide to Soil, actually, I told folks that the book was going to be an expansion of Homegrown Humus.
But when the time came to fold the cover-crop information in, my soil
book had already gone over my publisher's recommended word count and
seemed quite full. So 2016's paperback will be an expanded and revised
print version of Homegrown Humus to complete the tale. I'm actually glad
the books will stay separate because I have a lot more I want to add to
my cover-crop saga!
Phew! That's a long,
nerdy post. I hope some of you aspiring or actual authors will get
something out of it. And don't forget to have fun in the great frontier
of indie or hybrid publishing. I know I do. Happy publishing!
We moved our new feed trays to make room for a new kidding stall.
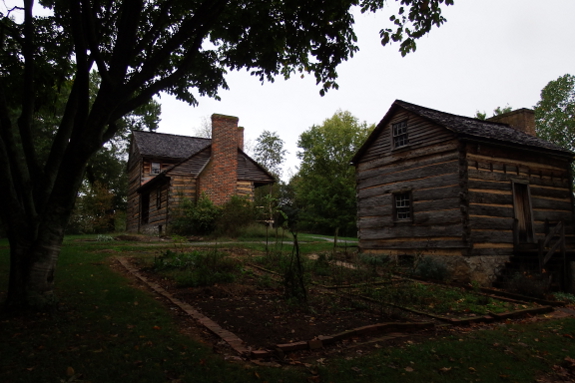
Rocky Mount
was another of those local attractions that I visited as a school kid
but was clearly too young to fully appreciate at the time. Emily and her
husband met us there for a tour, and we were all amazed by the museum
and (even more so) by the re-creation of frontier life out back.
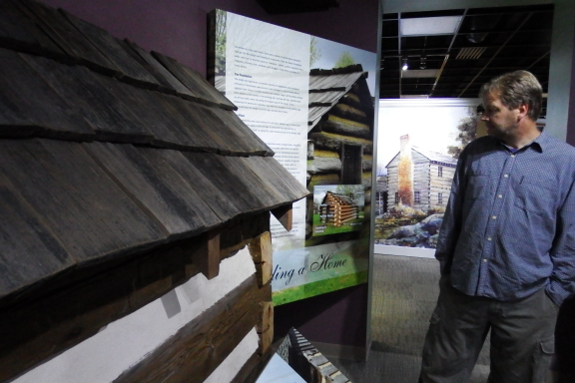
But I'll start in front, where Mark was quite taken by the shake roofs that covered the barn, sheds, and houses.
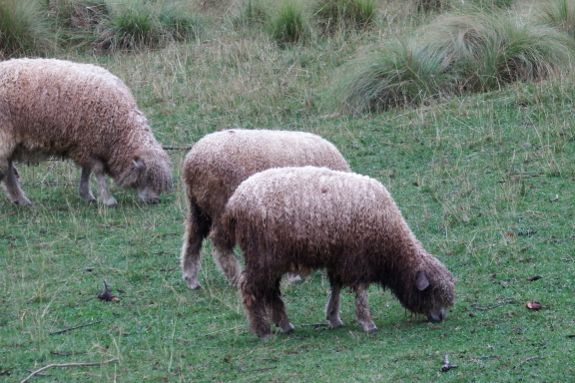
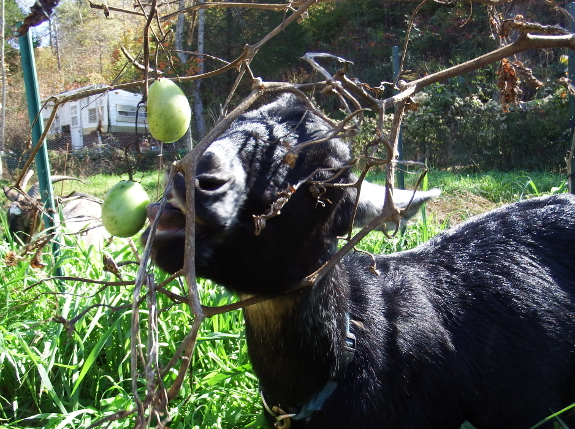
I, of course, was more
drawn to the heirloom sheep and to the orchard, where I snagged a few
pears that otherwise seemed destined to rot on the ground.
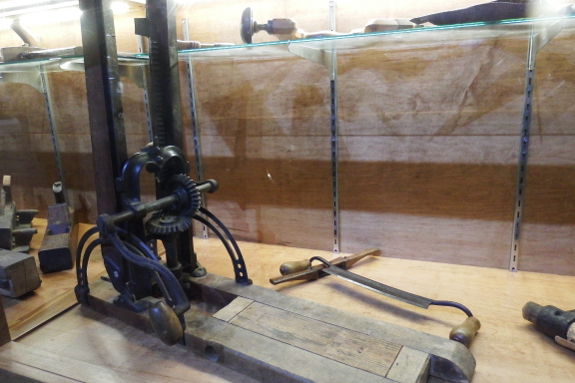
Inside, Mark's toolish eye immediately picked out the hand-cranked drill press...
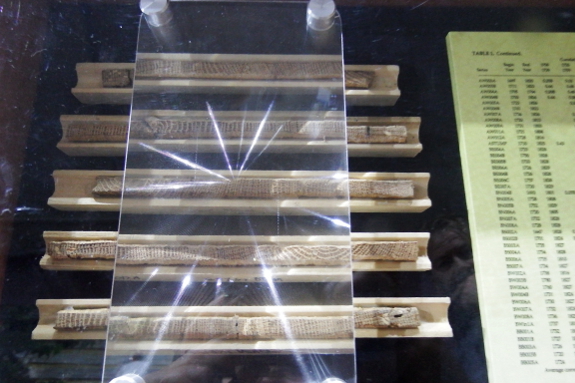
...while I was more interested in the idea of using coring technology to learn about the trees that made up the log houses.
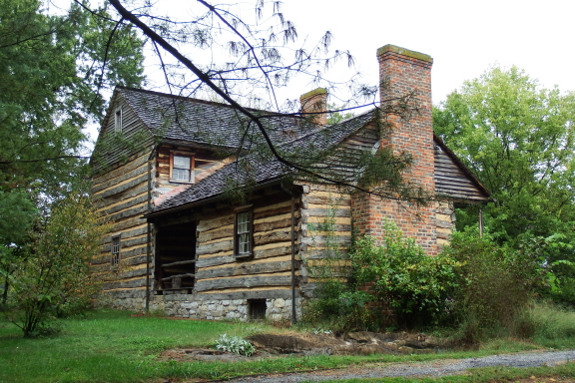
Speaking of log houses, the real adventure began when we finished our
interior journey and stepped into the world of 1791. The
farmstead of the Cobb family has been lovingly salvaged and restored and
tour guides dressed in period clothing welcome you inside to learn
about their life after the Revolutionary War.
Above, you can see the
main house, with the typical dogtrot (covered porch) joining the
original smaller house with the larger addition. The Cobbs were quite a
wealthy family, evidenced by the size of their house and by the presence
of glass windows. There is no kitchen in the main house either --- just
living and sleeping accommodations --- since the family was rich enough
to own slaves. As we learned later in our tour, all food was cooked in a
separate building and delivered in stages to the family and to their
numerous guests.
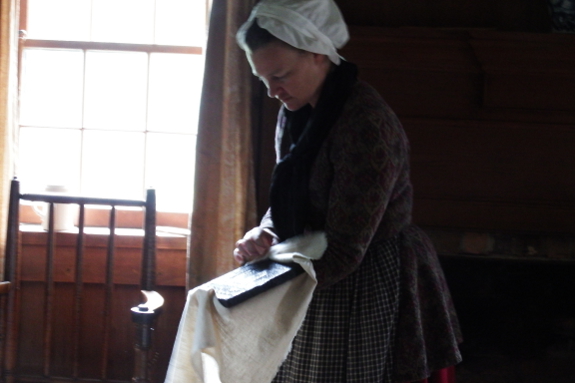
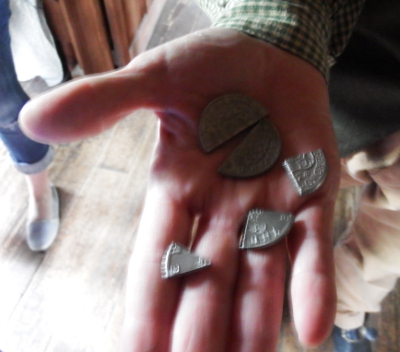 Mark called the tour guides actors,
but I was able to suspend my disbelief most of the time and accept that
they were real people of 1791 welcoming us into their lives. (Yes, I do
find it particularly easy to live in a fantasy world. Why do you ask?) I
could feel this woman's wonder and care as she unwrapped a block of tea
from China, which she informed us would cost more than a day of a man's
wages. And I was intrigued by the pieces of eight (called "bits" here
on the frontier), by straw ticking for children's mattresses (easier to
restuff than feathers if younguns wet the bed), and by standing writing
desks.
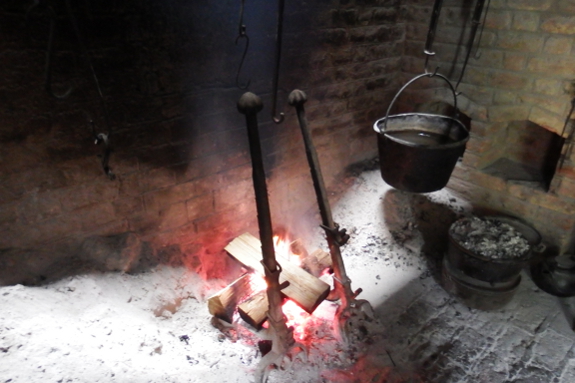
But the best part of the
tour came when we reached the kitchen, complete with drying herbs, huge
cooking hearth, meat spit, and warming oven. Off to the left (not
visible in this picture) was a bread oven, fired up once a week for a
huge day of baking. "We never bake on Mondays," our guide explained,
"Because it takes the entire day beforehand to prepare, and Sunday is
the Sabbath."
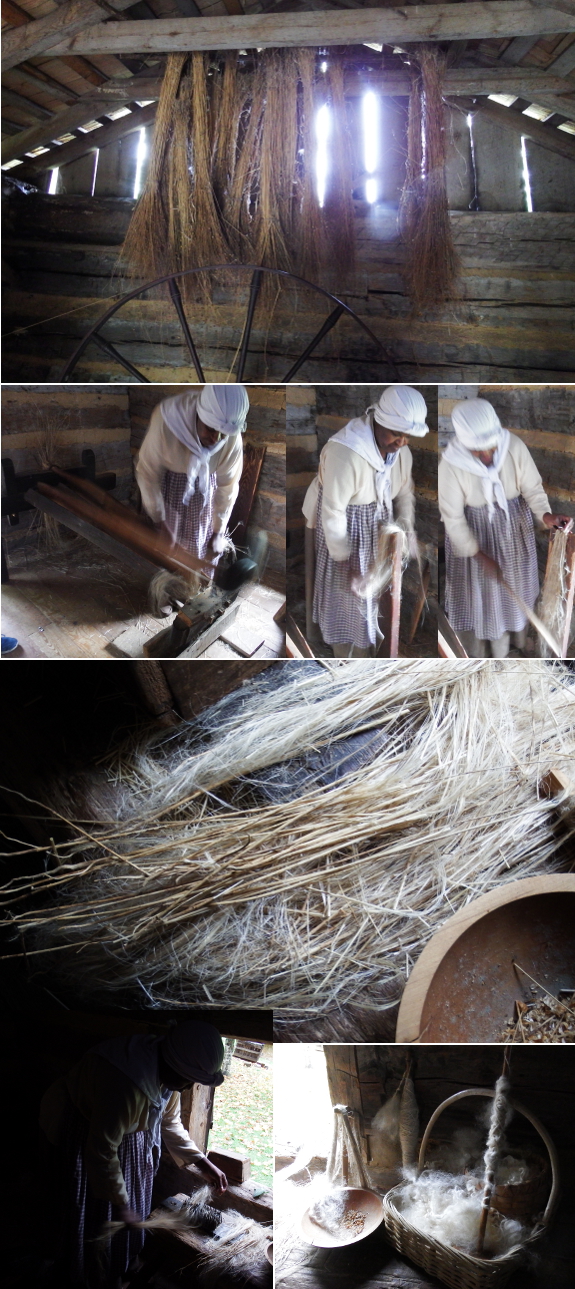
Okay, I lied. The real
best part was when the cook brought us down to the weaving house. I've
seen spinning and weaving before, but had never watched flax being
transformed from plant to thread. The process was astonishing.
First, you dry the plants
for a couple of years, then you pound them with a heavy weight thing to
loosen up the woody exterior fibers. (Yes, I missed all of the proper
words --- I should have been taking notes.) Rubbing bundles of loosened
flax across a post and then hitting it with a stick knocks off most of
those woody fibers, but you really turn the flax into thread by pulling
it through a metal brush. Add in some wool from the farm's sheep and
you've got fire-resistant linsey woolsey, perfect for a cook who spends
her days flapping a long skirt at an open flame.
I won't write more
because I don't want it to take you as long to read this post as it took
us to suck up all that Rocky Mount has to offer. But I highly recommend
this outing, which costs $7.50 apiece with a AAA card. We spent three
full hours in the museum and on the grounds, and if I hadn't been
starving we likely would have stayed longer. Go after lunch and stay all
afternoon --- you won't regret it!
We retired our rooster today
due to his aggressive mating habits.
He was so demanding that our
hens were flying over fences to get away.
I've been reading a pre-release copy of Leigh Tate's Critter Tales
and really enjoying following along on her adventures. My favorite
part, though, is quite personal. Leigh's journey toward meat
independence has 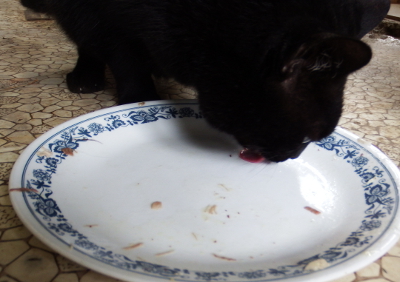 been quite similar to ours, and so her book helps me see how far we've come.
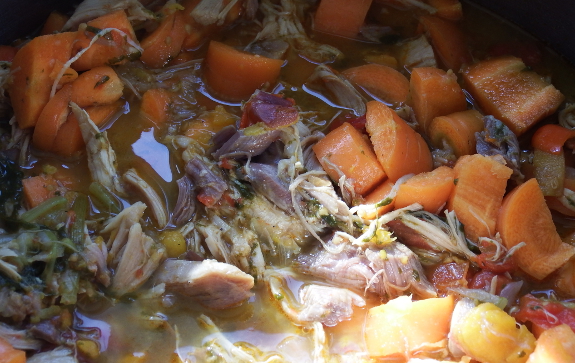
Not only do we kill a problematic rooster
without excessive angst nowadays, we also cook him up into soup to eat
that same night. This may not sound like such a big deal, but putting
your birds in the freezer for a few weeks before eating them is one way
to gain that emotional distance necessary to think of the meat as food.
Huckleberry and Lucy have no problem with this mental contortion, but
it's taken me a full nine years to get to this point.
What's the next step in
our meat-education journey? We're probably going to upgrade our goat
herd if Artemesia has a daughter, keeping the new doeling while deleting
Abigail. I'm having trouble thinking of our current milker as anything
other than a pet, though, so I haven't yet crossed over the bridge of
deciding whether it's better to take her to the butcher or try to sell
or give away an okay-but-not-top-notch goat. Clearly, we still have some
meat angst to work through before we'll be real homesteaders at heart.
We finished the kidding stall
today.
Now Artemesia has a semi
private place for her future birth day.
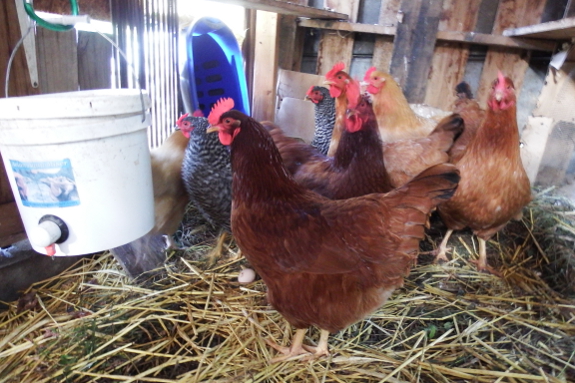
We had a chicken-flying-fences problem
beginning in September, but it took until our staycation rested our
minds before we were able to start getting a handle on the issue. With
problems like this, I've found that clipping wings
(dealing with the symptoms) doesn't hold a candle to rooting out the
real cause of the problem. So I put on my thinking cap and realized
there were several issues at play.
First of all, this year's
rooster turned out to be a pouncer rather than a dancer, and he was
especially fond of the Buff Orpingtons. As a result, those ladies
started flying fences to escape his affections, and the other hens soon
followed suit. I have a feeling that if I'd paid attention and nipped
this in the bud, deleting the rooster would have been sufficient cure, but the cat is now out of the bag. Oh well!
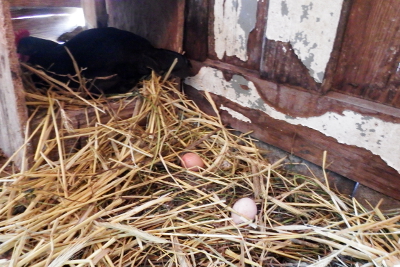 Since
the pullets started flying over fences right when they started to lay,
though, they ended up choosing random spots in the weeds to cache their
eggs. Again, this problem was exacerbated by our neglect. The chickens
were roosting in the coop nest boxes at that time, so the cavities were
poopy and unpleasant. No wonder our hens didn't want to lay there. As a
retroactive fix, Mark moved the roosts away from the nest boxes, cleaned
out the latter, and then added one nest box on the floor. (Even though
humans like raised nest boxes and chickens like raised roosts, in my
experience a hen will always prefer a nest box on the ground.)
A few pullets started
laying in the ground nest box, but half were still flying fences, so
Tuesday we embarked on Project Shut-In. It's pretty simple and is a
relatively effective way of breaking hens from roosting or laying
outside the coop. Just leave your girls inside with no play time for a
few days, and their short chicken attention spans seem to become
refocused on home base.
I hope that puts the
finishing touches on solving the fence-flying problem! As you can tell,
we could have nipped the issue in the bud in several different ways in
September, but in the midst of the planting/weeding/harvesting frenzy,
something had to fall by the wayside. Good thing chickens are relatively
easy to get back on the right track even after a month of neglect.
We deleted a 3 cedar post
trellis line today that was 9 years old.
Two of the posts are still
good despite being soaked in constant ground water.
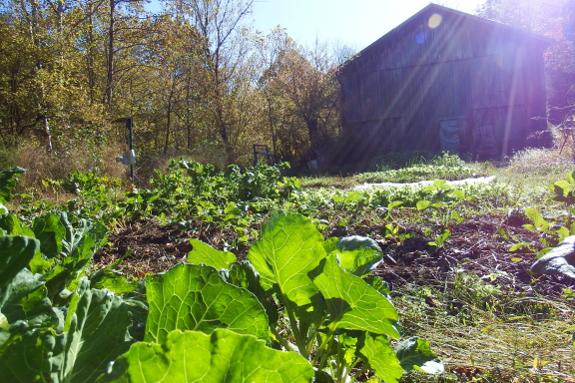
My front-garden renovations
are only about halfway complete, but I took a break this week to get
the mule garden in order. I hadn't originally planned to do anything
here except weed, mulch, and plant rye. But looking at the area with a
critical eye made me realize that this zone could use some bed
renovations as well.
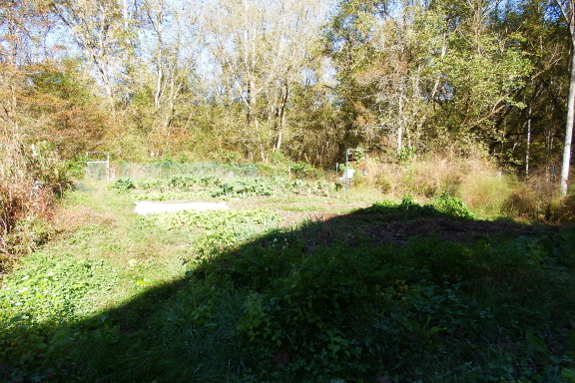
The mule garden is our
sunniest winter spot, so I save it for spring and fall
crops. But as you can see in the photo above, the beds closest to the
barn don't get much morning sun at all in the off season. Meanwhile, the
trellis you can barely see at the left side of this photo uses up prime
sunny real estate. Looks like Kayla and I will be moving some dirt
today from the shade to the sun!
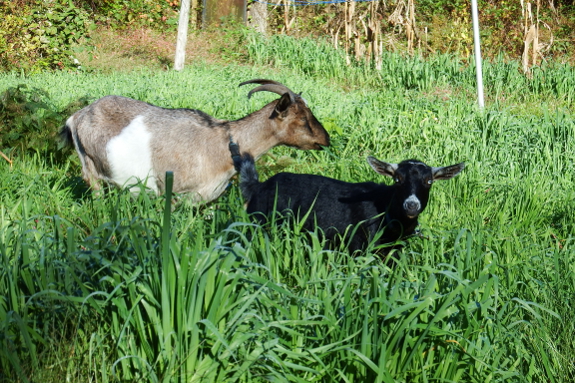
The new beds will be much
appreciated since I've been slacking on my crop rotation in the mule
garden. The trouble is that most of what I want to grow there is in the
crucifer family, so I've been rotating species rather than families in
an effort to squeeze everything in. As a result, diseases are starting to build up
and make my fall crucifers much less vigorous. I'm eying the back
garden as possible additional rotation area --- it's not quite as sunny
in the dead of winter and the ground water is high between the beds, but
a tiny bit more shade and harvesting in muck boots might be worth it to
break those disease cycles and get our winter crops in order for next
year.
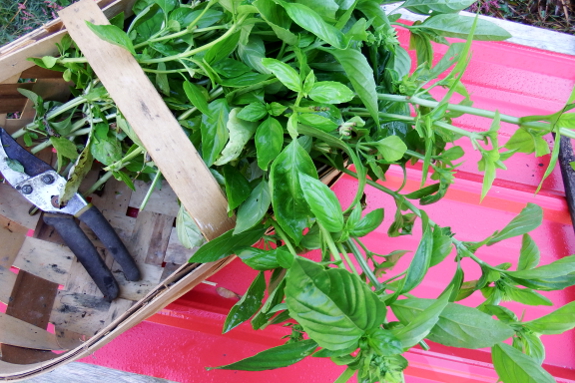
Our first frost
technically came early Thursday morning, when a thin skin of frozen dew
formed on top of the woodshed roof. Luckily, it only hit 34 at garden
level, so I gained an extra couple of days to get things done. I was
glad that I'd picked the best of the basil to dry Wednesday, though, since this tender herb tends to get nipped around 40 Fahrenheit.
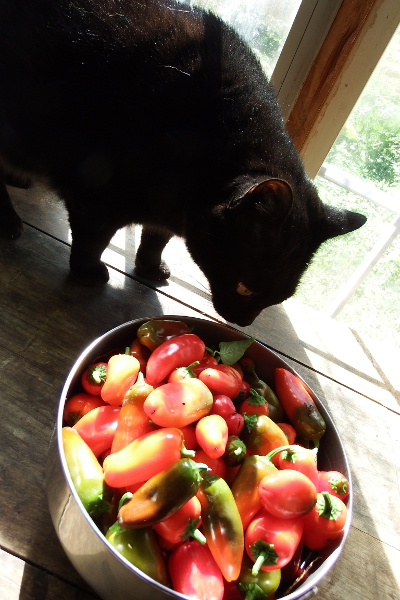 When
I thought we were going to get an ultra-early frost at the end of
August, I was scurrying like crazy to cover things up. But our average
first-frost date is now gone by, and I'm actually ready for the summer
veggies to perish (and the cabbage worms along with them). So rather
than covering things like peppers and tomatoes, we just picked the
plants hard, planning to move on to fall edibles once the freeze makes
the summer garden a thing of the past.
That said, I did cover our youngest lettuce bed. No need for a freeze to set back one of our most dependable autumn vegetables!
Maybe I'll even break down and light Huckleberry a fire?
We're trying something new
with the kidding stall access gate.
The puzzle is trying to
figure out the best way to attach hinges.
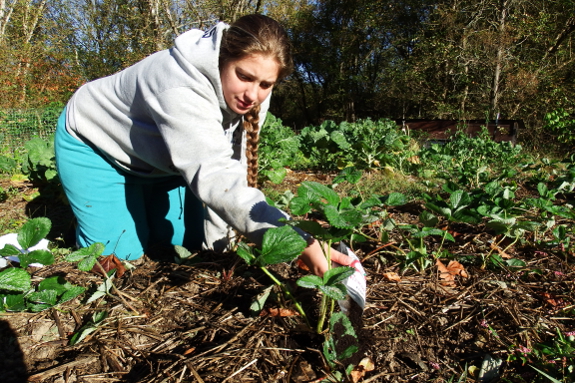
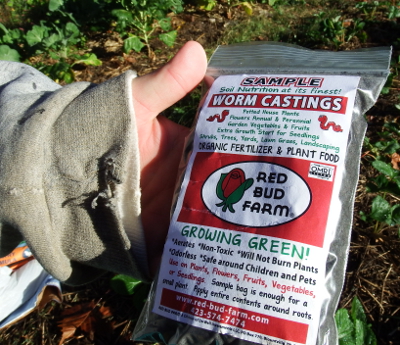
Kayla picked up this free sample of worm castings
at an agricultural conference last weekend. The producers had some
pretty hefty claims --- they promised that if you spread the contents of
their packet around a single plant, it would produce twice as much as
its sisters. "That sounds like an experiment for your blog!" Kayla said.
I let her pick the most
average-looking strawberry plant from from my recently weeded bed. (In
case I lose my notes, it's the second one from the southeast corner.)
Kayla then sprinkled the entire packet around the lucky winner, after
which we laid down a newspaper-and-straw mulch around every plant in the
bed.
I'm dubious of the
producer's claims since I add so much organic matter to my beds in the
first place. But time will tell! Here's hoping Kayla, I, or one of you
thoughtful readers will remember to make me measure yields next May and
June. The hard part will be keeping myself from eating the evidence....

We've still got a few high end heated chicken waterers left over from last year.
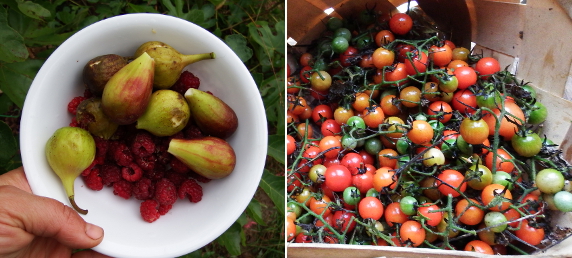

The end of that....
The beginning of this....
28 degrees, heavy frost, and the cold season has officially begun.
The repair
job on our broken refrigerator handle lasted just under 2 years.
Luckily the mounting holes
lined up with this replacement handle.
A little knowledge can be
a dangerous thing. A week ago, the internet informed me that goats can
actually go into heat one last time 21 days after they get pregnant,
which made me wonder whether Lamb Chop might have knocked up our little girl
on May 21 rather than during the lesser heat she exhibited three weeks
later. So I pushed Mark to finish the kidding stall ASAP...and I watched
our doeling with an eagle eye.
Nothing happened. And in
the interim I was peering so closely at Artemesia that I began to doubt
whether she was even pregnant in the first place. After all, her belly
doesn't actually appear very big unless she's gorging on hay (quite
usual for a goat whether she's pregnant or not), and Lamb Chop was only
three months old when he would have done the deed. Plus, I haven't
noticed any of the prekidding signs on Artemesia that I saw on Abigail
this past spring. In case you're curious, here's the summary of my notes
from our first goat home birth:
| Day before kidding |
Notes |
| -42 |
First obvious change noticed in vulva (pooch test) |
| -27 |
Ligaments seem to start loosening and a few drops of milk freeze onto ends of teats.
(Ligaments later appeared to tighten back up, then loosen again
repeatedly...suggesting that I'm terrible at discerning ligament
changes.) |
| -26 |
Slight bagging up of udder |
| -24 |
Abigail suddenly looks thinner as baby drops into a different position |
| -9 |
Cloudy discharge on vulva |
| -6 |
Ripples across belly. (This might have been me overreacting to random movements.) |
| -5 |
Whitish mucous on vulva |
| -2 |
Vulva sunken in, udder bags up more |
| -1 |
Vulva puffy and damp |
| 0 |
Lamb Chop is born! |
| +9 |
A trickle of bloody discharge |
| +15 - 16 |
Another round of bloody discharge |
As a result of my
confusion, I started pondering official goat-pregnancy tests. But after a
moderate amount of research, Mark and I decided that all of the options
are really too invasive to learn something we'll know one way or
another in three short weeks.
If we had more goats,
taking Artemesia to get an ultrasound wouldn't be a big deal since our
doeling likes the car and the vet is only half an hour away. But Abigail
would have a fit being left alone for the afternoon and I would have to
carry a possibly pregnant goat across the creek. The other option ---
taking a blood sample and mailing it to a lab --- also seems excessively
scary since you're supposed to draw blood from your goat's neck. Why
can't they make pee-on-a-stick pregnancy tests for goats?!
So I asked Mark to make
an executive decision, and he said "Wait." With the decision made, I can
now resolve to pamper our darling doeling for another three weeks.
Then, if she really isn't pregnant, we'll cross the breeding bridge in early November, better late than never!
I cut some 2x6 pieces to fit a few gaps in the panel and then sandwiched the pieces with two treated appearance boards.
It's that time again --- when I beg for contributions to round out a new book! As I complete the first draft of The Ultimate Guide to Soil,
a few gaps in my own experience have become clear. So if you have
photos and tips to share on any of the following topics, your name may
show up in print. (And if I use your experiences, you'll also get to
select from the second round of bookshelf discards mentioned at the end
of this post!)
What do I want to hear
about? Anything innovative and soil-related has a shot of making the
cut, but I'd specifically like to see firsthand experiences with:
- Seed meals as garden fertilizer
- Pit gardens for moisture preservation in dry climates
- Worm towers for in-garden composting
- Biodynamic preparation 500 (or another biodynamic preparation you feel has real merit)
- Your remineralization experiences (before and after photos, plus what you applied to improve your ground)
- Any tricks you use to garden in sandy or cold soils
- Your favorite plants for chop 'n drop
Photos need to be print-quality --- most shots taken with a camera will suffice. Email your contribution to anna@kitenet.net
and be sure to send only one photo per email so they don't bounce.
Please mention your state and growing zone (and whether it's okay to use
your last name).
Once the contributions
stop trickling in, probably next Monday, I'll start doling out prizes.
Here are the books you'll be able to choose between:
- The Gardener's Guide to Better Soil --- This is out of print and low on pictures, but is actually the best layman's soil book I read during my research
- Communities that Abide --- This is best for the serious philosophizer. I'll admit I found it interesting but didn't make it all the way through
- RFD --- In the fun, memoir category
- Meanwhile, Next Door to the Good Life --- Written by the Nearings' neighbors
- Bokashi Composting --- The best book I've found on the topic
- Growing Tomorrow --- A beautiful farm-to-table hardback
- The Vegetable Gardener's Container Bible --- Very pretty and easy to read
I'm looking forward to seeing what you've cooked up in your garden. Thanks in advance for sharing your experiences!
Despite what the forecast
called for, it's been in the mid twenties every morning for the last
four days. Frosty weather means we work inside during the early hours
and don't head to the garden until the afternoon.
The goats are a bit confused by the change of schedule since they're
accustomed to being tethered at 9:30 am, not 1 pm. But Artemesia got
over her angst long enough to help me clean up the frosted tomato vines.
Gardening with goats is always more fun.
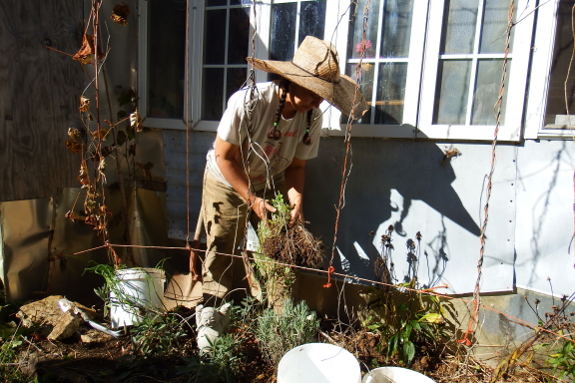
 After
putting the girls back in the pasture to chew their cuds, I changed
gears and got the front herb bed in order. I'm transplanting thyme,
lavender, echinacea and chives into this area in front of the trailer to
join the existing sage, Greek oregano, fennel, and grapevines for a
variety of reasons.
The most pressing is that my front garden renovations
mean I'll soon dig up the beds where these herbs used to live. Plus,
the ground ivy in those spots is getting out of control (actually
swallowing the thyme), so they needed some TLC anyway.
This warm, sheltered spot in front of the trailer is good for
overwintering sensitive plants like the thyme and sage, too, and it's
also very close to the kitchen for easy plucking. All-told, I think
it'll be a plus to have my herbs all in one spot in the future --- I
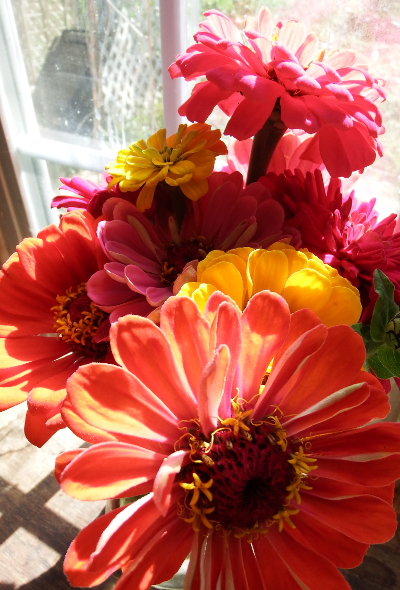
hope. And, either way, I'll still have room to slip some summer flowers
in there to fill in the gaps and brighten up our metal home.
We did some repair work to
our chicken
tractor today.
Now we have a place to put
rebel hens who like to sneak into the garden.
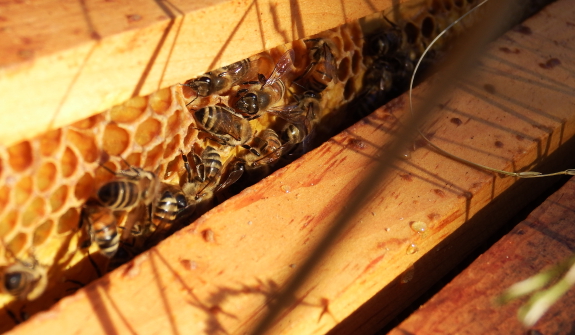
"How are our girls?" Mark asked.
We use that term for our
goats and our chickens...and apparently now our honeybees. "Oh, you mean
our thousands of girls?" I answered. "They've got enough honey for the
winter, but none for us...again."
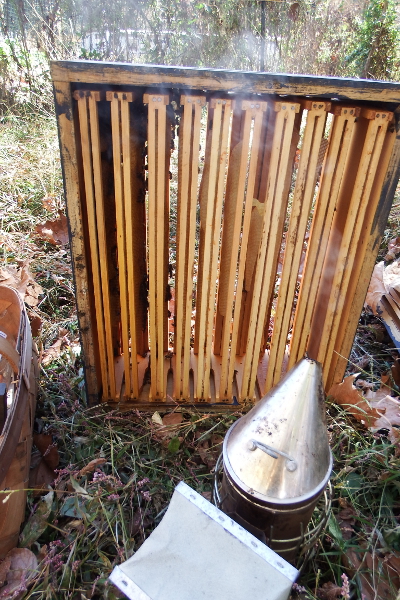 The mother hive --- our Langstroth/Warre hybrid --- was doing the best, probably because I fed them a couple of gallons of sugar water in September. The hive now consists of one very heavy Warre box chock full of honey, with a lighter honey-and-brood Langstroth box below.
Since we'll be
overwintering the hive as a hybrid, I went ahead and took away the two
Langstroth supers I'd optimistically placed on the bottom of the hive.
The bees had built some comb in one of them, but clearly lacked the
capacity to do any more after a spring split followed by a swarm. Oh well, there's always next year to get them all the way down into the Langstroth box and to hope for honey for us!
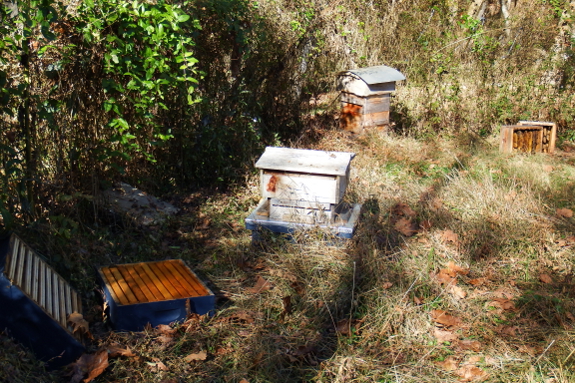
I thought
the daughter hive was down to one very heavy honey box and a lighter
honey-and-brood box as well. In fact, the photo above was meant to be my
"after" picture, showing how I'd left the removed boxes beside the
hives for the night so our girls could clean out any nectar they might
have been dehydrating within those combs. But there sure seemed to be a
lot of activity around one of those Warre boxes....
I walked back over to
take a look, and sure enough that box included some capped honey! Not
enough to make it easy to see by looking up through the bottom (my
method of 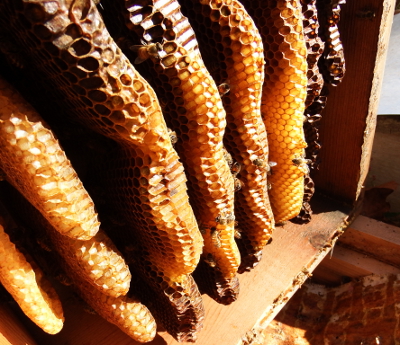 inspecting
Warre boxes since the frames usually end up glued to the sides and tear
if you try to lift them out). The visual inspection plus the lightness
of the box had convinced me that it was mostly bare comb. Looks like I
was wrong!
In a Langstroth hive, I
would have gone through both light boxes and consolidated all the honey
into one box so the bees would have less space to heat over the winter,
but that's not really possible in a Warre hive. So I plopped the third
box back on top, figuring our daughter colony could use the capped honey
and whatever dehydrating nectar was in the other frames to top off
their barely sufficient stores.
That's pretty much it for bee chores until spring since our fall varroa mite test came back very clean.
I'll slip in the bottom-board inserts before long and cross my fingers
that our hives will make it through the most dangerous time of their
lives --- the winter.
In the meantime, I'll
count my apicultural blessings. Even if we didn't end up with honey, we
doubled our hives this year for the price of about thirty pounds of
sugar, but with no purchased bees. Sounds like a success to me!

When I first read about Warre hives, the quilt box
was perhaps my favorite part. It simply made so much sense ---
insulating the hive from summer heat and winter cold while also soaking
up moisture from dehydrating nectar.
Unfortunately, in
practice, the quilt box has given me a neverending string of trouble.
First of all, there's the fact that in our humid climate, I'd have to
change the straw every week if I wanted it to actually sop up the hive's
moisture. Then there's the fact that ants like to live up in the quilt and raid honey from the bees below.
Meanwhile, our bees don't
seem to like the quilt box either. When I used the fabric- or
burlap-lined quilt boxes that came with our hive, the bees gnawed right
through. Then when I converted over to moderately impenetrable window
screening, the bees instead propolized the entire screen...and glued it
to the frames below for the sake of completeness. That was a hard top 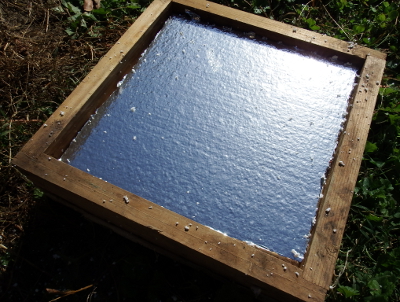 to pry off!
So I'm changing gears yet
again, filling the quilt box with layers of styrofoam this time around.
I'm hoping the synthetic material will insulate the hive without
providing such an ant-friendly habitat. And, if the insulation works,
I'll probably put a solid wooden bottom on the quilt box as well.
Perhaps Langstroth knew what he was doing after all....
Our Shiitake
mushroom logs are starting to fruit for the first time.
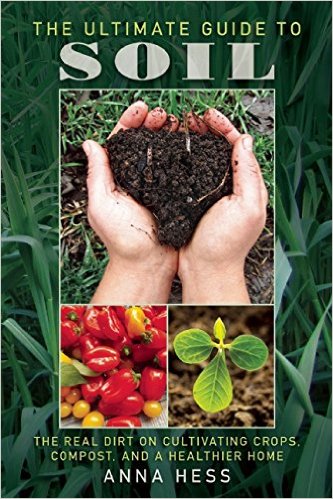 I finished the first draft of The Ultimate Guide to Soil Friday...and also saw that the book is now up for preorder on Amazon! I'm thrilled by the cover, and I definitely feel like this is my best book yet.
In fact, I poured so much
of my soul into its pages that I had to write to my editor and see
whether she could fit an extra 15,000 words into the finished product.
The answer, in case you're curious, is yes! So I won't have to cut the
in-depth information on biochar, bokashi, black soldier flies, and many
other topics that don't begin with "b." Phew!
There's a lot of information in this book that never made it to the blog, so I'll tempt you with a teaser today:
Growing vegetables in poor soil
Weeds are probably the
largest deterrent to no-till gardening, but there are other issues
you'll have to contend with. Most notably, no-till techniques are slower
(if surer) than conventional soil preparation at creating
plant-friendly soil in poor ground. That means you may be faced with
subpar soil in certain parts of your garden during the first year or two
while you're waiting for the earthworms to do your job. Which begs the
question—which edibles can be successfully grown in extremely poor
ground?
Had Tolstoy been a gardener,
he would have warned that all happy soils are alike, but that each
unhappy soil is unhappy in its own way. So I can't give you a
one-size-fits-all list of vegetables that thrive in troubled ground.
That said, if you've already used the tests in the first quarter of this
book to figure out why your soil is ailing, you can likely select a
vegetable that will fare well even in those specific poor conditions.
Let's start with shallow
soil. This issue could be due to compaction in the subsoil, to a high
water table, or to a newly applied kill mulch with only a few inches of
compost on top. Although I don't usually recommend planting root crops
in soils of limited depth, a few roots are actually good choices in this
scenario. Specifically, onions, garlic, and radishes are reported to
keep their roots closer to the surface than most other vegetables, so
they're good growing choices in shallow soil. In contrast deep-rooters
like beets, carrots, Swiss chard, parsnips, and winter squash should
definitely be avoided in these scenarios.
How about low-nitrogen
conditions? This is one of the most common soil problems in new organic
gardens since biological sources of nitrogen often take time to release
nutrients into the soil. Nitrogen-fixing vegetables—primarily peas
and beans—are the obvious choice in this type of poor soil since
these vegetables literally create nitrogen out of thin air. Otherwise,
it's easier to tell you what not
to grow. Vegetables with above-average nitrogen demands include
potatoes, onions, cabbages, sweet corn, tomatoes, and celery. I
recommend steering clear of these heavy feeders if you don't have enough
nitrogen to go around and aren't able to pile on the compost.
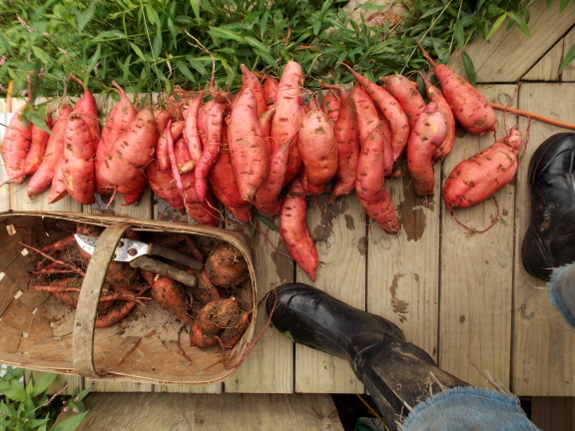
Sweet potatoes thrive in certain types of ailing soil. In this photo, the tubers in the basket were harvested from the same square footage as the tubers stacked nearby, but the larger mess of taters came from poorer soil.
Another common issue involves
poor soil structure. For example, the high raised beds I build in
swampy parts of my homestead to pull vegetable roots out of wet soil
often end up with clayey subsoil on the surface and with partially
decomposing sod in the center. Although these beds mellow into rich
growing ground eventually, the first year or two are rough with heavy soil that
hinders seedling germination and root growth. Two crops that have
thrived for me in this type of troubled soil are sweet potatoes and
sunflowers. In contrast, carrots and butternut squash did so poorly in
this type of ground that I might as well have skipped planting entirely.
Medium-producers include large-seeded vegetables like beans and corn
that can handle heavier soil as long as I increase compost applications
for the latter.
Improper pH is another issue
that often takes a few years resolve. Luckily, it's relatively easy to
select vegetables that do well in excessively acidic or excessively
alkaline soil. Carrots, cucumbers, eggplants, green beans, parsnips,
peppers, potatoes, sweet corn, tomatoes, watermelon, and winter squash
can handle sour soil with a pH as low as 5.5. In contrast, beets,
cabbages, cantaloupe, peas, pumpkins, spinach, sweet corn, and tomatoes
will grow in alkaline soil with a pH up to 7.5. Outside those ranges,
though, you'll be better off sticking to blueberries (acidic soil) or
certain ornamentals (alkaline soil).
All of these selections
aside, you'll get even better results if you spend a year or two growing
cover crops in that troubled ground. These soil-building species will
not only add organic matter to your earth, they'll also often go a long
way toward fixing the underlying issues that are keeping vegetables from
thriving in the first place. For example, soybeans are a great cover
crop for very low-nitrogen soil, oats thrive in waterlogged ground, and
oilseed radishes are top-notch at both breaking up hardpan and making
phosphorus more available near the soil surface. Be sure to check out the full book if
you'd like to learn more about integrating these soil-improving crops
into your no-till garden.
Are you sold? You can pre-order the paperback now
and it will show up in your mailbox as soon as Amazon gets the first
box of books in. And their preorder price guarantee means you'll
actually pay less than the price listed if there are any sale periods
between now and launch day. So snag a copy now! I don't think you'll
regret it.
We use the Safari
professional nail trimmer on Lucy's thick nails.
The list of over 2000
positive reviews makes it a top of the line choice.
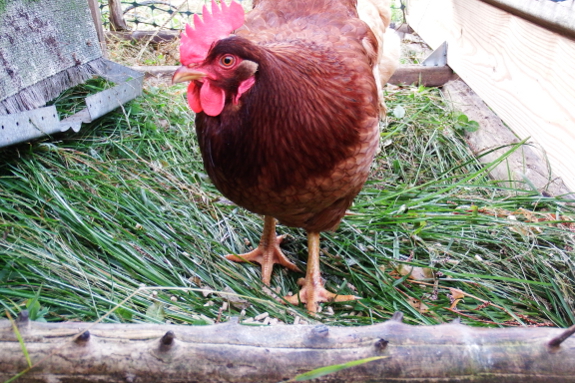
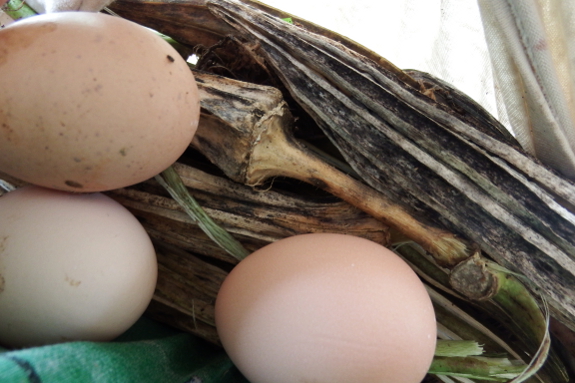
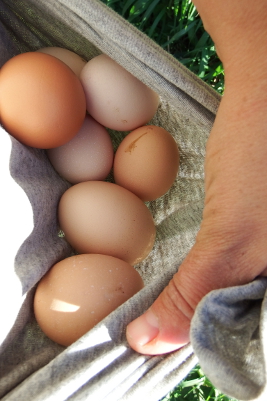 The good news is, Project Shut-in got all of our hens laying in the nest boxes within 48 hours. Clean, copious eggs at my fingertips --- what a treat!
The bad news is that two
of our pullets absolutely refused to be broken of the habit of roosting
outside the coop. Luckily, their favored perch was low enough that Mark
could lift them inside at sunset every day, but it offends my sense of
order to have hens where they don't belong. Okay, their unruliness is
bad for the homestead too since those hens ended up in pastures that are
supposed to be resting and...sometimes...in the fall garden.
So Mark fixed up our rickety old chicken tractor,
and I put the two bad girls in a more extended time out. It's a bit
tough to tell if it was always the same Buff Orpington and Rhode Island
Red who were fans of open-air roosting, so I won't know if this project
is a success for a few days. Fingers crossed....
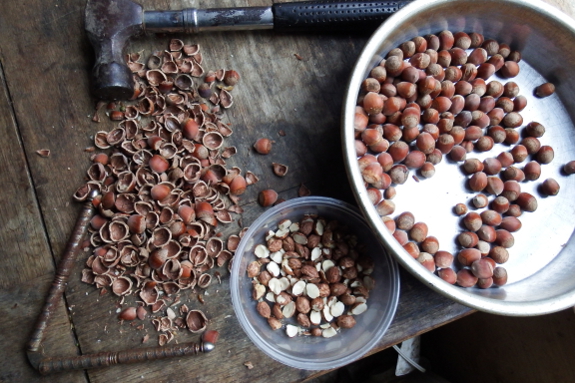
I gave Mom about a tenth of my hybrid hazelnut harvest, wanting to share the bounty. A few weeks later, I poked her with a nosy question: "What did you think of those nuts?"
"They were a little bit small," my usually frugal mother said evasively.
Hmmph, I thought to myself. See if I give you any more of my precious nuts! Then I went to crack my own hoarded hazelnuts...and found that the nuts inside the hard shells sure were awfully small!
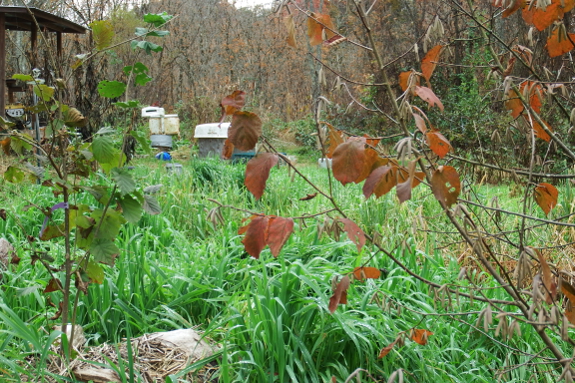
The bush in question
is the one on the right in the photo above, and you can tell by its
brightly colored leaves that the American portion of its heritage is
dominant. In contrast, the newer bushes I've put in are like 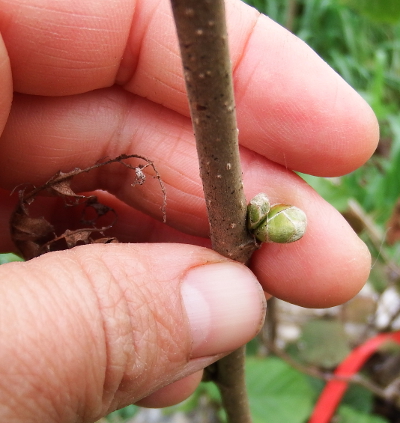 the
one shown on the left in the photo above --- greener foliage in autumn
means the European parent dominates. Similarly, I've noticed that these
newer varieties have buds that seem to break dormancy in late summer and
sit through the winter in a half opened state. Hopefully these European
traits will also be linked to that species' main claim to fame ---
bigger nuts in thinner shells.
Of course, as Lee Reich found in his own trials,
the dominance of the European parent in a hybrid hazelnut can mean
blight concerns as well. So I'll just wait and hope that Eta, Theta, and
Jefferson can handle our eastern diseases and that their nuts are a bit
bigger than those from my unnamed Arbor Day experimental bush.
In the meantime, I'll crack my little nuts and be grateful for any
hazelnut harvest at all. And as I do so, I'll apologize for thinking
uncharitable thoughts toward my long-suffering mother....
We made a screen door for our
butternut squash storage nook today.
The 1/8th
inch holes will keep a random mouse from nibbling the merchandise.
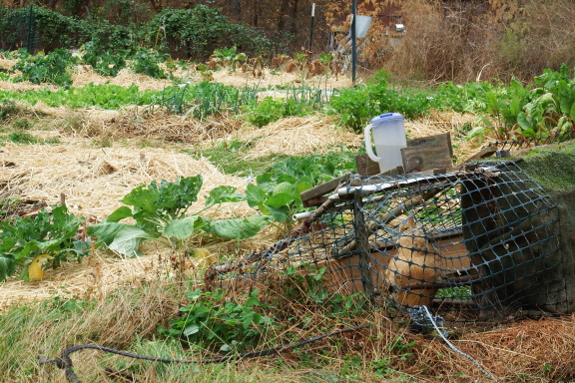
Tatsoi, mustard, kale,
swiss chard, lettuce --- 'tis the season for leafy greens of all shapes
and flavors! In the photo above, you can also see brussels sprouts,
mangels, parsley, potato onions, a chicken, and a deer deterrent --- sounds a bit like a Where's Waldo painting.
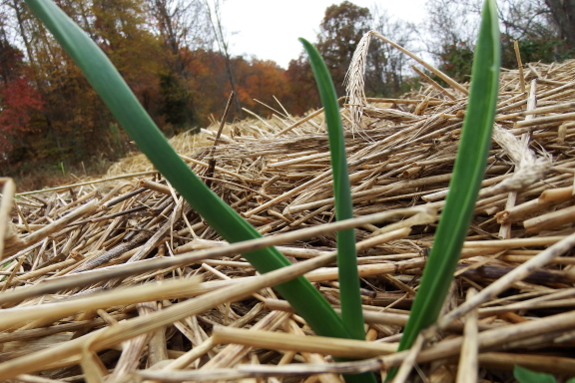
On the other side of our
trailer, the garden is looking a lot sleepier. Here, the shade of the
hillside will turn ground to permafrost before too long, so I don't do
much winter planting (other than oats and rye). But I've found that
Music garlic can handle even these deep-freeze conditions, and it's a
pleasure to watch that allium's new green shoots pop up through the
straw.
And did you notice the
fall foliage? Tree leaves on our hillside have just passed their peak
color, but this year's vibrancy seemed phenomenally bright to me.
"Definitely in the top ten since we've moved here," Mark said
definitively. Wait a minute --- this is only our tenth fall....
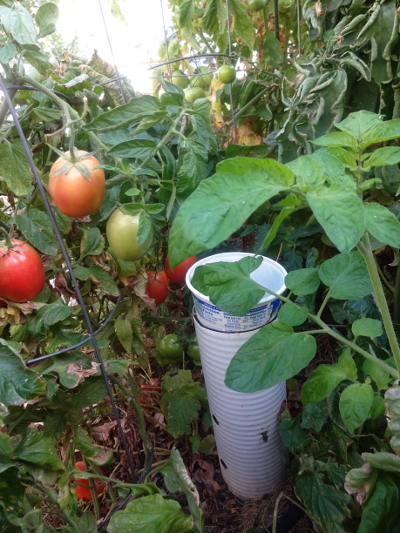 Note from Anna: A huge thank you to Sarah Oler, who sent me this description of her method of using worm towers to encourage ordinary earthworms in her garden. I've included a shortened version in my upcoming soil book, but her writeup was far too good to be lost. So I thought I'd share the longer version here.
Benefits of Using Worm Towers:
- Great for people with limited composting space in their yard
- Very easy to construct, install and can be made from free or cheap materials
- No smell and pest-resistant
- You don't need to worry about turning compost piles and spreading the nutrients
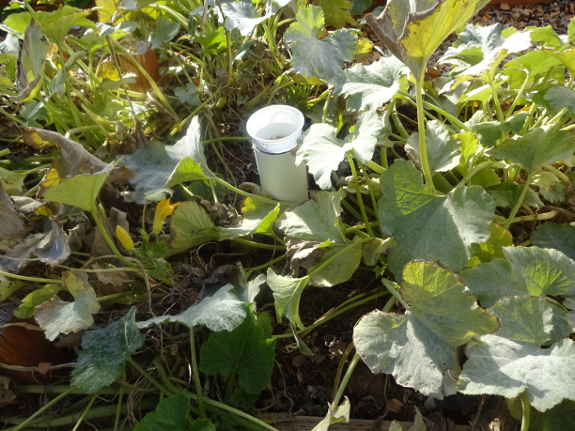
Cons:
- Since the worms are responsible for spreading the castings around the garden box there is an uneven concentration of nutrients around the tower.
- Limited composting space for all of your biowaste. This works great for kitchen scraps and small amounts of excess organic matter, but it isn't large enough to incorporate large amounts of landscaping waste.
- It can be hard to add biowaste to the towers when your garden is at full production. You have to fight your way through jungles of tomato plants to add your biowaste.
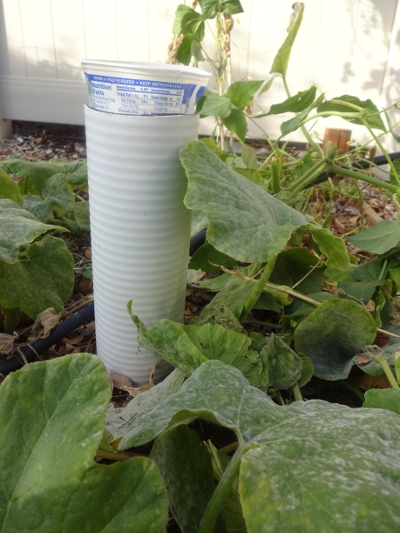 Construction:
Use 4 to 6 inch diameter
white or gray PVC pipe. Black pipe might make the compost too hot to be a
suitable environment for worms. I also don't recommend using corrugated
irrigation pipe. Not only did the drill create jagged holes, but I had
to cover up the predrilled holes in the top half of the pipe that stick
up out of the ground.
Cut the pipe into 2 foot
sections and drill 1 to 1 1/2 in holes all around the bottom half of the
pipe. Cover the top with a concave cup or bowl with tiny holes punched
into the bottom. This will provide air circulation as well as capture
water, keep out flies, and keep your compost moist. I used small
16 oz plastic containers, like the kind that holds sour cream, and I
poked many small holes in the bottom with a hot needle.
Installation:
Dig a hole one foot deep
where you want to put your tower. Insert the pipe into the hole and
backfill with soil. Be careful not to push the soil through the holes.
You can also add a layer of straw or leaves around the pipe to prevent
soil from falling into your pipe. Make sure that all the top holes are
properly covered with at least an inch of soil or mulch and add a few
inches of leaves or straw to the bottom of your worm tower. I recommend
placing your worm towers about every 3 feet apart.
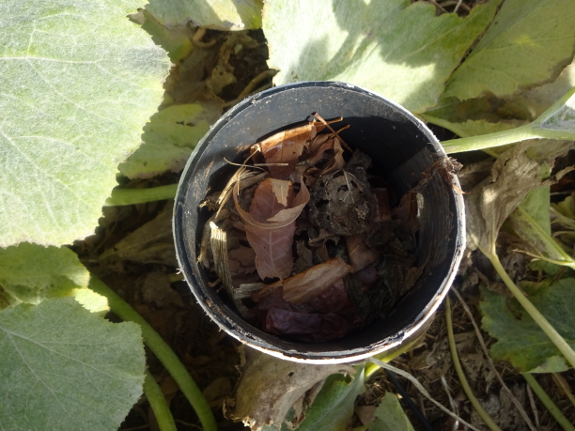
How to Use Your Worm Tower:
Add your biowaste, such as
fruit and vegetable scraps from the kitchen, including large
chunks like mango pits or small pieces like carrot peelings. You can use
a large funnel to make it easy to fill your tubes or you can put your
biowaste in a bag that is tightly fitted over the tower opening and dump
in the contents.
Top each addition of biowaste
with carbon-rich sources such as dry leaves, shredded newspaper or
straw to balance your C:N ratio. Before adding another layer, use a long
thick stick to gently push down your previously added material.
Pull out your tubes each spring and empty the castings to use for starting seeds or top dress your garden.
Author
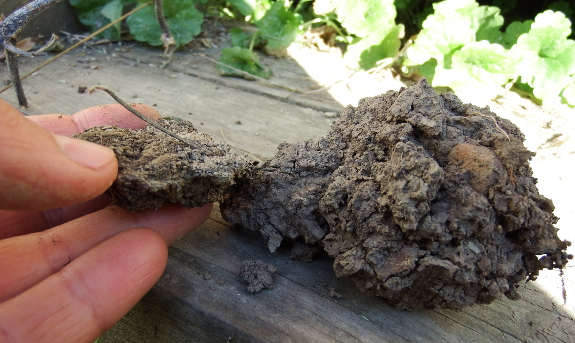
Anna: Working your garden while the soil is excessively wet or dry can
break apart those soil aggregates that I wrote so much about in the last
section. And when soil aggregates break apart, it only takes a little
bit of compaction to force them back together in a more rock-like
fashion with no handy air holes in between to keep the soil loose. The
result is clods...
Real-life Anna: Phew, I
need a break from all this editing! But it's raining too hard to spend
much time in the garden. How about some heavy-duty soil digging to get
my heart pumping and make me feel like I accomplished something?
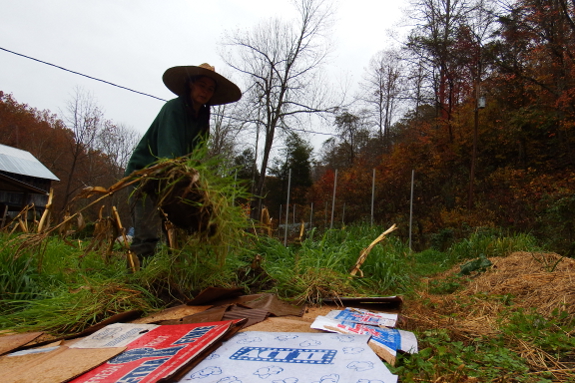
Author Anna: Do as I say, not as I do. And use a long-handled spade for this kind of shoveling.
Real-life Anna: I used up all your cardboard again, Mom. Could I have a little more, please?
It took 2 coats of the Kiwi Boot Protector to make Anna's boots waterproof again.
A cold week followed by a
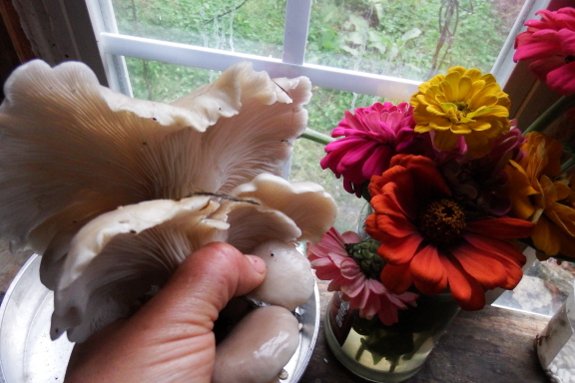
week of rain --- sounds like mushroom season to me! Changes in
temperature often tempt these edible fungi to fruit, so now's a good
time to check new logs in search of those first delicious shiitakes.
Or, if you're lazy like me, just wander around your homestead and look
for oyster mushrooms popping up on stumps and logs. This little haul hit the food dehydrator for an hour then perked up a bacon-and-mushroom quiche. (No, we didn't eat the flowers.)
 Our
readers spoke and I listened. 20% of you prefer a retailer other than
Amazon, so I'm slowly but surely moving my books to a wider
distribution. To that end, Growing into a Farm is now available at:
$10 Root Cellar is now available at:
Homegrown Humus is now available at:
And I'm hoping I can bribe you
to copy and paste any reviews you may have made on Amazon onto one or
more of these platforms. Since I know the request is a bit annoying, I'm
sweetening the pot by giving away a signed paperback copy of The Weekend Homesteader
to three lucky winners. Just leave your review, copy the link, and
input your information into the rafflecopter widget below. Thanks in
advance for your help!
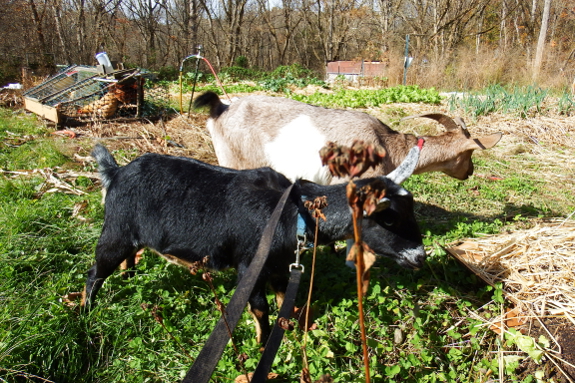
After four days of pretty
much solid rain, the girls finally told me they were willing to leave
their hay and hunt down wild grub. With their help, I got the rest of
the mule garden put to bed, which consisted of mulching around several
more rows of kale and lettuce, then planting rye in any bare spots left
over.
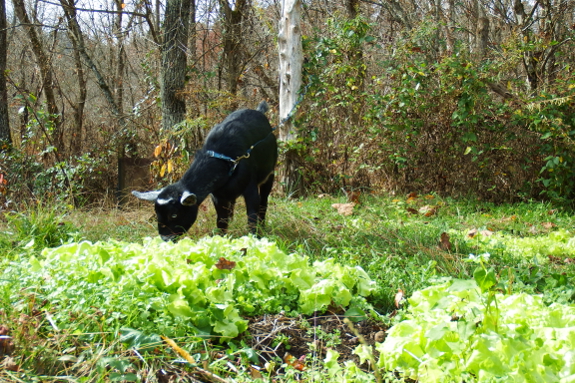
Okay, so maybe "help" wasn't quite the right word. You're not supposed to be able to reach that lettuce, Artemesia!
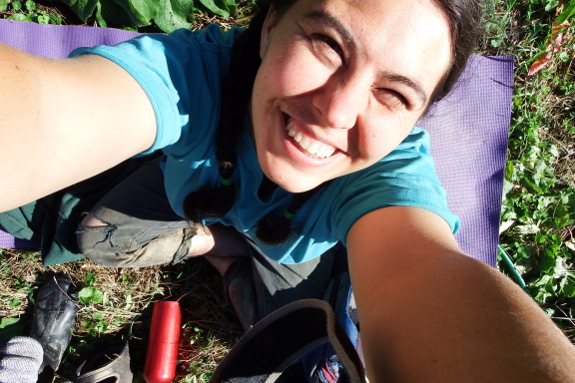
This year has been my
favorite one on the farm so far. Yes, I dropped the ball in certain
areas and have also been babying a sprained ankle for the last two
months. But we got enough done to feed ourselves and to stay happy and
healthy, which is what really counts.
Meanwhile, Mark's class
has been extremely inspirational, allowing me to thrive on his
second-hand enthusiasm. And I've spent so many golden hours on my yoga
mat watching the goats graze that I feel like I've lived more deeply
than in years past.
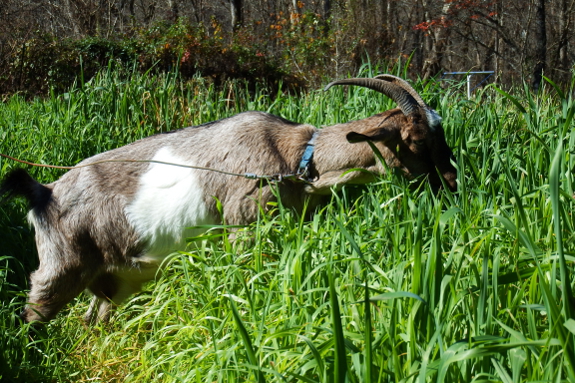
One big epiphany I had
this summer was --- there's no reason to always be at the end of my
rope. Yes, a homestead will consume very ounce of your energy and time
if you let it. But if you're in the adventure for the long haul, it's
better to savor each new experience and eke it out to its fullest before
expanding in yet another direction.
So I'm not actually
yearning for any new perennials or animals this fall. I'm quite content
to coast on my cover crop, goat, garden haze for quite a while longer
before embarking on a new adventure. Here's hoping the happy glow of
listening to the chomp, chomp, chomp of well-fed goats will last for
many years to come.
We harvested and ate our
first shiitake
mushroom from the new logs.
It was delicious!
Want more in-depth information? Browse through our books.
Or explore more posts by date or by subject.
About us: Anna Hess and Mark Hamilton spent over a decade living self-sufficiently in the mountains of Virginia before moving north to start over from scratch in the foothills of Ohio. They've experimented with permaculture, no-till gardening, trailersteading, home-based microbusinesses and much more, writing about their adventures in both blogs and books.
