
archives for 07/2015
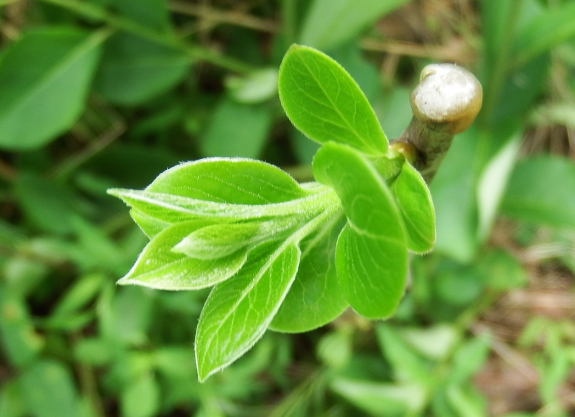
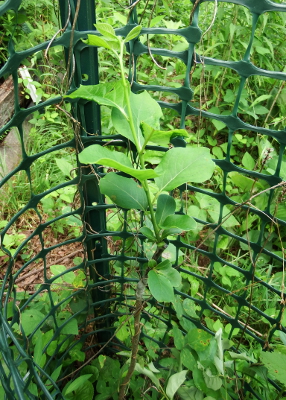 About a month ago, I grafted named varieties onto our seedling American persimmons.
I used two different techniques, whip grafting the hard-to-get-to
plants up in the powerline pasture and bark grafting the more accessible
plants where our pullets and cockerels are currently grazing. Since I'm
a lazy farmer whenever possible, I'd only been watching the accessible
plants, and was disappointed to see that one piece of scionwood had
broken off and that the other two pieces of scionwood showed no signs of
life.
But when the weeds in the
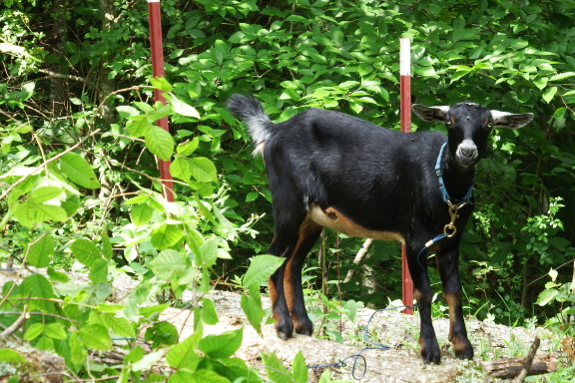
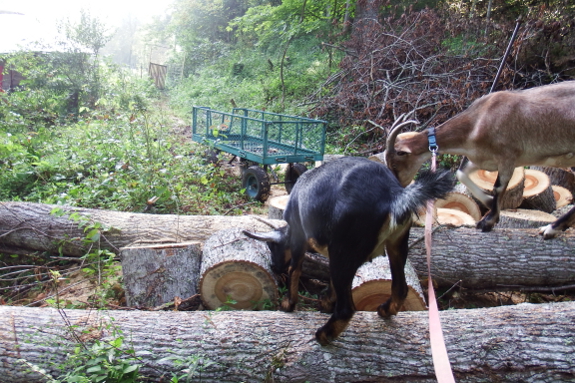
powerline pasture got tall enough to make it worthwhile to tether our
goats up on the hill, I brought along the camera and took a look at the
whip-grafted persimmons. The result? 75% success, which is pretty
awesome for this notoriously difficult-to-graft species!
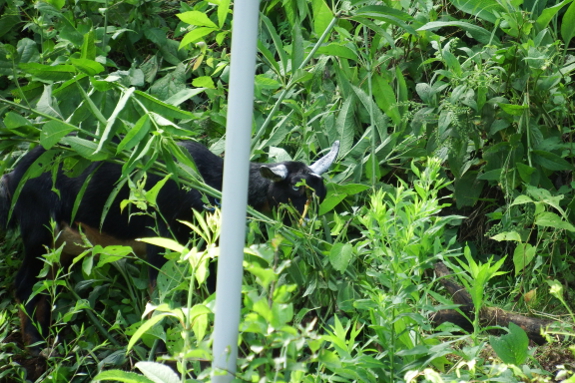
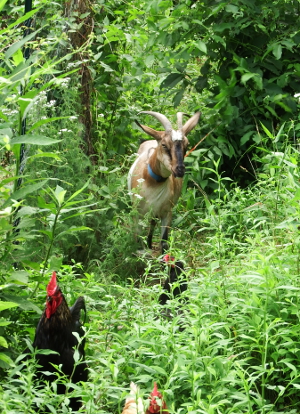 Now,
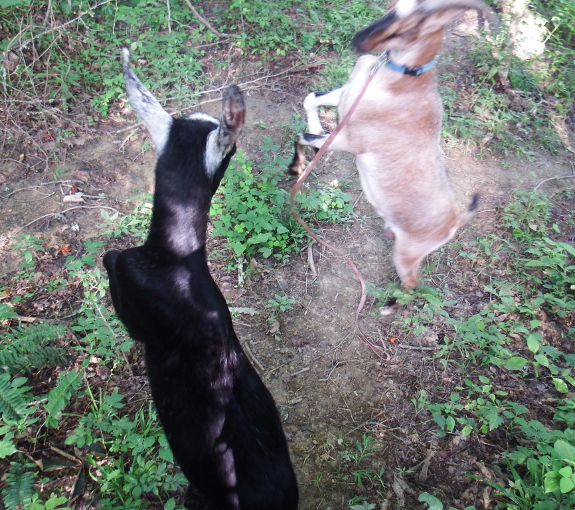
if only I hadn't tethered Artemesia quite so close the the Yates
persimmon, bringing my success rate on that hillside back down to
50%....
On the plus side, I still
have hopes that some more of the grafted persimmons might sprout from
the scionwood later this summer. After all, the scionwood on three trees
looks good...just seemingly dormant. But if I was going to repeat my
endeavor, based on this data, I'd go entirely for whip grafts in the
future.
Since it looks like all
of the seedling rootstock is still alive, I should get a second chance
on those trees, snipping scionwood off the successful grafts and adding
them to the unsuccessful trees next spring. In the meantime, I'll be
babying our successful grafts and hoping for fruits as early as
2018...if Artemesia keeps her mouth to herself.
I usually clean out the wood
chips on our Oregon
battery powered chainsaw with a nearby twig, but a small paintbrush
gets the job done faster and cleaner.
Two bungee cord straps on the
chainsaw handlebar keeps the brush handy.
If the brush had a flat head
screwdriver as part of the handle it would make tightening the chain in
the field easier.
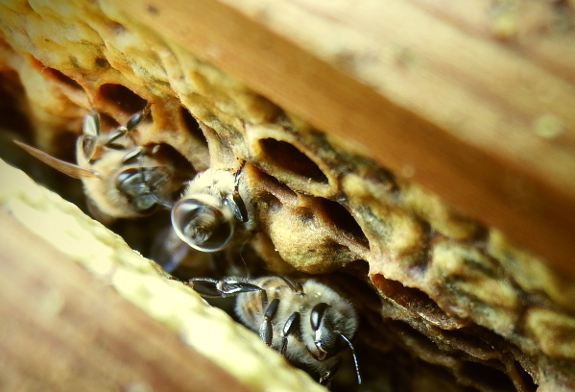
Both the basswood and the
sourwood are blooming right now, so the hives are hopping. Which means
it's time to look inside and make sure there's enough space for the bees
to sock away all that honey.
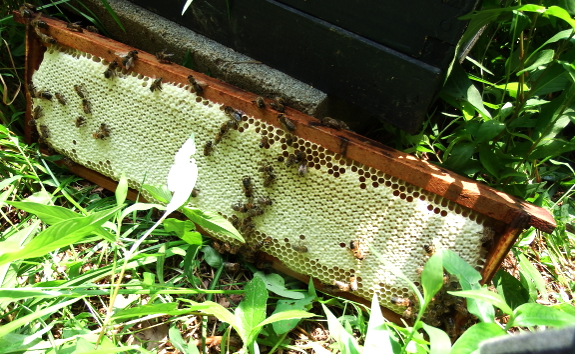
You may recall that our mother hive has been weakened twice this year. First, I took a swarm-prevention split, then the hive swarmed anyway.
And yet, despite losing all of those workers (and me not finding a
second feeder to boost their stores with sugar water), there's quite a
bit of capped honey in the hive. The top box (a Warre box above a hive converter,
which was the original box in this hive) seems to be about half full of
honey and half full of capped brood. The next box down (a Langstroth
super) is similarly full. And the final box (another Langstroth super)
is full of drawn comb with some honey already stored therein.
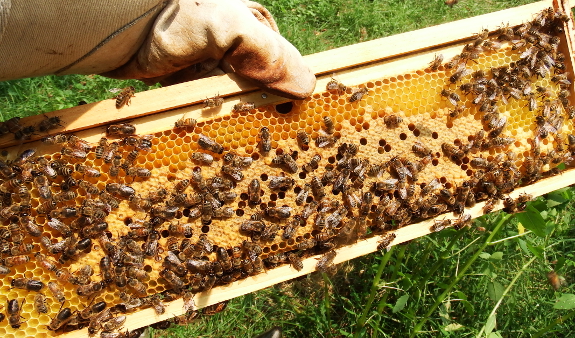
I took the hive all the
way apart for two reasons. First, I was hoping to be able to take off
the Warre box and call the conversion a success. Unfortunately, there's
still brood in the Warre box, so I'll have to wait on finishing our
conversion.
My second reason was to
hunt for eggs, to see whether the newly hatched queen had begun to lay.
It's really too early to expect a virgin queen to have mated and started
to lay, though. And, sure enough, the only brood I found was capped
(some of which was hatching, like in the photo at the very top of this
post). So I'll have to wait there as well to see whether the new hive
has produced a successful queen.
However, I did use the
intrusion to good effect in the end. Since I had the hive entirely
dismantled, I took the opportunity to add another empty super, although I
put it at the very bottom in the Warre manner. Hopefully that will give
the bees room to continue drawing comb and socking away the massive
amounts of nectar that seem to be winging into the apiary this week.
After all, I can hear the bees flying from the back porch, about 150
feet away, so I know they're working hard!
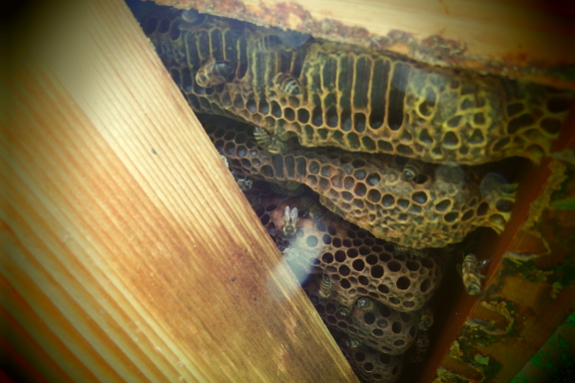
Meanwhile, the daughter
hive (from an early June split) is much less populous, but seems to be
doing quite well nonetheless. The top box is very heavy with honey and
brood, while the bottom box is fully drawn but appears mostly empty.
It's much harder to delve into a Warre hive in search of queen signs,
but the presence of brood four weeks after the split suggests that there
is a queen present and hard at work doing what she does best ---
expanding the hive.
I put the daughter hive back together as-is and left the bees to their
colony chores. Except for sugar water for the daughter hive, the apiary
should take care of itself for a few weeks now.
Our goats have already broken
their first mineral feeder trays.
These new 6
quart feeders are made of
thick Dura-Flex plastic.
I added some large washers in
case Abigail tries to step into one again.
 In
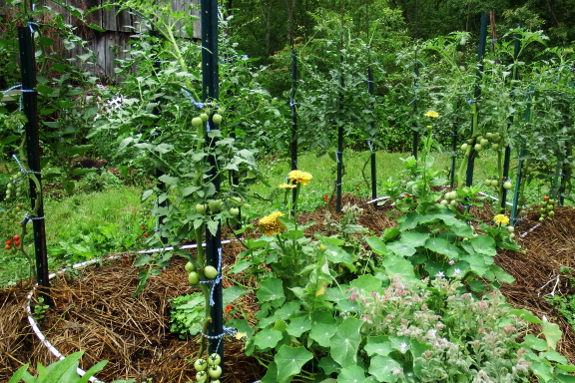
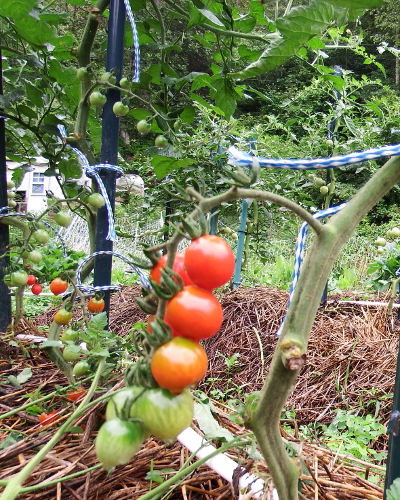
our garden, it's always a case of good news/bad news. Good news: we
started eating our first tomatoes (Jasper) this week and there is
technically still no blight in the patch. Bad news: septoria leaf spot has reared its ugly head and required me to snip off half the plants' leaves anyway.
Although not a blight by
name, septoria leaf spot is a fungal disease of tomatoes (making it a
blight in my book). In our garden, septoria is usually the first such
disease to appear, and it seems to weaken the plants sufficiently to let
the other fungi get a toehold. But maybe this year our blight-resistant varieties will come through and septoria will be our only fungal problem. Only time will tell.
(As a side note, I feel
dumb/condescending typing this, but several of you have asked me about
our blight-resistant tomato varieties despite me linking copiously in my
posts. If you follow the link above, you can read much more about them.
And, in general, if you follow the links in my posts, you'll learn more
about the topics in question. And now I'll end my quick course in
Web-browsing 101....after an apology for insulting your intelligence!)
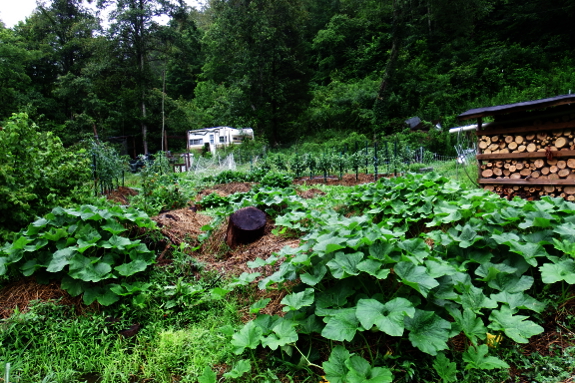
Back to the point, you
can see our tomatoes in the background of the photo above. The plants
look a little naked now with their bottom leaves all gone, but I'm
hoping the serious pruning will slow down fungal spread despite a rainy
week.
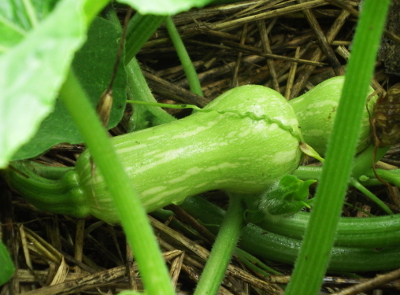 In
the foreground are happy, healthy butternuts, thriving and setting
fruit in what will probably be next year's tomato patch. Like cabbages,
squashes are such a joy in the garden simply because they grow so
vigorously that they make me feel like a pro. Honestly, though, other
than feeding the soil with a bunch of chicken bedding a few months
before planting then mulching the emerging vines, I've done nothing to
those plants. Cucurbits, unlike tomatoes, require very little babying in
our climate to party all the way across the aisles and into the next
beds. I love our naughty butternuts!
Abigail found a weak spot on
the milking
stanchion neck brace and
nearly worked one of the side panels free.
Two brackets made it feel
more stable.
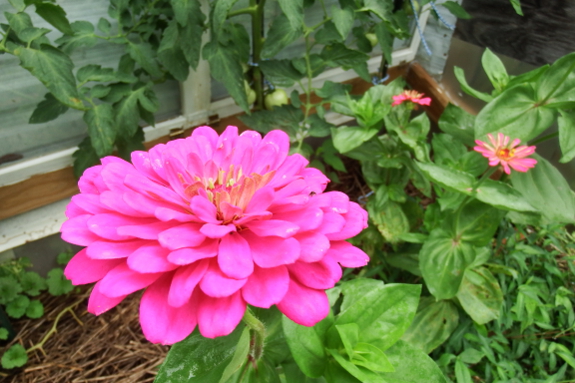
Sometimes I get so deeply focused on tomato blight or persimmon grafting
that I forget to show you the big-picture garden. So I snuck out
between rain showers Friday to snap some shots of this and that.
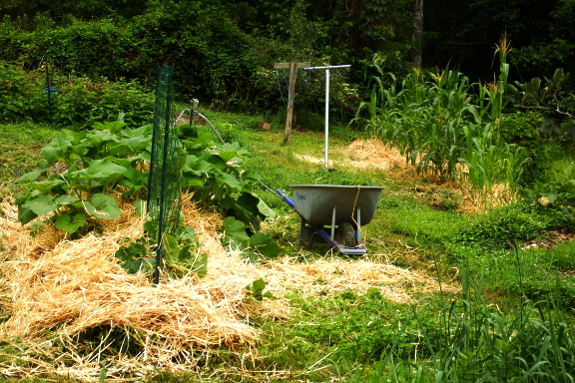
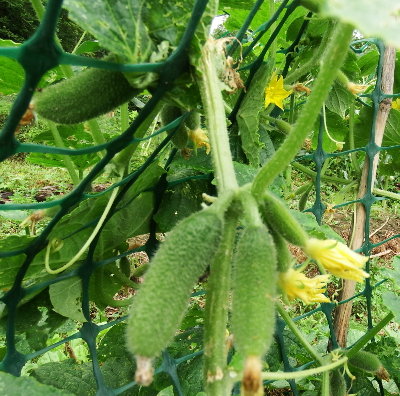 June
was weeding month, when I did my best to uproot interlopers between
young vegetable seedlings and then mulched the growing plants left
behind. The task is ongoing, but by the beginning of July I'm officially
ahead of the weeds and can finally breathe a sigh of relief.
We're also eating quite a
few summer vegetables already, making all that weeding worthwhile.
Cucumbers, summer squash, tommy-toe tomatoes, green beans, and Swiss
chard are all making regular appearances on our plates now, with more
contenders still to come.
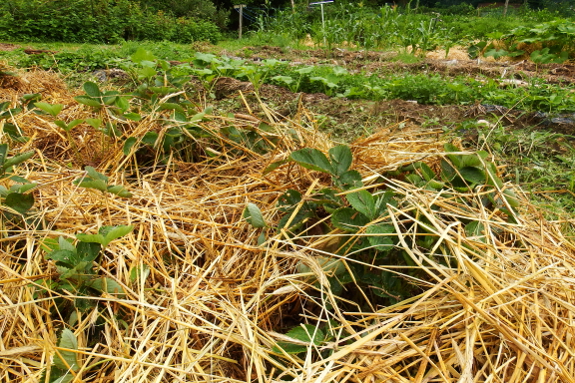
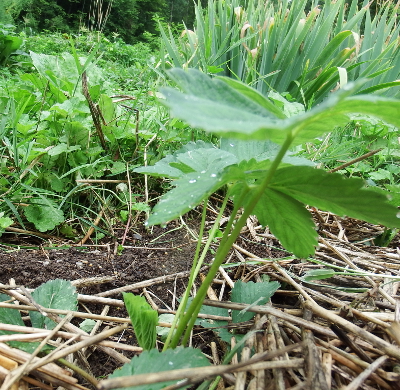 I also took a bit of time this week to start working on our strawberry beds. Midsummer strawberry tasks include renovating keeper beds,
ripping out old beds, and clipping blooms off any newly bought plants.
These last have been sitting in cold storage since winter, so they think
it's spring when they arrive at our farm. But June blooms in 2015 will mean fewer strawberries in 2016, so I pinch off flowers as they form.
The only difference in my
strawberry campaign this year is that I opted to fertilize and mulch
our renovated beds with fresh goat bedding. I hope I don't see burning
and regret this shortcut! I definitely wouldn't apply fresh chicken
bedding around growing plants, but goat bedding seems to be lower in
nitrogen and might make the cut. We'll see....
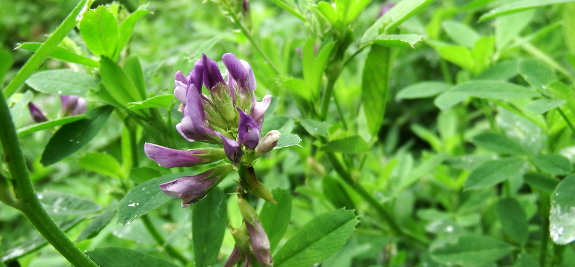
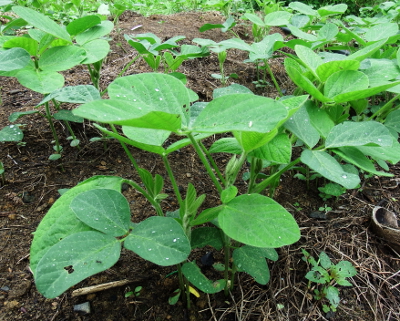 Speaking of nitrogen, I'm keeping an eye on the two new nitrogen-fixing cover crops
we're trying out this year --- alfalfa (above) and soybeans (to the
left). I'm not sure if alfalfa puts out enough growth to really count as
a cover crop, although the goats adore the leaves. The soybeans are
more intriguing from a garden perspective, since they appear to be
thriving in very poor soil. That's a cover-crop niche I'd been looking
to fill --- what to plant before your earth has been improved enough to
keep buckwheat and oats happy. But it's early days yet, so I'm not ready
to pass judgment on either cover crop right now.
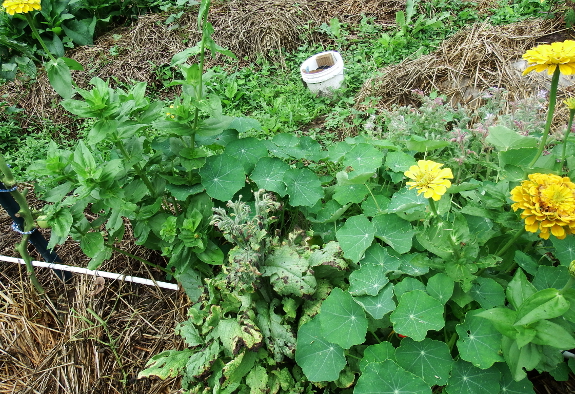
On a less utilitarian
note, borage doesn't look like it's going to make the cut as an
Anna-friendly flower. To survive on our farm, flowers have to be able to
thrive with absolutely no care, and our borage seems to be failing. I
could look up the disease and take steps to fix it...but with happy
nasturtiums and zinnias, I see no point in babying a flower.
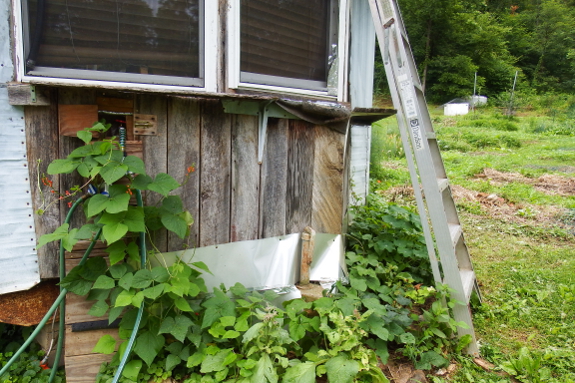
Scarlet runner beans,
of course, continue to prove themselves to be Anna-friendly flowers.
This area in front of the trailer is entirely subsoil, dug out of a bank
nearby and mounded up into a little bed that partially hides our
skirting. But despite poor soil, the beans are already growing so fast
that I've pulled Mark off other projects to start building them a
trellis.
The bed and trellis were
really meant to house grapevines, three of which are hidden amid the
beans in the photo above. Mark will tell you more about the trellis
soon, I'm sure, but suffice it to say that the eventual goal is to shade
this west-facing window from the hot summer sun.
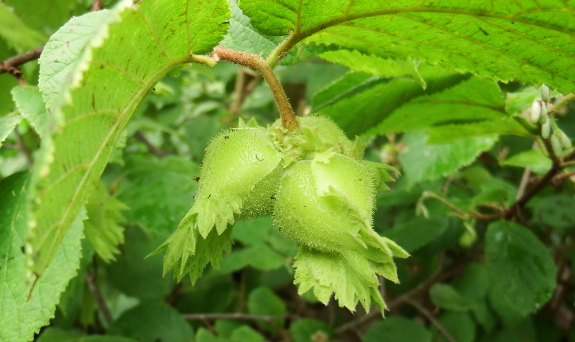
And that's a quick tour of bits of the garden that caught my eye before it started to rain. Happy Fourth of July!
Anna has been teaching me how
to milk Abigail.
It might take me a while to
learn the hand action and milking machine suction.
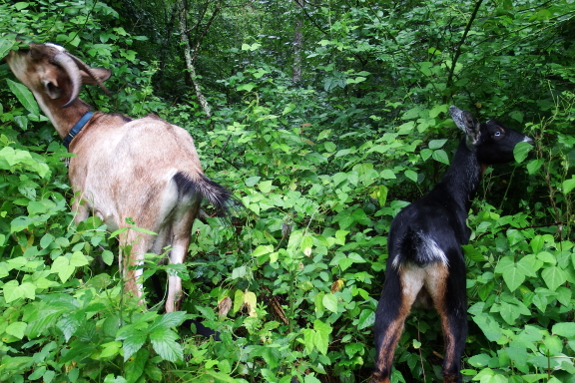
It's time for us to cross another goat-keeping hurtle --- breeding our does. I was hoping to do this the lazy way, letting our buckling
mate with our (unrelated) doeling this summer for a fall birth. But
Lamb Chop didn't mature fast enough to do the deed before my
self-imposed deadline, and any matings now would result in kids being
born too late in the season to be safe.
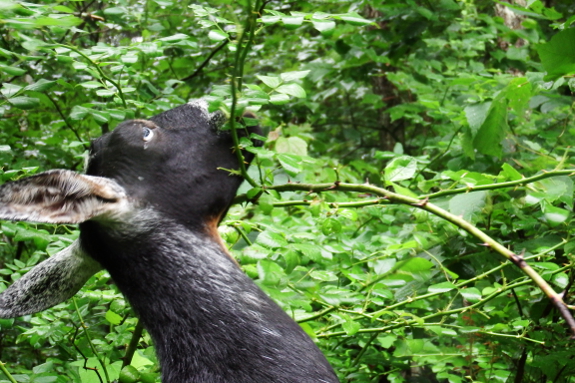
So we've got a bit of
breathing room to figure out a better way to get our does knocked up.
For an early April birth, we'd need to breed our does in early November.
Which seems like a lot of time to make up our minds...but probably
isn't.
There are lots of ways to
find goat sperm, which vary in dependability, safety, and quality.
Honestly, Mark and I would prefer artificial insemination (AI) for our high-class doeling
for reasons of safety and since she's a quality goat whose offspring
could be equally high quality (if dad supplies the right genes). But we
haven't found anyone local who can do goat AI, and driving a few hours
to get our goat bred could be problematic if the first time doesn't
take. (Success rates with frozen semen run about 60% with goats.)
Option 2 is to buy a
liquid nitrogen tank and supplies so we can inseminate on our own. My
understanding is that this would cost about $500 (plus ongoing liquid
nitrogen costs), which seems pretty expensive for goat sex.
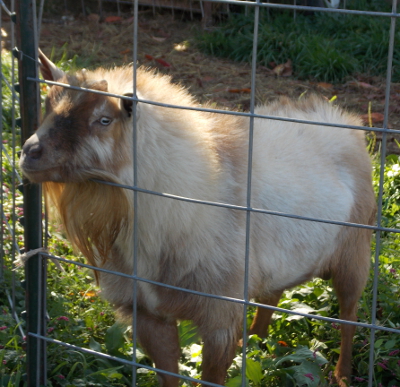 Option
3, the simplest and probably cheapest option, is to find a local buck
whom our does can have a date with. The trouble is that I'm working hard
to keep our farm's parasite levels very low, so I wouldn't want a
run-of-the-mill buck sleeping over and spreading his worms. (All goats
have worms, and if you've been deworming your herd monthly the way most
people around here do, those worms are most likely vermicide-resistant
"superbugs." Doesn't sound good, does it?) And the bucks I've heard
about nearby probably won't produce offspring that are worth keeping,
which would be a shame since a daughter of Artemesia's could potentially
be a top-notch goat. The closest milking-quality Dwarf Nigerians or
Mini-Nubians (Artemesia's breed) that I've found so far are a couple of
hours away, which adds another layer of complication to the breeding
endeavor if I want to produce keeper kids.
Option 4 is to buy a
buck, presumably one with good genetics and who has a clean bill of
health. The trouble here is that our farm is small and our
infrastructure is minimal, so we wouldn't really have anywhere to keep
him. Granted, if he didn't cost too much, we could simply buy a buck in
the fall, make sure he mates with our does, then eat him, which would
lower the hassle factor dramatically. But high-quality bucks tend to
cost high-quality money, making it less feasible to turn him into
sausage after he breeds with our does. And there's still the parasite
issue to consider.
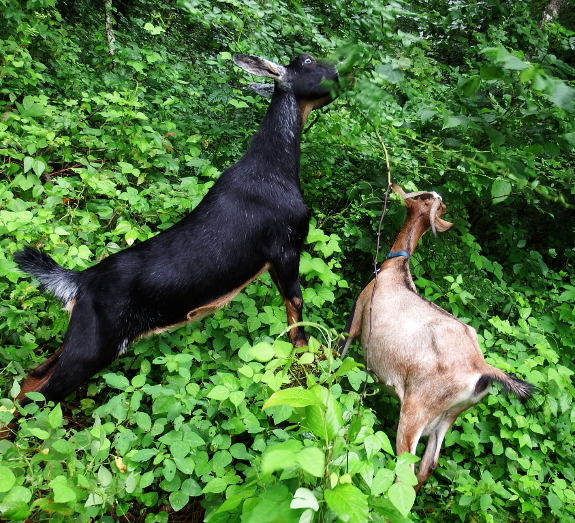
I'd be curious to hear
from more experienced goatkeepers among you. Is there an option I'm
missing? And, given our goals and infrastructure, which breeding
technique would you choose? I suspect November will be here before we
know it, and it would be great if I had our breeding plans all lined up
before those fall heats.
Our Chicago
Hardy Fig is limping along this year due to a harsh Winter.
Makes me wonder if a support
post might encourage more vertical growth?
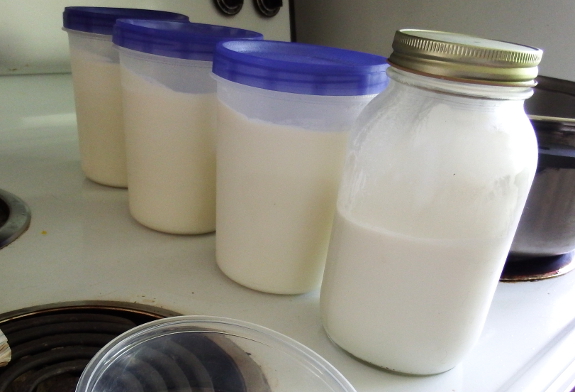
My first try with
mozzarella tasted and looked a little funny since I used balsamic
vinegar to acidify the milk. (That was the only acid I had in the
house.) But after a trip to the store to pick up a bottle of lemon
juice, my second attempt came together quite easily. Total time: 30
minutes active, 2 hours total in the kitchen, 3 days wait on the milk.
First of all, Leigh warns not to try to make mozzarella until goat's milk is at least three days old.
So I started a careful milk-aging system in the fridge --- new jars
went in the right side, wrapped around the back, and we drank out of the
jar in the front left. The great part about aging the milk before
turning it into cheese is that I was able to skim off enough cream to
whip as berry topping. Yum!
(Edited to add: I made this later with the cream left in, and I have to
admit that whole mozzarella was tastier than skim mozzarella. So you
might consider skipping the skimming step.)
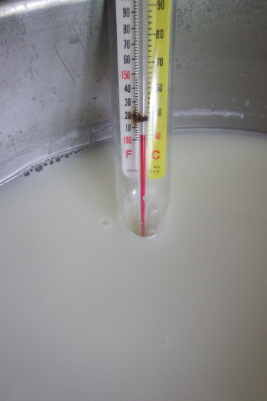 Okay,
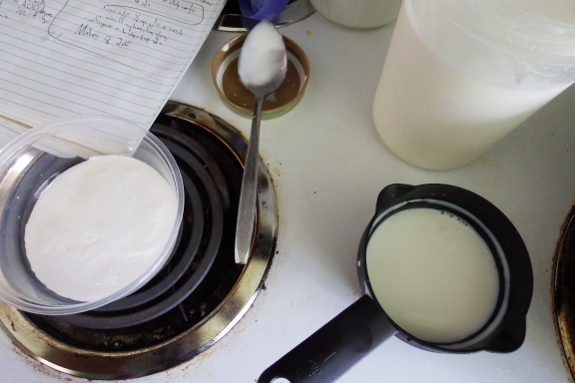
back to the point. I poured eight
cups of three-day-old milk into a stainless-steel pot. Next, I mixed 1/4 cup of lemon juice
(bottled) with one cup of water and poured that mixture into the milk,
stirring well.
The next step was to warm
the milk to 90 degrees Fahrenheit. My jelly thermometer doesn't go down
that low, so I used the inside-of-your-wrist test that is recommended
for warming water for bread-yeast proofing.
Once the milk was warm, I
mixed 1 drop of liquid rennet into 1/4 cup of cold water. Our raw goat milk requires very little rennet, so I then poured half
of the rennet-water mixture into my acidified milk. In other words, I
ended up only using half a drop of rennet for this recipe, which makes
the mozzarella come out at more the consistency I was looking for than
the harder, chewier cheese resulting from following a recipe.
After mixing the rennet-water into the
acidified milk, I was ready for the first waiting step --- 1 hour for
curds to form.
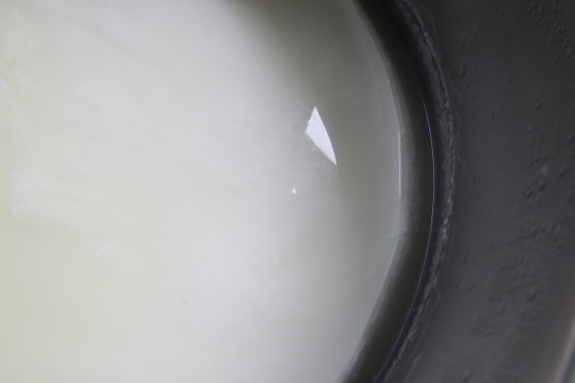
When you gently tilt your
pot of proto-mozzarella and the clearish whey slides away from the
solid curd, you're ready to move on to the next stage. Use a knife to
cut the curd into squares, then put the pot back on the stove over
medium-low heat.
This is where the candy
thermometer comes into play. Your goal is to achieve a temperature of
105 to 108 degrees Fahrenheit, then to hold your liquid at that
temperature
(stirring every five minutes) for thirty-five minutes. During this time,
the curds will shrivel and clump together to form a substance much more
like mozzarella. Be careful because I feel like overdoing the heat here
makes the mozzarella a little chewier than I would have liked.
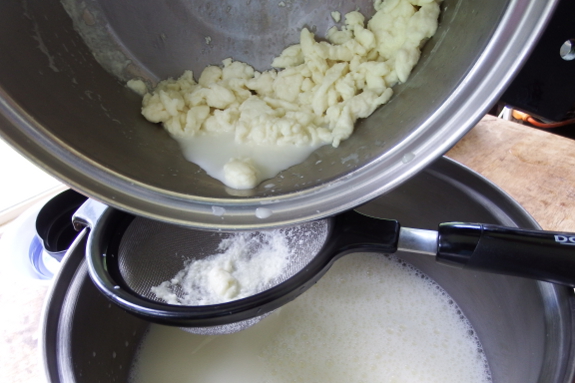
Now strain the curds from the whey by passing the contents of your pot through a stainless-steel sieve.
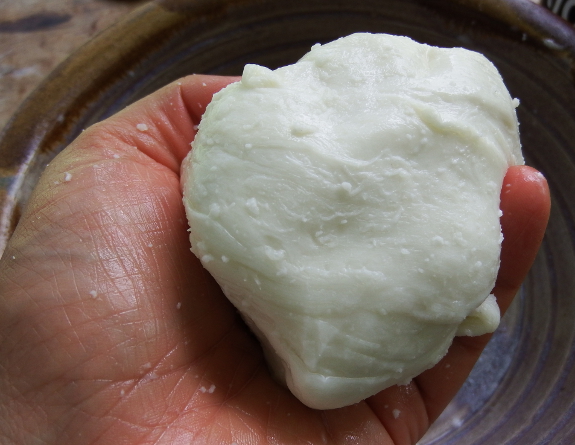
Add 1/4 teaspoon of salt
to the curds, then put them in the microwave (in a microwavable dish)
for between 30 seconds. The mozzarella should melt enough
to be stretched and easily formed into a ball. If not, put it back in
for 15 to 30 seconds before stretching a few times and calling the
cheese done.
The result is about six ounces of cheese from two quarts of milk, with the possibility to get more cheese out of the whey later. All told, mozzarella seems a bit more wasteful of milk than cultured cheeses,
but it's definitely quick and easy. In fact, there's a 30-minute
version knocking around the web that cuts out some of these steps, if you don't mind trading a bit of flavor for time.
What fun to add another homemade cheese to my arsenal!
We put up a new shade
trellis today for grapes and scarlet
runner beans.
The increased shade on these
West facing windows will help to cool the kitchen.
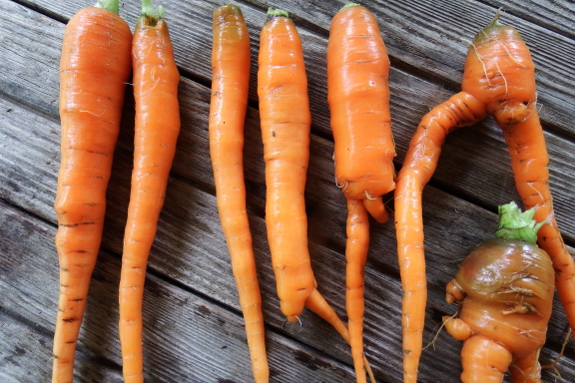
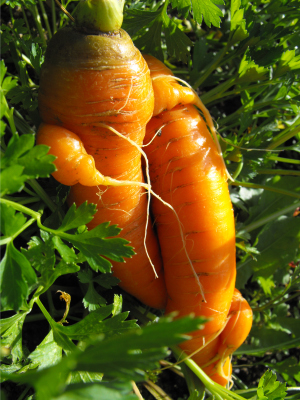 It's
hard not to be intrigued by the shape of carrots when they come out of
the ground twisted or gnarly. For example, the photo to the left (from
our 2009 garden) made me think one carrot was giving his buddy a hug.
However, after a while,
most gardeners realize that the goal is long, straight carrots that are
easy to clean and chop. So why, we begin to wonder, are some carrots
fine, upstanding members of our gardening community...while others split
and twist and make trouble?
The answer is usually in
your soil. The carrots in the photo to the left probably should have
been thinned, while the carrots on the right side of the photo at the
top of this post likely hit something hard in the soil and split to grow
around it. Since we don't have any rocks, those were likely tough spots
within the earth itself, a sign that our soil isn't yet perfect.
Luckily, more of our carrots come out of the ground long and straight
every year --- a good sign!
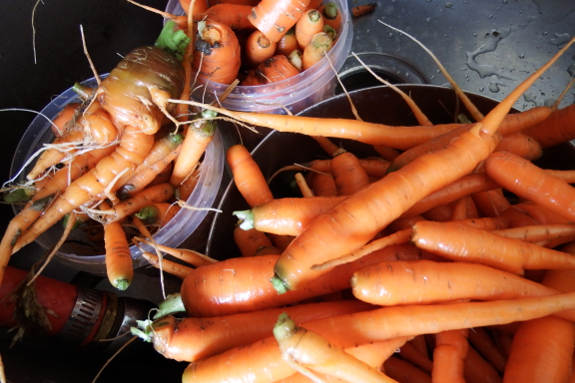
I harvested one of our
beds of spring carrots early this year because the plants were starting
to rot. It's possible the rot is due to our recent bout of wet weather
(2.7 inches in the last week). Perhaps more likely (since only one bed
was affected and the roots are rotting from the tips up) is carrot fly
larvae tunneling down into the roots. I'll probably pull the other three
beds this week just in case.
On the plus side, I
planted twice as many carrots as we needed so Abigail could get off the
storebought-carrot wagon. So I sorted our harvest into straight,
easy-to-handle carrots for the humans and partially rotted or gnarly
carrots for the goats. Even though I had to take care of twice as many
beds in the garden, I think the goats just saved us time overall since I
don't have to scrub those gnarly roots!
Our Stihl
FS-90R weed trimmer is just over 4 years old and still runs great!
The trimmer head needs to be
replaced. I was going to order an after market trimmer head on Amazon
but changed my mind when I saw all the bad reviews.
Better to wait and pay a
little more at a Stihl dealership. My new favorite place to take Stihl
products is the feed store in Gate City.
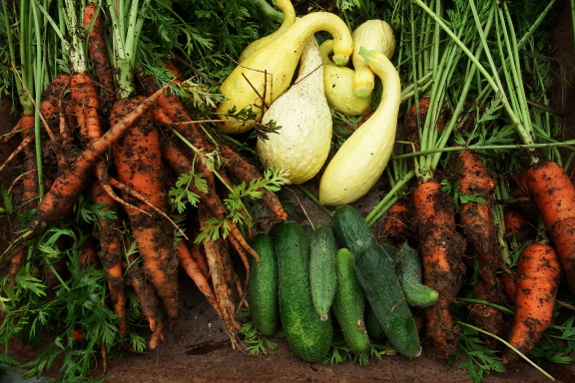
It's that time of year
again --- when a couple of hours weeding in the garden has the side
effect of bringing home a bigger harvest than we can possibly eat in the
next few days. Our local librarians are going to have to add more
cucumbers and squash to their diets. (We'll keep the carrots.)
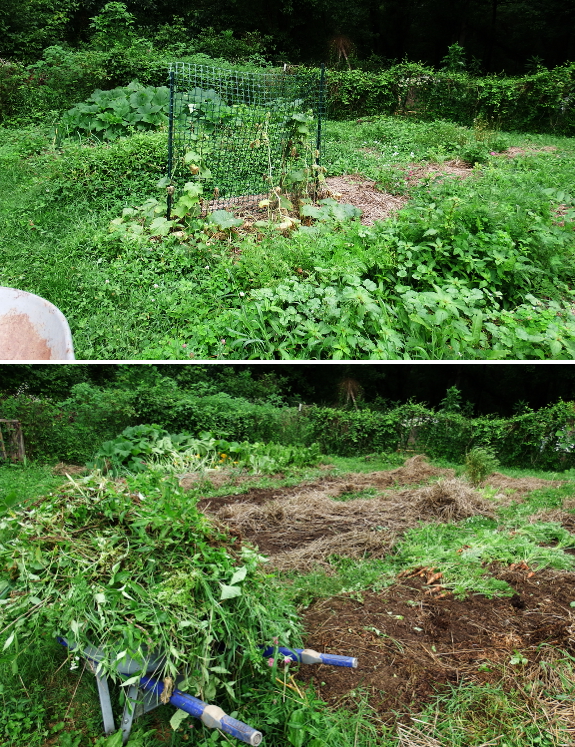
The photos above show the
part of the garden I hit Tuesday, before (above) and after (below). I
pushed back the squash (who were trying to eat the onions), yanked out
our first planting of cucumbers (since we have another bed in full
production now), and harvested the carrots. Other beds had been home to
oats (which didn't die properly and turned into weeds) or garlic
(harvested a few weeks ago). The result is that most of this area is now
fallow until it turns back into a fall garden. So I scattered buckwheat
seeds liberally across the bare ground and can write this area off my
agenda until planting time for kale, lettuce, and brussels sprouts.
Why have we only grown Masai beans
for the last 7 years?
Because they taste delicious with a
little garlic and oil with salt and pepper.
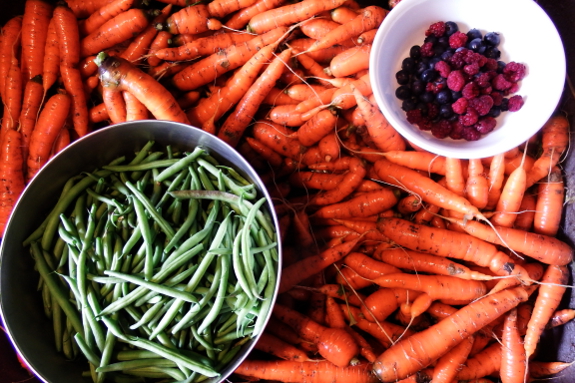
Wednesday's carrot
harvest put Monday's and Tuesday's to shame. These are Bolero carrots,
which get much bigger (although not as tasty) compared to the Sugarsnax I
harvested earlier in the week. The Bolero also seem much less affected
by carrot flies, which is a good thing given this year's infestation.
Without the carrot-fly
depredations, I was able to get a better feel for the difference between
broadforked soil and unbroadforked soil. You may recall that I broadforked half of each carrot bed before planting
in an effort to see what effect this soil-loosening step would have on
the root crop. Overall yields seemed roughly comparable on the two
halves of the bed, but I thought the carrots in the broadforked side
averaged a bit larger and they were definitely easier to pull up. I'll
get Kayla's unbiased conclusions on the last carrot bed tomorrow...if I
can think of somewhere to store another near-bushel of carrots.
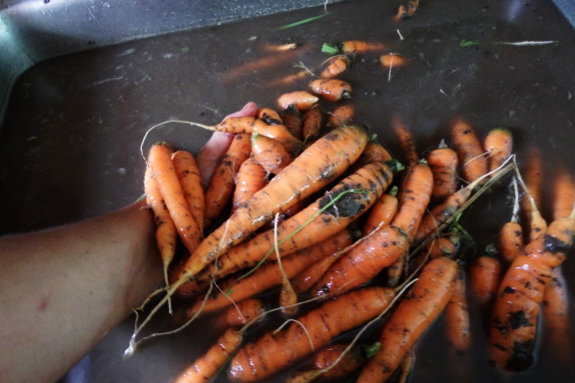
Speaking of storage,
upgrading the quantity of carrots we're growing so we can feed some to
the goats means changes in our harvesting habits. In the past, I've
sometimes stored carrots unwashed, but our heavy soil tends to really
stick to the vegetables if I dig them during a rainy spell as I'm doing
this year. Mark had the bright idea of filling up our huge sink with
water, pouring in the carrots, then swishing them around. After draining
out the muddy water, I then sprayed the carrots down well. The
combination of quick-and-dirty cleaning techniques probably removed
about 95% of the soil, which is pretty good for ten minutes of work! Now
if my inventive husband can just put his mind to work figuring out
where to put excess carrots when the weather is too hot to use our refrigerator root cellar....
We sweep the chimney every
year and each time the build up is tiny.
I think it's a testament to how
efficient the Jotul stove burns.
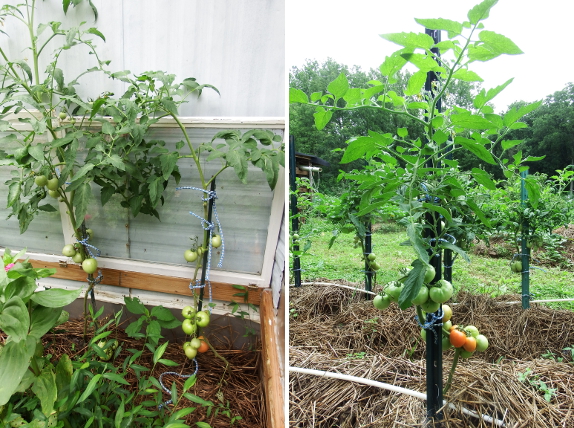
It's easy to get
engrossed in soil improvement and forget how important sun is to
vegetable production. Various lists suggest that some edibles do well in
partial shade, but my experiences have shown that full sun is mandatory
for full production of even supposedly tolerant species like asparagus.
Of course, no one will
tell you to plant tomatoes in partial shade. The photos above show the
huge difference between plants set out in partial shade (photo on the
left, in an area shaded by our wood stove alcove during the morning)
versus what counts for full sun on our farm.
All of the plants pictured (in the foreground at least) are the same
variety, and the ones in partial shade were actually set out five days
before the other. Guess who's going to give us the first tomato of that
variety? The same plant who has fewer fungal problems and will produce
more overall --- the one who enjoys more sun!
We had a water snake visitor
today.
She's probably this far from
the creek to lay some eggs.
Anna chased her away with the
hose and a stern warning not to come back.
 One of our readers commented to ask what the parasite-prevention program looks like for our goats.
I haven't posted about it previously because I'm a bit afraid to be
told that you absolutely can't raise goats without dewormers. So far,
though, that's been our plan. Instead of a regular deworming program,
we:
- Rotate goats weekly (although the goats do return to used pastures much sooner than the 90 days recommended for total worm eradication).
- Primarily feed goats outside the pasture, through morning
tethering and afternoon rambles, so they're very rarely eating where
they've pooped. (We also work hard not to make them so hungry they have
to eat weeds low to the ground where worms are more likely to hang out.)
- Keep kelp (which they scarf down) and minerals (which they largely ignore) available free-choice at all times.
- Keep a close eye on condition to see if worm loads are getting too high.
- Use garlic as our first line of defense if we begin to see problems.
- Cross the dewormer bridge when we come to it. (We've never reached this stage yet, and I'd probably head for copper first.)
What do I mean by keeping
a close eye on condition? Parasites get first dibs on your goat's feed,
so an animal with too many worms will be skinny even though she's
getting plenty to eat. I was intially testing for fat deposits using a weight tape...but
then one of our spoiled darlings knocked the ribbon down from its high
shelf and chewed it apart. So I've moved on to body-condition scoring,
which requires no supplies except your fingers and a goat. As long as
our voracious beasts don't eat my fingers, I'm all set.
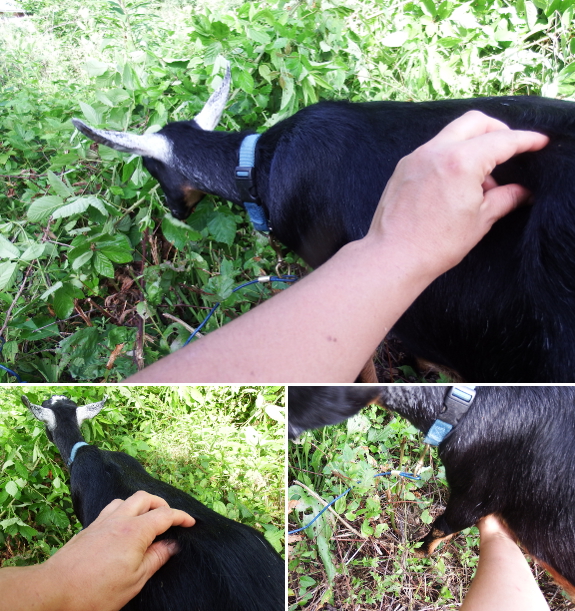
This factsheet
walks you through scoring your goat's body condition, so I won't repeat
the same information here. To cut a long story short, you're really
looking for fat in two locations --- under the goat between her front
legs (the sternal fat, which is what a weight tape really measures) and
in the area between the spine and the jutty-out bit (aka the transverse
process) above the hind legs (the lumbar fat).
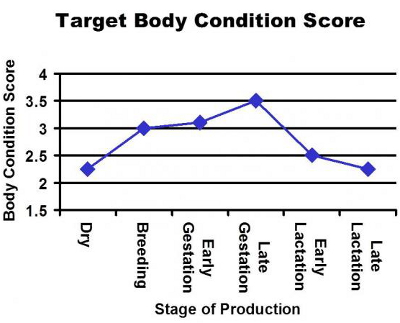 The image to the right is a quick cheat sheet on body-condition goals for milk goats, stolen from this page.
The graph was made for dairy sheep, but is similar to the goals for
milk goats. As you can see, it's best to have a goat bred at a
body-condition score of around 3, then she naturally drops some fat as
she makes milk. However, if you can't keep your milk goat above a
body-condition score of 2, then it's time to dry her off and feed her up
for next time.
So where do our goats
stand? Artemesia's body-condition score is a good estimate of her
parasite loads since she's not doing anything difficult (like milking)
and is barely getting any supplemental feed. My estimate is that she's a
solid 3, which is just about perfect. (Much higher and she'd count as a
fat goat.)
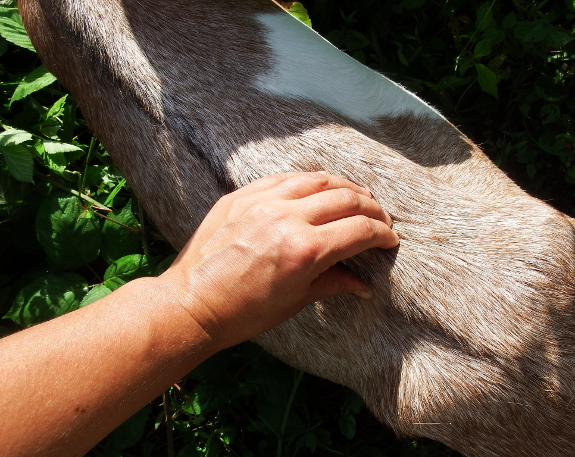
Abigail is a bit thinner,
with the fat deposit between the peak of her spine and the transverse
process being very slightly concave rather than in a straight line. Even
though it's not technically part of the body-condition score, I think
it's also relevant data that Abigail's hair doesn't shine in the sun
quite the way Artemesia's does. As a result, I'd estimate that our older
doe's body-condition score is 2.5 --- not too bad for four months into
her lactation cycle. I probably should increase her carrot rations,
though, since I'd let them dwindle recently in favor of feeding mostly
alfalfa pellets in her daily rations.
I should mention that
inside-the-eyelid color is another way of keeping track of a goat's
parasite load, but I haven't crossed that bridge yet. It just seems
easier to feel up our goats externally than to flip their eyelid out to
look inside. However, I feel pretty good about worms at the moment,
given how sleek and healthy our goats appear.
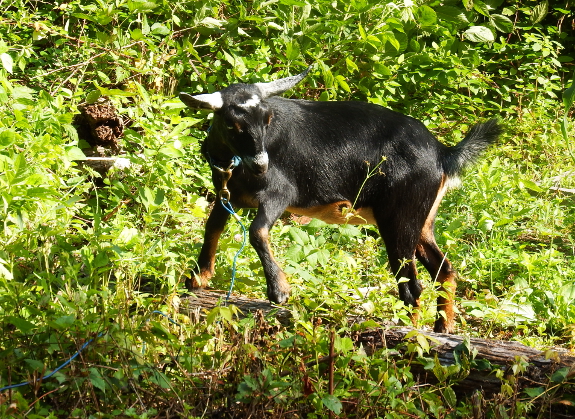
And that's the
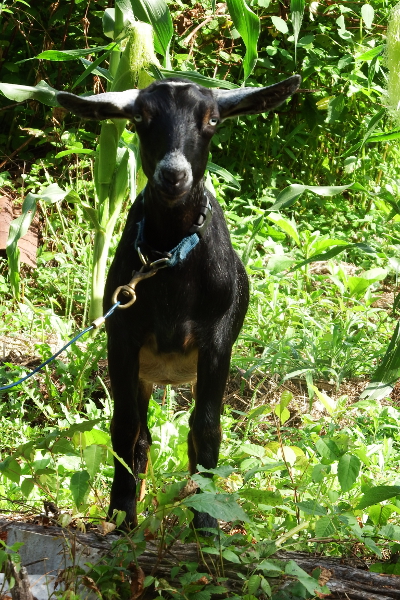
far-too-long answer about our parasite-prevention program. Here's a cute
picture of Artemesia to wake you back up in case your eyes glazed
over....
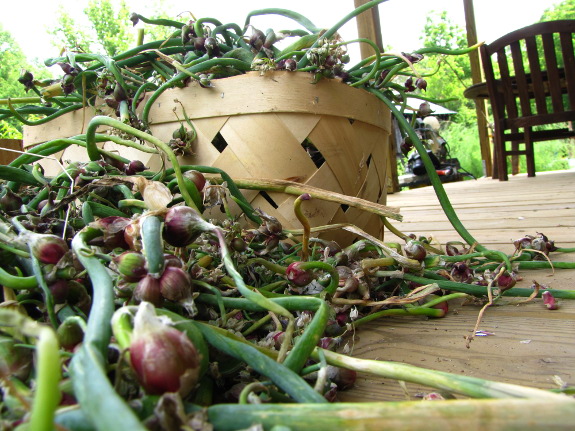
It's that time of year
again --- when I fulfill my end of the coevolutionary bargain with our
perennial vegetables. In other words --- several readers will get free Egyptian onion top bulbs this month in order to turn their garden into a delicious place year-round!
 Want
to enter the giveaway? I'm keeping it simple this year. Book sales fund
postage for all of our giveaways, so all you have to do to enter is to
help push our books along. Most relevantly, Aimee's newest novel, Jaguar at the Portal,
just went live today at 99 cents (and is also available for free
borrowing if you have Amazon Prime or Kindle Unlimited). I'd love to
help the title launch with a bang rather than a fizzle. Buy or borrow a
copy, then click on the proper giveaway button below to share the first
word of chapter 10, and you've got a good chance of having a free box of
onions arrive on your doorstep next week.
Of course, I realize that
many of you aren't interested in fantasy. So I've also included an
option of helping promote my non-fiction books (or any other Wetknee Book).
Reviews make or break our titles, so if you've bought (or downloaded a
free copy of) one of my books in the past but never got around to
leaving a review, here's your nudge to do so. Leave your honest review
on Amazon then put the link in the widget below.
I know I have at least
five boxes of Egyptian onions ready to wing to a new home this month,
but it might turn into more once I sort through my basket. Thanks so
much for helping our books reach a wider audience, and I hope you enjoy
your new perennial vegetables!
It occurred to me the
other day that the things I don't talk about much here on the blog are
the things all of our readers really should be doing. The things that
are so easy and successful that I barely give then a moment of my
attention...until it's time to harvest the results. So, without further
ado, four things I don't often write about:
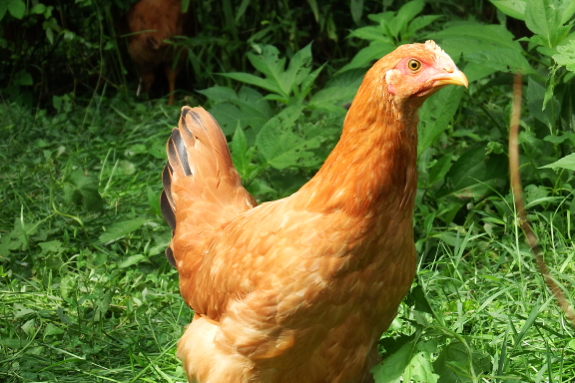
Pastured chickens. It took us a while to work the kinks out of the system, but our laying flock is mostly a set-it-and-forget-it homesteading project nowadays.
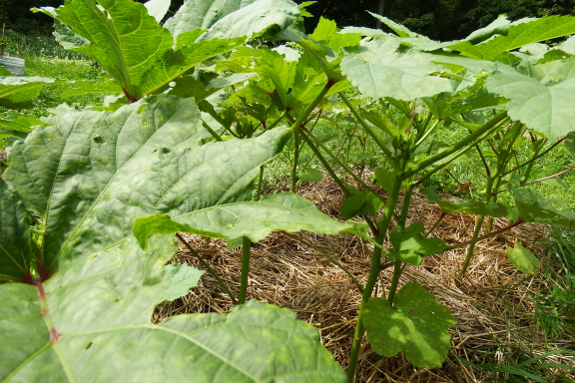
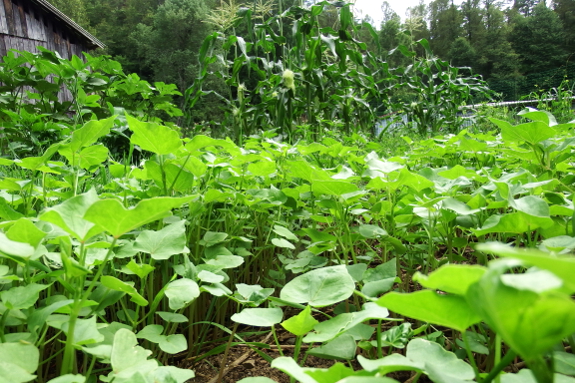
Low-work vegetables.
I know I post (far too much) about struggling with fungal diseases in
our tomatoes and trying to harvest apples despite living in a frost
pocket. But large parts of our garden are as simple as plant, weed and
mulch once, then harvest. I write in more depth about the easiest
vegetables in Weekend Homesteader,
but here's the cliff notes' version (slightly updated over the last
four years): swiss chard, okra, crookneck and butternut squash, green
beans, kale, and lettuce are hard to go wrong with.
Easy cover crops.
Once again, I post mostly about my experiments in this department. But
the trinity of buckwheat in summer and oats and oilseed radishes in
winter build soil while keeping weeds at bay. I adore them and plant
them copiously.
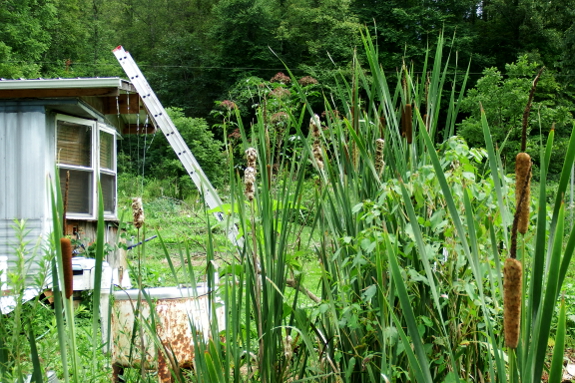
Greywater wetland.
Mark weedate around the greywater wetland last week...which is the
first time we'd touched the area in about a year. The cattails are
thriving and our kitchen-sink water disappears without a trace. In case
you want to learn more, I write in great depth about our greywater
wetland (and other infrastructure projects worth their salt) in Trailersteading.
What do these four facets
of homesteading have in common? They all started out as problems ---
smelly chicken runs, ailing vegetables, poor soil, and a mucky drain out
back. Then we tweaked and tucked and soon created systems that worked
with very little effort on our part. Maybe in ten more years, my
things-I-never-write-about list will include goats and tomatoes and
frost-bitten apples. In the meantime, I hope you enjoy tagging along
with our trial and error. And, I hope you'll consider posting your own
things-too-easy-to-blog-about list below.
Our Swisher
self propelled trimmer mower is a true advancement in weed control.
One problem I had was
carrying the pieces of string in my pocket.
They had a tendency to pop
out while I was mowing until I started clipping them on the middle
support bar with a small
spring clip.
And laptop battery is too low to post. Hopefully we'll be back online tonight, but please don't worry if you don't hear from us!
Power outages have made Anna
an expert at cooking breakfast with propane.
Total time off the grid was a
little over 20 hours.
Two thumbs up for the battery
powered fan that kept me cool all night.
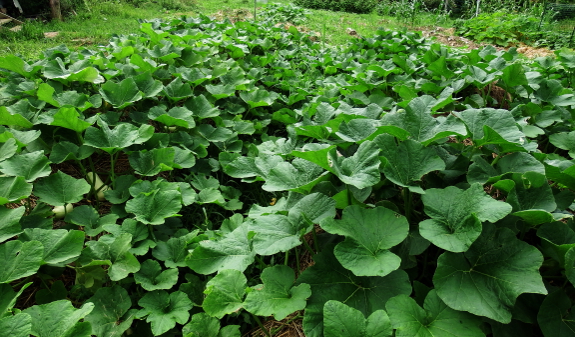
I might've gone a little
bit overboard on our butternut squash planting this year. The photo
above shows about half of our planting, growth fueled by chicken deep bedding.
Now that the vines have thoroughly filled in, the patch is pretty impressive. There aren't even any aisles left to mow!
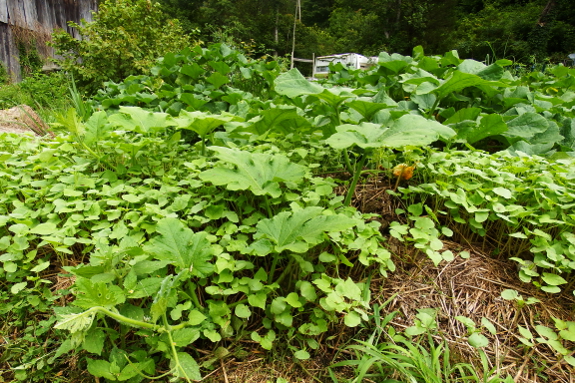
In fact, the squash are
already starting to run out of bounds. This particular stem has passed
over a bed of buckwheat and is moving into our main avenue. Maybe I
shouldn't have used the electric fence on the chickens and should have saved it for our naughty butternuts?
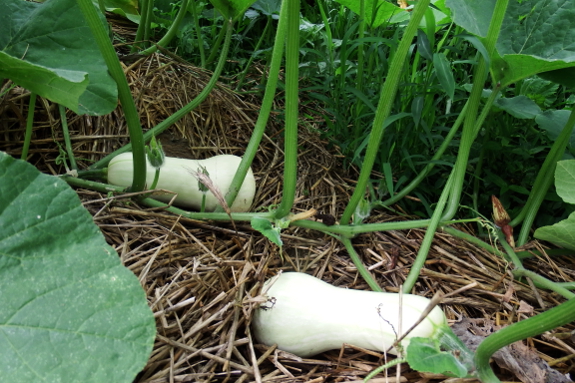
Nearly full-size fruits
are already abundant beneath the leaves. I expanded our butternut
planting this year for the sake of our goats, who particularly enjoy the
seeds (a natural dewormer
and all-around tasty treat). But if everything keeps going at this
rate, both humans and goats might have a hard time eating our way
through the bushels of cucurbits when winter rolls around!
A good problem to have....
We liked our Little
Giant feed trays so much we got one for the milking stanchion.
Now we can lift it off to
empty out the crumbs that Abigail leaves behind.
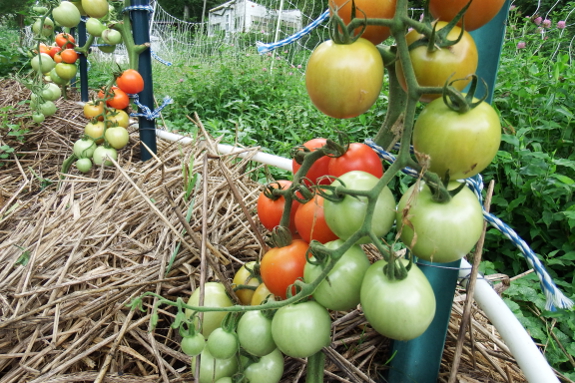
Our tomatoes are finally
ripening fast enough that I think we'll be able to make our first pot of
soup this week. That's good news since vegetable soup is a mainstay of our winter diet --- time to get cracking!
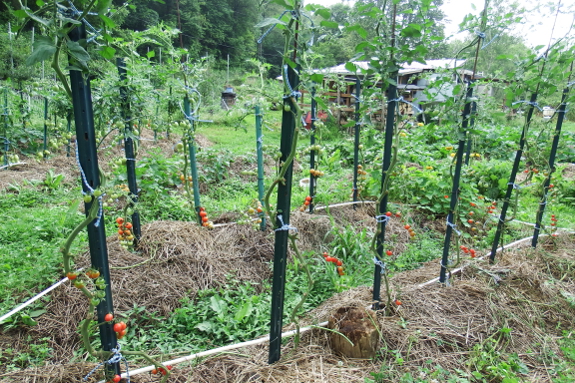
The bad news is that I'm pruning the plants higher and higher as the blights
spread. Septoria was soon joined by small outbreaks of early blight,
and I'm very afraid that the dreaded late blight has entered the fray
now. I'm ready to deem these new blight-resistant tomato varieties
a dismal failure --- flavor isn't nearly as good as the heirlooms I'd
been growing, and they don't appear to showcase any extra blight
resistance at all.
Next year, we may try yet another anti-blight experiment --- creating an
anti-rain canopy out of clear plastic over the tomato patch. Like a
greenhouse with no walls....
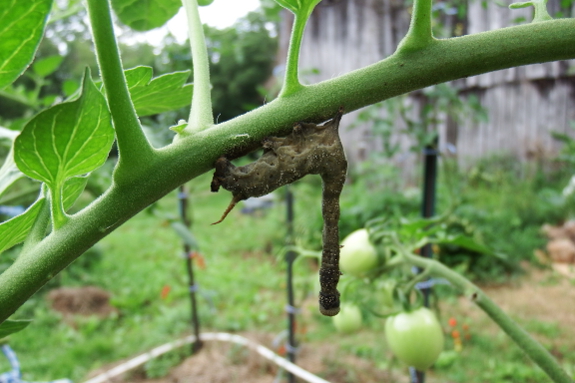
On the positive side
again, hornworms are appearing...and disappearing nearly as quickly as
they show up. This little guy doesn't even appear to have lived long
enough to get parasitized by wasps. Perhaps this is an example of the plant creating anti-nibbler pesticides within its leaves?
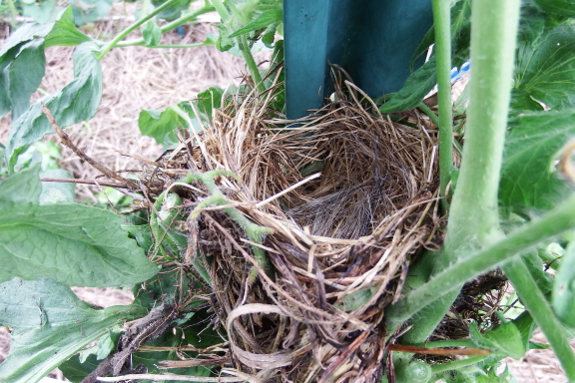
Meanwhile, a song sparrow
family has moved into one of my tomato plants. I'd thought that the
mother bird would give up on the nest once I pruned away blighted leaves
that used to shield the contents from rain and view. But Tuesday I
found a tiny spotted egg inside, nestled atop Abigail's hair. Looks like
our resident sparrow couple will have another successful nesting this
year! Round one occurred in the hardy kiwis, and I was treated to the
inspiring view of one of the babies waking up from its nap and gaping
for food before I let the vines curl back over nest #1. Here's hoping
Mama Sparrow does as well with round two.
We crushed one of our cattle
panels last week with a falling tree.
The new plan is to lay them
all flat on the ground before we cut another tree.
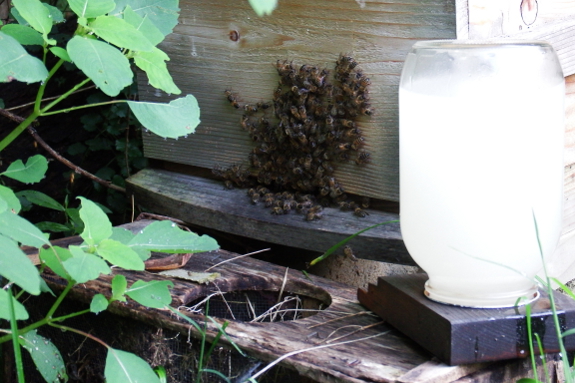
I'd been putting off adding a third box to our daughter hive, hoping that the mother hive would be done moving into the Langstroth boxes so I could begin converting
the daughter hive with the same hardware. But when I dropped by the
daughter hive Thursday morning to refill their feeder, the photo above
shows what I saw. Unless the weather is very hot, bearding is a sign
that the bees in your hive need more room. Time to get my act together
and add another box!
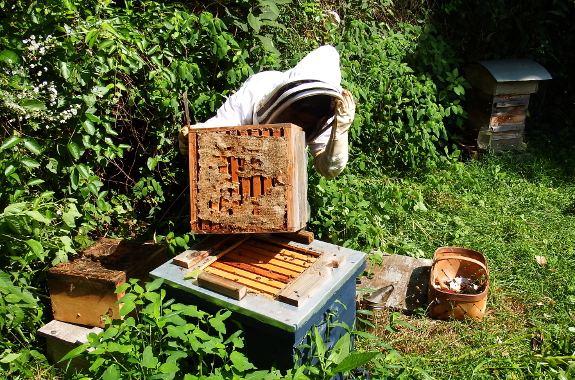
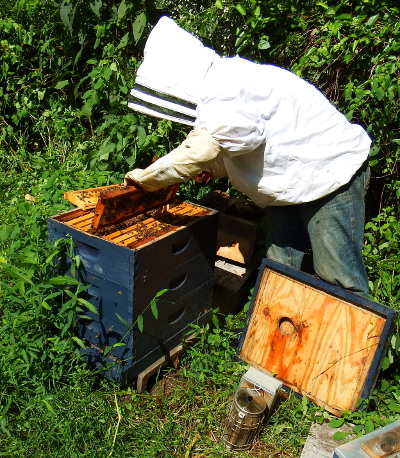 After
waiting until the sun was blazing and the foragers were out in the
field, Mark and I stopped by the mother hive first. The one Warre box in
this hive was very heavy, full of capped honey, and at first I thought
I'd be able to call the conversion a success.
But when I delved into
the Langstroth box underneath, I found only honey and pollen, no brood.
And when I peered more carefully up under that single Warre box, I saw
some capped brood, signaling that the queen is still working up in the
attic. So I put the hive back together as-is and headed over to the
Warre hive with plan B in mind.
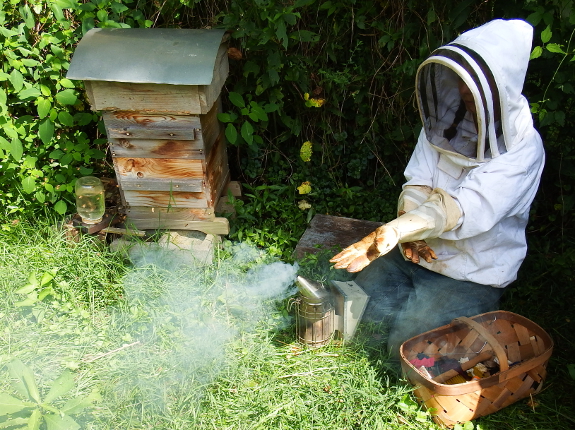
Although we could have made another Langstroth-to-Warre converter, I opted to instead go the simple route and just nadir
another Warre box under the daughter hive. The bees will have space to
keep expanding, and we'll wait until next year to convert them over to a
Langstroth hive.
On a different note, I
was heartened by how hard both colonies of bees are working this year.
The daughter hive is on the dole (sugar water), which seems to have
helped them bulk up well (although they still have a lot fewer foragers
than the mother hive). And the mother hive is doing well also, although
they appear to have eaten some of their honey since I last checked. If
nothing else, I hope both hives will be ready to go into winter without
any (or much) additional fall feeding.
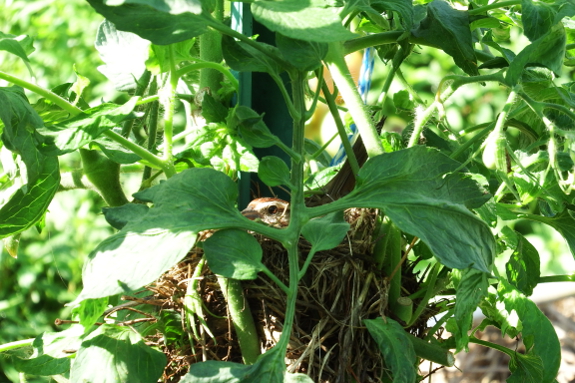
The bird nest in the tomato patch is right along the main walkway to the composting toilet,
so I see Mama Bird several times a day. As long as I look in the other
direction when I walk past, she stays put, lack of eye contacting
tricking the song sparrow into thinking she hasn't been noticed.
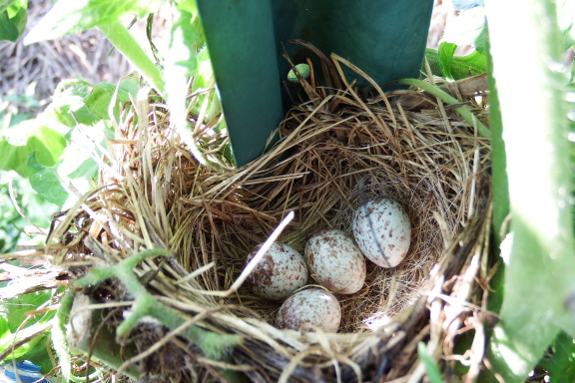
But when I pulled out the
camera, even using the zoom from a distance was enough to spook Mama
Bird. I figured I might as well look in the nest since she'd flown away
for the moment, and I was pleasantly surprised to find four eggs
clustered atop goat hair.
Song sparrows are one of
my favorite birds, mostly because of their ubiquity in human habitats
and tolerance toward people. But this is the first time I've had such an
up-close-and-personal experience with their nesting behavior. I'm
looking forward to daily views of baby birds, perhaps in a week or two.
I couldn't find hardware
cloth with 1/8 inch holes at any store around here.
It's the perfect
screen material for beehive bottom boards.
Anna found us a 10 foot roll
for 25 dollars on Amazon.
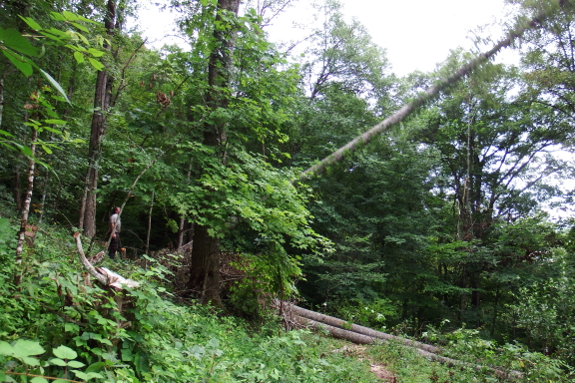
I've learned a lot about
firewood this year. For example, this gem courtesy of Kayla's father
(slightly tweaked): Tulip-trees are always longer than they are tall.
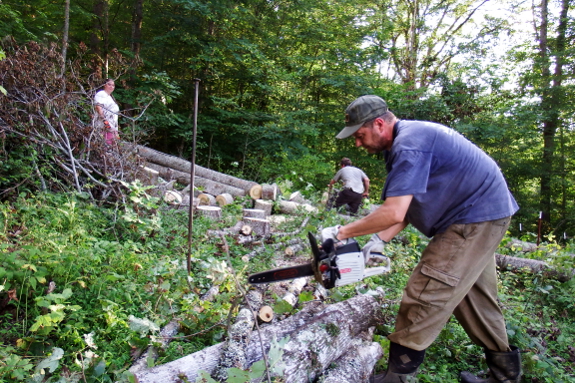
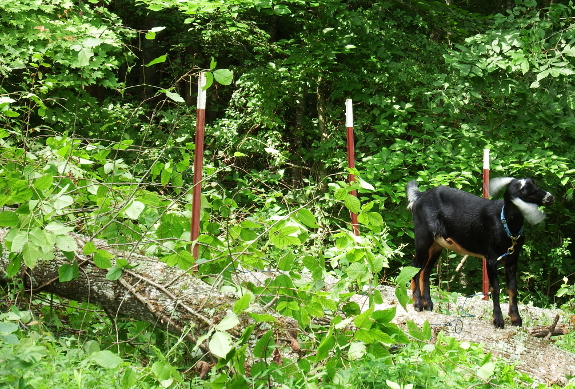
Or how about this one: If you want to create a sugar-bush/goat-pasture hillside, cut down your trees before putting up your fences.
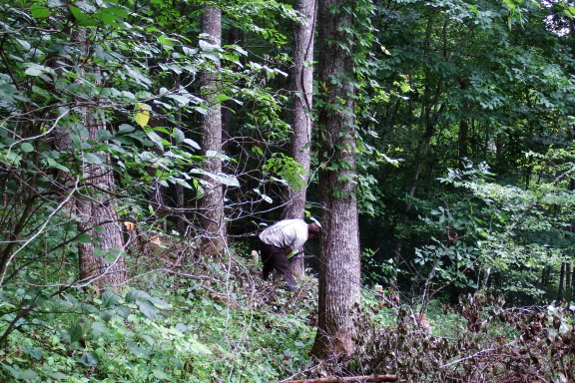
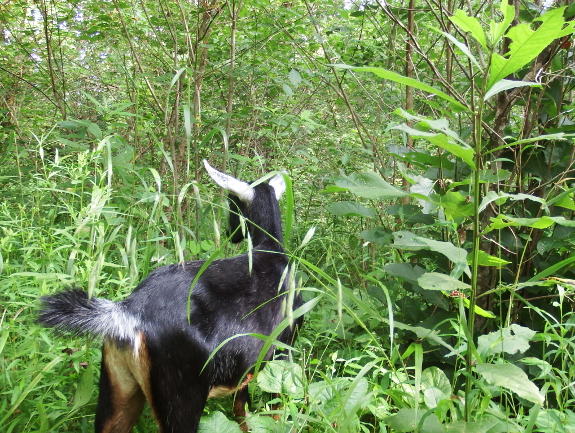
Here's a word to the wise: Let the goats eat up the poison ivy before sticking your head into the thicket to cut up logs.
And I'll end with: An hour a day fills up the woodshed (with a little help from your friends).
Now, if we can just
remember to starting cutting firewood in March instead of June next
year, we might finally have a fully dry stash of combustibles when
winter rolls around. In the meantime, I'll just enjoy the fact that
we're nearly on quota for this coming winter, and that the hillside
above the starplate coop now has a canopy open enough to let
goat-friendly herbs grow on the forest floor. Here's hoping the sugar
maples and black birches we carefully left behind will also benefit from
the extra light and will produce plenty of sugar next spring.
Our new step stool developed
a small crack on the top step.
Attaching a furring strip
with small screws through the plastic seems to have made it stable
again.
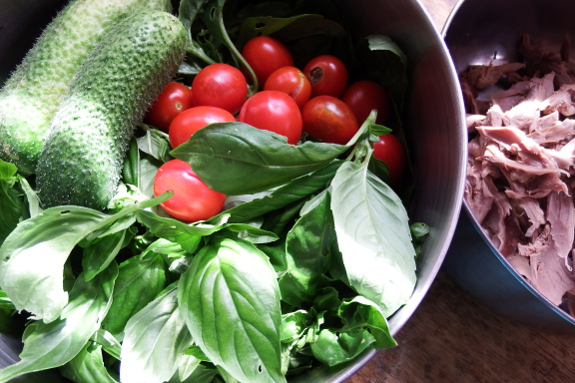
Homesteading can feel so
surreal in the summer, when the temperature is in the 90s but you know
that only about three months remain until the first frost. Then you do
the math and realize that 58% of the year isn't safe for tender summer
herbs and vegetables. But even with those warnings of the long, cold
months ahead, how can you resist living in the restful sea of summer
green?
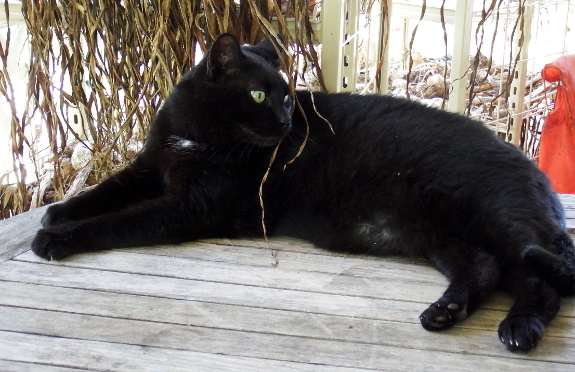
If you want to feed
yourself homegrown vegetables all year, though, it's time to eschew the
grasshopper lifestyle and turn into the ant. We've already got a bit
over a gallon of summer produce stored away in the freezer, and much
more will be hitting the ice box shortly. Meanwhile, the garlic is
nearly done curing and the onions will soon hit those drying racks.
We're planting fall crucifers and lettuce and carrots for fresh winter
eating, and I'm dreaming of upgrading from quick hoops to a movable
greenhouse for more serious frost-protection some year soon.
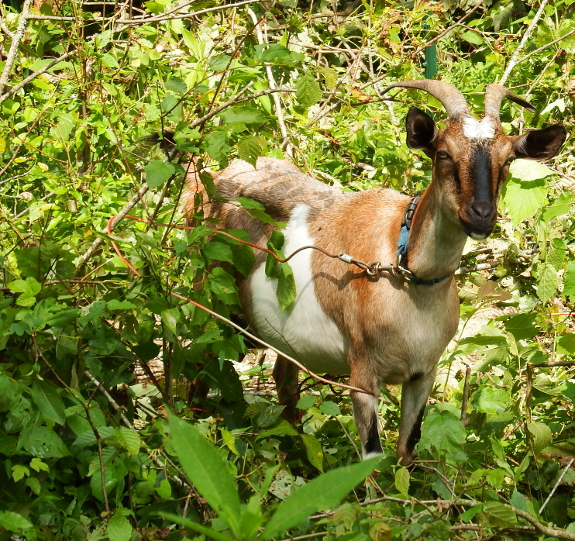
But I'm also taking advantage of the hot weather to take the goats out in the woods for extended bouts of grimming (they graze, I swim). The living may not be easy on a farm in the summertime, but it sure is satisfying!
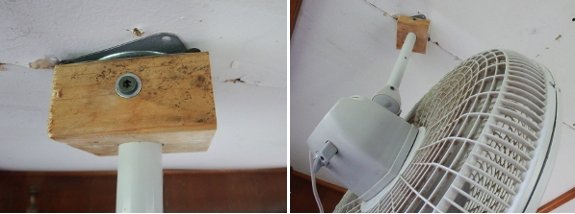
Mounting a pole fan to the ceiling on a lazy susan bearing makes it easy to change direction and keep the fan out of the way.
 "Is
there a five, ten year or longer plan for wood? That is will there be a
rotating supply for the future growing in time? Good idea on let [the
goats] eat poison ivy. Any trouble touching them after they have brushed
up against the leaves?" --- Jim
Jim has a very good
question about developing a sustainable firewood supply. To be entirely
honest, we haven't had to cross this bridge yet because we own 56 acres
of woods and seem to be constantly needing to take out trees to give me
more room for pasture or orchards or to keep our driveway clear. I
suspect we'll continue on this getting-established track for several
years to come.
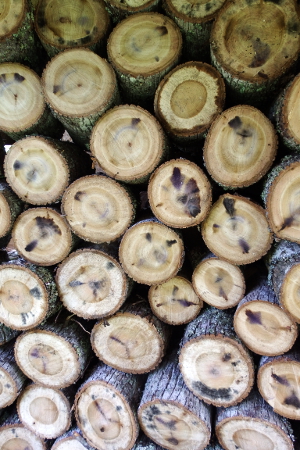
In the long run, we will need to develop a plan for firewood harvest, though. One option is to coppice the trees in the powerline cut that aren't supposed to grow too high anyway. The plus side of this is that small wood is very easy to harvest with our electric chainsaw,
it dries quickly, and the limbs require little or no splitting in the
winter. The downside is that it takes about three times as long to sock
away the same volume of firewood when working with small branches versus
larger trunks.
 Another
option is to develop a woodlot plan for the areas close enough to our
core homestead to make transport of the firewood simple. Selecting a
maybe 5- to 10-acre zone in which our goals are promoting trees for
sugar tapping (for the humans), nectar production (for the bees), and
log production for mushrooms would give us an incentive to take out
competing trees in that area. I've already started this plan in my head,
but should probably commit it to paper soon while I still know where
all those useful trees stand.
To answer your second
question --- I'm not actually allergic to poison ivy, and was (I'm
ashamed to say) ripping poison ivy away from our newly cut trees with my
bare hands Friday evening. Unsurprisingly, I didn't notice any issues
when petting on our darling doeling after her cleanup job.
That said, I definitely wouldn't have let my mom touch a goat who has
been on poison-ivy duty since she seems able to contract poison ivy just
by looking at a plant funny. So your mileage will definitely vary.
We harvested about 10 pounds
of carrots today.
Lucy likes to watch anything
we do that happens close to the ground.
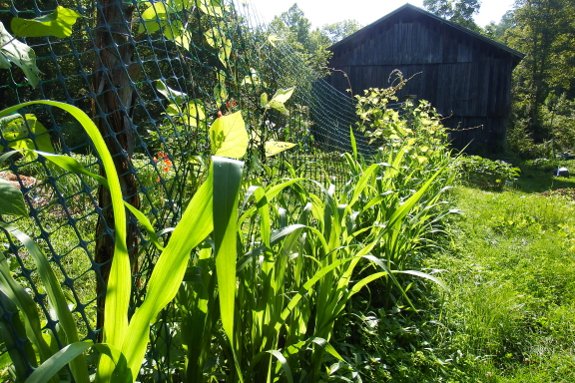
You may recall that I planted some experimental cover crops this year hoping they'd be cut-and-come-again mulch producers.
The ones I was most excited about --- pearl millet and
sorghum-sudangrass hybrids --- aren't really living up to their
potential. These warm-season grasses remind me of corn in that they grow
big stalks that require interim weeding and mulching, but the cover
crop versions actually appear to produce less biomass than corn does. As
a result, I feel like I would have been better off planting these beds
with sweet corn or field corn then using the corn stalks if I wanted to
harvest biomass from warm-season grasses. All told, I'm not very
impressed by the warm-season grasses, even though sorghum-sudangrass
hybrids are reputed to produce more biomass per acre than any other
cover crop.
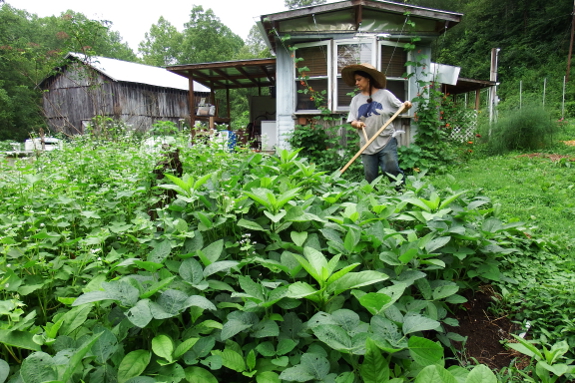
On the other hand, soybeans as a cover crop
continue to intrigue me. The soybeans we planted on June 10 are just
starting to bloom, so I chose one patch to scythe a few inches above the
ground in hopes the plants will grow back and let me cut again in a few
more weeks. While I was at it, I also scythed the buckwheat growing
next door (planted two weeks later) and then I replanted the whole patch
with new buckwheat seeds.
Before I go into the
results, I should tell you that I'd been out cutting pasture weeds
before embarking on this experiment, so my scythe was a little dull. As a
result, the tool yanked up (rather than cut down) perhaps 10% of the
soybeans. Gathering up the cut tops was easy, but I only got an armload
out of this whole patch, which would probably be about enough to mulch
15 square feet in the garden. Lazily, I instead simply tossed the cut
tops onto our compost pile.
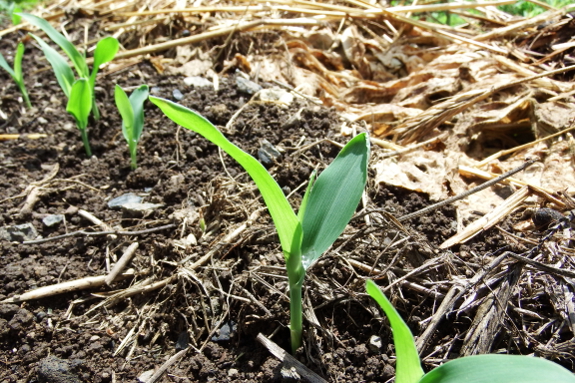
A perhaps better use of a
soybean cover crop (although more expensive since the initial seed
investment doesn't go as far) is to pull up entire soybean plants then
use the legumes to feed the next crop. I yanked up the soybean plants in
the bed pictured above less than a week ago, piling the cover crops in
between rows of new sweet corn. The soybeans are so high in nitrogen
that they're already disintegrating into the soil six days later,
meaning they'll feed the corn plants by the time the roots reach the
center of the bed. Whether or not the soybeans produce enough nitrogen
to feed an entire bed of corn with no additional amendment remains to be
seen. I'll keep an eye on leaf color and report back in a few more
weeks.
We've been growing Clemson Spineless Okra since 2007 and have saved the seeds every year.
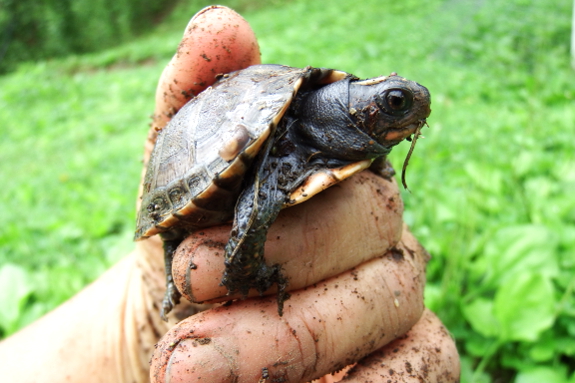
Apple-maintenance day is
often my favorite time of the month. And not just because I find
beauties like this hidden amid the weeds.
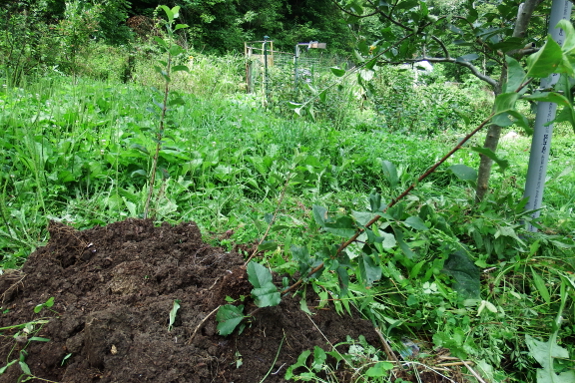
Spending a few hours manipulating and experimenting with perennials is simply rewarding. Here, I'm stooling one of our apple rootstocks in hopes I'll be able to graft onto homegrown roots next spring. (Because I'm in sore need of more apple trees...right?)
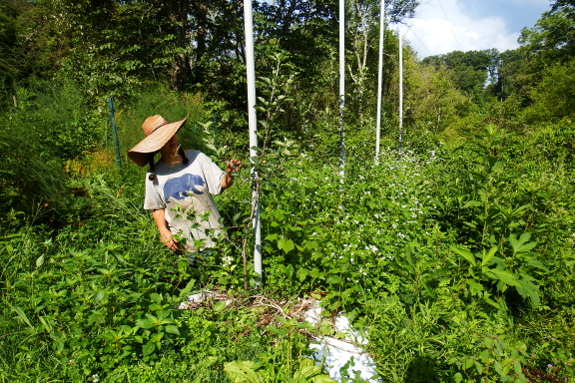
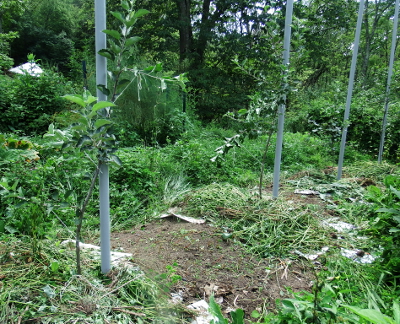 Meanwhile, this year's experiment of planting buckwheat within the rows between young apple trees is already deemed a resounding success. As you can see, it looks like
I let this row go to weeds. But half an hour spent ripping out
buckwheat and stacking the plants at the base of each tree (then
replanting the cover crop in the gaps) provided nearly instant mulch. I
can feel the soil turning darker nearly before my eyes.
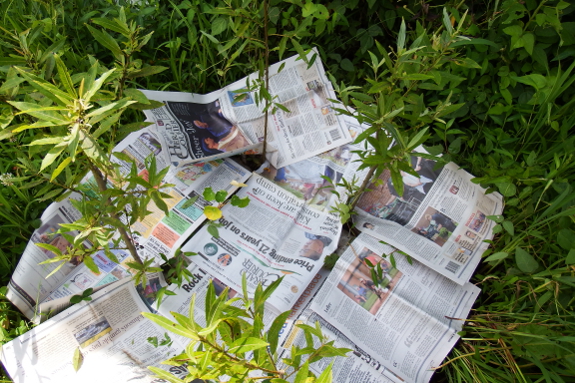
I even had a little time left after taking care of the apples (and trimming the goat hooves) to go check on my willow cuttings.
The ones I'd stuck right up close to the trailer and then hidden behind
mushroom logs had spotty success, but all of the ones out in the open
survived...even though the soil there is terrible and I forgot to keep
the weeds at bay. Okay, so Mark did
accidentally mow one of the eight plants down since my mulch was pretty
much nonexistent, but that doesn't mean we didn't have 100% rooting
success first. I applied a quick newspaper kill mulch then snipped off
the lower limbs to train each new willow tree to a central leader,
preparing for my plan of building with living trees.
And that's the highlights
of my fun morning with the trees (and turtles). I can hardly wait until
tree day next month! (Yes, you only get one Arbor Day per year, but I
treat myself to twelve Tree Days. I'm spoiled that way.)
Today was the first dry day in July we've been able to use the ATV.
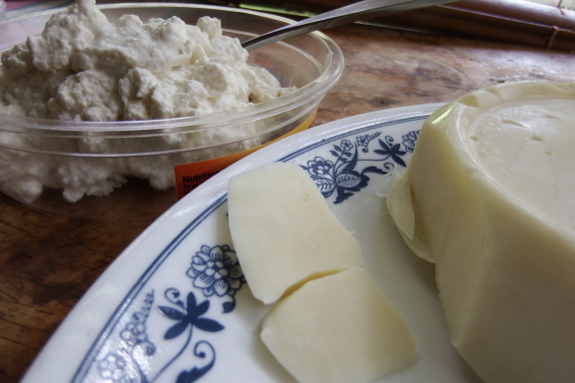
The internet was a bit unclear on whether the whey from mozzarella can be used to make ricotta. But I decided to give it a try anyway.
I'm no sure if this step
is necessary since mozzarella whey is already acidified from the lemon
juice, but I let the whey sit at room temperature overnight anyway. Then
I brought the whey to a simmer just as I would when making any other
kind of ricotta, strained out the liquids, and then let the solids drip
in a bag of cheesecloth for a few hours.
The result is ricotta much tastier than that which I got from chevre
whey! In fact, mozarella-offshoot ricotta is so tasty that I froze the
mozzarella for later and set aside the ricotta as this week's cheese.
It's delicious when added to sauteed summer squash right after you turn
off the heat so the ricotta melts into the vegetables. And this ricotta
is also a great addition to tomato-and-cucumber salad drizzled with a
dressing of olive oil, balsamic vinegar, honey, salt, and pepper.
Ricotta has now officially joined the ranks of my favorite cheeses!
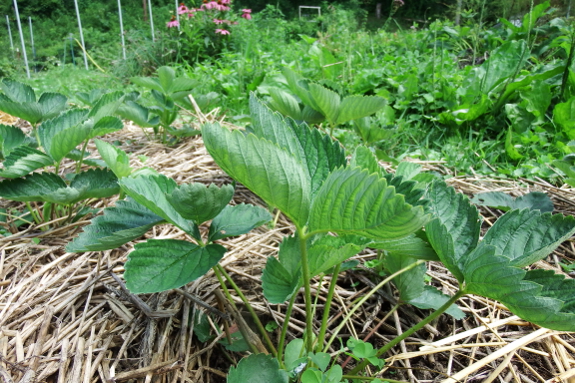
Our perkiest strawberry plants this year are the ones that got rabbit manure.
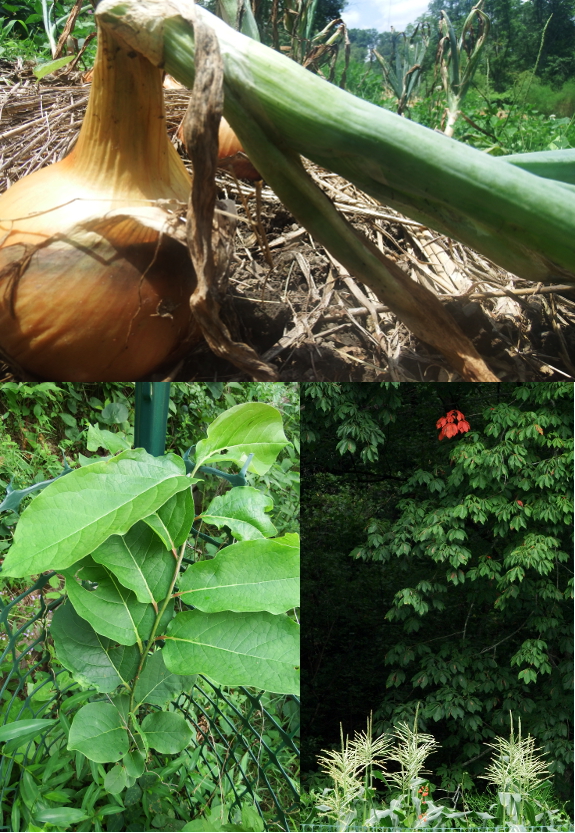
Onions nearly ready to harvest. Persimmon grafts (the ones that took anyway) growing like gangbusters, and a hint of red on the buckeyes. A beautiful Friday on the farm!
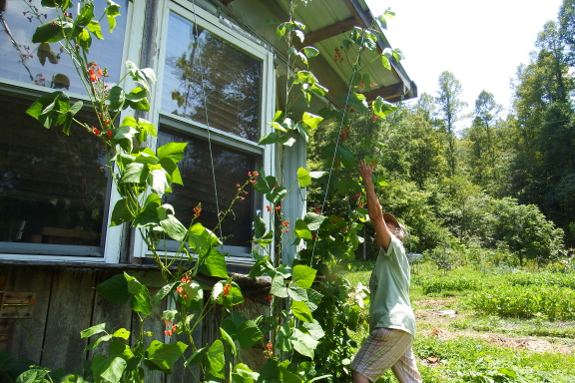
Mom was very taken by our scarlet runner beans
when she came over. She felt like I hadn't given an accurate picture of
their impressive height and spread on the blog...but I'm afraid I've
still been unable to capture the full awesomeness of this bean. The
photo above shows beans who have only had about two and a half weeks to
grow up their trellis. They've been at roof height for half that time!
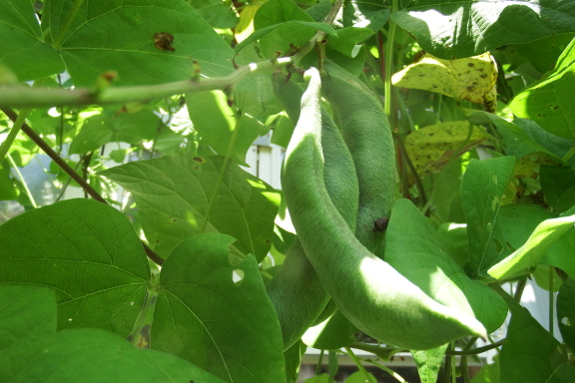
The plants in the first
picture haven't bushed out enough to provide much shade yet, but the
ones on last year's trellis on the south side of the trailer are already
doing a pretty good job breaking the summer sun. A hummingbird comes to
these plants each morning --- a perfect view to eat my breakfast to.
And, look, beans already being set to feed us this winter!
A lot of factors go into how long you decide to milk a goat. First, there's body condition, which I've discussed previously. If your goat has lost too much weight, you need to stop milking.
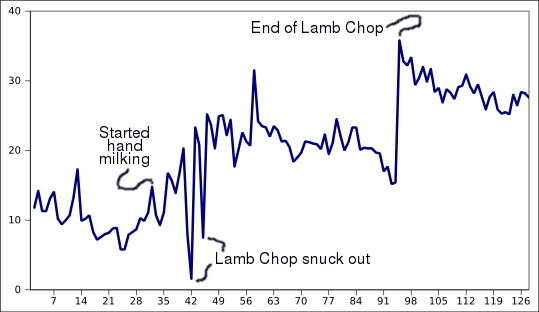
The other issue is
whether it's worthwhile for the human to keep milking as production
slowly declines. The chart above shows Abigail's lactation curve to date
(starting three weeks after Lamb Chop was born, when we started locking
him away for the night). There
was a lot of human learning involved in our first effort, so this curve
doesn't look like they usually do --- with low production slowly rising
to a peak at around 4 to 6 weeks post kidding, then declining back
down. However, you can see that production is already dwindling markedly
so we're now averaging about three and a third cups per day. I suspect
that when I'm only bringing home one or two cups per day, I'll decide
the milk is no longer worth the squeeze.
One thing to keep in mind is that Abigail was a cheap starter goat. Artemesia's genetics are more high-brow, so there's a good chance our doeling will produce more milk for longer than Abigail has.
Why bother with a goat who doesn't give very much milk? I figured it was
worth learning on a cheaper goat, and I stand by that decision as a
good one. It would have been a shame to decide we didn't like goats
after sinking much more money into the project, and Abigail has also
proven to be an easy keeper, which might be better than an amazing
milker in the long run. So I'm happy with what I've got...but am looking
forward to much more milk next year.
And, in order to get that milk, we're going to have to breed both goats. You can read my thoughts on our options here,
with the caveat that I'm leaning more toward buying a cheapish buck
whom we can use and then eat in the fall. Now that I'm pretty sure we'll
need to breed both goats (rather than milking Abigail through), the
hassle of bringing two separate goats to be bred when they come into
heat at two different times seems larger than the hassle of dealing with
a buck for about a month.
At the moment, though, we're just enjoying our happy little herd and our delectable milk products. I'm still thoroughly in love with our goats!
We got in some more straw
bale hauling today before getting rained out.
Seems like our older ATV
needs about a quart of oil every year.
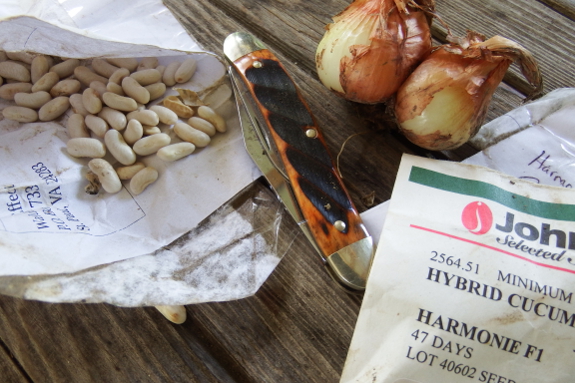
I usually try not to go
down that slippery slope of filling up my pockets. But Monday, I
realized I'd accumulated an odd assortment of odds and ends. The
pocketknife is present to cut straw-bale strings since Monday is deep-bedding-top-up
day. The seeds are to fill gaps in the garden where I noticed beans and
cucumbers didn't come up as perfectly as I'd like. And the potato onions were found while planting the beans, overlooked during a previous harvest.
My Monday mornings are
generally about as diverse as the contents of my pockets. I have to fill
about an hour and a half before the dew dries off the tomatoes, but I
don't want to get so engrossed in a big project that I'll forget about
my primary purpose for the day. So I scythe pastures animals were
recently rotated out of, feed the bees, tether the goats, and generally
mark little things off my list. And then it's time to prune those tomatoes and make some pesto chicken salad for lunch...and empty out my pockets!
Our Spring
chicks have reached the point where the roosters need to be retired.
We put 3 in the freezer today
with another three planned for later this week.
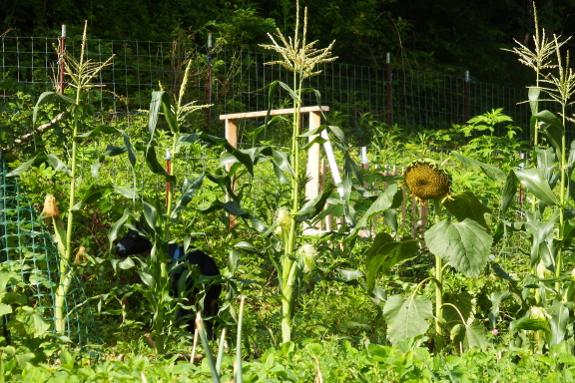
What's wrong with this picture?
(Guess before you peek!)
If you said that
Artemesia was eating our sweet corn, you got tricked by the zoom-related
flattening of the photograph. Our little doeling was actually about
five feet beyond the corn in question when I clicked the shutter button
on our camera.
On the other hand, if you noticed the large distance between the corn plants, you're on the right track. My germination test
this past winter suggested that last year's corn seeds were fine. But
in the real-world setting of our garden, those same seeds came up very
spottily. That's a problem since corn is wind pollinated and relies on a
relatively large stand to ensure the seeds develop well and the ears
bulk up. In fact, I was expecting to see lots of cobs like the one
pictured above when the time finally came to harvest our crop.
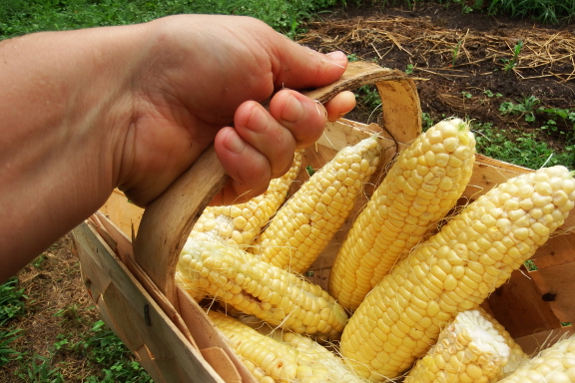
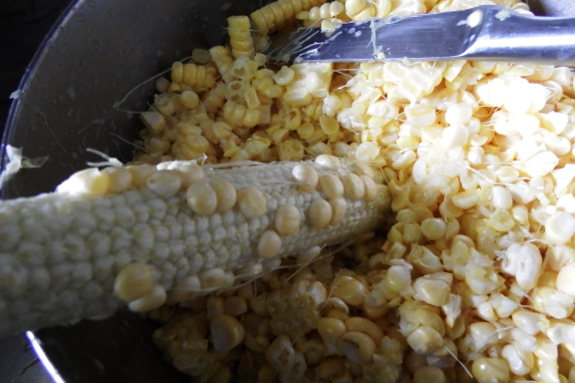
To my surprise, most of
the seeds seem to have set even with less than a dozen plants to spread
their pollen. While I'm glad the corn plants came through for us this
time around, I've resolved to stick to buying corn seed every year
rather than trying to eke out those packets for a second season. It
appears that corn, like onions, is simply better planted during year
one. Live and learn! At least we can still eat my mistakes.
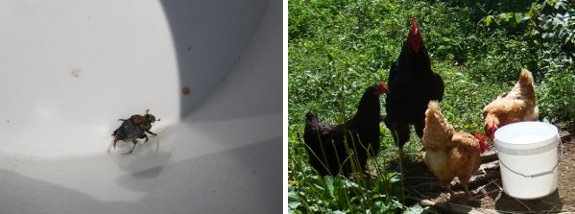
I found a June Bug in a
bucket and thought the chickens might want it.
They seemed to enjoy watching
it bounce around, but could'nt quite reach the bottom of the 2 gallon
bucket.
The bug was snatched up by
what I assume is the quickest hen when I dumped it.
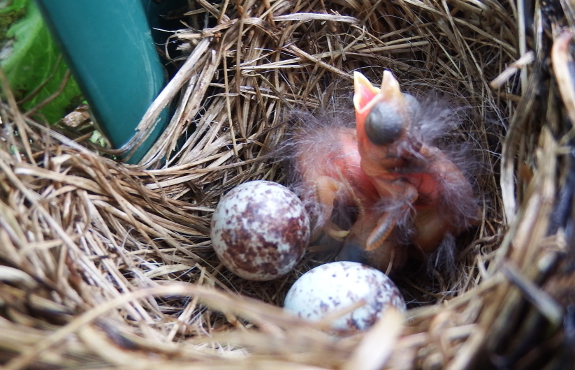
I was a little concerned that Mama Song Sparrow
might have decided she'd settled in too much of a high-traffic area and
abandoned her nest, because she seemed to be off more than she was on.
But I guess in the heat of July, you don't have to hug your nest to
hatch eggs. Because when I peered into the tomato patch Tuesday, I saw
two baby sparrows already out of their shells and looking for lunch.
Now to leave Mama Sparrow alone for a few more days and hope she hatches two more. It's been a couple of years since we've incubated our own chickens,
so it's fun to vicariously enjoy a successful hatch, albeit of a much
smaller species. And it's always a joy to watch wildlife move into our
garden...as long as they're not eating our crops.
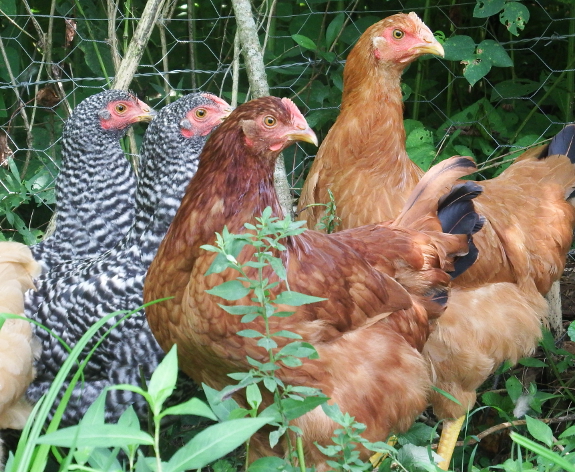
With three more cockerels in the freezer, I'm ready to pass judgment on this year's round of experimental chicken breeds. I didn't raise the five varieties separately, so I can't tell you who cost the least to feed, but I do have data on foraging ability, rooster weight at roughly fifteen weeks, and survivability. I'll start with the last.
We had quite a few predator losses this year, mostly due to human error (we forgot to shut in the chicks
a few nights) but also partly because our guard dog is getting on in
years and sleeps more soundly than she used to. It could be entirely
random which chicks got picked off, but I wanted to mention that the
australorps came through unscathed, the orpingtons only lost one bird,
and the three other varieties lost two birds apiece. This is interesting
because I'd read that dominiques are very good free-range birds because
they're less likely to get picked off --- that wasn't the case in our
very small sample.
Moving on to meat
qualities of the birds, I don't have any data on dominiques or New
Hampshire reds. It turns out we did end up with one dominique cockerel,
but his comb was so small when we went to snatch birds off the roost by
flashlight that I thought he was a girl! And all of our surviving New
Hampshire reds turned out to be girls as well. So you'll have to wait
for an update on meat qualities of these two breeds at a later date.
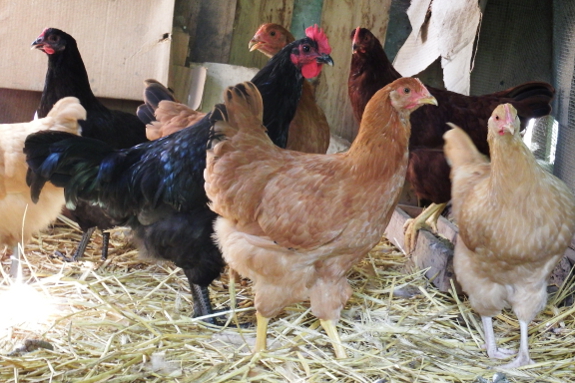
My all-around favorite
(without tasting any of the meat) is definitely the Rhode Island red
(the dark brown bird in the photo above). Australorps grew a little
bigger (averaging 2 pounds 13.9 ounces dressed for the australorps
versus 2 pounds 11.9 ounces dressed for the Rhode Island red), but the
Rhode Island red had the brightest fat. This is a key indicator if
you're looking for high-quality pastured meat since yellow fat comes
from birds that forage the most, meaning you're getting more omega 3s
and the birds are probably eating less feed.
In contrast, our orpington cockerels were big losers, having quite pale fat that almost looked like the fat on a cornish cross.
The orpingtons were also the lightest birds at fifteen weeks, clocking
in at 2 pounds 6.2 ounces. Although they'll likely catch up to the other
breeds later, this slow growth probably also means they eat more feed
for every pound of meat that ends up on the table (although I can't be
positive of that fact). As a final nail in the breed's coffin, the
orpingtons are the only birds in this flock who have been causing
trouble, refusing to abide by my pasture rotation and returning time
after time to the first pasture we started them out in. So while Kayla
assures me that orpingtons are good pet chickens, I'm afraid I have to
take them off my list of prime thrifty chicken breeds.
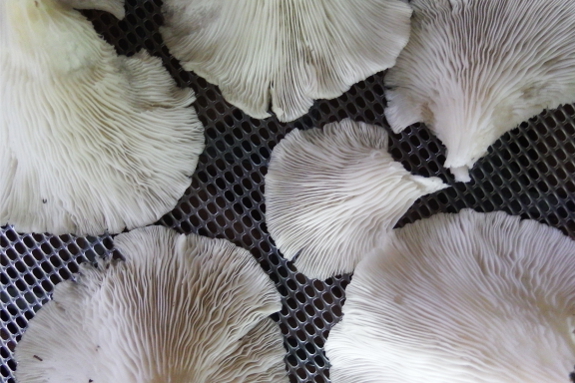
One nice thing about Anna taking the goats out to graze is the bonus mushrooms they find and bring home.
Want more in-depth information? Browse through our books.
Or explore more posts by date or by subject.
About us: Anna Hess and Mark Hamilton spent over a decade living self-sufficiently in the mountains of Virginia before moving north to start over from scratch in the foothills of Ohio. They've experimented with permaculture, no-till gardening, trailersteading, home-based microbusinesses and much more, writing about their adventures in both blogs and books.
