
archives for 05/2015
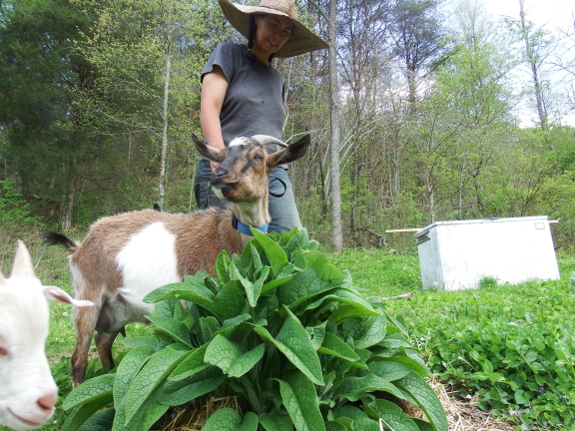
There's no doubt that our goats enjoy comfrey.
I have patches here and there throughout the farm, and Abigail
especially is always looking to grab a mouthful as she passes by. But of
my three types --- Common Comfrey, Bocking 4, and Bocking 14 --- which should I most focus on propagating for goats?
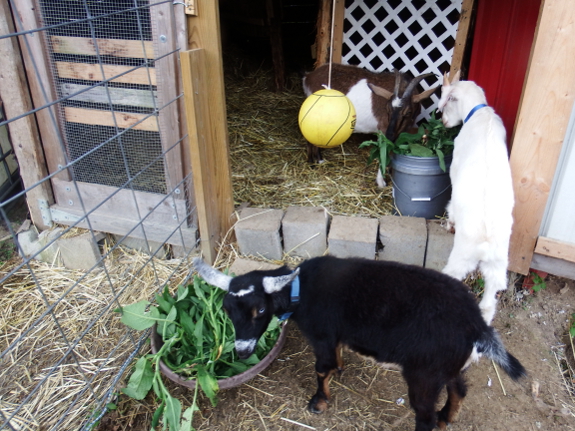
On a rainy afternoon when
tethering didn't seem to be an option, I decided to run a comfrey taste
test. First, I brought the goats a bucketful of Common Comfrey, which
they seemed to adore. However, when I came back a couple of hours later,
most of the comfrey was still in the bucket. Maybe another variety
would be better received?
This time, I grabbed a
handful of each of the three varieties and presented two handfuls at a
time to the goats to try to get a taste preference. Their answer? All
comfrey tastes delicious when handfed! They slurped up every leaf of all
three types (while continuing to ignore the container of older comfrey
leaves at their feet).
So I guess the solution
isn't to focus on a particular variety, but to instead figure out a
better presentation option for feeding cut comfrey to our goats. Any
ideas? (No, I'd rather not stand in the rain and feed our goats leaf
after leaf, even if that method is Abigail-approved....)
We decided to give up on the Warre hive box method of raising bees.
The plan is to lure the hive
now living in one of our Warre boxes to migrate into a Langstroth
box with a hole cut in the top.
I attached a piece of wood on each side to prevent any accidental bumps.
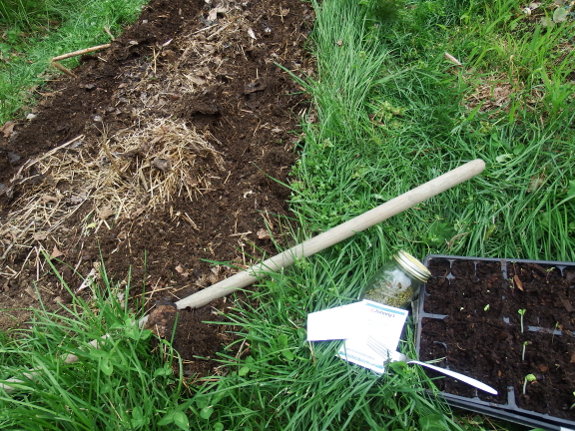
May Day is my traditional
planting of the first big round of summer crops. Our frost-free date
isn't until May 15, but it takes seeds a few days to come up and late
frosts are usually quite mild. As a result, a bit of row cover fabric is
generally sufficient protection for the
tender-but-not-excessively-tender crops like green beans, sweet corn,
and summer squash. (We save true tenderfoots like sweet potatoes,
peppers, tomatoes, and okra for after the frost-free date, when I plant a
second round of the early birds too.)
Actually, the first three
weeks of April were so warm this year that I started thinking I might
get away with presprouting some of this first set of summer seeds. So
the green beans and (perhaps not the brightest idea) the experimental
arava melons went into the ground as seedlings just barely starting to
poke their cotyledons above the soil surface. Only time will tell
whether I regret this move, or whether pre-sprouting gives me crops a
week or two earlier than their seed-started bedmates.
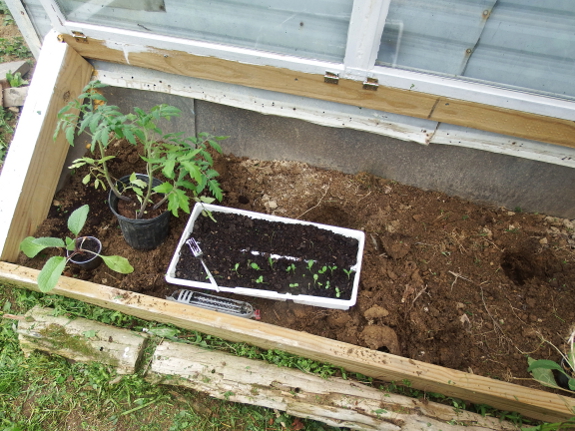
Meanwhile, I'm now regretting having jumped the gun by starting my tomatoes inside during the last week of February.
The plants thrived for quite a while, but they really needed more space
and more sun by early April. I suspect that's why a damping-off fungus
leapt from a tray of zinnia seedlings into the tomatoes and began to
wreak havoc once warm weather hit. I've never seen such mature plants
succumb to damping off, but something caused about half of my tomatoes to decline and several to outright kick the bucket.
I thought I didn't have any more seeds of the disease-resistant varieties
I'm trying out this year, but last weekend I realized that I did, in
fact, have quite a few more seeds in my storage box. So I started
another flat of seedlings who will be barely big enough to go into the
ground at our frost-free date. In the meantime, I also set out three of
my best-looking tomato plants in the cold frame in front of the trailer.
I don't like to plant tomatoes outside before frost is definitely in
the rear-view mirror, but by sinking the plants pretty far into the
soil, I should still be able to close the cold-frame lid for the next
two weeks if frost comes to call one more time.
(Okay, yes, I snuck two
borage plants and a row of zinnias into the front of the cold frame as
well. Here's hoping I don't regret planting so close to the tomatoes,
but I can always weed the flowers out!)
The square hole for the Warre Langstroth adapter is 12 inches on each side.
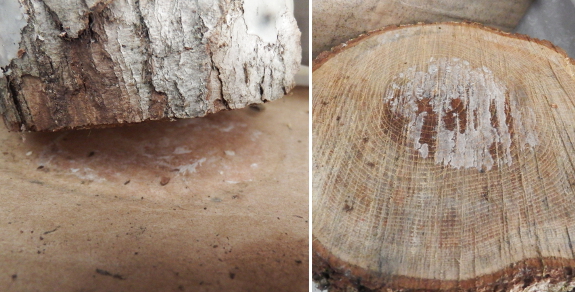
It took less than two weeks after flipping my experimental shiitake logs
over before the second side of the new round was well colonized. At
this point, the two logs and the cardboard sandwiched in between were
all fused together with mycelium, and I had to tug gently to break them
apart.
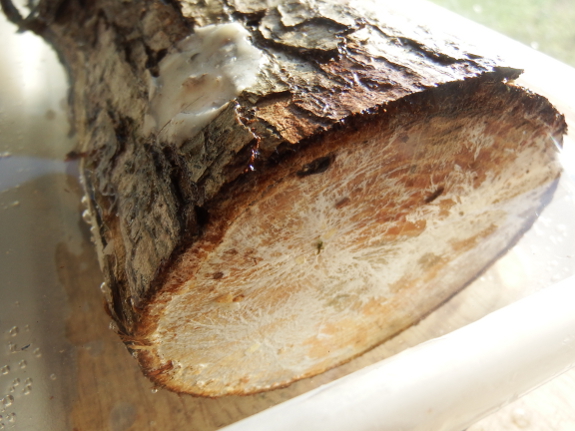
I'm assuming that means
the new round can now take care of itself, with the mycelium moving in
from each direction to colonize all of the wood in the middle. So it's
time to see if I can force fruit my mini-log using common kitchen items.
First, an overnight soak in a tupperware container full of water, then a
few days in the fridge to simulate winter. If all goes as planned, we
could see mushrooms beginning to bud on the log surface as early as next
week, about ten weeks after inoculation.

We made contact with a super
nice guy at the monorail factory in Japan who has agreed to put a
Briggs and Stratton engine on one so they can ship it to us here.
The new engine configuration
has to go through 300 hours of testing first, which means we'll have to
wait a few months.
We'll be their first sale in
the United States.
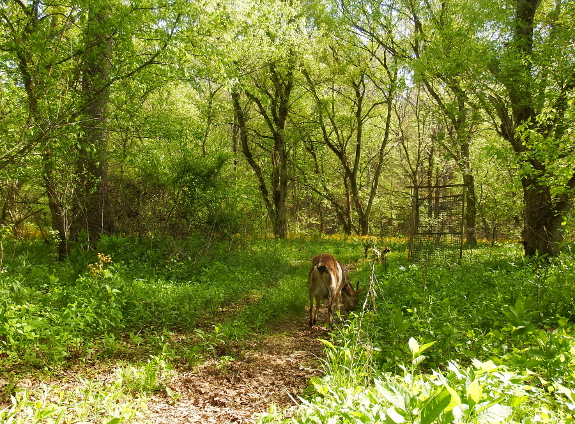
"Do you think you'll run
out of weeds for the goats to eat?" Joey asked when he was over this
weekend. The answer will depend on whether or not tethering our little
herd in the woods works out.
Dry weather has finally
slowed the growth of grass within our core homestead, so I've started
taking the goats beyond our fences to graze. The trouble is that the
goats don't feel quite so safe outside the boundaries...and I'm not sure
whether it's really safe for them to be that far away, tied down so our
local pack of wild dogs could make short work of them. Of course, I'm
always home, Lucy is always on patrol, Abigail has big horns, and the
goats are always well within ear shot, so I think Abigail and I are
probably both overreacting.
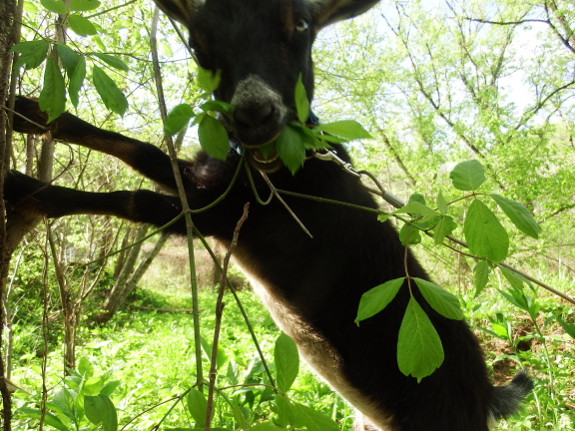
My tethering method
currently involves putting Artemesia on a long line, leaving Lamb Chop
untethered (if we're safely away from the garden), and then putting
Abigail on the shortest leash with the deepest anchor. It sounds
counterintuitive, but Abigail is such a browser that if she has a long
leash, she spends most of her time wandering around picking out which
morsel looks the tastiest. On the other hand, if you put her on a short
line, then she hunkers down and eats for nearly two hours...at which
point I go out and move her to the other side of Artemesia's spot. If
the weather permits, Abigail seems to fill her belly within about four
or five hours, even in the slimmer pickings of the woods, which works
well with my daily routine.
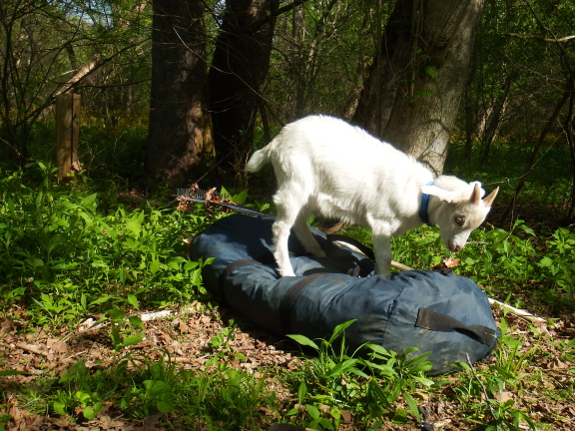
Lamb Chop is generally done eating within the first half an hour...especially if he's broken out of his stall and stolen the morning milk again.
(Bad Lamb Chop! And here Abigail had upgraded to three cups a day too!)
Luckily, Artemesia doesn't need much more grazing time than that and is
quite willing to butt heads or nap with her charge while Abigail
continues stuffing her rumen.
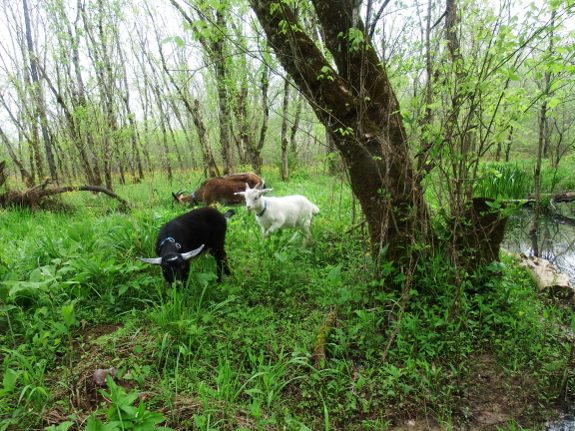
I keep hoping to see
signs of heat from our doeling since both Nubians
and Nigerians (her two lineages) can sometimes go into heat out of
season, but Artemesia always likes spending time with the buckling, is
always a loud mouth, and
always wags her tail a lot. She even lets Lamb Chop mount her, but it
seems to be in more of a "whatever, he's a kid, let him play" sort of
way. I'm hopeful that when they're both really serious about mating I'll
be able to tell the difference, but I'm not so sure. From an
animal-management perspective, it sure would be nice if Artemesia got
pregnant now for a fall kidding and Lamb Chop went in the freezer, but
there's not really much I can do about goat sex....
We got the sprinkler system
going today for the first time this year.
Adding a coat of White
Lithium Grease before it gets wet seems to make some of the
sprinklers go all Summer without a re-greasing.
After so many years of
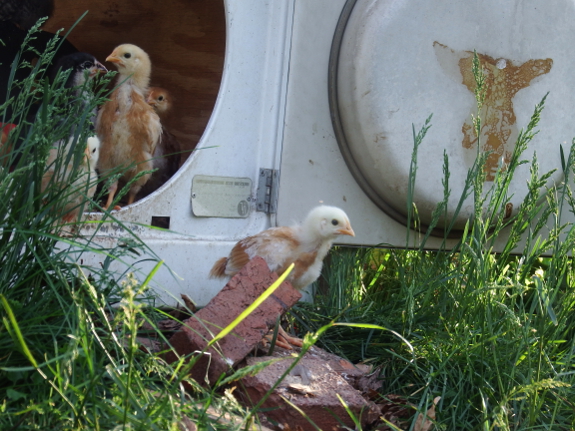
raising chicks annually, we've got chick care down to a science....until
I forget to follow the rules. Problem one this year was when I started
out with the automatic feeder you can see at the top of this post instead of the tray feeder
I usually use with very young chicks. I had forgotten that minuscule
feet can hop right in the larger automatic feeder and scratch grain all
over the ground. After wasting about half a gallon of feed, I remembered
and went back to the old way. I'll upgrade to the automatic feeder once
the chicks are eating the entire contents of the tray feeder in a day
and need a bigger reservoir.
The bigger mistake I made
was completely forgetting to shut the brooder door on Friday night.
Keep in mind that the brooder is located only a few feet from our back
door, in an area fenced off from the wilds and patrolled by Lucy at
regular intervals. Despite this supposed safety, I woke up to one dead
chick, a spooked flock, and perhaps four other birds missing. (It's hard
to count when they're all cowering in the weeds.) It always hurts when
you lose plants or animals due to human error, but hopefully the sad
reminder (plus Mark's backup memory) will suffice to keep the brooder
door closed every night in the future.
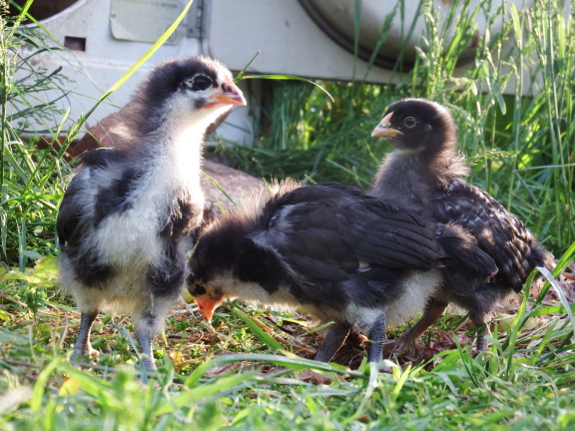
On the plus side, the surviving chicks are growing like crazy and have
reached that perfect age where they like to ramble through the nearby
raspberry patch. It's fun watching each breed grow into its unique
feathers!
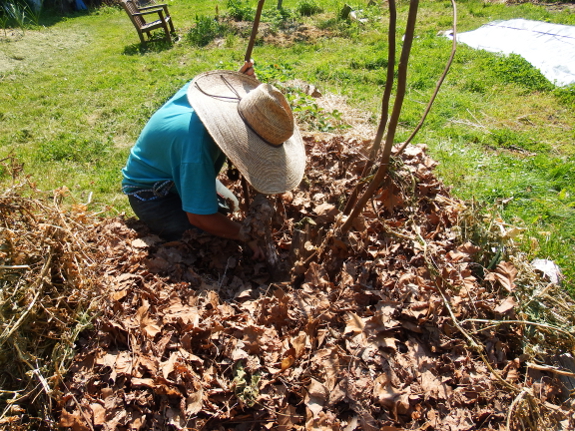
We uncovered our fig
trees today and were
relieved to see signs of life.
I'd say if they can survive
the extreme cold of this past Winter then they can make it through
anything.
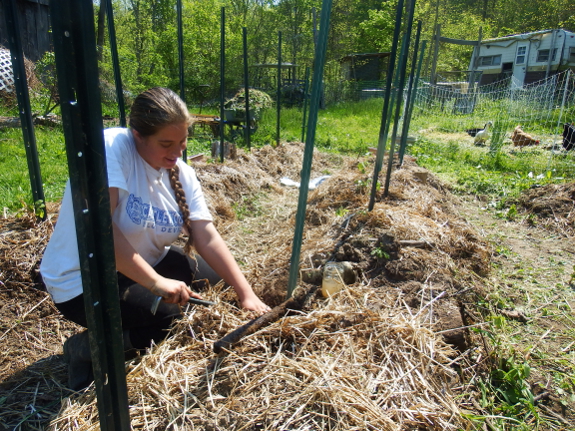
My weather guru
doesn't want to commit to no more frosts this early in May. But the
10-day forecast shows lows only descending in the mid-50s to low-60s
between now and our frost-free date, so I decided to go ahead and set
out our tomatoes. Worst-cast scenario, we can always cover the plants with buckets
during the inevitable Blackberry Winter. Best-case scenario, there
won't be any more freezes and our little plants can finally start
perking up with their feet in the earth. I know it's just my
imagination, but the plants look happier already.
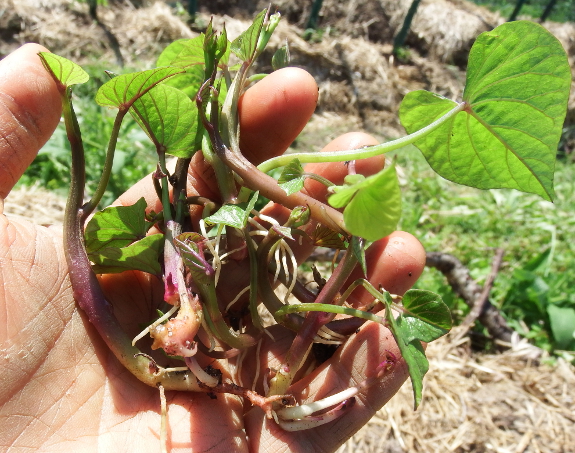
Meanwhile, I went ahead and set out eight sweet potato slips
as well. I've got lots more slips coming off my tubers inside or
rooting in a cup of water, and those will go in the ground throughout
the month of May. But since these guys were rooted and ready (and since
the highs are suddenly very summery), I decided to set them out early.
On the other hand, I really will wait to transplant the peppers and basil until after our frost-free date. Probably. Maybe....
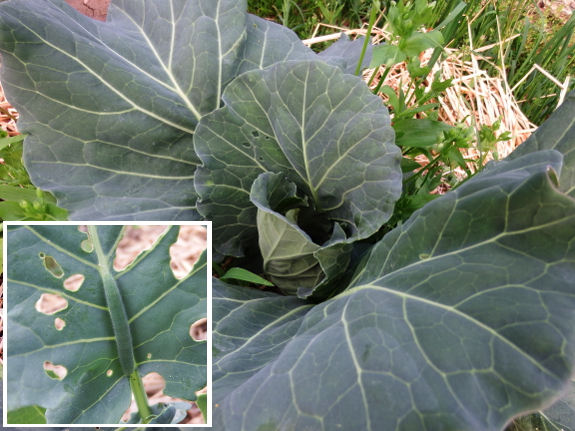
We noticed our first cabbage worm of the year today.
Feels like a good time to
plug Anna's new book "The
Naturally Bug-Free Garden".
Its got 4.5 out of 5 stars
and makes a great Mother's Day gift.
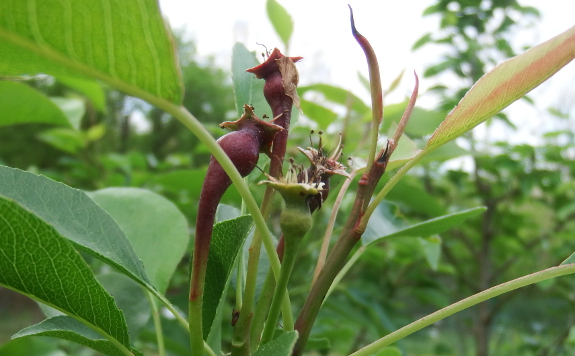
It's that time of year
again --- fruit-dreaming season! This year, the crop I'm watching most
closely is my seckel pear, which does appear to have set around half a
dozen fruits.
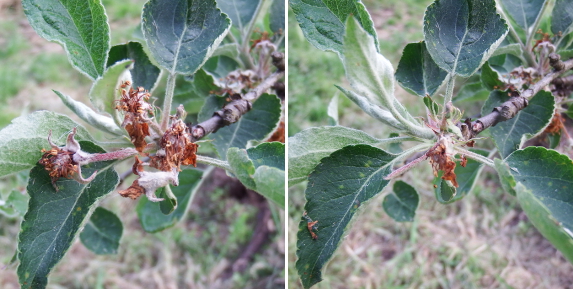
Of course, lots can
happen between now and fruit-ripening season, but
spring freeze damage and the plants' ability to hold onto the developing
ovaries are usually the deciding factors in whether or not we'll get to
enjoy a given fruit each year. For example, our apples are right at the
stage where failed flowers fall off at the lightest brush of a finger.
The photos above show the same twig before and after my test touch ---
there might be one apple staying in that cluster...if I'm lucky.
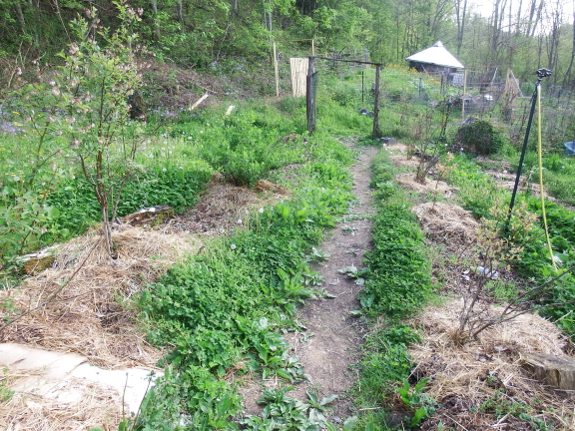
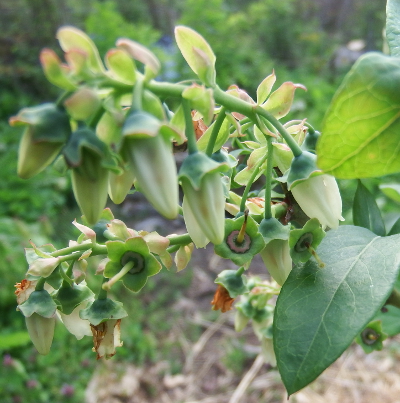 Up in the blueberry patch, there's yet more bad winter-kill news. None of the rabbiteye blueberries
outright perished in last winter's cold, but all were damaged. On the
other hand, our two northern highbush blueberries are a year or two
slower to fruit, but they shrugged off the extreme cold and are now
coated with flowers. I guess I'll be digging up the rabbiteyes and
giving them to my mom (who lives in town, at least one zone warmer),
then focusing on northern highbush blueberries in the future.
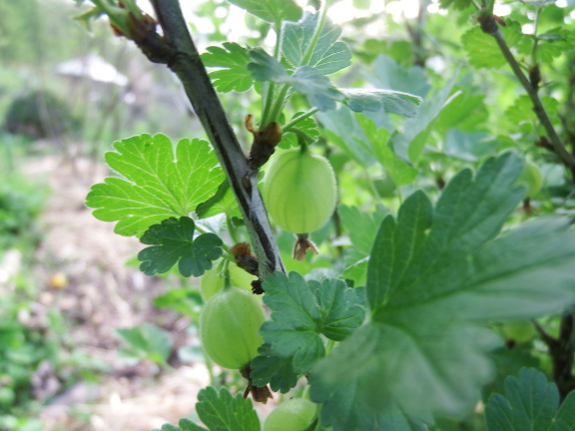
Next door, gooseberries
and currants continue to prove themselves as ultra-dependable berries.
Last summer, something defoliated our gooseberries long before their
time...but despite the damage, the bushes are loaded with fruits once
again. Winter cold, spring snaps, and apparently whatever ate their
leaves aren't nearly enough to faze this thorny but productive bush.
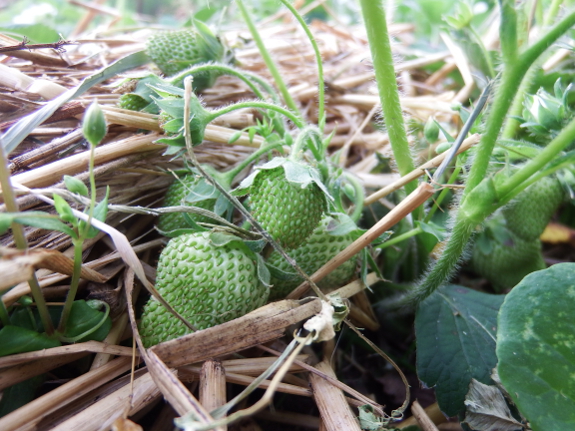
Speaking of
ultra-dependable, our strawberry fruits are plumping up as always.
Whenever I wonder why everyone doesn't focus on strawberries as one of
their primary fruits, I remind myself of the hard work that goes into
weeding out runners to ensure my plants stay big and the fruits taste
delicious. But if you're willing to weed, it's hard to go wrong with
this fast, productive fruit.
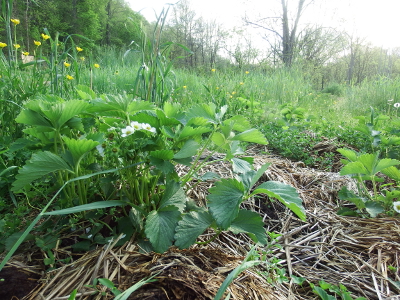 In other strawberry news, now's a good time to report on my oat-mulch experiment.
As I suspected, oats seeded around strawberry plants in the fall
competed with the main crop, resulting in much smaller plants with many
fewer flowers in the spring. The plant on the left was in the control
half of the bed, mulched with straw, and the little plant on the right
further back was surrounded by a living oat mulch. I had
to try the technique after reading about it...but I'm glad I only
experimented on a very small scale. I estimate production under the
living-mulch system will be a third to a fourth of that under my usual
system.
Returning to the point of
this post.... In the end, it feels a bit strange to be focusing so hard
on fewer species --- apples, pears, raspberries, strawberries, northern
highbush blueberries, 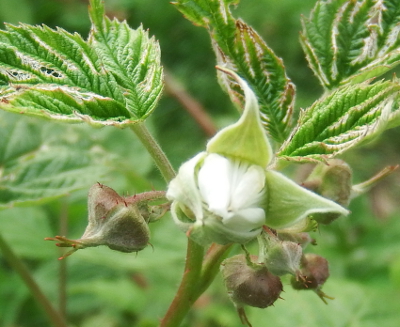 and
gooseberries --- with so many experimental species being ripped out
this spring. (Hardy kiwis, figs, and grapes are still borderline enough
to stay...for now.) On the other hand, I learned from each "failed"
species, and I'm now realizing that keeping only the dependable
producers will mean nearly as much fruit with only half the work.
Mark and I envision a farm where we grow all of our food in half or a
quarter of the current time in just a few years, and I can definitely
see our garden working toward that point as we expand the top producers
and cull the duds. Of course, I'll probably spend any time saved on
further experiments. But what can you do? I like to try new things....
We installed our new Warre
Langstroth adapter box
underneath the active Warre hive today.
The transfer was very smooth
and sting free.
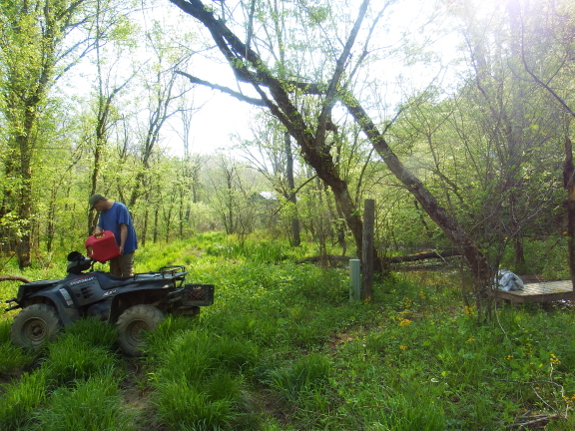
The floodplain isn't
precisely dry, but after quite a bit of hot weather, the groundwater has
sunk about six or eight inches below the surface. Which means that Mark
is now able to get the ATV to the edge of our new footbridge,
about 370 feet from the trailer. And roughly two-thirds of the distance
from motorized transport to garden is easily traversable by
wheelbarrow. Yep, the combination of factors finally makes it worthwhile
to haul in ten bales of straw!
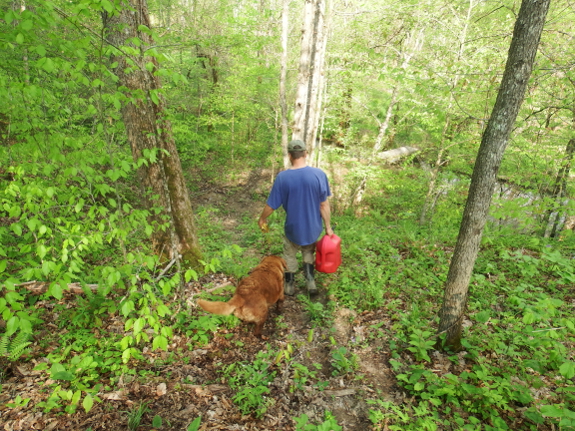
This isn't the time of year to buy straw.
Since no one has cut their overwintering grains yet, any straw
available hails from last year and is expensive --- $8 a bale, and only
available a 45-minute drive away. But I couldn't stock up on our usual
supply of straw last year because the offerings turned out to be full of
grain seeds, so the extra time and money is worth it now to keep the
spring garden in good shape. It's even worthwhile to haul the straw one
bale at a time up the hill pictured above.
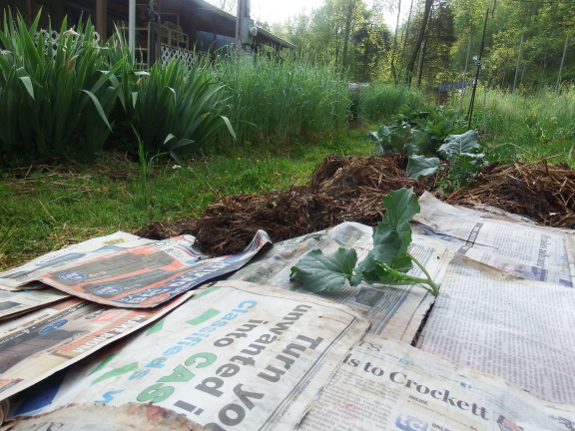
Back in the garden, I
made short work of my delicious new organic matter. I've been hoarding
newspapers since 2012 (according to the dates on the pages), and I put
most of my stash to good use acting as a weed barrier beneath the straw.
That meant I didn't have to hand-weed each bed before mulching, and I
could also use the straw more lightly than I would have needed to
otherwise. Between Mark's hard work with the weedeater and the
newspaper-straw combination, our garden is finally starting to look
presentable! (Mom and Kayla, any chance you'll start saving me newspaper
once again?)
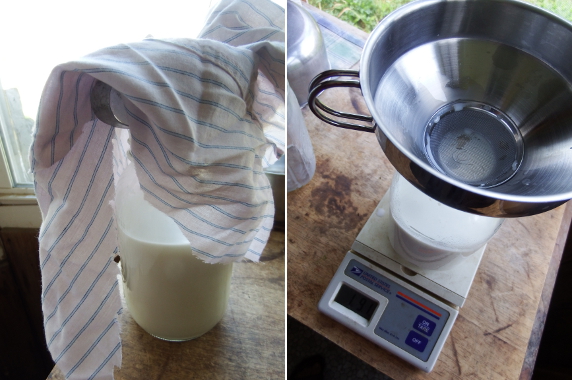
Hand
milking our goat means we
have to filter out any stray hairs.
This stainless
steel funnel with filter
works about the same as a clean cloth but is a whole lot easier to
clean.
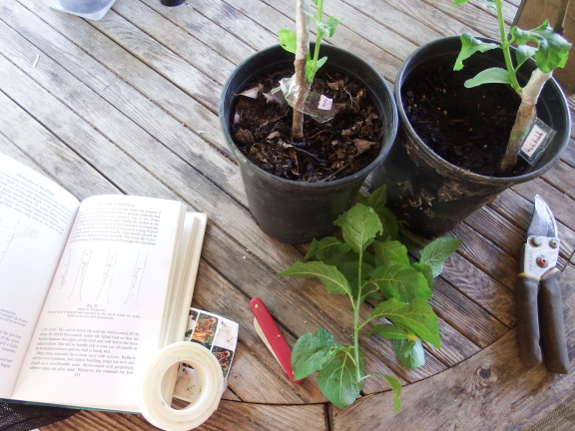
Grafting plums using dormant scionwood and rootstock
is not usually recommended, so I was much heartened when two of my five
grafts took immediately and sent vigorous shoots up from the scionwood.
Of the other three rootstock/scionwood combinations, I was willing to
give one plant a little more time to make up its mind since the
scionwood looked good 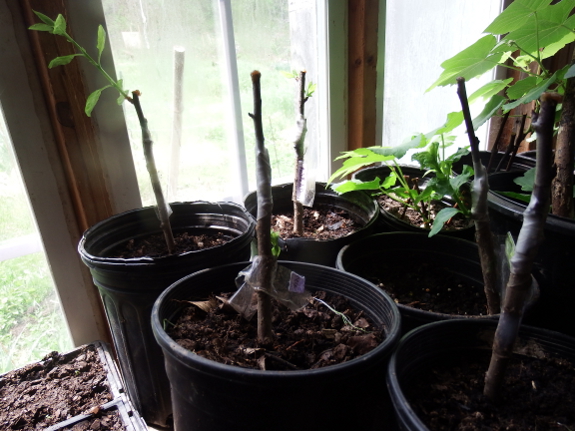 and
there were no sprouts yet from the rootstock either. But I assumed that
the grafts on the last two plants had failed. After all, the plants in
question were growing from the rootstock and the scionwood didn't look
particularly promising.
You may recall that the purpose of this experiment was to save two plum trees who were flattened by snow falling off the barn roof last winter.
Of those trees, one perished...but luckily the deceased was the same
variety as one of my successful grafts! The second tree is alive
(although not thriving), so I decided to try budding active growth from
that variety onto two of my failed rootstocks.
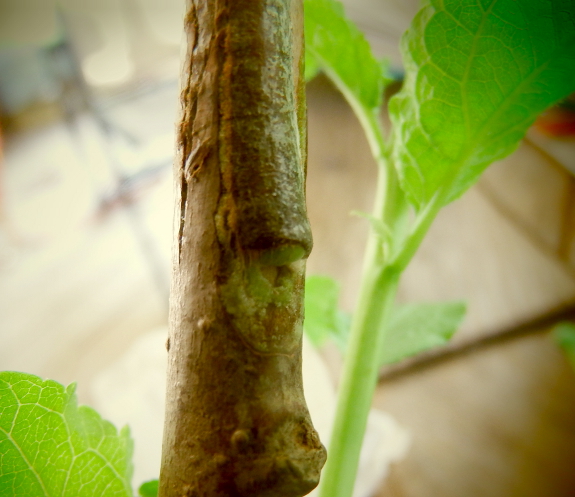
But imagine my surprise
when I removed the parafilm from one of the "failed" grafts and saw the
above. That green stuff growing between rootstock and scionwood...could
that be cambium beginning to join the two pieces of wood together? I'm
not positive, but decided it wouldn't hurt to give the tree a little
more time to get its act together. So I rewrapped the graft, plucked off
the rootstock sprout (to give the plant notice that it needed to sprout
from the scionwood) and set it back in the low light of our living
room.
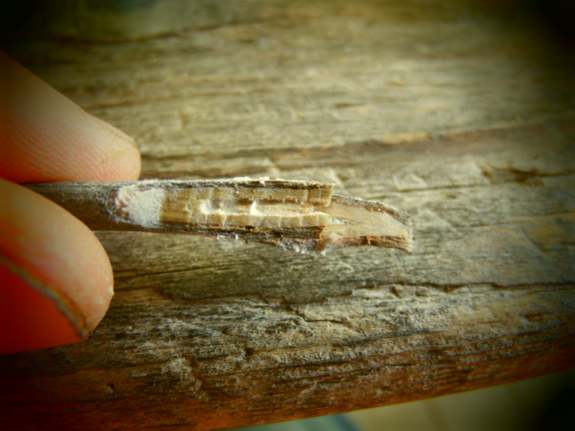
The second failed graft,
though, was truly failed. The scionwood came right out and there appears
to be no life (green) left in the wood. Time to try again with
budding...in tomorrow's post!
The store
bought paper mulch product
we tried last month is doing a good job at blocking sunlight to the
weeds, but don't expect it to stay black more than a few weeks.
When grafting during the growing season, most people turn to some permutation of budding
(aka bud grafting). The idea is that you cut a bud off the variety you
prefer, slip the bud into an incision in the bark of the rootstock, let
the wound heal, then bend down the rootstock's top growth to prompt a
new stem to grow out of the transplanted bud. Yes, this technique does
require more TLC than the simple whip-and-tongue grafts used during the
dormant season, but budding is much more successful than dormant
grafting on stone fruits like peaches and plums.
This is my very first
time budding, so I did the deed with book in hand (and without much
confidence). In other words --- who knows if this will work, so do some
research on your own before following my lead!
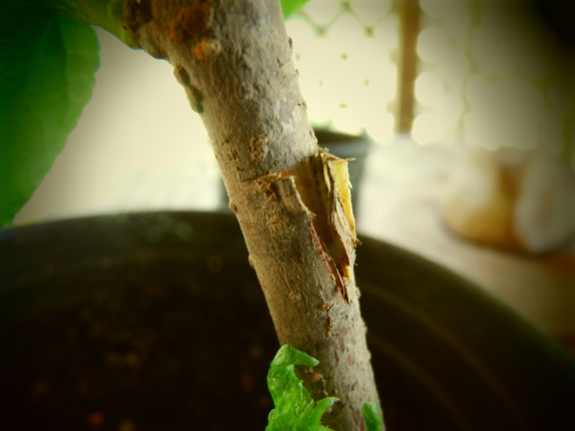
The first step was to
make a T-shaped incision in the side of the rootstock. You want to cut
down through the cambium (green layer) so the bud can slide all the way
underneath, right up against the wood. I've been told it's easier to do
this step in August, but I was able to pry the cambium up in early May.
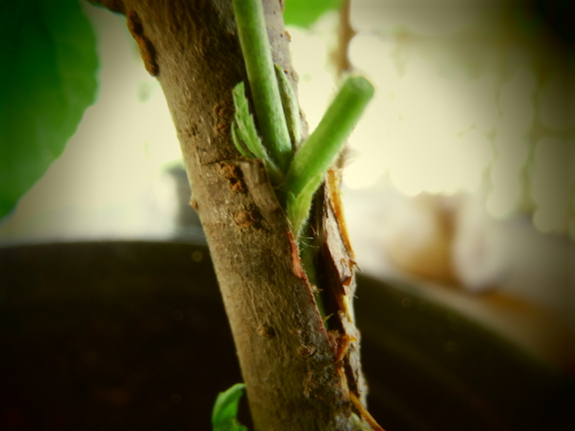
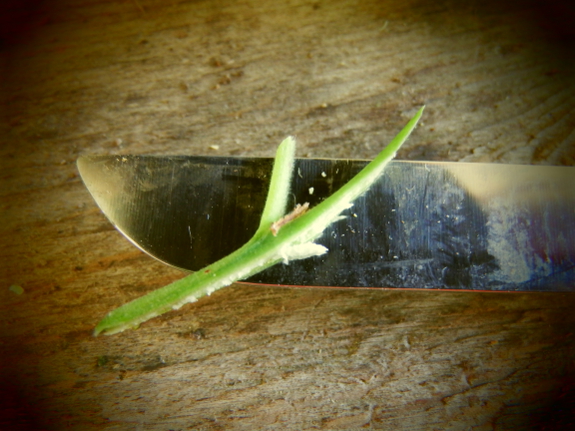
Next, I sliced a bud (and
the surrounding wood) off a growing stem on the plum tree I want to
propagate. (See photo at top of this post.) I snipped off the leaf, then
slid the bud down 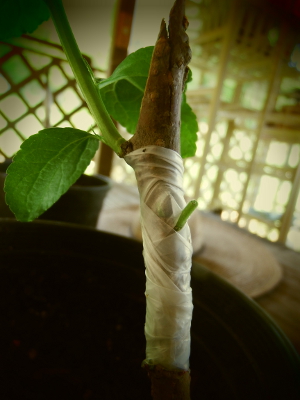 into the incision on the rootstock.
The top of the scionwood
above the bud is just a handle. So once the bud was in place, I cut the
scionwood off flush with the top of the T incision.
Next, I wrapped the graft
carefully, leaving an opening for the bud to burst through. Now it's
time to wait a month or two (or more?) and then see if I can get the
scionwood bud to grow!
Now I see why the experts recommended that I try dormant grafting my plums.
Sure, my success rate so far using that method has only been 40%
(possibly as high as 80% when all is said and done), but at least I knew
within a month whether the grafts had healed! Patiently keeping an eye
on my budded plum this summer will probably be the hardest part of this
new experiment.

I made two Big City trips
this past week to pick up straw.
This post is to help me
remember that the load rides a bit smoother when I leave the tailgate
down and ratchet strap from the wheel wells.
It was 8 dollars a bale.
Quite a jump up from last year.
I read a lot of blogs
written by aspiring and actual homesteaders, and one theme that often
comes up is --- "This simple life isn't all that simple, is it?"
Of course, the bloggers
are right. The intricacies of growing your own food and trying to be
more self-sufficient can be daunting and exhausting. But I find that the
complicated lifestyle simplifies me.
I was thinking about this
over the weekend while enjoying our usual weekly Mark-mandated respite.
"I'm a pretty boring person," I thought as I loosed the goats in the
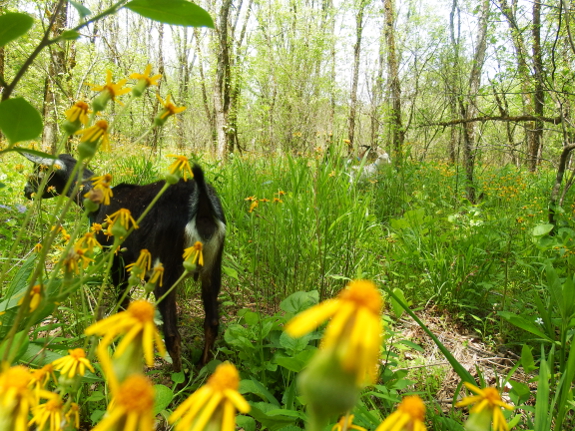
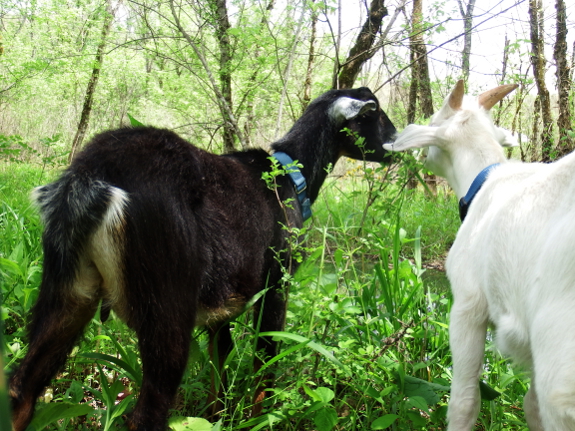
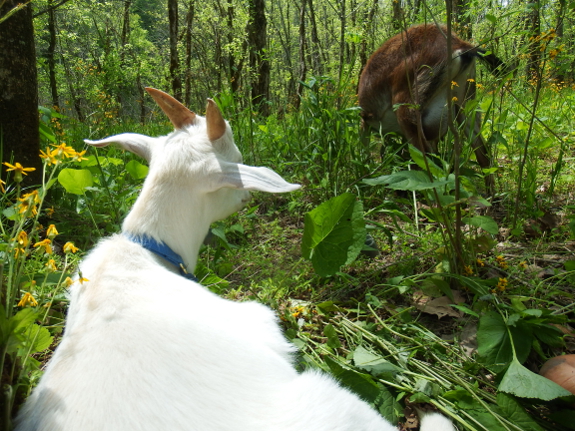
floodplain, then settled down with a book to watch them graze. Lamb Chop
curled up in the crook of my legs and I reached down to scratch that
itchy spot at the base of his horns. In that moment, all of us (boring
or not) were 100% happy.
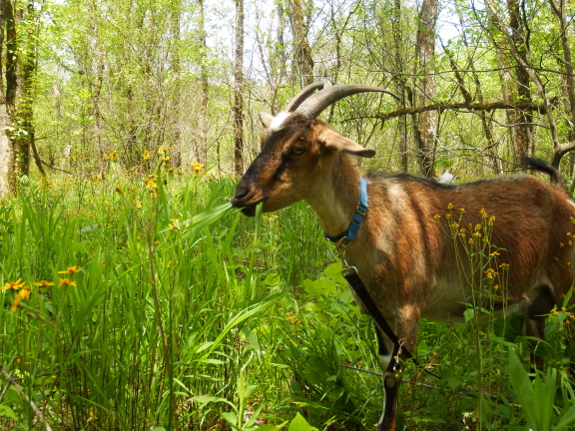
After a couple of hours,
even Abigail was starting to waddle as she walked, and I figured it was
time to come home. Standing, I saw for the first time a huge patch of
yellow flags --- a wild water iris that I rarely see --- about thirty
feet away from my resting spot. Even though I'd walked directly toward
the flowers while heading out for our weekend browse, I hadn't noticed
the blooms until I rose at last, my head completely emptied by an
afternoon with a novel and three goats.
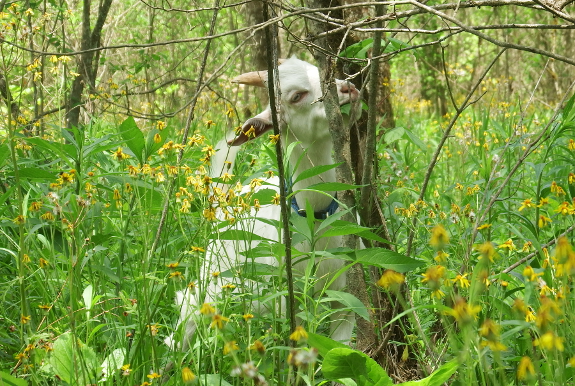
And that, to me, is the
purpose of the simple life. When my usually far-to-busy brain slows down
and completely empties, when I can't think of anything I want that's
not within reach of my fingertips, when the sight of a flower makes me
happy...that's the simple life.
Our Hardy Kiwi got nipped by the recent Dogwood Winter, but we've still got hope that the new leaf life will lead to flowers and then fruit.
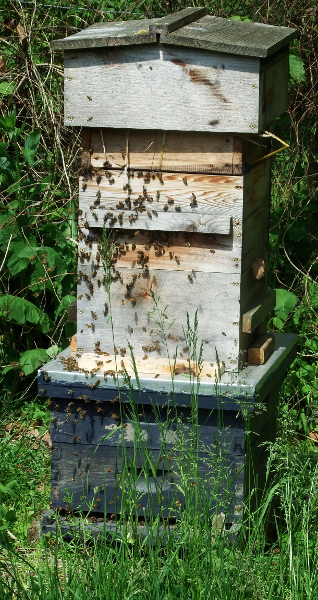 As I've mentioned, I like parts of both the Warre and Langstroth hive systems. So even though we're currently converting our colony from the former to the latter,
I'm not ready to throw in the towel on Warre methods. Here are some
Warre components I'm considering incorporating into our new system:
- The insulated "quilt" box. I can't see anything not to love about helping the hive retain heat in the winter by adding a layer of insulation on top. However, straw doesn't seem to be the best filler material since it breeds ants. I'm thinking of transferring over to a sheet of solid styrofoam insulation in the next iteration of the hive.
- Leaving the bees alone as much as possible. In all honesty, I suspect this is why bees survive so well in Warre hives, and I hope to maintain hands-off methods despite returning to Langstroth boxes.
- Nadiring instead of supering. I'm undecided on this one. On the one hand, nadiring makes it possible for me not to disrupt the hive while still knowing when the bees need more space, since the empty box is just above the screened bottom board and can be examined photographically. On the other hand, nadiring becomes physically difficult once a hive reaches a certain size, and one of the reasons to return to the Langstroth hive is to get more (heavy) honey. I suspect I might use the modified Warre method of nadiring the first box or two in the spring, then supering for later honey flows.
By the way, I should
mention that the primary reason we're converting our Warre hive back to
Langstroth is because both places we ordered bees from this year fell
through. One company changed their shipping method to the US Postal
Service (which I'm okay with) but refused to insure the bees traveling
that way (which I'm not okay with). The other company pushed back their
shipping date twice and then threw in the towel and said they wouldn't
be sending out bees at all this year. Two refunds behind me, I figured
I'd better focus on the hive I have on hand. Maybe next year we'll be
able to expand our apiary and will be able to put what I'm learning this
year to use!
We carried the rest of our
straw up a hill that's equivalent to a few flights of stairs.
Anna improvised this clever
shoulder dolly from one of our cloth
tow straps.
The tow hooks transfer most
of the weight to her back and shoulders and away from the wrists.
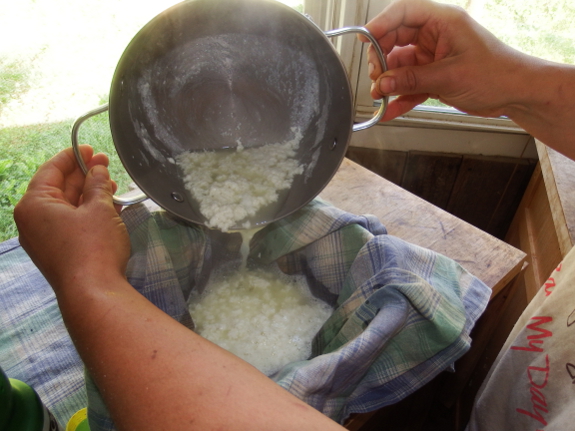
I made our first trial
cheese! I suspect this is most people's first cheese because it can be
made with normal kitchen supplies --- a quart of goat's milk, 1/4 cup of
lemon juice, a jelly thermometer, a clean cloth, and a collander. Just
slowly heat the milk to 180 degrees, add the vinegar, watch curds form,
then strain through the cloth. Nearly instant cheese!
If you want, you can
finish by adding salt, garlic, herbs, or other seasonings. I kept it
simple with a dash of salt and found the cheese tasty, but nothing like
the goat's cheese I've had from the store. Instead, this simple lemon
cheese tasted more like mozzarella.
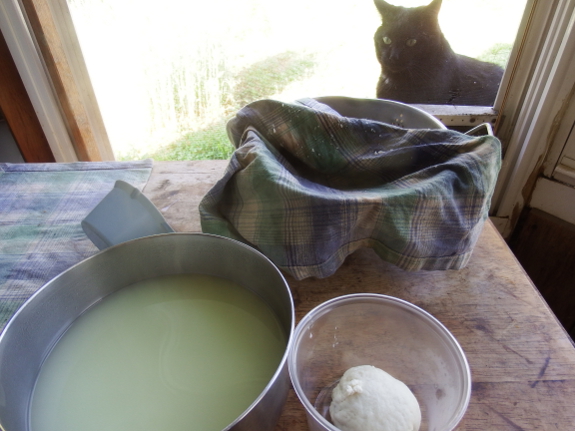
The amount of whey to
discard is rather daunting, though. A search of the internet turned up
the fact that there are two types of whey --- acid whey (which this is)
and sweet whey (from cultured cheeses). Sweet whey has scads of uses,
but acid whey is less malleable. So I'll probably end up giving the whey
to our animals (whichever one likes it best).
When I started
researching cheeses, most people reported that they soon moved on from
acid cheeses to cultured cheeses, and I can see why. Our lemon cheese
was tasty, but I prefer the more complicated flavors of cultured
cheeses. I guess it's time to bite the bullet and buy some cultures and
rennet....
Lamb Chop can now jump over
his kidding stall with almost no running start.
We debated making the wall
taller but decided to give him his own room.
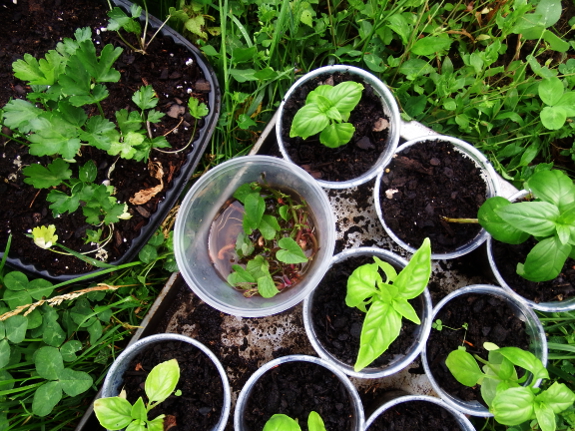
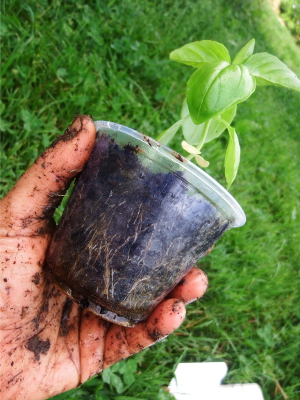 There's almost too much going on the garden right now to post about. Time for a disjointed catch-up post!
The biggest deal this
week, as usual in the middle of May, is planting. May 15 is
traditionally our frost-free date, so everything I've been holding back
goes in the ground now. Tuesday I set out basil and sweet potatoes;
Wednesday Kayla and I direct-seeded corn, okra, and melons; and today
I'll seed butternut squash, summer squash, cucumbers, and bush beans,
then set out our sweet peppers.
As if that isn't fun enough, Friday is my icing-on-the-cake day. So I'll get to plant grape vines rooted inside over the winter out
in front of the trailer, then set out some flowers between them. A
great way to end planting week, with some long-term dreams and
short-term beauty.
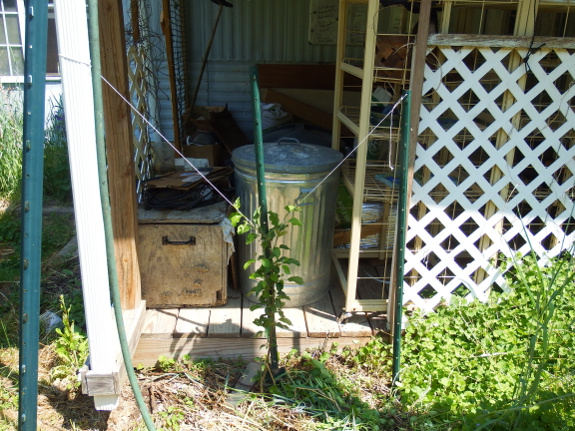
In the perennial sphere, I
found time last Friday to summer-train our youngest apple trees,
although our older trees are still waiting for their turn. The photo
above shows our espalier
experiment (before I picked up the porch). I lopped off the top of the
tree this past winter and am now training two new limbs along angled
pieces of string. The third incipient limb was pinched off to maintain
symmetry.
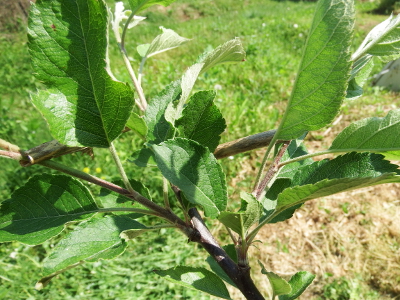 Our normal high-density trees aren't so particular, but they do get the usual light pruning and heavy training
monthly in the summer. The only new innovation I came up with there is
to make simple spreaders out of asparagus stalks dredged up out of the
mulch at the base of the plants. A notch in each end and I have a
spreader that will hopefully stay in place until the little branches
solidify their shape.
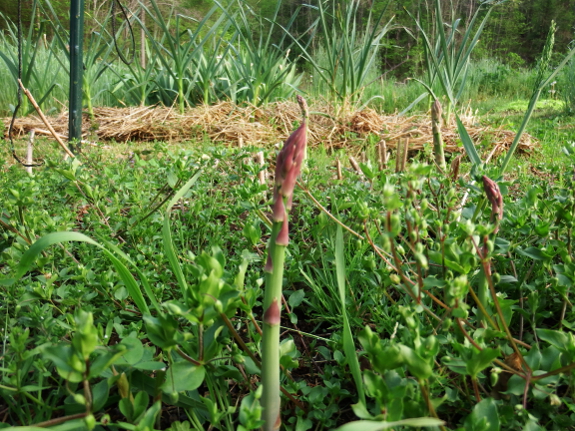
Of course, weeding is
always on the agenda, although the task goes on the back burner during
planting week. I do a lot of hand weeding, but most of our soil is now
so good that the job is easy and fun...even when the beds are ignored
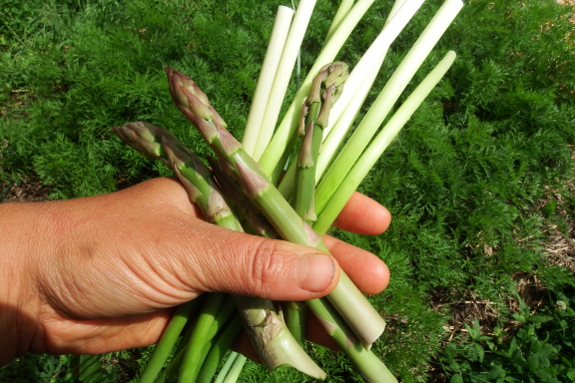
too long like around the asparagus plants shown above.
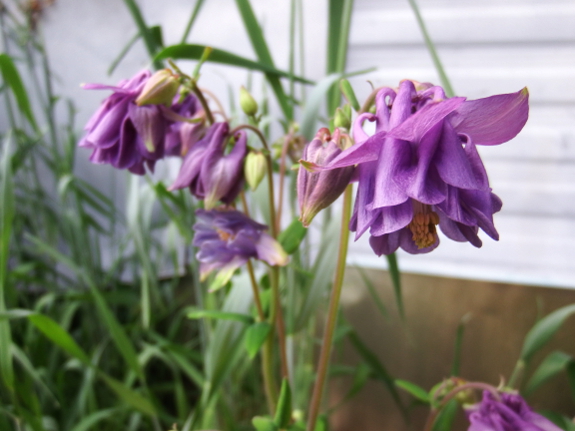
Speaking of weeds, I made
a mistake last winter by planting rye in my flower bed/grapevine area
in front of the trailer. While rye is a good cover crop, it's a weed in
my flower bed  because the plant is in the wrong place!
Luckily, ten minutes of yanking up the grain reclaimed the space with no
hassle. Columbine and chamomile are now blooming, and most of the little herbs I set out there far too early
survived and thrived as well. With the ground finally bare, I poked
some scarlet runner bean seeds into the earth and set out some fennel,
borage, and nasturtiums one evening last week, so hopefully we'll have a
vibrant flowerbed in the near future.
Of course, it would take a
whole 'nother post to tell you about how all of our other garden plants
are faring. The cliff notes version is: first strawberry fruit Monday,
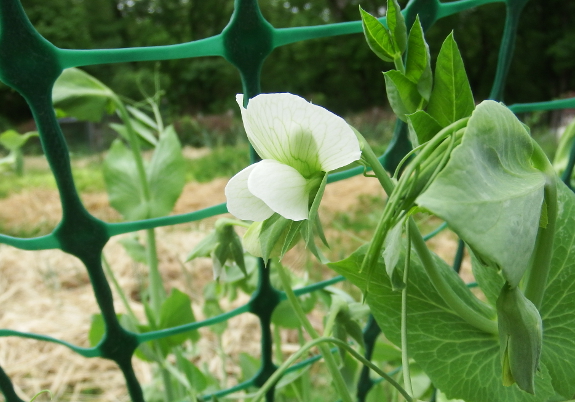
first pea flowers and tomato flower Wednesday, lettuce by the gallon,
asparagus finally starting to slow down from a daily dinner option to
tri-weekly. Delicious!
A quick left to right motion helps the Rye to lay in neat rows.
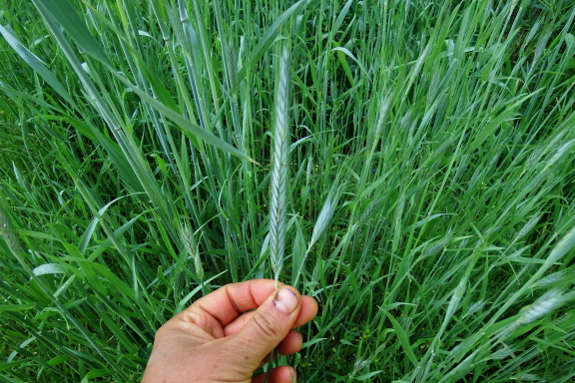
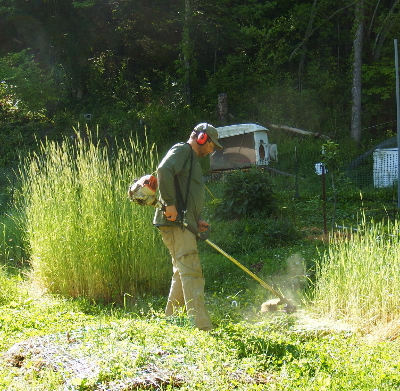 I went out with Mark to decide whether each rye bed was ready to be cut
or not, and in the process I was struck by the difference in biomass
production of various beds. My bed-by-bed approach to the garden means
that some beds are extremely rich from lots of manure and cover crops,
while other beds have managed to miss the boat on organic matter
accumulation. The latter beds produced rye plants less than half as tall
as the former beds with flower heads that are more like a quarter of
the size. Those puny beds will get to keep their rye mulch, while I'll
harvest the tops from the taller beds to use as mulch in other parts of
the garden.
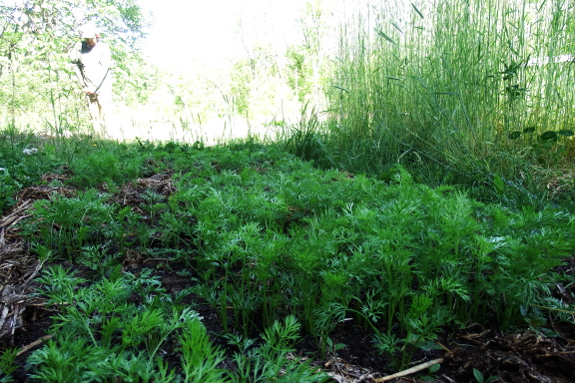
Kayla reminded me that it was also time to take the first set of measurements from our broadfork experiment. The first bed I looked at was the mangels in the photo below. The top half of the bed was broadforked while the bottom half wasn't.
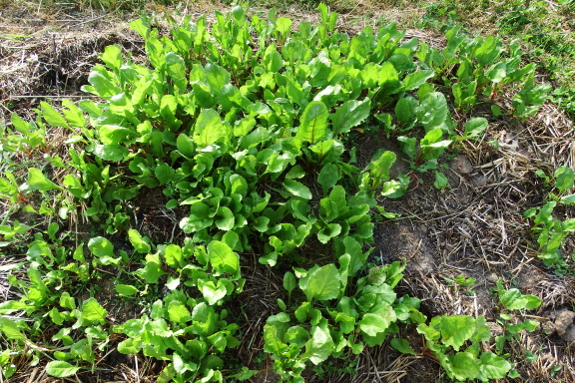
Aha! I thought. Broadforking promotes better germination! (And boy do I need to thin those seedlings.)
Then I checked out the
other beds I'd included in my first experiment. Of those, one other bed
had germinated better on the broadforked side, two beds had germinated
better on the non-broadforked side, and two beds looked the same on both
sides. I guess there's not yet any clear result of broadforking on our
root crops...but Kayla and I went ahead and broadforked half of a few
more beds anyway to test out the results on summer crops.
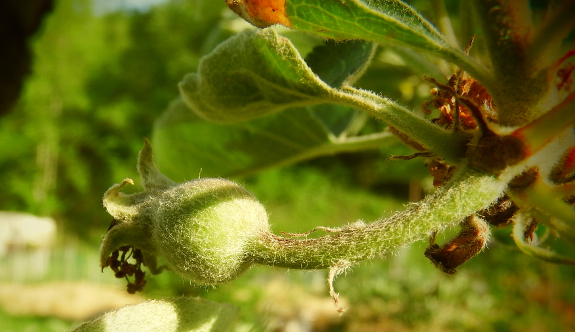
Another pressing question I'd been meaning to follow up on was --- does a low of 27 nip our fruit-tree flowers? Unfortunately, the answer appears to be yes. The developing apple 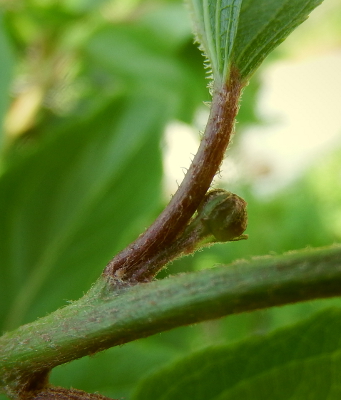 fruit pictured above is the only one I could find on all of our trees, and the pear fruits I'd been keeping my eye on have since dropped off.
On the other hand, there's at least one flower bud on one of our hardy kiwis. So maybe we wrote them off for the year too soon?
I'm starting to wonder if
it would be worth making little anti-deer enclosures in other parts of
the property just to see whether a hilltop location would beat these
perilous late freezes. Of course, the smarter solution would be to
scatter max-min thermometers around all the places I'm interested in
during next year's dogwood winter before going to all the trouble of
planting fruit trees outside our core perimeter. Something to ponder on a
cold winter night....
The big excitement for our
goats this week was some pasture expansion.
We decided to delete one of
the cattle panel walls to double the area where they like to hang out
when not being tethered to a fresh spot where the greenery is young and
lush.
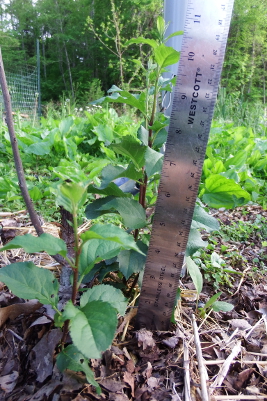 If
one of your fruit trees dies a wintry death, but the yank test says
there's still life left in the roots, you can choose to either wait a
year and then graft onto that rootstock, or to turn the area into a
rootstock-propagation zone. I opted for the latter with the
winter-killed apple tree shown above.
If you're interested in propagating apple rootstocks, you should read this post first since it explains the whys and hows of stooling. Do it now. I'll wait.
Are you back? Okay, so
you'll notice that my winterkilled apple sent up five sprouts of various
sizes from the rootstock (the largest four of which you can see in the
photo above). The Grafter's Handbook
recommends waiting until those sprouts are five to six inches tall (I
waited a bit too long), then hilling them up just like you would a bed
of 'taters.
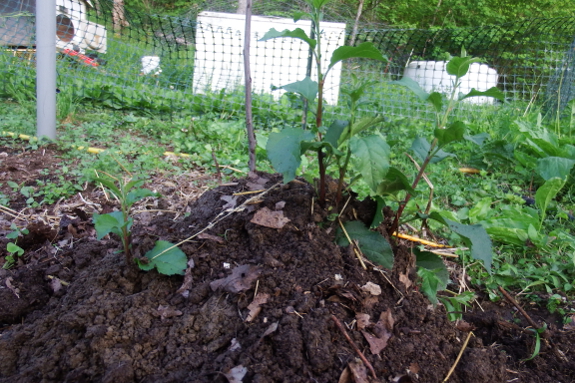
The idea is to cover
about half of each sprout's length with earth, and it's worth taking
some time to work the soil in with your fingers to thoroughly fill all
the air gaps between sprouts. Once the sprouts grow a little higher,
I'll hill a little more so I continue to have half of each stem's length
(hopefully six to eight inches by the end of the season) buried in the
soil.
(You'll notice we also
fenced the little scratchers out. Always a good idea to make sure your
chickens don't knock down the mounds of soil you build up....)

Varieties are chosen to
be rootstocks in part because they're keen rooters, so in my official
stooling areas, I chopped the tops off the one-year-old trees in early
spring and stuck those tops halfway into the ground several inches away
from the original stool. In the photo above, the stem is on the left and
the rootstock is on the right (by the rebar). As you can see, both
parts of the tree are currently leafed out and growing. Since this stool
is younger than the one shown in the previous photos (one year old
versus 2.5 years old), it's not as advanced and won't be hilled for a
few more weeks.
The good news is that it
looks like, if everything goes smoothly, I won't have to buy apple
rootstocks this year. Now, the question is, where will I put another
half dozen home-grafted apple trees?
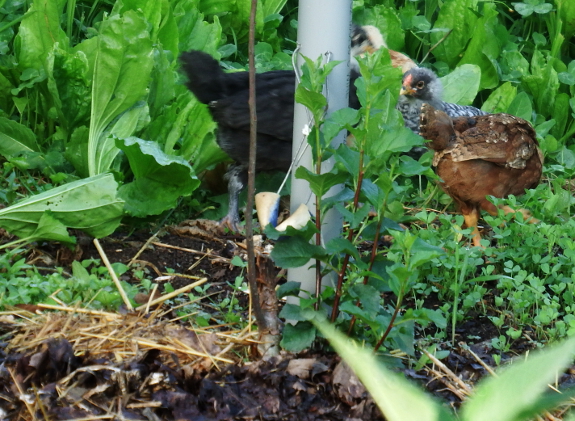
Our new chicks have gotten big enough to need another layer of bricks under their EZ Miser bucket waterer.
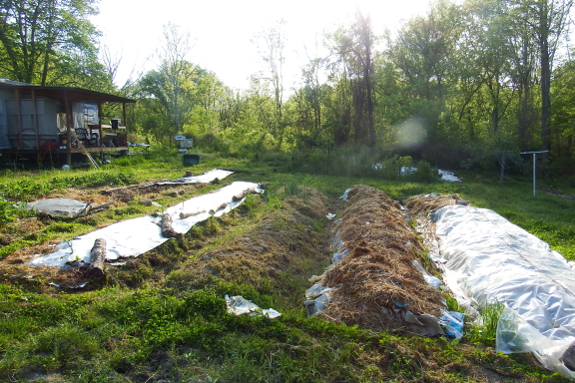
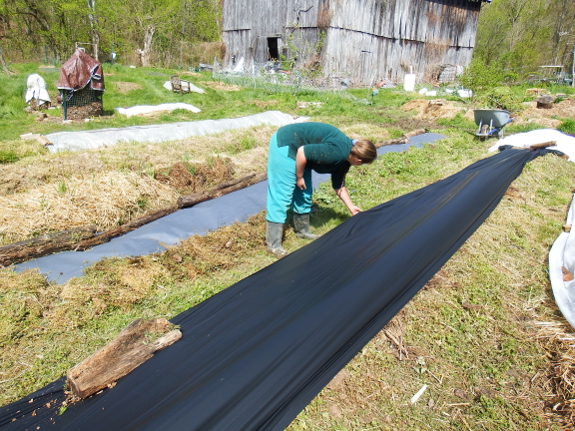
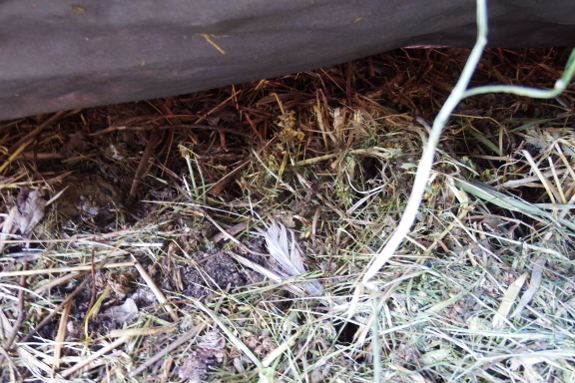
Option A involved a type of very thin, biodegradable black plastic.
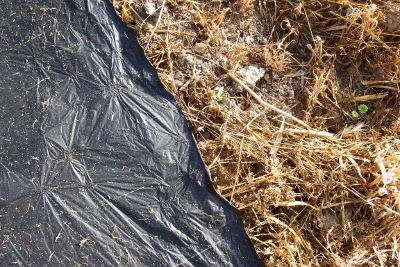
The photo above shows Kayla helping me lay down the plastic three weeks
ago. The photo below shows completely dead oats underneath the plastic
this past Thursday.
 This
product worked much faster than I thought it would, probably because
we've had crazy summer weather in April and early May (highs up to 90
some days), which surely heated up the soil underneath very quickly.
On the down side, all it took was Huckleberry walking across the plastic
to tear little holes, which a light wind quickly turned into long
tears. (I'm telling you Huckleberry really isn't that big of a cat!) So,
although effective, I'd caution against using this product anywhere
that pets will be walking even a little bit.
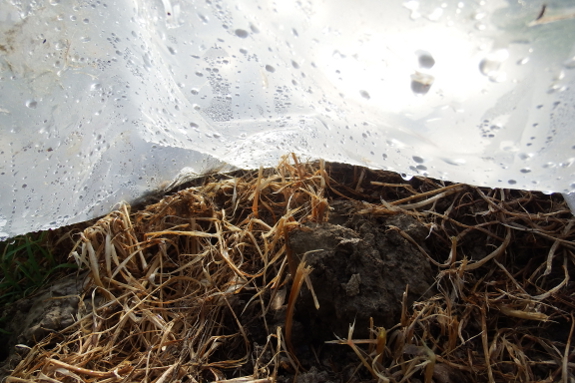
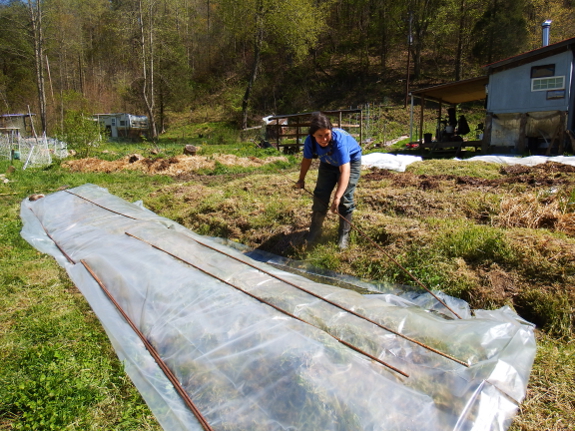 Option 2 was solarization, which I explained in more depth in this post.
The solarization worked about equally as fast as the black plastic,
with the bonus that this clear plastic didn't shred after light pet
traffic. The clear plastic also held in the soil moisture, which was
handy since rainfall for the last few weeks has been nearly nonexistant.
The downside of
solarization is that my raised beds in this area are tall enough that
the north-facing side of the bed didn't heat up fully, so the oats
underneath the plastic on that side are still somewhat green. So if you
plan to use solarization to prepare soil, you'll want to stick to areas
where the ground is as flat as possible. With that caveat and assuming
hot weather, you can also plant into solarized ground in about three
weeks if your weeds are only moderatly tenacious. (Add a few more weeks
for both Option A and Option B if you're trying to kill a wily perennial
like wiregrass.)
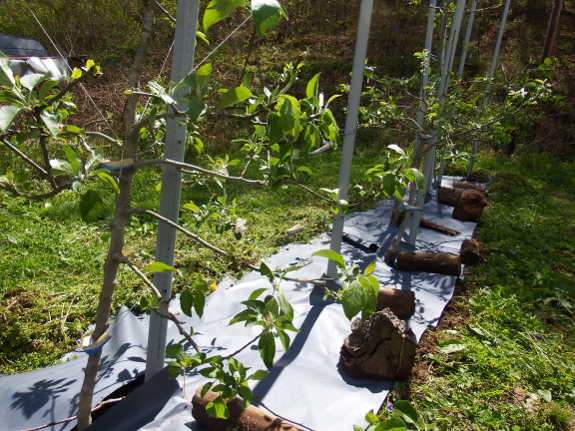 Option 3 was a storebought roll of paper mulch.
This mulch was the least effective as a fast weedkill, although it
looks to be the most effective as a long-term ground cover.
As Mark mentioned,
the first rain bleached the dye out of the paper, and the lighter color
left behind meant that the mulch simply acted like a barrier between
the weeds and the sun rather than heating the soil underneath. The
result is that the weeds beneath the paper mulch aren't quite dead yet,
although the paper is still providing a good barrier around the
high-density apple trees. I suspect I'll need to wait about 4 to 6 weeks
between laying down this mulch over an oat cover crop and planting into
the bare soil.
As another downside, Lucy running across the mulch did
poke holes in the paper layer, allowing some weeds to come up through.
That said, the paper has much more structural integrity than the very
thin black plastic, so only the paw-print areas were affected rather
than the whole sheet of mulch. So I'd say the plastic mulch is
acceptable over areas with light pet traffic.
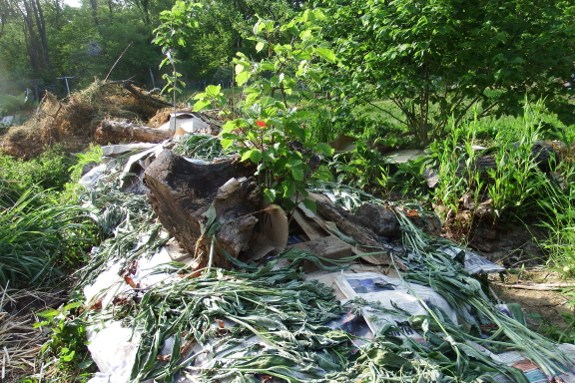
Option 4 was mad of
entirely free materials, but I didn't lay them down until later than the
previous options and thus don't have a comparison yet to the other
methods. Kayla's father came through with a big box of newspaper
(thanks, Jimmy!), and I've been applying the sheets using different
methods in different parts of the garden.
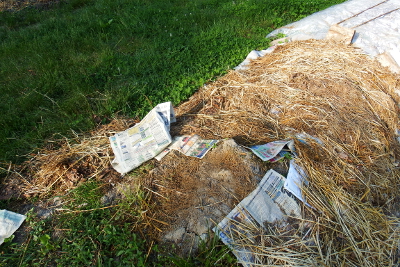 The
photo to the left shows how I laid the paper down dry and then anchored
it with deep-bedding material from the goat coop. Unfortunately, some
of the sheets have blown away, which is why I started soaking the paper
in a bucket of water before applying.
The top photo in this
section shows some newspaper-mulched areas around the hazelnut bushes.
Since I have comfrey plants growing along the aisles in that part of the
garden, it was easy to yank handfuls of the greenery as a short of chop-'n-drop
to weigh the wetted newspapers down. I'll post a followup in a few
weeks once I know more about how the newspaper mulches compare to the
other methods, but my guess is that they'll be comparable to the
storebought paper mulch.
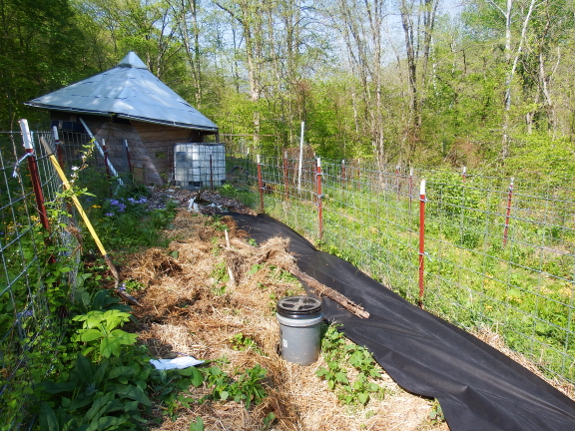
The final method I'm trying is a more long-lived type of black plastic
that is supposed to be good for 12 years (assuming you don't puncture
the fabric in the interim). I laid down an experimental span in the
proto-tree-alley a week ago, with the plan of taking up the plastic at
the end of the month and planting sweet potatoes there. I'll keep you
posted about weed control there as well.
Phew! I know that's a lot
of data, but I hope it'll help you decide on a weed barrier that'll fit
your particular garden needs. And perhaps there's another method I
haven't considered that you've used with success in your garden? Be sure
to let me know in the comments!
Our asparagus is slowing down, but the strawberries are just getting started.
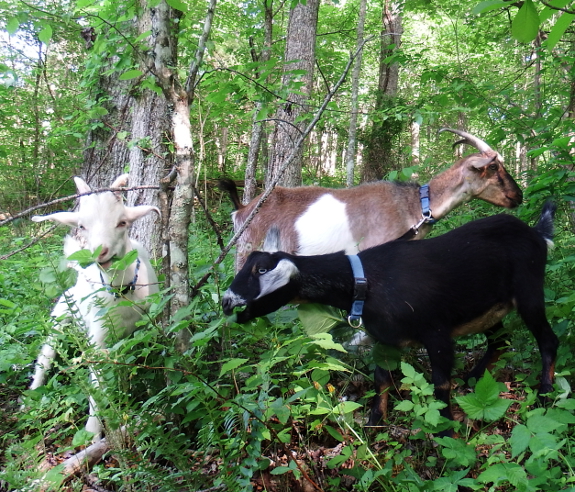
I suspect one of the
reason women love goats is because the caprine herd has the exact
opposite problem we have. As a goatkeeper, one of your primary goals is
to keep the weight on
your goats. Between intestinal parasites (usually present at low levels
but sometimes veering way out of control) and the energetic expense of
creating baby goats and milk out of grass, dairy goats have a bad
tendency to waste away to skin and bones. Enter my weekly bout with the measuring tape to reassure myself that our goats are in fine form.
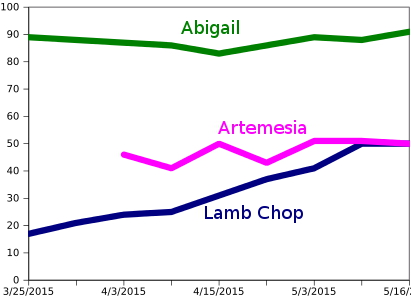 Lamb
Chop has never given me any worries on the weight front, though. The
most I've been concerned about is that our buckling will get bigger than
his mother before his date with the butcher, making it impossible to
carry the lad across the creek to his doom. Barring that issue, he seems
bound to surpass his 11-month-old herdmate's size in short order. As of
this week, Lamb Chop has officially caught up with Artemesia; in fact, I
think he now stands a little taller at the shoulder.
Abigail and Artemesia, on
the other hand, worried me a bit in April, although I now think that
their weight "losses" then were merely an artifact of shedding their
winter fur. Less fur for the tape to wrap 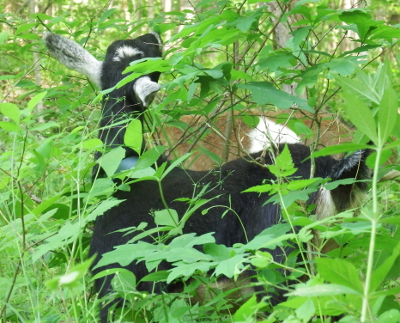 around
simulates the loss of fat. Regardless, I dosed the whole herd with
daily helpings of chopped garlic, which they all ate happily whether or
not they needed the herbal dewormer. Now both are well above their
winter weights, even without the furry padding.
I'm glad that I seem to be able to keep the weight on Abigail without adding grain
to her diet, but I'll admit that I'd probably get more milk if I fed
our doe more concentrates. As she started gaining weight on grass, I
started easing off the carrots, alfalfa pellets, and sunflower seeds I
was offering...with the result that milk production slowed down a bit
(from about 3 cups a day to about 2.5 cups a day). Bringing those
concentrates back up to previous levels (plus locking Lamb Chop away an
hour earlier in the evening) quickly increased milk back to normal, then
all the way up to a quart at my morning milking.
I suspect one of the dicey issues with dairy goats is deciding when
we're being greedy humans and pushing our goats too hard, and when it's
worth feeding a little more for a little more milk. Since I want to
experiment a bit more with cheese, I think I'll be greedy just a little longer.
When I get this one done we'll have 3 paddocks we can cycle the goats through.
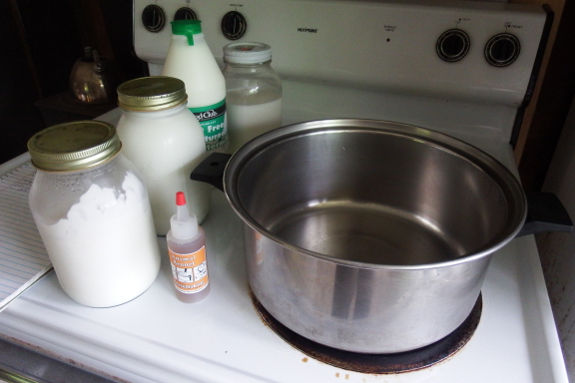
After deciding that our first cheese --- an acid cheese --- was too simple, it was time to move on to a cultured cheese. I followed this recipe for neufchatel, which uses buttermilk as the starter culture and rennet to make the curds separate from the whey.
Rennet, I learned when
hunting down these supplies, comes in several forms --- liquid animal,
liquid vegetable, tablets, and powders. The powders are usually for bulk
purchasers, tablets have a very long shelf life, liquid animal is easy
to utilize in small quantities for fractions of the recipe, and liquid
vegetable (as best I can tell) is a slightly bitter replica used by
vegetarians. Since I wanted to be able to try half recipes, I opted for this liquid animal rennet.
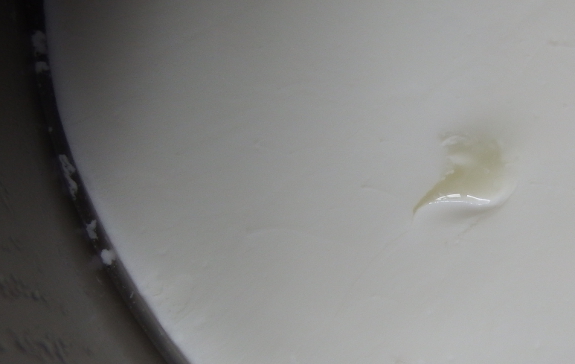
I'm not going to run
through all of the instructions for making this cheese since you can
find them at the link in the previous section. The shorthand version is:
take 2 quarts of room-temperature milk, add two tablespoons of cultured
buttermilk, dissolve two drops of liquid rennet in a quarter of a cup
of water and add to the milk mixture, stir, then cover and let sit for
about eight hours. You'll know your cheese is ready for the next step
when you see a clean break as is shown above.
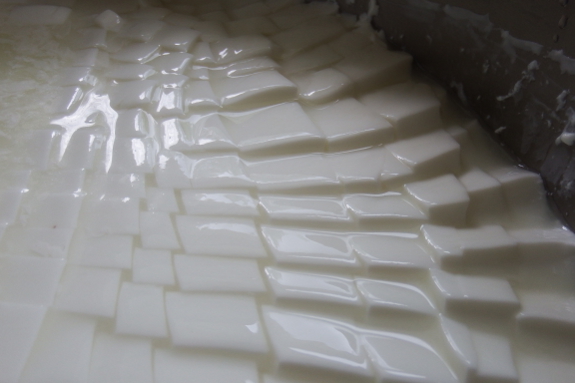
Now you're ready to cut the curds...

...and drain off the whey
by pouring the contents of your pot into a clean towel in a colander.
You're then supposed to hang this bag of proto-cheese for a while until
the rest of the whey works its way out, but I was impatient and simply
squeezed the bag, stirred the contents, and then squeezed some more
until the cheese was dry. (Someone please tell me why this method is
wrong --- it seemed to efficient!)
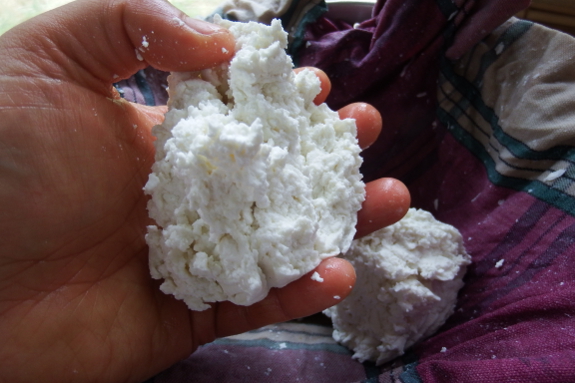
The final result gets half a teaspoon of salt mixed in and is then ready to eat!
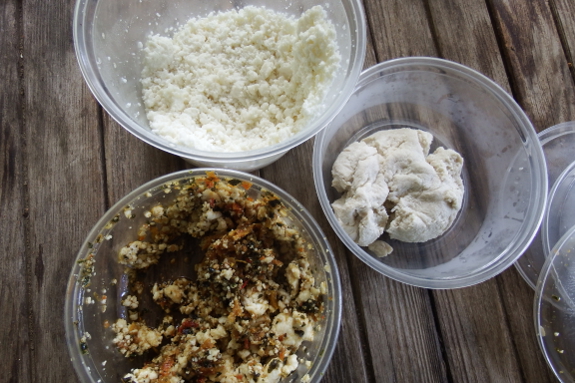
Mark and I tasted the neufchatel (top container), the same cheese mixed with some Hollywood sun-dried tomatoes,
and ricotta made from the whey. (More on the ricotta in a later post.)
Mark doesn't like goat cheese from the store, but he enjoyed this
completely non-goaty cheese...while I actually missed the goatish
overtones. Meanwhile, I've never been a fan of ricotta, but I thoroughly
enjoyed the homemade version, while finding the Neufchatel a bit bland.
As best I can tell, the
reason this cheese is neufchatel instead of chevre is because it uses
buttermilk as the starter culture. However, when I looked up the biology
of chevre and buttermilk cultures, I learned that both contain some
combination of Lactococcus lactis lactis, Lactococcus lactis cremoris, Lactococcus lactis diacetylactis, and Leuconostoc mesenteroides cremoris.
It's probably still worth buying a chevre culture to see what I come up
with using the other starter since my taste buds say this Neufchatel
isn't the same as chevre.
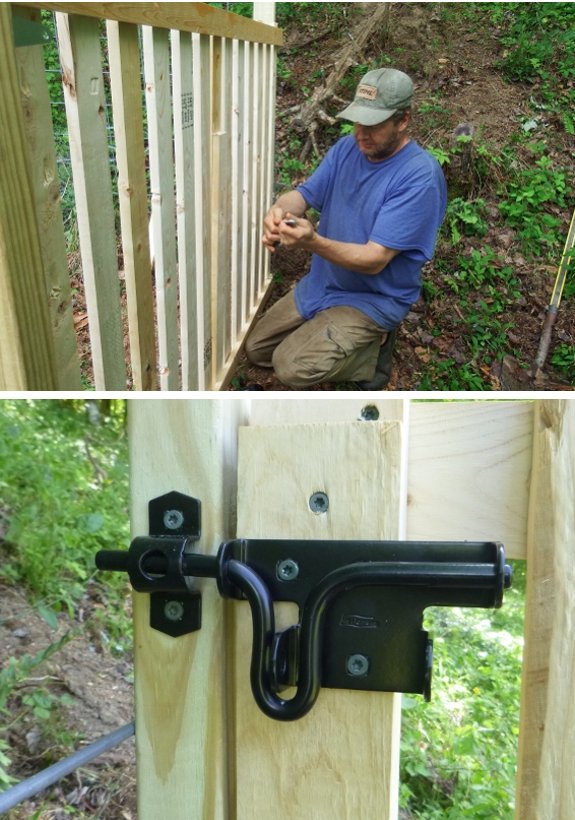
This sliding bolt gate latch is my new favorite way to keep goats out.
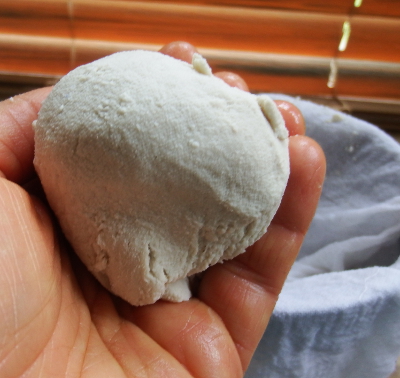 I'll
admit that when my parents made lasagna with ricotta when I was a kid, I
tried to pick around the grainy cheese. But I now that I'm
experimenting with cheesemaking, I've learned the purpose of ricotta ---
turning all that cultured whey into something useful. And, sure enough,
two quarts of milk turned into 9.5 ounces of neufchatel,
while leaving enough proteins in the whey to create another 2.9 ounces
of ricotta. Thus, I've decided this subtly acidic cheese is hereafter to
be referred to as "bonus cheese."
(Okay, not really. You can keep calling it ricotta. But doesn't "bonus cheese" sound good?)
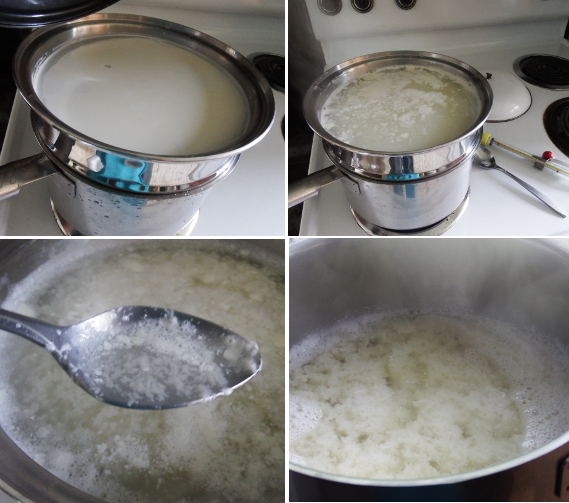
Ricotta is almost too
simple to post about. You take your leftover whey and allow the liquid
to sit, covered, at room temperature for 12 to 24 hours. Next, boil to
separate the curds from the whey, then strain out the chemically altered
(greenish) whey off your new cheese.
The boiling step is
supposed to be a near-boil, using a double boiler to heat the cultured
whey to 203 degrees Fahrenheit. However, after an hour in our double
boiler, the whey was beginning to separate out little curds...but still
hadn't surpassed 180 degrees. Only after decanting the whey into a pot
to cook it the rest of the way directly on the stove, at which point it
boiled at around 198 degrees Fahrenheit, did I realize that I really
should have factored in changing boiling temperatures due to elevation.
(Or, perhaps, the fact that my candy thermomter might not be accurate?)
So, to cut a long story short --- you can make ricotta just fine by
simply bringing the whey to a boil then removing it from the heat.
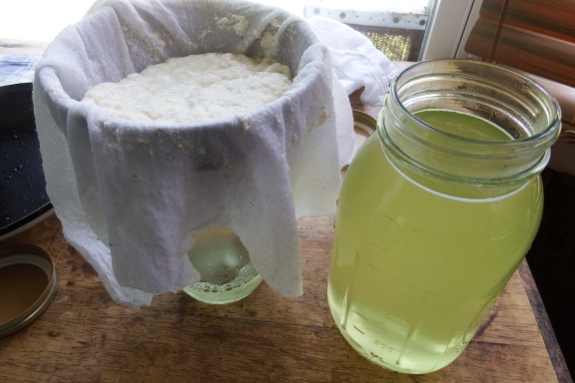
Anyway, after you boil
your whey, you let it cool for a couple of hours, then pour the curds
and whey into a clean cloth above a strainer. I used our new straining funnel for this step.
You'll also notice that I
moved to a white cloth instead of the colored one I'd used for my
previous cheeses. I learned the hard way that cheese picks up a little
bit of lint from the cloth, which is unsightly if the fabric is colored.
But if the cloth is white, no one ever knows....
I actually loved the
flavor of this ricotta plain, but I'm thinking of trying it in a
chocolate cheesecake with some of the neufchatel. Because everything tastes better with a little chocolate....
The Star Plate goat barn now has a third door to access the new paddock.
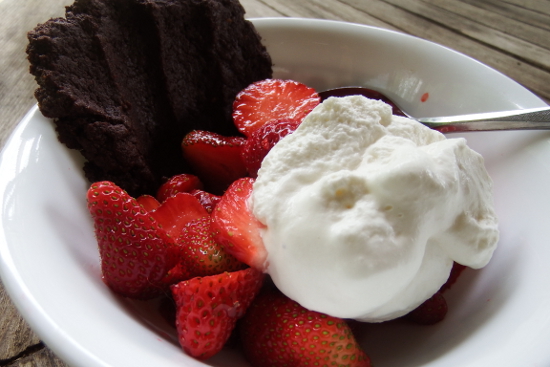
Despite some bird
pressure that's been forcing me to pick berries a little on the pale
side, we've been enjoying delicious strawberry desserts for the last
week and a half or so. That said, I've decided it's finally time to pull
the plug on our Honeoyes. Not the variety
--- this early season strawberry is still a favorite. But after
expanding my patch from gifted expansions of someone else's patch for
the last eight years, viruses (I assume) are building up in the clones
and the berries are slowly becoming less flavorful. When even I want a little honey on my fruit (unlike Mark, who always does), I know that it's time to make a fresh start.
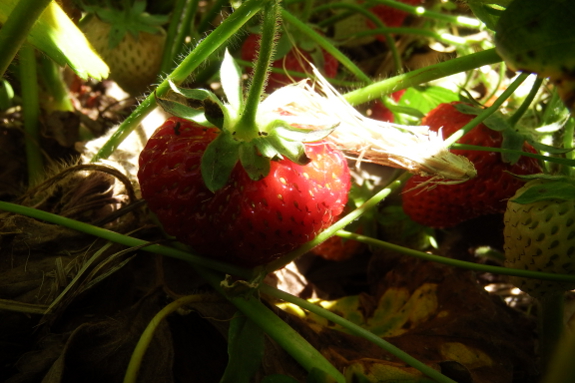
And, while I'm at it,
maybe I should try a second variety as well? Now that Kayla's in my
life, I can get away with ordering 25 plants of both Honeoye and Galleta
(an ultra-early variety) without worrying that the new plants will take
over my entire garden. Last year's addition of Sparkle
was a great boon to our homestead, so hopefully Galleta will be as
well. And even though the plants cost 70 cents apiece once you add in
shipping, when you figure that they and their children will likely feed
us for another eight years at a rate of at least a gallon a day, the
plants are definitely a bargain! That's my kind of homestead math.
Our Oregon
battery powered chainsaw
needed a new chain today.
The sharpening stone still had
about 1/4 of its surface area left, but one close look at the teeth
will tell you why it stopped cutting.
I like to flip the bar upside
down when a new chain goes on to even out the wear on the little bar
sprockets.
We are very happy with how
much cutting we got done on the first chain.
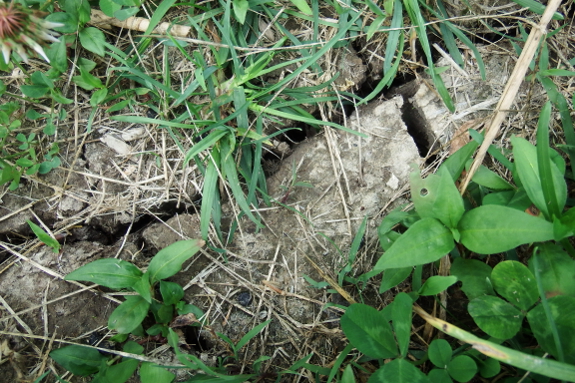
The weather and I can be
moody. After a crazy wet fall, winter, and spring, we started measuring
precipitation in hundredths of an inch this month. A quarter of an inch
of rain Thursday morning eased the earth's woes a little, but it took
Mark's cheerful demeanor and calm problem solving to ease my own bad
mood.
You'd think I'd realize that I always
get overwhelmed around the middle to the end of May. I keep a mood
diary (who, me obsessive?) and this is the time of year when my homemade
cheerfulness report card dips into Cs and Ds. All of the spring
plantings need to be weeded, our chicks are growing out of the easy
stage and require more frequent pasture changes, and learning goats has
also added to my load this year.
The trouble is, I love
the garden and chickens and goats. I just don't love it when a lengthy
to-do list pulls me out of my slumber too early and I turn irritable and
grumpy. Time to offload a few tasks.
Some chores are easy to
spread around. I pull Mark off his normal tasks to help me for a morning
in the garden, and together we move the chicks to a new bit of yard.
After a lesson in goat tethering, we figure he can halve my chores there
too.
But some headaches aren't
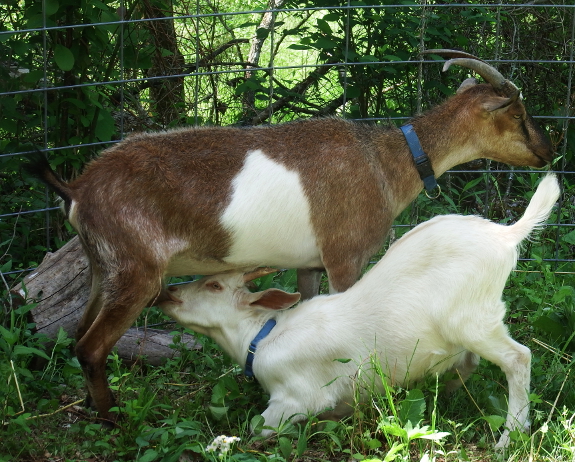
lighter when carried on two sets of shoulders. For example --- Lamb
Chop. At eleven weeks of age, our buckling is enormous, still
nursing...and starting to get ornery. Artemesia went into her first
clearly discernible heat this week, which suddenly made goat wrangling
much more difficult. Between the screaming from the woods, Lamb Chop's
need to mount our doeling in the middle of the garden, and the
egg-laying snapping turtle guarding the path on the way home, I was glad
Mark was along or I don't think I would have been able to get all three
goats back into the pasture. So our buckling has a date with the local
butcher (aka meat packing facility) in two weeks, and we'll just hope
Lamb Chop manages to knock Artemesia up beforehand.
Speaking of offloading, I've decided to let my Winter and Spring cookbooks stand alone for the moment. I had thought my book about living in a trailer
would be my most controversial and criticism-inspiring text, but
apparently our unusual food choices are much more divisive. Lacking the
energy to push a product that the world isn't ready for, I'm moving on
to one of the other creative projects that I always have waiting in the
wings.
Decisions made and tasks
offloaded, I step out into the garden and notice that the grass is
green, the flowers are beautiful, and the garlic scapes are ready to
eat. It's amazing what a shift in perspective will do to remind me that,
despite temporary troubles, we're still living in paradise!
Some of our onions
started sprouting and going bad on us.
This post is to remind me
around next Mother's Day to delete any bad onions.
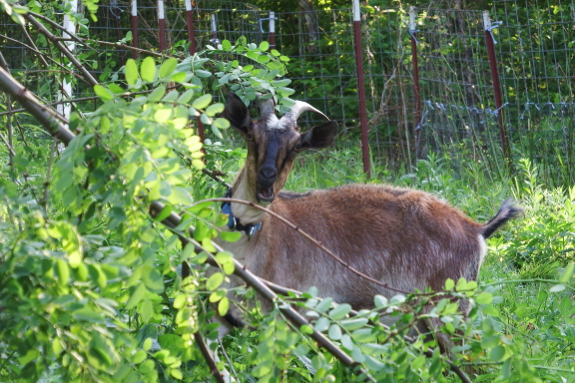
"I don't want to go out," Abigail said on Wednesday morning when I went to tether our little herd in the woods.
I was gobsmacked. Abigail not only always wants to go out, she wants to get to her fresh forage now, ASAP, hurry up, do you get the message?!
But I think the deer
flies the day before got to be too much for her. We had a light rain in
the morning, so I put the herd out later than usual. And when I went to
bring the goats home, the pesky deer flies were buzzing in their loops
so annoyingly that I was barely able to gather three goats before
rushing for cover myself. I should have worn a hat...and I'm sure that,
as a tethered goat, the deer flies were twice as annoying. (They do
bite, but it's really the buzzing that drives you mad.)
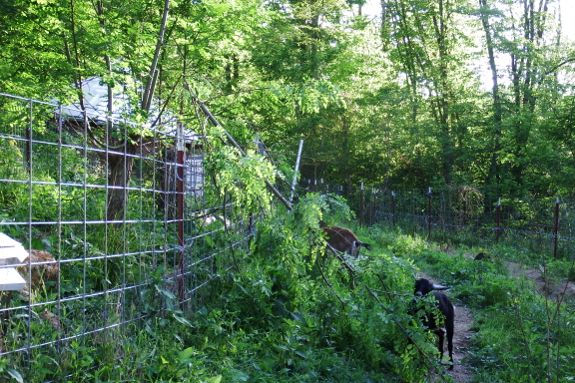
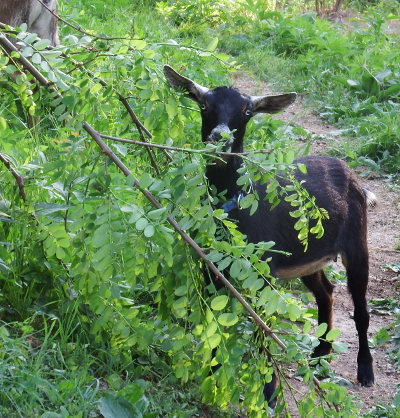 So
I met Abigail in the middle. I tethered her out early, took her in a
bit after lunch, then cut some locust boughs in the evening to top off
her belly. No, Mark, I don't know what you're talking about when you say
I spoil our goats....
More seriously, I do
dream of eventually having large enough pastures so our goats can get
all of their nutrition on their own schedule, retreating to the barn
when necessary to beat the flies. In the interim, tree boughs seem to be
a quick-and-easy solution for supplemental feeding when it doesn't make
sense to bring the goats out into the woods to eat. Like tree hay...but for summer nutrition rather than winter feed.
Kayla's husband Andy helped
us out with some firewood cutting yesterday.
He gave us 2 hours of
aggressive tree cutting for only 50 dollars.
If you're within driving
distance and need some trees cut leave a comment and we'll give him
your number.
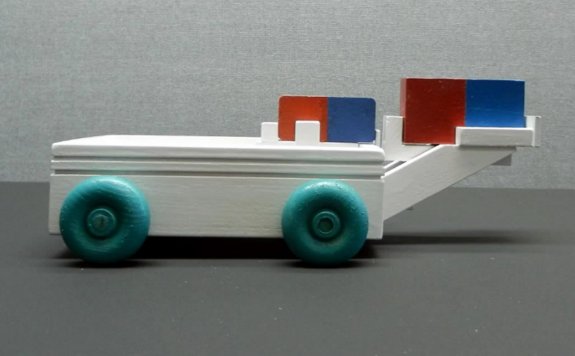
I saw a perpetual motion
Youtube video recently
that tickled my curiosity.
Anna was intrigued as well,
so we ordered some pinewood
derby wheels and a box
of magnets to see if we
could understand this puzzle a little better.
We had fun tinkering with it
for a few evenings before we came to the conclusion that the video is a
trick that uses gravity instead of magnetism to move the car.
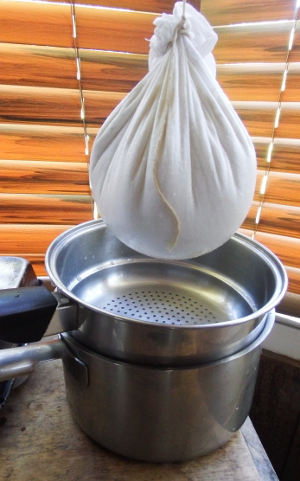 After some research and great input from our readers, I decided to make a few changes before repeating my neufchatel/chevre
endeavor. First, even though the instructions called for two drops of
liquid rennet in my half-gallon recipe, raw goat milk is notorious for
not needing nearly as much thickening agent --- pure milk is just very
alive. So this time around I backed off to one drop of rennet, looking
for more of a soft cheese consistency instead of the more chewy cheese I
ended up with last time.
I also decided to try to
boost the flavor with a bit more buttermilk (three tablespoons instead
of two) and a much longer culturing period (24 hours instead of 6,
although I should mention that the weather was much cooler during round
two). After that elongated culture period, there was quite a bit of
clear whey on top of the curd, and the curd had also begun to pull away
from the walls of the pot. This is all an effort to give the bacteria
more time to work, since I suspect microbial byproducts are what gives
soft cheese most of its flavor.
Finally, I drained the
cheese the right way for four hours instead of squeezing out the whey,
and I upped the salt to 0.75 teaspoons. The result? Nearly perfect! The
salt was too much --- I'll be going back down to half a teaspoon next
time around --- and I think the culturing period might have been just a
hair on the long side as well. But the flavor was much more full-bodied
than last time and the cheese felt much moister rather than dry and
crumbly. Success!
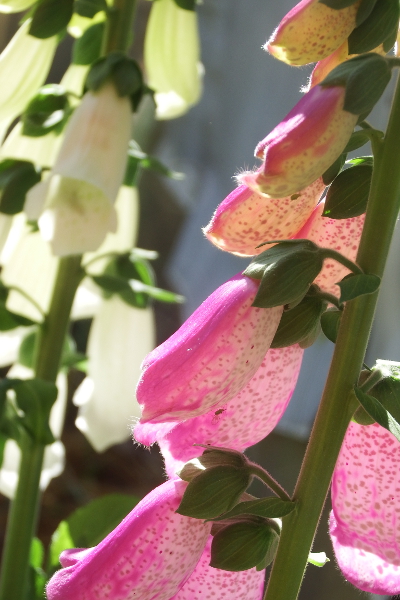
My young flower beds aren't quite to the stage where they stand up to distance shots, but the closeups are delightful.
Foxgloves from a family friend, chamomile because it reminds me of my
mother (who enjoys the tea), columbine from another friend, borage (not
quite blooming yet) because one of our blog readers suggested it as a
high-quality feeder of native pollinators, some zinnias and nasturtiums
(also not blooming yet) just because.
Every time I look at one of the plants, I smile!
One of the Teva
sandals I glued for Anna last year came apart.
I used JB
Weld again because the
other sandal is holding up nicely.
The plan is to use some
Plumbers Goop to seal up the edges to keep any water or dirt from
finding a way in.
 I set out ten persimmon seedlings in our chicken pastures 2.5 years ago,
figuring there were all kinds of experimental possibilities for the
young trees. Option 1 would be to simply let them grow up to adult size,
but a seedling persimmon has a 50/50 chance of being male (meaning no
fruit), grows very large, and takes a long time to bear. Option 2 (my
favorite at that time) was to graft hardy Asian persimmons onto the
seedling rootstocks...but my hardy persimmon varieties kept dying back
to the ground over the winter, so I decided to ditch that plan. Instead,
I moved on to option 3 --- to trade for named American persimmon
varieties (Yates, Proc, I-94, and Early Golden) and graft those onto my
seedling rootstocks.
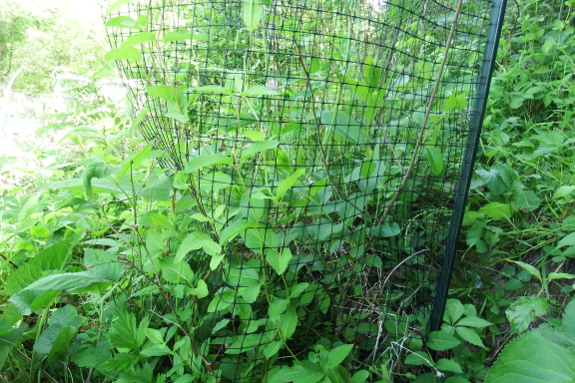
Persimmons are trickier
than some other fruits to graft, so I tried two different approaches. I
also followed the experts' advice by waiting until it seems far too late
to graft --- late May when the leaves on the seedling trees were nearly
fully formed.
The first step for both methods, though, was the same --- yank out the
weeds that had grown up within each tree's enclosure since the last time
I dropped by. Out in the chicken pastures, these little trees are lucky
to catch my eye more than once a year, so I wasn't surprised to find
that two of my seedlings had died and that one wasn't big enough to
graft onto. The rest --- despite being a bit winter-nipped from our -22
Fahrenheit cold spell --- had stems thick enough to graft onto.
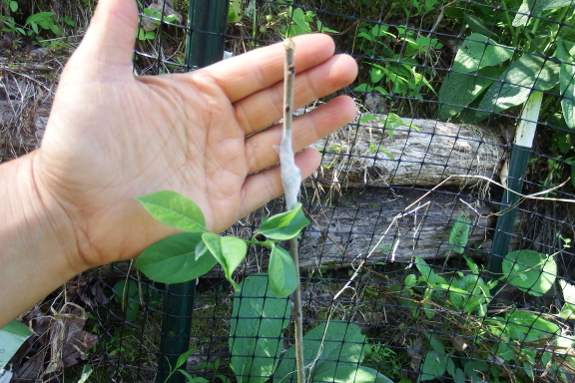
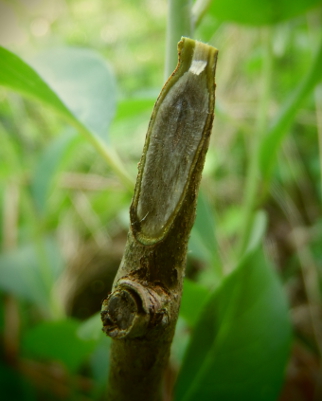 I grafted the first four plants before doing any research, so they got my usual whip-and-tongue graft.
It was definitely tougher to graft in situ than to bench graft, and
both the rootstock and scionwood were on the small side (compared to
apples) for most of the trees, so I'm not sure how many will take.
After I was done grafting, I still wasn't entirely sure what to do with
the existing growth on the trees. So I just cut the branches back but
left some leaves present to keep the tree alive until the graft union
heals. Again, I'm not sure if this was the best choice, or whether the
existing growth will prevent the graft union from healing. I guess time
will tell....
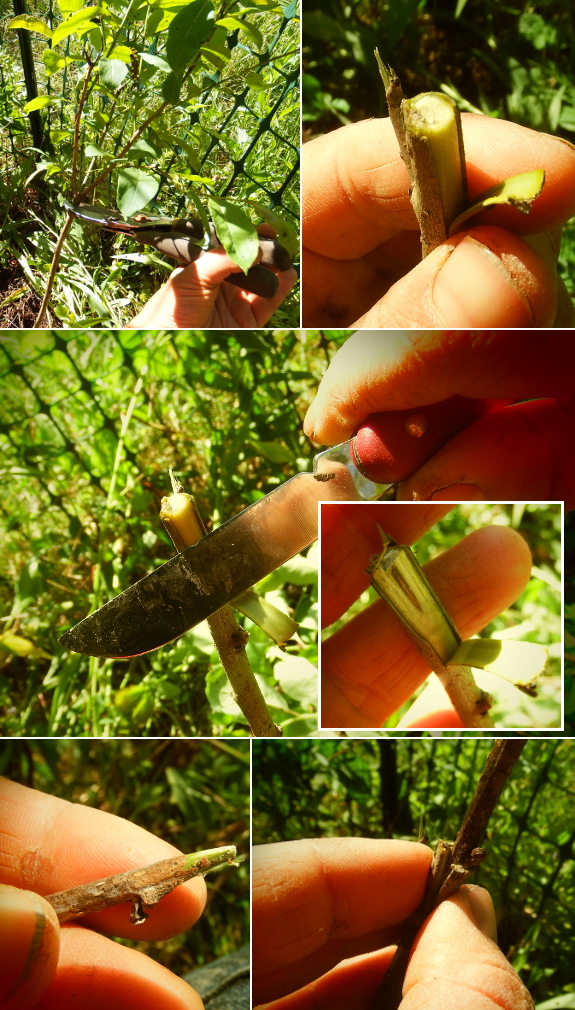
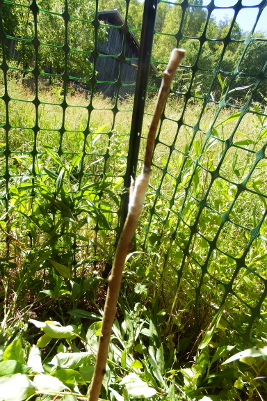 While I took a water break in front of the computer, I found this interesting file
suggesting an alternative method of grafting persimmons, so I followed
the author's lead for my last three trees. First, I snipped the entire
top off each seedling, then I slit a strip of bark and peeled it down
(carefully!) before cutting away a bit of the rootstock to make room for
another stick of wood to fit in.
Next, it was time to prepare the scionwood by cutting one side of the
bottom at a slant and then using the knife blade to scrape the bark on
the rest of the bottom of the scionwood down to the green cambium. The
prepared scionwood slid under the rootstock's bark flap, and the whole
thing was wrapped with parafilm. (Okay, I didn't wrap my entire piece of
scionwood since that just seemed too extreme, but I may regret that
omission!)
With seven trees grafted to four varieties, I'm hopeful I'll see at
least a 50% success rate and will end up with several different types of
persimmons to continue their slow growth in the chicken pastures. Since
the trees there don't get much TLC, chances are I won't see fruit until
2020, but hopefully the results will be worth the (very little) effort
I've so far put into my experimental trees.
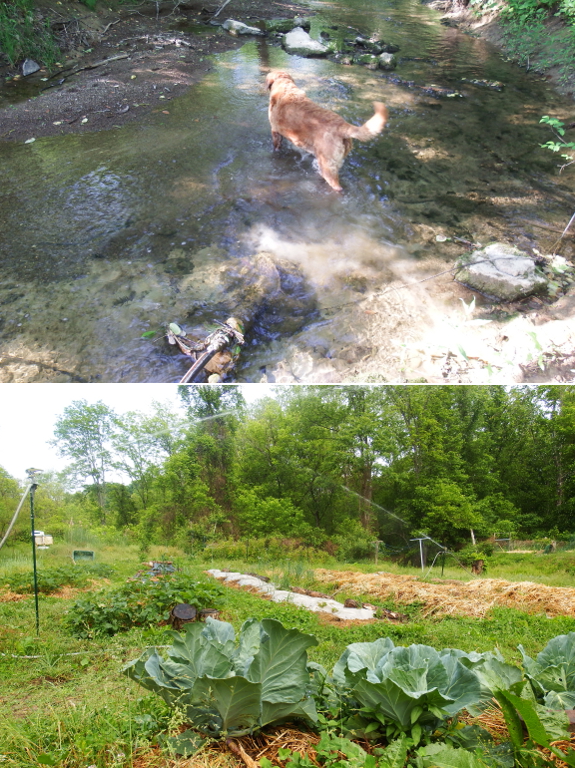
It's been a few years since we hooked up sprinklers in the back garden. But the groundwater has sunk too low for subirrigation to do much good.
In preparation for planting another round of beans, corn, and squash, we
let the sprinklers run all day to moisten the parched earth.
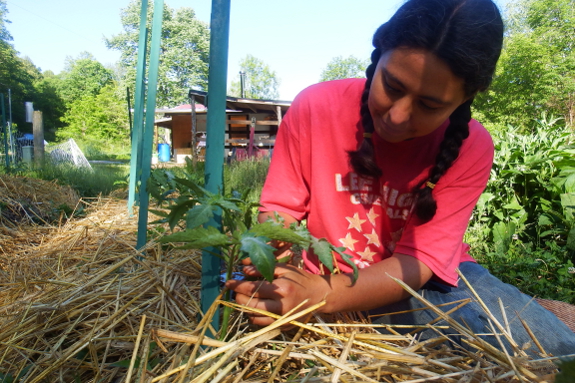
It's that time of year again --- the season for weekly doting upon our tomato plants! The first round of pruning
is simple --- I snip off the bottom leaves so none are touching the
ground, then I pinch off any suckers, no matter how small. If suckers
have grown too large to pinch, 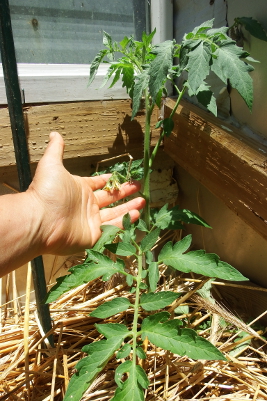 I instead cut them with clippers. Then I look at the many beautiful bloom buds (and the open flowers on the plants I set out a week earlier) and smile for the rest of the day.
That said, I am doing a few things differently this year. Most significant (I hope) will be growing only blight-resistant varieties
(although given our current weather, blight might not be an issue this
year anyway). I've also set out plants much closer together than usual
and am pruning each to one main stem instead of to three. I feel like my
previous efforts to beat the blight with maximum air flow between
plants didn't do much good, so why waste space?
On a different note, I'm
not surprised but I continue to be charmed by how the earth perks up
so-so transplants. I started another set of seedlings in early May just
in case my started-too-early transplants didn't make it, but I've only
had to replace two of the first round of thirty transplants. Within a
week of hitting real soil, everyone else perked up and grew happy new
leaves, proving that our natural ecosystem is 100% better than anything I
can replicate in pots in a sunny window. If I was listing the top ten
things I love, growing in real earth would be one near the top of the
list!
We decided our tomatoes
needed a drip irrigation system.
This white PEX
material is cheap and
easy to work with. It won't kink and you can get a 100 foot roll for
less than 30 dollars. Once I had the tubing secured to each post I went
in and drilled a small hole next to each plant.
The hole is three times
bigger than most drip systems due to the heavy sediment in the creek
water we use for irrigation.

An unusually dry May has
its pros and cons. On the plus side, if the summer stays like this, our
garden may bypass its usual wide range of fungal diseases. And, already,
the weeding pressure is much lower than in normal seasons...
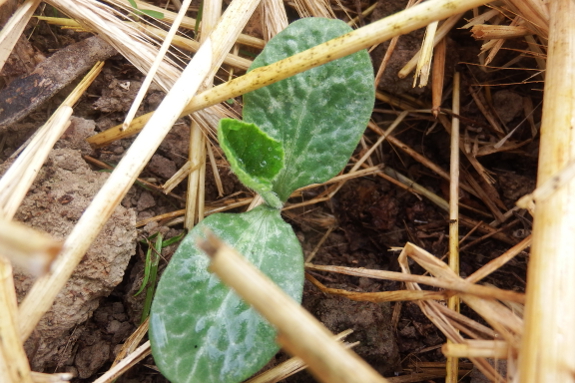
...because the weed seeds simply aren't sprouting. Unfortunately, unless I give them some TLC, neither are the vegetable seeds.
Usually, the only times I have trouble with seed germination are in early spring (pushing the envelope with cold soil)
and in midsummer (when I plant cool-loving fall crops that aren't
impressed by summer heat). But, this year, I'm having to replant some of
my usually dependable vegetables --- like green beans and sweet corn
--- because even the sprinklers aren't enough to get them off to a good
start. Heaven forbid I try to plant (the way I usually 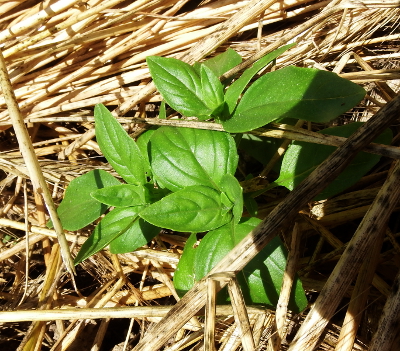 do) outside the spread of our irrigation system.
Luckily, the lack of a
spring this year is actually working in my favor. It was cold so late
into the so-called spring that I started lots of transplants inside, and
most are loving their new habitats in the garden. Those pre-sprouted
beans I mentioned a few weeks ago failed miserably --- only three of the
nine plants survived --- but I've been snipping off a few basil leaves
here and there for the last two weeks, and our pepper plants are up and
running.
Meanwhile, the summer
vegetables that I started before the weather turned dry --- either under
quick hoops or just early in the garden --- are also doing well. I hope
to see cucumber blooms next week and maybe we'll eat the first broccoli
head at the same time. The heat is 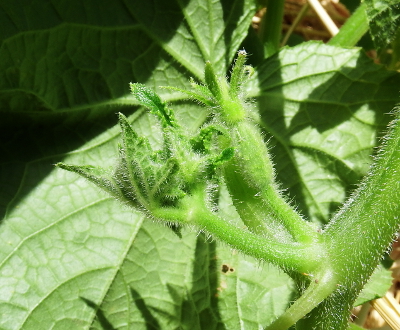 giving
some plants pause --- notably the peas (currently producing) and
crucifers, who wilt a bit in the afternoons even if they've been
recently watered. But, overall, these early vegetables seem to be
thriving beneath the bright summer sun.
I still can't decide if I
should be wishing for rain. Everyone else is --- non-rotational
pastures in the area are brown and nearly bare and unwatered gardens
aren't doing much better. But I keep thinking that if we have a few more
weeks of drought, we'll be able to drive in some manure....
Luckily --- since I'm so conflicted --- my wishes have no impact on the
weather at all. Rain will come when it comes, and in the meantime I'll
give my seeds a little daily water to make sure they sprout.
We got a big straw bale
delivery today.
80 bales at 5 dollars per
bale.
The guy felt bad about last
year's issue with seed heads and gave us a discount to make up for it.
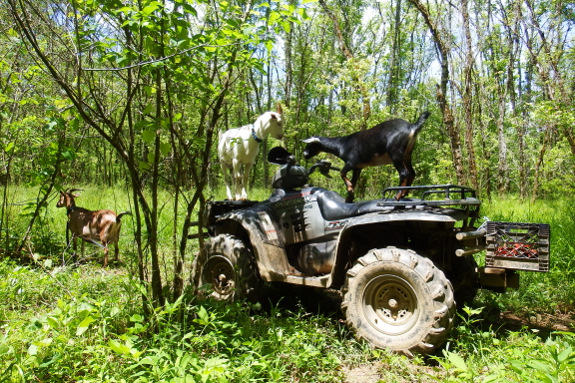
Lamb Chop's date with the butcher was supposed to be coming up next week. But, soon after Artemesia's heat subsided... (R-rated information after the next photo)
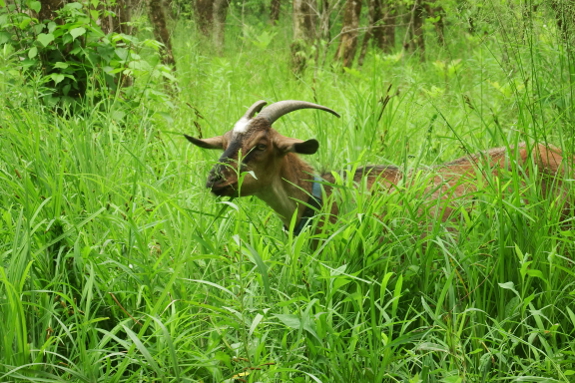
...our buckling finally matured enough to do the deed.
Lamb Chop currently runs back and forth between our two does all day
long. "Can I nurse?" he asks mama goat, who is trying to wean him (with
little success). Next, he moves on to Artemesia and asks "Can we have
sex now?"
It used to be that
Artemesia would always reply: "Yeah, whatever," for which the internet
supplied an explanation. Apparently, a buckling can't actually poke his
penis out of its sheath until he hits a certain age. So our buckling was
merely climbing up on Artemesia's back, and our doeling is a gentle
enough goat not to mind being mauled.
However, this past week, I
finally saw penis extrusion, and Artemesia started saying "No!" every
time Lamb Chop asked for sex. Which means that, hopefully, waiting for
Artemesia's next heat cycle will result in baby goats in the middle of
November.
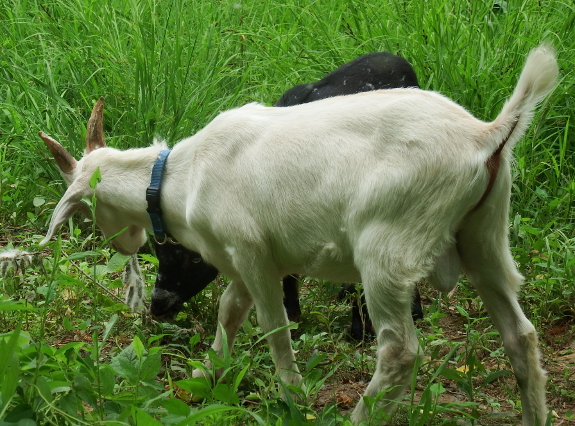
I hate to say it, but I
can hardly wait to see the back of our little buckling. He's actually
still quite sweet, but I've had to give up on tethering since he's
impossible to walk through the garden with two other goats in my hand.
Instead, our herd is subsisting on pasture goodies (less than a third of
their food at the moment), tree leaves from cut saplings,
and a daily guided walk into the floodplain. I dream of the time when I
only have two manageable goats and can fold our caprine herd deeper
into our homestead once again.
(Yes, literally, this is
what I dream about. Most recently, Artemesia and her hypothetical
daughter, who apparently is called Estella, went along with me to my
15-year college reunion. It was quite a dream. And, as I type this, I
realize that Artemesia's daughter looks just like and has a name similar
to one of my e-buddy's goats. Hmmm....)
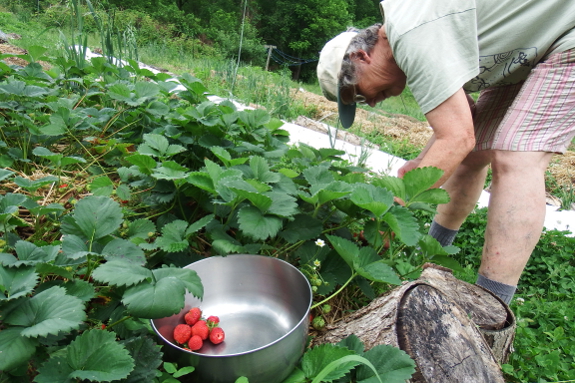
It rained! Two-thirds of
an inch is usually something we roll our eyes at. But when it amounts to
59% of the precipitation for the month, we celebrate...by inviting Mom
to come over and pick strawberries.
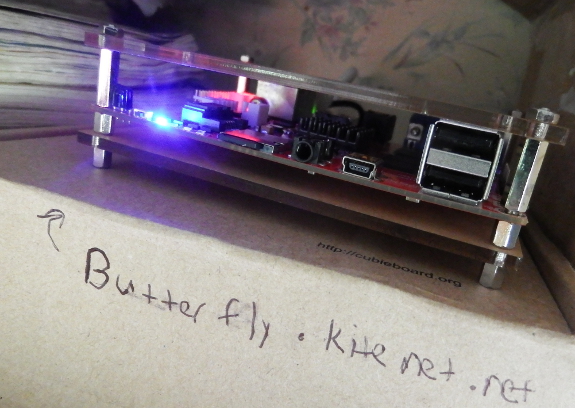
Joey showed up too to
install a DIY-computer-turned-server, which he plans to use for (insert
technical explanation I didn't really understand here). I think he'll
eventually post about it on his blog.
Much fun was had by all!
And, once again, I squeaked in just under the wire, barely managing to
take one just-for-fun holiday per month. So far, my one resolution for
2015 is still on track to be a success.
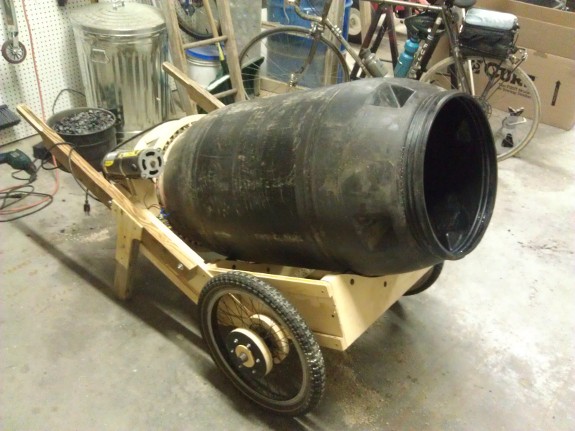
Dan's Workshop Blog is a good place to learn about making your own concrete mixer, charcoal powered transportation, and thermoelectric camp stove chargers.
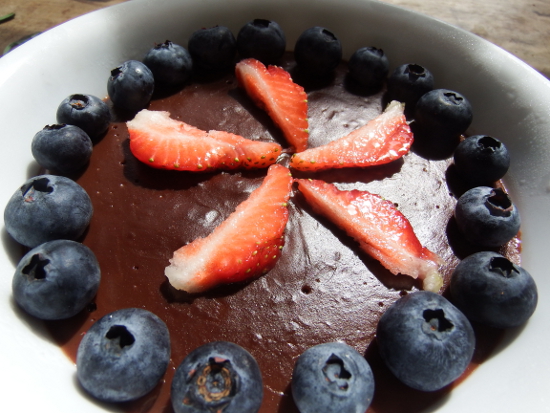
One of my favorite ways to use up milk is by turning it
into chocolate pudding. This fast and easy dessert tastes decadent
when boiled up from homegrown goat milk, and it would taste pretty good using whole milk from the store too.
Ingredients:
3/4 cup of honey
1/2 cup of cocoa
6 tablespoons of corn starch
1/4 teaspoon of salt
1 teaspoon of vanilla
Berries for a garnish (optional)
For the easiest pudding with no risk of scorching, you'll want to make this
dish in a double boiler. However, if you're lazy like me, it works
nearly as well if you cook the ingredients directly over medium heat
while stirring constantly.
Regardless of your risk-taking level, it's simple to make this pudding.
Mix up the milk, honey, cocoa, corn starch, and salt, then stir until
the pudding just barely comes to a boil. Turn off the heat and continue
to stir as the pudding thickens, then add the vanilla at the end.
Spoon into bowls and cool thoroughly. Garnish with berries if you want,
or simply dig into the delicious dessert plain. Serves four.
Want more in-depth information? Browse through our books.
Or explore more posts by date or by subject.
About us: Anna Hess and Mark Hamilton spent over a decade living self-sufficiently in the mountains of Virginia before moving north to start over from scratch in the foothills of Ohio. They've experimented with permaculture, no-till gardening, trailersteading, home-based microbusinesses and much more, writing about their adventures in both blogs and books.
