archives for 04/2015
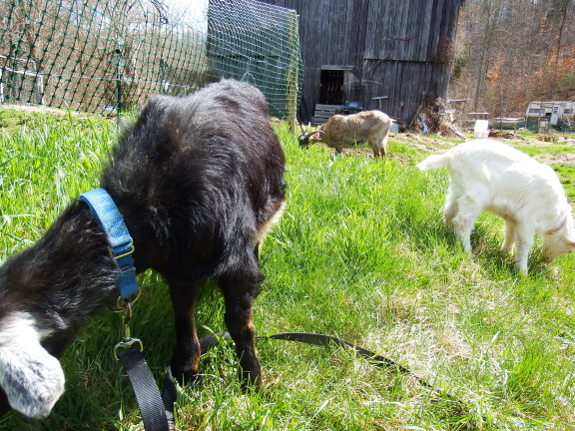
The great thing about
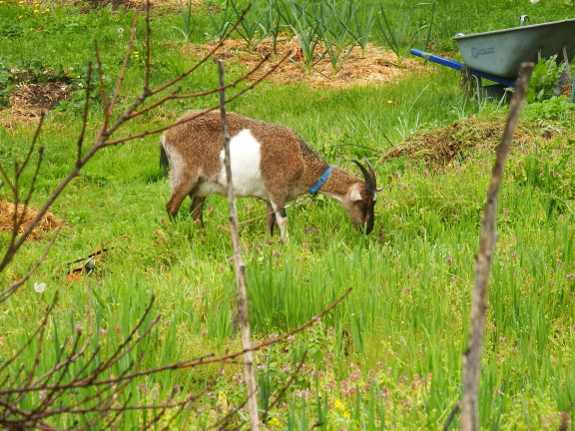
only having 2.5 goats is that it's possible to use our tiny herd to mow
the lawn in areas where more goats would cause more trouble. As you can
see, our grass is starting to green up in the sunniest part of the yard,
even though the pastures around our starplate coop are still nearly
entirely winter brown. Usually, Mark pulls out the power mower around
this time of year to cut back the newly growing grass, but I decided to
take another stab at tethering our goats to see how much mowing they
would do for us.
The answer? Our goats at least cut back some of the tallest weeds,
although they definitely don't leave the result looking like a mown
lawn. Good thing we don't care what our grass looks like!
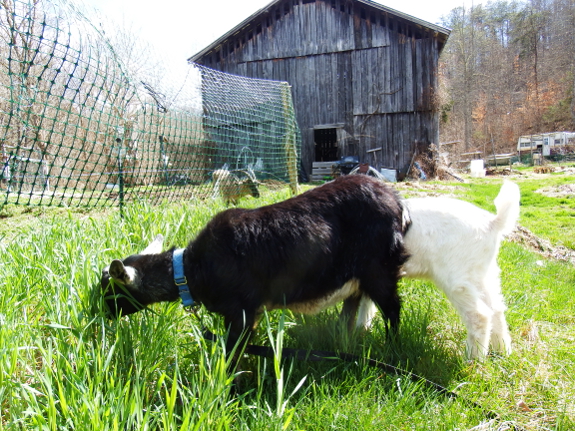
When I last tried tethered, Artemesia didn't really need to be tied since she
was more interested in clinging to Abigail's side than getting into
trouble. Now, both does require tethering, and I plan their lines so they can barely meet in the middle. This way Abigail doesn't
get terrified of having her herd-mate out of sight, but the two animals
also can't get tangled in each others' tether ropes. I still don't
leave our herd unsupervised since there's just too much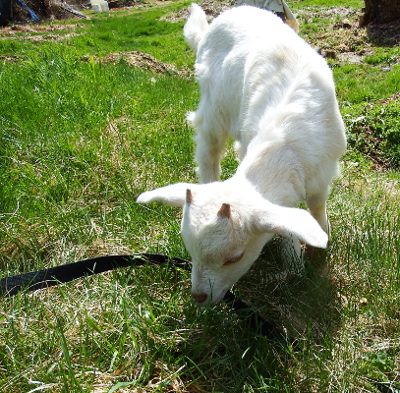 that could go wrong with tethering goats, but the ropes do mean that I
can walk over to the wringer washer and do a load of laundry while our
goats chow down.
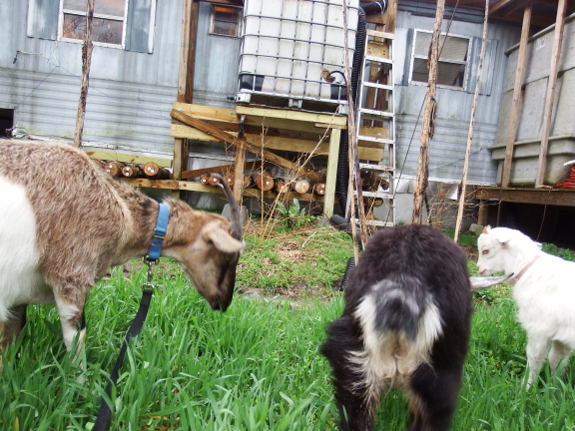
As a side note, you can
see in the picture above that Artemesia is a true nanny goat in both
senses of the term. Our doeling is nearly always willing to let our
buckling graze right beside her, training the kid to eat the good stuff
and eschew the bad stuff. When Lamb Chop follows me to the house (100
feet away) then starts crying because I closed the door in his face,
it's Artemesia rather than the kid's mother who bawls her upset at
having the buckling so far away. Abigail is content to chew and chew and
chew and chew --- she knows someone else will mind her kid.
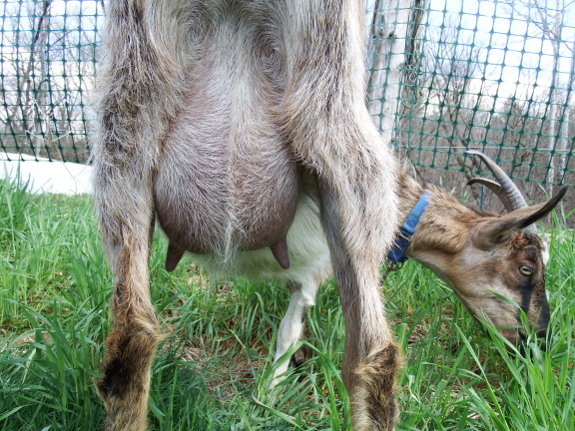
Of course, Abigail has
other things on her mind --- like making milk! We're still only getting
about 1.25 cups of milk per day, despite shutting Lamb Chop away from his mother overnight. I'm pretty sure our doe holds back quite a bit of milk for her kid in the morning because she's got
to be feeding him a whole lot more than a cup of milk per day. After
all, Lamb Chop is still only nibbling at solid food, but he's managing
to put on nearly a pound a day in weight gain. I'll be very curious to
see what milk production is like once our kid is weaned to entirely
eating dry food.
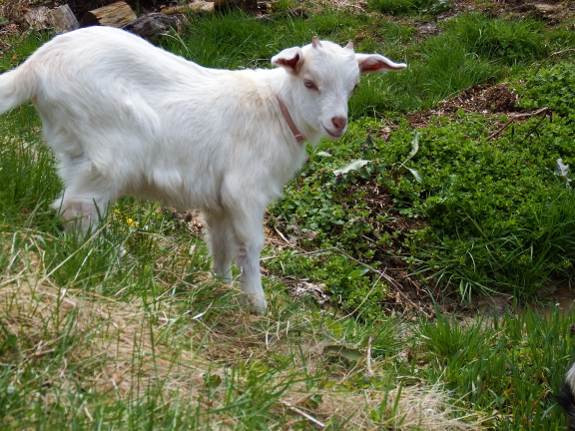
The downside of Lamb Chop
growing so fast is that I can tell tethering is going to become
problematic in the near future. I tried to tie our buckling along with
his herdmates, but he bounces and runs so fast that I was afraid he
would break his little neck. Oh well --- even though it seems like
there's a huge amount of grass and rye to mow down at the edges of the
garden, at the rate Abigail is going, we'll have to move the herd out
beyond our core perimeter by the end of the week.
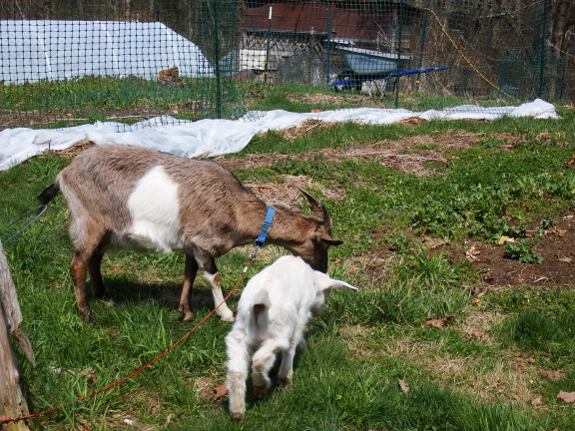
One thing I've noticed is
how very malleable our goats are, making them the easiest animals I've
ever had the pleasure of training. Abigail and Artemesia both know
they're not allowed to eat kale, strawberries, and other garden goodies.
Of course, knowing
that only means that when I walk our goats on a leash beside garden
plants, the does don't reach out and nab a snack. Turn my back, and
there wouldn't be any kale left, so I'm careful to tether where anything
I love is well out of reach. Abigail is right at the end of her rope in
the photo above.
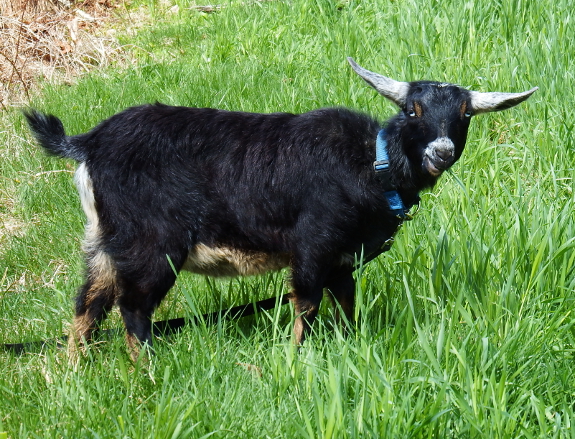
Finally, I wanted to
mention Artemesia's newly scruffy fur, which I suspect is due to some
combination of shedding her winter underfur, having a huge buckling
crawl all over her back on a regular basis, and me running low on kelp. Since the supplier I ordered from took a few weeks to ship, I had to take away our free-choice kelp to ensure that our lactating doe could continue to get enough of the mineral supplement on her daily ration. Of course, there are
minerals of a non-biological nature available to our goats all the
time, but neither doe will touch the stuff. In fact, when I made the
mistake of trying to trick Abigail into eating some extra minerals by
pouring the powder on top of her morning ration, she tipped the whole
bowl over to get those minerals out! Good thing more kelp arrived in the
mail Monday so that Artemesia can get back to her usual shiny self.
These spiral
tie out stakes are good
for tethering goats.
It only took a few minutes to
temporarily mount our drill
press vise to the
chopping block so I could bang the top open part closed.
Yes....Abigail figured out
how to move her leash so it was slipping out at the open part of the
spiral tie out stake.
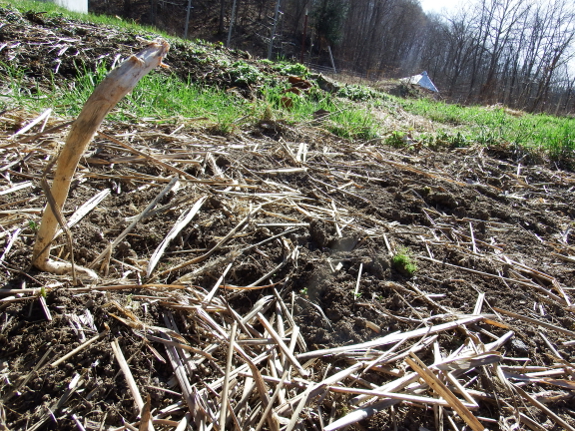
Did you ever wonder
whether you have a healthy microorganism population in your soil?
There's a simple way to check. Assuming you haven't tilled up the ground
since last year's garden, you can go out at this time of year and look for stems of fall broccoli.
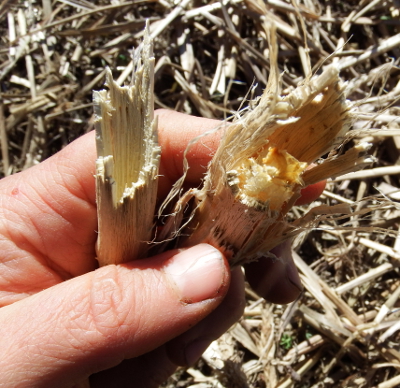 I
usually find one or two broccoli stems just barely standing at this
time of year, with the rest having dissolved completely into the soil.
When I break the remaining stems apart, I see that the once-woody debris
will soon have disappeared into the ground as well. On the other hand,
if I still saw lots of standing broccoli stems when the time came to
plant peas and cabbages, I'd start worrying that I'd done something to
get the microorganism population out of whack.
Of course, you don't have to plant fall broccoli to test your microorganism levels. Cover crops
also do a fine job as well. In beds where I planted oilseed radishes
last fall, there's now almost no debris left on top of the ground,
simply a nearly weed-free patch of soil waiting for the spring onion
planting. Oat beds tend to still have some debris left at this time of
year, but even that will be largely gone by our frost-free date.
I'd be curious to hear
from our readers. Do your fall broccoli plants melt into the ground by
early April (or by May for those of you who live way up north)?
We planted some new baby
apple trees from last
week's grafting workshop today.
Allowing the new trees to
rest in a cold, dark place for a week gives them some time to heal
before being planted.
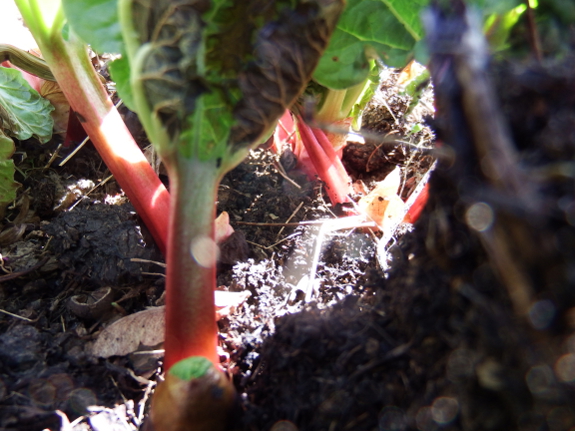
"My second cookbook
is almost ready to go," I told Mark at lunch on Thursday. "But I'm
going to have to ask Daddy to take some photos of my asparagus recipe
since the spears won't pop up here for a few more weeks. Good thing he
lives further south and already has scads of asparagus to play with."
Mark looked at me quizzically and then stated the obvious. "You know they have asparagus in the grocery store, don't you? I could buy you some Friday to work with."
Oh, right. Vegetables can
come from the store. I'd forgotten! I guess I can take the photos
myself and still get the spring cookbook out in a timely fashion.
This is the time of year we
prune the high
density apple trees.
We also cut off any old
training twine from last year that might girdle a branch.
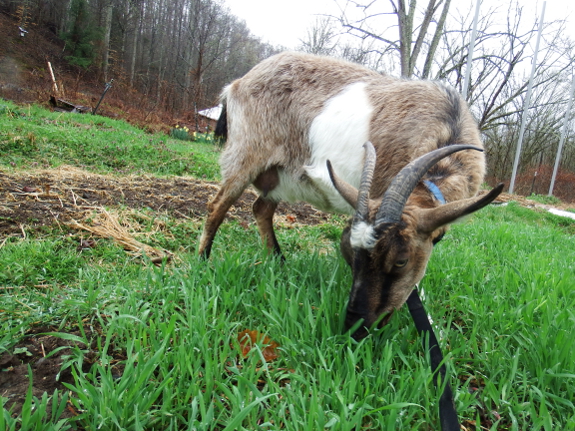
A club I once attended
had a saying, "If we hold an event twice in a row, then it becomes a
tradition." With a goat, this is even more true.
After tethering our girls
after the human lunch for three days running, during which time we
allowed the caprines to graze until Abigail could barely waddle home
afterwards, our goats decided there was no point in eating morning hay.
Why not just wait for afternoon rye and clover? So, on day four, when
life got in the way and I didn't let the girls out until 4 pm, the
moaning and bellyaching coming from the goat area was overwhelming.
Abigail told me she was starving to death...even though she still had plenty of hay in the manger.
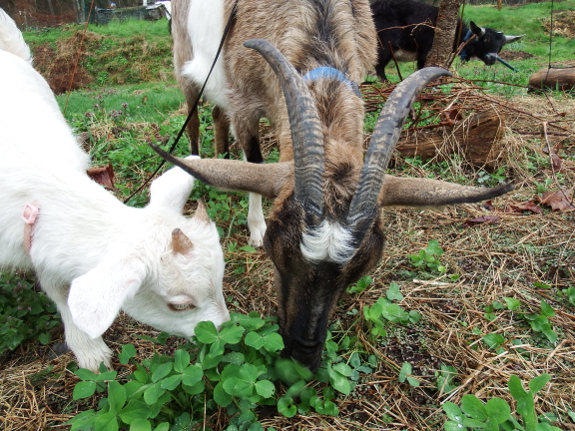
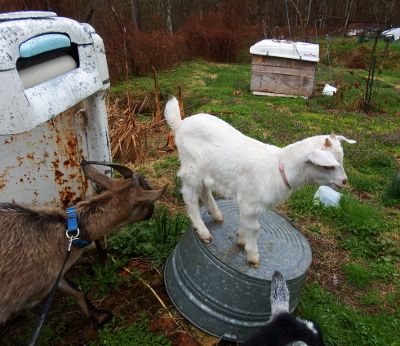 Unfortunately,
it's not quite the season for daily gorging yet. Over the course of
three short days, our goat herd mowed down all of the high rye areas in
our yard, and now there are just patches of newly growing grasses and
clover for them to eat. I guess our girls will have to make do with
half-full bellies for another week or two until the grass catches up
with the overwintering grains. (Or they'll have to resort to eating hay.
Horrors!)
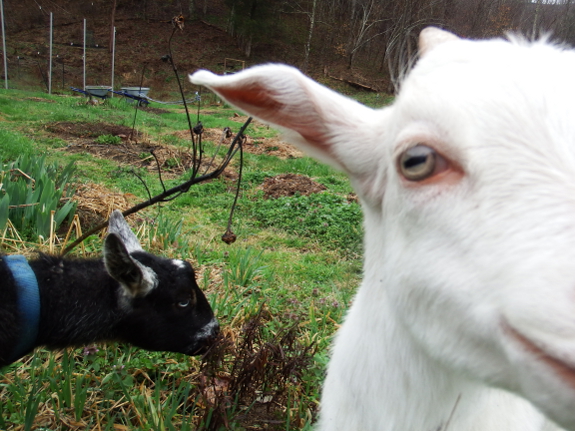
As a side note, I was
considering starting to milk Abigail out in the evenings after our milk
production nearly doubled one day this week to a pint during our morning
milking. But when I got our doe on the milking stand that evening, I
discovered that her udders were much emptier than I've ever seen them.
In other words, I'm now confident that Abigail holds back about half of
her morning milk for the little rascal, which means she's likely
producing at least a quart a day (even though she only gives us a cup).
Maybe that one high-production day she just forgot to hold back Lamb
Chop's milk, or he hadn't drunk her quite as dry the night before?
Either way, as I watch Abigail's kid eat a little more grass every day, I
dream of the milk production once he's weaned.
We drilled a hole at the top of our IBC rain barrel for an overflow elbow connection.
Mark has wanted a zipline
to run from our parking area to our core homestead for years, both as a
way of moving people and of moving stuff. Over and over, I explained
the reasons I didn't think it would work:
- The cable would have to run across our neighbor's field to go in a straight line, and I don't think said neighbor would be thrilled at the idea.
- We'd actually have to run two ziplines to be able to go in both directions, and that would also require hauling supplies up onto the hill above our cars before attaching said supplies to the zipline.
- We'd have to cut down a lot of trees to give the zipline a straight shot.
- The total distance (about 900 feet in a straight line) is pretty daunting.
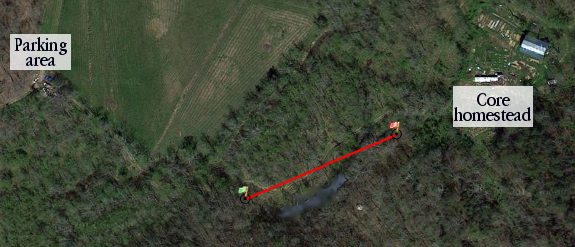
However, I've been
wondering lately if a different cable-related scheme might be the way to
expedite hauling while the floodplain is sodden and our eventual driveway upgrade
is slow in coming. Glad of any line-based solution, Mark was quick to
remind me that we really only need to span the worst of the swamp, which
would be a smaller distance and would require cutting fewer trees out
of the way.
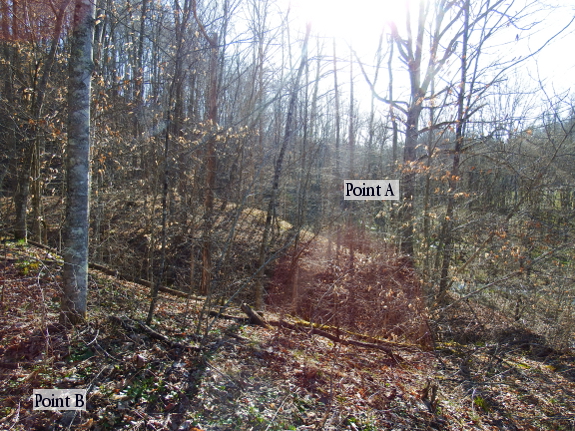
With our new access point by the goat shed,
we could potentially run a 350-foot cable from a hill above the
driveway near the ford (point A) to the goat-shed area (point B),
hauling supplies in the ATV to point A (since an old logging road runs
up onto that knoll) and then in a cart from point B to our garden along
another old logging road. This would cut off the entirety of the
terrible-driveway areas and allow me to haul in the manure I so badly
need...in a few short weeks. (Yes, we're hitting crunch time around
here.)
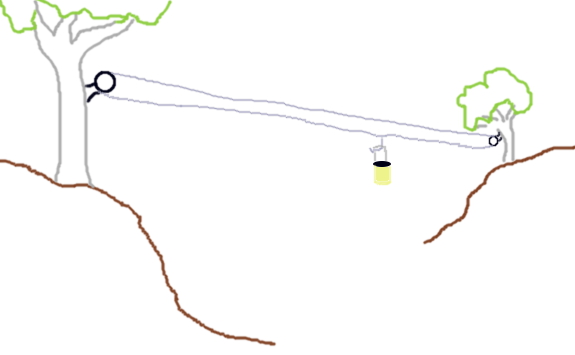
A zipline might be dicey
for hauling supplies, but what about a circular line designed like a
hefty pulley clothesline? One person would stand at point A loading
buckets onto the line, then someone else would pull the line at point B
and unload the buckets.
I'm thinking of using
galvanized "aircraft" cable just like people use for ziplines, either
7x7 or 7x19 strands. Does anyone know how to figure out the weight limit
on a system like this (so I can decide which diameter cable to spring
for --- 3/8", 5/16", or 1/4")? And how would you suspend the load ---
make a little carriage for the buckets to ride in that is suspended from
the cable by some kind of hook? Or make the cable support a single line
like a zipline (instead of my pulley system) with a carriage that rolls
along it pulled by a rope on both sides? Either way, do you think this
system is even feasible over a 350-foot span? Please tell me why my idea
is every bit as crazy as Mark's was (or how you would design the system
to make it work)!
Artemesia has claimed ownership of the new goat tire toy and likes pushing Lamb Chop off every chance she gets.
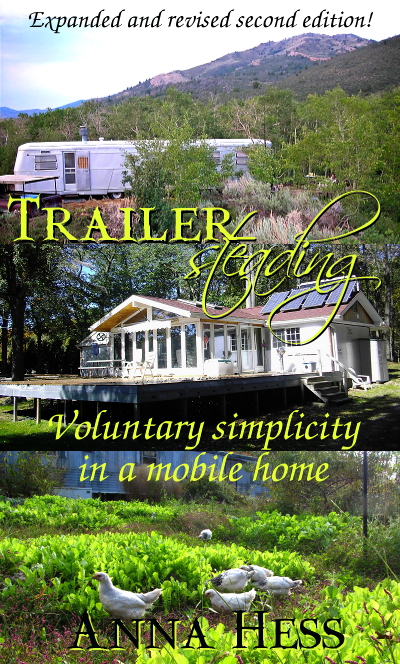 Trailersteading
began as a joke, turned into an inspiration for aspiring homesteaders,
and now --- in its expanded second edition --- the ebook contains dozens
of pages of additional hands-on information to help turn that
inspiration into a reality.
Even if you don't want to live in a mobile home, this book contains
step-by-step instructions for replicating some of our permaculture
systems, like treating greywater in a wetland that provides beautiful
wildlife habitat and also grow cattails for the table.
There are sections on rain barrels and humanure, along with thirteen
case studies of homesteaders who have embraced voluntary simplicity in a
mobile home.
And, of course, if you think a trailer might be in your future, the book
will be even more helpful with tips on insulating, fire-proofing, and
much more.
Trailersteading usually goes for $5.99, but it's on sale right now for 99 cents. So snag your copy and enjoy!
On a related note, I want to thank Buck Books
for featuring Trailersteading (a link to which will go out in their
daily deals email tomorrow). If you're like me and read voraciously (and
especially if your library is very small), it can be a struggle to feed
your literary appetite. Since authors often run free or very cheap
price promotions as a way of getting our books in front of new eyes,
it's possible to stock up on books for no or very little cash. Buck
Books is one of the services that helps hook up authors with readers,
and if you're in either camp, then I recommend you check them out!
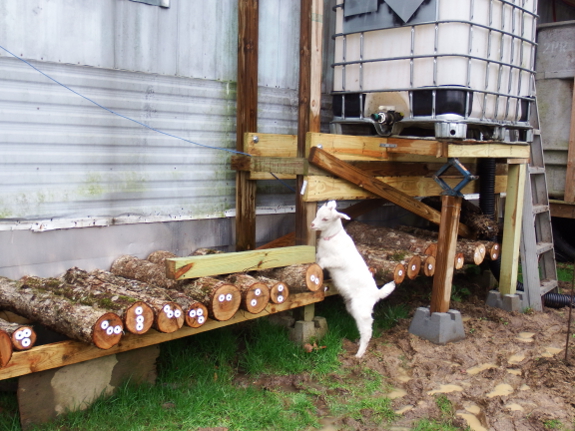
People say a Stanley SurForm shaver works good at finishing off a goat hoof trimming, but Anna is still figuring out the proper technique.
For those of you concerned about the safety of Mark's jack-support hack --- don't worry, he's going to beef up the tower some more.
In the meantime, I wanted
to let a little rain flow into the IBC tank to get an idea for how much
precipitation it would take to fill the reservoir. The photo above was
taken in the middle of the rain event, but, much to my distress, even
after the full 1.2 inches fell, the tank still looked nearly empty.
"You know, we only have
the tank plumbed to a small section of the roof," Mark reminded me.
True, but surely a 50-square-foot section of roof was enough to fill up
an IBC tank in short order? Time for a little math! 275 gallons of
capacity equals 63,525 cubic inches. Divide that by the 7,200 square
inches of roof area we have plumbed to the tank...and it would require
nearly 9 inches of rainfall to fill 'er up.
Which is actually good
news, although the realization will make more work for Mark. There's
another nearby gutter section currently draining into what has turned
into a swamp along the backside of the trailer. If we add another T
and include this gutter into the IBC-collection line, then we should be
able to fill up the tank with only 4.5 inches of rainfall (while drying
up problematic ground). That means we'd fill the tank up every month on
average, giving us plenty of water to keep the mushroom logs below well
hydrated. Back to work!
Anna was feeling the need to exercise her inner girl scout today.
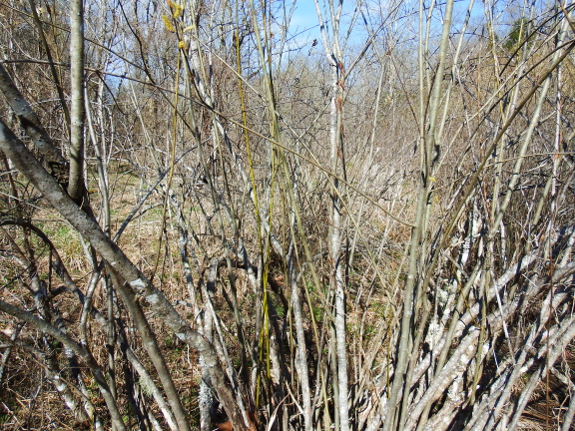
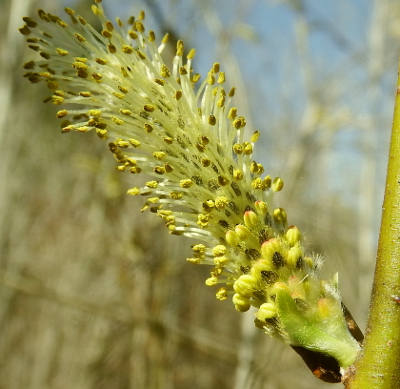 I've been holding off on my willow-building experiment because I couldn't quite decide whether our native black willow (Salix nigra)
was too tree-like (eventual height 33 to 98 feet) to keep small in the
format of a living sculpture. Then, while out hunting cattail spears for
lunch, I stumbled across a stand of what are probably planted purple
willows (Salix purpurea) and decided that this smaller (up to 15 feet), introduced species would be easier to keep within bounds.
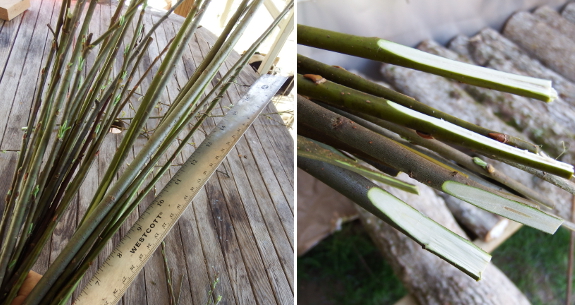
It's good that I found
the willow stand when I did because the bushes were already blooming and
a few leaves were even popping out on the most advanced branches. For
my experiment, I chose young branches, cut off any blooming tops,
snipped the wood down to about eighteen inches, then whittled each base
into a point. Willow cuttings ready to go into the ground!
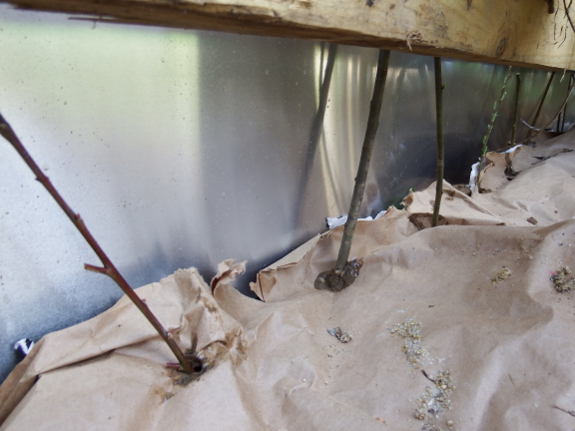
Back home, I prepared the
ground by laying down chicken-feed bags, cut open, which will act as a
weed barrier. (This is important --- it's hard for even a willow to grow
roots and get established if it has to compete with weeds.) Next, I
used a rebar to punch holes through the paper and about eight inches
into the earth, then I pushed my willow cuttings into the holes.
Now it's time to wait for
the show to begin. In the meantime, I fed the willow tops to the goats,
and Abigail deemed them "highly palatable --- hey, get away from my
willow twigs, Artemesia!" So I guess the eventual prunings are already
spoken for.
We took our Black
Birch spile out today.
It only lasted a few weeks
which means we may have started a little on the late side.
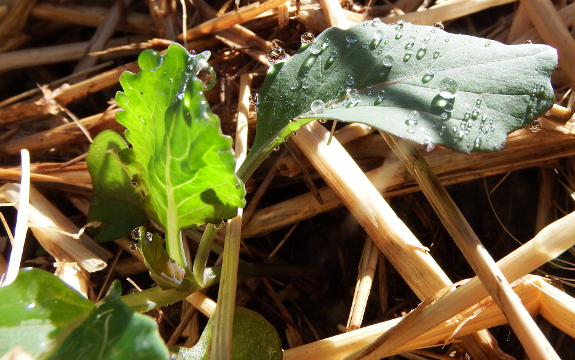
I'm extremely picky about
transplanting weather at this time of year. Sure, I prefer to pick an
overcast day with rain on the horizon, but I also aim for a day when
there will be no frosts for at least a week. The cabbage I set out a few
weeks ago and the broccoli and onions I transplanted Monday can all
handle light freezes once they're established but transplant stress +
freeze = unhappy seedlings. Thus waiting until the perfect day comes around, even if it doesn't match the planting date on my calendar.
Of course, with our
variable weather, I'm pretty much guaranteed to still have to cover our
transplants (and early sprouters like peas) with row-cover fabric a time
or two before our frost-free date. After all, even established cabbages
can be damaged by freezes below about 25 degrees (aka killing frosts).
But it's worth that inevitable babying to get the jumpstart on the
season since early broccoli and cabbages have much less pressure from cabbageworms, while early peas produce more fruits before hot weather makes the vines unhappy.
As usual, gardening is a
balancing act between planting too late and too early. Maybe that
endless puzzle is why I stay entertained with growing the same
vegetables year after year...or maybe it's just the delicious flavor of
homegrown food that makes the weeding worthwhile.
We finally found someone
local with a medium dump truck to deliver some gravel.
It was just under 4 tons for
80 dollars.
Every year, I treat
myself to $100 worth of perennials. This is my big splurge so I squash
my usual skinflint tendencies and allow myself to be experimental. As a
result of my whims, maybe a third of the perennials bought during these
splurges perish and I learn that almonds are beloved by Japanese beetles and get a lot of diseases to boot (making them unworthy of babying on our farm) and that honeyberries taste more like sour blackberries than honey. On the other hand, I also discover that Bocking 4 comfrey is indeed the very tastiest variety from a livestock point of view and that Caroline red raspberries are both delicious and extremely prolific.
This year, I added two
additional hazelnut varieties to our forest garden, but I spent the
entire rest of my perennial budget on shipping out scionwood (to swap
for varieties I wanted) and on ordering rootstock. The most experimental
of my graftees this year are the plums, which are really supposed to be
grafted by budding during the growing season. However, snow from the barn roof completely snapped off one of our plum trees and did a number on the other,
so I decided to try dormant-season grafting to keep Imperial Epineuse
and Seneca alive on our farm. And, while I was at it, I also swapped for
Mirabelle de Nancy, Late Transparent Gage, and Reine de Mirabelle to
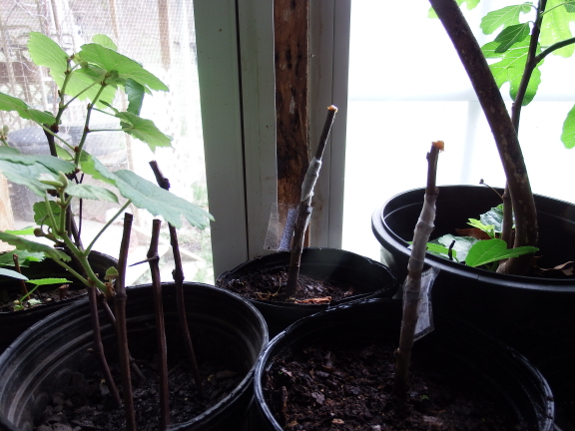
round out our planting. All types of scionwood were grafted onto St.
Juliene rootstock, then went into pots to sit inside where it's warm
since pros warn that, with dormant-season grafting of plums, any cold
weather during the callousing process will lower your chances of success
dramatically.
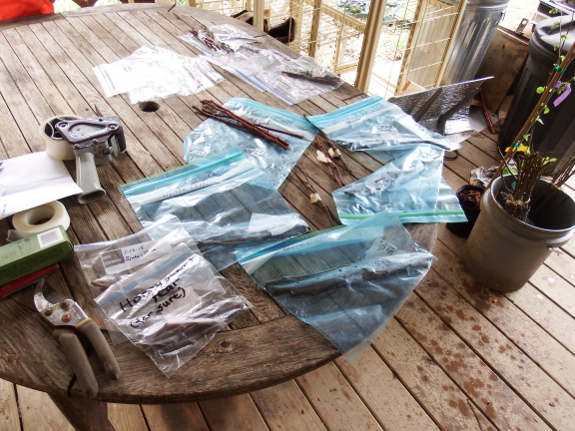
My main grafting episode, though, involved pears. We've decided to add a couple of rows of high-density pear trees
since our high-density apple trees are growing so well...and since the
high-density system makes it much more feasible for me to try out a
large number of varieties in a small space. I mostly aimed for disease-resistant pears, 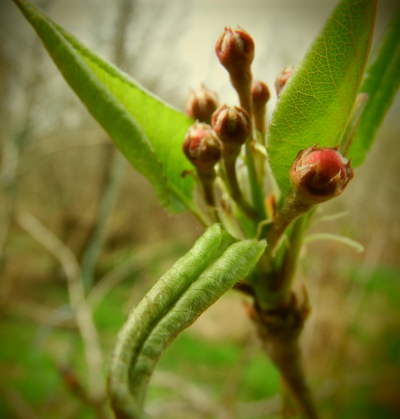 but
I added in some other varieties as well when swappers offered types I'd
never heard of. If all of my grafts take, Moonglow, Leona, Hosui,
Warren, Blake's Pride, Potomac, Honey Sweet, Shinko, Maxine, and Carl's
Favorite will be joining the ranks of our farmyard pomes. I'll be sure
to tell you how the trees fare and the fruits taste...by 2022 at the
latest.
And, in other pear news, out in the orchard, Seckel
looks like she's about to bloom for us for the first time in 2015! Now,
if everyone will send "no freezes below 25 degrees" thoughts wafting
toward our farm, maybe we'll get to taste what is sometimes colloquially
known as a "honey pear" this fall.
I've discovered a small piece of duct tape helps to keep the Chopper One spring pin from working loose.
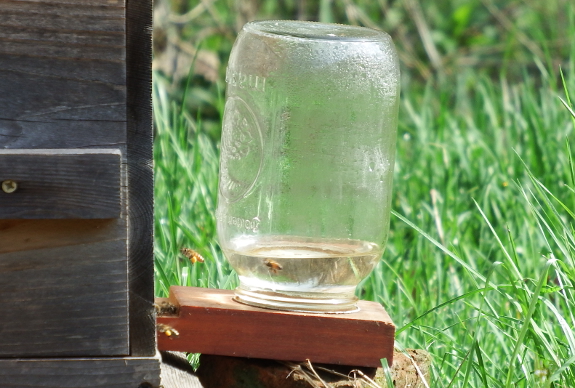
We'd get a lot more honey if we fed our bees more. But I try to use sugar water as a last resort, only feeding when the bees wouldn't have enough stores to survive without the helping hand.
Still, when I took out
the bottom board of our warre hive, tried to take a photo up through the
screen...and couldn't because the entire bottom of the hive was covered
with mouse debris, I knew that only a weak hive would let a rodent move
in. Time to feed.
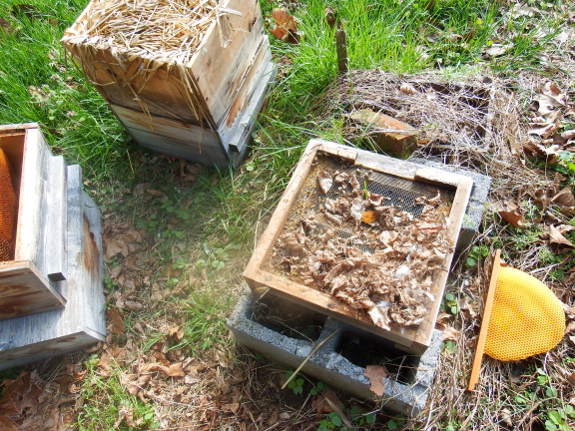
And also time to take
apart the hive to get rid of that mouse nest. From my aborted photo, I'd
assumed that I really needed to get into the bottom box to deal with
the mouse, but it turns out that I could have just lifted up the whole
hive the way you do when you nadir
and cleaned off the bottom board that way. Because the mouse hadn't
damaged any of the comb in the bottom box at all, as I discovered when I
broke warre rules and took the hive apart.
Since the two boxes were
already apart, I also took a quick peek in the top box, saw some capped
brood, and quickly closed the colony back up. Although the boxes are
light and thus clearly very low on honey, sugar water and dandelions
should carry the colony through. Looks like our three-year-old hive is still buzzing along!
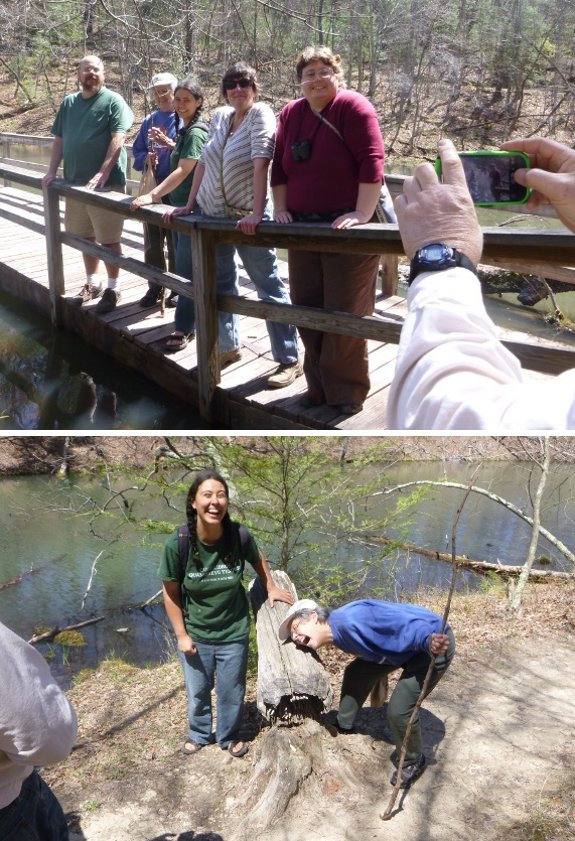
We had a fun afternoon celebrating Joey's birthday.
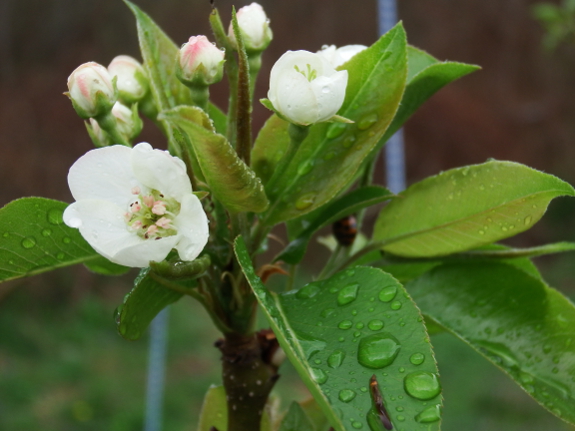
 When
extreme winter cold nips the peach bloom buds before they can even
start to swell, spring feels very slow in coming. But I think we're only
running about three or four days behind last year,
based on the emergence date of the first nanking cherry flower (April
9) and pear blossom (April 10). That sets us perhaps two weeks behind
some much warmer springs...which might mean our tree flowers will
sidestep the freezes of dogwood and blackberry winters.
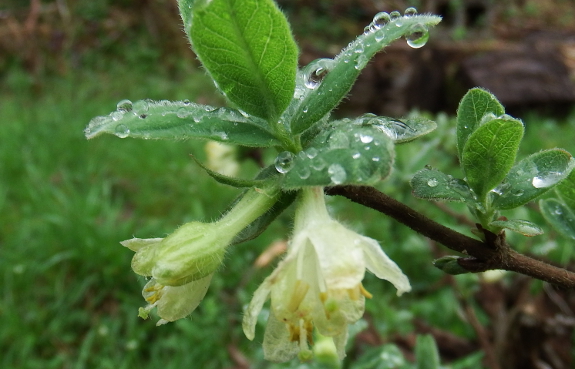
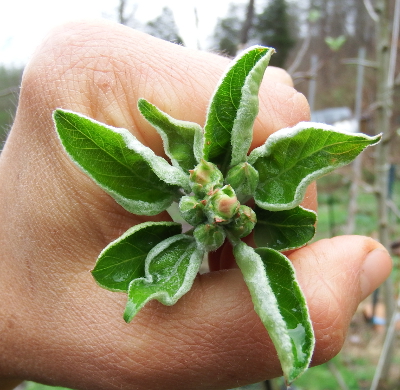
This is the time of year
when it's so hard not to count your fruits before they set. My rule of
thumb with perennials flowering for the first time is that they won't
keep their developing flowers all the way to fruition unless there are
dozens of blooms present. That means the crazy Kidd's Orange Red apple
tree, who appears to have a clump of bloom buds despite having only been
grafted this time last year, has almost no chance of setting fruit. But
the Seckel pear, with dozens of flower buds in evidence even though the
tree hadn't bloomed before, might just make my day sometime this fall.
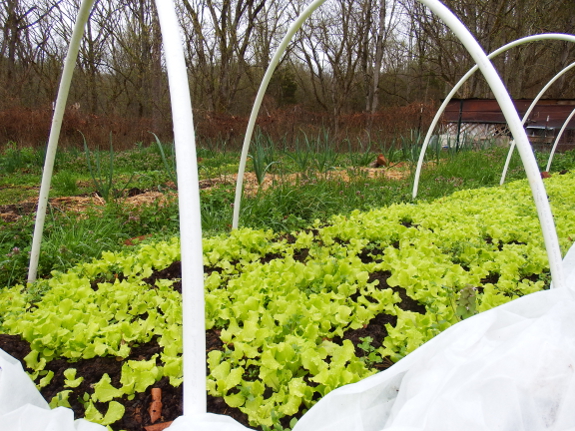
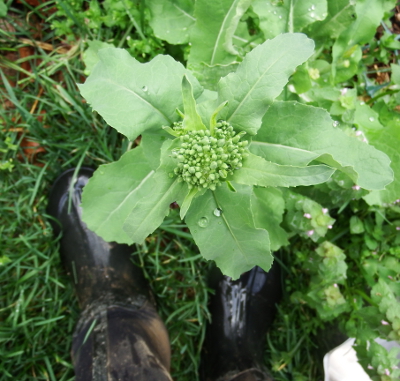 Of
course, there's enough going on in the vegetable garden right now that I
really shouldn't be wasting time drooling over fruit-tree flowers. We
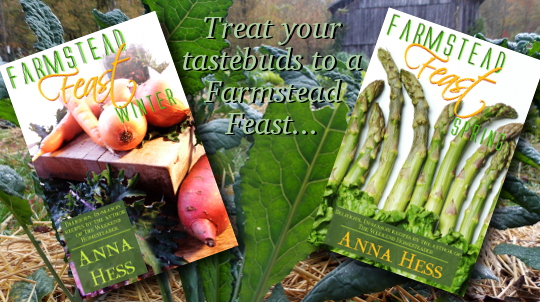
enjoyed our first spring salad Thursday and raab is finally popping up with its broccoli-like cooking opportunities. To celebrate, the second cookbook in my Farmstead Feast series will go live tomorrow and will be free for one day only. Be sure to check back and download your copy!
It only took about 1/4 of a tube of silicone to seal our IBC overflow elbow.
 First
of all, I owe a huge thank-you to everyone who read and reviewed my
first cookbook so quickly! Your kind words then make it cost effective
now to list the second book in the series free for one day only. So nab Farmstead Feast: Spring
while it's hot...and if you have a minute to write a review after
you're done reading, then chances are I'll give you the next book in the
series free too.
(I hope that doesn't count as bribery. I like to think of the technique
as more like the teacher who promises the whole class a pizza party if
no one is absent for an entire month.)
Not sure if my cookbook is worth your time? You'll find another dozen-plus recipes inside that are easy and delicious to fix using homegrown ingredients, so Farmstead Feast: Spring
should hit the spot. As a bonus, I've included a step-by-step guide to
harvesting dandelions and to taking maple syrup from tree to table,
along with a quick primer on planting for a 12-month harvest. So
hopefully everyone will find something to love in this short book!
On a related note, I'm well aware that cookbooks are a bit annoying to use in ereader form. So I've created a print version of Farmstead Feast: Winter, and marked the print price down to the bare minimum Amazon would allow --- $3.99. There will be a print edition of Farmstead Feast: Spring coming down the pipe soon, too, so stay tuned!
Finally, if you're not sure whether Farmstead Feast: Winter
is worth keeping on your shelf, come back to Amazon tomorrow and the
first ebook in the series will be free for a limited time as well. I
hope that helps you round out your cookbook collection. And, as always,
thanks for reading!
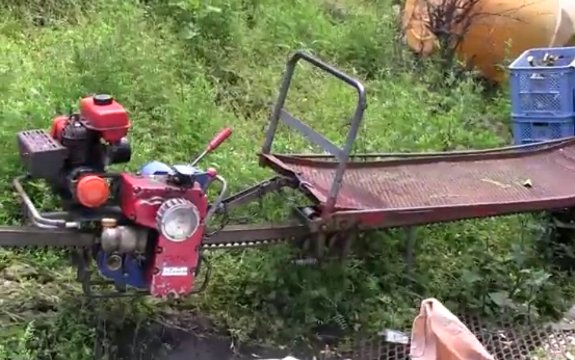
We've been thinking about
solving our driveway problem with a farm monorail.
They're called Monoracks
in Japan and they've been used since 1966.
We're not quite sure how much
or how to order one. The website hasn't responded to our inquiry. Have
any of our readers seen one of these operating in the United States?
Maybe we could be the first?
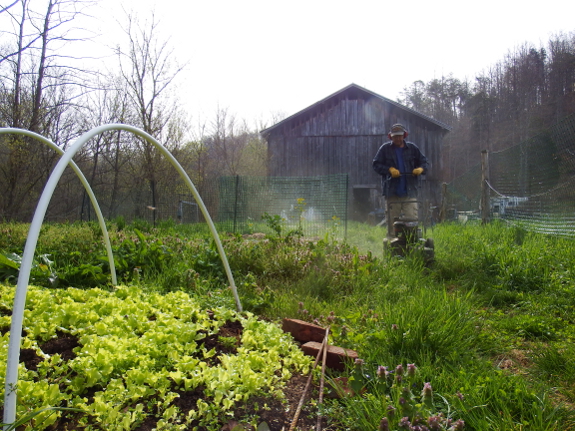
Monday was a day of firsts for 2015. First pass of the lawn mower through the garden...
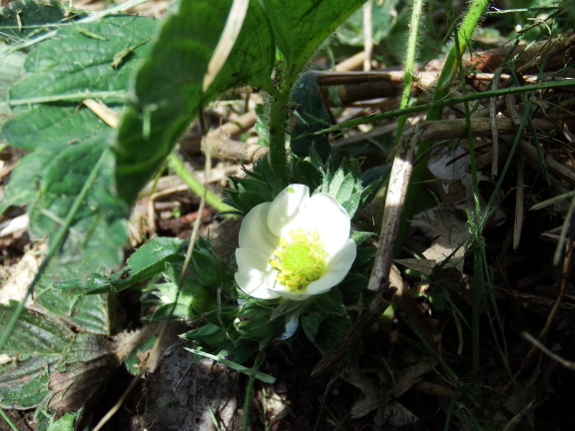
...first blooming strawberry (which would have been more photogenic if I'd snapped the shot before the lawn mower dusted the plant with grass clippings)...
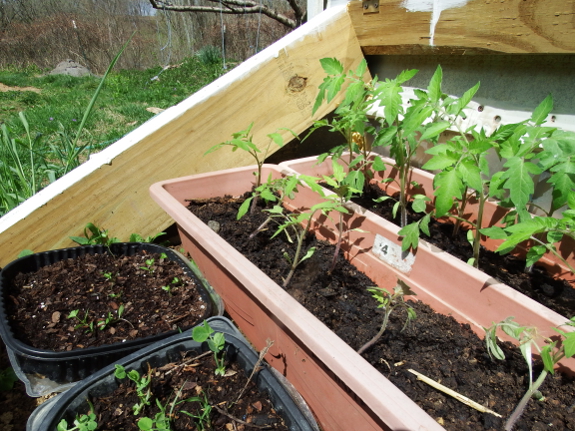
...first day I trusted the long-range forecast enough to put our tomatoes and basil outside in the cold frame
(you sure can tell the difference between the plants that were right up
against the window and those who had to cope with less light inside)...
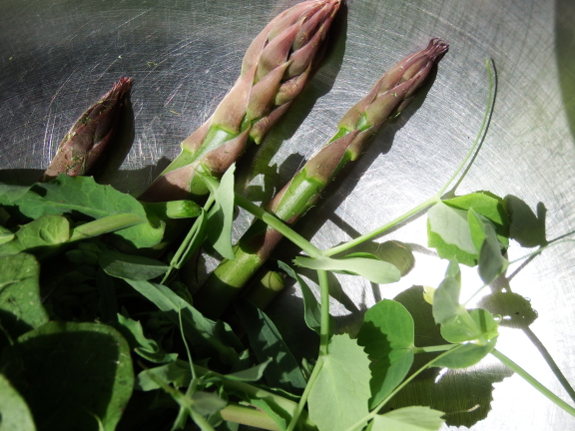
...and the first delicious taste of homegrown asparagus (which we promptly roasted).
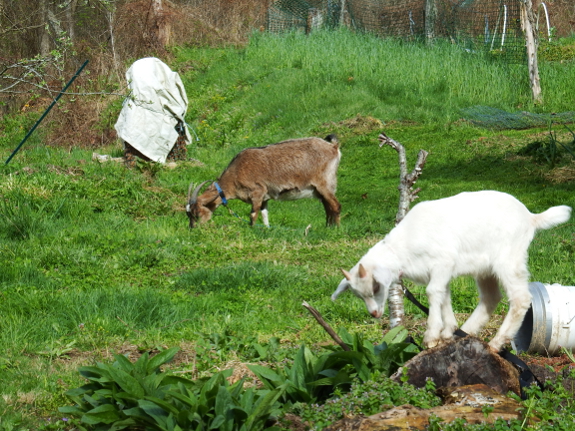
 The
garden excitement was punctuated by the sound of three tethered goats
chomping as quickly as they could through the new greenery. Well,
Artemesia tried to jump up in my wheelbarrow as I passed by, Lamb Chop
did his level best to tangle everyone up in his lead, and Abigail stood
guard against the terrifying sound of the lawn mower. But our herd did
some grazing too.
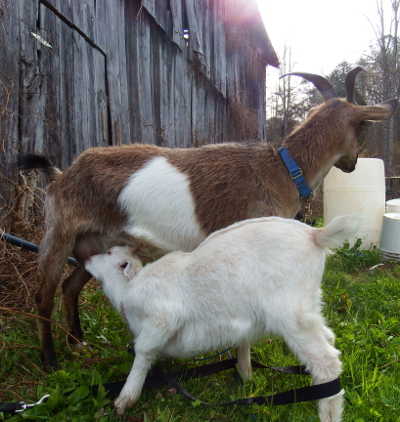
Do you think Abigail will keep letting her son nurse if he grows taller than she is before he's two months old?
We collected enough water in
the IBC rain barrel to soak the mushroom logs.
I thought we could set up a
misting system on a timer, but I think our water pressure might be a
problem.
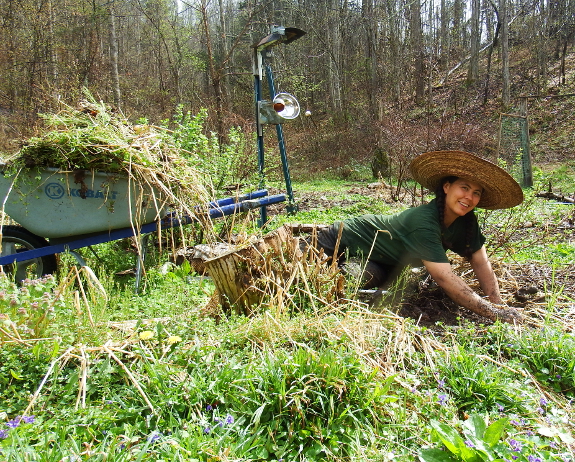
Do you weed during rainy
days or stay inside where's it's dry? My answer depends on the season.
In March, no way am I weeding in rain that freezes my fingers and leaves
me shivering. But in April? When it's t-shirt weather and a gentle
shower makes dandelions pop out of the soil with a gentle tug? Sure,
I'll weed in the rain. Once your pants and shirt are fully soaked, you
don't even notice the water (and mud) anymore.
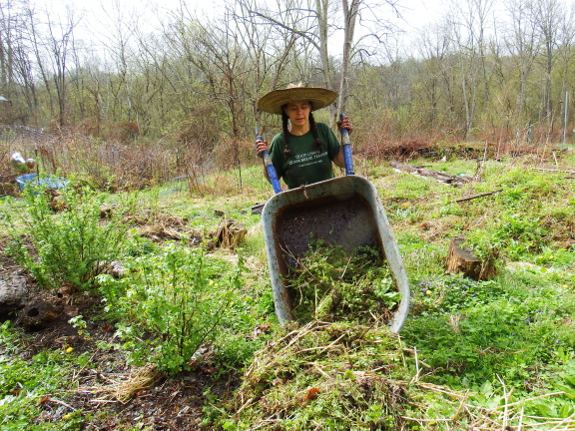
The real conundrum is
what to do with all that weedy biomass. I once read a novel that I was
thoroughly enjoying...until the author had her heroine weed the garden
and stuff the weeds into garbage bags to go out with the trash. I
stopped reading in horror. Sure, weeds have troubling seeds and the
perennials have roots that will start growing again under the right
conditions, but no way am I letting all that organic matter leave the
farm.
Lately, I've been dumping
weeds in big piles at the ends of perennial rows where a few
resprouting weeds won't present a problem. The weed piles rot down into
excellent soil that --- with a cardboard layer on top --- is perfect for
planting a new tree or bush into. I started one of this past fall's new high-density apple rows that way, and the trees seem to be thriving in the rich ground.
But I'm always looking for new weed solutions. What do you do with your weeds?
Ten weeks after its first cleaning, the goat bedding
had once again built up to the point where straw was overflowing the
cinderblocks on the downhill side of the coop. In early February, I used
the manure/straw/hay mixture in an experimental area, but this time
around I needed the biomass in the main garden. So I deposited the goat bedding around blueberries, gooseberries, 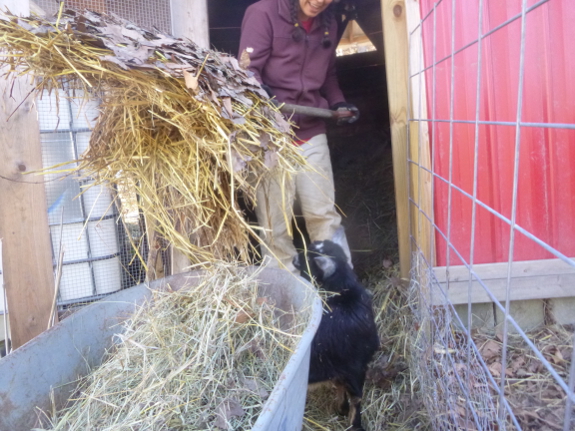 currants,
a few apple trees, and on beds that will be planted with corn and
cucumbers in two weeks. Here's hoping weed seeds don't make me regret
this use (but you'll notice I only spread the bedding in areas where it
will be simple to kill mulch if necessary to keep sprouting grasses in
line).
You'll also notice that I
was too engrossed in my task to get Mark to photograph me this time
around --- the photo above is from February when I cleaned out the coop
with goats inside. This time, I tethered
our little herd near the blueberries, which went great until Abigail
pulled up her tether at the bitter end and got three good mouthfuls of
apple leaves. Bad goat!
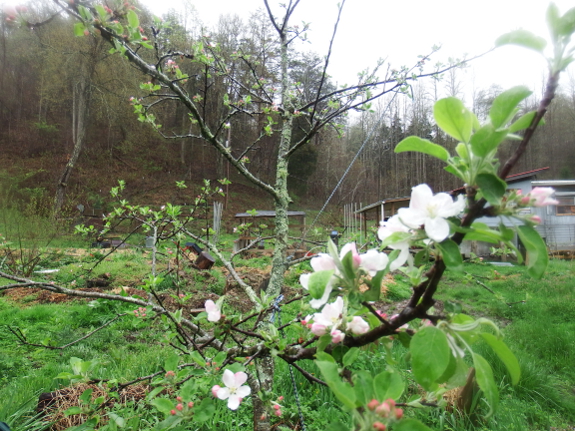
Speaking of apple trees, the first blossoms are opening on the earliest apple varieties. The tree shown above is primarily Virginia Beauty,
but I grafted a little bit of William's Pride onto one limb two years
ago. The graft union has nearly disappeared, but I can tell where one
variety stops and the other starts because the Virginia Beauty buds are
just barely unfurling while the William's Pride is in full bloom. Maybe
we'll get to taste both types of apples this fall?

This was also the week
when we shut our hens and ducks into the pasture for the growing season.
One of you mentioned in the comments a few weeks ago that you didn't
remember we still had chickens --- if you want to read more about our
poultry, be sure to check out our chicken blog where we give many more details about our feathered friends.
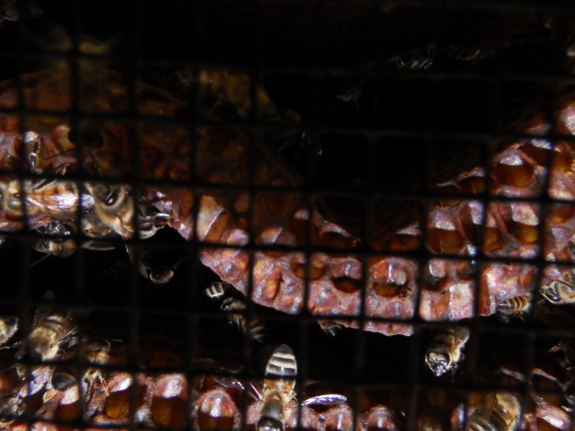
I'll end this disjointed post with a look up under the bee hive.
There's not much going on in the bottom box yet, but our colony is
working hard and will hopefully reach their basement level soon. We've
got another package shipping next week, so our apiary will be even more
abuzz in short order!
Can you tell it was a beautiful and exhausting spring day Wednesday?
Our Brinsea
EcoGlow chick brooder we
love so much stopped working.
The power cord broke at the
little nub. Some careful plastic surgery freed the nub enough to reach
the wires on the other side.
Splicing the wire and
deleting the nub brought it back to life. The wires aren't color coded,
so you have to figure out the polarity by trial and error. A dab of
silicone is all it took to seal up the hole.
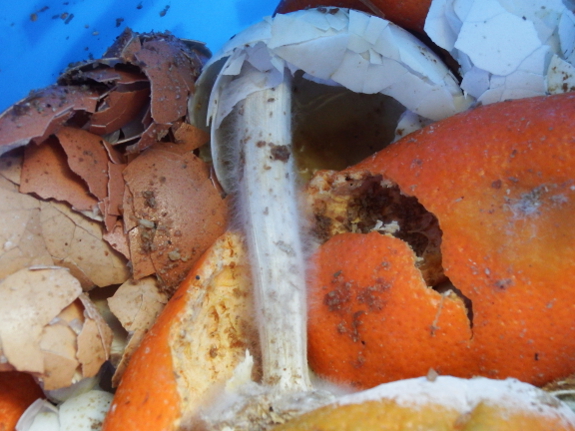
We're moving along to phase three of our bokashi experiment, with the Lactobacillus bokashi in the waiting phase, sealed away in its full bucket. This time around, we're using store-bought bokashi starter, and I have to admit that I have seen a different within the first two days of the experiment.
What differences could I
notice so quickly? I applied a light sprinkling of starter on top of the
sawdust in the bokashi bucket and then again on top of the food scraps
two days ago, and when I opened the bucket for my next deposit I could
see white fungi beginning to grow on many food surfaces. In addition,
while the Lactobacillus bokashi bucket smelled like composting food
scraps each time I opened it (no surprise there), the store-bought
starter did live up to the marketing and seemed to have no odor at all from a couple of feet away. (I should note that the gamma-seal lid means that neither bucket smells when closed, though, so don't worry about foul odors in your kitchen.)
* Of course, I'm well
aware that this "experiment" is far from scientific. With a sample size
of one for each of the three treatments, with slightly different food
scraps in each bucket, and with a different time of year (especially
temperature) for each treatment, all I can do is get ideas for further
research.
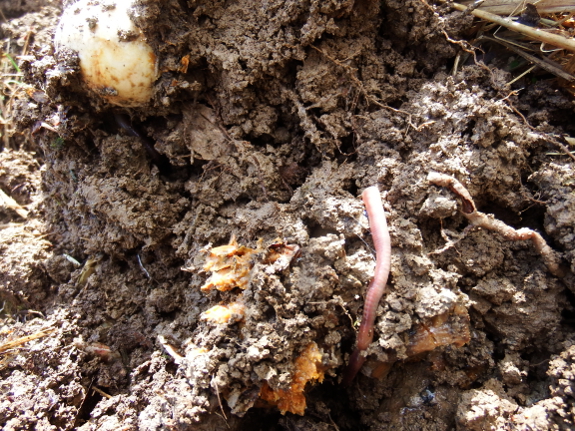
In the meantime, it was
the one-month-after-application mark for my control food scraps, which
had spent a month in an unsealed bucket with no microbial starter, then
were buried in a shallow trench in a very poor-soil area. According to
the bokashi literature, food scraps should have become compost by this
point if treated with bokashi starter during the bucket stage.
Un-bokashi food scraps, though, look very much like rotten food after
one month in the soil, with a few worms starting to move in but with the
outlines of the scraps well recognizable. The only really surprising
part about this phase of the experiment is that Lucy didn't dig up the
trench to eat the scraps --- I guess I chose a spot far enough out of
her usual stomping grounds.
Stay tuned for more updates as our Lactobacillus and store-bought bokashi buckets hit the soil!
This is a short bonus post to give you a quick cookbook update. I was surprised by the interest in the paper version of Farmstead Feast: Winter, so I decided to go ahead and put out the paperback version of Farmstead Feast: Spring
ASAP. Both books are still priced at the bargain-basement price of
$3.99 and are eligible for Amazon's free shipping, so nab a copy now
while they're cheap.
Meanwhile, if you want to
throw your hat in the ring, I'm giving away a copy of both cookbooks to
one lucky reader over on Goodreads. Click here to enter. (You'll need a Goodreads account, I believe.)
Finally, I wanted to thank those of you who took the time to read and
review so quickly. With the help of a Bookbub ad and your kind words, Farmstead Feast: Winter
spent 24 hours as the number one free book on Amazon this week! It's
thrilling to get in front of 40,000 new eyes and I hope my recipes make
everyone's spring a little more delicious. Thank you so much for helping
make it happen!
I built our 2nd goat pasture
gate frame today.
We plan to make the gate like
our first goat
gate. It's working out well.
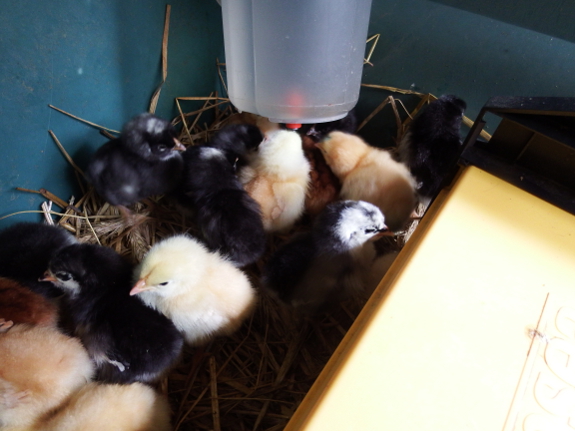
We usually like to hatch our own chicks, but due to dogs, ducks, and other dilemmas, we only have five hens at the moment. And when I tried to hatch the eggs of three of those hens (Red Stars)
last year, there seemed to be some sort of genetic problem that caused
the chicks to die in the shell, so we really only have two hens with
hatchable eggs at the moment. In the end, rather than saving eggs for
two weeks to fill the incubator, we bit the bullet and ordered 25
unsexed chicks from Cackle Hatchery.
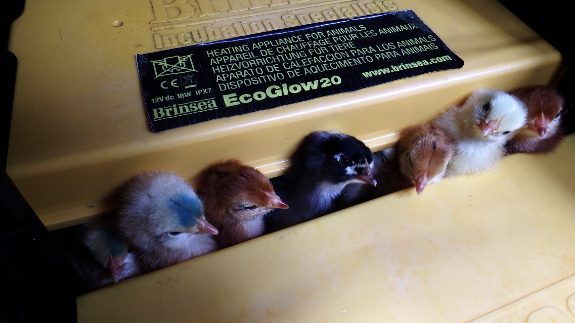
Australorps are currently my favorite all-around chicken
for our farm --- they're only okay layers, but they're meaty enough to
make it worthwhile to eat the males as broilers and the birds are heavy
enough that they don't usually fly fences and get into trouble in the
garden. But I couldn't resist trying out four other breeds as well:
Rhode Island Red, New Hampshire Red, Buff Orpington, and Dominique. I
have a feeling the Rhode Islands and Orpingtons might end up being
tractored hens due to flying fences (the former) and being too
people-centric (the latter), but only time will tell. Hopefully next
year we'll be back on track with a quality flock who will allow me to
raise all of our meat chickens and eggs for the year.
By the way, in case you're curious, those chicks on the left do
have a blue dot on their foreheads. The hatchery wanted to make sure I
could tell the two types of yellow chicks apart, so they dabbed some dye
on the Buff Orpingtons. Now, if someone can tell me whether the
reddish-brown chicks are Rhode Island Reds or New Hampshire Reds, I
should be all set with my chick-ID skills....
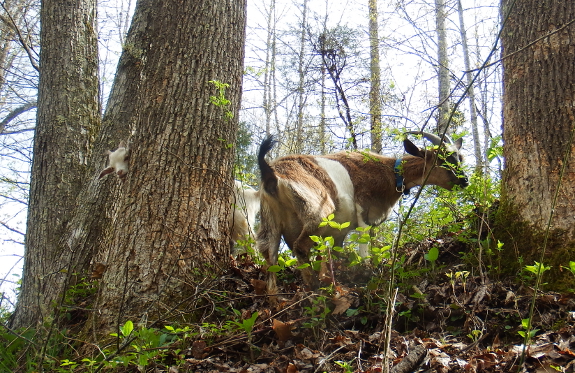
I've been wanting to
write about my milking adventures for a while, but I never seem to
manage to bring the camera during my morning chores. Plus, it's dim up
in the starplate coop on cloudy mornings (which seems to be most of them
lately), and our milking routine doesn't go as smoothly when a
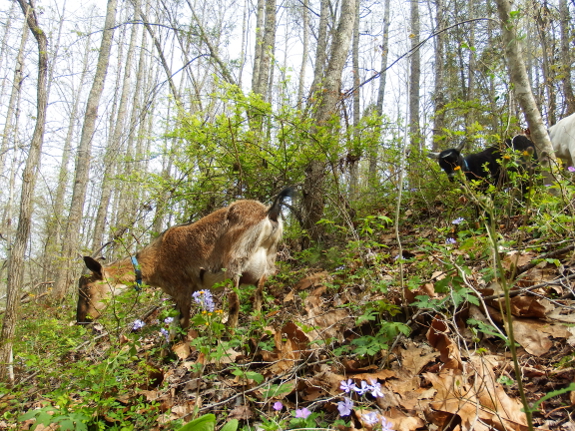
cameraman is present. So you'll have to settle for these shots of our
little herd grazing in the woods while I write about milking.
As I've mentioned before, I opted to buy an electric milking machine
because my carpal tunnel syndrome can barely handle the amount of
garden weeding I do --- adding milking on top of that sounded like a
recipe for disaster. Of course, it was an added benefit that the milking
machine does the work for me, making it less problematic that I don't
know how to milk a goat.
I say less
problematic, because you really need to know how to milk even if you
own a machine to do the job for you. Never mind the fact that your goat
isn't going to wait for a new machine to come in the mail if the
equipment ever breaks. What's important here and now is that most of the
bacteria in milk are found in the first squirt, which has been sitting
in the teat since the kid took his last sip twelve hours ago. By milking
out and discarding that first squirt by hand, you keep bacterial counts
much lower in the final product.
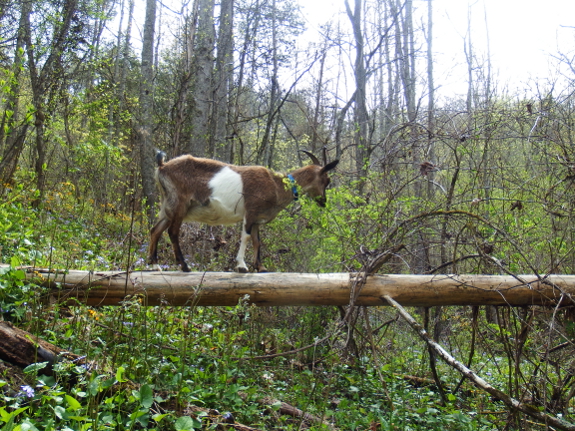
I'd had one lesson years ago about how to milk a goat and had read books
on the subject, but I'll be honest --- it's taken me about a month to
finally feel proficient with the process. Since I'd read that it's
actually more hygienic not to
wash the udder, I instead massage that area to stimulate milk letdown,
and I've recently begun to be able to tell by feel whether or not
there's any milk in the teat to squirt out. This is what gave me a tough
time at first --- I was trying to squeeze out milk that wasn't there!
Plus, I was being a little too gentle, imagining what it would feel like
if someone squeezed that sensitive part of my anatomy. Watching Lamb
Chop head butt his mother in the udder, though, reminded me that goats
are more rough and tumble than humans, and Abigail responded well to my
firm but gentle touch.
This weekend, I finally got to the point where Abigail and I were
working enough in sync that I was able to leave her head out of the
stanchion, easily discard the first squirts, and then hook up the
machine to harvest the human share. The entire process takes about ten
minutes or less (plus about the same amount of time inside preparing the
goat ration and then washing out the milking lines). As I'd read
elsewhere, milking really isn't the most onerous part of keeping goats
--- I spend much more time tethering them around the yard since we're
always short of fenced pasture.
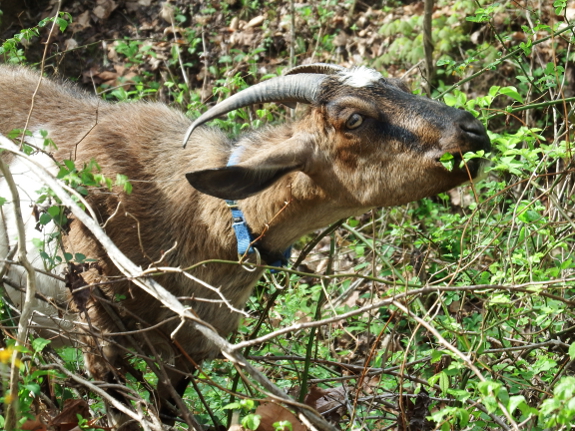
Six weeks into Abigail's
lactation, we're still only getting about 8 to 10 ounces of milk per
day. This is up a little bit since I started tricking Abigail by milking
out one teat, then the other, then returning to the first for another
round, but Abigail is clearly holding back milk 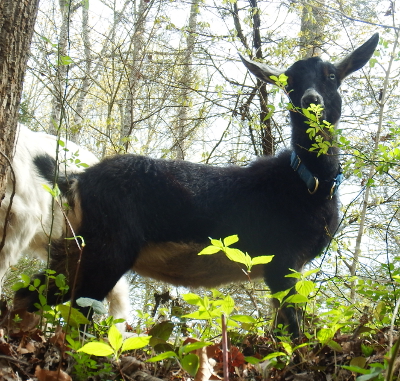 for
her kid. I'm guessing that Lamb Chop is consuming maybe a quart of milk
per day, although he's finally eating a lot more solid food as well and
should be old enough to wean (if Abigail feels like it) in two more
weeks.
So we're not getting much milk yet, but what we are consuming is
absolutely delicious. I can hardly wait until Artemesia (with her
supreme millking genetics) joins the productive portion of our herd. For
now, our little doeling only produces smiles and laughter --- not a bad
harvest from a goat who costs very little to feed.
We get our saw dust
from a local lumber cutter a few 5 gallon buckets at a time.
The guys there are nice and
give to us for free.
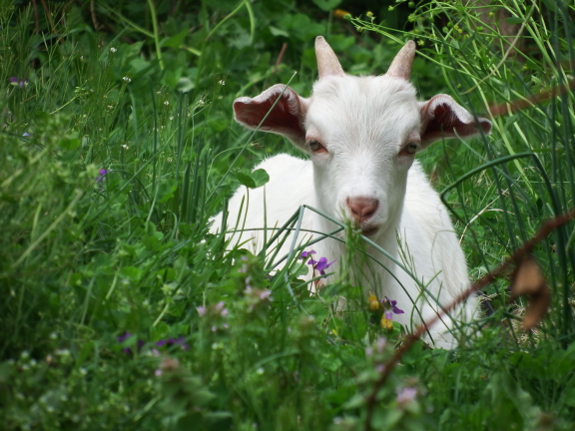
I'm going to talk about a
lot of dead plants in this post, so here's a cute shot of Lamb Chop as
preemptive mitigation. Feel free to scroll back up here if you start to
get depressed.
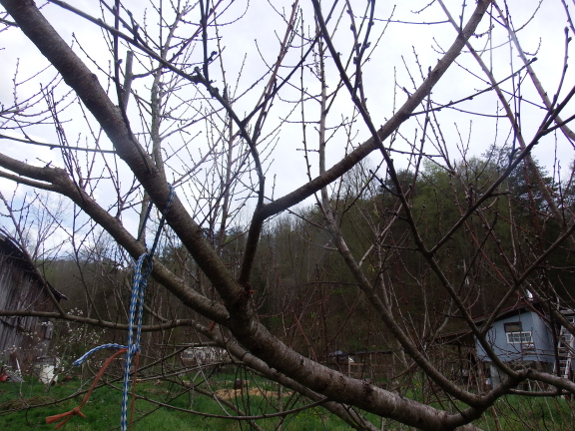
I used to think that late spring freezes
were the primary bane of fruit-growers in our region, but this past
winter taught me otherwise. With a low of -22 Fahrenheit, which is more
typical of zone 4 than zone 6, all of our peach trees not only lost
their bloom buds midwinter...they also lost most of their branches. Each
tree has a couple of dozen leaves finally coming out of winter-bare
limbs, and once I'm confident that all living buds have sprouted, I'll
prune the trees way back to start their lives nearly over. At last, I'm
beginning to understand why so few people in our region try to grow
peach trees --- the stone fruits aren't really reliably hardy here in
the mountains, despite being supposedly able to handle weather up
through zone 5.
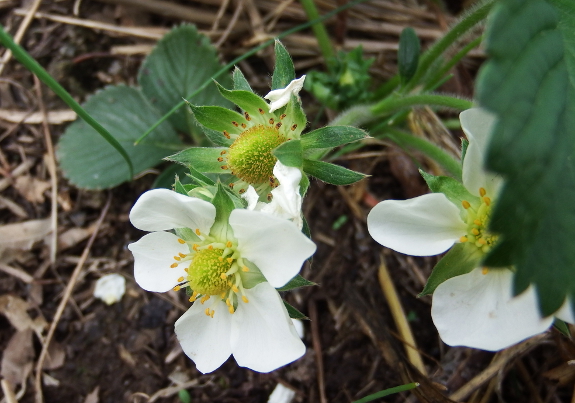
Similarly, this is the
second or third winter when nearly all of our blackberries have been
killed back to the ground, and a few of our black raspberries were
similarly affected for the first time this year as well. Once again,
blackberries and black raspberries are only hardy to zone 5, while red
raspberries and strawberries (both of which came through this winter
unscathed) are hardy to zone 3. Climate change seems to be reliably
introducing an element of unreliable extremes to our winters, so I think
it's safe to say that we're better off focusing on fruits like plums
and red raspberries that can handle bouts of extreme cold rather than
depending on species that are turning out to be undependable in our
region. (Good thing red raspberries and strawberries are Mark's and my
favorite berries, respectively.)
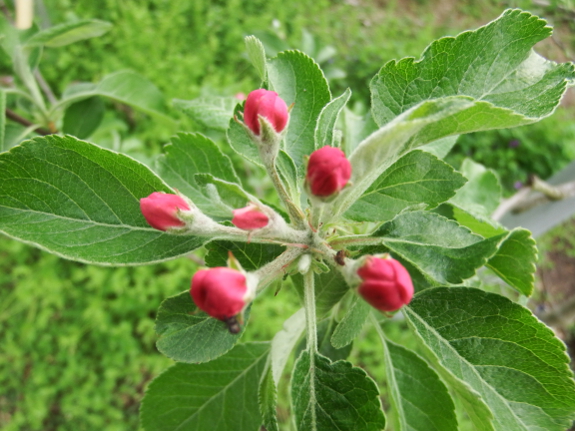
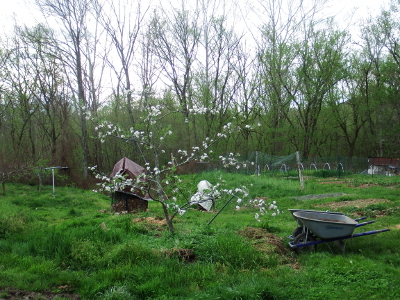 I
can't be sure, but I feel like even some of our apple bloom buds were
affected by the winter's extreme cold, even though the species is
supposed to be hardy to zone 3. The tree that gets more winter sun is
loaded with flowers, but the high-density planting closer to our
north-facing hillside has opened far fewer flowers than the number of
bloom buds this winter seemed to suggest.
As a result, I'm
putting more thought into protected locations that are likely to
mitigate winter's extreme cold when I plan ahead for locating our newly
grafted fruit trees. 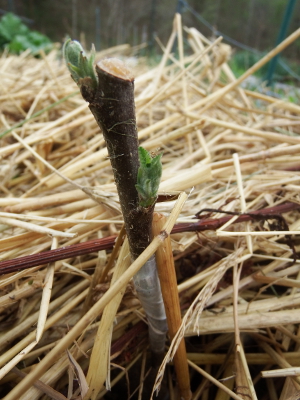 Currently,
I'm eying the south-facing side of the gully which, if terraced just
above the waterlog-line, would provide a warm and protected environment
for quite a few tender fruit trees. Maybe that's where I'll plant our
new plums?
In more pleasant news,
leaves are starting to appear on the scionwood of many of my newly
grafted fruit trees. I'm pretty sure that when these buds burst, that
means the cambial layers of the scionwood and rootstock have merged
(i.e. the graft has taken). So far, 14 out of 16 apples, 8 out of 10
pears, and 1 out of 5 plums have begun to unfurl leaves on the
scionwood. Since the pears and plums were only grafted a little over a week ago,
I have high hopes that the success percentages of the latter two
species will rise to match the apples in time. So it looks like I'll
have plenty of experimental material to replace what we lost last winter
--- I'll have to use my new trees wisely!
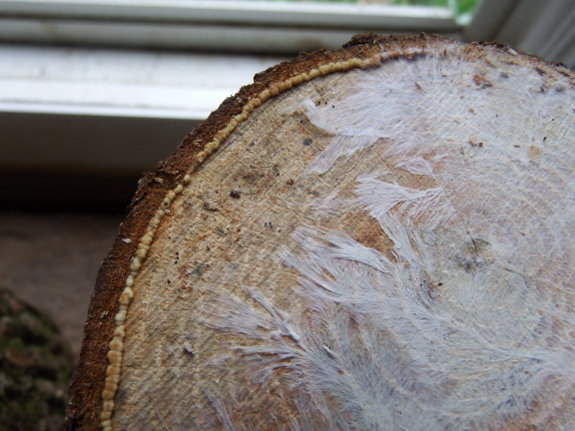
When we inoculated three mini-logs with shiitake mycelium in late February, my primary purpose was to deal with the winter doldrums. But I also wanted to experiment with a method Tradd Cotter suggested for propagating shiitake logs without lab conditions. If you've been reading for a while, you'll know that oyster mushroom spawn is pretty easy to expand on cardboard,
but shiitake spawn is more particular. Traditional shiitake farmers
simply lay new logs beneath older, fruiting logs and hoped some spores
would take, while modern farmers get their shiitake mycelium from a lab.
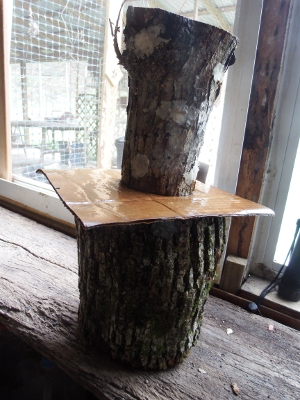 I'm
looking for something more reliable than the traditional method but
less expensive and painstaking than the modern method. Enter Tradd's
expansion totems! Once the mycelium started spreading across one end of
my mini-log (about 5 weeks after inoculation), I soaked a small sheet of
cardboard and stacked a fresh mini-log, the cardboard, and then the
colonized mini-log (with the most mycelium-rich side down). My little
tower went into a trash bag on the living room floor, which I tied
loosely closed...and then ignored for a while.
After two weeks, I took a
look inside and noticed that bad molds were starting to grow. You don't
have to be a fungal expert to tell the difference between good and bad
here --- shiitake mycelium is white, so any other color is a bad mold.
In this case, what I was seeing was little black dots on the cardboard
where the paper product stuck out past the logs. Bad molds are a sign of
excessively high humidity, so I opened up the trash bag (but also
poured a bit of water on the cardboard so it wouldn't dry out). Then I
went away for another week.

At the three-week mark, I
decided it was time for the moment of truth. Not expecting much, I
lifted off the top log...and the cardboard came along with it, proof
that the mycelium had run out of the wood and into the cardboard. So
far, so good --- but was there mycelium on the log below? Yes there was,
as you can see from the photo above!
Step two involved soaking the cardboard and both logs
for another couple of hours, then reassembling, this time with the
untouched side of the newly colonized log up. I'm pretty confident now
that this log-colonization method works, so the next experiment will
answer the question: are these mini-logs big enough to be worth
fruiting, or do I need to let multiple mini-logs fuse together before
asking the mycelium to make me a mushroom? Stay tuned for further experiments as the summer progresses.
We decided to give up on our peach trees.
Making room for something
more reliable.
Got most of the tree cut up
with the awesome
Oregon battery powered chainsaw. I monitor the battery level and
try not to take it down past 25% which is usually when I'm ready for a
break anyway.
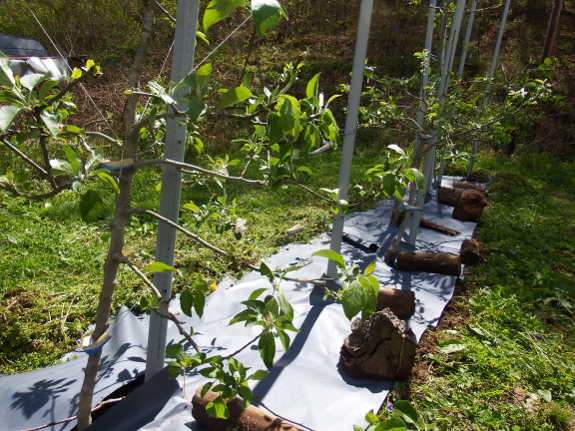
It feels a bit decadent to be trying out this store-bought mulch paper,
even though the price per square foot is comparable to the cost of
straw. On the up side, unlike other manufactured sheet mulches, this
paper is reputed to be fully biodegradable, so we won't have the issue
that black plastic causes, where you're picking your "mulch" out of the
soil for years to come. On the down side, the paper won't add nearly as
much organic matter to the soil as straw would, water penetration may or
may not be an issue, and I'm not sure how the paper will fare once the
areas beneath the weights begin to rot away. That's why we're only
experimenting on a small scale.
Honestly, I probably
wouldn't have even tried it, but the last year has been so absurdly wet
that I've finally ended up carrying in my mulch half a bale at a time on
my shoulder. After daily mulch walks, the garden is starting to shape
up and my stamina is much improved...but I know I won't be able to keep
up with the weed pressure of a summer garden. One roll of mulch paper
will take the place of several bales of straw and might serve as a
stopgap measure while we're waiting for either the weather to dry out or
for other people to find time in their busy schedules to work on our
driveway.
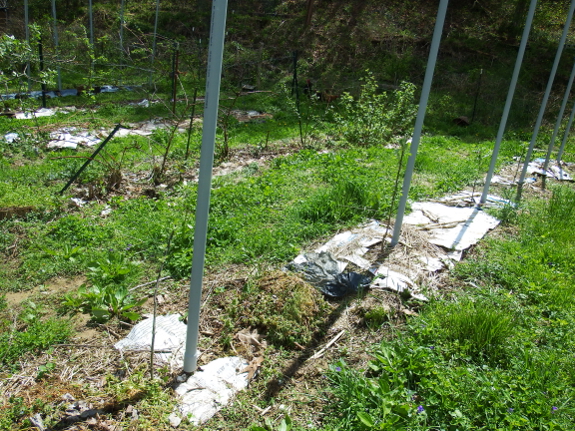
Of course, cardboard
mulch is much preferable to any kind of paper, especially amid the
perennials. The tree row above hasn't been weeded yet this year, but
it's looking pretty good regardless due to cardboard laid down last
fall. In a perfect world, I'd add mulch on top of the cardboard, but
during this stopgap year, I've instead taken to weighing down the paper
product with bits of prunings and other debris --- just enough to keep
the mulch from blowing away in our non-windy climate. Cardboard is
midway in carry-ability between the paper mulch and straw, the sticking
point there usually being sourcing the waste product.
To cut a long story
short, growing our own mulch has become much more of a priority this
year. I'm actually cutting back on nonessential parts of the vegetable
garden this year in order to have more room for cutting beds of oats, barley, sorghum-sudangrass, and pearl millet. There's nothing like a problem in the supply chain to make me want to become yet more self-sufficient in the garden!
A scrap piece of 1x6 makes a
good place to mount an electric
fence charger.
Two small
drywall screws poke out about 1/4 of an inch to hang the charger on.
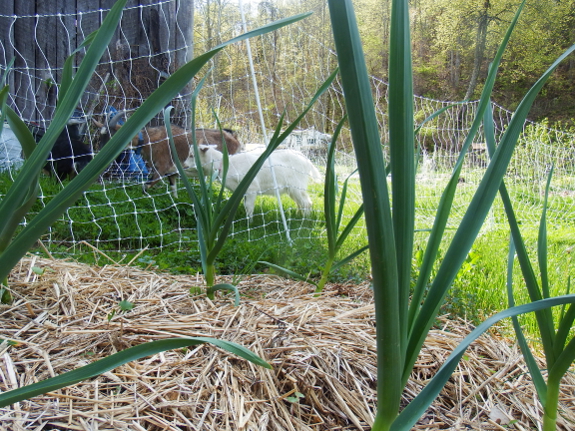
We finally hooked up the temporary electric fencing
as a way of leaving the goats alone in the garden unattended. Okay, so I
sat with the herd for an hour first while Lamb Chop learned that the
fence bites (this took four tries and he finally ended up lying in the
middle of the temporary pasture with a very glum look on his
face). And even after that, I checked in every five minutes just in
case. But both Artemesia and Abigail came from electric-fence-friendly
households and gave the netting a wide berth. No need to re-up any
training there.
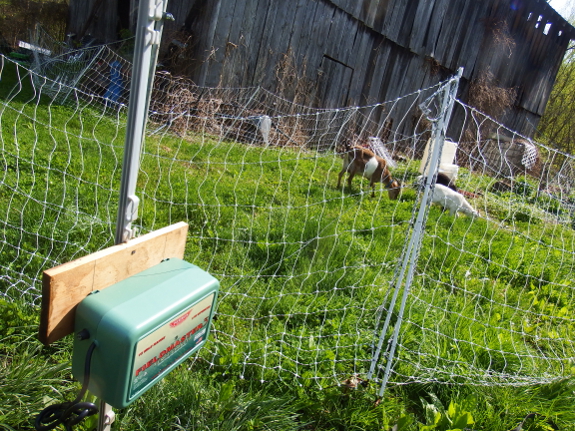
When Daddy "lent" us this
electric fence system, he included a solar charger. I'm no sure if the
battery had died in his charger while it had been sitting in his shed
for a few years or what, but we had no luck getting the solar charger to
work. A new plug-in charger
won't let us fence the goats as far afield, but it worked like a charm
(even though Mark had to test the wire with his fingers since our fence tester apparently doesn't work either).
Figuring out grounding rods was the other part of the endeavor that left
us scratching our heads for a while. The instructions suggested
pounding in three grounding rods six feet deep and ten feet apart. We
instead settled for one grounding rod pushed about 18 inches into the
ground so it will be easy to move to the next location, which seems to
be quite sufficient in our wet ground.
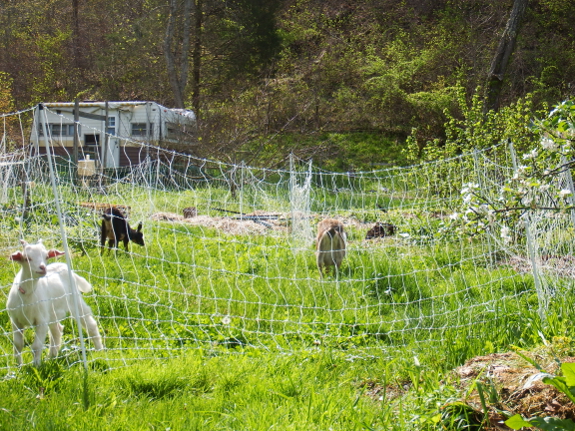
The electric fence will definitely have a niche in our goat-grazing campaign, but I have to admit that I find tethering
simpler to set up and easier to manage. Sure, Lamb Chop can't nurse
while he's tethered, and it would be tougher to tether goats in areas
with high weeds or brush, but for grazing little corners of our core
homestead, the tethers seem to be the way to go. After all, I don't
trust our girls alone in the garden even with an electric shock standing
between them and my cabbages, so I might as well just let them graze
while I weed and keep my blood pressure low.
We deleted 3 more peach trees and our thorn less Blackberries today.
Our next garden-experiment-that-I-may-live-to-regret is solarization. I'm trying all of these experiments for my upcoming soil book,
but this one was also spurred on by my fall oats cover crop not dying
as expected. I suspect the uncharacteristic overwintering ability of the
oats came about because I grazed it repeatedly in the fall, which kept
the plants at a vegetative state rather than ever getting close to
flowering. No matter why
the oats survived, I was left with a conundrum --- how to turn that
area back into plantable ground without tilling up the oats or lots of
hand weeding?
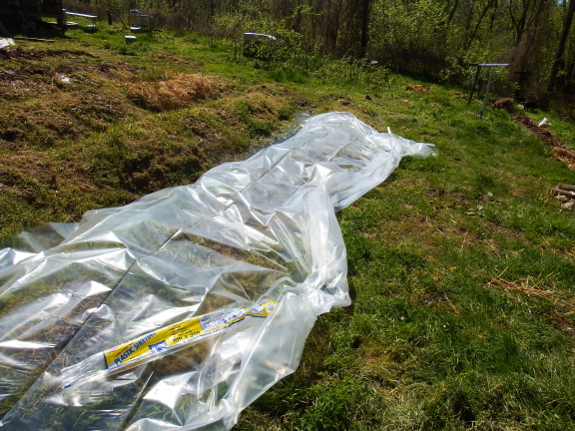
Solarization might be the
answer. The idea is that you prepare your beds (in my case by letting
Abigail eat the oats as low as she could and then begging Mark come in
with the weedwhacker to finish off the job), then you stretch a piece of
clear plastic tight over the ground to bake what's left behind.
Solarization only works during the sunny part of the year and can take
anywhere from one to three months to kill weeds and pests in the earth.
Of course, the biologist in me says --- what's to prevent solarization
from killing all of the beneficial soil microorganisms too? And, since
the plastic dropcloths often used for solarization aren't UV-stabilized,
will we end up having to pick plastic out of our soil when the
greenhouse layer disintegrates in the garden?
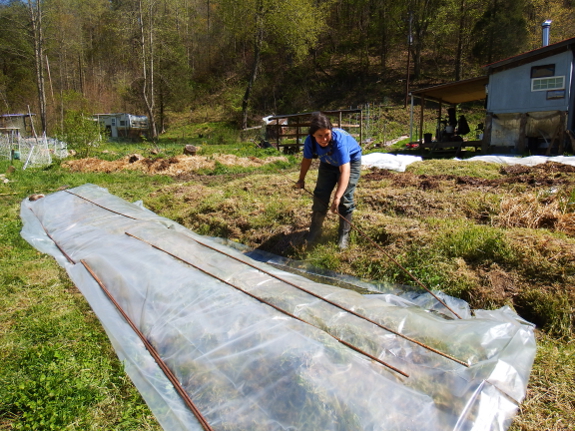
Mark always rolls his
eyes when I poke holes in techniques I haven't even tried, so I shrugged
and decided to give solarization a whirl. Worst-case scenario, we'll
have a biologically dead bed that I can perk back up with some
well-behaved cover crops and compost. Best-case scenario, we'll have a
bed ready to plant into in June with very little work on my part. Stay
tuned for more details as the experiment progresses!
We scraped enough chicken
dirt from the used
pallet chicken coop to fill multiple wheel barrows.
It was the total from 4 years
of accumulation, and it gave Anna the feeling of being at the beach.
 I
accumulated so much book news that I have to take a break from my usual
garden geekery and goat obsession to share. I hope you don't mind this
commercial break....
The first piece of book
news is a freebie today only, so I hope you'll consider snapping it up!
My father has been writing poetry for roughly half a century, and I've
spent a lot of the winter and now part of the spring sorting huge boxes
of his poems. The result was five themes that threaded through his
works, and Hunting Pennies showcases the first of those themes --- growing up poor in Appalachia in the 40s and 50s.
I generally figure that
Appalachia is at least a decade behind the rest of the nation
culturally, and Daddy's poems definitely showcase things most of us
probably don't remember, like an era when housewives saved their rags to
sell to the ragman and when boys ran nearly wild in the hills and
rivers. I could write a lot more, but the book is free, so I'll only add
--- I don't even like poetry and I thoroughly enjoyed this book, so
give it a try!
 In other news, the paper version of Trailersteading is up for preorder on Amazon...and, look, Artemesia made the front cover!
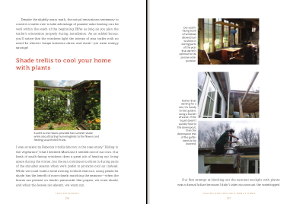
The interior is also looking good, and I'm very excited to get my hands on a copy of my third print book. Trailersteading
isn't due to ship until the winter, but Amazon gives a preorder price
guarantee. So if the book goes on sale anytime between now and when it
ships, you'll get the lowest price available. I hope you'll consider
taking a chance on a book that has inspired hundreds of homesteaders in
ebook form already!
Finally, I have to close
by begging for a few reviews. Most of all, I hope you'll consider
leaving a review of my father's poetry book if you take a look and like
what you read. Those early reviews make or break a book, and since
poetry is already a very hard sell, I figure Hunting Pennies needs all of the momentum it can get.
Second, I've been a grumpy guss all week because my efforts to reach a wider audience by setting Farmstead Feast: Winter
free last week backfired badly. Sure, I reached tens of thousands of
new readers, but many seemed offended by the very idea of homesteading  (and
of eating meat), with the result that I received a flurry of negative
reviews. So if you read and enjoyed the cookbook but didn't think it was
worth taking the time to leave a review on Amazon, you'll improve my
mood markedly if you take a minute to rate the book. Plus, Mark would
like to thank you in advance for improving his standard of living since
he's always the one in charge of talking me down off the
the-world-hates-me ledge....
We added a 2nd tee to our IBC rain barrel to accommodate another gutter.
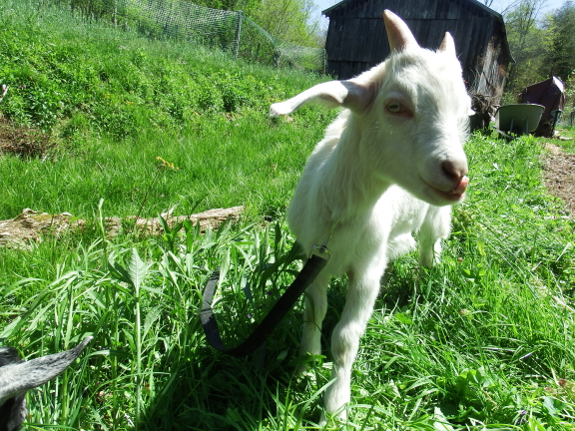
Whoever suggested that
Abigail wouldn't be as able to hold back her milk if I handmilked rather
than using the machine was right. I wasn't able to test the hypothesis
until I got my milking technique down, though.
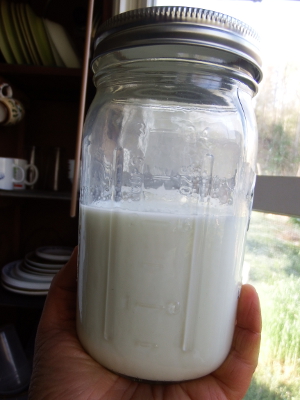 But
Friday morning, after Abigail stopped letting down milk for the machine
to suck up, I decided to just try handmilking a few squirts to see how
much I'd get. The result? A full pint for the morning, 50% more than I'd
gotten the day before.
Actually, I probably
could have stripped out a little more milk, but I figured if Lamb Chop
was used to a huge breakfast, I shouldn't take it all away immediately.
Plus, Abigail wiggled and grumbled a lot more when I began squeezing her
teats compared to when I simply let the machine gently suck out her
production. I figure everyone will be a little more used to the new
routine tomorrow, and hopefully I'll get yet more milk.
"But what about your
problematic wrists?" you may be asking. Apparently, milking half of one
goat (after the machine does the other half) is nothing compared to the
weed-grasping I've been doing lately. I didn't feel a single twinge, so
am quite comfortable squeezing again tomorrow. Such a pleasant surprise
to be able to handmilk our goat and to enjoy extra milk for our nightly
hot cocoa!
We tried adding Zestar to our
high density apple trees last year.
Not sure what went wrong.
There was no signs of life during our Spring inspection and when I
tried pulling on it there was almost zero root resistance.
We're currently in the
middle of Dogwood Winter 2015, an annual event that seems to determine
whether or not we get fruit from our trees each year. In 2014, the
Dogwood Low was 25, which meant no fruit. The year before, the Dogwood
Low was 29, which meant good fruit production. This year, we dropped
down to 27 --- only time will tell which way the fruit teeter-totter
tipped.
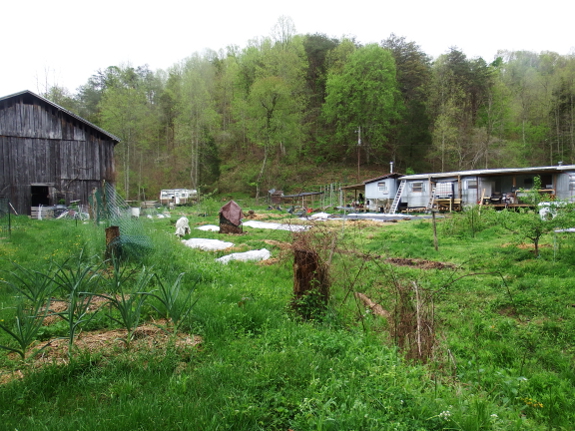
This is what our farm looks like
during Dogwood Winter. The white splotches are row-cover fabric laid
over potentially tender broccoli and blooming strawberries. The figs are
also still covered --- maybe I'll take off their tarps once the
beautiful, sunny weather returns.
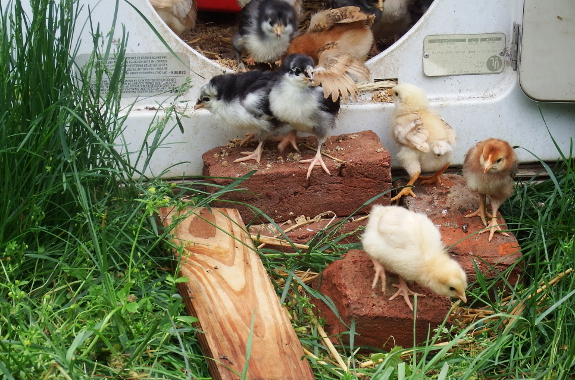
Unlike the garden, our chicks are largely unfazed by the cold weather. Starting when they're a week old, I let the baby birds run out the door of their brooder
if the grass is dry, if no rain is in the forecast, and if I'm going to
be nearby. Their first day out, the chicks always wander out of sight
of the doorway and then get terrified that they're alone in the wide
world...meaning that I have to herd them back home. But by day three,
the baby chickens are largely self sufficient, picking their way through
the tall (to them) grasses in search of bugs.
Yes, the chicks do go back inside by themselves at night (and then I
shut the door for predator protection). Yes, we do keep the baby chicks
within ten feet of our back door, also for predator protection. No, I
wouldn't recommend using even this ultra-safe pasturing technique with
one-week-old Cornish Cross.
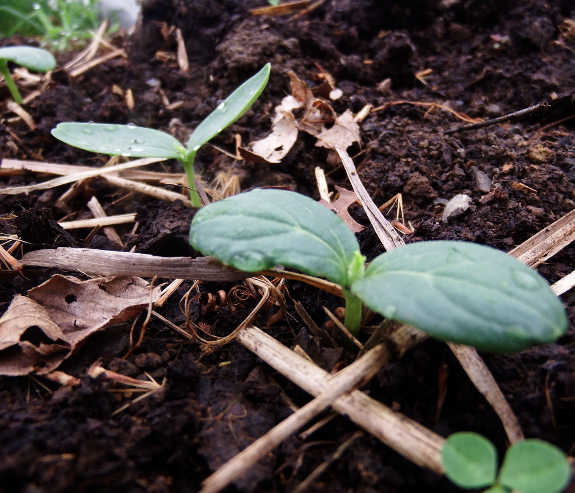
In other news, the crazy
warm spell that preceded Dogwood Winter tempted germination of the
cucumbers and watermelons I plant under quick hoops at this time of year
to jumpstart the season. I was relieved to see that 27 degrees outside
was warm enough under the quick hoops not to nip the cucurbits' tender
leaves. So maybe we'll get early cucumbers again this year --- always a
treat when the spring harvests start to expand out into summer
offerings.
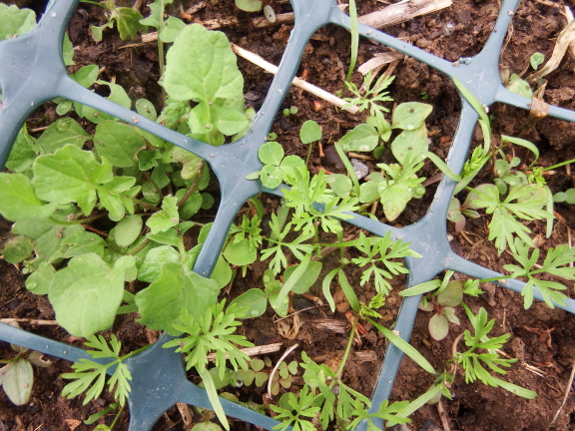
Elsewhere in the garden, we're raking in the lettuce and asparagus
(best year ever for the latter!), and are watching our other spring
crops slowly grow and mature. Our carrots always require a meticulous
hand-weed at this time of year since they're so slow to germinate,
meaning that weeds have time to slip under their emerging canopy. That
task is on the agenda for the week to come. I'll be thinning the
seedlings too...except in the bed where I forgot to lay down my Huckleberry deterrent, with the result that the carrot seedlings were naturally thinned. Thanks, you ornery old cat....
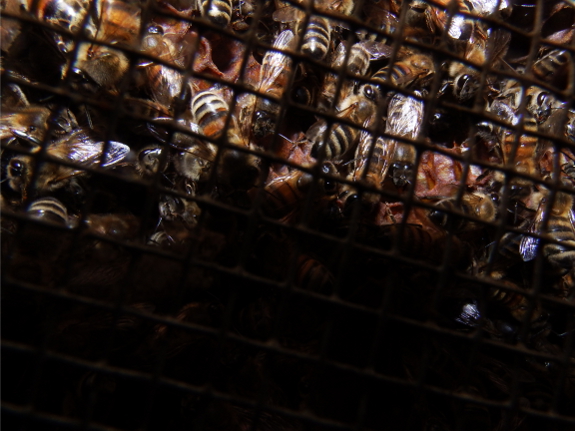
Next door, a photo up under the hive
shows that a week or two of sugar water was enough to get the colony
growing like crazy. With the bees working down in the bottom box, it's
time to nadir on a new living space.
In other bee news, we
were supposed to be getting our bees this week, but apparently rain
slowed down the works so they'll be yet another week late. Here's hoping
this very tardy start on the new colony doesn't prevent the bees from
storing up enough honey to make it through the winter. I guess I'll have
to commit to more feeding than usual....
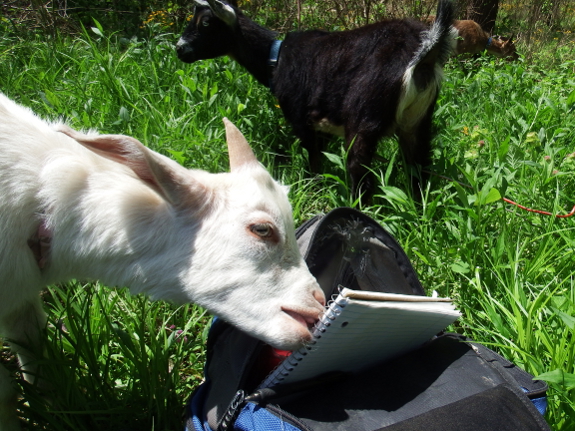
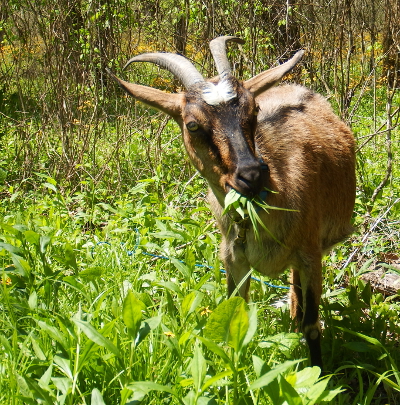 Of
course, I couldn't wrap up this here-and-there post without a shot or
two of the goats, out enjoying a beautiful sunny day before the cold
weather hit. It's amazing how different Abigail looks now that she's
getting nearly as much grass as she can eat. Her hair seems to be more
shiny and her weight --- which was slowly drifting downward ever since
she popped out her kid --- has stabilized. I guess eating hay and eating
grass are as different as subsisting on canned soups versus gorging on
spring asparagus. The former will keep you alive, but the latter makes your whole outlook brighter....
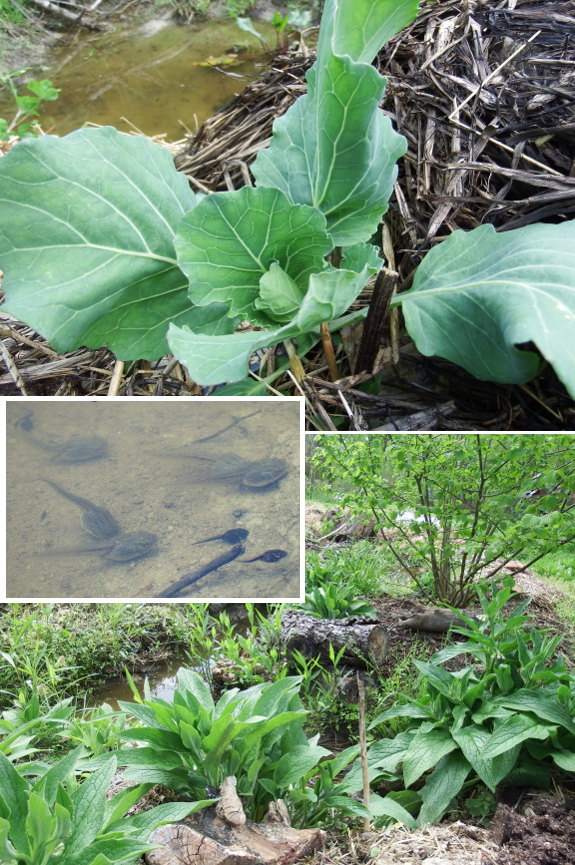
Will the excess nutrients that ran off from our high forest-garden beds
and caused a minor algal bloom in the nearby depressions be harvestable
as tadpole manure once the water bodies dry up? Only time will tell....
I finished up our second goat
gate today.
We made this one wide enough
to handle the ATV.
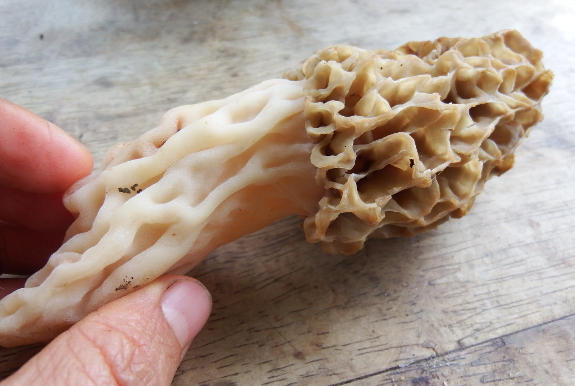
I found one big, beautiful morel Sunday in the exact same spot where Mark found one big, beautiful morel last year. We'd probably try harder to find these elusive mushrooms, but we both
think shiitakes beat morels in a taste test, hands down. As a result,
our total morel count for the last decade might come to five mushrooms
total.
If you don't have shiitake logs, though, this is probably a good year to
go out hunting morels. I've heard reports of family and friends finding
these tasty morsels in city cemeteries and in neighbors' yards. If
there's any tree-covered green space near you, you might find one...or a
bucketful...too!
Why did we get a goat
muzzle for our little Lamb Chop?
To keep him from munching on
our strawberry leaves during the short goat hike from their barn to a
temporary tethering spot.
It seems to fit best when you
pull the strap past the ears.
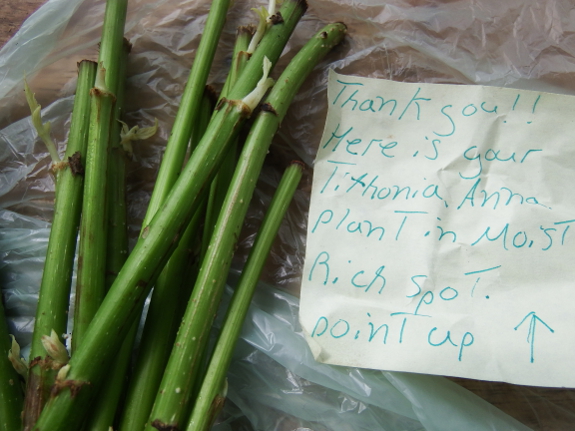
Thanks to one of our kind readers, I'm trying yet another new biomass-producing crop this year --- Tithonia diversifolia.
This relative of the ornamental Mexican sunflower is a weed in tropical
areas but has also shown promise in improving soil conditions for
African farmers. Since we're definitely not tropical, the plant will
have to work hard to prove itself worthy of being babied over the winter
in the form of cuttings on our farm. Still, I have high hopes for the
species' potential as a cut-and-come-again mulch and goat-fodder plant.
Stay tuned for more details (and let's hope I remember to cover my
cuttings if we get another freeze since I excitedly rushed out and
planted my 13 cuttings in the garden right away). Thanks, T.!
The last two nights our
little Lamb
Chop has been jumping out of his stall.
We think he makes his leap
from the milking
stanchion, which is why I
moved it away from the gate today.
Want more in-depth information? Browse through our books.
Or explore more posts by date or by subject.
About us: Anna Hess and Mark Hamilton spent over a decade living self-sufficiently in the mountains of Virginia before moving north to start over from scratch in the foothills of Ohio. They've experimented with permaculture, no-till gardening, trailersteading, home-based microbusinesses and much more, writing about their adventures in both blogs and books.
