archives for 03/2015
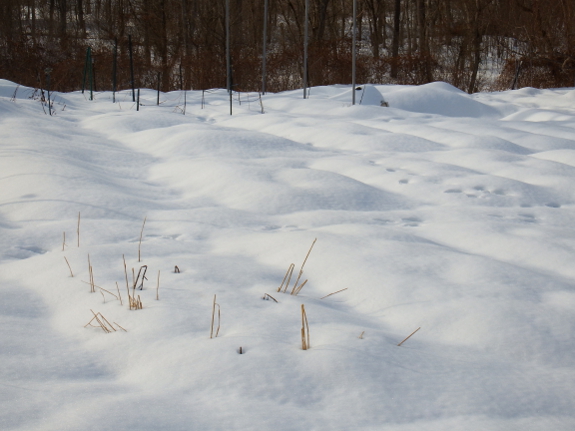
Two weeks ago, when the
snow and deep freeze hit our farm, spring ground to a halt. It wasn't
until this past Saturday that I felt like we were on the upward swing
once again. The snow is finally melting faster than it's falling, and
here and there bits of plant matter are beginning to poke above the
snow.
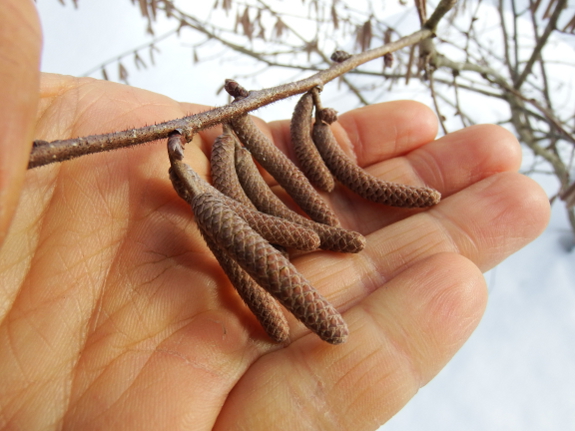
Hazel catkins loosening
and disgorging their pollen are nearly always the first spring bloom on
our farm. Like everything else, I noticed the first catkin just about
blooming before our snow storm...then the hazel bush went right back to
sleep. But with highs above forty forecast for most of the next week,
I'm betting the maple sap will start flowing and we might even hear frogs as our snow finally melts away. I sure am glad we don't live in the North!
Our two quick
hoops took some serious
damage this Winter.
It was twice the damage compared to the 2012
snow load.
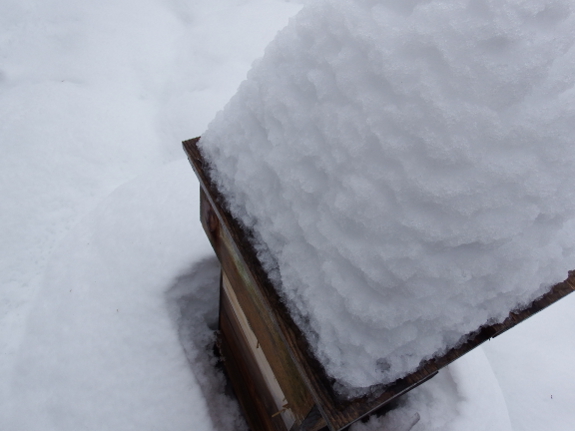
I took these photos a
week ago, when snow had been on the ground for six days and I suddenly
had the realization that my poor honeybees might be smothering inside
their hive. I rushed out and brushed the entrance free, then pressed my
ear against each side of each 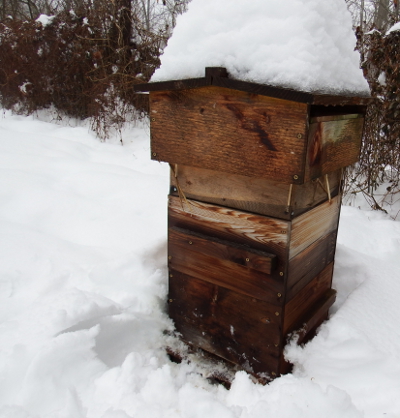 box. Nothing. Nothing. Nothing. And then --- there! --- a low buzz.
The colony sounded
awfully weak, which didn't really surprise me given the extremely low
temperatures we'd been experiencing. But, at the same time, I knew that
people successfully keep bees in much colder climates than ours, so I
hoped for the best.
Imagine my joy when I
went to listen again this past weekend and heard a louder hum. I think
the bees were just hunkering down during the extreme cold, and I now
have high hopes that they'll be able to make it until the first spring
flowers begin to bloom. The dandelions should be out in force within a
month --- hang in there, bees!
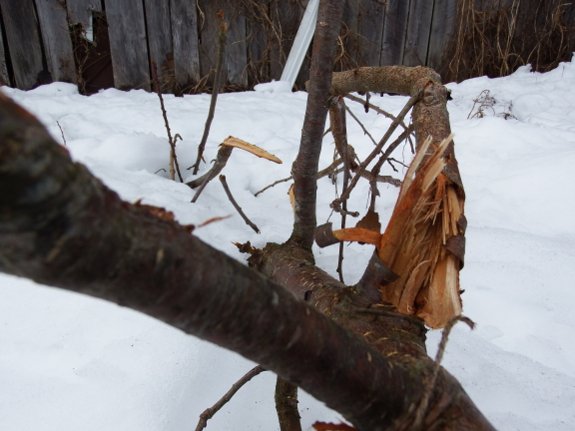
When the snow slid off the barn roof, I almost thought I could feel the ground shake.
Unfortunately, the plum trees
nearby were squashed by the avalanche. It looks like the snow danger
zone extends out for at least twenty feet from each side of the barn.
Good thing Anna ordered plum rootstock to bring our devastated trees back to life.
When I was reading up on
inoculating logs with shiitake mycelium, recommendations on log sizes
varied widely, ranging from 3 to 12 inches in diameter. Large logs tend
to fruit longer and to hold moisture better during dry spells. On the
other hand, small logs fruit faster and are easier to wrangle
(especially if you plan to soak logs to force fruiting).
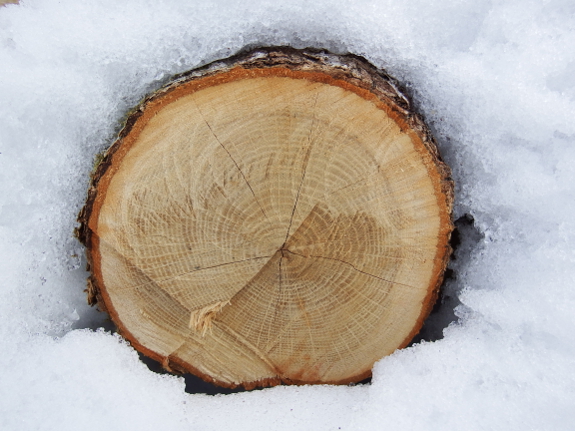
One factor I didn't read about, but soon thought of once I started looking at the logs Mark cut for me,
is the sapwood-to-heartwood ratio. Shiitakes only eat the sapwood, the
pale-colored wood around the outer perimeter of the log. And bigger
logs, especially if they grew slowly in woodland settings, might have
three quarters of their volume made up of useless heartwood, leaving the
fungi far less food than you might think.
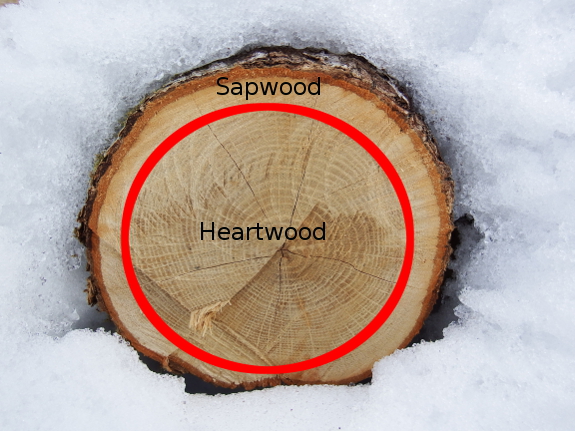
In case you can't pick
out the sapwood in the first photo in this post, here's a labeled
diagram to get you started. This log has been sitting around for a
couple of weeks --- the color difference is even more evident in the wet
wood of a newly cut log.
Looking closely at my
logs got me thinking that maybe the puny 3-inch treetops that I had
earmarked for firewood are actually better mushroom logs than these huge
logs that I'd originally considered prime fungi fodder. In fact, the
smaller-diameter logs have no heartwood at all, so they might contain
nearly as much sapwood as the log pictured above. Assuming I'm willing
to keep logs moist over the summer with sprinklers, perhaps little logs
are the way to go after all?
The decision will have to
be made soon because spring weather is finally upon us! Highs in the
forties and lows in the twenties means it's finally safe to pull the mycelium out of the fridge and inoculate those logs. Time to enjoy the March Into Spring!
We upgraded our goat
milking stand today.
The neck brace is now wider
and taller with a top piece to lock in place.
Everyday this week seems like
a possible baby goat day.
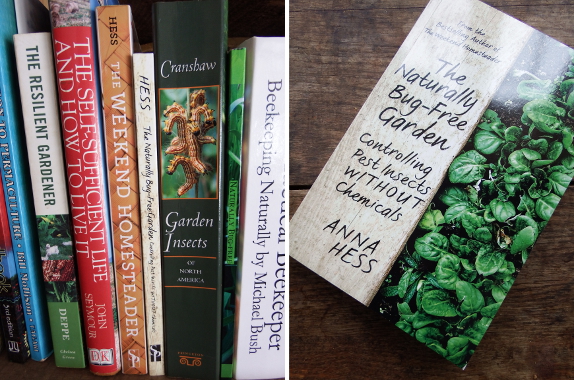
There's a new book on my shelf...and maybe on yours as well? I braved the flooded creek Tuesday to bring my first copy of The Naturally Bug-Free Garden home,
a copy that I ordered from Amazon since the box from my publisher is
running late. It was just too hard to wait any longer to hold my second
paperback in my hands....
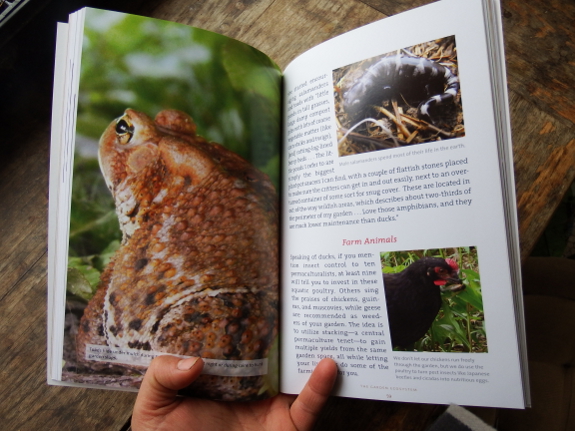
Do you want to jumpstart
your 2015 garden with a primer on natural pest-control techniques? If
so, you can get order the paperback here:
Or
you can join in my launch treasure hunt and enter for a chance to win a
signed copy of your very own! Just head to your local library or
bookstore and ask if they have The Naturally Bug-Free Garden in stock, snap a photo of my book in the wild, then enter using the widget below. Or, if you've already bought a copy and want to win a copy for a friend, snap a shot of yourself with your new book! I'm letting this giveaway run for a full month so that you'll have time
to request your librarian stock a copy for even easier entries. (Yes,
strangely, I get even more of a kick out of hearing folks tell me that
they checked one of my books out of their local library rather than
buying their own copy.) May the hunt begin!
We trim the
goat hooves once a month, but let Abigail skip this month due to
her being a little grumpy about being wrangled with her extra weight.
Artemesia likes the attention
but wiggles a lot. I ended up holding her while Anna finished the last
hoof.
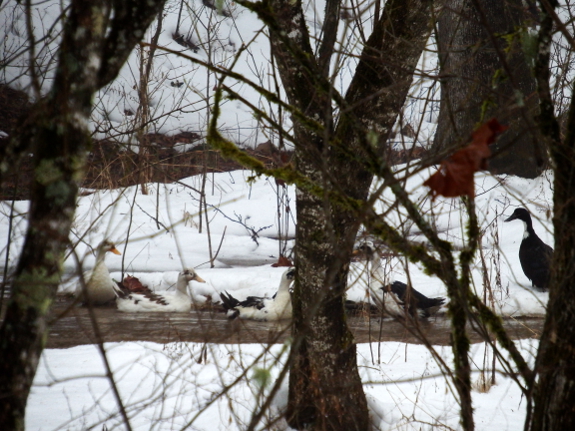
I feel like I'm living in
one of those nature documentaries where the ice pack is melting and the
grizzlies are hunting in flooded streams. Except the only thing hunting
in our flooded streams is ducks...who have finally stopped pouting in the coop and have slowly begun to lay once again!
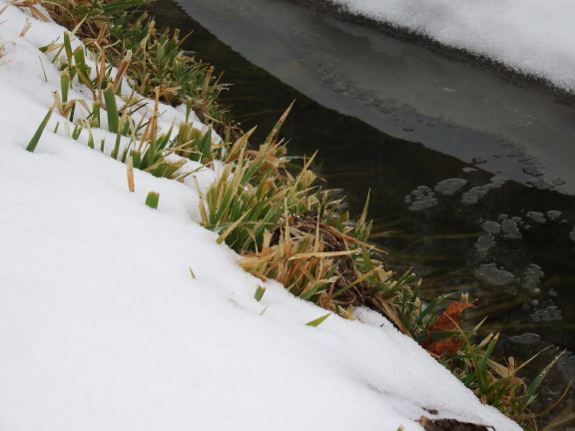
As the snow melts, I
remember that a world exists beneath the white. Abigail will be thrilled
to learn that some of the oats have survived the deep freeze due to
their frosty blanket and will soon be dry enough to consume.

I'm finally collecting
sap again from the sugar maple and box-elder, and the Buddha who had
entirely drowned in snow is dancing in front of the trailer once again.
Crocuses by next week, perhaps?
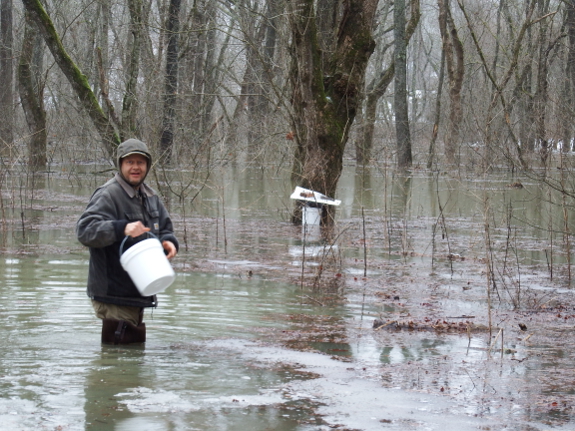
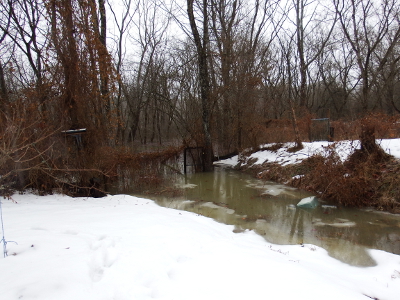 We moved the chickens to the uphill coop when the flood waters began to lap at the toes of their former home.
I tried to retrieve our closer sap bucket, but had to let it go.
Red-winged blackbirds moved into the newly created swamp, and the ducks roamed far and wide.
Maybe we'll be able to cross the creek sometime next week?
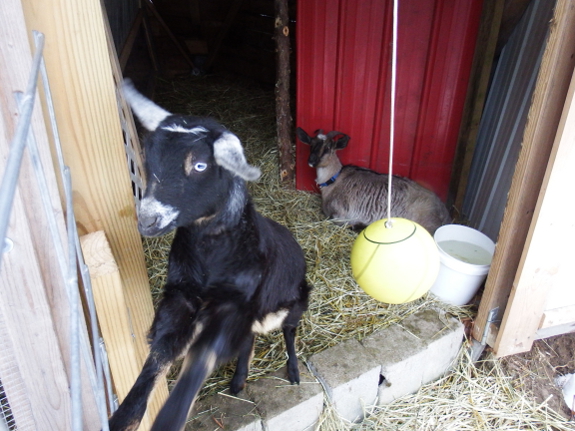
I've been spending a lot
of time with our goats as I obsessively monitor Abigail's slow slide
toward delivery. The actual specifics of when ligaments disappeared,
when udder bulked up partway and then became further engorged, and so
forth are going down on paper to make our doe's next pregnancy less
nerve-wracking for the human observers. But today I can't resist sharing
some of the thoughts I've had on goat language in the interim.
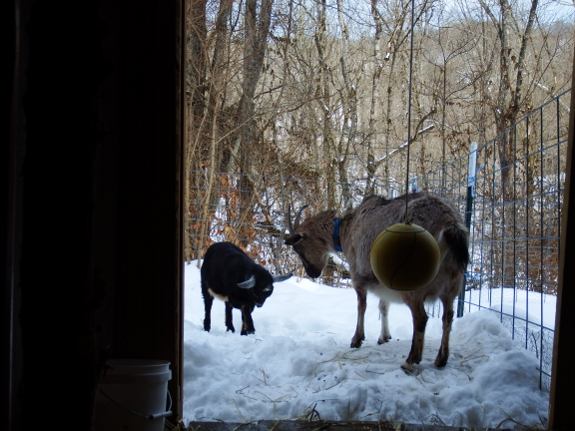
The way goats communicate is so simple that I can't quite figure out why Lucy doesn't get it. Here's a typical exchange:
Artemesia: Let's play! (Slightly lowers her head, then raises one front hoof, waving it about in the air.)
Lucy: *Sigh*. No one wants to play with me. (Wanders off.)
Artemesia: *Sigh*. No one wants to play with me. (Wanders off.)
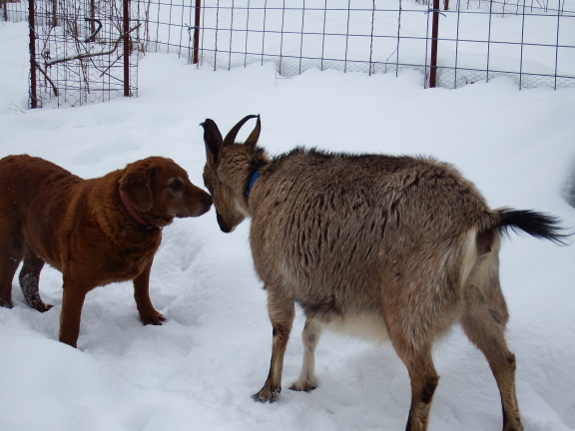
Or:
Abigail: If you know what's good for you, you'll back away slowly, right now. (Head lowered with horns directly facing forward.)
Lucy: Oh, goody, you want to play! (Bounds forward.)
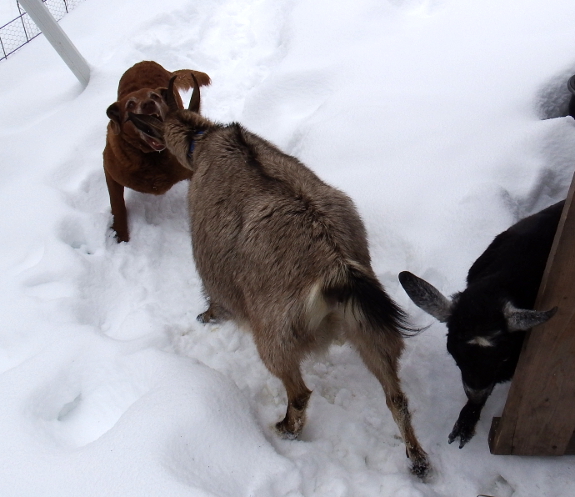
Lucy: WTF?! (Growls.)
Anna: Lucy! Bad dog!
Lucy: Oh, now I get it. Abigail is a cat.
Sometimes, I'm glad to be a human who speaks English, dog, goat, and cat. Does that make me multilingual?
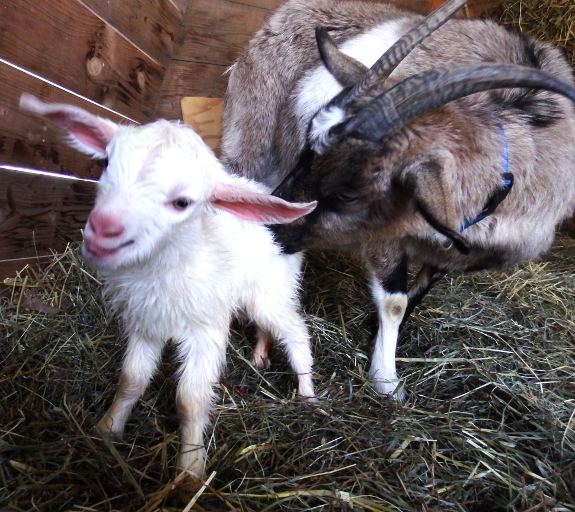
He showed up around 10 this
morning.
There were no problems during
the delivery.
Abigail and Anna are recuperating nicely.
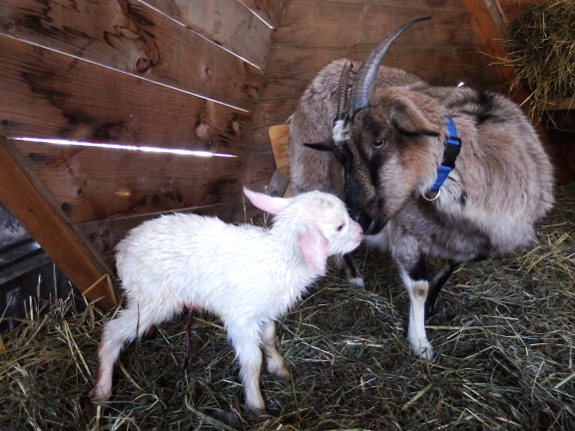
It seemed like every day this week, I woke up absolutely certain that Abigail would have kidded.
Without taking the time to make my own breakfast, I'd chop carrots and
then head up the hill to check on our doe...who kept showing signs of
kidding but never quite managed to pop out a kid.
So, on Friday, I decided
to go a bit slower. Even though Artemesia was standing at the gate and
hollering, I figured our half-Nubian doeling was maybe just in heat and
feeling chatty. I performed my morning ablutions, then wandered up the
hill to check on the goats about 8:30 a.m.
Nothing. Abigail's udder
had expanded again during the night, but her vulva looked about the same
--- no sign of mucus. Yes, the doe's ligaments had been absent for 44
hours at that point...but maybe Abigail hadn't read the same websites I
had?
For the last few days,
I'd had Abigail on a two-hour watch during daylight hours. This was more
for my sake than hers --- knowing that I'd wander up to the barn at a
set time prevented me from simply moving in with our goats. But at 10
a.m., I hit a natural stopping point in my writing, went out to carry in
some firewood, then decided to go up the hill just a little early....
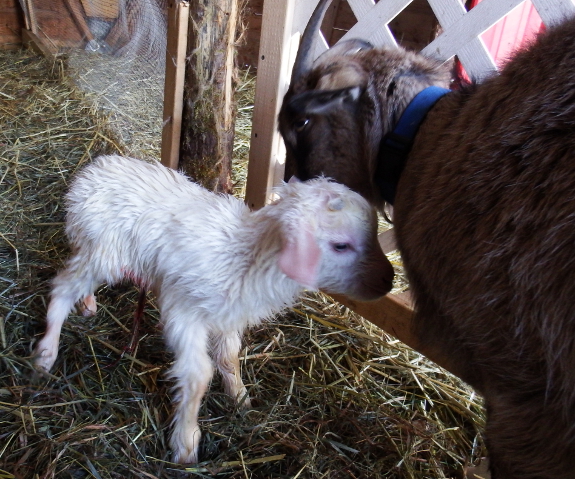
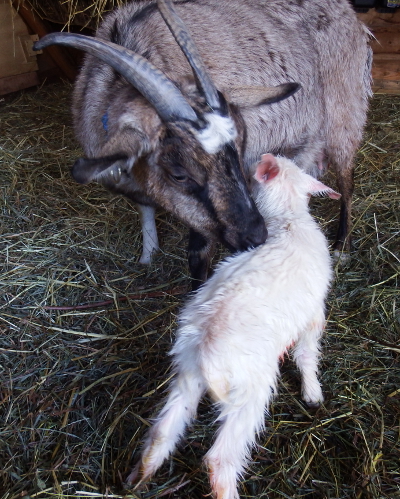 ...But
not early enough! I'd missed the main event and was greeted by a
healthy white buckling, standing on his wobbly feet as his mother
vigorously worked on licking him dry.
I rushed back home to
alert Mark and to collect my kidding basket, then went inside the goat
barn to see if Abigail needed any help. The kid seemed extremely
vigorous, but he was also very wet and the temperature outside was about
15 degrees Fahrenheit with no sun yet having popped over the hill. Ice
was forming on top of the kid's head and on his ears, so I got to work
with a towel while Abigail continued to lick (and even bite) at the ice.
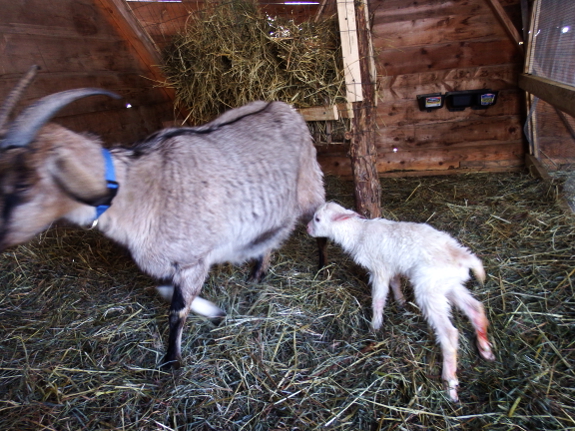
I had expected Abigail
not to want me to handle her baby, but she didn't mind me lifting him up
and setting him on my lap. According to my notes, if there was another
kid she should push that one out within about twenty minutes, so I
wasn't terribly concerned at first when Abigail didn't want to let her
current kid drink. Instead, every time he headed for a nipple, she
sidled away.
(Side note: If you're eating your breakfast as you read...maybe wait to finish this post later. Placenta pictures follow.)
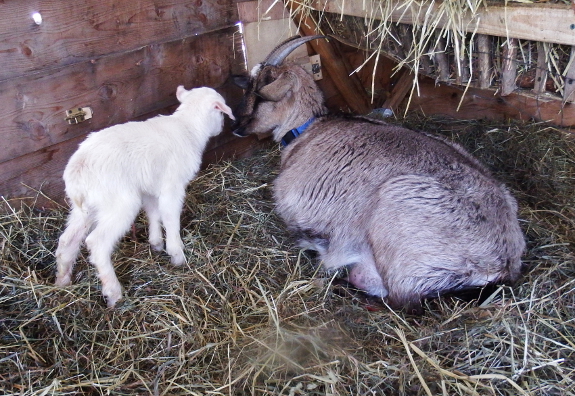
This process continued
for a while, until I tucked the kid into the front of my coat and sat
down to give Abigail a little peace and quiet. She promptly lay down,
and when I let the kid out, he settled down by her head.
Nothing happened, though,
except that Abigail started to shiver, and I started to worry. The
books said another kid should come within twenty minutes and that the
first kid should also nurse within its first half hour of life, and both
deadlines had already passed. So I went back to the house to collect a
cool-minded husband and a warm bowl of molasses water.
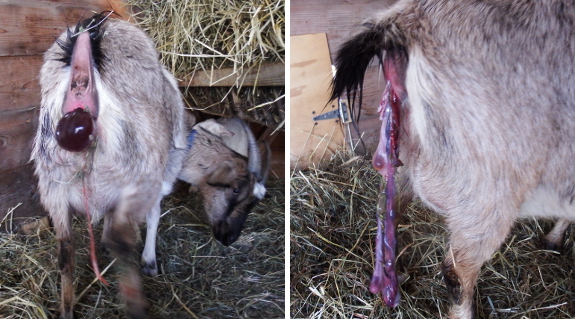
Abigail sucked down the
entire bowl of molasses water in short order, and then she seemed ready
to push out whatever was on its way. At first, I wasn't sure if it was a
kid that needed help, but soon became confident that the mass of gunky
goo was the placenta, meaning that Abigail had carried only a singleton
this time around.
Some goat owners are disappointed by singletons (since twins are the
average), but Mark and I were actually both glad to have only a single
kid to handle. The buckling can be Artemesia's paramour this fall, then
will go in the freezer (so no name). In the interim, a single kid will
drink less of the milk that I want for myself. Yes, I know I sound a bit
hard-nosed here, but that's what growing your own food is all about.
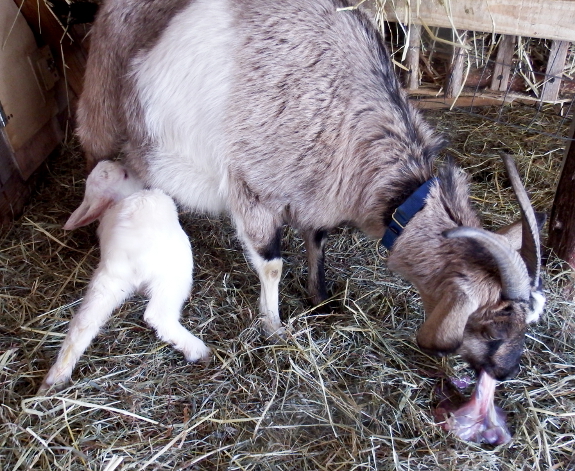
Anyway, back to the
kidding drama.... Once the placenta plopped to the ground, Abigail
turned around and promptly began to chow down. Some goat keepers don't
let their does eat the placenta, and the process did
look a little gross. But I felt like Abigail might need the dose of
nutrients, and her intentness on the placenta also gave me a chance to
help the buckling finally find a nipple. I squeezed out a little
colostrum to make sure Abigail had let down her milk, then worked with
the kid until he figured out that the teat went in his mouth. Soon, he was happily suckling and his fur was quite dry, so I finally felt comfortable leaving the pair alone.
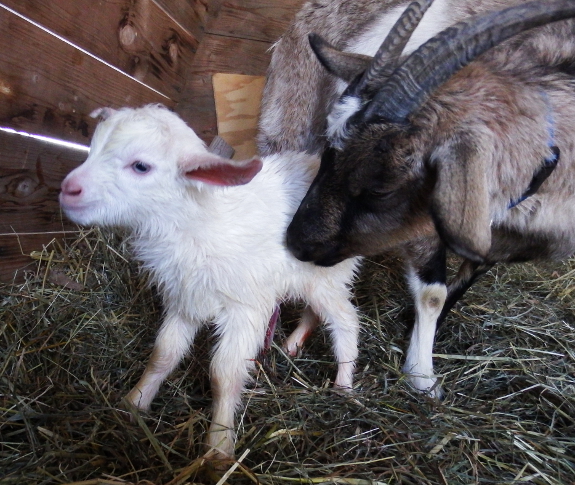
Next up --- I need to
decide whether to milk out a bit of colostrum to put in the freezer as a
backup, and then (in a few days) it will be time to learn to milk for
the human table. With only a single kid, we should be able to start
drinking homegrown dairy pretty soon --- I can hardly wait!
Abigail is clearly bonded
with her new baby except for the fact that she can't seem to teach the
new guy how to nurse.
We start out with me holding
the back leg down for the first few kicks, and then she loses interest
in kicking once the milking begins.
I think once he figures out
how to control his legs better then he'll learn how to attain the
proper nipple angle.
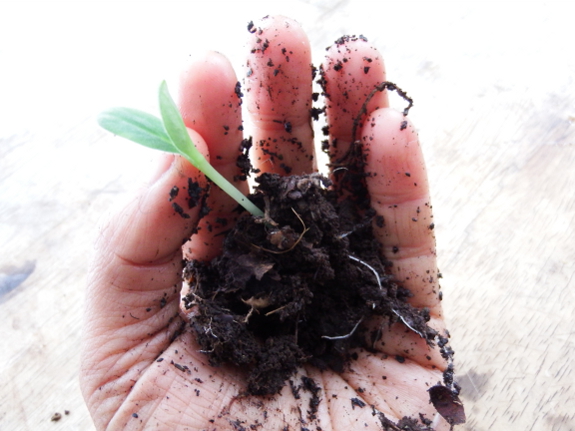
I've never grown borage
before, but I should have guessed from the larger seed size that the
plant wasn't one of those slow-growing herbs. While thyme, oregano, and chamomile
planted in the middle of February are still so tiny that you can hardly
imagine them growing out of their starter cells, the borage planted ten
days later seemed to be too big for its home as soon as the cotyledons
emerged. Time to pot up!
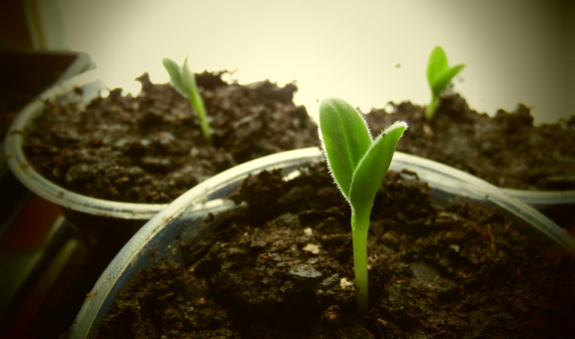
I like to keep the
nutrient levels very low in my seed-starting trays to get the babies to
work on roots while also minimizing problematic soil fungi. But bigger
pots means it's time to mix in well-rotted horse manure along with the stump dirt
or potting soil, at a ratio of one to one. A friend of Mark's
introduced the idea of potting up into plastic cups with holes drilled
in the bottom, which is a great innovation since the pots are cheap and
you're able to keep an eye on root growth. I have a feeling our borage
will require yet one more round of potting up before we're allowed to
set them out in the middle of May, and the clear pots will help me
ensure they don't grow root bound in the interim.
Technical
note: Some of you probably noticed we were unable to make new posts for
the last 24 hours. I'm afraid that comments you made during that time
period may have been lost --- sorry! I think I got to read them all, at
least, although I'm especially sorry that Brandy's comment about
placenta can't be shared with the world....
 Are
you thinking of adding chickens to your homestead this spring? Or
perhaps you want to expand your flock and make sure their run doesn't
turn into a muddy mess? I have two books that should hit the spot, one
free and one on sale today!
Pasture Basics
is the freebie, full of everything I've learned about rotational
chicken pasturing over the last few years. Then, if you like what you
read in book one, you'll want to be sure to pick up Thrifty Chicken Breeds
while it's marked down to 99 cents since this companion book will help
you choose the right type of chicken to put on your new pasture.
And, to make this a true chicken-giveaway week, one lucky reader will walk away with a free premade EZ Miser,
our favorite type of waterer for pastured poultry. Just share why you
want an EZ Miser (or why you love the Avian Aqua Miser or EZ Miser
you've already got) on facebook, twitter, or google plus, click on the
giveaway widget below, and you'll be entered to win!
Our creek went down enough to
get across on the
log.
It felt a little dicey
walking on it with a full back pack, so we decided to use the kayak to
ferry our groceries and chicken feed.
We'll be ready for the next
100 year flood by having one of the kayaks in the barn on this side of
the creek.
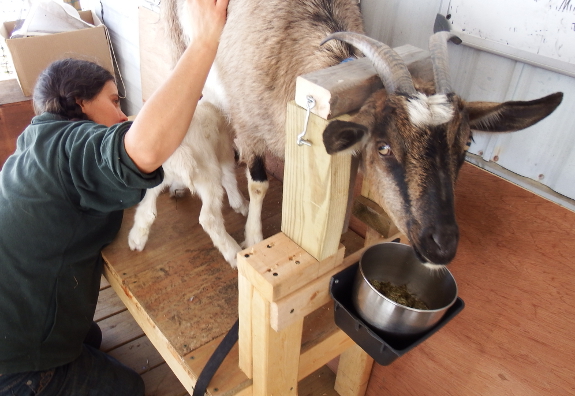
I should have known that Abigail's kidding experience
was too simple. The birth itself went fine and our doe clearly bonded
with her kid...but she really, really didn't want to let him nurse. On
the first day, once the placenta was gone and life in the coop had
returned to normal, I kept checking in and seeing the kid head for the
udder...then Abigail would run in the other direction. A search of the
internet suggested that this behavior is distressingly common, and that
the solution is either to bottle raise the kid (not our goal) or to
stick mom in the milking stanchion in order to give the kid an
opportunity to drink.
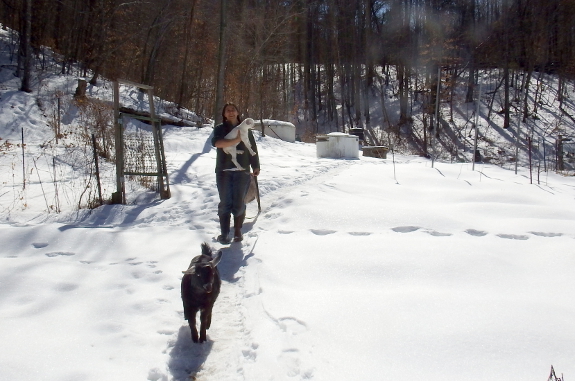
When the kid was six
hours old, I decided to try the stanchion trick. The result? Complete
and utter chaos. I tried to leave Artemesia in the coop and to carry the
kid while walking Abigail to the porch, but our doe seemed more
concerned about leaving her herd mate than she was about the location of
her kid. After much screaming (Abigail and Artemesia --- I refrained,
despite my frustration), we went back to collect the doeling and all
four of us (plus Lucy) ended up on the porch.
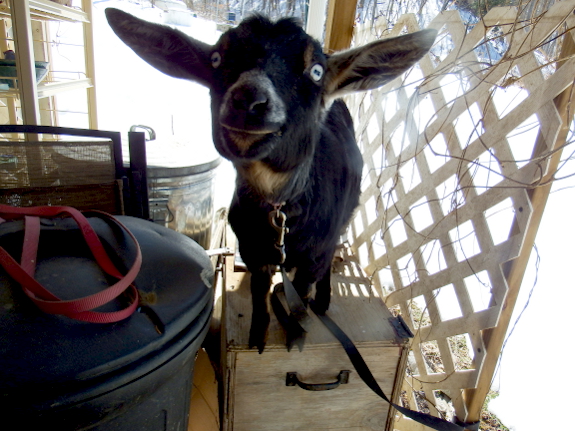
Lucy was intrigued by the
new creature in my arms, Artemesia figured out that by jumping up on
top of the picnic table she could stick her nose in the bag of alfalfa
pellets, and Abigail realized that she could yank her neck right out of
the stanchion. Nearly in tears, I ran to get backup.
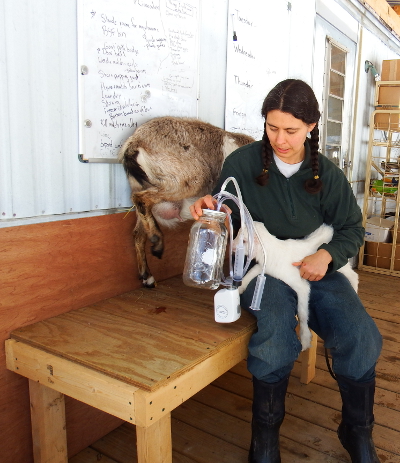 "You
should have called me sooner," said Mark, taking in the drama unfolding
in front of him. He tied up Lucy and Artemesia, then grabbed Abigail's hind leg
while I pinned our doe against the wall. That left each human with one
free hand, which we used to push the befuddled kid up against the
nipple. And, to everyone's relief, he drank...and drank...and drank.
Mark and I considered a
second feeding that day, but it gets dark so early at this time of year,
and I wasn't sure that Abigail would have produced any new milk in two
hours. So we left her until morning, at which point I made the same
mistake all over again. I was worried and went up to check on the goats
at 7:30 while Mark was still asleep, and seeing the kid shivering in
14-degree weather, I figured that surely
I could repeat the feeding on my own this time around. To cut a long
story short, chaos reigned again, this time with Abigail discovering a
new trick --- lying down in the milking stanchion, never mind that the
kid's head was underneath her belly. But I was finally able to tie up
the two troublemakers (Lucy and Artemesia), to heft Abigail's belly up
in one arm, and to stick the kid onto a nipple with the other.
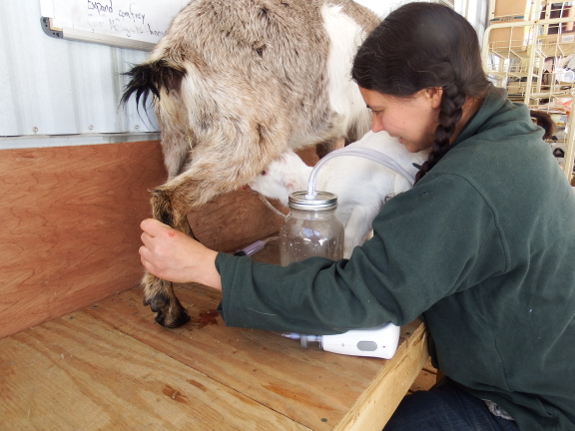
Meanwhile, I decided that
with only one kid, Abigail's udder wasn't getting all the way cleared
out, which probably kept the flesh perennially tender, so I pulled out our milking machine
and set it to sucking colostrum out of the other teat. I have to say
--- that milking machine is a life saver. I was able to hold Abigail up,
keep the kid's mouth on the nipple (he isn't too bright), and milk the
second teat all with my two hands. When Mark showed up, everything was
under control (even though, once again, he was right --- I should have
called him sooner).
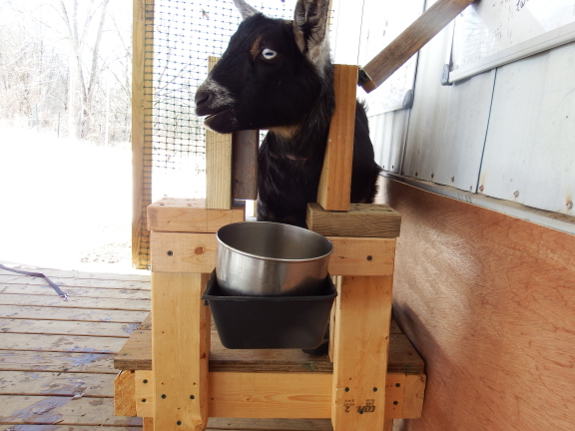
Since then, Abigail still hasn't let the kid drink on his own, but things have
gotten much smoother. After his fourth real feeding, the kid finally
started jumping around and acting like a baby goat should, which was a
huge relief. Meanwhile, Abigail still requires an admonishing hold
around her hind leg at first, but she soon settles into the stanchion
(which we've relocated to the kidding stall to make crowd control
simpler). Even Artemesia has figured out her role --- cleaning up any
tidbits Abigail leaves behind once the milking is done.
For the next few days, we'll stick to thrice-daily feedings, but by the
end of the week I hope to attain a morning and evening schedule as if we
were milking. And maybe by then Abigail will be making enough milk to
share with us as well as her kid.
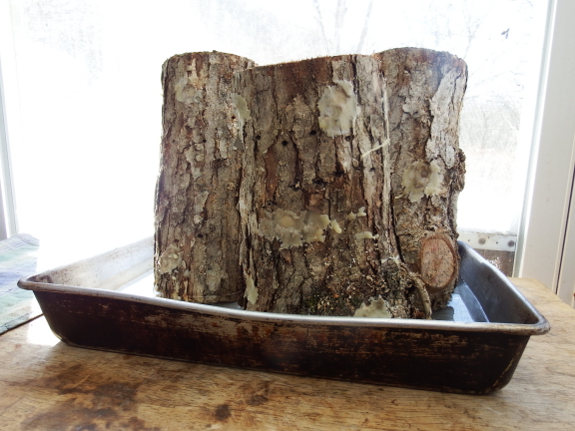
Soaking our mini
mushroom logs in a pan of
water every other week seems to be enough to keep them moist.
We also wrap each one in a
grocery bag to hold in moisture.
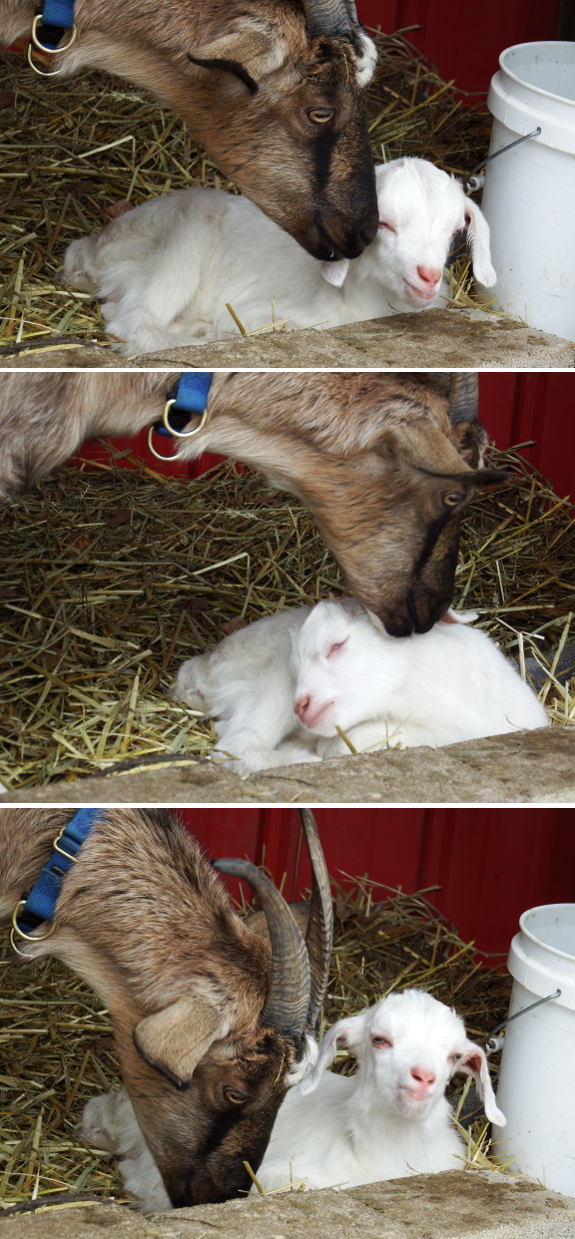
Guess whose belly was
full and whose udder was empty when I showed up with milking gear in
hand Tuesday morning? I guess Abigail's finally going to let me off nursing duty so I can start enjoying this speedy transition from January-in-February to April-in-March.
Yes, the first speedwell
and bittercress are starting to bloom, the frogs are starting to call,
and it's time to get serious about the gallons of sap coming out of the one tree we've tapped on this side of the still-flooded creek!
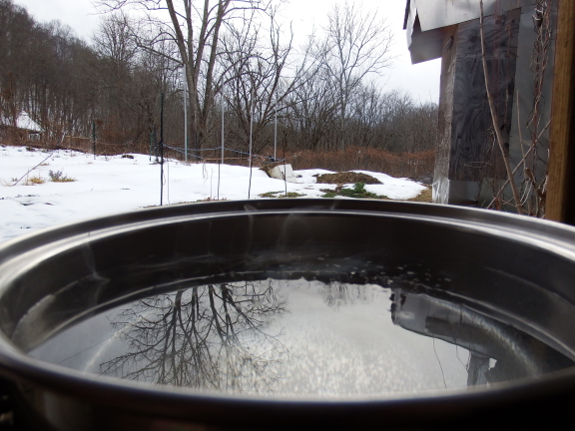
My movie-star neighbor
had big plans about expanding his sugar mapling operation this year,
and I have to admit his enthusiasm was contagious. After all, tapping
maples seems to be much simpler and more dependable than getting honey
from chemical-free bees.
The kink in the maple syrupping plan, though, is boiling down all that
sap. The weather is already getting too warm to drive off the moisture
from a single tree's sap on our wood stove, and using the electric stove
seems very inefficient. But what about the rocket stove?
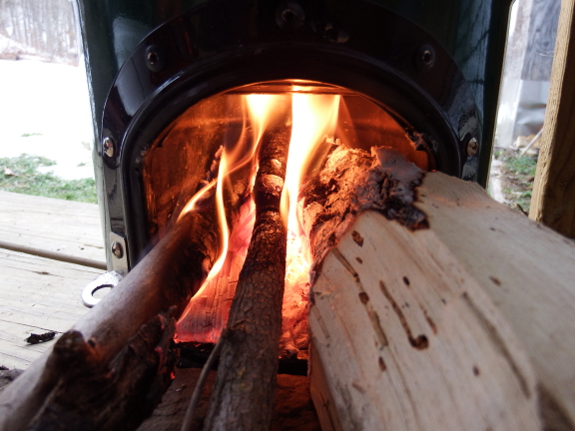
I filled a big pot with
box-elder sap on Monday night and decided to give the system a test run.
The good news is, one hour of rocket-stove use only consumed about half
again as much wood as is pictured above. The bad news is, the flames
only drove off about a cup or so of water, the sap ended up getting a
bit ashy, and I learned that you really do have to tweak the fuel in a rocket stove every five minutes or it'll burn down to coals.
So, no rocket-stove maple
syrup for us. I guess we'll stick to syruping on a small scale until a
better way to boil down the sap appears out of the ether. Maybe we need
to make a self-feeding rocket-stove-fuel hopper?
Abigail figured out how to
buck the milking
stanchion in just the
right way to unlock the screen door latch that was holding it.
I'm pretty sure she can't get
out of the above latch, but if she does we might change her name to
Houdini.
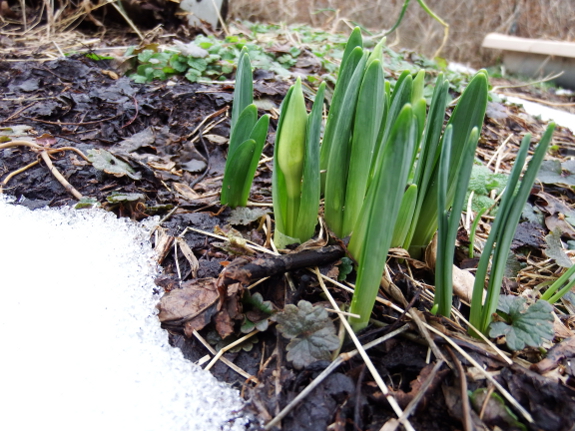
It's almost physically
painful to be forced to stay out of the garden when the weather has
suddenly changed over spring after weeks of anticipation. Unfortunately,
I made the mistake of going in to the doctor's office for a
regular checkup (which I'd been putting off for 7 years) and came home
with a clean bill of health...and a virus. So Mark has ordered bed rest
and I'm doing my best to comply.
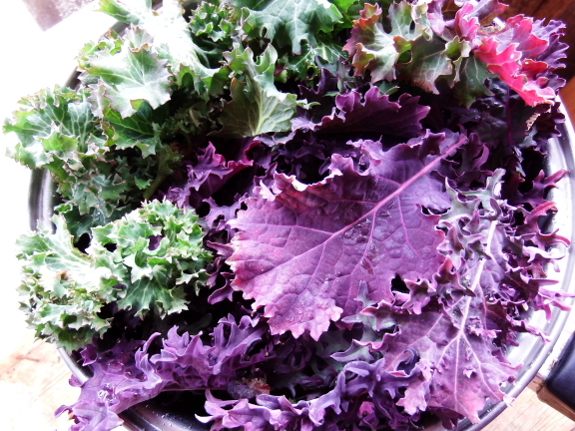
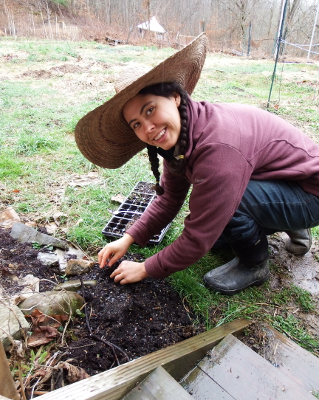
My long-suffering husband
did let me up long enough to get the first garden seeds in the ground
at last, a quick project since Kayla and I had already prepared the beds
weeks ago, hoping that the abnormally cold weather would someday break.
Lettuce, arugula, and peas should enjoy this current mild, wet
spell...and planting a month late probably won't make very much
difference in the eventual harvest time. That's the great thing about
spring --- every day gets warmer and sunnier and plants quickly make up
for any lost time.
So, if you're enjoying the warm spell we are --- by all means plant!
Just have some quick hoops waiting in the wings for when the lion
returns for one last roar before true spring.
A stainless steel wine bucket
makes a nice milking
machine jar holder.
It was easy to mount with a
short section of pipe
strapping.
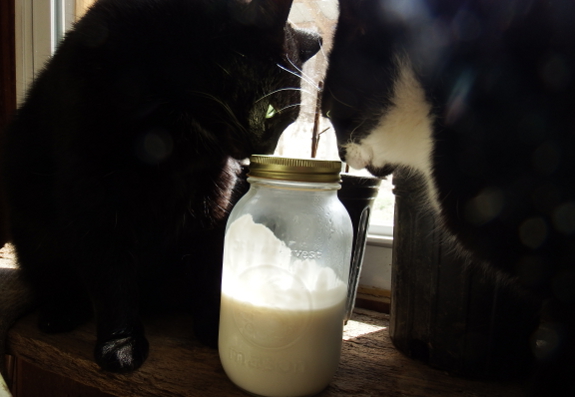
Five months of
goatkeeping has been such a joy that I almost forgot the whole point ---
milk! But Abigail's production has been increasing quickly, and even
though the kid is still drinking as much as he wants, our doe shared a pint yesterday with her human caretakers. Time to
figure out the dairying side of goatkeeping. As usual in the caprine
world, I've got more questions than answers at the moment, so I hope
you'll chime in with your wisdom.
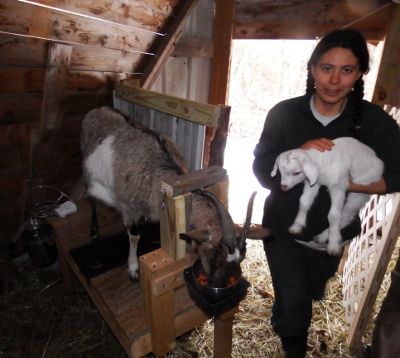 To wash or not to wash?
The udder that is. Older advice was to wash and dry the udder before
milking, but newer sources suggest that you might actually move more
bacteria toward the milk that way than you remove. Unless there's actual
dirt on the teat, many modern experts simply recommend dipping the teat
in a disinfectant instead of washing. Others say you shouldn't dip the
teat until after milking, and that the dip's purpose is to prevent bacteria from getting up inside the teat and causing mastitis. What do you
do? What kind of teat dip do you use (if any) and when? And won't the
chemicals from the dip end up in the milk if you use it before milking?
What to do with all that milk?
Wow, even a pint a day seems like a lot of milk and production is
likely to continue to rise for the next few weeks. I want to start
experimenting with cheesemaking, but most cheeses seem to require
cultures (except for the lemon juice method that most people say isn't
very good). Do you have a culture source you particularly recommend? A
way to grow your own cultures so you don't have to keep buying them?
Which cheese recipes have worked well for you with goat's milk? And what
cheese-making recipes do you recommend? Finally, if that kind reader
who once offered us a buttermilk culture is still around, I'd love to
take you up on that kind gift now!
A strip of shelf
liner makes it a little easier for our baby goat to get a sure
footing when trying to nurse on the milking stanchion.
Of course he figured out how
to get a drink from Abigail the next day.
At least it will be there if
we need it for the next baby goat.
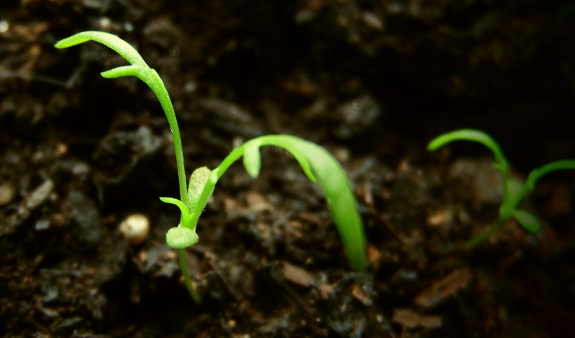
In one of his books, Paul Stamets
explains that it's essential to keep the mycelium (vegetative stage of a
fungus) running. In other words, don't let your cultures sit and
stagnate --- they need to grow!
While true for fungi,
Stamets' admonition is even more true for spring seedlings. My goal is
always to keep our seedlings running...or at least moving along at a
steady jog.
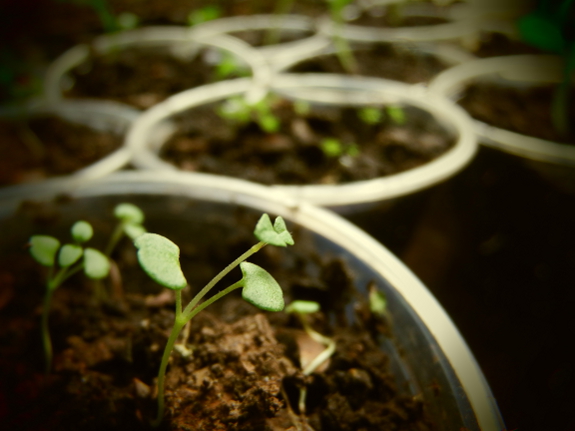
Potting up is one sure method of keeping little seedling roots and shoots
growing fast. But when I moved herbs out of their starting flat at the
beginning of March, I left about half the seedlings behind, figuring
that ultra-slow-growers like thyme and oregano probably wouldn't notice
the difference. Plus, I just didn't have enough window space for twice
that many new pots.
 For
the first day or two, the left-behind seedlings grew faster than the
potted up seedlings --- such is the way of transplant stress. But a week
after that, the difference was striking. The seedlings that I'd allowed
to spread out into bigger pots had suddenly acquired twice as much leaf
area...a fact that was true even for the minuscule oregano and thyme
that barely seemed to be making a dent in their living accommodations in
the flat.
Unfortunately, I couldn't
repot all of the herbs because I just didn't have enough room indoors.
But since those extra seedlings were just that --- extras --- I decided
to give them a bigger and more dangerous place to run. The ultra-sunny
flowerbed in front of the trailer just might be warm enough to let these
seedlings survive spring freezes. If the next burst of cold holds off
long enough for their tender roots to get established, I'll bet the
herbs get their feet under them and outgrow the indoors seedlings by the
end of the month. The race is on!
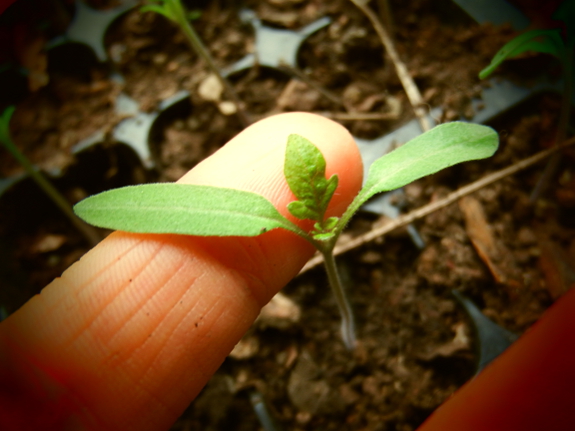
Up next: tomato seedlings
with their second sets of true leaves need more root space ASAP. Next
week, Mark and I might make a little cold frame around the front of the
trailer to house the broccoli, cabbage, and onion seedlings so there
will be more room indoors for big tomato pots. In the meantime, the
babies get a hearty dose of manure tea to provide a quick fix of nitrogen for faster growth. Gotta keep those seedlings running!
Our swamp
bridge floated downstream during the recent flood.
The last time it floated it
only went 10 feet and I thought the anchoring
job we did after that
would have kept it in place.
Maybe there's a better way to
anchor it I'm not thinking of?
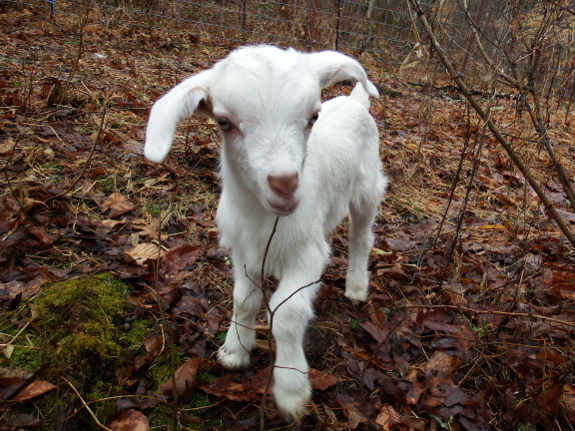
I started getting sick the night before our baby goat was born, so I missed a lot of photo and cuddling opportunities. Luckily, just holding Lambchop up to his mother's teats for the first 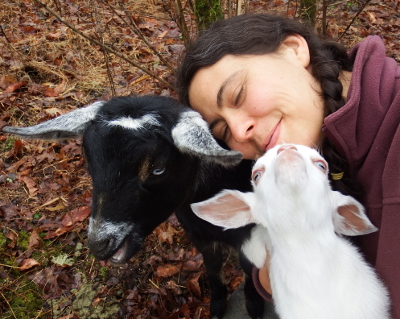 four
days ensured that the kid thinks I'm some kind of mother figure. So I
apparently don't have to worry about him being unsocialized.
In fact, when I went out
into the pasture with Lambchop and Artemesia to give our doeling some
much overdue TLC, the kid hopped right up into my lap for extra
petting...then jumped down...then jumped back up...then jumped down. I
guess I don't need to worry about his early nursing issues impacting his
vitality either.
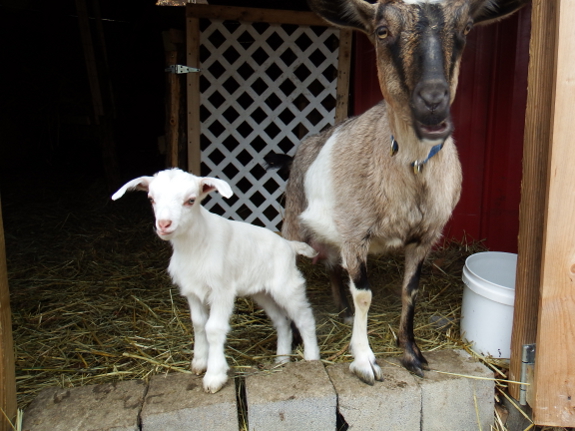
Abigail figures that
producing milk is a full time job. While I rollicked with the younger
goats, our doe stood in the doorway of the coop and chewed her cud. Then
she took a break to head to the manger for some hay, called Lambchop
over to relieve a bit of pressure on her udder, then got back to the
all-important work of cud-chewing. She feels no need to rub up against the human.
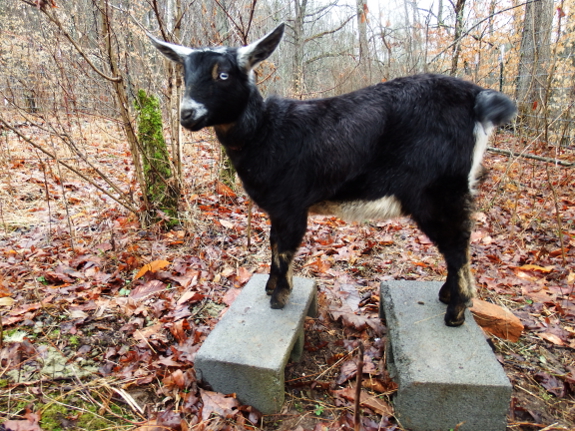
Artemesia, on the other
hand, has been a bit attention starved ever since she stopped being the
cutest animal on our farm. She's done a good job of turning into a
gentle auntie for Lambchop, bouncing around with the kid while Abigail
stands sentry in the doorway. But Abigail has continued to act crankily
toward her coop-mate, and Artemesia was quick to lean her shoulder
against mine and settle down to soak up a little bit of love when it was
offered.
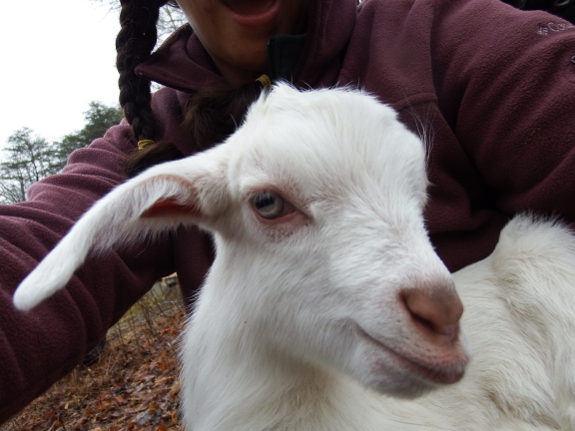
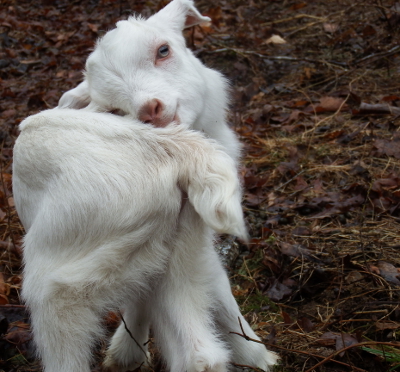 It's
a fine line between socializing a buckling to the point where he'll be
easy to handle...and falling in love with him. But I hope that Mark's
witty name for our kid will remind us that Lambchop is bound for the
freezer.
The moniker also reminds me that I left out the biggest reason new homesteaders shouldn't get goats in my previous post
--- it's tough not to fall for the bucklings. But the world only needs
so many wethered pets, so Lambchop and I will become friends but not
confidantes. I'll save my secrets for Artemesia.
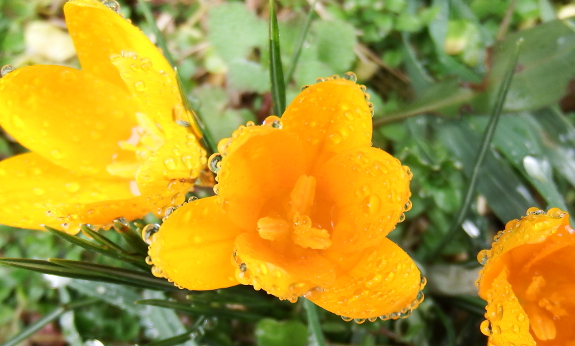
The earliest we've seen a crocus since we've been here was back in 2013 when they showed up at the end of January.
 I've been pondering a shade house
somewhere on the north side of the trailer for years. The idea is to
have a cool spot for summer dining, mushroom growing, and seed starting
during the hot season while still allowing rain to fall through the
"roof."
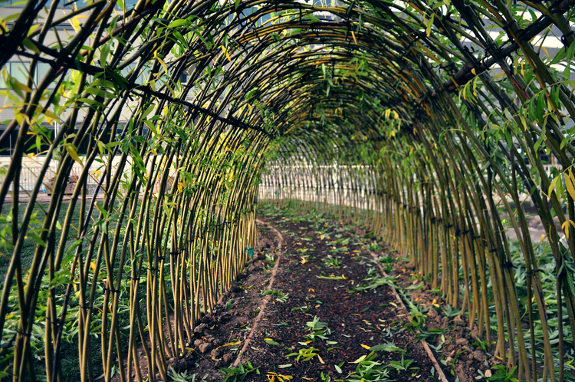
But the idea has never quite gelled into a finished form because I'm not quite sure what I want to make the structure out of. So when I stumbled across the photo to the left from Pooktre Tree Shapers, a light bulb went off in my mind. Maybe I need to build my shade house out of...trees!
Building with living
trees has a long history which may have begun with living root bridges
in India. However, those of us lacking a tropical climate can't get away
with using aerial roots for construction. Instead, we have to focus on
temperate-zone trees that grow quickly and (hopefully) have the ability
to easily graft together (inosculate) when nearby branches touch. Plants
that commonly inosculate and might be used for tree sculptures include
apple, almond, ash, beech, crepe myrtle, chestnut, dogwood, elm, fig,
grape, hazelnut, hornbeam, linden (aka basswood), maple, olive, peach,
pear, privet, river red gum, sycamore, willow, and wisteria.
Of these, willow is probably the easiest to use since you can root a
willow cutting simply by sticking the twig in the ground. Plus, the
resulting growth from the willow is malleable and extremely vigorous,
making it easy to shape and quick to grow. Finally, in our wet soil,
willows are bound to thrive, although I should mention those of you
gardening in drier climes might focus instead on elm or plum. (As a side
note, using fruit trees to make structures is enticing, but the
maturation process will be slower and you'll struggle to mesh your
sculptural needs with the plant's fruiting needs. In other words, this
is one instance where I'd probably recommend against going for an
edible-landscape selection.)
What have people built
from living willow trees? Chairs like the one shown at the top of this
post (although that tree is likely a plum), stairs, shade arbors,
arches, pergolas, and the newly named "fedge" (a fence that's also a
hedge because it's alive). I highly recommend this site (which is where I found the photo above) if you're looking for large-scale ideas, or check out this site for an inspiring array of willow fedges.
Now, before you get too
excited, I should tell you that creating structures out of living trees
is a long-term project that can take as much as a decade to fully
mature, so you'll want to think through your plan up front and make sure
you're willing to wait for the finished product. In addition, during
the early years, you're committing to a summer pruning and training campaign much like the one you'd use on a high-density apple orchard.
In general, you'll want to train the young growth into its final shape
as it appears, then rub off new branches that pop up in the wrong spot
during the summer months. After the sculpture matures, you'll still need
to prune perhaps twice a year (which can provide a handy source of goat
fodder or mulch for your garden).
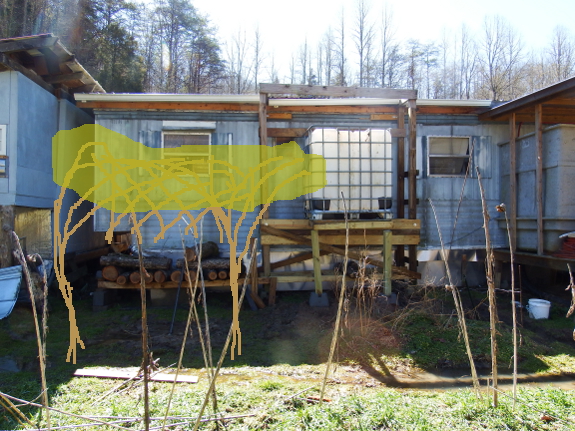
I'm pondering starting
out with a simple arch over our current mushroom station. A lattice of
willows at the back could arch across and merge with two larger trees in
the front to make a shady bower. Now I just need to determine whether
our wild black willows (Salix nigra)
are a good choice for tree sculptures, or whether I should splurge and
buy one of the willow hybrids that are reputed to grow up to 15 feet the
first year. Decisions, decisions....
How long does it take to
drill and plug our mushroom
logs?
We managed 2.5 an hour this
morning with me doing the drilling and Anna marking, hammering and
sealing each plug with bees wax.
I've used both quick hoops and cold frames in the past, and usually prefer the latter. However, now that we've finally skirted around the front of the trailer,
I couldn't help thinking that the sheltered, warm spot would be perfect
for a glass-covered cold frame to house flats of cabbage, broccoli, and
onion seedlings while they wait for safe outdoor-planting time. The
area is close enough to the front door that I won't mind opening and
closing the lid daily during sunny spells, and it'll also be pretty
simple to carry the flats inside if we hit a really cold spell. So when
Mark found two large, double-glazed windows in the barn, I figured the
cold frame was fated to be!
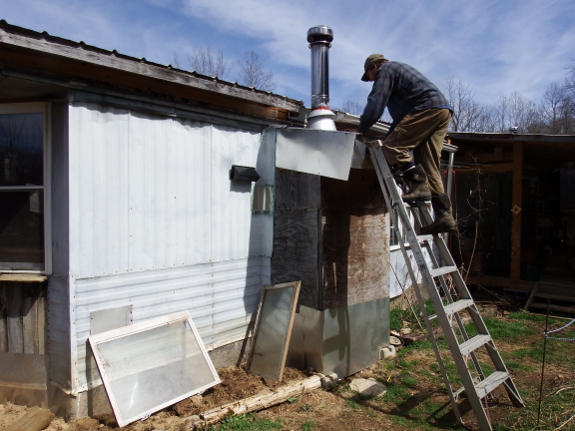
The first step of
building our new cold frame was checking to make sure we'd still be able
to get up on the roof to clean out our chimney. Now that I have a
grapevine on the right side of the wood-stove alcove and a cold frame on
the left, Mark will have to go up the front. Luckily, he says the
ascent is feasible...as long as I hold the ladder.
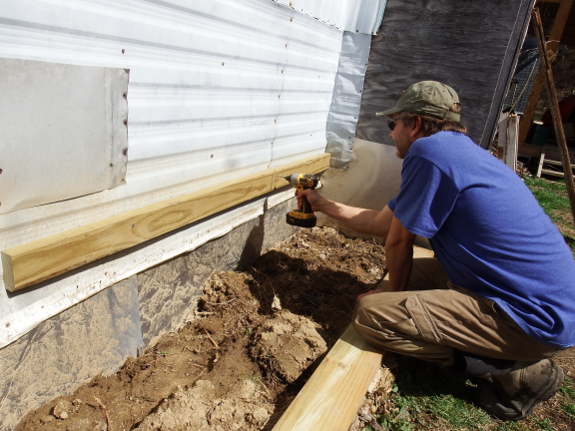
This area is a relatively
easy spot for cold-frame construction since two sides of the cold frame
can simply butt up against the existing building. Mark attached a
two-by-four along the trailer to support the windows...
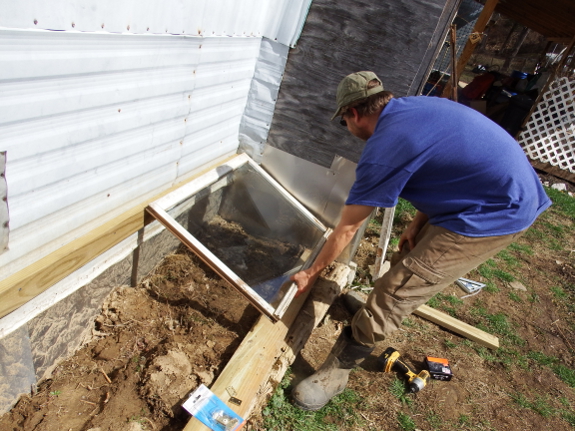
...Then hinged the first window into place. (Thanks for the hinges, Rose Nell!)
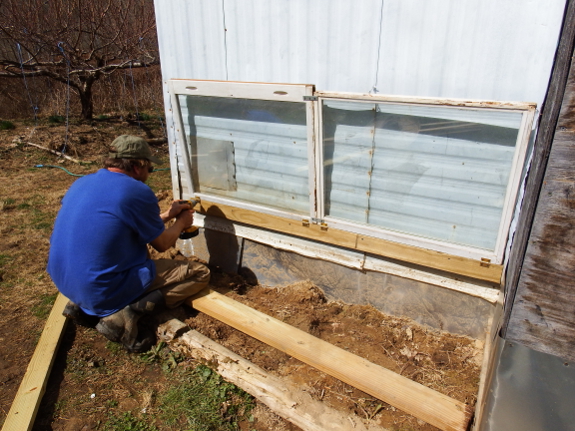
After adding the second
window, we realized that the two windows bumped against each other when
closed all the way. Although we could have tweaked the hinge arrangement
slightly to prevent this issue, Mark instead used metal brackets to
attach the two windows together into one solid piece. In addition to
fixing our slight mismeasurement, that arrangement also made it easy to
hold both windows open with a single screen-door hook on the side of the
trailer.
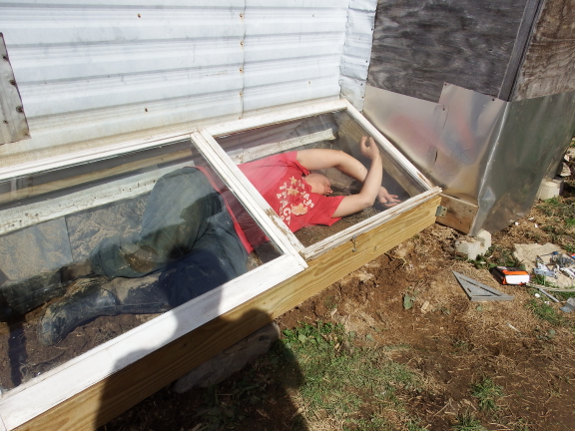
Next, we used a
two-by-six to form the front wall of the cold frame. Slanting the glass
from an 18-inch-high back to a 5.5-inch-high front should help the cold
frame collect more winter sun. But the angle did
make it tough to determine the location of the two-by-four support on
the right side. "Oh, that's easy," Mark said. He lifted up the window
glass and motioned me inside to mark and hold the support board.
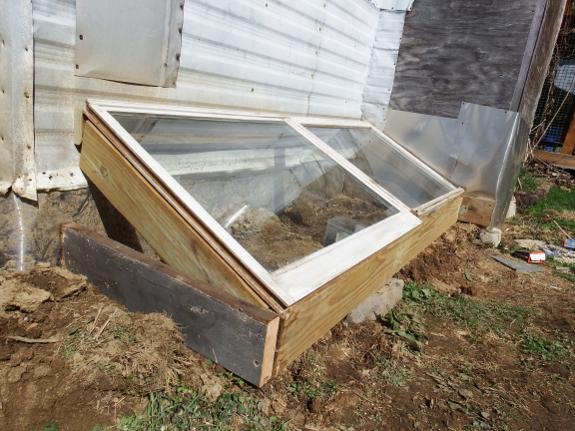
The left side of the cold
frame involved building a triangle out of wood, which we opted to do
the easy way. We used the end of the two-by-six that had formed the
front of the cold frame to butt up against the window on the top, then
cut segments of an old door (thanks, Sheila!) to fill in the gap left
behind.
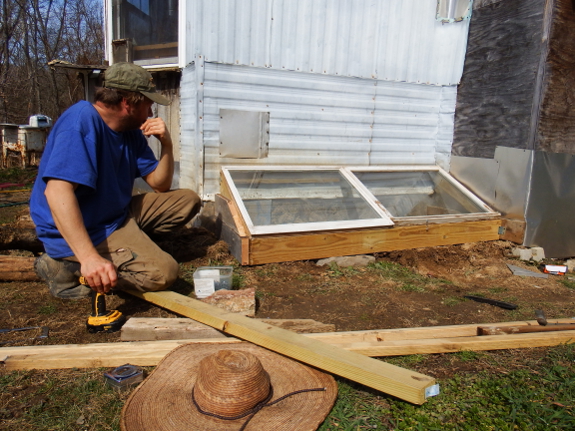
We've still got a little
work to do filling in gaps and painting the untreated wood, but the cold
frame is nearly ready to go after just a couple of hours' work. I've
got a max-min thermometer
in there now to test the waters and can hardly wait until we reclaim a
bit of our kitchen table from the cold-hardy seedlings. Right now,
there's barely enough room to fit two plates into the section the plants
left behind....
It was 5 degrees warmer
inside our new cold frame than the outside temp.
Adding some silicone and
spray foam sealant today should help to keep it even warmer tonight.
 I
have a love-hate relationship with books from Chelsea Green. Their
titles are so enticing...but the price tags are daunting and about half
of the books ultimately disappoint once I crack them open. Farming the Woods
by Ken Mudge and Steve Gabriel was partially inspiring and partially
disappointing, with a dry and academic tone and far too much basic
information, but with beautiful pictures and hands-on information that
made reading worthwhile.
The most helpful part of the book was the authors' realistic notations on which plants will really
produce in the shade. Despite forest-gardening literature to the
contrary, Mudge and Gabriel report that in a woodland setting with more
than 40% canopy cover, the only species that reliably bear fruit are
pawpaws, elderberries, ramps, and mushrooms. At 25 to 40% shade,
shisandra, hawthorn, currant, gooseberry, honeyberry, hazelnut,
juneberry, and groundnut join the mix, although productivity is likely
to be significantly lower than yields in full-sun environments. For
example, hazelnuts produce about 70% of their optimal yield in 30% shade
and 30% of their optimal yield in 90% shade, so you have to decide at
which point the juice is no longer worth the squeeze.
Another useful facet of Farming the Woods
was the authors' analysis of which non-timber forest products make
economic sense. After all, for forest farming to be more than a hobby,
landowners need to be given an incentive to keep those trees standing
rather than selling them to the local sawmill. Although many non-timber
options were presented, the authors felt that the most economically
feasible include tapping sugar maples (and possibly birch) for syrup,
growing ginseng for roots, and raising shiitakes on logs. In addition,
chestnuts and hazelnuts can provide relatively lucrative nut crops, and
turning the forest into a nursery for shade-loving ornamentals can also
help pay the bills.
In the end, Farming the Woods
isn't the must-read permaculture book of the year that I thought it
would be, but it's definitely worth at least checking out of your local
library. Or maybe you'd like to be the lucky recipient of my lightly
read copy? Enter the giveaway below and you may get a copy of your very
own for free!
We finished up the new cold
frame today.
Two coats of paint and some
caulk where we connected the two windows should help it to go well into
the future.
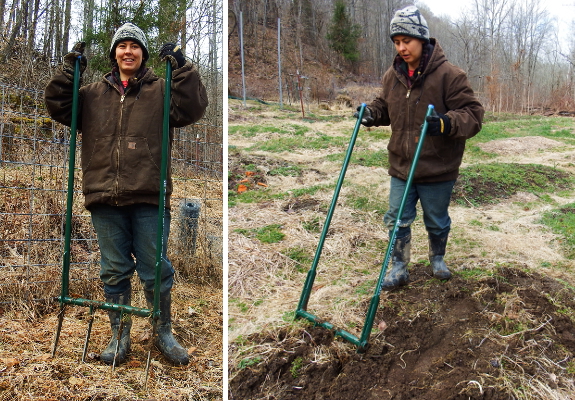
Our Meadow Creature broadfork
came in the mail a week and a half ago, but between the flood and my
cold, I only got to play with it for the first time Wednesday. My first
impression? This tool is fun! I'm slowly running out of terraforming opportunities to keep myself happy during the winter, so adding the broadfork to the mix will be as good as an antidepressant.
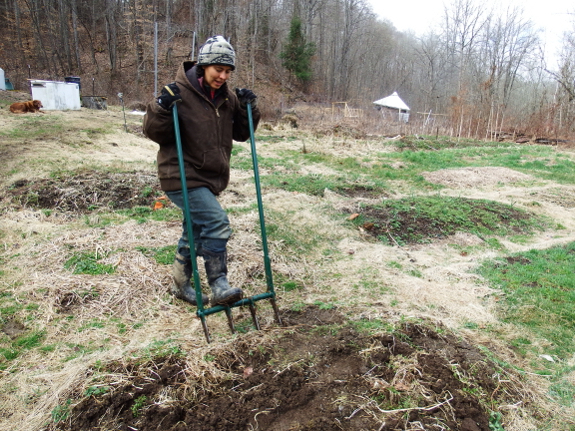
More seriously, in soft
garden soil, the broadfork works almost too well. Mark had to rein me
in, reminding me that our goal is merely a light loosening rather than
to really till up the soil. I eventually decided that a gentle fluff
from the edge of the bed is a good compromise in this kind of situation,
which will hopefully add a bit of aeration without negatively impacting
soil life. I plan to run a side-by-side comparison this spring, but
suspect that beds loosened lightly with the broadfork will be especially
good for root crops like carrots.
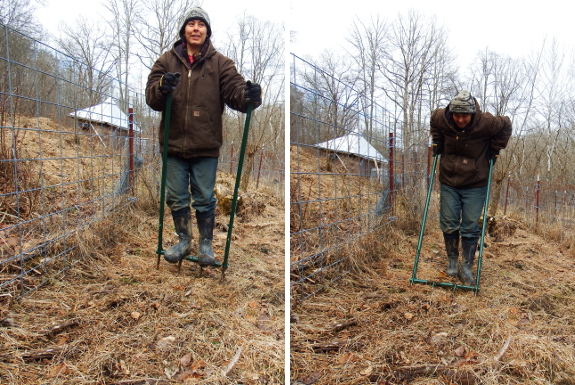
I also wanted to see how
well the broadfork performs in hard ground, so I headed up to the
extremely poor soil of the starplate pastures for test run number two.
Here, it took more effort to sink the tines into the earth and I had to
put my back into it to loosen once the tines were engaged. This area
will definitely be a good spot to work up a sweat next winter, and the
soil will probably benefit much more from broadfork action up here than
down in the main garden, but I'll admit this area felt more like work
than like play.
So did I select the right size?
I went for the smallest model, and that is definitely all I could
handle in the starplate pasture. I suspect I could have worked with the
next size up if I'd stuck to the main garden, but I'm not so sure the
extra two inches of loosening depth are really mandatory. So, yes, I
think Mark's nudge toward the smallest size was a good choice, and for
most female gardeners I would recommend the same. If you're particularly
tall or brawny, though, feel free to choose the 14 inch!
We're trying a new syrup
experiment on a nearby black birch.
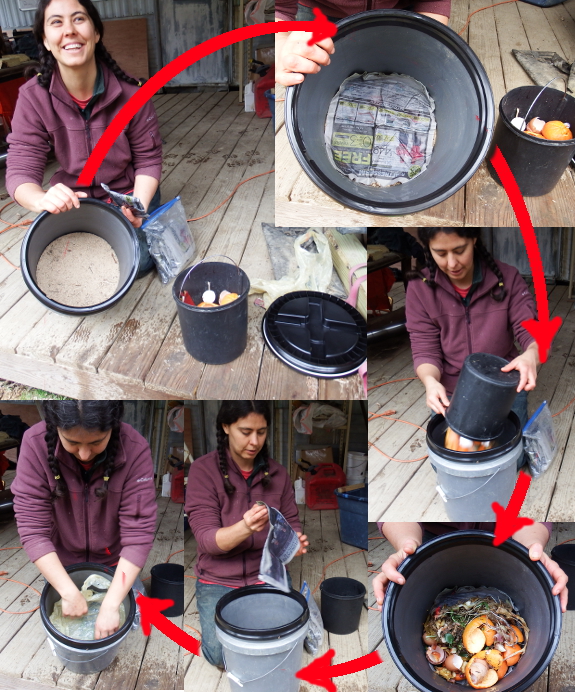
Our newspaper bokashi experiment is now underway. Here's our current method:
- Make a lactobacillus starter using yogurt, molasses, and newspaper. Wait at least two weeks. (We waited nearly three.)
- Use a gamma-seal lid and a five-gallon bucket to make an airtight container.
- Fill the bottom of the container with about four inches of dry sawdust to soak up any liquid that forms. Alternatives to this step include adding a spout to the bottom of the bucket so you can decant the leachate, drilling holes in the bottom of the bucket and setting it inside another bucket for the same purpose, or using newspaper or cardboard to soak up the leachate.
- Place a layer of the newspaper starter on top of the sawdust.
Instructions say that one sheet here is fine, but I had plenty of
newspaper and didn't want to try to tease apart wet pages so I included a
whole newspaper section. (More starter never hurts --- it just helps
the bacteria work faster.)
- Pour in food scraps. These should be no more than two days old and shouldn't include moldy or spoiled food, but you can include meat and dairy. As you can see, at this time of year, our scraps consist of eggshells, orange peels, a bit of discarded dandelion roots, and onion peels.
- Add another layer of newspaper starter to completely cover the food scraps.
- Put a plastic grocery bag on top of the newspaper and use your fists to pound everything down. The goal is to remove as many air pockets as possible and to bring the newspaper starter in close contact with the food scraps.
- Leave the grocery bag in place, screw on the lid, and set aside for two days until more food scraps accumulate. At that point, you repeat the food-scraps layer, the newspaper layer, and the pounding, then continue with bi-daily additions until the bucket is full.
- Let the bucket ferment at room temperature for two to four weeks
after filling, then apply to the soil. (More on this step in a later
post.)
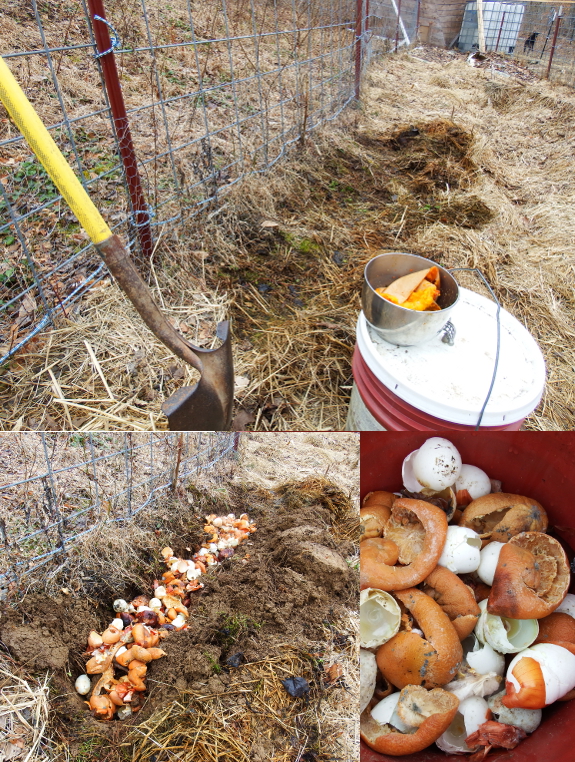
I'll admit up front that I'm a bit dubious of the efficacy of bokashi, even more so after I read the "science" chapter in Bokashi Composting
by Adam Footer. So I'm running a three-part mini-experiment to give
myself a rough idea about whether the more complicated bokashi method is
worth the time and expense.
The control is shown
above. I filled a normal five-gallon bucket (no air-tight lid) with food
scraps, let them sit on the porch for a month or so, then applied them
in a trench in the starplate pasture. I marked the location of the
control and will be adding similar trenches full of bokashi made using
two methods (store-bought starter and homemade starter) in the months to
come. Finally, I'll dig into each area a month or so after application
to determine whether the bokashi method really did make the scraps
decompose faster and whether the soil seems to be better in the bokashi
zones than in the control zone. Stay tuned!

I wanted to share this nice T-shirt design one
of our readers made.
It's only available for the
next 14 days, and she needs at least 3 orders to get the printing
process rolling.
Sarah is available for custom
shirt designs and can be contacted through her ThreadBearDesign
Facebook page.
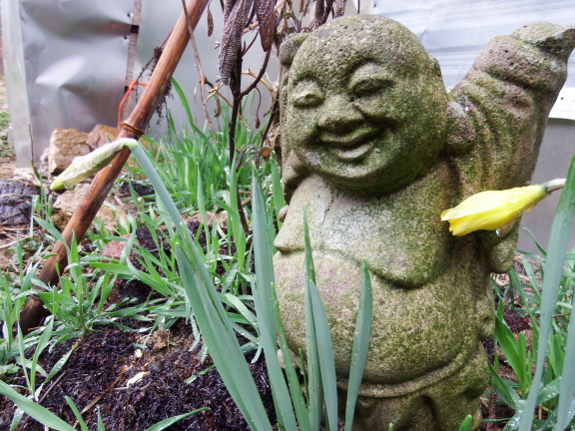
 Usually,
spring comes to our farm long before the equinox. But the natural world
is running a little late this year. Can you believe it's officially
spring and the first daffodil is still struggling to open its bloom?
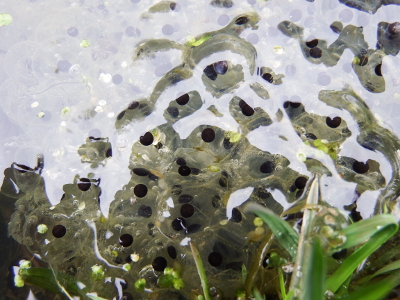
On the other hands, the frogs are calling like crazy, the first hepatica
was spotted in the woods Wednesday, and Mark and I each heard a grouse
beating on a hollow log calling for a mate. Perhaps we can finally write
off Old Man Winter after all.
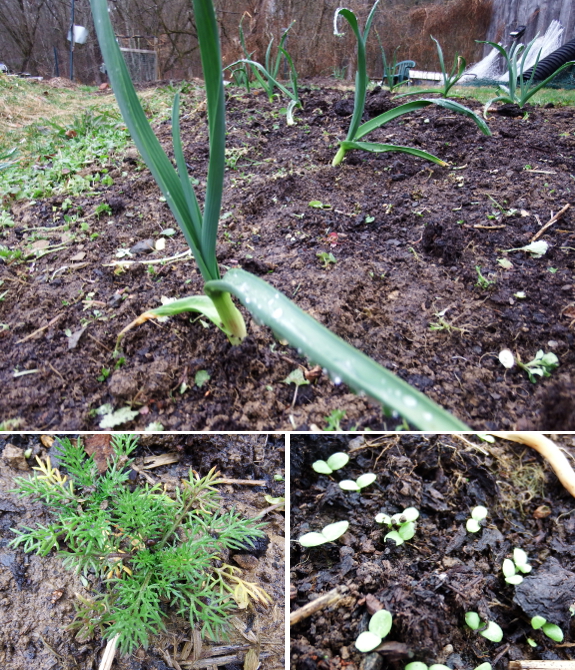
In the garden, I'm a bit
behind in chores and the plants are a bit behind in emergence. I went
into the winter a little remiss because sprouting-straw
issues meant that half of my garlic never got mulched in the first
place, and snow cover in February and early March meant that I wasn't
able to reach the ground to rip out the chickweed that had taken over
that open ground. Luckily, a warm week and a lot of rain washed away the
snow and I was able to get peas and lettuce in the ground
by the middle of the month. Now I'm hard at work weeding and prepping
beds for carrots, parsley, mangels, and cabbage transplants, while
slipping in a bit of time to weed our garlic and strawberry beds.
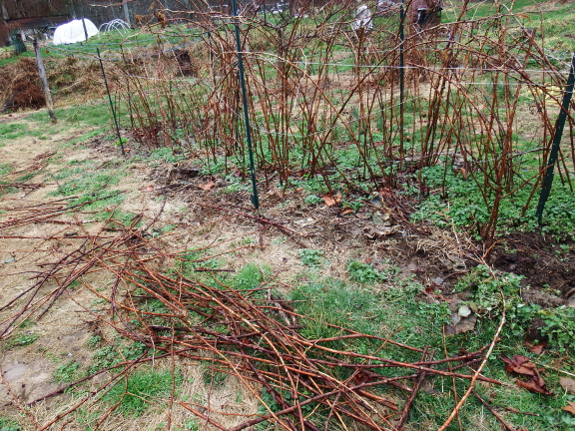
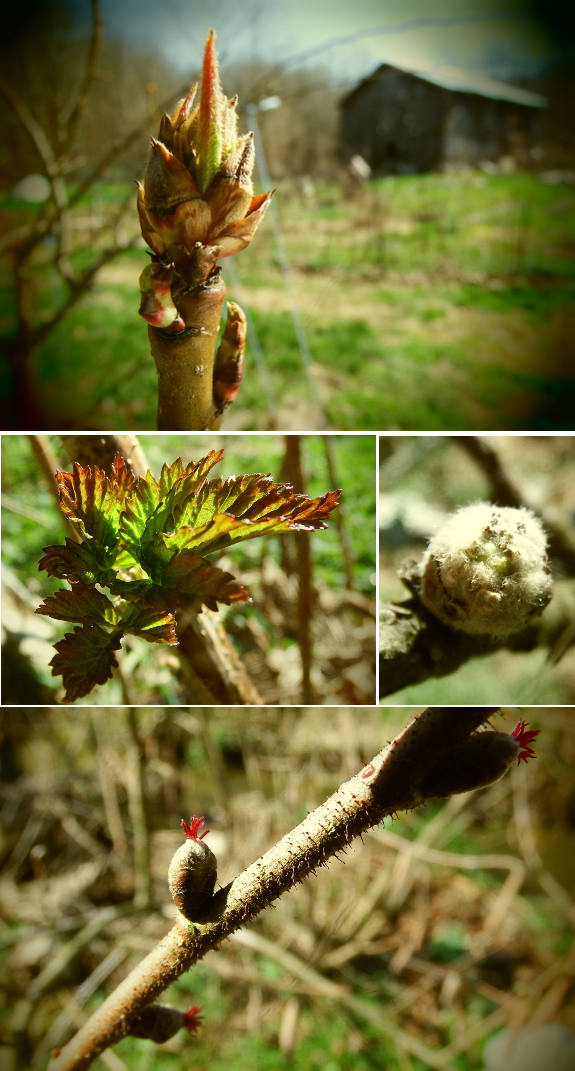
I'm also behind on pruning, but purposely so since I was afraid that early pruning during a particularly cold winter would exacerbate freeze damage. The good news is that my gut feeling was right --- early pruning combined with cold weather is what killed back our red raspberry canes last year. This year, an even colder winter (low of -22 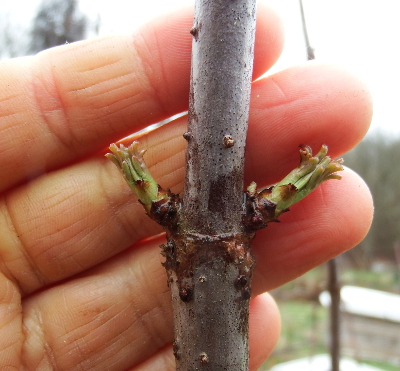 Fahrenheit) didn't nip the brambles, so we'll get our usual spring and fall crops --- success!
On the other hand, the
first elderberry leaves are now starting to pop out, so tree flowers
can't be too far behind. That means I need to hurry up and prune like
crazy to make up for lost time, a good project for wet days like this
when the garden is too sodden to make weeding a pleasure.
Even though the raspberries fared well during our winter cold, I still
plan to test some bloom buds on each new species before I prune. After
all, if the winter nipped some percentage of the peach bloom buds, for
example, I'll want to leave more behind to take their place.
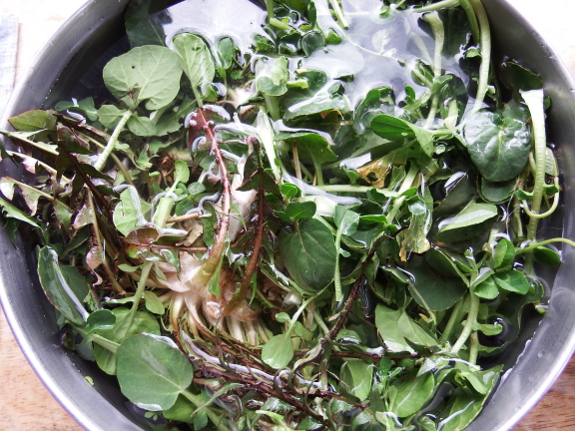
Even though our vegetable
garden is running behind, wild food is already becoming available.
Creasies keep springing up in our garden despite the fact that I'm
pretty sure I haven't let any go to seed since moving here, and
dandelions always find new ground to sink their deep taproots into. I
pulled a large bowlful of these two delicious greens out of the garden
while weeding Wednesday, then washed them in several changes of water
and sauted with balsamic vinegar and peanut oil. A delicious dose of
spring!
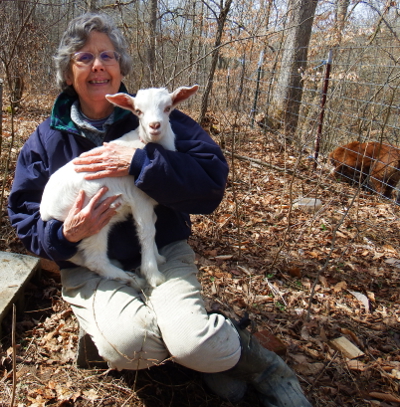
Our little Lamb Chop is at the point where he likes to jump up into a warm lap every chance he gets.
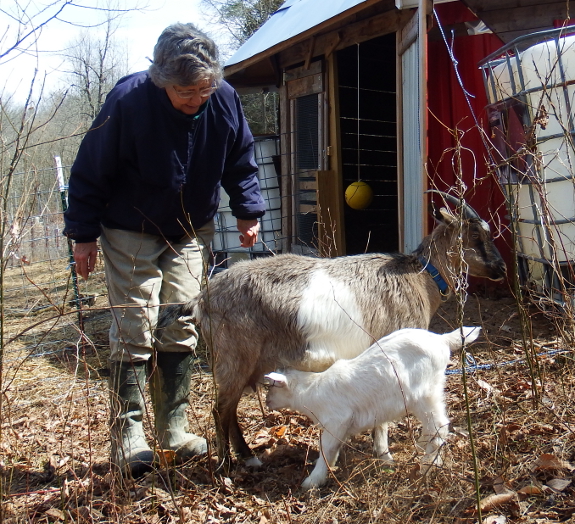
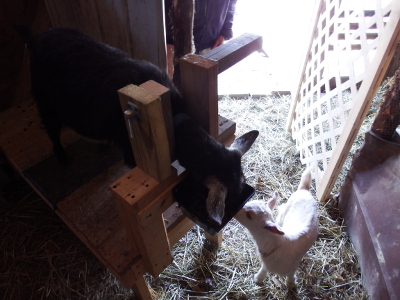 Baby
goats grow almost unbelievably quickly. The kids can stand up within
minutes of birth, they seem to double in size at a remarkable rate, and
at two weeks old they are mature enough to be separated from Mom
overnight.
Friday was Lamb Chop's
big night. After milking Abigail nearly at dark, I stuck our little kid
in the milking stall all by himself and walked away. He cried and
Abigail cried, but they both fared fine overnight, and the next morning I
was able to collect a larger share of the milk (11.8 ounces). As Lamb
Chop learns to eat solid food over the next few weeks, I'm hoping the
human milk quota will continue to grow.
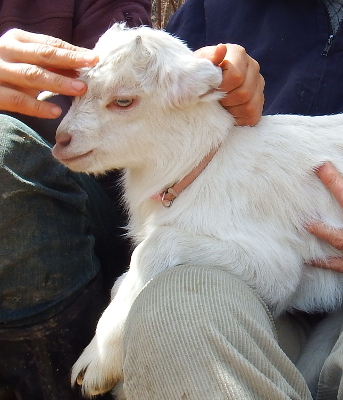 My original milking plan involved separating the kid(s) at night
and then just milking once in the morning, but Abigail's early nursing
issues set me off on a
different track. Even after Lamb Chop found his
way to the teat on day four, I kept milking twice a day anyway, only
getting dribs and drabs (seldom more than cup and often much less). The
small amount of milk
was appreciated, but I felt like the milking was particularly important because Lamb Chop seems to prefer Abigail's right side, a common issue
with single kids. By milking our
doe out twice a day, I'm able to ensure that both sides of Abigail's
udder
keep producing milk. Meanwhile, Lamb Chop was getting all he could drink
until the nighttime separation, so I didn't have to worry that he was
lacking in nutrients. In fact, he seems to have doubled in size over the
last week.
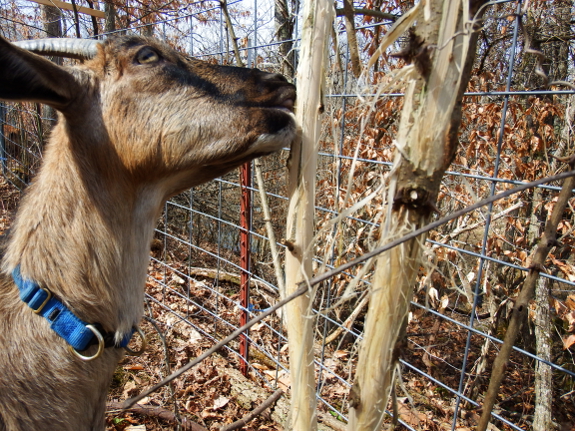
Speaking of lacking in
nutrients, Abigail has recently started peeling bark off the little
saplings in her yard. I suspect she's getting desperate for fresh
growth, and I have high hopes that we can set up some temporary
enclosures in the most sunny part of the yard in a week or two to let
our goats enjoy the first spring grass. I learned this fall that even
though goats aren't supposed to be grazers, our girls are quite happy to
eat tender leaves growing out of the ground and I can hardly wait for
our girls to be off the hay train.
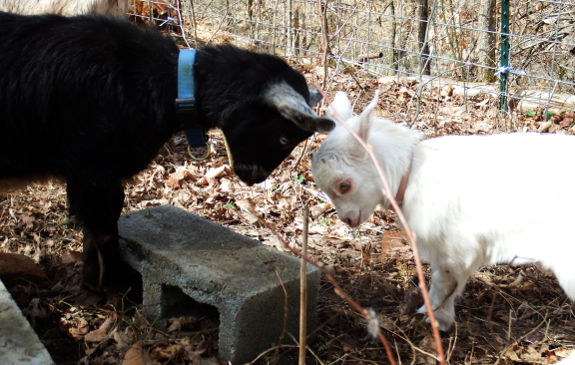
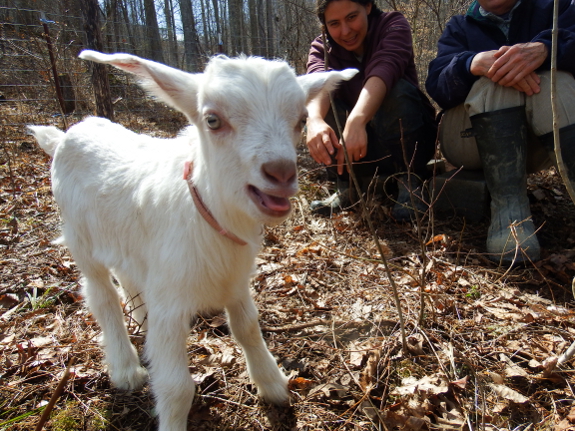
 In
other news, Artemesia seems to be losing her youthful bounce at the
same time that Lamb Chop learns to caper --- I guess there can only be
one baby in the family at any given time. As you can see in the photo
above, I upgraded our doeling to a real collar and gave the mini collar
to Lamb Chop. I think our buckling is confident enough in his
masculinity that he won't mind wearing pink. In fact, he'll be old
enough to possibly become a father in just another ten weeks --- then
we'll have to figure out whether Artemesia is willing to go into heat in
the summer for a fall kidding or whether we'll need to separate Lamb
Chop for the summer so he doesn't knock his mother up. Goat management
definitely leaves us with a continuing set of hurdles, but they sure are
fun!
Friday was one of those days
where the truck broke down and the car lost its entire exhaust system.
Nice of it to happen within a
mile of leaving home.
Sometimes I miss taking the
bus.
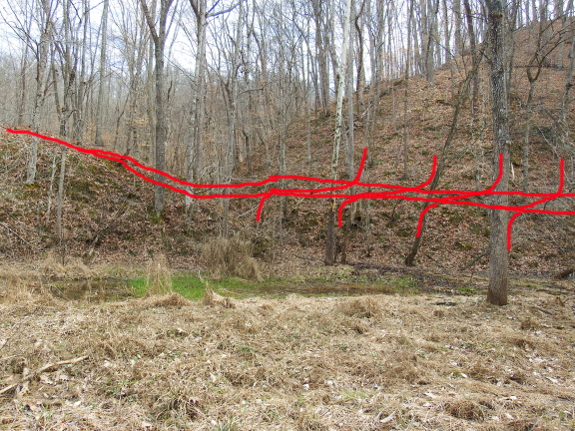
It's decision time around
here. Do we take the money we've been saving to improve our access and
sink 100 tons of rip rap into the 680 feet of terribly marshy floodplain our driveway currently traverses?
(That sounds like a lot, but I suspect it would be a mere drop in the
bucket.) Or do we use the cash to hire a neighbor with a bulldozer to
try to carve a path out above the floodplain, a task that might come to
naught if he hits bedrock too soon, and one that would require building a
bridge across a rather large gully?
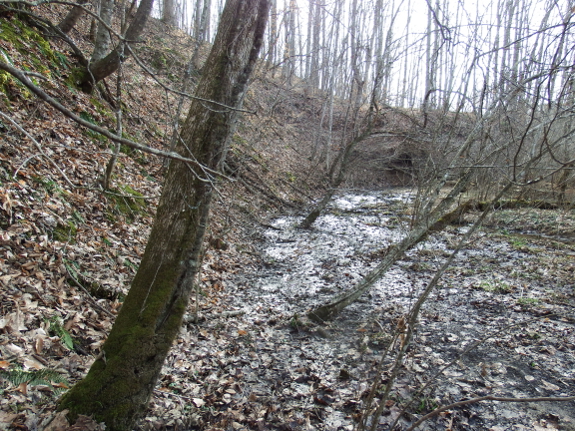
Here's a bit more
information about plan B. After crossing the creek, there's easy access
up onto the knoll you see at the right side of this photo, but the
hillside the bulldozer would be carving into is difficult, to say the
least. There would be a lot of short-term devastation involved (although
perhaps not more than we cause on an annual basis tearing up the wet
soils of the floodplain). And our neighbor warned us that there's no
guarantee he won't hit rock before he's able to carve out enough earth
to make us a road, which would mean we had sunk our money into a project
with no improvement to our access at all.
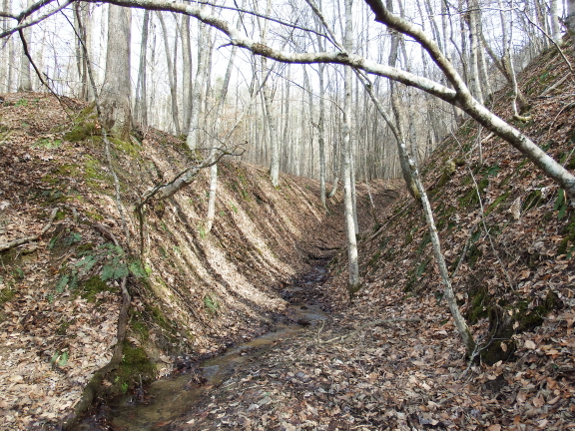
Then you reach a gully,
which our bulldozing neighbor says would have to be bridged --- he's
pretty sure his equipment won't continue carving around the bank you see
on the right as it runs up this little cove. Instead, he recommended
felling two trees to make a bridge for our ATV (which is the intended
recipient of whichever driveway fix we decide on). Mark and I don't like
the idea of a bridge rotting out under us after a few years, though, so
we might instead see if we could find a big culvert or two to bridge
this gap (and find out whether the bulldozer can haul them in). Unlike
our main creek, this little rivulet dries up in the summer and never
gets big enough to wash a culvert out, so a bridge here is more feasible
than in other locations. (Our most recent flood reached about six
vertical feet up the side of the hill here, but it should stay clear of
the top of the bridge.)
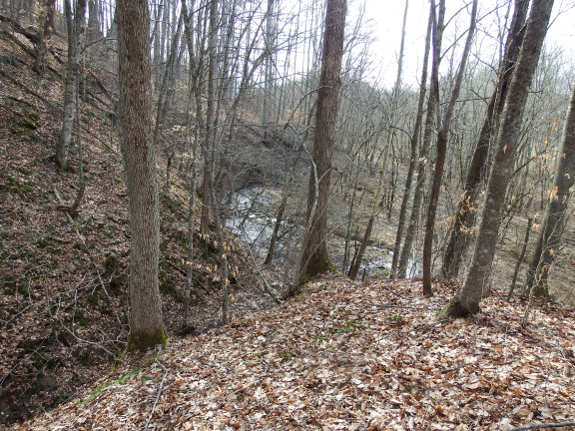
If we were able to carve around the bank and bridge the draw, we'd be home free. Up here is where Joey's yurt
stood, and an old logging road runs between this spot and our core
homestead. All it would take is a little chainsaw work to make the route
passable with the ATV and it's all dry, with no creeks to ford or swamp
to traverse.
It's hard to decide
between plan A and plan B because we don't have any solid cost estimates
for our neighbor's work, for culverts, and for the eventual rock that
would need to go down to hold this driveway possibility into place. Our
neighbor says it would probably take about two days of dozer work,
assuming all goes as planned, but when does anything ever go as planned?
While Mark and I are
mulling it over, I'd be curious to hear your thoughts. Assuming all you
wanted was to be able to haul in manure and straw a few times a year,
would you go for plan A or for plan B? If you were looking for a big
culvert, where would you look and how much would you expect to pay?
We cut our swamp
bridge in half and moved
it to a new location.
The new path will avoid a
spot that was going to need a bridge soon.
Thanks for all the useful
comments on how to avoid losing our bridge the next time it floods.
Next up is to tether a rope to the bridge and tie it off on the medium
Willow next to it.
 Are you pulling out your maple taps and plugging the holes? Maybe it's time to tap a birch!
Birch trees begin running around when sugar maples let up, making them a
good second crop for people who have already invested in the equipment
for the former and want to extend their syruping season. But birch syrup
isn't the same as maple syrup, of course. For one thing, the former
sells for a lot more --- maple syrup tends to go for thirty-something
dollars per gallon, while birch syrup sells for (by some estimates) ten
times that much.
What's with the excessively high price? I think some of the appeal is
simply that birch syrup is a niche product, added to which you have to
boil down about three times as much birch sap as maple sap to make
syrup. Birch syrup is also reputed to be a bit trickier to produce since
you have to be more careful to keep the sap from scorching, which
likely adds to the price tag. On the plus side, birch syrup is supposed
to have a lower glycemic index than maple syrup and table sugar, being
closer to the value of honey and sorghum molasses. In addition, birch
syrup is often treated as a healthful tonic, perhaps because the extra
boiling means that you're concentrating more minerals in each spoonful
of syrup.
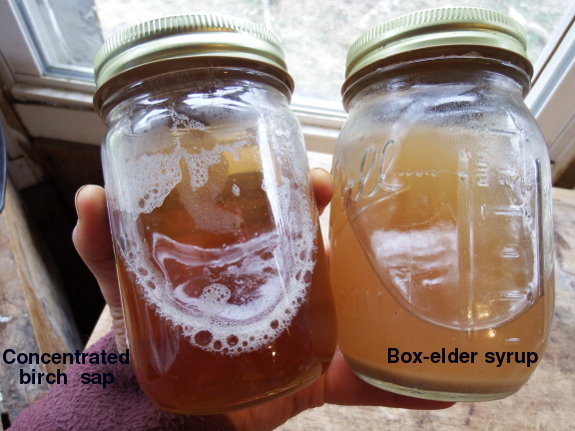
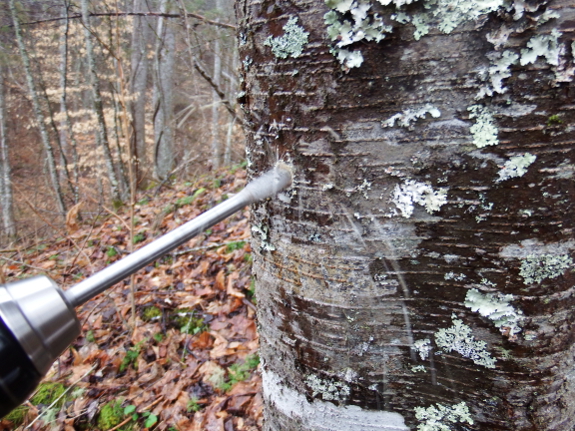
Mark and I aren't
interested in selling birch syrup, but since our maples stopped running
last week, we figured we might as well tap a birch tree and see what all
the fuss is about. I have to admit that I've only boiled down the
barest smidgen of syrup (made from about three pints of sap), but I can
tell that birch syrup is very different from maple syrup. For one thing,
the former is much darker, even in the sap stage. The photo above shows
condensed sap that began life as one gallon of liquid and will still
need to be boiled down considerably before it becomes true syrup. As you
can see, the condensed sap is already much darker than the box-elder syrup beside it.
Another difference
between maple and birch syrup is flavor, although this factor will vary
depending on which species of birch you're tapping. Most birch syrup
sold in the U.S. is made from Paper Birch or Alaska Birch grown in (you
guessed it) Alaska, but our much more southern clime means that Black
Birch is our common species. Although Black Birch twigs taste strongly
of wintergreen, I didn't notice any wintergreen flavor in the syrup we
sampled. Instead, the dark liquid reminded me of sorghum molasses, and
I'd likely use my birch syrup in the same recipes I use with that
southern staple sweetener.
I'd be curious to hear
from folks who have tapped birch trees and made their own syrup. What
did you think of the flavor and how did you use it in the kitchen?
We finished up our new
mushroom logs today.
16 logs total with 3
different varieties of shitake plugs.
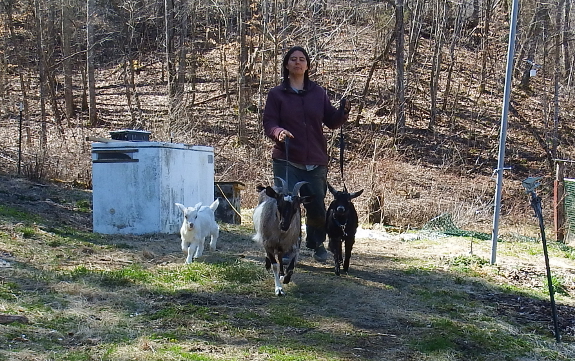
It's been a long time since I took our goats out to play. First, the honeysuckle
started to give out, then the snow fell and completely covered
everything edible. But now our grass is just barely starting to grow in
the sunniest part of the yard, so I decided it was high time I started
reconditioning our herd's gut bacteria. Five minutes longer nibbling on
grass each day means that our goats' digestive system will stay happy on
the fresh greenery, and I figure within a week or two the ruminants
will be safe to graze lush grass at will. Abigail thinks this plan is
the ultimate in human stupidity...but I hold the leash.
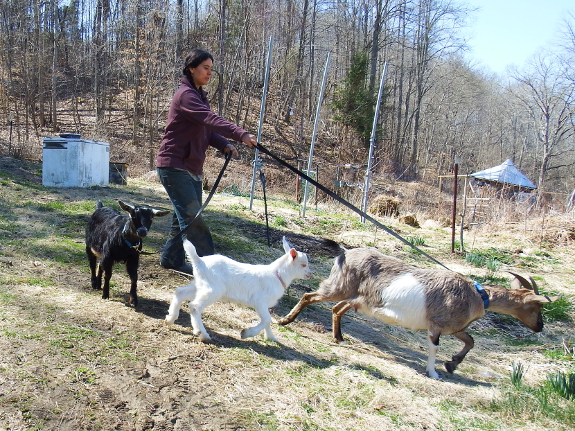
Well, I try
to hold the leash. I'd meant to walk our little herd to the other side
of our core homestead where sun is really making the grass grow, but as
soon as Abby saw the tall rye coming up in the front garden, she decided
it was time to dine. Rye held little to no appeal this past winter, but
I guess the lush new growth tastes sweeter now --- the leaves even
smell sweeter as I stand by and watch our doe chew. She also went for
tiny new clover leaves barely pushing a quarter of an inch above the
ground, in search of protein to go in her milk, I suspect. Those alfalfa
pellets we bought are being eaten avidly, but who wants dried when they
can have fresh?
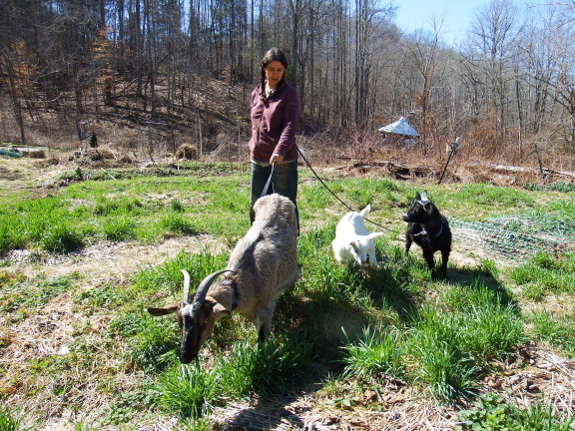
Abigail has a voracious
appetite --- making milk uses up lots of calories. In contrast,
Artemesia is just learning to walk on a leash, so our smaller goat spent
much more time figuring out how not to get her feet tangled than she
did eating. As for Lamb Chop, he apparently thinks dirt is tastier than
grass. And who really needs to eat solid food when the milk bar is open?
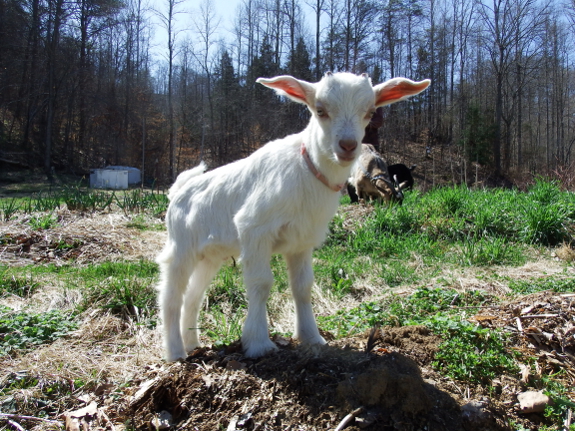
At the moment, Lamb Chop
is also too young to need a leash. Which is a good thing since I'm not
sure I could handle three goats in my two hands. On the other hand, our
buckling is much braver at two weeks old than Artemesia was at six
months old. When Mark came out for our photo shoot, Lamb Chop kept
trying to follow my husband across the yard rather than staying with the
goat herd. Maybe our buckling has realized that he's one of very few
males on our farm and figures the guys need to hang together?
A short section of nylon rope should keep our foot bridge from floating too far during the next big flood.
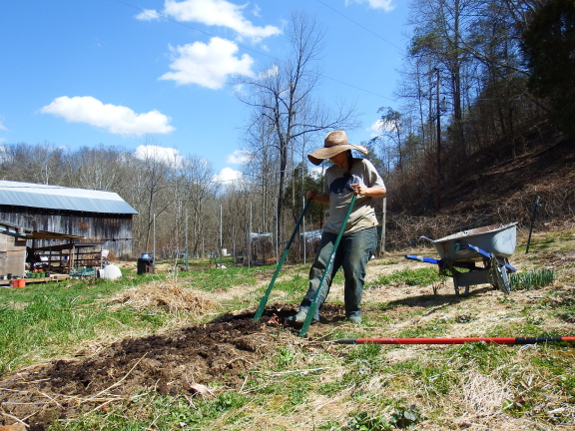
If you've sent me an
email or given me a call recently and I've been extremely slow to
answer...blame it on the sun. This bout of stunningly gorgeous weather
means that our usual schedule of half a day working inside and half a
day working outside went right out the window. Instead, Mark and I have
been catching up on all of the fun garden tasks that got put off when
snow was on the ground, barely coming inside for meals and then
collapsing at the end of a long, glorious day. I promise to be a better
correspondent once the cold, wet weather returns this weekend.
Specifically, I've been
weeding and mulching garlic and strawberries, pruning perennials,
transplanting cabbage seedlings, and direct seeding carrots, parsley,
and mangels this week. As I plant, I'm experimenting with the broadfork,
fluffing up half of each bed while simply raking topdressed manure into
the top inch of the other half. It's easy to see the broadfork's
effects right away, with manure filtering down into the looser soil in
the broadforked areas while the fluffed up soil sits higher above the
aisles. I'll keep you posted about germination, growth, and yields of
the roots in the broadforked vs. unbroadforked beds as the results come
in.
Why did I secure a chicken
door with pipe strapping in the goat barn?
Because one of our goats
figured out how to pop the latch and open the door.
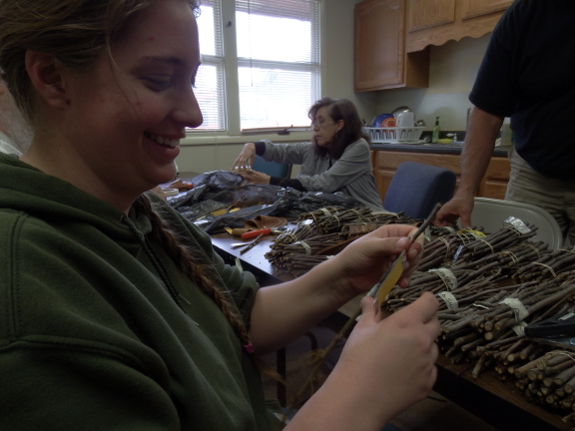
Kayla and I enjoyed a girl's day out Thursday --- we attended the annual grafting workshop
at the Gate City extension office. I've been to nearly half a dozen
grafting workshops now, and this one was by far my favorite. Not only
was it held at 2 pm so we could get home before dark, but the selection
of scionwood was astounding. I came in the door with nine pieces of
scionwood I'd brought from winter trades, planning to just graft what I
had...but I walked out with sixteen apple trees. (Good thing they were
willing to sell me extra rootstock for a dollar a pop.)
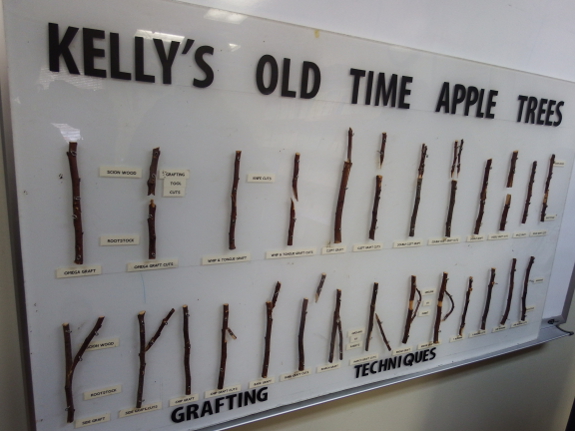
In addition to the copious scionwood choices, the organizers had three
apple books on hand, so I could look up each variety to see whether it would hit the spot. Yes, I did spend
an hour paging through the books to determine which types of apples were
worth a try. Even though the pages were simply text, I found the most complete book was Fruit, Berry, & Nut Inventory --- I may have to get a copy for future variety selection.
As a side note, I should mention that half of the instruction and most of the scionwood came courtesy of Kelly's Old Time Apple Trees, whose website is rather sparse but who sells both scionwood and full apple trees to ship across the country. Our wedding apple trees came from Kelly's and the fruits are superb! If you don't want to go through the hassle of swapping for scionwood, then Kelly's may be your one stop shopping outlet.
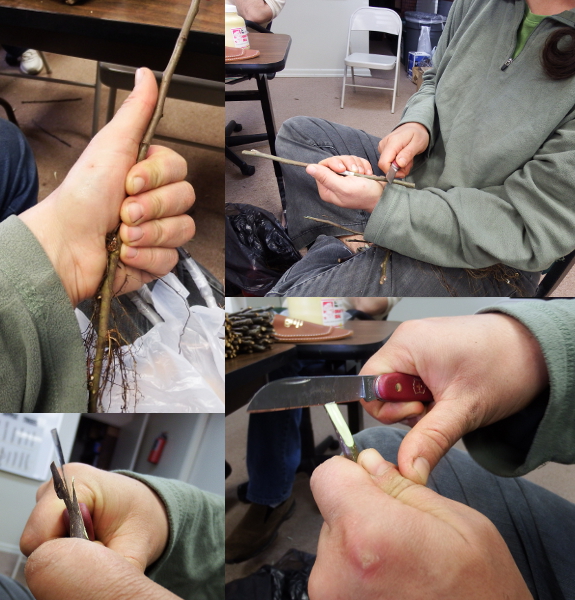
But the positive points
of this workshop went far beyond excellent scionwood selection and a
good time of day. The instructors were also pros who helped me learn
safer and more effective methods of making the classic whip-and-tongue
graft. First, start with their "rule of thumb" --- grasp the rootstock
where the top roots branch off, then cut off the top where the tip of
your thumb reaches. (I figured my thumb was a little shorter than the
digits on their male hands, so cut just a little higher.)
Next (top right photo), hold your knife in your right hand so the beveled edge is up and don't move that hand.
It feels awkward at first, but you'll soon learn how to hold the
rootstock in your left hand with the roots facing away from your body so
you can pull the rootstock away from you against the stationary knife.
This is much safer and makes a much straighter cut than the whittling
method I'd been using.
Finally, for the tongue,
brace the thumb of your knife hand against your other hand (which,
again, feels quite awkward at first), and gently pull the knife into the
wood by sawing it back and forth. Once the knife is seated, finish the
cut by rocking the knife rather than pulling it down. Then slide the two
pieces of wood together, seal them well with grafting tape, cut down to two buds on the scionwood, dab some sealer on the cut end, and you're done!
I'm still far from
perfect, but after sixteen trees, I was starting to feel pretty
proficient. Good thing too since I suspect this will be my last grafting
workshop for a while --- I'm finally running out of spots to put new
trees. Kayla and I are going to have to think of a new girl's day out
plan for next year.
Lucy went on a trip today to
visit our nice vet in the big city.
She got a clean bill of
health and multiple compliments on her beauty.
The different types of
sugars in birch sap compared to maple sap make birch syrup a little
trickier to boil down. It's imperative not to allow the developing syrup
to get above 200 degrees Fahrenheit with birch sap unless you want the
sugars to caramelize, darkening the color and impacting the flavor. In
addition, it's a bit trickier to know when birch syrup is done since it
doesn't get as thick as maple syrup, so you'll need to make your best
guess, then weigh the finished product to determine how close you are to
the optimal 11 pounds per gallon.
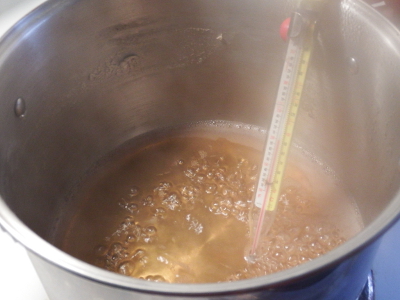 Luckily,
our birch tree started running hard when the warm weather came around,
and several days in a row of 1.75-gallon yields gave me enough condensed
sap to try my hand at syrup making. I ended up with about a quarter of a
cup of syrup from three gallons of sap, at a weight of 3.3 ounces for
the final product, which means I actually cooked the liquid down a bit
further than is optimal (even though the syrup still looked pretty
runny, even when cool). This equates to about 192 gallons of sap per
gallon of syrup, requiring half again as much boiling down as even the box-elder sap we experimented with last month and three times as much boiling as our sugar maple sap.
With a larger supply of
syrup on hand, we were able to try out a more in-depth tasting, this
time substituting birch syrup for the sorghum molasses in our favorite
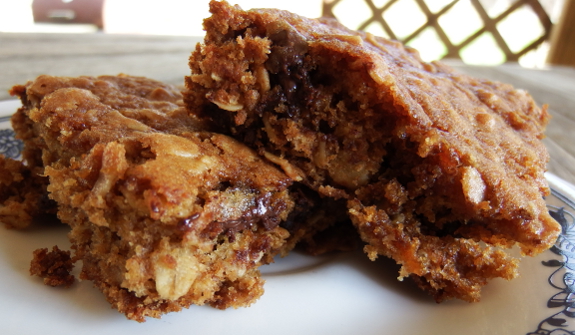
oatmeal cookie bar recipe. The result was delectable! I'll include the
recipe in my upcoming ebook, Farmstead Feast: Spring, due out in March, but if you'd like some farm-friendly recipes while you wait, Farmstead Feast: Winter is still for sale for only 99 cents. Enjoy!
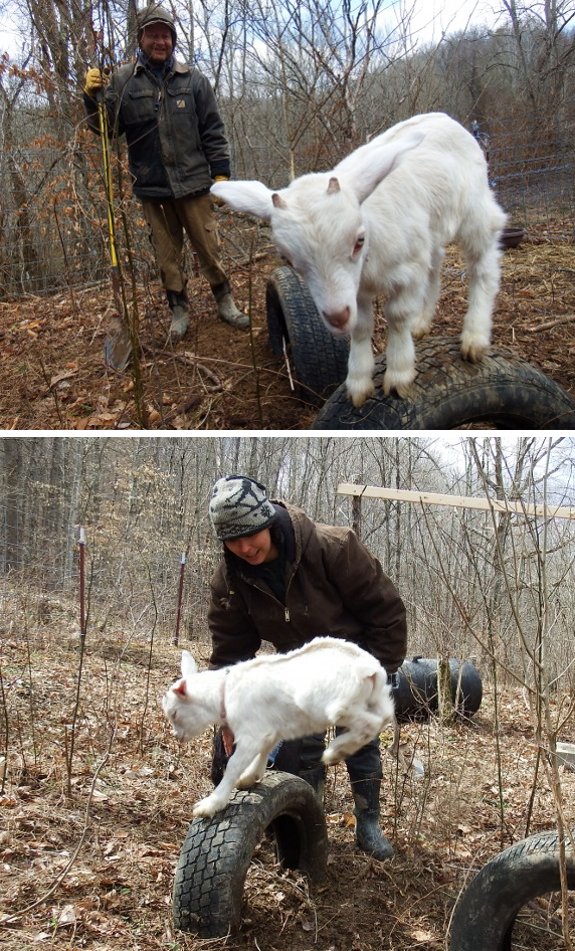
We discovered today that a
half buried tire makes an awesome goat toy.
Lamb Chop likes to jump from
one to the other.
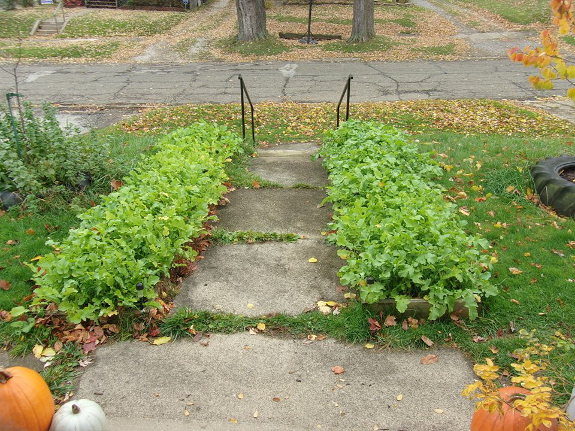
Last fall, I sent out seeds of some of my tried-and-true
(along with a few experimental) cover crops to readers to see how the
species fared in other soils and climates. My favorite result is shown
above --- Aimee in Ohio planted oilseed radishes in beds that will be
used to grow strawberries this year. She reported: "[The oilseed
radishes] stayed crisp and green clear past Thanksgiving, which gave me a
ready supply of greens and radishes for the guinea pigs. I'll admit it,
I ate a few myself. Even though I am not a radish person, they weren't
bad." Oilseed radishes also got good reviews from Missouri, although
Charity in the Pacific Northwest preferred barley and white mustard in
her garden.
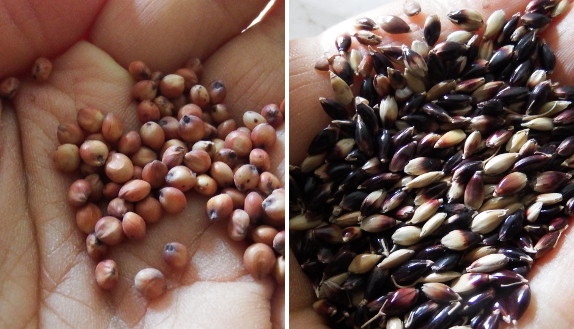
What's coming up this
spring? I splurged on several new varieties, which I plan to try out
both within the garden and as cut-and-come-again mulch producers in the
newly bare aisle soils in areas where I recently mounded up earth to
create higher raised beds. I figured --- why let that bare ground turn
into weedy lawn if it can do double-duty by producing biomass for the
garden instead? (Of course, I may regret this choice when I have to wade
through tall grasses to get to my tomato plants.)
New species on the planting agenda include:
- Barley --- This may be the plant I've been looking for to fill the
early-spring gap before weather warms enough to plant buckwheat. This
grain is supposed to mature enough to flower and be mow-killed in just a
little over two months. I wasn't terribly impressed when I tried barley
as a fall cover crop in the past, but I have higher hopes for its
performance in the spring garden.
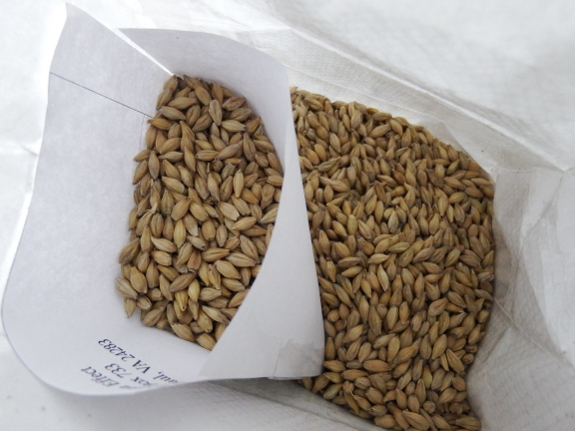
- Sorghum-sudangrass hybrids --- I'm trying two different varieties, which look very distinctive in the seed stage (pictured above). I figure this will be a good fit for my aisle experiment.
- Pearl Millet --- This species should fill a niche similar to the sorghum-sudangrass.
- Alfalfa --- In part, I'm growing this legume for the goats since I'm currently buying alfalfa pellets to boost our milking doe's protein intake and calcium levels. But I figured it would also be interesting to see how alfalfa fares as a nitrogen-fixing cover crop left in place for the entire summer.
Want to join in the fun? I
have room for a few more experimenters since some of last fall's
gardeners dropped out. If you live in zones 3, 4, or 8, drop me an email
at anna@kitenet.net and we'll
chat. Folks chosen will receive free seeds as long as you promise to
share photos for my book and to report on your results!
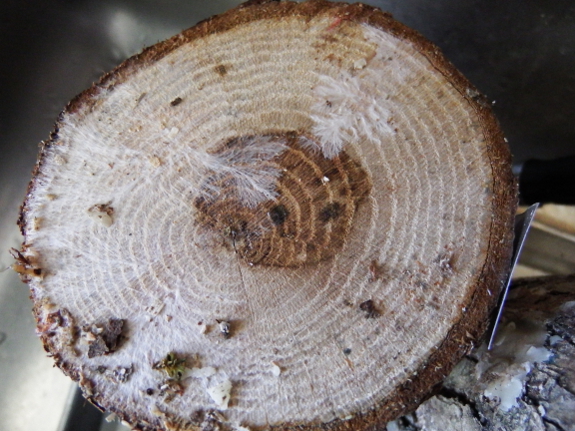
The mini
mushroom log experiment is showing signs of shitake growth.
We plugged them about 5 weeks
ago.
Winter came back with a
vengeance this past weekend. First, we had a light snow on Saturday
morning, then Sunday morning dropped down to 16 degrees Fahrenheit.
Luckily, the cold was short-lived and I doubt the fruit trees saw any
new damage.
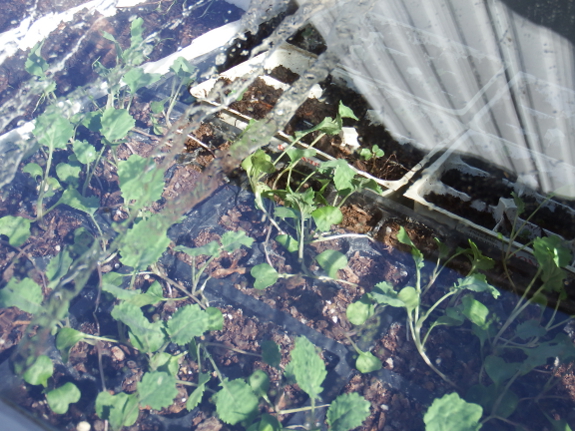
I went ahead and moved all of the plants out of the cold frame
just to be on the safe side, and that was probably a wise move even
though the interior temperatures only barely dropped below freezing.
Unfortunately, when I put the plants back out on a sunny but frigid
Sunday morning, I didn't take into account the power of the sun. By 2
pm, most of the broccoli plants had baked with the lid closed even
though outdoor temperatures were still in the low to mid 40s. I guess
I'll be starting some more broccoli seeds and paying more attention to
the cold-frame cover next time. Even if the air feels cold, if the sun
is out, the lid should be open!
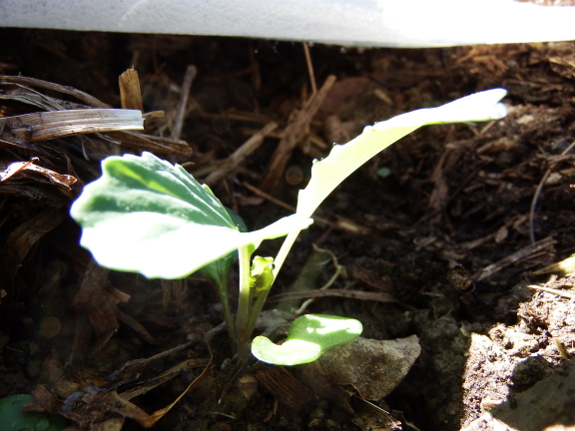
On the plus side, I
thought I'd messed up the cabbage seedlings, but they seem to have
weathered Dandelion Winter just fine. A week ago, the long-range
forecast only showed one low of 31 on the horizon, so I went ahead and
set out the cabbage into the garden...then instantly regretted it when
the weather report shifted dramatically. I covered the plants with
row-cover fabric, crossed my fingers, and was thrilled to see that they
seem to have come through the cold unscathed! So I guess we'll have
early cabbage this year, and late broccoli.
We used a scissor jack to
secure the front part of our new mushroom tower.
Next up is to re-direct the
gutter and design a misting system for the logs.
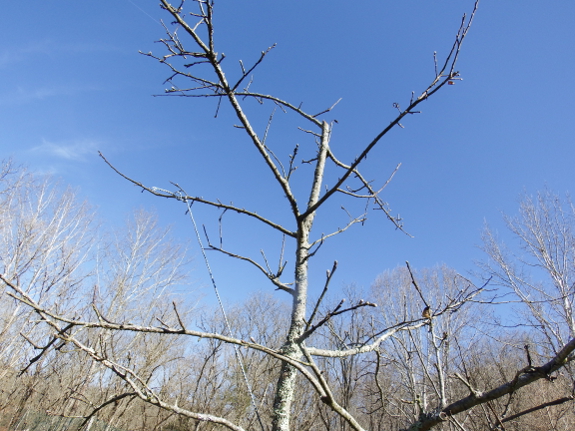
When I was waiting for warmer weather before pruning this winter,
one of our readers suggested marking which limbs I wanted to cut to
save time later. The suggestion made me realize how far I've come in my
perennial-pruning education. Just five or six years ago, I would have
done precisely that, but now my eye chooses the next cut in the time it
takes for me to reach the wood with my pruning shears --- no more
agonizing over choice of direction or lost wood.
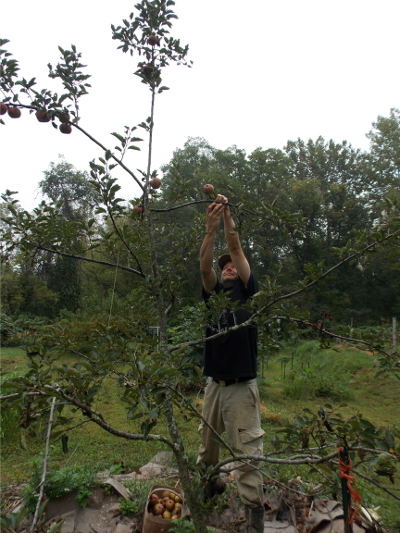 That said, I did
spend a minute or two agonizing before cutting the entire top out of
this apple tree. But when it last fruited, two years ago, the tree was
shorter and we still would have had to pull out a ladder to get to the
top fruits. The height meant I didn't thin blooms at the top of the
tree, and the resulting apples hit the ground before they were
harvested. Quality was much lower for the tree-top fruits than for the
apples I was able to baby lower on the tree.
So I lopped off quite a bit of wood this year, leaving a weakly
upward-pointing scaffold that I hope will prevent the tree from sending
up scads of watersprouts to replace the central leader I removed.
Barring late freezes (which means tree fruit is a 50/50 chance around
here if everything else is going well), we should get another good harvest from this Virginia Beauty. At the moment, I agree with our extension agent
in thinking that this variety is the tastiest heirloom apple around.
But I haven't tasted the other 35 varieties we have in the ground yet!
Our mushroom tower IBC rain
barrel has two gutter sources converging on a tee.
We used galvanized wire to
secure the extreme bend to the IBC frame.
Want more in-depth information? Browse through our books.
Or explore more posts by date or by subject.
About us: Anna Hess and Mark Hamilton spent over a decade living self-sufficiently in the mountains of Virginia before moving north to start over from scratch in the foothills of Ohio. They've experimented with permaculture, no-till gardening, trailersteading, home-based microbusinesses and much more, writing about their adventures in both blogs and books.
