
archives for 02/2015
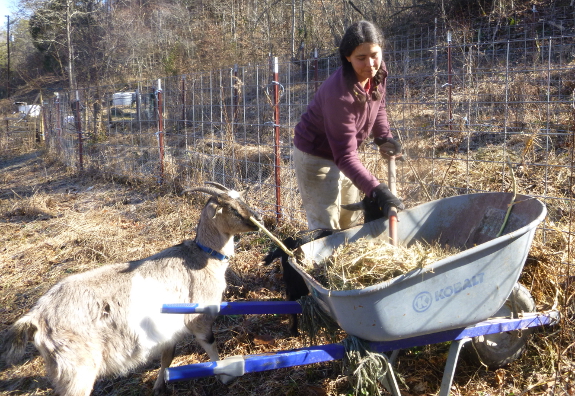
In Natural Goat Care, Pat Coleby says in no uncertain terms that deep bedding is a bad idea with goats. Unfortunately, she doesn't give any information on why
deep bedding is such a terrible idea. So I went ahead and used my usual
methods with our girls, and they haven't seemed to have any problems.
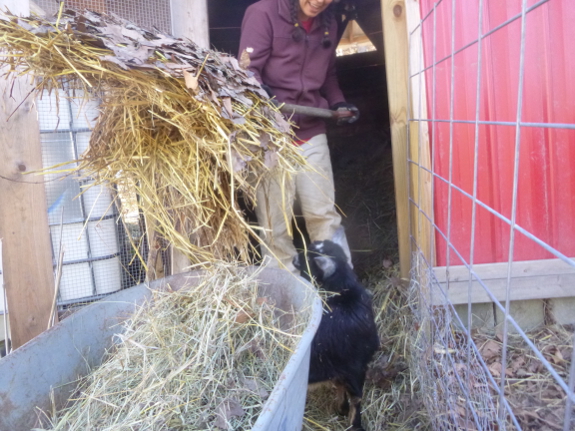
 However, a timely post on Throwback at Trapper Creek's blog
suggests that the issue could have to do with bacteria affecting
newborn kids. So I figured I might as well clean out all the deep
bedding in preparation for Mark separating the coop into two stalls for
kidding season. That way, we can keep the kidding stall manure-free just
to be on the safe side.
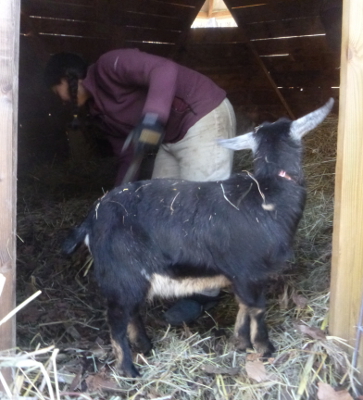
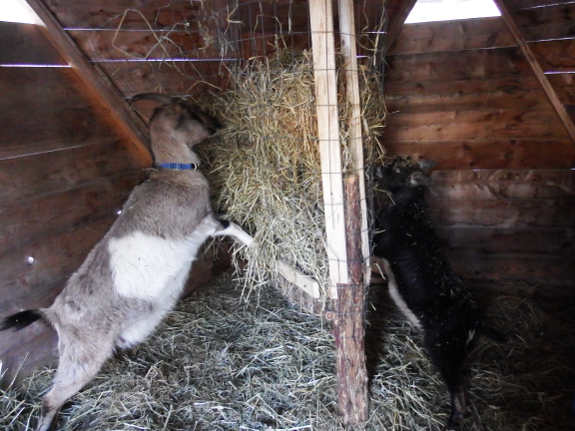
The girls had different
reactions to me invading their home for the afternoon. Abigail promptly
settled in to eat more hay, refusing to move her feet when the time came
to scoop beneath her. Artemesia, on the other hand, asked if she could
help me out. Maybe standing in the doorway would help? How about if she jumped up in the wheelbarrow? "You lifted me out? Oh, great, I can jump back in --- that's the fun part!"
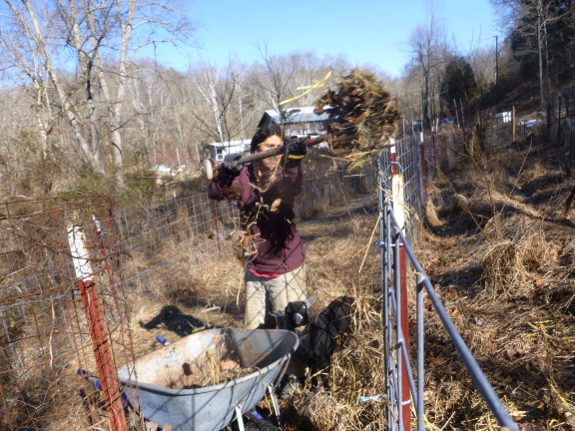
I'm tossing all of the
used bedding over the fence into the tree alley in hopes it will build
the soil and maybe kill back some of the weeds. I'll lay down some
cardboard on top, if necessary, to turn this into a zone to plant fodder
crops for next fall. On the menu are field corn (with the grain being
earmarked for the chickens and the stalks for the goats), sunflower
seeds, sweet potatoes, mangels, and carrots. The last two on the list
will probably go in the main garden, though, since this rough kill mulch
won't make soil good enough for carrot-like roots...at least not for
this year.
I'd be curious to hear
from other goat keepers. What do you grow for your goats? Have you had
any trouble keeping your herd on deep bedding?
We staged some materials to finish our IBC water tower project but had to use a few 2x4's for the new kidding stall.
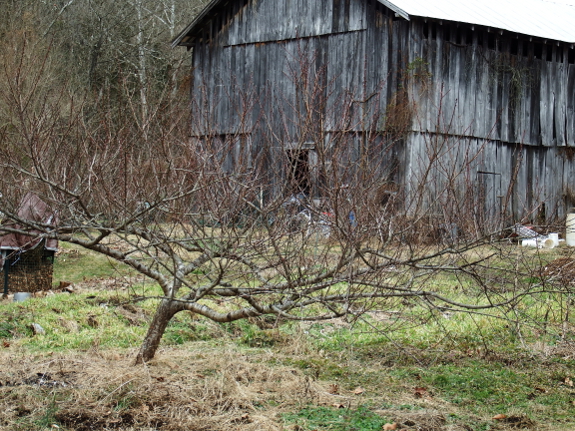
On warm, sunny days in January and February, I itch to be out in the garden, so I
often turn to pruning. However, last winter, I felt like my wintry
pruning bout may have been responsible for killing off the spring shoots
of our everbearing raspberries, so this year I decided to research
before pruning.
Unfortunately, the conclusion I drew after reading several scientific
articles was...it's complicated. Winter hardiness is affected by a
variety of factors, including how dormant the tree is at the time, the
recent air temperature, the plant's maturity, and more. So, although
most orchardists agree that fall pruning will lower your fruit plants'
winter hardiness for months afterwards, few are willing to go out on a
limb and give you a firm date after which it's safe to prune during the
dormant season. In fact, the data made me wonder whether, from a tree-health
point of view, you wouldn't be better off waiting to prune until after
the tree's flowers have opened in the spring.
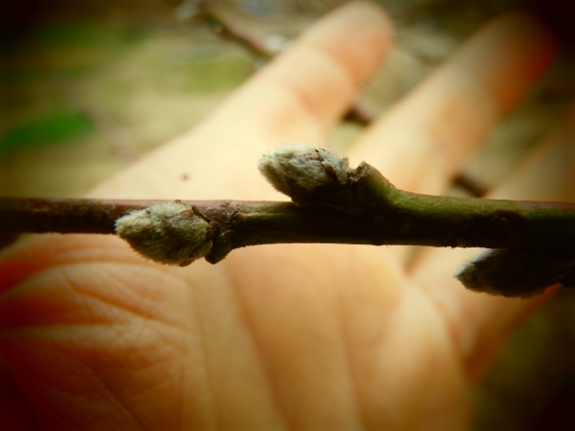
On the other hand, pruning not only makes a tree less winter hardy; it
also makes the tree's flowers more sensitive to cold. Critical temperatures
for
peach blossoms, for example, can vary by as much as ten degrees based on
factors that include the temperature just before the freeze and whether
the tree has been recently pruned. So maybe we really shouldn't
be winter pruning at all and should stick to the summer pruning and
training that has become much more of a staple on our farm.
But, on the third hand, there's just so much more time for careful
pruning at this time of year than there is in the summer when every
plant is breathing down my neck and asking for attention. So, I'll
probably winter prune anyway, maybe taking Lee Reich's advice of pruning
in February, or following the Iowa State University guideline of
pruning between late February and early April. Because, after all, we do have
to compromise between what's best for us and what's best for the trees
--- and what's best for me is to enjoy pruning under the winter sun
before the vegetable garden begins to consume all of my attention.

We celebrated Ground Hog Day
today by taking the day off.
Our friend Richard made this
cool drawing on how we might change the way our IBC
water tower is going together.
 It's
time to start planning your 2015 garden, and for many of us, roots will
be a large part of our planting. Mark and I love to stock up on carrots
for fresh eating throughout the winter months, and now that we've added
goats we'll be expanding our root repertoire. But how do you store
those crunchy carbohydrates?
$10 Root Cellar
walks you through growing, storing, and using root vegetables for
animals and humans alike. And you're in luck because the book is on sale
for 99 cents today! Grab your copy while it's cheap and plan ahead for a
more self-sufficient year.
(By the way, what do you think of my pretty new cover? Credit for the awesome photo goes to Stephen Ausmus at the U.S. Department of Agriculture.)
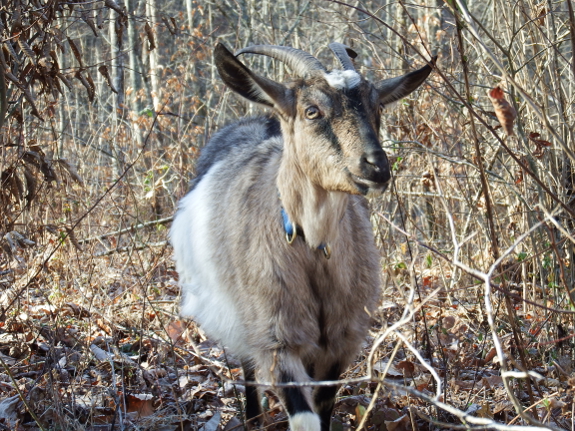
As I began setting aside garden areas to grow fodder crops for goats,
I realized that I needed to do some math. I'm starting to get a handle
on how much supplemental feed Abigail needs to stay in good shape while
pregnant, and I assume she'll need a similar ration while milking. So,
based on that data, how much space would it take to grow the
supplemental feed for one small milk goat during the six-month cold
season?
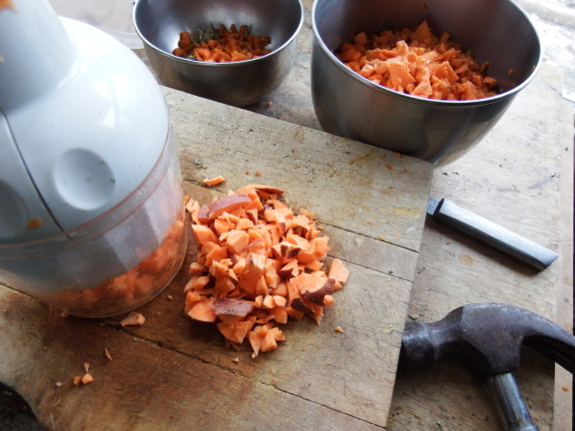
Abigail didn't seem to
need much other than hay during the beginning of the winter while her
pregnancy was in its early stages, so I figure a sixth of a head of
sunflowers and a carrot per day would provide the bulk of her ration
during that time. In addition, I've been matching her carrot ration with
a similar amount of butternut squash or sweet potatoes lately, figuring
that variety is good for our goat's health, and I'll include mangels in
that extras list next winter. For the sake of easy math, I then doubled
that ration for the late pregnancy and early milking months, resulting
in the feed amounts listed below:
| Weekly ration (Oct. - Dec.) |
Weekly ration (Jan. - Mar.) |
Total ration |
|
| Heads of sunflowers |
1.2 |
2.4 |
43 |
| Carrots (large) |
7 |
14 |
252 |
| Butternuts (small) |
1 |
2 |
36 |
| Sweet potatoes (small) |
0.5 |
1 |
18 |
| Mangels (small) |
0.5 |
1 |
18 |
Next, the question
becomes, how much space would I need to grow that much feed? Using
low-ball figures on yield for each of our 5-foot-by-3-foot beds (better
safe than sorry), I came up with:
| Yield/bed |
# beds |
Square feet |
|
| Heads of sunflowers |
15 |
2.9 |
43 |
| Carrots |
150 |
1.7 |
25 |
| Butternuts |
15 |
2.4 |
36 |
| Sweet potatoes |
15 |
1.2 |
18 |
| Mangels |
40 |
0.5 |
7 |
| Total |
8.7 |
129 |
That's really not much
space at all to provide a goat all of her feed except hay! Of course, by
this time next year, Artemesia will be pregnant too, so we'll need to
double those numbers. And we might also need to add on some supplemental
feed for the summer months, so I'll triple the chart's estimates to be
on the safe side. Still, considering that I plant nearly ten times that
much area for me and Mark, a few extra beds of butternuts tucked away in
a corner shouldn't be too much skin off my teeth, especially since all
except the carrots (and possibly mangels) are on my ultra-easy-to-grow
list.
Does Box Elder sap taste as
good as Sugar
Maple sap?
We tapped our first Box Elder
today to find out.
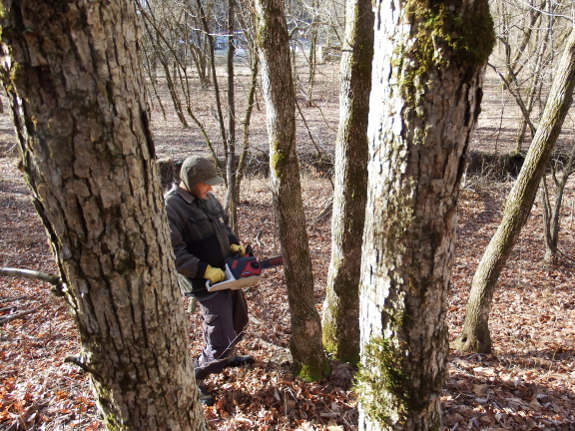
I went out into the woods last weekend looking for tree species on the shiitake-favorites list...and
ended up stumbling across not one but two places with white oaks
perfect for the cutting! I guess I wrote too soon when I said our farm
is too low and wet for oaks.
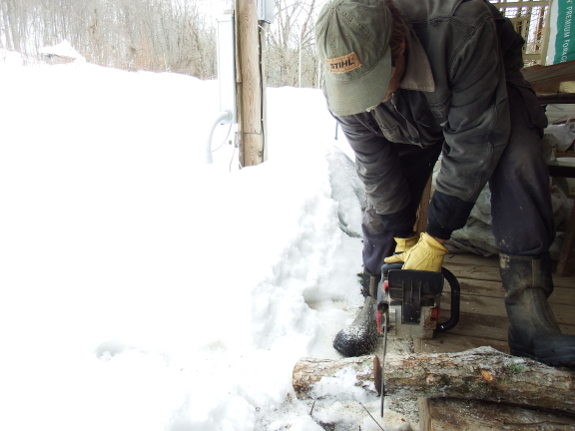
The great thing about the
oaks I found is that they're close to our core homestead and they're
double-trunked. The latter factor means that cutting down one trunk is
equivalent to pruning the tree, not killing it. In fact, when Mark cut
the trunk he's currently working on in the photo above, I could tell
that the top part was already starting to die back as the larger trunk
took up more and more of the tree's nutrients. Using up the base of the
trunk for mushroom logs and the top for firewood won't be taking much
out of our forest ecosystem at all (although the woodpeckers may miss
the snag for nesting).
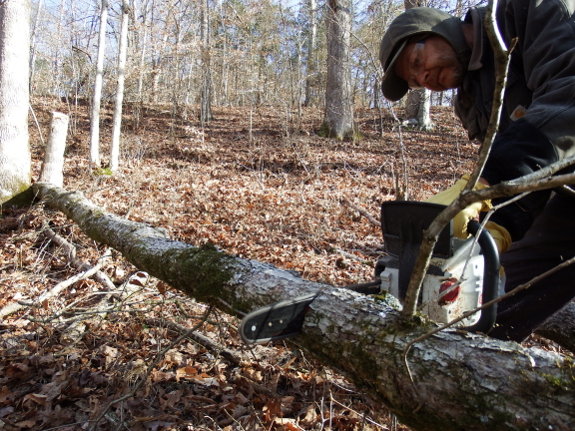
I had planned to cut one
of the double trunks from the tree in the foreground of the first photo
as our second tree, but in the end I decided to give that individual
another five or ten years to grow. I wouldn't have gotten many mushroom
logs out of the trunk as-is, so instead I opted to let Mark cut a
single-trunked oak that was just the right diameter. I think
this tree will sprout back from the base (since that's how our
double-trunked trees arose in the first place), so hopefully we'll have
more mushroom logs there...in about forty-five years. (Yes, counting the
rings of one of the cut oaks showed it to be just about Mark's age.)

In Organic Mushroom Farming and Mycoremediation
(a top-notch book that I'll be reviewing later this month), Tradd
Cotter recommends cutting logs about a week before plugging with spawn
to give the tree's natural defenses time to dissolve. At the other
extreme, you might get away with waiting as long as two months between
cutting and plugging for oaks, but sooner is generally better than later
since wild mushroom spawn can invade if you wait too long. But don't
inoculate if you're going to see prolonged periods below 18 degrees
Fahrenheit in the near future --- instead, keep the spawn in the fridge
and wait until the weather warms up a bit. Hopefully our weather will
cooperate and we'll be able to plug our oak logs week after next.
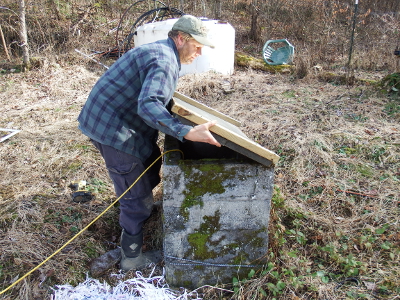 When
Artemesia gets bored, she starts jumping on things. And since her belly
is smaller than Abigail's, even an afternoon of nibbling cover crops
counts as boring for our little doeling.
Last weekend, I had the terrifying image of Artemesia hopping up onto our well housing...and falling down the hole. A well cover will keep the water cleaner and will also give us some peace of mind.
 Sometimes
when I overthink a project, I back myself into a corner and nothing
ever gets done. For example, re-insulating the lower part of the trailer
would, in a perfect world, go in this order:
- Add insulation under the floor everywhere that the original insulation has fallen out (and perhaps replace the stuff that's still in place while I'm at it).
- Run insulated skirting around the entire trailer to fill in the gap between the walls and the ground.
- Add on porches and other structures onto the sides of the trailer.
But the problem with this
campaign is that I haven't wrapped my head around the best way to
insulate under the floor, and that's also the project I care about the
least. As a result, somehow two porches ended up attached to the trailer
before I'd even begun step one of my reinsulation project.
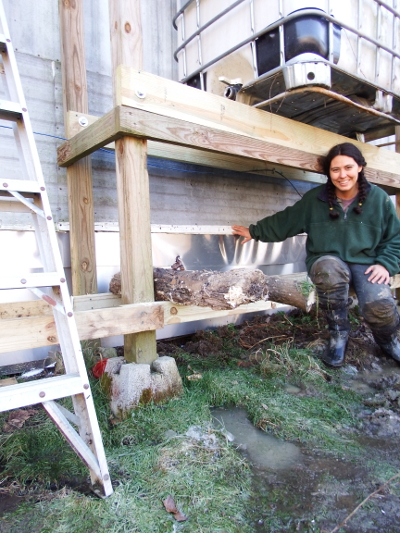
Still, it did seem like a good idea to install the skirting behind the mushroom tower
before we started putting mushroom logs and water-tower braces in
place. Luckily, I discovered that it's not all that difficult to do the
tasks in the wrong order --- yes, I had to crawl under the porch and the
trailer, but I embraced my inner coal miner and survived.
So maybe I was wrong with my original plan. Maybe it should have been:
- Do what I think is the most fun first.
- Then do whatever suits my fancy next.
- And finish up with what's left.
Turns out you can use a
ribbon to estimate the weight of your goat.
Artemesia was very
interested...Abigail not so much.
(This picture of Mark and Artemesia is totally unrelated to this post. But aren't they cute together?)
 Now
back to the point.... I'm experimenting with offering some of my ebooks
beyond Amazon at the moment, and I'm hoping I can bribe you into
helping me out by leaving a review on one or more of the new sites. I
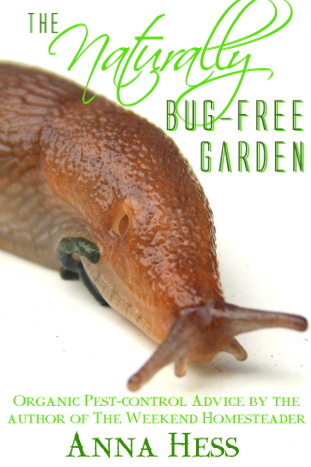
decided to start off with Permaculture Chicken: Incubation Handbook and The Naturally Bug-Free Garden.
The first book is perfect for folks who are considering hatching
homegrown chicks this spring (or who just want to learn about pasturing
very young birds) while the second will get your garden off to a good
start (and will be hitting bookstores next month!).
But don't take my word for it! You can download a free epub copy of either or both between now and February 11. Just use the code QB38N at Smashwords for Incubation Handbook and the code SX87Z at Smashwords for The Naturally Bug-Free Garden.
Then, if you enjoy what you read, please use the links below to leave
reviews on any retailers where you have an account (and also feel free
to copy and paste reviews from Amazon if you've already read and
reviewed there).
 Here are the links for Permaculture Chicken: Incubation Handbook:
- Amazon
- Barnes & Noble
- Google play
- iTunes
- Kobo
- Scribd
- Inkterra
- (and also Tolino, but I can't quite figure out how to find the link since their page is in German)
And for The Naturally Bug-Free Garden:
- Amazon
- Barnes & Noble
- Google play
- iTunes
- Kobo
- Scribd
- Inkterra
- (and also Tolino, but I can't quite figure out how to find the link since their page is in German)
"Yeah, yeah," I can hear you
saying. "What's in it for me?" I'm glad you asked. I really appreciate
the time you take leaving your reviews, so if you do so on any of the
sites listed above (including Smashwords and Amazon), you'll be eligible
to enter our giveaway using the widget below. One lucky winner will take home a heaping helping of homesteading books:
- A signed copy of The Weekend Homesteader
- A signed copy of The Naturally Bug-Free Garden (which may ship separately --- I haven't gotten them in my grubby little hands yet)
- Creating a Life Together (a step-by-step guide for building intentional communities)
- Gaia's Garden (an introduction to home-scale permaculture)
- Create an Oasis with Greywater
- Success with Baby Chicks
That's
a $92 value, and a huge amount of homesteading wisdom at your
fingertips --- I hope the bribe is sufficient to get you to enter. Thanks in advance for your help as I expand my readership beyond Amazon!
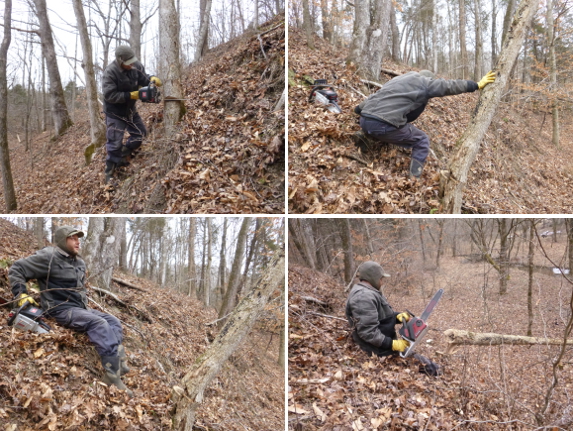
The solution is to cut until just before the trunk starts to bend back and pinch the chainsaw's bar...
...then push over the tree.
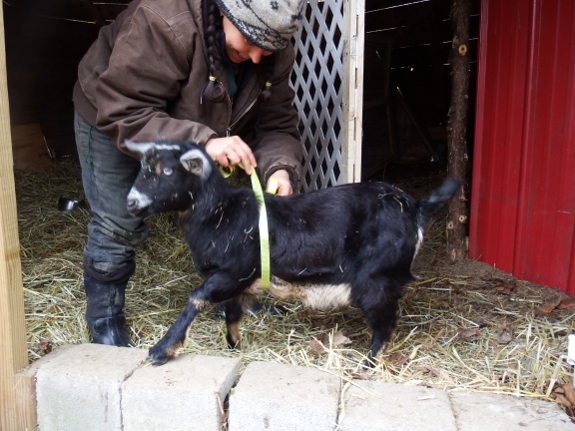
There are quite a few reasons to estimate your goats' weight
on a regular basis. With a doeling, most sources recommend that you
wait to breed her until she's attained 70% of her adult weight, and it's
also handy to keep track of all kids' weight as they grow to make sure
they're doing well.
With adult goats,
frequent weigh-ins help you decipher feeding regimes, medications, and
possible parasite loads. For example, most sources recommend that a goat
be allowed to eat 10% of her body weight in hay if she's not on
pasture. Similarly, you should expect a mature goat to put on a little
weight naturally in the spring when the grass greens up, perhaps to lose
a bit during hot spells in midsummer, then to bulk up a bit again in
the fall. If she's losing weight when she should be gaining, you might
need to focus on deworming.
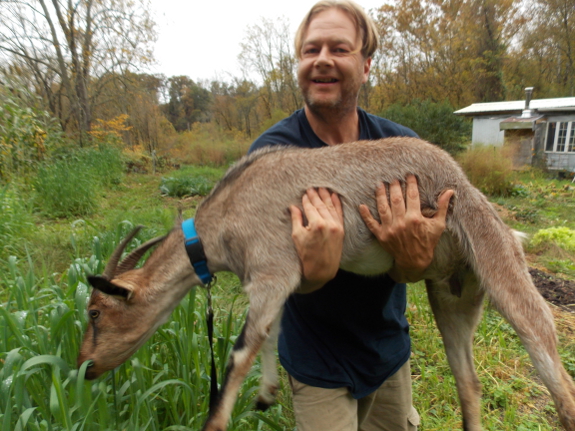
But it's tough to get an
accurate weight measurement on a goat. First of all, you either need an
animal scale, or you need to pick up the goat (tough for a goat like
Abigail who is not
interested in being manhandled; the photo above comes from this past
fall, when our herd boss was less pregnant and thus less sensitive about
her belly). Similarly, that 10% weight gain after eating her morning
hay is going to completely throw off the measurement.
Enter the goat-girth
chart or the (slightly) more complicated body-weight formula. In the
case of the former (which is accurate to +5%
on standard-sized dairy goats), you measure around the goat's body just
behind their armpits and shoulder blades, then convert from inches to
pounds using the table below. (Be sure to pull the tape tight, and to
take into account fluffy winter hair.) If you want to be more accurate,
you can use the formula right after the chart, which adds in a second
measurement --- the goat's length --- to add in a bit more accuracy.
| Heart girth (inches) | Weight (pounds) | Heart girth (inches) | Weight (pounds) | Heart girth (inches) | Weight (pounds) |
| 10 3/4 | 5 | 20 | 30 | 32 | 100 |
| 11 3/4 | 6 | 21 | 34 | 33 | 105 |
| 12 3/4 | 7 | 22 | 38 | 34 | 115 |
| 13 1/4 | 8 | 23 | 43 | 35 | 125 |
| 13 3/4 | 9 | 24 | 50 | 36 | 140 |
| 14 1/4 | 10 | 25 | 56 | 37 | 150 |
| 14 3/4 | 11 | 26 | 62 | 38 | 160 |
| 15 1/4 | 12 | 27 | 68 | 39 | 170 |
| 16 | 14 | 28 | 73 | 40 | 180 |
| 17 | 16 | 29 | 80 | 41 | 190 |
| 18 | 22 | 30 | 85 | 42 | 200 |
| 19 | 26 | 31 | 90 | 43 | 215 |
Here's the formula: (If you put in inches, then you'll get pounds.)
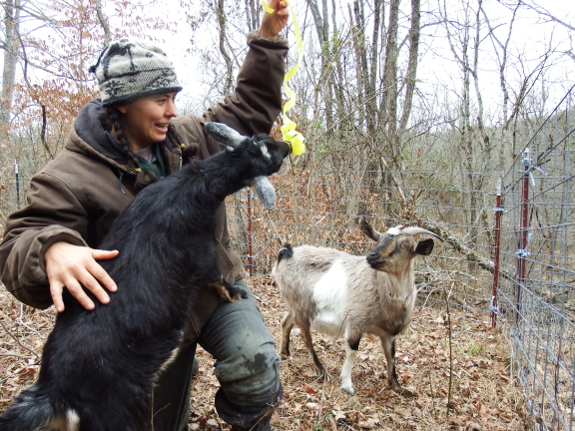
You can buy tape measurers that automatically convert the heart girth to pounds,
or you can make your own the way I did using a bit of ribbon. While my
ribbon won't be as accurate as using the formula, it should give me an
idea of relative weight gains and losses for our girls, and will
definitely make my life easier since I can just pull it tight around
Artemesia's chest and call out "37 pounds!" (That was my first measurement, but the girls were so 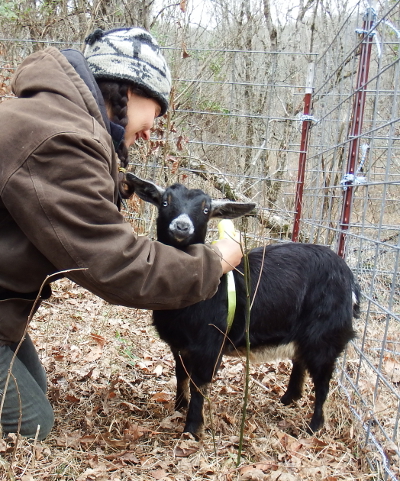 caught
up in enjoying the bright yellow ribbon that they wiggled like crazy
during the first trial. Next time, I'll try measuring while they're
chowing down on breakfast, a period when even Abigail lets me check
beneath her tail, feel under her belly for babies (who kicked
Thursday!), and probe the tendons on either side of her tail to search
for signs of impending birth.)
Adding this data to my
rough body-condition measurements (feeling for fat in various locations
along the body) should help make sure I feed our girls just enough but
not too much. I'm not sure that Abigail could
eat too much food right now, but since we've decided not to breed
Artemesia at her bare-minimum age, we'll have to be careful that she
doesn't get too fat while waiting for her fall date with a buck
(possibly one of Abigail's kids?). Good thing our little doeling thinks a
measuring tape around her chest is as good as a hug!
We thought a layer of flashing would keep most of the moisture away from rotting our new well cover.
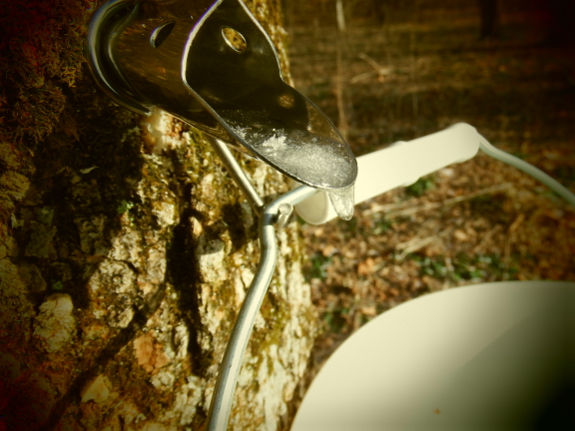
I was stunned by the productivity of the one box-elder tree we tapped --- after a single bright, sunny day, our two-gallon bucket was nearly completely full!
I usually cook down my
sap in stages, letting a pan of the liquid sit on the wood stove until
it's partway cooked down, then later combining that sap with other
partway-cooked-down 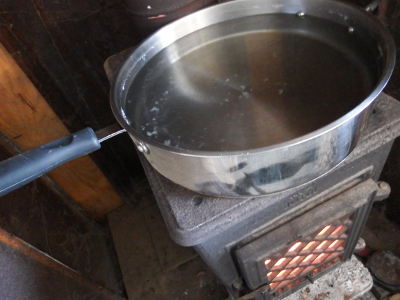 sap
to cook up a larger batch of syrup. But I wanted to know right off the
bat whether box-elder syrup was worth making, so I took our bucket full
of sap and cooked it all the way down over the course of 24 hours. The
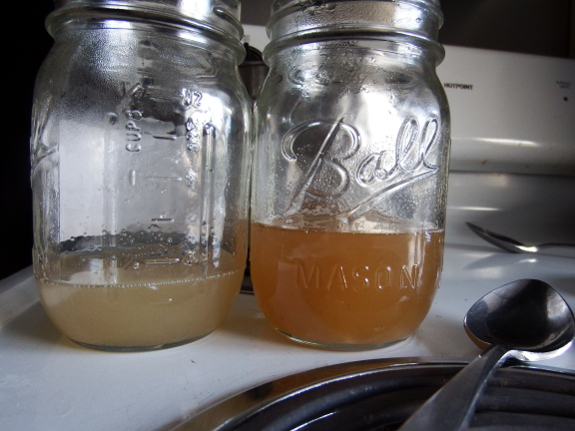
result was a quarter of a cup of syrup that lacked the bright gold color
of maple syrup and the delicate vanilla-like scent, but tasted every
bit as good. (Mark said the box-elder sap might be slightly less sweet
per unit volume, but he still licked his lips after the taste test!)
I realized in the process
that I'd never actually gotten a comparable figure for how much syrup
we get out of sugar-maple sap, so I took the half gallon of sap that
came from our sugar maple during the same time period and cooked it
down, resulting in an eighth of a cup of syrup.
For those keeping track
at home, that means my box-elder sap-to-syrup ratio is 115:1, while the
sugar-maple sap-to-syrup ratio is 64:1. On the other hand, we got nearly
four times as much sap from the box-elder during the same time period,
so actual yields of syrup from the two trees were twice as high for the
box-elder!
The good news is that we
have hundreds of box-elders within easy tapping distance. The bad news
is that, if we go beyond tapping a tree or two at a time, we actually
have to put effort into the operation. Mark asked me to estimate how
many human-hours it took to create half a cup of maple syrup (what we'd
produced in January) and I figured about an hour, if that. The reason
the project has been so un-time-consuming in the past is that the sap
bucket is right on my daily walk, so it only takes a couple of minutes
to swap out containers each day. After that, the sap just sits on top of
the wood stove, which we're running anyway to heat the trailer, so
energy use is also kept at a minimum. For larger amounts of sap, we'd
have to make special sap-carrying trips and figure out some way to cook
down the sap efficiently (probably outside).
We'll have to put some thought into the right size for our own syruping
operation --- the sweet spot, if you will. In the meantime, I'm
experimenting with maple-syrup recipes for the next volume in the Farmstead Feast series and am taking suggestions. Other than poured over pancakes, what's your favorite way to eat maple syrup?
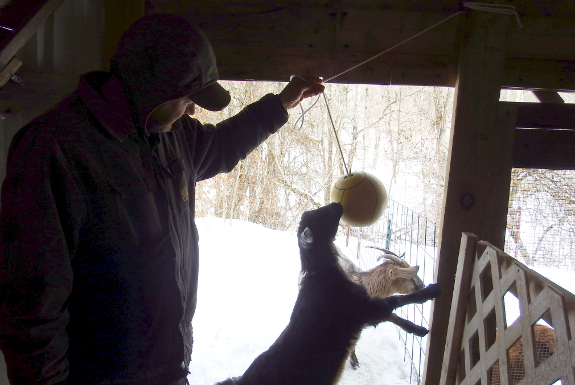
We installed a tether
ball today for the goats
to play with.
It started raining as we
finished up so we'll have to wait for a dry day to see how athletic
our girls are.
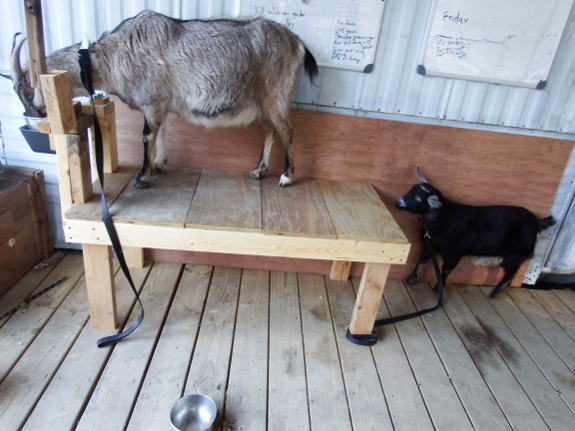
As Abigail gets closer to
B-day (which could be now or at the end of the month), I'm easing her
into the milking routine. She needs that extra attention since, unlike
our little lap goat, Abigail isn't a big fan of being fondled. But over
the last week or so, I've gotten our pregnant goat to the point where
she doesn't mind me feeling under her belly and along her tendons and
looking under her tail as long as she's chowing down on her morning
ration. So I figured it was high time we started moving her to the milking stand before her morning OB/GYN appointment.
Although most of you will
probably think it's crazy, we're considering leaving the milking stand
on the front porch. The plus of this location is that it's far away from
manurey bedding and is thus quite clean. Plus, it's close to the fridge
and running water, making the prep and aftermath of milking easier.
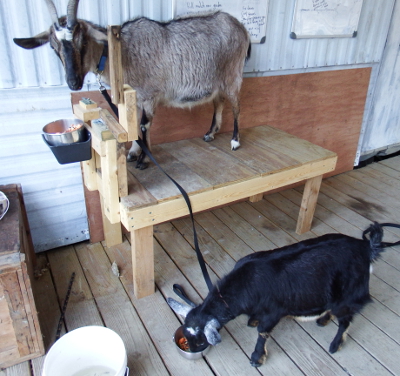 On
the negative side, Lucy gets fed on this porch at the moment, and our
loyal dog is not a fan of anyone except herself and humans eating there.
As obedient as ever, Lucy did
allow the goats to usurp her porch Sunday morning, but I could tell our
dog was edgy due to the amount of split firewood she dragged off into
the yard to gnaw on. And Lucy's edginess made Abigail edgy, so our
pregnant goat didn't allow me to feel her up the way I usually do.
Meanwhile, Artemesia
proved to be even more of a problem. Our little doeling kept trying to
hop up onto the milking stand, causing Abigail to butt her off. Then the
doeling started exploring the porch, so I ended up tying her to one leg
of the milking stand. Unfortunately, I haven't been training Artemesia
to understand being tied to a leash, and so spent a lot of effort trying
to figure out why she couldn't ramble whimsically about.
So, maybe the porch wasn't such a good idea after all. Or maybe everyone just needs a few days to settle into the new routine?
In the meantime, I'm
hoping that some experienced goatkeepers will help me determine how soon
after kidding we should start milking our goat. My plan is to shut the
kids into the kidding stall
for the night, milk Abigail in the morning, then let the kids spend the
day with their mom. But when do I start milking? Various sources tell
me I should wait three days, two weeks, or much longer between kid birth
and starting to steal the kids' dinner. What do you do?
Our 2nd
utility wagon is going on
two years old.
The wagon structure is
holding up well, but the air tends to leak out of the tires after a few
weeks.
We might add inner tubes to
each wheel, but for now we just use the foot pump to add air on firewood hauling
days.
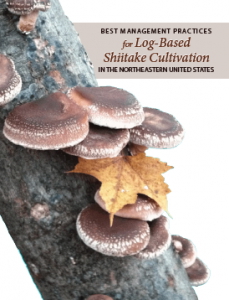 Blog-reader Ron pointed me toward the best shiitake-mushroom writing I've read to date...which you can download free here. Best Management Practices for Log-Based Shiitake Cultivation in the Northeastern United States
has a dry, scientific title, but the interior is full of photos and is
quite easy to read. In fact, I highly recommend you take the time to
peruse all 57 pages if you're thinking of growing shiitakes in logs, but
I'll sum up some of the most interesting points here in case you're
short on time.
My favorite part of the
text was the copious data. The file is full of real numbers about the
best time to cut logs (winter and spring), the best number of days to
wait before inoculating (none --- although when I look at the graph
below, I wonder if a parabola wouldn't have been a better fit for the
data than a straight line?),
the best trees to inoculate (oak, sugar maple, ironwood, hop-hornbeam,
and beech), the number of flushes to expect from a log (8 from red oak, 4
to 5 from red maple, all over the course of 3 to 5 years), and much  more.
Interestingly, the scientists in charge even reported on blind taste
tests, where they found that shiitakes grown on ironwood were considered
bland while those on bitternut hickories were prized by top chefs.
Equally useful was the
authors' sum-up of the differences between the three categories of
shiitakes: wide-range, warm-weather, and cold-weather strains. In the
past, I'd just assumed that these distinctions referred only to fruiting
times, but mushrooms in each category actually tend to act and taste
quite different as well. Cold-weather strains are nice for low-work
backyard producers like us since they generally start fruiting on their
own (actually preferring not to be shocked
in most cases), can be inoculated into larger logs since you won't have
to wrestle the substrate into and out of water to force fruiting, and
often have the most intense flavor in their fruits. Wide-range strains
are also a good choice for beginners because logs fruit quickly after
inoculation and recover rapidly between shock treatments. Finally,
warm-weather strains are optimal if you only have softer hardwoods like
red maples available, or if you need to make sure you'll have a
dependable harvest throughout the summer months.
Our spawn is already in
the mail as I type, so it's too late to pick out varieties with this new
information in hand. But I'm hopeful the types of shiitakes we chose
will do well on our farm. Here are the descriptions for our three new
strains (shamelessly copied from Field and Forest Products' website):
- Snow Cap Shiitake (cold weather) --- Produces beautiful, uniform, thick fleshed caps tufted with white lacey ornamentation. A long natural outdoor season makes it a favorite for those who like to visit their logs regularly. Heaviest fruiting occurs early spring and late fall. Possibly the best winter strain in the South.
- WW70 Shiitake (warm weather) --- This warm/cool weather strain has characteristics close to a CW strain. Its late summer - late fall fruiting period outdoors is one of the longest of all our strains. It is also one of the most beautiful, with dark caps and lots of contrasting ornamentation. Please note that WW70™ does not respond well to force fruiting.
- Native Harvest Shiitake (wide range) ---
Naturalized on our farm several years ago, this strain has been tested
from North to South and the results are the same: a very fast, vigorous
strain with excellent quality. First found on oak, it is also a good
producer on Red Maple. Unlike other wide range species, Native Harvest™
also gives a late fall flush; an added bonus for the Thanksgiving table!
Spawn run is 6 to 12 months.
 A huge thank-you to those of you who have entered my
homesteading book giveaway by downloading and reviewing a free copy of
The Naturally Bug-Free Garden and/or Permaculture Chicken: Incubation
Handbook! You've
still got a couple of days left to win $92 worth of homesteading books,
and I've got one more option for you to review. Weekend Homesteader: April
covers the first four projects in my Weekend Homesteader series,
including tips on why and how to start a no-till garden from scratch.
The book is currently free (and seeking reviews) on:
Take a look, and if you
like what you see, I'd really appreciate it if you left a review to help
the book get a head start on those new retailers! Then come back over
here and plug in your information for a chance to win a bundle of
homesteading paperbacks.
I installed this battery
disconnect switch to
prevent a small short in our truck from draining the battery.
It's a well built product
that was easy to install.
Hooking up the battery cable
to the switch first gives you a little more wiggle room to get things
tightened. You have to reach under a heater hose to reach the knob, but
it's a whole lot better than jumping the truck every time we need to use
it.
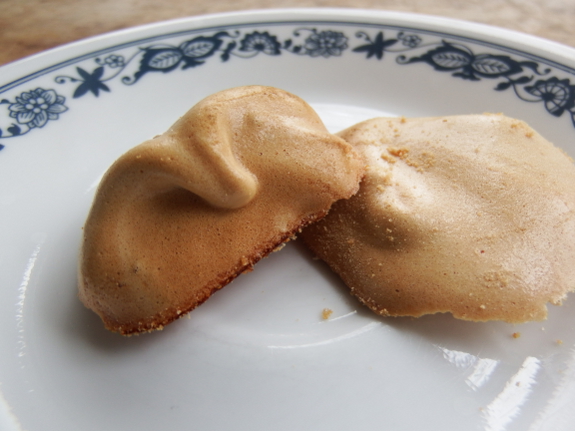
 The first recipe I tried with our homemade maple syrup
was meringues. I'm looking for a recipe that you can make using
homegrown ingredients and that really showcases the maple-syrup flavor,
and the meringues came in as a definite...maybe.
The sticking point (quite
literally) is that if you don't have parchment paper, your dessert will
crumble to pieces when you try to pry the cookies off the pan. Also,
Mark didn't realize until prompted that the cookies were made with maple
syrup --- instead, he felt that they tasted like vanilla wafers. Still
tasty enough to eat up all the crumbs, though!
Here's the recipe in case you want to try this simple recipe at home. Ingredients:
- 2 egg whites
- 0.5 cups maple syrup
- pinch of salt
Preheat the oven to 200
F. Beat the eggs until soft peaks form, then add the maple syrup and
salt. Mix lightly, then spoon onto a cookie sheet (or two) lined with
parchment paper. Bake in the middle to upper rack for 60 to 75 minutes,
until the meringues are starting to turn golden brown. The maple syrup
means that these meringues will cook a shorter time than that listed in
most recipes, so be careful not to let them burn!
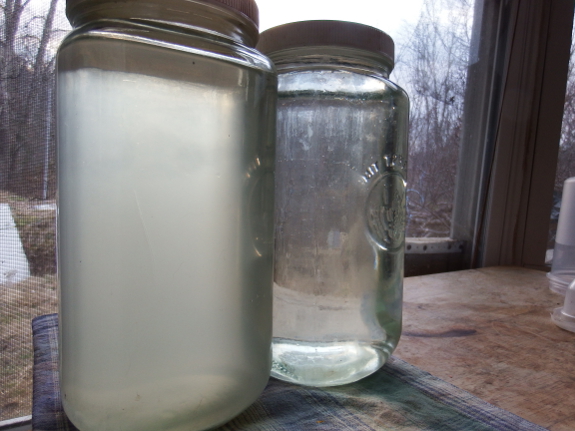
In other syrup-related
news, we've produced about a pint of syrup so far in 2015, and I'm
starting to work the kinks out of my low-tech production methods. When I
bring home a bucket of sap, I immediately put the liquid in a skillet
on the wood stove if we're currently heating the house. Unattended
(perhaps over multiple days if the weather is warm), I cook the sap down
until it's perhaps a fourth of its original volume, then I sock that
concentrate away in a big jar in the fridge until I've got about half a
gallon to a gallon of the condensed sap.
When the fridge is
getting overloaded with sap jars, I throw the condensed sap back on the
wood stove until it once again cooks down to a fraction of its original
volume. When I start seeing white bubbles, though, I take the skillet
off the wood stove and put it on the electric 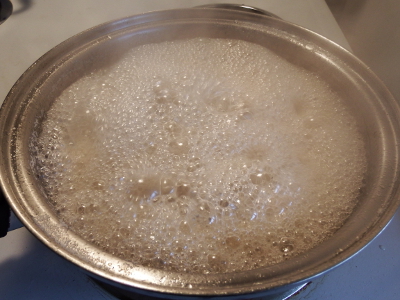 stove
where I can monitor it more closely. Next, I cook on medium to high
heat until foam over --- when the sap suddenly starts creating a huge
amount of big white bubbles that fill the entire pan. At this point, I
stir frequently and watch the clock, aiming for 1.5 to 2 minutes of
further cooking to create the perfect maple syrup.
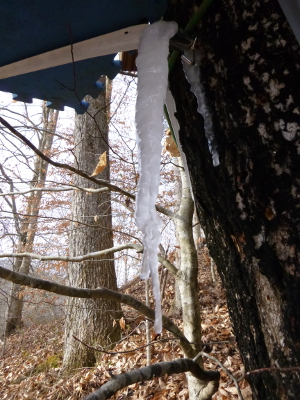
As you can see from the
sap-sickle at the top of this post, our weather is still too cold for
strong sap runs, but we've had a few good days so far. It sure is fun to
come home from my morning walk with a bucket of subtly sweet liquid
that I know will turn into a delightful project and a delicious addition
to our late-winter meals!
One downside to using a bucket
to collect sap is the bugs.
We modified this lid with a
piece of metal screen material to help keep our sap more pure.
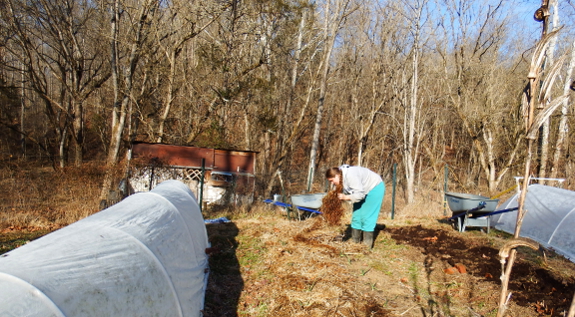
The first chorus frog
creaked its spring call from the woods Wednesday and the first male
hazel catkins softened into bloom. Meanwhile, Kayla and I spent the
afternoon with our hands sunk deep into the soil, preparing a bed for
spring lettuce and mulching some overlooked garlic. In fact, it was so
warm that even Huckleberry came out to help with our garden tasks.
But I won't be planting
lettuce (or peas) quite yet. Even though I mark February 2 as the first
outside planting of the year, I play the actual date by ear, keeping an
eye on the weather and on soil temperatures.
With temperatures due to plummet today and to stay below freezing for
the foreseeable future, I opted to simply lay down some dark-colored
compost and erect quick hoops to continue heating the lettuce-bed soil,
but to keep my seeds inside where they can stay warm and dry.
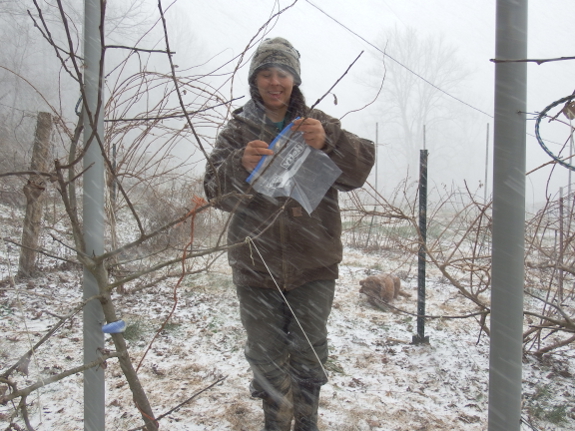
Good thing too since our farm looked very different 22 hours later! Fingers sure do get chilly when you cut scionwood in the snow.
We tried to get a big truck
of 6 inch rock delivered today.
The driver had some problems
with our driveway and had to give up after several failed attempts.
Now we need to either find
someone with a smaller dump truck or do some repair to our driveway.
 Whenever
I get excited or worried about a topic, I pick up a book to ease my
mind. I'm pretty excitable, so I read a lot...especially while waiting
for my first doe to give birth.
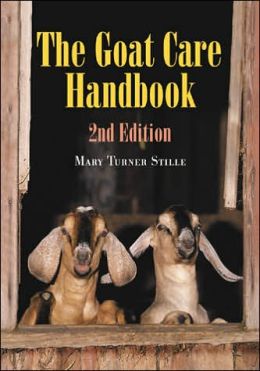
That said, I picked up Mary Turner Stille's The Goat Care Handbook
largely because I had read part of the text during a google search and
was impressed by her astute advice. "Don't trim the hooves of a pregnant
doe after the third month of gestation," she warns, "unless she is very
docile because her struggles may harm her and the unborn kids." Stille's firsthand experience from decades of goat care came through in that simple admonition, so I had to read the entire book.
And I'm glad I did since the text offered answers to other questions
that had been niggling against the back of my mind for weeks. For
example, I've often wondered how much time you'd have to allot to
goat-dining if you wanted to keep your herd penned up, giving them all
of their feed by taking them out into the woods to browse daily. Stille
actually kept goats in this manner for a while and found that her goats
required about an hour in the morning and an hour in the evening for
eating. In addition, she mentioned that she found the same grazing times
in pastured goats when she later had fences in place (with the
remainder of the day spent chewing cud, napping, and playing). I guess
my half-hour of honeysuckle herding (until we ran out last week) was making a bigger difference in our goats' dietary intakes than I'd assumed!
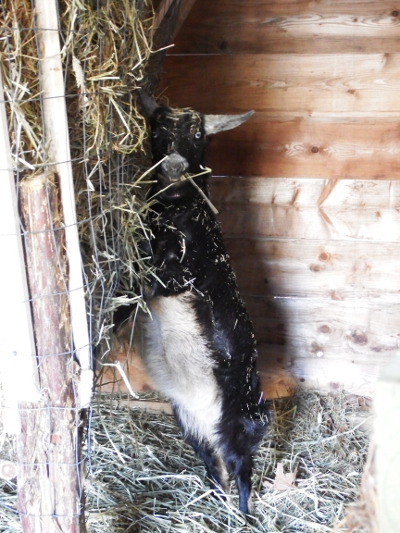 Although
I've promised Mark not to lobby for any new livestock for at least a
couple of years, I was also intrigued by Stille's information about
combining goats with other animals. She wrote that a goat mixed in with a
flock of sheep makes the woolly livestock easier to handle since the
goat will come when you call and the sheep will follow. Similarly, one
calf mixed in with goats will eat the waste hay (which goats won't touch
once it hits the ground) and will keep the pasture more evenly mowed.
(Unrelatedly, but still interesting, Stille is a fan of deep bedding on a dirt floor for goats, unlike Pat Coleby,
although Stille does warn that bacteria can get into caprine hooves if
you're not careful to keep bedding dry on top and hooves well trimmed.)
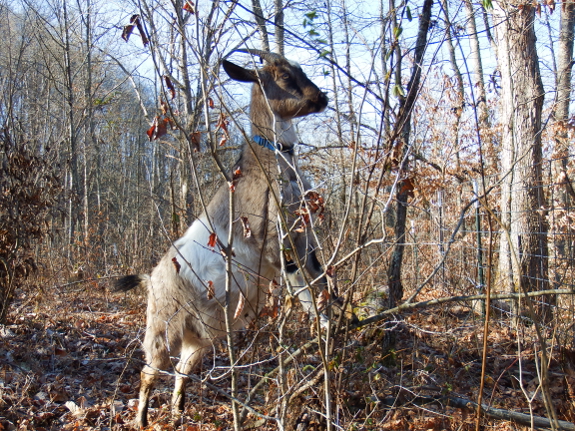
In the end, I'd still recommend Storey's Guide to Raising Dairy Goats as the first book for most beginners to read. But The Goat Care Handbook would make a good second read, especially if paired with Raising Goats Naturally. Of
course, the real test will be to see which goat book, if any, stays on
my shelf more than a year or two since I cull my collection just as
ruthlessly as Stille recommends culling your goats. Stay tuned to see
which goat book stands the test of time...more details to come in 2017.
I moved our goat
tether ball to the door
frame.
It took a few days but they
started to play with it yesterday.
Artemesia figured out how to
get her front feet on top of the ball enough to use it to launch
herself up and out the door like one of Santa's reindeer.
Abigail followed her lead by
bumping it with her horns but was first more interested in saying hi to
Lucy.

I wondered how long it would take for our five ducks to find the larger of our two creeks. And I also wondered --- if they took to the water, would they ever come back?
The answer is: February. And: yes.

I have to admit that our
ducks are growing on me. Chickens are so much more malleable, but ducks
have their own appeal if you're able to let them roam semi-wild across a
swampy property. (Outside
the core perimeter, of course, so they don't bother the garden.)
Despite their white color, we haven't lost a single duck to predators,
and the waterfowl continue to average an 80% lay rate throughout the
cold, dark winter. In contrast, our hens are only at about 50% at the
moment.
When two mallards (wild
version of the same species) flew over last week, I actually had a
random thought that maybe a drake would drop in and inseminate our tame
ducks, then she'd go broody and produce some ducklings to perpetuate the
local population of the species. A very slim shot...but I actually
wouldn't mind keeping ducks around for a while longer, if only to watch
them dabble in the creek...and to enjoy those big, midwinter eggs.
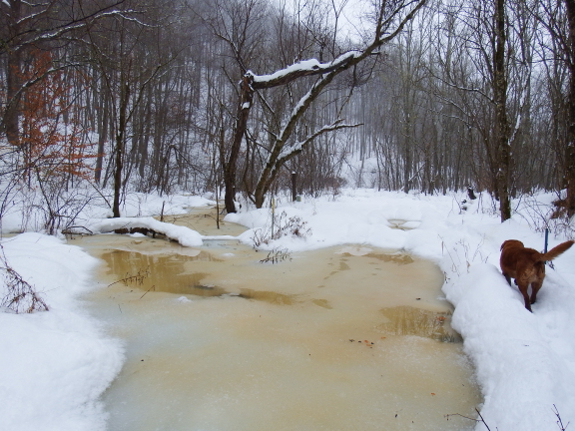
Our creek freezing is an
indicator that the previous night got down close to zero degrees.
Some part of our buried water
line froze last night. We added an extra electric
pipe heater to the part that enters our kitchen a few days ago and
thanks to that extra bit of warmth the line thawed just after lunch
which is a big improvement from last Winter.
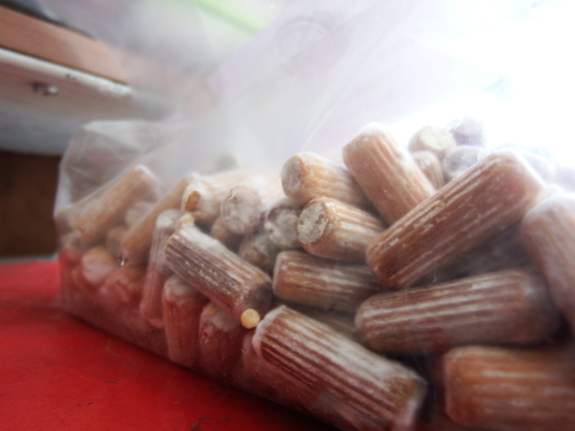
To ensure a steady supply
of shiitakes, you should inoculate new logs every three to five years.
We inoculated logs in 2007 and 2009, but by 2013, were feeling in need
of more shiitakes.
Unfortunately, the plugs
we ordered that winter arrived looking like plain wooden dowels,
apparently mycelium-free. I trusted the source, though, so Mark and I drilled holes, pounded the plugs in, waxed over the holes...and waited.
Unfortunately, nothing
happened, and I eventually realize that I should have trusted my gut.
Here's your warning: if your spawn arrives and the substrate doesn't
appear to be coated with white mycelium, something might be wrong.
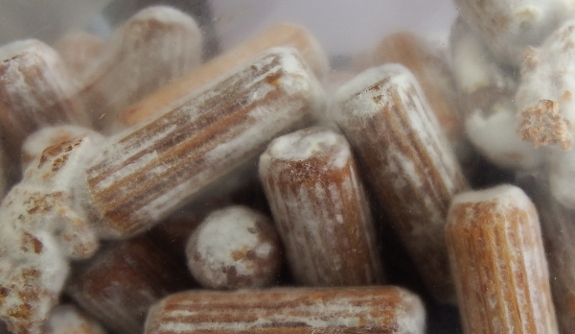
Fast forward ahead two
years. We decided to order from a different company this time around
(Field and Forest Products, whose spawn has always grown like
gangbusters for us). And sure enough, the plugs arrived fuzzy with
mycelium...but frozen solid!
This time, the issue was
entirely my own fault. I knew the spawn was shipping, but didn't change
my routine of walking Lucy out to check the mail the morning after it's
delivered rather than catching it on day one. So a night in the teens
meant that I brought home spawn coated with ice crystals.
I emailed the folks at
Field and Forest Products, and they responded quickly and soothingly. I
wasn't to worry --- as long as the spawn didn't freeze and thaw
repeatedly, it would be fine.
And, yes, I trusted them.
But I also recalled how much work and time we wasted on spawn that
didn't do anything two years ago. So I fell back on a technique I
recently learned in Organic Mushroom Farming and Mycoremediation.
Tradd Cotter recommends putting questionable spawn somewhere warm but
out of direct sunlight for a few days to see if the mycelium begins to
grow. Sure enough, after three days on top of the fridge, our plugs were
whiter than ever!
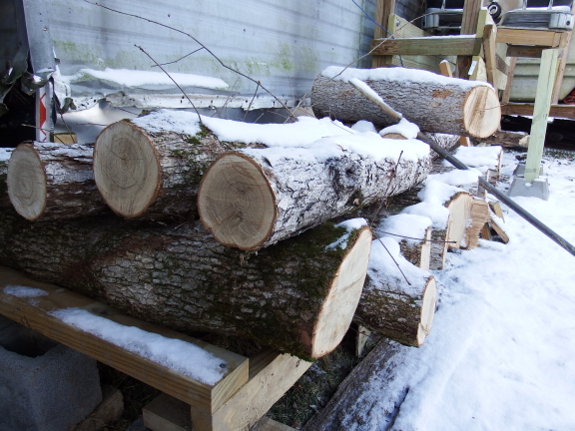
We'd planned to inoculate
our logs this week, but it looks like the weather isn't going to
cooperate. While I'd read previously that it's okay to inoculate logs as long as you're not going to see lows beneath about 18,
Field and Forest Products has a different guideline. They said to wait
until daytime highs are reliably hitting 40 Fahrenheit...which was the
case last year at this time, but not so much in 2015. (Actually, with
lows of -12 now forecast, we wouldn't be plugging logs this week by
anyone's guidelines.)
So the spawn is now
resting in the fridge, along with scionwood and maple sap. It sure is a
good thing I'm the head cook, or my homesteading spillover into the
kitchen might get on the kitchener's nerves....
 The average reader may not know this, but my father is one of the founding editors of Sow's Ear Magazine, and his poetry has been published widely in other journals including Madison Review.
This winter, I got to enjoy the treat of looking through his body of
work in search of an ebook...or two, or three. And, in the process, I
discovered that his short stories pack the same punch as his poetry. In
fact, they remind me of a mixture between O. Henry and Wendell Berry,
and I suspect that many of you will enjoy the farm and small-town focus
of the four pieces I picked out to include in his debut work.
But don't take my word for it! Sapling Grove Secrets
is free on Amazon today to give you a taste of my father's surprising
short stories. If you like what you read, you'll make both me and Daddy
eternally grateful if you take the time to leave a review. He's saving
up for his annual banana split, and a few good reviews on launch day
will make that treat much more likely to happen. Thanks in advance, and I
hope you enjoy these stories as much as I did!
It snowed enough today to
make the chickens and ducks choose a day in the coop instead of their
normal routine.
We had a hen who kept
escaping so we put her in a tractor for a week, but today seemed like
the day to move her back to the flock.
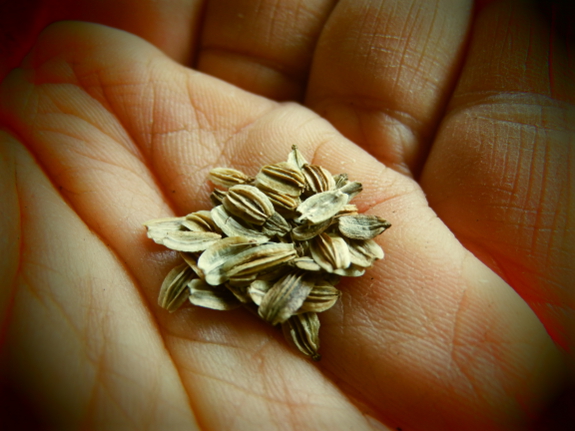
Spurred on by the permanent flower/herb beds I'm adding against the newly skirted sides of our trailer,
I decided to branch out into some additional herbs this year, and also
expand our planting of thyme. (Because there's never quite enough thyme
on our homestead!) While most perennial herbs are best purchased as
plants, I always like to test my green thumb against minuscule seeds, so
I filled a flat with chamomile, Greek oregano, thyme, fennel, lovage,
and poppies.
 Of
these, the chamomile is a self-seeding annual and the middle four
should establish themselves as long-lived perennials. Poppies, on the
other hand, are typical annuals that are planted in our main garden each
year as a matter of course. So why include them in the herb flat?
The trouble is that my planting calendar says to seed poppies outdoors now,
but our weather forecast has promised us at least a week below freezing
with an ultimate
low of -16 degrees Fahrenheit. Sure, I could just put off planting the
poppies the way I have the lettuce and will the early peas. But I often
end up thinning and resetting garden-seeded poppies, so I figured I'd
test them out as transplants instead this year.
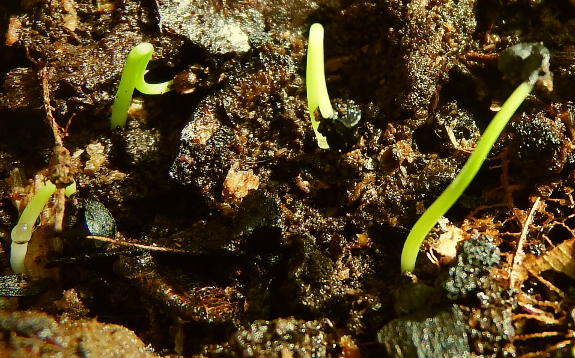
Will the herbs be our
first garden sprouts of 2015? Not at all! Onions started in flats at the
beginning of February are beginning to send up green leaves at the
moment. A perfect visual tonic for a February cold spell!
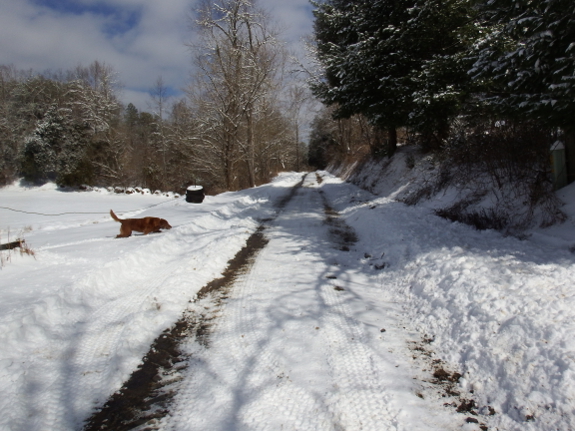
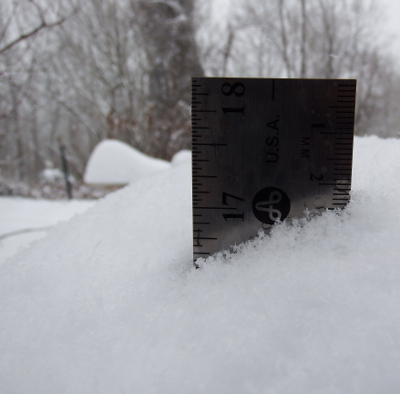
8,5 inches of snow is a bit
more than our previous snow
storm when the power went out for 10 days
Our main access road got plowed once today, but we decided to wait till
tomorrow for our regular trip to the Post Office.

"How about staying inside
today and taking it easy?" said the Red-shouldered Hawk. After seeing
how much effort it took to push my way through 8.5 inches of snow just
to do my morning chores, I decided the hawk was wise.
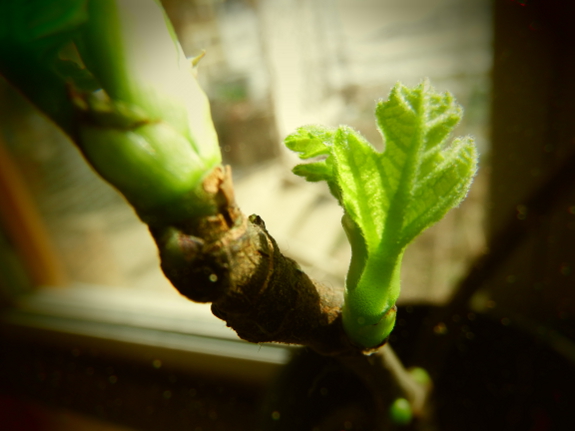
Indoors, my winter-mood-stabilization projects are greening up nicely. The Mars Seedless grape cuttings I started rooting six weeks ago are opening their leaves, as is the little fig tree 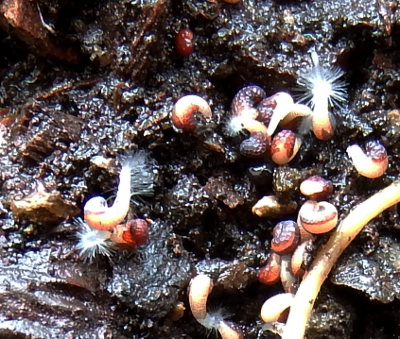 I
left inside for the winter. In contrast, Reliance grape cuttings
started at the same time are still dormant above ground, which actually
is a good thing --- the longer cuttings work on growing roots instead of leaves, the better.
Of my Valentine's herb seeds,
all except the fennel and lovage have already sprouted! Shown here are
poppy seeds that I planted far too thickly. But I won't mind thinning
once they poke up their cotyledons --- a race to green which has been
roundly won by the chamomile seedlings.
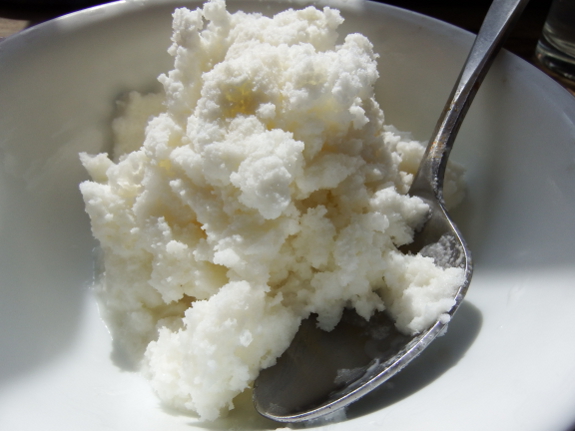
When I got sick of
writing, I headed to the kitchen. How about some maple syrup snow ice
cream? 2 tablespoons of milk, two tablespoons of cream, 1.5 tablespoons
of maple syrup, and a big bowl of snow per serving. Delicious!
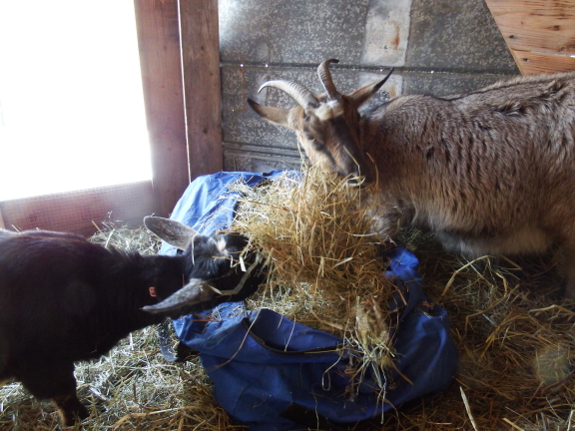
 On February 11, Abigail suddenly started looking a lot less
pregnant. Maybe this is when the babies did the two-week pre-kidding
change of position? Either way, I'm pretty sure now that our doe is due
at the second possible date, which would be around March 4 if you go by
the 150 day gestational period of a standard-sized goat, or around
February 28 if you go by the 145 days that miniature goats average. (As a
semi-standard goat, I'd say Abigail might be due right in the middle.)
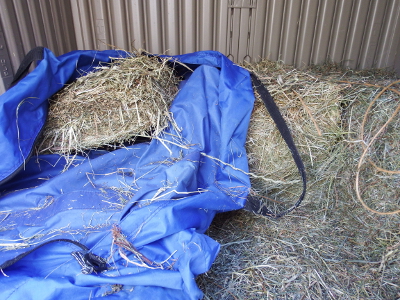
We're all enjoying the bit of breathing room from thinking there will be kids at any moment. Plus, by stocking up on hay and upgrading our manger, daily chores have been kept to a minimum. Less hay dropped to the ground means that our storage shed still 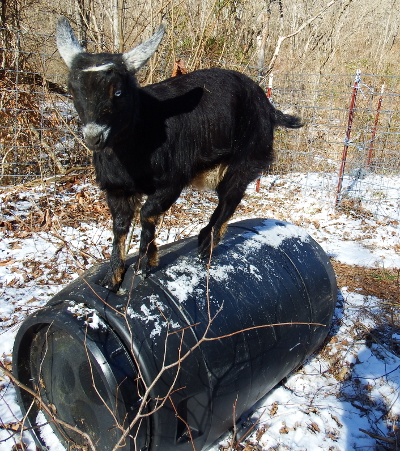 contains 7.5 of the 9 bales we put away near the end of January. We should definitely have plenty of hay to last until spring.
On the other hand, Abigail has
been a bit crankier lately, presumably because those unborn kids are
starting to weigh her down. She kicks Artemesia out of the shed unless
the weather's really bad in order to keep the doeling out of her hair.
"Why don't you go see if you can stand on that ice-covered barrel?" says
our pregnant doe. "Oh, goodie!" answered Artemesia. "That sounds like
loads of fun!"
We made it to town today
after being snowed in all week.
Might not have made it
without last year's
truck tire upgrade.
 Although Tradd Cotter's Organic Mushroom Farming and Mycoremediation deserves a full lunchtime series...I already wrote one after listening to his inspiring lectures.
So, instead, I'll simply tell you that this beautifully illustrated
book is a must-read for anyone interested in homestead-scale mushroom
production. You'll learn more in-depth information about many of the
home-propagation techniques I've posted about previously, will be
inspired to try out mycoremediation
in your chicken coop, and much more. Then dive deeper into topics like
producing a slurry of morel spores and associated microbes to grow this
elusive species at home, or experiment with propagating shiitakes
without a lab by stacking thinly sliced logs separated by pieces of damp
cardboard.
I really can't do Tradd's
book justice in a single post, so I'm merely going to sum up some
information on which mushroom species are best to grow in specific ways.
Tradd has a great section at the end of the book giving
species-by-species cultivation techniques for twenty-four types of
mushrooms, and he also breaks the species down into difficulty
categories. Based on that data, raw beginners who want to fruit their
mushrooms outdoors should consider black poplar mushrooms, wood ears,
reishi, brick tops, oysters and elm oysters, shiitakes, stropharia, and
turkey tails.
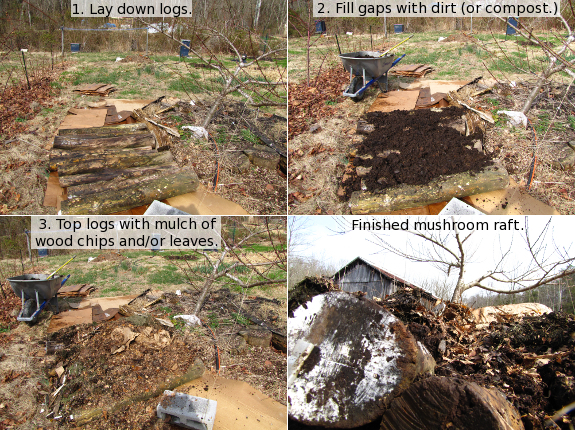
The book also clued me in to why my rafts
didn't do as well as I thought they would --- only reishi, nameko,
black poplar, brick top, and maitake are recommended for this type of
cultivation. Stumps,
similarly, are best for maitake, chicken of the woods, reishi, enoki,
oysters, and beefsteaks, with the tradeoff being that stumps take longer
to start to fruit than logs do, but that they then tend give you many
more years of harvests before petering out. Finally, if you want to grow mushrooms on cardboard, oysters, blewits, and stropharia are a good choice (at least during the vegetative stage).
Although I have a
tendency to focus on the easiest types of mushroom growing (namely
oysters and shiitakes seasonally fruiting on logs), Mark likes the idea
of faster production using sawdust, wood chips, coffee grounds and other
substances in containers. And Tradd succeeded in knocking out one of my
roadblocks to Mark's proposal, namely the constant use of throwaway
plastic bags. Instead, the mushroom guru recommends putting your growing
substrate in PVC pipes, nursery pots, or five-gallon buckets, all of
which can be modified with holes and sanitized in a 10% bleach-water
solution to allow reuse. Using these methods, you can see mushrooms as
soon as three weeks after inoculation when growing oysters on coffee
grounds --- too bad we don't drink that beverage or have a coffee shop
nearby!
In the end, Tradd's book is just as inspiring as his lectures were, but
the contents are much more meaty. I read the book slowly over the course
of a couple of months and recommend you do the same to enjoy the full
effect. Other mushroom books --- notably those by Paul Stamets --- will be a good supplement for the mushroom enthusiast, but Organic Mushroom Farming and Mycoremediation
has now risen to the top of my list of recommended mushroom books for
the homestead fungiphile. This book will be staying on my shelf for
years to come and I expect it will inspire many mushroom experiments.
Stay tuned for details as we try to propagate shiitakes using the log
method and perhaps grow some oyster mushrooms on old jeans.
We had our first power
failure of 2015 last night.
I guess it was caused by the
extreme low temperatures.
Nice of it to come back on
before lunch today.
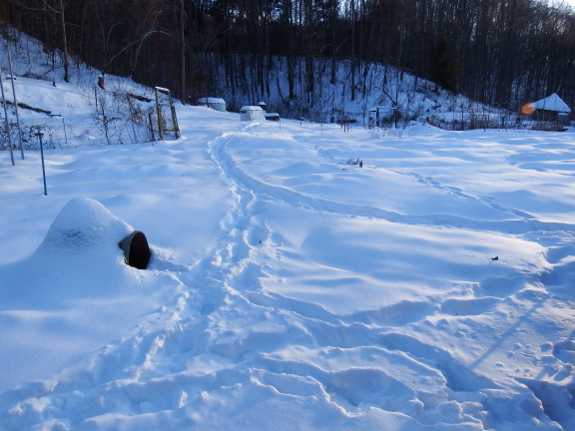
At -22 Fahrenheit, we clearly see the difference between the addition
we built and the main trailer. Even though the corners aren't precisely
square in the former, we insulated it like mad and thus find it easy to
keep the internal temperature at a balmy 68 throughout arctic blasts.
In contrast, inside the trailer, I had to keep the wood stove running
full bore from 4:30 am on to maintain a temperature above 40. We sure
would add a lot more insulation to our main living space if our normal
weather regularly dropped down so far below 0.
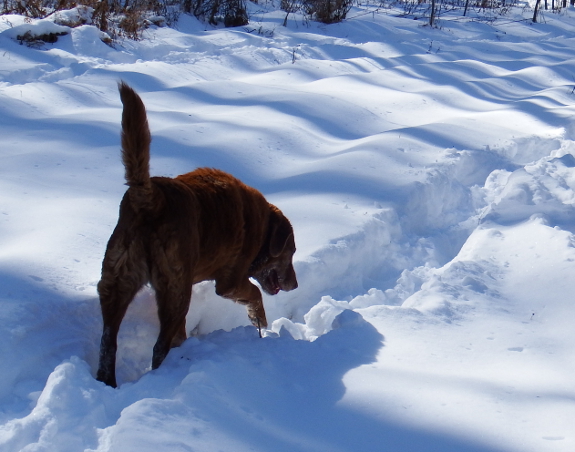
Despite the momentary discomfort, though, my main concern with this cold snap is fruit trees. Will our Chicago Hardy fig simply die back to the ground
the way it did last year at -12, or will -22 be the death knell for
this Mediterranean fruit? Our current thick snow cover should protect
overwintering garlic and strawberries, but with dormant peach buds
starting to get damaged at -10 Fahrenheit, will we even see a bloom this
spring? I sure am glad I decided to wait at least until March to prune.
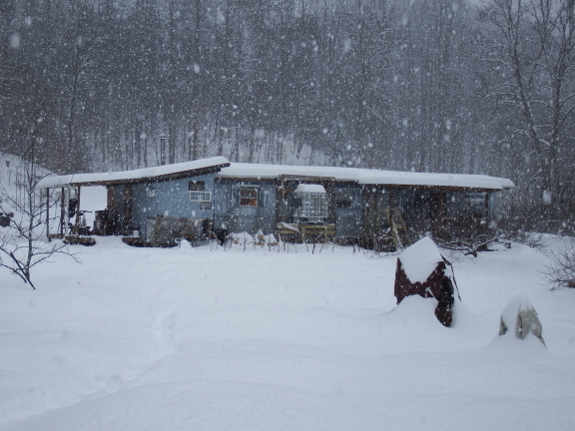
What kinds of Homesteading
chores do we do when buried by snow?
Anna has been working on a
new book and I've been building extra chicken waterers.
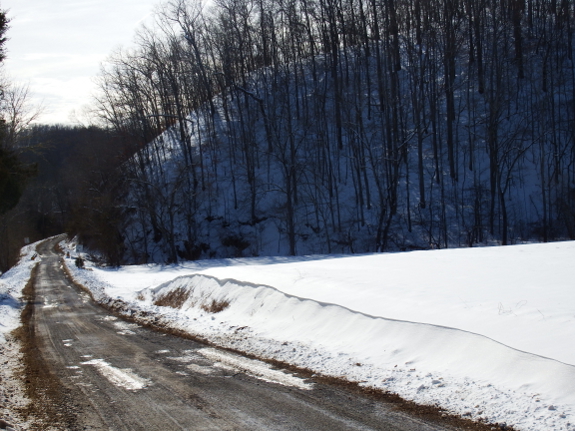
Great question, Karen
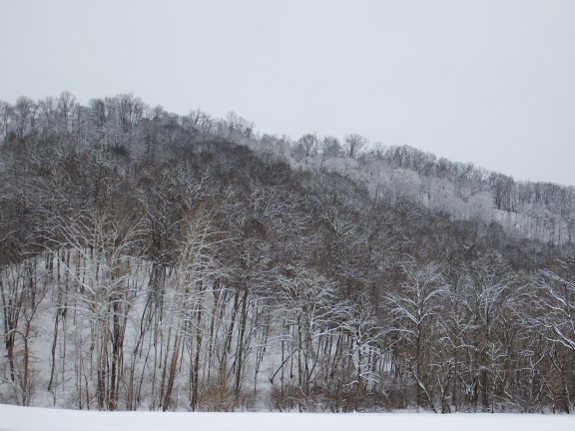
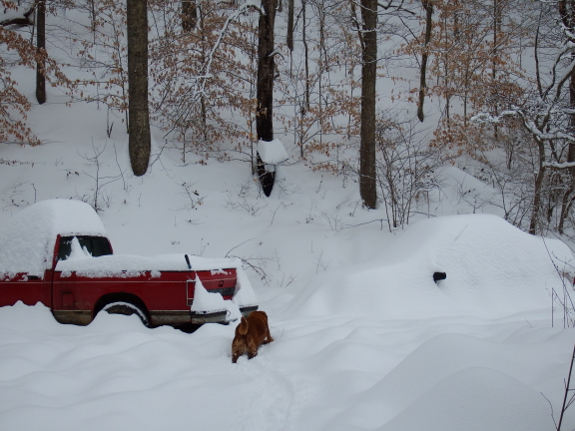
(especially since it gives me an excuse to include lots of snow photos
in this post)! The answer, of course, will depend on where you live and
on what kind of homestead you have. Presumably, if you homestead in
Alaska, you've worked out systems to deal with all of the cold-weather
issues, and -22 is just par for the course. So, for the sake of this
post, I'll assume that you live exactly where we do and homestead
exactly how we do.
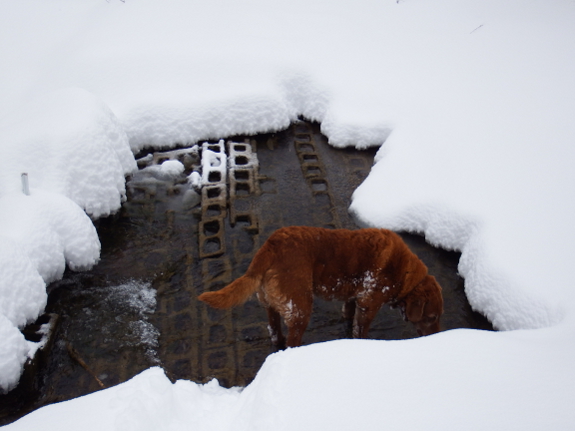
I've spent a lot of time
over the past week wondering how homesteaders managed before the era of
10-day weather forecasts. Luckily, modern homesteaders have quite a long
heads-up and tend to know when cold spells are coming. As a result,
Mark and I prepared extensively before our current deep freeze:
- Splitting lots of firewood and stacking it on the porch for easy access.
- Pouring out our old stored drinking water and refilling the jugs, then filling a few buckets with wash water to sit on the kitchen floor for animal hydration and dishes.
(This assumes that your water, like ours, reliably freezes around 5
Fahrenheit, but causes no problems except requiring water rationing.)
 Cooking lots of easily reheatable meals for simple human nutrition when the power goes out.
- Making sure the top layer of deep bedding in the goat barn and
chicken coop is very fresh since the animals won't want to go outside
and will be adding more manure than usual to the bedding. (Plus, fresh
bedding will keep them warmer during those frigid nights.)
- Filling the goat manger with hay up to the brim. (Remember, a belly full of hay is the best way to keep your goats warm.)
- Moving any inside plants a little further away from the window and/or closer to the fire. Lifting anything perishable (like sweet potatoes) that are sitting directly on the floor up onto a counter so they won't freeze.
If you messed up and
didn't prepare, some of these tasks can be done on sunny afternoons
during the deep freeze. But I'll assume they're not part of your daily
chores for the sake of this post.
Okay, so the mercury has plummeted --- what do you absolutely have to
do and how long does it take? Starting at dawn, I make two quick trips
into the outside on ultra-cold mornings. The first involves bringing a
bucket of warm water and their morning ration to the goats, and taking
in yesterday's bucket of ice. The second involves bringing a chicken waterer
full of warm water to the chickens, tossing a bit of food into their
coop, and then taking in any eggs. Actual time spent outside: two
5-minute sessions, with glove-warming lulls in between.
The second trip is
similar to the first and occurs right after lunch. Once again, everyone
gets warm water swapped out for the morning ice, and I've noticed that
this is when the goats go 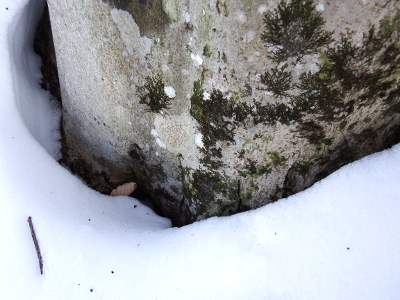 crazy
drinking, having spent the morning filling up on hay. This is also when
I tend to gather our eggs on cold days --- some will have frozen solid
and cracked if the night got below 0, but often I'm able to nab them in
good condition as long as I get there by early afternoon. Finally, while
my boots are already on, I bring in enough firewood to make sure I can
keep the wood stove raging until the next morning, while Mark often
takes this time to bring in a bucket or two of water from the tank so we can catch up on dishes. Actual time spent outside: 20 minutes, with more dawdling to enjoy the snow.
Of course, I can't
survive on a mere half an hour of outside time per day, so as long as
the day gets above 20, I tend to trick Lucy into going out for a walk
with me in the afternoon. She and I take turns breaking trail through the thick snow, and we do all the things that don't actually need to be done. We carry in more hay to top up the manger, check the mail box, and brush snow off the sap-bucket roofs. Then we settle in for a well-deserved rest in front of the fire. Cold and snow are a great excuse to take it easy!
Where does Lucy stay when
it's cold?
She sometimes sleeps in her
house with the heated
kennel pad, but she
prefers the couch on our front porch most nights.
The other night when it got
down to -22 she slept on the floor inside with me for the first time.
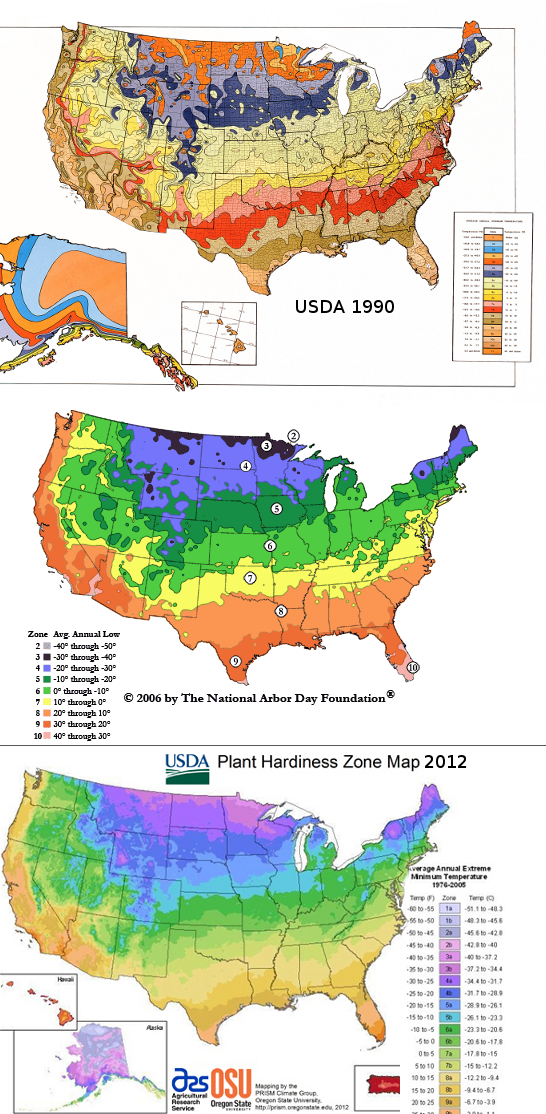 First the Arbor Day Foundation and then the USDA
came out with revised hardiness maps during the past decade, responding
to our changing climate. And in both cases, the maps promise that our
farm has moved to a warmer place. But can we take their recommendations
as gospel?
Depending on which map
you consider, our farm could have moved from zone 6a to zone 6b or
even to zone 7, with average annual extreme minimums of -10 to -5, -5 to 0,
and 0 to 5 respectively. However,
given the data of the last two years --- with annual minimums of -12
and -22 --- we might be smarter looking for plants that can handle zone
5b or even zone 4b, suggesting that our winters have become colder
rather than more mild. Granted, each zone's
annual minimums are supposed to be averages only, so it's somewhat
normal to exceed those minimums from time to time. Still, two years in a
row of deep-freeze conditions begins to look like a trend.
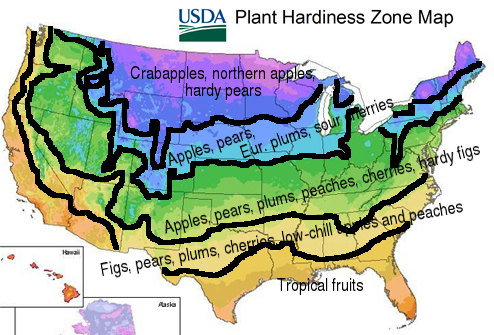
I posted before about Logsdon's recommendations for easy fruit tree species by zone,
with the map below summarizing the author's recommendations. If
we're moving a zone or two north, though, that would mean Japanese
plums, peaches, sweet cherries, and hardy figs all drop off the easy
list, leaving us with only apples, pears, European plums, and sour
cherries to savor. Similarly, blackberries, rabbiteye blueberries, and
hardy kiwis might all become dicey if the current trend toward arctic
blasts continues.
Which isn't to say that we won't be able to grow the dropped species at all. However, our sun trap
along the south face of the trailer might become prime real estate for
plants that have become a gamble from a climatic standpoint, and we
might eventually have to admit that peaches and figs in the main part of
the garden are doomed to failure.
Or maybe these brief cold spells won't have the same effect as a full
zone 5 winter. Only time will tell. But I do recommend keeping track of
your annual minimum temperatures and also perusing both of the new
hardiness-zone maps...especially if, like Karen B.,
you're planning to put in $928 worth of fruit trees. If nothing else,
stick to spring planting for questionable species, and plant your
charges in well-drained soil shielded from wind and in an area exposed
to the maximum amount of winter sun. Here's hoping all of your fruit
trees --- and mine too --- are surviving this long, cold winter.
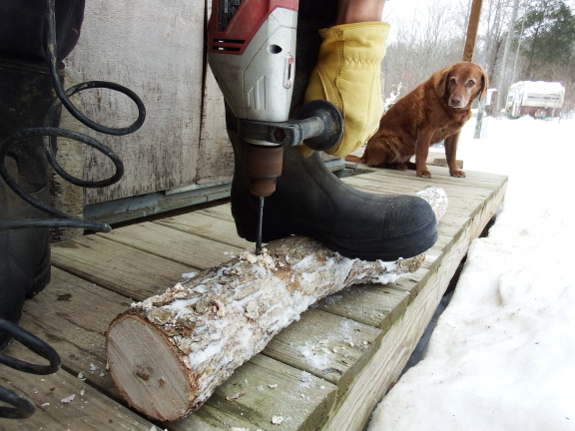
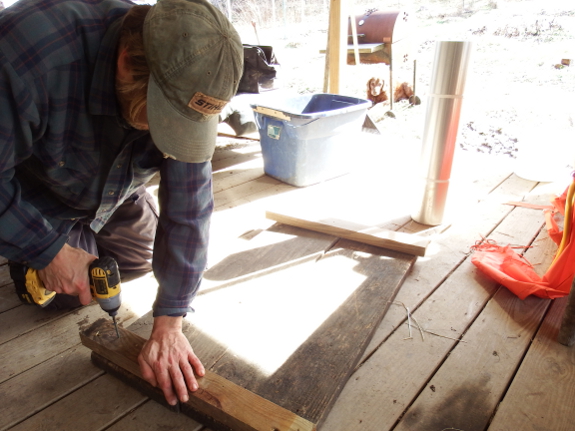
We drilled our first mushroom
log of 2015 today.
It was just the right amount
of fun, outside labor to remind us that the snow will someday melt.
Oyster mushrooms are easy to propagate on the home scale using cardboard,
so I spent quite a few years pushing oysters. But the truth is that,
while Mark thinks oyster mushrooms are good, he thinks shiitakes are
great.
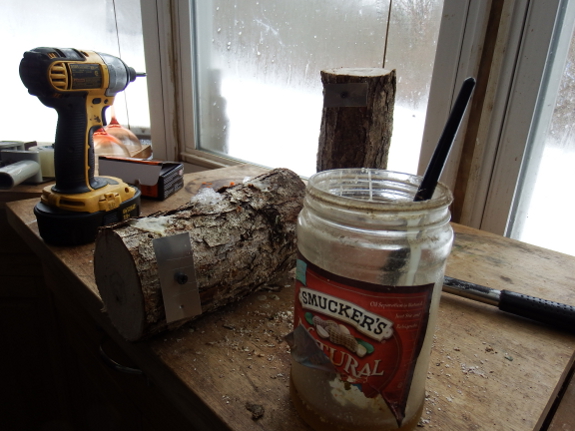
Unfortunately, shiitake mushroom spawn is less malleable than oysters
and won't thrive on cardboard. Enter the mini-mushroom-log propagation
experiment!
I call it an experiment, but the truth is that Tradd Cotter lists this as a viable technique in his book.
Granted, he uses logs that are much larger in diameter than the little
rounds I had Mark cut up and drill for me to plug Monday. But I'm hoping
that as long as I keep them moist, logs 8 inches long and 3.5 inches in
diameter will be sufficient for getting the shiitake mycelium running.
Eventually, we can stack multiple rounds together, allow the mycelium to
fuse, and thus have enough fungal body to produce a good mushroom
flush.
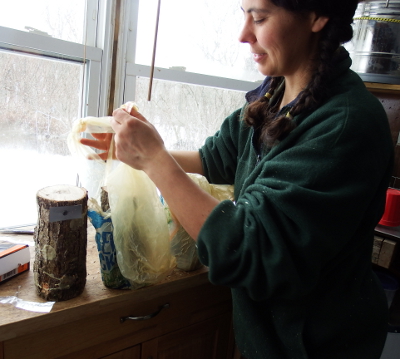 The
other thing I'm adding to give this experiment my own personal twist is
to bag each log loosely and let the spawn run through the logs at room
temperature. This is pure winter-doldrums thinking on my part --- I want
something to play with now!
Once I start seeing
mycelium on the ends of the logs, I'll put a piece of wet cardboard on
top of each log and a fresh, unplugged log above that. Tradd promises
that the original spawn will pass through the cardboard and into the new
wood, expanding my planting without buying new plugs.
Total cost for this experiment: $3 worth of plugs, plus a bit of electricity to run the chainsaw and drill. I can only peer at my seedlings
so many times a day, so having three mushroom logs to pore over while
the ground is snow covered is worth the price of admission already.
How are the goats coping with
all this snow?
Anna has started adding some
dried kelp to their morning snacks after she noticed Abigail eating
most of the kelp
in the free choice bins.
They do bounce the tether
ball from time to time, but mostly look out the door and yearn for a
snow free pasture.
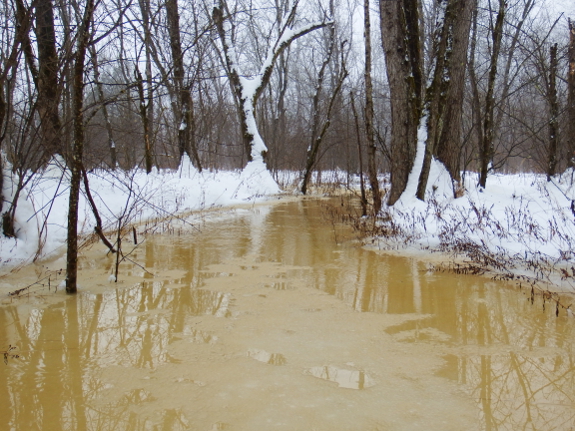
After a warm weekend that
began to thaw our accumulated snow, another couple of inches of snow
fell Tuesday and set back my belief that spring will actually come. The
solution? Ignore the outdoors and write!
I'm working on two
different projects at the moment, and am hoping to pick our readers'
hive mind about both. The first project is the sequel to Farmstead Feast: Winter, imaginatively titled Farmstead Feast: Spring.
Even though this is supposed to be a cookbook, spring is also the time
to be planting to ensure that you have something to cook with, so I was
considering throwing in a quick section on how much area we devote to
each vegetable variety and when we plant in order to feed the two of us
all year. But, of course, that information will be only moderately
useful to people with different diets and who live in different climates
than us. Would you find that a handy appendix at the end of the spring
cookbook, or should I stick to recipes?
Second, I'm excited to announce that my fourth paperback,
The Ultimate Guide to Soil: A Gardener's Tips and Tricks for Organic, Nutrient-Rich, DIY Humus will be hitting bookstores in spring or summer 2016! I originally tried to sell Homegrown Humus
to my publisher, but they felt like cover crops were a little too much
of a niche subject. And when my editor came up with that alternative
title, I couldn't resist saying that I'd expand the book to include much
more than the topic I'd written about so far.
I'm planning on keeping The Ultimate Guide to Soil
much more hands-on than all of the soil books I've been perusing in
order to educate myself about the topic, so I'm devoting perhaps half of
the book to less mainstream methods home gardeners use to build the
soil. In addition to cover crops, I've planned sections on
remineralization, traditional compost, manure, bokashi, worm bins, black
soldier flies, compost tea, hugelkultur, biochar, humanure and urine,
leaf mould, and chop and drop. But I feel like there are more
soil-building techniques that I'm not thinking of at the moment. Maybe
you've got some ideas I should incorporate into the expanded book?
Please consider leaving me a comment and brightening this snowy day with
your ideas!
We ended up damaging our
truck battery with all the recent draining and jumping and had to
replace it with a new one..
The battery
disconnect switch is
working out nicely as long as I remember to turn the knob each time I
get home.
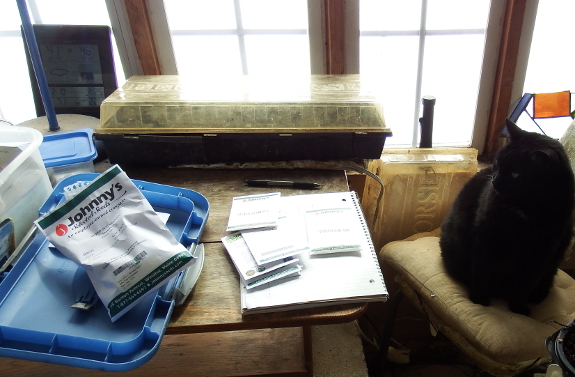
I give myself about a
week of wiggle room in my planting calendar, figuring that a few days
early or late won't impact the seedlings much and can allow me to fit
each planting into a much more favorable weather period. On the other
hand, I sometimes use that week of wiggle room for the sake of my own
sanity instead. For example, I planted a flat of tomatoes, borage, and
cabbage a little earlier than I'm supposed to as a way of keeping the
is-it-really-still-white-outside? blues away. Huckleberry was less than
impressed at the way I continue to fill up the sunniest spots with
seedling flats, but I reminded him that he's not really supposed to sit
on the table anyway.
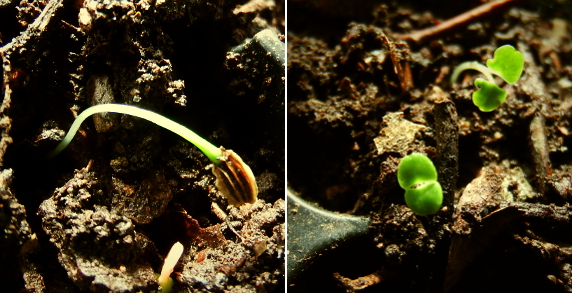
The previous round of seedlings
are doing well, with only the fennel yet to sprout. Age might be a
factor, but it's also possible that the fennel are just taking longer
than the members of the mint family --- after all, my lovage seedlings
only started poking out of the ground a day or two ago.
I did go through and thin the faster sprouters, slaughtering hundreds of
baby seedlings in one fell swoop. I hadn't expected to have such
near-perfect germination rates!
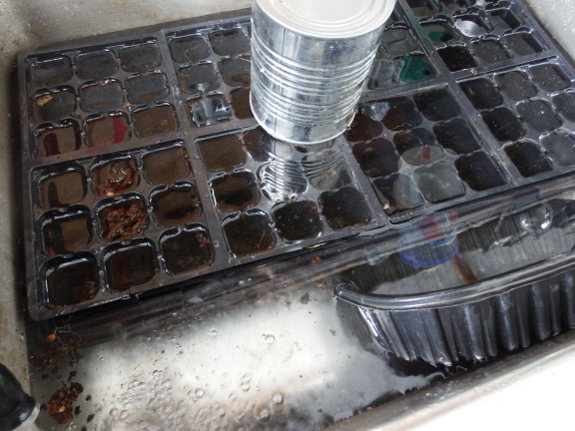
I've also been pleased to
see absolutely no damping off, which could be due to a number of
factors. Honestly, I think the most relevant is the time of year and
weather --- my earliest plantings often tend to skip that problematic
fungus, presumably because it hasn't woken up in the wild yet. But it
can't hurt that I've been soaking the seedling flats in bleach water before planting,
and that I've been more careful about taking off the clear lids as soon
as I notice the first sign of germination. The latter technique lets
the surface of the soil dry out just enough to keep seedlings happy but
fungi out of the picture.
I've still got a flat of broccoli to plant, but I finally ran out of non-frozen stump dirt.
I'll probably break down and buy a bag of potting soil from the store,
but that's a slippery slope --- with unlimited soil, I go a little
crazy, and there are only so many sunny windows to go around. In fact,
Huckleberry thinks I'm already past quota! Maybe I'll have to pull out
the seedling card table sooner rather than later.
The extreme cold temperatures
have caused one of our doors to warp.
We fixed it with some foam
weatherstrip seals, but might have to upgrade the door if our Winters
get much more extreme.
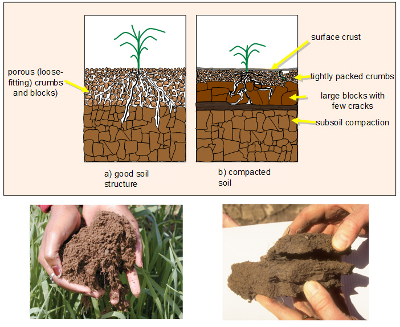 If
you don't want to destroy soil texture, burn up organic matter, and
decimate your microorganism population by plowing or tilling the soil,
what do you do to counteract compaction? Of course, your first step
should be not to allow compaction to begin in the first place. I've
trained everyone in our household (except Huckleberry) to only walk on
our permanent aisles, staying out of the growing beds in our garden, and
that goes a long way toward keeping soil compaction to a minimum. In
addition, if you're not tilling, you're unlikely to be working the soil
during wet weather --- another leading cause of compaction.
Still, who knows what
happened to your ground before you moved in? Our core homestead was
seriously overfarmed a few decades ago, and I can guess where permanent
pastures once existed based on barbed wire that we're still digging out
of the ground. Given the wetness of our homestead, I wouldn't be
surprised if cows (the most likely animals to have been grazed here)
seriously pugged winter soils, repeatedly treading the mud until all of
those essential pores between soil particles collapsed.
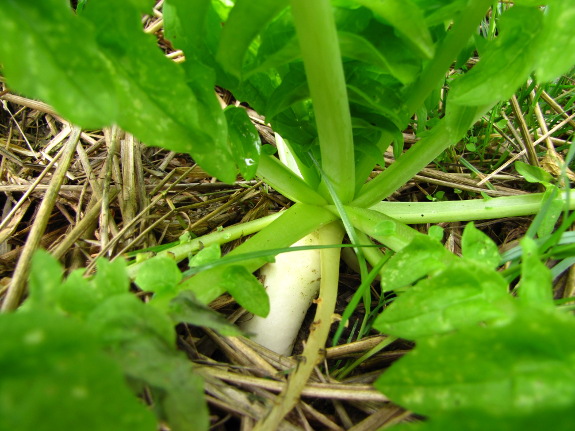 If
you suspect compaction, there are a variety of remedies available for
the no-till gardener. Adding lots of organic matter never hurts and can
greatly improve your soil structure when earthworms collect the compost
or mulch and bring it deep into the soil, leaving handy channels for air
and water in the worms' wake. Oilseed radishes
and some other cover crops (such as alfalfa) are often planted for
their tillage traits since the roots extend deep in the soil, then rot
and create organic-matter-lined pathways much like the ones earthworms
leave behind.
And then there's the
broadfork. Given my penchant for winter digging, I've always eyed this
tool speculatively, but the high price tag turned me off since I wasn't
certain that my soil really needed the help. Still, leaving broadforks
out of my upcoming soil book seemed like a major oversight, and when one of the bloggers I follow did all of the research for me and determined that Meadow Creature
offers the best model in the U.S., I was sold. When I learned that
Meadow Creature was willing to send me a review copy to try out, I was
even more thrilled.
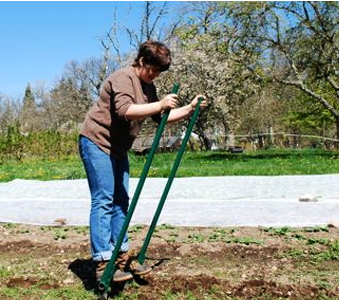 The
big question then became --- which size broadfork should I choose?
Meadow Creature offers three versions, each of which is a little bit
bigger and heavier (and will also reach deeper into the soil) than the
last. Margot Boyer at Meadow Creature wrote, "The 14" is our best
seller; it weighs 20 pounds and provides deep cultivation in an
ergonomic design. The 12" is also popular, especially with people who
are 5'4" or under --- at 15 lbs it's easy for most folks to use and
still digs deeper than any other forks we're aware of. I'm not
suggesting the 16" size; it's a heftier tool and of interest mainly to
professional farmers."
After talking it over
with Mark, I finally settled on the smaller size. Yes, I consider myself
to be pretty strong, but I'm also short and I know that the 17-pound t-post driver
is right at the upper limit of my strength for repeated use. Plus,
experience has proven that tools are much more likely to be used if
they're easy to handle and fun.
Which is all a long way
of saying that, once the snow melts and my new toy arrives, I'll be
improving the structure of my garden beds with a broadfork this spring!
I'll probably begin by hitting just half of most beds the first time
around so I'll be able to report how much of a difference the broadfork
action makes on this year's plant growth. Stay tuned for updates!
Our Star
Plate roof seems to handle snow a little better than the barn.
The steep angle produced
twice as much clearing when the barn roof tended to accumulate more
each snow episode we've had.
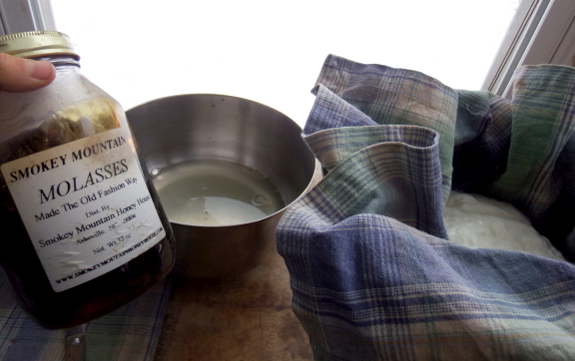
One of the soil additives
that I'm researching this year for my upcoming book is bokashi --- a
method of composting food scraps in a sealed five-gallon bucket at high
speeds with little or no smell. The jury's still out on whether this is a
trendy technique primarily of interest to apartment dwellers, or
whether land-based homesteaders should also give it a try. I suspect 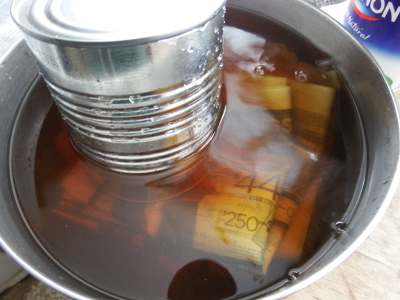 that after reading the book and doing a few experiments of my own, I'll be far more loquacious about my feelings on the topic.
In the meantime, I
followed some internet instructions to make a starter culture out of one
cup of whey drained from plain yogurt, one cup of molasses, and six
cups of warm water. Soaking newspaper in this mixture, letting the
excess water drain off, then sealing the wet newspaper in a ziplock bag
to ferment on top of the fridge for two weeks is supposed to create a
bokashi-like starter culture (although author Adam Footer believes that
this culture isn't as high quality as the store-bought cultures some
use). Mark's trying to talk me into buying some of the official starter
culture too as a side-by-side comparison, which does sound like a useful
way to dip into the advance from my publisher.
In the meantime, I'd love to hear from you. Have you tried bokashi? What
did you feel were the pros and cons of the composting technique?
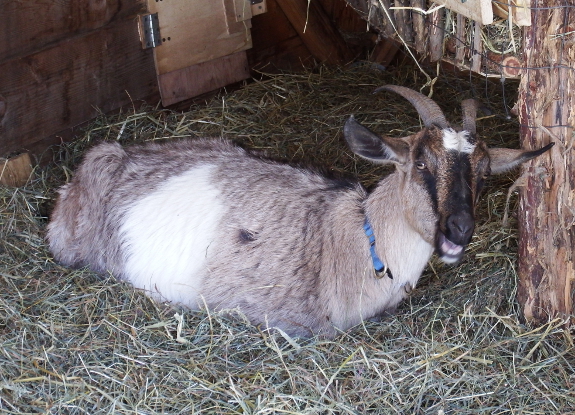
I'm stealing Mark's spot
to hit up our readers for timely advice. This morning, I became
convinced that Abigail was going into labor, but now I'm not sure if
what I'm seeing counts as contractions. At intervals, I'll see a ripple
slide across her baby bump, often with a bulgy kid-part pushing out in
an ungainly fashion. Once, I put my hand there and felt a hard kid hoof.
Is this simply kids repositioning pre-labor, or do those movements
count as contractions?
Other signs of imminent
delivery abound. I caught Abigail arching her back like a cat once this
morning, she's been yawning frequently, and she seems intent upon
scratching the top of her head against the fence. Actually, our usually
standoffish goat even came over and lay down right in front of me, then
put her head in my lap asking for a head scratch. Meanwhile, Abigail has
also been adamantly chasing our little doeling out of her immediate
vicinity. Otherwise, though, she seems content to eat hay and chew her
cud as usual.
So, what do you think ---
should I be camping out in the starplate coop and locking our doe in
her kidding stall, or relaxing until tomorrow?
Want more in-depth information? Browse through our books.
Or explore more posts by date or by subject.
About us: Anna Hess and Mark Hamilton spent over a decade living self-sufficiently in the mountains of Virginia before moving north to start over from scratch in the foothills of Ohio. They've experimented with permaculture, no-till gardening, trailersteading, home-based microbusinesses and much more, writing about their adventures in both blogs and books.
