
archives for 12/2014
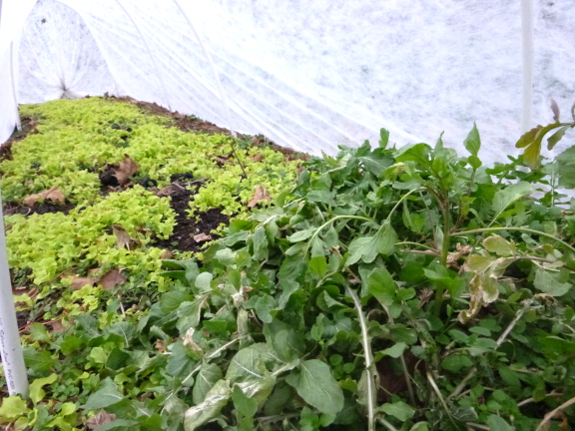
The time has come to delve into the quick hoops....
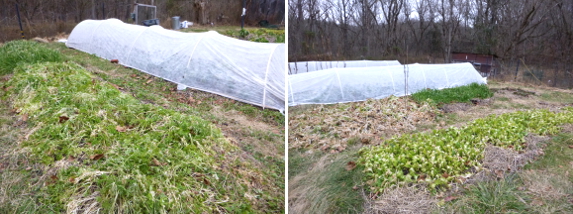
Beyond our
frost-protected areas, the garden is pretty much dead. There are still
hints of green here and there, but most plants are too damaged to be
easily harvestable and even the most winter-hardy kales and Swiss chard
aren't worth eating. (Well, Artemesia begs to differ, but this is meant
to be a goat-free post....)
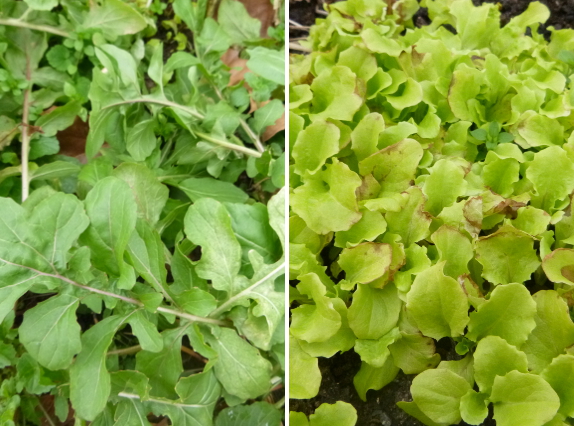
On the other hand, under the quick hoops, the world is much brighter. Yes, that 8-degree night did
damage even my protected greens more than I would have liked, but
there's plenty of delicious lettuce, arugula, and kale just waiting for
harvest anyhow.
Ready for some
nitty-gritty details? We cut new fabric for our quick hoops this year,
meaning that the first round of fabric lasted 36 months. When I first
started with quick hoops, I estimated that our supplies cost 29 cents per square foot,
which comes to about 10 cents per square foot per year over the
three-year life span of the fabric. (Yes, that's an overestimate of the
cost since I'll keep using the non-fabric parts of the quick hoops for
many years to come, but you can think of that as a worst-case scenario.)
Would you pay $4.50 plus an hour of your time for a 15-foot by 3-foot
bed of fresh salad greens ready at the beginning of December? I know we
would! That's why quick hoops continue to be one of my favorite parts of
our gardening year even though they cost money and I'm a certified
skinflint.
I made some progress on the new
goat milking stand today.
Abigail barely fits in it.
Making the neck brace a few
inches taller might make it easier to use.
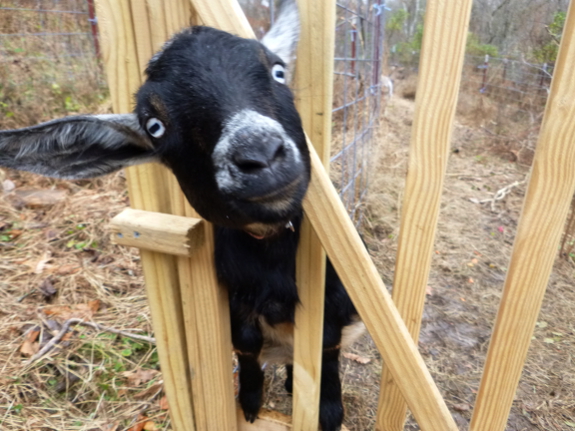
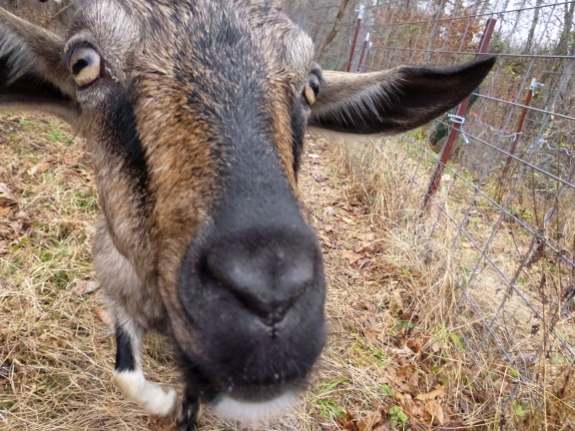
Guess what? It's time to
talk about poop! I'm sure you're excited...and if not, you can just look
at the cute snapshot of Artemesia and then move along.
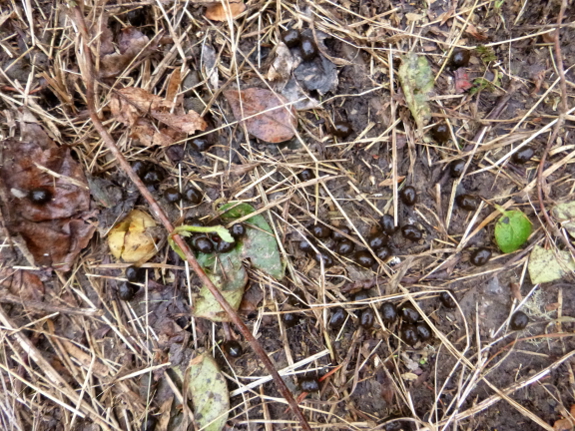
When you start reading
goat books and websites, you'll soon run across mention of "goat
berries." I guess the cute euphemism is meant to make up for the fact
that goat keepers spend a lot of time thinking about manure...and not
just about how well that manure will incorporate into their gardens.
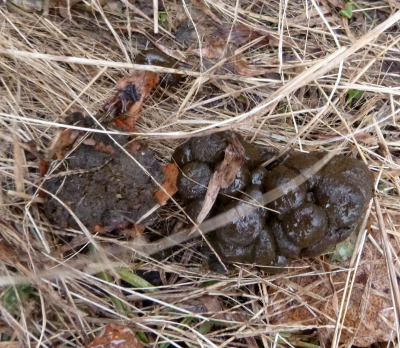 Over
a decade ago, a naturalist once told me that clumps of deer manure like
the photo shown to to the left were a sign that the deer in question
was a buck. Wrong! If deer are anything like goats (and the two species
do seem to be remarkably similar), manure that clumps instead of
separating into individual berries is an early warning sign. I notice a
few clumps every time I get lazy and let our girls dine solely on hay
for a few days, then allow them to gorge on oat leaves when their guts
have lost some of their acclimation to the greenery. The clumpy manure
tells me to be a bit more careful, to feed oat leaves every day in
moderation rather than expecting the caprine gut to change on a dime.
(Still, as long as I just see one clump and a lot of berries, I don't
worry much.)
Clumpy manure can also be
a sign of worms, but that doesn't seem to be the case in our situation
since I only see a clump occasionally, and only after their feeding
regimen has abruptly changed. Still, the worm potential is worth noting
since intestinal parasites are such a big deal with goats.
Speaking of the health
issues associated with goat manure, I should mention that I've been
letting our girls spend most of their time in the same pasture for the
last couple of weeks. While lack of pasture rotation is generally a very
bad idea with goats, this pen is more a spot for our girls to run
around in between dipping into the hay trough and talking a walk with me
to honeysuckle patches rather than a spot to dine.
Still, manure is
beginning to build up on the ground, which could be a health hazard if
the goats got hungry and nibbled at the low grass. (Unlikely given their
as-much-hay-as-they-can-eat diet combined with a very finicky nature.)
On the other hand, I like to think of goat manure feeding this poor
soil, so rather than moving the goats to a new spot, I'll probably
spread some straw over the current manure load and turn this patch into a
bit of an exterior deep-bedding zone. The goats get to keep running
around right outside their coop door, while the soil gets to slurp up
the high-quality manure --- a win-win.
That should work until we get our electric fence finished. At which point our girls will be spending more time rustling up their own grub...rather than watching me carry their hay in from the parking area half a bale at a time. Good thing two small goats eat less than a bale between them every week....
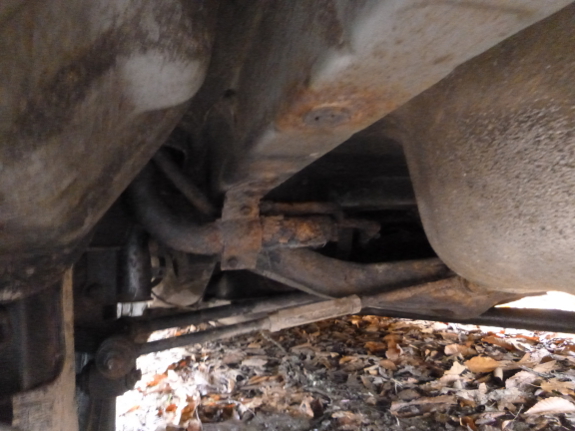
When your car's old enough to drink, sometimes key components spring a leak.
Our mechanic
fixed two holes in the gas line before Thanksgiving, but vibrations
during servicing busted an even bigger cavity into the rust. Now, when
we stop at a gas station, liquid hits the pavement on its way into the
tank.
After fillups, there are no
leaks...unless the front of the car is higher than the rear. So, until
we get hole number three fixed, there will be no more parking on hills.
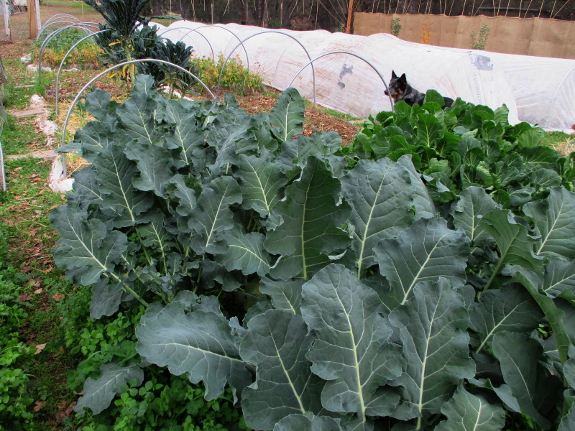
I hope you don't mind me sharing the photo above from your blog, Melina. I get this question a lot, so I thought the answer deserved its own post.
Eliot Coleman did some research with different fabric weights
and found that, counterintuitively, lighter-weight fabrics are actually
better at protecting the plants underneath. The heavier fabrics block
more sun, and it's really the sun-concentration effect that protects
your plants, not the night-time quilting effect. So, go for the thinnest
fabric, which in our experience (like yours) has been agribon-19. Yes,
it might not last quite as long, but it will do a much better job in the
interim.
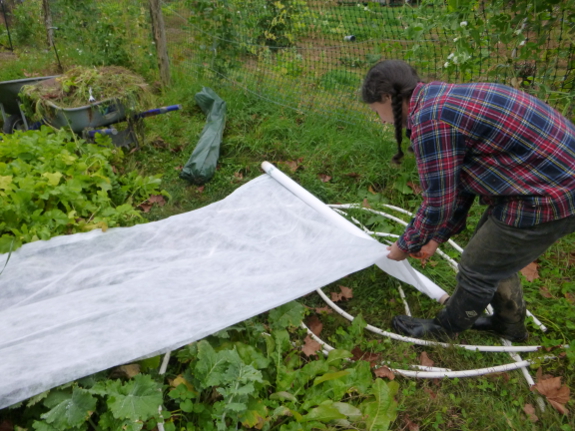
I haven't done as much experimentation as Coleman has, but I did originally begin with thicker fabric, which I used on cold frames
instead of quick hoops. I've since retired that cloth, though, because
even though it doesn't tear as easily, it blocks way too much light to
leave on plants 24-7. If you feel you need an extra layer of protection
(which Melina shouldn't, but which northerners might), then a layer of
greenhouse plastic on top of the quick hoops during the coldest part of
winter will help. But you'll have to remove plastic during hot days
since, unlike row-cover fabric, plastic won't breathe!
Finally, I should briefly address Nayan's comment,
since she complained that her row cover fabric "didn't even last from
spring into summer. They literally crumbled into dust." Row-cover
fabric is
fragile, but if you take care not to tear it and always put it away
dry, I've found that the fabric easily lasts two years with no mending
and three-plus years if you're willing to sew a little. We definitely have not experienced any crumbling into dust!
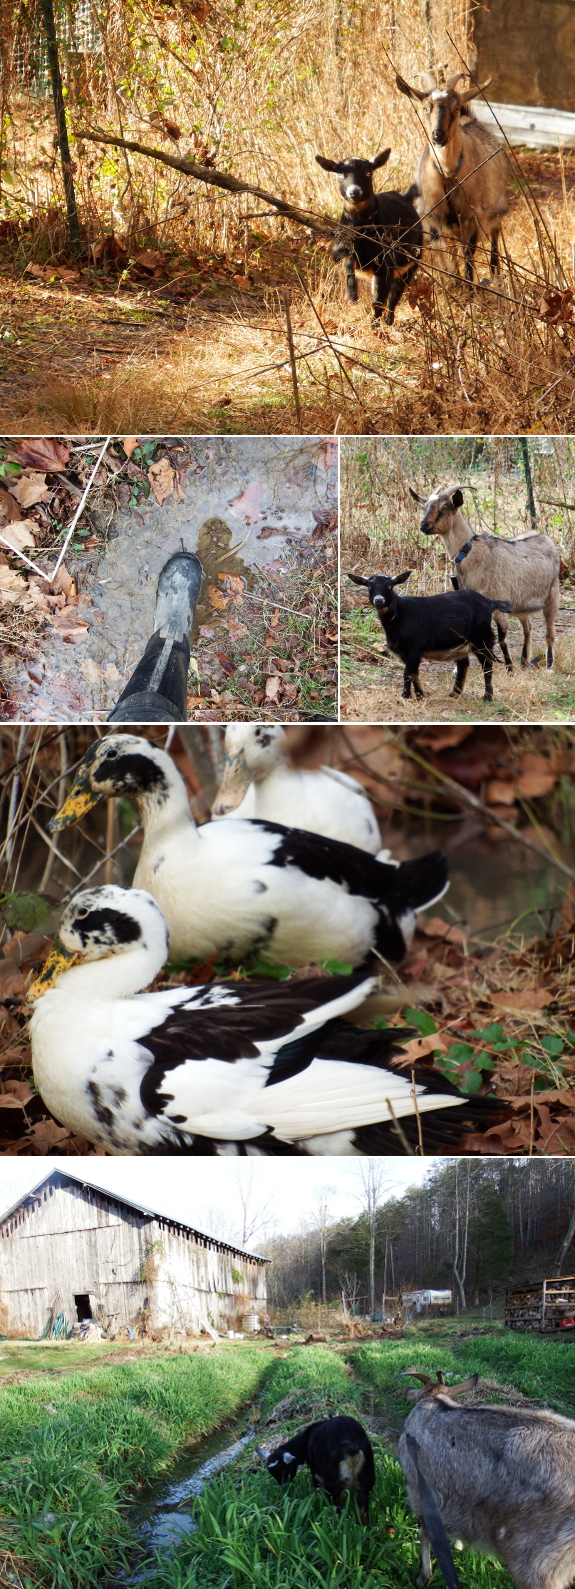
How much water is too much water to wade through in search of a waterproof camera?
Anna decided mid-thigh was acceptable.
The creek was too high for hip waders to be safe, though, so she stripped down and crossed barefoot and pantsless. Brr!

My editor dropped me an email Tuesday at lunchtime with a formatted proof copy of The Naturally Bug-Free Garden
to look over. And, by the way, could I get it back to her by Wednesday
morning? That didn't give me much room to be an over-achiever, but I still managed to get my corrections back to her by 5 pm Tuesday. (Good thing it was pouring down rain and thus being outside held
little appeal.)

I've been waiting with
baited breath to see what Skyhorse would come up with for the interior
design of this book since half of the reason I signed a deal with them
in the first place was because I felt like the images deserved to be
seen in print. Of course, Skyhorse's designer made very different
decisions than I did when I first laid out the book, planning to self-publish it on paper...but
in many cases I like Skyhorse's version much better. For example, take a
look at the two-page title spreads above, my version on the top and
Skyhorse's below. I'm not ashamed to say that theirs makes mine look
homemade.
(By the way, if you're
not used to looking at files like this, ignore the white space around
the edges and the black lines on the corners. The book is set up with
"bleed," meaning that the images will go right off the edge of the page
like you'd see in a glossy magazine rather than having a white border
around them. This is fancy formatting that gave me fits when I tried to
do it myself.)
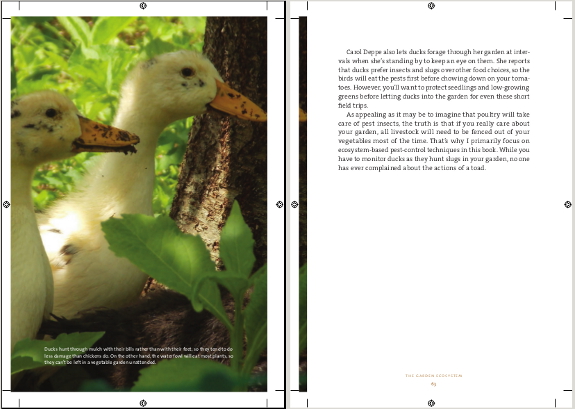
Our duckies will be
enjoying full-page billing, as will one of my favorite toads, but for
some reason Skyhorse's designer didn't opt to turn my awesome slug photo
into a two-page spread. I can't imagine why not! Don't they realize
that my readers will want to post those slugs on their walls as pin-up
models?
Interestingly, despite
having added 31% more words between formatting the manuscript for myself
and sending the file to my publisher, the page count remains the same
--- 126 pages even. I'm not sure why Amazon thinks the book will be 208
pages long, but I guess preorder pages are often based on guesswork.
Here are a few pre-order links in case you'd like to enjoy this
glossy paperback when it comes to life this spring:
I hope seeing a book slowly make its way into print is almost as interesting as my usual posting topics...like goat poop. Now isn't that memory making slug pinups look pretty good?

Winter is a good time to
put more thought into systems within your homestead that need a little
tuneup. What do I mean by "systems"? Well, mulching is a good example.
In our garden, the advantages of a permanent mulch vastly outweigh the
disadvantages, but cost and time mean that I don't always keep the
ground fully covered. A good system would make mulch easier to come by,
ensuring that our garden soil stays in tip-top health.
Forest gardeners talk about chop 'n drop
as their primary mulching system, but in my own experience, the result
is a lot of work without fully covering the ground. In our wet climate,
halfway-mulched soil is almost worst than unmulched soil since weeds
come up through the mulch and you're stuck trying to rip out the former
without removing the latter. In drier regions, chop 'n drop might work,
but around here, we need a more serious mulching campaign.
For the annual garden, my favorite winter solution is a fall cover crop
of oats (or oilseed radishes if I want to plant into the ground in the
very early spring). So, this year, I decided to try the same thing in
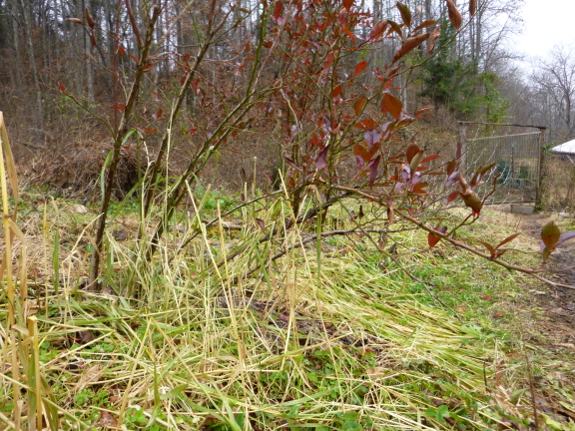
our perennial beds. The photo at the top of this post shows the result,
which is good but not yet perfect. The flaw came about because the soil
around my blueberries was already partially mulched when I sprinkled oat
seeds onto the ground, so germination wasn't perfect, leaving me with a
partially-mulched situation. But the experiment is a good start, and
suggests that perhaps if I raked in the oat seeds when I planted them
rather than scattering the seeds on the soil surface (which seems to
work fine in the vegetable garden), then I might get better mulch
coverage around the perennials. The possible negative side effect that
I'd anticipated --- oats competing with the blueberries during the
growing season --- didn't seem to be a factor.
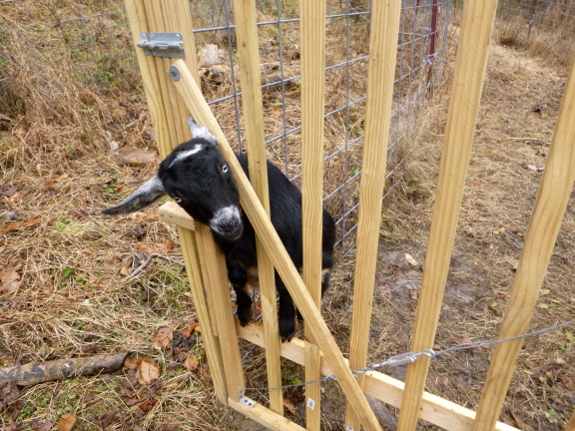
Goats are the other new addition to our mulching system. In the past, the manurey deep bedding
from our chicken coops has served as a partial mulch solution, but the
greater quantities coming from the goat coop should increase the amount
of garden area we can cover with this prime amendment. As an added
bonus, deep bedding acts as fertilizer as well as a weed suppressant,
which means we won't have to haul in as much off-farm manure this year.
Yet another system that I've been wanting to tweak....
Our low
pressure hot water heater
has been going for a little over a year now.
We've worked out a pretty
good system where I turn it on about an hour before dinner which gives
more than enough hot water for the dishes.
Makes me wonder how much
energy we've saved over this past year compared to a hot water heater going all the time?
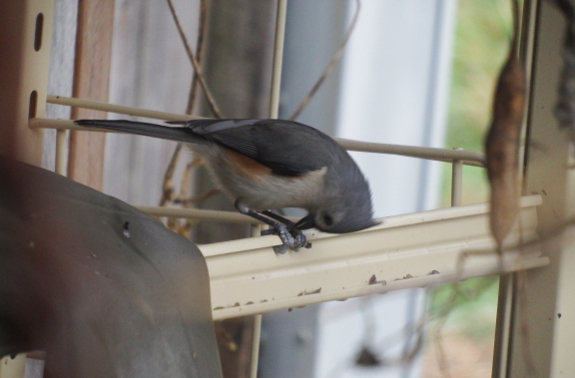
I accidentally created a feeder for the local titmouse population when I left our sunflowers on the drying racks too long. I had planned to put the sunflowers away in the feed freezer...but
I wasn't positive the heads were dry enough and didn't want them to
mold. And then the local songbirds started dropping by for a snack.
Next year, I'll take that
as my cue to protect the seeds, but this year, we still have about 40
pounds of sunflower seeds from the feed store to go through, and I
suspect we won't use it all before spring. So I've just been enjoying
letting the titmice dine. It takes a titmouse about as long to eat one
seed as it takes Abigail to eat the whole head, so we may continue
seeing bird traffic into the new year.
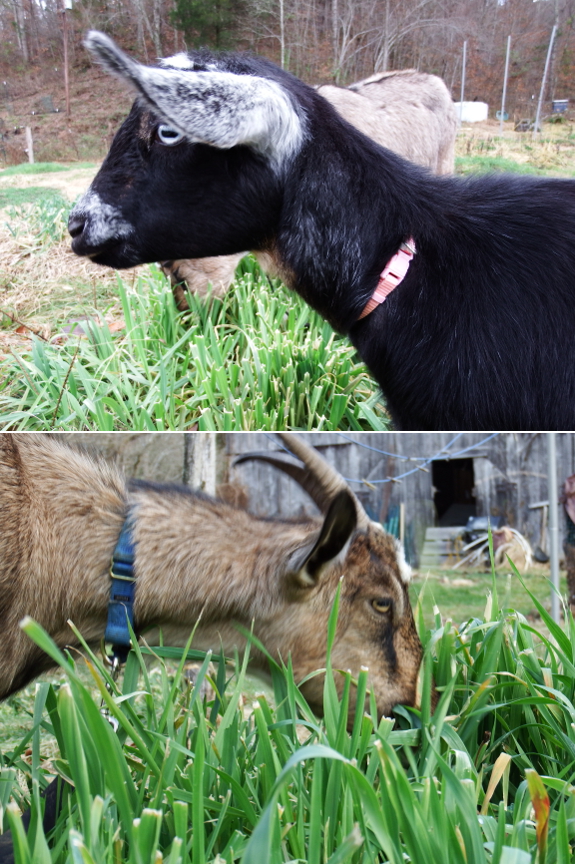
Artemesia is growing into her independence, so sometimes we have to give her a nudge in the right direction.
A collar makes nudges easier.
Abigail's collar is blue and sturdy, but Artemesia's is pink and delicate. Perfect for our little princess.

Those are indeed Ancona ducks, Meg! You can read all about our duck adventures here and here.
Chickens that are more than a year old stop laying in the fall when they molt,
and ducks molt too (although, the internet reports, on a bit more of a
sporadic schedule). That said, when our ducks "stopped laying" we soon
discovered that they'd decided to hide their eggs in the woods instead
of laying in the coop. Even though it was a hassle, locking the ducks in
at night broke them of the woods-laying habit. Since waterfowl tend to
lay quite early in the morning, all of the eggs had been deposited in
the coop by the time I let them out at 9 am.
I hope that helps turn up your missing eggs!
Due to popular demand we
hunted down some more heated
buckets.
Once we finish the back
orders we'll have a few available if you missed the first round.
I often feel like I have
the opposite of Seasonal Affective Disorder. My personal affliction,
GLADS, means that, after a week of solid gray, when the clouds finally
break, I'm Gaily Laughing at da Sun.
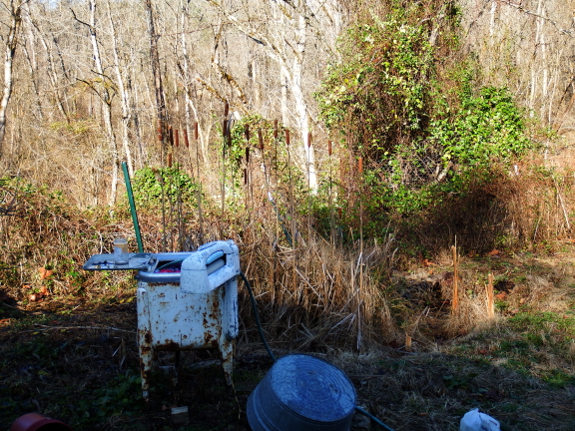
It's astonishing how
different 36 degrees and sunny feels from 54 degrees and rainy. Even
though it's nearly twenty degrees colder, I have to remind myself to
wear a coat --- the whole world seems bright and warm. Time to do
some laundry!
I visited my Mom recently and
she was not impressed with my frayed sleeves.
Before I knew it she was
cutting up an old pair of black jeans and attaching the pieces to my
tired old Carhart coat with
her sewing machine.
Thanks Mom.
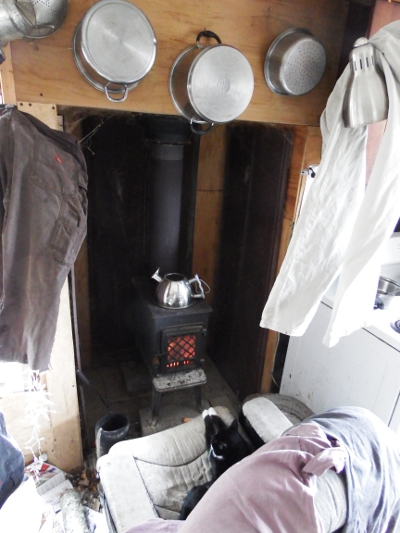
The day after the sun, realities of winter set back in.
Even flipped once,
thicker clothes failed to dry fully during our five-hour window of
sunshine, so I take them in to drape around the house.
The fire is once again raging, to the cats' delight, and Mark and I get busy splitting wood to feed the cats' addiction.
Maybe we'll get another sunny day Friday?
How do we keep hay out of
reach from the girls?
Bicycle
storage hooks seemed like
a good idea today.
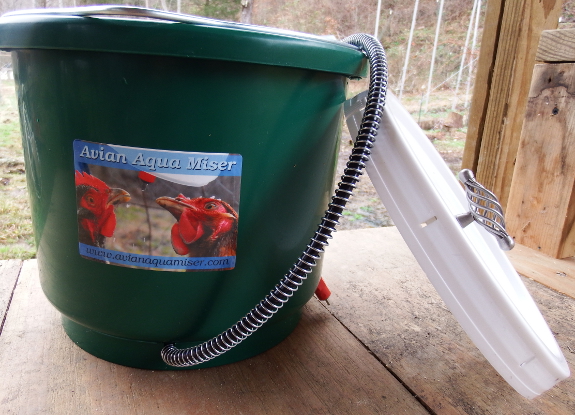
In the summer of 2013,
Mark and I were seriously considering bringing a heated chicken waterer
to market. Mark had constructed a waterer that kept working at least
into the low teens Fahrenheit, and we both thought other chicken keepers
would love the waterer as much as we did.
Unfortunately, not all products are worthy of going to market. The base of Mark's heated chicken waterer was a two-gallon heated bucket produced by Farm Innovators,
and we weren't able to get them to sell us the buckets at a low enough
price to make it worth our while to produce the heated waterers and then
sell them to you for under $150. So, we instead made a video tutorial showing you how to make the heated waterer yourself, then we moved on to the next project.
But we kept getting
emails from customers who said that making their own heated waterer was
just too hard. Could we possibly sell them a premade heated chicken
waterer...just one? This fall, we cleaned off the porch and realized we
had fourteen heated buckets taking up space, so we did a limited edition
run and sold out in 24 hours.

People kept emailing and
asking for heated chicken waterers, but a second limited edition run
didn't seem possible because the company now wasn't willing to even sell
us the buckets at the slightly-reduced price they'd offered earlier. Enter my awesome mother-in-law, who tracked down the same heated bucket on sale at Rural King and bought up a carload.
To cut a long story
short, we now have seventeen more premade heated chicken bucket waterers
ready to keep your chickens happy this winter...and this really will be
the last run for the winter. So snap up your waterer below ASAP!
Here are the stats:
- 2 gallon volume with two nipples (sufficient for 34 chickens for at least two winter days).
- Comes with a lid with a birdcage knob for easy removal. In addition, brackets within the bucket prevent your lid from falling in.
- Free shipping within the U.S. (We can't ship these out of the
country at all --- sorry!). Shipping time is approximately 6 to 10
business days, so order by this weekend if you want your waterer by
Christmas.
- Cost: $100
To buy, just click on the
button below and paypal will check you out, allowing you to pay by
credit card, echeck, or paypal balance. I hope your chickens love the
warm water as much as ours do!
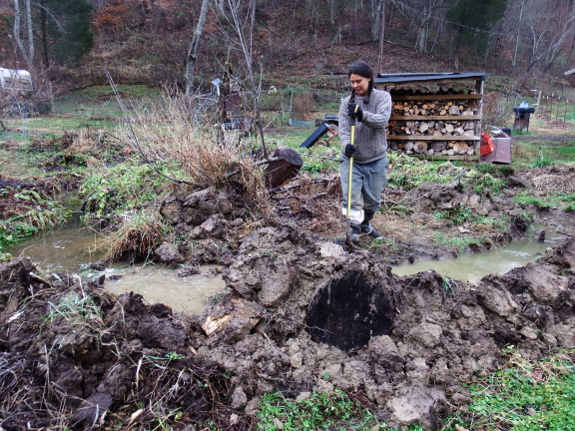
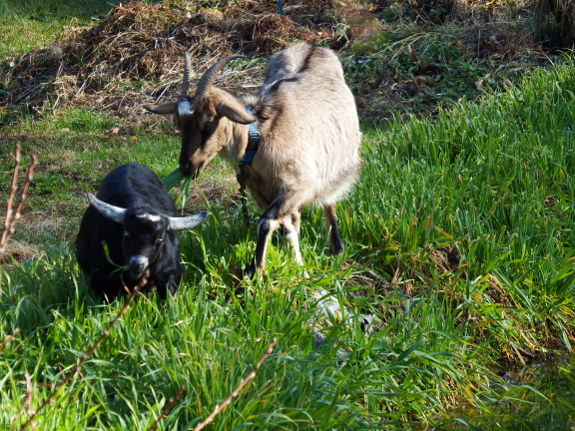
I've been intrigued to
realize that the beds of oats that our goats have repeatedly nibbled
throughout the fall and early winter are staying green longer than the
un-nibbled beds (which are pretty much dead by now). I wonder if the
nibbled beds are producing more underground biomass as well as regrowing
their leaves repeatedly? After all, I've read that, when grass is
grazed, the plants slough off a proportional amount of root mass
(although I've yet to see a scientific study to this effect). If the
root-sloughing is more than a permaculture legend, then you might
actually add more 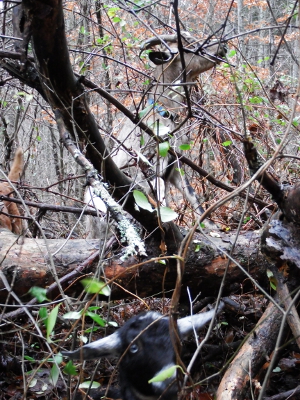 biomass
to the soil by letting goats graze your cover crops a couple of times
than by simply letting the oat plants mature and then die in situ.
Of course, even re-nibbled, there's only so much oat growth at this time of year. So I've been taking the girls up in the woods every day or two
to hunt down honeysuckle. This week, we found a huge tangle not far
from their pasture, where a fallen pine held honeysuckle branches high
enough off the ground that deer were unable to dine. Enter the biped and
the caprines! Artemesia thinks that humans are pretty darn awesome
because we can pull vines down from way up high with our flexible
fingers and opposable thumbs. But Abigail gets sick of waiting, so she
simply hops up onto the trunk of the fallen pine (three feet off the
ground) and chows down. If our local deer were as agile as Abigail,
there would be no honeysuckle left at all!
We couldn't get our ducks to
even look at the alternative
roll out nest box.
Some days they'll scoot
inside the old duck
nest box, but lately
they've been insisting on laying all their eggs on the floor behind the
box.
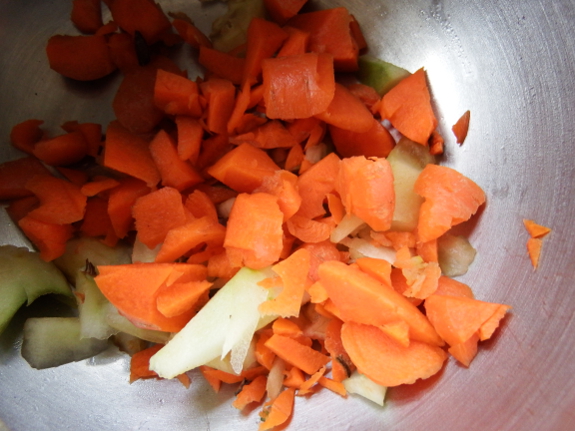
 Our
goats aren't precisely spoiled...they just like things a particular
way. So, when I started giving them apple cores and a carrot in the
morning, they informed me that the food choices were good but the
presentation was way off. "Chop our roots!" Abigail demanded.
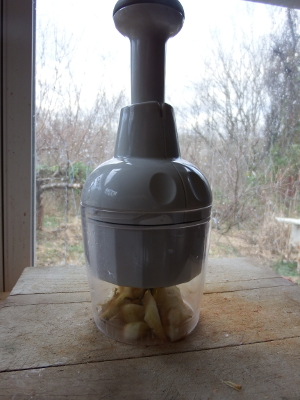
Luckily, Mark's mom had just found me a Pampered Chef Chopper
at a yard sale. This is a fun little device that basically does the job
of a food processor, but is hand powered. With carrots, you have to be
careful not to overload the reservoir, but with that caveat aside, a few
pounds of my palm reduced the root to a pile of splinters just the
right size for Artemesia's little mouth.
I suspect there are
better choppers out there for roots since the Pampered Chef Chopper
feels a little flimsy with its all-plastic construction (except for the
cutting blade). But it's definitely making my morning routine easier, so
I'll try to be gentle and will hope it serves us a good long time. "I
don't care how you do it," Abigail chimes in. "Just keep chopping my
roots!"
Chopping up firewood is a whole lot easier when the ground is frozen like today.
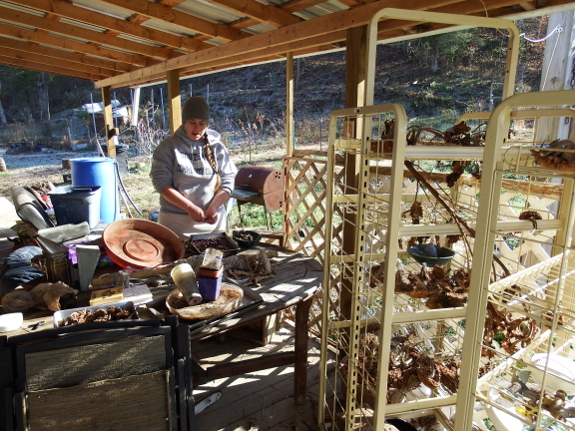
The trouble with our big,
beautiful front porch is that it's dry, so Mark and I both tend to set
things there...just for a little while. The fire in the smoker isn't
quite out when I get done checking on the bees? Set it on the porch.
Cardboard boxes not quite ready for kill mulching? Set them on the
porch. Seeds need a bit more drying time? Set them on the porch.
After a few months, the results look like the photo above.
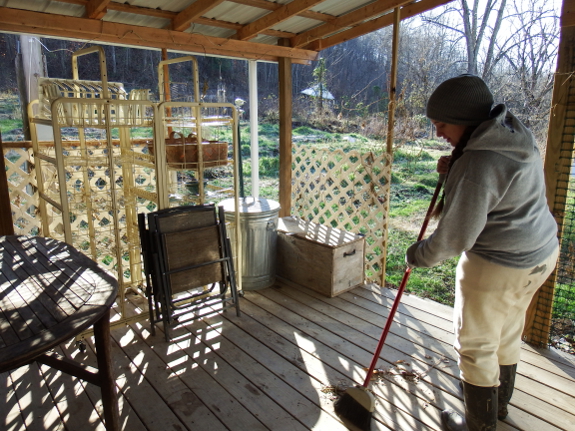
It gets to the point
where I'm too scared to even start picking things up because the project
begins to feel too tremendous for one. Luckily, Kayla came over full of
good spirits and energy, and Mark also lent a hand. In only an hour,
the porch was reclaimed!

 Look at all that empty space! Better fill it up with firewood.
Thank you so much, Kayla! And thank you for the awesome Bee Crossing sign too!
Next time, do you think we can tackle the barn?
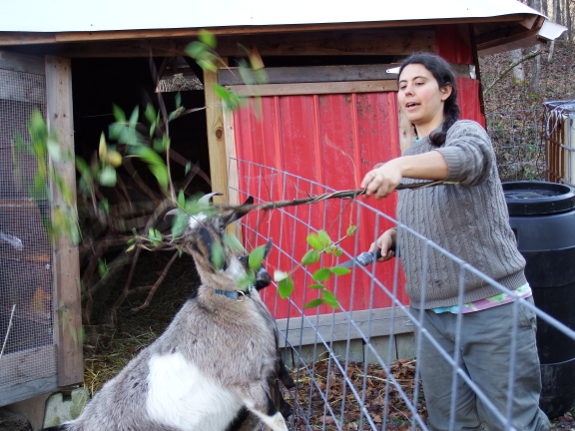
The first thing I taught
Abigail was how to walk on a leash. This involved a bit of pulling, but
mostly holding grain in my hand just out of nose reach each time she
stopped moving. Goats are smart. Soon, Abigail was nearly as well
leash-trained as Lucy is (although our goat gets much more recalcitrant
when she knows I'm about to lock her back in her boring pasture).
My guess would be that, if you can figure out who the lead goat is, leash training that goat might
do the trick. But I've obviously never worked with a dozen goats. And
Artemesia is willing to trot along at my heels whether or not Abigail is
on the leash --- I think she was a bottle baby, and she adores humans.
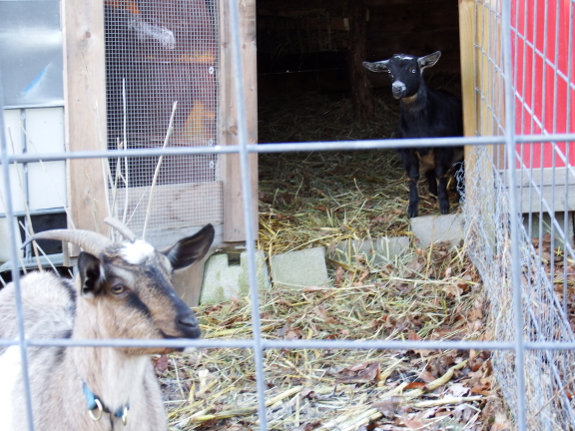
Unlike Artemesia, Abigail
has a mind of her own, but I can usually get her to obey by using goat
psychology. Lately, I've been taking Abigail out into the woods san
leash, which works well because she knows I'm going to lead her to
something tasty, and because she hates being left behind alone.
(Artemesia, if giving the choice, follows me rather than Abigail.)
The trouble comes when we
return to the coop, since Abigail would far rather keep exploring the
woods rather than get shut back up. If I'm in a hurry, I'll snap on a
leash to make sure Abigail doesn't get her panties in a twist about the
end of walktime, but I'm also working on training her to behave there
too. My method involves taking Artemesia off somewhere so that Abigail
can't see us, then Abigail freaks out, thinking she's been abandoned by
her entire herd, and she starts sticking much closer to my heels in the
future.
That method isn't
foolproof yet, though --- the last time Abigail came galloping down off
the hill with me and Artemesia...and then ran right past us to a new
patch of honeysuckle within sight line of the coop. She figured she
could graze, Artemesia could get shut in, and we'd all be happy. So I've
got a bit more work ahead of me there.
I'd be curious to hear
from others who have worked with bigger goat herds than I have. Do you
have tips for getting your goats to follow where you lead?
2014 is the year I finally
talked Anna into a metal detector.
On the list of things I want
to find is an old chain we lost in the weeds and a small bolt for the
rear prop shaft on the ATV.
We got the Bounty Hunter TK4, and it seems to be good at
weeding out the junk if you know how to listen for the right kind of
tone. Picking better target rich terrain might be another skill we need
to learn, but I can already tell it's the kind of activity that's more
fun with two people. Anna likes to do the digging while I do the
scanning.
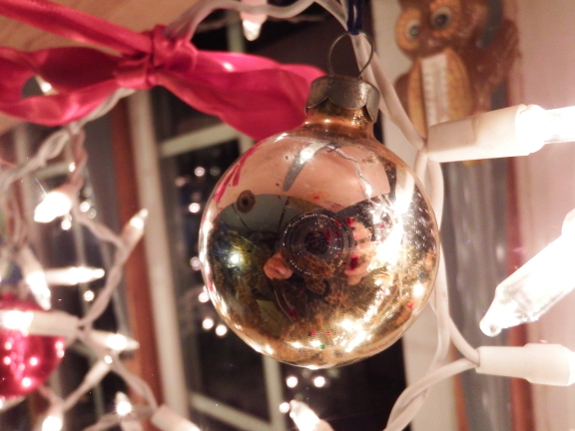
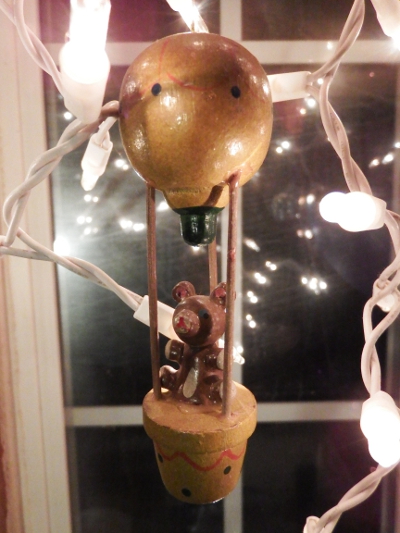 I'm
still feeling my way through Christmas decorations for our trailer. On
the one hand, it's very easy to go overboard and turn decorations into
clutter in such a small space. On the other hand, when the days are so
short and gray, lights and greenery are much appreciated.
Last year, I went with a homemade garland above our table,
which smelled good and looked pretty...but started dropping needles
awfully quickly. This year, I changed gears a bit, keeping the lights
(which we added to the garland after I made the post linked to above),
and adding the bare minimum of ornaments. Mom let me go through our
childhood Christmas box and pull out some ancient wooden ornaments and
glass balls, which definitely make me smile every time I look at them,
both because they're pretty and because they remind me of long-ago
trees.
I'm curious to hear from others who like holiday decorations but live in
a small space. What's your favorite nod toward the winter season?
I think we got our wood shed
roof fixed for good today.
Our next wood shed will have
a metal roof.
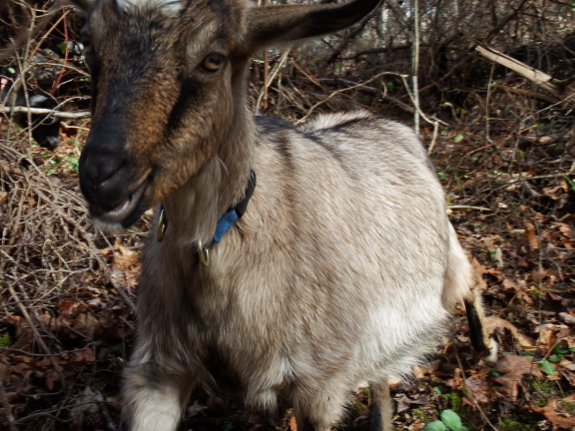
"So, is
Abigail pregnant?" Mom asked during my pre-birthday bash. I had to
admit that I didn't really know. Some goats begin to show a bit on their
right side (opposite the rumen) by the beginning of their fourth month
of pregnancy, but others pop out kids without putting on any apparent
weight at all. Still other goats have bellies so tremendous you'd think
they were pregnant with quintuplets...but they never give birth because
all that mass is just digesting hay.
My urine test
said Abigail wasn't pregnant, but I didn't really believe it. Short of
taking a blood test or finding an ultrasound machine, was there a more
definitive way to find out whether Abigail had been properly bred?
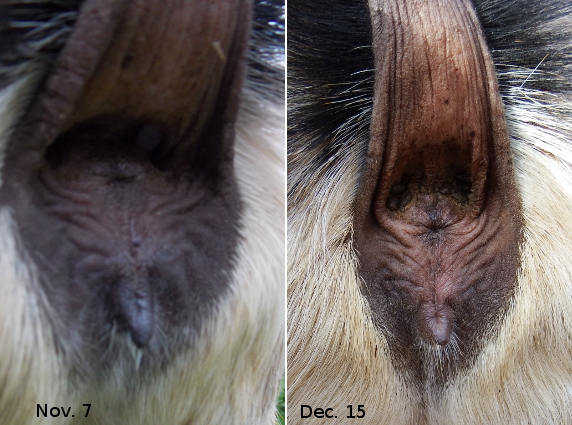
"You could also try the pooch test," reader Sheree Clopton suggested. And thus began my obsession with peering up under Abigail's tail.
If your goat is pregnant,
by two to three months after breeding, her
anus (the hole on top) should be dropping down further away from her
tail while her vulva (the pointy thing at the bottom) should become more
elongated and tear-drop shaped. The trouble is that I hadn't take a
before photo right when Abigail came to stay with us (because who really
takes a closeup of their goat's butt during an introductory photo
shoot?). And the test depends on deciphering individualistic changes in
your goat's unique hind end. So I still don't have a definitive answer,
although I think that perhaps Abigail's anus has dropped some over the last five weeks.
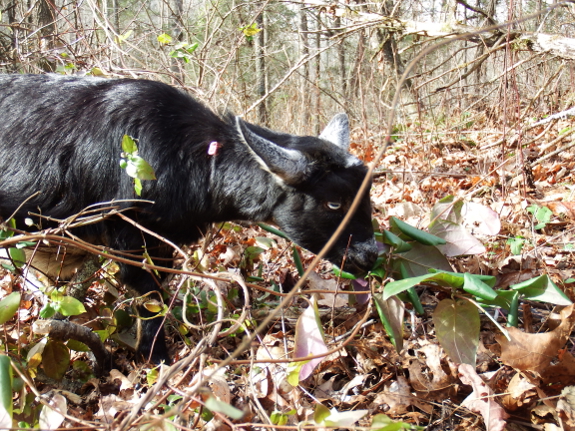
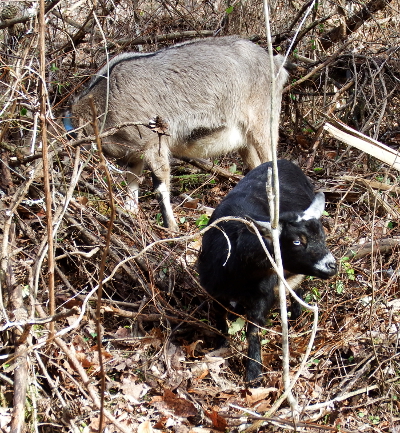 One
way to be sure that milk is in our near future would be to go ahead and
breed Artemesia, who is six months old and thus mature enough to get
pregnant by some folks' standards. However, I've read lots of horror
stories about breeding dwarf doelings on the young side, so Mark and I
decided that it's probably safer to let Artemesia keep growing for a
while, breeding her in the spring if she comes into heat then (which
some Nigerian dwarfs do), or just waiting until next fall if necessary.
Either way, I'll be sure to take some closeups before the breeding next
time...just in case.
In the meantime, I'd love to hear from some goat gynecologists. Do you think Abigail is pregnant from the photos in this post?
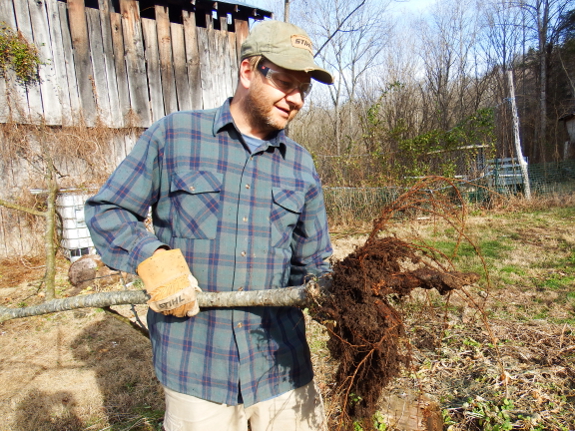
The so-called forest garden is now officially defunct. Due to extremely high groundwater (and some vole damage
last winter), all three of the apple trees living there had died way
back over the past summer, so Mark wiggled and wiggled and then ripped
them out by the roots. Only one even had enough root mass left to make
it seem worth trying to replant somewhere else, where the ground is more
dependably dry.
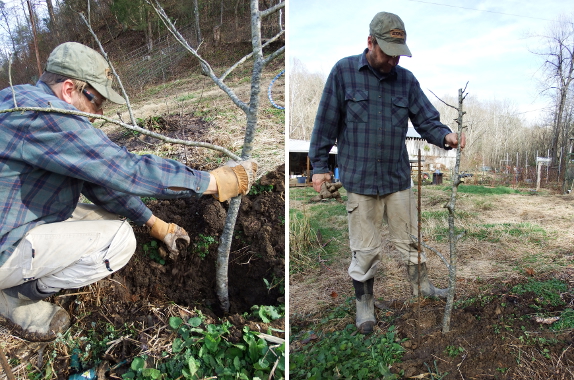
Mark suggested planting
the moved tree about eight inches deeper than it had been originally,
which means the plant might root above the graft union. If so, I hope
that I'll still be able to use my high-density training techniques to keep the tree relatively small.
In the meantime, we also
did some drastic pruning to make the branch area more in keeping with
the root area. This is very much an experimental tree, so it won't break
my heart if it doesn't recover from the transplant shock and drastic
pruning, but perhaps the tree will get its feet back under it in this
better soil and will try once again to grow.
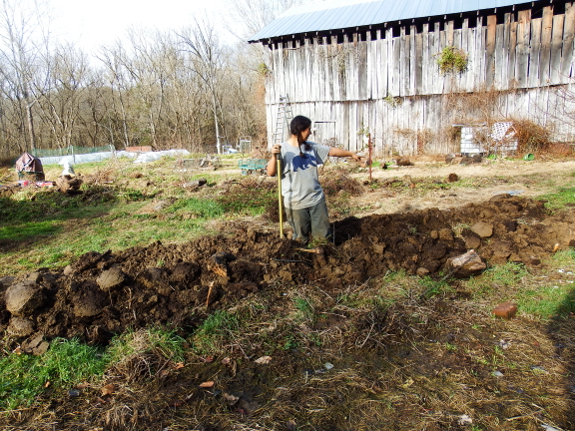
So, what's to become of the defunct forest garden? As I've mentioned off and on over the last six months, I'm busy mounding the area up into long raised beds
for annual vegetables (and for hazels, which seem to be the only woody
perennial that thrives in our waterlogged soil). The good news is that
after years of hugelkultur,
the soil is black and rich in many spots, so as long as I can get
plants' roots up out of the underground ocean, perhaps this zone will
turn into a prime growing spot after all. The big test will be tomatoes
in 2015. Stay tuned for more details on drainage patterns (this winter)
and on plant growth (next summer).
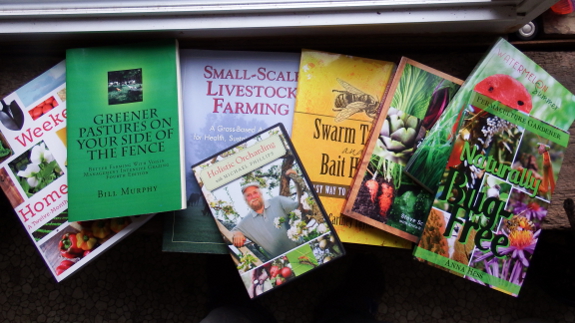
It's time for me to make a
little extra space on my shelves...which means one lucky reader is
going to have a very special Christmas present show up in their mailbox
next week. The seven books and one DVD below have a value of $166, and
if you enter this week's giveaway, you can win all eight:
- Greener Pastures on Your Side of the Fence
- Holistic Orcharding DVD
- The Naturally Bug-Free Garden (My homemade first edition --- only a very limited number of these are out in the world! This copy is signed by me.)
- Watermelon Summer (This copy is signed by me.)
- The Intelligent Gardener
- Swarm Traps and Bait Hives
- Small-Scale Livestock Farming
- The Weekend Homesteader (This copy is signed by me.)
In exchange, I hope you'll help me plug this week's sale --- I've marked the two books in my Permaculture Gardener series (Homegrown Humus and The Naturally Bug-Free Garden)
down to 99 cents apiece this week. I'd like to move a lot of copies so
the books move up the rankings and are more visible to folks unwrapping
kindles this Christmas, so any word-spreading you do would be much
appreciated.
Here's the giveaway
widget --- thanks in advance for joining in the fun!
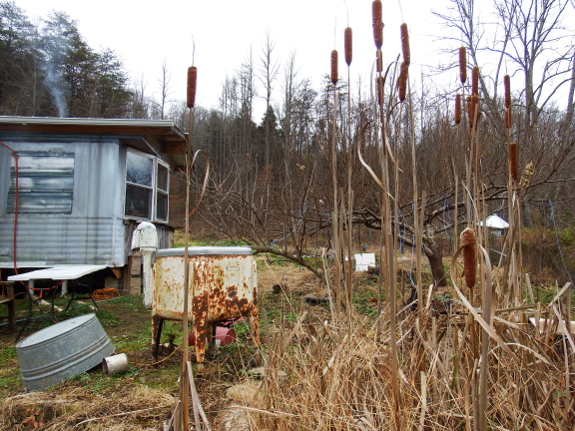
One of our readers asked for an update on our greywater wetland
and I'm glad she did. There are two kinds of projects that I seldom
post followups about here on the blog --- ones that fail unspectacularly
and ones that work so well I never have to think about them again. Our
greywater wetland falls into the latter category.
Specifically, Kathleen asked:
We did have a short
period the first summer when we smelled a bit of stagnant water wafting
back up the pipes...but before we got around to fixing the problem,
nature took over. I assume the right bacteria colonized the wetland and
broke down the odor-causing problem, because we didn't notice a
troubling smell again.
In terms of sending big
chunks down the drain, we don't do so on purpose (like you might with a
garbage disposal unit in a modern sink), but we also aren't careful when
letting 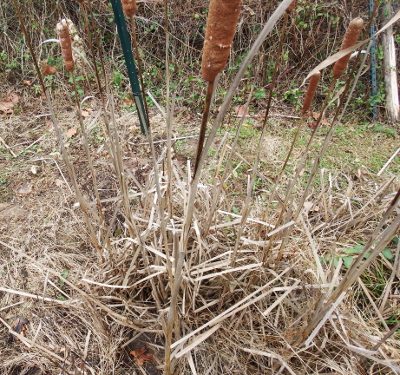 dishwater drain out, so some pretty big chunks do
get through. Due to our big pipes, and perhaps to the roof water I
channeled in to flush out those pipes every time it rains, we haven't
had any problems resulting from food chunks causing blockages.
Finally, no, we don't
winterize our system in any way. Water is more likely to stand in the
wetland over the winter, but it still sinks in pretty quickly, and we
haven't noticed any problems. Overall, I'd say this is a system that you
should feel free to replicate exactly as we built it --- it's an
awesome addition to our farm, and the cattails are both pretty and (as
we learned this fall) can be fed to goats when fresh and green. What's
not to love?

"Do you want me to come over this week?" Kayla asked on Monday.
"Of course," I replied. "How does Thursday sound?"
"But that's your birthday," Kayla rebutted. "Mark won't let you work on your birthday."
She was so right. In fact, after we came back home that day and Mark posted about our adventure, my father (who knows us both far too well), emailed to say: "Glad Mark got you out."
Gee, how did everyone guess that I'd originally planned to split some
wood and then spend a few hours writing as my birthday activities of
choice?
As a thank-you for his
fun-filled nudge, I told Mark that he's in charge of deciding what we do
on Christmas. Any guesses what he'll come up with next?
I sure am lucky to have a husband who reminds me how to play!
Our Cinder
Block stepping stones
are a little over three years old now and starting to show signs of
wear from the constant water pressure.
If we're smart we'll get
around to securing the steps that have a wobble before Mother Nature
resets that portion of the creek back to like it was before.
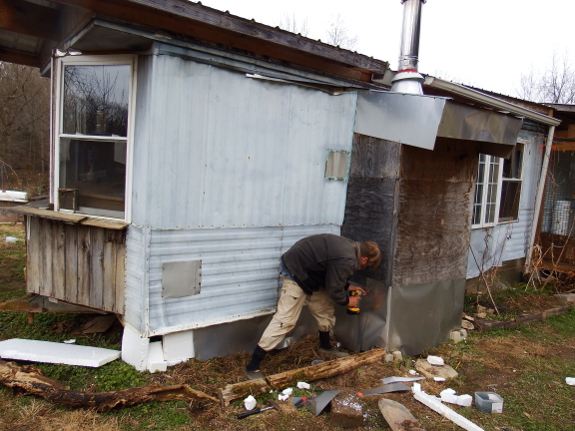
It's that time of year when homesteaders like me start to dream of new and crazy garden ideas. With the success of last year's shade trellis plantings
under my belt, I'm considering two new planting beds encompassing the
rest of the south-west side of the trailer and the entirety of the west
side (where we have a big bay window at the edge of the kitchen). As
usual, there are some restrictions and goals to keep in mind as I assess
these areas:
- I can't put any woody perennials right up against this side of the wood-stove alcove because that's where we set the ladder during Mark's annual chimney cleaning expedition. Perennials that die back to the ground or annuals are fine, though.
- My main goal is to provide summer shade, which can be supported by an overhead trellis for the south-facing spot, but should be a vertical wall for the west-facing spot since light and heat from the setting sun streams in those windows during the summer.
- Edibles are always top priority, but a few flowers would be nice.
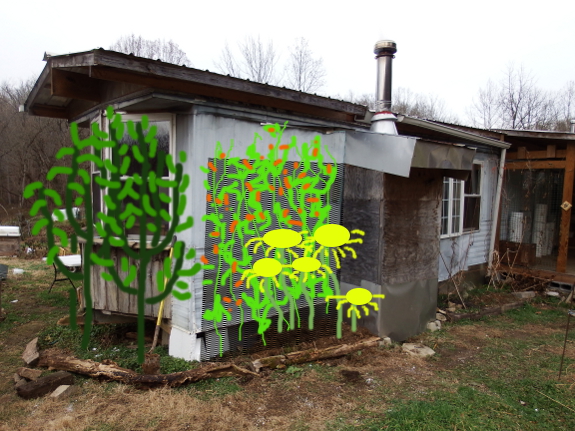
The photo above shows my current thoughts for filling in these two zones. Rather than building an overhead trellis along the south-facing wall (since I think Mark would hit his head on it while climbing the ladder), I'm thinking of a temporary trellis like we use for peas,
perhaps populated with the scarlet runner beans that did so well for us
this past summer. As an added color boost, maybe I'll scatter in some
sunflowers or Jerusalem artichokes?
I'm still indecisive
about the west-facing bed. On the one hand, I'd originally thought of
putting grapes there like we have growing up to our first shade trellis,
but we'd have to trellis these grapes vertically rather than
horizontally in order to block the setting summer sun...and that much
trellis might also block our winter views. Perhaps some closely-planted
pear trees could provide that vertical growth just as quickly...but
would the trees be leafy enough to block significant amounts of sun?
Maybe bamboo would do better for speed of growth and sun blockage,
although the species might keep its leaves during the cold season and
reduce winter visibility even more than grapes would. What do you think?
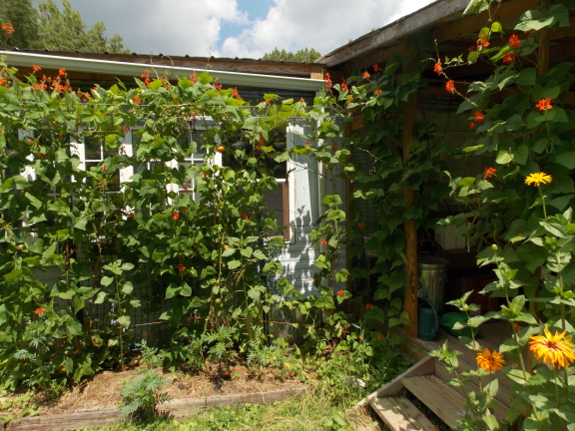 As
for this past summer's experimental area, the bed now has a grape vine
at each end, but I'll probably plant scarlet runner beans there for one
more year as well while waiting for the grapes to fully colonize their
overhead trellis. I'm starting to change this area over to a fully
perennial bed, though, with the addition of sage, columbine, foxgloves,
and some crocuses that I accidentally dug up while terraforming the forest garden.
My goal is to have the bed become a profusion of blooms and fruits in a
few years with little or no work on my part --- it's off to a good
start!
Collecting charcoal from
wood stove ashes is easy with a DIY
charcoal sifter.
We've been using this simple
design for 4 years with no problems.
For the last month or so,
I've been taking the goats out for a half-hour honeysuckle walk after
my own lunch. As a result, our woods are becoming considerably less
green.
Not long ago, Mom emailed
me to share her concern that I might denude our forest of honeysuckle.
She's right --- I probably will. Whether that will actually be a bad
thing, though, remains to be seen.
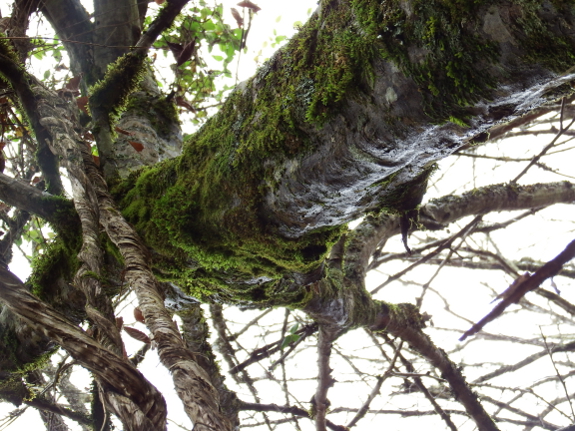
Japanese honeysuckle is
an invasive species here in the U.S., and it can actually strangle trees
when the vine's growth is particularly luxuriant. The photo at the top
of this post shows an ironwood that was sturdy enough to handle several
thick honeysuckle vines, but for every tree like this, there are two or
three that I end up just cutting down rather than pulling the vines out
of their canopies --- the tree is simply too mangled to survive.
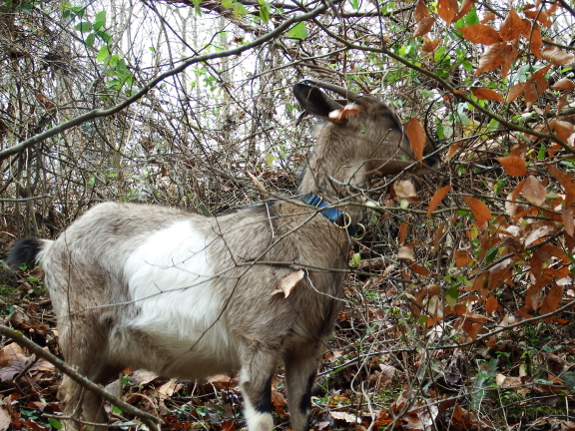
Of course, that's just
looking at the forest --- what about the goats? Our girls do seem to be
thriving on a diet rich in honeysuckle (although, when given the choice,
Abigail still makes a beeline for the garden to munch on half-dead oat
stalks). In fact, when I look back at photos from two months ago, our
girls look like entirely different goats, and I don't think all of their
new bulk is due to their thick winter coats.
So what will we do once
we run out of honeysuckle? I have various thoughts in mind for next
winter, and they mostly revolve around cover crops.
This fall, our girls liked oilseed radishes okay and loved oats, and
they currently like rye pretty well. Since those cover crops have prime
green periods that span October, November, and December, that would be a
good start for providing our girls with some early to mid-winter
fodder, as long as I plant quite a bit more of the last two. I suspect
it would be thinking too big to say that I'll replace most or all of
this winter's store-bought hay with homegrown cover crops for next year,
but we should definitely be able to provide our goats with that
essential half-hour nibble of green!
And, in the meantime, I'll keep pulling honeysuckle out of the trees. I suspect that both trees and goats will appreciate the gesture.
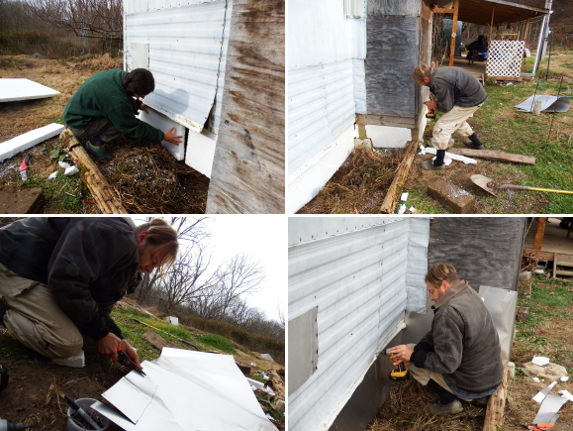
Twenty feet down. One hundred feet to go.
 After all of your good feedback on what I should write next...I decided to do something
entirely different. My father's been telling me for years that I need to
compile our recipes into an in-season, homegrown cookbook, and I've
been ignoring him...but the time finally seemed right! Which means,
you'll soon have several polished recipes in ebook form to enjoy in the
near future. And, in the meantime, I'm in search of the perfect title.
Titles are my weak point,
but they seem to make or break a non-fiction book. I could go with a
boring, literal (but likely to capture keyword searchers) title like
Locavore's Cookbook or In Season Cookbook. I could piggy-back on
possible name-brand recognition with The Walden Effect Table or (if my
publisher says it's okay) The Weekend Homesteader's Kitchen. Or I could
go with something entirely outside-the-box...which I haven't come up
with yet.
Feel free to submit your
title suggestions using the comment form below. To sweeten the pot (and
to continue cleaning out my bookshelves), if I choose your title, I'll
mail you slightly used paperback copies of Moosewood Cookbook, Preserving Food Without Freezing or Canning, and Wild Fermentation. I'm looking forward to hearing from you!
Sometimes these old Radio
Shack battery testers can stop working due to the paint rubbing off the
spring that puts pressure on each battery.
Once the paint is gone the
spring shorts everything out and reads bad battery.
It's easy to fix by
taking the back cover off and inserting a piece of electrical tape
behind the spring.
 Long-time readers will recall that when I reviewed Gardening for Maximum Nutrition,
I was a bit dubious of the author's methodology in determining the most
nutritious vegetables. I was much more impressed by the Tennessee
Extension Service document entitled "Gardening for Nutrition" that Mom
gave me for my birthday, and I was also pleasantly surprised to see that
many of our own favorite vegetables received top billing therein. Based
on 100-gram samples, the top vegetables for providing vitamin A,
vitamin C, iron, calcium, and potassium were (in order of descending
quality):
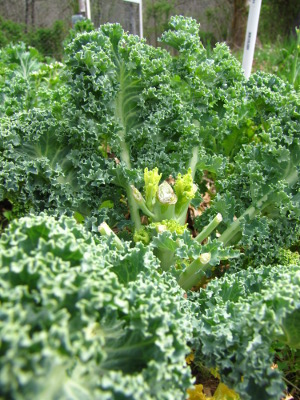
- Kale (our winter staple, and an overall best vegetable since it
ranks among the top four vegetables for all five nutrients measured)
- Spinach (tops the charts for potassium)
- Mustard
- Turnip greens (top the charts for calcium)
- Broccoli (our fall and spring staple that's high in vitamin C and in the top 15 for all five nutrients)
- Butternut squash (so I'm not the only one who thinks this is the best winter squash! An excellent source of vitamin A and a good source of potassium)
- Lima beans (top the charts for iron, but the nutrient is in a form
not readily absorbed by the human body, so take that with a grain of
salt)
- Hot peppers (top the charts for vitamin C, but how many can you really eat? (No, don't answer that, Joey.))
- Leaf lettuce (faring dramatically better than head lettuce, it's a particularly good source of iron and calcium)
- Okra
- English peas
- Snow peas
- Cauliflower (interesting --- I don't grow cauliflower because its whiteness always made me think it wasn't as good for me. And I guess it does trail its cousin broccoli by a pretty wide margin.)
- Collards (my least favorite leafy green. Coincidence?)
- Southern peas
- Asparagus
- Carrots (top the charts for most vitamin A per pound)
- Acorn squash
- Pumpkin (see why we grow butternuts instead?)
- Chinese cabbage
- Sweet potatoes
- Cabbage
- Snap beans
- Sweet peppers (after hot peppers, sweet peppers top the charts for most vitamin C per pound)
- Kohlrabi
- Cantaloupe (I guess the study's authors went by family for their "vegetables" and included cantaloupes because they're cucurbits?)
- Hubbard squash
- Irish potatoes
- Beets
- Tomatoes
- Eggplant
- Zucchini
- Crookneck squash
- Radish
- Turnip roots
- Scallop squash
- Head lettuce
- Corn
- Onions
- Watermelon
- Cucumbers
So now you know what you
should be growing (and training your family to eat) if you want to live
long and prosper! Plant some kale!
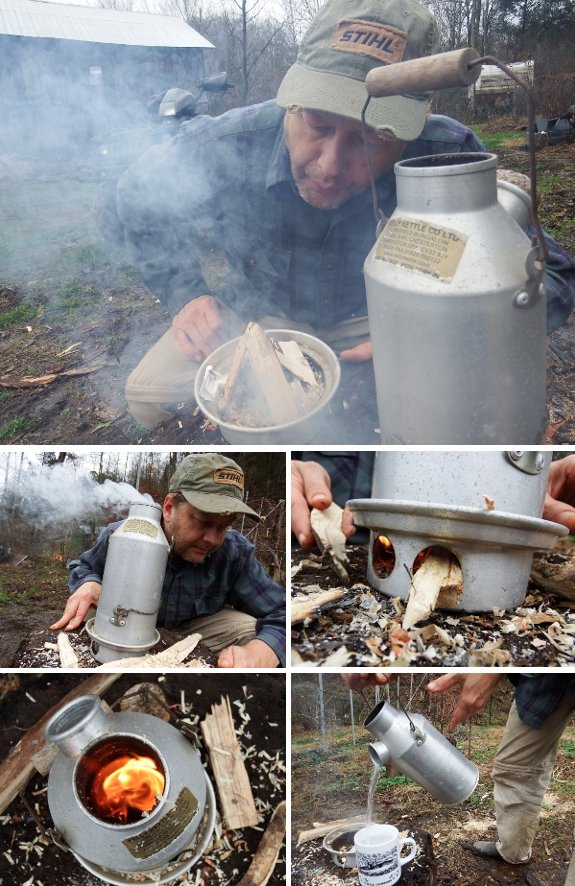
We fired up our Kelly
Kettle for the first time
today.
It's like a rocket stove with
a double-walled chamber for heating water.
Handy to have around during a
power outage. You can boil water in about 3 to 5 minutes with a few
pages of junk mail and some sticks.
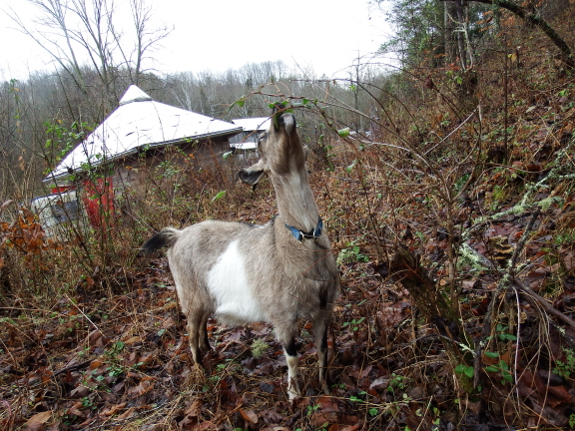
I always wonder when I
see one of our goats chowing down on a wild plant that our other goat
ignores. Was Abigail fulfilling a pregnancy craving when she spent a few
days chowing down on golden ragwort leaves? The plants' green abundance
in the brown winter woods suggests that ragwort might be toxic to deer,
and data on a related species shows that the leaves are very high in
copper. But everyone knows that goats have higher copper requirements
than some of their relatives, and Abigail's previous owner didn't
administer 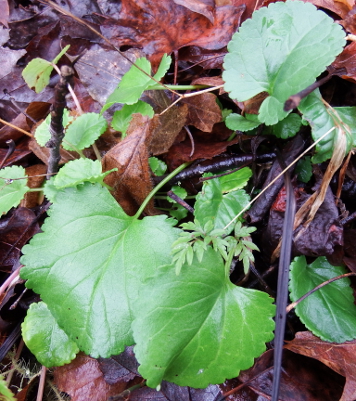 boluses while Artemesia's previous owner did. I've yet to cross the copper bridge myself, other than providing free-choice minerals and kelp in the coop, so maybe that's why Abigail spent a few days gorging on ragwort...then went off it cold turkey.
Meanwhile, our littler
goat always hunts down hog-peanut seeds, even while Abigail is busy
chowing down on mountains of honeysuckle leaves a few feet away. Perhaps
Artemesia simply likes the nutty flavor, or perhaps she needs more
protein to feed her teenage growth spurt.
And then there are the
times I catch Abigail scarfing down some dried oak leaves off the forest
floor. Could they really have any nutritional value after sitting out
in the rain for months? Or does our older goat just need something tough
to settle her stomach after gorging on honeysuckle?
After noticing that my own list of favorite vegetables closely matches the list of the most nutritious vegetables,
I have to assume that goats and humans alike can tell by taste which
natural supplements we need. The trick, I suspect, is to listen to our
bodies and learn that just because our eyes want chocolate ice cream,
that doesn't mean our stomachs don't want kale and garlic.
Huckleberry and Strider get extra
treats on Christmas day.
Sometimes I wonder if they
can tell the difference from tantalizing turkey or savory salmon?
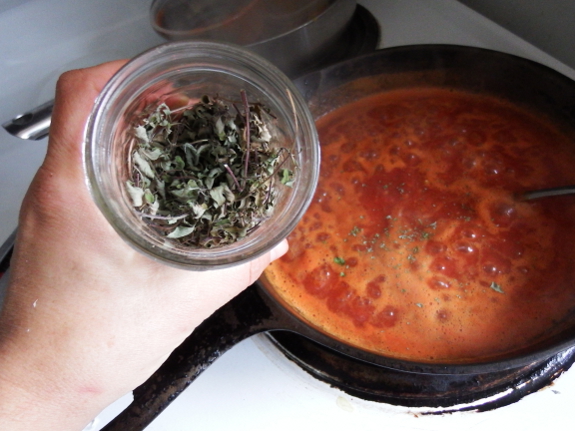
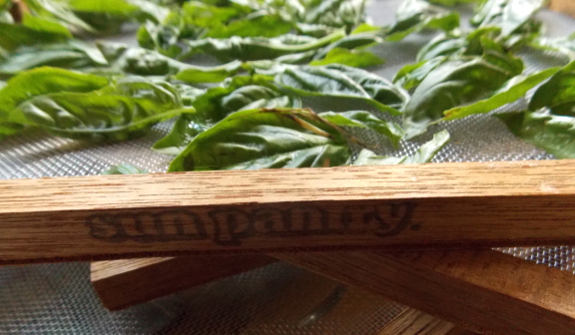 On a whim, I decided to air-dry some herbs this past summer.
After leaving the plants on the drying racks for a few weeks, I loosely
packed the dried leaves into jelly jars, only adding a lid recently
since I was initially afraid that our high humidity would prompt the
supposedly dried herbs to mold. While I was putting on lids, I crinkled
each herb between my fingers and did a sniff test, deciding that the
basil smelled just like summer, the oregano smelled just like the plants
it came from (but not very much like store-bought dried oregano --- I
really need to find a more intense-flavored variety), and that the
chives and Egyptian onions weren't worth saving. Two successes out of
four isn't bad for a first shot!
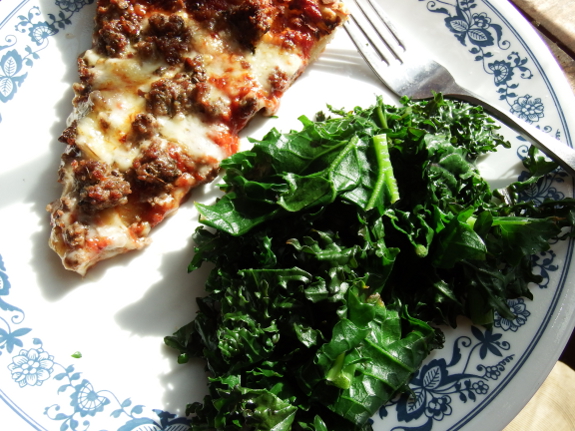
Then, in a Christmas relaxation of our low-wheat menu, I added the dried basil and oregano into the sausage
and sauce for a holiday pizza. Delicious! I'm going to have to remember
to dry more herbs in this ultra-easy manner next summer. And probably
to plant some more fennel too since the seeds we harvested in 2011 are
finally running low....
This picture on the Kelly Kettle instruction sheet got me wondering if the technology could be adapted to fit over a common wood stove chimney pipe to function as a crude humidifier.
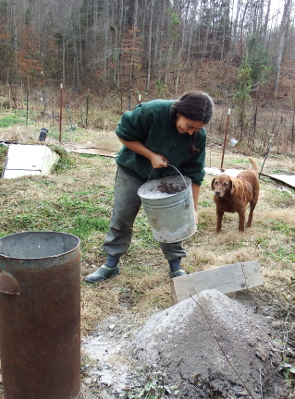 "Both charcoal and ash are important soil amendments on my homestead. I
was surprised to see your ash just dumped on the ground. I store mine
out of the rain until I need to use it. Just this past week I spread
three trashcanfuls on the back pasture and still need another 1/2 can
full to finish the job. As for the charcoal, I soak it in urine prior to
adding it to the compost. What do you do with yours?" ---
I'll start out with
the ash side of the equation. Wood ashes are a good source of garden
nutrients...for some soil. Unfortunately, they're a bad match with our
ground since wood ashes sweeten your soil and add a hearty dose of
potassium...and our garden soil already veers almost too far toward the alkaline and definitely contains more potassium than it should. We are
planning on raising the pH of some pastures this year, but those areas
are also overabundant in potassium already, so we'll be purchasing lime
instead of applying ashes. In the end, I highly recommend that gardeners
perform a soil test before adding wood ashes to their soil willy-nilly
or you may end up doing more harm than good. (On the other hand, you
might find that your soil is a perfect fit for wood ashes! Either way,
it's good to know.) That explanation (plus the fact that we're not
soapmakers) is the reason why our ashes are simply sitting in a pile of
waste on the ground.
The charcoal, though, we sift out with greedy little fingers to turn into biochar.
Please do read the lunchtime series I've linked to in my previous
sentence for more information, but the short version is that we tried
activating our charcoal with urine just like Su Ba does, and didn't seem much effect. So last year's charcoal went down the composting-toilet hole to create a combination much more like the terra preta
that modern biochar is trying to replicate. I won't be applying that
compost until this coming fall and probably won't have any results for
you until 2016, but that's the direction we're aiming for at the moment.
Stay tuned for more information on biochar...in about eighteen months.
Our last
encounter with stray hunting dogs got me thinking how we need a non
lethal option to supplement our home defense tools.
We ordered 5 shot gun shells
with rubber slugs for just under 20 dollars.
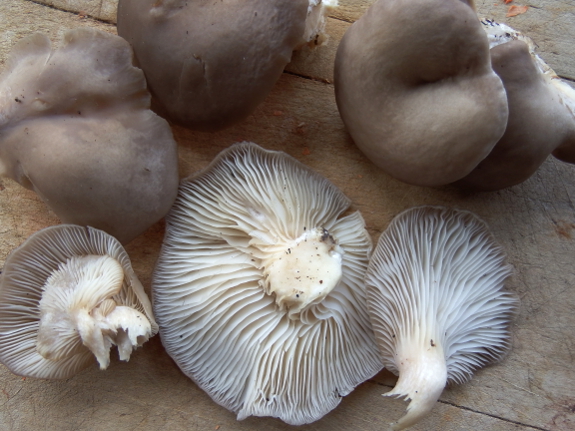
If you really know your wild mushrooms, you can pick them after dark, without a flashlight, by smell and by feel.
Okay, I'll be honest. I'd
already scoped out the oyster mushrooms beside the driveway during my
morning walk, but they were too frozen to easily pluck at that time. So I
waited until we were coming home with our movie-star neighbor from our
annual movie out in the big world to pick the next day's dinner.
By the way, The Theory of
Everything is the most totally Anna movie I've seen in a long time. No
violence, no explicit sex, high geek factor, and so well done that I
cried rivers at the end. Almost as good as picking wild mushrooms in the
dark. Almost.
We saved some wood shavings
from the last chainsaw session in anticipation of trying out the Kelly
Kettle.
It made starting the fire
pretty easy and dropping the shavings through the chimney once the fire
is going really heats things up.
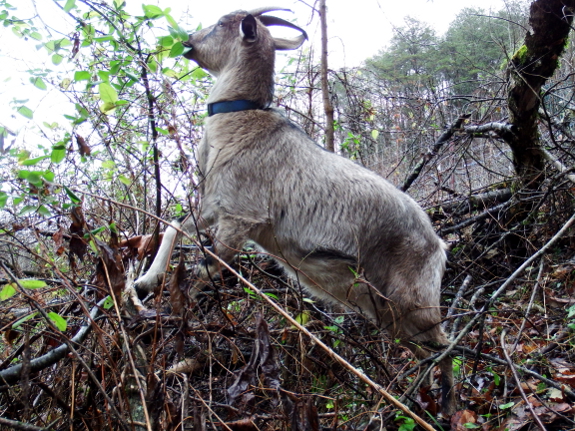
In the wild, goats would
primarily eat tree leaves, which tend to be higher in minerals than
grass and carry a lower risk for spreading internal parasites. So it's
no surprise that when people talk about winter fodder for goats, they
often talk about feeding them dried tree leaves. I love the idea, but,
unfortunately, that's all it is to most people --- an idea. Only one website that I've found so far has provided actual information on how
to gather tree leaves for goats, so if you want the long version, feel
free to follow that link. For the short version, read on....
First of all, I should
mention that, while goats will sometimes eat fallen autumn leaves, this
isn't the kind of high-nutrition foodstuff that the goat owner should be
looking for. As you probably learned in elementary school, tree leaves
turn color in the fall as the plant sucks  many
of the important nutrients back out of the leaf and into the trunk, so
fallen leaves are more akin to straw than they are to hay. A goat might
eat some fallen leaves, but they're not going to fare very well on a
diet of fallen leaves alone. Instead, if you opt to save tree leaves for
winter feed, your goal should be to strip the leaves from the trees
while they're still green, dry them, and then store the leaves like you
would hay.
Okay, so how does one go
about this process, which I've seen called "shredding," or making "tree
hay" or "pollard hay"? Since trees leaves are often out of reach, the
first step is usually to create a coppice
or pollard system --- which we luckily have growing up in our powerline
cut at this very moment. (No, we didn't create it. When the electric
company whacked down all of the big trees after a storm, many small
sprouts came up from their base --- instant coppice.)
Once you have a coppice system, you harvest the small stems and their
attached leaves in the summer at two-to-six-year intervals. At this
time, the young branches are usually around four or five feet long, and
they can be allowed to dry for a day on the ground, then are tied up
into bundles (a bit like corn shocks) to dry another two or three days in the field before being moved to the barn.
 The
trick seems to be finding tree species that handle coppicing well and
that also hold onto their leaves when dry, since you don't want to be
stuck raking dried leaves out of the summer grass --- it's much easier
to simply carry leafy branches to winter storage all in one bundle. In
Bulgaria, maple, hornbeam, ash, mulberry, some oaks, willow, linden, and
elm are most frequently used and are harvested any time between mid
July and the end of September, while in Italy, farmers focus primarily
on ash and harvest in late August.
This process of harvesting tree leaves for winter fodder is often called
shredding, probably because the leaves are plucked from the twigs in
the winter before feeding. Then the branches that are left behind can be
used for firewood.
I love the elegance of the system, and am curious to see how
time-consuming it would be to pack away fodder for two small goats. The
biggest stumbling block at the moment is where to store the tree hay ---
I guess we'll need to put a hay loft on our winter to-do list!
Looks like our last project
of 2014 will be a new range hood for the stove.
Prep work today included
taking out the old cabinets and beefing up the trailer's puny stud
framework.
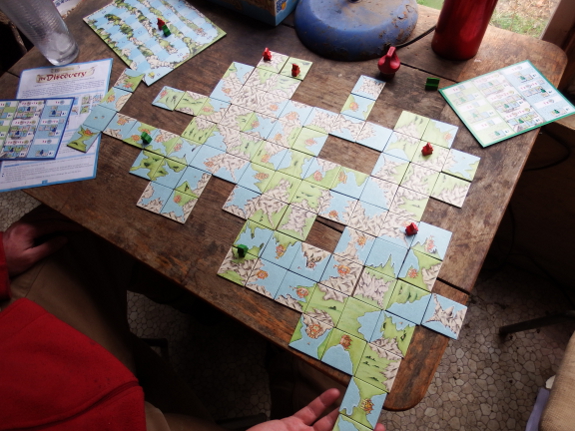
It's all fun and
games...until I get the 2015 planner. Then I get ambitious and start
making lists, and poor Mark has to put his nose back to the grindstone.
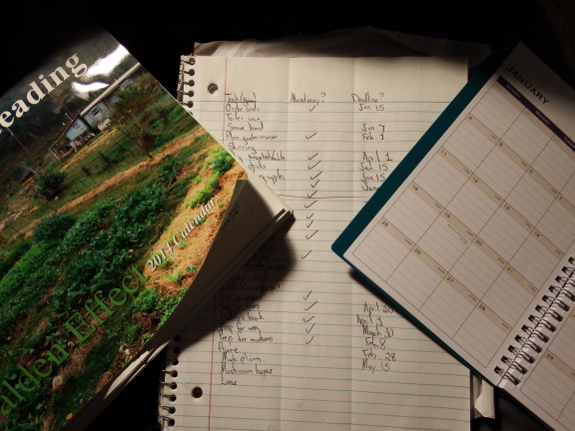
If you're a relatively new reader, you might find this post about our annual tasks
helpful as you plan out your own homesteading year. I even included a
spreadsheet with our yearly planting dates at the end of that post ---
the first seeds go in the ground around here at the beginning of
February under quick hoops unless the ground is ultra cold, so you don't
have as much planning time as you might think!
We haven't added any big projects to our list this year, but we are spending some time expanding certain systems. First, we've decided to streamline our mushroom operation,
perhaps with some sort of small shade house to keep the mushrooms cool
and moist on summer days (since sticking them under the fruit trees just
didn't cut it), and we're also splurging on two new colonies of chemical-free bees
for which we'll be returning to our original Langstroth hives.
Meanwhile, if Abigail is pregnant, I'll be learning to milk, and we'll
definitely be growing more goat fodder plants in the garden during the
summer months. Finally, we had so much fun with our limited sugar mapling
this past winter that we might expand a bit this year, and there are
always new perennials on the horizon. So stay tuned for lots of furry,
leafy, and sweet fun in the year to come!
We'll be mounting our new
range hood onto this 2x6.
The bottom of the hood will
be 24 inches above the stove.
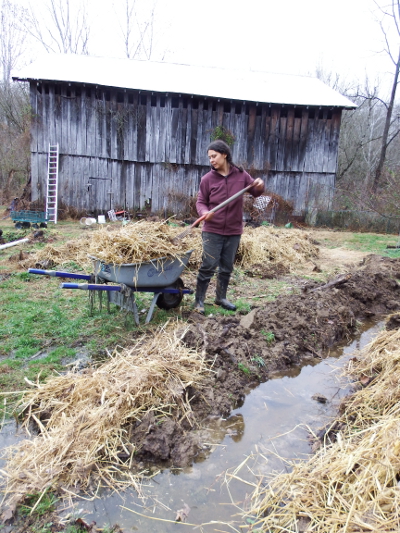 Both Cornish Cross and ducks
shocked me this year with their copious manure production. I was used
to heirloom hens, whose poop is pretty easy to sop up with a minimum of
straw or tree leaves, but I ended up using at least twice as much deep-bedding material for 2014's more poopy poultry.
Which is now a huge plus since I have extra deep bedding to use in the garden! In years past, I've applied deep bedding as a mulch around our perennials,
but the high-nitrogen manure makes the straw and/or leaves break down
pretty quickly once the combination hits damp ground. So this year I
decided to instead treat the bedding mixture as fertilizer for annual
garden beds. I figure that if I apply it to bare ground now, the bedding
will be well composted by the time I insert tomatoes in the middle of
May.
As a side note, 1.67 inches of rain in the last week has been enough to push us back over the edge into wet. You can see that my extra-deep raised beds
are a necessity in this part of the garden since the groundwater is
sitting at what used to be the soil surface. With the help of my new
mounds, though, there is now about a foot of "dry" soil on top of the
waterlogged ground. I may use ditching and piping to move some of that
excess water to a wet-weather pond, but that's an experiment for another
day.

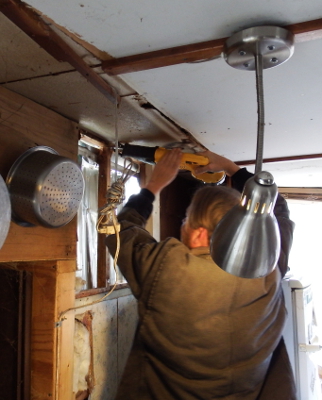
Could you see the sunlight shining in through the wall in yesterday's picture? Mud-dauber and paper-wasp nests suggested that light wasn't the only thing coming in those cracks.
After taking out a stud to
make room for the range duct and adding a two-by-three header, I sealed
up all the cracks with silicone.
Maybe next summer, we won't have any wasps in the kitchen.
Want more in-depth information? Browse through our books.
Or explore more posts by date or by subject.
About us: Anna Hess and Mark Hamilton spent over a decade living self-sufficiently in the mountains of Virginia before moving north to start over from scratch in the foothills of Ohio. They've experimented with permaculture, no-till gardening, trailersteading, home-based microbusinesses and much more, writing about their adventures in both blogs and books.
