archives for 11/2014
The first widespread
frost blanketed the farm Halloween morning. I've been harvesting the
broccoli and peas a bit at a time over the last month, but a low of 28
was enough to start damaging the remainder, so Mark and I spent the
afternoon bringing in the last of the early-fall harvest. Cabbages,
broccoli, peas, raspberries, and the last few figs soon lined the
kitchen counter, and then it was time to head back outside to protect
the late-fall bounty.
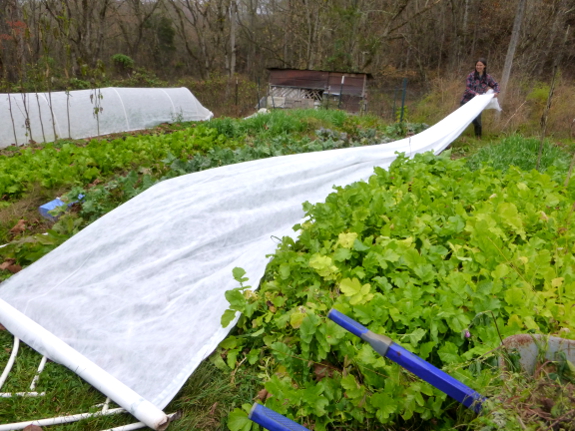
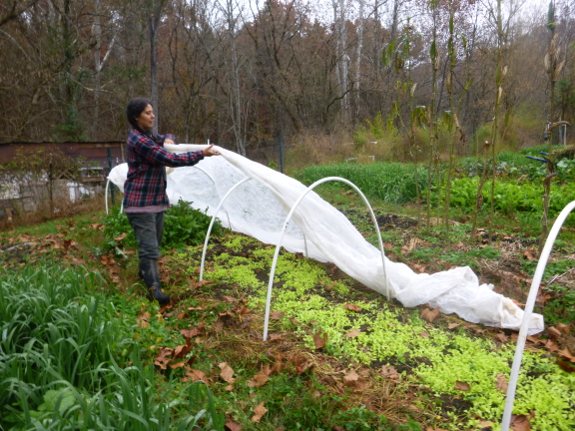
I've learned over the
years that it's not worth covering up tatsoi, tokyo bekana, and mustard.
These tender greens do okay in the early fall, but even with
frost-protection, they soon perish during November nights. So, instead, I
just erect quick hoops over the last planting of lettuce --- currently
in tender two-leaf stage --- and over most of our beds of kale. One kale
bed I'll leave uncovered to give us more variety in our greens harvests
before we begin delving into our covered beds in late November or early
December.
 At
this time of year, I always get lots of question about quick hoops, and
I don't blame you. They're a beautiful sight in the garden, and tender
kale leaves deep into the winter are a beautiful sight in the kitchen!
All of your questions are answered in my 99-cent ebook Weekend Homesteader: October, and if you want to splurge, you can collect all of the Weekend Homesteader months in the paperback form. I hope that helps turn your garden into a year-round affair!
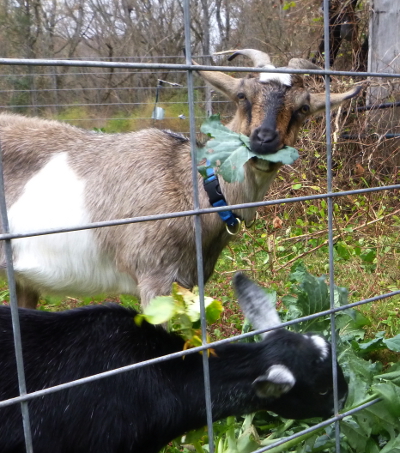
(Yes, the last shot is a totally unrelated cute goat photo. After all these weeks, you're still surprised?)
The good thing about letting
our ducks forage in the woods is the water.
What's not so good is when
they stay out all night and lay who knows where?
We'll herd them back in the
coop tonight before dark......at least that's the plan.
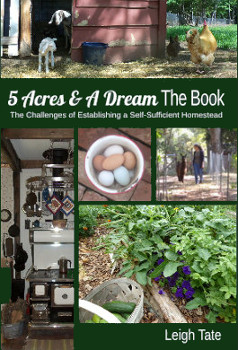 I first noticed Leigh Tate's 5 Acres & A Dream The Book when it popped up in the top 100 Sustainable Living books list on Amazon (where many of my books
reside on their good days). Once I realized the book was a
self-published paperback, I became even more intrigued because, while
self-published non-fiction ebooks are relatively easy to get into Amazon's top 100
lists, paperbacks tend to be trickier. In case you're curious
about reproducing Leigh's success, I suspect it boils down to:
- An excellent title and cover.
- Choosing a black-and-white interior, which allowed her to include lots of great photos but to still price the book very reasonably.
- Quite a bit of promotion at launch (podcasts, a well-established blog with lots of fans, etc.)
- And, of course, an excellent book.
Okay, self-publishing tips
aside, I'm sure many of you are simply interested in the book
itself. If you enjoy our blog, chances are that 5 Acres & A Dream The Book
will be right up your alley. Leigh explains that her book isn't a
how to or a why to; it's simply the story of how she and her husband
found their farm and spent four years bringing the land to life.
Perhaps
the most powerful part of the book is the way Leigh records changes in
the couple's thought processes as they began
to homestead, transitions that I suspect are near-universal since Mark
and I worked
our way across many of the same hurdles during our early years here.
That's why I particularly recommend Leigh's book to folks who are still
in the dreaming stage or who have recently moved to a homestead. Chances
are, her book will help lower your own hurdles, in the process
making the obstacles look more familiar when the time comes for you to
leap
across.
 As a more established
homesteader, I mostly read Leigh's book as a fun farm memoir, but I
definitely pored over the chapter on feeding animals with homegrown
products. The Tates experimented with planting field corn (a heavy
nitrogen feeder, but easy to grow and process), wheat (very tough to
process, but chickens will eat the grains out of the head), Ozark
Razorback cowpeas (can be fed to goats in the pod), and sunflowers (can
be fed in shells to goats). Since we're just getting started with
goats, Leigh's tips were very timely, especially since she's very
realistic about homestead-scale processing and storage.
Want to enjoy 5 Acres & a Dream The Book? You're in luck because one reader will win a copy just by entering the
giveaway below! If you don't win and want a free sampling of
Leigh's writing, head on over to her blog
for cute pig photos and much more. Leigh is also branching out
into ebooks, and her first two offerings, How to Preserve Eggs and How to Make a Buck Rag are now available on Amazon for 99 cents each. I
hope you enjoy the ebooks and paperback as much as I
did!
Some of our sprinklers are
cheap and don't have the ability to unscrew the hose without turning
the whole sprinkler or the hose.
A faucet
kink protector makes it
easy to disconnect hoses and eliminates that drastic kink that happens
when the hose bends down.
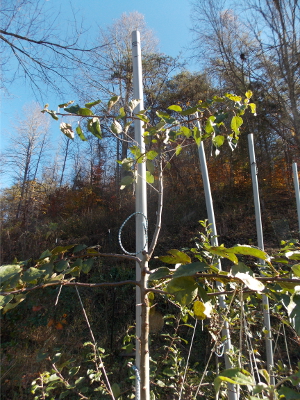 What
do you do if your dwarf apple tree is as tall as you want it to
get...and it keeps on growing? Whacking the top off a tree is seldom a
good idea since that type of pruning often prompts a tree to use up its
energy sending out lots of useless watersprouts. Enter a technique known as snaking.
The photo to the right shows one of our high-density apple trees
that exceeded Mark's ability to easily reach the top this past summer.
As a result, I tied down all of the limbs at the top of the tree so they
became horizontal, instead of vertical, branches. Inevitably, one or
more of these limbs will bend upwards again next summer, at which point
I'll pull the top back down on itself accordion-style. This method of
slowing a tree's upward growth prevents the accumulation of
watersprouts, while also keeping a tree's fruits within easy reach.
The other alternative?
You can do as my older sister did and go out after dark as snow starts
to fall and climb your apple tree all by yourself in an effort to reach
the fruits at the very tip top. But I can't say I recommend it....
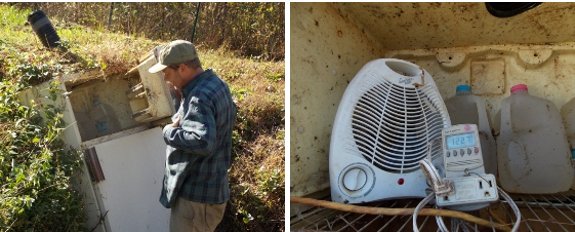
The carrots survived last
night's temperatures in the refrigerator
root cellar.
Experience tells us that when
it gets down in the teens we need the above supplemental heat to keep
our carrots from freezing.
A thermocube kicks on when it gets too cold
and shuts off when it gets above 45. The Kill a Watt meter is there to
tell us how much electricity it uses.
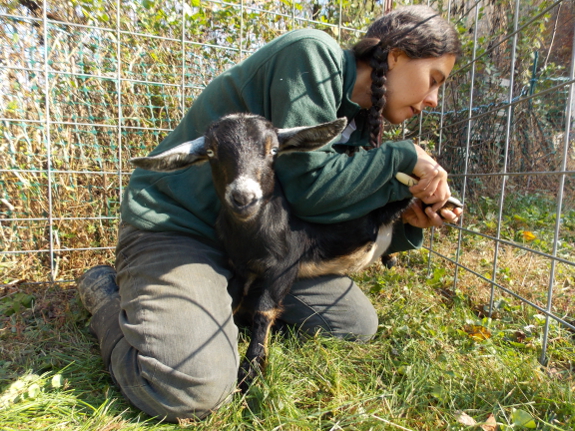
This week marks our one-month anniversary of having goats on the farm. Time to trim their hooves!
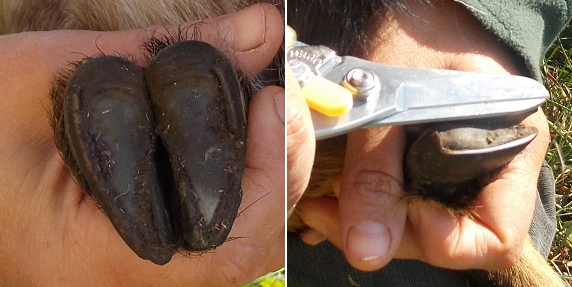
Hoof trimming was on my list of things I was uncertain about, which is why I opted to splurge on a special hoof-trimming tool rather than just using a pocket knife. Of course, now that I've trimmed hooves, I can see how a pocket knife could
work --- the part of the hoof you pare off is very easy to distinguish
from the not-to-be-cut area, and it's also quite soft. But clippers made
the operation very painless, and I'm glad we have them.
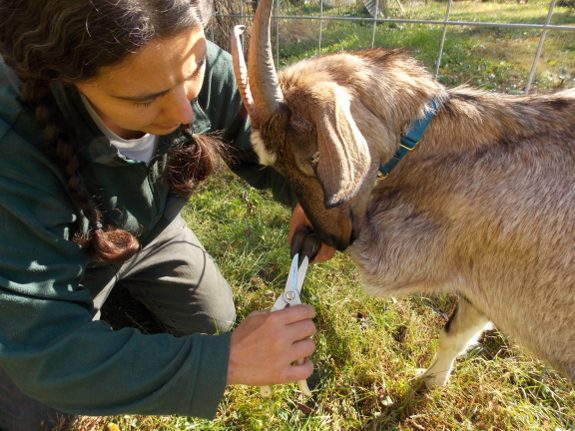
In the photos above, the picture on the left shows a hoof pre-trimming.
Notice that the edges stick out further than the center? All you have
to do is snip that bit off, a process which is simple if you do it
frequently (but can get tricky if you wait too long).
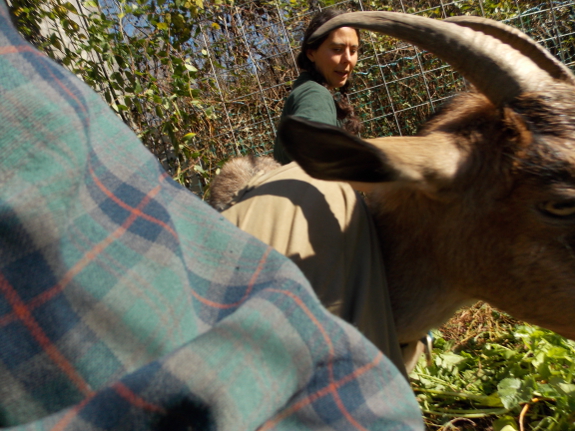
Once I figured out what I
was doing, front hooves were easy on both girls. Artemesia thought she
was being petted the whole time, so even our doeling's hind hooves
weren't bad, but Abigail didn't understand why something kept grabbing
her feet and not letting them go. In the end, Mark and I had to work
together to get Abigail's hind feet trimmed --- he corralled her and I
clipped.
Now that I've trained both of our girls to walk easily on a leash
and to do (mostly) as I say, it's time for the second round of training
--- milking prep. Abigail is (hopefully) pregnant (more on that later),
so Mark will be building a milking station shortly. Then I'll start
giving Abigail her treats (more on those later too) while up on the
milking station. That will give me an opportunity to get our doe used to
being manhandled, and should also make trimming her hind hooves easier.
As a side note, I recently learned that you can tell the age of a goat from looking at her teeth.
Abigail's previous owner wasn't sure how old she was, so I decided to
take advantage of already being on her bad list by prying open our doe's
jaw to take a peek. I had to look fast (so no photo), but the two big
teeth in the middle of six smaller teeth proved that our doe is around
1.5 years old --- the kids she had this past spring were almost
certainly her first. Hopefully she'll come through again in February or
March, at which point we'll start enjoying homegrown milk in addition to
cute goats.
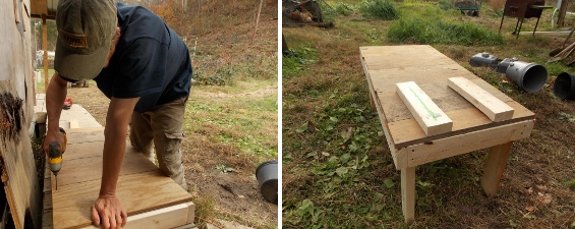
I got the base of our new
goat milking stand finished today.
It's 20 inches high, 48
inches long and 22 inches wide.
Milking day is still far off,
but we want to start using it to trim their hooves.
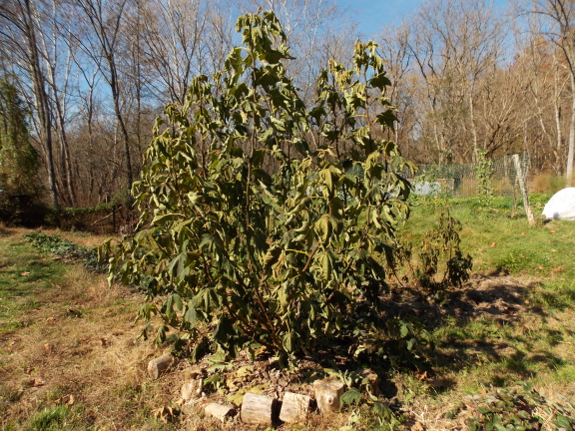
Even though it was hard
to believe when I stripped down to a t-shirt five hours later, we had a
low of 21 on Sunday night. The killing frost was definitely enough to
nip our fig leaves and put the tree to sleep, which meant it was time to
protect our fig from winter cold.
Regular readers will
probably know all about our fig trees (which I talk about almost as much
as cute goats). But if you're new, here are some answers to obvious
questions:
- Some fig varieties are hardy to zone 6 (with winter protection).
- General tips on protecting figs through the winter.
- Protecting a small fig tree.
Result: This was not sufficient to help summer-planted figs survive
during the ultra-cold winter last year, but it worked in other years and
on older figs.
- My 2012 method of protecting a large fig tree. Result: The tarp on top slid to the side and the leaves matted down, but it worked pretty well otherwise.
- My 2013 method of protecting a large fig tree. Result: Last winter was awfully cold, so it's hard to tell whether this method was worse or not. It definitely wasn't better.
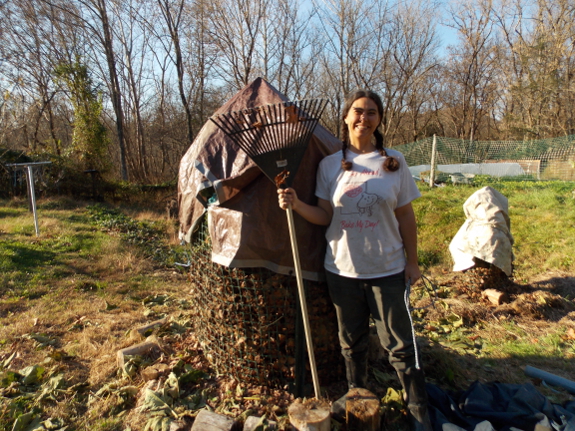
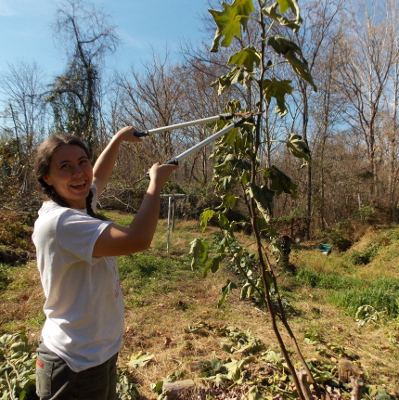 Okay,
now that you're all up to speed, it's time to protect that fig! I opted
to return to the 2012 method, figuring that more leaves around the base
of the plant will protect the sensitive junction of stem and root from
winter injury. Brian suggested stones around the base, which is a great
idea, but I never seem to have extra rocks to throw around. (It's a
momentous occasion when a new stone turns up in the garden.) Assuming we
don't have a repeat of last year's ultra-cold winter, and assuming that
I secured the tarp well enough, hopefully the three stems I kept will
produce an early crop (which we missed out on this year).
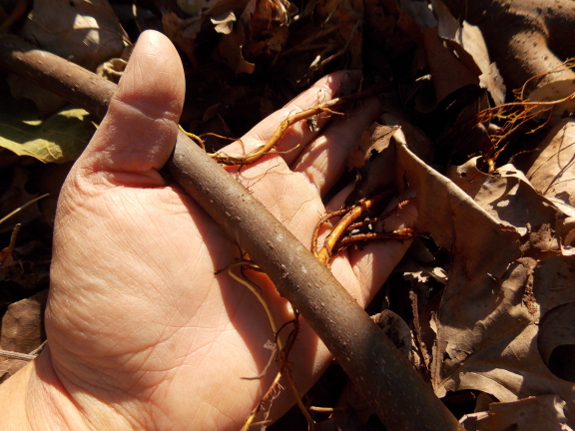
As I pruned, I was
excited to see that several of the small stems that had grown
horizontally out from the tree base had sprouted roots over the summer! I
snipped the rooted segments off and wrapped them in damp newspaper in
case any of our readers want to give Chicago Hardy figs a try. Enter the
giveaway using the widget below if you're interested (and be sure to
plan ahead for five cuttings that should be potted up and spend the
winter in a cool spot inside while they finish growing roots).
What do we do with the goats
on a rainy day like today?
Walk-em back to their Star
Plate barn.
Artemesia likes to lead the
way...I like to take pictures from the porch.
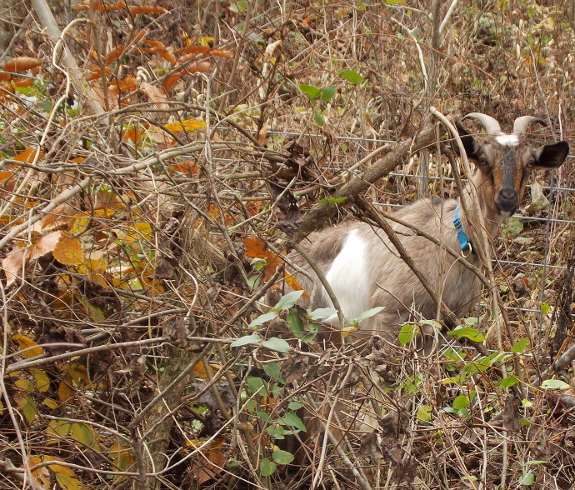
Back when we first paid for Abigail,
the owner seemed confident that she'd be able to breed her and let us
take home a pregnant goat. However, when the time came to pick up our
new addition, the owner seemed a little less sure. Yes, she thought
she'd bred Abigail a month previously, but she'd just gotten her buck
back from his visit to a friend's farm and the buck had acted very
interested in Abigail again. "So if she didn't get bred then, she got
bred now."
That left me with a lot
of question marks. If this was the same buck who had tried previously,
are we sure he did the job this time around? Is Abigail actually
pregnant? Enter the urine test.
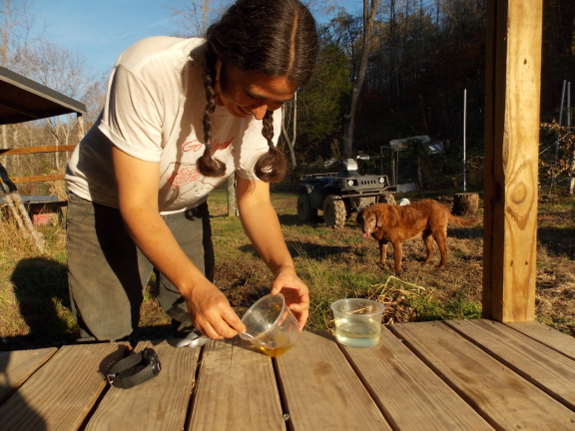
Leigh posted
that one technique people think is pretty accurate is to add a little
less than half a teaspoon of goat urine to a cup of bleach. Based on the
amount of fizz you see, you can determine whether or not your goat is
pregnant. Extended fizz = knocked up. No fizz = she's not knocked up.
Since Abigail nearly always pees right before I take her out of the coop
in the morning and then again right after I bring her back in at night,
it was pretty easy to stick a container underneath and run a test.
Unfortunately, the results weren't what I was looking for --- no fizz.
Even after I poured a whole lot of urine into that bleach, the only
thing that happened is that the combined liquid turned a very dark
brown/yellow color.
So now I'm back at the buck-rag method of testing Abigail's status. When we got Artemesia,
that goat lady was kind enough to rub a rag (which I'd brought along
just in case) all over her buck, then I sealed the aromatic fabric in a
ziplock bag and forgot about it. This week, I finally started pulling
out the buck rag every day for Abigail to sniff. The idea is that, if
she's not pregnant, sometime
within the next three weeks our goat will be cycling and will suddenly
grow interested in eau de buck. Here's hoping she keeps telling me that
eating oat leaves is far more interesting than going on the rag!
We tethered our goats for
about an hour this afternoon for the first time.
No need to tether Artemesia
because she likes to be close to Abigail.
I've heard some goats can be
left unattended on a tether, but we're not comfortable trying it with
these girls.
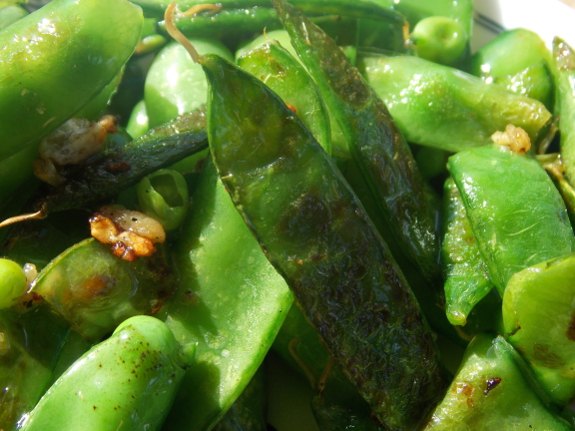
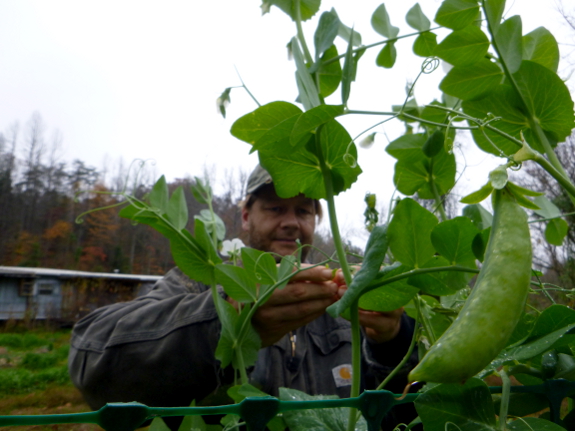
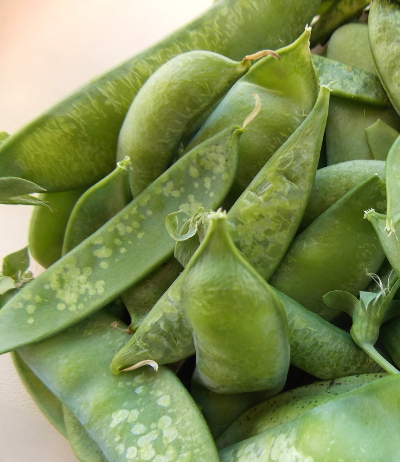 In their prime, it seems like sacrilege to cook sugar-snap peas. But I allowed a few frosts to damage the last peas before we picked the vines bare last week,
which means that the peas we harvested were subprime. They were still
crunchy and sweet, but the pods had started to turn a bit fibrous and
the aesthetics were much reduced (as you can see to the right). Time to
saute the remaining vegetables with garlic and turn so-so fare into a
feast!
(As a side note, this
recipe would be perfect for grocery-store peas. That's when we start
turning up our noses --- when our residual summer vegetables start to
taste like store-bought.)
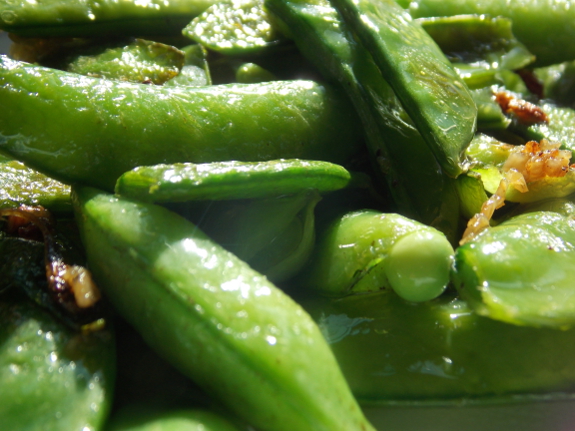
There's really not much to this recipe, but here's an ingredients list to make it even easier:
- 2 cups of sugar snap peas
- about 2 tablespoons of peanut oil (or other high-heat oil)
- 2 smallish cloves of garlic, minced
- salt and pepper to taste
Excellent sugar-snap peas
can be used whole, but if yours are turning fibrous like ours were,
you'll want to string the pods as if they were beans. Otherwise, leave
the pods whole and drop them into a skillet full of a little hot oil.
Turn down the heat to medium-high, add the garlic, salt, and pepper, and
cook for about five minutes (stirring often) until the beans turn
bright green.
Voila! Deliciousness from
so-so produce! Now, with the last of the summer bounty down the gullet,
it's time to eat up all of those stockpiled cabbages.
We went over our neighbor's
for lunch today and got blocked by a fallen tree.
It was my first time seeing
his new Stihl chainsaw with a spring loaded quick start.
I was impressed with what
little effort it took to get the saw started. He says the guy he bought
it from says the only trouble they have with this type of mechanism is
people with muscle memory still wanting to pull like the old style
which can break the spring.
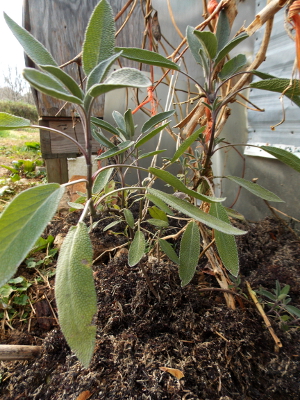 In Weekend Homesteader: October,
one of the projects I suggest is spending some time scavenging free
biomass for use on the garden. I barely touched on seaweed in that
chapter, including it only because I'd read that some people use seaweed
as mulch. But while Mark and I were at the beach last month, I decided to collect a bagful and bring it home as an experiment.
My first impulse, actually, was to feed the seaweed to the goats instead. After all, we offer kelp as a source of salt and micronutrients, so surely seaweed would be even better, right? A search of the internet found that some people do
feed seaweed to goats, but that you really have to find a source of
fresh, live seaweed and scrape it off the rocks (at which point I'd
start to worry about damaging the ecosystem). The seaweed that so
copiously washes up on our shores is instead dead and beginning to rot,
so isn't very healthy for our caprine friends.
But when applied to the
garden, the same seaweed shines. The bag I brought home went a long way,
mulching around a sage plant, a newly-transplanted grape, and a young
hardy kiwi. With a C:N
of 19:1, the mulch will probably rot down quickly, and I'd have to keep
an eye on salt levels if I used seaweed as a mulch on a regular basis.
But as it is, I suspect the top-dressed plants will get a boost in the
trace-mineral department and should grow quite well.
I'll keep you posted
about the results of my experiment, but in the meantime I'd love to hear
from those of you who live by the shore and presumably have plenty of
seaweed to throw at your gardens. Do you love it? Hate it? Somewhere in
between? Does it make up for painfully sandy, low-organic-matter soil?
Our kale seems to stop growing at this time of year, but it makes up for it by getting a little bit sweeter with each cold snap.
 My
favorite college professor wasn't a "real" professor at all. The "real"
professor was her husband Tim, who taught ornithology and animal
behavior. But Tim and Janet were true partners, which I suspect is why
she opted to accept a job as assistant professor (if I've got my
terminology correct) at the same college where her husband taught. Or
perhaps Janet was just the smartest person I knew, who managed to create
a job doing exactly the things she loved --- leading field trips and
looking at birds --- within no administration to sully the mix.
I liked birds, but I
loved Janet. She was exuberant and inquisitive, and she felt the same
awe toward the natural world that I did. Janet was just as mature anyone
else, but she was also unabashedly childlike. I remember walking
through the upstairs of her house one day and seeing stuffed animals
arranged across her bedspread, which Janet told me she set out every day
despite her children being grown and gone. The task made her happy, and
that was purpose enough.
Janet wore peasant
blouses and skirts and she loved to dance. She and Tim attended folk
dance classes with the students, where we all enjoyed taking part in her
favorite dance --- Levi Jackson's Rag. And like me, Janet couldn't stop
smiling because life was just so much fun.
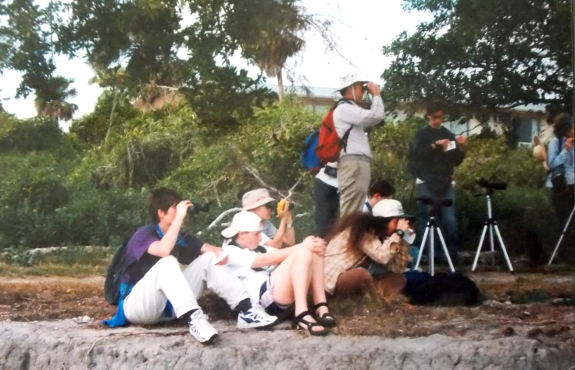
Janet was the only
college professor who I considered to be a true friend. During my
student days, I'd drop by her office and watch enviously as she mixed
homemade granola with yogurt and a cut-up apple for lunch, and we'd talk
about our lives. Janet once told me that she didn't feel any different
than she had when she was my age, and, years later, I finally understand
what she meant. Looking back at the few snapshots I have from my
college days, I'm surprised to see that I looked so young since I still
feel so similar to that girl who loved to track down the source of a
scent in the woods and who followed Janet across the creek one spring
morning in hopes of capturing a deciduous magnolia in bloom.
Janet challenged me, but
in such a gentle way that I didn't realize I was being helped to grow
until I'd already filled the shoes she always assumed I could fit into.
Janet aided me by writing letters of recommendation, but more
importantly, she told me that of course I could remember how to ride a bike despite not having been on wheels in nearly a decade, of course I could lead bird walks as her T.A., and of course I could spend a year exploring foreign countries on my own. And she was always right.
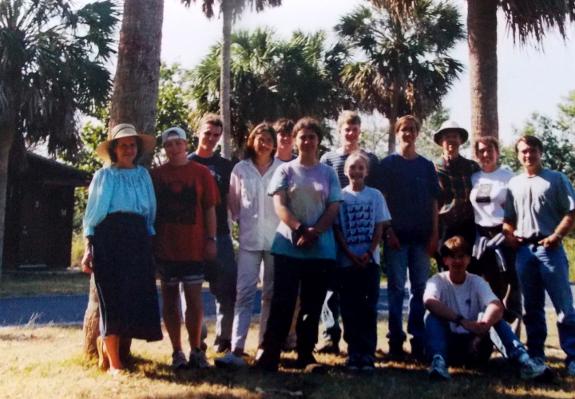
Janet and her husband
eventually "graduated" and moved to their home in New Hampshire, where
they had spent their non-college years (and summers). I visited the
college only once after Janet left, and couldn't talk myself into going
back thereafter --- the beautiful campus simply felt empty without my
favorite professor to drop in on.
And, last week, the whole world became a little emptier when Janet
passed away. She had been sick for some time, and near the end, her son
sent out an email to all of her family and friends to alert us of the
situation. He said that Janet was too weak to visit with us in person,
but that she loved receiving emails, and that she especially loved
seeing photos and hearing about what was happening in our own lives. And
that was Janet to a T --- even at the bitter end, she wanted to hear
about our lives rather than to talk about her own.
Chickadees make a single high-pitched call that Janet was always able to identify because I could hear it and she
could not. But my teacher never bemoaned her failing hearing and
instead simply reveled in walking through the woods and catching a wood
duck perched on a slanted tree. And, in true Janet fashion, I choose not
to mourn her passing, and instead to let birds remind me of the one professor who changed my life. She was very much real, and she will be missed.
We had some trouble with
Abigail chasing her little sister today.
Letting them graze on some
oats seems to have fixed the problem for now.
Hopefully they'll be more
bonded by the time we run out of oats.
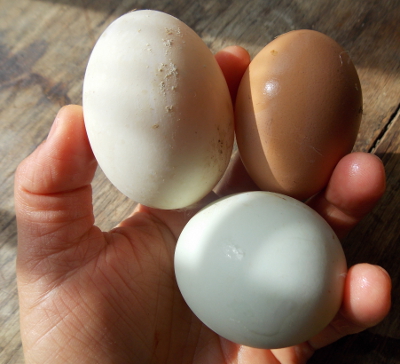 When I talked Mark into letting me experiment with ducks,
what interested me the most was the waterfowls' reputation for laying
well in the winter months even without lights in the coop. And I'm now
ready to say that their reputation is well deserved! We currently have
three point-of-lay pullets in the chicken department and five
similarly-aged ducks, and we receive about four eggs a day from the
latter (80% lay rate) and one egg a day (if we're lucky) from the former
(25% lay rate). Granted, this is without supplemental lighting in the chicken coop,
which would have increased our chicken-egg numbers, but that's
definitely a striking difference and a major mark in the pro-duck
column!
However, I've also
learned that not all eggs are created equal. Duck and chicken eggs look
similar but taste and cook quite differently. The first thing you'll
notice is how dirty duck eggs get if you don't harvest them from the
coop very promptly --- ducks can't hop up into raised nest boxes, so they'll walk all over their eggs after laying and coat them with filth.
This can be a health issue since washing can sometimes push bad
bacteria through the shell and into the eggs, so we usually give dirty
eggs to Lucy (who thinks all eggs are created equal).
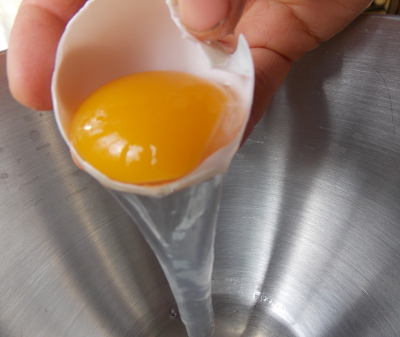
Assuming you manage to
swoop up the clean eggs in time (which we're getting better at), the
next distinction comes when you crack a few eggs open. Duck eggshells
are harder, and they have a thicker membrane underneath, which means
that tiny fragments of shell are more likely to end up in your egg if
you're not very careful. I'm getting better at preventing this, but I
still spend quite a bit of time chasing tiny egg fragments through my
uncooked eggs each morning. Unfortunately, I haven't found any solution
for the very glutinous whites in the duck eggs, which tend to leave a
streak of goo on the counter every time I try to decant the filling from
the center of an uncooked egg.
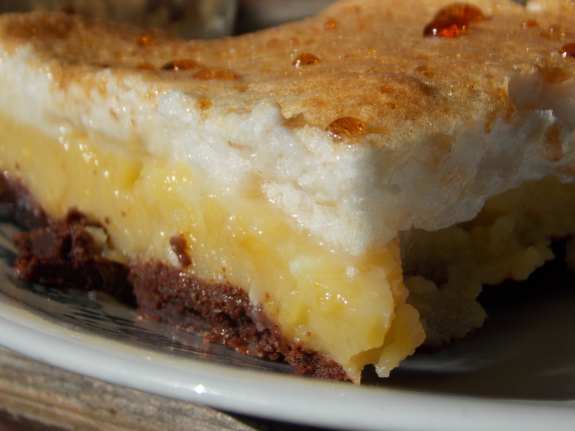
 Which
brings me to cooking. Here, I'm on the fence about which type of egg I
prefer. In cakes, duck eggs shine, resulting in a pastry that is so
perfect that it's nearly impossible to stop eating after one piece. (No,
despite what you think, that isn't
the bad part about cooking with duck eggs.) However, when scrambled,
I'm less of a fan. It's important to cook duck eggs more slowly and at a
lower heat than chicken eggs, but if you don't want to go over the edge
into burning, the result always feels just a tiny bit less cooked than
it should be. In a perfect world, I like to mix in at least 40% chicken
eggs when scrambling so that the result tastes "normal."
I'd be curious from other duck-keepers. What do you feel are the advantages and disadvantages of duck eggs?
We tested our new goat
milking stand today.
It's close...but needs some
small adjustments to make it work.
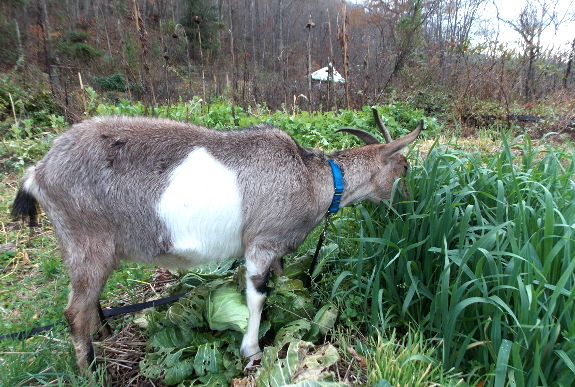
When we went to pick up Artemesia, her previous owner
warned me: "You'll want to get in some good hay now." I looked at the
lady's dozen-plus full-sized goats and mentally rolled my eyes. Of
course I wouldn't need hay with just two little goats to feed on our ultra-weedy farm.
Five weeks later,
pickings are starting to get more slim. Part of the trouble is that I've
spoiled our goats to want only oat leaves and honeysuckle, on which
diet Abigail is actually putting on a bit of fat despite getting
basically no concentrated feed. (I do give our girls an overmature
summer squash or a bit of dried sweet corn or some butternut seeds every
other day or so --- whenever I think about it.) Artemesia still looks a
bit skinny, probably because she's going through a growth spurt, but it
appears that high-quality pasture is quite sufficient for a dried-off,
full-grown goat, even if she's (hopefully) pregnant.
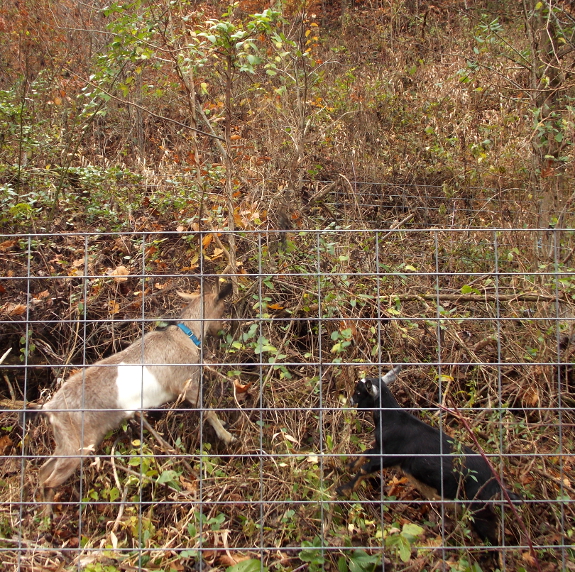
But my snooty goats are
far less excited by low-quality pasture. Last week, I penned them into a
brushy area, hoping that after they ate the honeysuckle covering the
young trees, they might eat up the twigs of the trees underneath. No
such luck. Instead, my usually-quiet Abigail yelled at me all morning
until I relented and tethered her in the oat patch
for the afternoon. And while my oat supply also seemed pretty unlimited
a few weeks ago, our girls are starting to eat the lush greenery down
to the ground, which means their afternoon fill-up sessions are going to
be harder to come by in the near future.
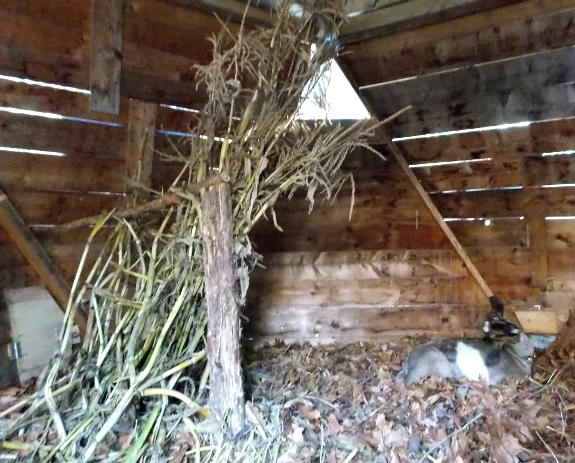
Which is all a long way
of saying --- once the ATV gets fixed, we're going to have to get in
some hay. Drat! Oh well --- it's still inspiring to think that, if we
planned far enough in advance, we might be able to feed our goats on
farm-only feed pretty easily. After all, they gorged for over a month
without me spending a penny, so twelve months wouldn't be all that much
harder, right?
 About
forty years ago, when visiting friends near Dungannon, Virginia, I
asked what fruit were under the big tree in their front yard. That
was my first taste of persimmons. They were close in flavor to a date, and very sweet. I loved them.
Once, when hiking in Maryland
at a reserve reservoir for the DC water supply, I passed through a
field of young persimmons and gorged myself on the sweet fruit.
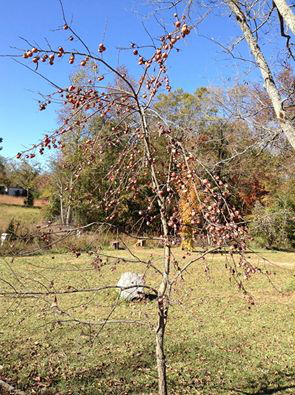
So when I moved to our
acreage in South Carolina I planted a foot-tall sapling. This is
its second year bearing, and it is loaded.
But what to do with so much
fruit? According to my online search, the skin is inedible (though
when I eat it, I eat the whole fruit and spit out the seeds). The
source I read recommended peeling the persimmons and scraping the pulp
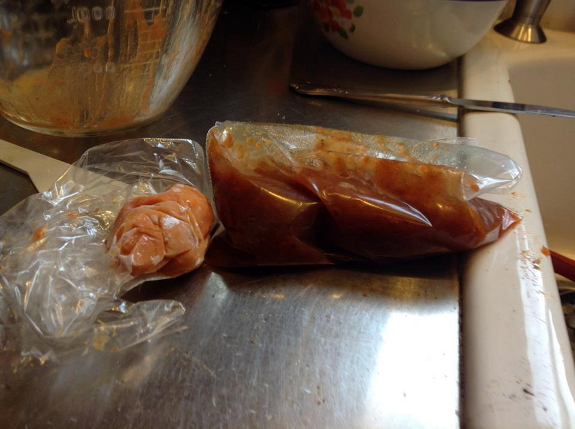
off the seeds. An hour of this got me 0.8 ounces (see photo
below). After a complete search online I found only one article on
separating the pulp from skin and seed. A Mother Earth News
article recommended using an old fashioned potato ricer.
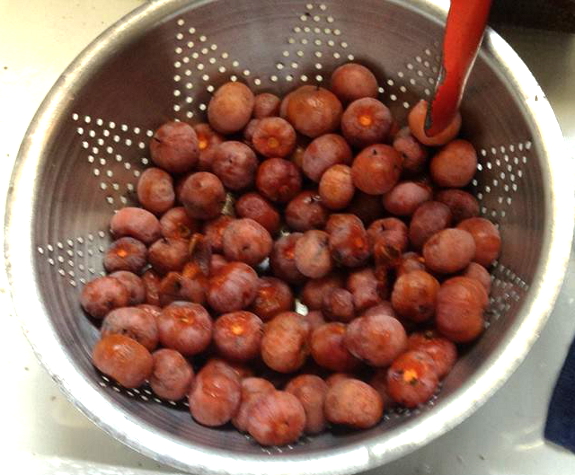
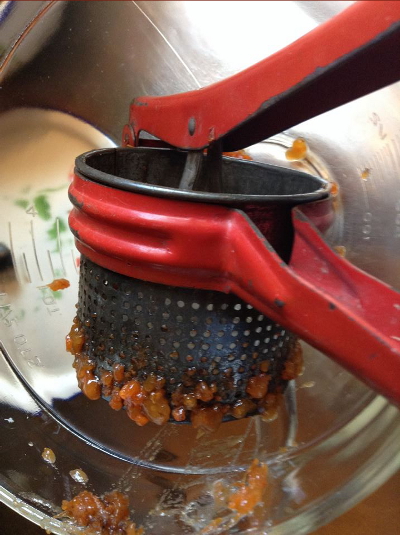 I
rinsed a quart of the fruit in warm water and drained it. Then I
filled the bottom of the ricer with fruit and squeezed. Sure
enough, pulp oozed out of its holes. I quickly learned that a
steady but gentle pressure was needed and that three squeezes would get
all that would come. Between squeezes I stirred the fruit with a
table knife and poked at any that hadn't split open.
The result was eight ounces
of fruit in an hour. If you notice in the picture, the fruit color
in the earlier attempt is lighter and clearer. That is because
the machine method will render some stem and seed pieces. These
don't affect the flavor.
As I was finishing, I looked
in the corner at the box with our steam juicer and a little light bulb
went off. It did a wonderful job juicing grapes. Why not
persimmons?
We cut down a small tree
loaded with honeysuckle today.
It might be enough to get the
goats through another day or two.
The Oregon
battery powered chainsaw
continues to be a perfect fit for small jobs like this.
 I
enjoy spending chilly mornings writing in front of a fire, and once I
finish up my stockpiled projects from earlier in the year, the question
becomes --- what to write next? I probably won't start any new projects
until the first of next year since I'm currently cleaning up old covers
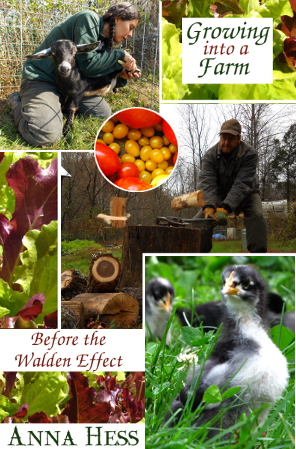
(what do you think of Growing into a Farm version 3?), finishing the expanded manuscript of Trailersteading
for my publisher, and generally getting all of the things I let slide
during the summer back into shape. But it's good to start ruminating,
and I'd love your opinion on which of these books you'd most like to
read:
Eating the Working Chicken expansion --- The short ebook that currently goes by this name
is very basic, with concise butchering advise and a small amount on
cooking. But since writing the first edition, I've learned at least half
a dozen delicious ways to cook tough, old hens without ending up
gnawing for hours on stringy meat. So an update seems to be in order.
Gardening in a Wet Climate
--- This new ebook would be just what the title suggests. We've
definitely learned a lot about how to make gardens thrive when it rains
all the time and when your soil is so waterlogged you have to garden in
knee-boots, so I'd love to share the results of our experiments. But
perhaps this is too much of a niche subject since most people probably
didn't get seven inches of rain during the first two weeks of October?
Permaculture Cliff Notes --- I give away Best Books For Homesteaders to anyone who joins my email list.
But I was thinking of adding in page-length summaries of each
recommended title so you could, conceivably, get quite a good education
in just an hour of reading.
Keeping Deer out of the Garden
--- Mark and I have certainly experimented with this topic like mad
over the last eight years, and I have a lot of permaculture tips to
share on the topic. However, my advice is pretty non-mainstream --- I
think that working with deer's behavior is the long-term solution rather
than purchasing repellents. So people in search of a quick fix might be
disappointed.
Even though I sell my
ebooks on the open market, my blog readers are the ones I really write
for. So I'm putting it up for suggestions --- does one of these ebooks
speak to you more than others? Or is there something else you'd really
like to hear about instead? Please leave a comment and let me know!
We finally found a local
mechanic that can fix our rear
prop shaft.
The operation requires some
tools and experience I don't have.
With any luck we'll be able
to haul in some hay for the goats next week.
 I
probably should have done this last month, but I took a few minutes
this week to close up our hives for winter. Hive winterization involves
adding a bottom board beneath the screened bottom and removing any boxes
that aren't currently in use, with the purpose of both tasks being to
make the hive easier to heat over the winter. Many people do the same
thing in their domiciles, in fact --- if you really only use your
bedroom and kitchen in the winter, why pay to heat the whole house?
Unfortunately (but unsurprisingly) I found the daughter hive empty when I went to remove the bottom box. Six weeks ago, I could tell that this hive was ailing, and even though though I tried to double down on feeding them, the bees didn't seem very interested in
sucking up sugar water. In retrospect, I suspect the colony I was trying
to feed was already gone at that point, with bees from our other hive
flying over to suck down the sweet 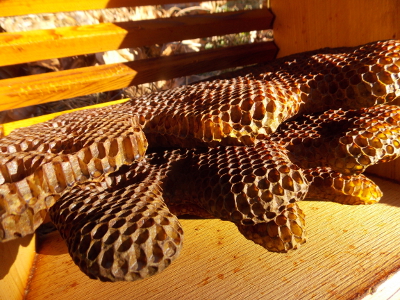 moisture. My guess is based on the fact that this hive didn't actually die out --- like
the one we treated with powdered sugar last fall, the entire colony
simply absconded, leaving only half a dozen dead bees behind.
So we're back down to one
hive heading into the winter, and even that colony felt a bit light
when I lifted the two top boxes to take out the cleaned-out box
underneath. I definitely don't seem very good at keeping bees alive
without chemicals and copious sugar water (and I'm unwilling to resort
to the methods other beekeepers use to keep their hives humming). But
we've got another trick up our sleeve for next year, so I'm not giving
up!
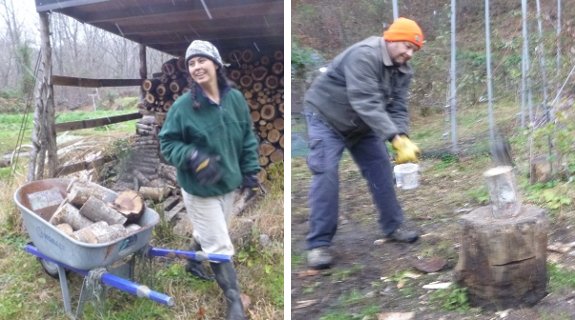
Are we ready for temperatures
40 degrees lower than normal?
I think so after some last
minute Winterizing this afternoon.
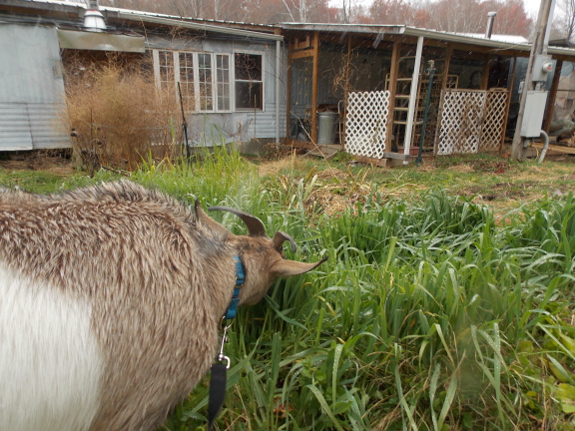
With the snow starting to
fall, I let our girls top off their bellies with oat leaves Thursday
afternoon, then put them to bed early with a sunflower-seed head.
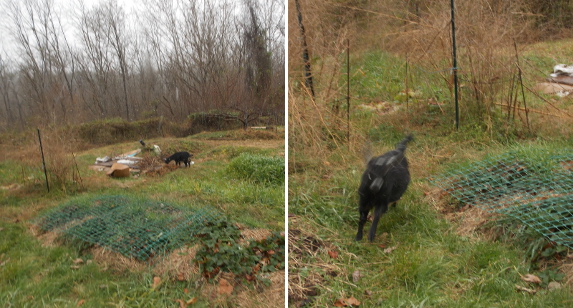
As she's gotten bigger,
Artemesia has grown an independent streak. She now has a bad habit of
lagging behind for just...one...more...leaf. But our doeling soon
gallops to catch up.
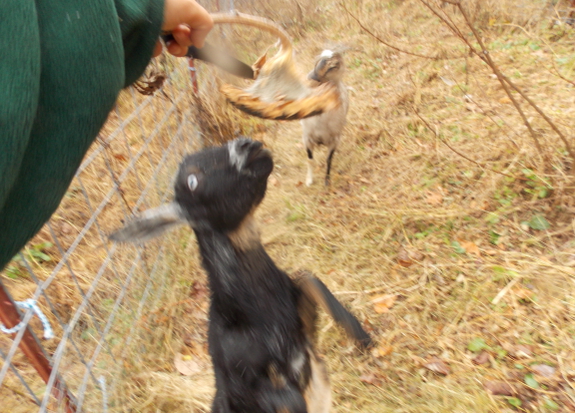
"Gee, I almost missed the treat?!"
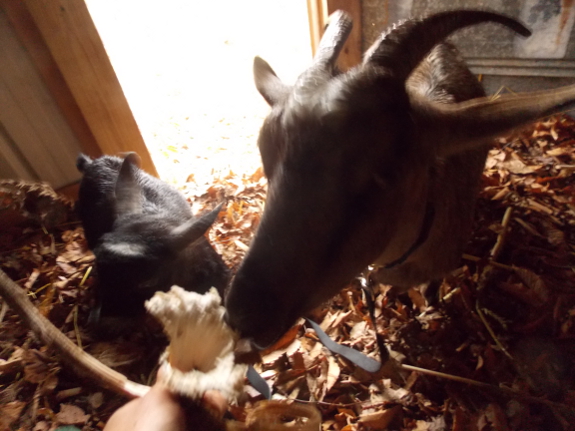
Both goats enjoy eating
the sunflower-seed head right down to the stem, but Artemesia isn't
nearly as good at it. Our little doeling always takes one big bite that
doesn't quite fit in her mouth, then she spends several minutes trying
to wrestle the seeds into her throat. Meanwhile, Abigail takes little
bites --- gulp, gulp, gulp, down the gullet --- and ends up consuming
85% of the head. No wonder our doe is getting fat while our doeling just
holds her ground.
Sorry for the dark pictures, but hopefully you enjoyed walking the goats back to the coop with me!
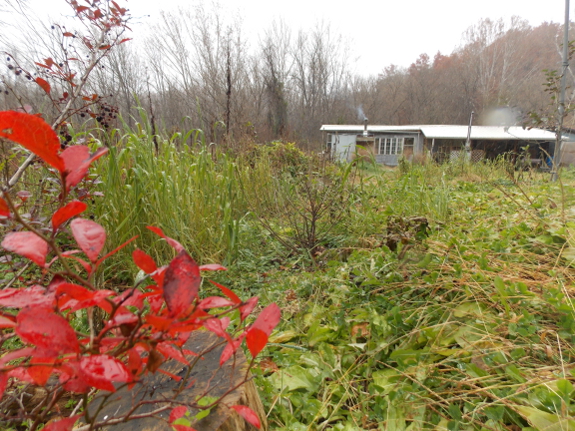
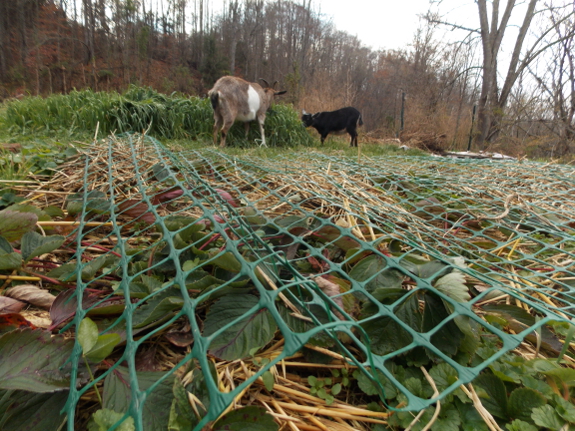
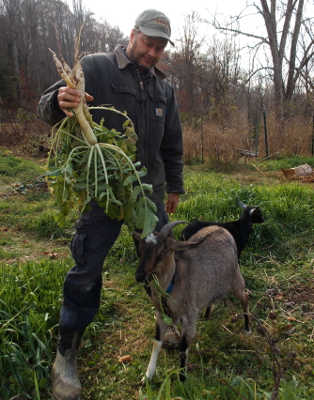 I've
written a lot already about how much our goats love oat leaves. Always a
softy, I've taken to tethering our girls in the garden for half an hour
or an hour every afternoon to fill them to bursting, during which time I
mostly monitor them (but also cover any strawberry plants with a bit of
plastic trellis material for an added layer of protection). But as our
oat stores dwindle, I decided to try our goats on another winter cover crop --- oilseed radishes.
Actually, I'd experimented with this offering before, including some oilseed beds into various enclosures while letting the goats eat the honeysuckle off the side of the barn.
Interestingly, our girls seemed totally uninterested in what were then
beautiful green leaves...until we had a killing frost. I suspect the
oilseed radishes changed at that point, perhaps the way carrots and kale
both get sweeter after a frost. Guesswork aside, the only thing I know
definitively is that our girls ate the oilseed radish plants to the
ground from that point on.
Since determining that our goats do
enjoy frost-bitten oilseed radishes, I've pulled up a few plants for
them now and then when no radishes are within their enclosures. But my
offerings were often abandoned, presumably because it's a lot harder for
a goat to break off bite-size pieces when a plant isn't anchored firmly
in the ground.
So, Friday, I decided to chop up the roots and see if that made the radishes more palatable. Did it ever! Artemesia got sick of radishes before too long, but Abigail ate about three big plants' worth.
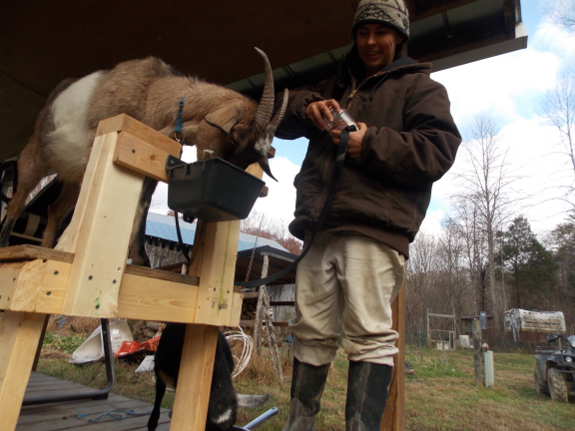
The photo above shows me starting to train Abigail to her milking stand,
the tray of which was full of radish roots plus a little bit of corn.
Our doe still doesn't always get on the stand immediately, but she did
jump up one day without me even asking because she wanted to look in
the trough for food. As with most things, I think training Abigail to
the milking stand will come easy --- goats are definitely the smartest
livestock we've so far had on our farm. (Which means we have to be
ultra-careful not to let them learn bad habits!)
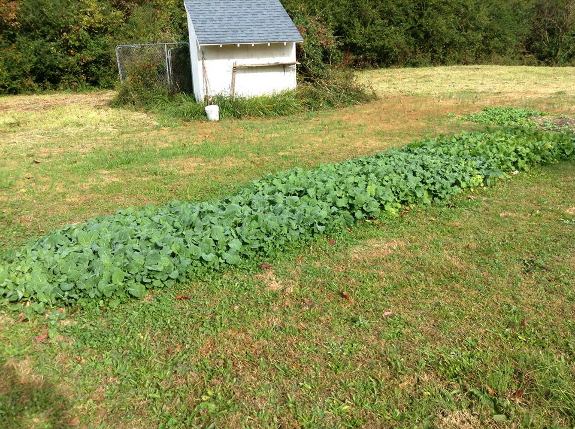
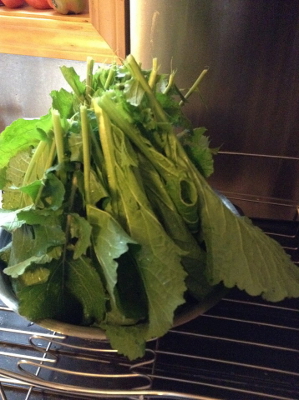 Talk
about a vegetable with an undeserved bad rap. In Canada they
changed its name to canola. If you want a recipe you need to look
up broccoli raab or rapini. It's one of my standard, easy-to-grow
winter vegetables. A ten-by-ten foot patch provides a never ending
supply of fresh and healthy greens.
Yesterday in the dentist's
waiting room, a cooking show was on TV with the sound muted. I
watched the cook put greens on a cookie sheet and into the oven.
After the commercial when it came out the words "oven roasted rapini"
flashed on the screen. I was planning on sauteeing mixed greens
for a supper side dish, but decided to try this instead.
First I soaked the picked greens in cold water and drained them.
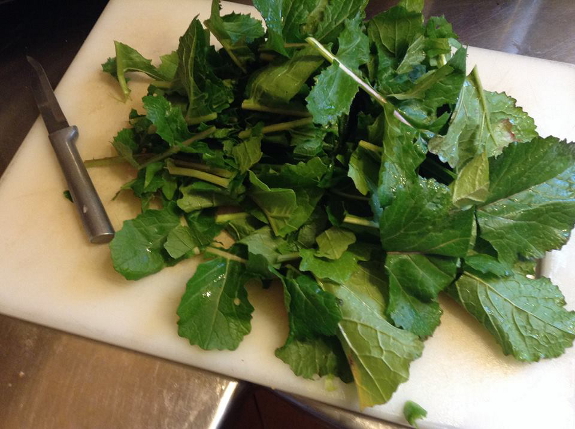
Then I cut them in two-or-three-inch-long sections.
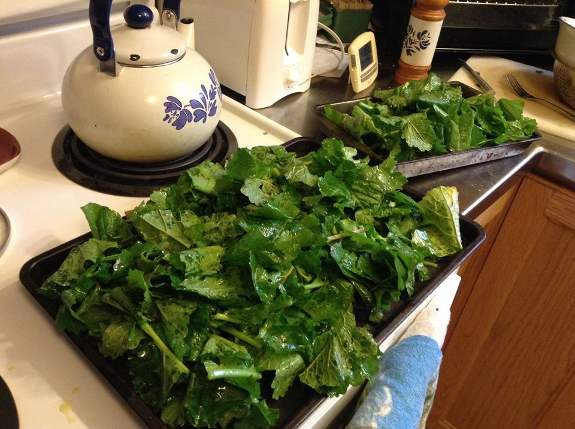
A coating of olive oil with
salt preceded putting them on baking sheets and placing in a 350 degree
oven. A stir or two, then, fifteen minutes later--ready to eat
along with crock-pot navy beans cooked with chopped onions and green
pepper.
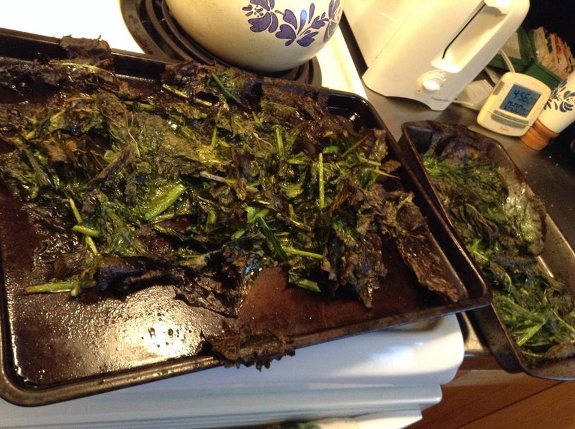
Delicious.
(Note from Anna: For those of you who aren't in the know, Errol is my
father, who homesteads in South Carolina and is the primary author of Low-Cost Sunroom. I'm tempted to nitpick about his use of the
term "rapini," which I understand to mean the broccoli-like flower buds
from various types of crucifers. But maybe he's right and I'm wrong and the whole plant can be called rapini? It definitely sounds better than rape....)
We hiked what we thought was
a fresh battery to the truck today.
Now we think something is
wrong with our ancient
trickle charger.
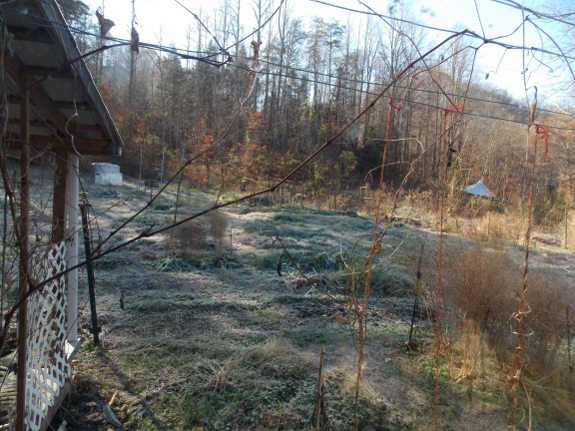
We've enjoyed such a
nice, gentle fall...but all good things must come to an end. When I woke
to a low of 12 Saturday morning, I realized that I'd forgotten some of
the winter tasks that I should probably have been more on top of. Yep,
our water line had frozen
(as it generally does in extreme cold weather...especially if I forget
to put insulation back around the summer access points), and I hadn't
filled up any backup water sources. So I had to steal half of the
contents of Huckleberry's water bucket for the goats, which prompted our
grumpy cat to stalk outside in a snit and then bring a junco back to
lay across the kitchen floor. I picked up the bird, thinking it was
dead, opened the back door to toss the critter out...and Huckleberry's
prey lifted off from my hands and flew away, stunned but unharmed by our
cat's attention-getting move.
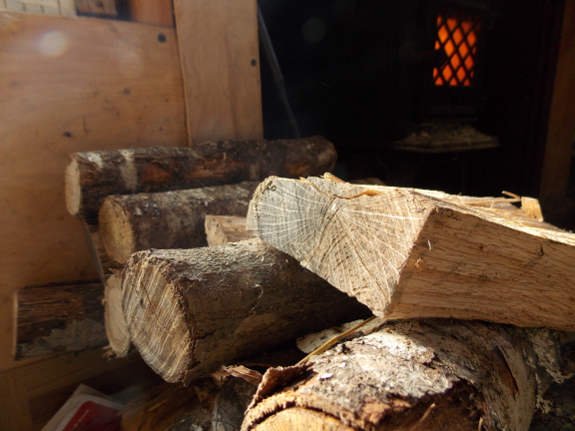
So winter is here at
last! Happily, I realized that twelve doesn't really feel all that cold
when you've gotten used to mid-fifties inside the trailer. And now maybe
those last few leaves will drop off our baby apple trees so I can enjoy one of my favorite seasons --- fall perennial planting! After the ground thaws, of course.
A short video showing what's involved in putting up a quick hoop.
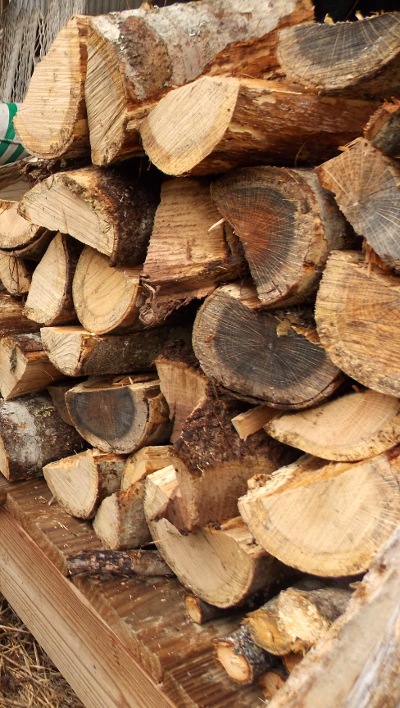 "I was wondering whether this feels like it might be a longer winter
than normal and if the woodshed was full enough to make it through to
the warmer weather of spring? In our two years having a woodstove at our
cabin, we are still learning just how much wood we will need to keep us
warm during the cold months.
Also - I was curious if you have to deal with mice in the trailer?
Our cabin was invaded recently and I was looking for more good ideas to
make them less inclined to visit."
--- Karen B.
Two great questions, Karen!
As for the wood --- we never seem to have quite enough, but we manage.
In order to really get ahead on firewood, we'd need to change our system
so that we can stock up on wood during the winter that comes a year
before we plan to burn it,
since that's a season when our lives are less busy. But since I need to
be able to get to last year's firewood during the winter, we instead
empty the woodshed out and then fill it back up. In the end, that method
means that cutting firewood has to compete with the garden --- I'll bet
you can guess which one wins! To make up for our slacker habits, I tend
to earmark a standing dead tree
or two for spring firewood since the dry wood can often be burned soon
after cutting, which generally ekes us through late February, March, and
April.
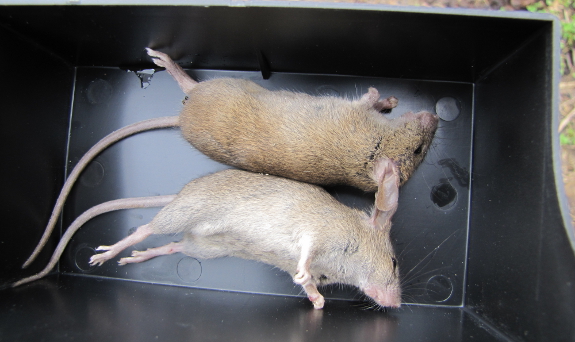
The mouse issue is more
interesting to me because we're finally starting to figure it out. Every
fall, the local mouse population does
tend to invade our trailer, and even though Huckleberry catches an
occasional mouse, he's not our first line of defense. (Our other cat,
Strider, is a lover, not a fighter.) We've learned the hard way that
it's essential to be hyper vigilant at this time of year --- at the
first sound of nibbling in the walls or sight of mouse droppings on the
counter, we pull out the traps with a vengeance. Mark talked me into
buying this super fancy trap
years ago, and it did work for a little while (as you can see above),
but then the scent of death built up and the mice started to avoid it.
Now, we tend to use cheaper traps, which we can reuse a few times until
they lose efficacy and then toss. Our favorite trap is currently one a lot like this.
When trapping mice, you'll
want to put the trap where you think a mouse might run. Mice are
skittish little varmints, so they're unlikely to head to your bait in
the middle of the floor; instead, set your trap against a wall in an
out-of-the-way spot (but near where you saw their signs). We sometimes
bait with peanut butter, but cheese has a higher success rate,
especially cheddar. I probably don't need to say it, but don't bother
with live traps --- moving animals around is never a good idea, and
unless you live way out in the country, the mouse is likely to head into
another home after you release it, where it will get killed anyway.
Another factor to keep in
mind is sealing away anything that a mouse might like. Food is obvious,
but clothing and toilet paper are also in great demand for bedding. An
average bureau doesn't really keep a mouse out, I've found, so
rubbermaid bins can sometimes be better. Barring that, I try to at least
go through each drawer on occasion so I don't miss a mouse nest being
built. If you have storage areas inside your home, don't pile things up
in such a manner that a cat can't get into the center to hunt, and do
check those little-used areas at intervals as well. Catching the first
few mice who drop by in the fall is only of middling difficulty, but if
you let them breed and have fifty mice to hunt down, your work will
really be cut out for you!
I hope that helps, and I'm
glad you're being proactive. In the city, roaches are probably the most
common vermin, but in the country, it's all about beating the mice. And
as cruel as it seems to kill them off in the fall, you'll be rewarded by
a winter sitting by the fire without the sound of nibbling in the
walls.
We got the first part of our
goat manger done today.
The access slots will be 2
inches wide and 4 inches tall.
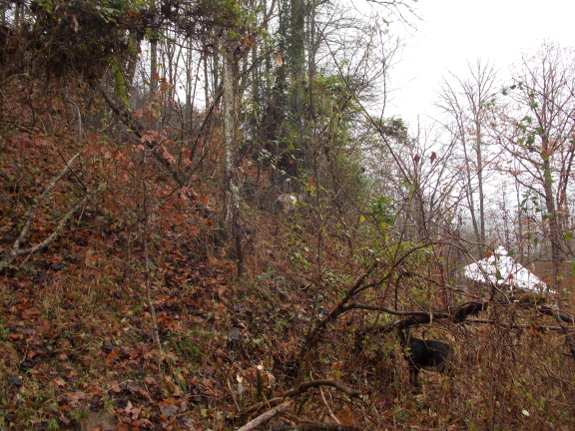
Ever since we got goats, I've been building them a new "tractor"
every day out of cattle panels. At first, that effort seemed very
worthwhile, since I was moving the girls around to eat all of the
honeysuckle off our fencelines and barn. But once I ran out of easy
honeysuckle buffets, it seemed like twenty minutes of labor for half a
belly of so-so food might not be as efficient a use of my time.
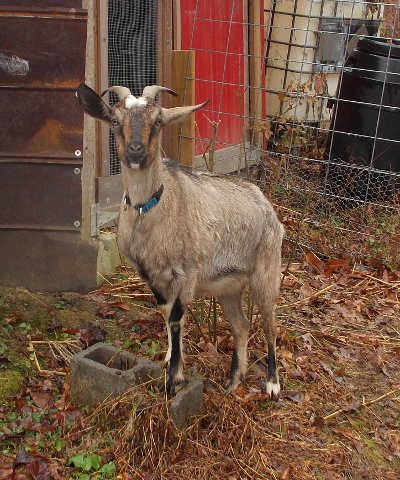 Monday
afternoon, I decided to let the girls run out in the woods...and boy
did they love it! If I don't have to ensure that the honeysuckle is all
concentrated in one place, there's still quite a bit out there, maybe a
few weeks' worth within a stone's throw of the coop. The question is ---
will I regret letting our goats run wild outside our core homestead?
The worst-case scenario
is that a trespassing hunter will think Abigail is a deer, or that the
pack of wild dogs who roam through our woods will get past Lucy's
defenses and try to eat Artemesia up. More likely (but only slightly
less heart-wrenching) is the possibility that our girls will hop right
over the chicken-wire fences that surround our core homestead and start
chowing down on apple-tree twigs.
To be entirely honest,
our goats have gotten out and ended up free in the yard a few times
already. So far, they seem much more interested in oat leaves than in
apple trees, so I'm willing to risk a few nibbles as long as I'm right
here to catch them in the act. Chances are good that if Artemesia got
loose in the garden, she'd just end up on the porch, as she has before,
asking why we haven't come out to play, so I'll try letting them out
into the woods for longer today. Here's hoping our goats aren't too
capricious and that they behave!
Abigail discovered how to
escape from one of her pastures today.
We think she used an edge on
the other side of this stump to climb up and over.
Trimming the stump and adding
a few pieces of wood might be enough to keep her in.
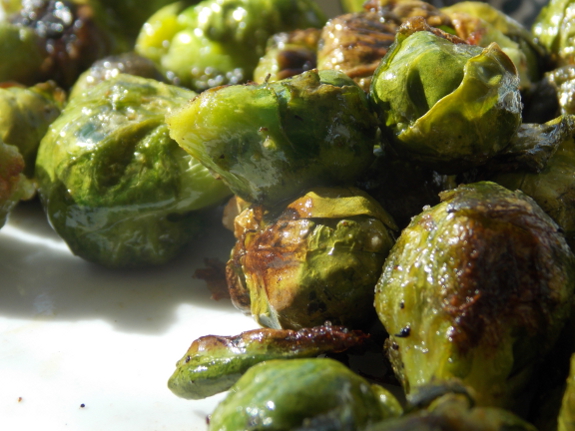
We enjoyed our first and possibly only roast brussels sprouts of the season Tuesday, the combination of a new variety and an extremely wet fall meaning that the plants blighted instead of thrived.
The experience made me think about how frequently home gardeners give
up on a crop because of a single failure, when what they really should
have gotten out of the experience was an impulse to figure out what made
their plants refuse to grow.
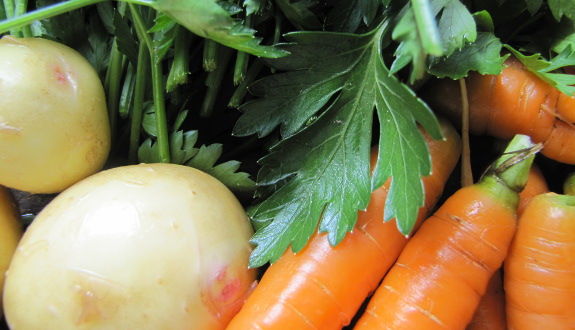
For example, I often hear
from folks who think carrots aren't worth growing, while for us the
tasty roots are an easy crop. Well, an easy crop as long as I pay
attention and make sure their seeds germinate during the summer heat.
And as long as I locate the root vegetables in loose, humus-rich soil. So, not really
an easy crop, but easy once you figure out what factors of your unique
site are standing in the way of getting a stellar carrot crop.
Now that the cold weather
has truly set in and most of you have nothing left to plant for the
year, why not spend a few hours thinking back over your garden past?
When you look at all of those luscious-looking pictures in the seed
catalogs this winter, try to ignore the pretty photos and tantalizing
descriptions. Instead, seek out the less sensational but more important
notes on which blights each variety is resistant to and how well they do
in other difficult situations that your garden will throw at them in
the year to come.
And, as a reward, next year your garden will grow twice as well!
Riding in our backseat lately is a rough equivalent to an old fashion hay ride.
 I
know that some weeks it seems like all I do is talk about goats and
books. So why not shake it up...and talk about goat books?!
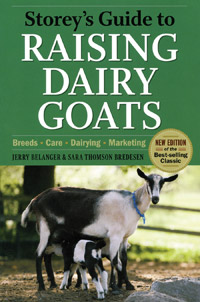
When I first started researching goats, my first stop was Storey's Guide to Raising Dairy Goats.
The Storey series is usually a safe bet for encyclopedia-style
information on livestock combined with beautiful pictures, and this book
was no different
(although a little less in-depth than some). If you've never met a goat
before and are only going to get one book, this is probably the one to
buy.
But once I finished that beginner guide...I still felt like a beginner. So I moved on to Raising Goats Naturally.
Deborah Niemann's book is also an introduction to goat care, but it's
written in a more chatty, first-person fashion (a lot like my own
books), which I suspect turns some people away. However, since I'm aware
that all one-author books inevitably share that person's biases and 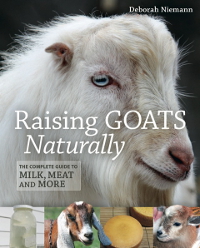 knowledge
gaps, I enjoyed the honesty of Niemann's book and definitely pulled out
some interesting tidbits that weren't covered in the Storey guide.
Specifically, I learned that you should always breed miniature or
partially miniature goats with bucks that are as small as the doe or
smaller so that you don't have to worry about extra-large kids causing
problems coming out. This and other factoids probably seem obvious to
many of you, but I sucked them up happily, glad to have someone else's
experiences to help me avoid beginner mistakes.
By the time I finished
Niemann's book, I was starting to feel more like an accomplished
goatkeeper...but I still didn't have goats. Since I couldn't move up our
goat-arrival date, I settled on getting another book instead, this time
Natural Goat Care by Pat Coleby. I'll admit up front that our two spoiled darlings arrived when I was only a 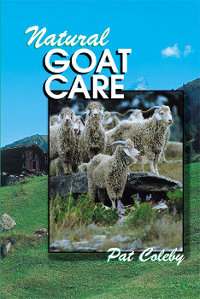 quarter
of the way through Coleby's book and my attention quickly turned to
real, live goats, so I've still got a lot left to read, but I think that
this book makes a very good addition to the beginning goatkeeper's
knowledge-base...as long as you take the contents with a grain of salt.
Coleby veers a little too far toward the personal-experience/no-science
side for my tastes in a few spots, but most of her book walks a more
middle ground. And she presents intriguing suggestions about how the
prehistory of goats impacts their current needs, explaining that goats'
tendency to browse on tree leaves means that the animals can develop
mineral deficiencies when dining primarily on short-rooted grasses in
human-build pastures. In turn, Coleby asserts that those cravings are
what spur goats to break out of our pastures...which may be wishful
thinking, but is worth considering.
I'd be curious to hear
from our readers. Which other goat books do you feel help beginners turn
into permaculture goat herders? Did I miss an obvious introductory text
from my lineup?
Of course the goats wanted to
be on top of the new manger.
The thin plywood lid was
collapsing when they stood on it, which could be a safety issue if they
fall the wrong way.
Adding some 2x4's for support
makes it more standable.
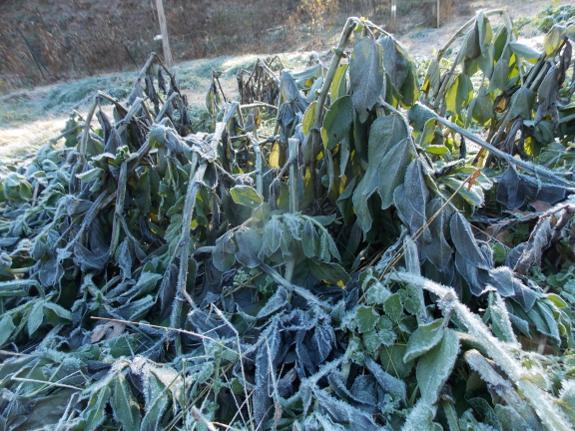
There's something
psychologically colder about nights that get down into the single
digits. Or maybe it's not completely psychological. Gates freeze shut,
my hands ache when I go out to do my morning chores, and the uncovered
winter crops begin to die back.
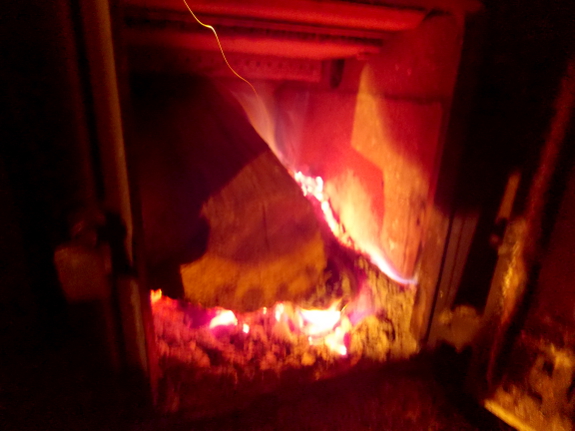
Last year at this time,
we enjoyed a similar cold spell, but the lowest low in November 2013 was
15. No wonder I ran through the firewood I had alloted for November
2014 by the middle of this month and have already started into
December's wood.
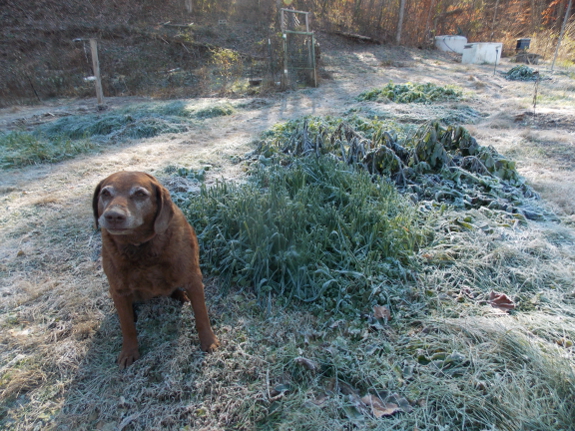
Everyone else on the farm
is glad that we're due to enjoy a bit more fall weather this coming
week as the current Arctic burst goes back where it belongs. But Lucy
loves the cold, so she might be sad to see it go. Don't worry, Lucy ---
there are many more frosty mornings ahead!
We transplanted some apple
trees this afternoon.
Honey Crisp will be in the
middle of Mr Winesap and Ms Red Delicious.
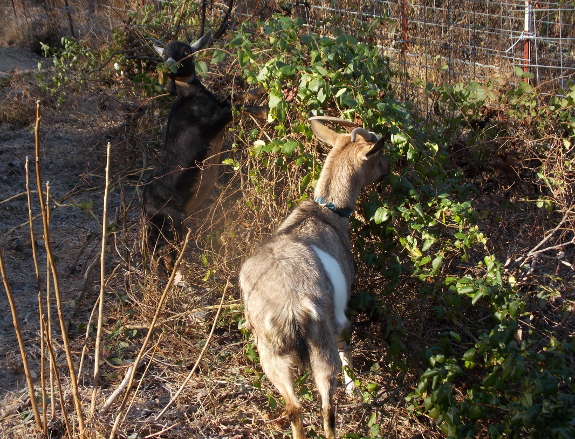
So, my goats-in-the-woods experiment
lasted all of about two hours. I let the girls loose, settled down to
write...and soon heard Artemesia yelling at the top of her lungs.
Abigail had circled around to the part of our boundary that has the
lowest fence and had hopped right over, but our doeling's stubby little
legs didn't allow her to follow. I guess it's a good thing that
Artemesia is part Nubian since there was no missing her anguished yells
as she was left 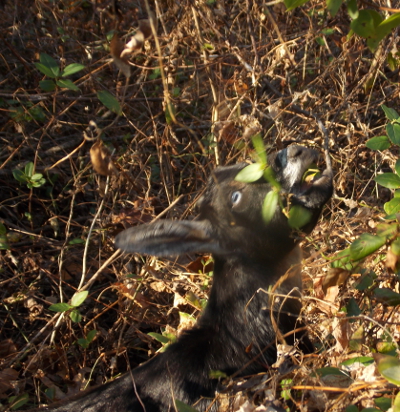 behind.
Or maybe our doeling was just telling on her big sister? Either way, I
pulled Abigail out of the garden before she could do any damage, then I
stuffed both goats back into the pasture with the honeysuckle trees shown above.
For experiment number
two, I decided to open the door on the far side of the starplate coop,
meaning that our goats would have to walk through some rough terrain to
circle around the fenced pastures and reach our core homestead. Sure
enough, when I came back from walking Lucy, I discovered that our goats
had decided to explore in the opposite direction. But Artemesia was
yelling again, and I got worried (even though our doeling sometimes just
likes to yell) and went to see what was up. No one was in trouble, but
both goats followed me right home, negating that experiment.
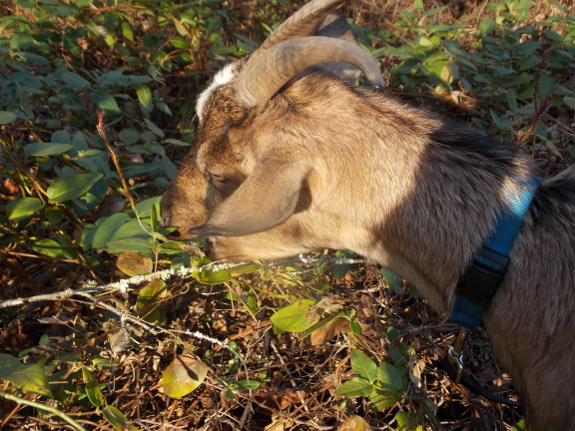
Next, I decided to try tethering Abigail
on the far side of the starplate coop. I figured that Artemesia would
stay close to her companion, and that everyone would be happy. So when I
heard non-Nubian yelling I guessed that our doe must have gotten her
chain hung up. Nope. Artemesia had decided to wander far afield in
search of honeysuckle, and her big sister was having a fit at being left
alone. So, once again, I stuffed the girls back into the pasture for
safe keeping. I guess they're stuck eating hay
now except when I take them out on monitored walks...unless I come up
with another supposedly bright technique for letting them run wild in
the woods.
I was a little worried about having the goats grazing on oats so close to our new apple trees, but it seems like they're not interested in anything with bark yet.
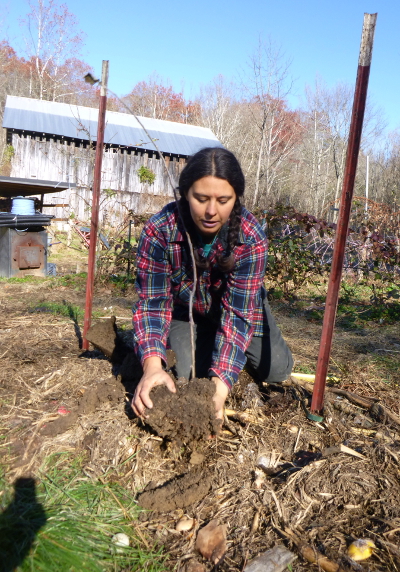 Although it's a little premature to count our two-year-old high-density apple experiment
as a success (since frost nipped all of the blooms this spring), I'm
feeling very positive about the system. Planting the apple trees close
together allows me to try out lots of different varieties, which in turn
makes it easy to select varieties that resist cedar apple rust and our other local bugaboos. The high-density row doesn't take up much precious garden space, and the summer pruning (although frequent) is simple and fun. No wonder Mark and I chose to plant two more high-density apple rows this fall!
With this second
planting, I'm experimenting in three different directions. Two years
ago, I mostly chose trees grafted onto Bud 9, M26, and Geneva 11
rootstock, meaning that the trees are true dwarfs, but I also included
two trees on a semi-dwarf (MM111)
rootstock. The semidwarf trees grew very well...but they've already gotten
quite a bit bigger than their neighbors. So, when I grafted 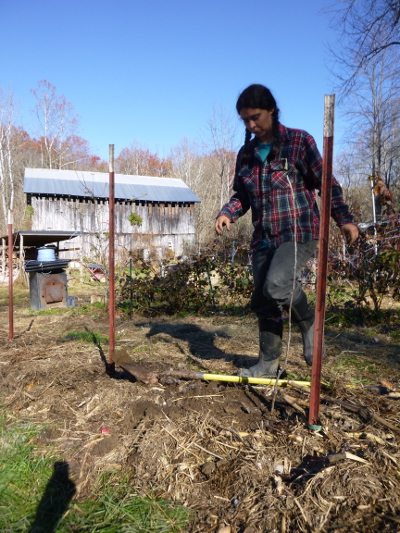 onto
MM111
for some of this year's new trees, I expanded the within-row spacing to 6
feet, hoping that the additional elbow room will help our semidwarf
apples
achieve their full potential while still toeing the high-density line. I
also plan to train the MM111 trees' limbs down considerably below the
horizontal this time around, which I was a bit more cautious about in
previous years but which I've since decided is definitely a good option
for
high-density apples in the backyard.
I also opted to branch
out and try yet another rootstock this year --- M7, which will produce
trees midway in size between the true dwarfs on Bud 9 and the semidwarfs
on MM111. My M7 trees went into the ground at 53-inch spacing but will
otherwise be treated the same as the MM111 trees. I'll be curious
to see, over the next few years, which rootstock turns out to be the best
fit for high-density plantings on our farm. It's a bit of a tradeoff ---
the more dwarfing the rootstock, the more precocious the tree, meaning
that we'll get more fruits faster. But, at the same time, truly dwarf
rootstocks have a hard time growing if you don't give them constant TLC,
and a few of the trees in my original planting (on Geneva-11 or Bud 9
rootstock) did fail to thrive.
Hopefully, either the M7 or MM111 trees (or both) will provide a happy
middle ground --- apple trees that do pretty well without watering and
other bonus attention, but that also produce within a few years after
planting.
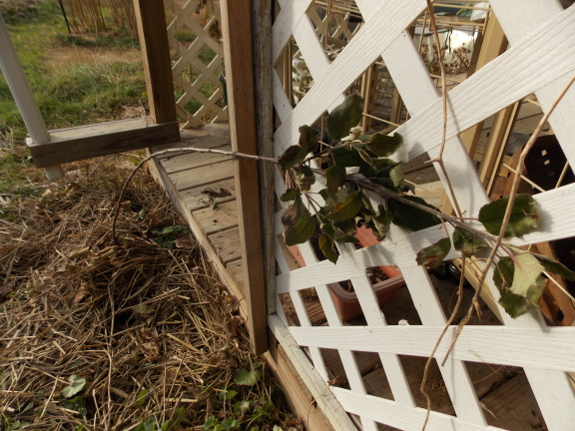
I've read lots of good and bad about espaliers (my third high-density apple experiment), so I earmarked only one tree for this final endeavor.
I settled on an informal design set against the south side of our front
porch and began by bending the young tree so the top was nearly
horizontal. As watersprouts inevitably pop up from the flattened trunk,
I'll probably bend them at a 45-degree angle to create a type of lattice
pattern...or whatever seems to make sense from the growth pattern of the
tree. Since I'm far from confident that my espalier will thrive,
though, I chose our Chestnut Crab for the experiment ---after all, I'm
mostly growing this sweet crabapple variety out of sentimental attachment to a similar
tree of my youth, so I won't feel too bad if I don't get high yields.
I'll keep you posted on
all three new plantings in the years ahead...and hopefully will be able
to report in summer 2015 about our first big crop from our older
high-density planting. In the meantime, stay tuned for another post
about next year's high-density experiment, which will veer off in yet
another direction.
This is the first year we've
trained Huckleberry and Strider to be good in the morning.
They've had to sleep on the
porch at night due to Huckleberry's problem of waking everybody up at
the crack of dawn.
With this new hallway door we
block off his chance to be a morning cat.
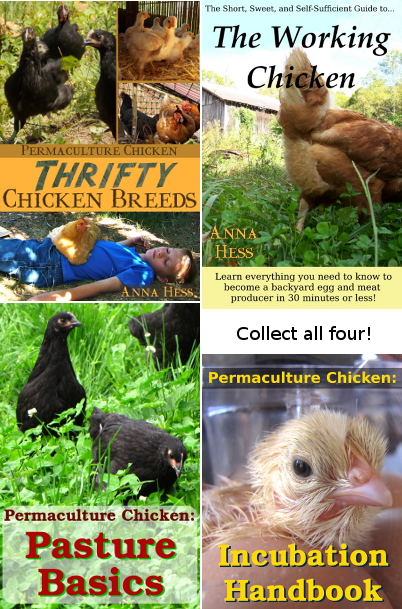 The
chicken-lovers among you will be thrilled to hear that I'm celebrating
Thanksgiving early by putting my chicken books on sale! But before you
go nodding off, you can get the first book without plunking down a cent
--- The Working Chicken is currently free on Smashwords and at Barnes & Noble.
Find out why hard-nosed homesteaders don't name their chickens and much
more in this photo-rich introduction to backyard chicken care.
If that introduction tempts your appetite, my more in-depth series, Permaculture Chicken,
includes three books bound to make your chicken-keeping adventure run
more smoothly. And each ebook is marked down to 99 cents this week ---
buy them all and save 74%! Here are the links: Permaculture Chicken: Incubation Handbook, Pasture Basics, and Thrifty Chicken Breeds. Maybe next year you can grow your own free-range chicken for Thanksgiving!
Thanks for reading! And if you like what you read, why not make my day by leaving a review?
The trick to pulling
honeysuckle vines from tall trees is pressure.
Pull too quick and the leaves
can strip off.
A slow and steady pace seems
to yield the best results.
 We
live deep down in a valley (known locally as a holler) where we seldom
feel breezes and even less seldom are faced with strong winds. So...I
get lazy. I lay down cardboard kill mulches
with just a rock or two to weigh the sheets down (if that), and this
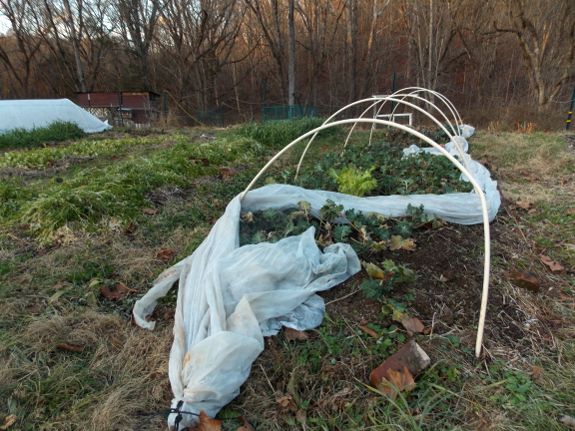
fall I minimized the number of bricks holding down the sides of our quick hoops to a mere six per 15-foot span.
But I've noticed recently that big changes in temperature do bring
winds, even down here in our holler. And those roaring winds toss
cardboard around the yard and whip right through lazily built quick
hoops. The results are shown above.
When I went out to fix my quick hoops Monday afternoon, though, I still didn't
increase the brick count. With one wind rushing through our valley
already this winter, chances are we won't see another until March.
In an earlier post, I teased you by saying that next year's high-density
experiment will veer off in an entirely new direction. But, really, it's
the same experiment...just with a different species of tree.
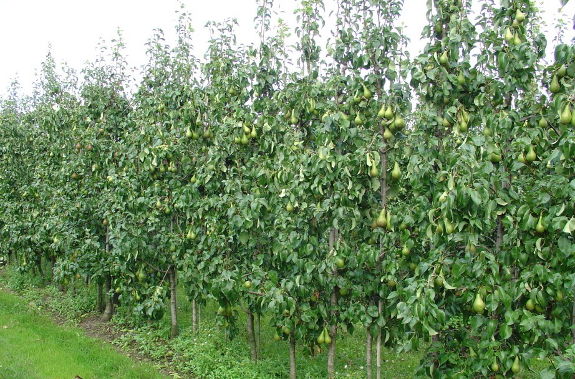
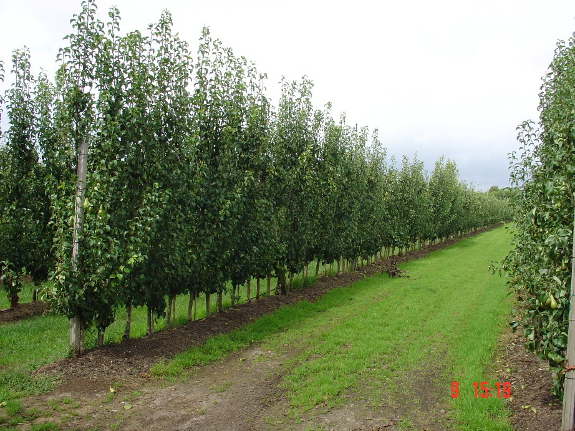
High-density apple
orchards have become big business in the U.S., but at this time, pears
are mostly grown in a more traditional, spaced-out setting. However, one
report I read mentioned that high-density pear plantings are already
common in Europe, suggesting that close plantings can be appropriate for
this other pome as well. Since I have several additional pear varieties that I want to try out
but not enough space for several additional full-size trees, I figured
--- why not experiment with a high-density planting for pears?
The best option for
high-density pear trees appears to be a 4-foot spacing with the limbs
tied down to 45 degrees below the horizontal. To make this work, the
New York State Horticultural Society experimenters recommend using
semidwarf rootstocks like OHF87, which
appeared to be quite acceptable in high-density plantings during the
eight
years of their study (and, the author thought, most likely also for the
entire
life span of the orchard). I ended up buying OHF513 instead for my own
planting since the nursery I wanted to order from uses this
similarly-sized rootstock rather than OHF87, so I guess in a few years
I'll be able to report on how well OHF513 does for high-density
plantings.
There are a few downsides to high-density pear
plantings that aren't a factor when similar strategies are used on apples. First, the
fruits on high-density pear trees tend to be on the small side, and pear
rootstocks also aren't as precocious as those used to dwarf apples. As a
result, the high-density pear researchers found that, even when
planting feathered trees, you really shouldn't expect your first small
pear crop until the third year after planting, and major production
won't begin until the fourth year. If you're starting with rootstocks that you
graft at home, you should add another year onto that figure, meaning
that we probably won't see any pears from our planned row until about
2018.
But what could be more
fun than grafting five little pear trees and setting aside another
garden row for planting out the young trees at this time next year?
Nothing! So, of course, I have to give it a shot.
I was skeptical about how
well the shapening
stone on the Oregon
battery powered chainsaw
would work, but I've used it several times now and it really makes the
chain sharper with just a short pull on the sharpening lever.
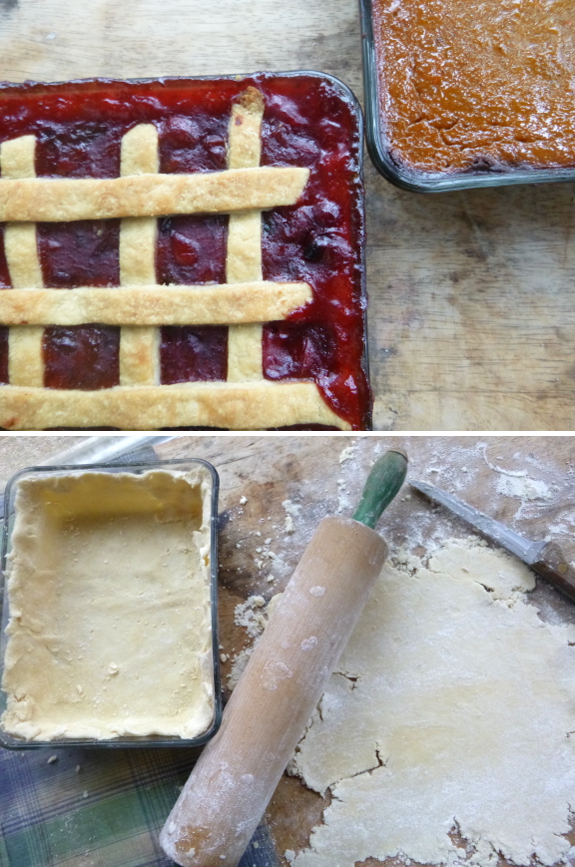
I know, I know, pies are
meant to be round. But this Thanksgiving, pies are squared (or at least
rectangular). In the past, I've carefully carried pies out across our
floodplain...only to find specks of mud atop my perfect crust or
meringue once we reached our destination. Not this year! Instead, I've
upgraded to lidded casserole dishes...which have the added benefit of
making a very deep-dish pie.
I hope your pies are similarly mud-free! Happy Thanksgiving!
 Lack of humidity is not
something our farm usually suffers from. But last week's cold spell was
notable in the extremely low water content of the air, which led to all
kinds of minor discomforts in my nose and lips.
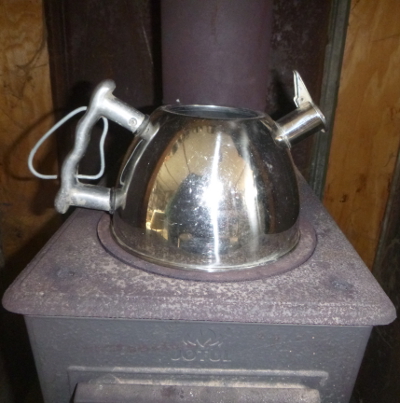
Luckily, Mark can fix
just about anything. He was less than impressed with the pots I pulled
out of kitchen circulation to fill with water and place atop the wood
stove, so he instead went out and tracked down an old tea kettle. The
vessel had been used as part of a deer deterrent,
but with our deer situation much more under control lately, we felt
comfortable repurposing the kettle as a wood-stove humidifier.
I wonder what this repurposed kettle will turn into next. Heck, maybe we'll even use it to make tea!
I killed another camera.
I'm sure the painfully short, 1.5-year life cycle of my fancy cameras
has nothing to do with the way I use the devices in the garden with
muddy hands, take photos in the drizzling rain, and leave cameras lying
in the grass all afternoon while I work. Surely the malfunctions are
really all shoddy manufacturing, right?
 Anyway,
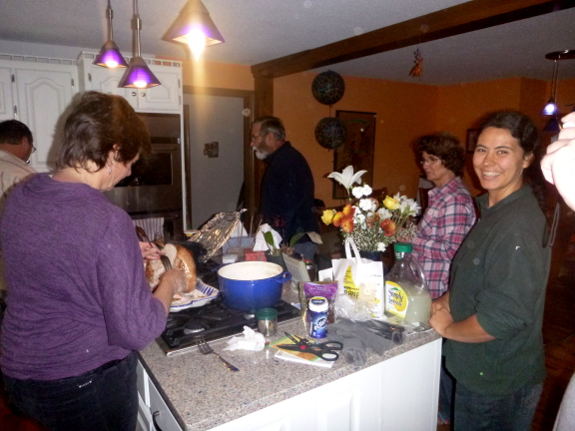
to cut a long story short, I had no camera with me for Thanksgiving,
and Mark took only four photos, so the unstructured view above of our
family will have to do. More relevantly, this is your warning that
photos will be a bit scanty for the next week here on the blog. But I have opted to splurge on a supposedly water- and dust-resistant camera, which should arrive in early December. Maybe I'll manage not to kill it too quickly?
(Because, yes, the more obvious solution of only using my camera with dry, clean hands just isn't going to happen.)
We borrowed a new electric
fence system over the Holiday. (Thanks Errol)
I think it might take a few
days of cloudy sunshine to charge up the solar charger?
If it works the goats will
have a bigger pasture area to roam around in.
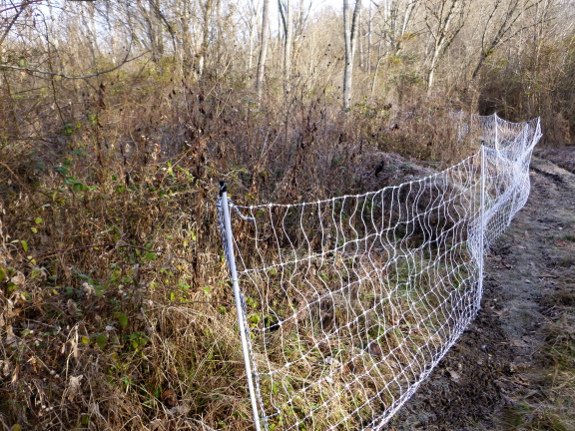
Daddy lent us a solar
charger plus two 164-foot lengths of poultry netting for goat
experimentation. (Thank you!!) Of course, I immediately came up with a
slew of questions, such as...
...Will the fencing work if I run it through heavy weeds, just knocking a path open with my foot?

...Do we really need the
three deep grounding rods we're instructed to install if I'm grounding
the fencing in what's basically a swamp? And do people who move
temporary electric fencing daily really drive in multiple grounding rods
(and then pull them back out) at each location?
...How long will the charger have to soak up sunlight during a cloudy, winter period to save up enough juice to shock our goats?
...Will our goats remember the electric netting both were living in a couple of months ago, or will they have to be retrained?
...Did Daddy really think that, if this works, he's ever getting his expensive hardware back?
We've got an electric
fence tester, but it's
hard to see the lights during the day.
Someone should make one that
uses beeps to tell how much voltage you have.
I prefer the old fashion
method of touching the fence.
Want more in-depth information? Browse through our books.
Or explore more posts by date or by subject.
About us: Anna Hess and Mark Hamilton spent over a decade living self-sufficiently in the mountains of Virginia before moving north to start over from scratch in the foothills of Ohio. They've experimented with permaculture, no-till gardening, trailersteading, home-based microbusinesses and much more, writing about their adventures in both blogs and books.
