
archives for 09/2014
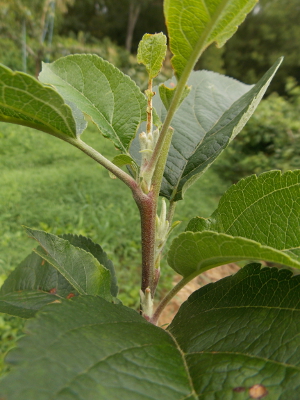 Most
folks will tell you to leave a grafted apple alone for its first year
of life. The goal is for it to grow straight and tall, into a
one-year-old whip that is hopefully four feet tall (for an apple on MM111).
That makes a lot of sense if you want a tree to achieve its full height potential, but what if you plan to use high-density methods to fit more apples into a smaller space? As our grafted trees
surpassed waist height, it occurred to me that if I want branching to
begin relatively close to the ground, I might as well break the apical
dominance now rather than waiting until this winter to begin
pruning. The photo to the left shows what happens a couple of
weeks after snipping the top off one of the whips --- new branches begin
to form in the leaf axils of the top three leaves or so.
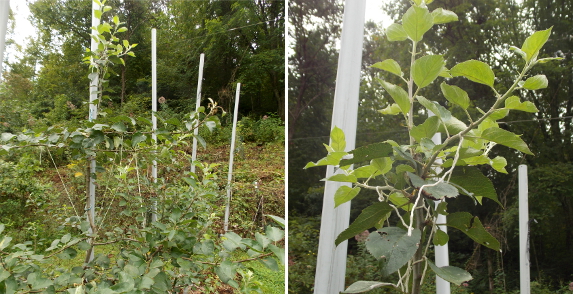
What next? The
photos above show an apple on MM111 rootstock that is several years
older, and also several weeks further along in its top-snipping
adventure. As you can see, I've tied down all but one of the new
branches so the tree will once again enjoy apical dominance while
turning the horizontal twigs into scaffolds. On a vigorous tree
like this one, I've managed to snip the top off the tree twice this year
(if I recall correctly), building two whorls of scaffolds in one
summer.
I doubt our little
grafted trees will put out much more growth this summer, but hopefully
they'll sink at least a little energy into the new branches. If
all goes as planned, when I transplant them to their new homes this
winter, they'll be a bit further along than the typical one-year-old
whip.
What's the best way to store
a year's worth of harvested onions?
We like to use old citrus
bags and sort out the damaged ones to be used first.
 The
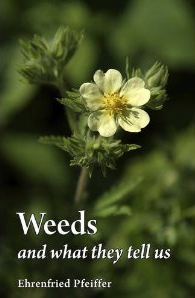
hypothesis I often see put forth by the permaculture community is that
you can use weeds to discover imbalances in your soil. When I finally tracked down the best book on the subject, though, I was disappointed.
Since then, I've come to my own conclusions --- problematic weeds are
an indicator of issues with your management strategy, not necessarily of
problems with the ground underfoot.
Since I tweak my
gardening techniques every year, it's no surprise that our worst weeds
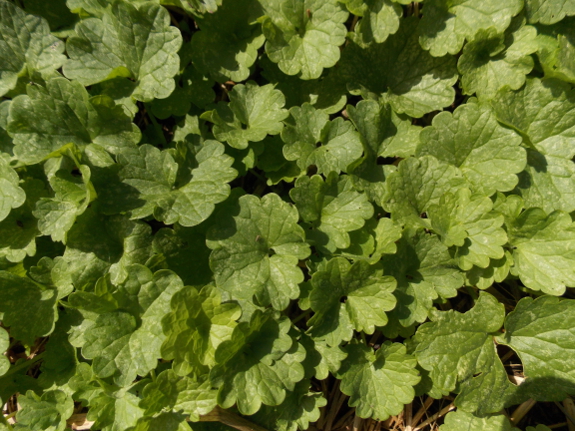
change with the times. This year's doozy is a plant that I used to
consider barely noticeable --- ground ivy (Glechoma hederacea),
which is pictured above. My mother enjoys this plant in her
garden for its bee-friendly spring flowers, its pleasant aroma, and the
way it quickly covers the ground. Unfortunately, ground ivy wreaks
havoc with the mulched areas since it quickly grows amid straw and
makes you lose most of your mulch when you rip it out.
Why is ground ivy
suddenly a big problem for us? I only see the weed in the shadier
parts of my garden, and primarily during wet years, making me think that
there's something about cool, wet conditions that gives ground ivy a
foothold over the grass that's supposed to be colonizing the garden aisles.
I can't do anything about the weather, but I can change a management
technique that I think has been giving the ground ivy a foothold in the
front garden aisles --- weedeating. Until this summer, Mark was in
charge of cutting our "lawn," and he generally opted to weedeat the
front garden rather than mow it since the aisles aren't very
linear. However, close cutting can promote ground ivy over grass,
especially in shady areas. Time to commit to mowing instead of
whacking the front garden grass!
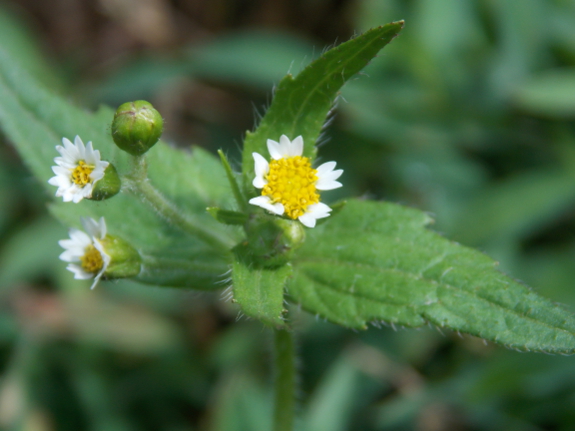
When I first identified
our second troublesome weed of 2014, the book I looked it up in gave it
the appellation "devil's racehorse." I haven't been able to track
down the source of that name, and now call the weed by its more common
names (quickweed, shaggy soldier, Galinsoga quadriradiata).
But the colorful name that originally made me scratch my head makes so
much sense now that I garden --- quickweed will take over a garden
lickety split.
While ground ivy is the
bane of my existence in the shady front garden, quickweed makes its
annoying presence known in the sunny mule garden. I made the
mistake about three years ago of letting a single plant go to seed in a
garden bed there, and the result has been nearly endless handweeding of
every crop I've grown in that spot thereafter. The solution here
is pretty simple --- whatever you do, don't let quickweed go to seed in
your garden!
Have you learned from your garden weeds? If so, which ones taught you memorable lessons?
There's still no sign of the egg
eating snake. I think we
ran him off.
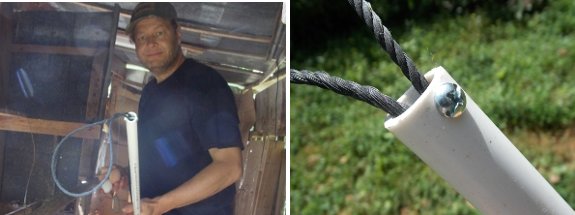
Looking at other snare poles
online prompted me to add a top bolt to ours.
I also tied a knot at the
other end so it all stays together.
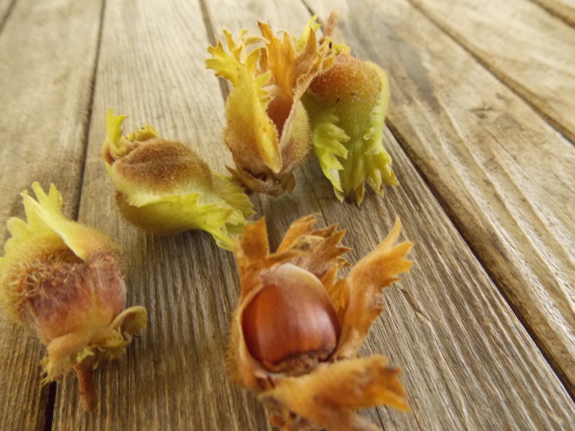
As I peered at our hazelnut bush yesterday morning, I reached out to touch one of the developing fruits...and it fell into my hand. Time to harvest!
Unlike most fruits,
hazelnuts are nearly impossible to see on the bush since they're
surrounded by leaf-like husks. So I opted for the lazy harvest
approach --- I carefully shook a branch, watched to see if anything fell
off, and then picked up the nut that had dropped. I could tell
that at least one of the nuts wasn't yet ready to harvest using the
shake method, so I'll go back around and try again next week.
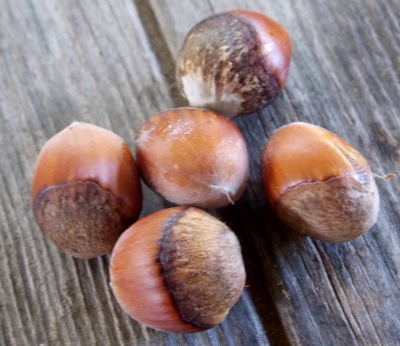 This
is the first year we've gotten anything from our bush, so the harvest
was small --- five tiny nuts. I took them out of their hulls and
will let them cure for a week or two before tasting. The big
question is --- how thick is the shell and how big is the kernel
inside? The bush in question came from Arbor Day's breeding campaign, when folks were just starting to hybridize American and European hazelnuts
in an attempt to combine the blight-resistance of the former and the
large kernel and thin shell of the latter. Stay tuned for the big
reveal....
(Yes, I am nuts to be so invested in...nuts....)
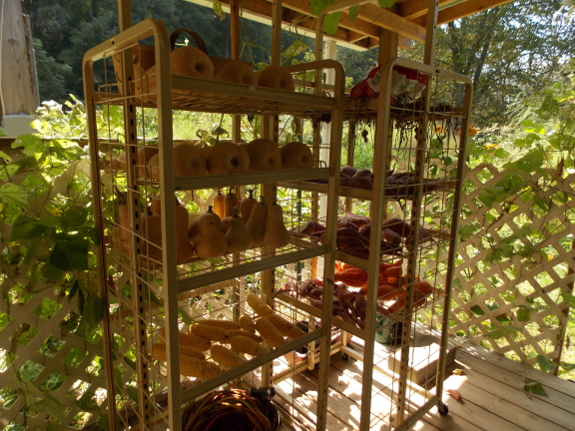
Our total butternut
squash harvest this year
was 27.
We like to get them nice and
clean before storing
them for the Winter.

I put it off and put it
off and put it off, but eventually the time came to try our hands once
again at killing (and plucking) ducks. By waiting so long, I hoped
that all of the ducks would be done molting (which was true for two of
the three ducks we processed this week). Plus, once September
hits, the garden year is starting to wind down (although there's still
plenty to do), so stealing a morning for poultry butchering seems more
feasible.
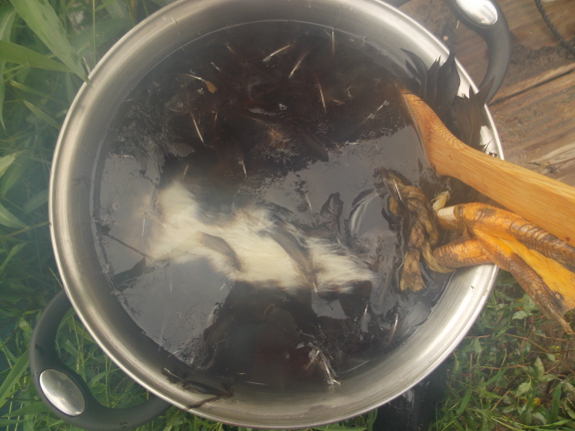
You may recall that, last time around, I ended up skinning our duck rather than plucking.
Since then, I accumulated some tips from a reader who prefers to remain
anonymous, the most important of which was --- try heating the scalding
water all the way to boiling rather than stopping at the recommended
temperature. Sure enough, boiling water (and lack of pin feathers)
changed duck plucking from utterly impossible to merely tedious.
We included a generous squirt of dish fluid in the water, roughed up the
duck's feathers while dunking the duck, and then let the duck sit for
several minutes in the hot liquid. This was still insufficient to
allow us to use a power plucker
to remove feathers, but we did manage to kill, pluck, and dress that
duck in 45 man-minutes --- not great by chicken standards, but feasible.
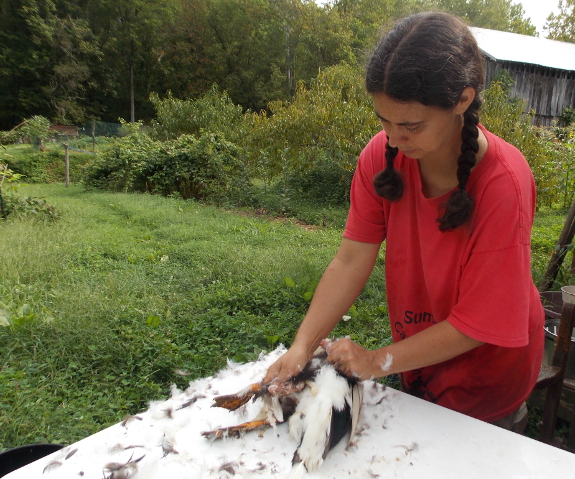
When the time came to
move to duck two, though, I decided to try dry plucking. Damp down
quickly coated my fingers while plucking duck one, and the down was
much more annoying to work around than wet chicken feathers. So I
pulled out handfuls of down before dunking the duck and found that the
down was much more pleasant (if no faster) to remove when dry.
(This method would also have allowed me to save the down for stuffing,
although I was too focused on experimenting with plucking techniques to
do so this time around.) The wing and tail feathers were too tough
to remove dry, though, so I dunked the dunk in the boiling water before
moving on to these larger feathers. The result was a duck
processed in 50 man-minutes, but resulting in a much cleaner carcass
than I managed with duck one.
Duck three was the one
with pin feathers, and I don't want to write about that pain and
suffering here. Ack! I survived (and the duck, obviously,
didn't).
Anyway, to cut a long
story short, my conclusion is --- dry plucking is a little slower than
wet plucking but is much more pleasant. And, whatever it takes,
wait until those ducks stop molting before butchering!
We continue to be impressed
with the Oregon
battery powered chainsaw.
It took about 50 minutes for
Anna and me to cut up some tree limbs.
The charge indicator
was at the halfway point when we started, which means the battery time
is close to 2 hours depending on how much stopping you do between cuts.
It still had some juice left when the indicator display was at zero and
that's when we stopped.
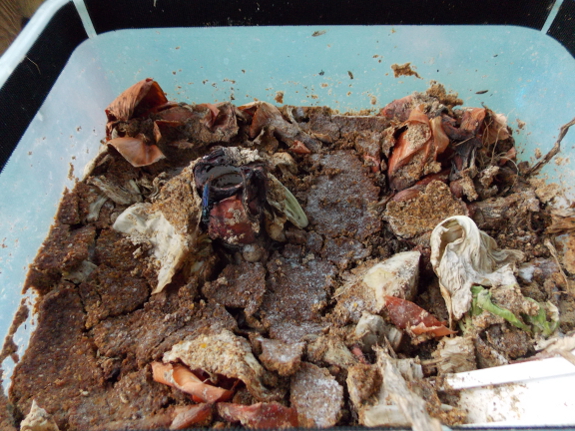
 How do you know when your black-soldier-fly bin
is fully colonized? Keep stuffing kitchen scraps in, and pay
attention to how quickly the contents decline in size. At first,
it'll be a bit like a compost pile --- wilting and general decomposition
will reduce your scraps' volume down a bit, allowing you to add more a
week or so later. Then, suddenly, your fly larvae get on the job
and the voracious grubs eat the contents in mere days.
I'll be posting over on our chicken blog
next week about what we're feeding our black soldier flies, and about
our first trial of offering the pupae to our chickens. But I
thought you'd like to see a few photos of the bin in action in the
meantime.
There are now hundreds of grubs of various sizes visible through the walls of the bin, a clear sign that the few larvae I added out of the yard, plus the batch of eggs we purchased, aren't the only source of larvae.
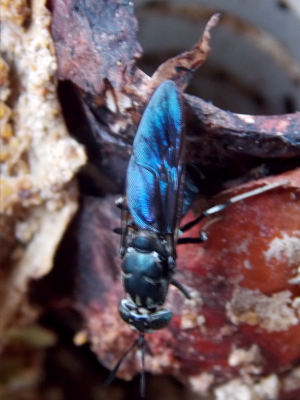
Not that I'd need that information, since I caught a female black
soldier fly in the act of laying her eggs on an onion skin. No o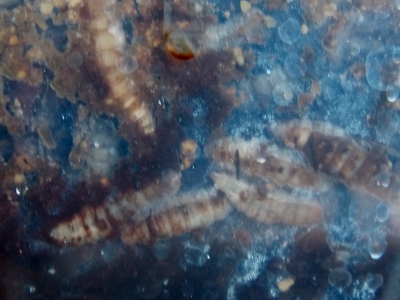 ne
seems interested in laying in the cardboard strips on the top of the
bin, but the cycle of life is definitely working anyway. I've also
seen a lot of yellow soldier flies buzzing around, presumably adding their offspring to the festival.
I love it when
experiments like this just work, with nearly no effort on our
part. Woohoo for a thriving black-soldier-fly bin!
We were eating figs
this time last year, but Winter
damage slowed things down.
I'm guessing it's still going
to be another week or two before the first one ripens.
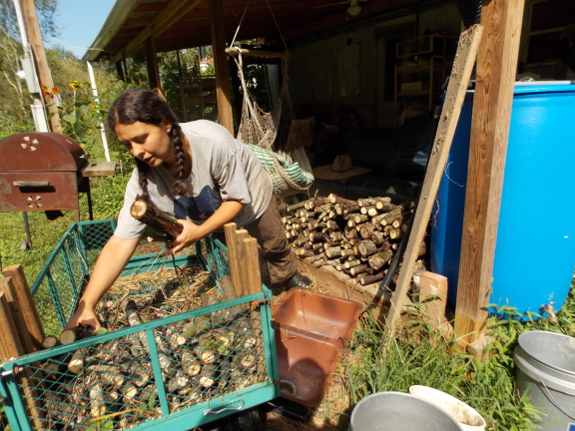
Some of you may be wondering if it's time effective to cut up the little branches Mark mentioned in a previous post for firewood. It does take a lot longer per Btu to cut small-diameter firewood, but these branches are perfect for short-lived fires during the shoulder season
(and you get some time back since they don't need to be split).
And, as Mark pointed out to me while we worked, this kind of wood is
very available for just about everyone since branches are often being
hauled away to the dump or to be burned even if you live in the
city. In our rural setting, the tops leftover from our previous
firewood sessions would just rot down to humus if we don't harvest the
wood.
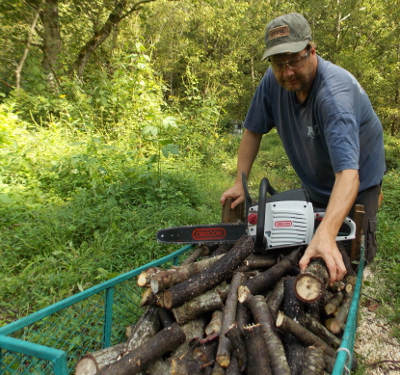 In
the past, we haven't cut much of this small-diameter firewood, though,
because it feels pretty inefficient when using a gas-powered
chainsaw. This is where the battery-powered saw
really shines. Since the saw's not using any energy except when
you're cutting, the operation is quiet (and fun!) and you don't feel
like you're burning more fuel than you're creating. (Do be sure to
build a firewood guide,
though, and to have one person hold the branch while the other
cuts. Mark thinks the battery saw is a little grabby, so you have
to use precautions when cutting small branches.)
That said, I think next
week it's time to really put our review saw through its paces. So
stay tuned for the third test --- whether a battery-powered chainsaw can
fell a two-foot-diameter tree.
Dried tomatoes are easy with our 9 tray Excalibur dryer with timer.
 Long-time readers will know I've been dreaming about milk goats for years. But Mark has been adamantly opposed, and we don't ever embark on projects when one partner is unwilling.
So, imagine my surprise when I teased Mark that Kayla
and I were getting a goat together...and he said I could have
one all for myself. Turns out, my adamant opposition to Mark's purchase of a
self-propelled, string mower is equivalent to his adamant opposition of
my purchase of a milk goat. "If you let me get a mower, then I'll
let you get a goat," Mark said. "I'll even help you milk
it." Much kissing and hugging ensued.
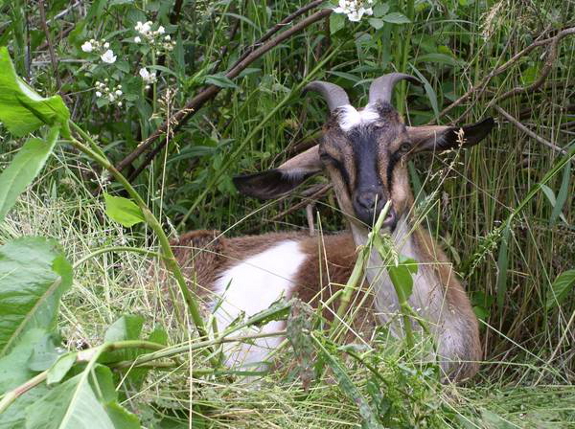
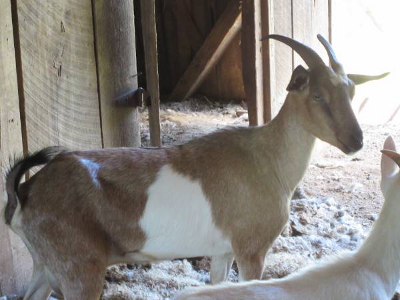 After rereading my goat book,
I decided that a mutt is probably our best option to learn on, and I
found the three or four year old girl pictured here on
craigslist. She's semi-dwarf, a combination of Saanen and Nigerian
with a bit of Nubian thrown in, and her mixed descent makes her quite
affordable ($125). She's been raised in a setting much like we
want to throw her into, and is reputed to give birth easily, to be
parasite resistant, and to have been giving a quart of milk a day while
feeding her kids on brush alone. Her owner is currently drying her
up and breeding her to a Saanen/Nigerian buck, and is willing to hold
onto her for a month while we get our act together (in the process
ensuring that the doe is really pregnant). Add in a wether (to
keep her company, source not yet decided), and this might be an easy way
to see whether we like goats during the winter, then to jump into
milking next spring.
It's a bit daunting to
make a commitment to branch out into larger livestock, so we haven't
decided quite yet. But I'd say we're 80% of the way there...and I let Mark
order his mower.
How do we store our dried
tomatoes?
1. Follow steps of Hollywood
Sun Dried Tomatoes.
2. Put in containers suitable
for freezing, label and store in freezer.
3. Resist the urge to eat
them all at one time, but instead wait until you need a dose of
sunshine when the short Winter days can sometimes get the better of us.

Original plan: Keep a mixed flock of ducks and chickens this winter to see whether it's true that waterfowl are better winter layers than land fowl.
Midsummer plan: Get rid of the ducks ASAP!
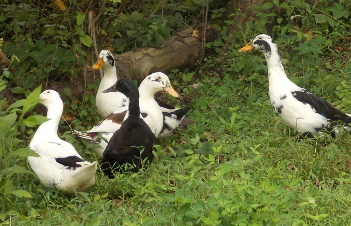 Late summer plan: Slaughter all the male ducks
(meaning we won't be raising waterfowl again next year), but keep the
girls for winter layers. Now that I treat the ducks like chickens (only giving them open water as a treat once a week
--- after all, it rains nearly every day), they're much easier to
handle. Sure, ducks don't forage as well as chickens on a
hillside, but the experiment is still worthy of carrying to its natural
conclusion...
...Especially since the
ducks are starting to lay! I found the first egg (slightly dirty
because we haven't built floor-level nest boxes yet) on Thursday and we
tasted it on Friday. The consensus was --- it tastes like an
egg. (By carefully eating bites of duck and chicken eggs side by
side, I could
detect a very slightly richer flavor in the former, but the difference
was very minor.) I'll be sure to report laying stats in a few
months once day length is at winter levels.
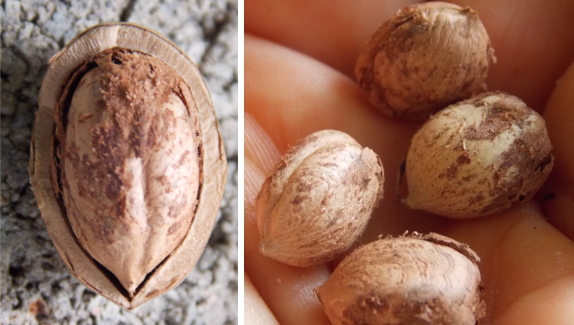
After a week of drying and a few hours in the dehydrator with the tomatoes, our first hazelnuts were ready for a taste test.
The shell-to-nut ratio was perfect and the roasted hazelnuts had a delicious flavor reminiscent of buttered popcorn.
Anna told me I have twelve months to come up with a powered nutcracker for next year's (hopefully) much larger crop.
 I
had forgotten how poor our soil used to be until I opened up some new
garden areas this year. Without frequent applications of manure,
straw, and cover crops
to build the organic-matter levels, our native soil is a cloddy mass of
pale silty-clay. Unsurprisingly, many crops failed to thrive in
this new ground...but others did even better. I figured you might
like hearing about the good and the bad in case you have poor-soil areas
of your own that you want to put into production now rather than
waiting until years of TLC turn your topsoil black.
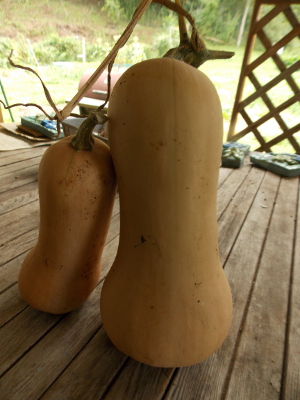
Who failed the
test? Carrots and butternuts both grew in the new ground, but
produced fruits and roots that were half the size of what I'm used
to. In the photo, the butternut on the right comes from an older
bed while the one on the left is representative of the squash we
harvested from the new bed. Total yield in the new ground was
about a third to a quarter of what I'd expect elsewhere for these two
crops.

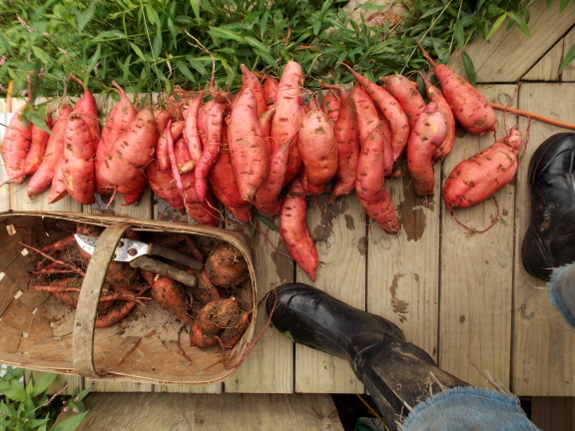
On the other hand,
sunflowers and sweet potatoes seemed to grow even better in the poor
soil. In the top photo, the potatoes in the basket all came from a
similar square footage (but from richer soil) as the huge number of
potatoes cleaned and stacked on the porch (that came from poorer
soil). Keep in mind that I did take the time to dig these new patches,
scooping the topsoil out of the aisles to double the height of the
growing beds (and I usually don't dig or till our established beds at
all). So, the thrivers may be responding to the fluffiness and
quick breakdown of organic matter into nitrogen that you find in
recently churned ground. Or maybe they just like low organic
matter and nutrient levels.
To paraphrase Tolstoy,
happy soils are all alike; every unhappy soil is unhappy in its own
way. So you might find that the crops that thrive in our poor soil
don't do so well in yours. Still, I'd be curious to hear from our
readers who have kept an eye on crops growing in good and poor parts of
their gardens. Which plants like and dislike the bad ground?
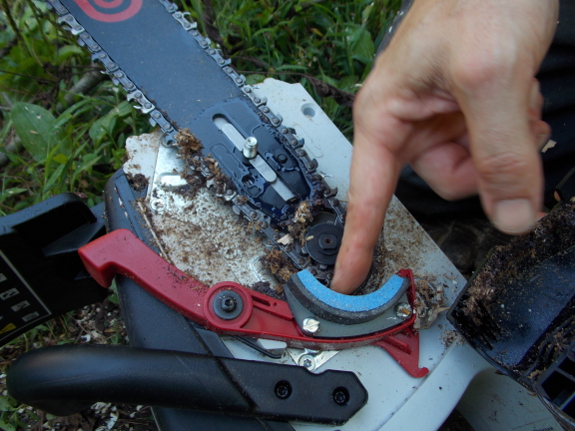
The Oregon
battery powered chainsaw has a nice self sharpening feature.
You pull up on the red lever
while it's running and a stone sharpens the chain.
It seems to work well as long
as you clear the area of stray wood chips.
The decision has been made! I mailed in our down-payment, and we'll pick up our nanny goat
in October. In the meantime, we've got lots to do and to
decide. For example, we're still not 100% sure whether we want to
start with the lowest-work option (one doe and one  wether)
or whether, since we're going to have two goats anyway, we might as
well bite the bullet and find another girl. On the plus side, two
girls would make us more likely to have enough milk to experiment with
cheese; on the minus side, two girls would mean double the kids to
manage in the spring and double the milking chores. At the moment,
we've resolved to let serendipity decide --- if another milk goat turns
up on craigslist in the next month that seems like a good fit for our
homestead, we'll go for it; otherwise, we'll find a cheap wether
somewhere to keep our first find company.
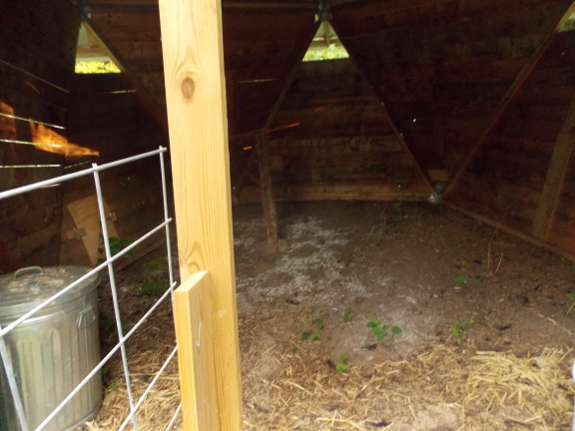
Since we won't be milking
at first, we can save half of our prep chores for later, but there's
still lots to do. It's time to finally add gates to our
starplate pastures, time to protect the one tree I care about that's
still growing there, and time to convert the starplate coop
into the starplate goat barn. The last task involves splitting
the building into stalls so the kids can be kept separate from the
mother(s) in the spring, adding food and water stations, and perhaps
making a food-storage room (to replace the metal garbage can we used
with chickens). My to-buy list currently includes hoof-trimming
supplies, loose minerals and maybe boluses for copper and kelp for
additional nutrition, leashes and breakaway collars, and a bit of feed
(although we're hoping to raise the goats on brush and weeds as much as
possible). And that doesn't even count the milking, kidding, and
disbudding supplies we'll need to think about before spring --- I guess
my goat endeavor is going to cost just as much as Mark's high-end mower.
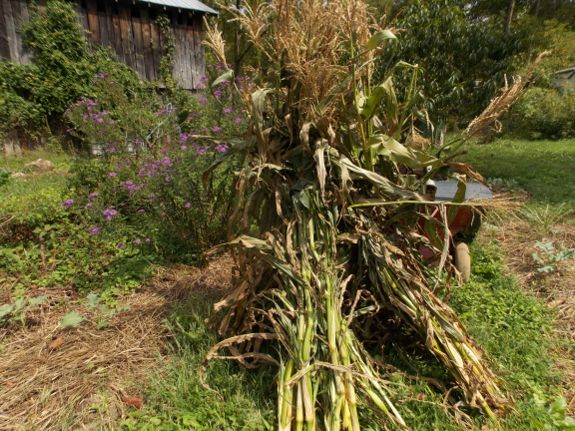
Then there are the less
essential preparations that just make me happy. I decided to dry
some sweet-corn stalks in a shock to see if the goats will enjoy them as
a midwinter snack, and I also draped the sweet potato vines across the
porch for a similar reason. Too bad we've passed the time to plant
carrots and mangels --- next year!
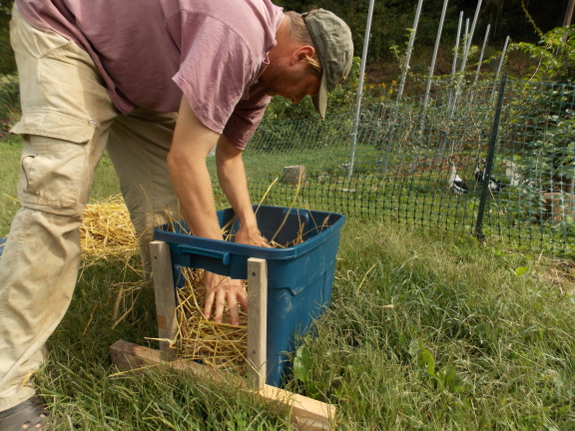
We chose an 18
gallon Rubbermaid storage box for our new duck nest box.
The bottom 2x4 extends out 6
inches past the edge to increase stability and provide a sturdy ledge
for the ducks to step on and over to get into the box.
Purchase price was 9 dollars
and it claims to be crack and weather resistant.
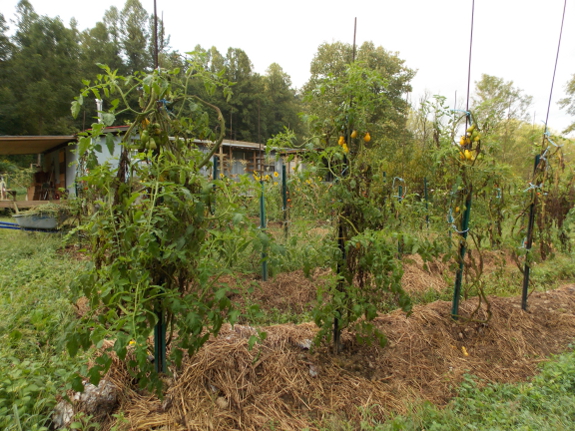
The first half of
September is a surprisingly busy time in our garden. Why the
surprise? Because most people are letting their summer vegetables
drift into weeds at this time of year...but I'm opening up areas as fast
as I can to plant oilseed radishes and oats as cover crops.
My method means that our farm's soil gets richer every year while weed
pressure gets lower and lower...but it does keep me hopping.
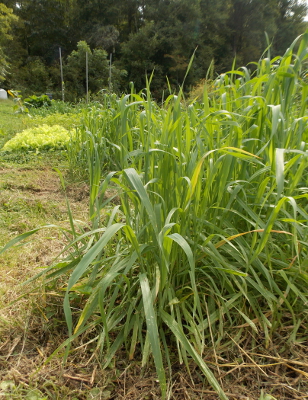 If
I didn't have an oat deadline to consider (September 15), then I'd let
beds of dwindling summer squash, cucumbers, bush beans, and mung beans
sit around and dribble in a bit more food. Instead, I rip them out
and plant cover crops. Similarly, I look at larger plants with a
stern eye --- will I lose much by raking back the mulch around declining
tomatoes and sowing oats to hold the soil over the winter?
Probably not, so oats it is!
I've read that some
old-timey farmers used to plant oats around their strawberry plants at
this time of year, growing mulch in place for the spring. I've
always been afraid of losing productivity in my favorite fruit, but I
opted to experiment with half of one bed this fall. Similarly, I
sowed oats beyond the canopy spread in our blueberry rows, hoping for a
bit of extra organic matter with little effort on my part.
Do I get to rest on my
laurels once the cover-crop deadline is past? Nope --- then it
will be time to weed the fall seedlings and plant a bunch of beds of
garlic. But I can definitely feel the garden locomotive slowing
down as it prepares to pull into the station and rest for the winter.
We decided the duck nest
box should be outside the coop for easy egg access.
I put a golf ball in the nest
to encourage the curious ones.
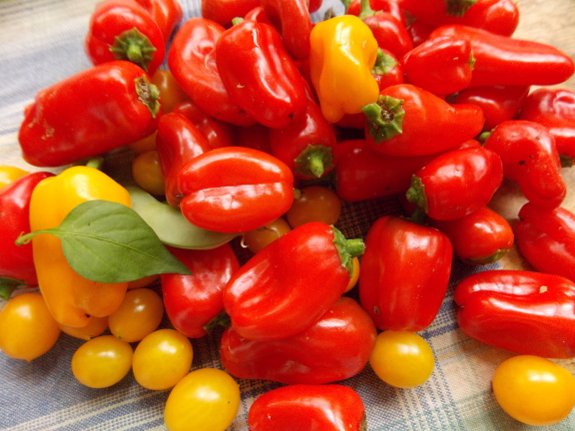
I think I may have found my new favorite sweet pepper. Too bad it's a hybrid!
I bought a packet of Lunchbox peppers from Johnny's this spring on a whim. We've been pretty happy growing pimento-type peppers
since the smaller fruits ripen up before frost even if I don't start
the plants inside ultra-early. But my heirloom variety started to
decline in vigor after a few years, perhaps because I didn't grow enough
plants to keep the gene bank deep.
 Anyway,
to cut a long story short, I chose two new varieties this spring,
selecting from among peppers with the fastest days-to-maturity.
The pimento-type pepper (Round of Hungary) that I tried this time around
did
ripen its first fruit just as quickly as the Lunchbox peppers, but the
former has been providing approximiately one red pepper per week from
three plants while the latter is overflowing with goodness from a
similar size planting. Even after adding peppers to our salad all
week, I still ended up with a bowful in need of preservation.
Lunchbox isn't really a
variety but a mix of three different types of pepper. Luckily for
me, most of my plants turned out to be the red type, since that one is
much more vigorous than the yellow and orange. The plants and
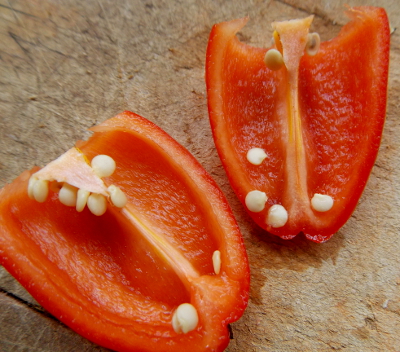
fruits look like hot peppers, but the peppers are sweet and delicious
(although with slightly thinner flesh than you'd expect in larger
peppers).
I wonder what I'd get if I saved the seeds of my Lunchbox peppers and tried the hybrid offspring in next year's garden?
The small,
multicolored sunflowers
were ready for harvesting today.
Most of our sunflower crop
still needs a few more weeks.
 I suspect we'll be making our own upgraded black-soldier-fly bin next year. The bin we bought
is an awesome introduction...but I keep overfilling it since I have 50
pounds of moldy chicken feed to work my way through. Last week,
the mass of decomposing chicken feed heated up so much that white larvae
crawled off, and even when I'm more careful, I feel like the bin is
getting waterlogged and full of castings when I add half a gallon of
chicken feed (soaked to become about a gallon) per week.
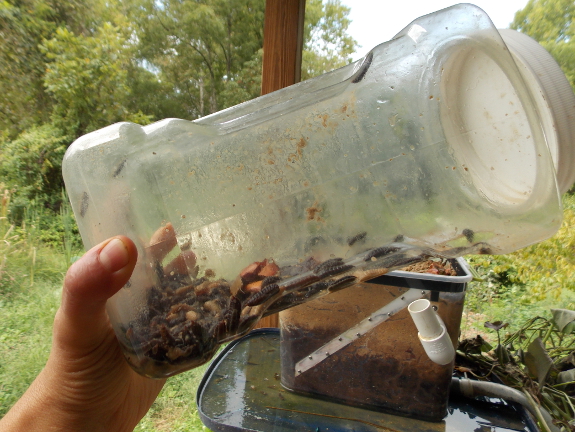
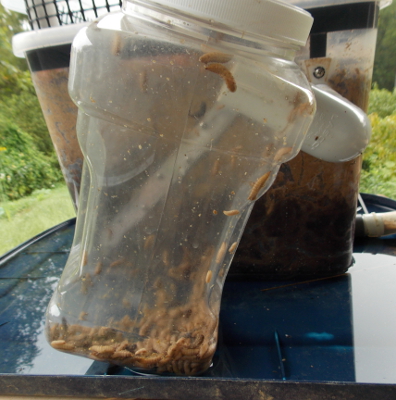
The photo above shows the
kind of crawl-off I'd rather see --- just the black pupae. This
type of heavy harvest comes about once a week, when I add more chicken
feed and soak the bin contents in the process. On other days, I
instead get perhaps a couple dozen pupae, still enough to make our
tractored hens happy. But more pupae is definitely better, and I
now understand why you might want to have a 10- or 20-gallon bin.
Or perhaps to have several smaller bins (although I'd still want them
all to be located right outside the back door where it's easy to put in
scraps and to take out pupae for the chickens).
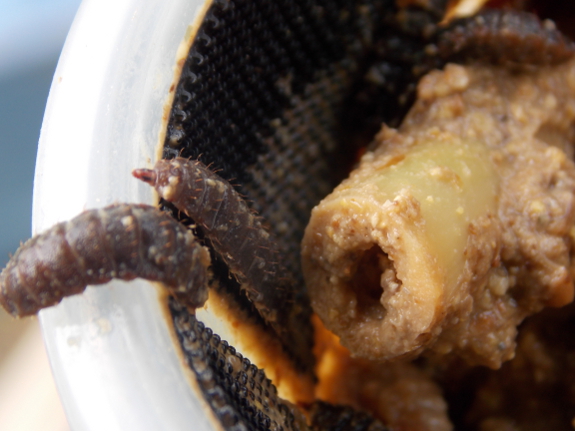
Meanwhile, there's at
least one feature of our current bin that I don't feel is working as it
should. The velcro strip around the top of the bin, meant to keep
pupae from escaping without crawling into the collection bin, has a gap
in each corner just big enough for pupae to wriggle through. I
keep finding drowned pupae in the ant-trap moat around the bin, which makes me sad.
While I'm writing a wish
list of future changes, I'd like to drill holes in the top of the
collection jar just large enough for an adult fly to escape, but too
small for a pupa to get 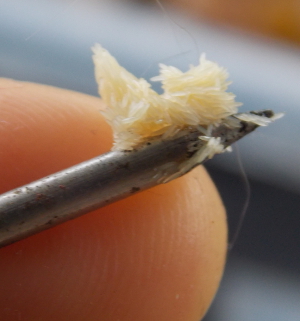 through.
Three times now, I've seen adult flies trapped in the collection bin,
once because I left a pupa inside too long and it hatched, but twice
because the flies went to lay their eggs in the main bin and ended up
exiting in a different direction.
That said, our bin is
providing a healthy dose of animal protein for our flock nearly every
day, and the number of larvae inside seems to keep growing. I
caught one fly laying eggs inside the handle of the drainpipe last week
(which I transferred to the bin), but I suspect there have been many
other sets of eggs laid without my notice. I'm definitely ready to
say that Mark is right --- black soldier flies are a good fit for our
farm. Now we just need to work the kinks out of the operation.
The new self propelled
trimmer mower showed up a week early.
Her first day on the job will
be Monday if it doesn't rain.
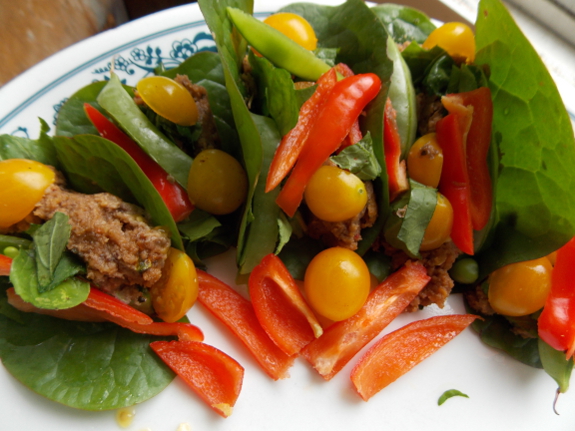
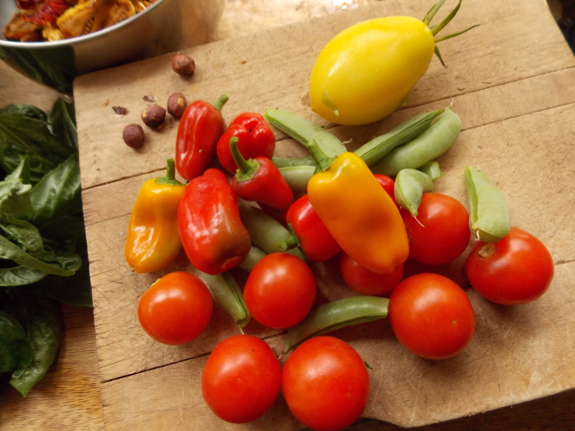
I wish I could give you a
solid recipe for the paste I made Saturday because it's based on beans
but even Mark found it delicious. (Plus, all of the ingredients
except the olive oil, salt, pepper, and walnuts are ripe on the farm
right now). But I mostly just put in some of this and some of that
until the paste tasted right. Here's my best guess on
proportions:
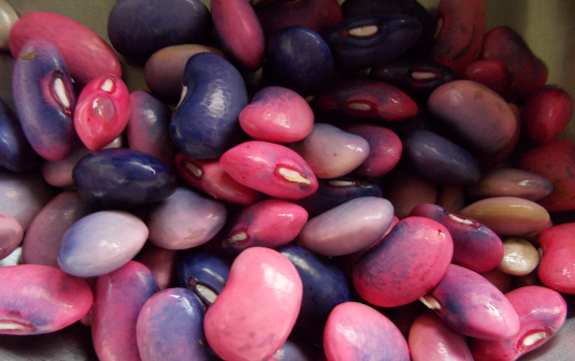
- 1 heaping cup of scarlet runner beans in the lima-bean stage, pods removed
- 1 cup of homemade chicken broth
- 2 small red peppers, minced
- 4 small sprigs of fresh thyme
- 1 large clove of garlic, minced
- salt and pepper
- olive oil (about 0.25 cups, enough to get the consistency hummusy)
- 1 large handful of dried tomatoes, on the soft side rather than thoroughly dried
- 1 small handful of walnuts
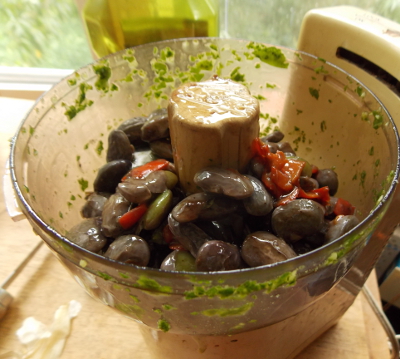 Cook
the beans, broth, peppers, thyme, and garlic in the chicken broth for
about 20 minutes, until the beans are soft. (Unfortunately, the
brilliant color goes away and the beans turn gray at this point.)
Cool, then puree the mixture in the food processor with the other
ingredients. If you're smart, you'll blend up the tomatoes and
walnuts first, but they worked out okay added in later.
Serving suggestion:
Make little tacos out of Malabar spinach leaves filled with bean paste,
chopped arugula, and thinly sliced tomatoes, red peppers, and edible-pod
peas. These can be eaten with one hand like a soft taco if you're
careful not to overfill. While this serving method is a bit
time-consuming to prepare, it's pretty and fun for a special
occasion! Happy birthday, farm!
Our old
ratchet straps are 5 years old and rusty.
My new method is to store the
new one in a ziploc bag to protect it from the elements.
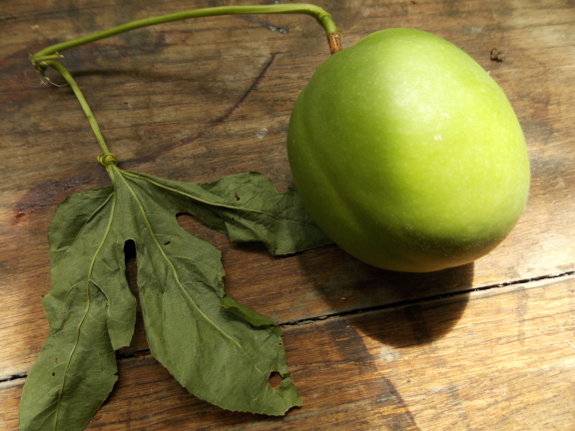
 One
of Mom's friends gave her this unripe passionflower fruit, which she
then passed along to me. Since the maypop is edible and the vine
is often included in permaculture texts, I might see if the fruit had
gotten far enough along on the vine to produce viable seeds.
I'm always up for growing an experimental species, even though I have a
feeling that, if maypops tasted all that good, I would have eaten one
before since they're native to our region and since I grew up amid
foragers. In
the meantime, I'd be curious to hear from those of you who have grown
passionflowers in your garden. I know the blossoms are beautiful,
but is the fruit worth eating?
We put together the new Swisher
trimmer mower today.
It feels like more than twice
the cutting power of our previous mower.
I'm still learning how to use
it. When the self propelled mechanism is engaged I found myself
struggling to keep up with its pace. It's better to just pump the
engagement lever a few seconds at a time to let the machine do most of
the work.
 I don't usually cross-promote books here if we publish them but they're written by someone else. But our publishing wing
has become the majority of our bread and butter lately, so I hope you
don't mind the occasional plug...especially if it comes with a
homesteading-related giveaway!
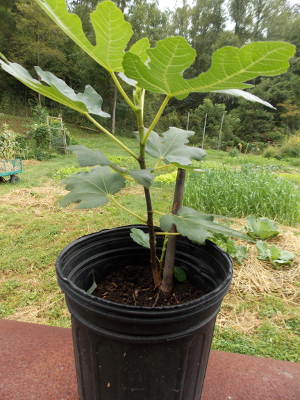
I'll start with the part
you're probably most interested in --- the free stuff! I rooted a
cutting from my father's Brown Turkey fig this year, and the sapling is
looking for a zone-7 or warmer home. Daddy is picking a gallon of
figs a day from this little tree's mother, and says that fig pie is his
current favorite way to consume the fruit. As long as you don't
live in a cold climate, fig trees require nearly no care, and can be fit
into an area about eight feet in diameter (although I hear they get
much larger in California). Why not enter to win your own no-work
fruit tree?
What if you live up
north? Don't worry, I'll swap out your prize for something more
appropriate. You might prefer cuttings from my Chicago hardy fig --- these are easy to root and will produce fruit (with a little care) up through zone 6. However, if even that is  too
tropical for your tastes, you can choose either a medley of our
favorite seeds, or a signed copy of one of my (or Aimee's) books.
And, if a northerner wins the prize, I'll pick a second winner to give
the fig tree to!
How do you enter the
giveaway? Just plug our books using the widget below. Aimee
has several new books out now or soon --- you've probably heard me
mention Shiftless, which has already sold over 3,000 copies and will be an audio book within a few weeks; Burgling the Dragon is available at a special preorder price of 99 cents through September 30; and Aimee's short story Flight of the Billionaire's Sister will make you itch to read her newest novel, slated to release in November or December. Oh, and did I mention that her short-story collection
is free on Amazon today? Once books are out of the preorder
period, you can also borrow nearly all of her books (and mine too!)
using Amazon Prime or Kindle Unlimited, so why not check some out?
Thanks in advance for reading and for spreading the word!
How is the new Swisher
trimmer mower on very steep hills?
Like a dream!
The above hill took a lot of
effort with our blade mower, but today was easy once I got the hang of
letting the machine drive it up the hill. Gravity takes over when you
release the engagement lever for the downward portion.

Autumn weather arrived
this past weekend and the long-range forecast suggests it may stick
around. Luckily, we're mostly in gravy mode in the garden ---
we've packed away enough vegetables to last us for the winter, and are
just enjoying eating the rest of the harvest (with occasional bouts of
tomato drying or pepper freezing for variety later in the 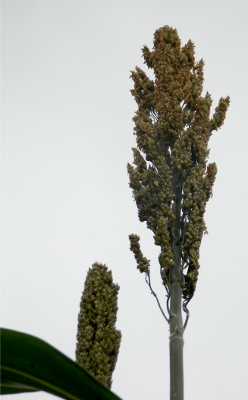 year).
The figs are still dragging their feet and refusing to ripen, but the
blueberries are winding down and the red raspberries are in full swing.
Mom asked what I planned to do if we get an early frost and I said that,
really, we're ready. Not that I want summer to end, but when
freezing temperatures are forecast, we'll just let them happen.
One experiment hasn't quite reached it conclusion --- the sorghum plants
I seeded at the beginning of July. Just as our current cool spell
came in, the plants shot up even higher and pushed out flower heads,
which may or may not have time to turn into seeds before the
frost. I took the photo to the left with the zoom feature since
these heads are way out of my reach, making our tall sunflowers look
like midgets in comparison.
Cooler weather also reminds me that it's time to pay attention to the bees. I did a second varroa-mite count
last weekend and was extremely pleased with the results --- 2.5 mites
per day in the daughter hive and 3.5 mites per day in the mother
hive. Our Texas bees continue to be worth their weight in gold.
But are they worth their
weight in honey? Now that the humidity has dropped below 90%, I'm
hoping for a sunny and moderately warm afternoon to harvest honey from
the mother hive. (The daughter will have the empty bottom box
removed but will otherwise be left alone.) Maybe Friday?
Why are we moving this ancient freezer?
To have a rodent proof
container to store goat feed near the Star Plate coop.
Yes...Anna helped push once
she finished taking pictures.
Several of you asked (or warned) about fencing for our upcoming goats.
I started to write a long post in reply about my complicated plans on
that front, but it seemed a little silly to theorize when I'll be able
to report on our trial and error in less than a month. However,
there is a goat-related conundrum we're currently trying to solve --- water.
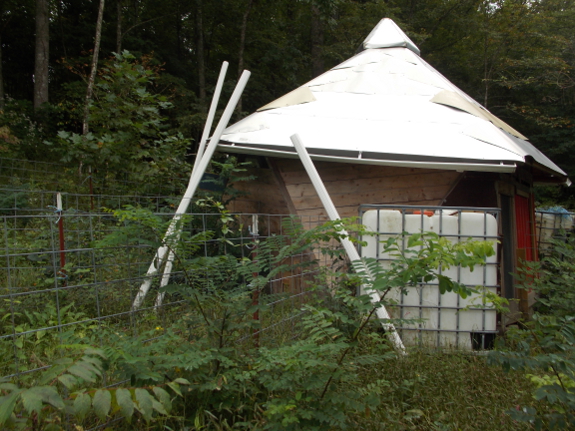
We plan to house our new goats in our starplate coop,
but the structure is about 250 feet from the closest water source and
up a relatively steep hill. It was a bit wearying to carry a
five-gallon bucket to the coop once a week over the summer, so I can
only imagine how old the chore will get for goats (who presumably drink
more than chickens) during the winter months.
 We've
come up with several potential summer solutions, but winter ones will
require more industry. We can finish working up the gutters and rain-barrel system,
but the spigot is bound to freeze during the winter whether or not the
tank is big enough prevent the whole thing from freezing solid.
Similarly, we could pump water from the creek
into our IBC tanks, but our creek-line isn't buried and only sometimes
runs in the winter (and we'd still have to deal with a frozen spigot).
Gene Logsdon posted a few
weeks ago about burying rain barrels to make mini-cisterns, and I think
the idea has potential in our starplate pasture. I love to dig,
especially at this time of year when garden work is winding down, and
the starplate earth is much lighter than the stuff in our core
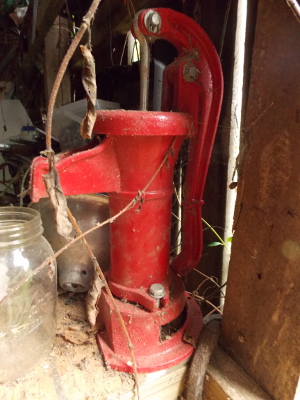
homestead. Plus, Mark brought a hand-pump home from the hardware
store many moons ago, thinking we might need it if the world came to an
end, and we could use that to get water out of the buried rain barrel in
order to hydrate our herd.
But I have a feeling that
I'm missing something even more obvious. Ideas? How would
you water goats located far enough away from the house that extension
cords don't really reach?
The Oregon
battery powered chainsaw
made quick work of this large Box Elder.
Some of it is already rotten,
but most of it will make good kindling material.
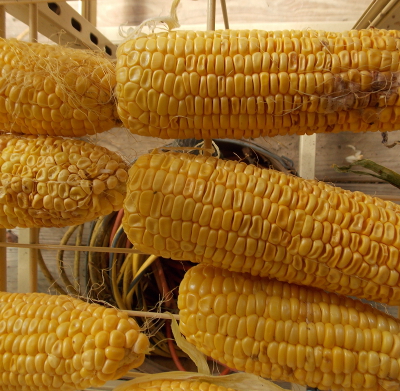
Every year, we seed six
plantings of sweet corn, which provide near-continuous availability of
the treat over most of the summer. And every year, one of those
plantings gets away from us.
 Mark
and I are such connoisseurs of sweet corn that we only eat the grain at
its peak. I start the water boiling at the same time I head out
to the garden to pick and shuck the ears, then I drop the corn in the
water and turn each ear once, removing as soon as the color changes from
pale to bright yellow, a process that takes mere seconds. The
result is corn so sweet, Lucy begs for the cobs, which she completely
consumes.
But if I miss that
peak-taste window and our corn starts to turn starchy...then Lucy, Mark,
and I all turn up our noses. Instead, I shuck the corn and put it
on our drying racks for winter animal treats. In the past, I've offered dried sweet corn to our chickens, but this year, I think the ears will go to the goats.
It took me a while to figure
out how to make the Clarity
anti-fog wipes stretch as far as possible.
Store the treated glasses in
an airtight container to maximize the hydrophobic effect.
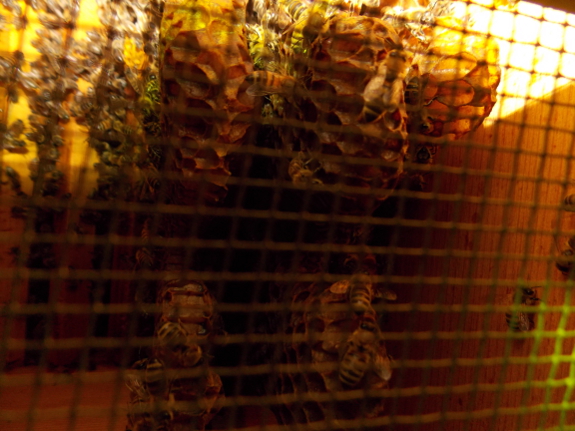
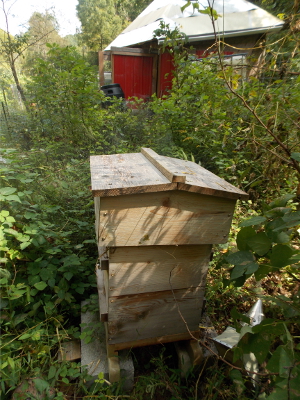 It
seems like there's never as much honey in my Warre hives as I think
there is. I went out to rob the mother hive's top box on a sunny
afternoon this week...and found that there was nothing to steal.
The fourth box was empty, the box below contained a good bit of honey
but also some capped brood (meaning it had to be left alone), I didn't
dig into the third box (but I hope it's also full of honey and brood),
and the bottom box consists of partially drawn comb (photo above).
So, instead of stealing honey, I took away the empty top box, and will
probably remove the bottom box later as well.
Of course, you don't really expect to harvest honey if you split a hive,
so just having enough bees and stores to get the mother hive through
the winter is good. Luckily, two boxes full of brood and honey are
supposed to be enough for a Warre hive, according to the experts,
unless you live in the far north. Since a Warre hive box is only
the size of a shallow super, that seems counterintuitive to those
of us who started with Langstroth hives, but I'm willing to bow to
wiser beekeepers, who report that the superior insulating ability of
the Warre hive allows the bees to thrive with fewer stores.
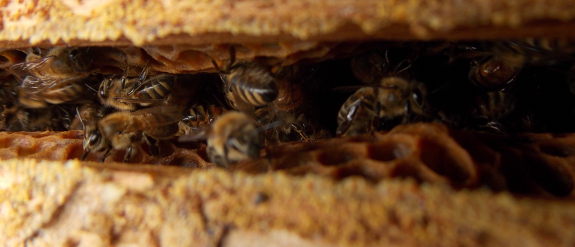
Unfortunately, the
daughter hive is also not doing as well as I'd hoped, and they may
actually be in trouble. I removed the third box (empty) and
finally got a look in the second 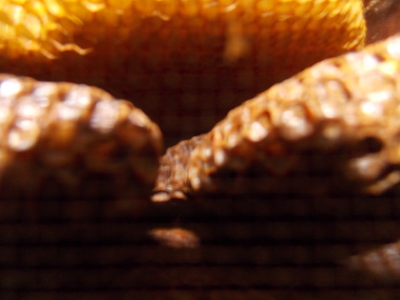 box,
which turns out to be full of drawn comb but absolutely empty of life
(photo to the left). That means I need to feed fast to get the
bees through the winter.
More troublesome was the
presence of wax moth larvae under the quilt when I peeled back the final
piece of burlap. Wax moths are usually a sign of a hive in
decline, since they mean the colony isn't strong enough to patrol their
entire territory. I hope that feeding the bees will be enough to
let them bulk up and defeat the moths, but realize that there's a good
chance the daughter hive might perish over the winter.
While I'm thrilled that my hives seem to be bypassing varroa mites without chemicals,
I'm still not sold on Warre hives being the way to go --- I'd like to
harvest some honey sooner rather than later. Unfortunately, my
past experience has been Langstroth hives with conventional bees that
produced honey but perished without chemicals or Warre hives with
chemical-free bees that don't produce honey but do survive in a natural
setting. Time to shake things up next year, maybe trying out
chemical-free bees in a Langstroth hive on foundationless frames to see
if those would give us a harvest in a natural setting. I'd love to
hear from other beekeepers who have figured the puzzle out, in case you
want to save me a few more years of trial and error!
I've added bar oil to the Oregon
battery powered chainsaw twice now.
Both times resulted in some
overspill, which can be a problem if it drips down and makes contact
with the sharpening stone.
The next time I plan to
refill the original bar oil container it came with first, that way the
amount will be exact and I won't feel like such an amateur.
 It
seems a little crazy to have two giveaways running at the same time,
but we're overflowing with fun items at the moment and it seems like we
should share the bounty. You've still got a couple of days to
enter our fig giveaway, but in the meantime, why not also try your luck for a just-released farm memoir?
I reviewed The Call of the Farm a few months ago,
and was surprised to get another copy in the mail last week. It
turns out, the publisher used my blurb in the front of the book (a first
for me!) and sent a more polished copy as a thank-you.
But I don't need two versions of the book, so one lucky reader will take
home this fun farm memoir --- use the widget below to enter! The
entry options are a little different than usual, but email list
subscribers still get an effort-free entry. Thanks for spreading
the word, and I hope you enjoy the book as much as I did!
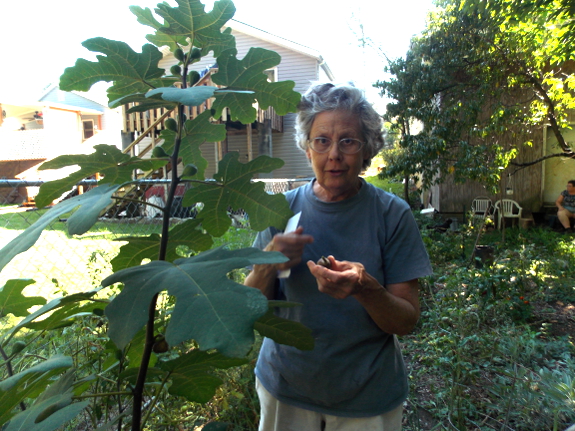
Unusually busy weekend
around here. I drove myself to town (horrors!). Mark cooked
himself supper without me (extraordinary!). I met one of our blog
readers and a couple dozen of her closest friends and family in the
flesh (hi, Emily in Bristol!). Mom showed off the one-year-old
daughter of our Chicago Hardy fig tree (impressive!). Lost 'seng
hunters wandered into our yard (unusual!). My weather guru warned
of a possible frost Monday night (yikes!).
(Bet you can't add more parentheticals and exclamation points in a 88 word post.)
The instructions say to go
from 4 to 2 strings if the mowing gets bogged down.
Discovered today that our
lawn of weeds cuts faster with just 1 string once you get the proper
cutting height figured out.
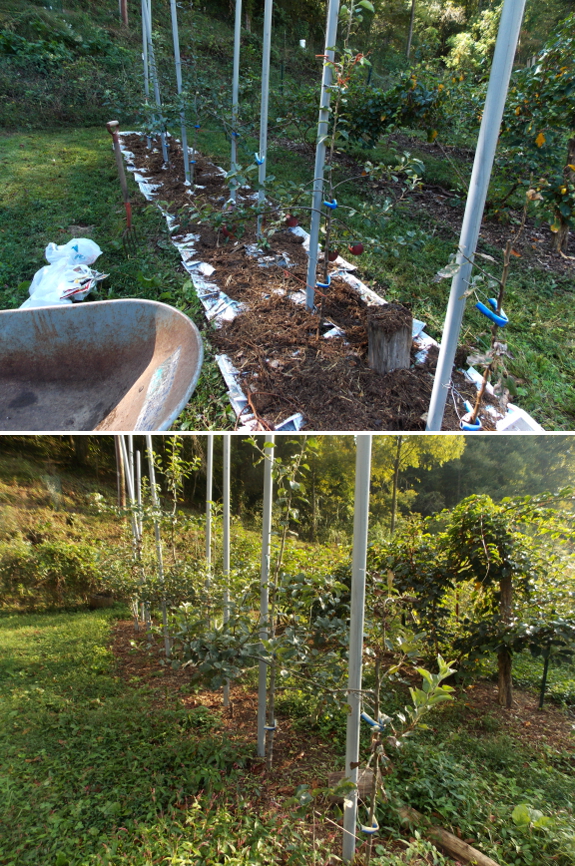
I'd like to put in my
order now for a May 2015 with no hard freezes to nip our apple
flowers. Because our high-density trees have grown remarkably over
the last two years (2013 in the top photo, 2014 below), and I suspect they could give us quite a few fruits if the weather holds off.
 It's
a bit hard to get the full effect from photos like these, but trust me
--- you feel like you're in a miniature forest when you walk by the row
nowadays. Mark's already talking about snaking the tops of the
taller trees (see left) so they don't grow too far above his reach, and
I'm itching for the leaves to fall so I can set out our second
high-density row with this year's graftlings. I wonder if I'll get as much joy from eating the fruits as I do from watching the trees grow?
How tall did our sorghum get this year?
Most were close to 9 feet,
but the tallest was a little over 10.
It's the first year we've
grown it. The plan is to see if the chickens will eat the seeds and
save the stalks for our future goat
population.
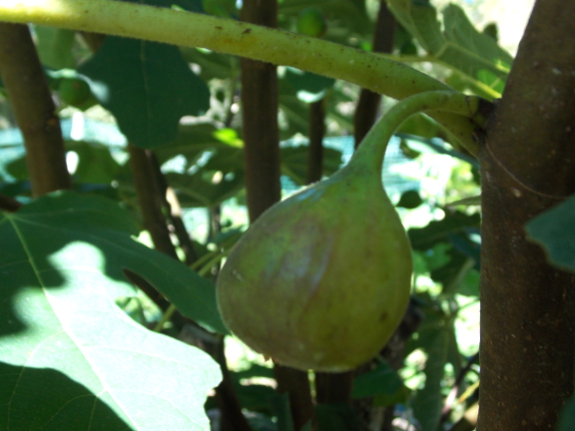
Our first fig ran nearly three weeks late
this year, ripening up on September 18. Even then, we only had
the one until today, when I hope to bring in enough figs to make it
worth our while to roast
some. Good thing that possible frost passed us by or this would
have been a one-fig year! Instead, with autumn warming back up
through the beginning of October, we may get to enjoy gallons of them.
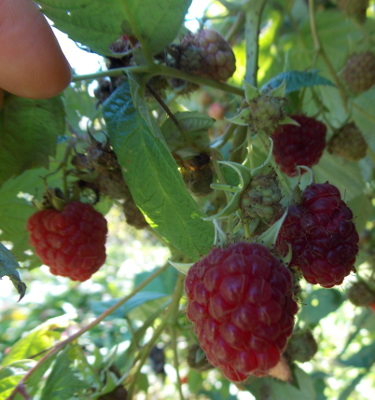 The
blueberries are finally slowing down, but another row of raspberries is
ripening to take their place. It's a bit odd how our two
plantings of red raspberries act entirely differently even though they
are all clones of one Caroline
plant. The row closer to the north-facing hillside (meaning they
get a lot of shade, even in the summer) ripened up their fall berries
nearly a month before the sunnier row, but the shady berries were
considerably smaller. The berries turning color now are huge and
copious, promising a bowlful per day for our favorite dessert.
What fruits are you enjoying this week?
The sky
pond has a different look after one year.
It seems to be most popular
with our bee population. They often use the duck weed cover as a safe
place to land when they need a drink.
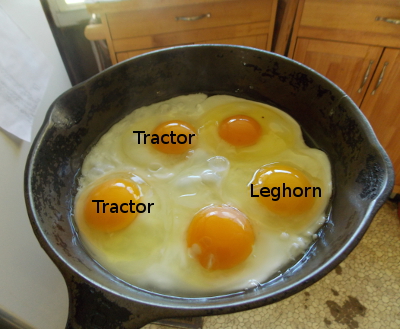 Since we've been averaging about half a cup of black-soldier-fly larvae going to the tractored
hens every day (plus they get all of our food scraps), I decided to run
a color test on yolks from our pasture versus from our tractor. I
hypothesized that the latter would have the most bright-orange yolks
due to all their treats...but I was wrong!
Instead, the orangest yolks came from the pastured hens (although the leghorn
egg was paler --- those flighty critters aren't as keen on scratching
for their dinner). It seems that even a daily offering of insects
and pepper tops isn't enough to make up for the hens' lack of space to
run around.
I should have thrown in a
store-bought egg to make this comparison really perfect, but I can tell
you from past experience that those yolks would be significantly paler
than even the Leghorn eggs. So, yes, you will be improving over
store-bought with a chicken tractor, but for absolutely tip-top eggs,
you need to use rotational pastures and to choose those varieties wisely. Enjoy your orange yolks!
We've been having a problem
with our pet door.
When Huckleberry squeezes
through he rubs against the locking tab and pushes it into a position
that blocks the door from opening back up.
I drilled a hole through the
tab so we could plug a wire through it to keep it open.
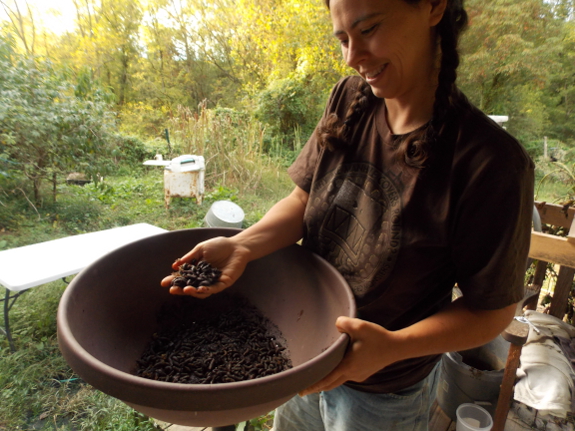
One of my favorite features of our black-soldier-fly bin
is the clear plastic, which lets me see exactly what's going on
inside. While this might not be quite as cool as an observation
hive (grimy grubs versus beautiful bees), the transparency does make it
easy to notice how many larvae are working inside. And, this week,
the feature helped me realize that a bunch of black pupae were
congregating in the bottom of the bin.
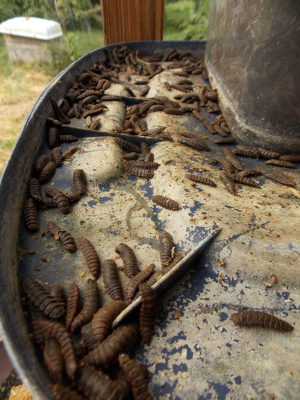 The
instructions tell you to flood the bin with water once a week to
prevent this exact problem...but I forgot. Luckily, it wasn't too
late to harvest all of those yummy pupae. A couple of hours after
flooding, I dropped by the bin and saw that there were pupae filling the
ant moat
(which I'd luckily forgotten to fill with water as well) since they'd
all tried to crawl out so quickly that there was a traffic jam in the
entrance ramp to the collection bin.
Mark helped me collect
all of the escaped pupae, and we ended up with about three pints
worth! In fact, based on how much the contents of the bin dropped
in height after the crawl-off, I suspect we might have lost another pint
of pupae before I noticed the great escape. Luckily, "lost" pupae
will just turn into lots of adults to repopulate the bin, so it's all
good.
The moral of the
story? If you don't keep a close eye on your bin and need to do an
emergency flooding, stand by to prevent escapes!
We had to hand
winch the ATV free today.
A lot easier to pull than a truck!
I think low tire pressure on
one of the rear tires was a contributing factor.
 "Anna, I think you've been doing some experimenting with pears on your
homestead, but I couldn't find any recent updates in the archives. Any
luck with your disease-resistant rootstocks, etc.?"
"Anna, I think you've been doing some experimenting with pears on your
homestead, but I couldn't find any recent updates in the archives. Any
luck with your disease-resistant rootstocks, etc.?"--- Jake, whose excellent blog is currently one of my favorites. His writing will definitely be enjoyed by those who love a combination of useful facts, zany humor, and unadulterated geekiness.
Good question,
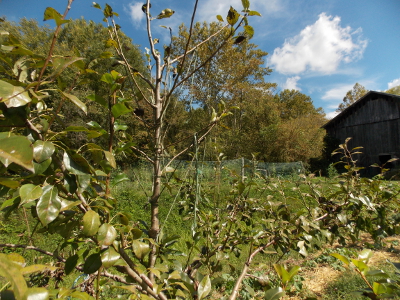
Jake! I haven't posted much about our pear trees because they're
mostly in the waiting stage at the moment. We originally planted a
Keiffer and an Orient pear
(the latter of which shouldn't be confused with Asian pears), and they
grew quite well...but produced fruits that weren't worth eating.
(Yes, we are snobs. Yes, if you plan to cook with the fruit, these
are probably still quite good varieties.)
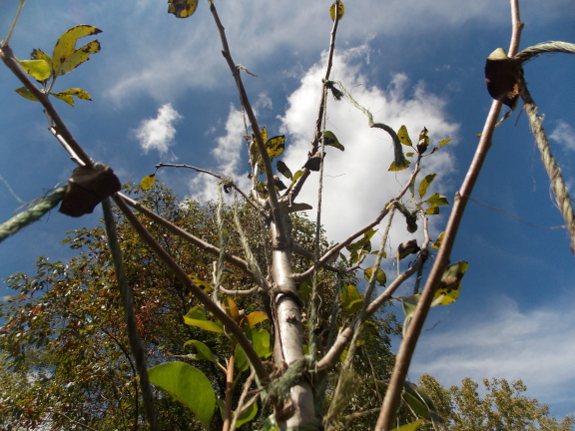
So, a year and a half ago, I topworked
the young trees to change them over to new varieties --- Seckel,
Comice, and an unknown variety that is supposed to be similar to
Comice. The two named varieties are reputed to be moderately
susceptible to fireblight, and I have
seen a small amount of damage from that bacteria, although not enough
to really slow down the trees. (The photo above shows the huge
number of new branches the Seckel's central leader has produced during
this growing season alone.) Otherwise, the transformed trees seem
to be immune to problems. Like most pears, our trees grow a mile a
minute and I'm kept busy ripping off watersprouts to ensure that the
pears don't revert back to their original varieties, then training
keeper branches closer to the horizontal so they don't all grow straight
for the sky.
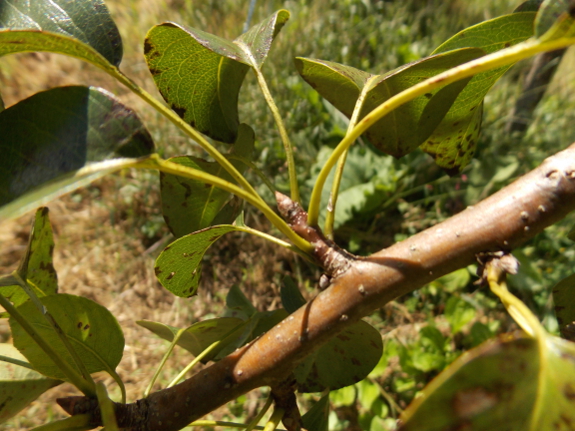
If all goes well, we
should see several fruits on each tree next year, at which point I'll be
able to tell you whether Seckel and Comice live up to their potential
for producing delicious pears that are much less prone to diseases than
apples are. So far, except for the fireblight, our pear trees have
been pristine. Of course, there are apple varieties that are nearly as disease resistant, and we manage to grow several despite having cedar-apple rust coming in from all sides --- a focus on types that are able to fight off that particular fungus is a big help.
But, from a management standpoint, I'd say that pears have definitely
been our easiest fruit tree, followed by apples, and then trailed
further behind by peaches. Of course, the peaches do shine in terms of producing soonest after planting, so it's all a tradeoff. But, yes, plant those pears!
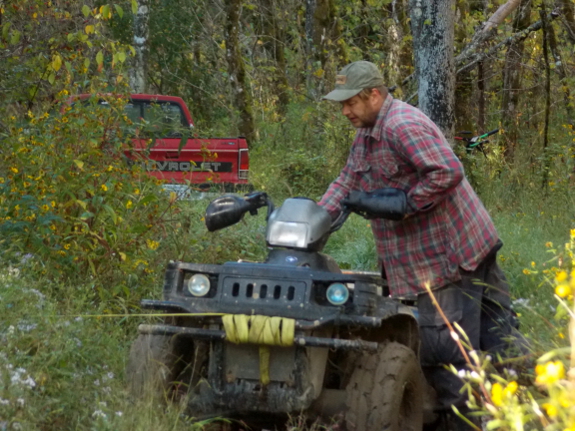
The truck is still where we last left it.
Turns out our neighbor with the
tractor got a little
nervous when he saw how much mud we were dealing with and wants to wait
till it gets a little dryer.
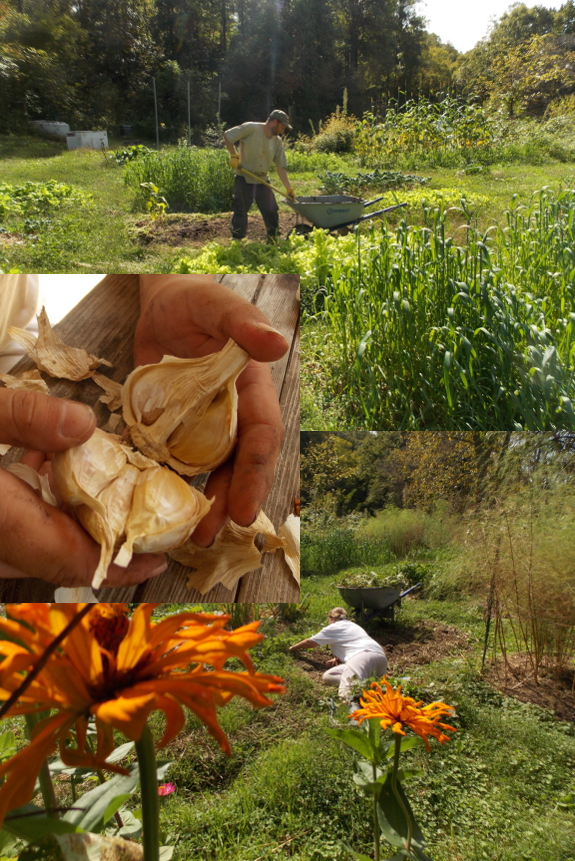
I stressed myself out
last week by playing hooky from the garden for three days while a
writing project consumed my attention. When I came up for air, I
realized that it was time to plant twelve beds of garlic and two beds of
potato onions before the end of the week --- yikes!
Whenever I get overwhelmed by homesteading tasks, Mark reminds me that, together, he and I can do anything. Add in Kayla,
and we managed to get all of the winter alliums into the ground in
about 9 man-hours. Time to quit early and enjoy the fall weather!
I've avoided posting
anything specific about garlic here because I've pretty much said it all
before. Type "garlic" into the search box on the sidebar and
you'll learn far more than you ever wanted to know.
The only thing we're doing differently this year is to cut back to only growing Music garlic.
It seems a bit dicey to put all of our eggs in one basket, but over the
last eight years, this variety has consistently done better than all
the others, and the huge cloves make cooking a breeze. Maybe next
year we'll try a few other hardneck varieties...but maybe we'll say if
it ain't broke, don't fix it.
The old freezer
we want to use for goat feed storage accumulates water.
I think it's functioning as a
solar still when the sun hits it.
Hopefully this vent hole will
help to keep it dryer.
My second paperback has a co ver, a publication date (March 3) and a preorder page! I'm not entirely sure whether I like the image, but then, I hated The Weekend Homesteader cover...until it slowly grew on me over the years so that I now find it delightful (yellow boots and all).
And Skyhorse has done a great job producing a full-color book priced at
a steal (marked down to $11.55 at the moment), so grab one while
they're hot!
In other book news, the ebook version of Trailersteading
is on sale today for $1.99. I haven't uploaded the expanded and
revised version yet (still waiting on print-quality photos from a few
contributers --- you know who you are and will get email nudges next
week). But if you buy now, you'll automatically receive an updated
edition this winter when the new version is available, and will have
saved 50% off the cover price in the process. Of course, you could
also wait for the paperback, which will be coming out in fall 2016.
Thanks for putting up with a day of self-promotion. I can hardly wait to see the interior of The Naturally Bug-Free Garden,
and I suspect you'll have to bear with a glowing post about that
too. I promise that serious content will return shortly to a blog
near you.
Today I tried putting a piece
of nylon rope
where the trimmer
line usually goes.
It worked pretty good till it
got frayed, and it still kept cutting, but not as fierce.
Maybe soaking the rope in
some sort of adhesive would extend the amount of cutting each piece can
do before it needs replacing?
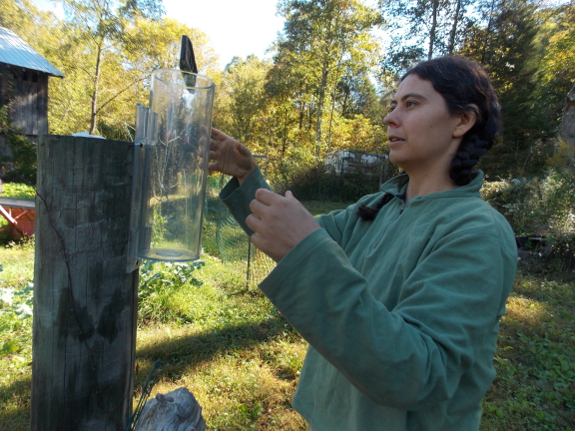
I love collecting weather
data --- not only is it good, geeky fun, the endeavor also helps me
decide whether the garden needs to be watered and it helps me keep track
of our specific frost-free period. Unfortunately,
weather-tracking kept falling by the wayside when the tools of the trade
turned out to be shoddy and quickly bit the dust.
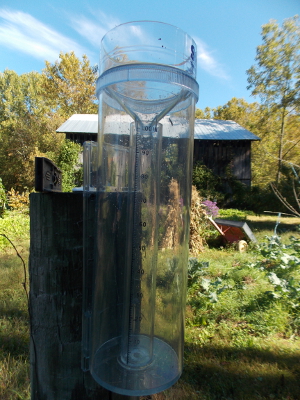 A couple of years ago, I solved the temperature-tracking dilemma by going completely analog, and now I'm hoping I've found the rain gauge that will survive winter freezes.
The inner cylinder measures up to one inch of rain, then the outer
container gives you an extra ten inches of wiggle room. In the
winter, you remove the inner cylinder, bring the frozen
precipitation indoors to thaw, and then pour it into the measurer.
My weather guru sent our
new rain gauge along in exchange for using our farm as a weather station
--- he's tracking the way a nearby mountain impacts microclimates in
our region. He's had to replace two rain gauges (not sure out of
how many -- quite a few) over the last seven years due to freezing, but
that's much better than my previous rate of losing a rain gauge every
year.
Now, to see if I can remember to thank him by keeping track of which days begin with fog....
The new Swisher
trimmer mower is very
easy to start.
Not so easy if you try
pulling the rope with the engagement bar pulled.
Our old mower needs the
engagement bar pulled before starting, and my robot brain took over for
the first few starts before I realized my error.
Want more in-depth information? Browse through our books.
Or explore more posts by date or by subject.
About us: Anna Hess and Mark Hamilton spent over a decade living self-sufficiently in the mountains of Virginia before moving north to start over from scratch in the foothills of Ohio. They've experimented with permaculture, no-till gardening, trailersteading, home-based microbusinesses and much more, writing about their adventures in both blogs and books.
