
archives for 08/2014
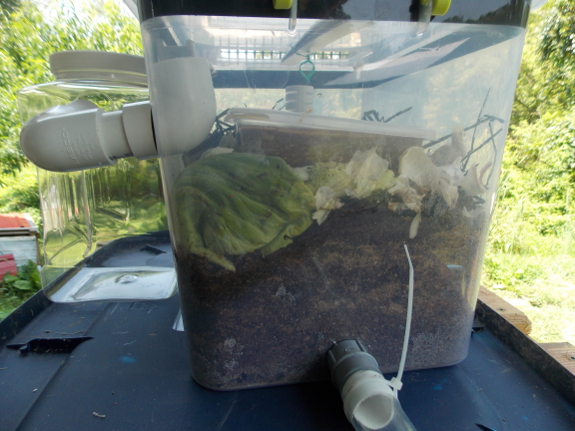
We had several commenters
ask questions about our new black soldier fly bin, so I'm going to see
if I can answer them all in one fell swoop. I understand the
interest --- we've been intrigued by black soldier flies for years. The reason we didn't experiment sooner is because we just didn't have time to reinvent the wheel and the only premade bin available when I started researching cost nearly $200. Luckily, while we were dragging our heels, the
folks over at blacksoldierflyblog.com were experimenting to create a
lower-cost version that ships to your door for a total of $76.
Their website also walks you through all of their experiments so that
you could make your own bin easily at home, but we decided to support
their ingenuity and purchase a premade bin.
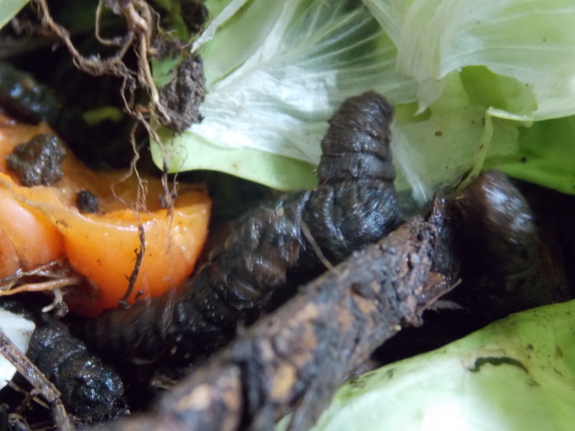
If you follow our lead, I
recommend you start some food fermenting to attract black soldier flies
as soon as you place your order. It can take a few weeks for
rotten materials (with fermented grain being the blog author's
recommendation) to become ripe enough to attract the mother flies, so
you might as well start early. Since we didn't think ahead in that
way, I started some chick feed fermenting as soon as we got our bin,
but I also went hunting around the yard for black soldier fly larvae to
seed our new bug station. I quickly found a dozen relatively
mature larvae in the bedding beneath what was the duck brooder, where
spilled feed spoiled and attracted the parent flies. Other good
places to look for larvae and eggs include under the lids of trash cans
(for eggs) and in your compost bin (for larvae).
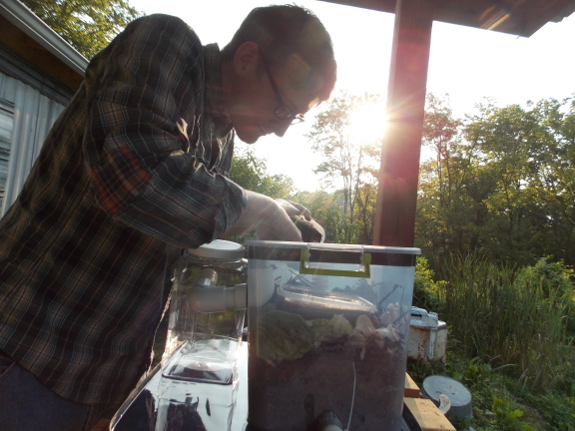
I filled the bin halfway
with partially rotted sawdust (and a bit of homemade charcoal at the
bottom) for bedding, then added a bit of the bedding material that my
found larvae were living in on top. The fermenting chick feed went
in a container on top of the bedding so the feed will stay wet, and I
also added a few vegetable scraps to start prerotting, since black
soldier fly larvae (like compost worms) need food partially broken down
before they can eat it. And then my favorite cousin-in-law also
came bearing gifts --- coffee grounds, which one of our commenters
reports makes a great food for black soldier fly larvae. Hopefully
this combination of materials will get our bin up and running in short
order. Stay tuned for many more updates in the near future.
If
any other cousins-in-law are wondering how to make it into the favorite
category, it's pretty simple. Brave our moat and come visit!
Bearing biomass, of course....
Usually when I see a blue
heron it flies away before I can get a good look.
Today we had one visiting
that seems to want to stay a while.
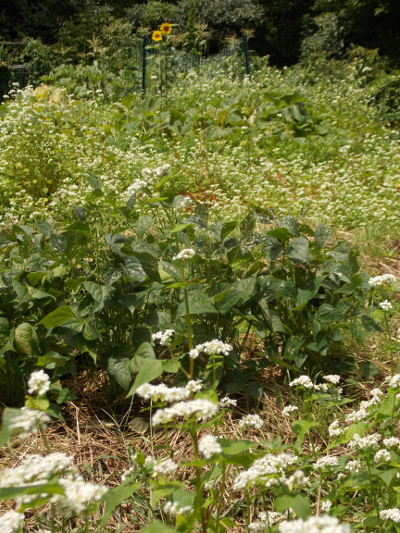 Here in zone 6, August is a critical time for cover crops.
Earlier in the year, I dabbled in soil improvement by planting
buckwheat (and some sunflowers) into garden gaps. But August is
the month to plant oats and oilseed radishes for long-term soil
improvement that will keep growing throughout late summer, fall, and
early winter.
As a result, my big goal for August is to make a pass through the entire
garden, not just weeding, but also seeding oats in any beds that have
finished up their spring or summer crops and won't be needed during the
fall and winter. This job also takes those beds off my weeding
plate until spring, which is always a great feeling during the busy
summer months.
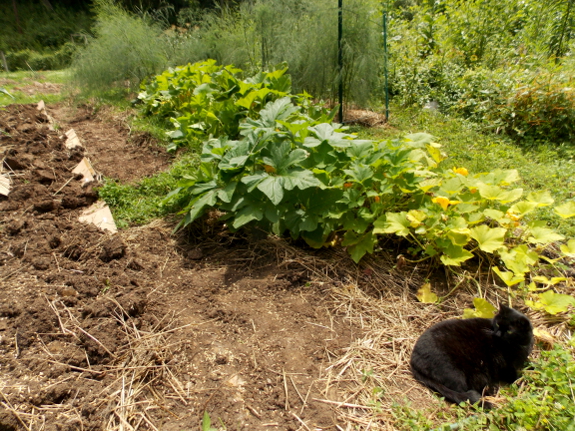
While I'm at it, I do a bit of terraforming. This corner of the front garden has been designated excess space, and I plan to turn at least one row of it into high-density apples.
However, the beds in this area were laid out when I was very new to
gardening, so the aisles are too narrow for even annual vegetable
gardening. They definitely won't provide space for our apple trees
to grow.
The solution was to turn two long rows into one, laying down cardboard
over the grassy aisle between them then shoveling the good topsoil from
one bed over to widen the second bed. Finally, I sprinkled oat
seeds on top of both the bare soil in the new aisle and the new half of
the old bed. I'm sure our young apples will enjoy the enriched
soil when they move in this coming winter or spring.
Last year at this time we
nearly had all the worm bins
full of horse manure.
We are trying to catch up to
those levels this month, but so far I've only managed to haul enough to
almost fill one bin.
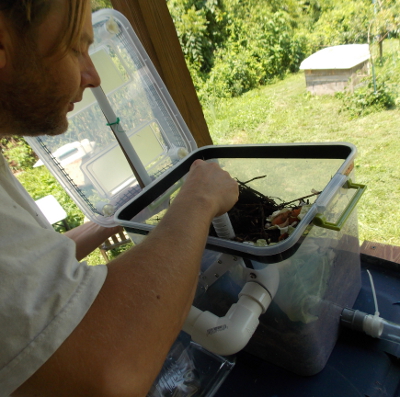 "How much chicken feed will [your black soldier fly bin] produce? How many grubs are
you expecting per week? Will it be enough to be a
substantial caloric addition or is this just for a treat? Will this
replace any supplements you may currently use?"
This is a good question,
but the answer is a bit complicated. As a starting point, the
number of grubs you get from a unit like ours will depend on how much
food you provide and on how well colonized your unit is. Best-case
scenario is that our six-gallon unit can handle 2 pounds of food scraps
per day, which will be converted into 0.2 to 0.4 pounds of black
soldier fly larvae per day. Of course, if you don't do everything
perfectly, you'll get less.
Mass Production of Beneficial Organisms: Invertebrates and Entomopathogens
suggests that black soldier fly larvae (fresh, I think, but the table
is a bit unclear) provide 1,994 calories per kilogram. That would
mean that our daily 0.2 to 0.4 pounds of black soldier fly larvae would
provide 180 to 360 calories, equivalent to the daily energy needs of half to one chicken.
 But
that doesn't mean our bin will only feed half a chicken. Protein
makes up about 35% of the calories in black soldier fly larvae, meaning
that you should consider the grubs to be more like soybeans than like
the 16%-protein feed mixtures from the store. Since soybeans often
make up about a third of the weight of store-bought
chicken feed, it's conceivable that our bin's daily output could equate
to supplemental protein for 1.5 to 3 chickens.
But how do you work around having this supplemental protein source on hand? You might get away with mixing one of these homemade layer feeds
and simply substituting black soldier fly larvae for soybeans (figuring
that a pound of dry roasted soybeans is equivalent to about 2.24 pounds
of fresh black soldier fly larvae). Or, on a smaller scale, you
could simply provide your chickens with all the black soldier fly larvae
you have available and then also provide an automatic feeder full of
store-bought feed and another of grain so the chickens can lower the
overall protein level of their diet (by eating more grain) as they see
fit.
No matter how you figure
it, having a high-protein, animal-based feed available for chickens
should cut feed costs and improve the birds' health, along with boosting
the nutritional density of the eggs and meat the chickens
provide. The real question will be --- is the positive impact
greater than if we simply fed our food scraps to the chickens (as we
currently do) instead of to the black soldier fly larvae?
Why did we choose this
particular Black
Soldier Fly container?
It was less than half the
price of a BioPod, which seems like a good product,
but we have a soft spot for the smaller homesteading business
operation.
Maybe someone should compare
each one side by side to see who can produce the most grubs? Of course
you would have to put the exact same food scraps in each bin.

The one thing I wished I'd done differently with our purchase of a quarter of a pastured cow was
to ask for more stew beef. I should have realized that most
Americans would vastly prefer ground meat to stew meat, so nearly all of
the tougher cuts showed up in our freezer ground. But ground meat
doesn't make a very good fit for adding protein to soup...unless you
turn it into meat balls!
You can season your meatballs any way you want, but I decided this combination of flavors worked well with our tomato-based harvest-catch-all soups. Ingredients include:
- 1 pound of ground beef (low fat content is better)
- 1 small egg (this is a great use for pullet eggs)
- 0.25 cups of parmesan
- 1 well-packed cup of fresh basil leaves
- 1 to 3 cloves of garlic (depending on your taste buds)
- salt and pepper
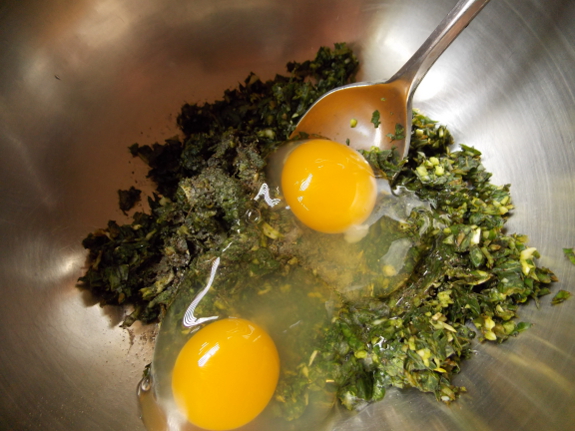
If you're using a food processor, just throw a chunk of parmesan, the
basil, and the garlic in and whir the ingredients around until they're
cut into tiny pieces. Otherwise, start by cutting up the basil,
mincing the garlic, and grating the parmesan. Either way, you next
add the egg (I was making a double recipe in the photo above, thus the
two pullet eggs instead of one) and the salt and pepper. Wash your
hands well, then turn the meat into the bowl with the seasonings and
work them together until they're well mixed.
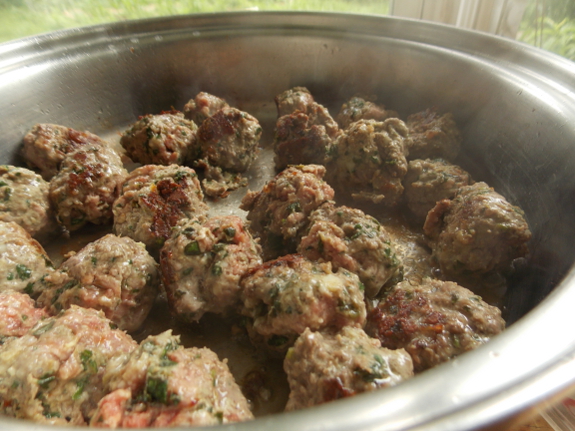
Roll out the meat mixture into small balls and set them on a plate in
the fridge for half an hour for the flavors to meld. Then heat a
little bit of oil in a skillet over medium high heat and place the
meatballs in the pan. Once the bottoms begin to brown, turn the
meatballs over and cook until the other side is brown as well.
(The meat in the center of the balls will still be uncooked at this
point.) Finally, make sure your pot of soup is at a gentle simmer
and plop in the meatballs to finish cooking in the soup broth, a process
that takes about ten more minutes. Cut a meatball open to make
sure the centers are brown before serving.
This recipe makes
enough meatballs to add protein and oomph to 1.5 gallons of hearty soup
if you're an average American. Before I met Mark, I probably would
have made the meatballs smaller and used this recipe for 3 gallons of
soup; and before Mark met me, he probably would have doubled this recipe
to use in 1.5 gallons of soup, so use your own judgment. No
matter which proportion you use, these meatballs will spice up your soup
and turn it into a full meal!
Anna likes to push our basket carrying capacity a little past its normal limits.
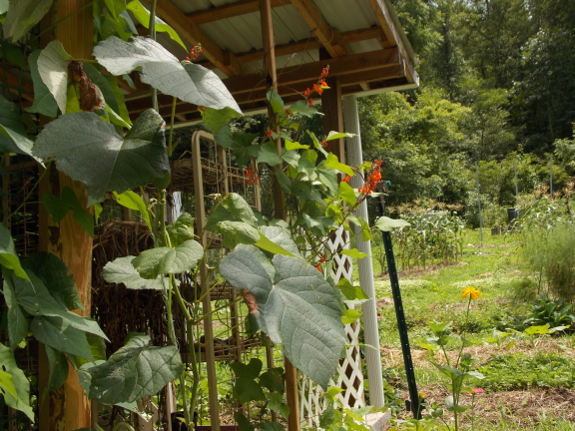
I've been surprised by
how much joy I've gotten out of flowers this year. I always put
the bare minimum amount of effort into non-edible plants, choosing the
easiest annuals and perennials that survive lots of neglect.
Zinnias, sunflowers, touch-me-nots, and scarlet runner beans seem worth
replanting using my lazy methods, and echinacea and bee balm have
already survived years of neglect.

From the perspective of
the local wildlife, sunflowers are probably the top choice among my
for-show flowers --- I definitely see more bugs there than on my other
"useless" plants. I've been enjoying the hummingbird who claimed
our patch of scarlet runner beans, though --- she drops by multiple
times a day and has been busy chasing off the competition.
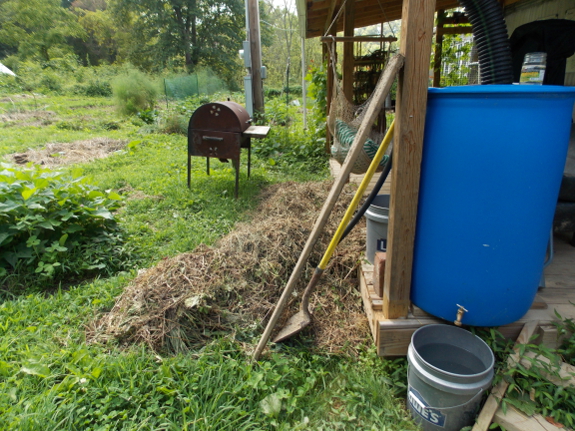
Part of the reason I've
gotten so much bang for my buck from flowers this year is that I started
a patch in front of the trailer where we can see the flowers from the
couch and from the outdoor table. So I'm dumping weeds along
another section of the front porch this summer to give a little
fertility to soil that will become flowers next year. No, flowers
aren't worth wasting cardboard on, but this lazy kill mulch will do its
job pretty well anyway.
I'm curious to hear from
other similarly lazy flower gardeners. Which species make the cut
among your low-work annuals and perennials?
The driveway was dry enough
today to drive in a truckload of straw.
How many bales can you fit
into a Chevy S-10 truck?
We got 10 bales today for
57.50.
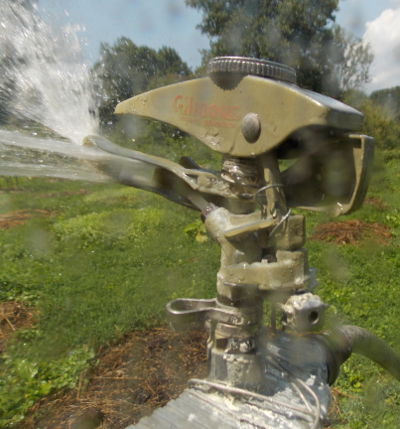 We really depend on our pulsating sprinklers to turn dirty creek water into a well-hydrated garden. So when one starts acting up, we rush to fix it.
The easiest problems are when the sprinklers clog (often from algae growing in the hoses), but this issue has been much less frequent since Mark removed the filters.
More often (now that the sprinklers are aging), we have to deal with
sprinklers that get stuck. Water keeps flowing out, but the
pulsating action isn't enough to push the sprinkler head around in its
little circle. Sometimes, greasing the sprinkler helps, but this week, two rounds of grease failed to have any impact on the sprinkler shown above.
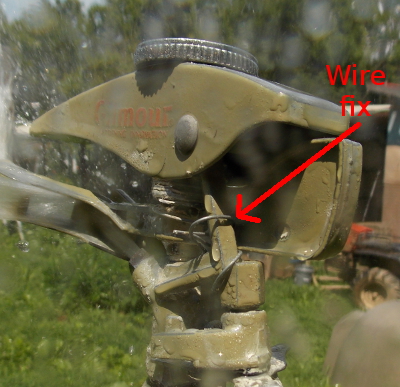 As
I growled and moaned at my sick sprinkler, I realized that if I placed
my thumb where the moving piece at the back of the sprinkler hits the
solid piece, the sprinkler would run normally. Perhaps the
sprinkler had just come slightly out of true (or had worn down the metal
that the moving piece is supposed to hit on)? Twisting a piece of
wire around that stationary piece to emulate where my thumb had been
sitting was enough to get the sprinkler running normally again. My
pride at doing Mark-style troubleshooting knew no bounds!
Of course, the wire isn't
a long-term fix, since the action of the sprinkler tends to bend it out
of true. We can upgrade to a heavier piece of wire, but perhaps
those of you familiar with this type of sprinkler can tell me what's
really wrong based on the description above. Is there something I
can adjust to bring back our sprinkler's charmed youth?
We decided to get rid of this
old Statesman tiller we never use anymore.
Why did we stop using it?
Because the soil in a no-till
garden looks, feels, and
smells a whole lot better.
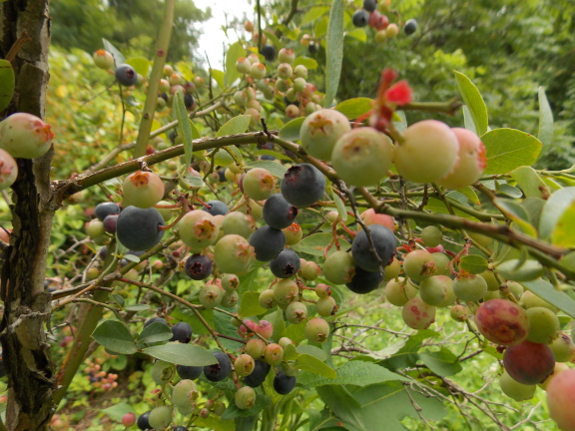
Berries are much simpler
than tree fruit. At least in our climate, the former are less
prone to bug and disease problems, and many berry bushes start fruiting
when they're a year or less old. But berries do have two major
problems --- picking time and bird predation. People are always asking me how we keep birds out of our berries, and the truth is that we'd never had much of a problem...until this year.
This spring, the blue
jays were so bad amid our strawberries that I'll admit I shot at them to
get the family to move out of the yard. It's illegal to kill a
blue jay without a permit from the game warden, but you can scare the
birds off with frequent shots into your strawberry patch. I was
very relieved when the jays moved on, leaving the rest of the berries
for me.
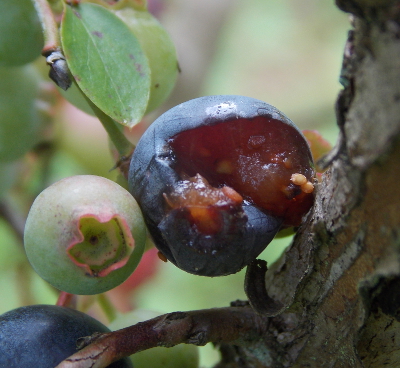 So
when our blueberries started getting eaten, I thought perhaps the
corvids were once again at fault. Nope. Mild-mannered
cardinals were responsible for pecking each ripening fruit just before
it became 100% sweet, ruining the flesh that they didn't consume.
At this busier time of
year, Mark and I didn't have time to put much energy into the bird
problem, so we waited...and it went away. No, the cardinals didn't
stop dining, but the heavier-bearing bushes began ripening their
fruits, and there were soon so many blueberries present that the birds
couldn't really put a dent in the harvest.
My conclusion is that,
short of a voracious family like this spring's blue jays, your best bet
is simply to overplant berries so that you can share with the
birds. Yes, you can rig up some kind of bird deterrent or build a
frame to cover with netting, but isn't it easier just to double your
planting and dine with the cardinals?
We got the truck stuck in the
worst possible place yesterday.
It's bottoming out on our row
of carefully
placed cinder blocks.
Pulling it backward and
forward didn't work today.
Arghhh!
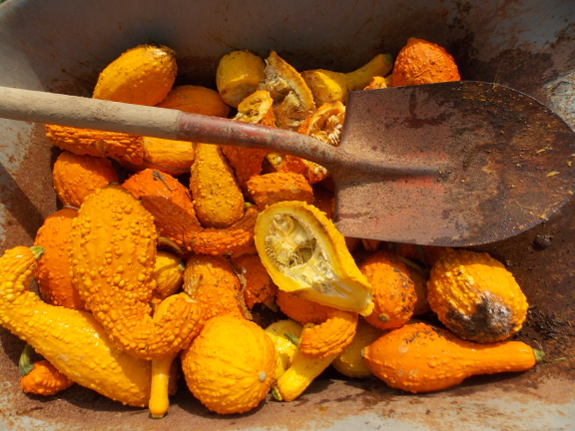
One of our readers asked what we do with excess summer squash. We definitely have a lot of it, since I succession plant to beat the bugs and thus put in far more squash plants than we really need. We've tried drying
or freezing the excess, but neither option seemed very palatable when
we broke back into our winter stores. So, currently, I just pull
out old vines once the new ones start producing and eat what we want in
the interim.
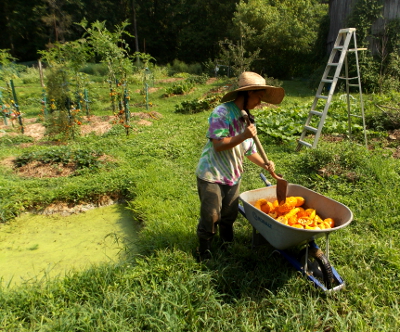 Even
using that method, there are still lots of big squash that get away
from us. So when I remove vines, I select half a dozen of the
darkest-orange squash from various plants to sit on the porch for a
month and then be broken open to provide next year's seeds. After that, the rest of the squash go to the chickens.
If you watch your flock, you'll discover that they're not so interested in cucurbit flesh (although they will
eat it if they haven't had many other vegetables lately). What
the birds really want, instead, is the fresh seeds. Unfortunately,
big squash like the ones I earmark for chickens have skins too tough
for the birds to peck through, but that's easily fixed by whacking away
at the squash with a shovel until each fruit has popped open to expose
the more nutritionally-dense morsels inside. This same method is
pretty effective at moving overripe cucumbers back into the food chain
too.
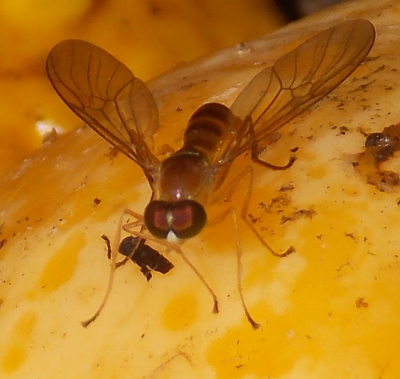 Each
chicken will only consume the seeds from maybe half or one large squash
per day, but I'm hoping my wheelbarrowful will get eaten before the
fruits entirely rot away. I came back a couple of hours after
dumping the squash in the chicken pasture and saw several fruits
hollowed out, but also lots Yellow Soldier Flies (Ptecticus trivittatus) circling over the
squash, some mating and presumably laying their eggs in the squash
flesh. Does anyone know if Yellow Soldier Flies can be raised in the same bins as Black Soldier Flies?
Side note about soldier
flies aside, what should you do with your squash if you don't have
chickens? Today is Sneak Some Zucchini onto Your Neighbor's Porch
Night --- go celebrate!
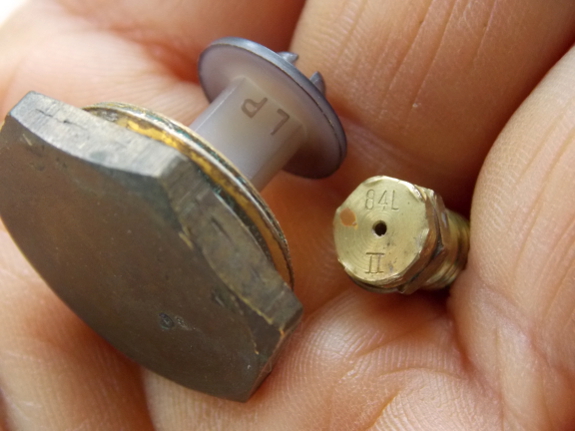
We appreciated everyone's educated feedback about our natural-gas-to-propane stove-conversion project.
It turns out the stove's previous owner wasn't as well informed.
Using the manual, we flipped
the pressure regulator from natural gas to propane. But when we
removed the orifices, we discovered that the burners had already been
converted over. ("L" on the orifice refers to LP, commonly known
as propane.)
Perhaps the improper conversion is why the stove was being sold cheap?
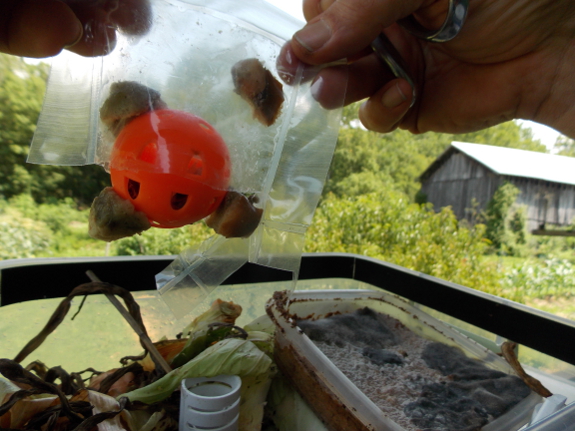
Although I probably would
have gone with the wait-and-see approach, Mark opted to spend an extra
$20 on some black-soldier-fly eggs to get our bin
off to a faster start. This was probably a good idea since summer
is already waning and we'd like to get some data on the composting
experiment before winter.
 Meanwhile, an expert over at Bugguide.net provided some information on the yellow soldier flies that I posted about yesterday.
Fly expert Martin Hauser noted: " While [the black soldier fly] eats
literally everything (it is used in organic waste
disposal), [the yellow soldier fly] develops also in my compost pile,
but they clearly
prefer rotten fruit." It sounds like if we had enough excess
squash and other semi-sweet morsels, we could expand our bin's capacity
with this second species too. In fact, I wouldn't be surprised if
yellow soldier flies end up laying eggs in many black-soldier-fly bins
undetected.
In a perfect world our chickens would get most of the sunflower seeds we grow, but the local bird population usually takes a major chunk before the seeds get a chance to finish drying.

Mom brought me this
140-year-old book yesterday, and I've been pondering it ever
since. Books like this always feel like an opportunity, but I
generally end up asking myself, "An opportunity for what?"
 The
illustrations are beautiful...but the text is really only interesting
to folks who are intrigued by both nature and history and thus don't
mind mentally translating captions like "hive bee" into "honey
bee." There is a print-on-demand version of the title available on
Amazon already, but the book's lack of ranking within the store means
it's probably never been purchased.
My mind wanders through
various scenarios for bringing the heart of this book back into the
public eye. I could hire someone to scan every image and simply
write a quick summary of the nest to go with each picture. Or I
could think outside the box and turn it into a children's story since
the author's theme (animal nests) is very age-appropriate.
I've gone through similar
mental perambulations over more homesteading-related titles, and always
ended up veering away because I have a hard time figuring out which
books are really in the public domain and up for grabs. Robert Plamondon
does an excellent job bringing old farm-related titles back into print,
so perhaps I should leave the job to him. But it's hard to turn
down opportunities when they stare me in the face so prettily....
Ideas?
The 28
inch flashing material is keeping the coop dry.
One of the rolls is
discolored a bit, but it seems to be fine.
I'm guessing it's some kind
of coating material that was different when we got the second roll.
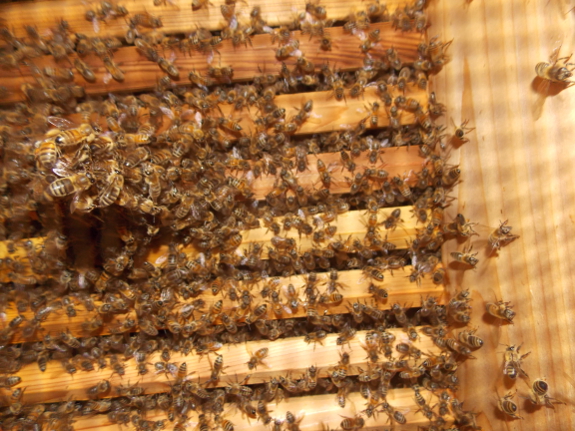
A couple of weeks ago, I opted to super (rather than nadir) our larger warre hive.
If you're interested, you'll want to follow that link for more on the
pros and cons, but since I wrote my original post, I've realized there's
one more major disadvantage to the action. Supering the hive
makes it impossible to guess what's going on inside using a simple
photograph up through the screened bottom rather than using an invasive
search through the boxes.
In contrast, I nadired the smaller hive
three weeks ago, which has allowed me to keep a close eye on the bees'
progress. The sourwood started petering out soon thereafter and
the "yellow flowers" (as my beekeeping mentor refers to wingstem,
woodland sunflowers, goldenrod, etc.) have only barely started up.
So I wasn't surprised to see that that daughter colony has just now
begun to build the first piece of new comb in its third box.
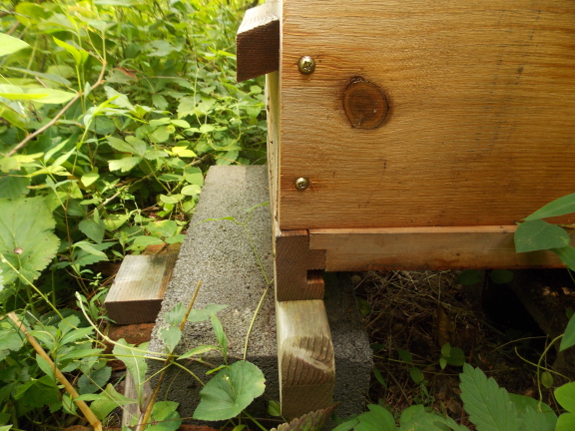
With 20/20 hindsight, I'm
now figuring that the smarter tack when choosing to super a warre hive
is to add two boxes at the same time, figuring any empty space can be
deleted when I delve back into the hive to collect honey. And I
think there's a good chance we will
be harvesting honey from our mother hive this year since sources on the
internet suggest that two warre-hive boxes (one of honey and one of
brood) are sufficient to keep a colony going through the winter months
unless you live in the far north. We currently have at least three
full boxes on that hive, with the super being the wild card that could
bring us up to four.
Since I don't want to repeat last year's disaster of removing brood when I thought I was removing honey,
I'll be waiting until mid to late September to steal the sweet
stores. At that point, the queen should have moved down lower into
the hive and left the honey unaldulterated in the top box or two,
making robbing relatively painless.
It's been a long wait to
get significant honey from our warre hives, and I can see how that could
turn many apiarists off the method. On the other hand, either the
hive or the chemical-free bees
we put into them have resulted in at least one colony that seems able
to survive without chemical intervention. Here's hoping the
daughter hive will be just as vigorous, surviving the winter and perhaps
giving us a honey harvest in 2015.
Our ATV developed a fuel leak
recently.
A visual inspection revealed
what looked like a spot where it was dripping and clearing away mud,
and above that was a hose clamp that needed tightening.
The plan is to add a small
amount of fuel with newspaper spread out underneath to see if the leak
is fixed.
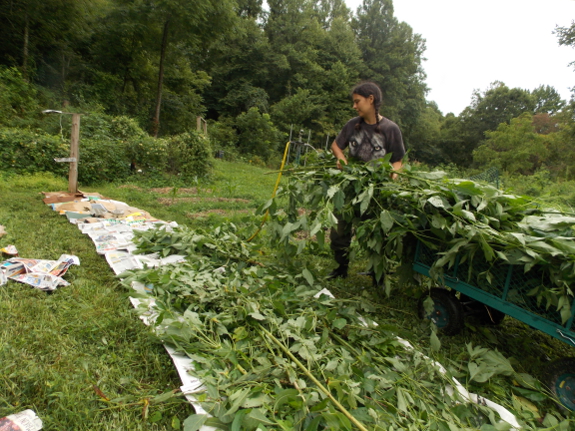
It's ragweed week around here. Even though Mark went through a couple of months ago and tried to rip up all of the small ragweed
within our core homestead, some plants slipped through his net.
Now that the massive plants are getting ready to bloom, it's time to go
through with the loppers and cut each one down so we don't have
thousands of new plants next year. The "chore" becomes much more
fun when I realize I can easily load all that awesome biomass into the
green wagon and use it to top off a kill mulch for next year's high-density apples.
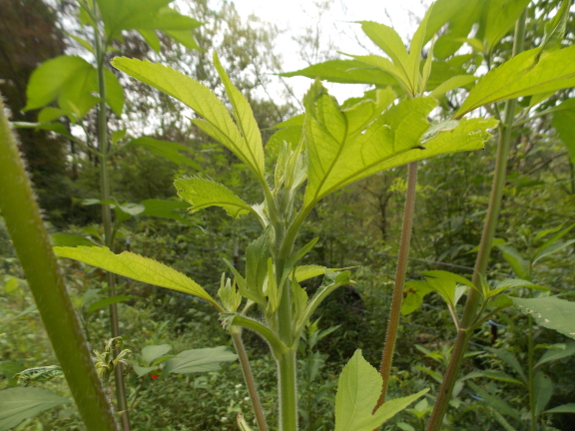
Meanwhile, out in the
starplate pastures, I'm leaving the ragweed alone. I figure that
anything willing to grow in that poor soil will only add much-needed
organic matter to the ground, and if the ragweed plants spread their
seeds widely, we can just mow down the offspring when it's time to turn
the area back into pasture. In the interim, ragweed acts as a very
good deer-monitoring tool since the plants are very tasty to ungulates
at three to five feet tall. Weeds like the one shown above are a
sign that the deer are busy munching in that pasture --- yet another
reason not to plant apple trees there until our fencing is 100%
complete.
Fogged up safety glasses have
always been a problem for me on humid days.
Some days I need to stop weed
eating every 10 minutes to clear the fog.
Today I tried something
called Clarity
Defog it wipes. Wipe
the inside of your glasses and say goodbye to fogged up lenses. Not
sure how long it will last. I put my used wipe in an airtight container
after I opened the sealed foil.
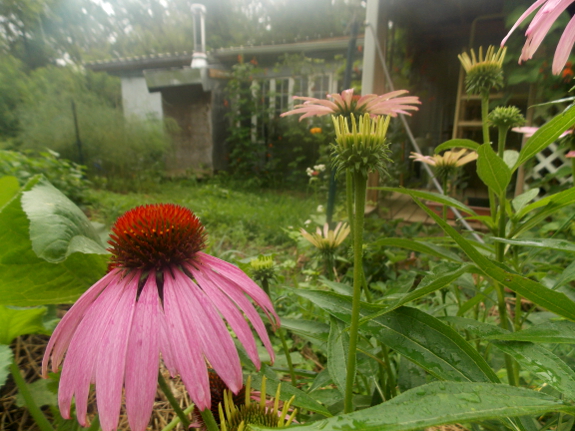
Bouts of cool, rainy
weather prompt our asparagus to send up new spears, even if it is August
instead of April. In the past, I've left these late-summer
asparagus spears alone, but this week I started wondering how much
energy late spears will really sock away for spring. Our asparagus
patches are already covered with forests of fronds, and there are only
two months of growing time left before frost (with the days getting
shorter and cooler 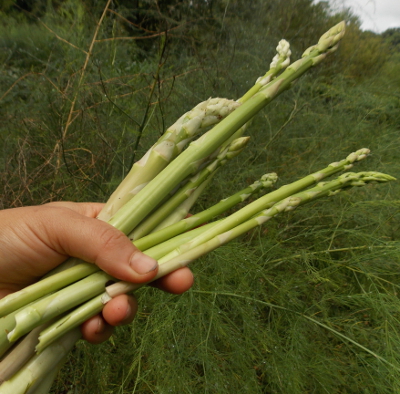 all the time). So I opted to pick a handful of August spears to tempt our jaded summer palate.
If you really want a
late-summer harvest of asparagus, the official method is to plant two
beds --- one for spring and one for fall. In the fall bed, you
don't harvest any spears when they first come up, letting the plant put
all of its energy into frond production. Then, in July or August,
you lop down all the tops and enjoy the new spears that come up in their
place.
We have so many
vegetables to choose from at this time of year that it doesn't seem
worth setting aside asparagus beds just for a fall harvest. But a
stolen spear here or there never hurt anyone....
We're trying reader Faith T's comment on using a
shopping bag to block birds.
I cut some holes at the
bottom which might help to prevent molding.
Doing it side by side with an
unprotected flower should be a fair test.
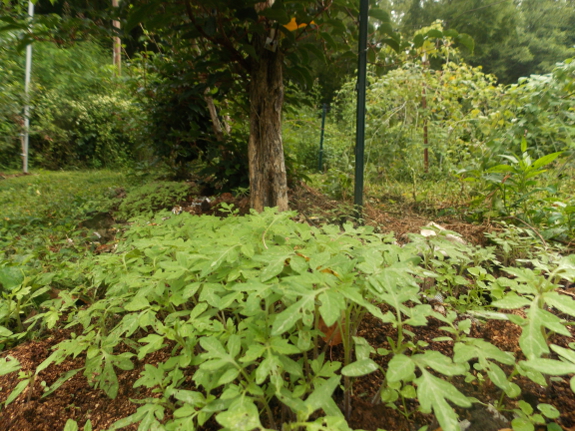
About a week after applying humanure
around the base of our kiwi plants, I figured out a minor flaw --- the
compost is chock full of tomato seeds. When I cook tomatoes into
soups and sauces, I leave the skins and seeds in, and apparently the
human digestive tract doesn't bother the seeds at all. Since
tomatoes are a large proportion of our winter diet, the result is a
forest of seedlings everywhere I laid down humanure in the garden.
I'll let all of the
tomato seeds sprout, then if they seem to be growing too fast, I'll let
Mark whack them down with the weedeater. In future, it might be
smart to apply humanure just a few weeks before the first frost --- long
enough to get the seeds to sprout before winter naturally kills them
off.
Cut the tops and bottoms off.
Sort according to size.
Save the big ones to plant
again.
Yes...we used the stalks as
an addition to the ragweed
mulch.
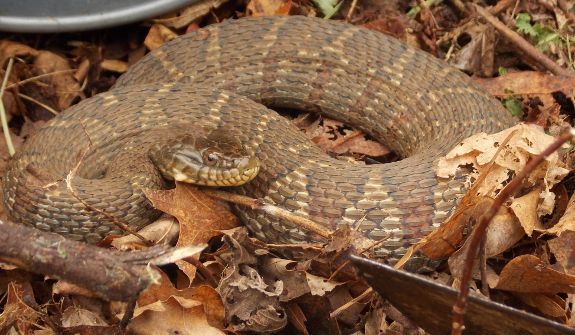
The last time I thought we had a copperhead in the yard,
it turned out to be a water snake. And this time, once again, I'm
ashamed to say I stole half an hour of Mark's morning and tied up our
free-range dog for what I was positive was a copperhead. Only to
discover, upon closer 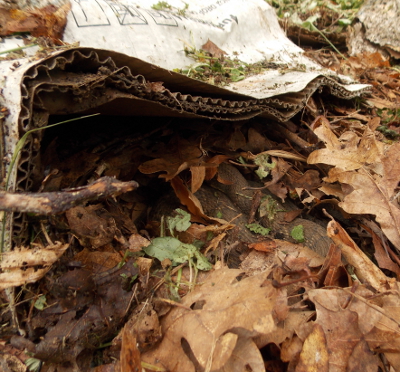 examination of the photos, that our reptile turns out to be...a water snake.
The snake in question was
hiding under some cardboard that I'd used to mulch between our
blueberry bushes. I ran out of tree leaves this spring and opted
to just weigh the cardboard down with branches, which did a pretty good
job keeping weeds down to a dull roar, but which seems to have mimicked a
snake's preferred napping spot --- a cavity under a rock. In
hopes of growing some of my own mulch, I was out in the morning cool
Thursday moving cardboard closer around the bases of the blueberries and
sprinkling oat seeds in between, and I nearly patted this guy on the back before I knew he was present.
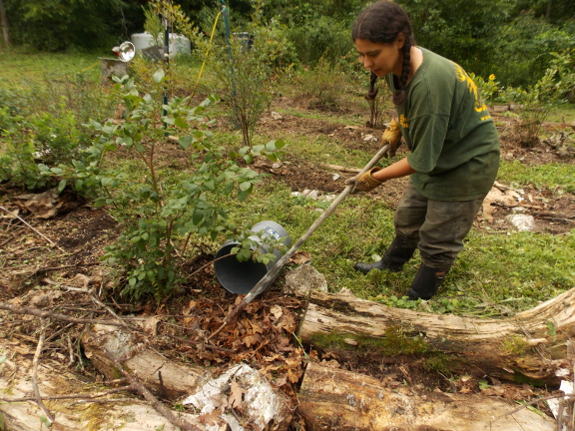
Luckily for me, snakes
are slow in cool weather, and this snake was the least aggressive water
snake I've ever met. Despite quite a bit of wiggling the hoe
around, trying to get the snake to slither into a bucket for relocation,
the snake only (finally) tried to strike when Mark took over the tool
and got more aggressive at the snake-capturing campaign. In the
end, our visitor slithered away into the weeds and disappeared from view
without seriously trying to bite anyone.
In retrospect, I'm not
sure there's really much point in trying to capture and move a snake,
even if it really is poisonous. As Mark pointed out, we could have
half a dozen around the yard without knowing it due to how skittish
most snakes seem to be. I just need to remember the basic farm
rule --- when lifting something like that piece of cardboard, always
lift away from you rather than toward you and assume there's a poisonous
snake underneath. (But do check the snake book one last time
before calling in reinforcements since 67% of our copperhead sightings
seem to turn into water snakes in the light of day....)
This Clymer ATV repair manual is a little expensive at just
over 30 dollars but pays for itself when it guides you to fixing a
problem.
Almost 500 pages of
impressive technical details seems to cover just about any problem that
might happen, along with a comprehensive troubleshooting section that
can often save huge amounts of time.
It's already helped me twice
by pointing out a
quirk in the way oil is added to a Polaris 700 ATV. The other way was recently when
I used the fuel system diagram to track
down a leak.

Years ago, I made
notecards out of my watercolor paintings, and I've been using those
cards for letter-writing ever since. But the inevitable finally
happened --- I ran out! Rather than buying someone else's
notecards to fill in the gap, I figured, why not make up some Walden
Effect cards to spread the word instead?

 I
chose four fun images for fall, then printed 65 of each, enough for me
and my mom to use, with some to give away and sell. If the
response is good, I'll even choose another round of homesteading images
in a few months and do a winter series to match these fall images, but I
won't be reprinting the fall set, so act now if you'd like a copy!
If you want some pumpkins
and simplicity quotes to brighten your day, you can buy sets of four or
sixteen notecards (which come with envelopes and shipping included,
even numbers of each design), or you can enter the giveaway at the
bottom of this post to win free packages of four cards. (As a side note, if you live outside the U.S., you can
enter the giveaway, but will need to email me if you'd like to buy
notecards. I haven't figured out what international shipping costs
would be yet, but I don't think they'll be too much.)
16 notecards --- $18
We'll be giving away sets
of four notecards to three different winners next week, and if we get
more than 100 entries, we'll add another winner for every 50
entries. So tell your friends and use the widget below to enter!
How can you tell which cat is
the Alpha cat in a group?
In our group Huckleberry only
sits on the prime roosting
spot when Strider is off
somewhere doing his normal activities. If Strider comes back and it's
occupied he just takes it without even a dirty look from Huckleberry.

Back
in 2003 when my previous watch died, I decided I wanted a watch that would
really go the distance. With my usual supreme unconcern for
aesthetics, I chose the huge specimen shown on the right above, and that watch has
served me very well. Between waterproofness, shock resistance,
solar battery charging, and automatically setting the time every night
using something I can't recall (radio waves from Texas?), I haven't had
to deal with watch issues in over a decade.
But all good things must
come to an end. The battery inside my beauty finally stopped
accepting a charge a few months ago, and I decided to buy a new watch rather than a new
battery. Over the last decade, due to Mark's hard work to smooth down
the edges of my type-A personality, I've stopped wearing a watch every
day and instead simply use my time piece to check the hour if I wake up
at night, to jerk me out of sleep once or twice a year when I can't wake
at my normal pace, and to monitor how long we've been rubbing rocks
when counting stream macroinvertebrates. I do
like the solar feature of my old watch since longevity is always a
boon, but since I rarely take watches out in the field now, I'm willing
to bypass the extreme waterproofing and shock resistance. I'm even
willing to set my watch twice a year to take care of daylight savings
time the hard way.
Despite that willingness
to downgrade, I put off buying a replacement watch for months. I
remember my old watch was pretty pricey (although I don't recall the
exact figure), and I wasn't sure I was willing to spend so much
again. But apparently solar technology has come down considerably
in the last decade. A simple solar watch now costs under $10 even after you factor in shipping!
At that price, and with such good reviews, Mark said he wanted one
too. Here's hoping my second solar watch will last another 11
years, not just the 6 years promised by the manufacturer.
Anna has been researching
battery powered chainsaws and somehow arranged for the nice people at Oregon tools to send us a
complimentary review chainsaw to drive around the block a few times.
The first test will have to
wait till the massive 40 volt battery charges up.
Stay tuned to see how long
the battery lasts and what kinds of firewood it can handle.
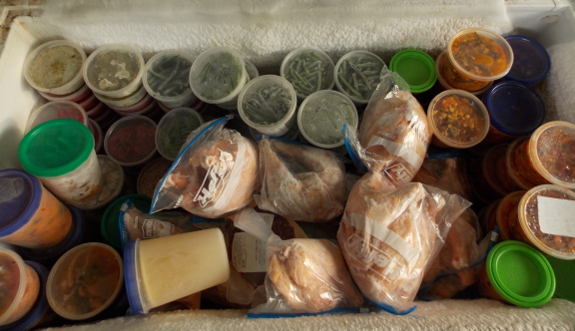
I knew when we bought our quarter of a cow
that we might run out of freezer space as a result, and the inevitable
has finally happened. Pastured beef, homegrown chicken, some
strawberry jam and leather, plus 22 gallons of various vegetables
equates to a freezer nearly full to the brim. What's next?
If it were September
instead of August, I'd say, "Time to rest on my laurels and prepare for
winter!" But the garden is still overflowing, and we should have
at least a bushel apiece left of beans, corn, and tomatoes coming in
over the next few weeks. In a pinch, I can give some away, but we
always wish we had more summer bounty come spring, so I'd prefer to
preserve at least a few more gallons of warm-weather food.
The obvious solutions to
round out our preservation campaign are canning and drying. If I
limit myself to plain tomatoes, canning is easiest since I can use the
hot-water-bath method, but I'm tempted to brush off the pressure canner
we bought years ago as a backup to the freezer and try my hand at
canning soup. Alternatively, I could dry tomatoes,
which is a bit more nitpicky but is cooler since the heat source is
outside rather than right in our living area. And, if I were
brave, maybe I'd even try my hand at drying corn and beans?
What do you do when you run out of room in the freezer and still have food in the garden? (Don't say "Buy a pig!")
The bottom of our chicken
tractor nest box collapsed this weekend.
After fixing it this morning
I made a holder for a 2 gallon chicken bucket waterer.
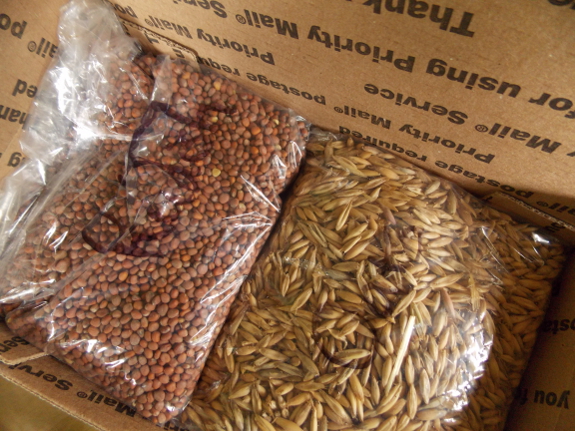
Even though I'm quite happy with my current cover-crop campaign (explained in depth in Homegrown Humus), there are some gaps I want to fill in both the book and in my own protocols. Time for an experiment!
Part of this year's cover-crop experiment is going to take place off-farm. As with any gardening book, Homegrown Humus
is largely based on my own experiences, which means that people who
live far away may have slightly different results. So I tracked
down ten readers scattered across the U.S. who were willing to accept
free packs of cover-crop seeds in exchange for putting my experiments at
work in their own gardens. Seed packages went in the mail last
week for folks living in zone 5 and colder, while everyone else's seeds
will be mailed out tomorrow. I'm really looking forward to
learning how buckwheat and sunflowers do during "cold" months in the
Deep South and how oats, oilseed radishes, and fava beans fare all over.
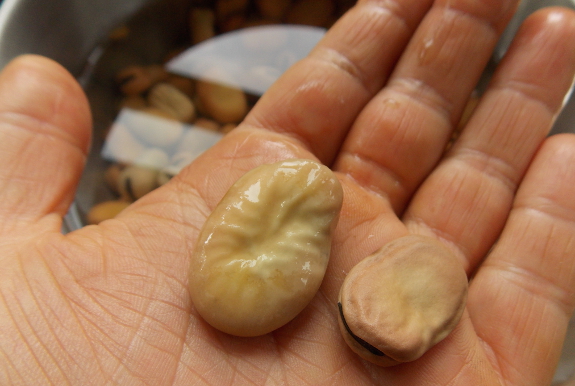
"Fava beans?" you may be
saying. "You haven't mentioned that cover crop before." Very
astute of you! In fact, fava beans are the other part of this
year's cover-crop experiment --- trying out a new species for our farm.
I've read a lot about fava-bean cover crops on permaculture blogs, but
the legume seems to be hardy primarily in zones 7 and warmer.
Since we live in zone 6 (and sometimes have nearly zone-5 winters due to
our north-facing hillside), I figured fava beans were out of our
league. But why not push the envelope?
To that end, I soaked Windsor fava bean seeds for speedy germination,
then planted 0.625 pounds in several different locations around the
farm. Soon I'll know if fava beans are worth the high seed price
($12.75 per pound once you factor in shipping), whether they can handle
clayey soil, whether they will survive in waterlogged ground, and
whether they do well when mixed with oats and oilseed radishes.
Stay tuned for updates!
Do
you want to be part of future experiments? I usually post this
type of opportunity to our facebook page, but even if you're already a
fan, facebook might not be showing you our updates. Be sure to
click the like button at the bottom of our posts when you notice them if
you want to be sure to see them on your news feed in the future!
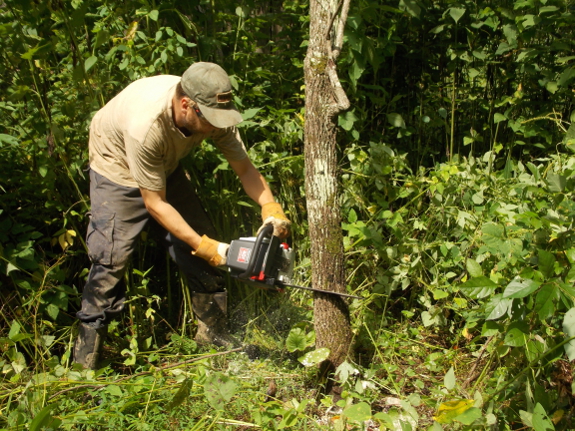
We tried out the new Oregon battery powered chainsaw today.
I was very impressed with the
power. We cut down a medium sized walnut tree with no problem. We also
cut up some small pieces for an upcoming Rocket Stove experiment
It's nice to not need ear protection.
When Mark's gas-powered
chainsaw
died after only a couple of years of use, I decided to see if there were
any battery-powered chainsaws out there. It turns out that quite a
few battery-powered
saws are starting to look like possibilities for homesteaders who just
need to cut enough firewood to get them through the winter. Is a
battery-powered chainsaw a good option for us (and for homesteaders like
us?).
While attempting to
answer that question, I came across many pros and cons for
battery-powered versus gas chainsaws. The major disadvantage of
battery-powered chainsaws is that they're not quite up to handling the
same extreme cutting conditions that gas-powered saws are. Most
reviews of even the best battery-powered chainsaws suggest that cutting
trees more than 9 to 12 inches in diameter (depending on the hardness of
the wood) might stress your saw, and you'll need to be pretty careful
with maintaining chain sharpness to get even that level of
cutting. Similarly, you can't cut all day with a battery-powered
saw since the battery usually gives out after an hour or two, and, in
the long run, replacement batteries usually cost over a hundred bucks
once the cell stops accepting a charge. (Of course, Da Pimp might extend that battery life considerably.)

On the other hand,
battery-powered saws have a major appeal for folks like us who wouldn't
usually be cutting for more than a couple of hours at a time
anyway. There's the quietness factor --- not only are
battery-powered saws silent when not cutting, they're much quieter than a
gas-powered chainsaw even when zipping through wood. We'd never
have to fight those ornery pull starters (that always seem to get harder
and harder to pull as a gas-powered saw ages), and maintenance in
general is likely to be much simpler with a battery model.
Homesteaders who go for months without cutting won't need to be as
worried about their saws if they opt for battery-powered versions since
there's no fuel to go bad, and battery-powered saws probably cause less
overall pollution than a typical two-stroke gas saw. Finally, a
battery saw definitely feels safer since the motor isn't running at all
as you move between areas to cut.
Is the pleasantness factor worth the lack of power? We received a review saw from Oregon to see if we can answer that question. Stay tuned for a bunch of posts from Mark as he experiments with our trial saw,
and for a later post from me explaining how we narrowed down the
battery-powered chainsaw choices out there. In a few weeks, I hope
that we'll be able to tell you whether or not a battery-powered
chainsaw is worth the expense for homesteaders.

An old hand cranked Chinese
military generator found its way back to us recently. (More on those
details tomorrow.)
It was designed to power Army
radios in the field. Cutting the 4 pin cable reveals black, red, and
white wires. The red and white wires equal 30 regulated volts at 1 amp
and the red and black outputs 25 regulated volts at 2 amps.
I'm surprised at how
little effort it takes to create 12 to 15 volts. The first experiment I
want to do is hook up an additional voltage
regulator/charge controller
to try charging a golf cart battery.
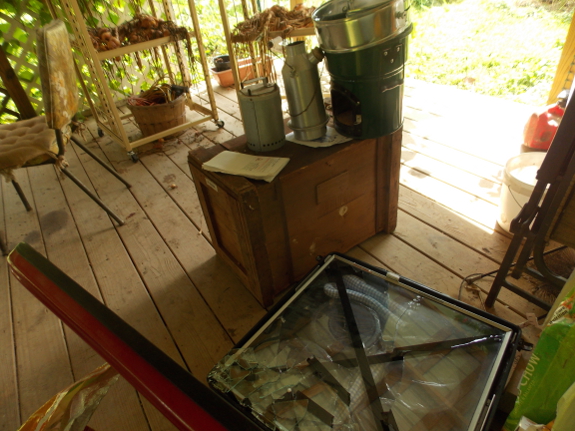
It turns out that a
like-minded neighbor was living a mere half mile down the road from us
all this time, and we only learned the extent of our similarities when
she got ready to move away. For health reasons, our neighbor is
having to return to her home state, and she decided that much of her
homesteading gear wasn't worth shipping south. Did we want a rocket stove, hand-cranked generator, solar oven (with one broken pane), and much more? Definitely!
I'm most excited about
experimenting with the rocket stove and the solar oven, while the
Chinese military-issue generator from 1972 tops Mark's list.
However, what I actually
used first was an item I thought wouldn't be much use to us here.
A simple wooden rack of drying trays makes sense if you live in a
climate where the humidity doesn't often hover around 80%, but if we
tried to dry food in such a device without building a solar dehydrator around it, we'd just grow mold.
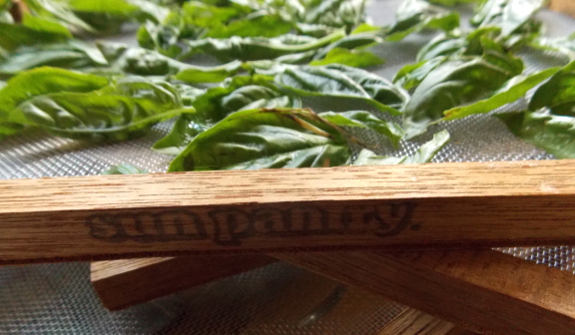
Still, when I realized
I'd picked too much basil for my current batch of pesto, I thought ---
maybe the simple drying setup would work for herbs? I filled the
four trays with basil, oregano, chives, and Egyptian onions and will
report back in a few weeks once I discover which, if any, dry quickly
enough to maintain their flavor in our wet climate.
A huge thank you to our soon-to-be-ex neighbor for sharing the bounty with us!
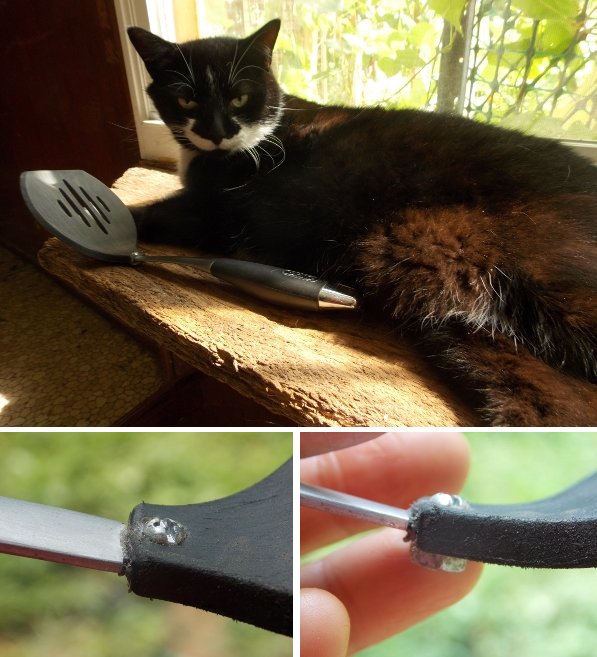
Our good spatula broke in
two. I tried gluing it once, but it didn't hold for long.
It works okay like this...but
we lost a pastured beef meatball last week due to it separating.
Today I got lucky with
drilling a hole through both the plastic and metal and securing it with
some found hardware. With any luck this will put an end to any future
meatball casualties.
Nuts are notorious for
taking a long time to bear. For most species, you probably
shouldn't expect a harvest for at least a decade, and during that time
nut trees may spread to cover an area fifty feet in diameter. So
it's no surprise that many homesteaders instead turn to the bush growth
habit and relatively fast bearing nature of the hazel.
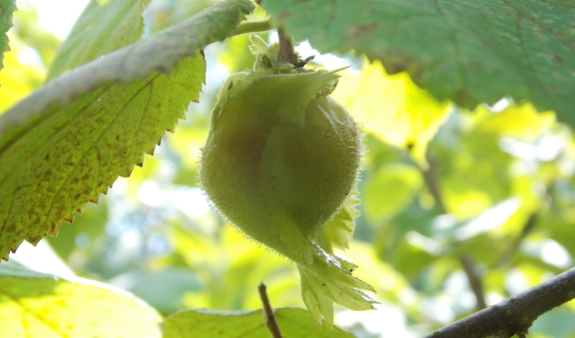
Of course, "relatively fast" isn't exactly speedy. Almost five years after planting, our unnamed hybrid hazel variety from the Arbor Day Foundation is finally starting to take off, and I was excited to see both male and female flowers on the bush this spring. I'd thought the latter dropped off, but
closer inspection this week turned up a few developing fruits nearly
hidden amid the foliage. Since only one of the three bushes I
originally planted survived, this bush is either self-pollinated or
(more likely) the wild hazels about a hundred feet away in the woods
provided enough pollen for everybody. No matter who the nuts'
daddy is, I'm excited to think that we'll get to taste our first
homegrown hazels this year after all!
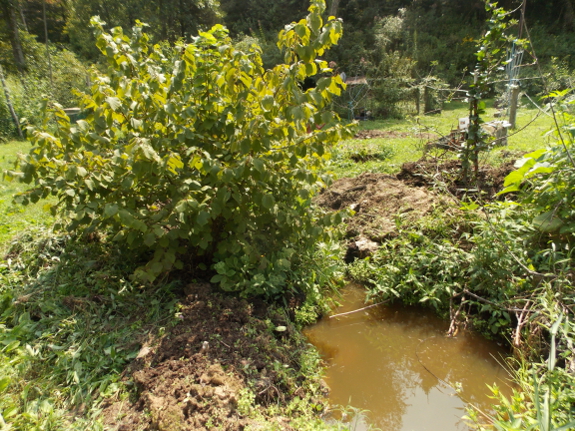
Despite our bush's slow
initial growth, it has proven itself able to handle waterlogged soil, as
is evidenced by the "pond" in the photo above, which is actually a pit I dug to gauge groundwater levels and to elevate the surrounding soil.
Unfortunately, the two named varieties I planted in the starplate
pasture this spring have been less resilient in the face of heavy deer
pressure. Only one of the two bushes has survived and I recently
decided that the hazel would probably do better if transplanted into the
safety of our core homestead close to its cousin. In fact, I
might even dig the little survivor up now rather than waiting for the
usual transplanting season (after the leaves fall) since I'm not sure
how much plant will be left after a few more months of deer grazing.
Rambling aside, the purpose of this post is really to tell my father to go check on his hazel bush. Yes, you think
it's never born fruit, but I had to look really, really close to see
the developing nuts on my bush, so yours might have them as well.
Or you can wait a few more weeks until the husks turn brown and look
less like leaves, at which point I suspect the nuts will be more
evident.
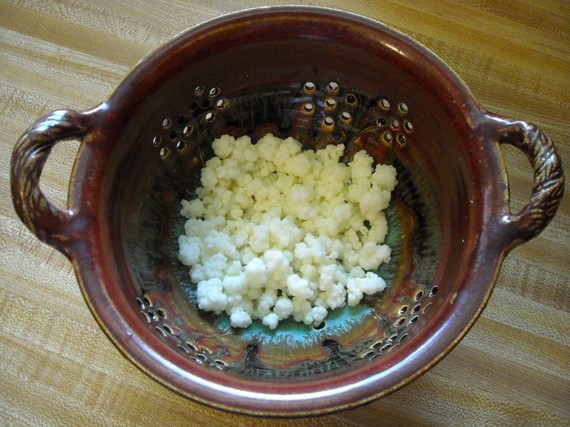
Anna:
Brandy is the
original source of my kefir grains, and she's been experimenting with
wild fermentation for much longer than I have. So I was thrilled
when she offered to share a bit about her experiences...along with a
free starter culture for one lucky winner. Scroll to the bottom of
this post to enter the giveaway, but be sure to read Brandy's tips too. (And don't forget that you've still got a few hours left to enter our notecard giveaway!)
Brandy:
 It's been more than five years since
my kefir grains arrived in the mail, packed in a small zippered bag
and looking all squished. I don't think I knew what was ahead then,
that it would be the one thing I'd keep up with through good times
and bad, through morning sickness and two new babies. My kefir
grains have traveled, too. After sharing them with dear local
friends, they've been packed up and shipped all over the country.
I'm still just as excited about kefir as I was when they arrived, so
I thought I'd compile some of my thoughts and favorite recipes.
 I got the grains on a whim, thinking
it would be fun to try them out. I'd had some serious antibiotics a
few months before and I was not feeling all that great. I started by
making berry and peach smoothies and putting the kefir into biscuits.
I'm still doing that, and more. I haven't bought buttermilk in
years and I don't really buy much yogurt since Anna enlightened me on
the
differences. My stomach feels so much stronger, too.
Kefir makes a wonderful substitute
for buttermilk, even for those who enjoy buttermilk plain, and adds a
lovely leavening kick to quick breads. We put it in waffles,
pancakes, biscuits, smoothies, cobblers, coffee cakes, anywhere that
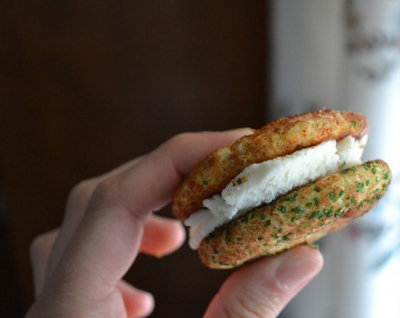
buttermilk would normally go. I've even used kefir cottage cheese in
place of ricotta in lasagna! My mother, who is gluten-free, enjoys
kefir as a way to add a yeasty taste to wheat-free baked goods. All
this is making me hungry, let's get to some recipes!

Fluffy
Kefir Biscuits
Kefir
Cottage Cheese
Vanilla
Kefir Ice Cream
Kefir
Cream Cheese
Long-Fermented
Sourdough Biscuits
My
simple kefir tutorial
Anna:
If those recipes sound good, you can get started on kefir in your own kitchen. Enter the giveaway using the widget below for a chance to win a starter culture, or buy your own for just $10 (plus $5 shipping) in Brandy's etsy store. Enjoy!
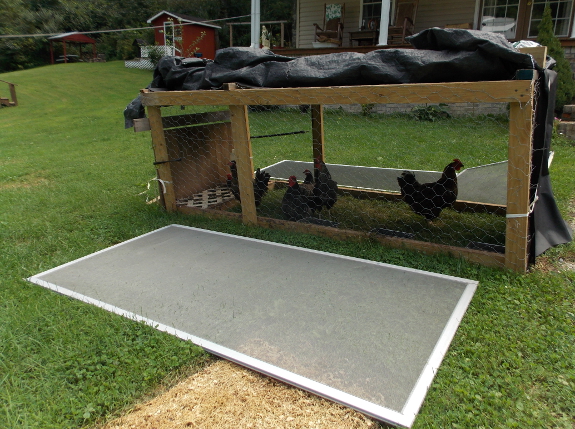
It's tough to make a chicken tractor light enough to pull and still strong enough to keep out predators.
The photo above shows how Kayla used movable screens to keep a hawk
from reaching through the mesh into her chicken tractor.
We recommend not trying to beef up your tractor to keep out raccoons. Instead, keep your chicken tractor very close to home (and get a good dog, if possible) to scare any potential predators away.
With raccoons, it's also handy
to make sure your birds eat any kitchen scraps very quickly. We
learned the hard way that raccoons will come for scraps and stay to eat
your chickens. Better a flock that only eats store-bought feed and
grass than birds with a more diverse diet who end up in a raccoon's
belly.
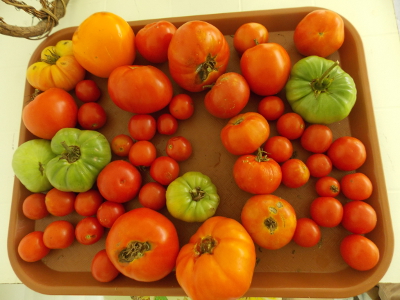 "You know, my parents' house used to be a trailer," Kayla mentioned after I posted about looking for a few more trailersteaders to profile in the upcoming print edition of Trailersteading.
It turns out that her family home is an elegant example of turning a
mobile home into a beautiful and functional living space...but you'll
have to wait to read about that in the book.

Still, I can't resist
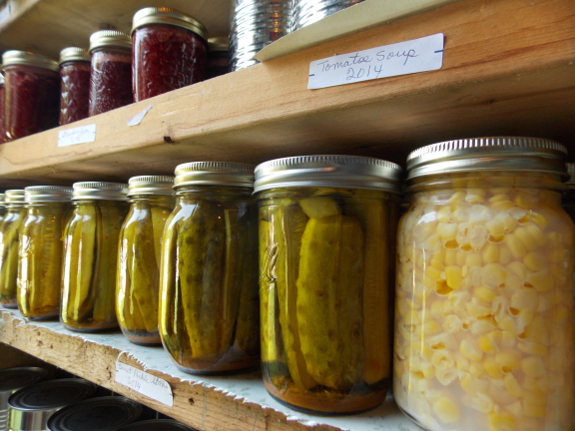
sharing some highlights from my tour. From a purely aesthetic
standpoint, I was taken by the canned goods that Kayla and her mother
have stocked away in their pantry (including lots of pickles from our
cucurbit overflow). And aren't ripening tomatoes always beautiful?
More functionally, some
of you might want to follow the family's lead and turn a yard-sale bed
into a beautiful bench like the one shown above. Just use the
headboard for the back and cut the footboard in two to create the
sides. Kayla's mom decided to make her own bench after seeing a
similar one selling for $150; in contrast, her version cost only about
$10 to produce.
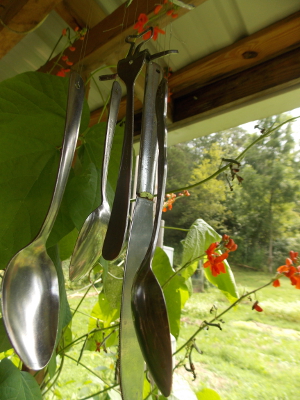
On a similarly crafty note, I was so taken by the harmonious sound of Kayla's silverware wind chimes that I traded a chicken waterer
for a set to take home. When I first saw photos of these wind
chimes, I expected them to be a bit tinny like the cheap chimes you can
get from big box stores, but I was very wrong! Want a set of your
own? Kayla has four more already made and up for sale in her Etsy store.
Thanks so much for letting me invade your home and take photos, Kayla and Alice!

I've looked at a lot of
chicken cam set ups over the years and have not been impressed with any
until I found Terry Golson's HenCam.com.
What's it take to keep 4 live streaming cameras going in a barnyard
environment? Terry's
husband does an excellent job explaining the not so easy IT details
that make such a project possible.
They've also got goats to
keep their flock of over a dozen chickens entertained.
I'm intrigued by the potential of the scarlet runner beans I'm growing for the first time this year. I planted them for quick shade along the south face of the trailer
while the perennial vines get established, but I was soon taken by the
way the orange-red flowers attract hummingbirds (plus bumblebees,
butterflies, and other insects). And now I'm wondering whether
biomass production might not really be scarlet runner beans' primary
selling point.
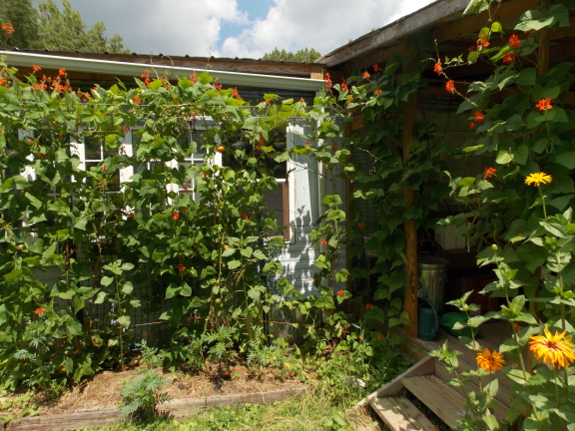
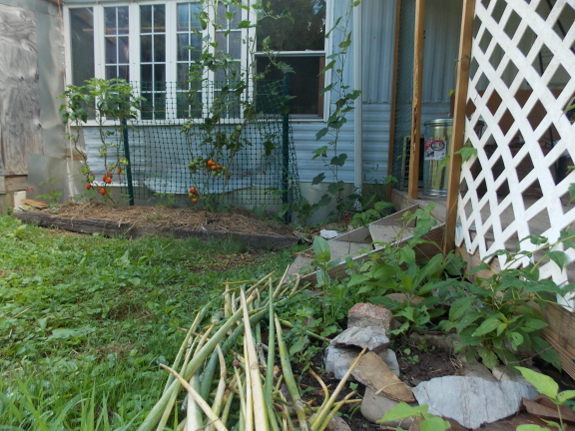 "Those
plants are like annual kudzu!" I told Mark at lunch yesterday, and he
asked me why I was being so mean to the beans. But, the truth is, I
was paying them a compliment. If the species wasn't the scourge
of the South, kudzu would have a lot going for it from a permaculture
perspective due to its ability to fix nitrogen, to thrive in poor soil,
and to grow extremely quickly. Scarlet runner beans seem to share
many of the same traits, as you can see by comparing the two photos
above --- the top picture was taken this weekend while the second photo
is from only seven weeks earlier. Since scarlet runner beans are
annuals instead of perennials, they can put out this crazy amount of
weekly growth with much less risk of the beans taking over the world.
Since our soil is getting
richer by the year, meaning we can grow more food in less space, I've
been tossing around ideas for what to do with the freed up growing
room. One big goal is to grow more of our own compost and
mulch. To that end, I'm experimenting with some plants that I
wouldn't quite call cover crops since they don't out-compete weeds, but which might mix together to make a prime compost pile.
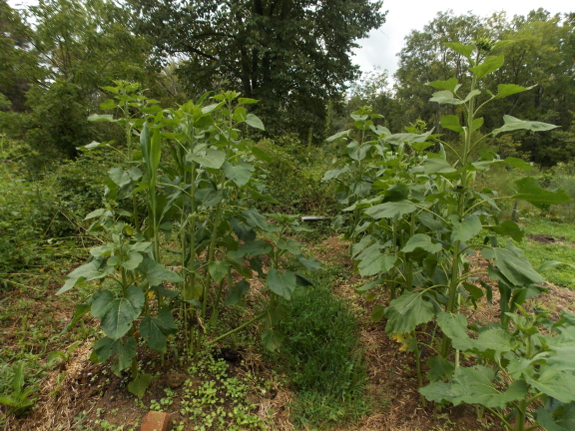
 The
photo above shows this summer's experiment of sunflowers and sorghum,
with oilseed radish planted around the roots of the left-hand bed for
weed control. Perhaps the relatively woody stems of sunflowers
will combine with the high-nitrogen vines of scarlet runner beans to
create good compost? As a lazy gardener, I'd love it if the
compost could be made in place --- just toss the plant carcasses on top
of a garden bed in the fall and let them rot into compost by spring
while shading out weeds in the process.
It seems like I've always
got exciting cover crop experiments in the works. That's the sign
of a geeky gardener --- she's drawn to the buckwheat being grown for
soil improvement before she takes a look at your tomatoes.
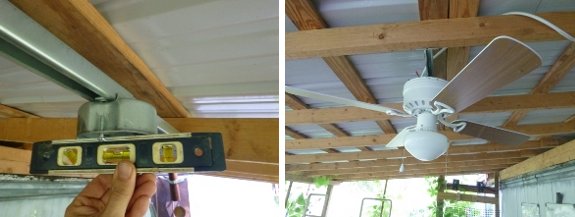
We recently decided our front
porch would be a good place for a small ceiling fan.
How do you install a ceiling
fan on a slanted roof?
Level the ceiling
fan mounting kit at the opposite angle before securing it.
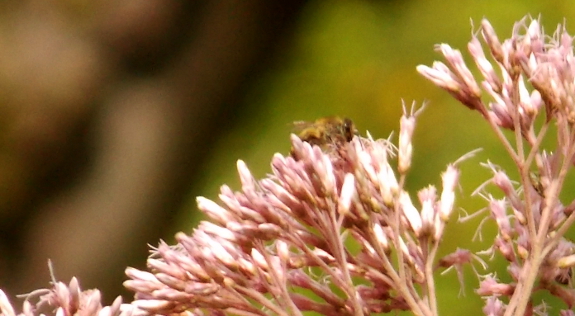
The bees haven't managed
to do any extra comb-building this week, as evidenced by a photo up
through the bottom of the daughter hive. Sure, there are scads of
flowers available at the moment, but bees can't fly when it's raining
every day. Luckily, both of 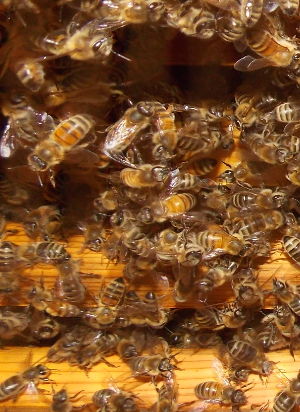 our colonies have socked away so much honey that they could probably coast until winter if they had to.
Honey is on my mind
because this is the time of year to start thinking about the hives'
winter survival. But survival through the cold months doesn't just
mean honey stores. Varroa mites can be a huge drain on a hive's
resources in the winter, and the populations sometimes balloon in late
summer and early fall. So I like to do a mite check
in August, another in September, and one more in October just to make
sure the colonies are on track. Our two hives passed with flying
colors during this first round --- the daughter hive dropped two mites
per day while the mother hive dropped 1.3 mites per day, far below the
worrisome threshold.
What will we do if mite levels rise over time? We already use a lot of the methods of varroa-mite treatment/prevention listed here. Last year, we tried out treating bees with powdered sugar
as well, but I don't think I'd do that again --- it could be just a
coincidence, but the hive dosed with sugar is the only one where I've
ever had a colony abscond in the fall. Instead, I might try the rhubarb trick that an old-timer recently shared with me. Better yet, here's hoping our hygenic bees will groom off so many varroa mites that I won't have to do anything at all.
Five years ago we hauled
a freezer twice this size with the golf cart.
That was during a rare dry
spell. The golf cart wouldn't have made it on a day like today and I
think we maxed out our ATV carrying capacity with this 7 cubic foot
IDYLIS.
A 10 percent discount for
veterans along with free delivery made this a sweet deal.
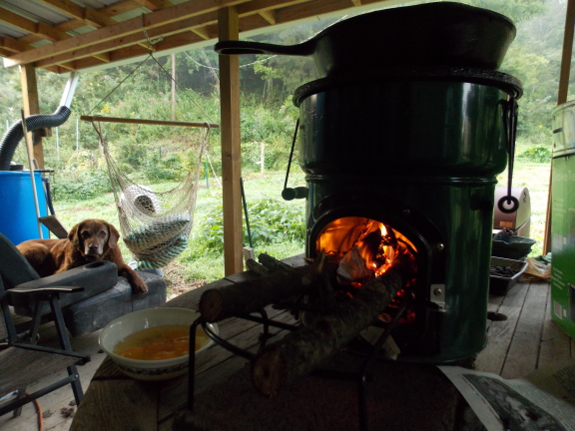
Our power was out for
about 21 hours Sunday afternoon through Monday morning. That
seemed like the perfect opportunity to try out the new rocket stove that our neighbor gave us!
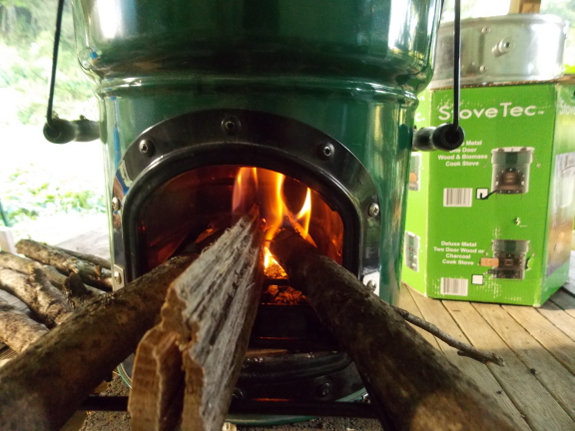
I'd like to be able to
tell you "I only needed two sticks of wood to scramble our breakfast
eggs," but the truth is that this first iteration of rocket-stove
cookery was a learning experience. What I mostly learned is that
damp wood doesn't fly in rocket stoves --- I didn't really get the fire
blazing until I tracked down the piece of kindling in the middle of the
photo above, which had been sitting in our woodshed for a couple of
years and was bone dry. The sticks that have been drying on the
porch for a week mostly smoldered instead of burning.
Perhaps because I only
ended up using one dry piece of wood, the temperature in the skillet on
top of the rocket stove never got warmer than what equates to about
medium on our electric range. That's fine for scrambling eggs, and
would be great for things like soups, but for my next experiment I look
forward to trying out the skirt that fits around a pot to increase the
stove's efficiency by 25%. I also want to get a more solid handle
on exactly how much wood the rocket stove consumes, although I have to
say that I'm already impressed in that regard.
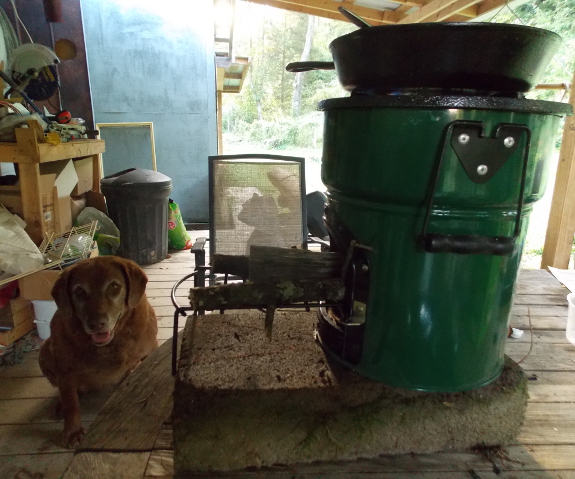
What was the biggest
surprise about making breakfast on the rocket stove? How much I
enjoyed the fire therapy! Usually, I get a little cranky during
power outages due to internet deprivation, but a dose of fire first
thing in the morning instead set me singing happily as I weeded the
garden. Of course, it doesn't hurt that our Cyberpower Battery Backup combined with my laptop battery means I can enjoy about an hour and a half of blogging time even while the grid is down.
In case you're curious, everything in the freezer
stayed frozen during the outage, despite highs that nearly reached
90. If the juice had stayed off for more than 24 hours, though, we
would have topped off the cold with our generator.
I installed a firewood guide
on our steel
crate garden wagon today.
The small and medium slots
will help us cut up all the fallen limbs we have.

August is probably the
tastiest time of the year on our farm. This week, we've enjoyed
the first lettuce and red peppers, and the fall round of red raspberries
are starting to be nearly as copious as the blueberries we've been
enjoying for weeks. Three cups of berries per day make perfect desserts.
 We're
still eating tomatoes and cucumbers and watermelons (although they're
starting to decline), and have plenty of summer squash, green beans, and
Swiss chard that will continue to go the distance. We're nearly
at the end of our spring cabbage and carrots (which currently live in
the crisper drawer of the fridge), but fall crops are all growing like
gangbusters and promise to replace the spring round soon. In fact,
I saw the first pea flower Monday!
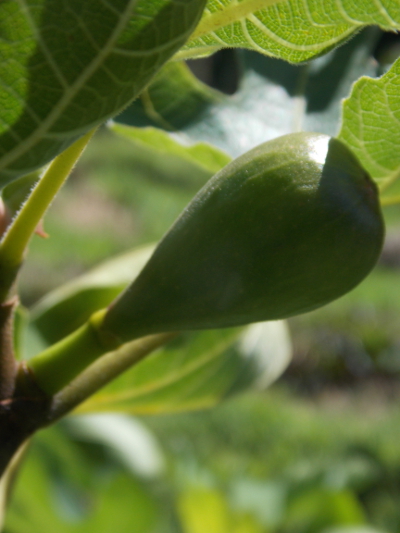
What am I watching with
an eagle eye? Our fig bushes! Last year, the first fig
ripened up at the very beginning of September, and I'm looking forward
to tasting the first few Celeste figs (along with bowlsful of Chicago
Hardy) later this year.
What are you enjoying and looking forward to seeing soon in your own garden?
Our neighbor with a tractor
has agreed to help us get the truck unstuck.
Today we just looked it over
and developed a plan.
With any luck it will
continue to dry up and make things a little easier.
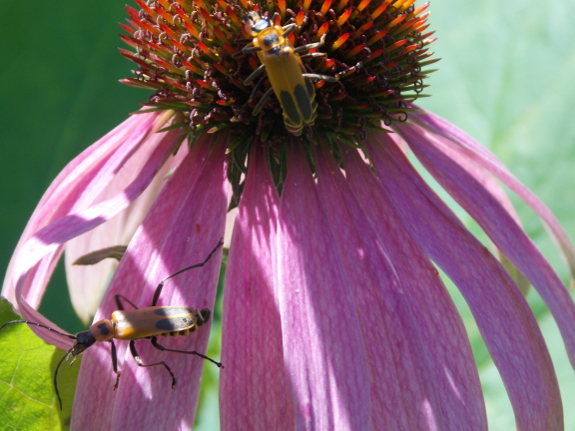
 This
week, the world seems to be chock full of soldier beetles.
Specifically, these goldenrod leatherwings are in a mating frenzy --- I
counted half a dozen on just a few echinacea flowers on Wednesday
afternoon.
With nearly 500 species
of soldier beetles in the U.S., gardeners aren't likely to learn them
all by name. But I'm pretty sure all of the soldier beetles are
either innocuous or beneficial (although some of their larvae are minor problems on fall fruits).

The beneficial species
are handy because the larvae eat slugs and snails while the adults
consume aphids. Other species (like the goldenrod leatherwing)
seem to fixate on nectar instead, but the world can't have too many
pollinators!
(Yes, this post is just an excuse to share pretty bug photos. What can I say --- they're cute!)
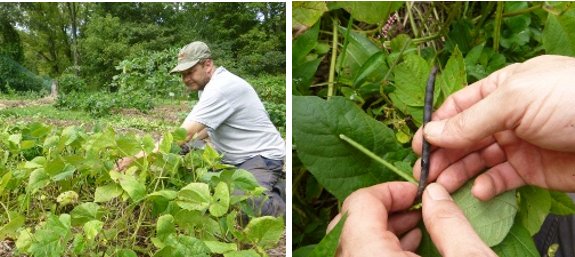
When is the best time to pick
mung
beans?
We pick them once a week this
time of year after they turn black.
They make yummy sprouts for
greening up tuna salad during the Winter months.
I appreciated all of the thoughtful comments on my scarlet runner bean post
last weekend! Several of you correctly pointed out that the
species is actually a perennial, although the distinction won't make
much of a difference for most of us since (like tomatoes) scarlet runner
beans are perennials that act like annuals in temperate climates.
On the other hand, that reminder did point out that not only the green
beans, shelled beans, and flowers, but also the tubers of scarlet runner
beans are edible.
 However,
what I wanted to share today is a downside I just discovered of my
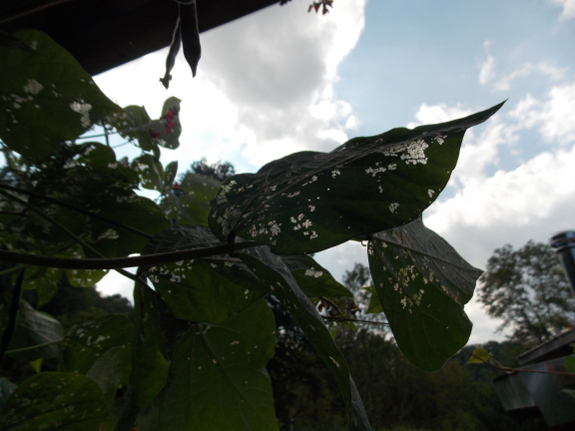
beautiful bean planting. Unfortunately, scarlet runner beans seem
to make awesome nurseries for Mexican bean beetles,
as you can tell from the holey leaves in the photo above (and from the
larva that was hiding in a photo in my previous post, repeated to the
left). We use the ultra-simple bean-beetle control method of
succession planting bush beans (explained in more depth in The Naturally Bug-Free Garden),
but adding scarlet runner beans to the mix means that this year's
beetle population exploded and quickly colonized my bush bean
plants. Good thing I'd already frozen several gallons of the
staple crop because the plants will probably soon bite the
dust.... I might try scarlet runner beans again, but this piece of
data suggests I should keep my for-food beans far away from my
for-beauty beans in the future.

On a semi-related note, our experimental fava beans
have come up! The seedlings look more like peas than like beans,
which is probably because fava beans are really a vetch. We hope
to experiment with eating both the fava bean seeds and the scarlet
runner bean seeds at lima bean stage...even though I don't think I've
ever eaten lima beans before in my life. For those of you who are
more experienced --- what kind of introductory recipe would you
recommend?
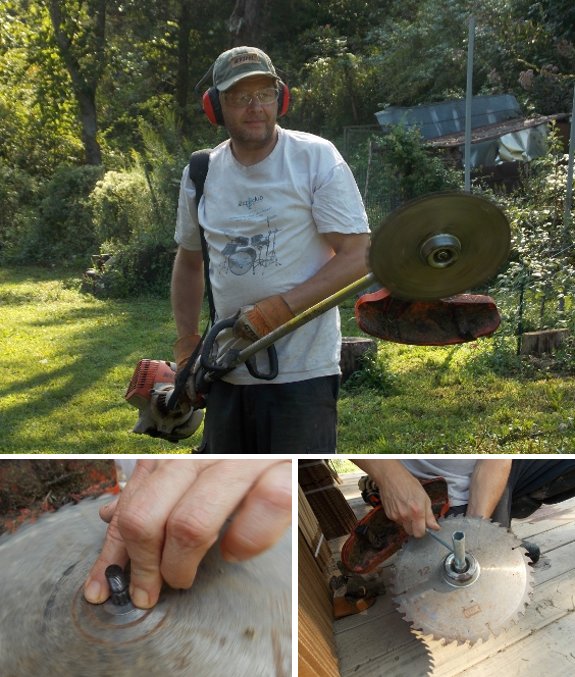
Our neighbor mentioned that
he uses a miter saw blade on his weed trimmer.
The arbor hole is the same
diameter as the Ninja
brush blade. Make sure the teeth point to the left to take
advantage of the cutting teeth.
I only tried it on some rag
weed and it was like a hot knife cutting through butter. Our neighbor reported
when he tried it the blade would bind up on even medium sized trees. I
think we don't need the little bit of extra cutting power for such a
huge leap in danger.

While we refer to our
"lawn" only in parentheses since the grass is full of dandelions,
clover, and whatnot and never gets fertilized (except with the chicken tractor), I do occasionally feel guilty about the grassy areas. Granted, on our farm, grassy garden aisles make sense,
but most like-minded people think all lawns are evil. However, as
I mowed Thursday, I started wondering whether the carbon dioxide coming
from our mower might not be offset by the carbon being sequestered in
the soil as grass blades and roots turn into humus.
Sure enough, independent
scientists (in addition to the lawn-care "scientists" you might expect
to feel this way) report that lawns do act
as carbon sinks. A minimal input lawn like ours that only gets
mowed with no other treatment sequesters about 147 pounds of carbon per
lawn per year (after you subtract out the carbon released by the
mower). The abstract I read didn't mention lawn size, but I'm
assuming they're using the American average of a fifth of an acre, which
matches up with another study that reports each acre of lawn sequesters
a net of 760 pounds of carbon per year.
Of course, cover crops
will put the puny carbon sequestration powers of a lawn to shame.
Sorghum-sudangrass will pump a massive 10,565 pounds of carbon per acre
into the soil, and oilseed radishes don't do so bad either at 3,200
pounds of carbon per acre. In fact, a 120-year-old northeastern
woodland only clocks in around the carbon sequestration powers of
oilseed radishes, and you can still grow tomatoes in the oilseed-radish
ground during the summer.
Which is all a very long
way of saying --- if you're considering making a patio or leaving that
area as lawn, go for the lawn. But if you really want to sequester
carbon fast, plant some cover crops.
Thanks for the comments on using a
miter saw blade with a weed trimmer.
Most people are like my
neighbor and report problems with it binding up when cutting small
trees which could be a result of not keeping the blade exactly even
during a cut.
Maybe in the future Stihl
will invent some sort of LED indicator you could look at and know which
way to tilt the blade to make the most level cut.
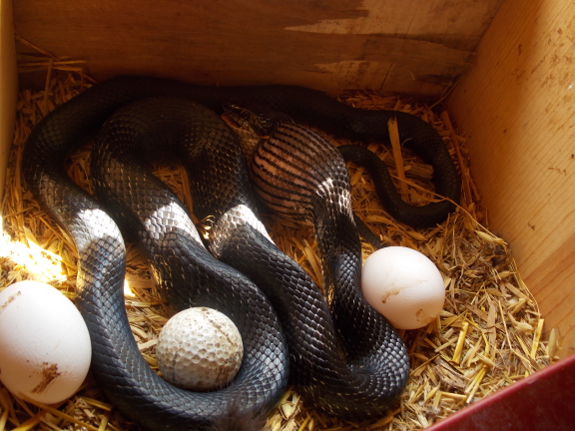
A few weeks ago, we noticed a drastic decline in the number of eggs coming out of our coop. As day length decreases, it's normal to notice fewer eggs,
but a hen's lay usually drops off gradually rather than all at
once. Added to the mystery, some days our egg haul was back to
normal, followed by a series of days with only one or two eggs in the
nest box. What was going on?
Mark solved the mystery
when he found a black rat snake sunning itself outside the coop in the
middle of August. For a while, we gathered eggs earlier in the
day, and the snake seemed to have moved on, but numbers once again
declined this past week. Sure enough, this time Mark caught the
snake in the act, its body swollen around an egg.
 Black
rat snakes are completely non-poisonous, and from my days as a
naturalist, I know most are actually pretty friendly too. But I
still didn't feel comfortable just picking up the snake (which I planned
to relocate to the other side of the hill).
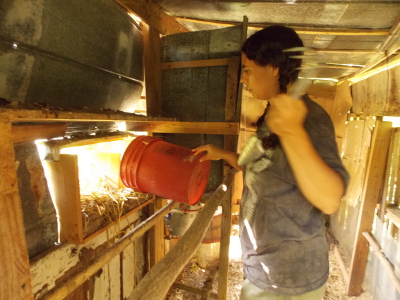
Instead, I tried pushing the snake into a bucket, then I ended up
chasing it across the coop where the reptile kept trying to slither out
holes which no longer fit its body due to the addition of the egg
lump. Eventually, the snake regurgitated its egg and disappeared
into the weeds...just as Mark appeared with a homemade tool to make
snake handling easier. Stay tuned for Mark's post on that topic
later (and, maybe, a successful catch this afternoon?).
We didn't get the snake
today, but now we're ready.
If you need to do a lot of
animal grabbing then maybe the deluxe
critter catcher for 140
dollars could be justified, but threading the right size rope through a
PVC pipe is a lot cheaper.
Want more in-depth information? Browse through our books.
Or explore more posts by date or by subject.
About us: Anna Hess and Mark Hamilton spent over a decade living self-sufficiently in the mountains of Virginia before moving north to start over from scratch in the foothills of Ohio. They've experimented with permaculture, no-till gardening, trailersteading, home-based microbusinesses and much more, writing about their adventures in both blogs and books.
