archives for 07/2014
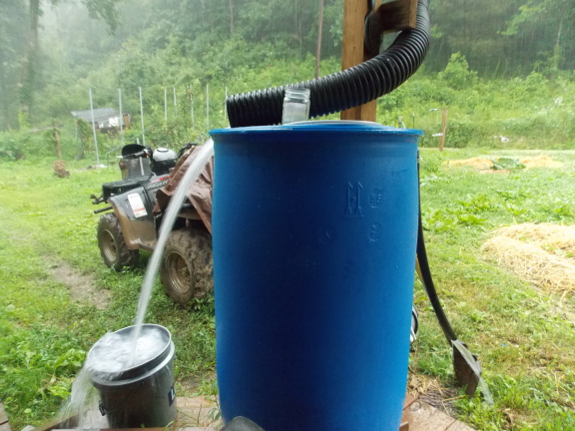
Our first rain barrel has only been in place for about ten days,
but already I wonder how we ever lived without it. The container
ran dry just a day before a thunderstorm dumped enough rain on the farm
to fill the barrel back up, and I was cheering the storm on all the way.
However, I'm still finding features I would definitely change in this workshop-designed rain barrel. The slight leak around the faucet
turns out to be quite minimal, so even though I'd probably follow a
reader's advice of turning the barrel upside down and using the bung
holes if we made another, I haven't felt the need to drain and seal our
current barrel. The overflow pipe is more problematic, though.
The photo above shows how
I have to resort to moving the pipe from the gutter away from the rain
barrel once the reservoir fills up. The issue is that the outflow
pipe should be bigger --- not smaller --- than the inflow pipe.
Since the outflow pipe is so small, once the barrel is full, water
starts gushing out the top (and all over the porch) rather than being
channeled through the outflow pipe into the outside world. In busy
summer mode, that just means I wander by and move the inflow pipe to
the side once the barrel fills up, but our next rain homemade barrel will definitely have a better design.
As a side note, it's interesting to see that the fancy premade rain barrel
that Mark's mother found by the side of the road a few years ago has
the same spigot and overflow-pipe issues. I do like the big
screened top, though, which allows me to stick the premade barrel under a
roof without installing gutters first.
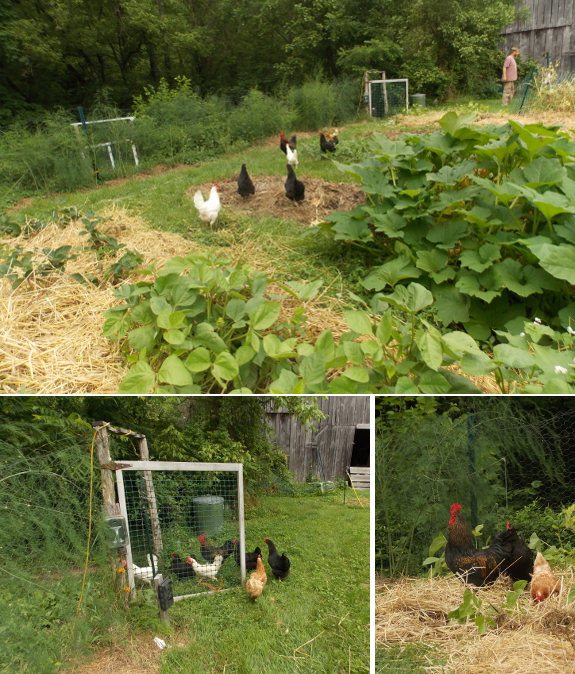
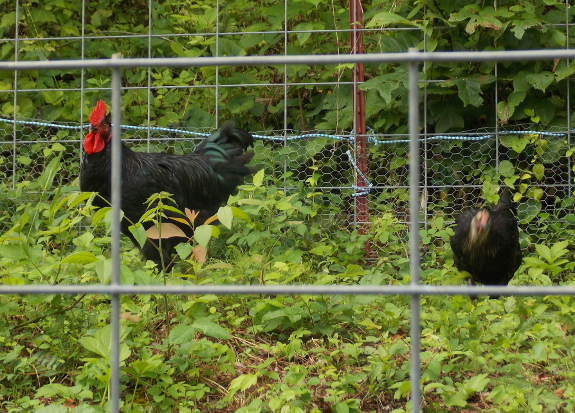
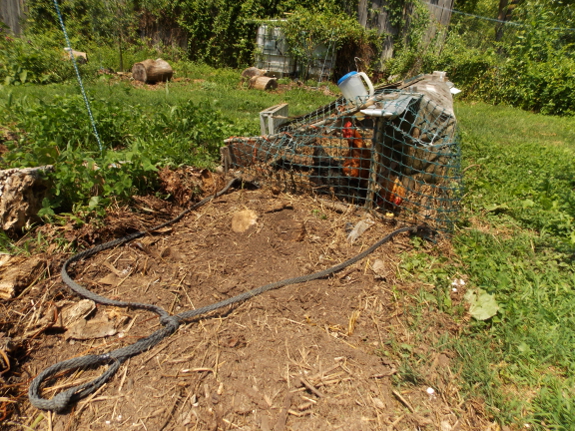
It turns out the White Leghorn in the garden wasn't flying fences.
Finding the whole flock out of their pasture was a sure sign something else was amiss.
Turns out Lucy was gnawing holes in the fenceline. I guess all that chicken manure looked too good to resist.
It's been a rough few
months on the homestead. Mark had two close family deaths, which
entailed two long trips and one shorter trip plus a lot of emotional
anguish. Then there was the surprise major dental work that
knocked him out for the better part of a week, and another illness that
he's still recovering from. All told, my poor husband has been out
of commission from a farm-work standpoint for a significant part of the
season, which means I've been trying to do both of our jobs...and
cutting a lot of corners in the process.
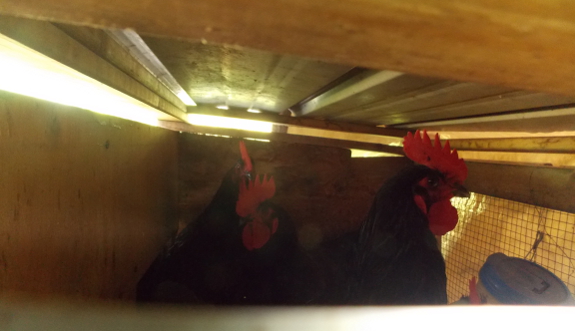
One place we cut corners was with chicken killing. Our australorp broilers
should have gone in the freezer at the end of May...but we only got
around to them on July 1. Letting heirloom broilers grow past the
three-month mark means the cockerels start fighting and are a bit
ornerier during processing day (plus, you spend more money for every pound of meat you get back),
but the heavier birds will be a treat this winter. And we now get
to enjoy the lower entropy resulting from having only the designated
rooster remaining in our pullet flock.
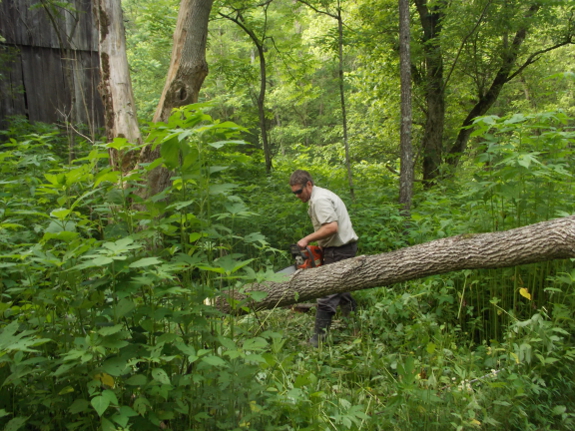
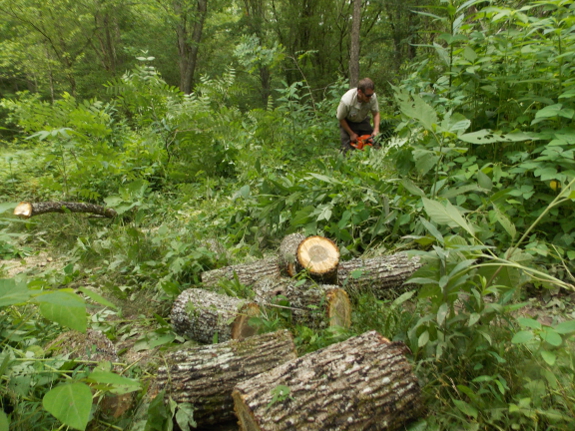
With winter breathing down our necks, we also decided to hire Kayla's
husband to come in and cut a few trees into firewood. Mark's been
wanting to open up the area in front of the barn for years, so I
figured those trees could come down (despite my deeply ingrained
tree-hugging tendencies). A few walnuts and one dead box-elder
filled up about a third of the woodshed, so hopefully a few more
evenings of Andy's hard work will get us back on track in the
winter-heat department.
Overall, while it's been tough (and less fun) running more of the farm by myself, it's also empowering to know I can
do it...as long as I put in a few extra hours' work here and
there. Just a few years ago, I think everything would have crashed
and burned (or, rather, would have grown up in ragweed and poke over
our heads) if Mark had been forced to take a few weeks off the job
during the summer. I sometimes wonder what the farm will be like
when Mark and I are old and gray, but this experience makes me hopeful
that Mark's right --- we'll have everything so streamlined that even
octagenarians can handle the labor.
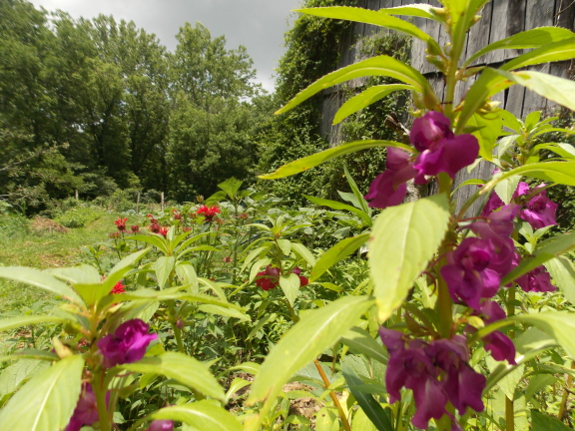
In the meantime, I'm
pleased to be able to report that Mark is starting to feel better, and
the farm is starting to come back into shape. If you want to send
your happy thoughts his way, though, good energy is always
appreciated. Thanks for sharing our journey!
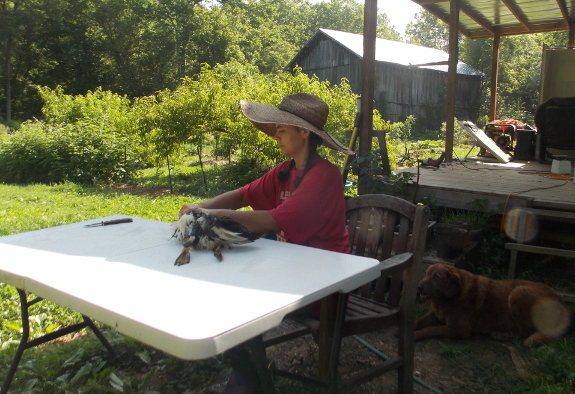
We retired our first duck
today along with some chickens.
Lucy likes to patiently wait
till Anna throws her the heart and liver. Lucy also enjoys licking up
the blood that collects in a cake pan, but she turned her nose up at
the duck blood and organs.
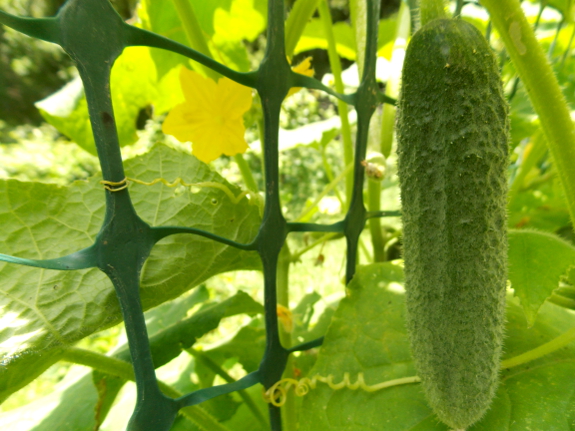
Last summer, I set out to determine what I'd get if I saved seeds from a hybrid cucumber. Why? Because Harmonie
is the world's most prolific and tasty cucumber and resists whatever
blight tends to kill all other varieties on our farm in short
order. But the seeds of the hybrid are expensive, so I didn't want
to have to spend $12 on them each year. Thus the experiment to
see what would happen if I saved some seeds.
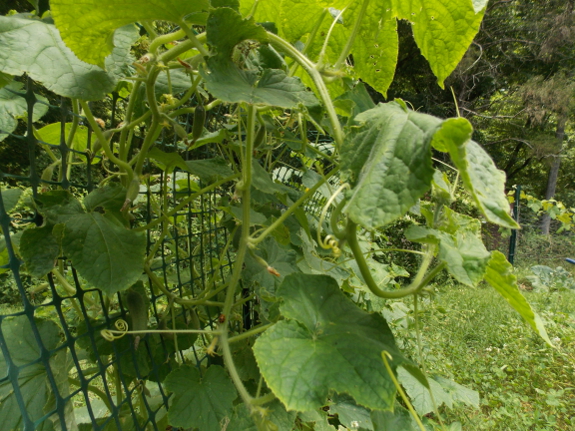
 For those of you new to seed-saving,
it's generally a no-no to save seeds from a hybrid variety.
Heirloom vegetable varieties generally breed true (especially if you're
careful to isolate them from other varieties in the same species), but
hybrids will mate with themselves and still produce many different types
of offspring.
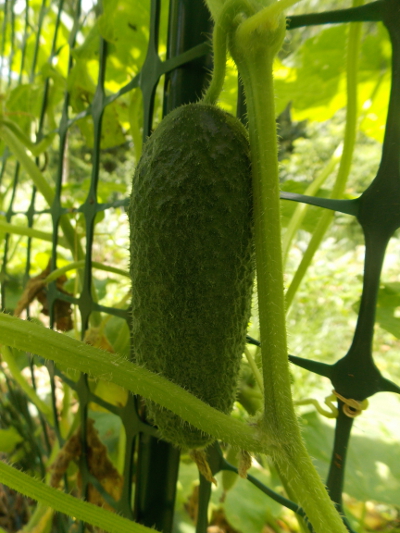
However, that's not
always the case. 95% of the cucumbers that I grew from my saved
seeds turned out to look and act just like their parents. The
plants that looked different were clearly that way because of
hybridization with Muncher, an heirloom variety I was also trialing last
year (but wasn't as impressed by). Sounds like, as long as I
stick to growing Harmonie cucumbers, I can safely save seeds from this
variety despite the fact that it's a hybrid. Success!
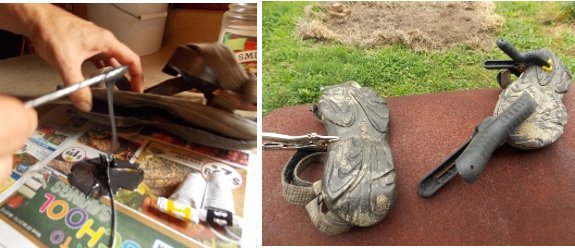
Anna is the only woman I've
met who does not like to buy shoes. When she finds a pair that works
she hangs on to the bitter end.
Hopefully this JB
weld epoxy will work at fixing the bottom flap problem and add a
few miles to what's already been a longer than normal run for medium
grade sandals.
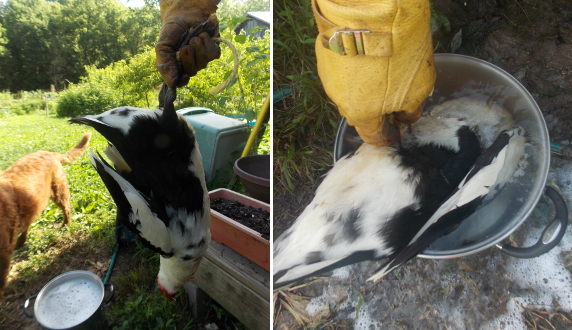
Storey's Guide to Raising Ducks reports that "ducklings are normally in
full feather for only 5 to 10 days sometime between six and a half and
ten weeks of age.... Shortly after achieving full feather, young ducks
go into a molt.... If ducklings are not dressed before this molt
commences, they will not be in full feather again for approximately 6 to
10 weeks." I didn't take the admonition very seriously since I've
plucked chickens who had lots of pin feathers and never had a problem, but I soon found that the report that ducks are more difficult to pluck than chickens was an understatement!
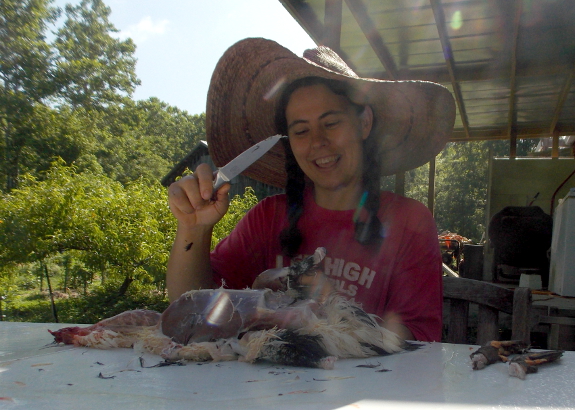
When the time came to try our hand at duck slaughtering,
Mark and I added some dish detergent to the scalding water and roughed
up the feathers a lot with a spoon while dunking the bird up and down in
hopes of getting water through the feathers so it would reach the
skin. Despite that extra attention, though, plucking tested even
my patience (and I hand-weed our quarter-acre garden mostly by myself
each year). So I ended up skinning the duck, which means we lost
that pastured fat (and even skinning wasn't easy). Final weight of
the cleaned carcass (sans skin) for the 10-week-old duck was 1.9
pounds.
The ducks started their
molt a week or two ago, so we'd need to wait until August or September
to slaughter if we want an easier job plucking. But I wonder how
much easier it would be at that time, since even the big feathers on our
trial duck were awfully hard to pull. I'd be curious to hear from
others who have raised ducks for meat. Do you pluck, or did you
throw in the towel and skin?
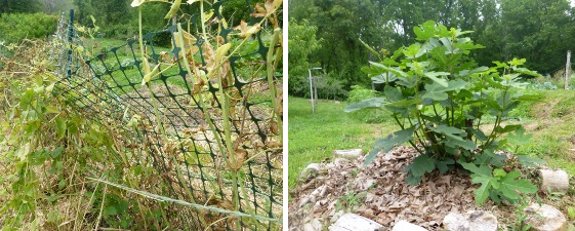
It's too hot for Sugar Snaps, but the Chicago Hardy Fig is recovering nicely.
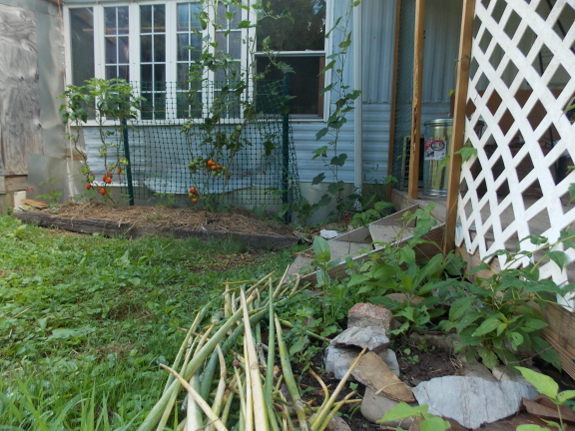
I know this is probably
the first thing many of you would have done, but we've been on the farm
for nearly eight years, and I'm just now starting to do a bit of
landscaping around the trailer. And, of course, even my
half-hearted efforts at aesthetics are primarily edible and
functional. But the small zone I've tackled this summer does make me smile every time I walk past. (And there are a few flowers mixed in, even if they're not blooming yet --- foxgloves from Mom and scarlet runner beans from Dani.)
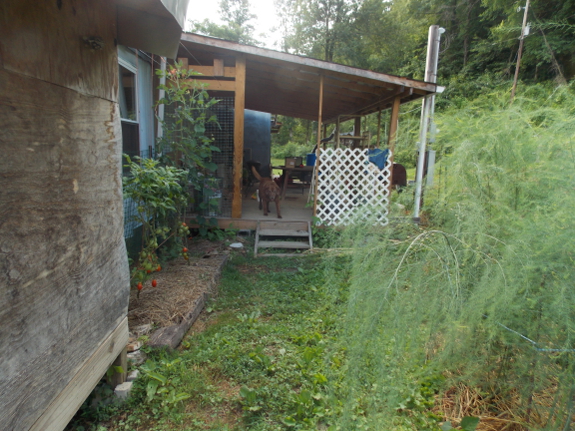
With skirting
in place in this one small section, I finally I felt able to start
planting right up against the trailer this year for the first
time. In high school art class, I remember being admonished that
edges make or break a picture, and the same is true of a garden.
Having planned greenery rather than weeds up around the base of the
trailer does make it feel more like a residence and less like a campsite.
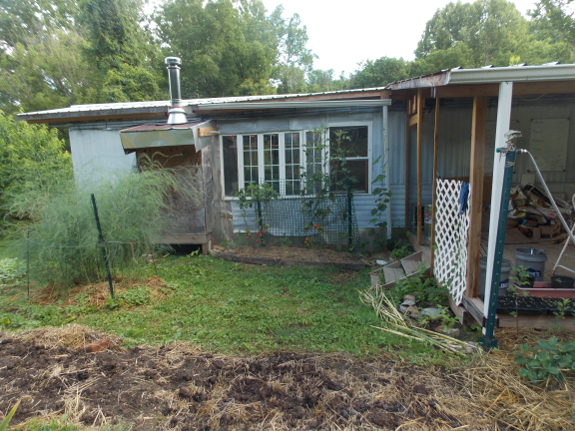
I'm also pleased to find that the raised bed in front of the south face of the trailer is doing its
job of elevating the soil enough so that water pouring off the roof doesn't
drown the plants. (The gutter and piping that together channel excess water
from that zone to the greywater wetland help too.) We aren't seeing the summer shading of the  windows
that I hoped for yet this year, but the grape near the
gutter downspout has nearly reached its trellis, promising more and
faster sun-blockage next year. Meanwhile, I filled in the main
space with garden vegetables --- two tomato plants and a row of
edible-pod peas, the latter of which have already been pulled out to
make way for scarlet runner beans.
The third photo in this
post also shows the little square of "lawn" created by letting one
garden bed go to the lawnmower this year. I'm actually kinda
enjoying that dab of open space, but am also pondering whether it might
be a good spot for either a little water garden, a fire pit, or a
bricked-over area to put the charcoal grill on. What do you think
--- would you light a managed fire only five feet away from your
residence?
Why do some cucumbers
look more complete than others?
Pollination.
On cloudy days less
pollinators out flying equal a pollination rate under 100%.
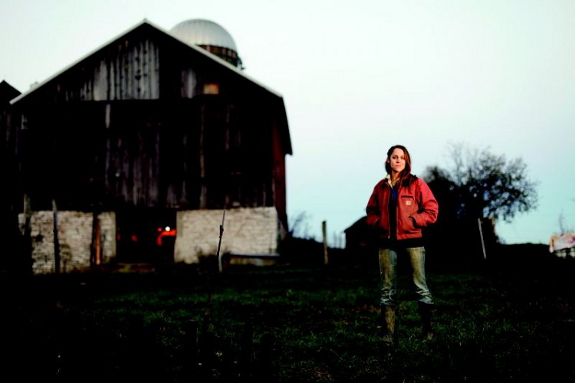
As gripping as a novel, The Call of the Farm
immerses you in an aspiring-food-writer's journey from city to country
as Rochelle Bilow falls in love with a farmer and learns to cook with
real food. This beautifully written, honest, and vivid memoir
sucks the reader in and lets us share Rochelle's failed attempts at
butter churning, cold days of rock-picking in the spring mud, and
moments of delight finding companionship with a crew of like-minded
farmers.
Like The Dirty Life,
Bilow's memoir is set on a full-diet, draft-powered CSA farm in the
northeast. Along with four acres of organic veggies, the crew
raises layers, milk cows, and chickens, pigs, sheep, and cattle for
meat. CSA members are invited to take home as much as they can
eat, and the whole operation is run by idealistic young people who
consider 60 hours of farm work per week to be a part-time job.
Bilow ends up becoming immersed in the farm, where she spends most of
her time cooking, sharing her favorite dishes in both story and recipe
form throughout the book.
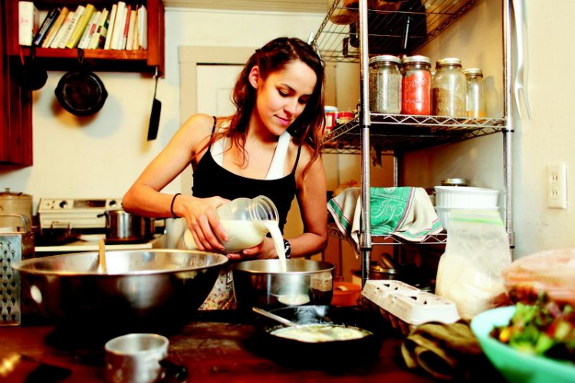
The setting aside, the
heart of Bilow's memoir follows her "emotions-first" love affair with a
man and a farm. If you're like me, you'll be unable to put the
book down once you start, and will end up reading long into the
night. I owe you two pieces of warning, though, before you pick up
this riveting memoir. First, strong language and moderately
explicit sex would garner an R rating if The Call of the Farm
were a movie --- use your own judgment if you prefer your books to be
squeaky clean. Second, the ending might depress you as much as it
did me, and you will definitely spoil the story if you read the about-the-author blurb on the back of the book. On the other hand, if you enjoyed This Life is in Your Hands, The Call of the Farm will be right up your alley.
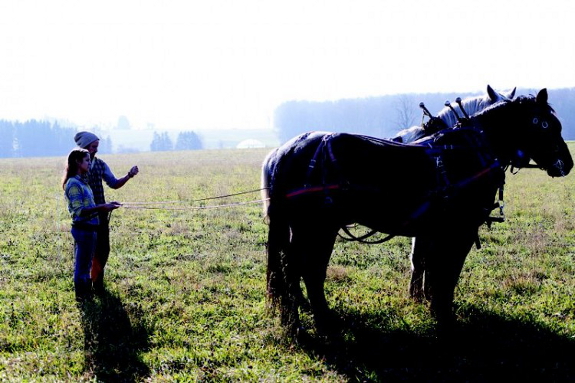
Those caveats aside, The Call of the Farm
is poised to become one of those must-read homesteading books of
2014. I enjoyed a galley copy, but the title will be available to
the general public in September and can be preordered now.
All told, I'd highly recommend Rochelle's book if you enjoy
homesteading memoirs (especially of the "city girl goes to the country"
type), since this piece of light summer reading packs a punch.
(As a side note, all of the photos in this post come from Rochelle Bilow's website and were taken by Anthony Aquino.)
I like watching how fast Sunflowers
grow at this time of year.
If I was guessing I'd say the
rate is somewhere between 1 to 2 inches per day.

I figure I type at least a
million words a year, so I guess I shouldn't be surprised that my
keyboard laptop started to fail me right after the one-year warranty
expired. Sticky keys and faded letters were possible to work
around, but an unfortunate incident with a flyswatter a couple of weeks
ago knocked off the x key and broke the underlying plastic springy
thing. "I could just learn to write without the letter x," I
suggested, but Mark looked at me like I was crazy and told me to buy a
new keyboard.
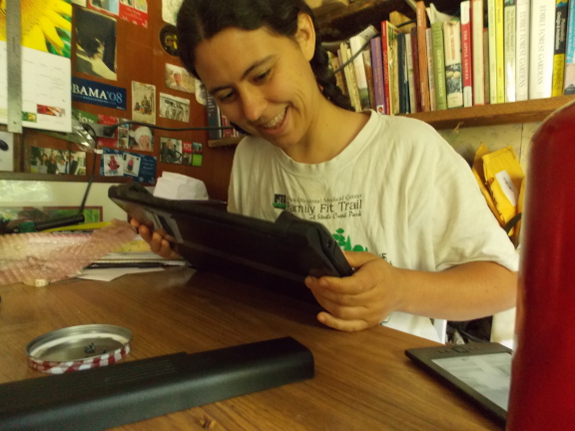
It turns out zareason
sells a replacement keyboard for my laptop for $60, which I figure will
be worth it if it allows me to easily send emails in pine again (using
control-X --- the real reason I need the x key). The keyboard
arrived, I backed up all my files, read a few general tutorials, then
took my laptop most of the way apart...and got too scared to finish.
So we're back to x-less
typing and I'm hoping the support folks over at zareason have some
brand-specific documentation they can send me to make the keyboard swap a
little less daunting. I chose the small company because I wanted a
linux-box with the operating system pre-installed (and presumably 100%
suited to the hardware), and I've been quite happy with my laptop until
the keyboard issues popped up. In addition, in zareason's defense,
I am hard on laptops --- previous laptops have had failed hinges,
warped screens, and flaky power-cord sockets within two or three years
after purchase, all due to me opening and closing the laptop too much,
using the laptop too close to the wood stove, and moving the laptop
while plugged in. Perhaps I should go back to the resiliency of
desktops, but the ability to type in front of the fire or in the porch
swing makes me stick to these sensitive but flexible pieces of
equipment.
Thank you doc for commenting on my work
glove post a couple of weeks ago.
A small squirt of Anna's hand
lotion was enough to soften up the stiff parts.
A facebook reader asked what's going to go into the beds opened up by the end of the peas.
The short answer is Brussels sprouts, but the long answer is that there
are a lot of fall crops itching to be set out or seeded in the next few
weeks. Our tractored chickens
are preparing ground for broccoli sets, and we'll also be planting
cabbage sets, the last sweet corn and summer squash seeds of the season,
and a fall round of sugar snap peas within the next week.
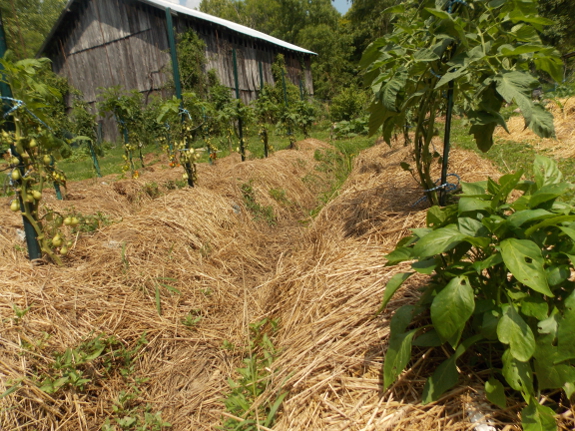
 Of
course, planting is only a small subset of what goes on around the
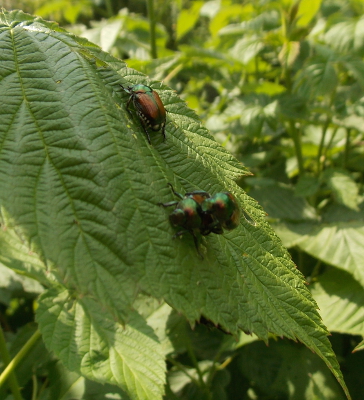
garden at this time of year. We're on thrice-weekly
Japanese-beetle patrols, and once-weekly tomato pruning.
The septoria leaf spot has been terrible this year, as you can see from
how high I've already pruned the leaves away from the bottoms of our
tomato plants, but the good news is that we're enjoying ripe fruits from
the vines and hope that this hot, dry weather will slow down the fungal
spread.
 We're
currently eating cucumbers, summer squash, cabbages, the last of the
spring broccoli, masses of green beans (which are mostly going in the
freezer), Swiss chard (if I feel like something so "boring" as greens
with all of the summer bounty available), and probably several other
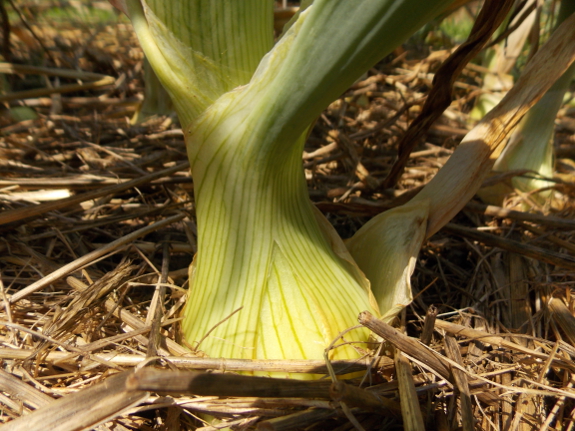
vegetables I'm forgetting about. Meanwhile, I'm watching our
onions with an eagle eye --- I had to break down and buy a few bags over
the last couple of months, so I'm itching for our homegrown
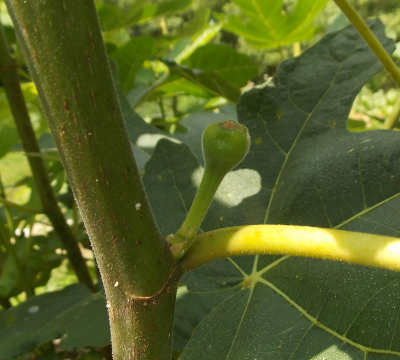
harvest. And, look, baby figs starting on the Chicago Hardy bush!
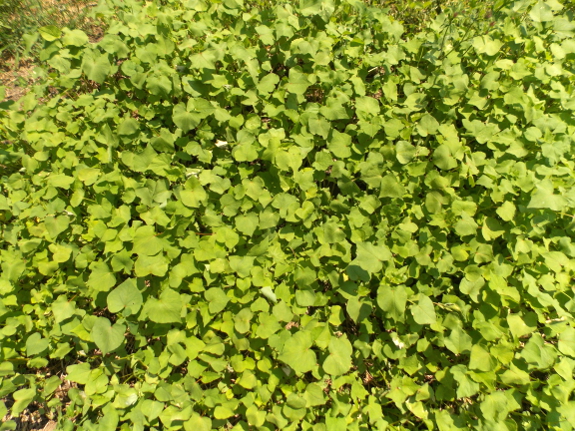
Since we got a bit behind
this summer, I'm also scaling back a bit on my garden plans, but am
keeping the soil in the fallow beds weed-free with cover crops.
Buckwheat planted close together the way I describe in Homegrown Humus won't let any weed seeds germinate, and in a month I'll be able to put beds to sleep for the winter with an oat planting.
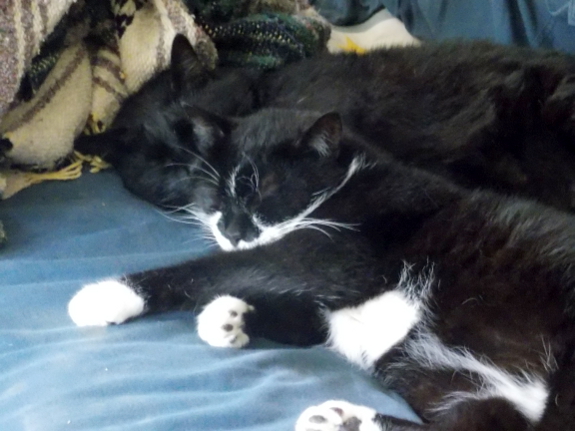
Being as lazy as our two
felines seems like a dream at this time of year, but cold weather will
be here before I know it. I'd better enjoy summer greenery while I
can!
You can download the owners
manual from Polaris, but it leaves out one detail.
The oil is added by removing
the dip stick and pouring it in down that tube.
 I'm excited to announce that I'll have two new paperbacks in bookstores in 2015! With The Naturally Bug-Free Garden spiffed up and turned in (due out this coming spring), I tentatively approached my publisher about the idea of printing Trailersteading
as well. I've been wanting to expand and update this best-selling
ebook, but I didn't have high hopes that a mainstream publisher would
be interested in a book teaching our permaculture redneck ethics.
However, I was pleasantly surprised --- Skyhorse once again was willing
to leave me the ebook rights and publish a full-color paperback edition
that will be hitting bookstores in fall 2015, despite the book being
about living in a trailer.
What does this mean for
you? I'm looking for more trailersteading tips from the field, so
if you homestead in a trailer on any level, now's your chance to see
your name in print. I'm especially interested in contributions in
the following areas:
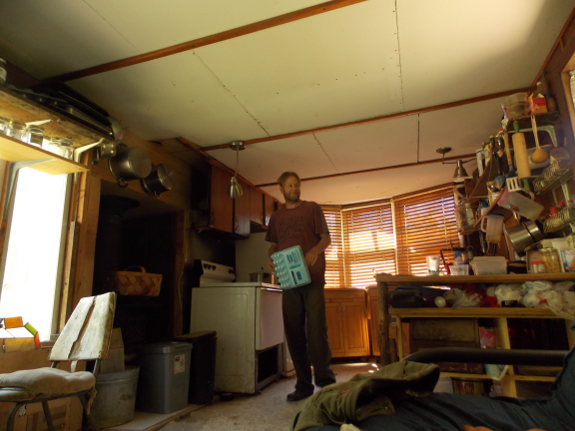
- Interior design. I have a tendency to ignore anything that's purely pretty rather than functional, but several readers clearly wanted to learn more about making an old trailer into an aesthetically pleasing living space. If you've rehabbed your trailer on the cheap and have photos to showcase your artistry, please drop me an email.
 Rehab suggestions. On a similar vein, I'm always looking for trailer-related rehab tips that can be turned into a sidebar.
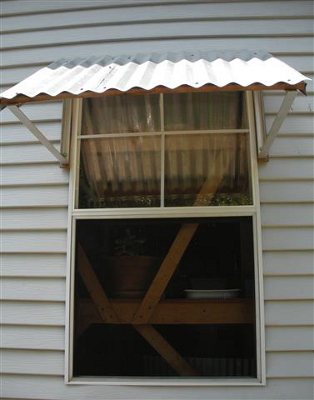
For example, Harry recently emailed me photos and construction
information for his homemade window awnings, which he uses to keep out
the worst of the summer sun. Perhaps you have a similar simple but
functional trailersteading tip?
- Inspirational stories. The heart of Trailersteading is the idea that living in an old mobile home can be a stepping stone allowing you to achieve your goals. If you have a similar story to share, I definitely want to hear about it.
- Around the trailerstead. I plan to add a new chapter about how a trailer fits into the larger homestead. I've already got sections planned on adding gutters and rain barrels and piping greywater to a wetland for treatment. Do you have something to add in a similar vein?
I'm not going to
buckle down and really start working on the updated version until this
fall, but please do send your submissions now while they're on top of
your mind! (I'll try to remember to make another post when the
deadline is closer.) To sweeten the pot, if I decide to use your
submission in the paperback version of Trailersteading, I'll send you a paperback of your choice (The Weekend Homesteader, Watermelon Summer, Shiftless, or my color version of the first edition of Naturally Bug-Free) and a Walden Effect t-shirt (size L or 2XL). Please email anna@kitenet.net with high-resolution photos (anything except pictures from a camera phone will probably work)
and a written explanation of your innovation. Emails will bounce
if they're larger than about 5 MB, so be sure to send one picture per
email. Thanks in advance for your contribution!
I used some fuel in the weed
eater that had ethanol for the first time this year.
The fuel I used was fresh,
and I chose the higher octane, but I think I'll go back to hunting down
the ethanol free fuel in the future.
It might not be connected,
but it now takes a harder pull on the rope to get it started and it
does not always start on the first try like it did last year and the
year before.
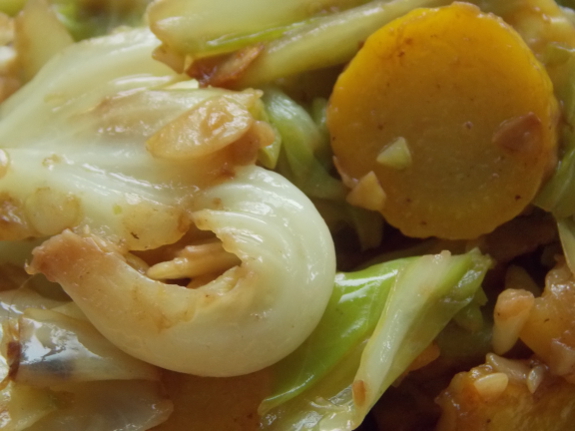
This is the time of year
when summer squash and cabbages start to become overwhelming. This
simple recipe is a tasty way to feed your family lots of both, and it
hits those sweet, salty, buttery buttons a bit like mac and cheese in a
box (but in a much more nutritious package).
- 2 to 4 tablespoons of butter (more is tastier)
- 2 medium summer squash or 4 small summer squash (we use yellow crookneck)
- 1 small or half of a large cabbage
- 0.5 teaspoons of salt
- 3 tablespoons of red wine
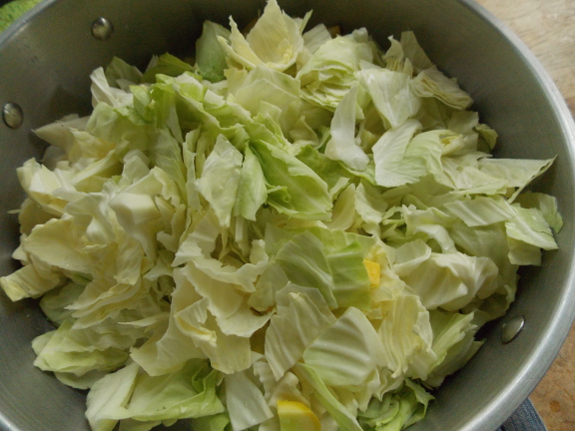
Melt the butter in a
large skillet, then chop the squash and cabbage and add them to the
butter along with the salt. Saute, stirring often, on medium-high
heat for about 22 minutes, until the vegetables are soft or they begin
sticking to the pan (whichever comes first). Add the wine and turn
the heat down to medium, then cook for another three or four
minutes. Serves three vegetable lovers as a side.
We planted some Fall cabbage
today.
The Trake continues
to be our favorite
trowel and rake garden tool.
In the early days we only had
one and ended up fighting over it. That problem was easily fixed by
ordering another one.
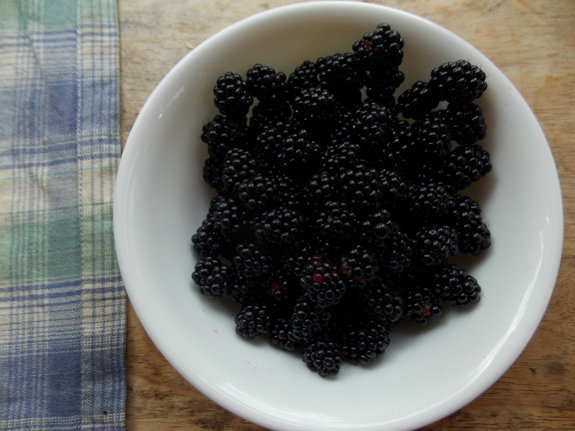
For the second time since
we moved to the farm, all of our cultivated blackberries died to the
ground over the winter. The bushes quickly sent up new stalks in
the spring, but since most brambles fruit on last year's growth, that
meant no blackberries for us this year.
Or maybe not. I was
thrilled to see that a wild blackberry plant Mark accidentally left in
the gully last year is loaded with big, tart fruits. Blackberries
spring up in our area anywhere there's light and not too much
disturbance (aka mowing), and I picked lots of these wild blackberries
when I was a kid. As an adult, I prefer to spend a bit more effort
tending cultivated varieties since the plants are thornless, the fruits
are bigger and sweeter, and they're handily located right outside my
door. But it sure is nice to have backup blackberries when our
thornless plants fail!
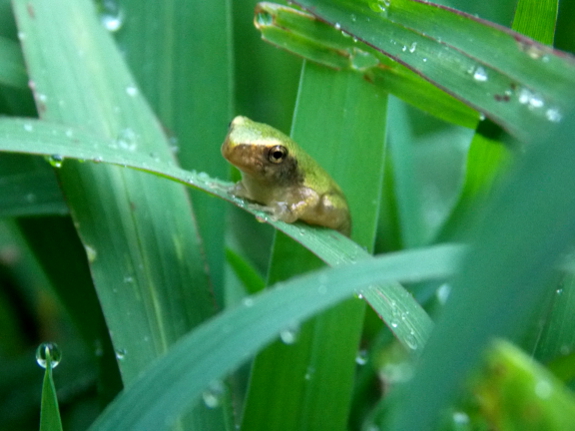
We don't use most of our
58-acre farm for anything, but at times like this, I appreciate the way
nature fills in the gaps. And, speaking of nature, dozens of these
tiny green frogs hopped out of our sky pond this week. Even
though they're green, I'm 99% sure these are baby gray tree frogs, who will resemble their name better in a few weeks. Go find a tree, little frog!
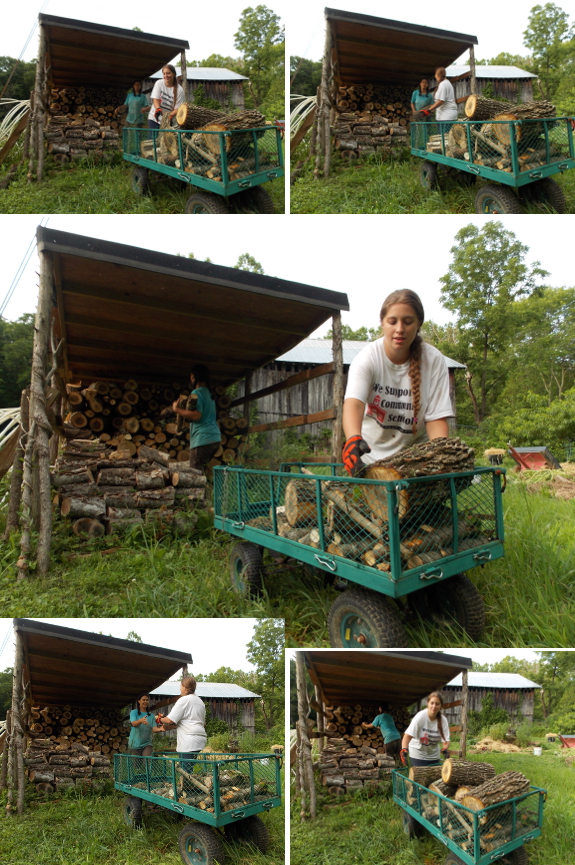
With Kayla and Andy's help, we've just about filled the woodshed to the point we had it at last fall.
There's plenty more room in
the shed, though, since Anna is stacking the wood nearly to the roof
this year. Just to play it safe, we'll put in a few more hours of
firewood collection to ensure we don't run low on fuel this winter.
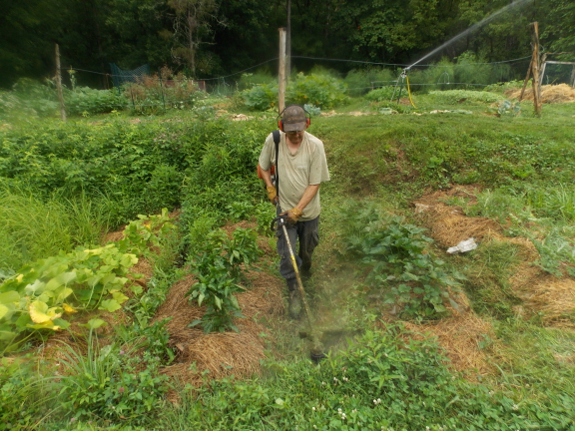
Having Mark available to weedeat the aisles seems to be an essential part of our chinampa experiment. Since I mounded up weed-filled dirt without a kill mulch (although I did put down some newspaper/feed bags/cardboard and straw around the plants a month or so ago), it takes a few passes with the whacker to get the beds in line.
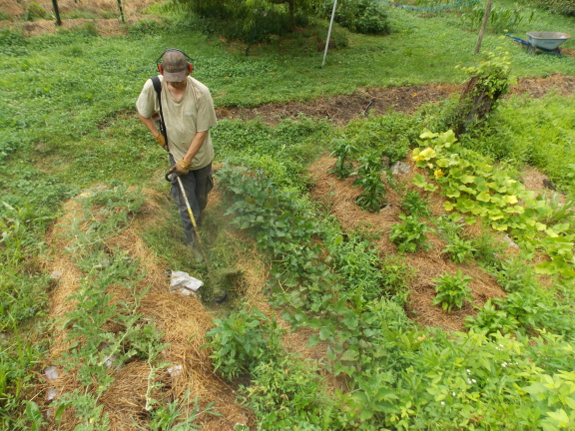
So far, I've been quite
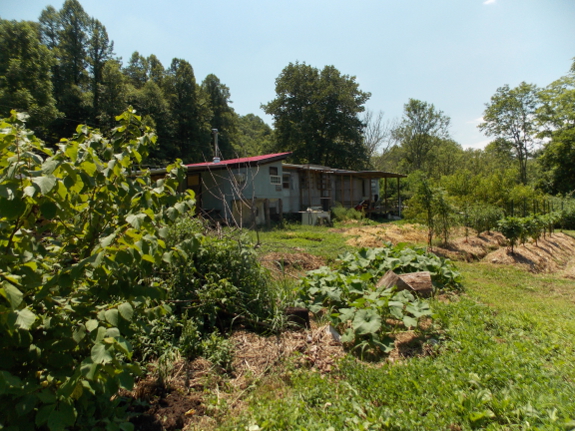
happy with this little chinampa experiment, except for the lowest bed,
where I planted butternuts. As you can see in the photo above, the
butternut leaves are pretty yellow, which is never a good sign in the
vegetable garden. I suspected lack of nitrogen and topdressed with
manure, but Mark suggested an even more likely possibility. The
stump you can see near the butternut bed was a black walnut, and even
though the tree has been dead for a few years, juglone might still be
present in the soil in that area.
Luckily, I know better
than to put all of my eggs in one basket when experimenting. The
butternuts, peppers, sweet potatoes, and watermelons grown in our
chinampa beds are only a subset of the year's planting of each type of
vegetable. In other words, if my manure trick doesn't bring the
butternut vines back to vibrancy, I've always got the happy twiners in
the forest garden to fall back on.
I was hauling another load of
horse manure yesterday when I realized I'd forgotten the ratchet strap
to secure the top tier buckets.
The cargo
net I got last year
worked as a good replacement. Having multiple hooks at different spots
allowed for several tension choices to get the right hold.

Joy and rapture! My laptop has returned!
After my aborted attempt to replace my laptop keyboard last weekend, I did more research online, which turns out to have been a bad
idea. Somehow I got the idea that (since my laptop doesn't have a
piece of trim between the top of the keyboard and the screen like most
others do) I was going to have to take off the whole piece of trim that
runs all the way around the keyboard. I took a bunch of screws out
of the back and got that plastic partway pried up, but I felt like I
was going to break something if I tried to lift it further.
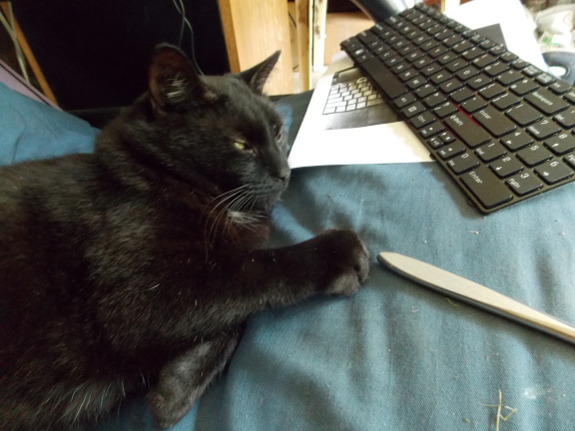
Huckleberry was no help, so I gave up.
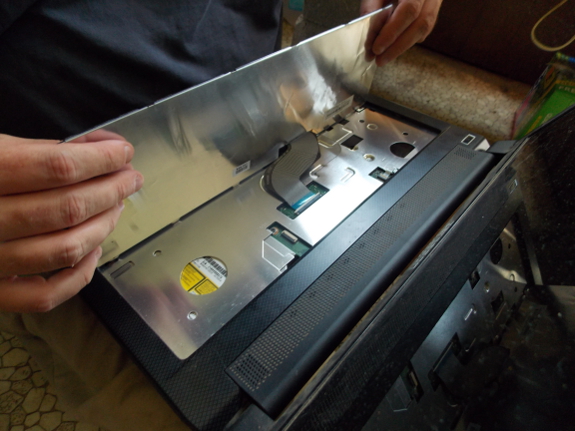
Next, I begged my sweet brother to come put me out of my misery. "You do realize the keyboard lifts up out of the trim, right?" he asked. "This is going to be simple."
We took out the battery,
unplugged the power cord, and, a few minutes later, we'd pried the
keyboard away from the clips that line the top edge. It turns out
Joey was right --- the keyboard lifted right up with nothing else
holding it in place.
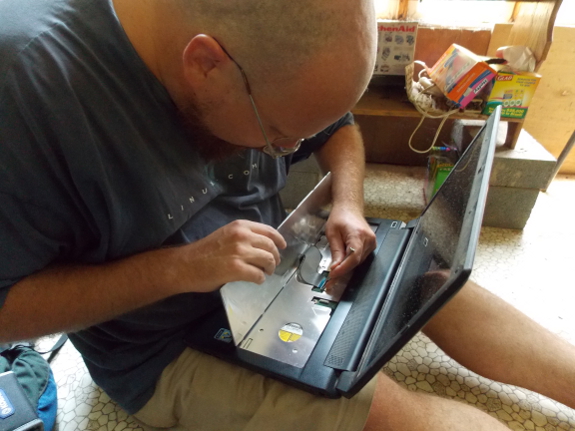
Joey gently detached the
old keyboard ribbon, attached the new one, and briefly powered up to the
computer to make sure everything was working as planned. Then we
shut the laptop down and pushed the keyboard into place.
Success! Hopefully
this keyboard will last me at least another million words, and now I
have the old keyboard to pirate key by key if necessary. Thanks
for your help, Joey (and Tony at zareason)!
Why am I ratchet strapping
our tailgate shut?
Because the dang thing kept
popping open and spilling precious manure.
I guess I'm lucky it didn't
happen on the main road.
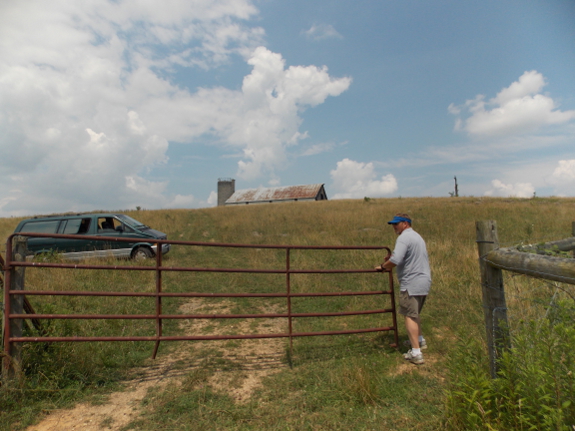
Mark and I decided my book-advance check should go to a worthy cause --- buying pastured beef for the freezer!* But where would we find the meat? Our pastured-lamb producers don't raise cows for sale, so we downloaded the huge Local Food Guide from 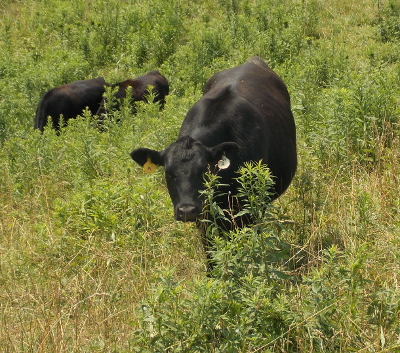 the sidebar of this website.
Next, I read all of the farm descriptions of pastured-beef producers
within an hour-and-a-half drive of our homestead, I skipped the ones who
didn't list an email address (yes, I hate the phone), and then I
quickly narrowed down our options to one top choice --- Laughing Water Farm in Marion, Virginia.
What was the appeal of
Laughing Water over the other options? Antoinette Goodrich manages
Laughing Water Farm as a healthy ecosystem, keeping her cattle on grass
year-round, stockpiling winter pasture,
and also putting away some hay. The only supplements she feeds
her cows are sea salt and kelp, and one look at the farm was enough to
prove that Antoinette has the animal equivalent of a green thumb.
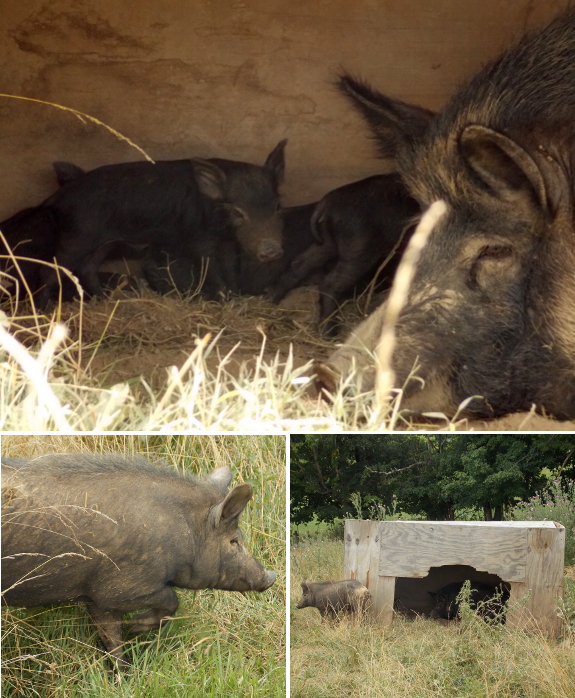
 With
over 200 acres to play with, Antoinette has room for more than the 40
head of cattle (plus their calves) that she raises to turn into pastured
beef. She stocks Ossabaw pigs too, a heritage breed that was
abandoned by sailors on an island off the coast of Georgia. Over
the decades that the pigs lived on their own, they turned into strong
specimens well able to thrive on pasture. Granted, an Ossabaw pig
may take a year or more to reach slaughter weight (and that weight is
much less than that of huge modern breeds), but for Antoinette, the
hardy pigs are worth the wait.
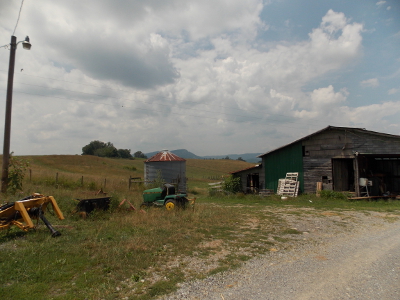
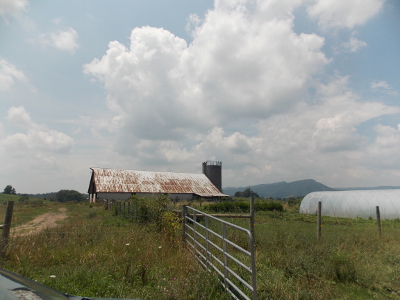
We only spent about an
hour on the farm, so there's probably much, much more to Laughing
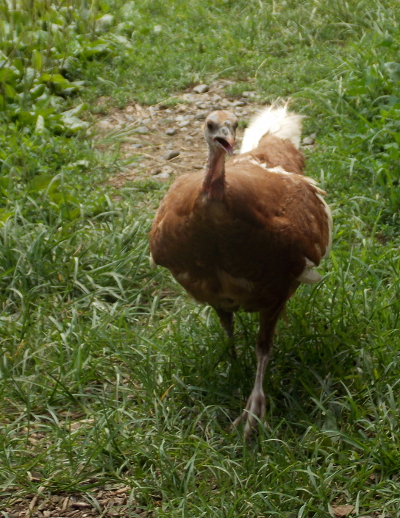
Water's farm-diversity story. But I should mention that there were
also lots of free-range turkeys, ducks, and chickens, plus experiments
in no-till gardening, and some great-looking tomato hoop houses.
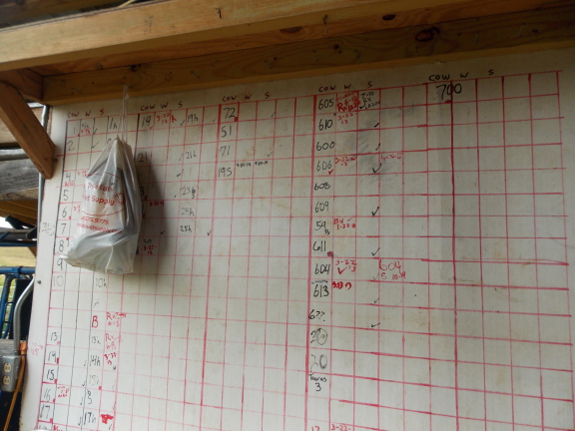
 And
excellent record-keeping! The chart above shows every medication
that's been administered to the cows on the property. Besides
worming and immunization, the only problem that has required treatment
was pink eye in a single cow. Antoinette noted that she will
treat cows in a scenario like that because she doesn't want the animals
to be in pain, but the pink-eye-treated cow wouldn't end up in a
customer's freezer.
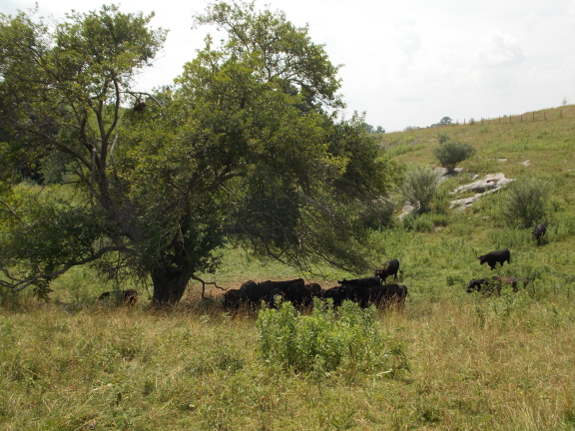
Our one mistake during
our visit to Laughing Water Farm was getting the meat out of the freezer
before we started our tour. As a result, by the time we reached
the cattle, I knew we shouldn't leave our precious haul to thaw in the
heat much longer. But we did stay long enough to learn about the
extensive infrastructure, including self-watering stations 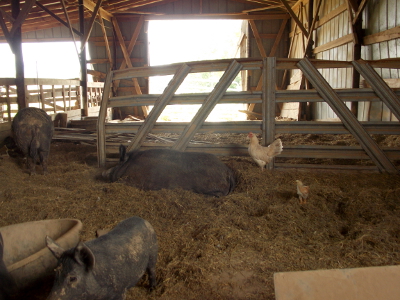 designed
to keep the liquid close enough at any given time so that individual
cows will seek out hydration without waiting for the lead cow to bring
the herd to water. There are permanently fenced pastures, through
which cows are moved at a rate of about two paddocks per week, and we
could tell that the cattle were very happy since most were still out
grazing rather than lazing under the shade tree despite the summer
heat. (The pigs, on the other hand, chose to spend a bit more time
in the barn.)
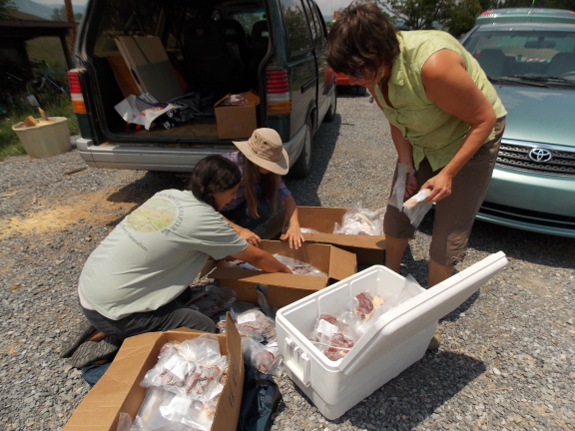
The other thing I might
have done differently is to alert Antoinette that my sister and I were
going to split the half of a cow fifty-fifty. We had to separate
the meat a piece at a time, trying to give us each an equal number of
each cut. Antoinette was very helpful in suggesting equivalent
cuts for parcels that didn't come out even, but I don't recall the exact
details (just that Dani got the oxtail and I got the brisket).
 The
final cost was $661.25 for each quarter of the cow. While that
price tag is a bit more than some suppliers I've found, Laughing Water
Farm clearly produces pastured cows that are head and shoulders above
the competition, so I consider the price very fair. In addition,
although I didn't do the math this time around, I'm guessing that even
this "high" price per quarter comes out to be cheaper than buying the
same quantity of much-lower-grade, grain-fed meat a pound or two at a
time at grocery-store prices.
Antoinette brings her
wares to the Abingdon Farmer's Market every week, and serious WWOOFers
are welcome to come learn at her farm. Or you can buy the other
half of my cow, which I believe is still available, and enjoy an
excellent and educational farm tour in the process. Stay tuned for a later post with a taste test of our freezer full of beef!
*Yes, that does mean (that if you use the transitive property) I technically plan to eat my words....
We got the truck stuck a
couple of times today.
Having 4 wheel drive on the
ATV makes moving it somewhat easy compared to the old
way we used to get a truck unstuck.
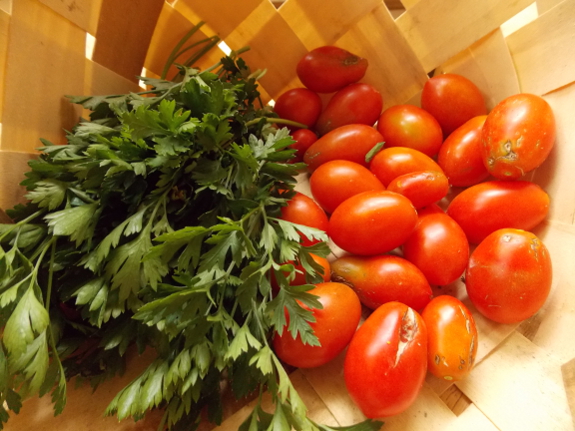
It looks like this will be another low-tomato year, with septoria leaf spot rushing through our planting despite weekly pruning
sessions. I've also seen a couple of patches of early blight, but
the septoria is doing the majority of the damage because of its early
start.
Septoria leaf spot is
supposed to only hit tomato plants relatively late in the year, which
suggests that the fault is my own --- I probably carried the fungus over
from last year's garden in my saved seeds. In other words, any
seeds I save this year will be equally suspect, although a
heat-treatment of 25 minutes at 122 degrees Fahrenheit might possibly
make them safer to use.
Luckily, tomato breeders
are finally starting to come up with varieties that resist early blight,
late blight, and septoria leaf spot. Johnny's Select Seeds sells Jasper, a red cherry tomato with intermediate resistance to early blight and septoria leaf spot, while their Plum Regal, Defiant, and Mountain Magic are moderately resistant to late blight and early blight.
An even more enticing selection comes from High Mowing Organic. Iron Lady
is a red slicer bred by Cornell University and North Carolina State
University to resist early blight, late blight, and septoria leaf spot,
along with verticillium and fusarium wilts. I'm thinking we might
try all five resistant varieties next year and not use any of our saved
seeds in hope of getting the various tomato blights off our farm.
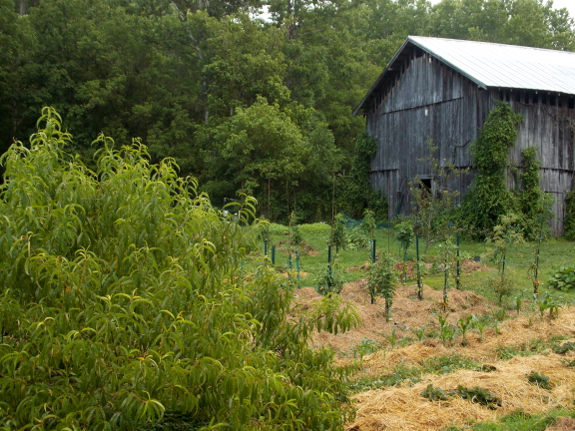
What's the next line of
defense if that fails? The real reason we lose so many tomatoes to
blight is because our climate is very damp, even during the
summer. We already save the sunniest spots for tomatoes and don't
use overhead irrigation there, plus we tie the plants up and prune away
leaves close to the ground. And this year I even tried raising the
plants up on mounds to produce even drier conditions, but clearly none
of that is enough to beat blight.
The next step would be blocking rain from hitting our tomatoes with a
greenhouse, hoophouse, or something similar. Or we could follow
the recommendation of a Canadian website, which suggests growing
tomatoes on a balcony or rooftop for a similar reason. One of
these days, I'll figure out how to have copious tomatoes despite our wet
climate!
Today was a high
density apple training
day.
Trimmed off some branches that
were reaching too high and tied them down to encourage horizontal
growth.
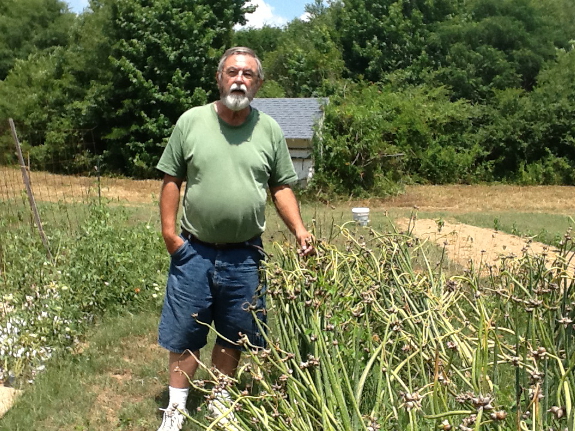
All of our excess
Egyptian onions for the year are long gone, but Daddy has quite a few
top and bottom bulbs he's willing to sell. I asked him why he
planted so many onions and he shrugged. "I had the bulbs and I had
the room," he explained. I understand --- that's the danger of
the gardening bug!
Luckily, you get to
benefit from my father's poor judgment. Daddy's selling small
flat-rate boxes of top bulbs (at least 100 per box) for $25 with free
shipping, and sets of 20 bottom bulbs (and a few top bulb bonuses) for
$25 with free shipping.
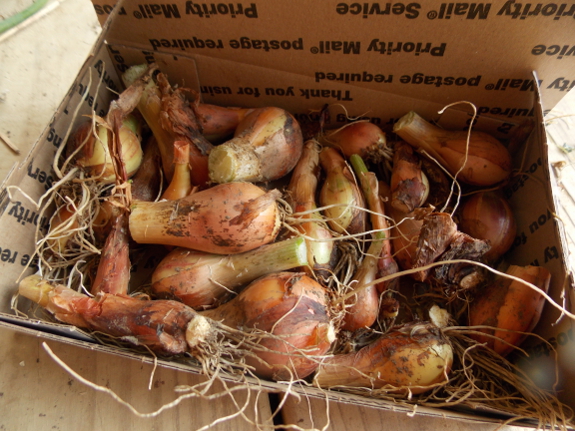
Free shipping within the U.S.
(Sorry, we are unable to ship live plants internationally)
$25
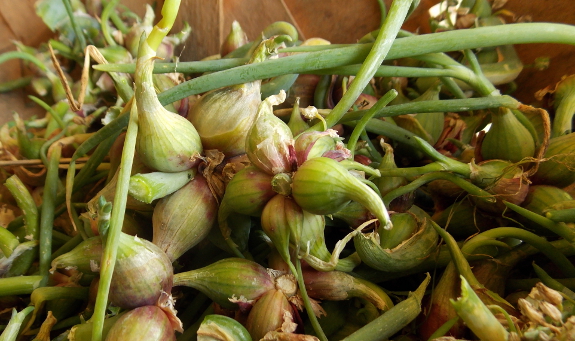
Free shipping within the U.S.
(Sorry, we are unable to ship live plants internationally)
$25
Trying to decide which starter pack will fit your garden? If you've got
lots of time and room, I'd go for the top bulbs --- you'll need to
give them a bit more time before harvesting, but will end up with many
more onions by this time next year. On the other hand, if you want to
start eating nearly right away (or don't have much room), the bottom
bulbs are a great value (plus, next year you'll have top bulbs to give
away or to expand your planting).
To read more about growing and eating Egyptian onions, click here.
And to celebrate excess onions, Daddy is also giving away two boxes,
winner's choice (top or bottom bulbs). Click on the widget below
to enter! (If you live outside the U.S., you can still enter, but
if you win, I'll send you a non-perishable replacement prize like a
t-shirt or book.)
Thanks go to Barbara Ervin for taking the top photo in this post!
The county started posting a
guard at each dump site to prevent people from taking valuable garbage
and scrap metal.
I was dropping off some trash
the other day when I noticed this stove box sitting on the ground next
to a dumpster.
The guard was distracted
doing something in their little shack which made me think I could take
the cardboard and run if I acted quick enough. I made a clean getaway.
No sirens or admonishing statement from the guard. The box will live on
as a layer
of kill mulch for the
garden.
 I Am Hutterite
by Mary-Ann Kirkby is an intriguing glimpse into Hutterite culture, a
sister religion to the Amish and Mennonites, but one that is centered in
Canada instead of in the U.S. Although none of these religions
are technically homesteading-related topics, I suspect many of you are
as intrigued as I am by their farm-based communities, so I thought I'd
share some tidbits from this interesting memoir.
The author was raised by
Hutterite parents who chose to leave the community when Mary-Ann was
nearly ten years old. So the reader sees the Hutterite community
primarily through a child's rose-tinted glasses, but also comes to
understand why Mary-Ann's parents chose to "run away" after a power
struggle resulted in the death of Mary-Ann's young brother.
Although it's easy to
understand how inter-personal politics can go wrong in this type of
situation, Mary-Ann also shares how safe and accepted members felt as
part of the Hutterite community. The 15-acre vegetable garden,
milk cows, and geese fed everyone sumptuous meals, which led to a
striking comparison with the moldy bologna, stale bread, and rotting
produce that the children ate soon after the split. On the other
hand, the story also served as a cautionary tale for non-Hutterites
interested in forming communist communities --- while everything can be
wonderful as long as the community stays together, it can be very tough
for a family to get their feet back under them after a split.
Mary-Ann was in for other
surprises, too, as her family slowly integrated themselves into the
outside world. As you might expect, the author and her siblings
had trouble blending in with kids in their classes at school, but there
were also troubles at home. Since Hutterite children start
kindergarten at 2.5 years of age and then spend the rest of their lives
eating most meals with the community and working designated jobs, the
concept of being around her nuclear family all day was a surprise.
In fact, if she had
remained Hutterite, Mary-Ann would have had her life planned out for
her. She would have begun alternating between weeks spent baking,
washing dishes, and cooking at the age of 17, she would gotten married
and then have taken several long breaks to bear children, and finally
she would have retired from her work career at the age of 45.
Instead, Mary-Ann and her family were spat out into the "English" world
that most of us live in, where great freedom means great responsibility.
I Am Hutterite is
first and foremost a glimpse into Hutterite culture, written in an
engaging, fiction-like manner. Whether you'd like to know more
about an Anabaptist community or simply want want a light summer read, Mary-Ann Kirkby's book is bound to hit the spot.
I built this chicken
tractor over 4 years ago and it's held up pretty good under some
tough, all weather conditions, but one of the bottom cedar log runners
broke.
A treated decking board made
a good replacement and it seems to slide nicely.
 "Onie Mae Cresong Clark, age 79, of Bristol, VA, went to be with the Lord
on Tuesday, July 15, 2014 at the NHC Healthcare of Bristol. Onie was
born April 8, 1935 in Washington County, Virginia, a daughter of the
late Ward Christopher Cresong and Elvie Smith Cresong. She was a lifelong
resident of Scott County and Washington County, Virginia, where she was a
homemaker and was of the Baptist faith. She was preceded in death by
her husband, Silas Clark..."
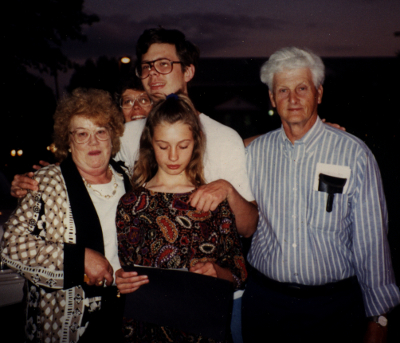
Back when I was knee high to a grasshopper, Onie and Silas
lived up the creek from my childhood farm. I would run down to
visit, barefoot and clad only in underpants, until Onie finally put her
foot down and required me to don a shirt. Despite that one act of
tough love, our neighbor was always ready to enfold me in her arms,
where I was riveted by her neon orange chewing gum, a color I'd never
seen before in my life, and by her southern makeup, so different from
the appearance of my clean-faced Yankee mother.
 But
appearances weren't important to me at that age. I was on a
mission, and once inside, I headed straight for the bathroom. No, I
didn't need to go, but our family's farm only boasted an outhouse, so
the concept of peeing in a toilet was remarkable to my young mind.
Plus, Onie's bathroom had real green carpeting on top of the closed
toilet lid, so soft I wanted to run my hands through the pile. In
fact, I probably hid out there for several minutes, drawing pictures in
the deep yarn.
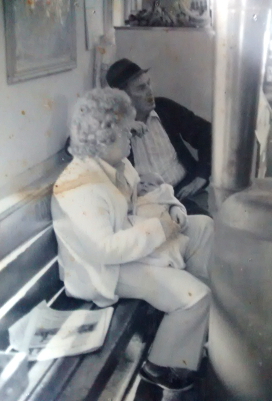 Back
in the kitchen, I entered Onie's domain, decorated with big ceramic
bins in the shape of mushrooms. Our country neighbor was most
likely cooking soup beans and biscuits, but hers was a version
remarkably dissimilar to the type my health-conscious parents set out on
our table. Grownup Anna knows that the difference was copious
butter and salt, plus a healthy hunk of bacon in the beans, but
child-Anna only knew that Onie could cook like no one else. There
would be yellow tomatoes with red centers, so juicy they oozed across
the plate, and perhaps an ear of sweet corn on the side. I
definitely wanted to be invited to dinner.
At the time when Onie was
part of my village, my nuclear family was so dirt poor that all of us
were fed free lunches at school. In fact, I remember my
kindergarten teacher giving me a red, hooded cape that I cherished, not
realizing she felt me a charity case. And I remember how much I
yearned for the big, beautiful boxes of crayons that the other kids
brought out to color with, complete with metallic hues and a sharpener
in the back.
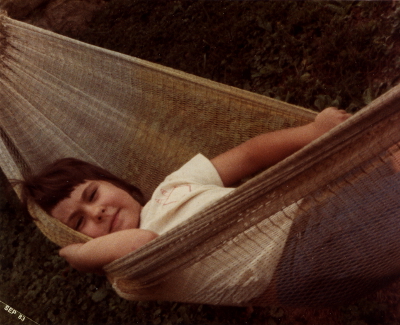 Later,
I would become saddened by Christmases where the presents were never
quite what I asked for. One year, I yearned for Archie Carr's Handbook of Turtles, and was instead gifted with the larger and more colorful (but harder to read) Encyclopedia of Turtles.
I'm not even sure the issue was so much money as a difficulty
deciphering the dreams of a complicated child, but to Onie, I wasn't so
complex. My neighbor saw the silver and gold crayons dancing
through my dreams and she gave me the best gift I'd ever received in my
young life --- a box of crayons so big the sticks were arranged in
stadium seating. My brother Joey and I would later melt a few
crayons on our tin roof, molding them into shapes as glorious as the
drawings I made when the crayons were first sharp and new. That
gift may well be the reason I majored in art (as well as biology) when
the time came to go to college.
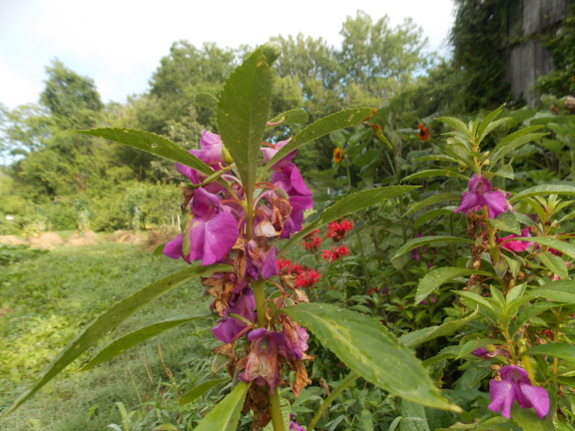
As with her husband, I
never really knew Onie as an adult. When she passed away this
week, I hadn't truly visited with her in years. But my memories of
sitting on the ground by her porch and gently massaging sedum leaves
into balloons while Onie and Mom visited together will last
forever. And whenever I walk by my touch-me-not flowers that
descended from Onie's seeds, I'll think of the colorful woman who once
made my dreams come true. Thank you for the crayons, Onie, and for
spreading color and love through my young world.
Once I installed the new decking
board I bevelled each
edge.
Without the bevel the edge
wants to dig into the dirt when you pull it.
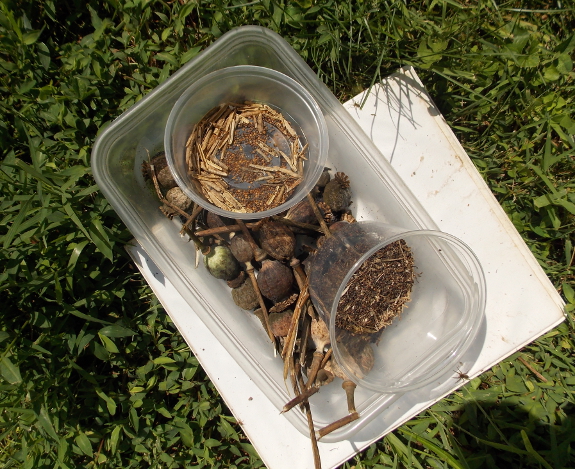
The last vestiges of
spring are coming out of the garden this week and next. A few
small cabbages are lingering in unneeded corners, and I just pulled out
the kale, arugula, and poppy plants after harvesting their seeds.
I probably should harvest all of the spring carrots, too, but there's
not really room for them in the fridge due to the dozen cabbages
currently chilling and waiting to be souped, so I've just been pulling
orange roots as needed for the last few weeks.
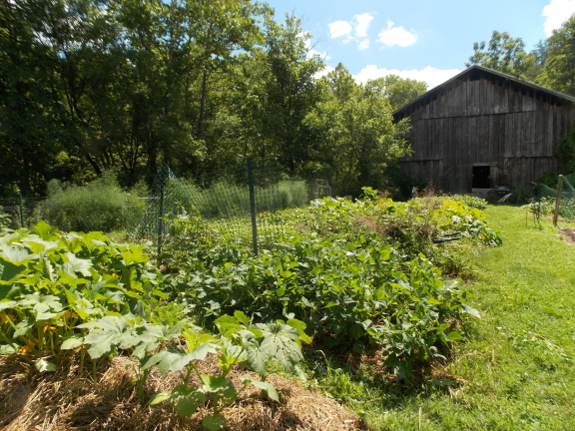
Of course, the summer
crops fill most of my attention at this time of year, both in the garden
and in the kitchen. But we've already started on fall crops, too,
setting out broccoli, cabbage,
and brussels sprouts and direct-seeding carrots and peas. Since
fall crops often germinate poorly during hot, dry weather, one of my
most important tasks at this time of year is remembering to drop back by
the fall beds a week or two after planting, reseeding as necessary.
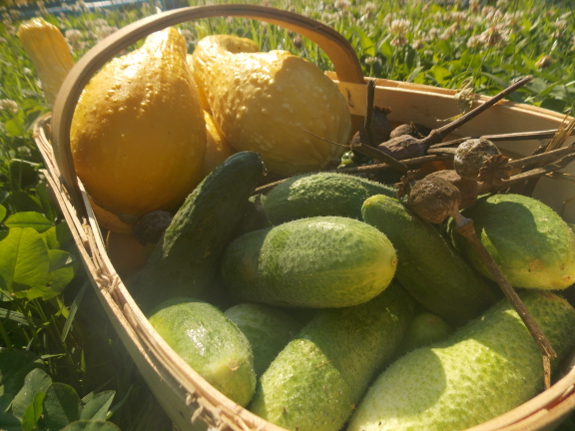
The other thing I try
(and often fail) to remember in the height of summer is to make notes on
my gardening spreadsheet about what we planted too much of. For
example, we've had so many excess cucumbers and summer squash for the
last few years that I've had to give them away by the basketload, and
yet I keep planting the same amount. Maybe I'll remember to only
plant half as many cucurbits in 2015?
We went to the big city for a funeral and brought home some bags of leaves.
 Michael Judd sent me a copy of his Edible Landscaping With a Permaculture Twist
to review, and I gulped the book down the same day it arrived.
Too bad I couldn't taste the berries in those beautiful pictures!
More seriously, Judd's book is a fast and fun read, mostly geared toward
newbie suburban homesteaders, but with tidbits that will suit even the
established farmer on forty acres.
I'll discuss the one
negative right away. Most of the book's projects are clearly based
on plantings Judd made as part of his edible landscaping business, so
they focus on initial aesthetics and don't necessarily have the
multi-year followup to see what does and doesn't work. As a
result, there are a few things included that I've seen in other books,
but that have failed when I tried them on the ground. For example,
I wouldn't recommend planting comfrey right up to the base of young fruit trees (especially if your soil is poor), and I think it would be handy to note which of the unusual fruit species profiled are invasive in the U.S.
On the other hand, by keeping each section simple, Judd will probably
inspire many more readers to take the plunge and try something, which is how we truly learn what suits our site.
That caveat aside, I found a lot to pique my interest in Edible Landscaping With a Permaculture Twist.
First, there's the story of the book itself, which is self-published
based on a kickstarter campaign, but is distributed by Chelsea Green ---
I wanted to hear more about how that came about! Next, mixed
amidst the most-popular permaculture techniques (hugelkultur, herb
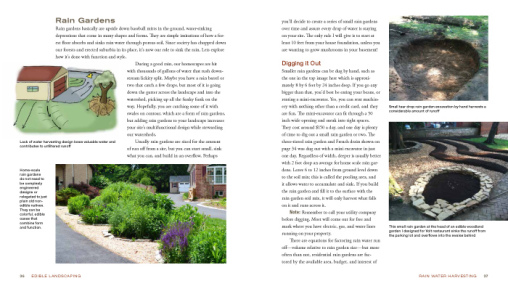
spirals, earthen ovens), Judd includes a fascinating section on rain
gardens, which sound very much like my sky pond but for soil that actually drains. In the same chapter, the author also explains how to make an A-frame level for easy keyline
marking, a tool I definitely plan to try out. Finally, those of
you who imbibe will likely get a kick out of the various alcoholic
recipes scattered throughout the text.
In the end, though, my
favorite part of Judd's book was the photos and diagrams. If
you're a magazine reader, you should track down a copy of his book just
for the eye candy, and I guarantee you'll end up inspired to try at
least one of project on your own homestead. Judd's beautiful and
inspiring read is just the nudge you might need to stop dreaming and
start doing.
I've always thought lizards are more adorable than most puppies.
Despite a week that felt
more like September than July, our bees have been working astonishingly
hard. Every time I pass by both hives, workers are flying in and
out like crazy. In fact, the colonies have been so busy, they
didn't even mind me weeding nearly on their doorstep last week, a sure
sign a nectar flow is under way.
Sourwood
has been blooming for a few weeks, and even though the trees I can see
from my window seem to be nearly done, I'm still noticing new blossoms
littering the forest floor in the woods. But my movie-star
neighbor tells me his bees are probably working basswood, which would
explain the hive traffic jams even better. Even though the lofty basswood
at the edge of our yard isn't blooming this year, there are probably
many more trees in the woods dripping with sweet nectar for our bees to
partake of.
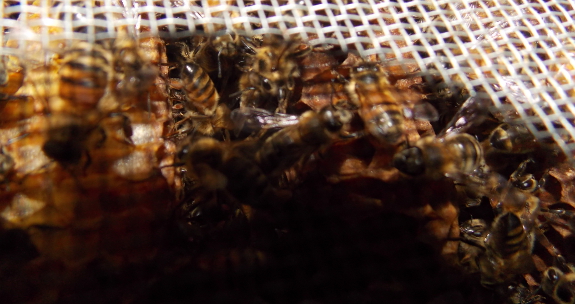
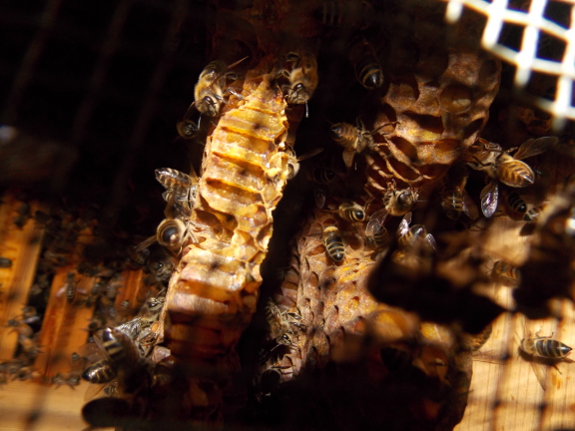
The last few times I've
taken photos up underneath our hives, I haven't seen much new
activity. In fact, if anything, it seemed like the mother hive had
eaten through some of their stores last time I checked, and the top
photo in this post shows that they haven't made much headway since last month.
But on Sunday evening, I struggled to take a photo under the daughter
hive and eventually realized the problem was that the bees had drawn
comb nearly to the screened bottom board, and that the camera simply
couldn't focus so close to the lens. Looks like the feedings I've
been giving that hive have paid off. Time to add another box and
proclaim our split a glowing success. Maybe now I can take them off the dole...again?
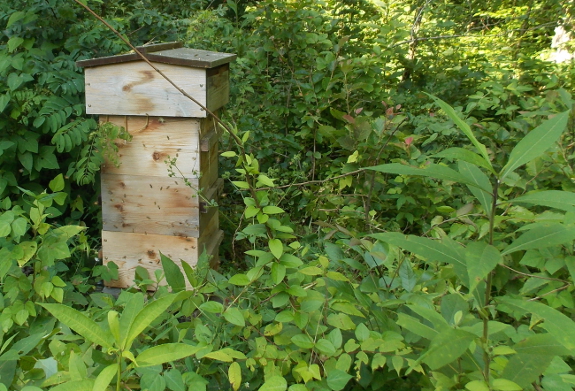
Both of our hives are now three stories high, with an additional uninhabited attic.
This hive doesn't seem to mind
being lost in the weeds on a seldom-visited part of the farm. But
we pulled a few of the larger plants in front of their runway while we
were nadiring.
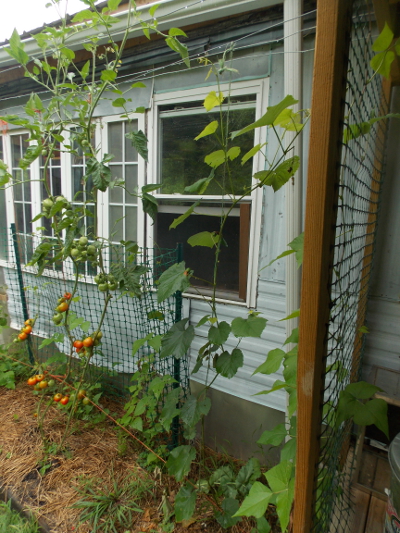 When I strung up a simple piece of baling twine to guide our young grape vine to its trellis,
Mark rolled his eyes. Did I have to relentlessly reuse found
material?, I could see him thinking. What if the twine rotted out
before the grape hit the wire?
Luckily for me, the grape vine took to its job with gusto. Despite having been a mere unrooted twig only a little over a year ago,
the plant settled in to grow like nuts. I could watch the plant
out the trailer window, and I just knew it was going to reach the
trellis wire 7.5 feet above the ground in early July.
Then, one day, a bush katydid that I had written about in The Naturally Bug-Free Garden
as mostly harmless nibbled the growing tip right off my grape
vine! I had warning too, having watched the same insect bite the
end off a tendril just a few minutes before, but I wouldn't quite
believe my eyes. Could that sweet little insect have derailed my
baling-twine experiment so quickly?
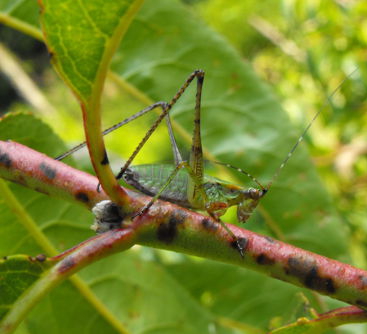 I
snagged the katydid and fed it to our tractored hens (so there!), but
the damage was done. As with any plant that loses its top, apical
dominance had fled and the vine began to branch out from lower buds
rather than continuing its race for the sky. But soon enough one
shoot took the lead, and this weekend that grape finally reached the
wire, proving my crazy reusing ways weren't flawed.
So much drama! This
is my favorite part about the growing area in front of the trailer ---
since I can watch it out the window, I see every little bit of life that
occurs, both good and bad. I can hardly wait to discover whether,
next year, I might get to watch grape fruits develop from tiny blooms
right in front of my eyes.
The big excitement for today
was a wheel alignment in Weber city.
All 4 wheels for 59 dollars.
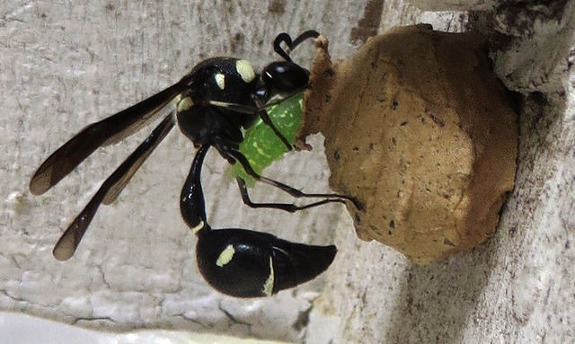
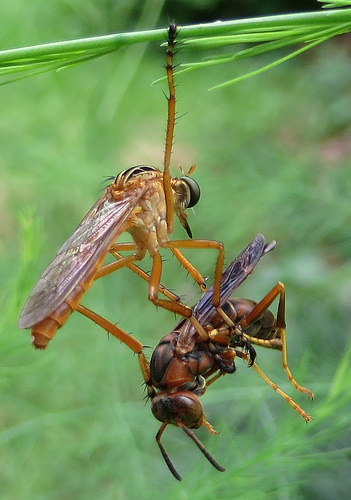 Some
of you may experience buyer's remorse. I don't buy much, so I
rarely feel that pang, but I do experience what I've come to call
writer's remorse. What am I talking about? Imagine you
polish a book to within an inch of its life, send it off to your publisher...and then a reader shares these astonishing pictures of beneficial insects from his yard.
The solution?
Posting those awesome images here on the blog so at least some of you
will get to enjoy them. The top photo shows a potter wasp storing a
caterpillar to feed her young while the second photo is a cannibal fly
getting ready to suck the juices out of a wasp. Both are taken by
Brian Cooper --- thank you so much for sharing, Brian!
We decided to spend some of Anna's
new book deal money on truck tires.
Four good sized mud tires
cost us just under 300 dollars.
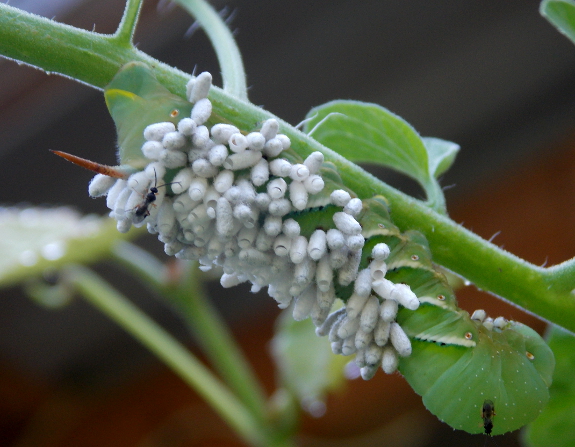
In addition to watching a bush katydid top my grapevine,
I've been enjoying a closeup view of life on the tomato plant right
outside our front window. Two weeks ago, a hornworm caterpillar
showed up, and I left it alone, knowing that the leaf muncher would soon
be munched in turn. Hornworms are never a problem on our farm
because parasitoid wasps kill them in short order, and this caterpillar
was no exception.
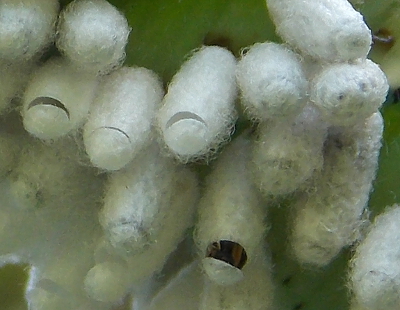 What was
unique about this hornworm is that I noticed when the adult braconid
wasps were ready to hatch from their cocoons. Tiny black fliers on
the immobilized caterpillar alerted me to the hatch, and I was able to
watch as wasp after wasp pushed its way out of the top of each cocoon.
Just a few minutes later, I was treated to a viewing of a tiny gray treefrog on our hazel bush, and that afternoon, a female goldfinch visited our greywater wetland
to gather cattail fluff for her nest. When my eyes are open, I
know that's a normal day in the life of our diverse homestead.
We used up that big box
I stole last week.
I like to take a minute and
remove all the tape and labels.
Maybe I'll return to the
scene of the crime like a typical criminal?
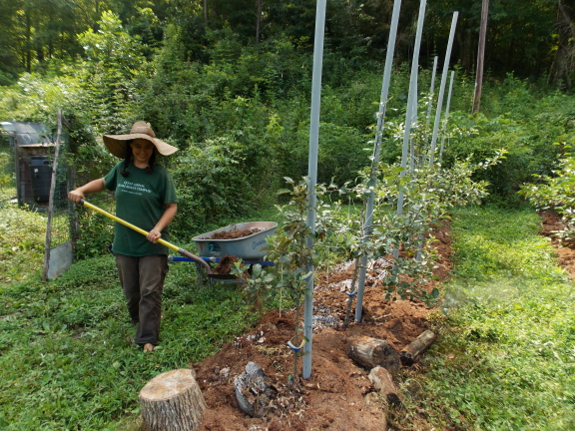
"Guess what this is?" I
said to Mark yesterday morning as he walked past. My voice was
full of the excitement of finding a new source of organic matter to
mulch with, so he hit the nail on the head with his first try. "Humanure," my long-suffering husband answered, a distinct lack of enthusiasm coloring his voice.
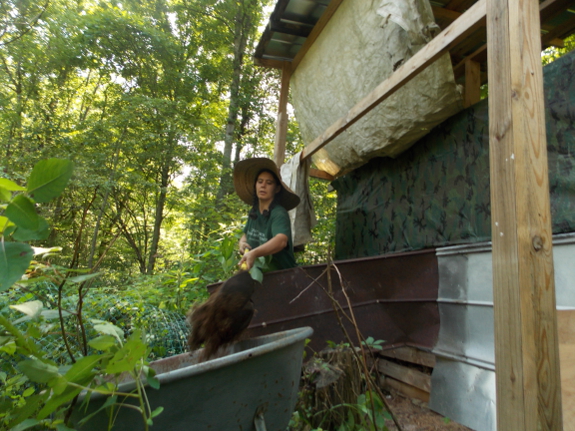
We
closed off the first bin of our composting toilet last November, and I
wrote that I planned to wait a year...or maybe two...before breaking
into the stash. However, my standards always start slipping when I clean out the deep bedding in the chicken coops
and still need more high-carbon materials to mulch the
perennials. I figured, as long as no chunks of poo were visible in
last year's humanure bin, I could use it beneath plants that wouldn't
be producing until this time next year. Really, that gives the
material almost 24 months between excretion and eating, right?
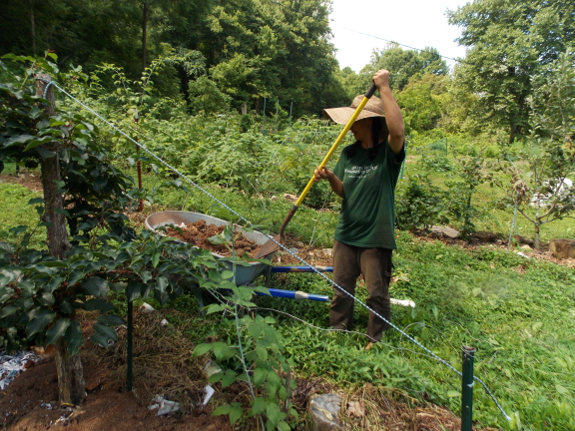
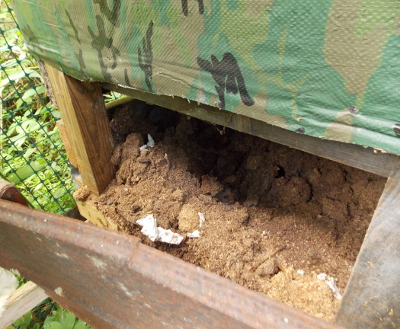 When
I opened up the composting toilet bin, I was surprised to see that the
contents really just looked like slightly aged sawdust. There were
some chunks of toilet paper around the edges, where the contents were
too dry for decomposition, but all other signs of human waste were
gone. I set aside most of the residual toilet paper as we went
along and used the four wheelbarrows of organic matter that remained
beneath our high-density apples, our hardy kiwis, and our black
raspberries.
In the interest of full
disclosure, I will admit that despite a lack of odor in the composted
humanure, it slightly grossed me out, especially early in my cleanout
efforts. As with slaughtering chickens, I immediately went and
took a shower after finishing the cleanout, even though the biologist in
me knows that nine-month-old humanure is probably less likely to make
me sick than relatively fresh chicken manure and horse manure are.
I handle the latter with barely a sniff, but I definitely still have a
hint of the fecophobia that made Mark lack his usual enthusiasm about my
crazy experiments.
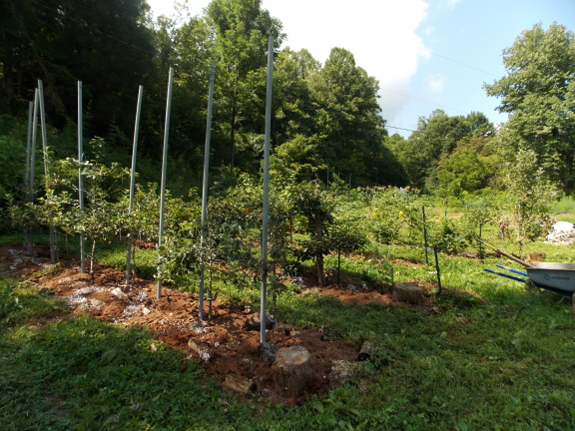
Mental issues aside, Mark
and I have some thoughts for improving our composting-toilet before
changing back over to the now-emptied bin this fall, but I'm pretty
happy with version 1.0 as-is. Human "waste" has become an asset to
the farm rather than a hindrance --- just what I was looking for!
The last piece of big cardboard went to some brussel sprout transplants.
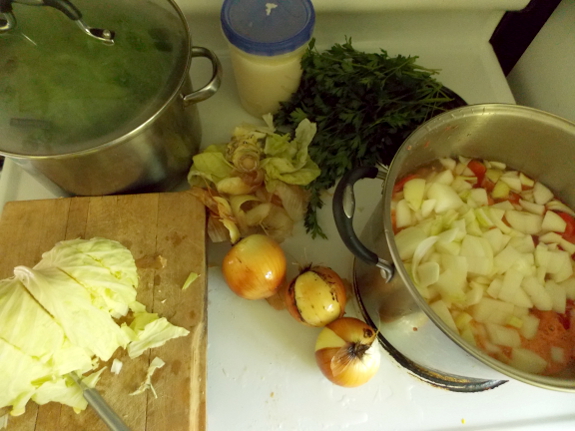
It's now officially
freezin' season! The tomato crop is far smaller than I'd hoped
for, but enough fruits are coming in to produce one or two big pots of
soup per week, most of which ends up as winter meals. And, as if
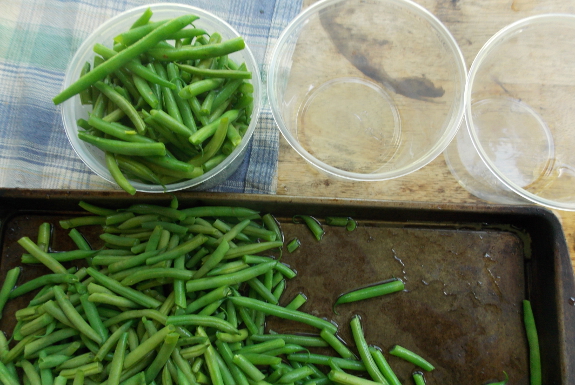
to make up for the moderate tomato harvest, the green beans are
extremely prolific this year, allowing me to freeze half a gallon at a time once or twice a week. Add that on top of this spring's bountiful broccoli,
plus the stir fry I'm experimentally freezing, and we've already got
8.5 gallons of winter vegetables socked away in the deep freeze (along
with a bunch of homegrown and purchased meat).
Whenever I write about
our winter stores, commenters always ask about our frozen-food goal for
the year. I'd post a link to my previously written answer, but
we're constantly tweaking our diet to include more fresh produce even in
the winter months, and are also streamlining non-fresh winter stores to
include only the foods that taste best frozen and rethawed. Last
year, we had barely enough winter stores from 6.75 gallons of green
beans, 11.25 gallons of vegetable soup, 0.6 gallons of sweet corn, and
0.25 gallons of tomatoes --- just shy of 19 gallons of vegetables
total. Since we plan to stock up on the same amount of storage vegetables
(onions, garlic, sweet potatoes, carrots, cabbages, and butternut
squash) and to continue pushing the weather boundaries with brussels
sprouts, kale, and lettuce under quick hoops, twenty gallons in the freezer should do us this year as well.
I put together this last storage rack in
about 10 minutes.
Plenty of room for the upcoming onion harvest.
It seems like I reinvision the forest garden
every couple of years, always thinking this new plan is going to turn a
problem zone into an area of bountiful harvest. So take what I
write here with a grain of salt. But, really, I think I've got it
this time!
This year's reinvision is the result of rain and rodents. When voles girdled the three apple trees
that were supposed to grow into the canopy of the forest garden, I
finally had to admit that those trees had been ailing for quite some
time. The issue in the forest garden is the same as in the
neighboring back garden --- high groundwater drowns anything with roots
more than two or three inches below the surface in the winter.
I've worked hard to build tree mounds up out of the wet using copious
organic matter (logs, branches, leaves, weeds, manure, etc.), but as the
plant materials inevitably break down, my trees' roots end up right
back down in the submerged zone. As of this year, the only
perennials that are thriving in the so-called forest garden are a hazel
bush and tons of comfrey. Time to change gears.
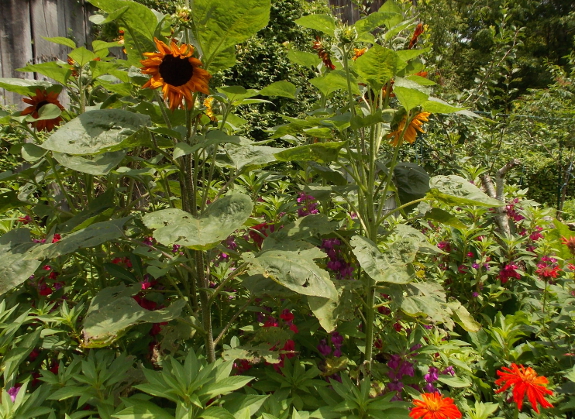
The first thing I'm admitting is that high groundwater probably does
mean a poor place for trees. All of my soil amendments have
created a rich layer of topsoil, but the quality dirt soon gives way to
waterlogged clay that kills deep-rooted plants in the winter.
While I could keep working to make the forest garden a tree habitat,
chances are I'd be better off using my efforts to turn it into a shrub
and herb (in the botanical, not the culinary, sense) playground.
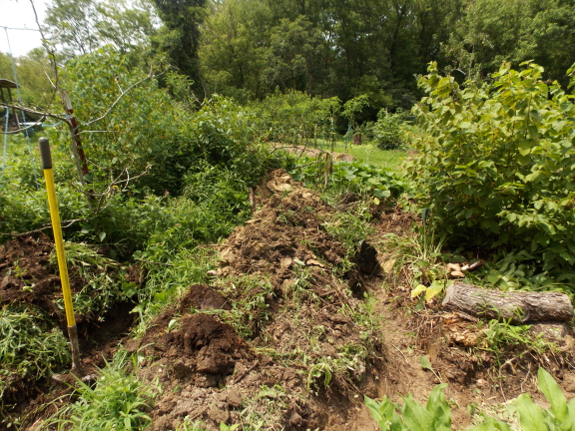
However, raising the planting zone up out of the groundwater enough to keep a foot or so of soil dryish does seem feasible now that I've experimented with a sky pond and chinampas.
Both have worked quite well, with Mark's only complaint being loud
toads singing on spring nights (requiring him to turn on a fan before
bed). Why not combine the two winning strategies, using dug-out
aisles to raise the planting surface while gently sloping excess water
toward a sky pond at the lowest point? As a bonus, I'll get to
discover whether a sky pond with no gleying will hold water as well as
the experimental one I semi-gleyed last year. And, as Mark said tongue in cheek, we really need more toads. Right? Who doesn't!?
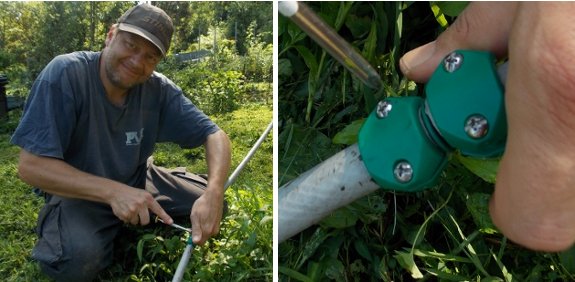
I first started using these cheap
plastic hose repair kits
4 years ago.
There's been no trouble with
any of the repairs all
this time.
I used the last one today
after a mower mishap.
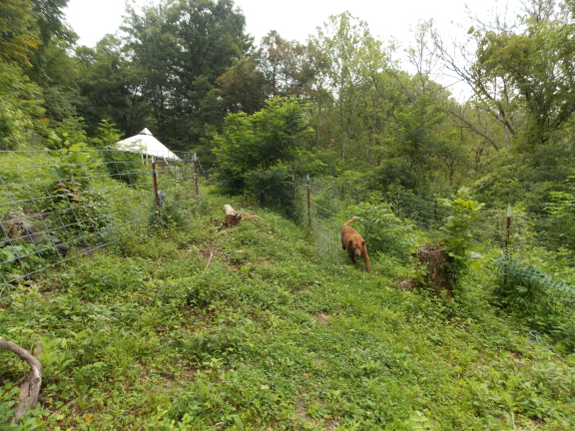
I'd been planning on setting out our newly grafted apple trees into the tree alleys in the starplate pasture
this winter, but my gut says the soil there isn't ready to support tree
growth. Sure, the texture looked great when I dug into it last
winter --- well-drained and loose --- but plants have been slow to
colonize the bare soil. In our climate, all I should have to do is
avert my eyes if I want weeds to grow over my head, and instead, the
ground is still spottily covered with bits of grass and white clover
despite the copious addition of chicken manure from our pastured flock
and the last mowing over a month ago. As a result, I figure those
tree alleys need another year or two of TLC before I put beloved
perennials in place.
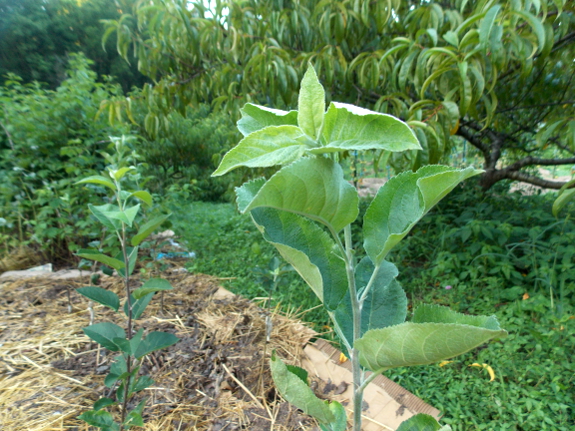
So...what am I to do with 11 beautiful apple trees? Even though a late frost kept our two-year-old high-density apples
from fruiting this year, I've been very happy with the vibrant growth
resulting from the training method. So I decided to keep this new
round of apples small and closer to home using similar high-density
methods. Sure, if I train the trees to stay diminutive, I'll
probably end up getting fewer apples from each plant, but I suspect I'll
get the same or more total apples since close-to-home trees are more
likely to survive and thrive.
Time to find gaps to
fill! I have five trees on M7 rootstock (usual spacing 12-15 feet)
and six trees on MM111 rootstock (usual spacing 15 to 20 feet) to play
with, so if I planted them traditionally, they would take up most of our
garden. However, the M7s should make good espaliers
along the front of the trailer and the MM111s can be trained to the
high-density method if I space them at least five feet apart (based on this handy calculator).
I'm curious to hear from folks who have played with espaliering --- do
you think a six-foot spacing for apples on M7 rootstock will work?
And, given that I'm most interested in productivity over beauty, which
shape would you recommend?
I had to replace
the flywheel shaft key on the lawn mower today.
It's my second flywheel shaft
key, and it went faster this time. Less than 30 minutes.
The things I'd like to
remember for next time would be try not to forget the bell shaped
spacer that goes on top of the flywheel and the oil spout goes first
before putting the gas tank back on.
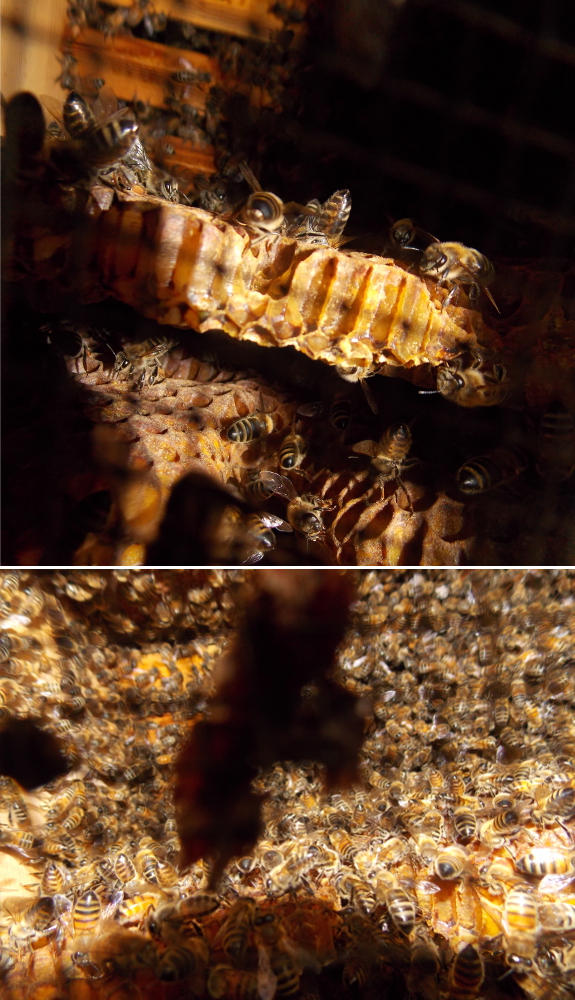
I've come to understand
that a natural beekeeper's primary job is to make sure the bees have
just enough space to continue working without wearing themselves out
patrolling large expanses of empty hive. So, when the third box of
our mother hive went from looking like the top photo to looking like
the bottom photo in a mere seven days, I figured I'd better give them
some room to grow.
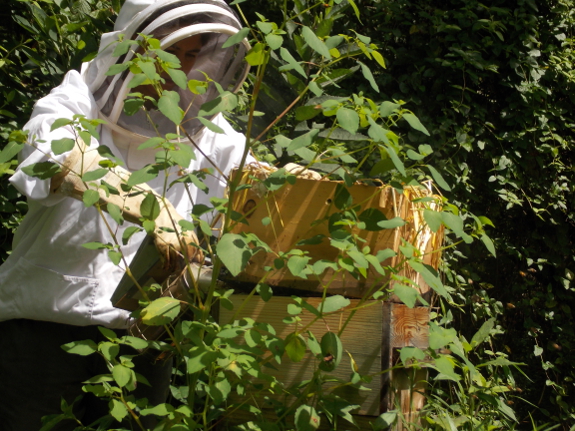
The question was ---
should I add the extra box to the top or to the bottom of the
hive? In general, Warre beekeepers nadir instead of super, meaning
that empty boxes are added to the bottom rather than to the top of a
hive. The theory is that keeping the lid on the hive and simply
hoisting the whole thing up to put a new box underneath causes less
disruption to the critical heat and scent within the brood
chamber. In the past, I have only nadired Warre hives, and last week I added the third box to our daughter hive at the bottom, as usual.
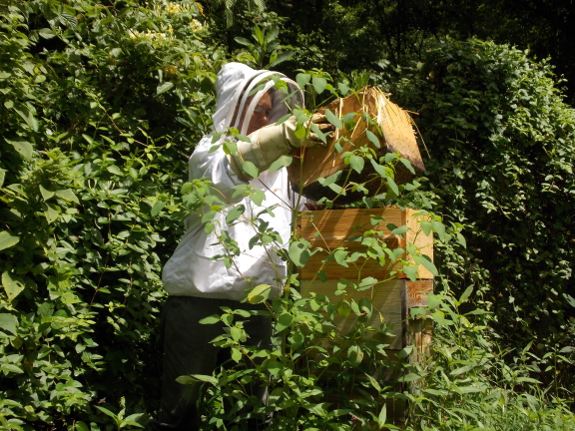
However, once a Warre
hive has more than two boxes mostly full of brood and honey, it becomes
much less feasible to nadir the hive without rigging a lift (or roping
two more people into helping you). In addition, this excellent page
suggests that supering is really the best way to add extra boxes onto a
booming Warre hive during a heavy summer nectar flow. In case you
don't want to read the long version, the gist is that bees only build
down as quickly as they need the space for brood, adding honey into
cells above the brood chamber as young bees vacate that space. So
during heavy nectar flows, nadiring simply doesn't give the bees enough
room to store the sweet liquid as quickly as it comes in.
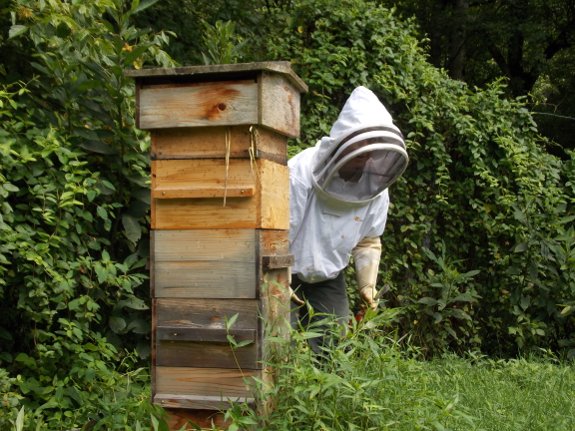
With that data in mind, I
opted to super the mother hive (and then to clean up the weeds around
the hive entrance, a task that was long overdue). Before supering,
a quick peek down into the top box proved that the upper chamber was
full of capped honey, so hopefully that buffer will mean taking the top
off the hive had less impact on that all-important brood chamber.
And if this flow keeps up, we might get a box or two of honey this fall
despite slowing our mother hive down by splitting her in half this
spring!
It took a few minutes of trickle
charging to get the ATV going today.
I cleaned the contacts last
week due to a low charge and I guess the short trip from here to our
parking area wasn't enough to charge it up.
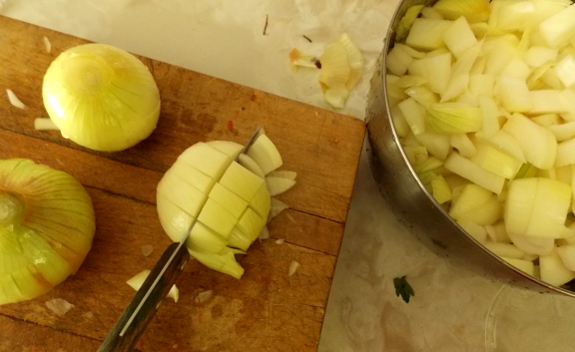
We ran of our storage onions
this year in May --- better than most years, but still leaving me with a
two-month drought. With most vegetables, I simply substitute or
do without if our crop isn't sufficient, but I can't quite imagine
cooking without onions. So we ended up buying a few bags at the
store (plus planting 20% more to feed us over the next year).
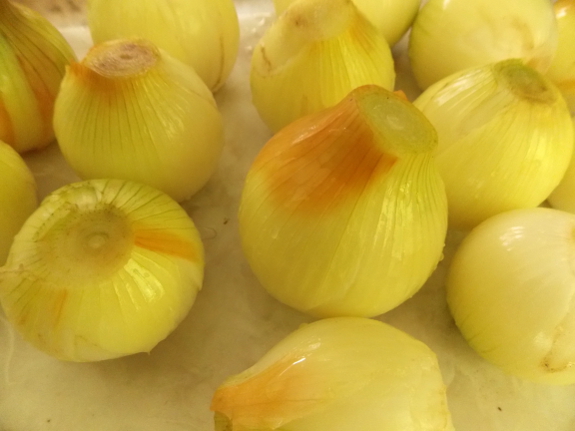
We learned the hard way that garlic just doesn't taste quite right until it's been cured,
but onions are ready to go in the soup pot as soon as they reach full
size. I haven't even harvested most of our onions out of the
garden yet, but I've been pulling the biggest ones for soup for the last
week or two. It seems like we can never freeze enough soup or
grow enough onions --- maybe those two problems are related....
I built a bench like shelf
for our new Black
Soldier Fly project today.
A big upside down lid makes a
good water moat to keep ants away.
The goal is to cultivate
enough grubs to supplement the chickens' diet.
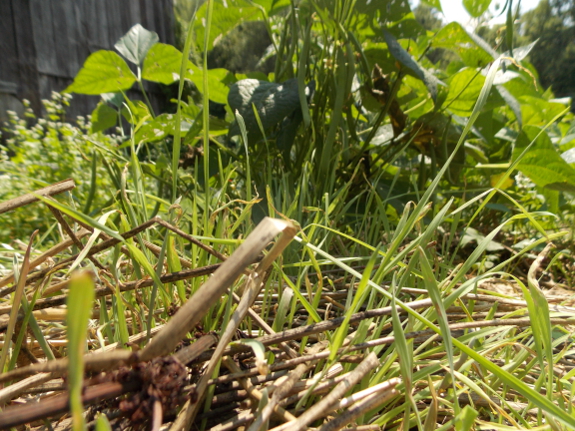
Mark and I were thrilled to get our summer purchase of straw last month...until
it started to sprout. That's right, I laid down several bales of
straw in the vegetable garden as mulch, figuring the straw would do its
usual weed-suppressing job, but the mulch turned out to be a source
of weeds. Looking more closely, I saw that the grain heads were
full of seeds --- seems like our supplier forgot to thresh before he
baled.
Mark's immediate answer
was: "Let's buy a flame weeder!" But I decided to try a low-tech
solution first. As I've been weeding this week, I've grabbed hunks
of seedling-filled straw and flipped it over as a unit. I'm
hopeful that the baby grain plants will be smothered by this cruel
treatment and will give up the ghost.
In the meantime, I'm setting aside the rest of these bales of straw to use as deep bedding
in the coop, where our chickens will be glad to remove the
grains. Looks like we'll have to hit up the feed store for some
replacement straw for the garden.
We made the Black
Soldier Fly shelf long to accommodate a propane stove top.
Next up is to figure out how
to match up the small connector to the big one on a regular tank of
propane commonly sold at grocery stores around here.
Want more in-depth information? Browse through our books.
Or explore more posts by date or by subject.
About us: Anna Hess and Mark Hamilton spent over a decade living self-sufficiently in the mountains of Virginia before moving north to start over from scratch in the foothills of Ohio. They've experimented with permaculture, no-till gardening, trailersteading, home-based microbusinesses and much more, writing about their adventures in both blogs and books.
