
archives for 06/2014
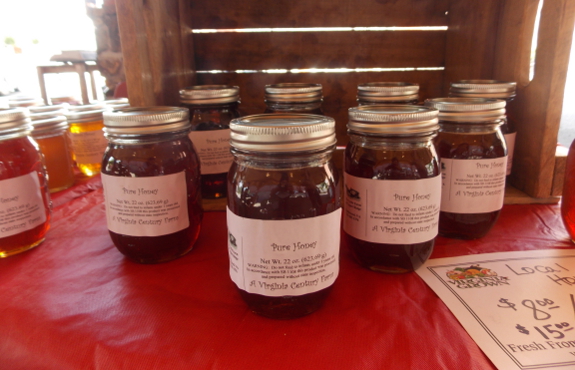
After the rain-barrel workshop on Saturday, I dropped by the St. Paul Farmer's Market
on my way home. I was thrilled to stumble across a local
beekeeper who keeps 28 hives without any chemical use at all, resulting
in only 10% losses per year. For non-beekeepers, those are very
good stats --- even if you use chemicals, 30% to 50% losses are normal
in our area.
I asked the beekeeper
what he did about varroa mites, and he shared his home remedy ---
rhubarb leaves. He told me to make a tea out of rhubarb leaves,
then to dip in a sheet of plain paper. After letting the paper
dry, you put it in your hive the way you would use mite strips in the
fall.
The internet suggests
that the purpose of the rhubarb tea is to extract oxalic acid, which is a
proven treatment for mites. Rhubarb leaves contain 0.2 to 1.3%
oxalic acid, and spraying oxalic acid into bee hives does seem to kill varroa mites with only some damage to the bees.
The less-intrusive strips seem much better than spraying if they work,
though. I may have to try that this fall if our mite counts are high.
We've had the Excalibur
food dehydrator for 3
years now and love it.
My favorite thing so far is
having strawberry leather in the middle of Winter.
The reusable
fruit leather sheets are
holding up well. They're not hard to wash and look like they'll keep
producing leather for years to come.
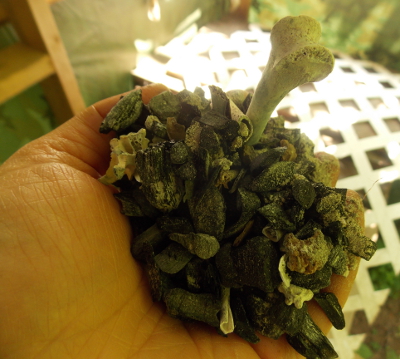 "I was wondering if you used your biochar to help grow your seedlings
and/or put any into your garden. I have made a lot over the winter and
put it in my beds, I am hoping for a great harvest this year.
Also, what is your preferred method for getting your biochar?" --- John
I haven't posted about our biochar in a while because it's become one of those things we just do as a matter of course. You can read my last big post on the topic here, which answers your question about how we harvest biochar and how we put biochar on the garden up until 2014.
This year, we're trying
something different. Since I haven't seen much impact from the
urine-soaked biochar in the vegetable garden, I decided to use this
year's charcoal in the composting toilet,
tossing a few quarts down the hole every few weeks (or whenever I think
about it). I'm hoping that by putting the biochar in an active
compost pile, it will become better inoculated with good microorganisms
and will result in more of the kind of boost you read about. Plus,
this way our biochar will be much closer to the terra preta
that started the biochar craze, since the charcoal will be combined
with human wastes. The composted biochar and humanure will go
under fruit trees in fall 2015, and I might have some data for you in
2016.
Mulching the middle with Rye is a little easier than baled straw.
Let me start with the official information found in many books and websites. Hardy kiwis
come in male and female varieties, and the recommendation is to include
one male plant for every eight females in your orchard. Only a
few varieties --- such as Issai --- are listed as having both male and
female flowers on the same plant, meaning you can get fruit from a
single vine.
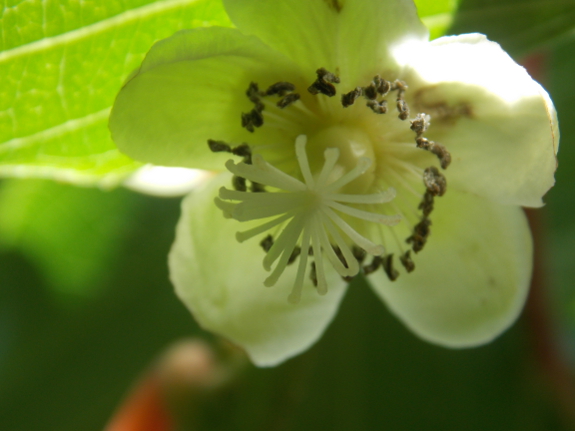
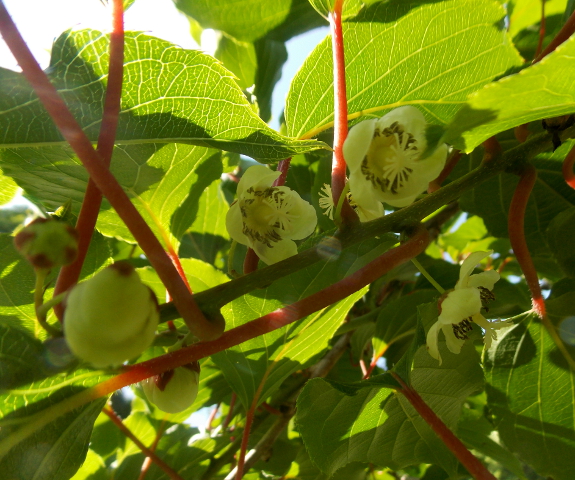
Our Anna (aka Ananasnaya)
vine is flowering for the first time this spring, and when I looked up
into the pretty white bells, I noticed that each bloom consists of a
central ovary (the green bump, which will turn into a fruit) surrounded
by quite a few stamens. Wait a minute! The presence of
stamens means that the flower is both male and female and is potentially
self-pollinating. I even tapped the stamens with my finger and
saw pale pollen come off, a sign that the male parts are functional.
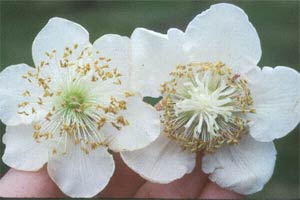 Is my Anna kiwi just an odd duck? I don't think so, based on the photo to the left, from the Washington State University Extension Service.
The WSU photo shows a male kiwi flower on the left and a female on the
right --- their "female" flower, just like mine, is full of stamens.
Interestingly, one
of our readers commented last year to say that she had planted an Anna
kiwi and a male kiwi, but the male never blooms with the female...and
yet she still gets fruits. We're accidentally running a
similar experiment since our Anna kiwi is the most vigorous of the three
vines I planted in 2008 and our male isn't blooming this year. If
we get fruits just like the commenter did even though no male flowers
are available, I'll know that either Anna is like Issai and is both male
and female, or that perhaps all "female" hardy kiwis are male too and
don't need a pollinator plant.
I'd love to hear from
readers who have hardy kiwis flowering right now. If you go out
and look at the flowers of your female plants, do you see a ring of
stamens? If so, what variety are you growing? Could the need
for male hardy kiwis just be an untested "fact" that's been passed down
from book to book for years with no data to back it up?
We filled the truck up with buckets
of horse manure today.
Our first load of the season
and it went smoothly.
 Even
though I really should be weeding and mulching, I'm stealing a bit of
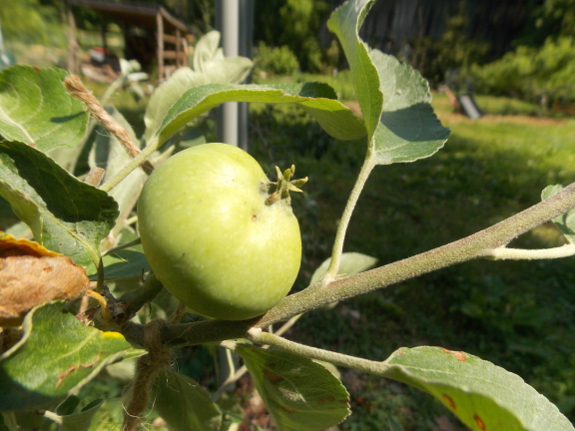
time this week to spend pruning and training the perennials. The high-density apple planting,
especially, needs frequent TLC during the growing season so I can
channel the trees' energy in just the direction I want, ensuring very
early fruiting rather than years spent on vegetative growth only.
In fact, we would have enjoyed a pretty good harvest this year, I
suspect, if we hadn't been faced with a late, hard freeze that wiped out
nearly every flower.
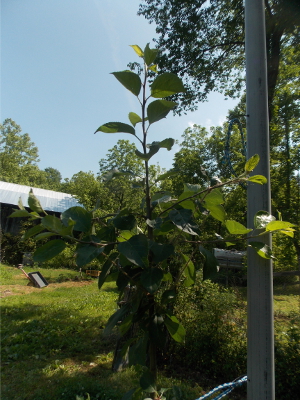
The only pruning I did in
the high-density planting over the winter consisted of cutting off the
tops of most of the trees. This is the same thing you want to do
with one-year-old whips to promote branching, and as you can see from
the photo to the right, the tops of the trees do
branch out the next spring just as you'd expect. What you
probably can't see is the pieces of twine I have holding down all but
one of the branches, turning them into near-horizontal scaffolds instead
of letting them fight over becoming the central leader.

In addition to bending branches way down, I did
head back a few branches that were reaching into other trees'
territory. With high-density plantings, the goal is to cut off as
little wood as possible, but if you absolutely have to cut, summer is a
better time than winter since a summer cut will be much less likely to
promote vigorous vegetative growth.
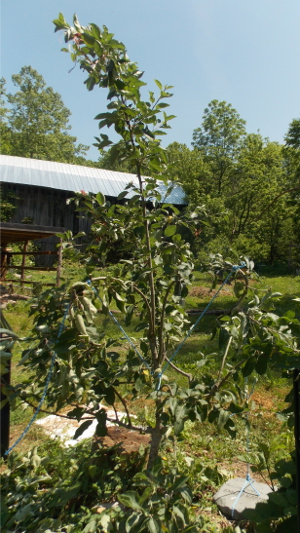 To the left, you can see the dwarf apple that I've named my loopy tree since I tied its copious watersprouts into loops last summer. After spending the better part of a decade without a bloom, my loops tempted the tree to put out quite a show this spring, and a few fruits even missed the hard freeze and seem to be sticking to their twigs.
Although my loops did
promote fruiting, in retrospect, I see that they weren't the brightest
idea because they resulted in branches coming away from the trunk nearly
vertically, which will be weak spots as the tree matures. With a
dwarf, though, it's probably not such a big deal since I won't let those
branches get very long anyway.
My job with the loopy tree this week consisted of untying the existing
loops and tying some new loops to make sure all of the branches were
pointing down. I hope the effort will be repaid with many apples
from this tree in 2016, barring another hard spring freeze.
Not pictured are the
blackberries and black raspberries, in which I left the fruiting stalks
(of course), but otherwise pruned each plant down to one main
stem. Then I snipped the tops off each of those primocanes to promote branching, which will ensure plenty of spots for flowers on next year's plants.
If you look carefully, you'll notice that I have pictured the hardy kiwis
in this post, where I cut the most vigorous vines way back and removed
all vines coming up from the base. Still to come on the
summer-pruning agenda is our non-dwarf trees and thinning the red raspberry canes.
But those plants won't be too pissed off at me if I get engrossed in
other garden tasks and forget about them, so they're on the bottom of my
list. Back to weeding!
Lucy helped me fix this 5
gallon bucket handle today.
It only took about 2 and a
half feet of rope and an extra hole next to where the wire handle would
fit into the protruding groove.
The rope should be thin
enough to fit through the old plastic handle twice. Loop it around on
one side and tie the ends together on the other.
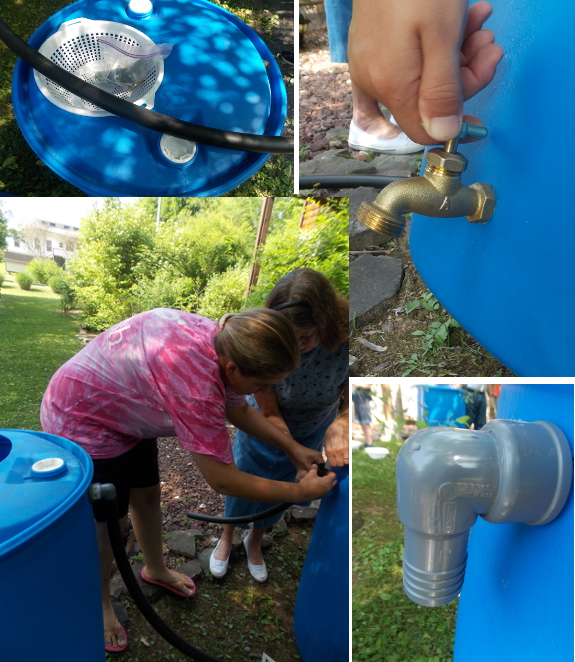
I'd like to make this post all about how to make a rain barrel.
But the truth is that the Upper Tennessee River Roundtable had done so
much prep work, each rain barrel took the participants only about
fifteen minutes to put together. The sponsors had cut round holes
in the top of each barrel for a colander to fit into, and they'd added
smaller holes in the sides for overflow and outlet pipes. The
outlet pipe simply consisted of a brass faucet screwed into the barrel,
while the overflow area was two PVC pipe fittings screwed together,
sandwiching the barrel, then a length of hose slipped over the exterior
fitting and hooked on with a hose clamp. Total supply cost was
$27 per barrel --- $10 for the barrel, $1 for delivery of the barrels
from North Carolina, and $16 for the hardware.
Mark and I are pretty sure we want to use our rain barrel to make an
easy hand-washing station out at the composting toilet.
Installing
the rain barrel will be a bigger project than making the water
collector since we'll have to add gutters to the roof and to support the
barrel at a height above the ground. I suspect rain-barrel
installation will be one of those projects that I deem unnecessary
during our busy season but that Mark sneaks onto the list when I'm not
looking.
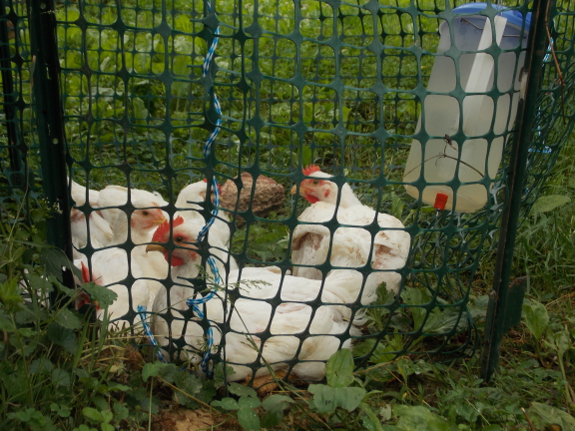
This temporary pen was all it
took to keep 5 Cornish
Cross broilers from escaping on their last day.
It takes Anna and me about 20
minutes per bird once we have everything ready.
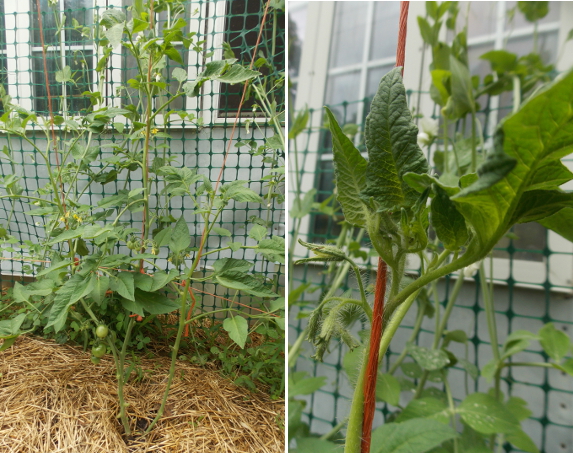
Remember my string tomato trellis? (Here's a photo on planting day.) The tomato plants are big enough now that I can give you a bit of data on how the new training method is working out.
The instructions in The Planet Whizbang Idea Book for Gardeners
tell you to space the vertical strings six inches apart, but I put mine
more like 18 inches apart since I wanted to give my tomatoes plenty of
air flow for fungal reasons. As a result, I had to tweak the
design further when the time came to twine the side shoots around their
strings --- the strings were too far away for the branches to reach, but
I didn't want to wait any longer to tie the tomatoes up. So I
simply slid the bottom part of the two side strings closer to the main
trunk, turning the three strings I use for a single tomato into a bit of
a W shape instead of a series of vertical lines.
Other than that, training
the tomatoes has gone quite smoothly. I gently twine the stems
around their strings whenever I think of it, snipping off extra sprouts
at the same time, and I think the process is really easier than my usual method of tying each tomato to a post at intervals. On the other hand, setting up the trellis would have been a lot more work if I hadn't had a soon-to-be grape trellis handy to work with, so I probably won't expand the string trellis to cover all of our tomato plants in future years.
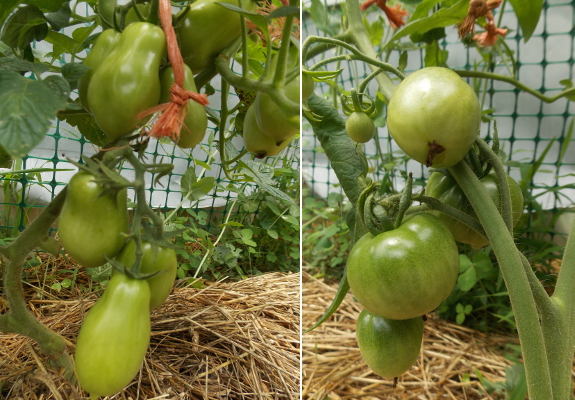
In other tomato-related news, the sunny microclimate
in front of the trailer is definitely doing its job at speeding along
our first tomatoes. Both the roma Daddy started inside very early and
the Stupice that I started inside at the end of February have big fruits
that are at least a week or two ahead of the fruits on our main
planting. Maybe we'll be eating ripe tomatoes before the end of
June?
We replaced our old sharpener
with a Lansky Blade Medic.
It seems to be more heavy
duty than the kitchen knife sharpener we've been using with the added
bonus that it can fit in your pocket.
I'm ashamed to say that, until this year, I'd yet to find a really delicious way to cook garlic scapes.
As a result, I plucked the scapes out of our hardneck garlic last
year...and let them compost in the garden. I'll never do that
again now that I've tasted roasted garlic scapes!
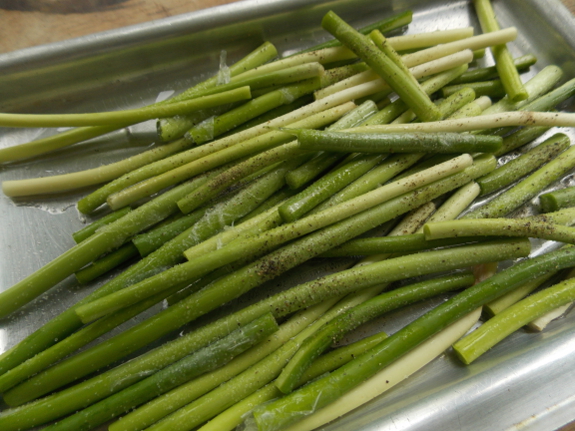
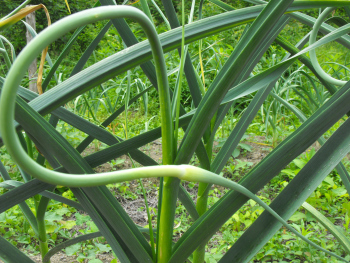 I roast scapes the exact same way I roast asparagus. After pulling the scapes out of the garlic plants, I break off the tops (which are tougher and less tasty),
then pile the sweet bottom portions onto my toaster-oven tray. A
drizzle of oil and a sprinkle of salt and pepper season the scapes, then
I turn the toast oven on high and cook for about thirty minutes,
stopping a couple of times in the middle to shake the pan and turn the
scapes around so they all get coated in oil and equally browned.
The finished product (not pictured) is somewhat shriveled, with every
scape at least lightly browned. The taste is like roast garlic,
but sweet and mild enough to be eaten as a side. Delicious!
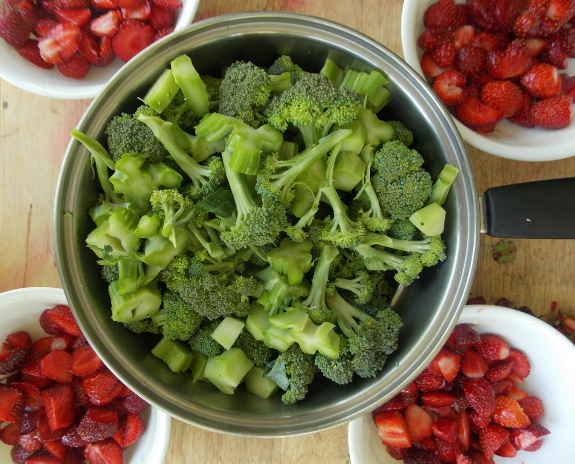
The way Anna prepares fresh
broccoli and strawberries is a thing of beauty.
The tricky part about
your question is that I apply manure based on quality of the soil.
In poor soil that I'm just bringing into cultivation, I may lay down as
much as two inches of manure over the entire area. In this case, I'm
applying manure both to provide nutrients (especially nitrogen) and to
increase the organic matter levels of the soil, improving the poor
ground. Plus, the high levels of manure jump-start the soil life
and get everything humming fast.
On the other hand, much
of our garden is now getting to the stage where the soil simply needs to
be topped up with nutrients before each planting. There, I often
apply one to two five-gallon buckets of manure per garden bed (about 20
square feet), which would work out to about 11,000 to 22,000 gallons of
manure per acre of ground (assuming no unplanted aisles). That's
about 55 to 110 cubic yards
of manure per planted acre, or a layer approximately 0.4 to 0.8 inches
deep spread across the planting area. At this application level,
you're only maintaining soil nutrients and organic matter, not improving
your ground, so you'll want to add cover crops into your rotation to ensure you're still making your earth richer.
Anyway, to get back to
the point and to actually answer your question, I estimate that we use
about 200 to 250
buckets of manure per year for our vegetables and strawberries. We
also add a few buckets to our bigger perennials, but most of our
bushes,
vines, and trees get their fertility from the deep bedding in the chicken coops and (starting this fall) from our composting toilet.
Last year, we went
through 107 bales of straw, which felt a bit extravagant but
which allowed me to use straw as bedding in the coops when I ran out of leaves and also gave me straw to mulch a few of the perennials. Since our vegetable garden is only about a quarter of an acre, your friend's statistics sounds about right (although I assume he meant straw, not hay).
In case you're curious,
our manure costs us nothing but sweat equity and gas for hauling, while
our straw costs us a bit over $5 per bale from a local farmer. You can see my rundown on the other costs of our garden here.
Gardening or farming
organically definitely does use a lot of inputs! Of course, we
could turn the whole thing into a closed loop pretty easily if we just
had another 24 hours in every day and another ten arable acres to grow
grains for straw and cows for manure. In the meantime, we'll keep
bringing in manure and straw to keep our little two-acre growing area
feeding us a large proportion of our own food.
Our new seed starting shelf does double duty as Strider's new roosting spot.
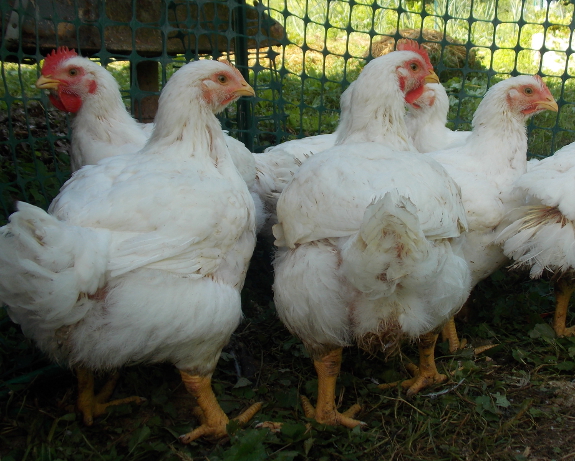
Our Cornish Cross chickens
are clocking in at a dressed weight of around 3.9 pounds at six weeks
of age, which is the youngest you'd want to slaughter even these
ultra-speedy hybrids. We could expect our broilers to perhaps
double in size if we let them grow out another month, but, to be honest,
Mark and I are heartily sick of Cornish Cross and don't want to risk
dealing with the health problems that crop up as the birds get even
bigger. Since the six-week-old dressed weight of Cornish Cross is
already twice what we get out of twelve-week-old Australorps, we decided to slaughter at the youngest age possible and move on to birds we enjoy more.
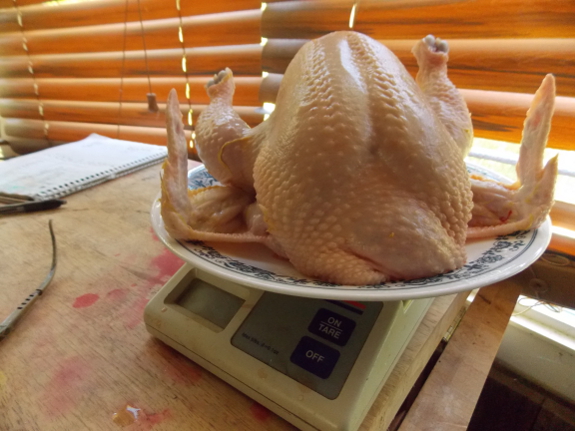
As I butchered the
Cornish Cross carcasses, I could tell they were a very different bird
than we're used to, and not just because of their heavy weight, small
legs, and big breasts. With Australorps, I'm used to seeing
minimal fat, but what fat is present is richly yellow
due to their pastured diet. Despite the fact that our Cornish
Cross had access to just as much pasture as our other chickens do, their
fat was a very pale cream color, and there was much more fat
present. In retrospect, I think the only real way to get much
pasture at all into lazy Cornish Cross is to use Salatin-style chicken tractors,
and I'm sure even that would only result in a fraction of the
nutritional quality of the meat that we get out of our Australorps.
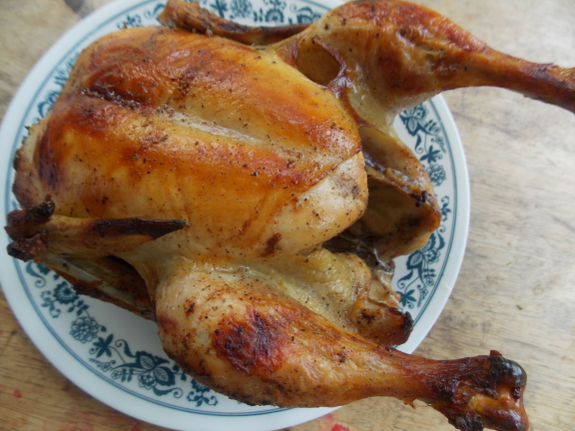
But what about flavor? I brined
and then roasted up a broiler twenty-four hours after slaughtering and
was pleasantly surprised to find that the taste of a homegrown bird is
superior to that of a supermarket chicken. On the other hand, the
Cornish Cross didn't hold a candle to the Australorp broilers we're
used to (although the former does have meat that's less tough than the
latter, due to the older age of our heirloom broilers).
In the end, we concluded
that Cornish Cross broilers are slightly cheaper to raise per pound than
Australorps are, have carcasses that are more familiar to the
mainstream American, and are ultra-speedy. But we're willing to
put in more time and a bit more money for healthier and tastier meat, so
we'll go back to our heirloom breed "at least for another ten years
until we forget what Cornish Cross are like," says Mark.
 I've got two rounds of book excitement to share with you this week. First of all, I have a new ebook out! Thrifty Chicken Breeds
sums up our experiences over the last five years trialling different
types of chickens and keeping track of their foraging abilities and of
how much it cost to keep the chickens fed. The result is a
recommendation on types of chickens perfect for the homesteader who
wants her birds to pay for themselves, plus tips on how to breed an even
more self-sufficient homestead flock.
Thrifty Chicken Breeds
is only 99 cents on Amazon (or free to borrow if you have Amazon
Prime), so I hope you'll splurge a buck! Early sales make a huge
difference in an ebook's future, so I'm not
setting this ebook free on Friday the way I usually do. Instead,
I've set aside a limited number of free copies for those of you who are
willing to leave a review on Amazon (email me
if you're interested), and once I have enough reviews to help the book
reach strangers, I'll set up a free period on Amazon. I announce
those freebies on my book email list, so head over here and sign up using the form on the sidebar if you want to know when this and other ebooks are free.
 Second, I revised the manuscript of The Naturally Bug-Free Garden to send to Skyhorse, and as always happens when I know I won't get another stab at a book for quite a while, I went over the book with a fine-tooth comb and also enlarged it.
If you've already downloaded a copy of the first edition, pay attention
to your inbox and Amazon should give you an opportunity to upgrade to
the second edition for free in the near future. And if you haven't
got the book yet, now's your chance to enjoy a sneak preview of the
same text and photos that will show up in bookstores in spring 2015!
A huge thank you to everyone who reads and reviews! And please don't forget that you can always read my ebooks on any device using these free apps. Stay tuned for some excerpts from Thrifty Chicken Breeds, coming up as this week's lunchtime series.
| This post is part of our Thrifty Chicken Breeds lunchtime series.
Read all of the entries: |
We used to be Snow Pea people, but switched to Sugar Snap when we discovered how much sweeter and crunchier a pea can be.
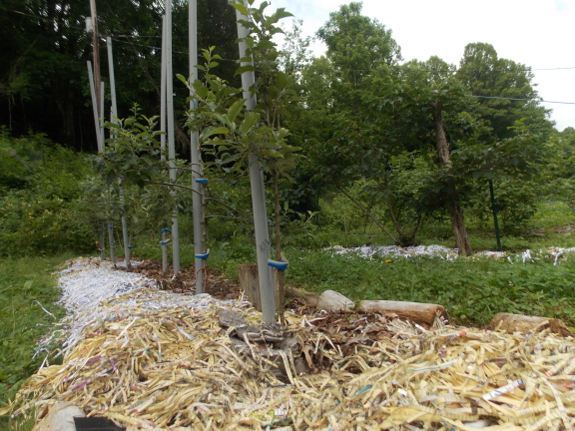
What should you do with junk mail? I've minimized our junk mail
to the point that what remains is just right for starting fires during
the winter months. But by June, those credit card offers are
piling up, so I shred anything that's not glossy and use the paper as
mulch around the perennials. Sending junk mail through a shredder is slow, but the mulch is an excellent source of organic matter for the soil and is a good weed blocker if applied thick.
What innovative homestead use have you found for junk mail?
 Why
are there so many chicken breeds to choose
from? A lot of it is just looks. Within the last century,
dozens of types of chickens were developed with unique plumage that made
them good bets to win a prize at the county fair, but these lookers are
unlikely to be prime homesteading birds. Not only is efficient
egg-laying
and meat production often ignored when breeding exhibition-quality
birds, but chickens with feathered feet have a hard time scratching for
their dinner, and those with fancy plumes can't glance up. In
general, fancy fowl tend
to be eaten by hawks in short order, and they usually don't produce much
compared to how much they cost to feed. The serious homesteader
will
be better off giving these birds a miss.
Why
are there so many chicken breeds to choose
from? A lot of it is just looks. Within the last century,
dozens of types of chickens were developed with unique plumage that made
them good bets to win a prize at the county fair, but these lookers are
unlikely to be prime homesteading birds. Not only is efficient
egg-laying
and meat production often ignored when breeding exhibition-quality
birds, but chickens with feathered feet have a hard time scratching for
their dinner, and those with fancy plumes can't glance up. In
general, fancy fowl tend
to be eaten by hawks in short order, and they usually don't produce much
compared to how much they cost to feed. The serious homesteader
will
be better off giving these birds a miss.The rise of fancy fowl is a relatively recent phenomenon. In 1868, Charles Darwin (with the help of a "Mr. Tegetmeier") published a survey of the currently known chicken breeds, which included Game, Malay, Cochin, Dorking, Spanish, Hamburg, Crested or Polish, Bantam, Rump-less, Creepers or Jumpers, Frizzled or Caffre, Silk, and Sooty. As you can tell, Darwin's descriptions were mostly categories rather than actual breeds as we consider them today, so it's not surprising that only thirteen types made the cut.
 The
heyday of chicken breeding didn't last forever,
though. The discovery of vitamin D not only made chicken keeping
more economical
for the homesteader, it also allowed large chicken farms to raise
thousands of birds at a time. During the same time period, many
Americans were moving off farms and into the cities, and while some
ex-farmers bred
miniature chickens (bantams) to take with them, others decided it was
simpler to buy their eggs and meat at the store. Before long,
homestead-worthy chicken breeds were dwindling and being replaced by
types of chickens that did well in the cramped quarters of factory
farms.
The more recent surges in backyard chicken-keeping of
the
1970s and early 2000s have mostly focused on the breeds that already
existed, although the choices were reduced to those that had
survived decades of backyard disinterest. And while most of the
chickens that were alive at the time Darwin was writing were probably
scrappy farmyard birds with no pedigrees who fit the farms they'd been
raised on, the modern homesteader looking to develop a productive flock
has more choices but a harder time finding productive genetics.
That's why, despite the wide variety of chicken breeds out there, it can
be tough to find a good homesteading bird. Thrifty Chicken Breeds is all
about tracking down that productive breed that can feed your family at a low cost.
I hope you enjoyed this excerpt from Thrifty Chicken Breeds.
If so, why not read the whole thing for only 99 cents? Or stay
tuned for another excerpt here on the blog tomorrow.
| This post is part of our Thrifty Chicken Breeds lunchtime series.
Read all of the entries: |
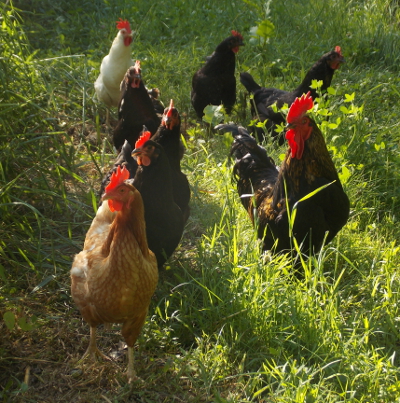
We water the vegetable garden to even out the weather, but the gullywasher last night was still appreciated.
Pastures will be greener, berries will be plumper, and trees will heave a sigh of relief.
Thanks, rain!
 Although a homesteader can
certainly choose Cochins as gentle pets for their preschoolers and
Polish to win first prize at the fair, the average farmer will be
more interested in making sure her chicken habit pays for itself.
The best farm breeds should produce lots of eggs and/or meat on little
store-bought food, but homesteaders should also pay attention to some
less obvious chicken traits.
What
are the less-than-obvious traits to be on the
lookout for? Prime homesteading birds will usually be good
foragers and will stand
up well to predators and weather. They will typically lay in the
winter, even when day length drops below the critical 14 hours per day
required for peak production (or the homesteader will commit to
installing supplemental light in the coop or to doing without omelets
during cold weather). In addition, the
best breed for your farm might make good mother hens...or you might
prefer a non-broody breed if you're going to use an incubator and want
to maximize egg production. Even if you don't have nearby
neighbors, I recommend choosing birds that only make a racket when
predators are
sniffing around since you'll soon tune out the cackling of loud breeds
like Anconas, Leghorns,
Old English Game hens, and White Faced Spanish, which means you might
lose some free-rangers to hawks as a result. If you garden (and
what homesteader
doesn't?), you'll also want to select a breed that's less likely to fly
fences and scratch up your lettuce bed—heavier breeds are better in
this respect, and the worst fliers (to be avoided) include Hamburgs, Leghorns, Old
English Game hens, and all types of bantams.
 Beginning homesteaders might choose from among the
most productive
egg-layers for their first couple of years, but chances are you'll
slowly gravitate toward dual-purpose birds that also produce a
worthwhile amount of meat (dressing out to at least two pounds at twelve weeks).
From an economic standpoint, it simply doesn't make sense to keep hens
around after they've been laying more than one to three years (depending
on the breed and on your level of sentimentality). So if you
don't want to be feeding unproductive pets, you'll end up butchering your
layers frequently, meaning those stewing hens will need a use in
the kitchen. In addition, once you start hatching your own eggs (a
big savings over buying hatchery chicks every spring), you'll
notice that fifty percent of your flock is male...and most farms only
need one rooster. All of the excess cockerels will join the spent
layers in the self-sufficient homesteader's belly. Since the most
productive egg-laying breeds simply aren't worth your while to butcher
and dress out as meat birds, I focus on dual-purpose breeds through most of Thrifty Chicken Breeds.
What shouldn't
the self-sufficient homesteader care about? Eggshell color only
matters for aesthetic reasons, as does color of a meat bird's
skin. In both cases, the taste and nutritional quality of the eggs
and meat are due to what the chicken in question ate (which generally
equates to how much non-store-bought feed it consumed). In
addition, I recommend that you don't pay too much
attention to the
actual breed name or to whether or not your chickens are listed as
heritage
breeds. While threatened heritage varieties sound good on paper,
it's worth asking yourself—why do so few people raise that type of
chicken any more? Perhaps the breed was particularly suited to
only a
very specific climate or type of homestead, or maybe (as has happened
with many breeds in the last century) breeders began selecting for
exhibition-quality looks rather than for productivity and
efficiency.
While Thrifty Chicken Breeds does list variety names to give you a place to start, I
believe the best chicken for most homesteaders is a mutt specifically
bred to match your farm and needs. So take everything I say with a
grain of salt—if your Australorps don't live up to my high praise,
seek out another dual-purpose variety that is being raised by
homesteaders like you who are interested in productivity over prestige.
I hope you enjoyed this excerpt from Thrifty Chicken Breeds.
If so, why not read the whole thing for only 99 cents? Or stay
tuned for another excerpt here on the blog tomorrow.
| This post is part of our Thrifty Chicken Breeds lunchtime series.
Read all of the entries: |
We found a new source for saw dust.
It's closer to home, which
would save about an hour of driving, but there's no loader to do most
of the work.
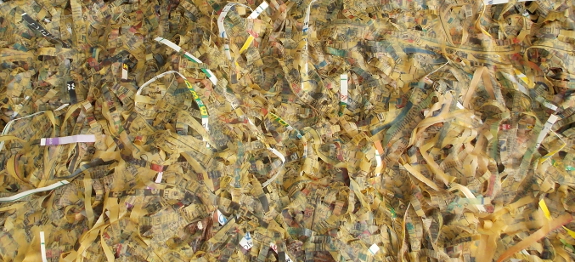
"I was actually wondering about this recently. I am somewhat leery of the chemicals in the paper and inks (even if it is soy based ink there are other chemicals in it that may not be great)." --- Sharon
I put this question to Tradd Cotter at his talk on mycoremediation
(using mushrooms to deal with chemical pollutants) and the upshot is
that fungi can break down nearly anything we throw at them as long as
the fungi are healthy. Since Mark and I work hard to create
fungus-friendly soils (by not tilling, never adding pesticides or
herbicides, always applying organic matter to the soil surface, and so
forth), I trust our fungi to break down everything except heavy metals.
The question becomes ---
will paper used as mulch in the garden contain heavy metals? A
study by West Virginia University showed that glossy paper may
contain heavy metals while, in contrast, paper with only black ink is
quite safe in the garden. The study didn't address the middle
ground, though --- non-glossy paper with color ink.
What do we do in our own
garden? Glossy paper hits the trash can (since it makes plants
grumble even before you consider the heavy metals issue),
black-and-white paper is used without concern in the garden, and
non-glossy paper
with colored ink goes in one place or the other, depending on how
desperate I am for mulch material. I figure that, given the
relatively low quantities of paper we use for mulch, simply using my
paper to mulch different areas each year will keep heavy metals from
building up to toxic levels. (My junk mail mulch probably amounts to about 1% of our annual mulch, if that.)
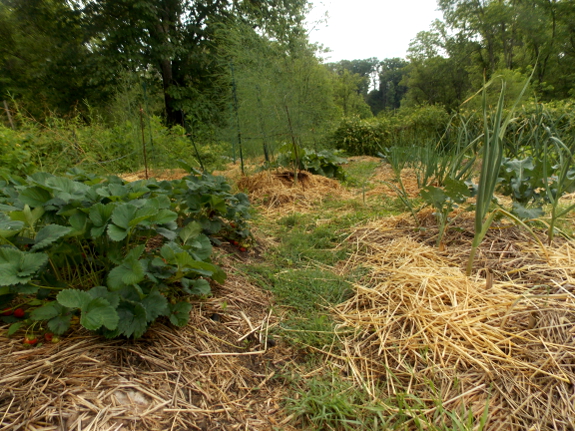
As a side, note, neither of the questioners addressed the C:N ratio
issue, but I think this is an important point for gardeners to
understand if they're using paper in or on their soil. Paper has a
C:N of between 50:1 and 175:1, which means that decomposing bacteria will suck
nitrogen out of your soil while breaking the paper down if you're not
careful. How do you get around this issue? Only use paper as
mulch in parts of your garden where you aren't going to till in the
near future, since mulch doesn't steal much nitrogen from the soil but
paper worked into your dirt definitely will. Or, if you must till
in paper mulches, be sure to apply some extra nitrogen (compost, manure,
urine, etc.) at the same time so the paper won't steal important
nutrients from your plants.
I hope that helps you
decide whether or not to use paper as mulch in your own garden. In
the end, it comes down to a personal decision about how careful you
want or need to be, and how much you want to save a buck and keep waste
materials out of the landfill. (Or to avoid a trip to the
recycling center if you have one nearby, which we don't.) We try
to use up as much of our "waste" as possible, so paper mulch, within
reason, is acceptable on our farm.

Are
you the type of reader who likes to skip to the
end of the book to see how the story turns out? If so, here's a
handy chart summarizing the pros and cons of the types of chickens
mentioned in Thrifty Chicken Breeds.
| Breed |
Avg. eggs per year |
Weight of adult rooster / hen (lbs) |
Primary uses |
Primary disadvantages |
| Ameraucana |
250 (prolific) |
6.5 / 5.5 |
Green and blue eggs |
True Ameraucanas are very
rare. Most birds listed as "Ameraucanas" are actually hybrids more
properly known as "Easter Eggers." |
| Australorp |
250 (prolific) |
9 / 6.5 |
Eggs and meat |
Only a moderate winter layer |
| Brahma |
150 (average) |
12 / 9.5 |
Meat, pets |
Feathered feet |
| Cochin |
110–160 (below average) |
11 / 8.5 |
Broody hens, pets |
Feathered feet |
| Cornish |
150–180 (average) |
10 / 5.7 |
Meat |
Less efficient converter of feed to meat than Cornish Cross |
| Cornish Cross |
May not live to laying age |
10 / 6 |
Meat |
Hybrid, so you can't keep your
own flock going. Also, this very productive meat bird may be hard
to keep in homestead conditions. |
| Dominique |
180–260 (average, good winter layer) |
7 / 5 |
Eggs and meat |
Aggressive roosters |
| Easter Egger |
200 (varies) |
varies (about 6–7) |
Green and blue eggs, pets |
Inefficient layers |
| Faverolles |
200 (above average, good winter layer) |
10 / 8.5 |
Pets |
Currently bred for looks, not production |
| Leghorn |
280 (extremely prolific) |
2.4 / 2 |
Eggs |
White variety attracts predators, flighty behavior |
| Marans |
150 (average) |
8.5 / 7 |
Broody hens, "chocolate" eggs |
Inefficient layers, skittish behavior |
| New Hampshire |
200–280 (above average, good winter layer) |
8.5 / 6.5 |
Eggs and meat |
Inefficient layers |
| Orpington |
175–200 (average, good winter layer) |
10 / 8.5 |
Eggs and meat, broody hens |
Most strains are now bred for looks, not production |
| Plymouth Rock |
200–280 (average, good winter layer) |
9.5 / 7.5 |
Eggs and meat |
Most strains are now bred for looks, not production |
| Red Sex Link |
200–280 (varies, but usually prolific) |
8–9 / 6–7 | Eggs, pets | Inefficient meat producer, too friendly for some homesteads, doesn't breed true |
| Rhode Island Red |
200 - 280 (extremely prolific, good winter layer) |
8.5 / 6.5 |
Eggs and meat |
Aggressive roosters, flighty behavior |
| Silkie |
150 (average, small eggs) |
2.3 / 2 |
Broody hens, pets |
Inefficient producers, can't see predators, feathered feet |
| Sussex |
240–260 (above average, good winter layer) |
9 / 7 |
Eggs and meat |
White variety attracts predators, too friendly, inefficient meat production |
| Wyandotte |
200 (average, good winter layer) |
8.2 / 6 |
Eggs and meat |
Fluffy vent feathers can make it hard for roosters to fertilize eggs |
 What if the breed you're interested in isn't listed
above? Here are a few of my favorite sources for chicken stats if
you want to research further:
BackYard Chickens has a helpful section where visitors have rated many breeds, listing the pros and cons of each.
Wikipedia is a good source for just-the-facts stats.
Cackle Hatchery includes egg-laying statistics on most of their breeds.
But don't get bogged down in crunching numbers and making pro and con
lists. Your on-the-ground data might not match what others have
reported, so there's no replacement for just diving in and trying a new
breed out!
I hope you enjoyed this excerpt from Thrifty Chicken Breeds.
If so, why not read the whole thing for only 99 cents? Or stay
tuned for another excerpt here on the blog tomorrow.
| This post is part of our Thrifty Chicken Breeds lunchtime series.
Read all of the entries: |
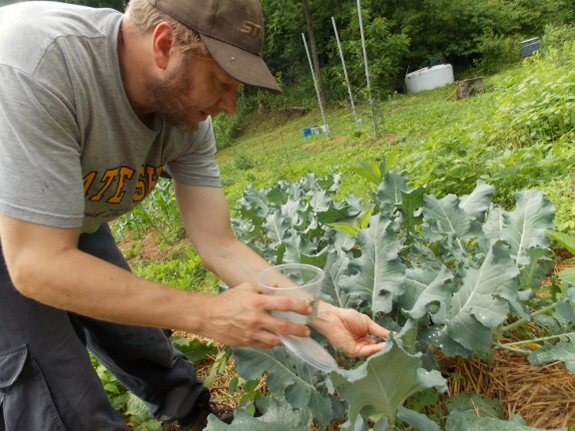
What's the best way to feed cabbage worms
to ducks?
I plan to try adding today's
collection to tomorrow morning's feed. Sort of like adding raisins to a
bowl of oatmeal.
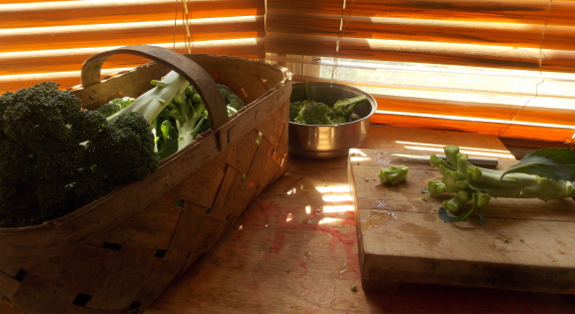
The freezer feels like it's filling up pretty fast this year. Part of that is the 75 pounds of chicken meat we
added this and last week, plus the gallons of chicken broth from feet
and necks of all the birds and from carcasses of the seven we parted out. The broth will be 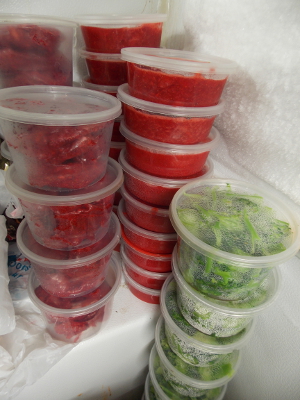 thawed back out in a month or two to form the base of tomato and vegetable soup, but right now the liquid takes up quite a bit of space.
Strawberry season this
year was a bit shorter and smaller than previously since frost got some
of the earliest flowers and then rain this week caused other berries to
rot. It's hard to complain, though, when we have over a gallon
each of strawberry leather and strawberry freezer jam to perk up our late winter doldrums next year.
The only newly-frozen
food that counts toward my goal of thirty-or-so gallons of stockpiled
vegetables is the broccoli --- nearly a gallon put away so far. We
didn't have enough broccoli to freeze last spring and our fall crop
bombed, so it's exciting to be able to gorge and still freeze quite a
few of the cruciferous buds.
Although rain rots the
strawberries, I was glad of a rainy afternoon since it let me work in
the kitchen without burning up. If it's too wet to be in the
garden, you can always spend that time preserving the bounty!
 One way to narrow down the vast array of available chicken
breeds is to consider the most popular breeds right
now in the United States. Merging together the data from two surveys (one by Mother Earth News
and one by the Backyard Chickens Forum), I developed
this list of top breeds from most to least popular:
2. Orpington
3. Plymouth Rock
4. Wyandotte
5. Easter Egger
6. Australorp
7. Ameraucana
8. Silkie
9. Cochin
10. Leghorn
11. Brahma
12. New Hampshire
13. Star
Of course, a simple popularity contest combines all of the reasons people might choose to keep chickens:
copious eggs, delicious meat, charming temperament, pretty feathers, and
so forth. So a serious homesteader probably won't want to simply
pick the top three types of chickens from this list without looking further into each breed.
Murray McMurray Hatchery's starter guide, Chickens in Five Minutes a Day,
also bases its recommendations largely upon popularity, but the authors break
down their recommendations into the following categories:
 Productive white-egg layers: Pearl White Leghorns, followed by Silver Spangled Hamburgs, Single Comb Brown Leghorns, and Blue Andalusians
Productive brown-egg layers: Red Stars and Black Stars, followed by Rhode Island Reds, Buff Orpingtons, and Barred Rocks
Multi-colored-egg layers: Araucana/Ameraucana hybrids
Exotic-looking birds: Bantams in general, but specifically White Silkies, Blue Silkies, Frizzle Cochins, Belgian Bearded d'Uccle Mille Fleurs, and Quail Antwerp Belgians
Pets: Cochins and Orpingtons
Some of these varieties won't be appropriate for the
self-sufficient homesteader, and some less popular breeds deserve to be
more well-known. But the popularity contest approach at least gives us a
place to start.
Want to keep reading about which chicken breeds are best for various purposes? Thrifty Chicken Breeds is available for 99 cents on Amazon!
| This post is part of our Thrifty Chicken Breeds lunchtime series.
Read all of the entries: |
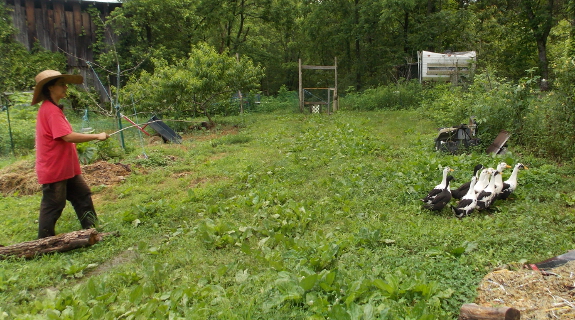
A long stick is handy when moving chickens, but essential when herding ducks.
The stick acts like an extension of your arm, making it easy to change the direction of birds who are veering off course.
But even with the help of a stick, it still took two people to move the ducks from their temporary paddock in the forest garden to the forest pasture.
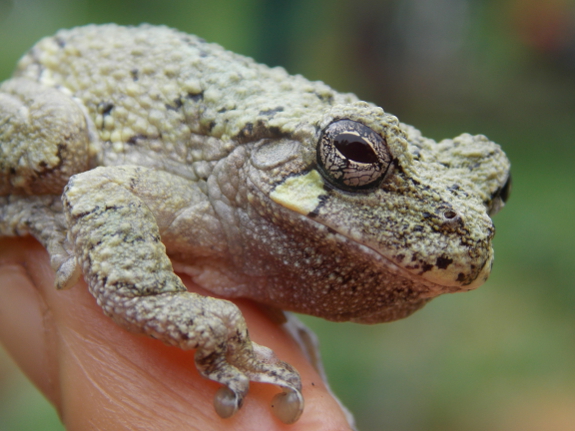
When I went out to tie up
the tomatoes Thursday morning, I discovered this adorable gray tree
frog hiding in the crevice of one of the U-posts.
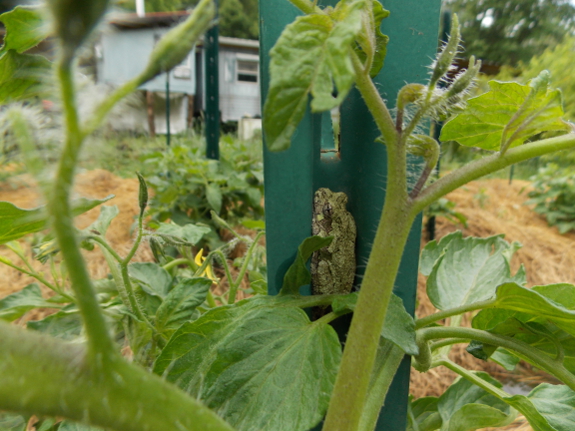
I was getting ready to slide rebar down each groove to extend the height of my tomato support posts, so it's lucky I was working from the back side and noticed this little guy before he could be squashed.
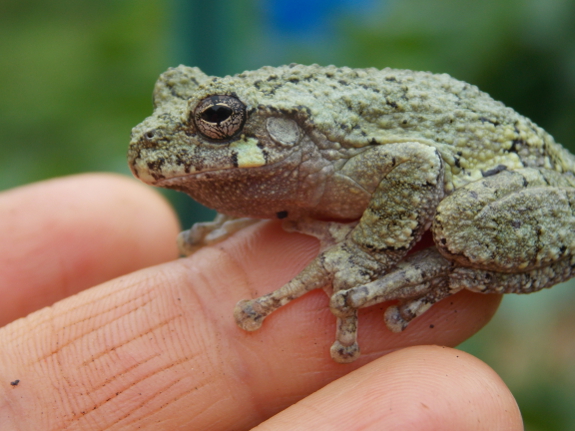
With a little nudging, I
was able to convince him to let go of the post with his suction toe tips
and to move onto my finger so I could ferry him to another tomato
plant.
I suspect the frog has been enjoying hunting bugs attracted to the
eight-inch-deep water currently standing in the aisles between my chinampa beds.
I even saw water striders skating across the surface as I waded through
to prune and train the astonishing amount of growth our tomatoes put
out over the last week. Water definitely attracts even more life
to the garden!
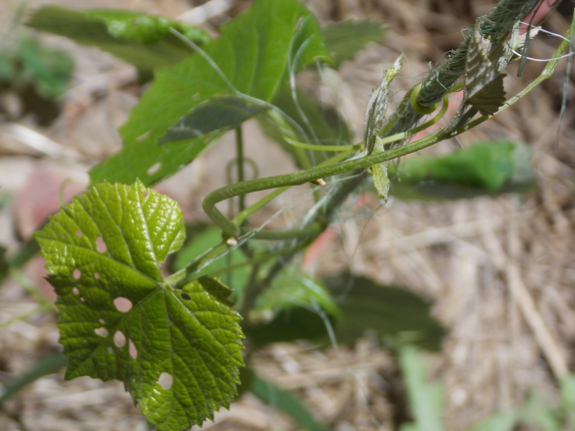
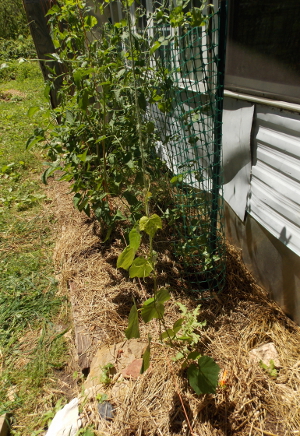 Even though his siblings perished during the winter cold, the Reliance grape I rooted last year and put in the warm microclimate in front of the trailer is growing fast. Eventually, this grape will sprawl across the shade trellis
(an overhead arbor) in front of our bank of south-facing window to
provide protection from the summer heat, but at the moment, the plant is
too short and needs some support.
I decided to take a page out of the tomato string trellis
book and give the baby grape a piece of baling twine to grow up.
Only a couple of days after offering the support (and gently twisting
the grape vine around the string), tendrils have already grabbed
hold. I wonder if the vine will reach up to the trellis by the end
of this summer?
The first hint of color
started showing on one of our tomato plants.
Maybe the first tomato taste
will follow in a week or so?
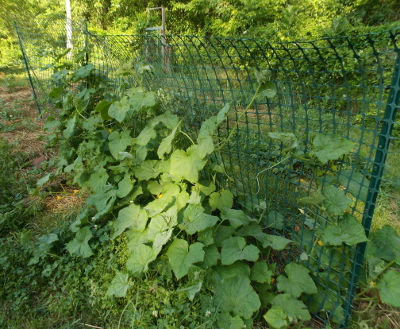 For the last two years, I've started a long row of cucurbits under quick hoops in mid-April,
three weeks before our frost-free date. My very unscientific
method of deciding which varieties got to be included in the early
planting involved asking Mark, "Which kinds of cucurbits are your
favorite?" The result was a planting that contained two-thirds
watermelons and one-third cucumbers.
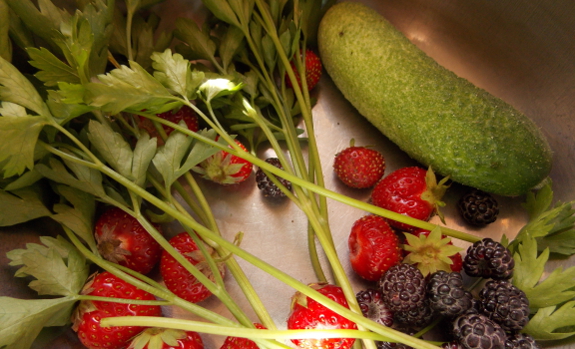
And the early planting
really paid off on the cucumber front. We got to enjoy our first
cucumber Saturday, and in a week or so I suspect we'll be overrun with
these crunchy vegetables. Yum!
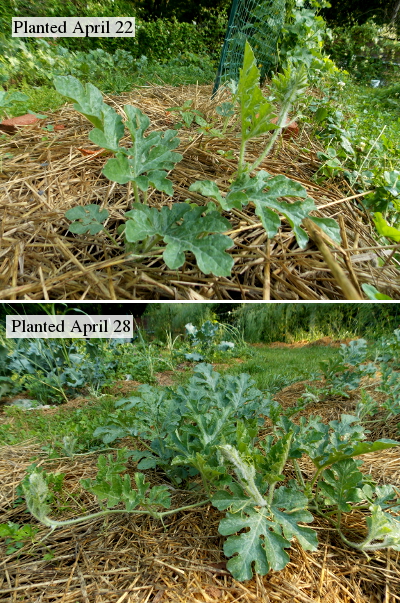 On the other hand, I noticed this year that the watermelon plants that I started under quick hoops are actually smaller
than the ones I planted directly into the ground at the very end of
April. We had some very cold weather during the intervening period
(with a low of 23 recorded one night), and it now appears that the
chilly weather resulted in sulky melons.
That got me thinking that
perhaps I should jump the gun on some other summer vegetable next year
instead, saving the watermelons to go into the ground when it's a bit
warmer. Perhaps green beans or summer squash? Which types of
summer vegetables have you had good or poor luck with starting
extra-early under frost protection?
The first squash flowers
bloomed today.
What kind do we like?
When we first started we used
the Gold
Rush variety, but switched to Yellow
Crook Neck when we discovered it tastes a little better and is more
resistant.
Unlike raspberries and
strawberries, which carry through for us nearly no matter what, grapes
have been a problem on our farm. We started out with French hybrid grapes,
which attracted Japanese beetles like crazy (and which happened to have
seeds, meaning that Mark wouldn't eat them). There were also some
disease issues with those early vines, but to be honest, the other
problems were so big I never even got to the point of figuring out what
diseases I was dealing with.
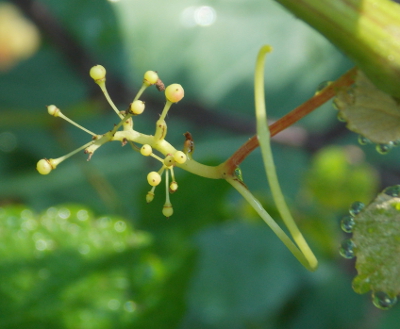 After Mark pulled those vines out,
I planted two Mars Seedless in fall 2011. The grape vines were
pretty minuscule when they arrived, so only this year have they started
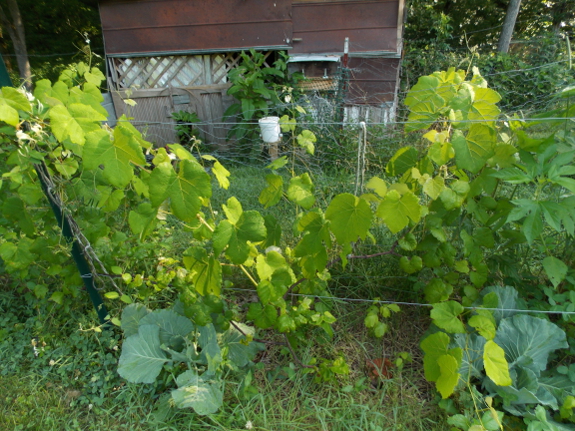
to come back onto my radar. One plant (pictured at the top of this
post and to the right) clearly needs some weeding and training, but is
otherwise thriving. We might even get to taste a few grapes this
year! The other...isn't.

Diseases in our garden
are nearly always fungal, exacerbated by our wet weather, and the issue
facing this ailing grape is no exception. I'm pretty sure what I'm
seeing is symptoms of Phomopsis viticola,
and since I don't spray anti-fungals, the solution is to prune off the
affected areas. If I hadn't been sticking my head in the ground, I
could have pruned a lot less, but I'll just hope that pruning now will
keep the other grape from catching the fungal disease.
The good news is that
Phomopsis (as people often refer to the disease) can also cause fruit
rot, so perhaps it's responsible for the other issue I've had on grapes
all along. Only time will tell whether better garden sanitation
practices will allow us to eat chemical-free grapes.
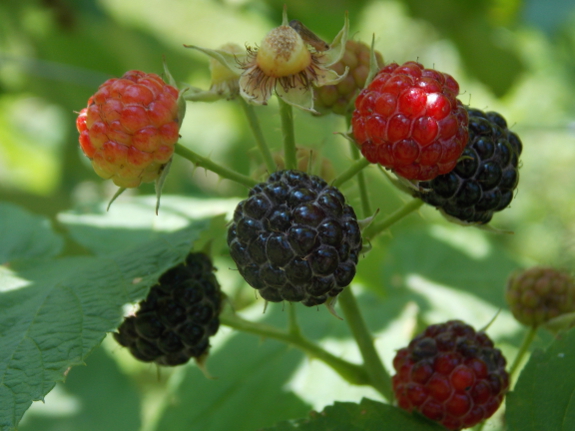
Our 4 year old Black Raspberries are producing some yummy fruit.
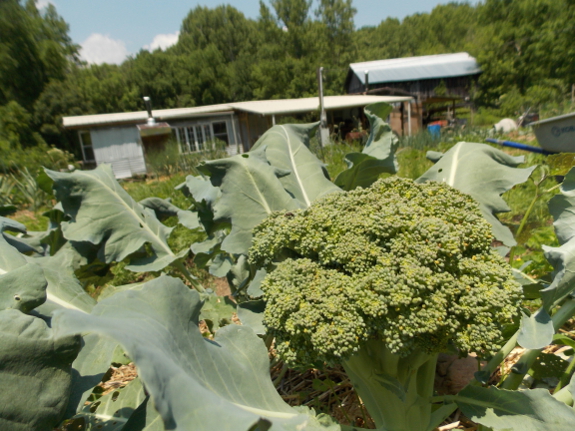
What's going on the vegetable garden at the moment? In addition to enjoying the first cucumbers and anticipating the first summer squash and tomatoes, I'm keeping my eye on the bush beans and am freezing more broccoli.
I'm also weeding as fast as I can, and planting the second-to-last set
of beans, sweet corn, summer squash, and cucumbers. Oh, and
serving us masses of sugar-snap peas, Swiss chard, black raspberries,
strawberries, and gooseberries.
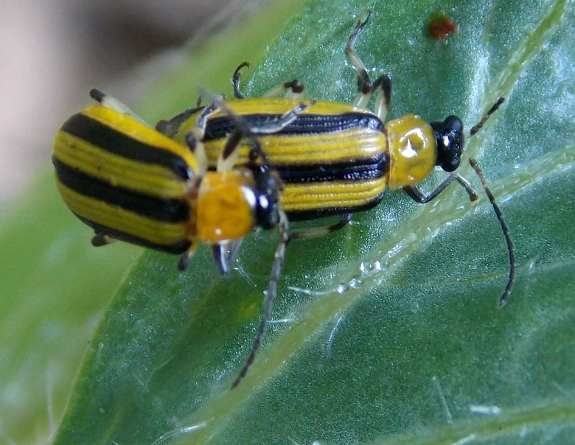
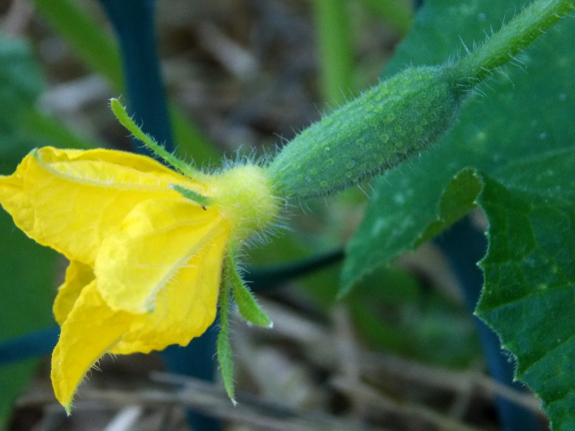
Bug patrol has become a weekly task, which at the moment just involves cabbage worm removal,
but which will soon expand out in other directions. I don't pick
cucumber beetles (pictured above), choosing the lower-work option I
explains in The Naturally Bug-Free Garden
--- I simply select resistant varieties and succession plant to beat
the bacterial wilt carried by the beetles. (That's not to say that
when a mating pair perches right in front of me that I don't squish
them after taking a picture.)
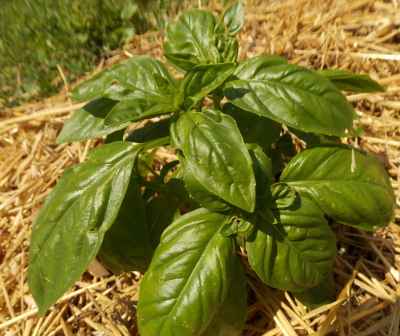 The
perennial plantings need my attention, but woody plants generally have
to wait their turn at this time of year. Instead of summer pruning
fruit trees, I spend a minute snipping the top off the young basil
plants so they'll bush out and produce many more leaves without rushing
into bloom. Of course, those basil tops make their way onto the
menu too.
What's on your garden to-do list this week?
Our latest straw bale delivery came with a bonus today.
The guy said he had the baler
set on hay instead of straw, which makes the bales more dense for the
same price.
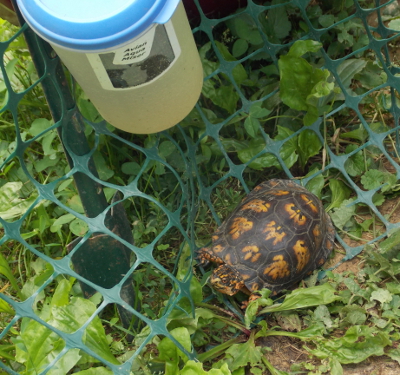 No, we're not branching out by using our chicken waterers with box turtles. This shelled friend showed up in our broiler isolation pen Wednesday, and I figured I'd snap a shot before giving him free run of the garden once again.
The reason I think the
sighting merits a post is because this is at least the sixth time this
year that Mark and I have moved box turtles out of temporary and
permanent pastures. I had been hypothesizing that the turtles were
simply hibernating within the fenced areas when I erected the cattle
panels or plastic trellis, but since we only made our broiler isolation
pen a couple of weeks ago, I now suspect the turtles are pushing under
the fences to go where they want to go.
And they're all different
turtles too, showing how high our box turtle population must be.
Mark turned up an adorable four-year-old while ripping grape vines out
of a new pasture, the hefty boy above is quite colorful, and I seem to
recall that the turtle I relocated before him was a more drab (and
slightly smaller) female.
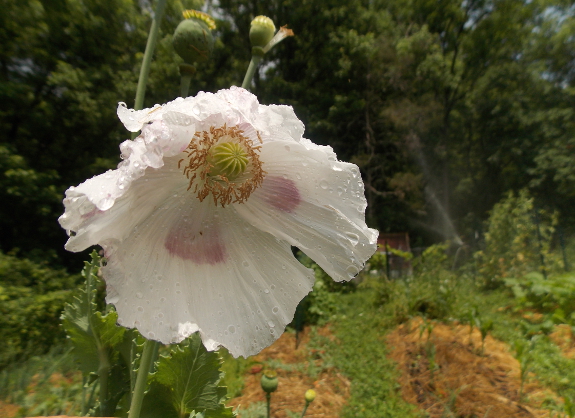
In fact, now that I'm
thinking about it, I even rescued a box turtle last month that was being
swept down the creek, unable to paddle to shore because the current was
too strong. And then there was that box turtle I stumbled across
in the barn, who was eating spilled food beside the barn cat's dish.
Where am I going with
this post? I don't know! But the fact that I consider box
turtles my totem animal would give these sightings much more
significance if they occurred in the dream world.
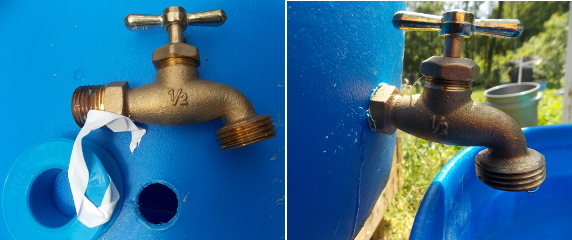
Is plumber's tape sufficient to seal a faucet screwed into the side of a rain barrel?
The drip suggests not.
For now, we'll put a bucket underneath to capture the water. Then
when the barrel is empty, we'll use caulk as suggested by the rain barrel workshop instructors.
 Although we'd most like to have a rain barrel over by the composting toilet,
every time I walked past our unused rain barrel, it said, "Put me
up!" Our preferred location will take a few hours to assemble, but
I was confident that I could install the rain barrel on the edge of our
front porch in half an hour. That location would save me a few
steps every day when I carry water to the heavy-drinking ducks,
so it seemed worth the effort. And, with one rain barrel under
our belt, I figured our next installation will be even simpler.
So, what did I do to
install the rain barrel? Mark was in town when I got the
water-collection bee in my bonnet, so I did it myself...and took about
an hour instead of half an hour (probably because I didn't know where
all of Mark's tools were).
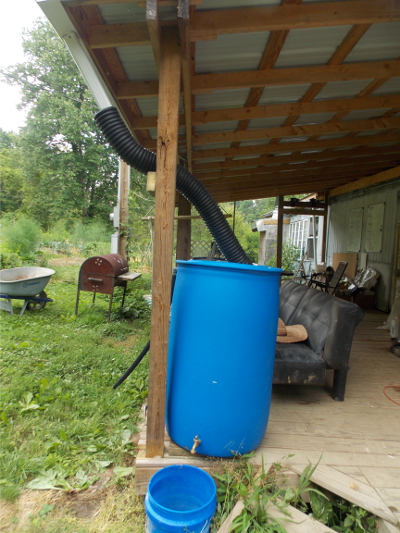
The first step was
figuring out where to place the rain barrel. If I'd been making
one from scratch, I would have preferred to make the faucet stick out
past the front of the porch rather than coming off to the side near the
steps, but since the overflow pipe is on the left side of this rain
barrel, the orientation shown above seemed the best. I stuck a few
scrap pieces of 2X6 under the barrel to make it easy to get a bucket
out from under the faucet, then called the elevation job done.
(Yes, this is the very quick-and-dirty version of rain barrel installation. Mark would never let that kind of jurryriggery fly.)
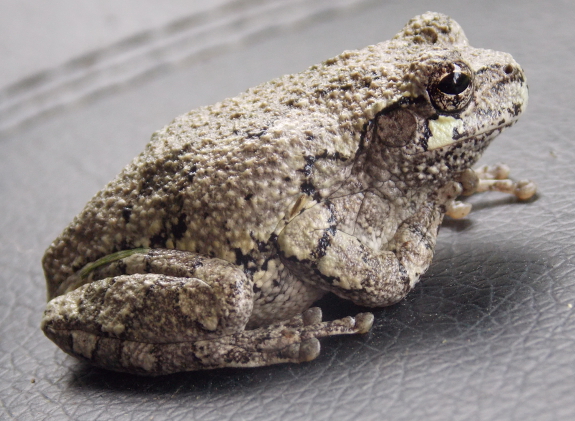
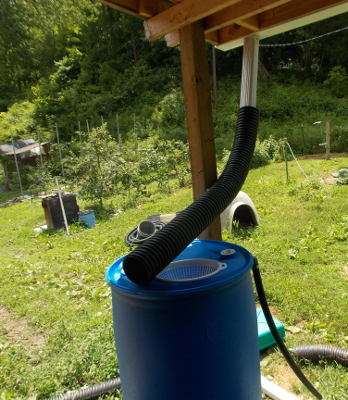 Now
it was time to cut the downspout from the gutter. I eyeballed the
height and used a sawzall...then carefully worked around the gray treefrog who hopped out of the drain.
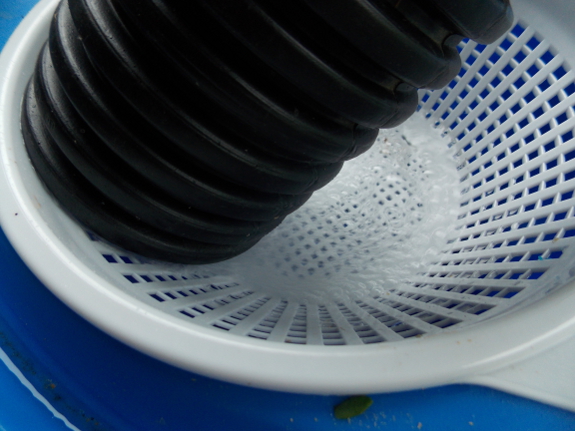
Next, I cut a piece of
black corrugated pipe to slip over the downspout and send water into the
rain barrel, but the black pipe didn't want to bend right to send water
down instead of to the side. So I added a piece of wood on the
porch post (see top photo) to give the pipe the appropriate curve.
(The photo to the right shows the pipe pre-curve.)
Literally minutes after I
finished putting away Mark's tools, the sky opened up and began to fill
the barrel. It was a joy to listen to water gurgle into the
barrel, although I did have to add a third piece of wood under once side
when the container started to tilt to one side. As Mark mentioned
in his post, I also discovered that the faucet leaks slightly when only sealed with plumber's tape, so that problem will need to be solved at a later date.
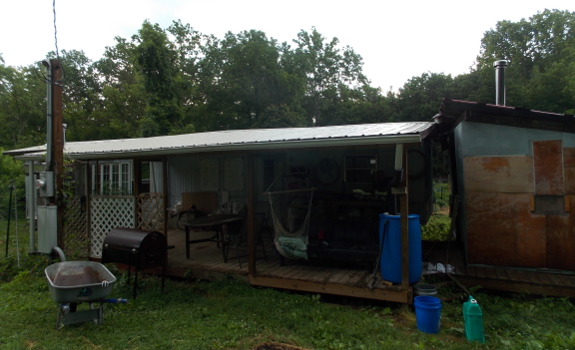
It only took a quarter of
an inch of rain to fill the barrel, and just before any slipped out the
overflow pipe, the storm passed us by. I figure one rain per week
would be sufficient to keep enough water in the barrel for my
fowl-watering duties, saving me a few minutes every day since I'll no
longer have to lug buckets from the back side of the trailer to do duck
duty. That hour of installation will trickle back into my time
bank account in just a few weeks!

Five apples that Anna grafted at home with Parafilm Grafting Tape are all thriving, while four out of ten trees that Anna grafted at a workshop using some sort of athletic tape failed.
The trees grafted with
parafilm tape are already starting to push out of their wrappings, while
we'll have to unwrap the other trees in a few weeks to give the trunks
room to grow.
At 7 bucks and change, a roll
of grafting tape will probably last us the rest of our lives. We
feel like the tape has already paid for itself.
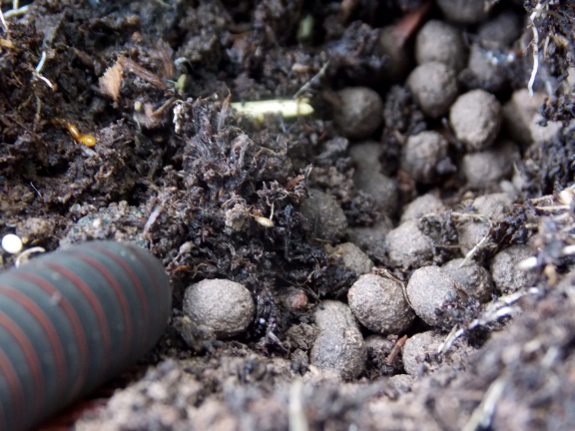
I stumbled across a big,
beautiful millipede while weeding this week, then noticed these round
balls beneath her. Were they castings (aka poop)? Well, yes
and no.
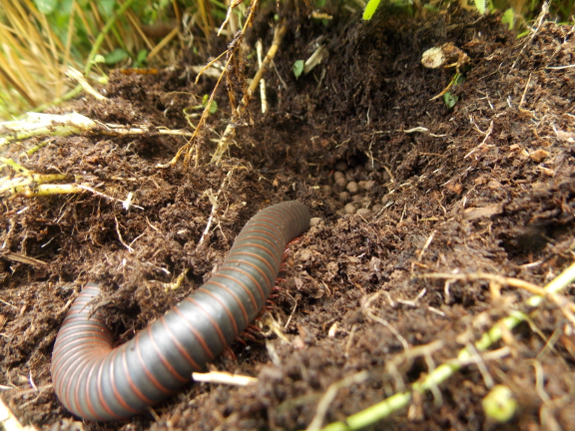
Female millipedes dig
nests like this when they're ready to lay eggs, and many species form a
protective case around each egg with their own castings. I broke
one ball open and, sure enough, a tiny egg was inside. Sure of the
balls' ID, I carefully put Mama Millipede back in her nest and swept
some dirt back over top of her. A planting of buckwheat
ensures the millipede's nest won't be pawed up again until at least a
month from now, at which point the eggs will have hatched.
Inside, I learned that
mother millipedes sometimes guard their eggs until the babies hatch and
that the tiny millipedes come out of the egg with only six legs, making
them look like tiny insects. The youngsters quickly push out of
their old skins and add new sets of legs with each molt, eventually
turning into helpful decomposers of decaying plant debris like their
mother. Live long and prosper, little millipedes!
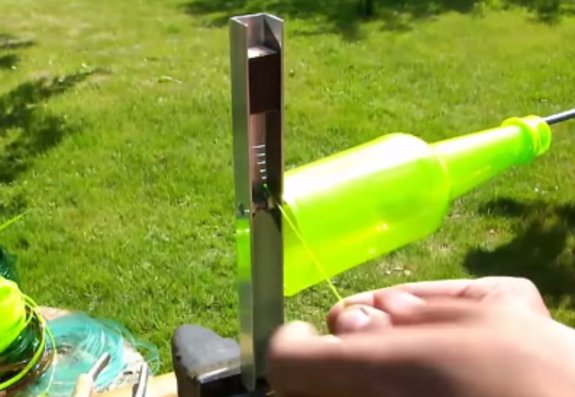
Is it possible to make
your own weed eater trimmer string?
The video is in Russian, but
you get the idea from watching it that common plastic bottles can be
converted into a spool of plastic ribbon with what seems to be an easy
to make metal jig.
I'm sure the stuff you buy in
the store would last longer, but the feeling of making your own might
be worth trying it to see how well it works?
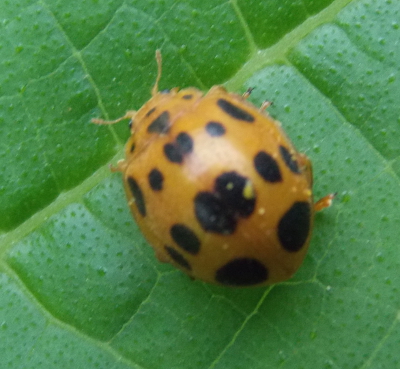 Even though I use the lower-work strategies I outline in The Naturally Bug-Free Garden to deal with pests on cucurbits, I do crush bad bugs there if they hang around while I'm taking photos or harvesting.
The beetle to the left
was clearly a bad bug since it was sitting on a nibbled section of leaf,
so I smashed it...then went inside to look the beetle up. I
learned that squash beetles (Epilachna borealis) are actually ladybugs, as are Mexican bean beetles.
Despite their illustrious heritage, though, these are beneficials gone
bad --- both species are leaf eaters in all stage of their life
cycle. To tell squash beetles apart from good ladybugs, look for
the orange color and for the seven big black spots on each wing cover
(i.e. on each half of the back).
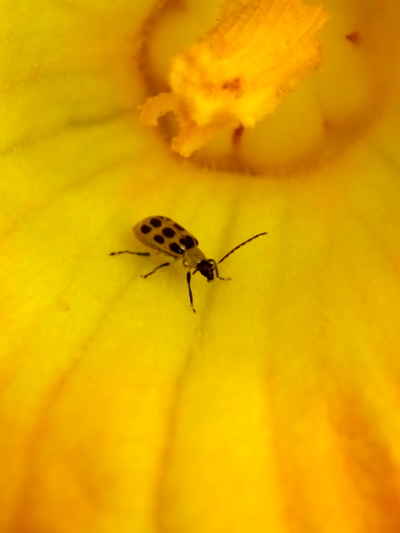
Spotted cucumber beetles (Diabrotica undecimpunctata howardi)
are also on the bad list, although the beetles I saw this weekend were
inside squash flowers and might have been acting as minor
pollinators. (Makes me want to do a series of photographs entitled
"What Georgia O'Keefe left out of her paintings.")
Since cucurbits are
native to the Americas, they tend to feed more pest insects than many of
our other vegetables. In addition to the ones shown here, you're
likely to find squash bugs, squash vine borers, and striped cucumber
beetles in your planting, and might also stumble across other cucumber
beetles, corn rootworms, melonworms, pickleworms, armyworms, cutworms,
leafminers, seedcorn maggots, tarnished plant bugs, aphids, leafhoppers,
thrips, mites, and sap worms eating various parts of your plants.
Phew! Sometimes it's a wonder gardeners have excess zucchinis to
foist off on their neighbors at this time of the year.
Our row of high
density dwarf apple trees
are shaping up nicely.
A few of them are already
taller than 6 feet.
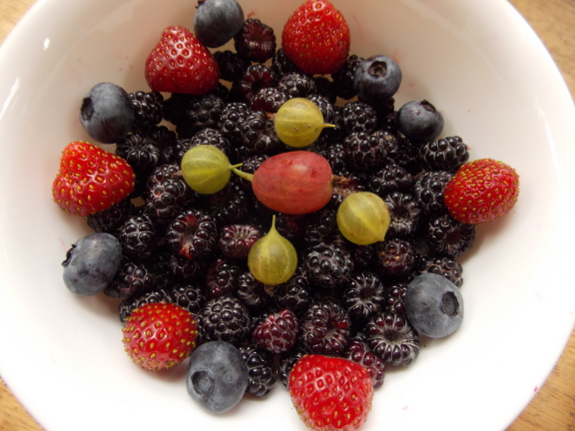
Mark asked me how many
kinds of berries we grow. Of course, I immediately got bogged down
in the fact that many things we think of as berries (strawberries,
raspberries) don't technically fit the botanical definition, while
others that people don't really put in the berry category (grapes)
do. Geekery aside, we're currently eating two kinds of
gooseberries, the last of the strawberries, the first of the
blueberries, and masses of black raspberries. Other "berries" on
the farm include honeyberries, red raspberries, blackberries, red
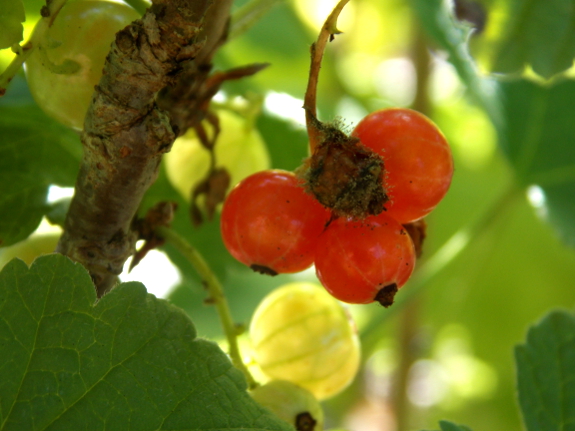
currants, grapes, and hardy kiwis.
Berries have a lot going for them on the homestead (ease of growing, quickness of bearing, and pure deliciousness coming to mind), but they do have two major minuses. First, there are the birds,
which we mostly coexist with (although we had to chase away a family of
blue jays this spring since the corvids were eating or damaging a full
half of our ripening strawberries!). Second, there's the fact that
it takes several minutes a day just to harvest the delicious little
morsels. When I'm feeling overworked and the sun is blazing, I
sometimes skip the picking chore, but I usually relax into a happy
end-of-the-work-day berry zen.
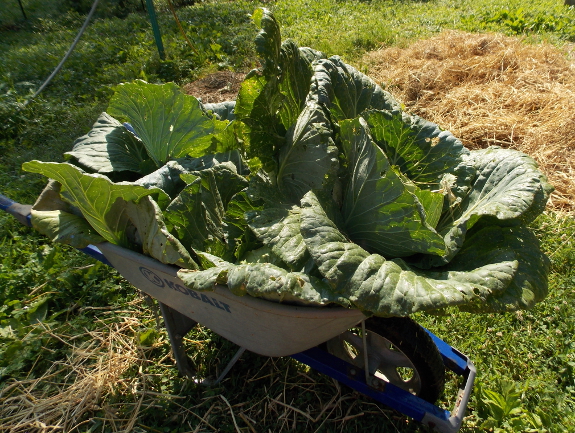
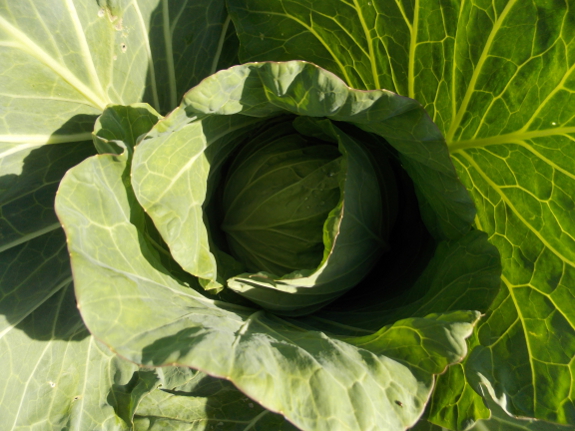
Today was the day our cabbage
looked mature enough for picking.
We've been thinking about
trying sauerkraut this year.
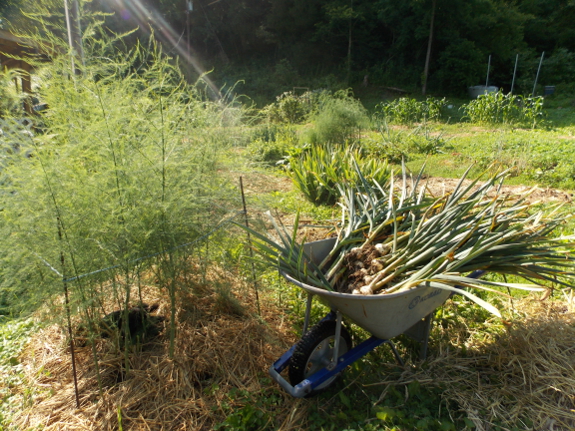
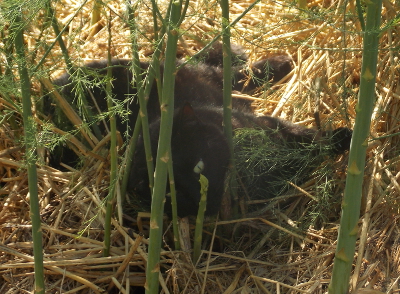 Huckleberry
helped me harvest the garlic Monday, which is a bit later than we
usually dig the alliums up. The cold winter really set our garlic
back, and I was hoping that a little extra time would help the heads
grow larger. Of course, I know better --- a little extra time just
means the outer wrappings start to rot away and the garlic won't keep
quite as long.
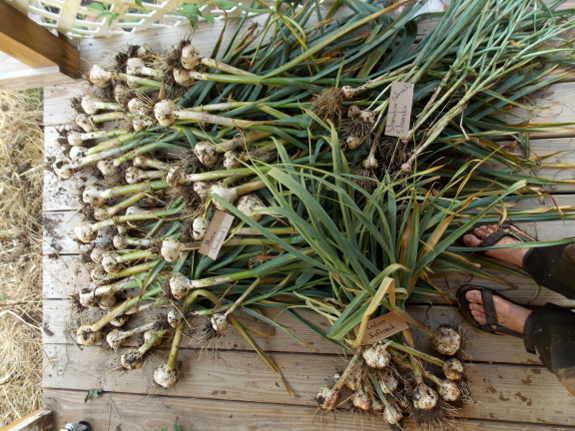
Last fall, I started
transitioning away from softneck garlic for lazy reasons (hardneck has
bigger heads and cloves), and now I'm very glad I did. I planted
54% of my area in Music (hardneck), 31% in Italian Softneck, and 15% in
Silverwhite Silverskin (softneck), but the yields were more like
two-thirds hardneck and one-third softneck. (I'll have more solid
numbers on yields once the heads dry down and I weigh each variety.)
What happened? The
extremely cold weather set the hardneck garlic back so it didn't do much
growing until spring, but the temperatures actually killed over half of the softneck plants.
I'd be curious to hear from garlic-growers in zones colder than
6. Do you plant your garlic in the spring, plant late in the fall
and mulch heavily to ensure the plants only put out root growth during
cold weather, or stick to hardneck garlics?
Now is a good time to start
Fall garden seeds.
We started broccoli, cabbage,
and brussel sprouts this past week.
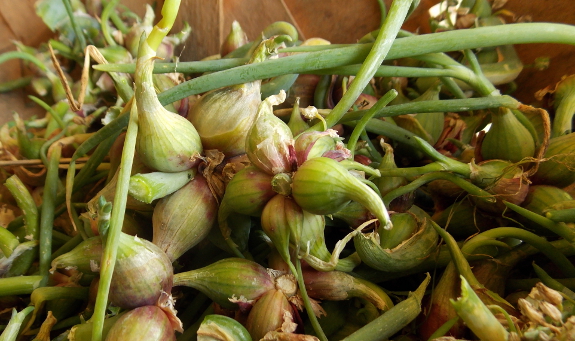
It's that time of year
again --- time to spread more Egyptian onion propagules into the
world! This year, we're selling some and giving some away.
If you're interested in either option, be sure to read this post first to learn how to grow and eat Egyptian onions (and to find out why we think these perennials are so awesome).
I'll start with the free
stuff since I'm sure more of you are interested in that option.
This year, I've got a box of top bulbs to give away to one or two
winners, each of which will be enough to fill your yard and probably
your neighbors'. The photo above shows what the top bulbs look
like --- you split the clusters apart to plant each little bulb
separately. To enter, scroll down to the widget at the bottom of
this post.
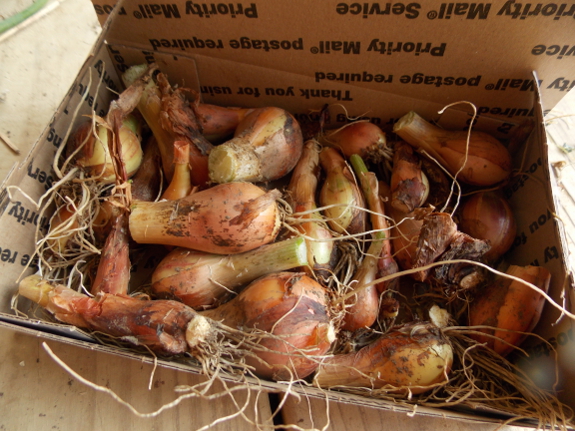
Would you rather get a
headstart on your Egyptian onion garden? I'm selling sets of 20
bottom bulbs for $25 each, with free shipping. Bottom bulbs are
the quickest way to get started with Egyptian onions since the larger
size means the plants won't need nearly as long to become
established. After planting top bulbs, I usually let the bulbs
grow for a few months before harvesting any leaves, but with bottom
bulbs you can start snipping off a leaf here and there as soon as you
see three or four leaves. (Always allow at least two leaves to
remain on the plant so it can keep growing.) I have three boxes
of bottom bulbs available, so they're first come, first served ---
snag yours now if you want to be sure to get one! (And if for some
reason no one buys the bottom bulbs by the time the giveaway ends, I'll give the rest away to contest entrants.)
I'm sold out, but the South Carolina branch of Walden Effect (my
father) says he has at least eight boxes of bottom bulbs available, so
I've put the paypal button back:
Here's the giveaway widget:
Happy green-onion growing!
The new work
gloves I posted about 5 months ago are intact with no holes.
Chicken blood has stiffened
one. I tried using some linseed oil to soften it up but it only helped
a little bit.
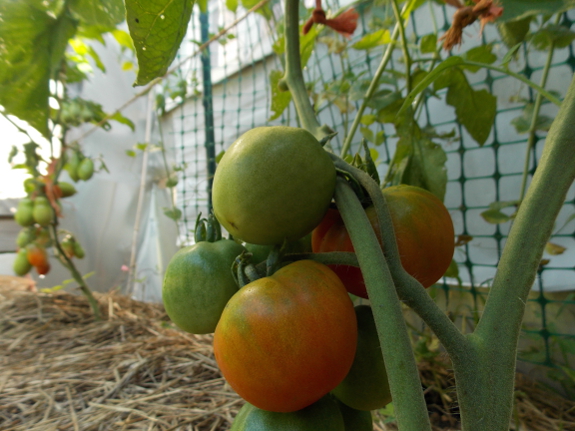
We enjoyed our first ripe tomato on the summer solstice from the plant that Daddy started ultra-early
(on the left above). But our second tomato is probably going to
come from our own Stupice (on the right above), started inside nearly
two months later at the end of February.
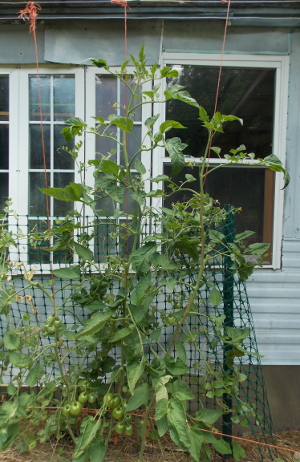 The
big question for tomato-lovers is --- what's the happy compromise
between starting your plants early enough to beat your neighbors to the
first fruits, but not so early you're babying a plant that should have
been in the ground weeks ago? For us, it looks like the end of
February is a pretty good time for starting tomatoes if I'm willing to pot up and nurture them a bit, netting ripe tomatoes up to three weeks earlier than if I'd started the seeds under quick hoops
at the beginning of April (my previous, lazy technique). For the
sake of comparison, here's a quick rundown on when we've enjoyed our
first ripe tomato in previous years:
Since blight seems to be
hitting us early most of the time now, jumping the gun with
inside-started tomatoes might be my new method for the foreseeable
future. We're already racing septoria leaf spot and the first
signs of early blight, but I'm hopeful heavy pruning will keep the fungi
at bay long enough to fill up our soup stores and to sate me on
tomatoes.
In case you want to boast about the earliest tomato on your block next year, here's a guest post on growing the earliest possible tomato and here's some information on how cold temperatures can keep early-planted tomatoes from setting fruit. Good luck making your neighbors jealous!
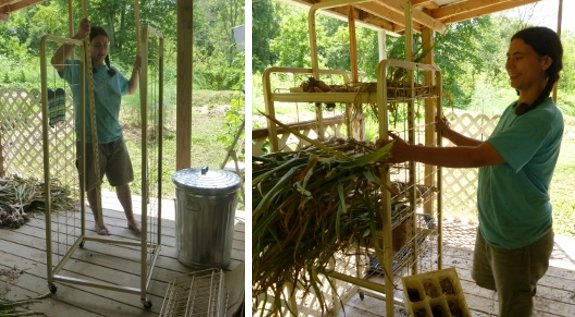
We got another one of those awesome
retail racks. Thanks Mom and Jayne.
I think it took Anna all of
about 15 minutes to put it together.
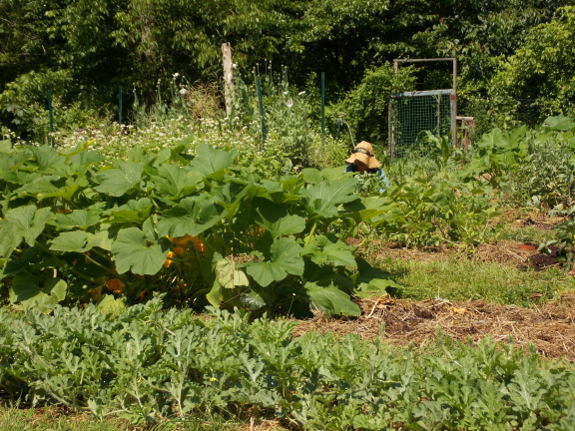
At this time of year, I
start weeding by zone. We've got three vegetable garden plots,
plus various larger perennial areas, and each one needs to get hit in
the next month or so. While a better gardener would probably weed
the spots that need it the most first, the zone technique gives me a
momentary feeling of control and lets me enjoy a manicured look in each
area...for a week or two. And it doesn't hurt crop plants as long
as you wait to change over to zone weeding until most seedlings have
been weeded around once.
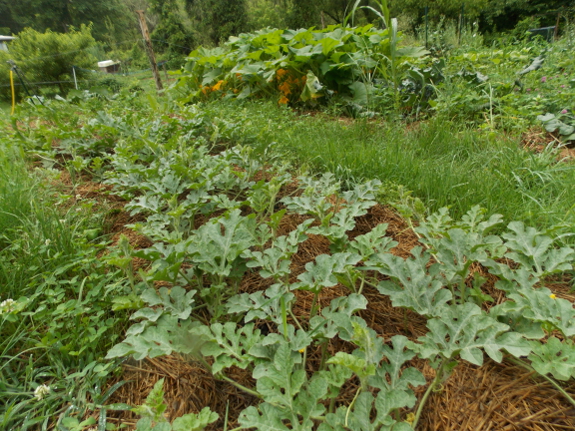
 Of
course, the downside of the zone approach is that each area looks
pretty shaggy in the weeks leading up to that zone's turn to be weeded
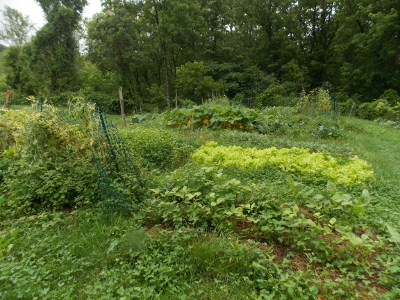
once again. These two shots show the mule garden at the beginning
of the week --- enough weeds to make me feel overwhelmed! Luckily,
a quick pass with the lawnmower and then three hours of weeding with
Kayla just about perked the whole area up. I figure one more
morning's work will have the whole place sparkling with that just-weeded
glow.
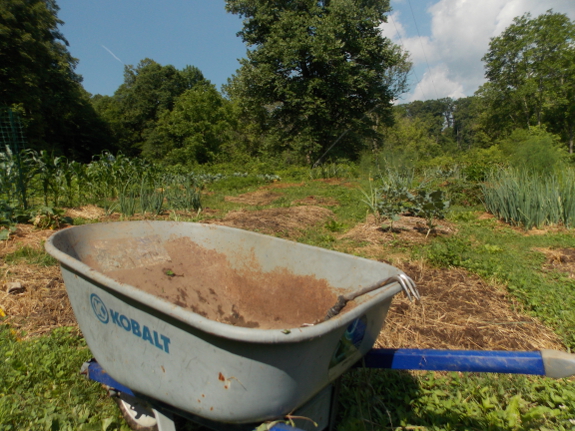
The front garden took a
lot longer to get into shape --- more like two weeks instead of two
days. Many of those beds were full of a rye cover crop
until May, and the cold winter made our rye grow so slowly that many
weeds had poked up amid the grain by cutting time. Since I don't
let garden areas get any further out of control that that, though, one
tough weeding job per year is the maximum I can expect in each
area. Everywhere else, weeding just consists of dampening the soil
the day before (via sprinklers or rain), then quickly pulling out weeds
between seedlings. I follow up by smothering further weed seeds
with straw mulch, ensuring that later weeding jobs are as quick as our
recent pass over the mule garden.
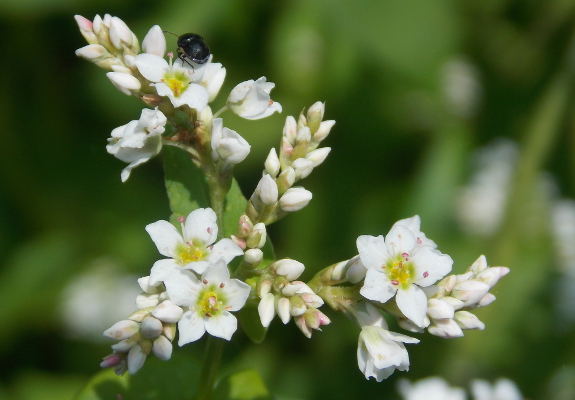
What about areas where I pulled out spring crops but don't plan on planting any new vegetables until fall? A buckwheat cover crop is the perfect way to build organic matter while keeping weed pressure at a minimum. Between the tree alley
in the pasture and the vegetable garden, I've already used about 15
pounds of buckwheat seeds so far this summer, which keeps the bees and
the soil microorganisms happy.
I'm finally starting to
feel like the end is in sight with the spring weeding catchup job, but
this is no time to rest on my laurels. Soon, preserving the bounty
will take the place of extra weeding, ensuring that the garden keeps me
well busy at least until the first frost. Now's when I make up
for those lazy winter days writing in front of the fire....
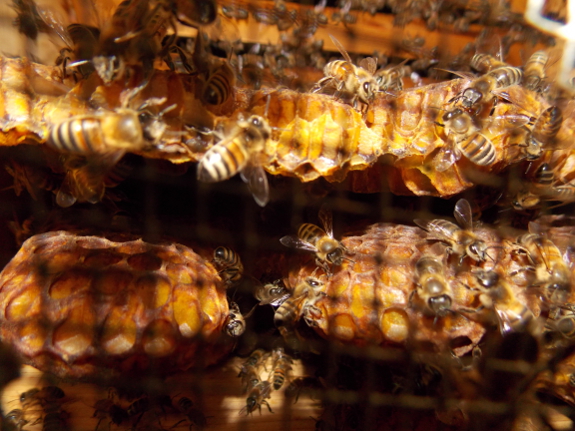
We haven't opened either hive to make sure our May split
worked. But photos taken up through the screened bottom point
toward our apiary now having two queens. Both hives also sound
right, with a steady hum rather than a discordant, queen-less buzz.
This is the mother hive, where the bees are busy filling up the third box with sourwood honey.
The daughter hive is smaller, but the bees seem to be holding their
own. Anna put the daughter back on sugar water to help the colony
bulk up and pack away honey for winter.
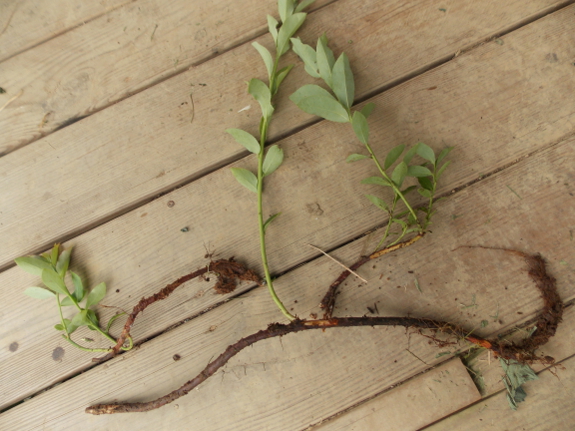
One of the benefits of rabbiteye blueberries
is that the mature plants send up suckers a few feet away from the main
bush. If you treat these suckers well, you end up with free
blueberry bushes!
My father's rabbiteye
blueberry patch is four or five years older than mine, so he's been
tantalizing me with descriptions of blueberry suckers for years
now. I only noticed the first suckers around my biggest plant this
year, though.
"Should I protect the
suckers from mowing for a year and then dig them up, or should I dig
them up now?" I asked Daddy. He reported that the suckers don't
grow many more roots even if you wait a year, so I opted to dig up what I
could find now. As you can see from the photo above, there
definitely were very few feeder roots on these young suckers.
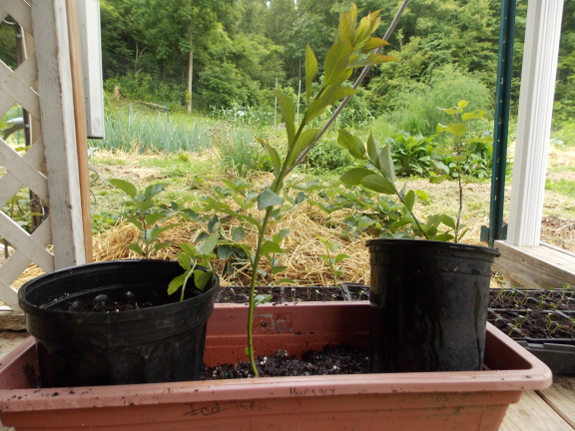
I stuck each sucker in
its own pot, soaked the soil well, and then cut off the tops. (I
took the photo above before I pulled out the clippers.) I have
high hopes that, if I keep the blueberry suckers in partial shade on the
porch and water them regularly, we'll have three new blueberry plants
to add to our collection this winter.
I'd be curious to hear
from others who have planted out rabbiteye blueberry suckers. Do
you have a method for making the suckers develop roots while attached to
the mother plant, or do you snip and pot like I did?
One of our White Leghorn hens
has been acting bad by flying over the fence.
Maybe it was the Hawk
Attack back in December that turned her into a bad girl?
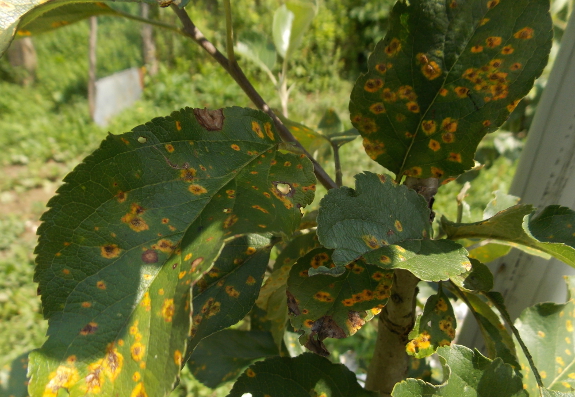
The list below includes
varieties that books report have at least some resistance to cedar apple
rust, and I've added notations to the varieties I've tried:
- Arkansas Black
- Baldwin
- Belle de Boskoop
- Black Limbertwig
- Bramley Seedling
- Duchess (aka Duchess of Oldenburg)
- Empire (slight damage)
- Enterprise (no damage)
- Fireside
- Florina
- Freedom
- Grimes Golden (serious damage)
- Hardy Cumberland
- Hudson's Golden Gem
- Keepsake
- Kidd's Orange Red (moderate damage)
- King David (no damage, but currently small)
- Liberty (slight damage)
- Lodi
- Mammoth Black Twig (slight damage)
- McIntosh
- Myers Royal Limbertwig
- Novamac
- Prima
- Priscilla
- Pristine (moderate damage)
- Ralls Genet
- Red Delicious (no damage, but currently small)
- Redfree
- Red Limbertwig
- Rusty Coat
- Summer Rambo (moderate damage)
- Sundance
- Sweet Sixteen (serious damage)
- Virginia Beauty (slight damage)
- William's Pride (slight damage)
- Winesap (no damage, but currently small)
- Yates
- Yellow Transparent (moderate damage)
Plain text varieties are those I don't have enough experience with yet to report on, bold varieties are those I highly recommend in cedar-apple-rust areas, italicized varieties are ones I might recommend, and struck-through varieties don't seem able to handle the rust in our region.
I'd love to hear from
other readers with your list of apple varieties that do and don't show
cedar-apple-rust damage. Share your information in the comments
section and I'll edit this post to add to the list!
Our 2nd rain barrel will make getting drinking water to the ducks easier.
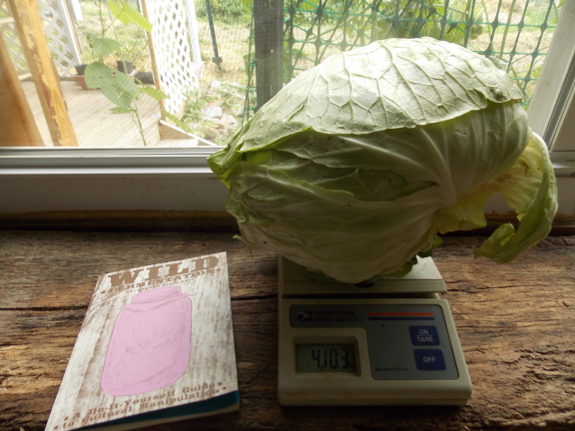
As Mark mentioned,
we decided to try making sauerkraut for the first time this year.
My reasoning was two-fold. First, although we had fun
experimenting with kefir,
when we stopped using the fermented milk product for a while, Mark's
stomach felt better, not worse, so we're still looking for the proper
probiotic to keep him healthy. And, second...I grew an absurd
number of cabbages this spring and they have to go somewhere.
Of course, when I want to
try something new, I head straight for the books. Sandor Katz is
the poster child for fermented foods at the moment, and he has several
titles out on the topic. I'd heard that his Wild Fermentation is the basic book for beginners, so even though it pained me to pass up Katz's 500 page The Art of Fermentation, I decided to save that lengthy tome for a treat in case we decide we do like sauerkraut.

Unfortunately, I didn't research quite far enough, and got the very small, booklet version of Wild Fermentation (subtitled "A Do-It-Yourself Guide to Cultural Manipulation") rather than the expanded version with the same title (but subtitled "The Flavor, Nutrition, and Craft of Live-Culture Foods").
If any of you are following in my footsteps, the book I read is fun and
beautifully laid out, but is very short --- I'd recommend upgrading to
the longer version of Wild Fermentation. Or just start with Katz's sauerkraut recipe, which you can read for free online.
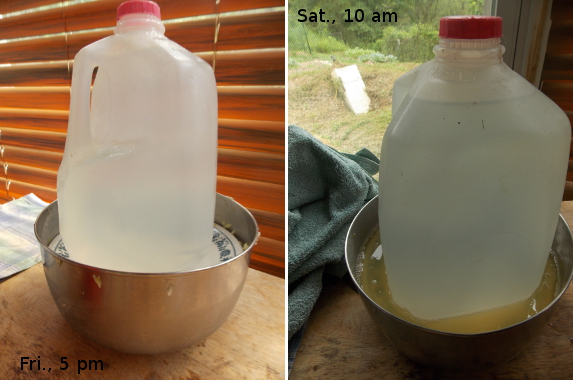
Anyway, to cut a long
story short, I mixed up my first batch of sauerkraut in a matter of
minutes Friday evening, and the salty juices soon filled the bowl.
Since we don't have a big ceramic crock, I followed one website's
advice and figured a stainless-steel bowl would do. On the other
hand, I liked Katz's recommendation of using a jug of water on top of a
plate as a weight --- simple and free.
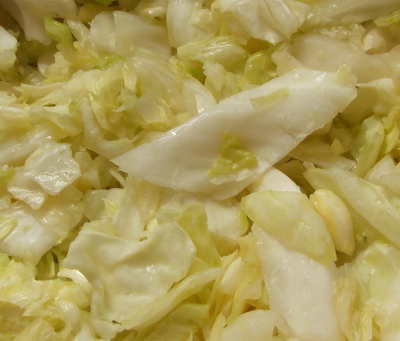 I
do have one observation even before we taste the sauerkraut --- the
recipe is absurdly salty. When I cook it up, half a head of
cabbage forms a meal for the two of us (yes, we're major vegetable
eaters). At nearly 3 tablespoons of salt per head of cabbage,
sauerkraut would provide three times our recommended daily allowance of
salt in one serving. Perhaps sauerkraut and similarly fermented
foods are meant to be a small garnish beside a large helping of other
vegetables?
That caveat aside, making
sauerkraut was easy and fun. I'll post again soon with a
taste-test of our first batch of fermented cabbage.
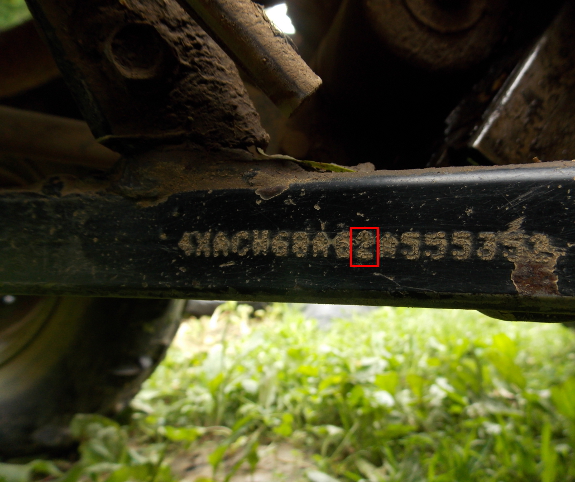
To change the oil, we needed to find the manual. To find the manual, we needed to discover the year our ATV was made.
If you're in the same boat,
look under the frame of the ATV on the left side for the 17-digit VIN
number. The 10th digit tells you the ATV's year:
A = 1980 B = 1981 C =
1982 D = 1983 E = 1984 F = 1985 G = 1986 H
= 1987 J = 1988 K = 1989 L = 1990 M =
1991 N = 1992 P = 1993 R = 1994 S =1995 T =
1996 V = 1997 W = 1998 X = 1999 Y = 2000 1
= 2001 2 = 2002 3 = 2003 4 = 2004 5 = 2005 6 =
2006 7 = 2007 8 = 2008 9 = 2009 A=2010
Our ATV is a 2002 model.
Want more in-depth information? Browse through our books.
Or explore more posts by date or by subject.
About us: Anna Hess and Mark Hamilton spent over a decade living self-sufficiently in the mountains of Virginia before moving north to start over from scratch in the foothills of Ohio. They've experimented with permaculture, no-till gardening, trailersteading, home-based microbusinesses and much more, writing about their adventures in both blogs and books.
