
archives for 05/2014

I made a big mistake when our livestock panels were delivered.
There are lots of different kinds of livestock panels, some with holes
the same size all over and others with various types of small holes at
the bottom. I'd ordered the ones with very little holes down low
working up to normal-sized holes halfway up the fence, but what actually
came just had two rows of medium-sized holes at the bottom then had
large holes the rest of the way up. Unfortunately, I didn't notice
the substitution until the panels were halfway unloaded, at which point
I thought it wasn't fair to complain and figured we'd work with what we
got.
Of course, once we put our first batch of chicks in the starplate coop,
we realized that young chickens have no problem slipping right through
those holes. So we moved on to plan b --- add an expanse of
one-inch chicken wire along the bottom of the panels to keep chickens
in. In some ways, this negates the awesomeness of livestock panels
since it takes as long to attach the chicken wire as it did to put up
the panels in the first place, and the panels will also now be harder to
move. But the chicken wire does keep the chickens in.
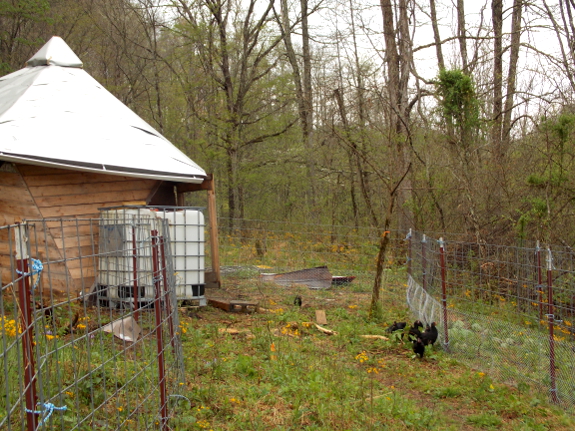
And we do get keep many
of the good qualities of the panels. I've enjoyed the way cattle
panels can be curved into any shape imaginable --- a great asset if you
have an irregularly shaped area and want to enclose every inch.
Plus, the heavy metal will keep Lucy from gnawing dog doors wherever she
wants them, and will also allow the fences to stand up to bigger
livestock if we ever get them. Finally, I especially enjoy the way
cattle panels are Anna-friendly fencing --- easy enough that I can put them up all by myself.
Our little flock is now enjoying the first paddock and I'll be adding
chicken wire to new paddocks as they're needed by the pullets and
cockerels. At the moment, there are no gates at the far end of the
pasture --- the chicks are still young enough that they don't venture
that far from the coop. I have a feeling gate-building will be on
Mark's agenda in a week or two, though. That's definitely a task
too complex for me.
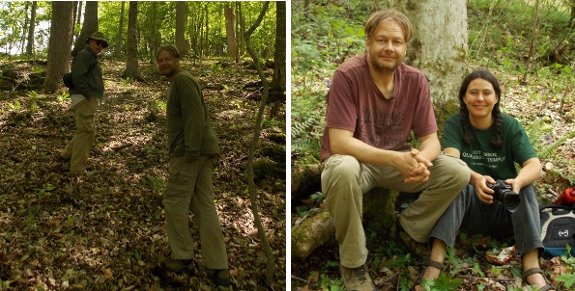
We took the day off to celebrate May Day by going on a hike with a neighbor.
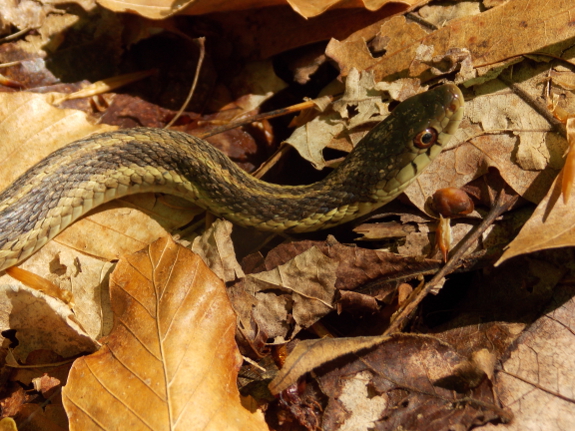
Between getting engrossed
in farm projects and Mark having to rush up to Ohio to see his father
in the hospital last week, we never did make an April holiday
happen. So May Day seemed mandatory. Luckily, our
movie-star neighbor wanted us to walk over a neighboring property that
his intentional community is planning on purchasing, and that seemed
like a good May Day activity. The weather cooperated with beautiful sun but cool temperatures, so we headed out to hike.
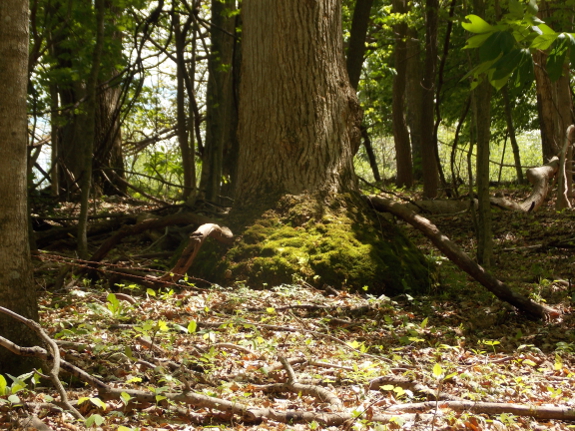
Even though the land is
less than a mile and half from our house (as the crow flies), this
south-facing slope is about a week ahead of us in terms of leaf
development. I can't explain the huge bole on this tulip-tree,
though.
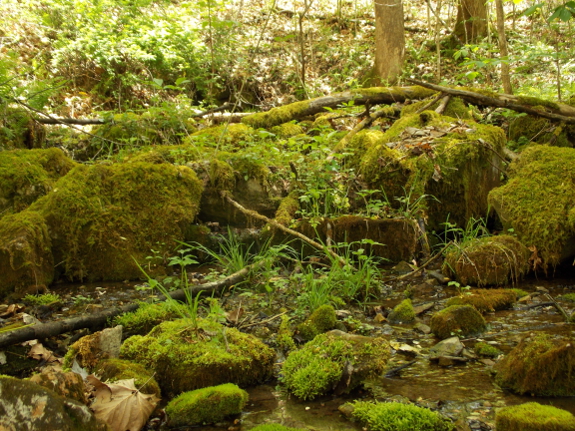
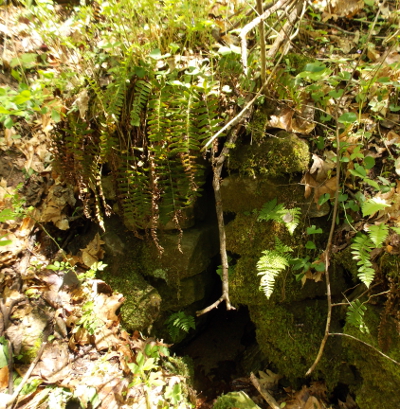 After
our lesson in microclimate (and a walk through a beautiful, maturing
forest), we headed down into a sinkhole and then up the other side a
little way to see a seep and spring. The spring had been boxed in
so long ago that nature had taken over the spring box and it almost
seemed natural. Until, that is, I peered closely and noticed that
the stones were carefully stacked by human hands. I took a sip
since you can so rarely safely drink found water, but the taste was a
bit mossy.
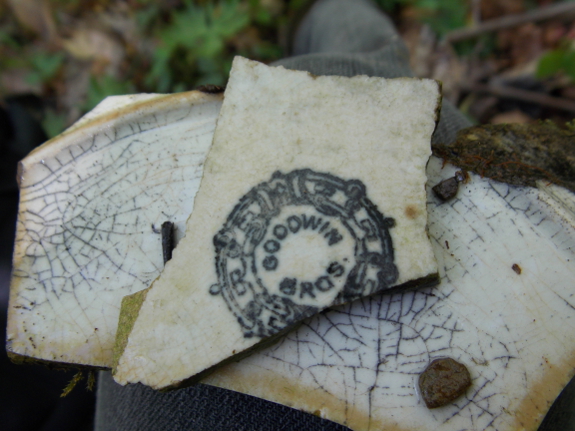
Our neighbor found
fragments of what was probably a plate in the seep. We peered at
the old objects, then put them back for the next person to find.
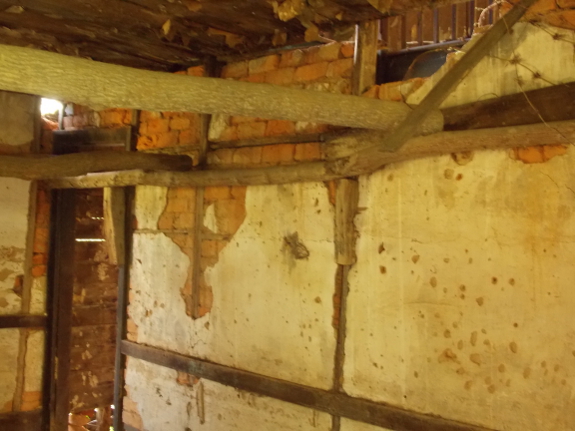
 The
land hosts an ancient barn and a tumbling-down house, both of which we
had to explore. The house had brick walls infilled between wood
and then plastered over --- very unusual in our region. The
outside, though, was trimmed with wooden clapboard just like the old
house that used to stand on our own property.
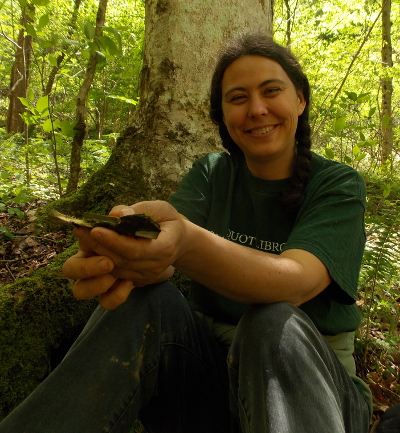
We had a fun adventure, and I might have even come out of it with a new author photo for my upcoming book. What do you think of this shot for the back cover of The Naturally Bug-Free Garden?
(Information on sale price removed since it's not quite sold yet.)
We modified our new isolation
coop to handle the ducklings.
This way we can let them play
in the Sky Pond.
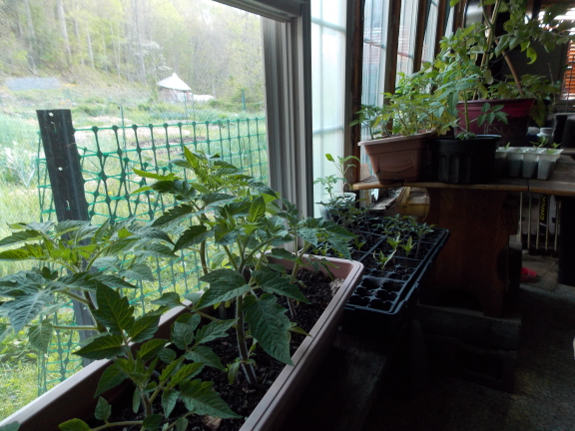
I've learned a lot from this year's foray into starting plants inside at an ultra-early date. First of all, the plants can spend most of their time outdoors in April,
which gives them the light they crave to prevent legginess. I do
have to take the youngsters in when nights are forecast to get below 45
since that really means 35 here, but Mark has been a good sport who
doesn't mind bigger and bigger plants taking up the entire front room
during cold spells. (We now eat on the porch.)
In addition to light, the
other important thing I've learned is that it's imperative to keep
seedlings growing fast since a stunted plant generally doesn't
recover. With precocious species like tomatoes, your best bet is
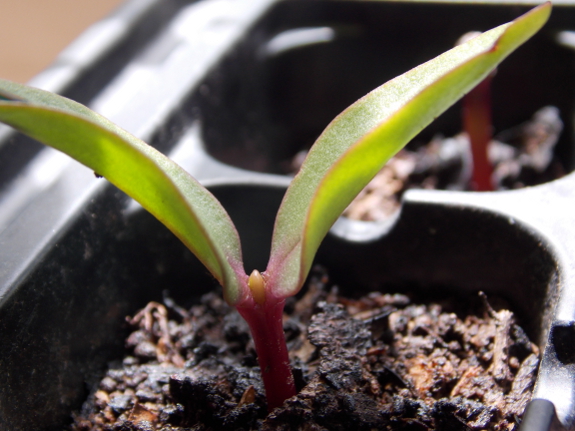
to pot them up out of their seedling flat as soon as you see the
cotyledons unfurl. Don't wait for true leaves or the plant will
already be starting to turn purple from the stress of searching for
nutrients in such a limited space.
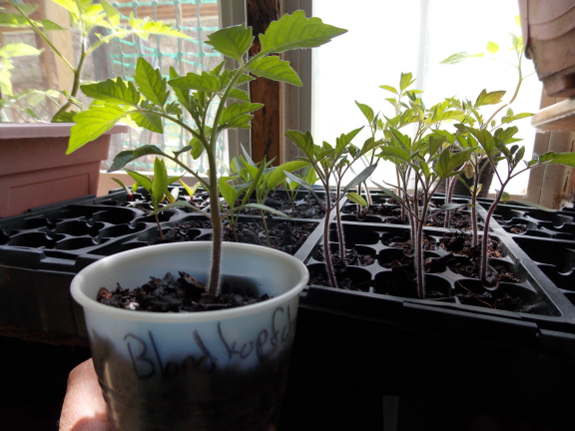
For the sake of comparison, the photo above shows tomatoes of the same
age and variety, one of which was potted up and the others of which were
left behind in the flat. The difference is striking!
(You might get away with leaving the tomatoes in the flat much
longer if you basically turned it into a hydroponic setup, giving the
seedlings daily doses of liquid nutrients in the form of compost tea.)
Slower-growers like
peppers, on the other hand, don't mind sitting in their baby flats for
days and weeks. And don't give up on late-sprouters --- I put some
Malabar spinach seeds in one flat six weeks ago and they're just now
starting to come up. I'm not sure if they really needed that
extended time to germinate, or if something about being left outside
during heavy rains finally broke through the seed coat.
On the negative side, as the days warm and the weather turns humid, damping off
starts to rear its ugly head. Luckily, the seedlings I was
starting when damping off came to call were non-imperative --- zinnias
and experimental apple seeds.
But it's worth noting that there didn't seem to be any damping off for
seeds started in early March. Maybe this is a good reason to go to
extremes with jumpstarting spring?
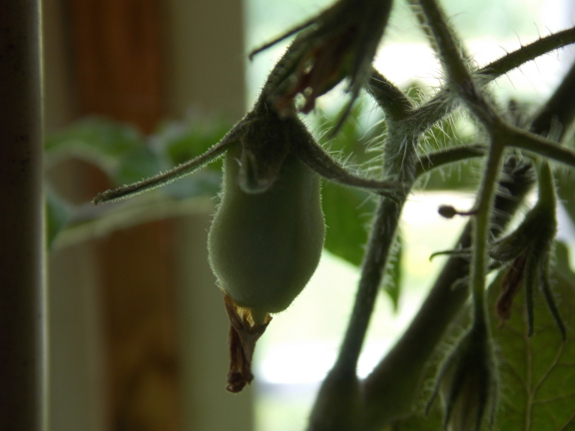
More pleasantly, the big tomato plant Daddy gave me
has already set fruit, although the plant looks purple and
pot-bound. I'm itching to put it (and some of my own seedlings
that have flower buds) out, so I'll start checking the ten-day forecast
early next week. So far, once the current cold spell passes, the
lowest low is forecast to be in the mid 50s up through May 11.
Maybe I can start sinking these tomatoes deep into the earth for extra
roots and early harvests?
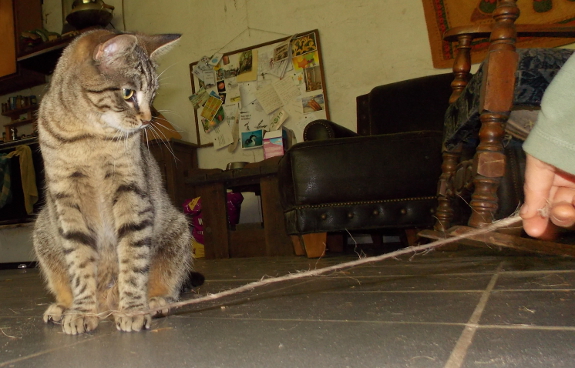
We dropped by Joey's underground house today to check on Michi.
Her owner is connecting remote villages in Brazil via git-annex.
Michi was content to connect to a piece of string fallen out from under a rope bed.
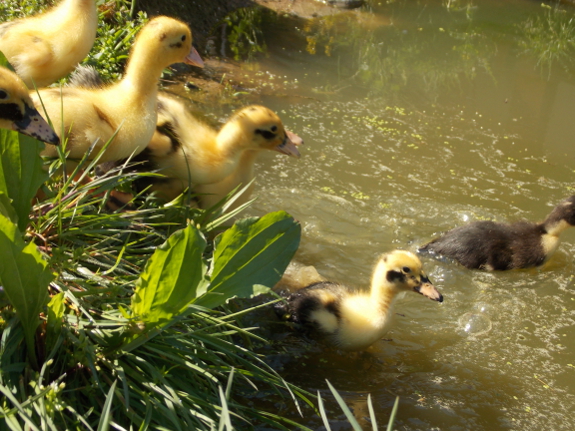
Our ducklings quickly outgrew their dabbling dish, so I figured they were big enough to swim.
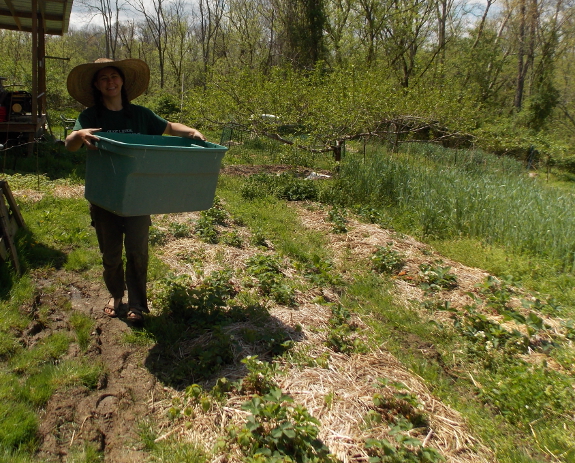
Mark added a door to their brooder
Friday, but I wanted to wait until I could monitor them before letting
the ducks into their pond. Here I am carrying the ducklings from
their temporary bin back to the relocated brooder on Friday afternoon.
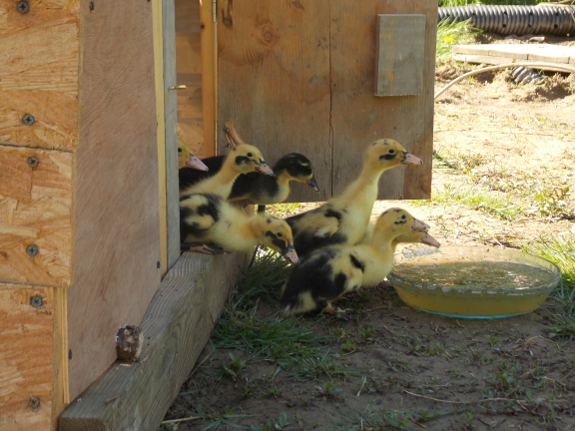
The youngsters weren't so
sure they wanted to come out at first, but putting their dabbling dish
right outside the door quickly changed the ducklings' minds.
They're so big now that they can't even pretend to swim in the dish,
though, so I scooted the the container a little closer to the pond to
tempt the ducklings beyond their comfort zone.
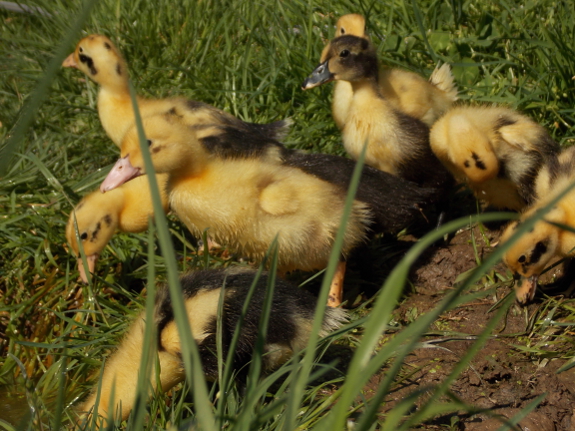
"Oh my gosh, is all of that water?!" one exclaimed.
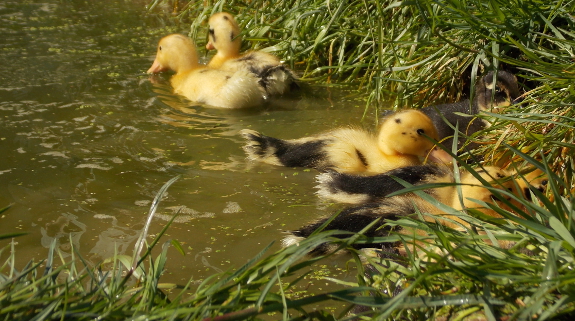
Plop, plop, plop --- soon
every duckling was in the drink. Mark had wondered if ducklings
need to learn to swim --- the answer is no. These guys have
already started oiling their feathers due to their early dunking, so
even though they were skittish of the big expanse of pond, they had no
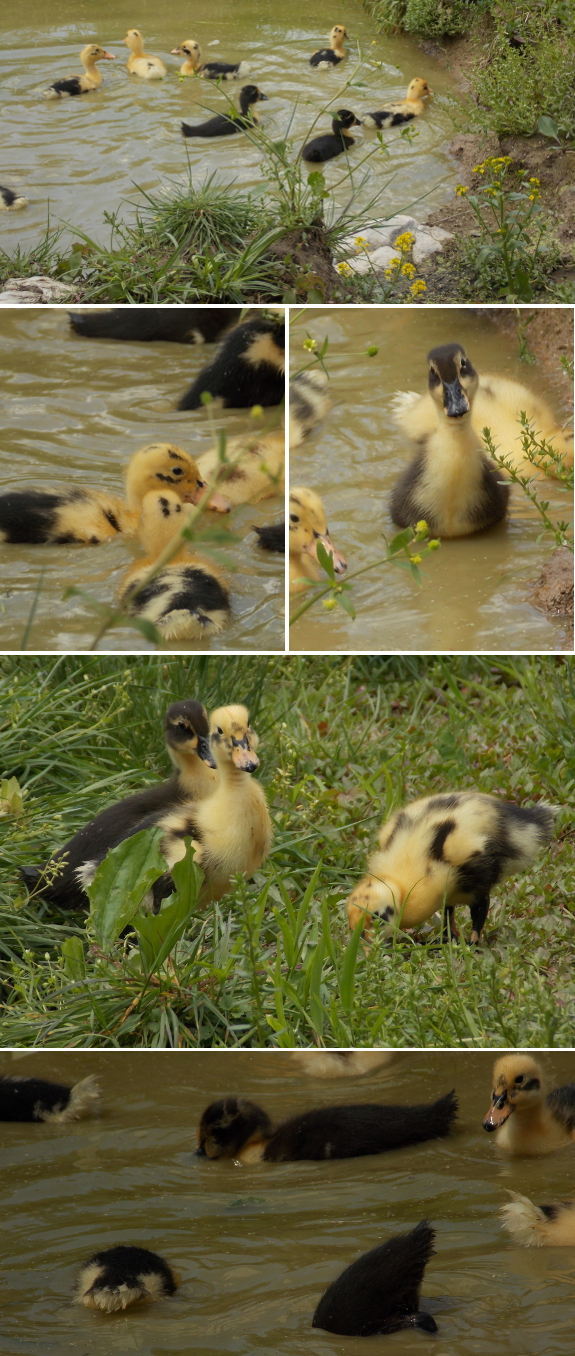
problem staying afloat. They also cleaned up the duckweed in short
order. I'm going to have to dig another sky pond to stock up on
duckweed before I'm entirely cleaned out!
I shut the ducklings back
up in their brooder when we left the farm from the day, but I look
forward to a lazy day today watching them play while reading in the
shade. Hopefully the ducklings will convince me they're big enough
to dabble unattended, although I suspect I'll still spend far too much
time watching their antics.
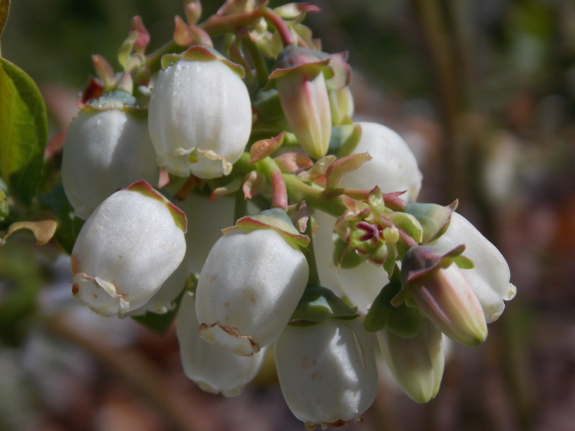
As trees and bushes begin to leaf
out, the full effects of last winter's cold are becoming evident.
Some issues are transitory --- our Caroline red raspberries and many of
our thornless blackberries were killed down to the ground, which means
we won't get fruits until fall for the reds and until next year for the
blacks. (Black raspberries seem to be more hardy, showing no signs
of damage.) But other damage is permanent.
Many of the young plants I rooted last spring and put in the ground last summer
perished since they hadn't built up enough roots to survive a really
frigid winter. I gave Kayla samples of the figs and grapes I
treated this way and warned her to keep them inside over the winter if
she really wanted to make sure every single one survived. Now I'm wishing
I'd followed my own advice. It looks like only one baby grape
(Reliance) and possibly none of the baby figs survived the winter.
This is clearly an issue of age since our older figs are quite alive,
although possibly dead back to the ground, while our older grapes are
just fine. Similarly, the two mulberries we planted last spring
may both be dead, although our older tree is doing just fine.
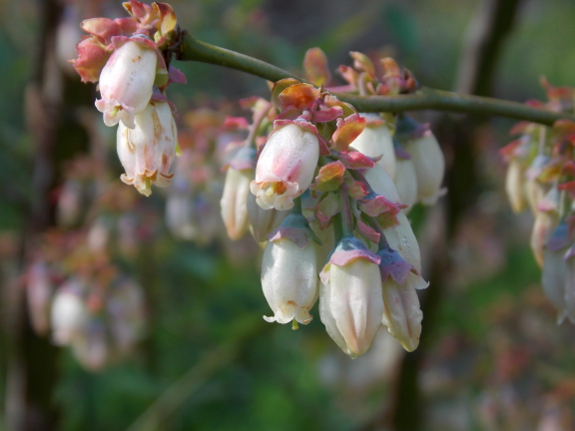
Elsewhere, winterkill is a sign that I pushed the boundaries of our
hardiness zone too far. Rabbiteye blueberries are on the edge of
their survivability zone here, and two of the varieties that have done the least well here
(Austin and Brightwell) perished during the cold weather. We'll
be replacing them with some northern highbush blueberries (rated to
survive much colder winters), but are still happy to have lots of
rabbiteye blueberries in our garden since the survivors are absolutely
loaded with blooms this year. And, on the bright side, it looks
like our blueberry, currant, and gooseberry harvest may make up for
those missing spring red raspberries.
The saddest loss from the cold was two dwarf apple trees. I'd put
three of the dwarf trees off by themselves since they didn't fit in the
main row, and the area where they lived might have been a bit colder
than the other spot since the smaller two of the three loners
perished. Perhaps more likely, though, the deaths were due to deer
damage over the summer weakening the plants, plus their M26 and M111
rootstock, which are reputed to be less cold-hardy than the Bud9 onto
which most of the other dwarf trees were grafted. (We do have apples on M111
rootstock elsewhere that survived the winter fine, but those were older
trees that probably had more roots under them.) Unfortunately, a
one-year-old pear tree living in the same area perished also.
 Although this sounds like a huge litany of losses, you've got to keep in
mind that I experiment like crazy, so we have a heaping handful of
survivors for every plant that bit the dust. However, the data is
helpful because it helps me plan --- newly rooted trees should really be
kept in for the winter since I never know if the weather will be particularly harsh, and I
shouldn't count on spring red raspberries even though they're delightful
since they might not survive the cold.
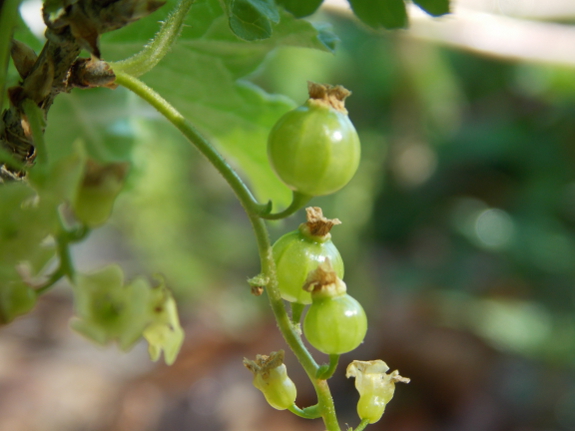
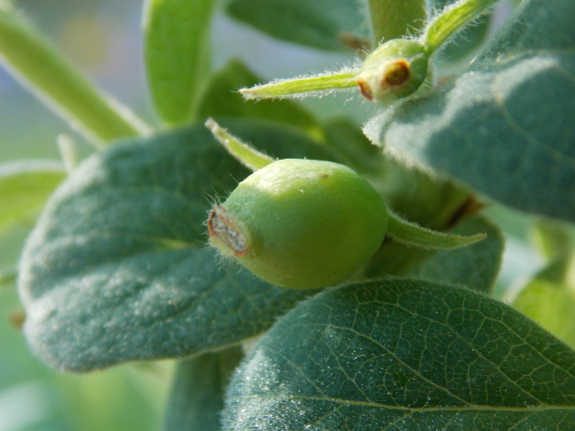
As a side note, I
sprinkled photos of spring excitement through this post instead of
photographing the dead and dying. From top to bottom, photos
depict northern highbush blueberry flowers, young red currant fruits,
rabbiteye blueberry flowers, developing honeyberry fruits, our very
first hardy kiwi flower buds (!!!), and the first sprouts from our
grafted apples. Life goes on in the fruit plantings...in style!
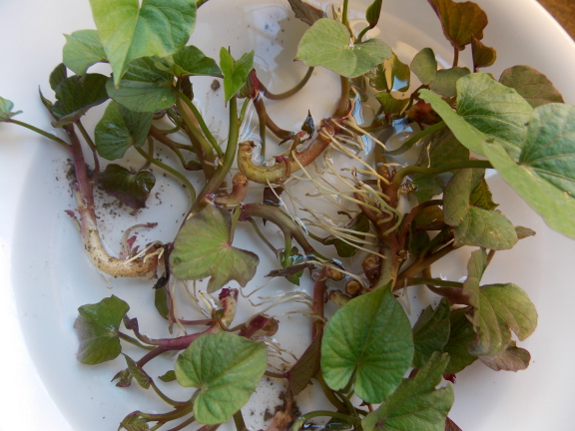
It took a few weeks for our sweet potato propagation technique to start showing signs of life, but now the new sprouts are popping up like they want to start a family of their own.
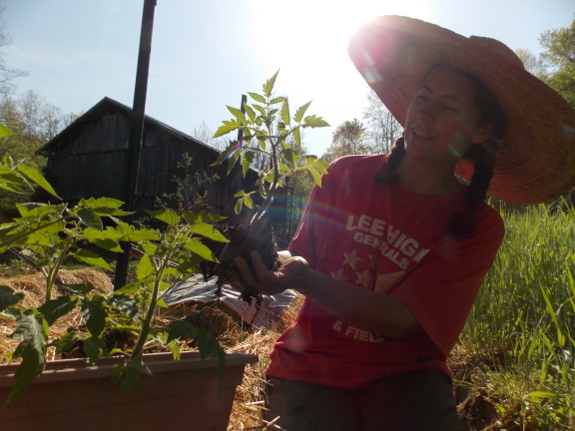
The long-range forecast
said "Summer!" (i.e. no lows below 50 for the next 10 days). Time
for my favorite day of the year --- Tomato Day!
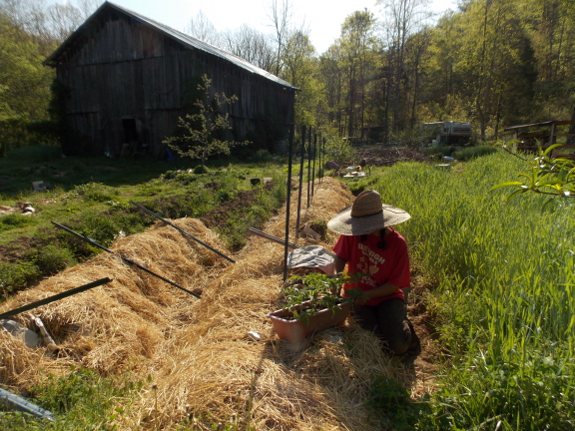
Twenty-four romas went into my small-scale chinampas.
Since the transplants were bigger than usual, I used a post-hole digger
to make relatively deep holes to sink the plants quite a ways into the
earth. These guys will need hand-watering for a week or two until
their roots tap into the high groundwater in this area (which is
currently right at the aisle surface even though the rest of the farms
is pretty dry). After that, I hope they'll get the best of both
worlds --- subirrigation will keep the plants hydrated, but the leaves will stay dry.
The field of rye you can see at my back in the photo above is going to become one more tomato row after the cover crops bloom and are cut
in a week or two. In the meantime, I'll probably pot up the
transplants that are ear-marked for that row so that they can keep
growing during the intervening time period.
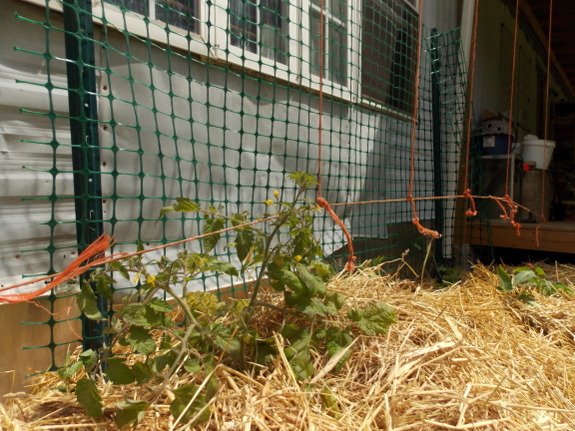
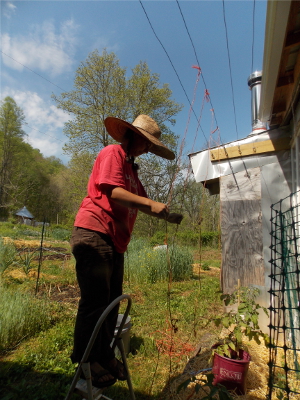 Two tomatoes went into the hot microclimate in front of the trailer, where I'll experiment with training them using the string trellis system.
(The plastic trellis in the background is holding up some young peas,
which will hopefully be done fruiting by the time the tomatoes really
fill this space.) These tomatoes have a head start since one is Daddy's ultra-early-started tomato
and the other is a Stupice (our earliest-fruiting variety). Only
time will tell whether the location and trellis system will turn that
head start into very early tomatoes.
As a final side note, I realized that the baby grape who survived the rash of winter-kill
was the one in this hot microclimate surrounded by rocks. Maybe
this spot really is a zone warmer than the surrounding farm!
We unwrapped our Chicago Hardy fig tree today.
The leaf
insulation wasn't enough to protect it during this past Winter.
Anna cut it back to its base
which might mean a few less figs than last year.
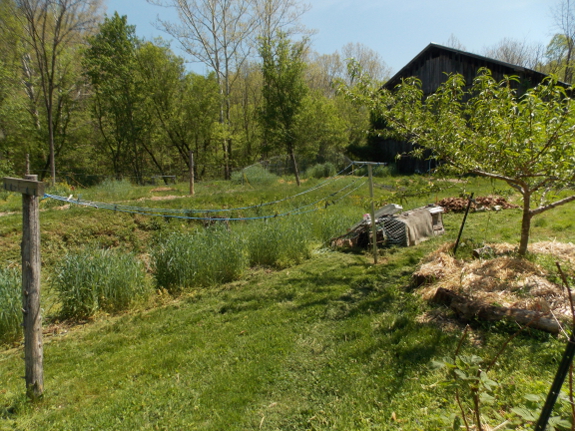
When you have no
neighbors in sight, it seems like mowing should be at the bottom of your
priority list. But Mark and I have learned that a quick pass with
the mower significantly decreases the perceived entropy during a busy
time of year. As an added bonus, shorn grass means I no longer get
soaked to the knees when I do my morning chores.
How do you move 20 chicks
from a crowded brooder to a proper chicken coop?
We use a plastic Rubbermaid
tub and have had no complaints from the chicks.
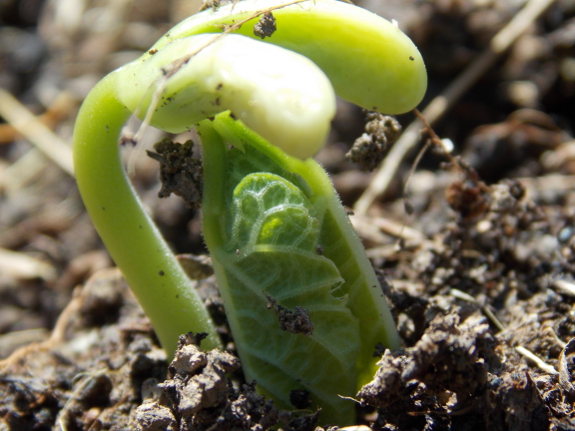
We're fully committed to summer around here, even though I have a sneaking suspicion that blackberry winter
might still come along and reduce me to tears. The long-range
forecast looks warm, though, so I'm enjoying seeing the first summer
vegetable sprouts poking out of the soil.
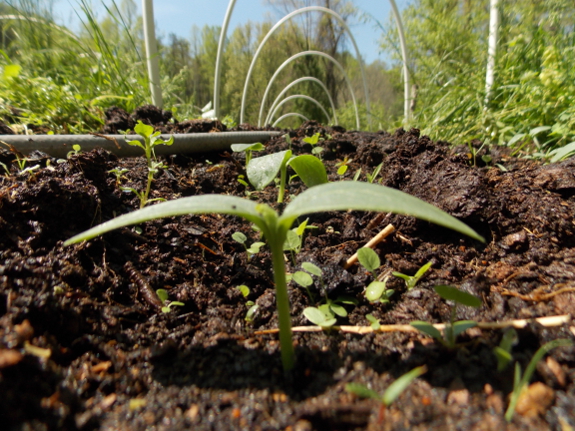
The quick hoops are
coming down at last to reveal young cucumber and watermelon plants,
seeded two weeks ago. It's time to weed and mulch these little
guys and put up a trellis for the cukes. In fact, that's what's
going on in the whole garden this week and next --- lots of watering,
weeding, and mulching. The summer routine is in full swing and I'm
happy to be out in the green.
When the sprouts are easy to pull off put them in a dish of water to promote rooting untill you're ready for planting.
A couple of weeks ago, I
posted about the first stage of caring for a newly grafted apple tree
--- breaking off the sprouts that open up on the rootstock.
With that done, the tiny trees will soon start channeling their energy
into the scionwood, and buds there will begin to open. That's your
cue to give your miniature orchard another few minutes of care.
Your goal with newly
grafted apples in the first year is to get them to grow one long stem,
which will hopefully reach four feet tall (a stage at which the apple is
known as a one-year-old whip). Since you probably left two or
three buds (or maybe even more) on your piece of scionwood, now's the
time to break off all but the best sprout so your tree once again
channels all of its energy just where you want it --- into developing
that whip.
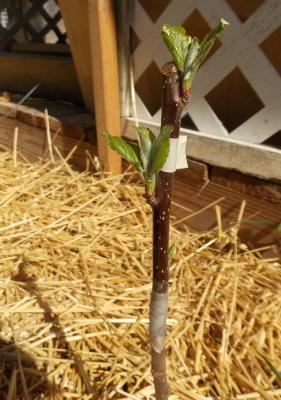
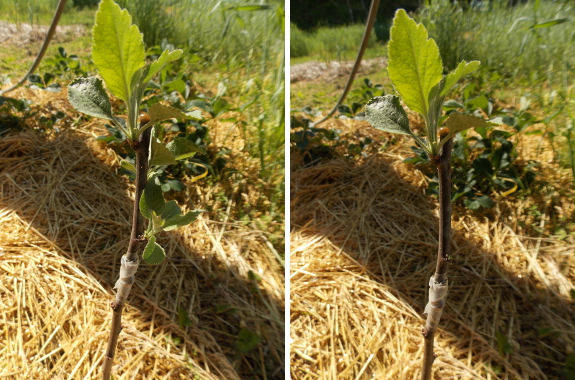
 The
top photo pair shows an apple before and after pruning. Most of
your trees will probably look like that one, with the top bud already
asserting some apical dominance and growing faster than its
brethren. If that's the case, gently break off the lower two
sprouts to let the top bud have full sway over the future shape of the
plant.
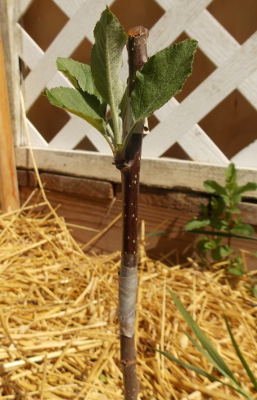
The photo to the left
shows a more unusual situation where the middle bud created a bigger
sprout. That's fine too! If the middle bud is biggest, take
off the top and bottom sprouts and let that strongest bud take over.
While you're visiting
your trees, be sure to pull any weeds that might have come up in your
nursery bed, and give the plants a round of water if they need it.
You don't want these apples to have to struggle any more than necessary
since they're already recovering from surgery. Also, resist the
inclination to take the bandage off the graft wound --- that area still
needs to be kept moist for a few more weeks before the tree is ready to
leave intensive care.
It took me longer to type
all of these instructions than to actually spruce up around our double
handful of baby apple trees. As usual, the most important
gardening work takes mere minutes if hit in a timely manner. Too
bad I never stay ahead of the weeds in the vegetable garden in this
way....
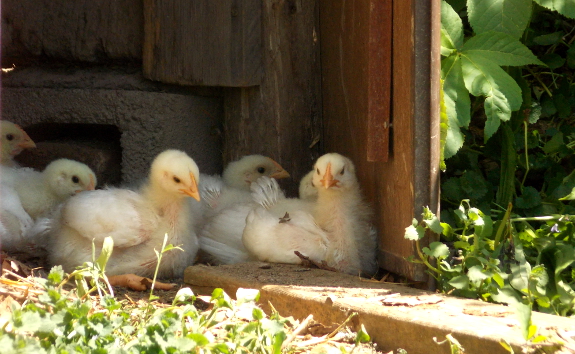
How are the Cornish
Cross chicks that came with the ducks doing?
They do a lot of sitting
around...and seem to be jealous of all the attention the ducks have
been getting.
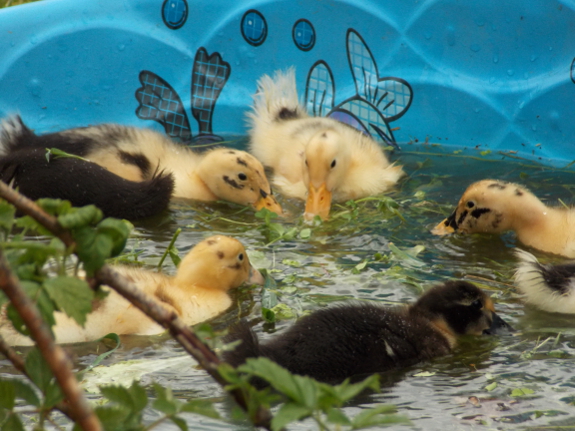
It's been six whole days since we last posted about our ducklings. I know you must all be in withdrawal!
More seriously, we've
learned a lot over the past week, so it's time for another photo-rich
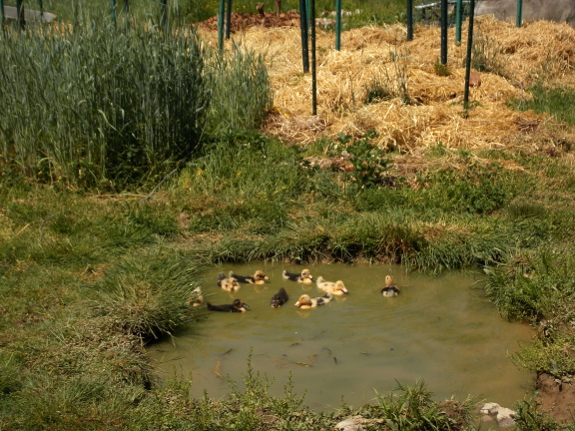
post. The first thing we learned is --- our sky pond does hold
water!
 Why
do I sound so surprised? In a linerless pond, you don't really
know right away whether your sealing method worked since it takes time
for all of the little leaks to stop themselves up. As a result, I
wasn't sure whether my foot-stomped gleying
did its job, or whether the pond surface was just reflecting the
surrounding groundwater levels. All winter, the pond waxed and
waned with the weather, so I suspected my gleying hadn't done anything.
When the sky pond dipped
down to about six inches below ground level early this week, Mark
suggested I fill it up with a hose. This was a good test of the
water-tightness of the seal since the groundwater has descended quite
low in the absence of rain. Thus, if the pond wasn't sealed, I
would expect the water I added to the pond to quickly drain away.
Instead, twenty-four hours after filling, the pond was pretty much the
same depth as when I turned the hose off! It looks like the sky
pond might really be turning into a pond rather than a simple hole in
the ground.
 The
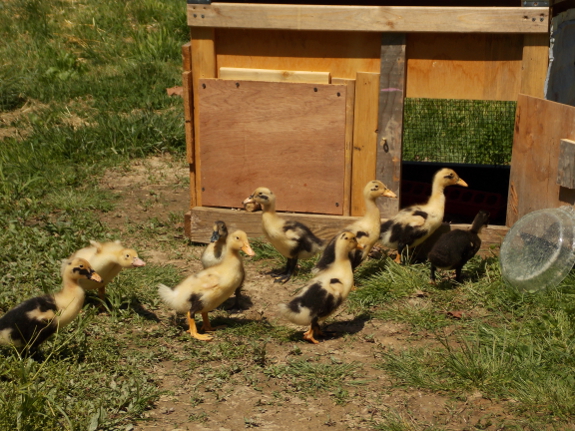
next thing I learned was more duck-related. When we posted last
weekend about letting the ducklings out into the sky pond, several of
you commented to ask how we'd get them back into the brooder at
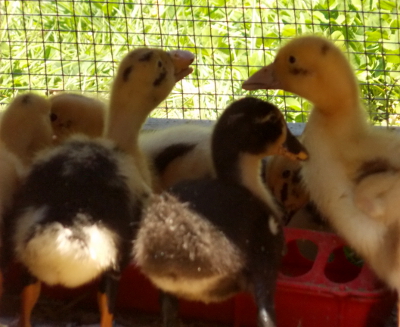
night. Although our ducklings did
pop out of the water a few times a day to dine inside, our readers were
right --- they would have rather slept on the water rather than in
their safe little coop. However, a little bit of gentle herding
(with a stick or a second person to channel the waterfowl toward the
open door) was sufficient to get them into the brooder each night.
Ducklings are definitely harder to herd than chickens (despite what
books say), but shutting them in is quite feasible.
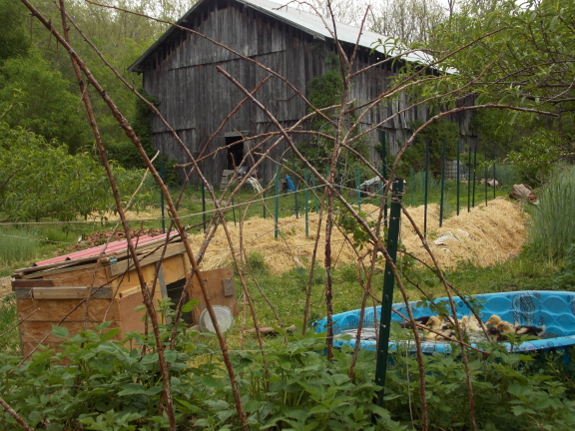
For the first few days,
the ducks didn't get out of the sky pond until I made them, but then the
duckweed and water bugs gave out and our waterfowl started to spend
more time on the bank. Soon, the little flock realized that
strawberries were only two feet 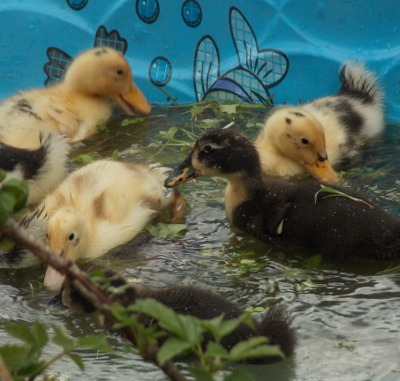 from the shore and they began to peck hungrily at the green fruit. That was my cue to move them to a new spot.
The kiddie pool had only
enjoyed about a week of duck-weed-growing time, so I was a bit afraid
the sterile surroundings wouldn't hold their interest. But our
ducklings told me that water is water --- they were happy. They
were even happier once I tossed in an armload of tender weeds from the
garden, giving the youngsters something to play with.
Mark wanted to know what
the big picture plan is --- how long will the ducklings be living in the
backyard? When will they go to the starplate coop with this
year's young pullets? The answer is --- I don't know. It all
depends on how well they play with the garden. I'll keep you
posted and will regale you with far too many photos again before you
know it.

How much heat can J-B
Weld's Quick-Setting steel reinforced epoxy take?
I fixed this pot handle
recently and it's been holding up well under average cooking
temperatures.
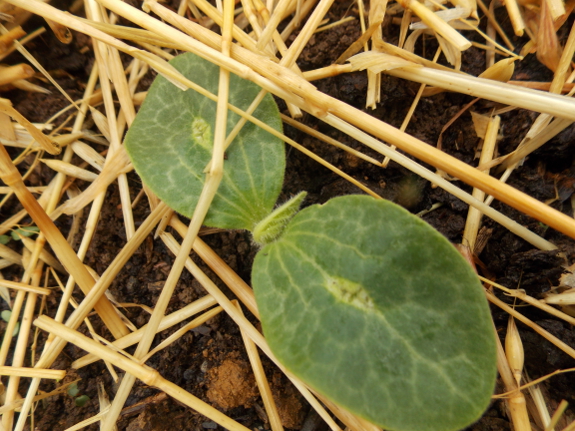
If I were smart, I'd mark
my calendar for a round of weeding and mulching two weeks after I put a
mass of seeds in the ground. Instead, I just play it by ear,
which means I freak out when the garden suddenly seems to be overrun
with weeds and in need of attention. Luckily, a few busy mornings
gets the beds back into shape.
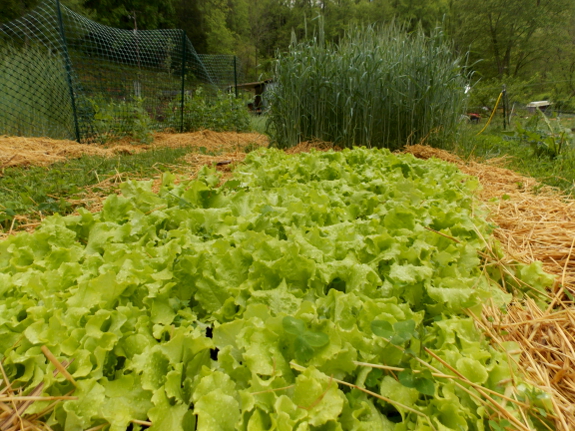
Every plant needs
slightly different care. Slow-growers like carrots and onions
(from seed) really require two rounds of weeding before they're big
enough to mulch around, while most summer crops can be carefully mulched
just a week or two after emergence. At the other extreme,
close-planted lettuce beds often grow so quickly that they don't need to
be weeded at all. This year, though, our manure is chock full of
clover seeds, so I had to do a round of lettuce weeding, which is always
difficult and makes it look like a cyclone blew through the bed.
One rain later, though, the planting is once again vibrant and ready to
feed us half a gallon of leaves per day.
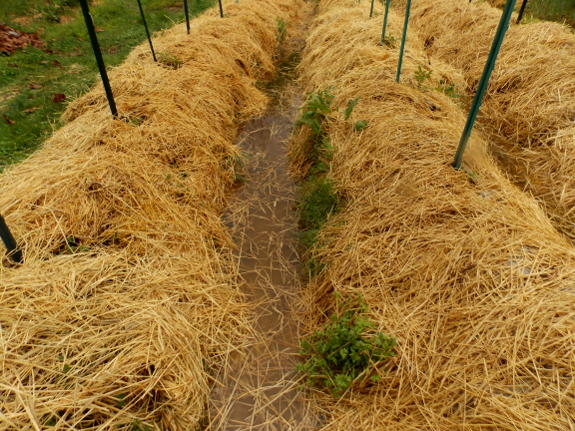
Speaking of rain, an inch or two on Saturday morning turned our tomato raised beds back into chinampas.
You can't really see the tomato plants in this picture, but a few are
already starting to bloom. Visions of plump, red fruits are
swimming through our heads, even as we anxiously wait for earlier crops
to ripen, like the first spring peas. This is definitely a good
time of year for dreamers!
Our greywater
wetland cattails are expanding.
This might be the year we
remember to try cattail flowers.
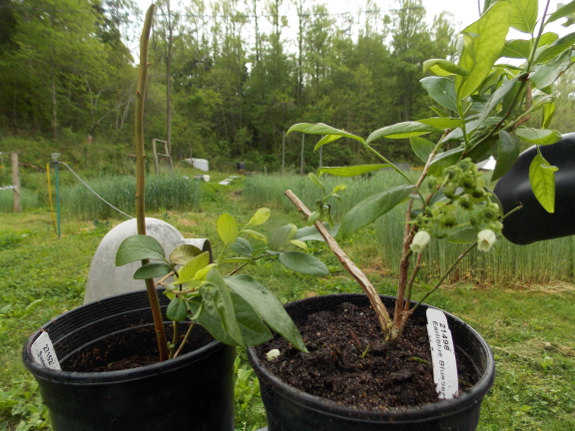
Now is not the time to be planting perennials, but I really wanted to fill up the winterkilled gap in our blueberry patch,
so I'll commit to watering these two little guys until they get
established. I also snipped off the flower buds so the plant on
the right would put its energy into roots, not fruits. Hopefully,
with a little TLC, they'll survive and thrive despite the late planting.
Mark and I went back on
forth about where to get our replacement blueberries. He had
noticed some good-looking plants at a local store, but it turned out
that those were rabbiteye blueberries, which I've now learned are a bit
of a gamble on our north-facing, zone-6 hillside. So I looked at online retailers instead. I was sorely tempted to go with Willis Orchards, who provided us with some awesome-looking rabbiteye blueberries
in 2009. But that southern nursery has a pretty small selection
of northern-friendly plants, so I instead ordered from Starks Brothers,
where the prices were higher and the plants a bit punier, but where the
variety selection more up my alley. In case you're curious, we
settled on Earliblue (a very early-fruiting northern highbush) and
Sweetheart (a northern-southern hybrid).
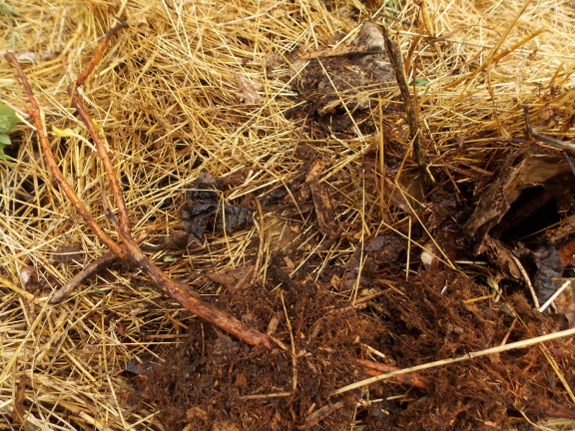
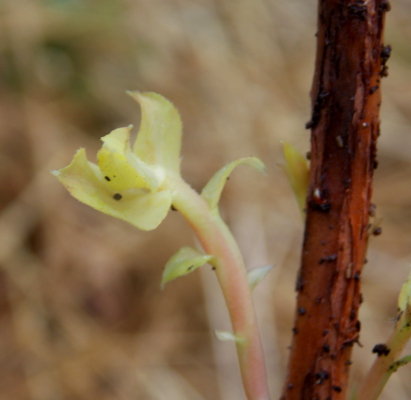 While
digging out the two dead blueberries, I was in for a surprise.
The main Brightwell plant was dead (as evidenced by how easily the roots
came out of the ground), but one stem had bent down and been hidden
under the mulch. That stem had rooted and now little leaves were
poking out, looking for light.
In a previous life, I
would have nursed that little plant along and returned it to the patch,
but in this life, I know that if the parent was winterkilled, it's not
worth wasting space on the offspring. Instead, I'll pass this
little blueberry plant along to my mother, who lives in a slightly
warmer climate and whose winters are mitigated by asphalt and
concrete. A freeze-sensitive blueberry variety should be just the
ticket in her city yard.
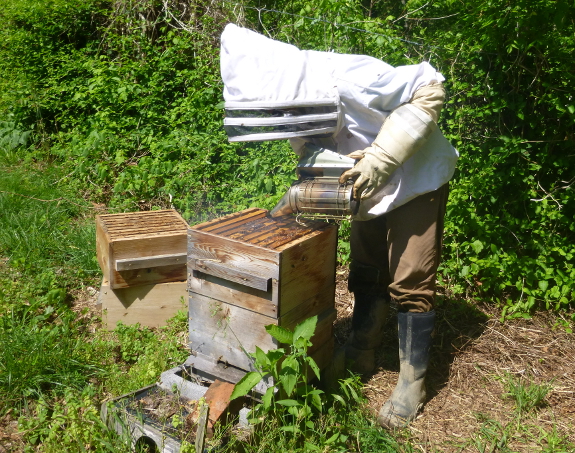
At this time last year, the bees in our Warre hive swarmed. Even though I have several swarm traps out this year, I know that catching a swarm is a gamble, so I decided to go against the Warre party line and preemptively split our hive.
The last time I split a hive,
I was using Langstroth boxes and didn't realize how intrusive all of my
poking around inside the colony was. So, at that time, I went through and made sure both new hives had frames of eggs, capped brood, and honey.
I didn't want to be so disruptive this time around, especially since our
Warre hive frames are technically movable but actually tend to tear
comb when removed. So this year's split is more of a gamble --- I
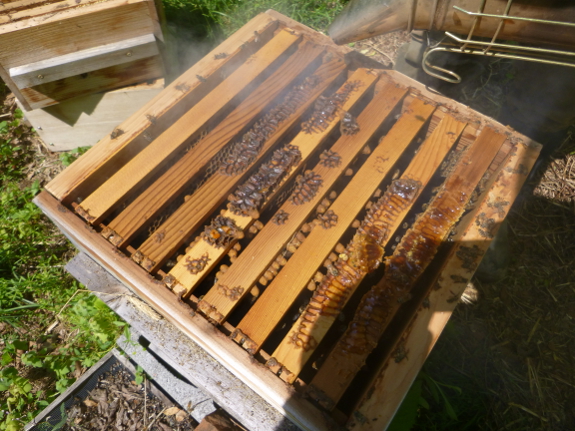
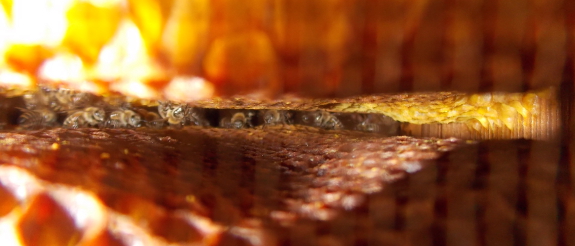
don't know for sure that both hives have the eggs 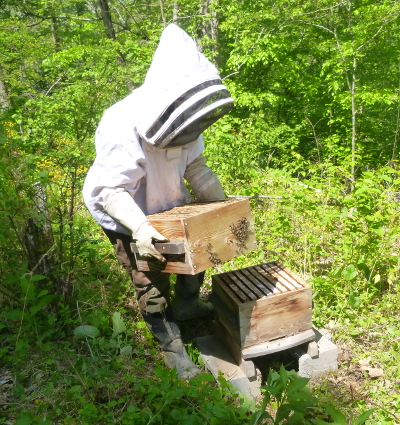 necessary
to make a new queen. If I'm unlucky and the queen and eggs are
all in one colony, I'll either buy a queen for the other colony or will
just put the two hives back together. (As a side note, I think
that's capped drone brood in the photo above, not queen cells --- what
do you think?)
Even without poking
through the frames, though, I can make sure that both hives have an
equal chance of success. With a split, the hive that you leave in
the old location gets an automatic boost since all of the worker bees
out foraging will go home to that location. So I took the heavier
box to the new spot (in the starplate pasture), figuring the lack of
workers there would mean the daughter hive could use the extra
honey. I'll also start feeding both hives, even though there are
lots of flowers in bloom, since a split is definitely a setback for each
set of bees.
Splitting the hive means
that, once again, we probably won't get honey this year. However,
the colony I split has proven its worth as a survivor colony despite not
being treated with any chemicals. Maybe, if I'm lucky, both
daughter hives will survive and thrive and give us honey in 2015.
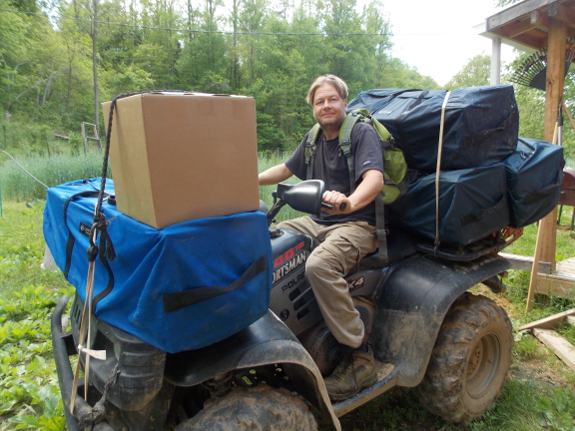
This is our bigest load of
chicken waterers so far this year.
Our new EZ
Miser bucket waterer is
now available on Amazon.
We really appreciate the nice
Amazon comments.
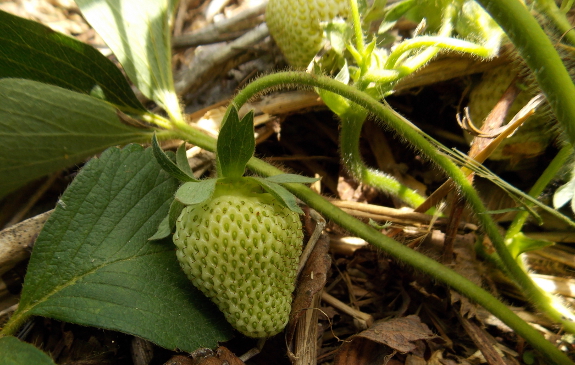
I'm extremely jealous of the fact that our helper Kayla
has been enjoying strawberries for nearly a week. The photo above
shows our most-ripe berry, proof that it may be another week before we
join her in berry heaven. We got set back by allowing some of our strawberry flowers to be nipped by a hard freeze, so all I can do is wait impatiently for the first color to appear on my favorite fruit.
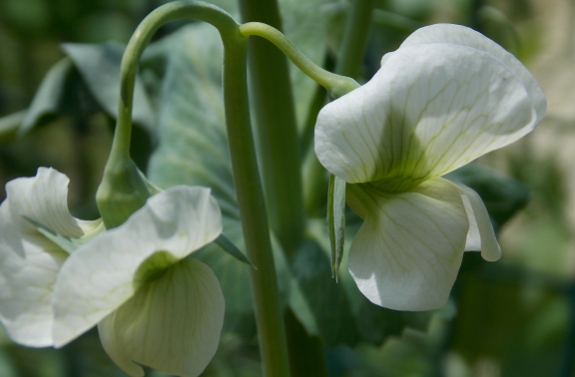
Even though I'm behind in
the berry department, the garden is brimming with life. Our peas
have just started to bloom, so we'll soon be enjoying those crunchy
pods, which is good since lettuce and kale are now on their way
out. Other coming attractions in the next few weeks include Swiss
chard and broccoli.
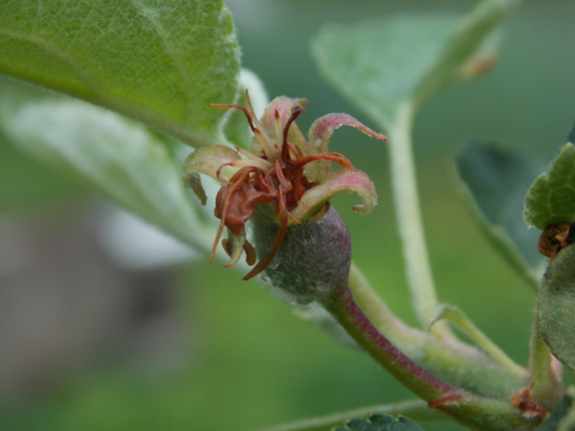
I was also excited to
notice that a few apple ovaries seem to have made it through the hard
freeze. At this time of year, fruit trees drop the flowers that
were damaged or which the plant doesn't think it has the energy to turn
into fruit. Usually, I would be thinning
further to ensure trees aren't too overloaded, but this year, I'm just
glad to see a few flowers sticking and promising autumn morsels.
How's your spring garden growing?
Today I learned that by trimming Rye only from left to right instead of back and forth yields nice and neat rows where the Rye lays down in the same direction.
It's hard to believe
after a week in which the afternoons topped 90 degrees, but we're slated
for a major cool-down today and tomorrow. Friday night and Sunday
night are both forecast to drop to 41...which could mean we'll see
freezes on our frost-pocket farm.
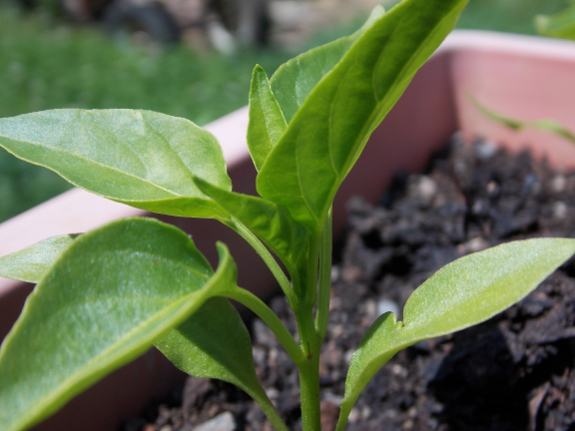
So even though I have the
ground ready and transplants well-rooted, I'll hold off on planting the
rest of the tomatoes and all of the peppers and sweet potatoes until
next week. I'll already have to do a lot of prioritizing when I
decide what to cover on Friday --- it'll be much easier to carry pots
inside than to find yet more frost-protection for tender summer prima
donnas.
I should get a better
idea of what the actual Friday low will be soon. The forecast
calls for 44 tonight, so if that's 34, I'll know to cover like crazy on
Friday. If the forecast is closer to reality, I might just cover the tomatoes (one bucket per plant) and hope for the best.
I stumbled upon a new weed
trimmer tool yesterday.
Instead of looking for the
right size nail to hold the trimmer spool stationary for removal I now
use one of these pegboard
L-hooks.
It's just the right size and
travels well in a pocket without the sharp point of a nail.
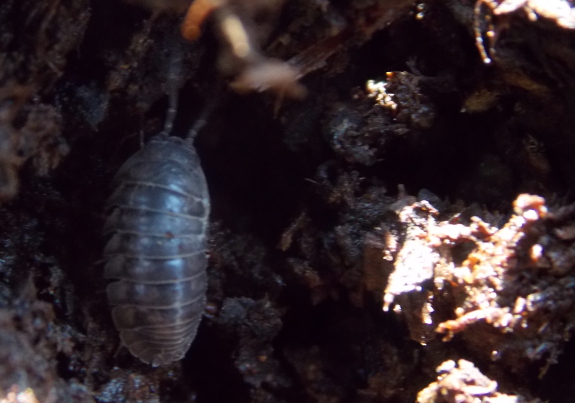
I grew up with pill bugs
in our backyard. When we played with these little land
crustaceans, we called them rolly-pollies because they were able to curl
up into a ball, and as a result, I tend to think of all woodlice as
rolly-pollies. However, when I looked into the topic, I learned
that not only are the little critters in my compost pile sow bugs
instead of pill bugs, they're also an invasive species brought over from
Europe. (But then, so are pill bugs!)
In case you feel the need
to identify the invertebrates in your compost too, here's a quick
primer. Pill bugs (as I mentioned previously) can roll up into
balls, and they also tend to have a blue tinge to their gray. Sow
bugs don't curl up, are browner gray, and generally have little tails
visible sticking out from under their shell. Both live in damp
places, are largely nocturnal, and mostly eat decomposing matter
(although some will also nibble on seedlings and ripening strawberries).
As a final word to the
wise --- even though woodlice are crustaceans like lobsters and crabs,
you might not want to eat them. One scientist reports that
woodlice taste like urine, but a few wildcrafters liken boiled woodlice
to tiny shrimp. I suspect the difference might be between pill
bugs (which roll into a ball and thus don't produce many defensive
chemicals) and sow bugs (which can't roll and thus do produce lots of
noxious chemicals). I'd be curious to hear firsthand reports from
anyone who's eaten sow bugs and pill bugs --- does one taste good and
the other bad?
It took me a while to figure
out the best way to mount milk crates to our ATV.
Securing them only near the
back bar with rope allows you to flip them back when you have something
bigger than a milk crate to haul.
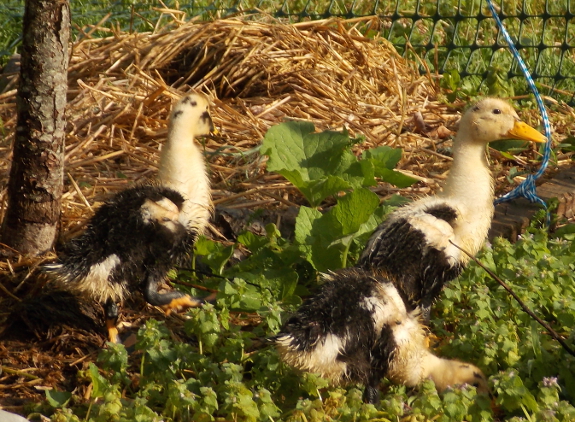
One week after moving the ducklings into a pasture,
they had devastated the entire area (about 200 square feet) and had to
be moved to a new spot. For the sake of comparison, 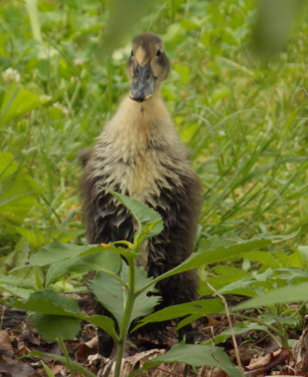 chicks of this age would have caused a lot less impact, but chicks of this size
would have done about the same, only in different patterns. (Our
Ancona ducks grow a lot faster than Australorp chicks, thus the size and
age distinction.)
While chickens peck and scratch, most of the impact of ducks seems to
come in the form of wet manure. Sure, our ducklings ate some of the greenery, but
the real reason I moved them so quickly is because their little paddock
was beginning to smell due to too much manure in one spot.
The worst of the manure buildup was in the open-bottomed brooder.
I ended up
pulling the brooder to a new spot every day the way I do with a chicken
tractor rather than trying to lay
down fresh bedding because ducklings don't mind sleeping on the damp
ground, and they make so much manure I'd be using up lots of straw or
leaves to soak it up. The only downside was that, after a few
days, most of the pasture was piles of duck manure from where I'd moved
the brooder over those spots.
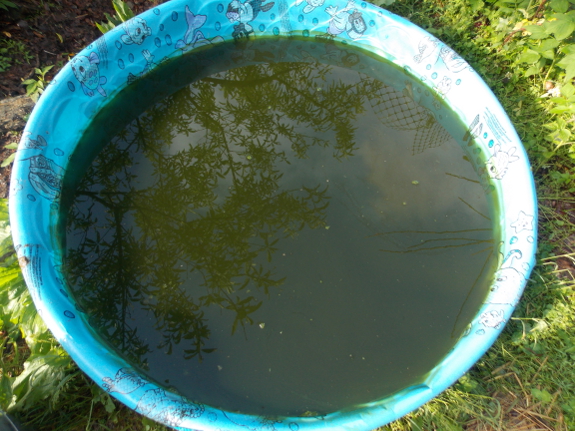
The other spot duck manure lands is in their dabbling pond. We put a little kiddie pool with some duckweed in it in the new location,
and the ducks quickly turned the clear water into pea soup (or is that
duck soup?). This is a spot where I need to put on my permaculture
thinking-cap since the high-nitrogen water in the duck pond would be a
perfect fertilizer for the garden, but it takes quite a while to move
that water one bucket at a time. Maybe if we had a little pump
(and if it hadn't rained two inches the night before I wanted to empty
the pond), I could have utilized both the fertilizer value and the water
more efficiently.
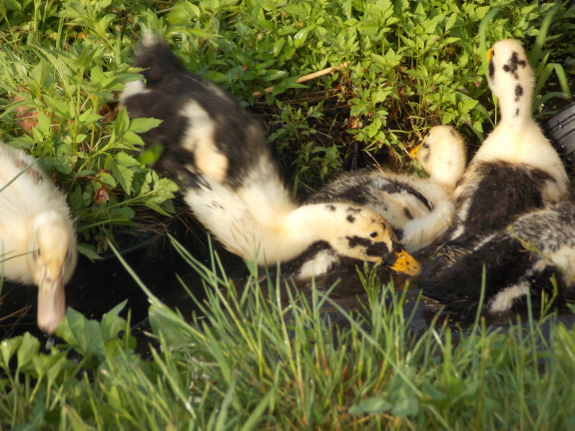
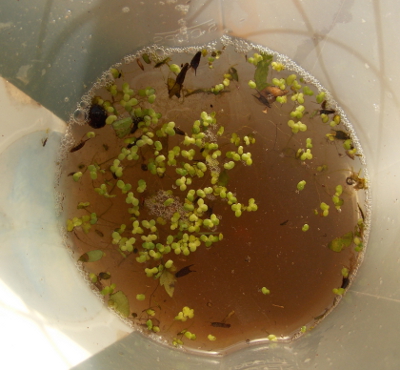 The
photo above shows our ducklings enjoying the next pond in the
rotation. This one is tiny, barely big enough for nine growing
ducklings to float in at the same time. I scooped out a bit of
duckweed and pond inoculant to seed the kiddie pool before turning the
ducks loose in their new pond, but I'm already learning that it takes
much more than a week or two for a pond to grow enough life that the
ducks don't demolish it in the first five minutes. I definitely
need to build more sky ponds for the long-term cultivation of aquatic
life if we want to keep ducks.
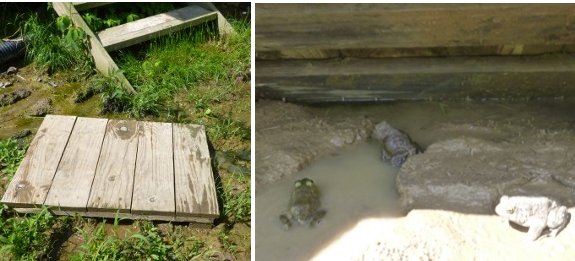
I put this pallet down back
in the Winter to avoid stepping in the mud.
Turns out to be a perfect
toad house for these three boys.
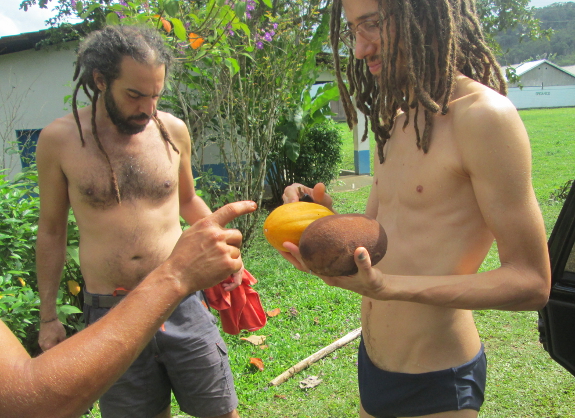
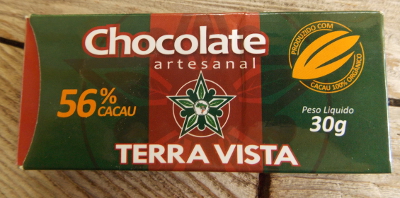 Joey
went to Brazil and brought me back a chocolate bar...plus a fascinating
story about Terra Vista, an 800-acre sustainable chocolate farm in
Bahia. The photo above shows some of Joey's new Brazilian computer
buddies, one of whom is holding a cocao pod (the brown one) along with a
tropical fruit. The other photo is of my Brazilian chocolate bar,
which is interestingly hard --- perhaps much lower in fats than the
chocolate I'm used to? The ingredients list 50% cocoa, 6.6% cocoa butter, 36% sugar, 7% milk, and 0.4% soybean lectin.
 The
story that goes along with the bar is about the Brazilian Landless
Workers' Movement, an effort by the peasantry to regain control of
agricultural areas in Brazil. According to the Movement, 3% of the
Brazilian population owns 67% of the country's agricultural land.
A new constitution drafted in 1988 can be interpreted to give
Brazilians the right to occupy unused agricultural land, to return that
land to productivity, and then, eventually, to gain ownership of the
property. Using this method, 50 low-income families moved onto
what is now Terra Vista in the 1990s, planted crops, and began to farm
organically.
The story made me wonder --- what would life be like in the U.S. if we
had a similar law on the books? Would it be good, allowing lots of
young people who dream of farming but don't have the capital to move
back to the land? Or would it be bad, with wild areas currently
being protected by neglect instead clearcut and turned into
farmland? I'd be curious to hear your take in the comments
section.
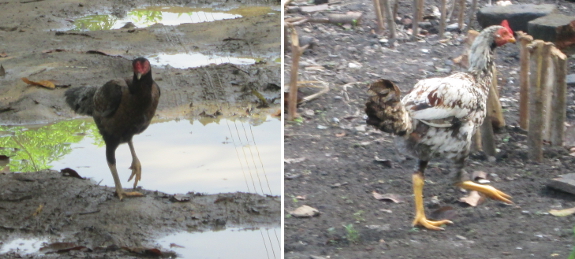
On a less serious note,
Joey said that what caught his eye in Terra Vista was the free-range
chickens, all of which were skinnier than American birds. There
were so many chickens that it seemed that each person on the farm ate
one a day, mostly in the form of stew.
I would love to send you
to a website so you could learn more about Terra Vista, which Joey said
was full of raised beds and other techniques he was familiar with from
our own farm. But the whole point of Joey's trip was to connect
villages who don't have internet access, allowing them to trade data
using memory sticks carried by hand when people travel from place to
place. So you'll have to use your imagination about everything
Joey didn't happen to take photos of. I hope you enjoyed this
brief glimpse of sustainable Brazilian agriculture!
How's the hammock
chair hanging we
installed a year ago?
The chain bites into the 2x4,
but the damage is only cosmetic.
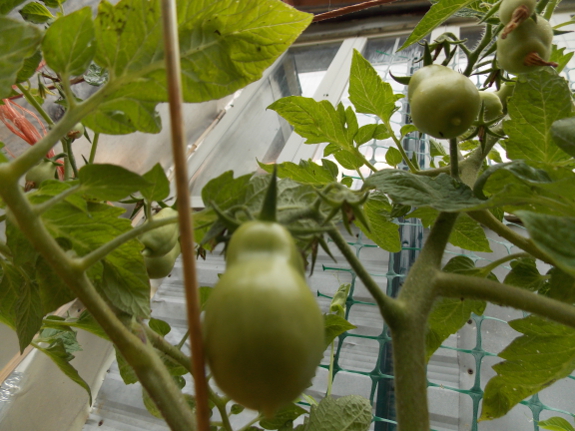
My tomatoes and I were relieved when the cold wave passed and our low only dropped to 37 degrees. No frost!
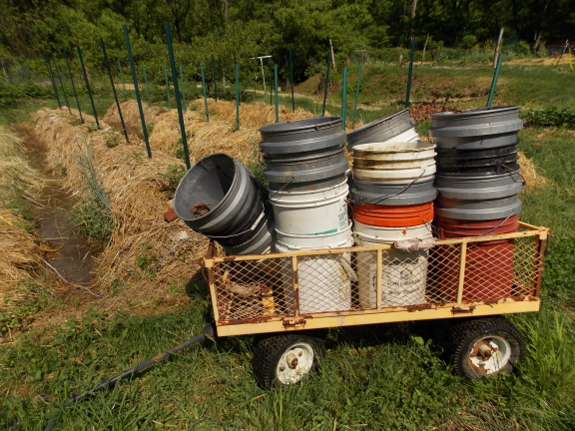
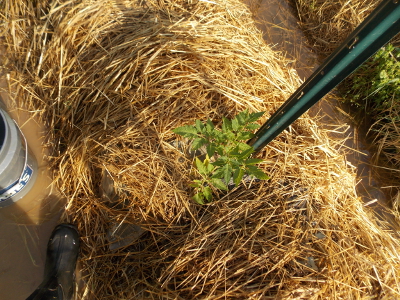 Figuring
it was better to be safe than sorry, I covered each tomato plant with a
five-gallon bucket on Friday night, then removed each bucket first
thing Saturday morning so the plants wouldn't cook or dwindle from lack
of light. Most of the plants fit into their buckets well, but the
large plant from Daddy (first photo in this post) had to be carefully
constrained before I could cram it into a bucket, and my Stupice (our
earliest producer most years, photo below) also had to have the top bent
down a bit. Hopefully both plants will bounce right back.
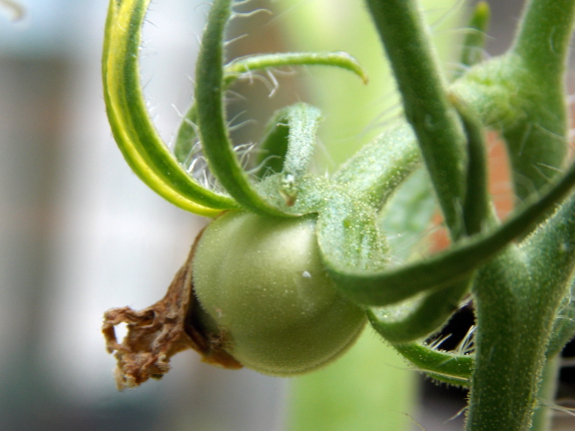
On a related note, my
father was surprised that the plants he'd set outside a couple of months
ago didn't make early fruits even though they were large and in a
sheltered location where it wouldn't frost. I explained that
tomatoes tend to drop most or all of their flowers when nights dip below
55 degrees Fahrenheit. This isn't quite the same as a critical temperature,
because one chilly night won't generally make a tomato drop
fruits. Instead, a string of cold weather slows the pollen so much
that it doesn't travel up the style fast enough to fertilize the ovary
within the requisite fifty hours, at which point the plant drops the
flower as a loss.
Despite the current
cool-down, at least one of my tomatoes managed to set a few fruits, as
you can see in the photo above. I'm curious about whether my
Stupice (an early ripener) started inside on February 26 can beat
Daddy's tomato (started inside in January, I think). And will
either plant's head start really make them beat my usual first-tomato
date of early to mid July?
Want to grow the earliest tomato? Check out this guest post from one of our readers for expert advice.
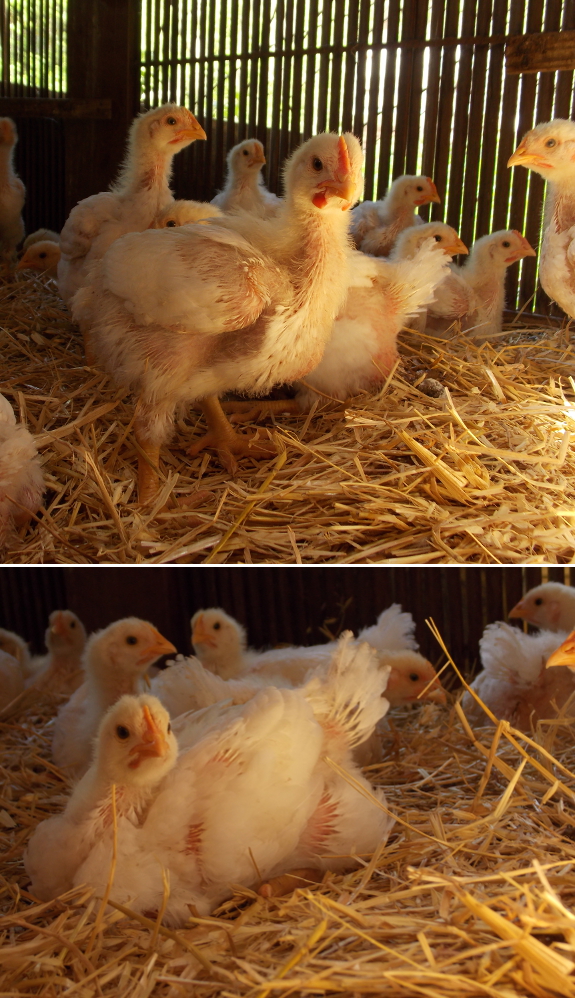
We started out with 26 chicks and are down to 19.
The chicks aren't quite smart enough to come in out of the rain and prefer napping to foraging, but at least they grow quickly.
Only two and a half more weeks until our broilers are big enough to eat.
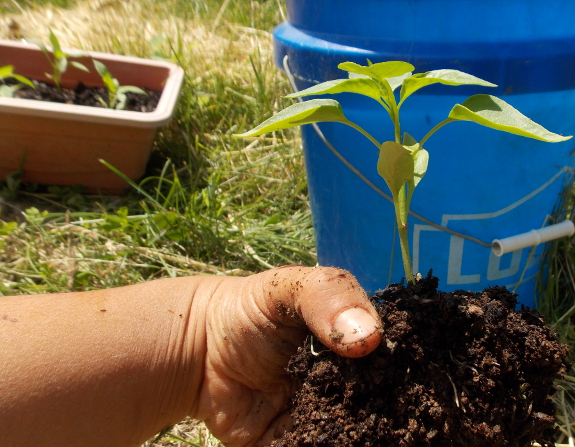
I wrote previously that tomato-planting day is my favorite day of the year,
but the truth is that I just enjoy putting plants of any type in the
ground. Setting out peppers and sweet potatoes Monday was
definitely a treat, especially since the former are so spunky and pretty
this year.
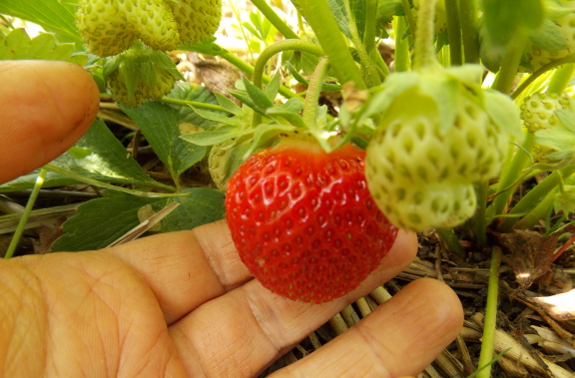
The night before I
transplanted dipped down to 34 degrees, but there was no sign of frost
in the garden, so I decided it was time to take in the row covers and tomato buckets and to stop worrying about freezes.
And what did I find under the row covers? Strawberries starting
to turn red...at last! I squashed my usual impatience and left
every fruit on the plants to ripen all the way --- it's worth waiting
two or three more days for berries that are red clear through. Maybe that's my favorite day of the year, when I plop the first sun-ripened, homegrown strawberry into my mouth....
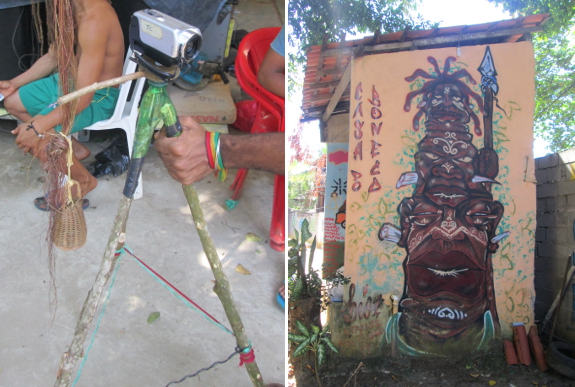
What do you do if you need a tripod and live in the sticks?
Pick up three of those sticks, cut apart a soda bottle, apply some electrical tape, and start filming.
Photo courtesy of Joey from his trip to Brazil. Joey reports the tripod was still in action three days later.
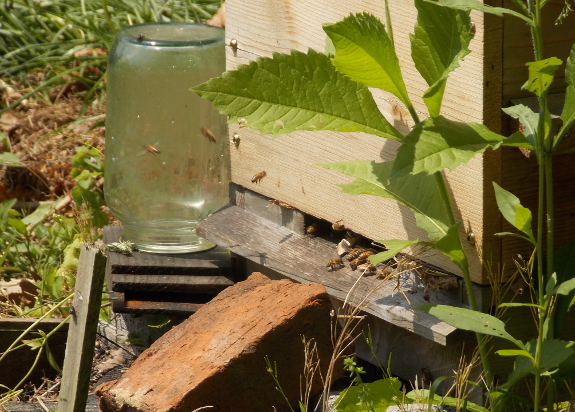
It's amazing how much you can learn about a hive without lifting the lid. After splitting our Warre hive in two,
I was a bit worried about the colony I'd moved to a new location since I
could barely hear the bees inside when I pushed my ear up against the
side. I knew that all of the foragers would have scurried home to
the mother-hive location, but was it possible that the daughter hive
might contain so little brood that everyone flew the coop?
I was getting nervous
enough that I was on the verge of opening up the hive, Warre rules be
darned, but I'd waited long enough that there was no need. Worker
bees go through a specified series of jobs, with the youngest workers
cleaning out brood cells, 3-to-11-day-old workers tending brood,
12-to17-day-old workers building comb, and older workers heading out of
the hive to forage. A week after the hive split, the first
foragers began heading out of the daughter hive, and I could see that
many were carrying back pollen! That was a clue that not only was a
colony still living in the hive, there was also uncapped brood present
to eat that pollen.
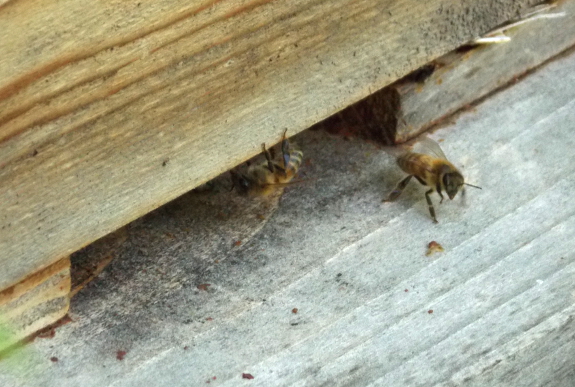
Honeybees feed pollen to
their young until the cells the baby bees live in are capped over (which
allows the youngsters to change into adults uninterrupted). This
capping occurs on day 7.5 for baby queens, on day 9 for workers, and on
day 10 for drones. So, eleven days after my split, I should be
able to figure out which hive kept the queen by looking at both
entrances for pollen-carriers --- the one that's still bringing in
pollen kept the queen. After that, it will be another two-week
wait while the other hive finishes raising and mating their queen before
I should see pollen entering the colony that lost their queen in the
split.
If I had my druthers, I'd hope that the daughter hive is the one who
kept the queen. They got slowed down by losing all of the
foragers, so it's only fair that they get to bring new bees online
faster than the other hive. Only time will tell whether my wishes
came true.
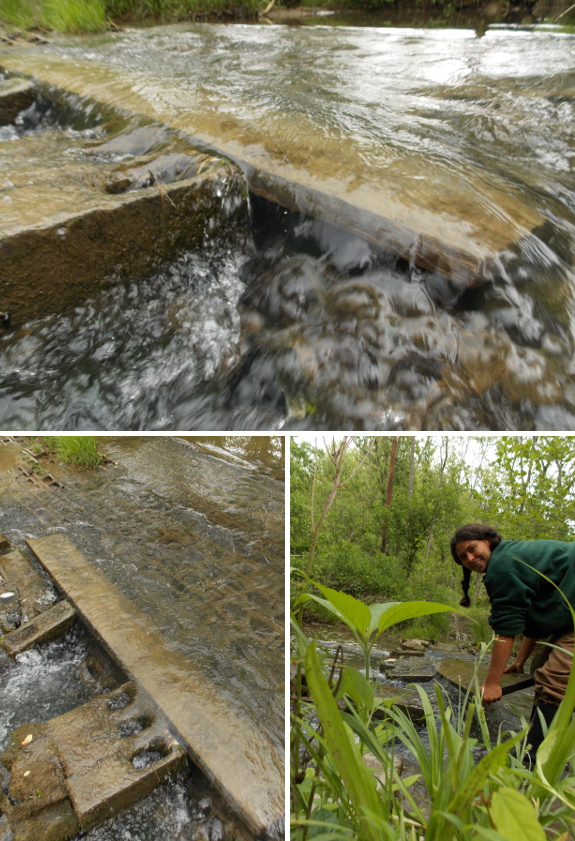
Recent heavy rains washed this two-by-twelve down the creek.
It lodged behind our stepping stones, and we pried it loose to dry on the shore before we haul it home.
The board will make a good shelf for heavy objects. Or maybe it will become part of a nest box in the new starplate coop.
On the farm where our movie-star neighbor lives,
crows are one of the worst problems in the garden. Sure, our
neighbors battle deer like we do, but their farm is less wooded, so the
four-leggers aren't quite so ornery. On the other hand, their
garden plots are further from their houses, so critters that we never
see a problem with move right in to eat. Specifically, sprouting
corn kernels are plucked right out of the ground by ornery crows on a
regular basis.
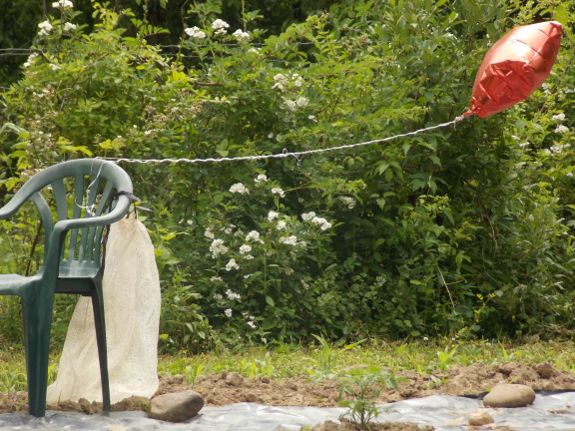
For the last couple of
years, our neighbors have used helium balloons as crow deterrents with
pretty good success. Our movie-star neighbor invested in a weather
balloon last year, which kept its helium for quite a long time, but
even these cheap supermarket balloons can last for a week or two in the
garden.
If you battle crows in the garden, what strategies do you use to keep the corvids at bay?
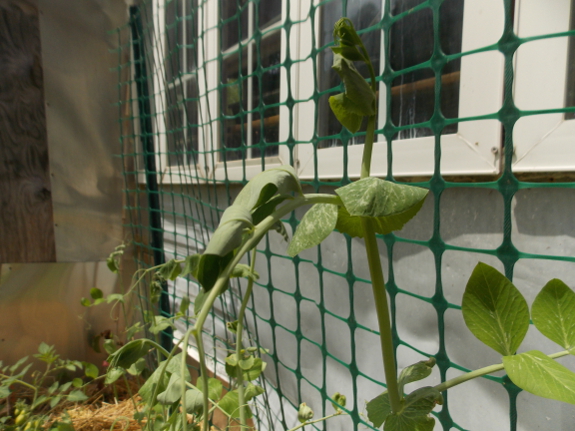
Reflected heat from the
south-facing front of the trailer makes this spot too hot for
peas. The plants grow, but they wilt on sunny afternoons.
On the other hand, the tomatoes in front of the peas and the grape vine on one side are thriving.
It looks like we've found another garden microclimate for our farm.
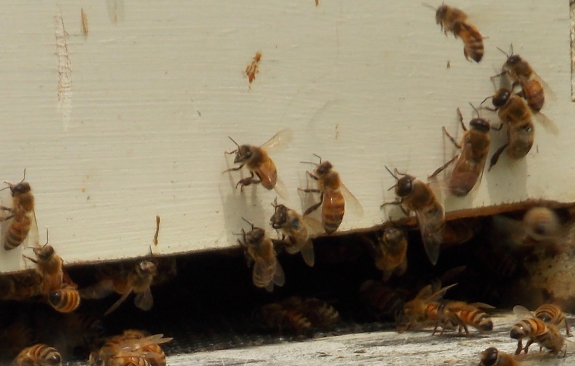
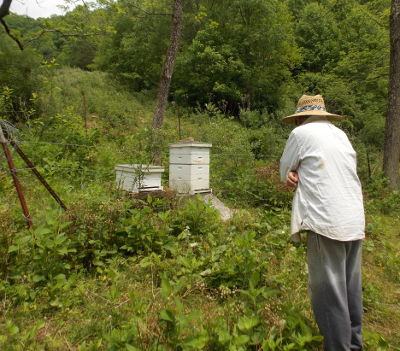
At this time of year, our
move-star neighbor visits his hive every day looking for signs of
swarms. Kayla reported watching a swarm fly over her head about
ten miles from our farm on April 19, and May is prime swarming season in
our region. But we haven't seen any activity in our swarm traps yet.
 Even hives that don't plan to swarm seem to make more drones at this time of year. In our split hive,
I've noticed quite a few male bees flying around the entrance, getting
their bearings so they'll know how to come home after heading out to
look for young queens to mate with. Our neighbor's hive seemed to
be equally heavy on drones --- you can see a cluster of four on the
right side of the top photo, distinguishable by their big eyes.
I probably should have
done this a couple of weeks ago, but I'll be adding a bit more
lemongrass oil to our swarm traps today. Maybe if I'm lucky, I'll
catch our neighbor's swarm?
It's that time of year when our 3 foot tall asparagus needs a little help standing up.
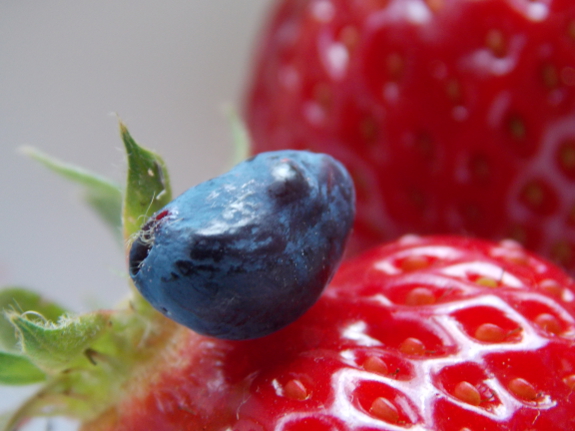
We planted two honeyberry
bushes last spring (Blue Sea and Blue Velvet), and a few berries showed
up on each last month. I waited with baited breath as the first
one turned pink and then purple, then I waited yet a little longer since
I've heard that honeyberries are best when eaten very ripe. At
long last, it was time for a taste test.
The conclusion?
Half of a tiny honeyberry is too small of a morsel to register on your
tastebuds. Drat! I guess I'll have to wait until next year
for a real flavor sampling. In the meantime, though, I can write
about how honeyberries live up to other claims by nurseries and by
garden writers.
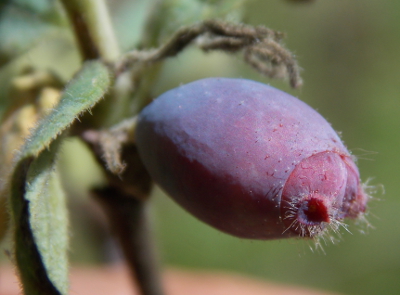 The
main reason I planted honeyberries is because I'd read that the fruits
ripen up before strawberries in the spring. This appears to be
false on our farm --- we ate our first strawberries a few days before
our honeyberry. On the other hand, our honeyberry bushes are
planted closer to the hillside, meaning the ground there is colder in
the spring and the plants might grow more slowly than they would have if
planted in a more sunny location. If a taste test next year
suggest the species is worth committing to, I'll try out some more
bushes in a warmer spot --- honeyberries are just rebranded honeysuckles
(Lonicera caerulea), so they should be easy to propagate
Honeyberries did better
in the second claim department --- that they grow well in shade.
The area where our bushes are growing is on the shady side
of our blueberry patch, so they get about six hours of shade at the
summer solstice. Despite the lack of sun, the bushes are doing
great and are fruiting already (albeit lightly), so the species
definitely does fit into those difficult-to-harvest-from shady areas.
I'd be curious to hear
from others who have eaten more than half of a honeyberry. What do
you think of the flavor? And do honeyberries ripen up before
strawberries in your neck of the woods?
Our repaired
pot handle broke again. Anna only used it twice.
I guess I should've degreased
the area better, or maybe it was the heat?
Part of me feels like a wood
handle might work if the hole was drilled in just the right spot to
allow the support screw to thread through and attach to the pot.
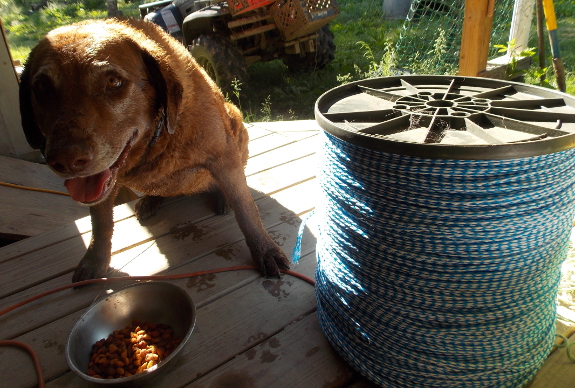
Many moons ago, Mark's
mom worked at a rope factory. When the factory closed, she somehow
ended up with several of these huge spools of rope, and one wound up on
our farm when we first got started.
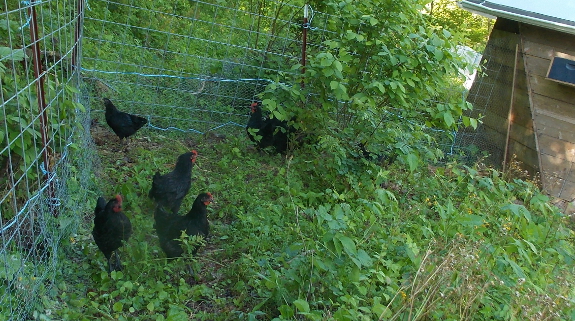
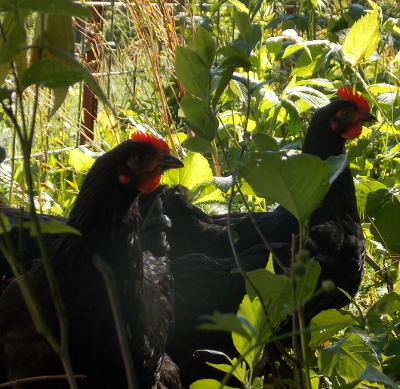 When you have a huge spool of rope, it's astonishing what you'll use it for. Little pieces turned into tomato ties and bigger pieces attached fence sections together. By the time we got halfway through our starplate pasture, I realized the impossible had happened --- we'd run out of rope!
Life without a huge spool of rope now seemed inconceivable.
Luckily, Mark's mother hooked us back up with another spool, which we
hope will last another eight years. Thank you so much, Rose
Nell! The garden, chickens, and I all vastly appreciate that huge
spool of rope.
What kind of shotgun do we
use?
It's a 16 gauge Winchester.
Today felt like a good day
for some target practice.
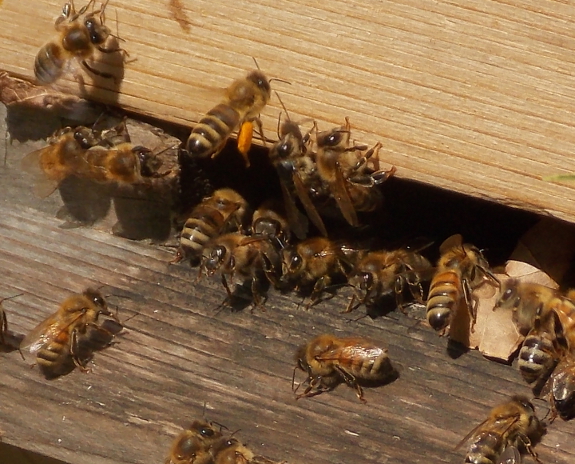
 Saturday
morning, I decided to amuse myself with a pollen count. No, I'm
not talking about the type of pollen count that allergy sufferers
concern themselves with --- I mean counting how many worker bees were
carrying pollen into each of our hives.
As I explained in a previous post,
all of the eggs laid by our queen before the hive split should now be
capped brood. So the hypothesis was that I could tell which hive
ended up with the queen by looking for the colony into which workers
were still bringing pollen.
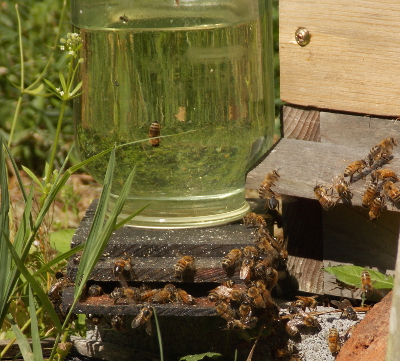
The mother hive location had so many bees coming in and out (top photo)
that my count might be off by a bit, but I think I managed to catch most
of the returning workers. I definitely counted every bee coming into the daughter hive. Here's what I found out:
| Mother Hive |
Daughter Hive |
|
| Time of day |
10:54 am |
11:05 am |
| Length of data collection time |
1 min. 30 sec. |
5 min. 55 sec. |
| # workers entering with pollen |
13 |
19 |
| # workers entering without pollen |
37 |
31 |
| % of workers bringing pollen |
26% |
38% |
| Pollen carriers per minute |
8.7 |
3.2 |
| Notes |
In full sun; lots of bees at feeder |
Sun just starting to hit hive; no bees at feeder |
The conclusion? To
my surprise, both colonies were still bringing home pollen at a
relatively high rate. It looks like my I can't tell which hive has
the queen based on pollen counts after all!
I was interested to see
that the old piece of bee-keeping wisdom --- bees bring in pollen to
feed brood --- seems to be only partially true at best. And it
makes sense to me that a colony would collect pollen whenever the
protein source is available since they'll need to store some for times
of dearth.
It looks like I'll have to keep my eyes open for other signs of queens,
like batches of new workers coming out for test flights. And then
there's my old standby of peering up under the bottom of the hive.
Stay tuned for more investigative reporting from the apiary!
I like to mix our 2 cycle
fuel in this small 1 gallon container on the right.
The cap is a plastic switch.
You push pour to open and store to close it.
I was a bit dubious of the
design when we first got it, but after a few years of field use I'm
ready to conclude I prefer the pour and store type because it makes it
impossible to lose that yellow plastic cap. It's also nice to know
you've got exactly one gallon when adding the oil.
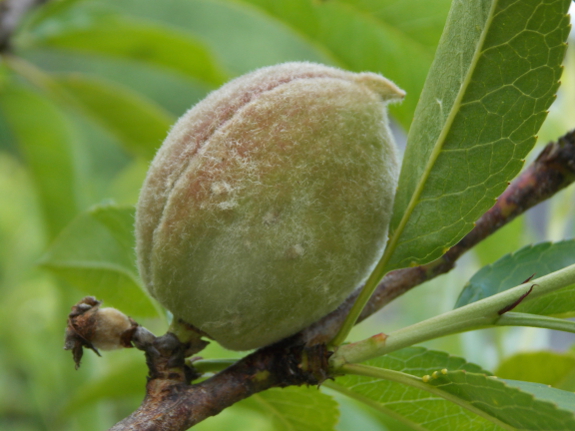
 This is the time of year when I usually thin tree fruits
so the full-size apples and peaches won't touch each other.
Thinning prevents disease, results in larger fruits, keeps limbs from
breaking, and bypasses biennial-fruiting.
But in a year like this one,
there's a grand total of only about a dozen baby fruits on all of our
trees. So instead of taking fruits away, I'm using my thinning
energy to tell the trees to hang onto the few fruits they have left! (No, this doesn't actually have any effect on the tree, but it makes me feel better.)
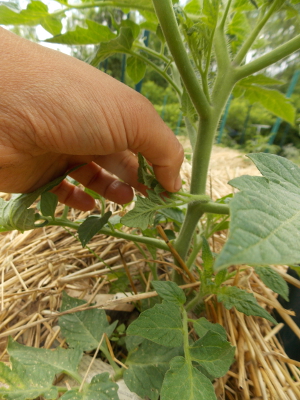
While you're in the garden thinning (if you need to), don't forget to pluck tomato suckers, to start summer pruning and training
fruit trees, to break off strawberry runners, and to keep an eye out
for the first insect infestations. I saw the first cabbage white
butterfly over the weekend, so bug patrol will begin this week.
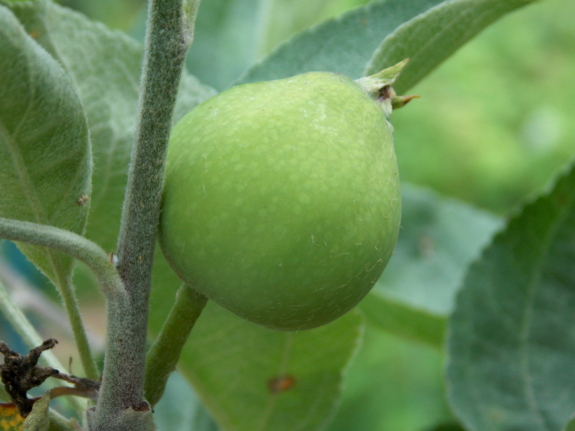
(Here's a bonus baby apple photo. When you've only got a few of them, they all seem to deserve baby pictures!)
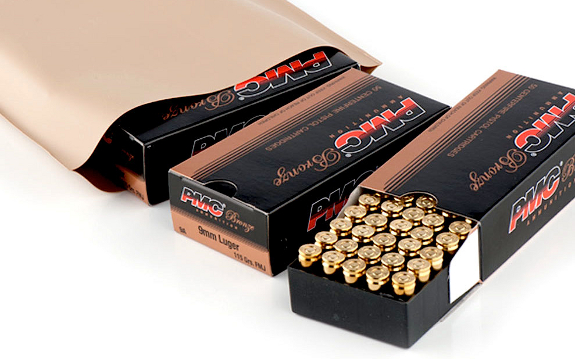
I'm sure one of our readers
would love to add the sealed ammunition to their bug-out bag or hunting
gear. Readers, enter using the widget at the end of this post, or
read more about the battle pack below:
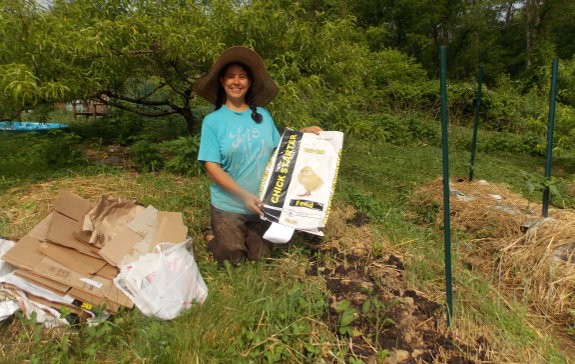
We have a lot of uses for
empty feed bags, but my favorite is kill mulching around small
transplants. As you can see in the photo above, the parts of the
garden that spent the winter as rye
are a little weedier than I'd like, so rather than hand-weeding, I'm
laying down a layer of paper bags and then a layer of straw. The
feed bags conform to the soil surface better than cardboard does in this
type of uneven terrain, and they decay just as fast (including the
strings).
When we go somewhere
other than our usual feed store and end up with the plastic-burlap bags,
I generally save the empties for troublesome trash. We're still
pulling old barbed wire and broken glass out of parts of the garden, and
that type of debris will puncture an ordinary trash bag. A
plastic feed bag, though, holds wire and glass with ease.
Mark gets his ingenuity
honest --- from his mother --- and her use for a feed bag takes the
cake. She makes hip handbags out of the empty plastic sacks,
something I'd definitely use if I was a handbag carrier. (I wish I
had a photo to share with you!)
What do you do with your old feed bags?
Both our Chicago Hardy and Celeste fig trees have started the process of leafing out. We were a bit worried after cutting away all the frost damage from last Winter.
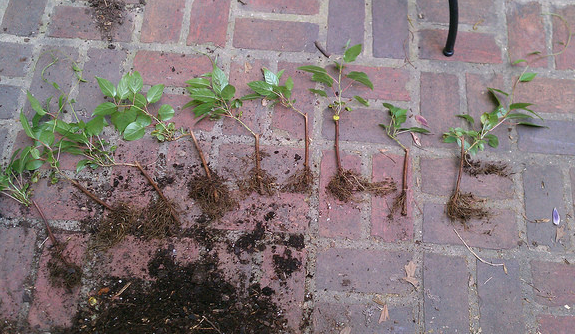
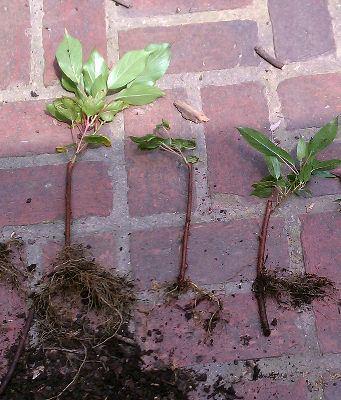
I love rooting
experiments so much that I'll often mail people cuttings as long as they
promise to report back on their methods and success rate. One of
our favorite* readers, Brian Cooper,
wanted to expand his hardy kiwi operation, so I sent him cuttings from
all three of our plants, many of which grew roots as you can see.
Brian reported:
 "My
plan was to bury them vertically and once they poked out then add more
compost to the base to allow rooting of the new growth. Two rooted
from the new growth but they also rooted from the hardwood, so it did
work but it probably wasn't necessary. A lot of the compost that
was added settled down and the new growth was still above the
compost. I made the cuttings a bit shorter so they fit under my
humidity dome and this left a lot of 2" pieces that I put a layer of
compost over, and some of them rooted up as well. I think if I was
to do it over, I would just bury all the cuttings (4-6" pieces)
horizontally under 1/2" to 1" of compost or dirt."
It turned out that 1 of 7
Male cuttings rooted, 6 of 10 Anna cuttings rooted (even though the
cuttings had flower buds on them), and 9 of 12 Dumbarton Oak cuttings
rooted. So if you have a kiwi plant and want to make more, Brian's
method looks like a pretty good bet!
* Okay, I know I
shouldn't play favorites. But I love readers who share their
experiments and make thought-provoking comments!
We moved the ducks back to
the Sky Pond today.
A temporary fence gives them
a nice 50 foot circle to roam around in.
Bad news for the toad and
tadpole population.
Last spring, we planted
some Sparkle strawberries to replace the late-season variety we hated
(Allstar), which in turn had replaced the mediocre late-season variety
Jewel. Time for a rundown on the pros and cons of this new type of
strawberry!
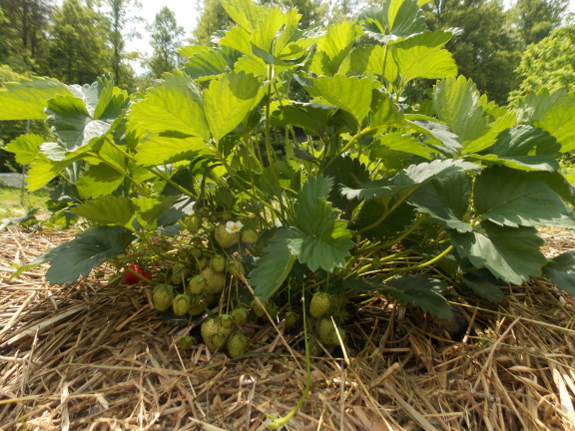
As you can see from the photo above, one of the major advantages of Sparkle is that the plants are very
productive. I grow strawberries in the hill system, removing all
runners and giving the plants plenty of space, so I always get lots of
big berries from each plant. But our Sparkle planting takes the
cake in terms of pure quantity of fruit! (The plants produced just
as many runners as berries, though, so if you hate plucking runners,
this might not be the variety for you.)
Taste is another major
advantage. Sparkle is one of the sweetest strawberries I've ever
tasted, and although it lacks the fuller-bodied flavor of Honeoye, it
compares favorably with Ozark Beauty. (You can read more about flavor of the strawberry varieties we've tried here.) Mark says he likes Sparkle even better than our other varieties, while I rank it on the same level.
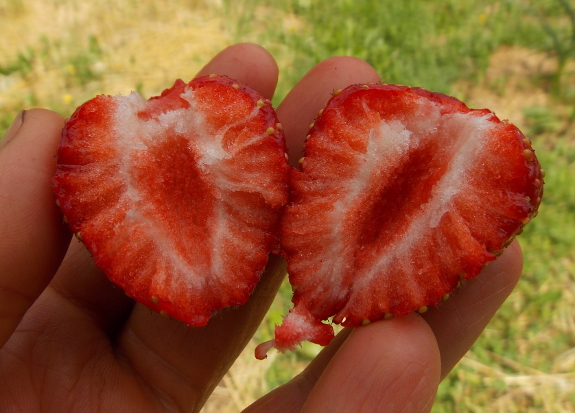
Where did the Sparkle
berries fail? Well, the plants don't really seem to be a
late-season variety, despite being listed as such on Nourse Farms
website. The Sparkles are ripening up in the mid-season, just a
hair behind the first Ozark Beauties, which means that the variety won't
extend our strawberry season as late into the summer as I'd
hoped. (Actually, as I go look at Nourse Farms' site, I see that
Sparkle is now listed as "late midseason" instead of "late
season." Not sure if they changed the site or if I just made a
mistake when researching.) Maybe next year I'll consider adding
another variety that is a truly late-producer.
Less importantly (at
least to me), Sparkle berries are so soft and luscious that it's hard to
even pick them off the vine without damaging the berries. I guess
that's really only a disadvantage to Mark since I often eat damaged
berries as I pick rather than risking them going bad during the two
minute journey into the house. Gotta protect those berries....
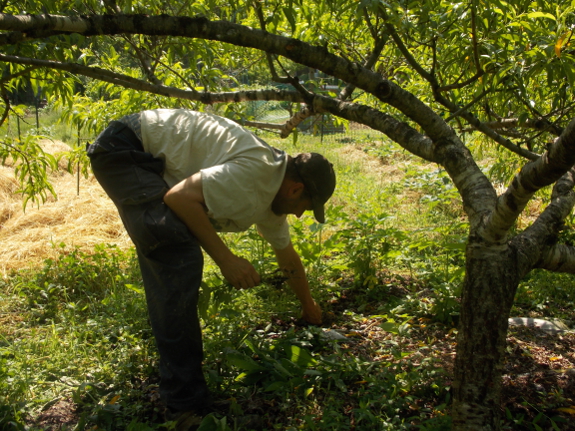
This time of year the ragweed is easy to delete when you catch the ground wet.
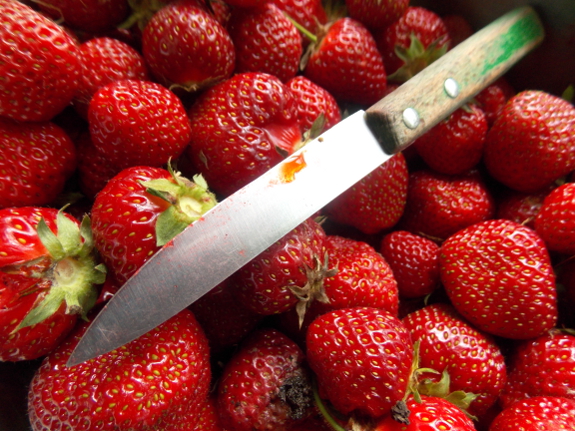
Strawberries are our
first big harvest of the year. Sure, we've been eating lettuce so
long that we're sick of it, and kale rapini
and asparagus are giving way to Swiss chard and peas, but none of those
vegetables are worthy of being preserved. Strawberries, though,
come out of the garden by the gallon. Even after we eat our fill,
there's still plenty left to be squirreled away for the winter.
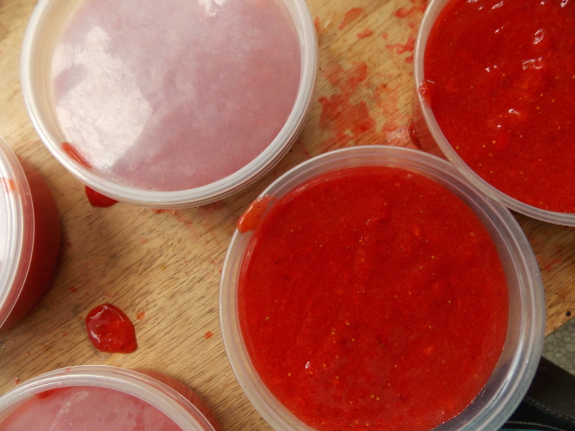
My stand-by preservation methods for strawberries include fruit leather
(for special treats) and strawberry freezer jam (for dressing spring
salads). This year, I'm trying out a new freezer jam recipe, based
on Pomona's Pectin
and using a lot less sweetening than usual (plus, the sweetener is
honey instead of sugar). Here's hoping the healthier option will
be just as well received in February 2015 as the previous version was in February 2014!
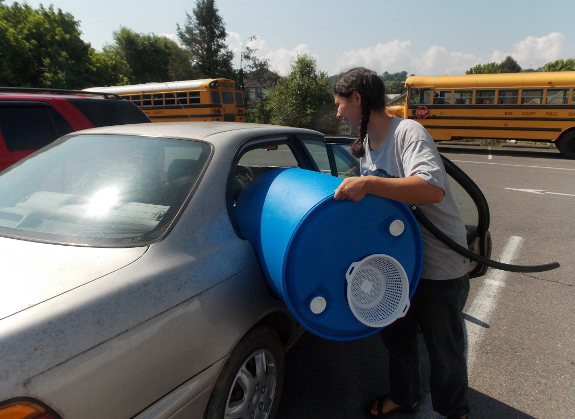
What's it take to coax Anna
into a trip to the big city?
A rain barrel workshop did it
today. Complete with free rain barrel.
Yes...it fit into the
backseat with room to spare.
Want more in-depth information? Browse through our books.
Or explore more posts by date or by subject.
About us: Anna Hess and Mark Hamilton spent over a decade living self-sufficiently in the mountains of Virginia before moving north to start over from scratch in the foothills of Ohio. They've experimented with permaculture, no-till gardening, trailersteading, home-based microbusinesses and much more, writing about their adventures in both blogs and books.
