archives for 09/2013
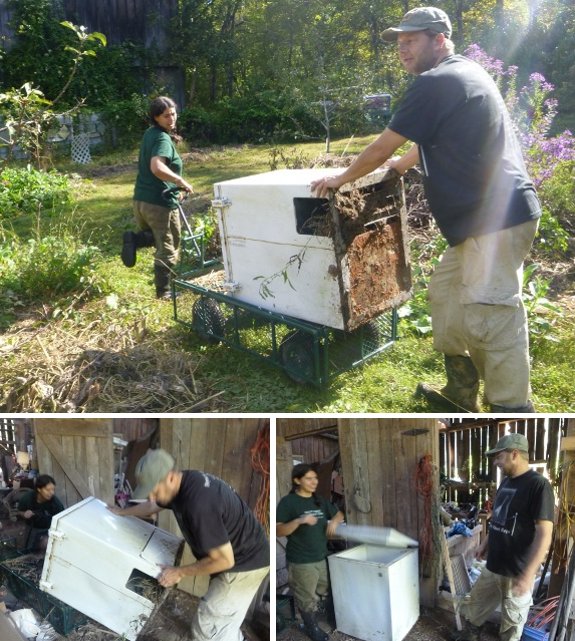
 Next month, we'll be swapping over to the
other composting
toilet hole,
but I wanted to go ahead and put
the roughage on the bottom now while I have corn stalks available.
Learning from our
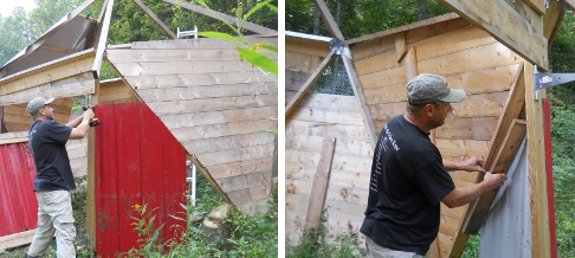
mistakes, I asked Mark to use some of the better junk tin
from the barn roof replacement to cover up the cracks in the walls
of this new chamber.
"I told you so!" Mark
crowed. He did indeed. Back when we initially designed
the composting toilet, I adamantly refused to make the walls
solid, but Mark's gut reaction was right. I'm glad he's
still willing to fix my design flaws even though he knew better
from the beginning.
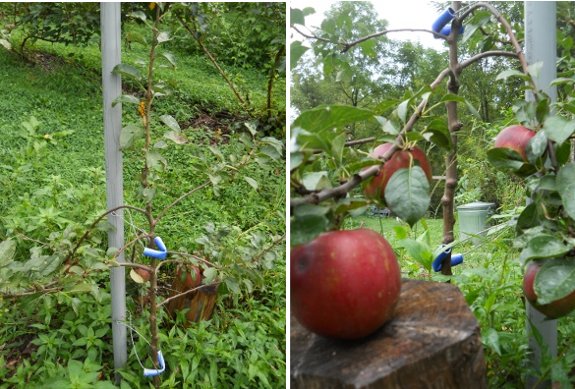
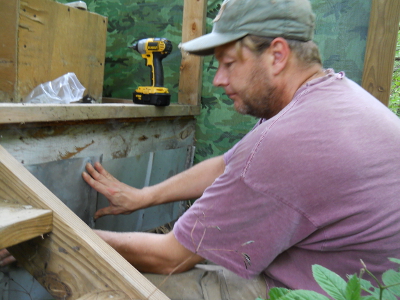
A third or fourth appendage would be helpful on a job like this, but the next best thing for holding a piece of sheet metal in place is one of those medium to large plastic spring clamps.
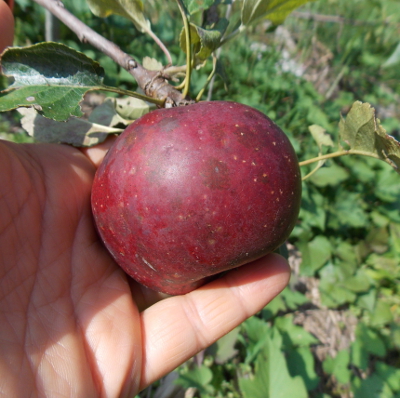 I rustled up another early Virginia
Beauty apple
along with the first ripe Liberty apple so that Mark and I could
taste test them together. The Liberty we tasted had a
simpler flavor than the Virginia Beauty, wasn't as dense, and was
sweeter, all of which led to me giving it a lower score and Mark
giving it a higher score than the Virginia Beauty. (We have
slightly different apple tastes.) For the record, here are
our variety ratings so far for our homegrown apples:
| Variety |
Mark |
Anna |
| Early
Transparent |
6 |
7 |
| Virginia Beauty |
7 |
9 |
| Liberty |
7.5 |
7 |
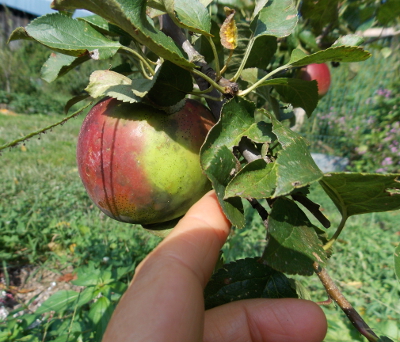 Yet to come in this year's spectacular
fruiting run is six Enterprise apples from our high-density
planting. I had fun lifting up leaves close to the
Enterprise fruits and seeing green spots where the fruit was
hidden from the sun, a bit like developing images on sun-sensitive
paper. Some people even stick paper shapes onto their apples to
create specially-colored fruits, but I let nature do the work for
me.
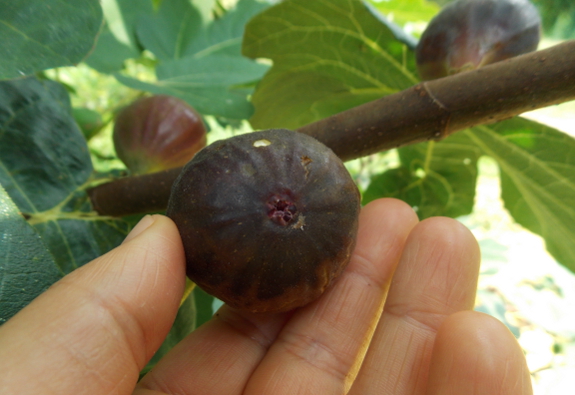
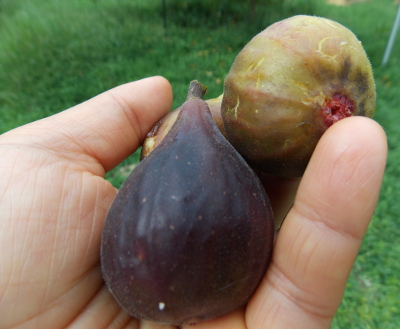 Even though all of the apples were accounted
for, there was one more fruiting surprise waiting for me.
Last year at this time, the first
Chicago Hardy fig was ripening up, but the fruits all looked
stiff and green on Monday, so I figured they were running
late. Then, out of the blue, a fig tripled in size
Wednesday, and by Saturday there were three ready to eat!
The fruits are huge and numerous this year --- maybe we'll be able
to eat our fill for the first time?
We've had some troubled hens
escaping from their pastures lately and we also have some areas of the
garden that could go for some agressive chicken scratching.
The solution seemed obvious
after Anna suggested it. Tune up our last remaining chicken
tractor for some End of
the Summer poultry powered weed eating and fertilization.
It only took an hour to get
this tractor back in running order. I think it's held up pretty good
for being out in the elements these past 4 and a half years.
 "I was wondering if there
is something you do to your fruit trees each year to help them
grow.
I have just started doing that espalier
thing for my trees. It is their first year, I put in aged horse
manure and mulch around each tree. But I was wondering what type
of annual chores your do for your trees."
I'm a very hands-on
gardener, so even our fruit trees (the lowest -maintenance parts
of our garden) get a lot of care scattered throughout the
year. It starts with pruning
and feeding each tree in late winter, the latter generally being a
topdressing
of horse manure scattered very lightly underneath the
canopy. In a perfect world, I would mulch each tree at the
same time I fertilize it, then keep topping up the mulch as needed
throughout the year, but in reality our older trees tend to have
small weeds grow up underneath by summer, then Mark cuts the
growth back a couple of times with a weedeater. If I have
extra cardboard, I may lay down a kill mulch instead, which is
particularly handy around younger trees who can't stand much
competition.
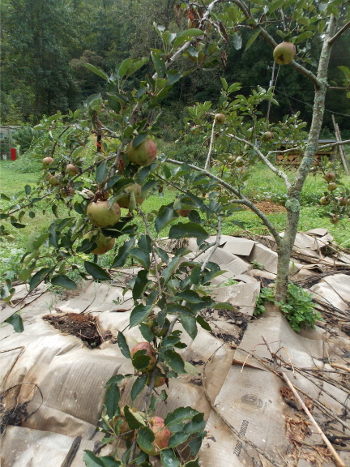
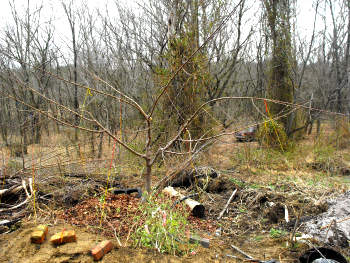 Younger trees also get more
structural attention in the summer when I prune a second time (removing
watersprouts) and train the limbs into shape. At the
moment, I'm training
peaches to the open center system (which I love) and apples
to the central-leader system (which I'm not as sure about
yet). After they start fruiting, most trees will begin to
maintain their shape on their own and will need less summer
pruning and training, but the warm-weather attention is very handy
with young trees since it keeps them on track to produce the
growth you really want while they're small.
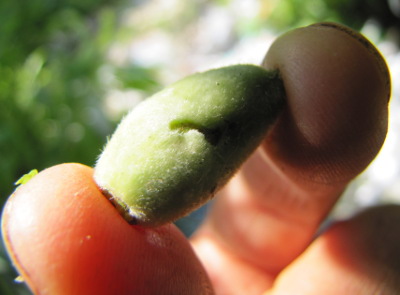 Speaking of fruit, I start
paying attention to the developing fruits as soon as the petals
drop. I worry myself sick about late frosts (although I've
yet to come up with any preventative that works there), then after
the last freeze, I thin
the tiny fruits hard. I think thinning is one of the
most-overlooked aspects of getting high-quality fruit in the
backyard --- don't skip it! I also perform some pest
management, which mostly consists of removing troubled fruits and
twigs.
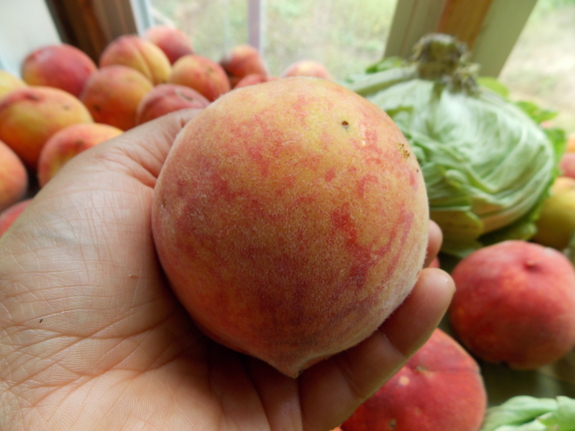 Finally, I pick
and pick and pick! I've learned that fruits on the
same tree don't ripen all at once, and I get a much better harvest
if I pluck
early fruits as soon as they start to develop infection,
then keep picking problematic or particularly ripe fruits as the
season proceeds. We gorge on fruits, dry them, then give
extras away or experiment with other preservation techniques.
 That's the bare bones of
our fruit-tree management schedule, but, of course, I'm always
experimenting with new techniques. For example, this summer,
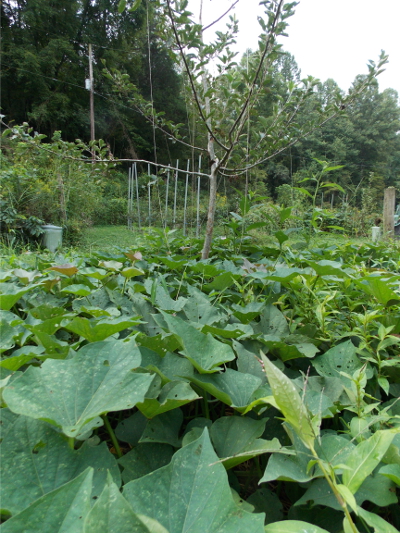
I'm trying out sweet potatoes planted beyond the tree canopies
then used as a living, noncompetitive groundcover under the
trees. Last winter, I started experimenting with grafting
new varieties onto medium-sized pear trees, and next year my
dwarfing apple rootstock will be big enough to stool
and propagate to extend our high-density
planting. But that's all advanced tree husbandry ---
the techniques mentioned previously should be enough to get you
off to a very good start.
Clamping a block onto the
side of the Milwaukee
M12 PVC shear cutter
allows me to cut small pipe sections at the same length without
measuring and marking.
Why am I cutting several
small sections of PVC pipe? To make the new and improved EZ miser chicken waterer.
I always mean to work
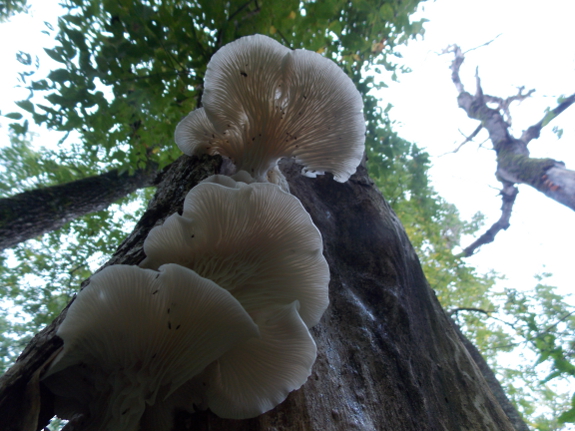
a bit harder on getting my homegrown mushroom production perfected
so we can pick mushrooms whenever we want. The trouble is
that the woods 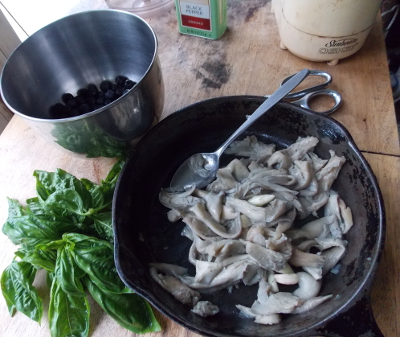 churn out high-quality oyster mushrooms with
such regularity that I have little incentive to get my act
together.
It's hard to complain, though, when the box-elder by the barn
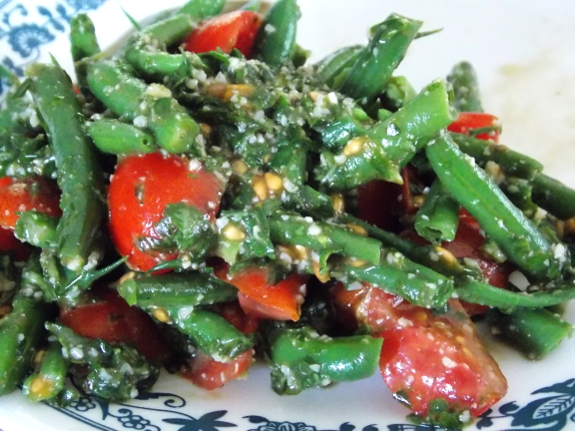
provides the main ingredient for wild-mushroom-and-basil pesto for
lunch, then for mushroom green beans for supper. Delicious!
 It's time to vote on your
favorite entry in our "I
wish I'd known" chicken contest! I've summed up all the entries here, and you can vote by
commenting on the relevant post over on our chicken blog or by
liking or commenting on the relevant post on our facebook
page.
We're looking forward to sharing an EZ
Miser with the
winner and an Avian Aqua
Miser Original
or a DIY kit with the runnerup.
Voting ends Friday!
I think there might be a
better way to haul lumber on the ATV.
Maybe some kind of wooden
holder that goes on the front and back to extend the rack surface area
by 7 or 8 inches on each side?
What does early fall
look like on our farm? It's all about fall colors, fall
flowers, and (of course) the fall garden.
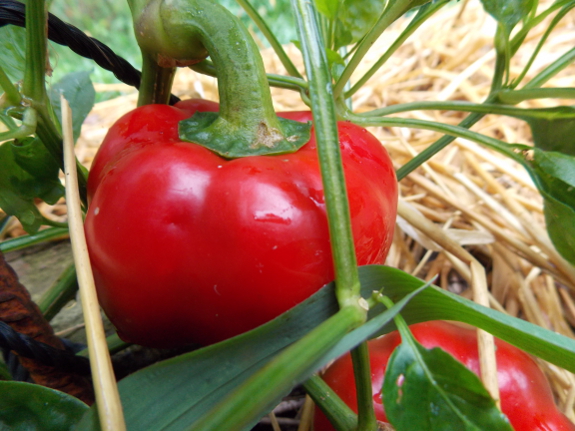
For us, fall colors come in the form of red peppers. Since
we prefer our peppers ripe and raw, I don't put in the effort to
start a bunch of plants early. Instead, we just wait until
the days start to chill down for this annual treat. (We also
have the more traditional fall colors in the woods, with buckeyes
and blackgum having colored up weeks ago.)
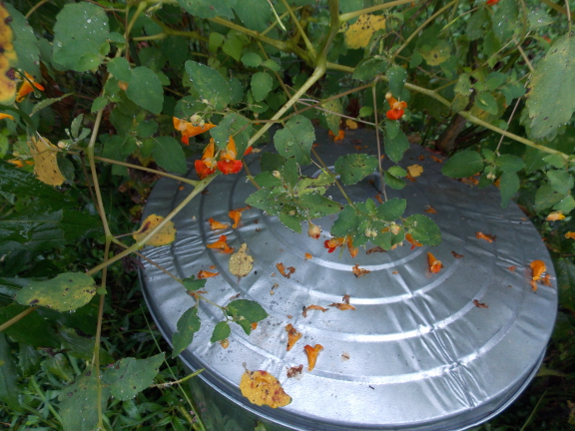
The fall flowers, of
course, are still blooming like crazy. I particularly enjoy
the jewelweed, which attracts hummingbirds (and is so easy to rip
up that I let it go to seed even at garden edges). All these
fall flowers mean the nectar
flow is
continuing, and bees (wild and cultivated) are everywhere.
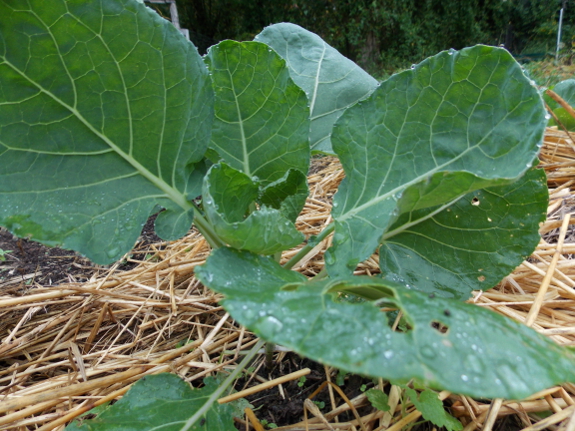
The fall garden is up
and running, too, although we're not eating from it yet. I
figure pea flowers a week ago mean we'll get our first succulent
nibbles soon.
While we wait, I've been counting the rather excessive number of
Brussels sprouts I installed this year. Last year, only
four plants were in a sunny enough spot to bear, and we
loved the vegetable so much we opted to quadruple its square
footage this year. But then I got spooked by the early onset
of tomato blight and set out another dozen or so Brussels sprouts
between the ailing vines. Is it possible we'll get sick of
Brussels sprouts this winter?
Any signs of fall
showing up in your neck of the woods?
Got the Star
Plate chicken coop doors
installed today.
We'll use the small door for
most visits and keep the big one closed except for when we need to get
a wheel
barrow in to replenish the deep
bedding.
I used hardware cloth on the
screen door to increase ventilation.
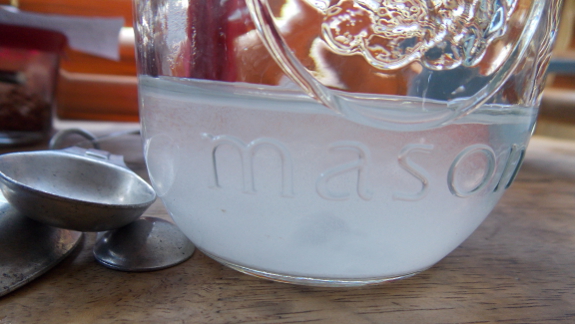
 After reading about my experiments
with low-sugar jamming, one of our readers kindly sent me several packages of Pomona's
Pectin to
try. (Thank you, Rhonda!)
Pomona's Pectin was
discovered by Euell Gibbons' diabetic brother who experimented
with various ways to create low-sugar jam. Gibbons learned
that the pectin in citrus peels (low-methoxyl pectin) uses calcium
phosphate (the form of calcium found in cow's milk) instead of
heat and sugar to create a gel. Modern homesteaders repeat
Gibbons' feats the easy way by purchasing Pomona's Pectin, which
comes with both the low-methoxyl pectin and the calcium phosphate.
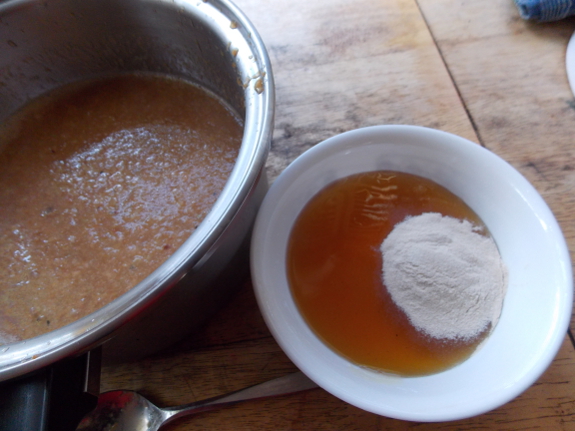
With Pomona's Pectin,
you can use much less sweetener than with normal jams (about 0.25
to 0.5 cups of sugar or equivalent per cup of fruit), and you can
also use sugar-substitutes like honey. I won't repeat the
jamming instructions here, since they come in each box of
pectin. But the upshot is that you mix the calcium with
water, put a bit of calcium water (and lemon juice) in your pureed
fruit, mix the pectin with your sweetener, then bring the fruit
mixture to a boil, add the pectin, and bring it all back to a
boil. You can eat the jam as-is, or can it in a hot-water
bath.
I was nearly out of
peaches by the time my Pomona's Pectin arrived, so I only made one
batch of jam with frozen puree and honey. The result was
delicious --- a lot like freezer jam, but less sweet and thus
fruitier. It didn't gel as well as some of my other jams,
but I suspect tweaking the recipe would have fixed that
problem. I guess I'll have to wait and report back during
jamming season next year!
It's been less than a year
since we put in new apple trees with the high
density method.
One tree died, but the rest
look great. The Enterprise tree has 6 full size apples!
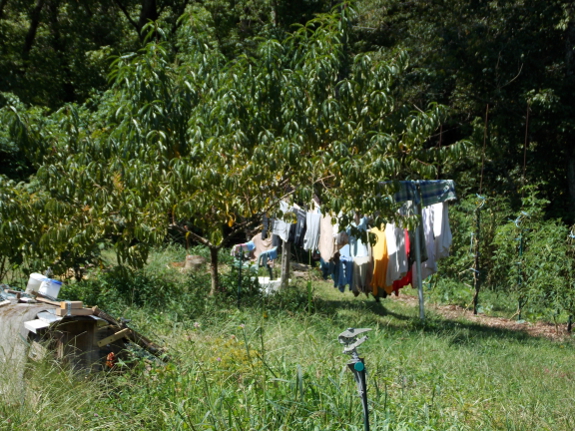
When I laid out my
plantings on the north side of the trailer, I figured I'd fill in
as much space as possible, then take things out as necessary when
the trees got bigger. So I included vegetable garden,
brambles, and even a clothesline in areas that will be 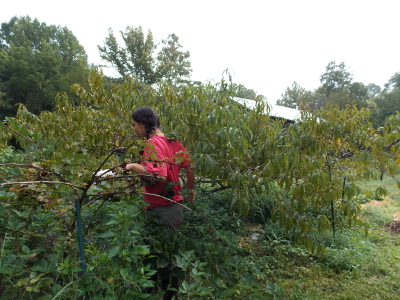 beneath the eventual canopy spread of my
trees.
The great thing about
the fill-it-in-from-the-beginning method is that there's less
mowing and high yields right away. The bad part is that I
actually have to rip out those plants that are now making it
impossible to walk around our peach tree.
I plan to soften the
blow by replacing some of the shadowed blackberries with a home-propagated
gooseberry. And maybe I can move one of the
blackberries over a few feet and get in another year or two of
production?
Making a Star
Plate door extra big has
a price to pay.
You need to cover a half wall
section on each side.
Metal roofing panels are easy
to attach once you get it cut to size.
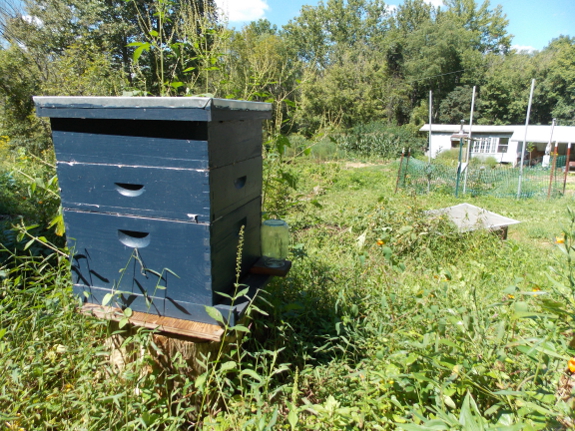
I go back and forth
on the issue of swarm management. For years, I very
successfully managed
my hives so they wouldn't swarm, but this year I toed the Warre line and let my
hive release a swarm.
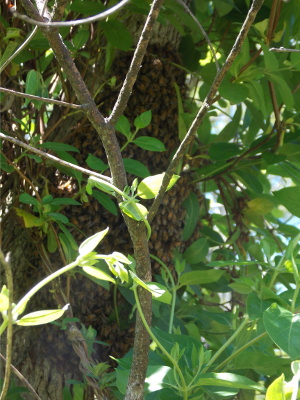
Before I go into the
results of that swarm, I figured I should back up and tell those
of you without bees a bit about why hives swarm. If it's
healthy, most bee hives have the impulse to reproduce in the
spring, but they reproduce at the super-organism level. So,
rather than producing an apple like a tree does, a bee hive
produces a swarm, complete with everything needed to start a new
colony (queen and workers).
Unfortunately, a hive
that puts all that energy into building a swarm tends not to put
away much honey. Which is why so many beekeepers manage
hives to prevent swarms. On the other hand, my autumn varroa
mite counts
confirmed the big benefit of allowing swarming in a chemical-free
bee hive. Our mother hive (which released a swarm this
spring) had a grand total of 6 varroa mites on the sticky board
after a three day count, and the swarm we caught dropped only 1
mite during the same three days. In contrast, the sticky
board beneath the package we purchased this spring contained 86
mites.
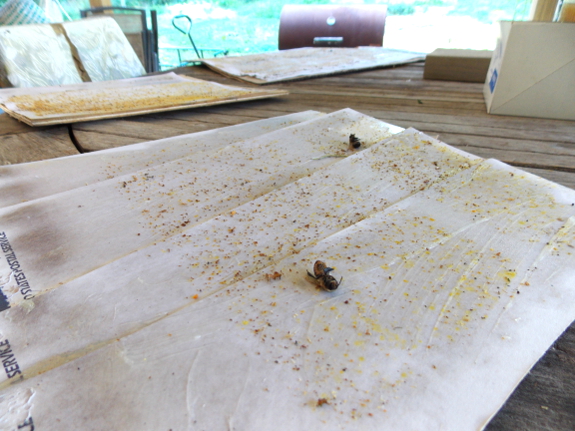
To put those numbers
in perspective, you have to estimate
how many mites that would be per thousand bees in the hive (or at least guesstimate
the relative size of the colonies). This year's package hive
is one of the strongest I've raised, so it's to be expected that
more bees would host more mites. However, I can't imagine
there are more than twice as many bees in the package hive
compared to the other two colonies, so swarming definitely helped
break the pest cycle in the other two hives.
Whether the benefits
of swarming will outweigh the lower honey yields on our farm is
yet to be seen. I'd really love to eventually develop a
beekeeping method that both keeps bees alive without chemicals and provides sweet treats
for the beekeeper.
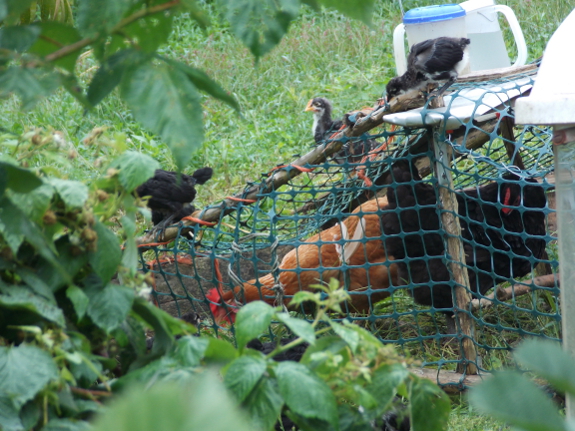
They decided it made a perfect jungle gym.
Permaculture is all about stacking, right?
 Congratulations to Robin and Eva, who won free chicken
waterers as part of our last contest! Since we've finally
perfected the EZ
Miser enough that we're selling it in kit form (10%
off this week!), we decided to celebrate with another contest.
To enter,
email anna@kitenet.net with one or more photos
and your answer to this question: "What is your favorite
chicken variety and why?" To make this round a bit
fairer, we'll be judging the winners ourselves so it doesn't turn
into a popularity contest.
The fine print: All entries
must reach my inbox by Sunday (September 15) at midnight. Be
sure to send photos one at a time if they're larger than 2 MB
apiece. Mark and I will choose winners based on quality of
the photos and written explanation. All photos and text will
become the property of Anna Hess, which means I might share them
with readers via our blogs or ebooks.
Winners: The grand-prize winner will receive your
choice of a premade EZ Miser or a 4 pack EZ Miser kit,
and the second-place winner will choose between a 3
pack DIY kit, 1
Avian Aqua
Miser Original,
or a 2 pack EZ Miser kit. I look forward to
receiving your entries and to sharing clean water with your flock!
(And don't forget to
spread the word among your chicken-keeping friends about our new
EZ Miser kits. We learned from our mistakes last time around
and have a bunch of kits stockpiled, so you won't see a decline in
post quality if we have to fill a deluge of orders. Thanks
for your help keeping Walden Effect running!)
We spent most of today on EZ Miser production.
Our new source for 2 gallon
buckets is the local hardware store in St Paul.
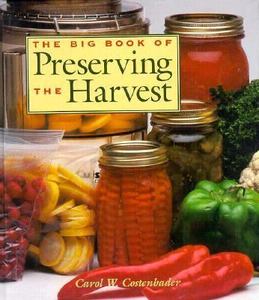 Kayla recommended that I check out Carol W.
Costenbader's The
Big Book of Preserving the Harvest, and since the text was available at my
local library, I figured I didn't have anything to lose.
With chapters on canning, drying, freezing, jams, pickles,
vinegars, and cold storage, this initially looked like the go-to
reference for every well-rounded homesteader to have on her
shelf. Closer scrutiny, though, showed that the recipes
included are more fancy and less basic than you'd want if this was
your single reference guide.
On the other hand, The Big Book of Preserving the Harvest shines in the chapter
introductions, where Costenbader walks you through all of the
basic techniques for each preservation method. I was
particularly taken with the canning section since I haven't canned
extensively and didn't know that people at higher altitudes might
need to leave more head space (so that's why my peach sauce
erupted!) and that minerals in your water can cause the top layer
of canned food to turn brown or gray even though it's still
perfectly safe.
When I first started
the book-learning part of my homesteading education about 15 years
ago, Stocking
Up seemed like
the best option for an all-around basic preservation guide, but
since then I've mostly gravitated toward websites. What
resources do you use when you want to know how long to blanch your
green beans before freezing and how much head space to leave on
top of your canned tomatoes?
The latest
nest box addition worked
out so well we decided to make another one.
We've got more chickens in
this coop so I made it a double.
I thought the front roost
extension would help lure in the more curious chickens and then it
should turn into a game of follow the leader.
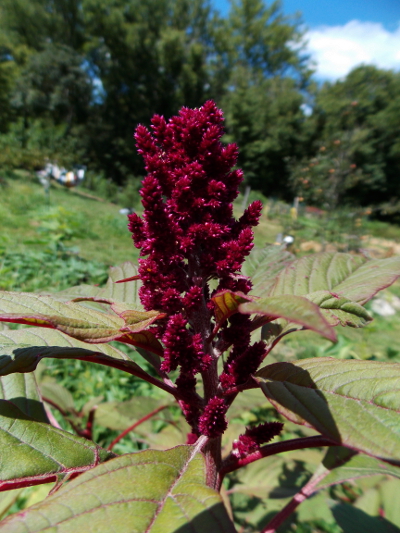 Two readers left comments last week on old
posts about amaranth
we grew for grain a few years ago, which reminded me I wanted to share my
experience with growing amaranth for greens. Generally,
you'll choose either a greens or a grain variety when you plant
(although, presumably, both are multi-purpose to a certain
extent). Our first experiment, when growing grain amaranth,
was with Manna de Montana, which I had trouble getting to
germinate but which then grew into huge plants and produced lots
of seeds. (We didn't even sample the leaves because I didn't
know they were edible at the time.) Joe (a reader) kindly
sent us some seeds for Mayo Indian amaranth this year, mentioning
that he likes the variety for greens, so we decided to give it a
shot.
I planted the
amaranth late (in mid-July), but it still jumped right up and grew
like crazy. The plants have a reddish tinge to the leaves
and produce red seed heads so pretty that my mom put some in a
vase as an ornamental after coming to visit. I wasn't as
keen on the taste, though. The leaves were edible, but when
raw they had a mucilaginous texture like sassafras leaves
(interesting in small amounts, but you wouldn't want to eat a lot
of them), and cooked the flavor didn't stand up to that of our
summer favorite, Swiss chard.
On the other hand,
after a search of the internet, I discovered that Mayo Indian
amaranth is usually grown for the grain, so I guess I've yet to
try a true greens amaranth. Anyone have a favorite variety
to recommend?
Today was the day our new
chicks decided to explore what's on the other side of the trailer.
Soon they'll be big enough to
scratch up mulch, but before that we'll move them to their own private
pasture.
People throw around
the term "symbiosis" all the time, but most don't realize that the
word only means that two (or more) organisms are living close
together, not that they're helping each other out. Symbiotic
relationships can be parasitic (one organism benefits and the
other is harmed), commensalistic (one organism benefits and the
other is neutral), or mutualistic (both organisms benefit).
Why should you
care? If you're a permaculturalist trying to build guilds or
an organic gardener experimenting with companion planting, it's
handy to know where your combinations sit on the
mutualism-to-parasitism spectrum. That way you can grade the
interactions --- parasitism is probably a failure, commensalism is
a moderate success, and mutualism is the holy grail of the guild
world.
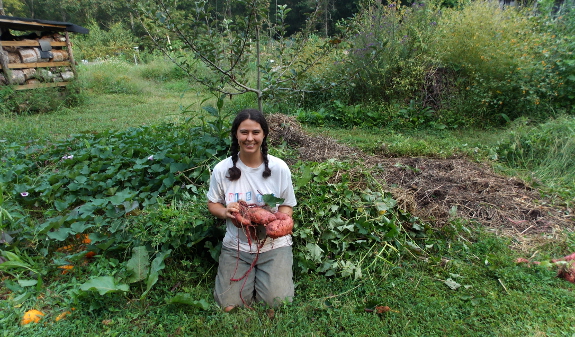
While my sweet-potato
cover-crop experiment is closer to a commensalism than a mutualism, I'm so
happy with the results that I'm going to deem it a glowing
success. This spring, I set out sweet potato slips into some
beds I've developed just past the root zone of a peach and an
apple in the forest garden, and the sweet potatoes thrived.
They soon formed a living mulch beneath the trees, but only barely
rooted there, so they didn't steal any nutrients. When
harvest time came this week, I discovered huge, beautiful tubers,
and the tops of the sweet potatoes created a deep mulch ring
around each tree, perfect for taking the trees into winter.
Meanwhile, the bare ground left behind in the sweet potato beds
made it easy to sprinkle oat seeds for even more biomass
production.
What would turn this
symbiosis from a commensalism to a mutualism? If the sweet
potatoes had done better close to the trees than they would have
done in a vegetable garden bed. I'd be curious to hear if
you've developed any true mutualisms in your garden, but in the
meantime, I whole-heartedly recommend sweet-potato cover crops for
anyone needing to build biomass around fruit trees.
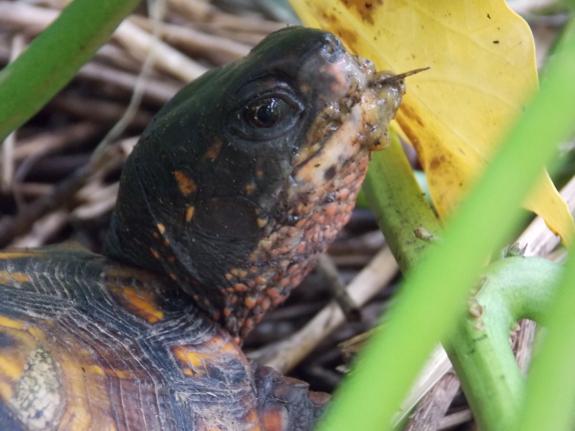
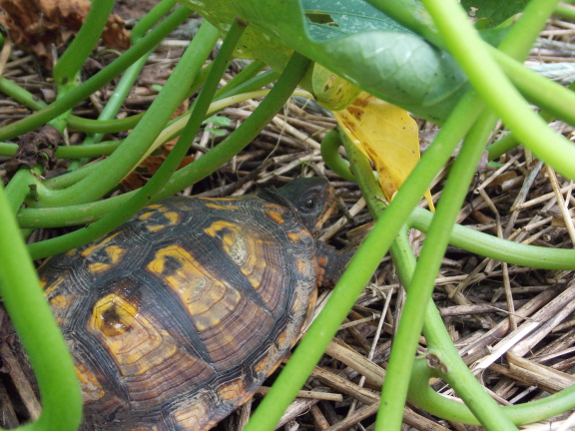
At first, I was
puzzled by the
box turtle I photographed for yesterday's post. Why
was she hiding under the sweet potato leaves when the
turtle-friendly zone is currently around the dropped raspberries
fifty feet away? Then I took a look at the turtle's chin and
realized she had been chowing down on slugs.
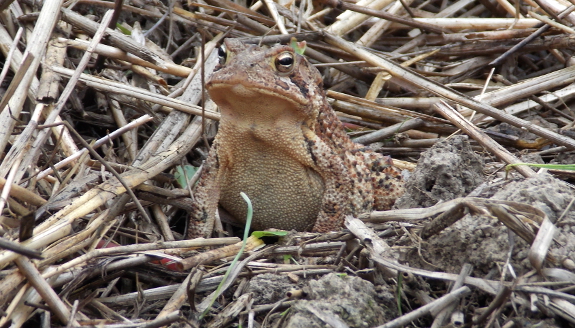
Some gardeners stop
mulching entirely after a few years because they feel the slug
populations get too high. We have seen an increase in
slugs since we started mulching seriously, but our resident
critters seem to keep them mostly in line. Along with box
turtles, other wildlife I've seen in our garden intent on slug
patrol include skinks, worm snakes,
garter
snakes, ringneck
snakes, shrews, mole
salamanders, wolf
spiders, and even (potentially) some species of slugs.
So far, the benefits
of mulch outweigh the negatives, but I suspect the tables would
turn if we tilled. Chopping up the soil would invariably
also chop up a lot of our slug predators, giving slugs the upper
hand. So maybe the moral is --- either till and don't mulch
or mulch and don't till.
Finished up the new
nest box with a proper
exterior door installation.
One brave Leghorn hen settled
in and sat there through all the construction noise.
 I've always looked forward to Friday the
13ths. I figure if everyone else is sure they're going to
have bad luck on those days, there must be lots of good luck
floating around looking for a home, and if I focus, it'll stick to
me. Here's a disjointed account of all of my Friday the 13th
good luck.
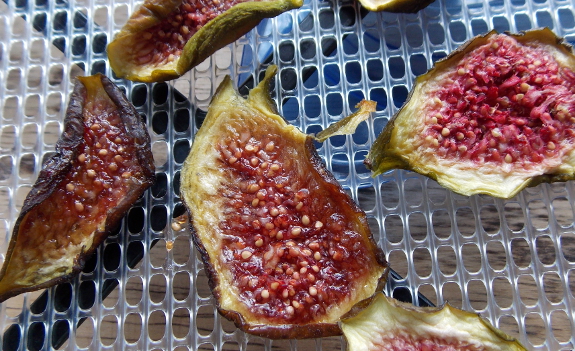
I discovered that
slices of our Chicago Hardy figs dry quickly and taste
delicious. Yum!
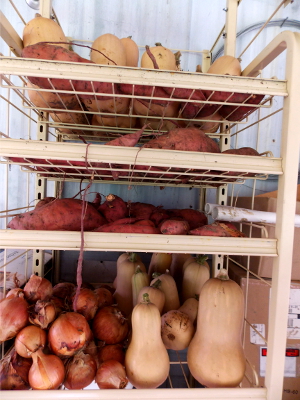
Our curing
rack is now 100% full with winter bounty. I've moved
most of the onions inside to make room for butternuts and sweet
potatoes, and yet some spillover squash still have to cure on the
floor.
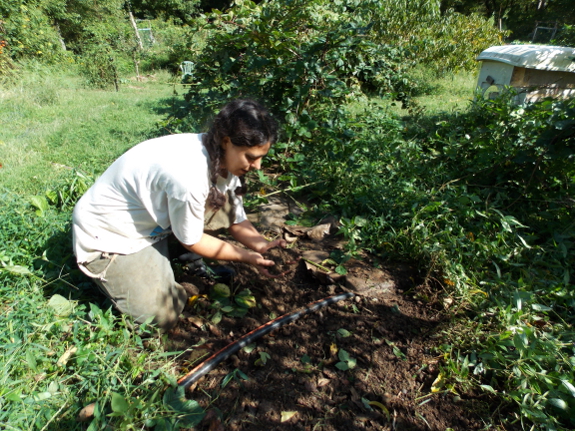
 I dug out the
blackberries being shaded by the peach and discovered that
the soil left behind has been improved dramatically by five years
of mulch and compost tossed on top of the soil.
Transplanting one of the blackberries out of the shade zone and
into a hole in the lawn reminded me that most of that area is pure
clay with about an inch and a half of slightly-dark topsoil near
the surface. In contrast, the soil in the old blackberry row
is loose and dark for at least five or six inches down.
Thanks, worms!
And, despite the
blight, we're still getting tomatoes! The Crazy (a large
tommy-toe), in particular, barely seems phased by the
fungus. Next time I think it's going to be a blight year, I
should include half a dozen plants of this productive variety in
our garden.
Anything lucky happen
to you on Friday the 13th?
Mowing this segment of our chicken
pasture system requires
moving within the flight path of hundreds of worker bees doing their
thing.
This hive has been a bit
aggressive the past few months, which is why I put the bee
suit on yesterday.
 I was interested to see so many comments on
my post about eating
amaranth leaves,
especially Nita's suggestion of Orach as an alternative. We
may try Orach next year, but in the meantime I should report on
the other summer green we experimented with in 2013 --- Malabar
Spinach. (Thanks for the seeds, Shannon!)
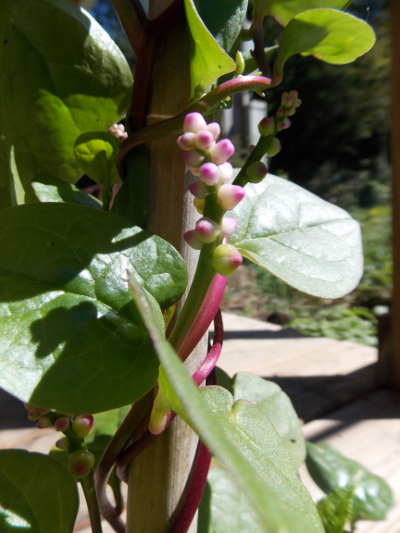
Malabar spinach is a
lot like amaranth in that I think it could slip into an urban
homestead's ornamental flower garden without raising
eyebrows. The flavor is superior to amaranth, in my opinion,
being very spinachy and mild (acceptable even for salads).
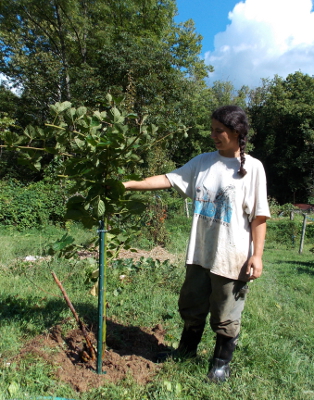
The main problem with
turning Malabar spinach into a main crop is that the plant is a
vigorous vine, so we'd have to provide a trellis. The one
pictured here grew sideways until it was able to take over the
stake I'd put in the ground beside our baby Issai kiwi, then
headed straight up.
I was quite content
with Swiss chard being our sole summer green until three years ago
when blister beetles showed up. Ever since, these night-time
nibblers have turned my Swiss chard into a mess of holes and
frass, with only the youngest leaves available for eating.
Maybe I should be focusing on blister beetle control, not looking
for a replacement summer green?
It took 2 ATV trips to haul 100 two
gallon buckets back to
the barn.
45 stack up nicely in the
back with 10 in the front.
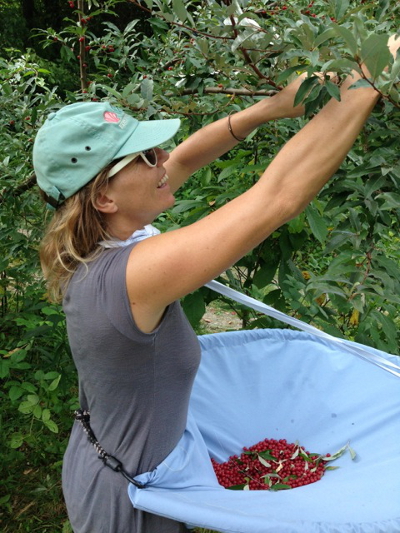 Long-time readers will be aware that our
movie-star neighbor loves to harvest Autumn
Olive berries,
which he freezes for the winter and also turns into delicious fruit
leather.
His farm is overrun with the invasive bush, so he only has to walk
a few feet from his door to pick, but that picking can be
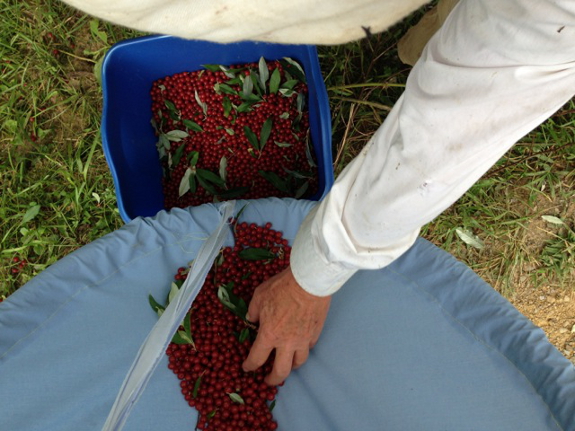
time-consuming. So this year, our neighbor developed the
Berry Apron, a DIY picking tool to make his harvests even
easier. You can follow along at home.
The first step is to
take a length of PVC pipe like you'd use for quick
hoops and thread a rope through it. It's even better
if the pipe has already been used for quick hoops and has
developed a bend. Using this bend (or what you envision the
bend would be) as a guide, sew a channel into an old sheet (the
same way you'd make the top of a curtain fit over a curtain rod),
then push the pipe (with its embedded rope) through. Tie the
ends of the rope 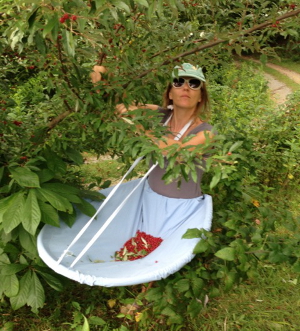 together to pull the pipe
into a solid curve, then make a hole at the peak of the pipe's
curve to attach another rope, which will go around your
neck. Finally, use a bungee cord to secure the Berry Apron
around your back, and you're ready to pick.
The great thing about
the Berry Apron, my neighbor reports, is that it lets you pick
with both hands at once without worrying about channeling the
berries into a bucket. He and Nellie (pictured above)
plucked about two gallons of Autumn Olive berries into their Berry
Aprons in about half an hour, and he could envision using the same
aprons with highbush blueberries or any other non-thorny bush
berry.
I'll be curious to
hear if anyone else tries the Berry Apron and streamlines the
process. Our neighbor was already thinking that version 2.0
might be made with a screen instead of cloth, so bugs and dirt
fall through. Any other suggestions to make this good idea
even better?
One advantage to not having a
mother hen raising new chicks is a reduced foraging perimeter.
We like to have our new chicks near the garden without being
close enough to do any real damage.
Moving the brooder a hundred feet seems to reset
their foraging zone, but when they're this big we start fencing them in
over by the barn with some temporary plastic fence.

I've noticed by
reading back over old posts that I tend to be less than enthralled
with just about every cover crop the first time I grow it, so take
this with a grain of salt, but...I'm less than enthralled with sunn
hemp.
Here are the negatives that jumped out at me this summer:
- Japanese beetles adore the plants, which meant I either had to extend my beetle-plucking to the cover crop beds (and cover crops are supposed to be no work) or let our beetle population expand.
- Sunn hemp doesn't cover the ground quickly (or, really, at
all) since it grows up instead of out, meaning that weeds pop up
in the bare soil around sunn hemp's feet. I didn't pull
them because cover crops aren't supposed to have to be weeded,
so our forest garden has a lot of tall weeds getting ready to go
to seed.
- I don't feel like I got nearly as much biomass production per
unit area with sunn hemp as with sweet
potatoes, and sunn hemp didn't provide an edible return.
- Sunn hemp can't handle the more-waterlogged parts of our
garden (but, then, only oats and rye have thrived there).
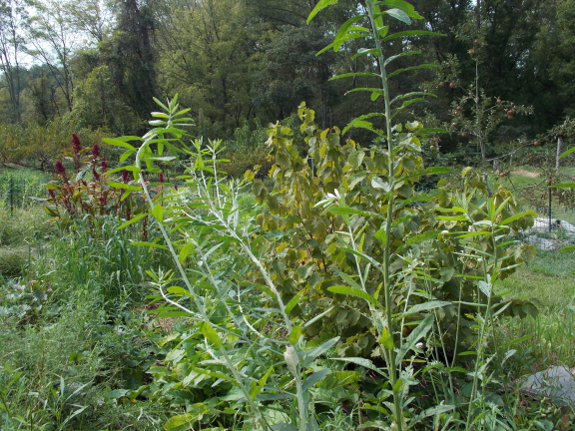
All of that said,
sunn hemp is pretty,
especially now that it's starting to bloom. And the plants
are legumes, so they fix nitrogen, which my other cover crops
don't do. Still, they failed to meet my two primary goals
for cover crops (maximum biomass production and weed suppression),
so I don't think we'll try sunn hemp again.
One of the Georgia
work boots started leaking. I make a point not to submerge them in
water, but today some wet grass was enough to make one of my socks damp.
I'm pretty disappointed in
the longevity. It was a wet year, which meant most of the time during
this 11 month trial I was wearing my Muck boots,
which are still going strong, and there was no walking around
construction sites with nails pointing up.
Maybe the next brand I try
will come closer to feeling like a fair deal?
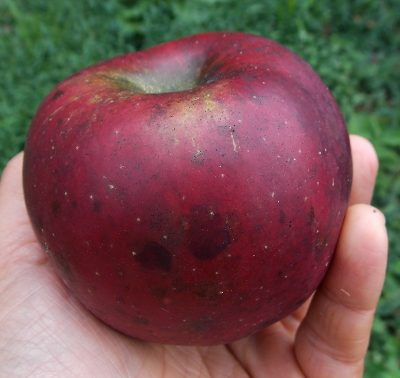 The last new-to-us apple variety we got to
taste this year was Enterprise, from one of our high-density
trees. The apples were big and beautiful, and their flesh
was crisp and just the right texture, which is probably why Mark
gave the variety his highest rating of the year --- an
8. I only rated the flavor a 5, though, because I felt it
lacked the complexity (and particularly the tartness) you'd find
in my current favorite (Virginia Beauty). In fact, I'd say
the Enterprise we tasted had a flavor very much like a
top-of-the-line Red Delicious.
On the other hand, a
bit of research suggests that I might like Enterprise better after
a month or two in storage. The developers
of Enterprise report: "Flavor is sprightly at harvest but
mellows to moderately subacid after storage." (I've come to
realize that "sprightly" in apple descriptions is what I call
"insipid".) Enterprise is a good keeper, lasting up to six
months in storage, so maybe when we have more than six fruits to
enjoy, I'll be able to run a second taste test with aged apples.

By the way, did you
notice I wrote "the developers of Enterprise" above? I chose
a mix of heirloom varieties and new developments for our high
density planting, and Enterprise is one of the latter. This
modern apple came out of the Purdue-Rutgers-Illinois cooperative
apple breeding program (thus the "pri" in the name) using the
crosses shown above. I'm definitely impressed by how well
the scientists imparted disease-resistance in the variety since
Enterprise has fared the best of all our new varieties in our
chemical-free orchard, but the taste issue is still up for debate.

Congratulations to
the winners of our chicken
variety contest! We had  an astonishing number of good entries, so I
made Mark choose the winners. (Otherwise, you all would have
gotten prizes.)
First place went to
Julie for the beautiful shot above of her grandkids and their
Salmon Faverolles. ("Three models for the price of one!"
Mark exclaimed.)
Second prize went to
Kaat who captured the whiskers on her Ameracauna perfectly.
Honorable mention
(but, unfortunately, no prize), went to Kathleen's Buff Orpington:

...Edith's Buff Orpingtons:

...and Pamela's
ISA Brown who survived a neck injury and bounced back in three
days:

To hear more about
these and other breeds, stay tuned to our chicken blog over
the next few weeks. And a huge thank you to everyone who
entered!
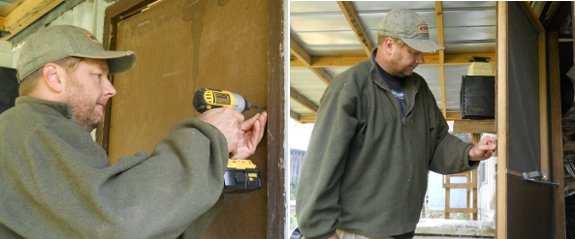
It's that time of year when the kitchen screen door gets closed up until warm weather 2014.
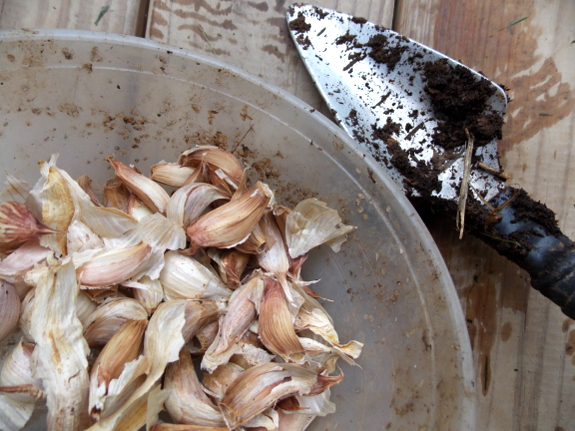
Garlic week is
bittersweet. This is our last big planting push of the year
--- sixteen beds of garlic and potato onions. All that's
left to plant this year after the alliums go in is four final beds
of lettuce, plus rye anywhere I can fit the cover crop in.
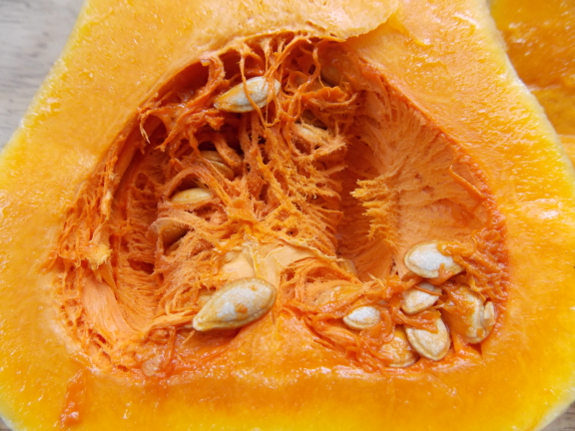
The weather seemed to
want to drive the message home, with the first cold rains of the
year falling Wednesday. I closed the windows and asked Mark to
seal off our screen door, then settled in to make fall comfort food. Chicken
soup with the first of the fall carrots and a butternut pie with
the first of the winter squash remind me that cold weather is a
time of good food, deep thought, and writing.
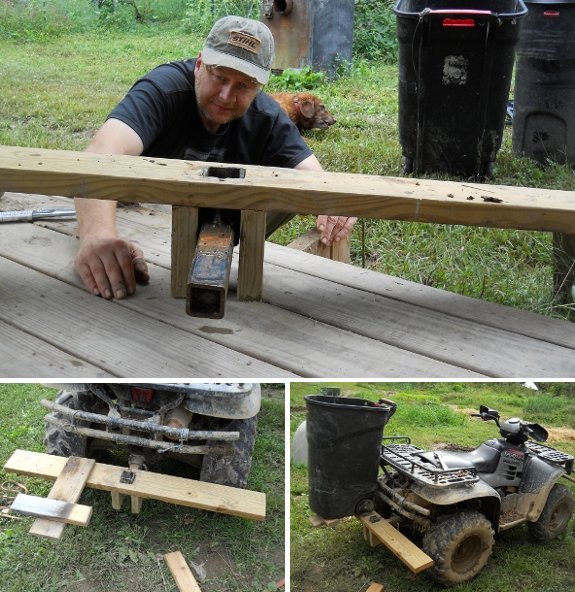
This modification should help us to haul out some garbage and bring in some saw dust.
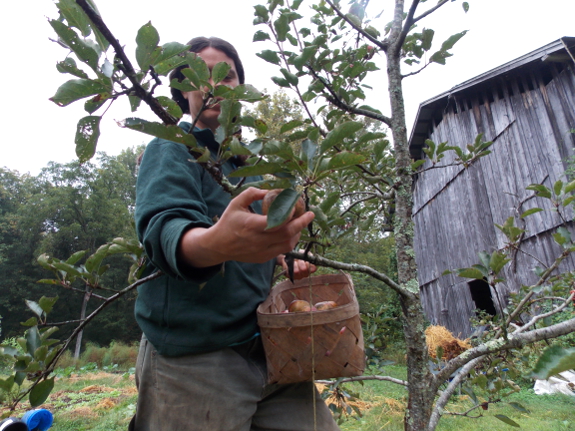
Until this year, I
didn't realize there was a right and a wrong way to pick
apples. Of course, it's important to wait until the apples
are at their peak ripeness, signs of which include dropped apples,
seeds turning brown or black, the green on the apple turning
yellowish, and (most importantly) the apples tasting ripe.
But once you've determined that your apples are ready to harvest,
you shouldn't just go out and yank the fruits off the tree.
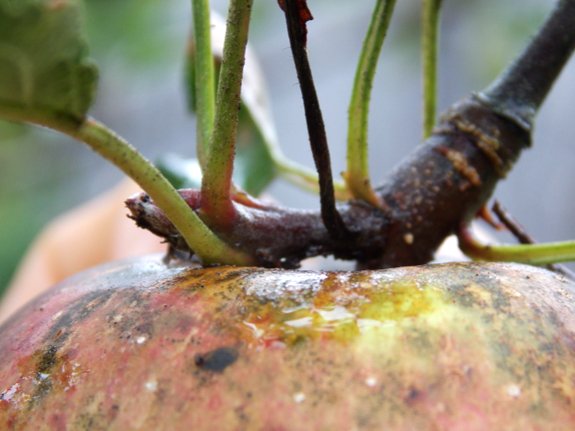
To understand why
not, let me back up and zoom in on the top of an apple.
Fruits like peaches develop on first year wood, but apples are
different. In most apple varieties, flower buds form only on
spurs, which are second-year-and-older, short branches. The
same spur that's holding up this year's apple is also where next
year's flowers are forming, and if you're not careful, you'll rip
the flower buds off right along with this year's fruit, meaning no
apples next year. In the photo above, you can see next
year's flower bud as a pointy structure on the top, left side of
the apple.
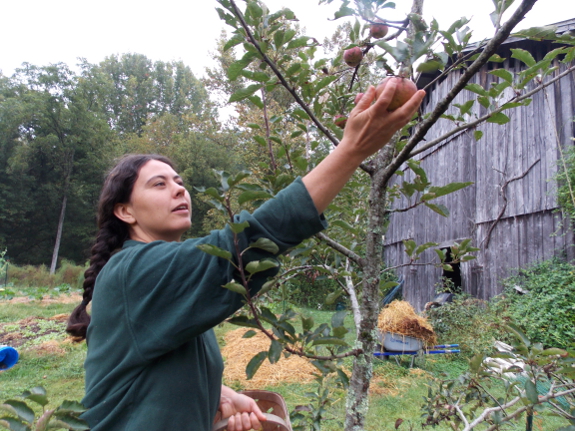
To pick an apple
without damaging the spur, you want to lift and twist rather than
yank. You can do this one-handed, but at first you might
want to use two hands, holding the branch steady with one while
twisting the apple with the other.
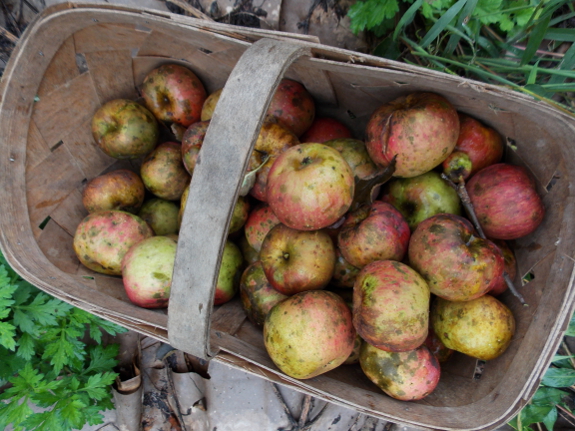
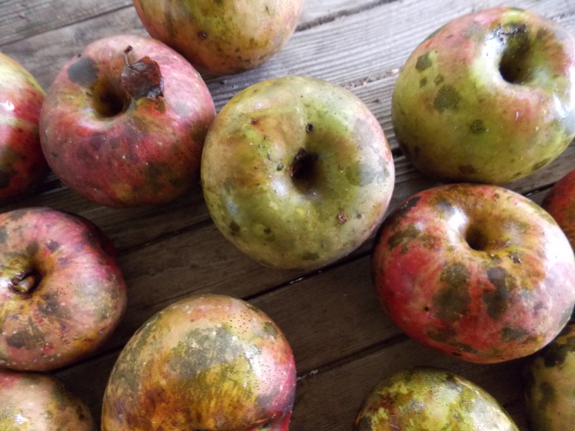
Using this technique,
Mark and I harvested all of the apples from our 4.5-year-old
Virginia Beauty yesterday and got about a third of a bushel.
This is the first year our tree has produced, so I figure that's a
pretty good haul (especially considering that I've eaten at least
a third as many more over the last three weeks. I had to
consume the split
apples so they
wouldn't rot, and they tasted so good I just kept eating...).
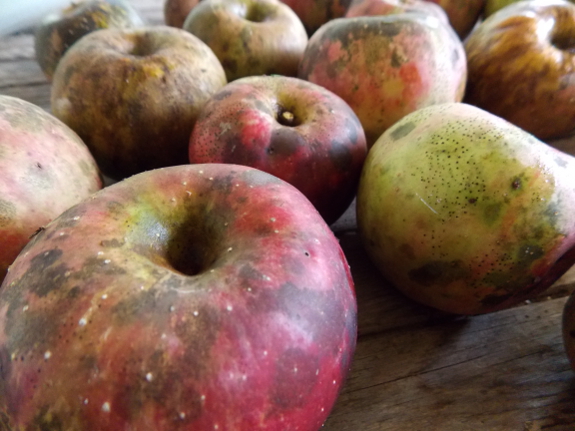
I sorted the apples
and stacked them from best to worst in our crisper drawer.
If we had more, I'd put the fruits away in the fridge
root cellar, but at the rate I'm going through them, these
apples won't last another month. And the crisper drawer was
empty, having stored spring carrots, peaches, and now apples, with
fall carrots not coming in until next month. It's hard to
explain how satisfying it feels to be harvesting (and eating) so
much homegrown food.
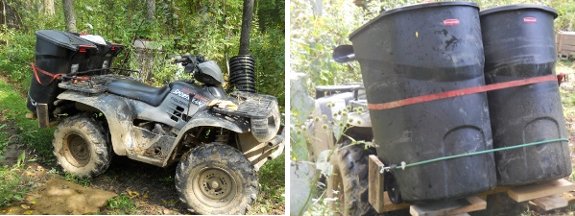
Finished up the ATV
garbage hauling hitch receiver platform holder today.
A bungee cord holds it at the
bottom with a ratchet strap near the middle.
I can see a future
modification to hold some extra buckets of horse manure for 2014.
"Today's Talk Like a
Pirate Day...and I forgot to celebrate it...again!" I exclaimed to
Mark Thursday.
"You mean today's our
anniversary?" he replied.
 I wracked my brain, trying
to remember when
we got married.
"Oops, um, yeah." Then, picking up steam, "So it's pretty
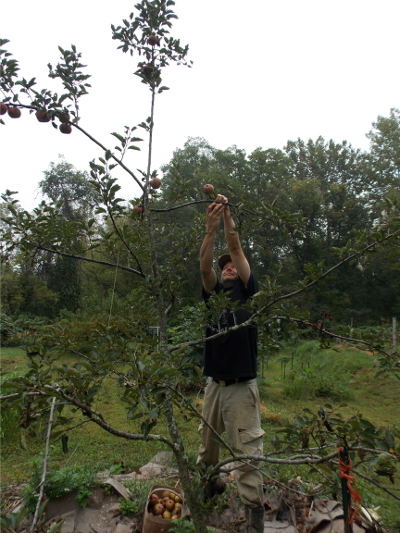
special that we harvested
the apples from our Virginia Beauty today because it's our
wedding anniversary!"
"That's right!" Mark
agreed. "My
aunt gave us that tree from her neighbor's heirloom apple nursery
as a wedding present."
"I guess I should
have gotten you something for this anniversary, huh?" I mused,
then wandered off to google the traditional gift for a fourth
anniversary. "Fruit or flowers!" I exclaimed. "And you
got me fruit today!"
"Well, really, you got me fruit," said Mark,
referring to the way I cut up the dropped apples for our
lunch. But I was intent, instead, on the fact that my sweet
husband had reached high into the tree to pluck the apples over my
head, then shaken the trunk to get the last four from the
tippy-top to fall.
Husband-wife apple-picking --- the best anniversary gift
ever! We may have to pretend it's our fourth wedding
anniversary every year, although next year's traditional gift
(wood) sounds pretty good. Maybe it will equate to an
extra-full woodshed?
The three fig cuttings are now fully established and looking great in the forest garden.
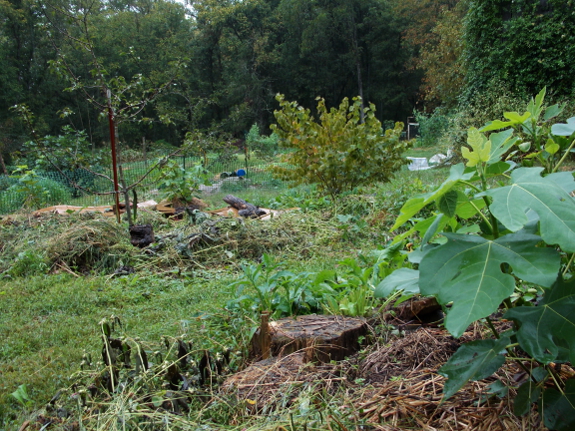
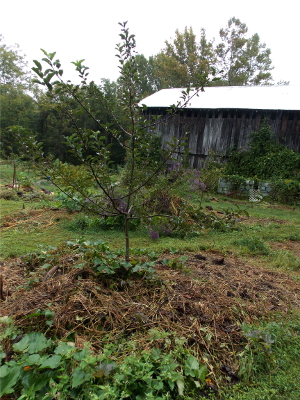 Long-time readers will recall that my young
forest garden
sits in an area where all of the topsoil has eroded away and where
the groundwater pools right at the surface during wet
seasons. My solution to this extremely-troubled growing area
is create my own topsoil, raising the trees' roots up out of the
groundwater as quickly as I can.
As you can see in the photo above, sometimes that's not quickly
enough. The apple tree in the worst part of the forest
garden had to be staked this year because it had no place to put
taproots, resulting in a leaning trunk. In contrast, its
age-mate to the right is thriving in the slightly-better soil not
far away.
This long
introduction is all to explain why, over the last few years, I've
been focusing most of my forest-gardening energy on building
biomass, with some techniques working better than others. My
hugelkultur
donuts were the
best option, but they depend on masses of punky firewood and we've
been doing a better job lately of making sure our firewood stays
dry and gets burned. So I've instead been growing cover
crops (like sweet
potatoes) just
past the root zone of my fruit trees, then piling up the biomass
around the trees' roots to rot down into organic matter, building
soil while feeding the trees.
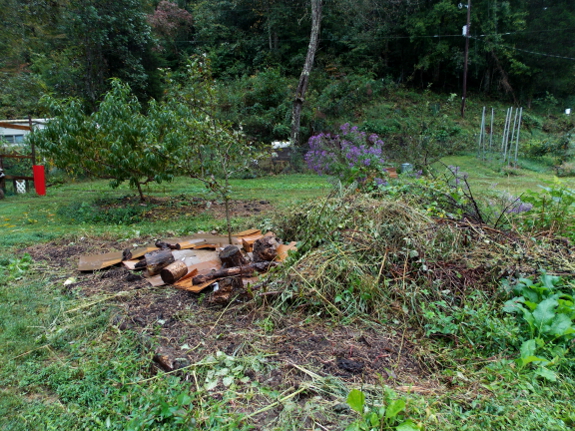
And then there's my brush
pile, shown to
the right in the photo above. All of the prunings from
berries and trees across our homestead end up in this pile, which
reaches over my head during pruning season but slowly rots down to
a gentle mound by this time of year. (Right now, the pile is
also topped by yanked-up cover crops and weeds from the
surrounding bed.)
You can also see how I kill-mulched under most of the fruit trees
last week to ensure they don't have to compete with weeds during
their fall-feeding
window, then
cleared ground further away to plant rye for winter biomass
production.
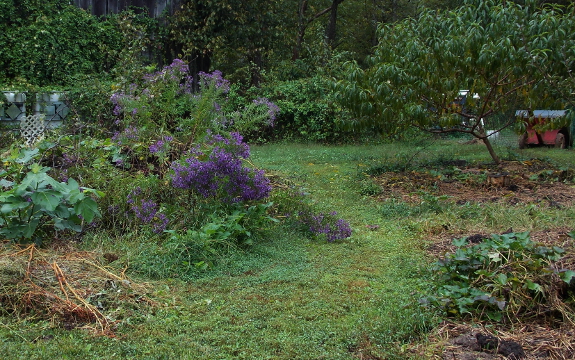
The result of all of
this biomass growing is happy trees covering two-thirds of the
forest garden. The last third just needs a little more TLC
before the soil is dry enough to really keep cover crops happy, at
which point the soil-improvement cycle will take off nearly by
itself. That area is where I'll concentrate any punky wood I
rustle up this winter. I seem to recall a couple of piles of
firewood in the floodplain that didn't get collected last winter
and are probably ripe for hugelkultur right about now....
First I placed a 3.5 foot 2x6
on top of the hitch
height adjuster and
traced the square hole.
Then I cut the hole out so it
sungs onto the metal with a short support on each bottom side.
10 inch decking boards go on
the sides to act as a wall and to have a place for the eye bolts where
the bungee cord gets secured.
19 inch decking boards are
used as the two extended supports with a 2x4 to level it out.
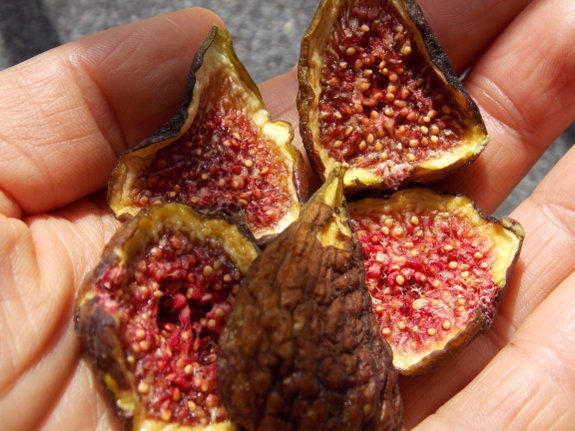
Last year, I had a
love affair with roasting
figs.
This year, I'm not as keen, probably because the figs are bigger,
moister, and don't roast quite the same way when halved.
Instead, I'm returning to my first love --- dried figs.
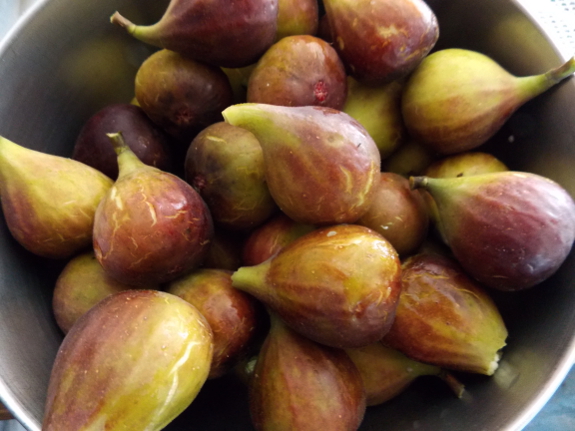
Our Chicago Hardy
tree has been in the ground just shy of 3 years, and it's already
starting to produce masses of figs. For the past week, I've
been able to pick a bowlful every other day, and the bowls keep
getting bigger. Sunday's bowl contained about a gallon of
figs.
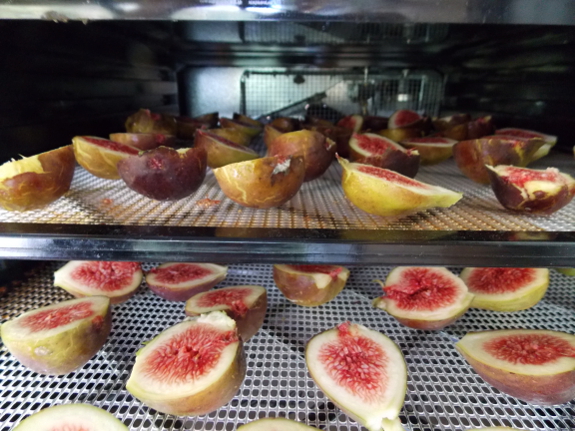
Although it's a bit
wasteful of energy, I dry the figs right away rather than saving
them up in the fridge the way my father does until he has a full
dehydrator load. I wait to pick the figs until they're so
ripe the skins have cracked, and I don't want to risk any
spoiling. So I halved each fruit in my bowl and filled two
trays of the dehydrator, then sat back and waited for the rich
rounds to come out that afternoon.
Next year, I'll save
some of the dried figs for the winter. This year, I'm just
enjoying eating them up, in between bowls of raspberries and crisp
Virginia Beauty apples.
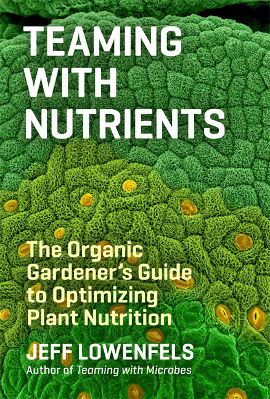 Teaming
with Microbes
was an eye-opening, readable, and beautiful guide to the
microscopic life of the soil, so I was thrilled to hear that one
of the coauthors was coming out with a book about plant
nutrients. Unfortunately, I was very disappointed by Teaming
With Nutrients.
Granted, the topic was a tough one to cover for a layman audience,
but the long descriptions of cell biology and chemistry felt like
a textbook written by an undergraduate, and I can't really
recommend the book.
On the other hand,
after wading through pages and pages of textbookery, I did finally
find some useful information scattered here and there. I'm
going to share some tidbits about how nutrients move through the
soil and through plants in later posts in this lunchtime series,
and in the meantime you might want to check out Steve Solomon's The
Intelligent Gardener for a more hands-on approach to plant
nutrition. I'm still looking for a good book to school me on
the middle ground between these two extremes.
| This
post is part of our Teaming
with Nutrients lunchtime series.
Read all of the entries: |
Why are we making yet another
new
nest box?
We moved all the laying hens
into one coop due to overgrazing of a pasture.
Anna noticed one hen trying
to sit on her sister who was trying to lay an egg. This new double
sitter should fix that problem.
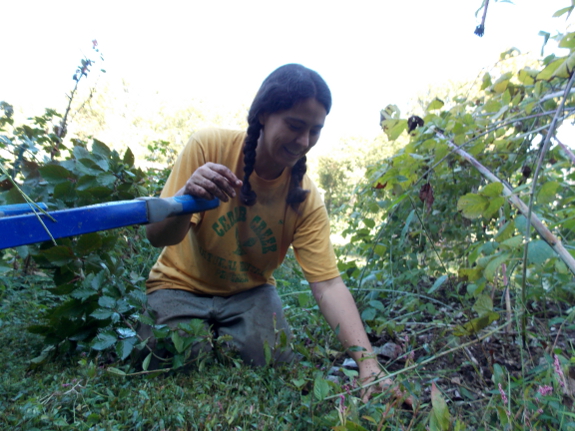
At this time of year,
I'm always torn in several directions. I want to weed and
mulch the fall crops so they'll get off to a good start, but I
also want to take some time to pull back weeds around the woody
perennials so the weeds don't go to seed. Luckily, this year
I have Kayla to help me out --- she can weed the carrots while I
hit the raspberries.
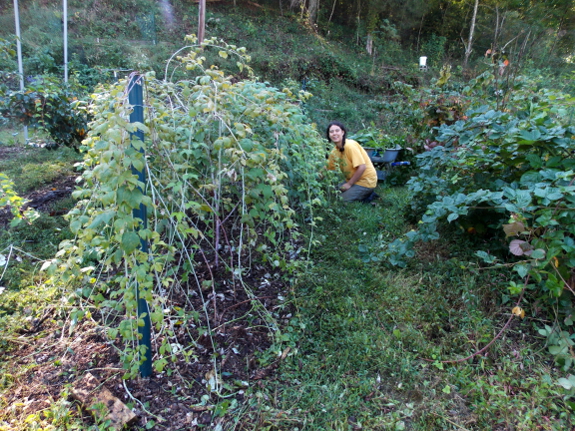
Even with Kayla's
help, though, I'm being a lazy weeder so that I can get to the
other time-sensitive garden tasks on my list (like finishing clearing
up the pastures).
I have a tendency to be obsessive about tasks like weeding, but if
I leave my trake behind and limit myself
to ripping up big weeds, I can work through a row of berries like
the one shown here in less than half an hour. Next up will
be a layer of newspaper to make up for the shoddy nature of my
weeding job, then some deep
bedding from the nearby chicken coop to feed the berries
during their fall root-growth spurt.
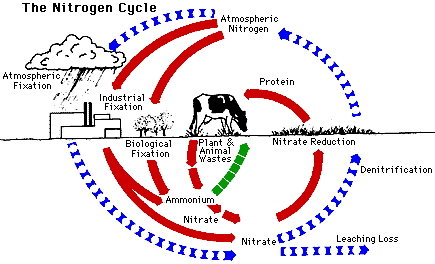 Jeff
Lowenfels' book
provided a handy way of dividing up plant nutrients --- by how
mobile they are in the soil. Understanding nutrients'
mobility helps explain why certain soil nutrients can be present
in the soil but unavailable for your plants, and why others might
not stay put when you add them to your garden.
At one extreme lie
the nutrients that are very mobile in the soil and tend to float
into plants along with water. As long as there's enough
nitrogen in the form of nitrate, sodium, boron, and chlorine to go
around, you won't see deficiencies in your plants. On the
other hand, these mobile nutrients tend
to wash away in heavy rains, so those of you who live in
rainy climates like I do will want to make sure you provide mobile
nutrients only when plants are actively taking them up.
At the other end of
the spectrum, phosphorus, copper iron, manganese, and zinc (and,
in tropical soils, sulfate, nitrate, and chlorine) react
chemically to soil particles. Plants have a very tough time
taking in these nutrients without the help of mycorrhizal fungi,
so you can often see a deficiency in your plants even if (for
example) there's plenty of phosphorus in 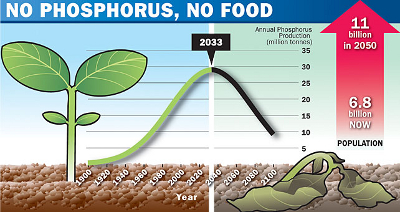 the soil. This is
one reason why farmers worry about the world running out of
phosphate fertilizers --- they're pouring phosphorus into the soil
far faster than plants can use it rather than keeping the soil
healthy so fungi can bring plants the phosphorus that's already
there.
In between these two
extremes lie most of the positively-charged nutrients, which are
attracted to soil particles a bit like a magnet to iron.
Roots have to trade a positively-charged hydrogen ion for each cation they take in (a process
known as cation exchange). These semi-immobile nutrients
include nitrogen in the form of ammonium, potassium, calcium,
magnesium, molybdenum, and nickel. If your soil is low on
these cations, it's probably because you haven't built up your
organic matter enough to hold them in place so your plants can
trade for them.
Stay tuned for
tomorrow's post to learn more about how plant nutrients make their
way into roots.
| This
post is part of our Teaming
with Nutrients lunchtime series.
Read all of the entries: |
Yesterday's nest box ended up forming a double decker nesting station.
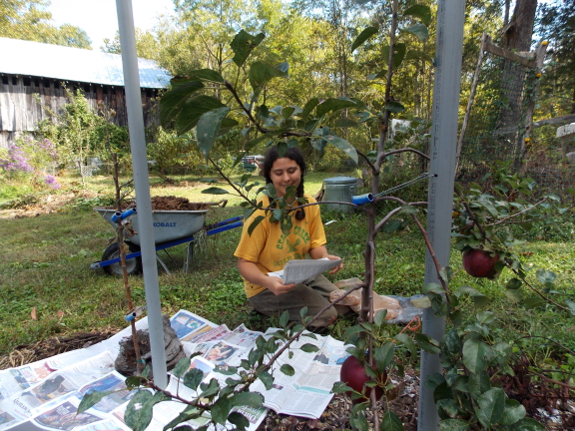
Mulching with
newspapers is dangerous. If you're like me, you might get
sidetracked reading the headlines and take twice as long to put
down your kill mulch. Then your photographer will have to
take a look at an article on hops, and pretty soon you're just
sitting in the garden catching up on the news.
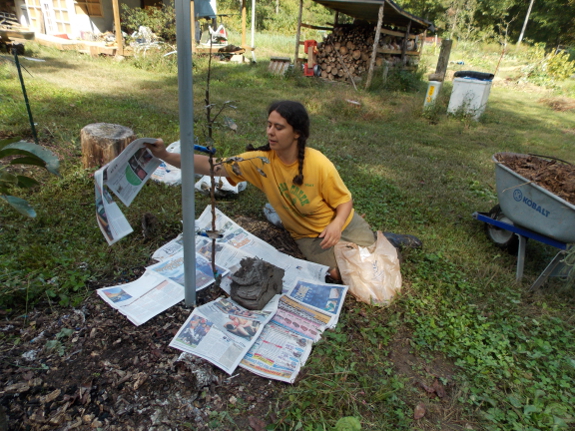
More seriously,
newspaper isn't my favorite kill layer in a mulch --- cardboard
works better and feeds the fungi more --- but the thinner paper
will do in a pinch. Both Mom and Kayla have been saving me
their newspapers, which is why I felt I could do a quick-and-dirty
weeding job Monday instead of ripping up every weed.
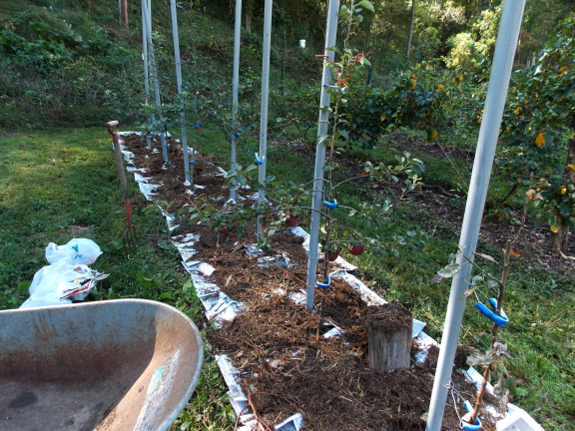
Another disadvantage
of newspaper is that it will blow away in even a mild breeze,
unlike cardboard which tends to stay put in our valley without any
help from above. I've started feeding our woody perennials
in the fall, though, so partially-decomposed deep bedding did a
great job weighing down the newspaper. In the end, the only
real problem is that there's never enough deep bedding to go
around --- clearly we need more animals!
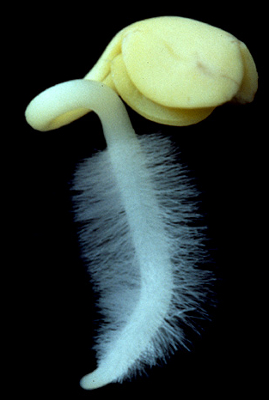 Now that you
understand how
mobile nutrients are in the soil, it'll make more sense when I write about
how those nutrients get into roots. Root hairs (tiny roots)
are constantly growing, searching for new areas full of soil
nutrients so they can trade for cations and suck up anions.
The roots use calcium as a way of determining whether they're
growing in a good direction --- if calcium stops coming in (for
example, if the root hits a rock), the root hair stops growing.
At the same time
they're growing, the root hairs are exuding substances that help
ease their way between soil particles and that also help in other
ways. The root exudates ooze between soil particles and help
dissolve phosphorus, aid in the uptake of metals, and feed
microorganisms that make other nutrients more available. As
I mentioned in yesterday's post, the roots are also pumping out
hydrogen ions to trade for cations in the soil; and (less
importantly), roots pump out hydroxyl ions to trade for
negatively-charged nutrients.
Mycorrhizal fungi act
like extension of the root hairs during this nutrient-uptake
process. The tiny fungi are thin enough and long enough to
vastly extend the reach of the plant roots, and they're also good
at bringing in immobile nutrients like phosphorus, copper, and 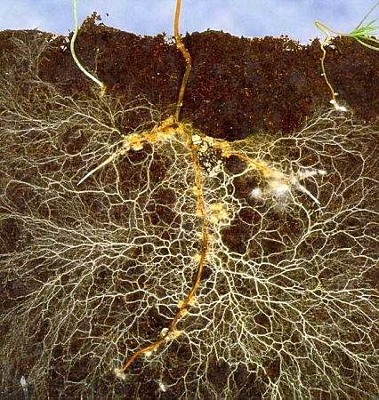 nickel that would be
tough for plants to suck up on their own. Mychorrhizal fungi
also help out by digesting organic matter to free up nutrients,
making yet more nutrients available for plants.
As if all of the
above methods of getting nutrients aren't complicated enough,
plants also have to deal with weeding out nonessential nutrients
(like heavy metals) that would compete with essential nutrients in
the plant. Some of the exudates released by roots are used
to bind these nonessential nutrients into the soil so they become
unavailable, and mychorrhizae also help out with this binding.
Why should the
gardener care about all this microscopic action? First, it's
handy to understand how important microorganisms are in teaming
with your plants so you'll spend energy keeping the microbes happy
(with lack of tilling, the addition of organic matter, etc.)
But you should also be aware that the work of soil microorganisms
and mychorrhizal fungi slows down drastically during cool weather,
so your plants will have more trouble finding nutrients in early
spring. That might be a good time to pay more attention to
ensuring easily-soluble nutrients are available right up against
seedlings' roots so they can suck up nitrogen without bothering
their sleeping fungal neighbors.
| This
post is part of our Teaming
with Nutrients lunchtime series.
Read all of the entries: |
These milk crates fit nicely
onto the ATV
garbage hauling hitch platform.
Driveway repair got a lot
easier with this modification.
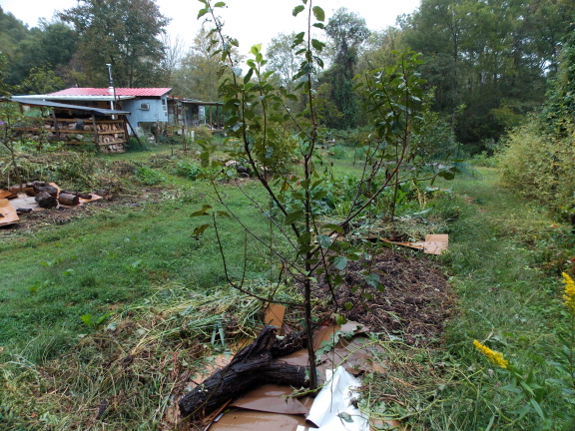
While I was cleaning
up the forest garden, I decided to bite the bullet and rip out the Methley plum
I've been babying for the last four-and-a-half years.
Several people have sung the praises of their European plum trees
in the last year, telling me how much the trees produced with
little care, and I figured I'd obviously just chosen the wrong
species by going for an Asian plum.
Since the two new
European plums I installed last winter --- Seneca
and Imperial Epineuse --- have already grown considerably more than the Methley
ever did, I suspect my gut reaction was right and I should have
been more hard-hearted sooner. In fact, I was able to
literally rip the Methley plum out of the ground bare-handed, a
sure sign that it was lingering, not growing, in our soil.
Now I just need to
wait another three to five years for these better plum varieties
to produce. It's a bit easier to be patient now that other
fruit trees on our homestead are starting to bear...but not much.
 Now that you
understand how
nutrients move through the soil and into
plants, you can
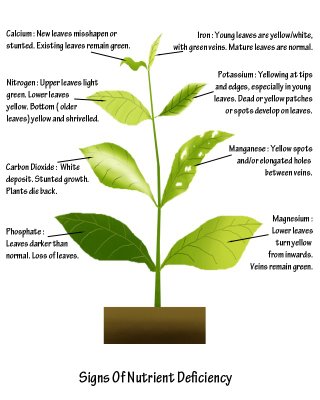
finish the journey with nutrient movement within plants. A
nutrient's mobility once it gets within a plant's cells will
determine where deficiencies show up, as well as how you should
apply fertilizers. For example, Jeff Lowenfels is quick to
point out that foliar feeding is really only appropriate for very
mobile nutrients since immobile nutrients won't be able to move
out of the leaves to where they're needed by the plant.
I'll start with those
immobile nutrients. Calcium and boron are the least able to
move once they've been consumed by a plant, so any calcium or
boron deficiencies will show up in growing tips. More mobile
nutrients are usually moved from older (less efficient) areas to
these critical growing zones, so any problems in very young leaves
and buds are likely to be due to nutrients the plant really can't
move at all.
Deficiencies of
slightly-more-mobile nutrients (like nickel, molybdenum, sulfur,
copper, iron, manganese, and zinc) will show up in young
leaves. Finally, very mobile nutrients in plants include
nitrogen, phosphorus, potassium, magnesium, molybdenum, and
chlorine. Since plants can take mobile nutrients away from
old, inefficient leaves if necessary and move them to young
leaves, deficiencies tend to show up in the oldest leaves first.
Lowenfels also went
into depth about what each nutrient is used for within the plant,
but I didn't feel that information was immediately useful for the
average gardener. So, if you want to learn more, check out Teaming
with Nutrients
and read for yourselves.
| This
post is part of our Teaming
with Nutrients lunchtime series.
Read all of the entries: |
The ATV
hitch receiver platform garbage hauler broke on me today.
I knew I was pushing my luck
with that extra bucket.
Maybe a piece of angle iron
would fix it and make it stronger?
 "Please explain (again)
your take on soil testing. I've never
had one done and I've gardened for many years. As your
photo
depicts, deficiencies are detectable by plant performance. I
employ crop rotation and try to compensate for particular plant
needs at or before planting and religiously compost."
A lot of gardeners
test their soil and never use the information, so I know what you
mean about it not really being necessary. I generally only
send a soil sample off to be tested if I have a reason to.
Specific testing purposes might include (from most to least
important for me):
You
want to plant blueberries or something similar in average soil. If you're going
to need to change the pH of your soil, it's good to have an idea
of how acid or alkaline your soil is at the moment.
You
want to get an idea of how you're improving (or worsening) your
soil over time. I like to look at the percent organic matter and CEC of my soil because these
figures are (hopefully) going up every year. This is
generally just interesting, but can be important in permanent
perennial systems (like pastures) where you never really see the
dirt, so you can't just guess based on on color and texture.
You
plan to remineralize
your soil.
If you believe that ratios of nutrients are just as important as
the absolute amounts (which I'm on the fence about), you'll need
more solid data before you can add minerals to your soil.
 You're concerned there may
be a slight deficiency that isn't showing up in your plants. Most soils are
lacking in something (related to the remineralization concept
above). Your plants might just slow down a bit due to a mild
deficiency, but if you're getting most or all of your nutrition
from homegrown food, then a mild deficiency in your plants could
turn into a mild to moderate deficiency in yourself. You
might not care much if your plants are only operating at 80%
efficiency, but I'll bet you care if your kids are.
You
think your soil might contain heavy
metals.
A one-time soil test is probably worth doing if you live in a city
or have some other reason to believe your soil might have heavy
metals present above the recommended levels.
You
see some kind of nutrient deficiency in your plants, but can't
figure out what it is. Even though you can tell some problems apart
visually, others look pretty similar. If you're a
large-scale farmer, you might even choose to take a plant tissue
sample in this situation instead of a soil sample.
You
are a chemical farmer. If you're buying any kind of chemical fertilizer,
you should definitely get your soil tested first and see how much
of it you need. On the other hand, if you fertilize with
compost, this isn't so important.
There are probably
other reasons you'd want to test your soil, but those are the
first ones that come to mind. What would you add to the
list?
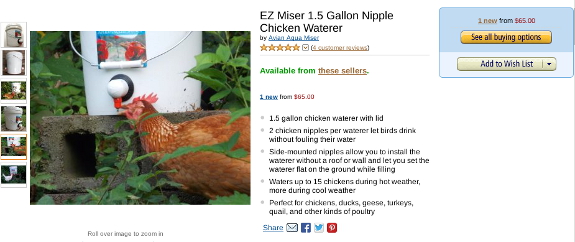
Over the last few
years, several of you have emailed me to ask if we have an
affiliate program so you can make a little cash by pushing our chicken waterers.
I've had to regretfully say no in because I hadn't jumped through
the technical hoops to make it happen...until now!
We've just started experimenting with selling on Amazon and they
have a built-in affiliate
program.
So now the answer is yes --- you can earn anywhere from $1.72 to
$7.48 each time someone follows your affiliate link and buys one
of our chicken waterers. (You can use Amazon's affiliate
program to plug my ebooks too, but the 4 to 17 cents you'd get per
book sold probably isn't worth much effort.) We've been
using Amazon's affiliate program from the other end for years and
I've been pretty happy with it, especially since they credit sales
to your account if someone clicks your link and ends up buying
something different.
At the moment, we've
only listed our Premade
EZ Miser and
our EZ
Miser kits on
Amazon (plus you
can see my books here). I'll keep you posted if we decide the experiment
is worth expanding. Thanks in advance to anyone who decides
to sign onto the affiliate program and plug our new-and-improved
chicken waterer to your friends!
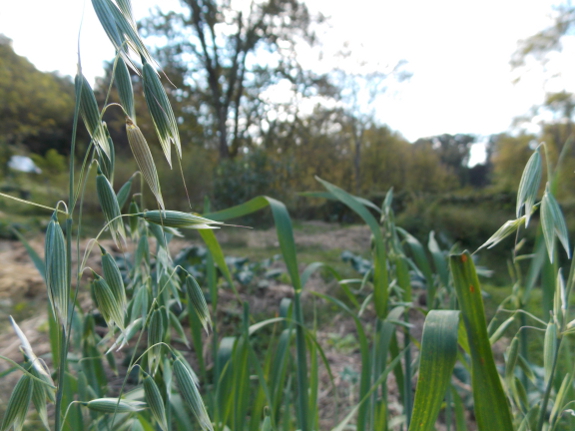
What happens if you
plant oats
for a cover crop too early (before August 1 in our zone 6
garden)? They go to seed rather than winter-killing in the
vegetative stage.
If you catch the oats
just as they begin to bloom, though, I'm thinking you can scatter
rye seeds over the bed, cut the oats down, and get a second round
of biomass-building in the same season. Time will tell
whether that experiment works.
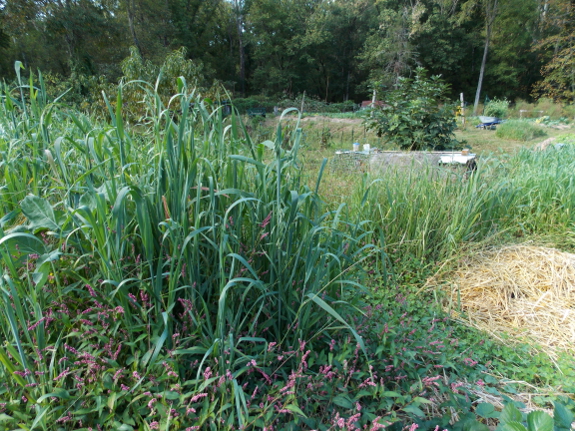
Why did I plant oats
so early? I've been trying to grow biomass in the back
garden for most of the last year, but it's been so wet (and that
area is always so soggy) that buckwheat wouldn't grow. Oats
and rye are the two cover crops that have proven their ability to
deal with waterlogged clay soil, so I went ahead and planted the
former on July 22. Due to weeds that crept into the poor
stand of buckwheat early in the season, I'll be kill mulching the
whole garden area anyway, so a few oat seeds shouldn't make much
difference.
The FS-90R trimmer is Stihl the best way to cut down an oat cover crop.
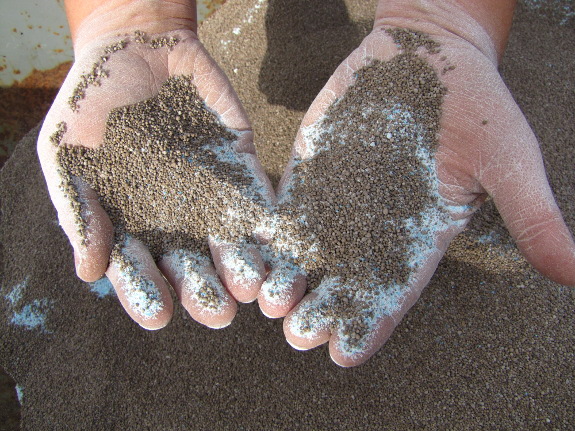 "I was wondering if you could clarify your
comment about being
on the fence about ratios vs. absolute quantities. Based on your earlier
mineralization posts, I'm supposing that you're on board with balancing
ratios and on the fence about the absolute quantities. Frankly,
I love testing my garden soils, but I'm an environmental
scientist and a data nerd
  I tried Solomon's
remineralization techniques this year but didn't notice
any stellar gains in plant performance. My TCEC is rather low
(5-6) so I'm applying bentonite clay and biochar to help boost
nutrient retention. I'll give it a few more years. To me, the
soil test is a crucial step towards establishing healthy,
balanced soils."
As you rightly
remember, I also followed Solomon's remineralization lead this
spring, and (although I haven't posted here yet about the
results), I was disappointed. Part of my disappointment
came because the
applied minerals burned the plants I had growing at the time (there's no true fallow
season in our garden), which may be due to the way I added
micronutrients in chemical form. I'm okay with a short-term decline, though, if I
see long-term improvements...but I didn't. In fact, not only
was there no flavor improvement, there actually seemed to be a
decrease in growth (although that's likely due to the cool and
overcast summer we had). As John
commented on the same post you reacted to, I might get
better results from more natural nutrient sources, like seaweed.
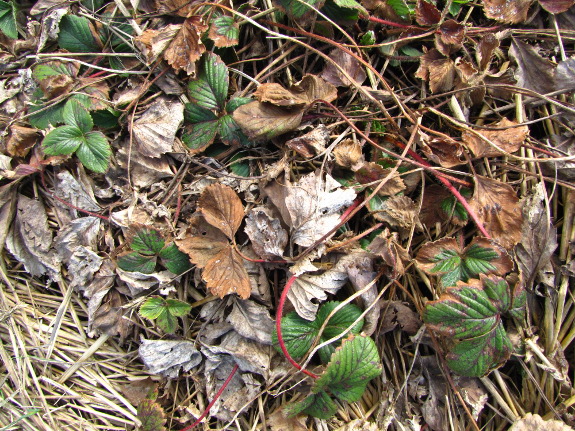 On the other hand, I'm not
100% sold on nutrient balancing being important. The concept
makes intuitive sense, especially if you look at the way ions are
pumped into cells. But I haven't delved deeply enough into
the scientific literature to discover whether there are any solid
studies supporting Solomon's hypotheses.
In the meantime, I'll probably test my soil again this fall to see
how the numbers look post-remineralization. And hopefully
next summer will be a more regular season, so I'll get a better
idea of how the garden is doing. Until then, I'm not ready
to recommend for or against remineralization, so I remain dubious.
We liked our first Mainstays
kitchen island so much we decided to get another one.
Anna said it was easy to put
together, and the fact that it comes in a large box made it easy to
haul back here on the ATV.
The first one cost about a
hundred dollars last year, but this one went up to 110.
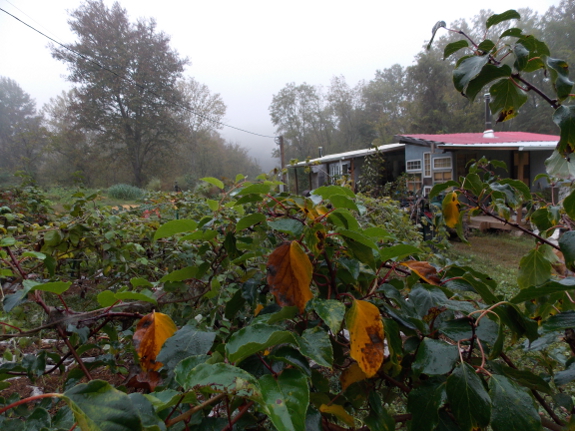
It's leaf
season! I look forward all year to the time when free
biomass falls out of the air, so I start raking as soon as the
first drifts pile up.
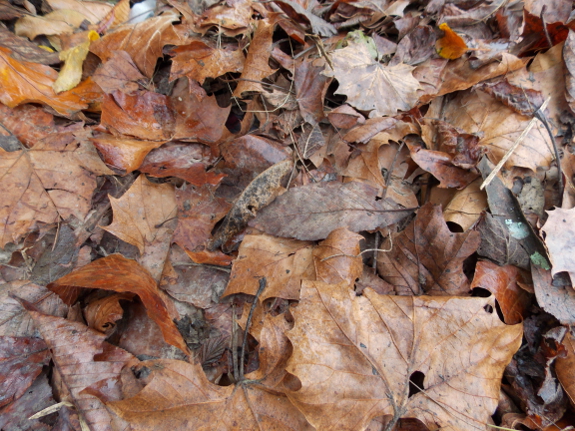
Right now, that means
sycamores, buckeyes, and box-elders (and walnuts, but I work
around those). The combination of early leaves makes a good
mixture that clumps well (the box-elder and buckeye) while not
rotting away immediately (the sycamore).
Later, the tougher
oak leaves will fall, which make a long-lasting mulch and
soak up lots of nitrogen under the chicken roosts. Oak
leaves tend to blow around more, though, so I try to put them
under fruit trees where the limbs shield the breeze.
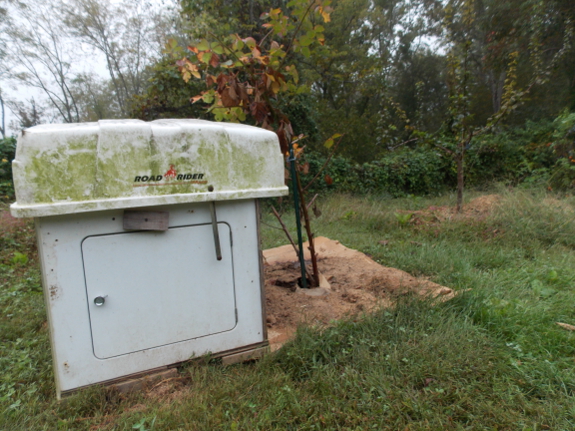
I can go through a
pretty much unlimited number of leaves just putting the fruit
trees and bushes to bed, but I do my best to stock some up for
adding to the chicken coop throughout the winter. I was
thinking of building a special leaf-storage bin that would let me
push leaves in from the top and open a door on the side to pull
them out, but then I realized the cleaned-out brooder
was perfect, and wouldn't be needed again by chickens until
spring. Lets see how many bags
of leaves I can cram inside.
 Our last two chicken-related contests have
been so well received (with entries still trickling in even though
they're over), so I decided to give you one more opportunity to
win free stuff and share your chicken adventures.
To enter, email anna@kitenet.net with one or more photos of something special you've
built for your chickens. Your entry can be a coop,
a homemade incubator, an automatic feeder, or even your spin on
one of our kits. (Or anything else you can think of!)
If you want to take a minute to write about how you built your
chicken attraction, I'll be more likely to share your photo on the
blog, but text isn't mandatory for this contest.
The fine print: All entries must reach my inbox by Sunday
(October 6) at midnight. Be sure to send photos one at a
time if they're larger than 2 MB apiece. Mark will choose
winners based on quality of the photos. All photos and text
will become the property of  Anna Hess, which means I
might share them with readers via our blogs or ebooks (but I don't
mind if you keep the photos up on your website or use them in any
way you want).
Winners: The grand-prize
winner will receive your choice of a premade EZ Miser or a 4 pack EZ Miser kit,
and the second-place winner will choose between a 3
pack DIY kit, 1
Avian Aqua
Miser Original,
or a 2 pack EZ Miser kit. I look forward to receiving your entries and to sharing clean
water with your flock!
This contest is
brought to you by the EZ Miser, now available on Amazon in both premade and kit form.
The latest nest
box was not working out. It may have been too high.
Now they're both at the same
height, which hopefully will put an end to eggs on the floor.
Want more in-depth information? Browse through our books.
Or explore more posts by date or by subject.
About us: Anna Hess and Mark Hamilton spent over a decade living self-sufficiently in the mountains of Virginia before moving north to start over from scratch in the foothills of Ohio. They've experimented with permaculture, no-till gardening, trailersteading, home-based microbusinesses and much more, writing about their adventures in both blogs and books.
