
archives for 05/2013
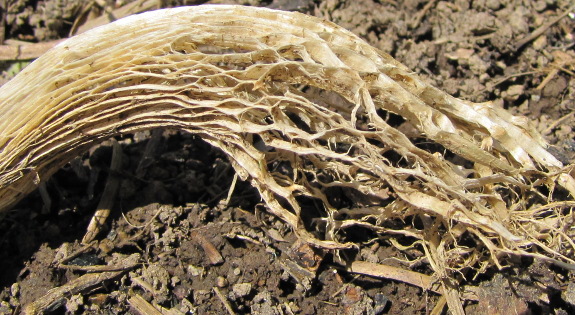
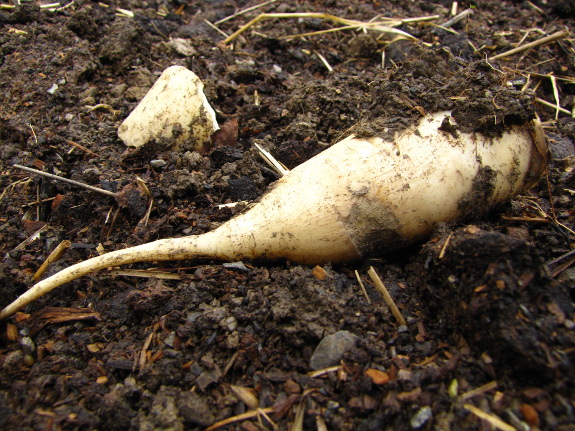 The effects of cover crops are surprisingly
long-lasting in the garden. This spring, I've been finding
stunning oilseed
radish skeletons littered throughout the garden beds, along with a
few roots that must have survived the winter by freezing solid then
slowly thawing during our cold spring. Of course, the most
noticeable effect of winter cover crops is soft, dark soil in beds that
barely have any weeds, and I've definitely been enjoying the easy
spring soil prep that radishes made possible.
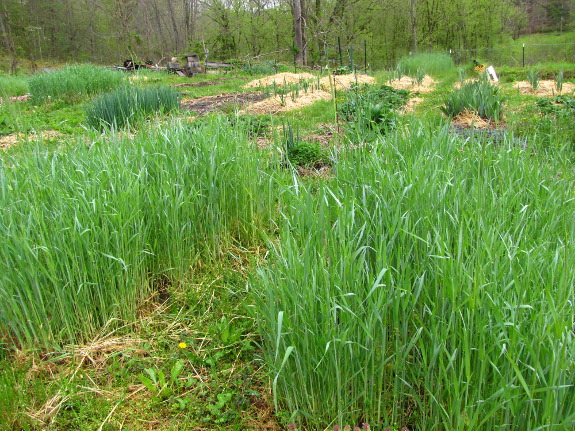
The rye also seems to be working
well, with the tallest plants just starting to bloom. We'll cut
the rye down early next week, once most plants are blooming, and then
I'll plant
directly into that mostly weed-free soil around the beginning of
June. Rye will provide a homegrown mulch for summer vegetables,
and the tall grain outcompeted most weeds over the winter and early
spring.
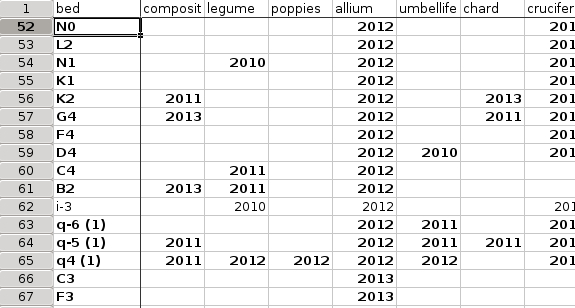
The cover crop circle
continues with buckwheat soon to go into any open beds that won't be
used for crops until at least June 1. I managed to plan out my
garden rotation for the rest of the year already, which will make it
easy to slip buckwheat into beds that are slated to be used for late
plantings of corn, beans, squash, and cucumbers. A few beds are
even due to be left fallow until fall, which, in practice, means back-to-back
plantings of
buckwheat all summer long.
My goal is to use an
entire 50-pound bag of buckwheat seeds this year, which should add an
astonishing amount of organic matter to the soil. Care to enroll
your garden in my Buckwheat Challenge? You can usually find
buckwheat for about 30 cents per pound at the feed store, so you'll
likely find buckwheat-produced organic matter cheaper than any
storebought soil amendment.
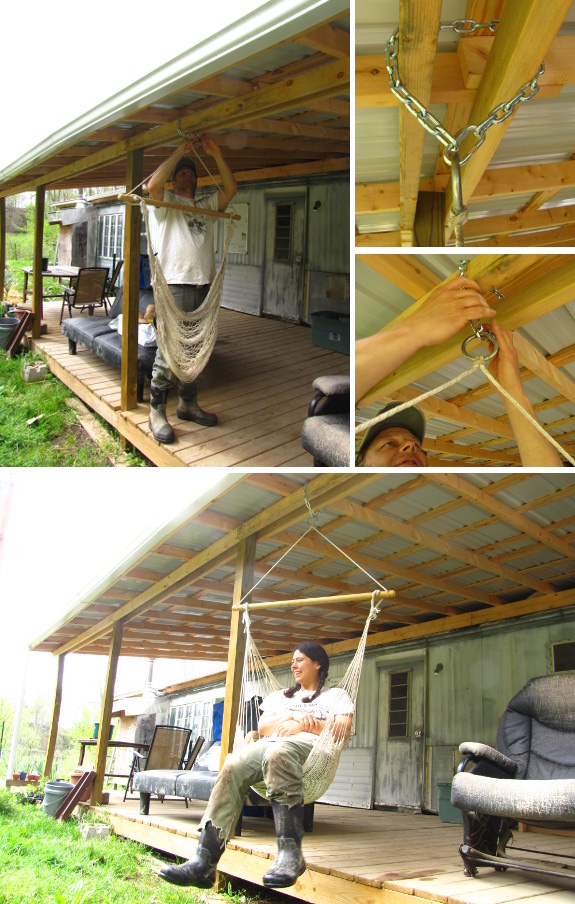
It took us about four years
to find a dry spot for the hammock chair Sheila gave us. But the
actual hanging only took fifteen minutes, including cutting
the chain.
Hanging cost: $1.60 quick link plus $2.15 chain. Watching the
first lightning bugs while swinging on the porch: priceless.
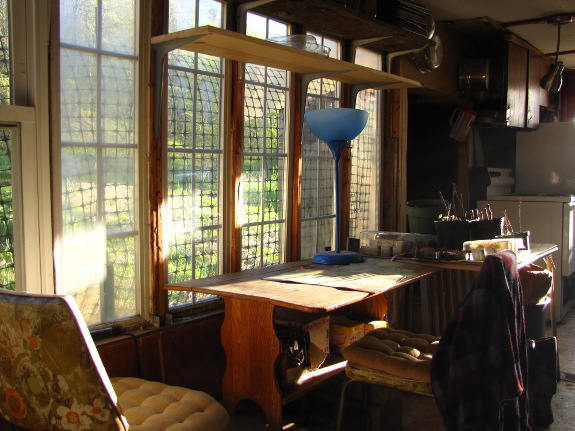
Mark looked at me like I
was nutty when I told him our core homestead felt smaller this
year. "You do realize we expanded the boundaries in a couple of
places, don't you?" he asked. Well, yes, I do know that our core
homestead is actually bigger in a spatial sense, but we
seem to be starting to hit the fewer-weeds plateau that established
gardens eventually acquire, which gives me tidbits of time for play
even during the height of planting season.
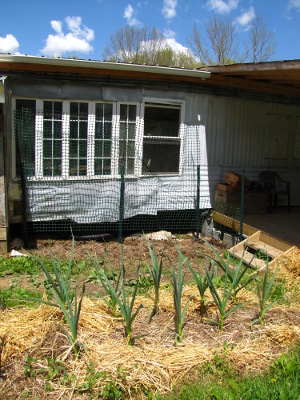 This week's play has
consisted of planting two beds of flowers, something I never seem to
find time for in the spring, but always regret when summer rolls around
flower-free. One bed is an area I kill-mulched in front of our
south-facing bank of windows last fall. I added a trellis and Dani's mystery
beans in the back of
the bed, then set out some seedling sunflowers, zinnias, and marigolds
that I'd started inside a couple of weeks ago. I hope the result
will be a shady trailer interior this summer, along with a pretty view
when we eat on the porch.
The other bed is
similar, but minus the beans and located in the forest garden.
That spot is really for the bees since there's no often-used human zone
nearby.
Of course, most of my
garden time has been spent on more worthwhile pursuits, such as weeding
and planting. Even though we could have a frost anytime during
the next two weeks, the 10-day forecast looks freeze-free, so I put in
green beans, mung beans, sweet corn, cucumbers, crookneck squash,
watermelons, okra, and basil seeds last Friday. After a weekend
of heavy rain, I expect to see sprouts any day now and am hoping our
late spring won't mean a late summer after all. If the weather
decides to be tricky and slam us with a late frost, I can just replant
--- it's worth risking a couple of dollars' worth of seeds for the
chance of early harvests.
We recently ordered 2 bungee
nets from Amazon.
They seem to be a perfect
size for securing 5 gallon buckets to the ATV.
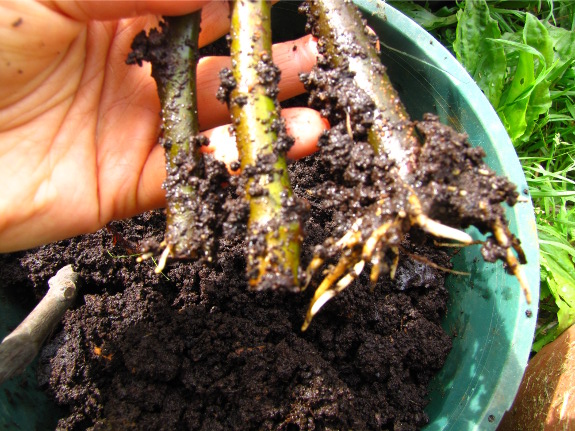
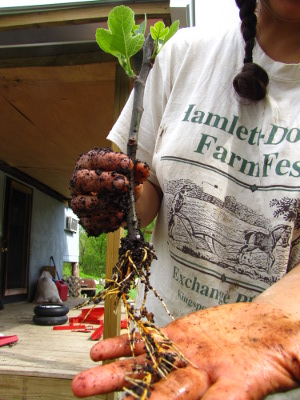 Remember my willow
rooting hormone experiment? The three fig
cuttings above were the control and the fig to the right is one of
the cuttings treated with the willow hormone. An unscientific
observer would probably say: "Clearly the willow rooting hormone did a
great job!" But let me throw a bit of data at you:
Celeste
Fig:
- Willow: 1 awesomely-rooted cutting (shown to the right), 1 well-rooted cutting, and 1 cutting not rooted at all.
- Control: All three cuttings have small roots (photo above).
Dwarf
Fig:
- Willow: 1 cutting with a small root and three unrooted (photo
below).
- Control: 2 cuttings with small roots and one unrooted.
Black
Mission Fig:
I haven't dug into this
pot yet.
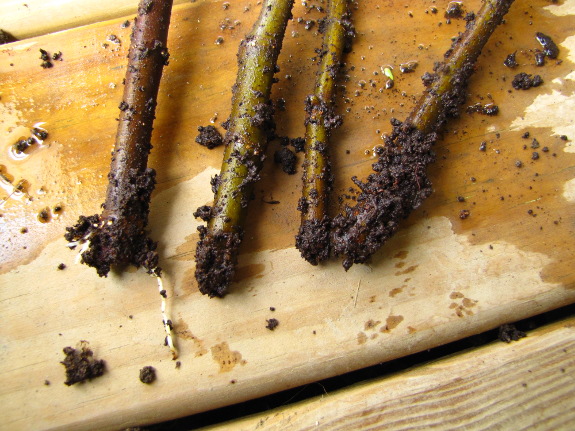
After looking at the
data, my conclusions are:
- Celeste Figs are easier to root than Dwarf Figs.
- The willow rooting hormone may do nothing, or it might impact
different varieties in different ways. It seems worth trying the
willow rooting hormone again with Celeste, but maybe not with the Dwarf.
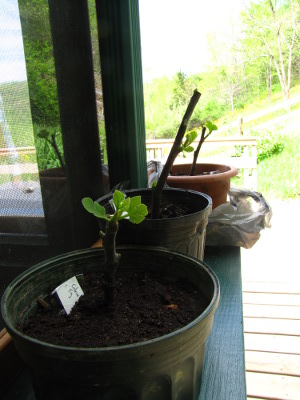 All of this geekery aside,
the reason I was delving around in my fig pots is that I noticed the
plants with the biggest leaves wilted a bit when I placed them in full
sun this week. Now that I see how few roots most of the cuttings
have, I understand why.
I had originally planned
to transplant these cuttings into a nursery bed in the garden for the
summer, but I opted, instead, to pot them up into individual pots large
enough for a full summer's root growth. That way, I can keep the
cuttings in partial shade on the edge of the porch until they've got
their feet under them a little more and are ready to go in the ground
in permanent locations this fall. Plus, now I can start rehoming
the extras --- the three figs shown here have already moved to our
movie-star neighbor's high-class accommodations.
We could've installed the trailer ball directly onto the ATV, but this
receiver hitch is reversible to adjust the height.
The main reason we went this
route was to provide a hook- in point for a future hitch basket carrier
for days when we don't need a trailer but could use a little extra
storage.
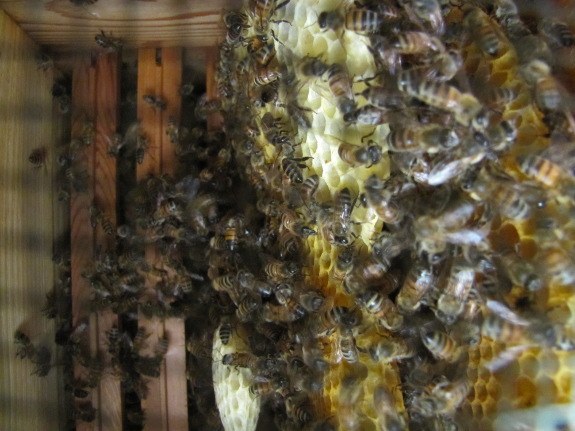
It's best to have at
least two hives of honeybees, so one of my goals
for this year is to double the size of our apiary. How exactly to
do that has
been an issue I've been pondering for months. Here are your main
options for getting new bees:
- Split an existing hive.
I've done this before with good luck, but it does have three
downsides. First, Warre hive enthusiasts believe you shouldn't
open the hive more than once a year, and splitting is
majorly intrusive. Second, since we're in the very early stages
of developing a chemical-free apiary, splitting wouldn't give us much genetic
diversity.
(The queen for the new hive would have the queen from the old hive as
her mother, and would likely mate with drones from the old hive since
we're pretty isolated back here in the woods. Inbreeding can be
good...or it can be bad.) And, finally, we probably wouldn't get
much, if any honey, this year if we split the hive.
- Catching a swarm. This is the Warre-approved method of getting new bees from your current hive. If we don't split our current hive, chances are it will swarm this spring because the bees seem to have already filled two boxes and are working on their third. Putting up a swarm-attractant box could help capture that swarm. This is chancy, of course, and has the same genetic problems as the option above, but is definitely worth a shot.
- Buying a new package.
After long thought, we've decided to go with a new package this
spring. I found a new
source of chemical-free bees in Maryland
(whose bees are actually raised in the mountains of Tennessee and
Georgia --- pretty close to us). The proprietors explained that
their bees are a mix of Carniolan and Russian varieties that have been
raised on small
cell and natural comb without chemicals for several
years, so the ones that survived are better adapted to living without
miticides and other pharmaceuticals.
In the long run, our
goal is for the apiary to be self-sustaining, but
since we've only got one hive at the moment, paying for a new package
this year makes sense. Stay tuned for the big install next week!
The Haul-Master trailer
cart showed up with a problem.
It's missing all the hardware
except a bag of small bolts.
Calling the Harbor
Freight tech support line was a joke. No real person to talk to and
a frustrating phone tree that just directs folks to the website. The
only way to communicate a problem seems to be through email. They claim
response time should be between 24 and 48 hours, but I'm going on the
third day with no help.
 Nearly a decade ago, I got
bitten by a dog. I was helping a friend of a friend move tables
out of the cultural center she helped run, and her dog was napping in
the corner. The dog seemed nice, and I assumed the friend of a
friend would have warned me if it had a tendency otherwise, so I
ignored it and started hauling. But on my third or fourth trip,
the stars aligned wrong and the dog turned its head just as my foot
went in its direction, and I bumped the dog's chin with my knee.
The seemingly-friendly
dog went nuts, snarled, and bit a big gash into my hand. My
initial reaction (after the usual surprise and terror that a dog bite
brings) was to reassure the friend of a friend that it wasn't the dog's
fault. After all, I knocked its chin. Sure, a dog like Lucy
would turn the other cheek in that scenario, but who knows what had
happened in the dog's past to put it on such a short fuse? My
motto is: if in doubt, take responsibility.
And now, ten years
later, Mark and I sustained the human equivalent of that dog
bite. It was even more painful this time around, and will
probably make me twice as people-shy as that dog bite made me
dog-shy. But it's over now (and, no, I don't plan to hash the
issue out in a public forum, although I may write about what I learned
in a decade once everyone has moved on). The upshot is, you won't
be seeing B.J. on our blog any more, but
you will be seeing the returned truck doing hauling for us without
its former master.
Even though our first
impulse was to give up on community-building experiments, Mark and I
have determined that the issue is a tough nut to crack, but is still
worth pursuing. If it were easy, everyone would be doing it,
right?
More on our next
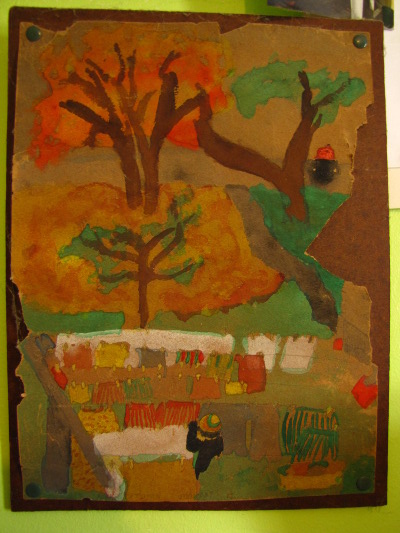
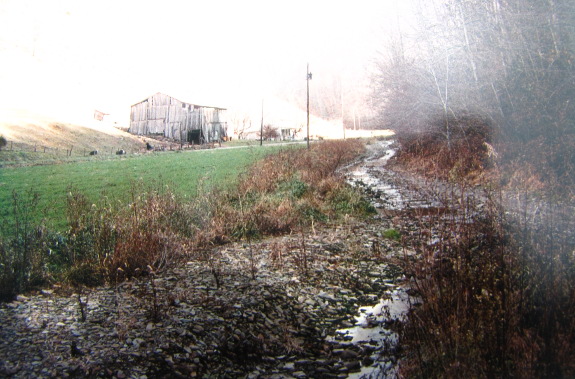
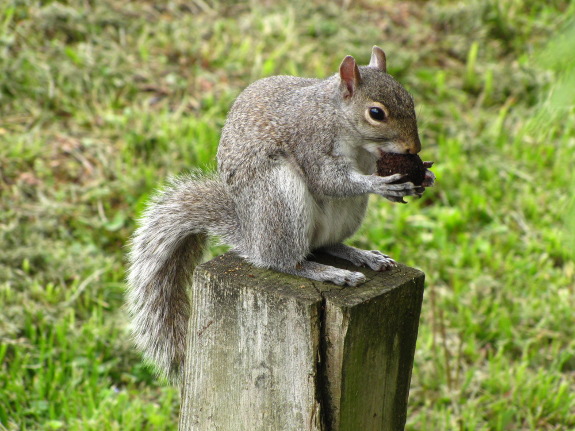
experiment in a later post. Meanwhile, I hope you enjoy these
photos from my cheer-up visit to my mom --- the first one is a painting
she made as a child of her mother doing laundry, the second is the
creek I grew up beside, and the last is a tough nut to crack.
We'll just keep gnawing away like that squirrel until we get it right.
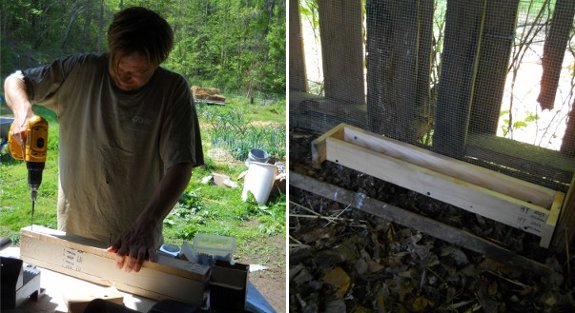
It's been a year since we
first installed the DIY
chicken feed trough.
One thing I might do
different next time would be to make the inside of the trough more of a
V shape. It might also help if it was secured in a way that was easy to
lift out and clean.
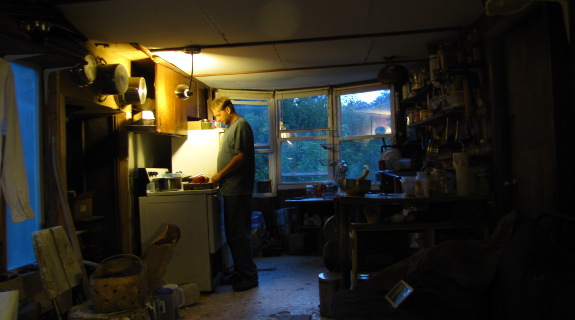
Katie
asked for a tour of the inside of our trailer, and while I'm not ready to
oblige yet, I thought I'd share a few little-known truths about living
in a tiny house (or trailerstead). These all seem like
lemons on the surface, but can be turned into lemonade with a little
care.
There
are no public spaces in your house. Those of you who live
in large houses probably don't pay much attention to the way your
residence has public spaces where you don't mind inviting strangers in,
as well as private spaces like your bedroom. Tiny houses double
up functions, which tends to make all spaces feel private (at least to
a shy introvert). Solution: Build a nice porch and only invite
people over in the summer. Silver lining: Small spaces feel cozy
during the 99% of the time you spend at home with only your family
around.
Only
one person can move around in a room at a time.
Small spaces mean that you need to find a spot to settle once you're
inside, then stay there. Solution: I have no clue how families
with
rowdy kids handle this, but for Mark and me, it generally means
treating the trailer like a time-share --- when I'm cooking, he stays
out of the kitchen, and vice versa when the dishes are being
done.
Silver lining: Not sure whether to mention this since it's PG-13, but
you
can imagine how this adds to marital harmony.
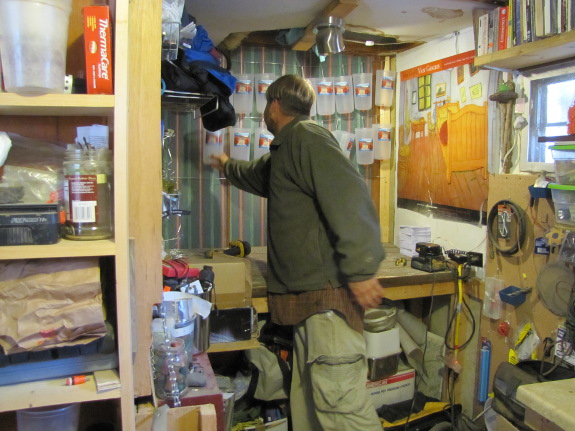
Walls
are not for art.
Chances are, you'll need every speck of wall space for some combination
of windows, shelves, and hanging things. Solution: Maybe the art
should go in the outhouse? Silver lining: It's much easier to
keep your life relatively simple if you look at all of your accumulated
possessions every day.
Your
smoke detector will go off at least once a week. Even the
best smoke detectors
are designed for larger residences, so chances are good you'll set
off false alarms quite frequently. Deglazing a greasy pan for
easier
cleanup inevitably sets off our smoke detector, as does roasting
vegetables under the broiler. Solution: Learn the right doors and
windows to open when broiling to prevent the klaxon. Silver
lining:
You don't need to worry about your smoke detector running out of
batteries without you noticing.
This is far from an
exhaustive list, so I'm curious to hear from others who live in houses
smaller than the national average. What unconventional techniques
do you use to make tiny house living fun?

Anna has enjoyed her Canon
Powershot SX20 over the
last two and a half years, but the camera finally gave up the
ghost. Dirt has caused an intermittent lens error for most of the
camera's life. Usually, we can simply do a hard reboot and the
camera starts working again, but this time around none of the recommended
tricks solved the problem.
We plan to see if a camera
repair shop can do any better next time we're in the big city, but in
the meantime, we decided to upgrade our high-tech camera to a Nikon
Coolpix L810. Until
the L810 arrives, my Nikon
Coolpix L22 will be the
primary blog camera.
The L22 often outperformed the Canon in picture quality, even though it
lacked the supermacro features and extensive zoom, and the price and
size are both very reasonable. We hope the Nikon Coolpix L810
will be an upgrade in all departments.
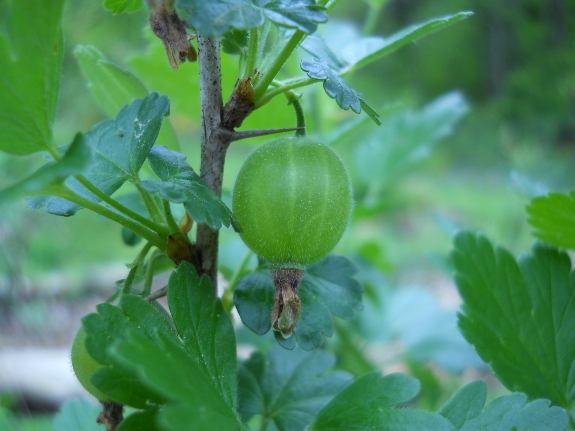
A long, gentle rain over
Sunday and Monday has increased the lushness factor of our farm by
50%. I wanted to give you an extensive farm-tour, but I'm working
with one hand tied behind my back with our current
camera situation.
(Life without supermacro is tough.) So, instead, I'll just tell
you that the first of the summer vegetables (beans and cucumbers) are
up, the rye is ready to be cut, and the perennials are growing like
crazy.
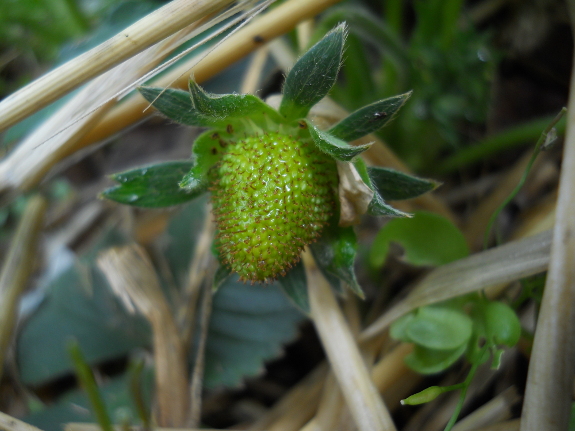
The strawberry beds are
finally white with blooms, and the first fruits are being set.
Other perennials that already have little berries swelling include nanking
cherries,
gooseberries, blueberries, and even one of the red currants we planted
this spring.
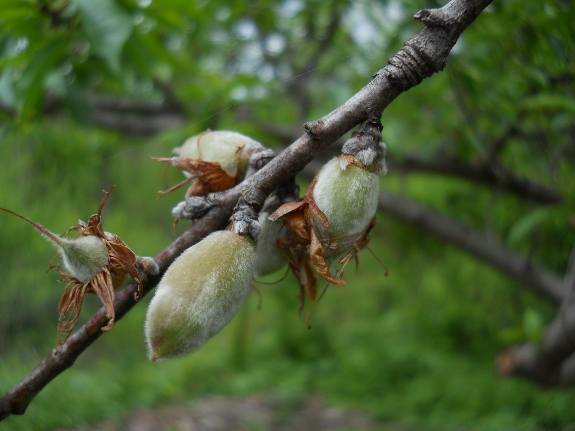
The peaches are bursting
out of their faded flower wraps and will soon be big enough to thin. I can't tell yet
whether the apples are hanging onto their fruits this year or not, but
I have high hopes.
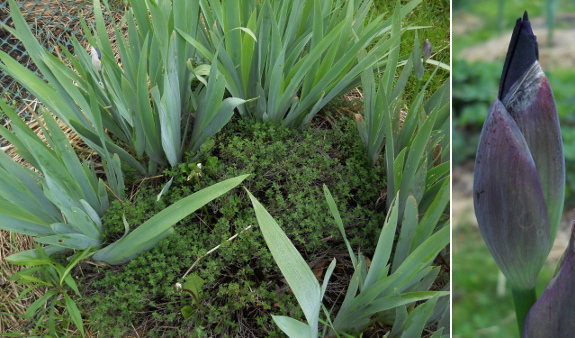
And it looks like this
will be the first year we'll enjoy iris flowers. Our polyculture
of irises with thyme seems to be working pretty well --- the trick will
be whether the tall iris leaves start to outcompete the low herb now
that they're well-rooted. This is one of my attempts to include a
few more flowers in the garden without feeling the space is entirely
wasted.
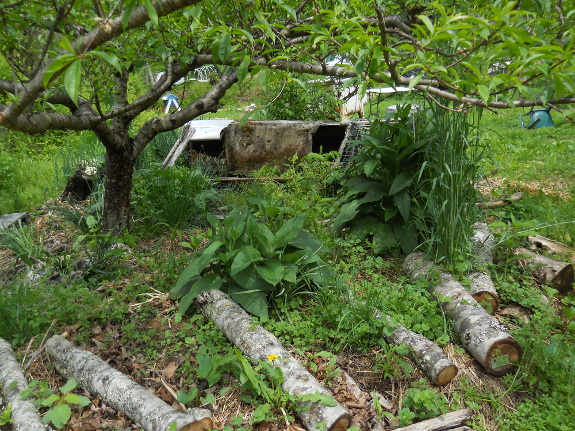
Finally, the woody
plants are starting to yearn for another round of weeding. This
week, I'll be torn between prepping 31 beds for the big frost-free,
spring planting on May 15, and getting a head-start on the weedy, woody
perennials. According to Michael
Phillips, the trees
will be be putting out a new flush of feeder roots soon once they hit a
lull in leaf growth, and I definitely want them to be weeded and
mulched down again before then.
Thanks for all the comments on my Harbor
Freight tech support frustration I posted about last week.
I tried calling today but
this time I used Edith's suggestion of hitting zero a few times and it
worked! I talked to a real person who was nice and took less than
5 minutes to figure out the problem and start the process to ship out
the missing hardware. Not
sure why that option was not listed in the menu choices at the start of
the call but I'm more than pleased to get this resolved.

If you're changing over
from Langstroth hives to Warre hives, you're stuck with a
conundrum --- should you buy all new equipment, or can those Langstroth
boxes be cut down and turned into Warre hives? I decided to give
the latter a try since I was one Warre box short of having equipment on
hand for our new package of bees.
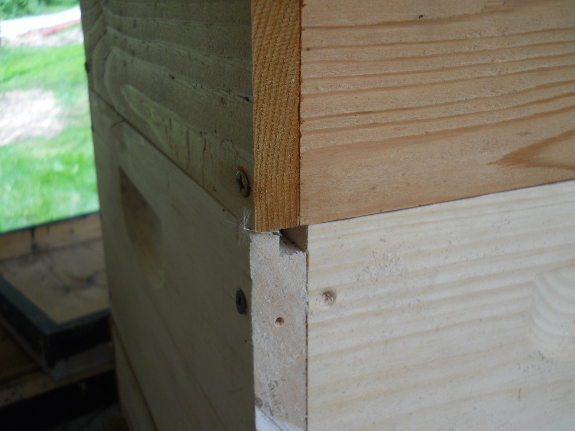
We actually have the
parts for multiple Langstroth boxes that were never even put together,
so I decided to use those for my experiment. Step one was to cut
two of these pieces to the length of the Warre hive (13.75 inches) and
two pieces to that length minus twice the thickness of the wood (12.25
inches). If you'd like to avoid my mistake, which produces four
bee-worthy holes per box, make the longer sides be the pieces without a
rabbet (indentation for the frames to rest on). The photo above
shows what happens if you disregard that advice.
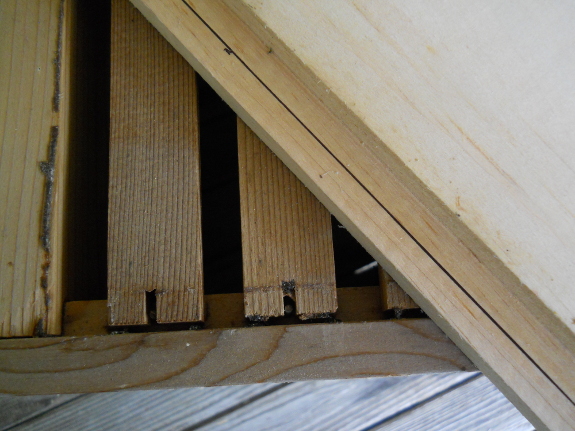
Speaking of the rabbet,
Warre hives require a smaller indentation there than Langstroth hives
do. Assuming you're cutting down a Langstroth deep, you have
plenty of wiggle room in the depth department, so mark your rabbet to
3/8 of an inch and cut off the extra wood. While you're at it,
cut enough wood off the bottom of each side so that your box is 8.25
inches tall.
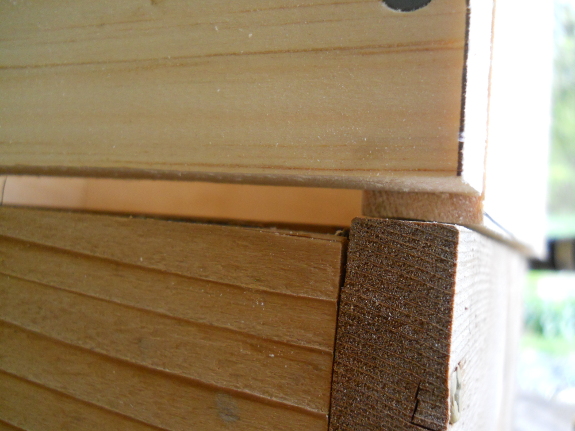
Then it's just a matter
of screwing the sides together. Be sure to use pilot holes and
three screws per side. And do try to cut more exactly than I did
the first time around (shown above) or your bees will spend masses of
time propolizing all the holes. (I whittled off the longer sides
until they matched up, but next time I'll have Mark do the cutting.)
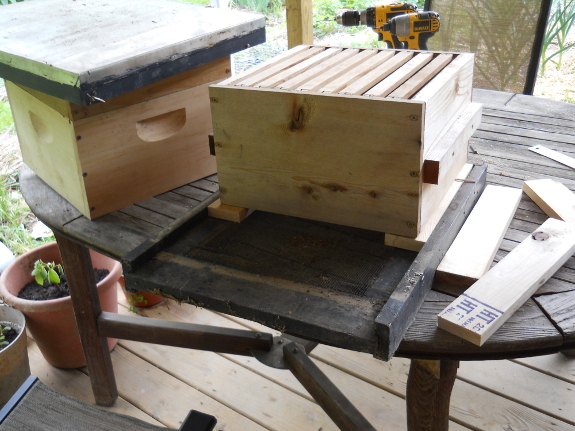
To be honest, this box
is just a stop-gap measure since the new Warre hive I've ordered is
likely to arrive after our
new package of bees
does. And I suspect I'll keep buying most of the parts for
new hives since top bars, screened bottoms, and roofs feel past my
skill level. However, saving $40 per box by cutting down a
Langstroth deep that would otherwise be collecting dust in the barn
seems like a good deal if it only takes me half an hour to construct
--- sounds like a good compromise between my wish to make all of our
equipment and the reality that woodworking is far from my strong point.
The Stihl
FS-90R trimmer did a
great job cutting the latest Rye
cover crop experiment at
the base,.
We made short work of it with
Anna following behind me with a rake to bring back the few plants that
fell in the aisle.
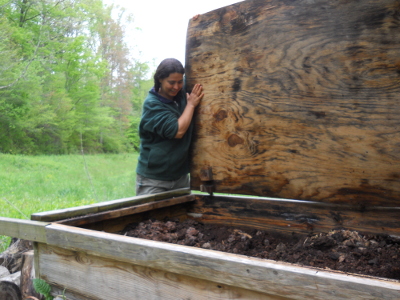 Last spring, we
harvested 9 buckets of worm castings from the bin at the parking area (but figured the yield was
only two net buckets since we'd initially seeded the bin with 7 buckets
of worms plus mostly-composted castings). This year, we got 6
buckets of excellent castings out of that bin. If we'd been
desperate, we probably could have harvested another 4 or 5 buckets, but
I figured castings that are still full of worms were best pushed to the
side to seed the next year's crop. There is also about a quarter
of a bin of uncomposted manure that I'll add to the worm side before
filling the rest of the bin back up with manure in preparation for next
year's crop.
Meanwhile, I delved into
one of the closer-to-home worm bins, and was delighted to see much more
worm action than I'd
reported in early spring. I now think that the
issue with these bins was partially lack of water (which I've since
corrected by leaving the lids open during a few storms), but was also
simply lack of time. Seeding
worm bins in early fall doesn't give the worms time to do much
before winter puts activity on hold. In addition, I think that
worm bins get better after they've been in place at least one summer
and have accumulated all of the partner microorgnisms and invertebrates
that pre-digest manure for the worms. The parking-area worm
bin certainly has a much more diverse array of inhabitants, with my
harvest turning up hatched snake eggs, black soldier fly exoskeletons,
and an array of unidentified critters.
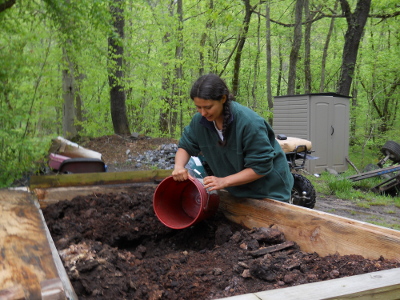 The castings from the parking
area bin are all going to potted plants --- topdressing the citrus and
potting up seedlings and cuttings. In a perfect world, I'd leave
the close-to-home bins alone since the worms are laying eggs and will
soon be experiencing a population boom. However, I need that aged
manure for the garden, so I'm carefully shoveling out the untouched
manure and pushing the worms (and eggs) to one end, then we'll fill
these bins back up once the floodplain is in shape for hauling manure
in. If all goes well, by this time next year, we'll have at least
24 buckets of worm castings to spread around the farm.
The current
worm bin design has 2
flaws that I hope to fix on the next generation of bins.
Using a sheet of plywood for
the lid seems like it won't last much more than a few years before it
warps beyond the comfort level and the hinge placement makes for a long
stretch to reach the other side.
I'm thinking of cutting the
lid area in half and hinging them on the sides with more of a steeple
shape so most of the rain can run off while some of it can be channeled
inside depending on the dryness level. Maybe a sheet of thin roofing
tin with a wooden frame for support would stand the test of time?
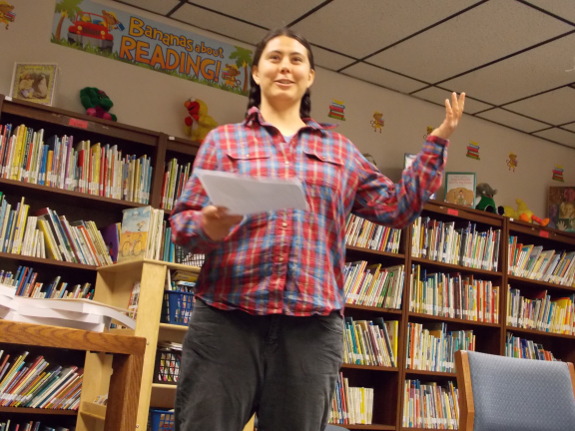
There are a few people
in my life I just can't say no to, so when our
local librarian asked me to give a talk to their Friends of the Library
group, I hemmed and I hawed, but I finally agreed. I didn't
announce it here because I figured a smaller group would be less scary,
but
Mark did record the audio to share with our readers after the
fact.
The sound quality is low
because the only electrical plug
was at the back of the room, but some of you might enjoy listening
anyway. You can either download the file (on the large side) or
listen below:
Sorry, long distance
readers don't get free Egyptian onions, nor do they get to partake of
the amazing spread the library patrons brought to share. But
maybe you'll still get a kick out of hearing me proselytizing about no-till
gardening.
Edited to add: Roland did some fancy computer work and filtered out most of the obnoxious buzz, so the file should now sound much better. Thanks, Roland!
I've been getting our lawn
mower blades from the same place for the last 4 years.
Every time I order from Yardpartsexpress.com the right blade is delivered the
next day for regular UPS shipping charges.
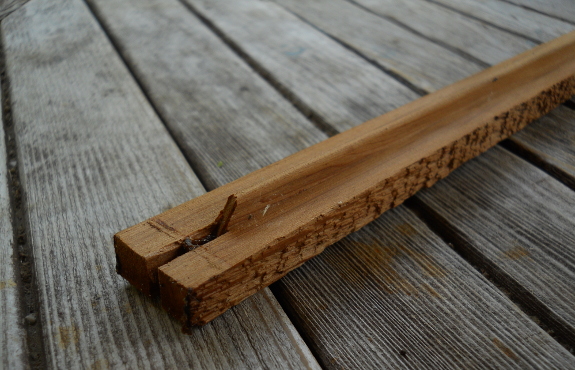
I haven't mentioned this
in a couple of years, so new readers might be interested in learning
about how foundationless frames
help deter varroa mites. The absence of
foundation can also help promote the health of your bees since
chemicals are often embedded in the beeswax that's used to make
foundation. The infrastructure to help bees build
regimented combs of honey without frames of foundation is generally
referred to as a top bar.
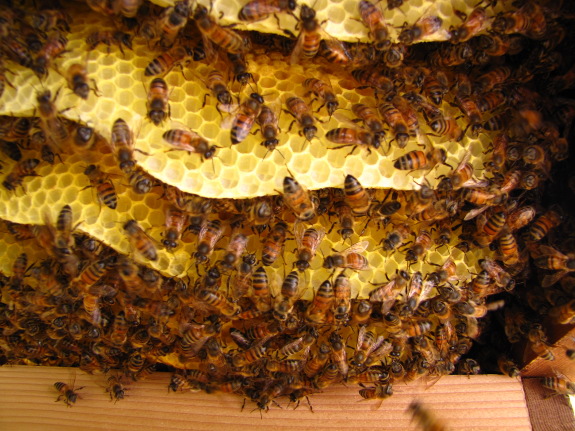 Now that you know why you might choose top bars,
let's talk about the specific frame Mike was asking about. The
photo at the top of this post shows the top bars that came with our
premade Warre hive. You can get these for $1.50 apiece at
Beethinking (or at
least I think you can --- that's where ours came from in 2012, although
the picture on their website shows a different design). Even
though the top bar is only a tiny piece of wood, I think these are
worth buying if you can afford them since they're rather complex to
build yourself, and this design definitely helped our bees create
beautiful, straight comb with no foundation. We did modify
the box slightly to use pins instead of nails, though, in order to make
the frames easier to move.
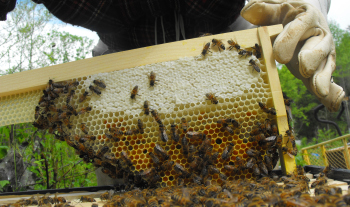 I've
seen (and used) various other top bar options, and one of these might
be better for you, depending on your situation. If you're using a
Langstroth hive, it's simplest to modify the frames that come
with the hive.
You can nail the wooden strip that's usually used to hold foundation on
vertically instead of horizontally, but I didn't have luck with getting
bees to build from that option. Instead, thin strips of
foundation at the top of each frame worked well for me. (Of
course, you still end up with a bit of foundation in the hive with this
method, but much less than if you filled the whole frame with
foundation.)
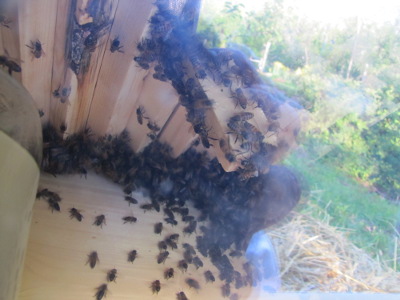 This image, through a viewing
window up into a horizontal top-bar hive, shows the V-shaped top bars
that are perhaps the simplest to construct if you're making your
own. The
package we installed in our top bar hive absconded, so I can't tell you whether
our bees would have built off these top bars, but I believe most
top-bar beekeepers use a similar design with good results, so it's
worth a try.
No matter what kind of
top bar you use, the idea is pretty simple. You want to make the
bottom of the bar come to a point to tempt your bees to draw out comb
in a straight line. And you want to allow the right amount of
space between frames (if you're using a vertical hive like a Warre hive
or Langstroth hive) so that bees can pass through but won't be tempted
to fill in the gap. In contrast, with a horizontal top-bar hive,
you want to have the top bars completey fill the space so that bees
don't end up under the roof. Those two design points in place, a
top bar can be pretty much anything you dream up.
We had our new friend Waylon
help out with some chicken care today.
It might be a few more years
before he's ready to apply for the intern program, but he seems to have
an aptitude for poultry that could give him an advantage over other
applicants..
 Daddy gave me Jay
Walljasper's The
Great Neighborhood Book a few years ago on the
understanding I'd review it on our blog. Unfortunately, there
weren't enough plants and non-human animals in the book to move it out
of my slush pile, so it sat there until our
failed intern experiment got me thinking that I
needed to learn more about community-building.
It turns out I could
have sucked the marrow out of The
Great Neighborhood
book in just a few hours, but the long wait was no big loss because
there is, unfortunately, absolutely nothing for rural dwellers in the
whole text. In fact, Walljasper is one of those folks who
believes that cities are the only solution to environmental problems (a
stance I tend to disagree with since the extra car use in rural areas
can easily be offset by working online and growing your own food).
Anyway, rants aside, I
love the idea of turning neighborhoods into interconnected villages,
and I wish someone would write a similar book for the
countryside. While I'm waiting for The
Great Neighborhood: The Rural Edition, a few of Walljasper's tips
might carry over to our habitat. For example, a neighborhood
listserv (or, in this day and age, perhaps a facebook page) could help
people communicate more, and Mark's always wanted to get folks on our
little road together once a month for a potluck.
On the other hand, if
you live in a suburb or urban area, I highly recommend at least
flipping through this easy-to-read book to get ideas for turning your
neighborhood around. Learn how putting a bench in front of your
house or waving at people passing by can turn up new friends, decrease
crime, and slow traffic. Walljasper might change your mind about
dogs (good for neighborhoods) and wide roads (bad for neighborhoods),
and the case studies will definitely inspire you to get out there and
make change.
Do you have a suggestion
for a more rural-based community-building book? I suspect someone
out there has done as good a job with that topic as Walljasper did with
the city neighborhood.
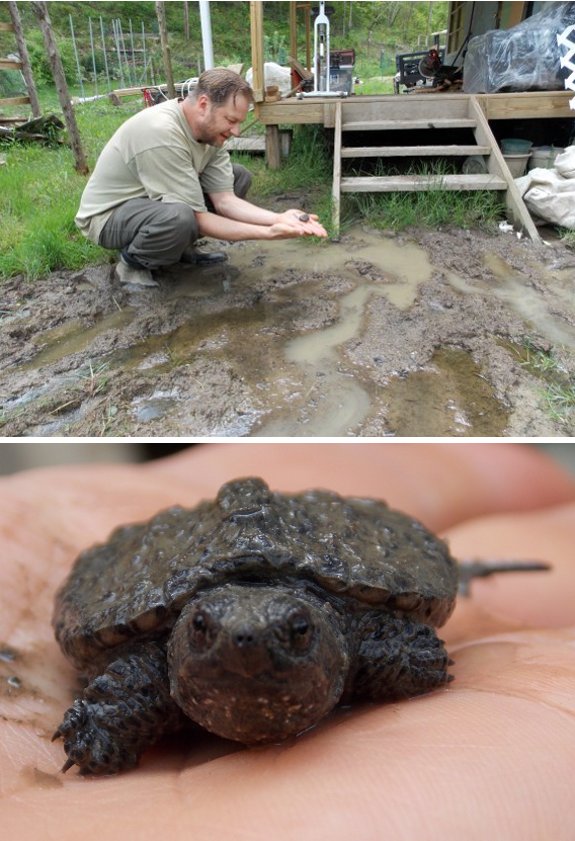
We installed gutters last
year, but have not got around to diverting all the water.
I found this baby snapping
turtle in our biggest puddle.
Anna thought about moving him
to the new
pond, but got concerned
he might be too small to climb over its plastic walls. We ended up
moving him to a more friendly puddle with no foot traffic.
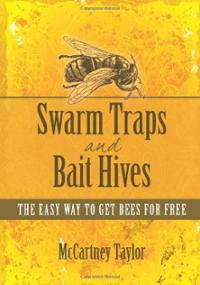 The only downside of Swarm
Traps and Bait Hives
by McCartney Taylor is the price --- $6.99 for the ebook or $16.16 for
the paperback. As you've probably noticed, I price ebooks of this
length at 99 cents, and I don't make print books available because I
figure no one would want to pay $20 for a copy of Incubation
Handbook,
for example. However, I went ahead and bought Taylor's paperback
because I wanted something I could easily work from, and figured I'd
likely lend the text to friends once I'm done.
And I wasn't
disappointed. After an hour perusing the elegant and
well-written interior of this 50-page book, I was itching to go out and
build a swarm trap. I'll write some followup posts once I've
created my first box, but for now, here are some tips to get you
started:
- Leave your swarm traps up between a couple of weeks before you usually see swarms (probably April around here) until about July.
- The best swarm trap is dark inside,
has an entrance hole near the
bottom about 1.5 to 2 inches in diameter, includes frames with a bit of
old wax on one or more, and has a capacity of around 10 gallons.
An 8-frame or 10-frame Langstroth deep with a top and bottom screwed on
and a hole in the side makes an instant swarm trap.
- Lemongrass oil vastly increases your chances of catching a swarm. (I wonder if lemon balm would work as well? I recall watching a swarm of ants when I was a kid and being struck by the fact they smelled exactly like lemon balm.)
- If you include an attractant (like lemongrass oil), you can hang swarm traps as low as six feet off the ground, but do plan to put them in full shade. Good locations include along fencelines, rivers, and treelines, under a lone tree in a field, or on a lone building in the country --- bees use all these features as landmarks, so they spend more time there than in other areas.
- Check your swarm box at least twice a month. (More often is better.) You know a swarm has moved in if you not only see bees flying in and out but also notice that workers are bringing pollen inside. Once your box is occupied, visit it at dusk, plug the hole, and bring it to your apiary, where you can transfer the frames to a new hive and then put the swarm box back in its trap location.
Taylor reports that you
should have at least a 20% chance of catching a
swarm if you make one bait hive, but he recommends building several so
you can test different locations. We'll probably just start with
one since we're at the height of garden season right now, and I want to
build a slightly more complex version to make transfer to a Warre hive
easy. More on my rendition of Taylor's design in a later post.
We cobbled together our first
swarm
trap from some old hive boxes.
It took about an hour with
Anna measuring and me cutting and drilling.
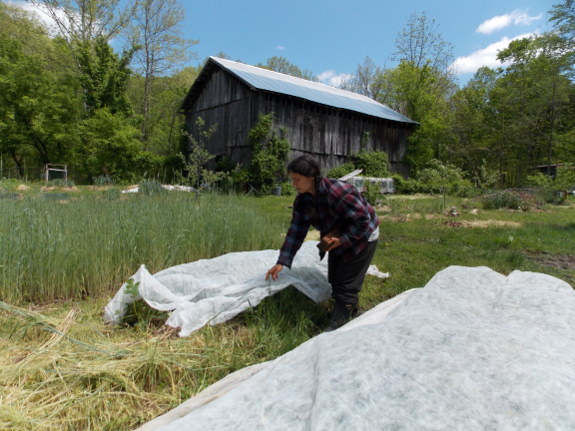
 When I planted our first set
of tender vegetables at the end of April, the long-term forecast looked
frost-free. But a freeze slipped up on us, so Sunday afternoon I
rushed around and put row covers over the strawberries and seedling
corn, beans, and squash.
The last frost in our
neck of the woods is awfully likely to wipe out young fruits on apples
and peaches, but I've figured there's not much you can do there except
hope. Luckily, these fruits usually don't
get damaged until at least 28 degrees, and our (hopefully) last
freeze of the year clocked in at a mere 32 degrees, leaving patchy
frost on the ground but no nippage higher up. I'm especially
pleased to see that our hardy kiwi wasn't harmed this year --- the
leaves have been nipped every spring to date, and we've seen no fruits
as a result, so I'm hopeful 2013 will be the year the vines have enough
vigor to bloom.
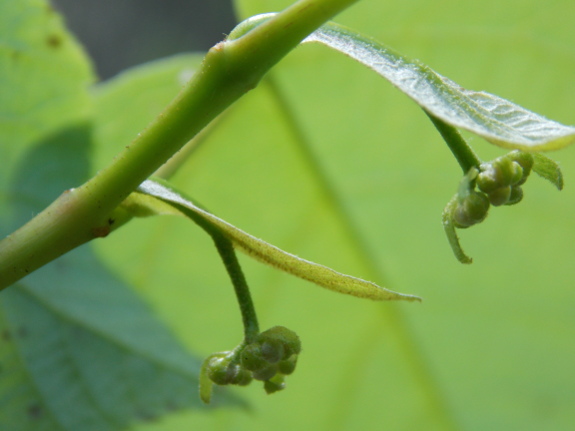
Meanwhile, concern about
the frost prompted me to test a hypothesis I have --- that the reason
basswood trees bloom erratically is simply because the flowers get
frost-nipped most springs just like many fruit trees do. Sure
enough, the bloom buds are already in place on the basswood tree, but
since our recent freeze was so light, my hypothesis will have to wait
until another year for a test. That's just as well since
non-nipped basswood flowers will make this the first year since 2010
that our farm will be enjoying this top-notch
June nectar flow.
Technically, we'll be
frost-free as of tomorrow, but I can use any weather magic you all have
on hand to ensure that will be the case. The blackberries aren't
even blooming and we usually enjoy a blackberry winter....
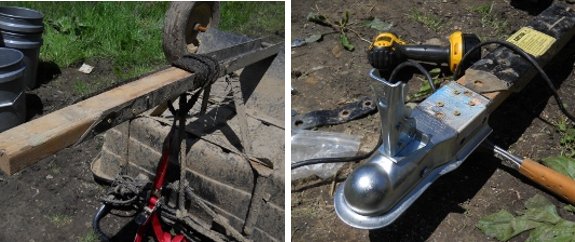
It cost 15 dollars to upgrade
the Heavy Hauler so it can hook up to a trailer ball.
A scrap piece of 1x3 made the
installation smooth and painless.
Backing up is now a dream
compared to the other pivot point.
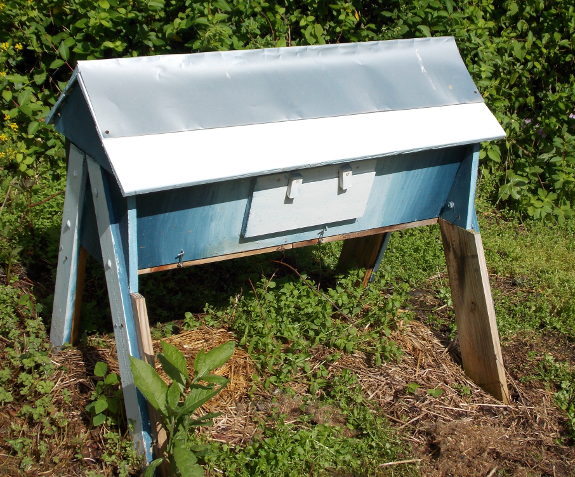
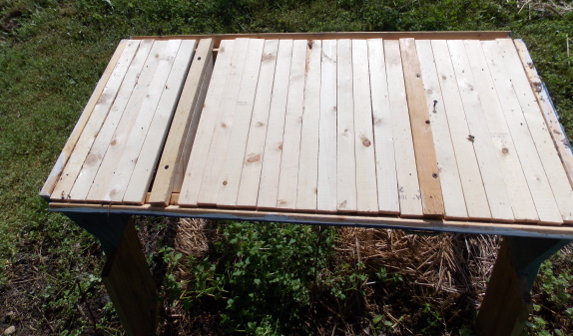
 Our top-bar hive has been sitting in the yard
vacant ever since our
package absconded from it this time last year. I've been leery of
giving the structure another try because the Warre hive is working so well, but
reading Swarm
Traps and Bait Hives
suggested another possible use for the top-bar hive --- catching swarms.
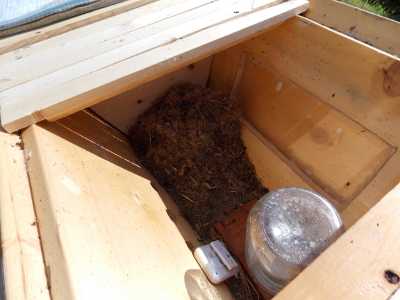
The first step in the
top-bar-to-swarm-hive conversion involved looking inside and cleaning
the hive up. In the process, I discovered that our top-bar hive
wasn't entirely vacant 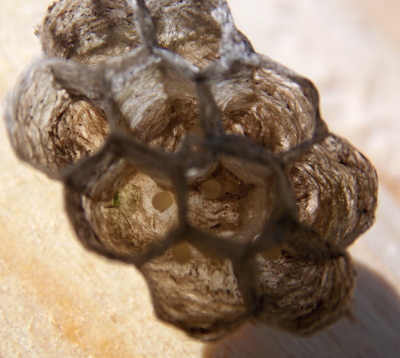 after all. An ant
colony was living in one corner, a wasp had laid eggs in a new paper
nest, and what appeared to be a mouse nest covered most of the hive's
bottom. Once I pulled out the "mouse nest," though, I discovered
that it was actually a bird nest, perhaps from the miniscule Blue-gray
Gnatcatchers that make such a racket around the edges of our yard in
the spring. There were no eggs present in the bird nest, so I
figured it was okay to make the birds find a new home, and I had no
qualms about doing the same for the wasp. (I left the ants alone
since it seems like bees and ants can coexist.)
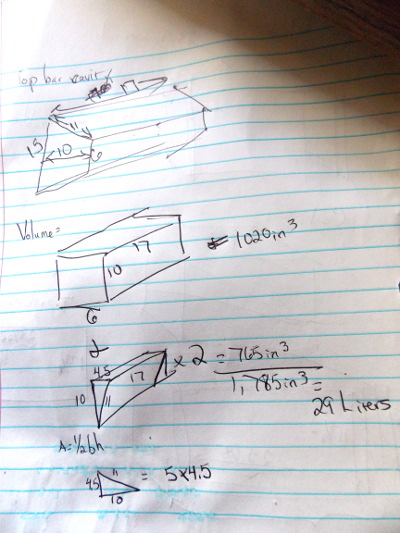 Next, I considered the cavity
size of the top-bar hive. The instructions I'd read last year
recommended moving the follower boards in so that only twelve top bars
were included in the bees' initial living area. However, my
calculations suggest that leaves a cavity volume of only 29 liters,
while 40 liters is the optimal size bees look for when choosing a new
home. So I moved the follower boards to the ends of the hive and
doubled the interior space.
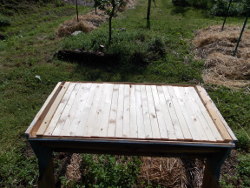
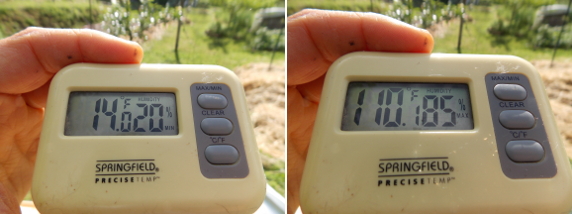
One hypothesis about why
our bees absconded last year was that the hive was getting too hot in
the sun, so Mark put in a max-min thermometer to see what temperatures
the colony would have been dealing with. Swarm
Traps and Bait Hives recommends locating these
structures in full shade for best chances of catching bees, and more
shade does seem to be merited since the top-bar hive reached 110
Fahrenheit last year. We may move the structure elsewhere now
that it's been reinvisioned as a swarm trap.
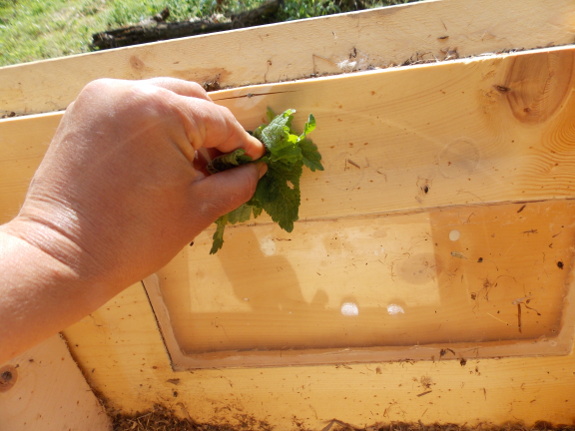
Finally, I smeared some
lemon balm around the inside of the top-bar hive. My lemongrass
oil hasn't arrive in the mail yet, but my gut says lemon balm will work
just as well as a swarm attracter. We'll just have to wait and
see.
The ATV
was beginning to have trouble starting from a cold stop.
I knew the previous owner
used fuel with ethanol, and it was in his garage for at least a few
weeks like that, which lead me to suspect that as the problem.
Start is a fuel system revitalizer made
by the people who make STA-BIL. It took a few days before I
started seeing results, but it seems to have improved starting.
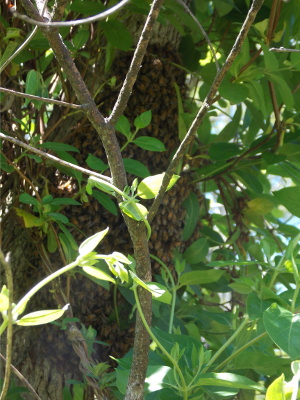 I was weeding the mule garden
about 15 feet away from the hive when the bees decided to swarm, but I
missed the mass flight. I had walked off to the barn to get
another tool, and when I returned I heard a great buzzing overhead and
to my left. By the time I got my eyes turned around, the bees
were out of sight.
Luckily, they hadn't
flown far. In fact, they'd settled into the honeysuckle on the
exact same sassafras last
year's absconded package settled on before flying away.
That means the bees would have been right beside our top-bar-hive-turned-swarm-trap...but I had talked Mark into
helping me move that structure behind the barn the day before.
Oops.
We were woefully
unprepared for a swarm, despite the fact that I've been blogging about
little else all week. I really should have known it was coming,
not just because this is the swarming time of year, but also because
the Warre hive's three boxes were getting pretty congested.
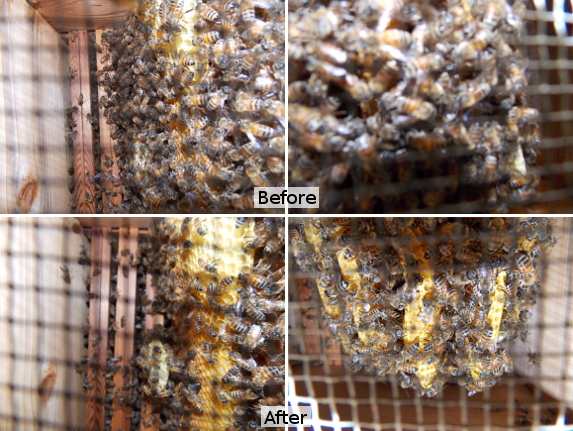
I took the top two
photos up through the screened bottom the morning before the swarm
left, catching the back (left) and front (right) of the hive, and it
was evident that the cluster of bees was humongous at that time.
That's why the second photo is out of focus --- the bees were hanging
all the way down to the floor. The hive had been a bit like this
(although not quite so extremely crowded) for a couple of weeks, and if
I'd wanted to slow down swarming behavior, that would have been a good
time to nadir a fourth body into my
hive.
However, I didn't have
the spare equipment on hand because the place I ordered from is swamped
and hadn't mailed my hive bodies two weeks after I paid for them.
(I haven't figured out how to make top bars yet, so I couldn't just
make my own homemade hives.) We do have a fourth hive body, but
I'd been saving that box in case the package
shows up before the new hive parts do. Which is all a long
explanation for why I let the bees get so congested that they swarmed
before they need to have. All of that said, Warre theory is that
you want your bees to swarm to break the pest and disease cycle, so all
I would have been doing with management is slowing down the swarm, not
preventing it.
(As a side note, it's
interesting to compare the inside of the original hive the morning
before (top photos) and the afternoon after the swarm (bottom
photos). The comparison gives you an idea of how much of the
hive's population leaves with the swarm and how much stays home to tend
the worker brood and baby queens. Generally, about 10,000 workers
and drones (two-thirds of the population) leave, but they're soon
replaced by workers hatching out in the old hive.)
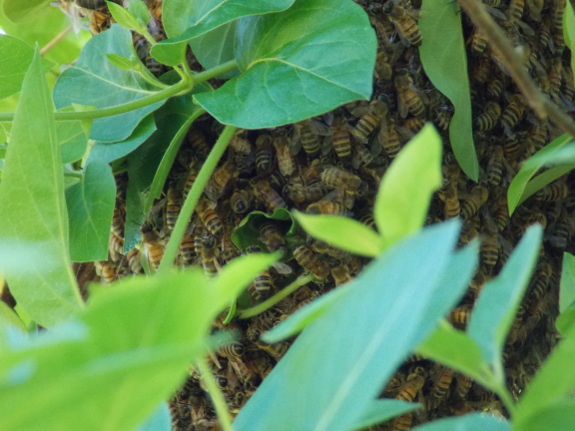
Anyhow, mea culpa's
aside, I had a swarm on my hands and I didn't want to lose it. My
first hope was that the bees would find my swarm trap even though the
structure was now a couple of hundred feet away, but I soon discovered
that the bees were considering another site instead. How could I
tell? Well, I've spent the last week reading Honeybee
Democracy (which I'll review here after finishing the last couple
of chapters), and thus had discovered a lot about the behavior of bees
in swarms.
It turns out that after
a swarm leaves the hive, they always settle just like mine did, not far
from the parent hive. At that point, an astonishing exercise in
consensus decision-making occurs. Most of the bees hang out
around the queen, but 300 to 500 workers peel off to survey the
surrounding 30 square miles in search of nest sites. If a worker
finds a potential home, she returns to the swarm and performs a waggle
dance (shown below) to inform her cohorts of the location. Other
bees go and check it out, dancing about the site if they like it or
ignoring it if they don't, and eventually enough bees have settled on
one location that the swarm figures they've found what they're looking
for. At that point, they all take off and relocate to their new
home.
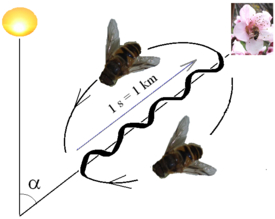 This all sounds a bit
esoteric, but the truth is that once you have a swarm in front of you,
waggle dances are extremely obvious and easy to decipher. After
only a few seconds of observation, I was able to find two workers
dancing about the same location, which I videoed above. The
dance's angle away from vertical shows the angle the actual location is
away from the sun, and the length of time the bee wiggles her butt
shows how far away the site is. Using this data, I was able to
tell that our bees had only found one good site so far, and that it was
two miles away to the southwest --- definitely not my swarm trap.
My first thought was to
set up a potential hive on the other side of the yard, smear it with
lemon balm, and hope my bees would find the site. Then I changed
my mind and figured I'd set up the potential hive much closer to the
swarm tree to ensure the bees found it. But half an hour of
observation showed that only one worker checked out the empty hive, and
she didn't even think it was worth crawling inside. (Scouts
looking for potential house sites go inside and measure the cavity
volume to ensure the hive is what they're looking for. When
visiting a good site, they'll spend over half an hour buzzing around to
check out the cavity from all directions.)
If we were going to lose
the swarm otherwise, it seemed worthwhile to try to catch it.
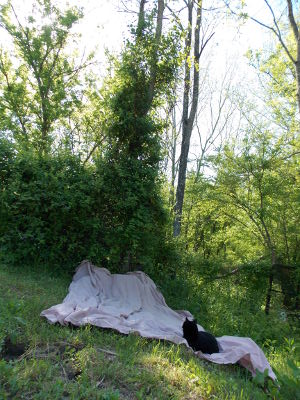
Huckleberry told me to lay out a white sheet underneath the swarm and
then cut down the tree to drive the swarm into a box (although I think
our spoiled cat might have mostly been thinking about napping in the
shade), but I got scared and called my beekeeping mentor (aka our
movie-star neighbor). More on the ensuing action in tomorrow's
post....
The Chevy S-10 truck can hold
20 five gallon buckets of horse manure.
I'm thinking of attaching a 5
inch board on each side to increase capacity to 40.
"Our hive cast
a swarm!! The
first one ever!! What do I do?"
Perhaps it was the
excess of exclamation points, but something told our
movie-star neighbor he should skip the advice and just come over to
lead the capture.
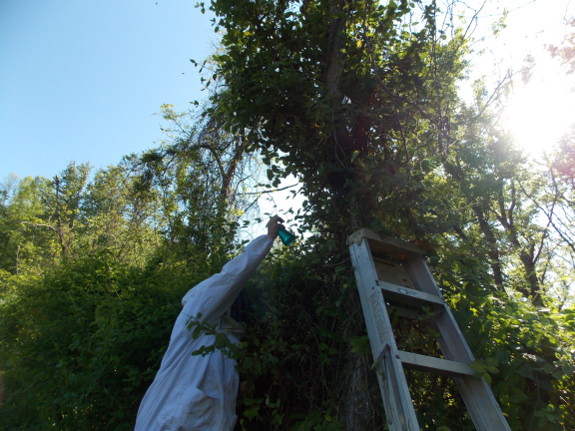
Our neighbor later told
us that this was the toughest swarm he'd ever
captured because of the masses of honeysuckle encircling the
bees. Mark had suggested we cut away the vines, but I was
terrified this swarm would be annoyed by the activity and leave just
like last year's package did. Luckily, our neighbor had a simple
solution --- spray the swarm liberally with sugar water so they'd stay
put, then clip those vines.
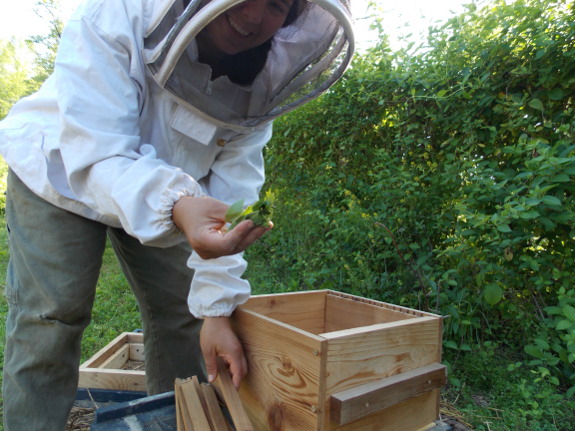
He also suggested we
smear peach leaves along the inside of the boxes
we were going to install the honeybees into. Since our neighbor
had just
bought some lemongrass oil on my recommendation, we also dabbed a few
drops of that fragrant substance on the inner walls of the hive as well.
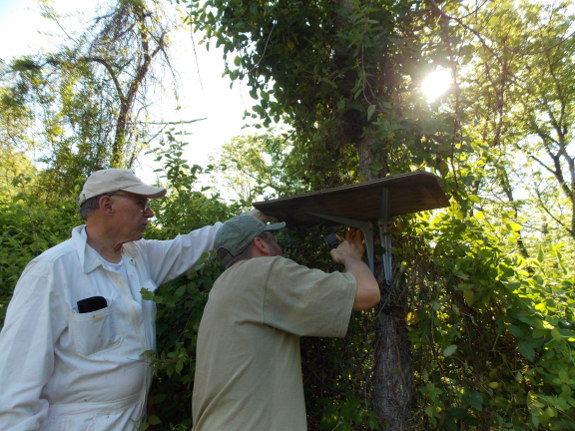
"Are we going to scoop
the bees into a bucket?" I asked. (Imagine
this sentence uttered with the intonation of the classic "Are we there
yet?") We'd very carefully cut all of the vines underneath the
swarm, but left one in the middle to make the mass of bees easy to
shake. But into what?
My neighbor didn't like
the bucket idea, and planned to instead
levitate a hive body under the swarm and knock the bees directly into
their new home. Here's where Mark's ingenuity shone. "Why
don't we put a couple of brackets on the tree, add a board on top, and
then put the hive there?"
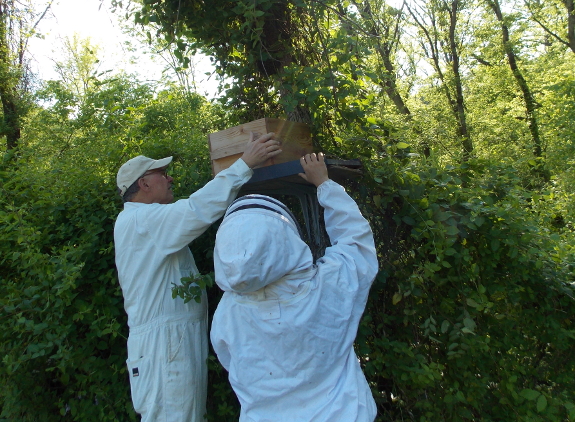
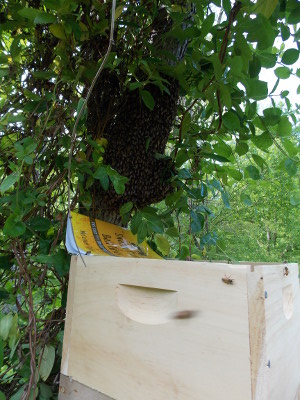 Nearly
as easily done as said! Too bad our hive was a cobbled-together
version of Langstroth and Warre equipment since we want the bees to
eventually live in the latter but have much more of the former on
hand.
It seemed to form a relatively solid container, though.
Unfortunately, the tree
grew at a bit of a slant, so there was a good
chance the bees would fall into the gap between the hive and the
trunk. Perhaps a bee book would make a good ramp to guide them in
the right direction?
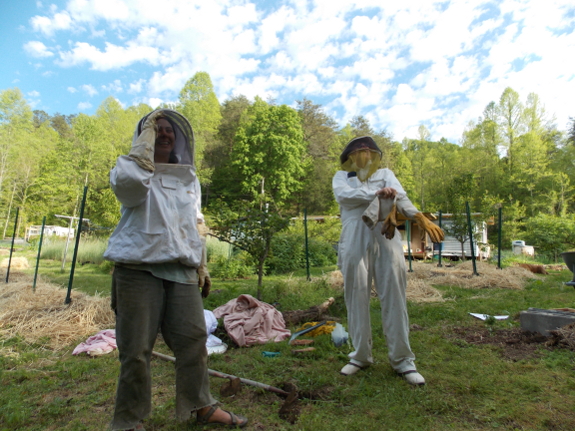
Here's where activity
got heated and we stopped taking pictures (except
the last one below). Our neighbor and I suited up, I stood on a
bucket with a brush, and he stood on the ground with a hoe.
"On three, I'll yank
this vine and shake the bees into the hive, then
you start brushing any stragglers down," he ordered. "One, two,
THREE!"
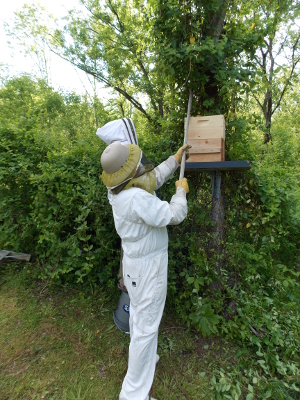 Whoosh!
Bees were everywhere! Even though bees in a swarm are supposed to
be very polite, I was ultra-glad I'd donned a bee suit since I'm
positive I'd otherwise have ended up with several ladies stuck in my
hair. I put on the lid, then we stepped back and waited.
At first, we thought
we'd been successful, but when I checked on the
hive just before dark, the swarm had reformed in the narrow gap between
tree and box. I guess our bee book wasn't as good of a ramp as
I'd
thought and the queen fell into the gap, then everyone else
followed. Downhearted, I figured the experiment had been a
failure, but by the next morning, I'd figured out a solution.
Mark and I headed out to
the swarm first thing the next day and I
sprayed all the bees I could reach with sugar water. Then Mark
gently
eased the second box away from the tree, figuring at least some of the
bees would adhere to the surface and end up dangling above the cavity
below. Sure enough, his gentle motion combined with my brushing
got at least half of the swarm into the lower box, then we pushed the
hive back
together.
This time, I was sure
we'd failed since bees nearly immediately began clustering between the
box and the tree again. But a few hours
later, the bees were streaming into the hive box instead. I can
only guess
that, at first, that gap smelled like queen, but as her scent
dissipated, the workers discovered the queen herself, ensconced in her
new hive.
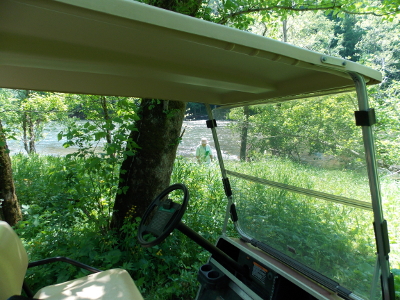 Unfortunately, this happy
sight was not the ending of the story. On our neighbor's
recommendation, we left the hive in place that afternoon so any
stragglers would join their queen, and I went off-farm to monitor the
quality of our nearby river. It was a blazingly
hot day, reaching nearly 90 in the shade, and perhaps the heat was too
much for the bees (or they really wanted to live in that site
two miles away). Because when I came home, the hive was empty,
the swarm gone.
So, we didn't catch our
first swarm after all, but I did get a lot of hands-on experience and I
feel much more confident that I'll know what to do next time.
I'll probably move the hive to a good location right away if we catch
another swarm, and I should definitely get our ducks in a row so we
always have extra equipment on hand for swarm catching.
Of course, catching
swarms is always chancy, so we'll continue to experiment with setting
up swarm
traps, the sooner
the better. Honeybee
Democracy explains
that the scouts who go out looking for a new homesite are usually the
hive's oldest foragers, which suggests they may be househunting on the
sly for weeks before they leave their old home (meaning that a swarm
trap set up the day before a swarm emerges may be too late). And
even though I haven't read any data to this effect, I also wouldn't be
surprised if honeybees preferentially choose new house sites further
from their home colony, since they'd then have less competition for
resources and less chance of catching pests and diseases. Perhaps
bees would be most likely to move into a swarm trap at the parking
area, a third of a mile from our other hive?
A scrap piece of decking board wedged and secured like above should be enough to prevent any future unexpected dumping in the middle of hauling.

Even though I've spent
all week talking about bees, most of my efforts have
been in the garden. The elongated spring has put us behind where
we were in years past, but this week turned into summer, prompting me
to play catch up.
First on the agenda ---
planting out everything that has been waiting in the wings until our
last chance of frost passed. Thirty
beautiful tomatoes are now in the ground, all but three gifts and two
homegrown Stupice started under quick
hoops. I had
sprouted some tomatoes inside, but the outside starts were vastly
larger and more vibrant, as usual, so the insiders went on the compost
pile.
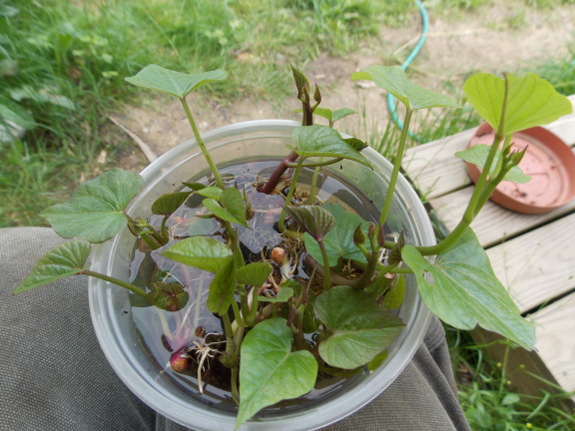
Meanwhile, I planted the
first eight sweet potato slips. I generally set these out a few
at a time since they're homegrown and don't all root at
once. My garden plan tells me I only need four more slips to
reach this year's quota, but I think I'm going to plant some extras in
gaps in the forest garden as a summer cover crop. Sweet potato vines
definitely seem to produce at least as much biomass per unit area as
buckwheat does, plus the tubers make great gifts.
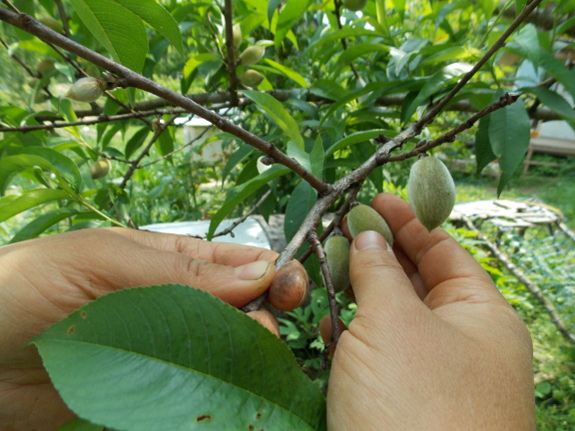
I stole a few hours away
from the vegetables to get the apples and peaches thinned. Thinning and pruning
are two of the most important factors in getting delectable fruits, but
are the most often overlooked by home gardeners. Sure, it's tough to pluck
five baby peaches off the tree for every one I keep, but I've learned
the hard way that peaches left too close together end up touching and
are more prone to brown rot infestations. In
addition, breaking off young fruits damaged by Oriental
fruit moths has
helped decrease that pest's population, and also prevents the tree from
pouring energy into fruits that will end up in the compost bucket due
to maggot frass in the middle. (Okay, I just cut out the bad
spots, but still.)
Thinning also helps
prevent the tree from breaking branches under heavy fruit loads, and
reduces your chances for biennial bearing. Finally, thinned trees
produce bigger, tastier fruits. I figure it's well worth the hour
I spent on our largest tree, and the few minutes on each smaller tree,
to get all of those benefits.
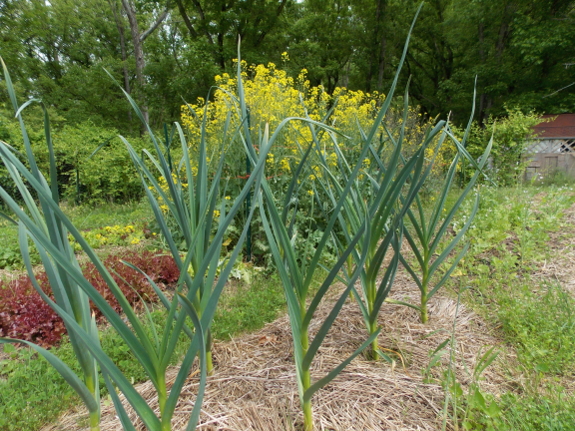
What didn't I have time
for this week? Weeding and mulching around seedlings planted
earlier in the year and catching those weeds in the woody perennials
before they get really rooted and hard to pull. Luckily, next
week begins the late May planting lull, so I should have time to catch
up in the areas I got behind on this week while playing catch up from
the weather.
Our front porch
is being attacked by carpenter bees!
I just found out they dig a
90 degree tunnel that can expand after each year of nesting.
Painting or varnish usually
prevents this kind of damage. I think we'll be using treated lumber for
any future porch projects.
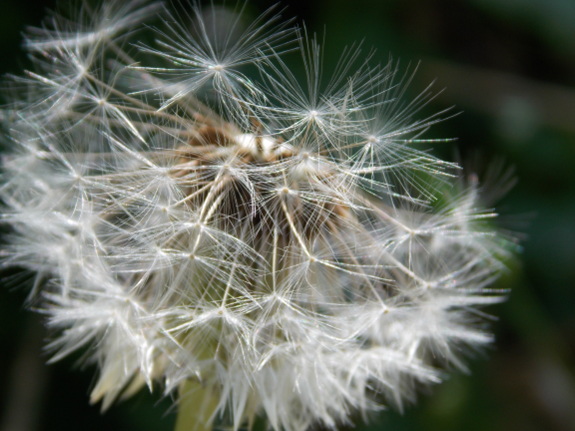
As Everett once wrote
on his blog, voluntary simplicity is far from
simple. It's tough to wrap your head around why you might choose
to embrace simplicity in your life, and equally tough to figure out how
to be simple when mainstream society considers simplicity 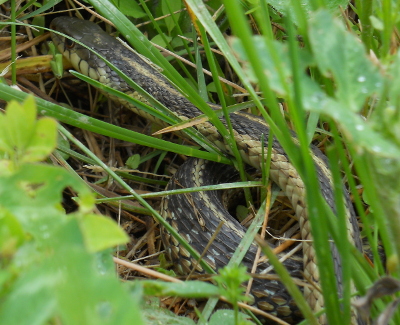 close
to a
sin. On the other hand, when I achieve simplicity in bits and
spurts, I understand the importance of the measure --- the word
"simple" in
the phrase refers to the peace you feel when you've cut that cord to
consumer culture.
Despite believing in the
philosophy, I haven't done much reading about simplicity because
writers like Thoreau
generally make my eyes roll. But when a copy of the Baltimore
Yearly Meeting of the Religious Society of Friends (Quakers)'s Faith and
Practice: First Reading
(2012) fell into my lap, I flipped through the sections on
simplicity and found some helpful advice. Here's an example:
 History has shown that when a
future outcome, however
noble, seems of greater worth than the human being before us, any
means, any atrocity, is possible.
History has shown that when a
future outcome, however
noble, seems of greater worth than the human being before us, any
means, any atrocity, is possible."We need to think of simplicity not as an impossible demand, but as an invitation to a more centered, intentional, and fulfilling Spirit-led life. Simplicity flows from well-ordered living. It is less a matter of doing without, than a spiritual quality that simplifies our lives by putting first things first.... This does not mean that life is to be poor and bare, destitute of joy and beauty. Each must determine...what promotes and what hinders the compelling search for inner peace...."
I'll close with one last
quote found in Faith and
Practice:
What do you think about
voluntary simplicity?
Thanks for all the comments on
last week's post about respecting
the load limits of a small truck.
Our conclusion is to be happy
with 20 buckets. The truck is over 20 years old, and she sometimes
creaks on turns with a full load, which is a message I'm getting load
and clear.
Apples are a magnet for
pests and diseases, and there are various responses to this
reality. Conventional growers just dose the trees with chemicals,
while organic growers tend to use less-noxious-but-still-problematic
sprays. Those
of us who eschew even the organic sprays, though, have to get a bit
more clever, and I start that cleverness off with variety
selection.
Our high-density-apple
planting gave me a
chance to try a lot more varieties than I could otherwise cram into our
core homestead, and I'm taking advantage of that opportunity to see how
each type of apple performs in our climate. The apple disease
that's been our biggest bugaboo in the past is cedar
apple rust, and I
tried to select only varieties that show resistance to the
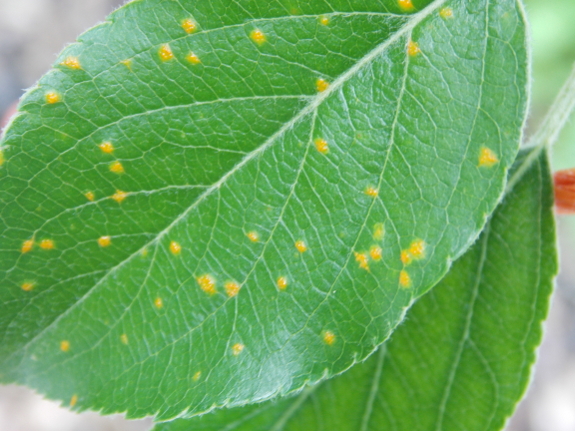
fungus. Still, I've seen the pretty (but problematic) orange
spots on several of our new trees --- Sweet Sixteen, Grimes Golden,
Pristine (ironic, huh?), Mammoth Black Twig, one of our two Zestars,
and Summer Rambo. All infestations are light to moderate, so I'll
ignore it for now and consider ripping out these varieties if the
fungus seems to be unduly affecting the trees' growth in the future.
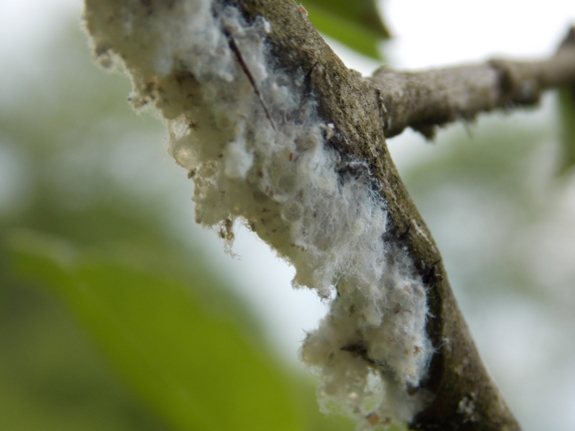
A new problem is woolly
apple aphid, which showed up on the last year's cicada
wounds on some of our older trees. Once I realized the white
fuzz wasn't a fungus, I stopped 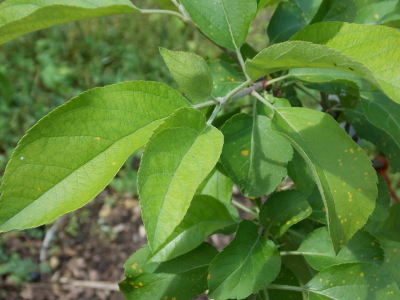 being as concerned, since I'm
quite good at squishing bugs. Woolly apple aphids only become
really problematic when they get into the roots of the trees and cause
leaf yellowing, which may be the case in the Pristine leaves shown to
the left. (All of Pristine's neighbors have darker leaves, or I
would have assumed the yellowing was simply a nitrogen deficiency, but
the issue could also be due to something else I've yet to figure out.)
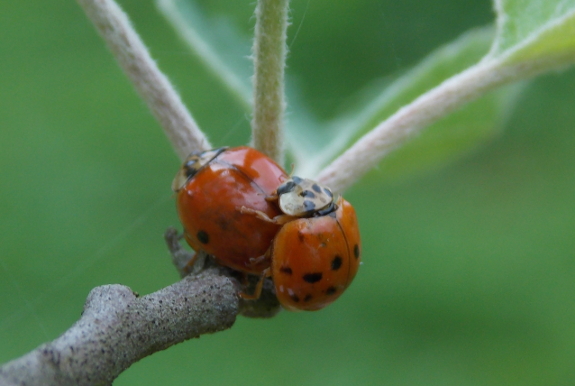
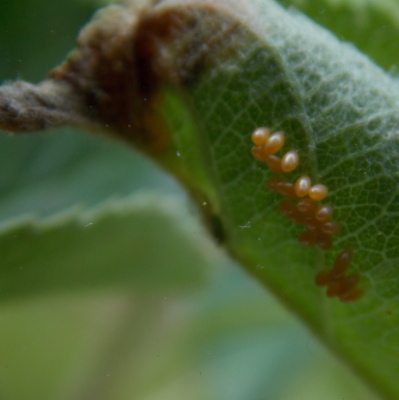
Possible root damage
aside, I suspect the woolly apple aphids will be long gone soon.
I started noticing the white fuzz less than a week ago, and when I went
out to visit the trees Sunday, I saw mating ladybugs and eggs --- the
predator insects are on the job.
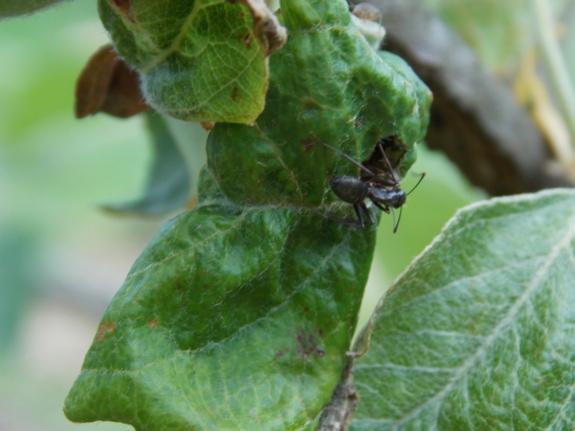
While we're on the topic
of aphids, it's worth noting that the woolly apple aphids weren't on
all the trees with cicada damage, just the Virginia Beauty. On
the other hand, our Yellow Transparent, Winesap, and Enterprise sported
a few curled leaves like the one above, which closer inspection showed
were full of fuzz-less aphids being tended by large black ants.
Once again, I'll let nature take its course here. I've never
known aphids to be more than a passing inconvenience in our diverse
garden.
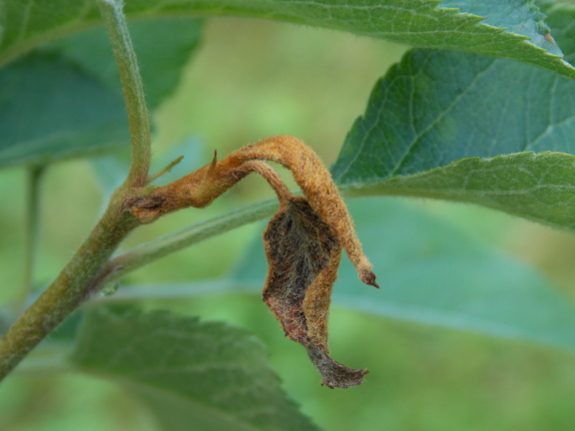
More troubling is the
dead leaf tips like the one shown above, which I'm guessing is the
apple version of fire blight. As with cedar apple rust, I tried
to select only resistant varieties, but apparently Enterprise is more
prone to fire blight than the internet lets on.
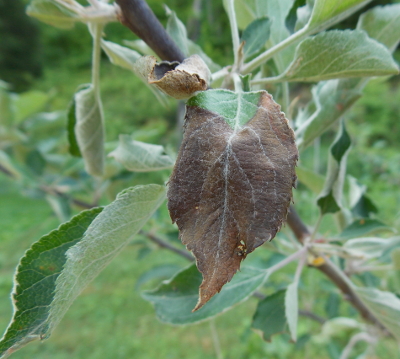 I'm not sure what to think
about the few blackened leaves like the one shown to the left, which I
discovered on our Winesap. Ideas?
In case you're keeping
track at home, all of this leaves just a few varieties completely
untouched by insects and disease so far this spring --- Liberty, the
dwarf Yellow Transparent, and Red Empire. So far, the following
varieties have set fruit --- Virginia Beauty, Liberty, Yellow
Transparent (the elder and the the younger), Enterprise, and
Pristine. I'll keep you posted on how the variety selection pans
out later in the year once we've seen how our trees hold up under their
various stresses.
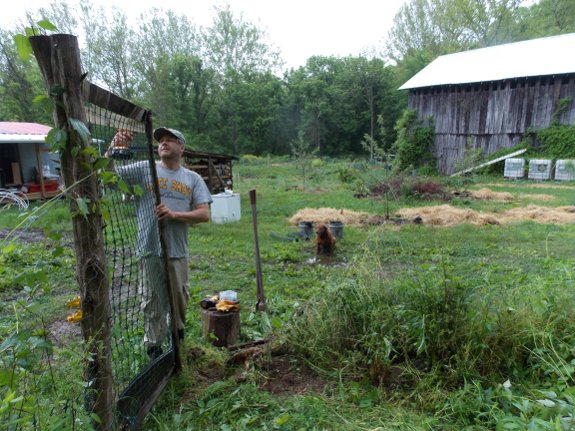
This chicken
pasture gate got damaged
last year because it couldn't get out of the way from the golf cart
backing up at full speed.
The latest batch of chickens
from the incubator
are starting to get big enough to threaten our strawberry crop, which
is what motivated today's gate repair.
We plan to relocate them into
this pasture tomorrow if we can figure out an easy way to move the outdoor
brooder without shaking
the chickens too much.
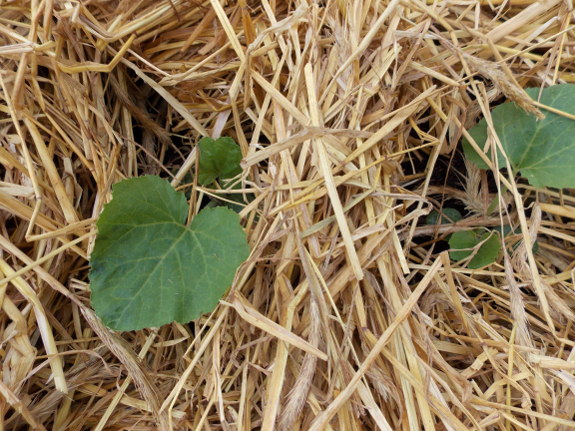
Planting always seems like the most
pressing part of starting the summer vegetable garden, but equally
important is following up a week or two later to make sure the crops 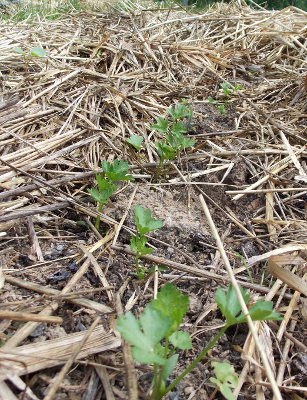 are off to a good
start. This week, I'm taking a close look at each of our seedling
beds and:
- Taking off the cat-repellant covers.
- Thinning if necessary, then weeding and mulching around each seedling.
- Replanting individual plants (like beans) in gaps, or replanting whole beds that didn't come up due to cold soil or that got eaten by hungry early-spring critters.
Some no-till gardeners
start everything in pots and transplant to avoid this dance (and the
bare soil that goes along with it). But I prefer the
cat-weed-mulch-replant waltz to the potted-plant polka.
It only took about 10 minutes to get the outdoor brooder to the new pasture.
 There's nothing like failing
the first time around
to make your ultimate success that much sweeter. That's right ---
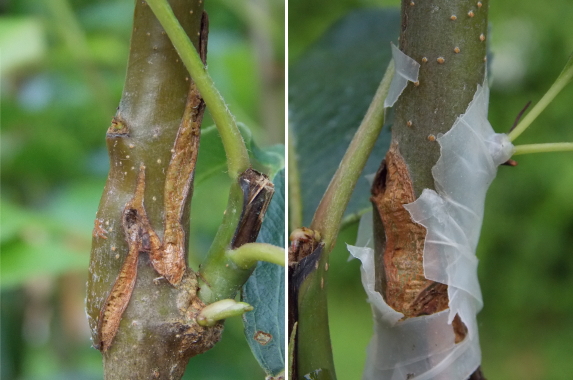
the grafts on my frameworked
pears are healing up well, and the growth from the scionwood is
really taking off. I've been ripping off new shoots below the
graft union as I pass the trees by for the past couple of weeks,
ensuring all energy in each grafted twig goes into the new wood, and
now it seems to be time to take off the parafilm before the twigs burst
free of their wrappings.
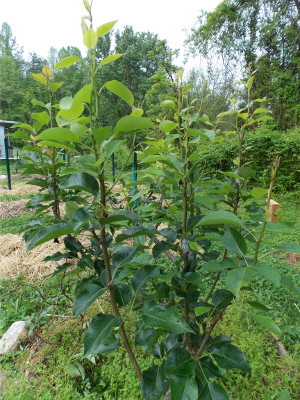
The Seckel scionwood I
grafted onto our Keiffer pear is doing an excellent job, with nine out
of ten grafts having taken. The other pear --- with an unknown
variety and Comice replacing the Orient twigs --- isn't as perfect, but
enough grafts have taken there to make the variety changeover.
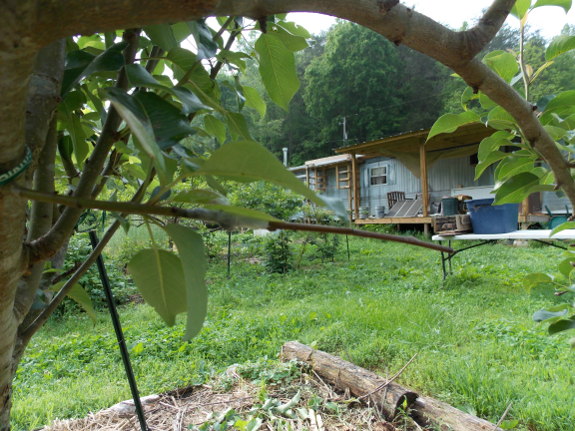
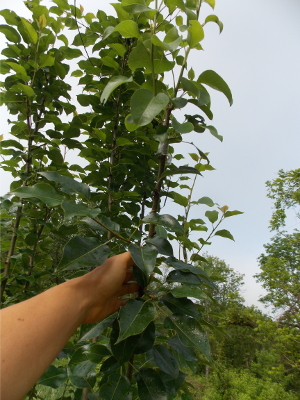 I'm not quite sure what the
big difference is between the two trees, but I've got some
guesses. The most obvious factor that determined the success or
failure of a graft was the orientation of the twig I grafted onto ---
vertical watersprouts resulted in fast and prolific growth from the
scionwood (photo to the left) while horizontal twigs (photo above)
often failed to take or started growing late. All of the twigs I
used for the Seckel pear were waterpsprouts, while a lot more of the
other tree's twigs were horizontal.
I also forgot to dab a
bit of grafting wax on the ends of the scionwood on the non-Seckel
tree, so those twigs might have dried out (although they don't look
like it). And it's also quite possible the Orient pear just isn't
as amenable of a rootstock --- several of the grafts that did take on
that tree have yellowing leaves on the scionwood and haven't put out
much new wood, while the Seckel scionwood has shoots that are often
nearly a foot long. (This isn't a crazy idea --- some varieties
are incompatible with each other and will simply die if grafted
together.)
The tricky part will be
keeping track of which twigs are the new variety and which belong to
the rootstock, so I can slowly let the former take over the
latter. For now, the graft unions are very visible, but I suspect
they'll disappear into the wood before long. And maybe all this
vigorous growth means we'll enjoy pears of the new varieties by 2015?
We learned today that 6 bales of
straw is the ATV's limit.
The truck can hold 12, which
makes an even number of trips back to the barn.
Readers from last year will
remember when I was hauling 10 with
the golf cart, but had trouble getting up the hill and decreased it
to 7.
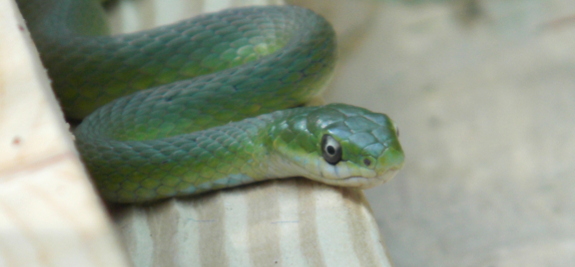
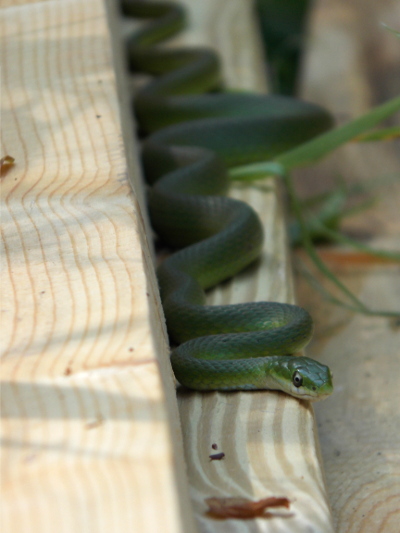 "Do you want to see the
cutest snake in the world?" I called down to Mark from the edge of the pig pasture. I had found a Rough
Green Snake (the first one I've ever seen!) in the lumber we'd stacked
for our new coop/pig shed, and Mark was very
willing to walk up the hill for the chance of a peek.
Which is all a long way
of telling you that we're back at work on the new pasture. Not
that things have slowed down at all --- the weeds are growing a mile a
minute --- but the broilers are too. We plan to keep about ten of
this year's first batch of broilers to replace our two-year-old layers,
and those pullets need somewhere to live between when the new
broilers get their
pasture and then they begin to lay. (At laying time, our new
flock will take over the quarters of our current laying flock, while
the old hens go into our tummies.)
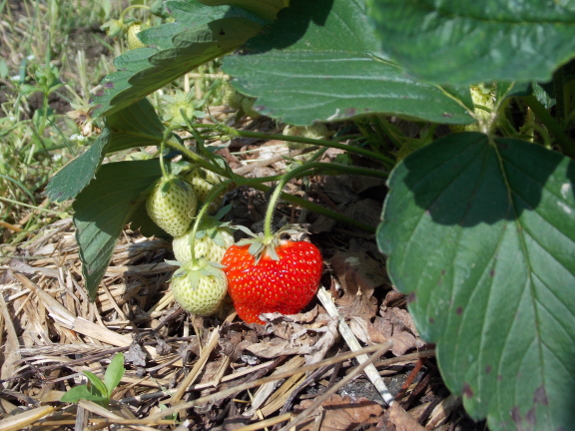
In completely unrelated,
but delectable, news, we ate the first strawberry of 2013 on
Tuesday. I suspect the floodgates will open soon, since lots of
half-ripe fruits like this one are scattered amid the beds. Our
long wait is finally over!
There's a small learning
curve on this new star
plate building method.
We plan to level up the
downhill side when we get the roof frame on.
 I wrote last fall that high-density
apples yield early and prolifically, but that you have to commit to
lots of summer
pruning and training
to make that dream a reality. With fruits well set on trees that
are going to produce this year, the plants are now turning their energy
to shoot growth. Time to honor my commitment and give those dwarf
trees some TLC.
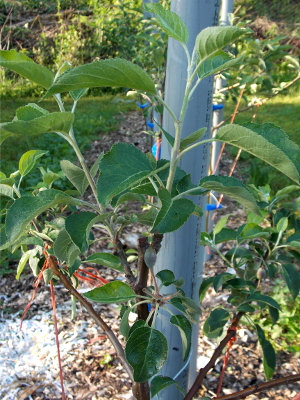
The first thing I'm
looking for at this time of year is double headers like the one shown
to the left. Since the nursery I bought the trees from headed
(cut the tops off) the apples before shipping them, multiple shoots
have a tendency to spring up right below the cut. I want one
central leader, so I pick my favorite, then rip the other one(s) off.
Side shoots are also
starting to elongate at this time of year, and many varieties have a
tendency to send that growth vertically, straight to the sun. I
don't want side branches competing with my 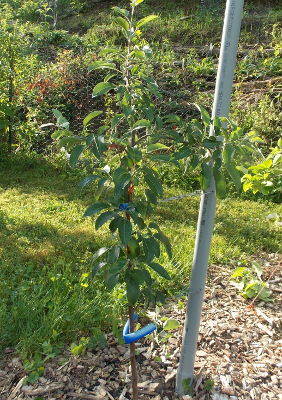 central leader, and I also
want to make the branches as horizontal as possible to promote early
fruiting, so I took another pass through the planting to tie down
branches so they look like the photo to the right.
Even if you don't have a
dwarf apple tree that you're pruning in a high density system, now's a
great season to spend a little time with your fruit trees. Weighing
down a few branches now or yanking off watersprouts before they harden
off really pays off by prompting the tree to put all of its energy into
the wood you want. Just remember that for most trees, you won't
want to make the side branches completely horizontal the way I'm doing
for my high-density apples --- that's a way of keeping the plants
compact and tempting out early fruits at the expense of a large canopy
and longevity.
We finished up the StarPlate
chicken coop frame today.
Next up is to fill in the
walls and decide on roofing material.
 I had originally planned to
write a lunchtime series about Thomas Seeley's Honeybee
Democracy, but I
ended up regaling you with most of the salient facts in my posts about our first
swarm and our
attempts to catch said swarm. Plus, you can read
the cliff-notes version of the parts most relevant to beekeepers in Swarm
Traps and Bait Hives.
Even though I'm sticking
to writing only one post about the book, I do heartily recommend that
anyone interested in honeybees check it out, especially the first half
before the text gets technical. The author studied under E.O.
Wilson, and his work was also informed by the methods of Karl von
Frisch, so Seeley's work is based on sound science, and is carefully
explained so it's understandable by laypeople.
As you probably
gathered, the book is all about swarm
behavior of honeybees, but the author interjects observations about how
the bees' version of democracy can inform our own. The last
chapter (which you can read as a stand-alone
ebook) considers
five lessons we can learn from the bees:
- Build decision-making groups out of individuals who share interests and mutual respect. (The bees do this the easy way --- the swarm only has one egg-layer, so if the queen perishes, so does all of their DNA.)
- Minimize the leader's influence on the group's thinking. (Although we think of the queen bee as a leader, she really doesn't make any decisions.)
- Seek diverse solutions to the problem. (When looking for a new home, a swarm usually sends out 300 to 500 scouts to search for possibilities, turning up around 13 to 34 potentials.)
- Aggregate the group's knowledge through debate. (Bees dance to show other bees the potential hive they've found, then those bees go out and look it over and decide whether to throw their support behind the site.)
- Use quorum responses for cohesion, accuracy, and speed.
(The swarm chooses to lift off and fly to a new site only after about
twenty to thirty bees are present at that site at any given time, which
means that most (but not necessarily all) scouts have come over to
their point of view.)
So, what do you think
--- would these bee lessons carry over to human groups?
Silkworms seem to be easy
livestock so far, just feed fresh mulberry leaves.
Once they get to be about 2
inches long they'll become protein snacks for the chickens or we'll have to start making home made pajamas.
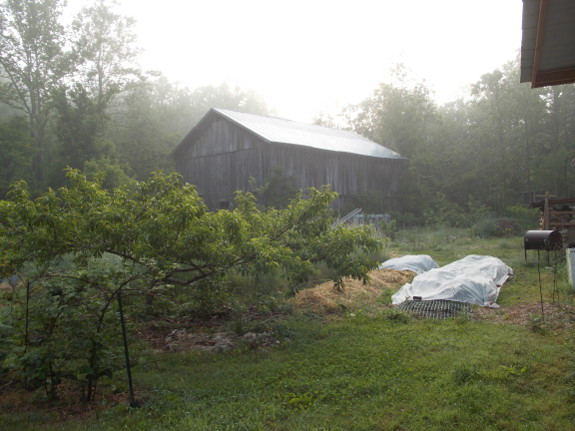
It seemed a bit unfair
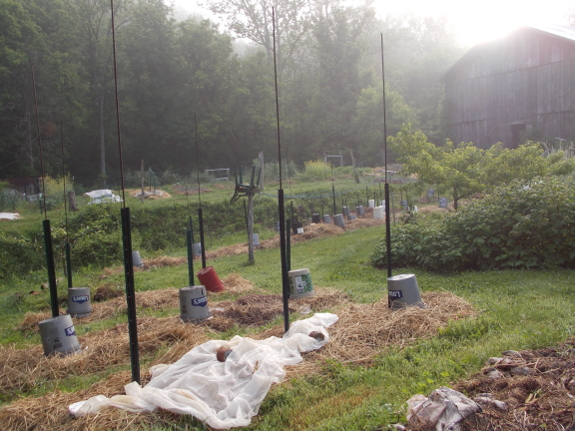
to have a freeze watch in effect 10 days after our frost-free
date. I'd set out everything frost-sensitive except our peppers,
so it took about an hour Friday to put buckets over each tomato plant
and row covers over the strawberries and vegetable seedlings. I
had to leave about half the tender vegetables uncovered, though,
because I ran out of fabric (and gumption), and, of course, the hardy
kiwis and fruit trees are always at risk.
Luckily, the low only
dropped to 34, and we didn't even see frost in the cold air drainage
path (back garden and gully) that usually seems to get hit first.
I did hear a round of dripping off our metal roof and into the gutters
just as the sun hit this morning, though, suggesting that we saw a
light frost on that conductive surface.
Our local weather guru
says there's a good chance that our area has set itself up in a
feedback loop of cool, wet conditions that may last all summer, and the
slowness of the garden this year does seem to support his
hypothesis. I can't quite figure out what I should change in that
case, although I know it means we're likely to lose our tomatoes to
blight quickly and our peachs to brown rot. Perhaps I should seed
a few flats of summer broccoli and brussels sprouts as a consolation
prize? Or start doing sun dances?
We've been missing a hen for
weeks.
Turns out she's been on
maternity leave. She found a nice spot in the barn and is now taking
care of 8 new bonus chickens.
Maybe we'll make this
location more chicken friendly for any future nesting.
Even though we didn't
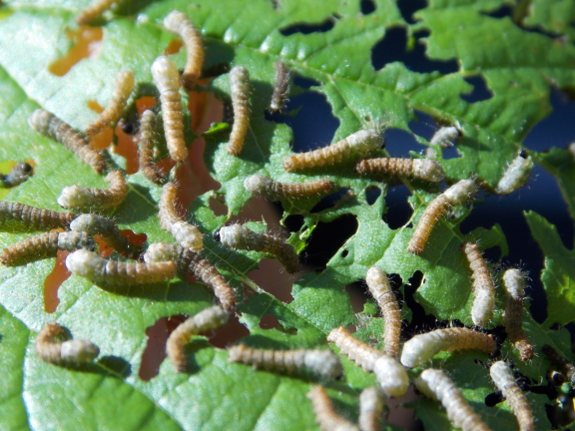
get pigs this year, we do have a few hundred new animals on the farm
--- silkworms! I haven't been posting about our inesect
adventures here because I've been pouring out my enthusiasm over on our
chicken blog, specifically:
- The potential of feeding silkworms to chickens
- How to raise silkworms
- How silkworm culture compares to feeding your chickens grains and soybeans
- When to hatch silkworms
- And many more posts coming up in the days ahead now that our silkworms have hatched
But I wanted to hit up
this larger audience for ideas on designing a silkworm experiment this
spring. Silk producers end up with a lot of dead silkworm pupae,
which they feed to chickens, pigs, and people, but it's clear that
silkworms aren't at their nutritional best at the pupal stage.
Since I don't care about silk, I can feed my silkworms to chickens at
any age, but when is the best time?
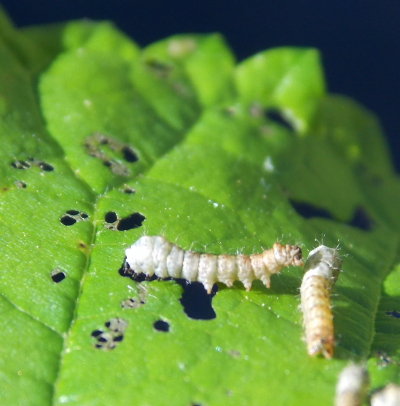 Before pupating, silkworms go
through five instars (caterpillar stages between molts). During
each instar, the catperillars are larger than they were before, but so
is their silk gland in proportion to their body, and silk isn't
terribly tasty or nutritious. My goal is to find the silkworm age
at which the caterpillars are as large as possible before their
nutritional value declines.
I assume chickens can
tell the difference between a subpar and a top-notch silkworm just like
I can tell the difference between an old, woody kale leaf versus a
tender, young leaf. But how do I analyze taste-test data from a
chicken? I could put out a tray of 30 silkworms each week and see
how long it takes the flock to gulp them down, but that plan has issues
since the silkworms will be bigger each week (presumably meaning they'd
take longer to eat). More importantly, we breed our chickens to
be non-pets in an effort to keep the flock out of the garden, so it
would probably take a while for them to even come up and discover a
dish of silkworms. How would you go about deciphering silkworm
palatability to your flock?
 Without an intern, Mark and I
are back on the job of not only fulfilling chicken waterer orders, but also building
the kits and premade units ourselves. We've really streamlined
the operation over the last year, so the actual construction only takes
us each two or three hours per week. Still, those hours always
call to me to work on my weaknesses since my mind is free and my hands
are busy.
This summer, I've opted
to use my construction time to take a refresher course on basic
permaculture while also improving my shoddy listening comprehension
skills. North Carolina
State University's free online permaculture class seemed like the perfect way
to kill both birds with one stone since the course format is videos and
the information is pretty local (from about 280 miles southeast of
us). As an added bonus, the required texts for the course are two
books I skimmed years ago and have been meaning to reread with a
fine-tooth  comb --- Gaia's
Garden and Introduction
to Permaculture.
I'm not committing to listening to all 38 lectures since I think the
summer may be long over before that happens, but I'll post about the
tidbits from the lectures I do make it through. Feel free to
listen along and comment with your own thoughts!
(As a side note,
Regenerative Leadership Institute also has a free online
permaculture course.
I chose NCSU's instead because they're physically closer to me, plus
RLI's videos weren't online when I began listening (although a beta
version is up now). I'd be curious to hear from anyone who
chooses RLI's course instead, or listens to both and would like to
compare and contrast. Or perhaps you've found yet another free
online course you prefer? Or maybe you paid for an online course
and thought it was worth the money? Please do comment if any of
those possibilities sound like you!)
And don't forget to tune
back in tomorrow at lunchtime to read my thoughts after listening to
lectures 1 and 2....
Discovered today that really
long rye
wants to get tangled up and clogs the trimmer.
It's not too hard to
dislodge, but usually can be avoided by running at full speed.
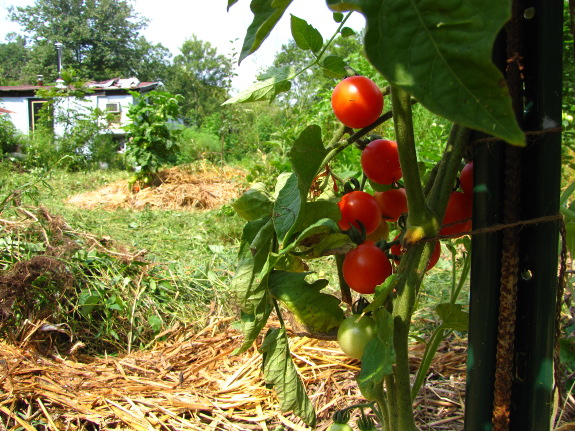 This year's tomatoes went in
the ground less than two weeks ago, and I'm already planning ahead for
next year. I've had good luck for the last two years choosing a subirrigated spot as a blight-control
measure, but I want to keep the tomato patches on at least a three year
rotation, which means I needed to find yet one more garden area with
high groundwater.
The back garden is the
obvious solution. Unfortunately, previous owners let that area's
topsoil completely erode away, so it's a bit more like a swamp than
like a true subirrigated garden. Which is all a long way of
explaining why the back garden is in the midst of a 12-month cover-crop
rotation to get ready for tomato season 2014.
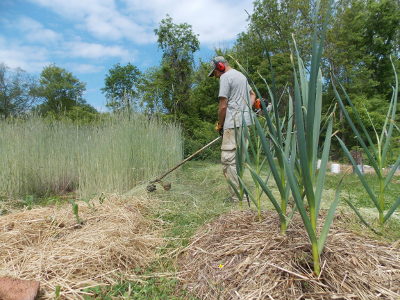 Much of the back garden has
actually already been in cover crops for over a year. I sowed
annual ryegrass in early March 2012, kill-mulched in early summer, then
planted buckwheat in any beds that weren't needed to reach last year's
vegetable quota. At the end of October, the whole area went into rye, which grew up over my head
despite sodden and poor soil.
Before Mark
cut the rye this week,
I scattered buckwheat seeds amid the standing stalks, and I plan to ask
Mark to pee on each bed in turn to add nitrogen to the soil. This
is my  version of Fukuoka's
do-nothing grain rotation, except that I don't let the
grains go to seed and instead grow them for biomass production. I
figure I'll have enough summer to plant buckwheat three more times in
these beds, before either repeating the winter rye experiment or using
oilseed radishes there for the winter instead.
My hope is that by this
time next year, I'll stop thinking of the back garden as terrible soil,
and can upgrade it to "good soil as long as I add a lot of manure every
year."
(In case you're
wondering, the pea flower has absolutely nothing to do with
tomatoes. I just thought it was pretty and wanted to share.)
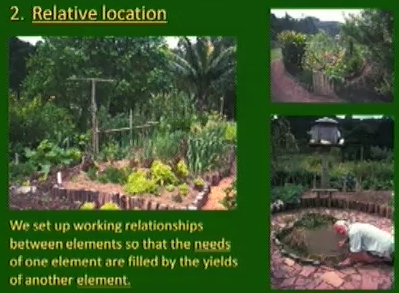 As
I mentioned yesterday,
I'm trying out Will Hooker's free online
permaculture class. The course was originally taught once a week,
with each day's lecture cut in half and put on the web in two
pieces. Since it makes sense to review and react to each pair of
lectures together, this post contains my take on lectures 1 and 2.
First of all, our
internet was running terribly slowly when I started
listening, which made it painful to jump to a spot in a video if I got
interrupted partway through. Luckily, the university didn't
protect against visitors simply right-clicking and saving each video to
their
computers, so I recommend you do that first. After downloading,
it'll be easy to skip past all of the information that's really only
relevant to local students --- like the getting-to-know you half hour
that made up most of lesson 1. In fact, if you know anything at
all about permaculture you might skip lesson 1 entirely and maybe even
lesson 2 (which covers permaculture ethics and principles). The
only really interesting tidbit I took away from these two lessons is
the idea of adding bird perches to the tops of
garden-trellis-and-staking posts to make it easier for our feathered
friends to hang out
and deposit manure below.
Your homework before delving into lesson three includes:
- In Grave Danger of Falling Food --- This 50 minute video about Bill Mollison is interesting, but drags a bit, especially since you're likely to have heard everything he's talking about before. It's intriguing, though, to hear permaculture-related stances straight from the horse's mouth, and to guess how current-day forest gardening grew out of Mollison's mixed-species garden.
- Earth Day Ecological Footprint Quiz and Carbon Footprint Quiz --- These quizzes are fun, but suffer from a very narrow worldview. I can understand why they don't give you the option to say you use a composting toilet and why they can't delve into the complexities of when meat-eating makes sense, but how hard would it be to let you input your actual electricity usage per year?
- Gaia's
Garden chapters 1 and 2 and Introduction
to Permaculture
chapter 1 --- These
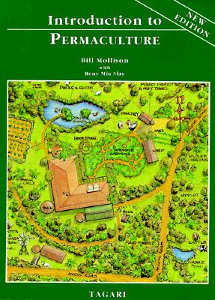 two
books are the required texts for the course
(with other books offering optional reading). I skimmed both of
these books when I first got started with permaculture many moons ago,
but recent reading (with a more experienced eye) changed my
review of each
dramatically. Now that I've tried a lot of permaculture
techniques on the ground, I find parts of Gaia's Garden naive and
overly enthusiastic, plus the book is obviously geared towards rich
suburban Americans who don't really need to grow any of their own
food. On the other hand, Bill Mollison's Introduction to Permaculture
has improved with age, and I can't quite figure out why such an
excellent book is out of print. Sure, it's based in subtropical
and tropical Australia, so you have to use completely different plants
than Mollison recommends, but the underlying themes are thoughtful and
rooted in experience (and the drawings are beautiful and informative).
I'll write more
specifics about the reading when I listen to the relevant lectures (3
and 4). That post probably won't show up here until next week, so
you've got plenty of time to catch up if you want to join this year's
version of last
summer's book club.
The more the merrier!
I made a mistake installing the ATV
receiver hitch.
The star washer should've
been sandwiched between the Receiver and the ATV.
It came loose, even though I
re-installed the star washer where it should be. I thought about trying
some epoxy, but might just weld it on.
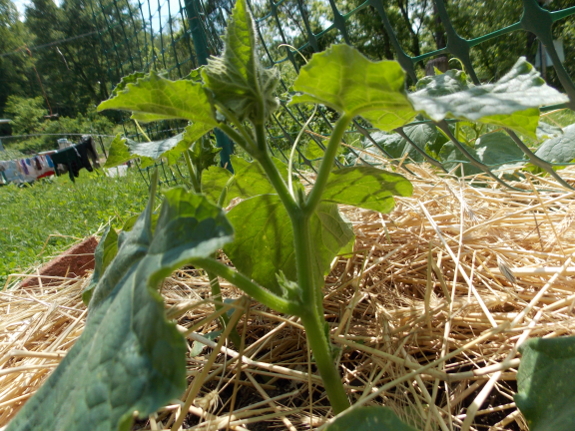
Have you ever been
wandering through the garden, and for a split second you can actually
taste that cucumber that hasn't even bloomed yet? Okay, maybe I
just have a very vivid imagination....
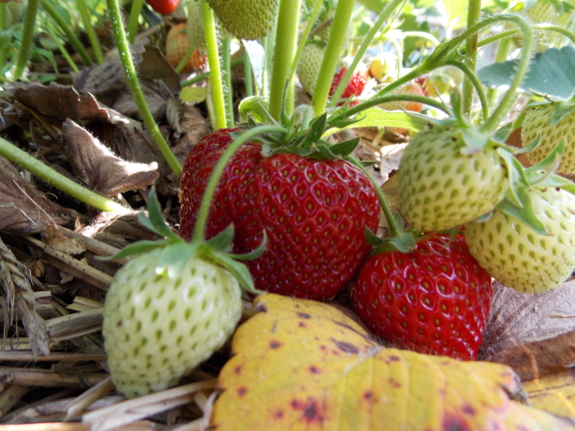
Gustatory hallucinations
aside, the actual garden produce is starting to expand out into summer
bounty. Tuesday officially began strawberry
week, when we
stopped rationing those delectable fruits and started gorging.
Tuesday also would have been the first tasting of sugar snap peas in
2013, but Mark was at an inventor's conference and I didn't want to
partake without him, so I saved the first crunchy duo for today.
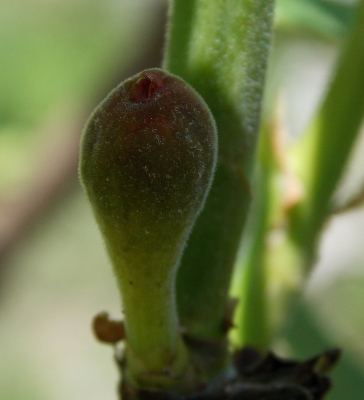
We're still eating
asparagus, although I've let each plant unfurl one stalk to recharge
their root batteries, and that's slowed production down. Kale
raab is also slowing
down, but it looks like garlic scapes will be joining our menu
this week, and we're already eating the spring planting of Swiss
chard. There's still plenty of lettuce, although it's going a bit
bitter and will probably be off the menu soon. And, look!, the
Chicago Hardy fig has already set its first fruit!
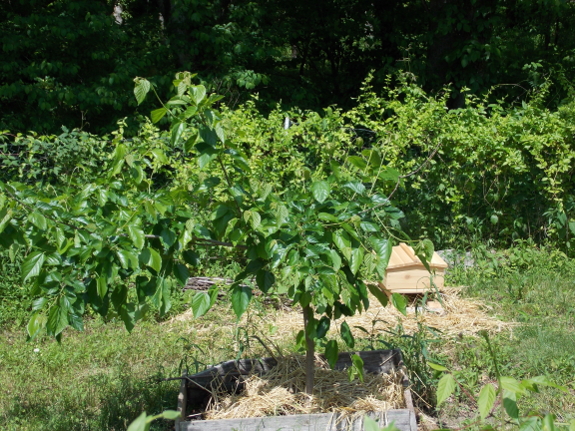
And then there are my
thrice-daily pickings of mulberry leaves. Oh, wait, those are for
our silkworms, not for us....
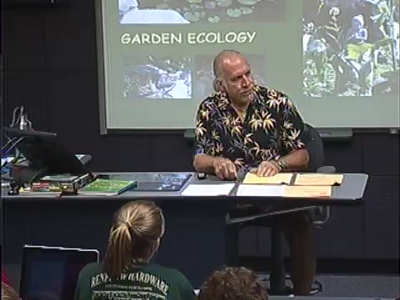 I told you yesterday that I
wouldn't write a reaction post to lectures 3 and 4 until next week, but
it turned out that those lectures (especially the latter) were much
more interesting and took me less time to finish up. So here's a
rather rambling series of thoughts on those lectures and the associated
readings.
The third lecture in the
online
permaculture course
is about garden ecology, and I felt it was a bit light (even after the
first 35 minutes of student observations ended). The only useful
tidbit I came up with was the idea of focusing on multiple-kingdom
guilds in our climate rather than on the plant-plant guilds that you
read about in tropical books (like Mollison's). I think Hooker is
spot-on with this assessment --- mixing chickens and trees or fungi and
plants has worked much better for me than companion planting.
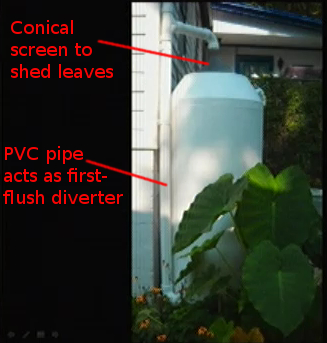 Lecture 4 is where the online
course begins to really shine, since it's basically an overview of the
professor's own urban homestead. Hooker shows us his Belgian
fence of apples, a grape-covered
chicken run (allowing him to shake the vines to feed Japanese beetles
to his flock), and a great rainwater-collection system (pictured to the
right). On the other
hand, you also begin to get a feel for Will Hooker's limitations in
this lecture, especially when you learn that he doesn't eat his
chickens (giving away the roosters and presumably letting his hens die
of old age). Hooker also puts a lot more effort into aesthetics
than into producing an edible
harvest.
Most of the reading that
went along with these lectures was information I already knew, but
there were a few gems in Mollison's Introduction to Permaculture:
****
"The golden rule is to develop the nearest area first, get it under control, and then expand the edges. Too often, the beginner chooses a garden far from the house, and neither harvests the plants efficiently, nor cares for them well enough. Any soil can be developed for a garden over time, so stay close to the home when placing the garden and orchard."
Finally, your reading
assignment before enjoying lectures 5 and 6 is:
- "Orchards, Farm Forestry, and Grain Crops" in Introduction to Permaculture. (The book I finally tracked down is the first edition, in which this is chapter 5, but I understand it is chapter 6 in later editions.)
- "Growing a Food Forest" in Gaia's Garden.
If you're watching and
reading along with me, did other parts of these two lectures jump out
at you? Feel free to share your thoughts in the comments.
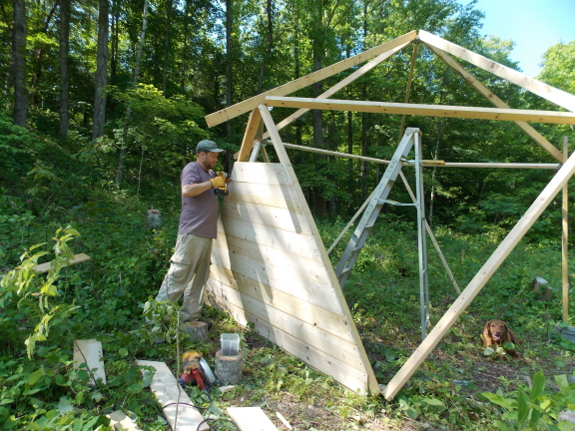
The easiest way to fill in
the walls of a starplate
chicken coop is using plywood...but only if you don't have to haul
the wood to a remote location. 1"x8" boards are much easier to
haul, and are not hard to cut to size on location.
No wood will be wasted. The bitter ends will match back up to
form the comparable portion of the next triangle over.
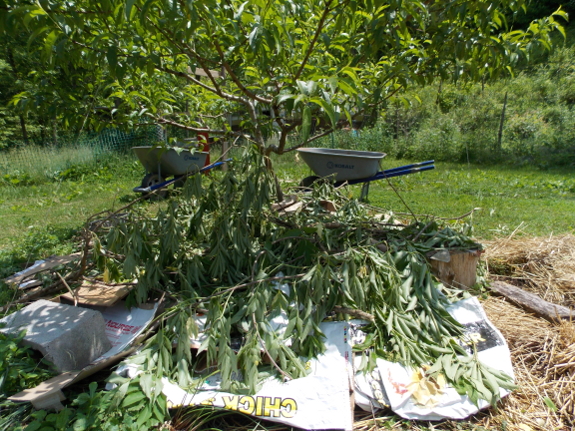
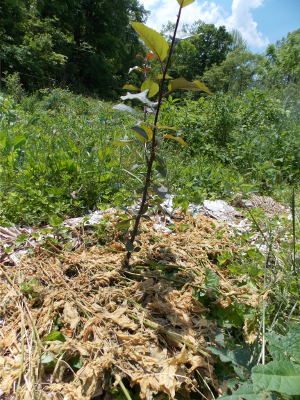 This is the time of year when
the weeding starts to get ahead of me and I have to cut corners.
For example, a couple of spots in the forest garden had turned into
such weed pits that I figured the understory plants were detrimental to
the trees above. Without an hour per tree to root out each weed,
I hunted down cardboard and paper feed bags to lay down a
quick-and-dirty kill mulch instead. But what organic matter could
I put on top to weigh the kill mulch down and give it some longevity?
Our core homestead was
entirely wooded when we got here, and many stumps are still sprouting
back from the base annually. At this time of year, new sprouts
are easy to rip loose --- one minute of yanking and I had enough
box-elder branches to mulch the little apple tree to the left.
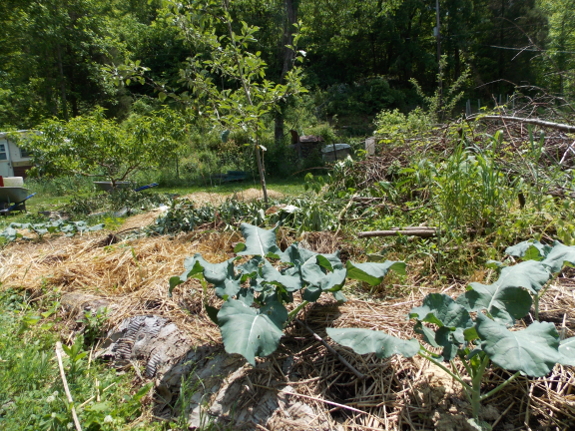
For the forest garden, I
instead turned to elderberries. It's
actually part of traditional Guatemalan agriculture to allow
elderberries in your fields, then to coppice them regularly to mulch
the plants you care about. Our damp homestead
means elderberries spring up everywhere, and I cut down all of last
year's stems from the patch in front of the barn in just a couple of
minutes. At this time of year, elderberries are easy to snap
across your knee, so the leafy stems are what I ended up topping off my
forest garden kill mulches with. Since I left this year's stems
on the trees, they should have plenty of gumption to keep growing,
allowing me to repeat the easy mulch-gathering next year.
Last
year, I made a similar mulch out of wingstem and ragweed, and the berries mulched
thusly stayed much more weed-free than I would have thought,
considering that leafy stems tend to dessicate down into a very thin
mulch within a few days. I'm hoping my forest-garden quick fix
will have similar results.
Our local lumber store was
out of 1x8's so we switched to 6 inch boards, which takes a bit longer
for each wall.
I started putting the scrap
pieces on one of the triangles, but will wait till tomorrow to share
those details and pictures.
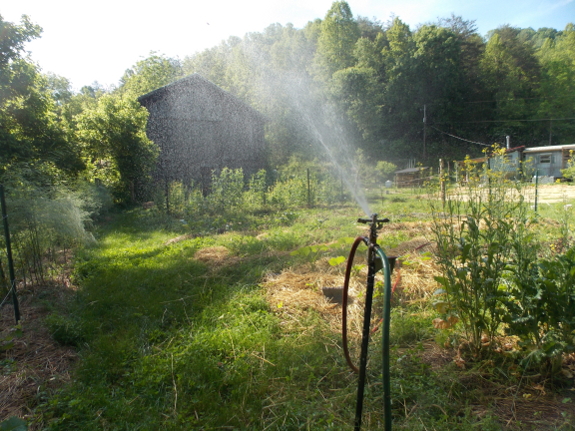
Some years, we bring out
the hoses and hook up the sprinklers in April; this year it's nearly
June. That said, my sun dances seem to have been working ---
highs up to 90 and a week without rain has started cracking the earth
as it shrinks and dries. Garden growth is slowing down too ---
thus hauling out the sprinklers.
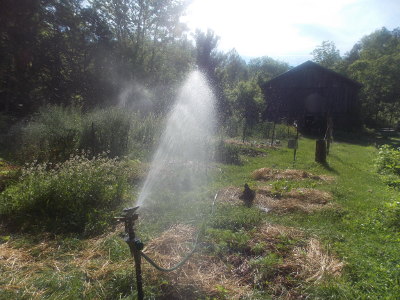 You can read all about the
reason we designed our irrigation system the way we did here. The initial setup
cost a couple of hundred bucks, but the sprinklers and hoses have been
going strong for four years now without an end in sight. I did
take a minute to grease each sprinkler before getting started this
spring, which should prevent the trouble I had with a couple of
sprinklers getting stuck in one spot previously. That small
bit of maintenance aside, irrigation of the vegetable garden is now
nearly trouble-free --- just flip a switch and change a valve every few
hours.
We left the TC1840H
garden wagon in place
when we moved
the chicks recently.
Now changing pastures is
easier and fun.
Want more in-depth information? Browse through our books.
Or explore more posts by date or by subject.
About us: Anna Hess and Mark Hamilton spent over a decade living self-sufficiently in the mountains of Virginia before moving north to start over from scratch in the foothills of Ohio. They've experimented with permaculture, no-till gardening, trailersteading, home-based microbusinesses and much more, writing about their adventures in both blogs and books.
