
archives for 04/2013
Chelsea Green sent me a
review copy of Holistic
Orcharding with Michael Phillips to peruse, and I enjoyed the
way
the video rounded out the information found in the companion
book. Even
though I'm more of a reader than a watcher (and
thus probably wouldn't have spent $50 on the DVD), I was enthralled to
see a holistic apple orchard in action.
 The video mostly covers the
same topics as the book, but you'll almost
certainly learn something new. For example, I discovered that
Phillips kill mulches with used sheet rock, providing both
weed-supression and the addition of gypsum to the soil. I also
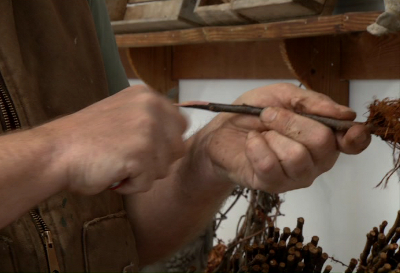
enjoyed seeing how he makes his grafting cuts (pulling the knife toward
him for more control), and learning that the sugars binding pelleted
lime together provide microorganism food that helps the calcium work
into the soil faster than unpelleted lime would.
 The video was five hours
long, and I'll admit that my eyes glazed over
in places (notably when Phillips started talking about his organic
sprays). But
at other times, I felt like I was in his orchard and
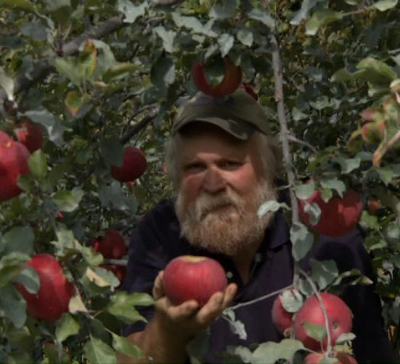
almost able to take a bite out of the heirloom varieties Phillips was
describing as he plucked them crisp from the tree. I loved that
Phillips was wearing his work clothes and had dirty fingers, and
I actually wished we'd gotten to meet his wife as well. A final
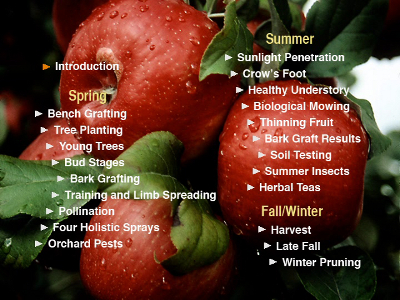
positive, the DVD is extremely well indexed, so I'll be able to refer
back to information on specific topics quickly in later years when I
need a refresher on pest insects, herbal teas, or what have you.
 The
short version is --- if you get a chance to watch this DVD,
definitely do so. And, if you're more of a watcher than a reader,
it may well be worth the steep price tag. In fact, at this
instant, the
DVD seems to be on sale for $32 on Chelsea Green's website
(although I didn't click through to find out if shipping was extra), so
it might be more reasonably priced than I thought.
(And now I really want more apple trees.)
 The
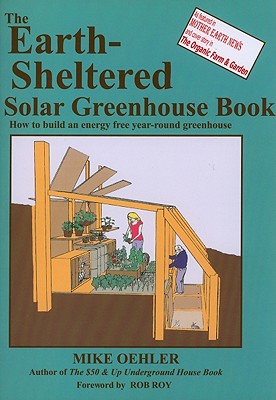
Earth-Sheltered Solar Greenhouse Book is similar to Mike Oehler's The
$50 Underground House Book, with all of the usual
self-published pros and cons. I was a bit more disappointed in
the greenhouse book than in the earlier text because I felt the former
used large print to extend the page count, and the typos were a little
excessive. But it was interesting to see how the author built a
greenhouse for $400 using the same techniques he uses to make
underground houses. (He estimates a greenhouse built using his
methods and new supplies would instead cost about $1,250 for a
32-square-foot grow area.) And I enjoyed the copious
illustrations and the anecdotes about happenings at Rainbow Gatherings.
On the other hand,
Oehler is clearly more of a builder than he is a gardener. His
greenhouse book is full of theory, but when it comes to the practical
elements, it turns out he's only getting about as much out of his
greenhouse as we do out of our quick
hoops.
Granted, I estimate Oehler lives about one zone colder than us, but if
I were to build a greenhouse, I'd want it to do more than provide kale
for the winter and tomatoes in early December. Still, I found
some greenhouse-building tips to regale you with for the rest of the
week, so stay tuned.
 This post is part of our Earth-Sheltered Solar Greenhouse lunchtime
series.
Read all of the entries: This post is part of our Earth-Sheltered Solar Greenhouse lunchtime
series.
Read all of the entries: |
Our first DIY
dog door didn't work out
so well.
This plastic lattice material
is attached at the top with some 16 gauge galvanized wire so that it
will hang free and swing whichever way Lucy is going.
Stay tuned to see if this
helps keep Lucy from chewing holes in our chicken pasture fence.
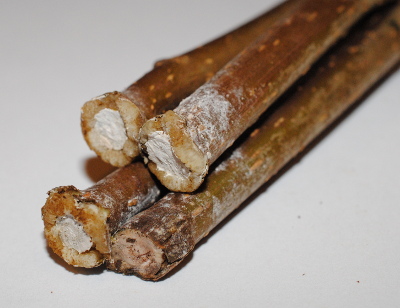 I sent some Illinois
everbearing mulberry cuttings to a reader who wanted to experiment with
their propagation, and asked that he give me some details on how his
experiments panned out. Last week, Gary wrote back to tell me:
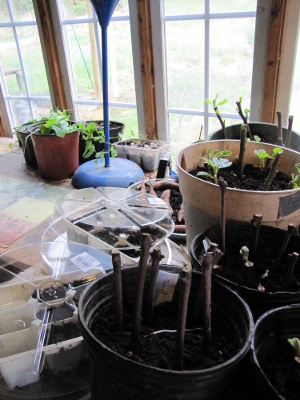
"My second approach was to dip in rooting hormone, wrap in moist newspaper, roll in a black plastic bag and place over a furnace register. A similar approach that I use successfully for grape vine cuttings. On inspection last night I have callus starting to form on three of the four I.E. Mulberry cuttings using this method. [See photo above.] They are still a few days to a week away from planting in a rooting medium but I am encouraged by good callus formation.
"I'll share another update in a month or so with updates on rooting and with early results from my grafting efforts."
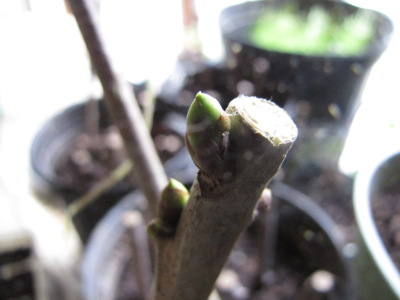 As
a side note, I decided to try my own mulberry experiments at the same
time I sent cuttings to Gary. I soaked them in willow
rooting hormone for
a day, then put four cuttings in a pot inside and about a dozen
straight into the ground outside.
As you can see, one of
the cuttings inside is breaking dormancy already, which is actually a
bad thing since that
cutting shows no signs of growing roots. On the other hand, a
differnt one of the four indoor mulberry cuttings and perhaps three of
the outdoor mulberry cuttings show some resistance to the tug test,
suggesting they might be growing roots. I'll post again when the
time comes to repot and I know what kind of root growth (if any) comes
from my simple propagation method.
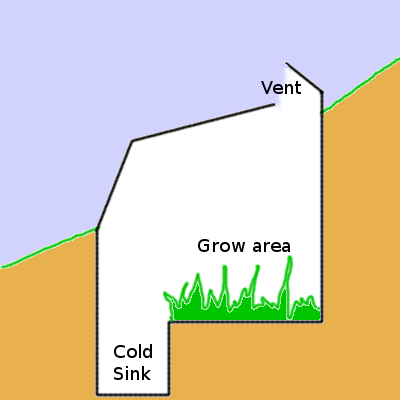 I've written previously about
a couple of other insulated
greenhouses, so I
thought I'd focus here on what makes Oehler's
design different.
The most obviously
unique feature of Oehler's greenhouse is the cold sink --- a lower
aisle near the front. The original purpose of the cold sink was
to give Oehler head space on the downhill side of the greenhouse
without requiring so much excavation on the uphill side. But, as
the name suggests, this lower aisle also allows cold air to pool away
from the plants. The cold sink is pushed up against the south
wall, an area that is usually in shadow during the winter and is thus
of little use for growing plants.
Using the earth as
insulation and thermal mass is another difference between Oehler's
greenhouse and many others you'll see. He recommends using either
water tanks or masonry to turn the north wall into a heat battery,
soaking up the sun's rays during the day and radiating the warmth back
out into the greenhouse at night. Insulating behind the upper
three feet of the wall keeps out cold air from above, but Oehler feels
you should leave the rest of the north wall uninsulated to let the soil
continue the heat-battery concept. Similarly, he feels that
you'll actually get more warmth in the greenhouse over the long run if
you sink the east and west walls into the ground rather than covering
them with windows.
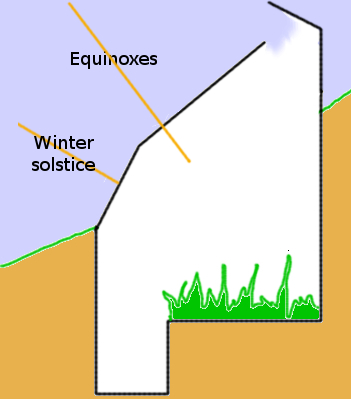 Another design factor Oehler
brought up is the angle of the glazing. (More on the glazing
material in a later post.) Oehler has found that you get the best
light penetration if the sun is perpendicular to the glazing surface,
meaning that you'll need to plan for which time(s) of year you want the
most light. One option is to raise the south wall out of the
earth at an angle, perhaps matching that to the sun's angle at the
winter solstice (around 30 degrees here), then matching the roof
glazing to the sun angle at the equinoxes (around 53 degrees
here). Alternatively, you might choose different angles if you're
mostly using the greenhouse during the spring, summer, and fall and
want full light penetration during those times rather than during the
dead of winter.
Finally, Oehler
recommends that we learn from his mistakes and provide much more
ventilation than he originally planned for. He's found that
plywood at the peak of the roof doesn't shade the interior at all
except at the summer solstice (a time when you're likely to have the
vents open), and that wood makes vent-construction easier. With
20/20 hindsight, Oehler recommends covering the entire peak of the
greenhouse with these vents, and also including cold-air intake vents
somewhere lower down (like at the bottom of the door).
 This post is part of our Earth-Sheltered Solar Greenhouse lunchtime
series.
Read all of the entries: This post is part of our Earth-Sheltered Solar Greenhouse lunchtime
series.
Read all of the entries: |
We got the new gate
with dog door finished
today.
It swings nice and free and
feels like it might solve the problem.
I ended up adding a small
piece of wood to the bottom of the dog door to keep the wind from
blowing it and inviting chickens through.
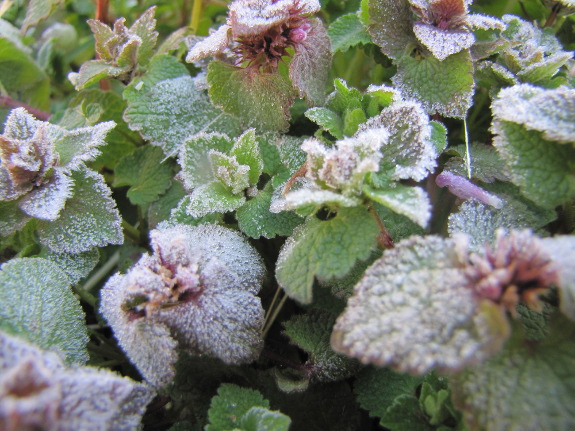
We're still getting
nights down in the low 20s, but spring decided it had better start
anyway. The buds on the peach trees are just barely starting to
show pink, and I finally saw the first spring beauty flowers in the
woods last weekend.
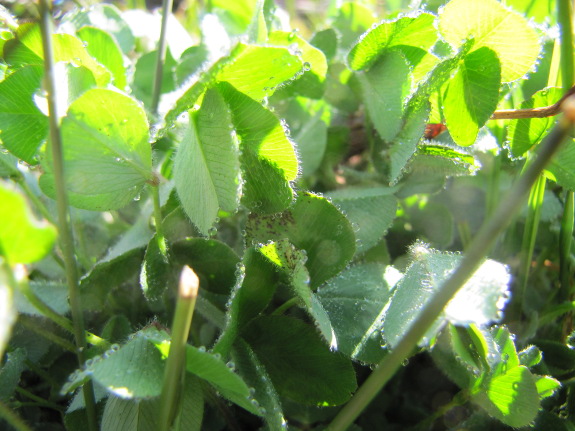
Meanwhile, surprises are
popping up around the yard. I tossed a bunch of red clover seeds
in the gully last year after the briars got
cleared away, but I
assumed they'd bitten the dust since I never saw hide nor hair of the
plants. But while walking through the gully to get to the
new dog door gate, I
noticed several big clumps of clover coming up in the damp soil of the
gully bottom. Maybe we'll do some soil building down there after
all!
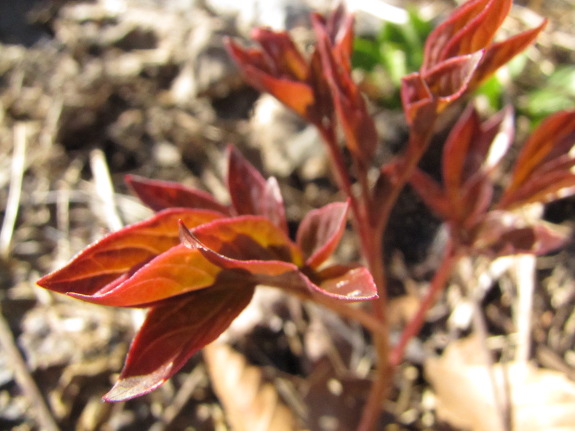
Along the western fence,
I'd planted three peonies Mom split from her own collection last
summer. I kill mulched around them, but didn't give them
much love, and the plants soon shriveled up and died. I let Mark
start mowing over the peony patch in mid summer, but while walking past
the mulched spot this spring, I saw shiny red leaves. Two of the
three peony plants have come back from the dead --- happy zombie peony
day!
Don't you love spring
surprises? What popped up in your garden this year that you'd
forgotten about or given up on?
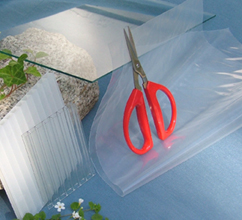 Choosing
the glazing for a greenhouse is one of the trickiest parts of the
design process. Most people choose thin sheets of
so-called greenhouse plastic, the cheapest of which you can often buy
locally at a hardware store. Unfortunately, Oehler reports that
this ultra-low-end plastic usually only lasts about a year. He
finds that the 6 mil, UV-treated plastic
available at greenhouse-specialty shops lasts a bit longer (up to four
years), but not
long enough to be worth the additional price.
Moving into the more
expensive but more long-lived choices, there are
various types of rigid plastics you can use in greenhouses. None
of these plastics will last as long as glass since they slowly yellow
(blocking light) over time, and since scratches will speed up the
decline in
light penetration. On the other hand, rigid plastic is safer than
glass
(especially on roofs) because the plastic won't shatter, and plastic is
considerably lighter, making it easier to work with.
At the high end, acrylic
(aka plexiglass) lasts the longest (25 to 30
years) and gives you the best visibility if view is important to
you. Polycarbonate is a slightly cheaper choice, staying clear
for about a decade, or up to 35 years if you choose a version that's
been UV-treated. Oehler notes that he would probably choose
polycarbonate for future roofs.
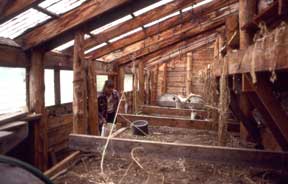 For the walls, Oehler is a
fan of scavenging old windows,
especially if
you can find double-strength B grade. Glass is much heavier than
plastics, which makes installation tougher, especially if you double
up windows to provide an insulated air space in between. But
windows
can often be found used or cheap, making them the lowest-cost building
option.
None of the glazing
options have spoken to me in the past, which is one of the big reasons
I've been anti-greenhouse. So I'm curious to hear from readers
who have experience with greenhouses. Which type of glazing did
you choose and how long did it last?
 This post is part of our Earth-Sheltered Solar Greenhouse lunchtime
series.
Read all of the entries: This post is part of our Earth-Sheltered Solar Greenhouse lunchtime
series.
Read all of the entries: |
We got some of our new mushroom
logs drilled, plugged,
and sealed today.
This is the first year we
tried doing it with the DeWalt impact driver. It seems to do a fine job as
long as the battery holds out and you have one of those bits that slide
in.
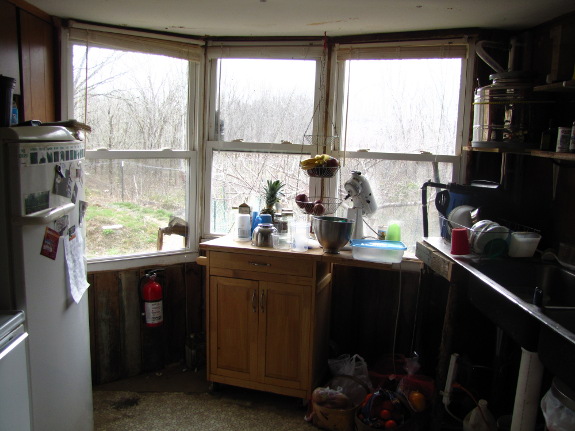
Interior design is one
of my worst subjects, mostly because all I really care about is being
able to look out windows. I also like small spaces --- I vividly
remember pit-stops during long family car trips where I closed the door
on the bathroom stall and just wished I could stay in that tiny space
for the rest of the day. So I was perfectly happy squeezing our
tiny table (a coffee table up on cinderblocks) into the spot in the
kitchen between the fridge and the sink. It drove Mark's
long-legged self a bit nutty, though, to fold into such a tiny space
for two meals a day, so last fall I rearranged everything and put a
kitchen island where the table was, moving the table to the bay of
south-facing windows.
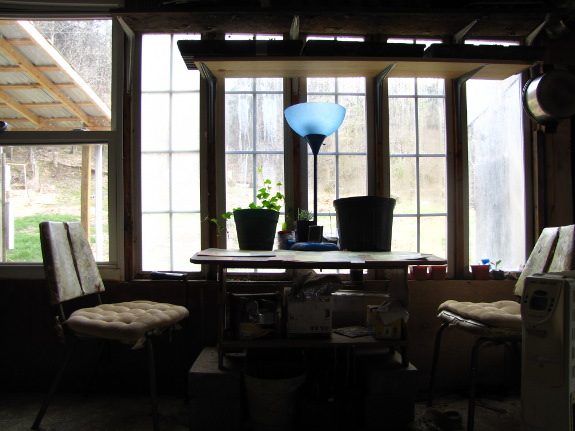
More room made for a
happy Mark, and I liked the new view. The only real downside was
that I'd planted a mass of spring flowers under the kitchen peach tree
for us to enjoy at this time of year, and now the flowers are out of
sight.
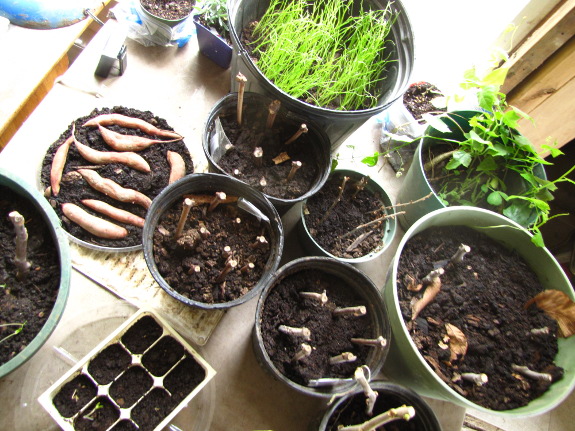
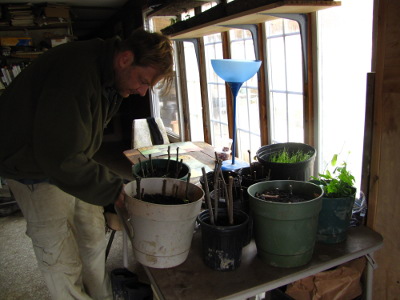 But
then seed-starting time came and I realized the other flaw in my plan
--- our dining table is now located where I used to mass plants to
enjoy spring sunlight before they moved outside.
So we rearranged again to make space for a card table that was
immediately full of cuttings, seedlings, and perennials. These guys are all
slated to move outside sooner (weeks ago for the onions, but it kept
being too cold) or later (the frost-free date for the cuttings and
tindora). Mark is once again happy to have them out from under
the table, off the top of the fridge, and off the edge of the dining
table. Thanks for putting up with my plant hoarding, Mark!
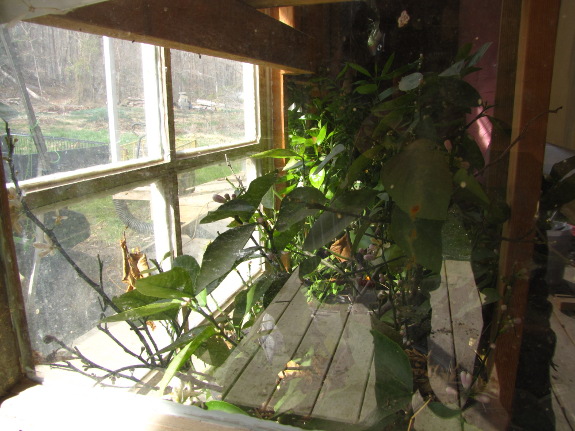
So why am I writing a
whole lunchtime series about greenhouses when I've been adamantly
anti-greenhouse in
the past? Oehler's less-than-exciting results aside, Toensmeier
and others have shown that you can get more out of an unheated
greenhouse than I'd seen elsewhere. But, mostly, I'm just
trying to figure out how to keep our dwarf
lemon tree growing.
In the winter of
2011-2012, our potted lemon tree provided thirty-some lemons from its
large pot in the East
Wing. However,
a variety of factors worked against our darling tree over the ensuing
year, so we only enjoyed four measly lemons this winter. Part of
the problem won't happen again --- the
cicadas laid eggs in the stems just like they did in
everything else, and I pruned
the roots too drastically in an effort to keep the
plant from becoming root-bound.
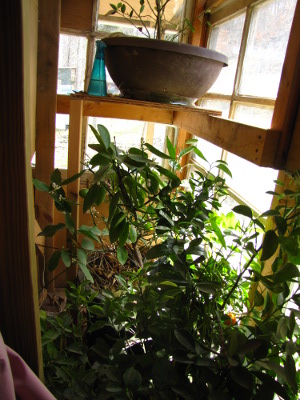 However,
the biggest issue is that Mark changed his use-patterns and ended up
putting a wall in front of the windows in the East Wing so he wouldn't
have sun glaring in his eyes while he rested. To tend to the
dwarf citrus at the moment, I first have to climb over a sofa and slip
into a three-foot-wide closet, trying not to hit my head on a
brace-beam. Suffice it to say that I've barely given the plants
the watering they crave and have completely avoided any extra
TLC. And the citrus show the neglect by sitting there and
scowling at me (which makes me want even less to visit their den).
The ailing lemon has
dampened my mood this winter, and Mark and I eventually decided we
didn't want to go through another year of this. We'll either give
our darling lemon tree away, or make it an accessible home by the end
of the year. Unfortunately, there's no window space in the
trailer for a lemon tree, and since the East Wing is now out, any sunny
window would have to be in a newly constructed space.
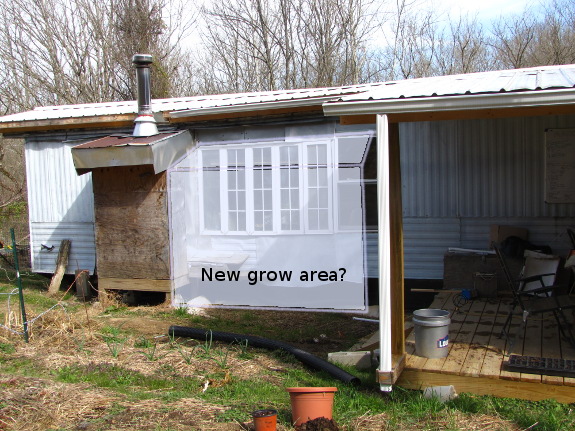
Two alternatives are
currently in the running. Option one is to build a little nook in
front of the trailer, just like the wood stove alcove but a hair bigger.
Since this area would open into the trailer right by a heat source, it
probably wouldn't be take much extra wood to keep the lemon tree above
freezing therein. As an added bonus, a second round of glazing
outside our south face of windows would insulate the glass and help
hold heat within the trailer itself. (As a side note, I had
written last summer about the possibility of turning our south-facing
porch into a
sunroom, but a winter of cogitation showed us that we really like that
area as a porch and that it feels too big to heat for our small family.)
The second option is to
build a passive solar greenhouse into the south-facing side of the gully. This would be a much
larger project, and has the disadvantage that it wouldn't be connected
to a building, so if I didn't design it well enough to stay above
freezing due to passive solar heating and thermal mass, I'd be heating
what's essentially the outdoors. On the other hand, a greenhouse
down there would give me more room to play with other plants ---
currently I've completely filled up the area under the table and on top
of the fridge with rooting cuttings, and could use more space. In
addition, the gully gets much more sun than the front of the trailer in
the winter months.
Luckily, we have plenty
of time to ponder the project, and the worst case scenario would
consist of one of our friends getting a stellar house plant, so that's
not all bad either. In the meantime, we'll keep thinking....
 This post is part of our Earth-Sheltered Solar Greenhouse lunchtime
series.
Read all of the entries: This post is part of our Earth-Sheltered Solar Greenhouse lunchtime
series.
Read all of the entries: |
I made another gate
with a dog door today.
It started raining before I
got a chance to hang it.
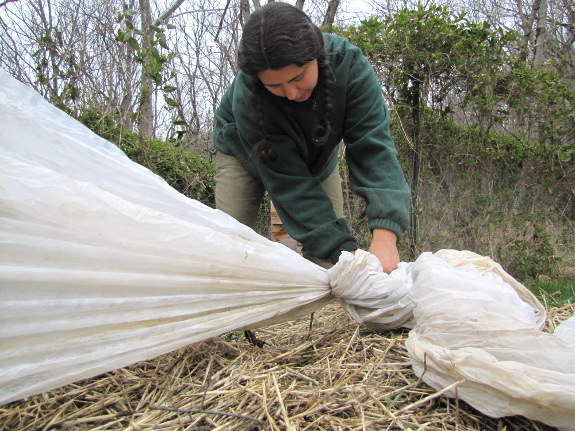
The only thing
dependable about the weather this week has been its sheer
undependability. Yes, that's sleet in my hair on a morning that
was supposed to be warm and sunny according to Monday's forecast.
I rushed to seed carrots, parsley, lettuce (third planting), and
tomatoes (under a quick hoop) before the sleet turned into cold,
drenching rains.
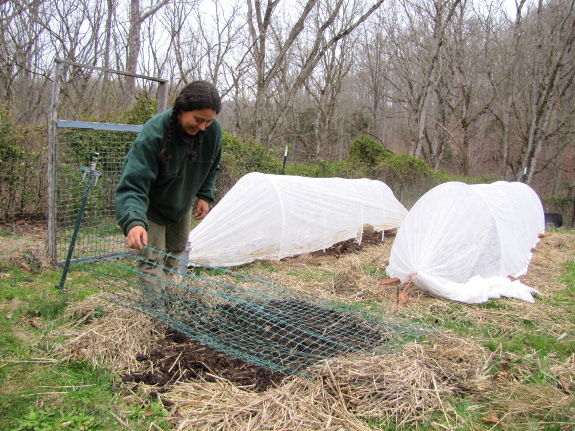
Unfortunately, our
animals are more dependable than the spring weather. Lucy hasn't
seemed as interested in sitting on our newly seeded beds as she has in
past years, but the cats have been busy using the soft ground as a
toilet and the chickens have been breaking in to scratch new seedlings
out of the soil. I'm trying an ultra-simple scratch
deterrent this year
--- just a plastic trellis on each newly-seeded bed until the
plants are up enough to be mulched. Within a month, our animals
will have gotten sick of raising my blood pressure, and I won't have to
protect the new beds any longer.
What didn't happen this
week was onions, broccoli, and cabbage sets going out into the
ground. I really, really want these seedlings out of the house
--- they're already weeks late --- but the forecast low for tonight is
36, which could mean 26 on our north-facing slope, so we'll wait a few
more days. I would like to say next week will be warm and sunny
and perfect for transplanting, but those 10-day forecasts are
notoriously undependable.
With any luck this will be
the last morning we wake up with chickens in the garden.
It only took Lucy a few
minutes to figure out the nose lifting thing.
I made it wide so an ATV and
golf cart could fit through.
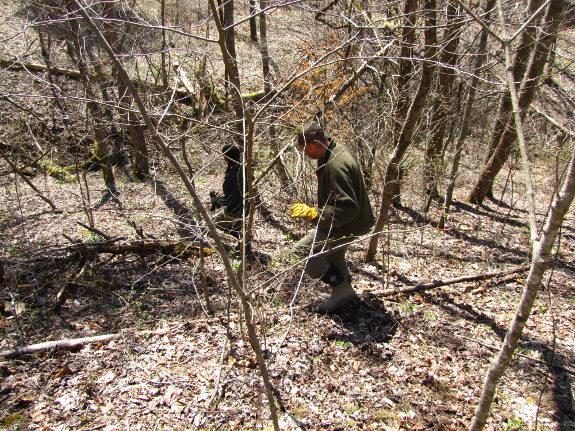
I'm always astonished by
my ability to think strongly sloping land is
flat. I just don't notice a slope unless it looks like the photo
above.
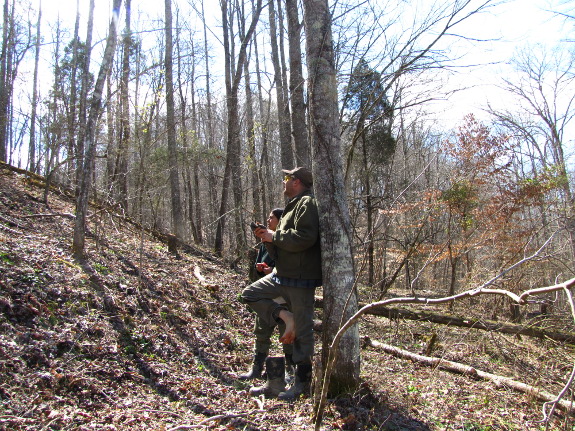
Luckily, Mark is better
at geometry than I am. Taking a look at
the hillside above the pig
pasture, he
pronounced it too steep for easy
pasturing or orcharding. Sure, the top of the hill is
(semi) flat, but there's no way a wheeled vehicle could get up there
without a lot of work, so how did I plan to haul the apples home?
Honestly, I'm not sure I'd envisioned the trees getting all the way to
bearing age....
So I've taken that
hillside off the table as a potential orchard, at least for the near
future. We might still use the slope later if we suddenly have a
lot of manpower to terrace it, or if we want to make a hillside
pasture. But for now, I'll have to keep looking for a flat, dry,
and not-too-shady spot for more fruit-tree experimentation.
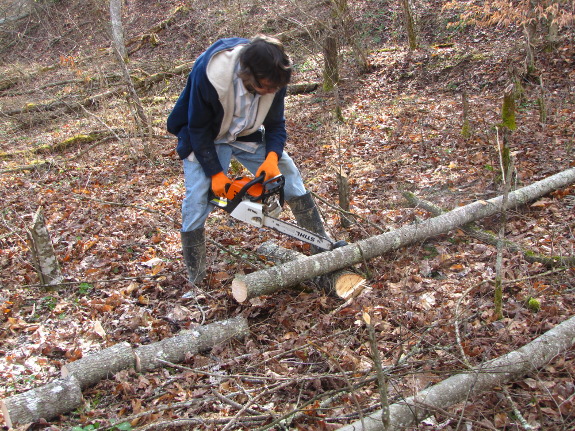
The good news is,
ditching the orchard dream up above will expedite the current pasture
project since we won't have to take down any more trees. We got
sidetracked by the garden, chicken incursions, and mushrooms this week,
but hopefully we'll be back on track with pasture building next week.
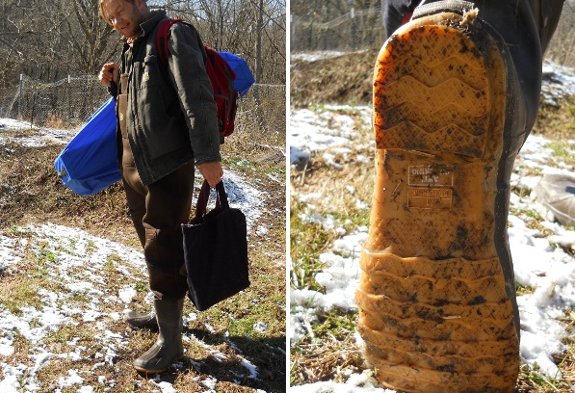 The
new Pro-Line
chest waders have already
sprung a leak!
I'm not sure what happened,
but my third trip across the creek resulted in my left sock being
soaked from the ankle down.
There's a pretty good sized
cut in the boot section and I don't recall rubbing up against anything
sharp.
The folks we bought them from
have already agreed to take them back and pay the shipping, but there're
no Federal Express stores in this region and I found out the hard way a
location with a drop box won't accept it if it won't fit in the box.
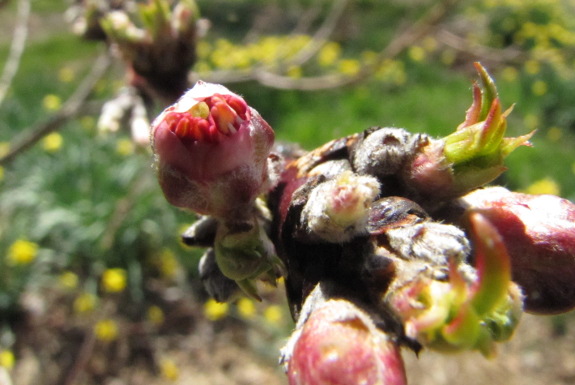
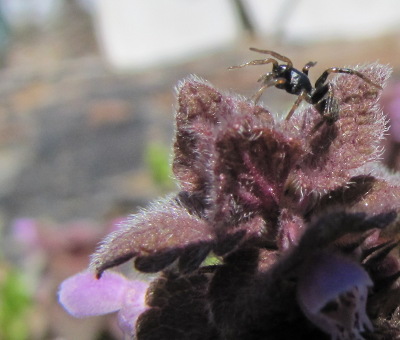 This is going to be spring
bonanza week --- I can feel it! I did see a mourning cloak
butterfly two weeks ago, but most of the spring insects started showing
up Friday when a greater
bee fly and eastern
tiger swallowtail both flitted across my field of view in a matter of
minutes. The eaters of the spring insects are also coming out in
force, like the spider waiting on the dead nettle to the right.
And, sure enough, the
pollinators are right --- the main show of flowers is just about to
begin. I found rue anemones and hepatica blooming in the woods
Saturday, and the first peach buds are on the verge of unfurling.
It was good of them to wait until after the last 28 degree night for a
while.
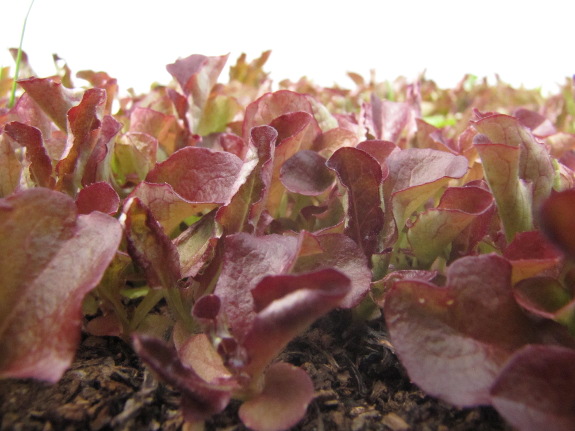
In the garden, we ate
the first spring lettuce last week. The second planting of peas
is up, and so are broccoli, cabbage, lettuce, and arugula under quick
hoops.
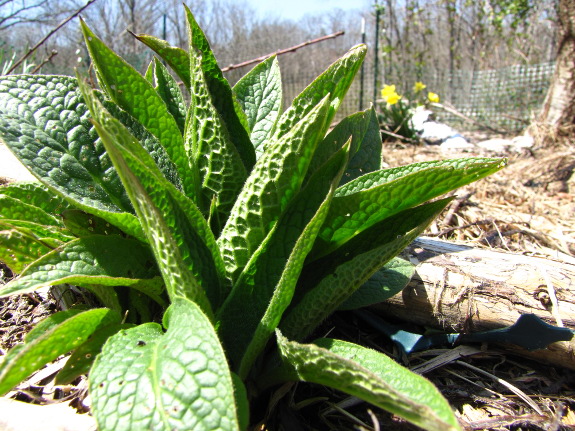
Comfrey leaves are
getting big and the Egyptian onions are vibrant with spring
vigor. It's been a late spring, but that just means we enjoy it
more after weeks of anticipation!
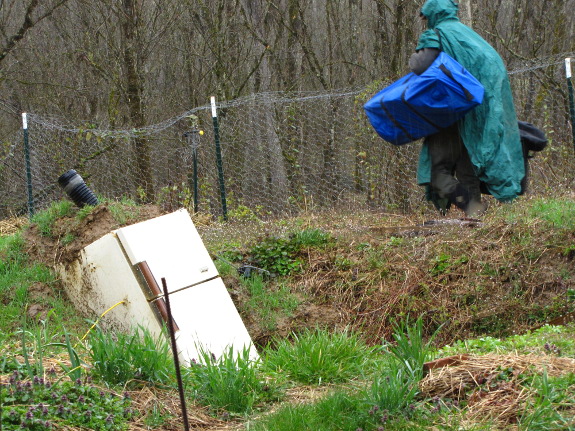
Roland
asked what was next, a drysuit? Last week, I just rushed
to town before the creek rose too high.

Update: This opportunity is now closed!
Back
in the original homesteading days, mail-order brides were a common
feature on the frontier, and our movie-star neighbor
would like to turn
back the clock and find his own. While he was out adding a super
to his bee hive over the weekend, he couldn't help musing that the only
thing marring his happiness was the absence of a female partner in his
homesteading endeavors. Hopefully one of you can fill that gap!
 Our neighbor lives in an intentional
community with lots
of land to make your homesteading dreams come true. He loves his
bees and his garden, is a top-notch cook and a great preserver, and he also likes to play
golf, enjoy good movies, and dine out. He often has the
opportunity to travel for work, and hopes his mate would
like to go with him.
On a more personal note,
our neighbor is a true gentleman and is one of the few people I go out
of my
way to see on a regular basis. In the winter, I love dropping by
to warm my hands on the water-rounded
stones he selects
out of the nearby river, and I'm always intrigued by his ingenuity, gripping stories, craftsmanship, kindness,
and artistic sense. Plus, his lemon tree is just plain
amazing.
Edited to add: Our neighbor is no longer looking for a mail-order
bride, so the contact information has been removed.
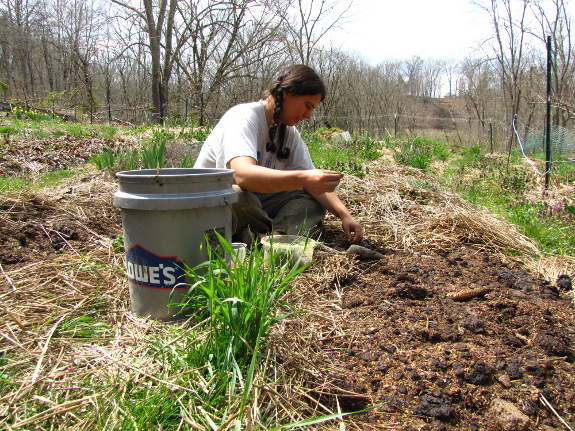
I feel a bit like a kid
who swears the dog ate her homework when year after year I have to
report trials and tribulations with our bulb onions.
Unfortunately, this year is no different.
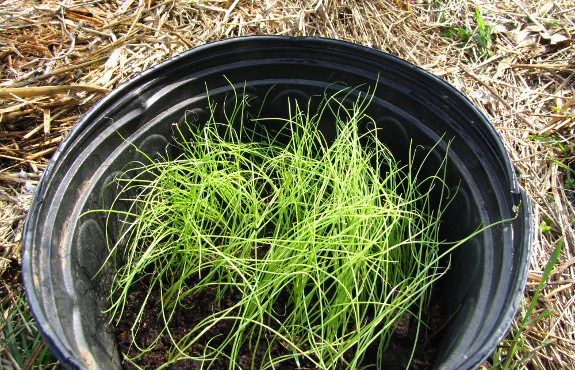
The problems began on
February 1 when I
started onion seeds
saved from last year in the same plastic flats I've been using for
seven years now. Even though my germination
test said the onion seeds were pretty good, not very many came up,
and most of those that did sprout soon damped off.
I think the problem was
partially due to fungi hanging out in the plastic flat, but it was
exacerbated by old, unvigorous seeds and by cold weather that prevented
me from putting the flats outside to enjoy the sunshine. Cool,
damp, dark conditions were perfect for the damping-off fungus to
colonize weakened seedlings, but I was able to get another set of seeds
going by putting newly-bought seeds in a pot instead of in the
problematic flats.
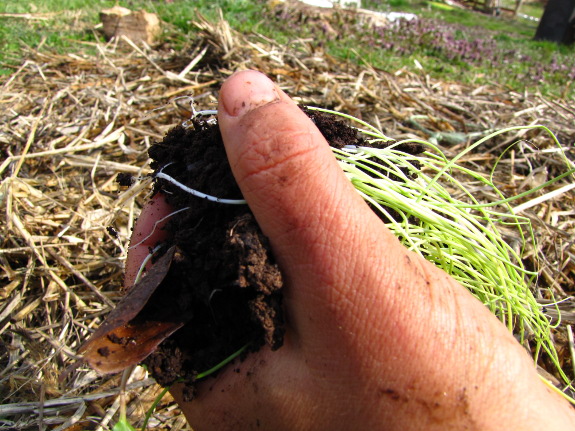
I had been concerned
that a pot of onion seedlings would be trouble to transplant, and I did
have to gently tease each seedling apart, doubling my transplant
time. I don't mind the extra minutes, though, as long as these
guys take.
Since I'd been counting
on the old seeds germinating, I only bought
half as many new seeds as I needed, so I was only able to plant seven
beds (the same number as last year) instead of the fourteen beds I'd
hoped
would take us through the year without storebought onions. Which
is
all a long way of saying --- I need all of the seedlings I set out
Monday to
survive!
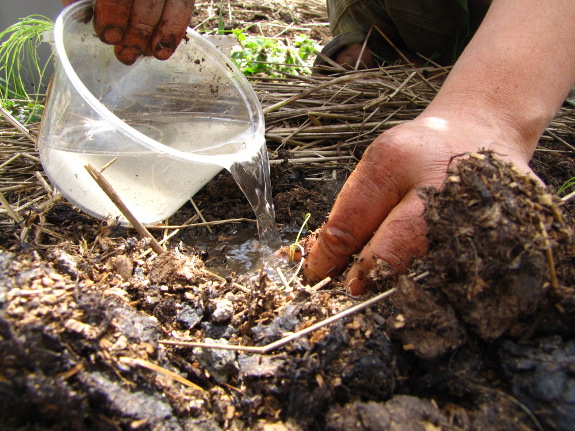
I think next year I may
hedge my bets by planting a bed of onion seeds close together under a
quick hoop the same way I do broccoli
and cabbage.
Planting directly into the ground avoids so many problems
with indoor seed-starting, with the only minor
inconvenience being that you have to wait on the weather. But
I'll also try to disinfect my flats and will plan to buy new onion
seeds every year, which might also solve the problem. Maybe 2014
will finally be the year of the onion?
I first started cutting these DIY plastic lattice dog doors with the miter saw, but figured out today that a jig saw makes the job smooth and easier.
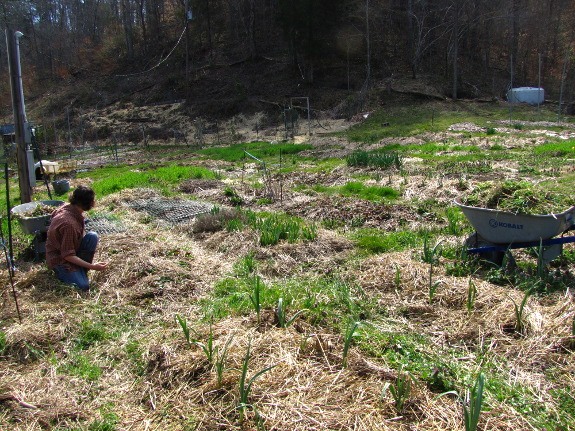
 Of course, the arrival
of warm weather also means the weeds are starting to grow a mile a
minute. Although quite pretty, I'm sure the dead nettle and
chickweed choking out my garlic plants were depriving the vegetables of
much-needed nutrients. So I roped B.J. into helping me weed, and
we made short work of about a third of the front garden beds.
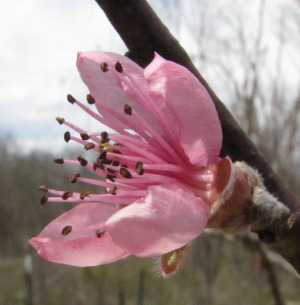
And, look, the tree
flowers are finally opening! Nanking cherries and sporadic buds
on the peaches have unfurled, but the main event is still a few days
off.
I'm reveling in
barefoot weather, listening to toads trilling at night, and dreaming of
SPRING!
I first started using plain old
hinges for the new plastic
lattice dog doors.
These non-mortise
hinges allow for a full swing in both directions. I'm not sure Lucy
would notice, but the exit swing with a regular hinge stops sooner than
the entrance side. This could be a factor with bigger dogs, but Lucy
just scoots down to get through.
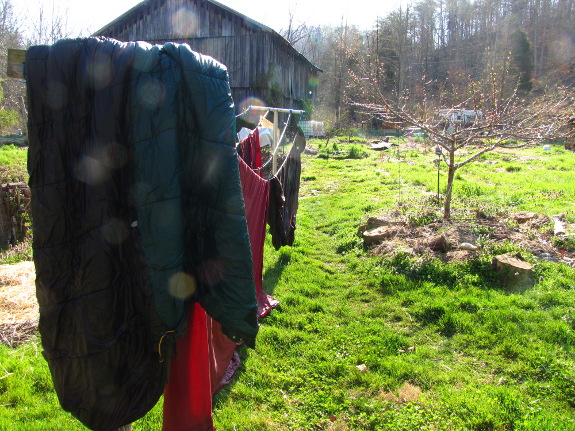
 With
highs forecast to reach the 80s Wednesday, I figured I might as well
steal an hour away from the garden to start on winter laundry.
Sure enough, sheets dried by lunch, in time to fill the line up again!
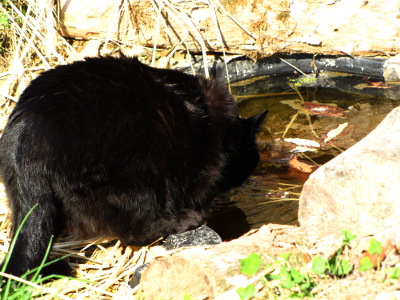
On an unrelated note, I
thought for sure my three tiny
goldfish had
perished in the cold weather last month, but two were seen swimming
around Monday. Yet another pleasant
spring surprise!
More pig
pasture clearing today.
The new goal is to clear an
ATV path so we can get all this fresh firewood out of the way and in
the wood shed.
Yes...that means we've decided to
get an ATV. It might even
be part of tomorrow's post if everything goes as planned on my Friday
trip to St Paul.
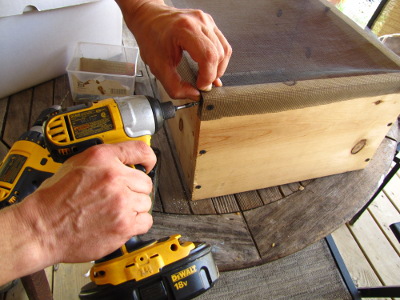 Usually, a warre hive
wouldn't be opened at all in the spring, but
the last time I delved inside, I noticed that I can't
change the water-absorbent material in the quilt without bothering the
bees because workers have gnawed through the burlap bottom. So I
opted to upgrade the quilt to include a screen bottom, which meant
taking the current quilt off to swap. (I forgot, though, that the
real issue was the burlap layer beneath the quilt --- I'll have to upgrade
that layer later.)
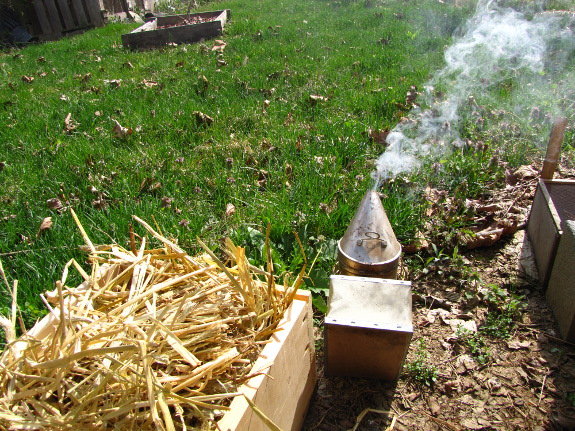
Smokers are similarly
verboten in warre hives, but I was less than pleased at the bees'
reaction to their second nadiring last year, so I decided to
go ahead and smoke lightly. After all, I was only affecting the
bees directly under the quilt since I didn't open the rest of the hive
up. With the smoker in hand, the bees were so calm I omitted
gloves and could 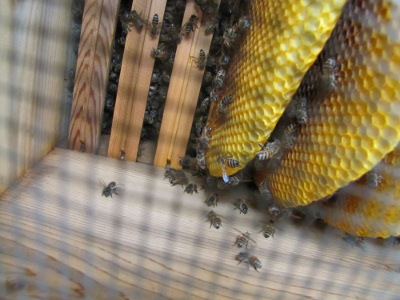 have
gotten away without any gear at all.
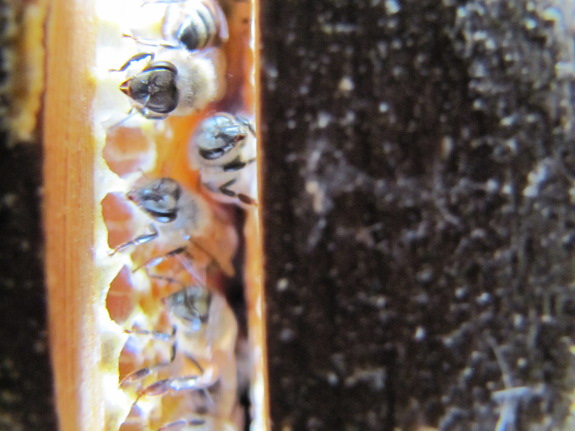
I did take a photo from
underneath and a couple down through the bars in the top box to get an
idea what's going on inside. The bottom box (of three) is showing
very little activity, but the top box looks like it's got at least some
capped honey, which is a great sign for April. The whole
structure was literally buzzing with life.
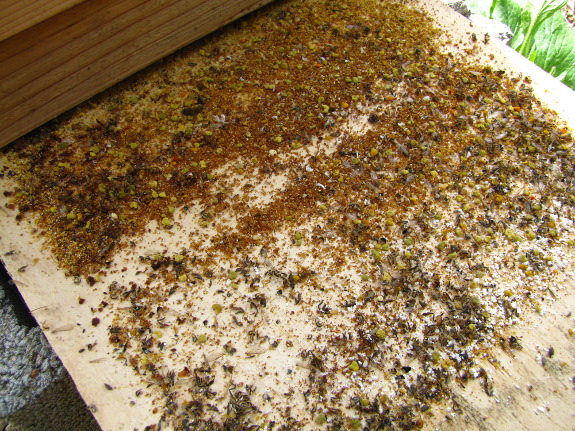
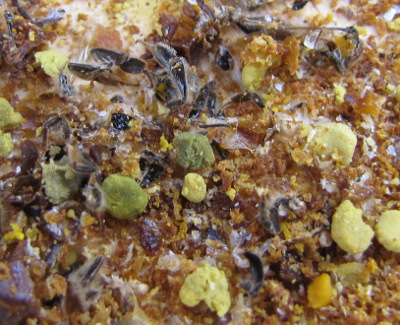 My final task at the hive was
to remove the board so that the screened bottom was once again
exposed. Quite a lot of debris had built up over the winter,
mostly bee legs, pollen clusters, and capping wax. The open
bottom will allow for much-needed ventilation over the summer, and will
also let debris like this fall to the ground, keeping diseases away
from our bees.
I'm still on the fence
about how to expand our apiary this year. If I don't make a
decision soon, I'll go with the obvious (but less sweet) option of
splitting this hive in May. Stay tuned for further thoughts on
the topic in later posts.
We bought a used Polaris
Xplorer ATV today.
It's in good shape and runs
like a dream.
I think that smile on my face
is connected to a memory of being 6 years old and playing with Tonka trucks in the backyard sand box.
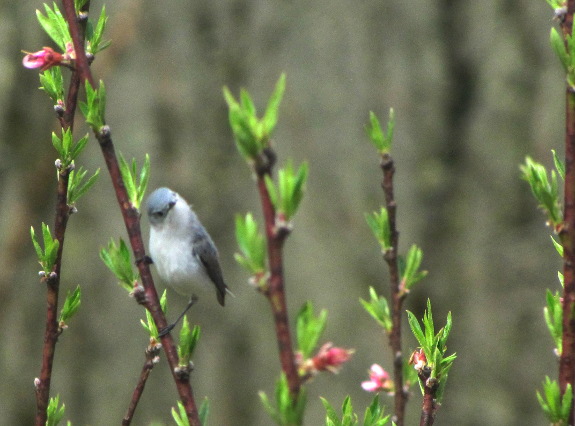
This is my favorite time
for strolling amid the perennials, supposedly checking up on how they
survived the winter, but really dreaming of fruits to come. (By
the way, the bird above is a Blue-Gray Gnatcatcher who is hopefully
eating bad bugs on the kitchen peach tree.)
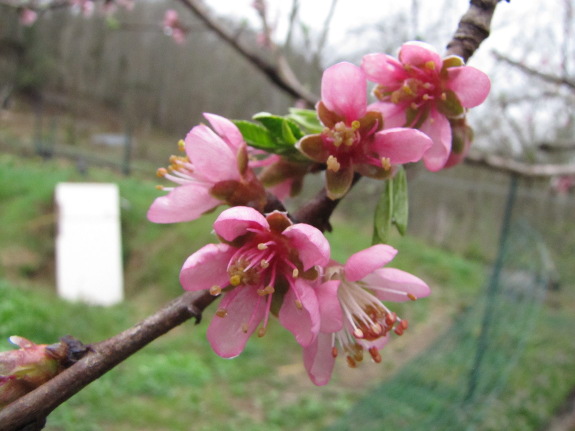
All four of our peaches
have bloomed prolifically this year. A heavy rain Thursday night
knocked off some petals and prompted leaves to start pushing out of the
buds, so the trees are now past their prime from a beauty
perspective. From a dreaming perspective, though, they're still
at their peak --- I'm working hard not to count any peaches until
they're ripe.
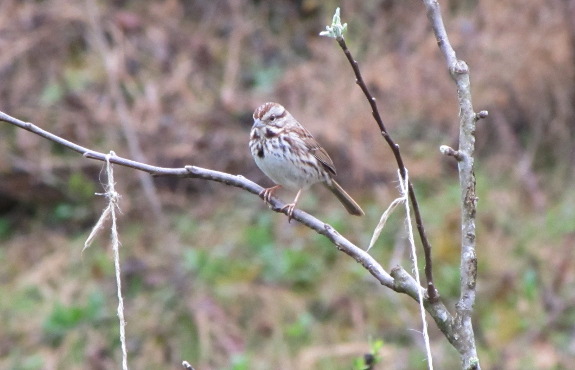
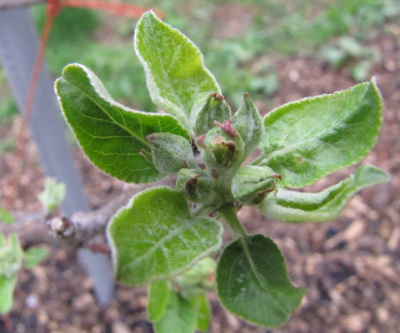 Meanwhile, this may be the
year of our first homegrown apple! The Song Sparrow above is
pictured on our Early Transparent, which only has a few flower buds,
but the Virginia Beauty is loaded. I'm hoping we'll see fruit set
on the latter, and I wouldn't be shocked if we got one or two Early
Transparents and Liberties too.
Our high
density apple planting
also looks to be loaded with blooms. Since I just planted these
dwarf trees last fall, I'm assuming I should pluck all of the flowers
off (perhaps after giving them a chance to pollinate our larger trees),
but I'm open to suggestions.
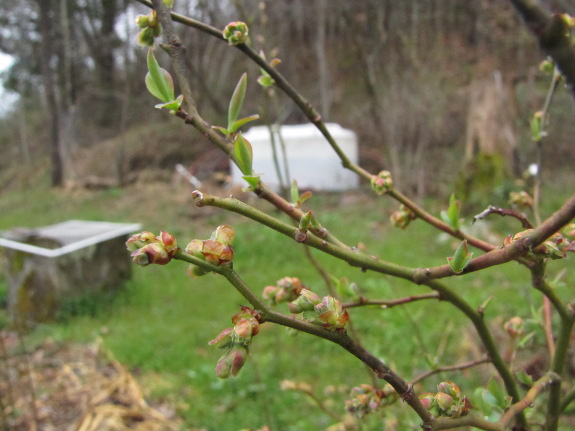
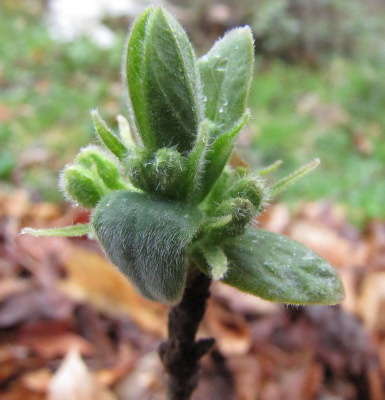 Moving on to small fruits,
our brambles plug along with little need for concern, and are happily
leafing out. We had a lot of cicada
damage in the
blueberry patch, so only about half the plants have limbs old enough to
bear, but those seem to be heavy with flower buds. And the
gooseberries are also looking good, although I didn't notice any
flowers yet. Finally, one of our newly-planted honeyberries seems
to have come mature enough to flower --- I'll pick those blooms off
along with the dwarf apples', even though I'm itching to find out what
a honeyberry tastes like.
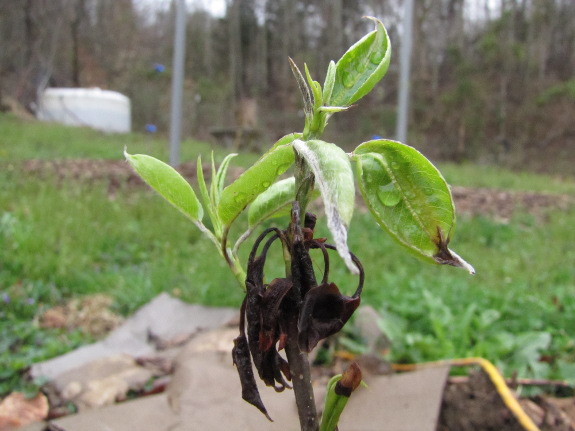
I also noticed that the two
baby pears I set out
during cold weather did get a little nipped, but are happily putting
out new leaves. Our bigger pears are now leafing out too, but I
haven't seen any sign of budbreak on the
scionwood I grafted onto their limbs. I'm not overly
concerned since buds on scionwood often don't open as quickly as the
rootstock buds.
This post is already too
long, so you'll have to wait until tomorrow for highlights of nonwoody
perennials and the vegetable garden. I know it doesn't look like
it, but I really did edit down the number of photos I was originally
going to share with you today....
Yes...there's a clear warning
printed on the ATV seat about the dangers of riding with a passenger,
but we decided a quick trip across the creek with Anna's sister Dani
would be safe enough.
I could see where having a
passenger might be hazardous at high speeds or during a tight turn or a
steep climb, but today's experiment felt very safe.
Of course Anna and I
practiced it once this morning to be sure.
Yesterday, I posted
about how
the woody perennials are coming along. Although less
riveting, the vegetable garden is definitely springing to life as well.
Of course, perennials
and over-winterers wake up long before new seedlings make much of a
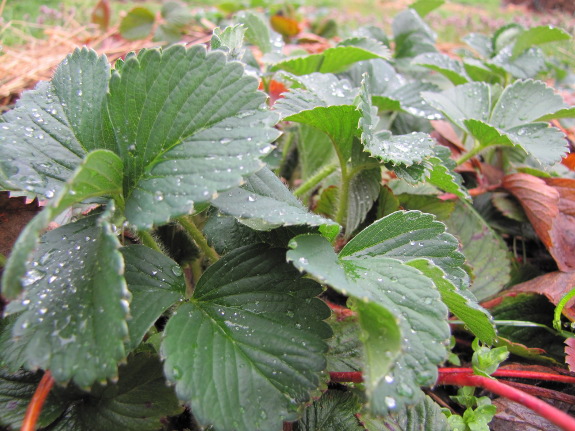
showing. I've been concerned that my mineral-burned
strawberries were
worse-off 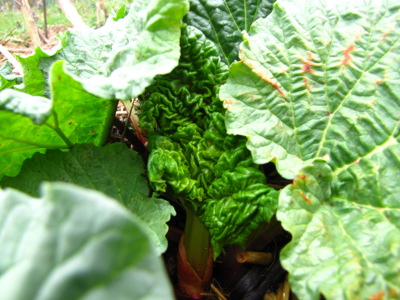 than I'd first estimated, but
it turns out they've simply been running slowly just like everything
else this year. At long last, new leaves are finally starting to
turn the strawberry beds green, although flower buds aren't yet evident.
Rhubarb is also growing
quickly, with stems nearly big enough to eat. And I found two
beautiful spears in asparagus
alley --- too bad
those plants were started from seed last year and are off limits for
picking until 2014. Hopefully the older (but more shaded)
asparagus plants will start popping up soon.
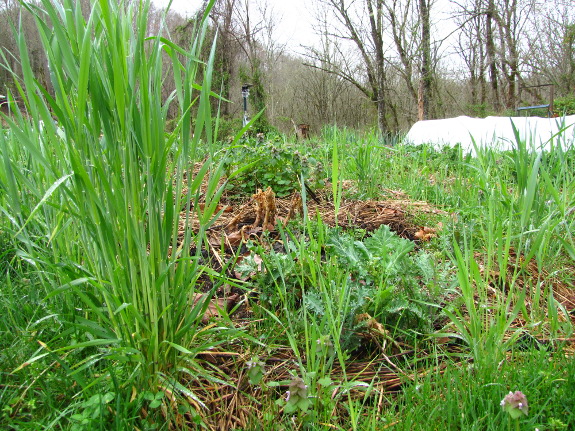
The most obvious feature
about the rest of the vegetable garden is the grain (probably rye) that
came along for the ride in last year's straw mulch. Mark will
have to mow the aisles next week simply to whack back the grain along
the bed edges, even though the grass isn't really tall enough to need
it. I've been pulling out grain plants in the beds themselves,
which is easy in moist soil.
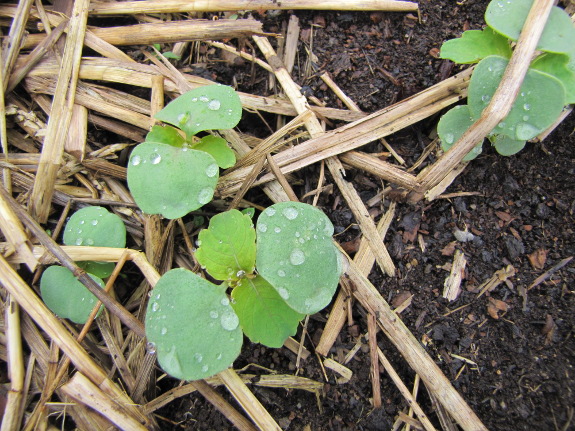
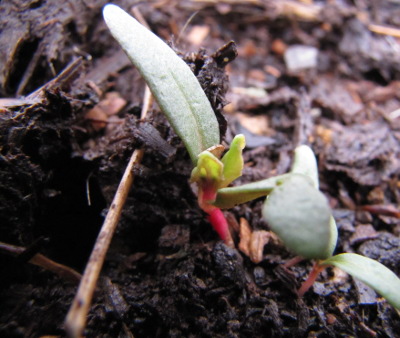 And even though I probably
shouldn't find it exciting, I'm even happy to see the first summer
weeds sprouting. Jewelweed (above) will probably be nipped by a
late frost, but it clearly thinks the soil is warm enough to
gamble. My planted seeds (like the Swiss chard to the right)
agree and are popping up right and left.
My main task in the
vegetable garden in April is weeding and refreshing mulch, which is
going much more quickly this year than previously. Three
man-hours resulted in 34 beds of garlic, Egyptian onions, herbs, and
strawberries weeded, and then another hour added enough new straw to
carry them through until summer. At this time of year, it's a
pleasure to be sinking my hands into the earth, but speedy weeding does
give me more time to experiment with other projects.
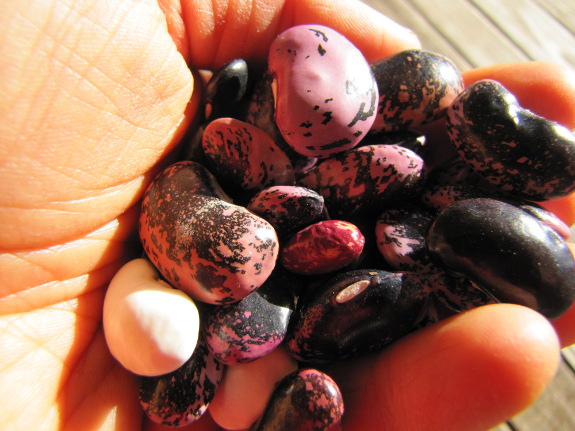
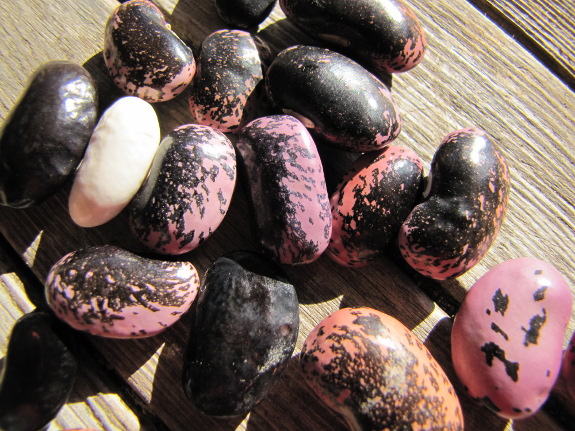
Dani brought me a bag of the
prettiest dried beans I'd ever seen. When she explained about
Jack beans on the phone ("they grow so fast and tall, it's like Jack
and the beanstalk"), I'd assumed the name was just another description
for lablab (aka hyacinth beans, Lablab
purpureus).
But it turns out Jack beans are completely different --- Canavalia
sp. --- although
they are edible and have also been used as a living mulch.
On the other hand, an
image search suggests that these beans might actually be scarlet runner
beans (Phaseolus
coccineus).
Many people grow scarlet runner beans purely for their ornamental
flowers, but the beans and tubers are both edible.
Ever since I saw photos
(which I included in Trailersteading) of a trailer shaded and
spiced up by an arbor covered with fast-growing plants, I've been
meaning to follow suit in front of our south-facing windows.
Originally, I'd thought of putting perennials there --- maybe hardy
kiwis or hops --- but since we're pondering using that space as a greenhouse
addition in the future, annuals look better for 2013. Mystery
beans it is!
It's difficult to describe how mechanically excited I get when the old Craftsman lawn mower begins the year by starting on the second pull.
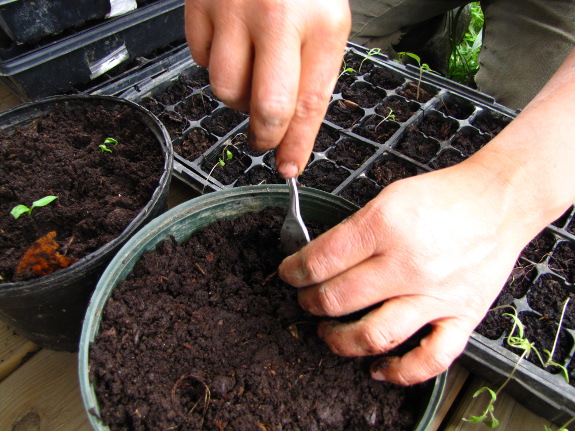
I'm only willing to
carry so many pots in and out when the nights are still
cold. But now that we've got at least a week of above-40 nights
planned, I figure I can give our sad-looking seedlings a little more
space. The light will do them more good than the room, but both
will probably be appreciated for the next month before we can safely
set tender vegetables out in the ground.
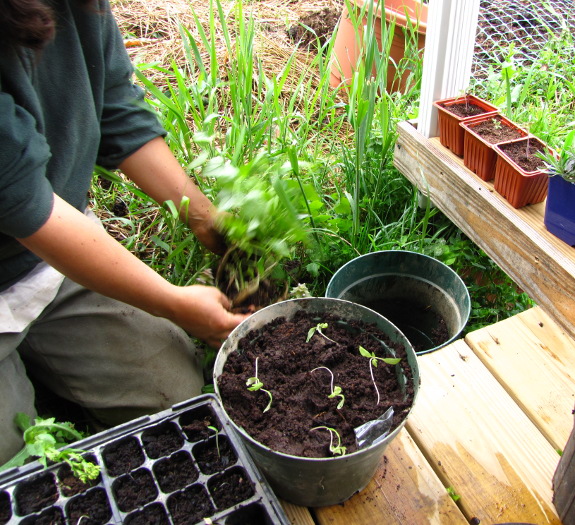
The one plant that
thrived despite low light levels inside was the tindora (perennial
cucumber) from a reader. I had put all of the tubers in one pot
when they first came because I wasn't sure how well they'd do, and that
decision was fine for most of the winter when the cucumbers sulked
through chilly indoor nights. However, as soon as it started
warming up, the tindora took off and started vining across everyone
else. Time to give each plant its own pot.
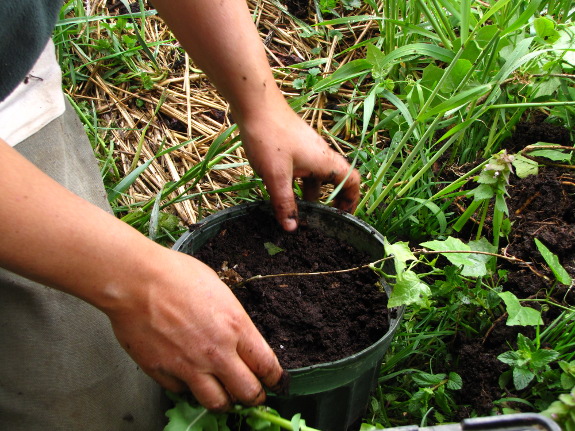
It's a good thing the
tindora is thriving since it's one of the few inside plants that isn't
just an early gamble for which I have outdoor backups. If some of
my sad-looking tomato seedlings perk up, they'll probably mean
homegrown fruits about a week earlier, but that's not such a big deal
in the grand scheme of things since the quick-hoops starts will
definitely provide the majority of our harvest.
How do we move the older
chicks from their outdoor brooder to a new coop?
Anna hands me two, and then
she scoops up two and we walk them over.
We didn't have an even number
today, which meant someone had to stay behind alone for a few minutes.
In the future we'll try to avoid that because the little guy kind of
freaked out being alone and flew the coop. Luckily all we had to do was
open the brood coop door and wait for him to scurry in.
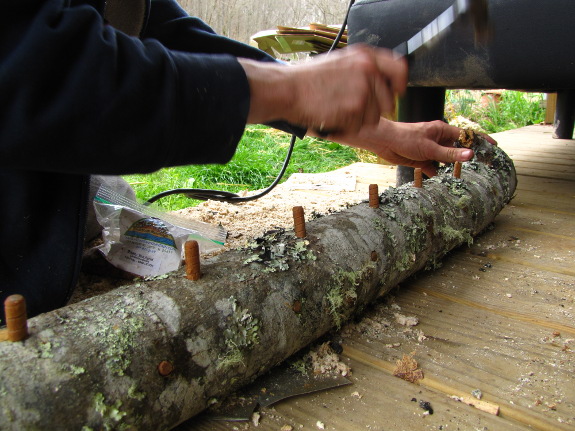
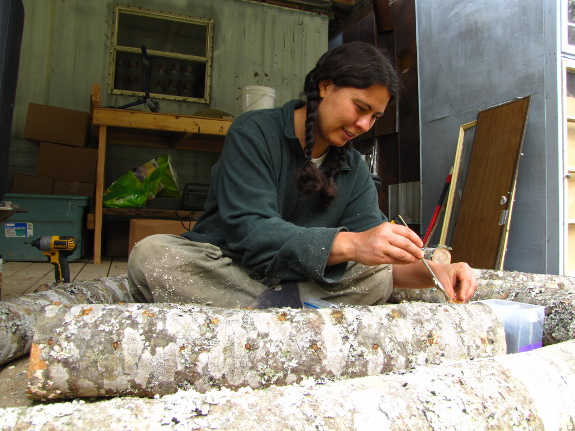
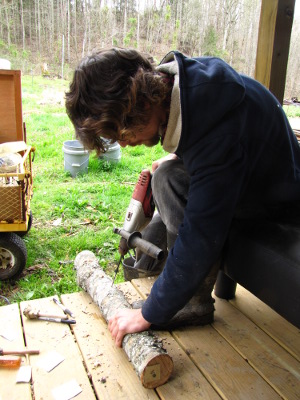 We finally inoculated the
rest of our shiitake
logs Monday. I
didn't mean for it to go so late, but it turns out that one drill
battery only holds enough juice to prepare one log. Since we only
have two good batteries, that would have meant a lot of walking back
and forth between the logs (at the parking area) and the battery
charger. It seemed smarter to wait until Mark had his ATV, allowing us to haul the
logs back to the trailer and drill them with the plug-in drill on the
porch.
As if to reward us for
finally getting the new logs plugged, one of our ancient shiitake logs
(inoculated in 2007) pushed out five big fruits. I would have
taken a photo, but felt more inspired to pick kale rapini and saute
both treats up in some butter and garlic. Topped with parmesan,
the mushroom and rapini side dish made the meal.
As a side note, if you'd
like to read more about how to grow shiitake and oyster mushrooms on
logs (the easiest method and varieties for backyard growers), check out
Weekend
Homesteader: March.
I didn't think I liked eating anything in the fungal kingdom before we
started growing our own mushrooms, and now oysters and shiitakes are
one of my favorite ways to turn a simple meal gourmet.

Lucy has had no problems adjusting to the new DIY dog doors which is keeping the chickens out of the garden and in their pasture where they belong.
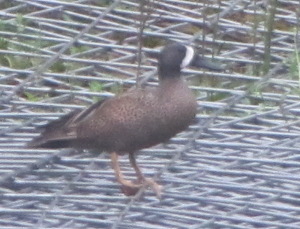 Wednesday was the kind of
rain day I remember from my visits to various jungles --- a steady,
endless shower. Mark and I were able to stay busy indoors, but
the wild birds were less lucky. This is the middle of spring
migration (wood thrushes arrived Tuesday!), and one confused teal
clearly figured the weather was too bad to keep flying. I can
just imagine the duck looking down and thinking it saw a pond, then
coming in for a landing...only to end up on our pile of cattle
panels.
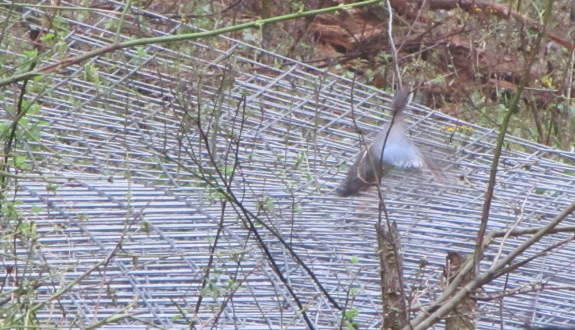
Except for their role as
a duck decoy, our cattle panels haven't seen any use yet. Spring
is heating up in the garden and chicken world, and we've been spending
most of our energies there, which makes it less and less likely we'll
get the new
pasture done in time
to trial pigs this year. However, all is not lost --- I'm hopeful
we'll have the fencing and shelter ready for spillover chicken pasture
during the usual summer lull, and it'll definitely be ready for pigs
next spring. Slow but steady definitely wins the homesteading
race.
(If you're dying to see
pigs this year, I can't recommend the Sugar Mountain Farm Blog highly
enough. Plus, our friend Sarah is trying pigs this year and her
piglets have already arrived! Hopefully those two
sources will tide you over until we get our act together.)
It might be too early to get
our hopes up, but over the last week we've been trickle charging each
battery back to life and today I hooked them up for a test.
The charger acted normal and
shows a steady current flow, which is a lot more than the nothing it
was doing back when we first towed her home.
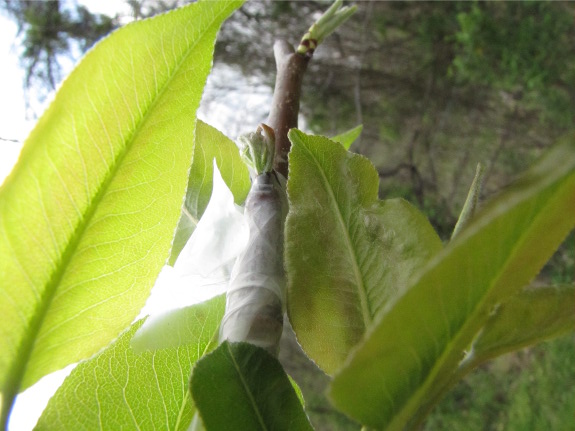
Good news from the frameworked
pear trees --- the
first of the scionwood has broken dormancy, with the rest hopefully
soon to follow. I'm not 100% positive, but I'm pretty sure if
scionwood breaks dormancy, that means the graft has taken. (As
opposed to 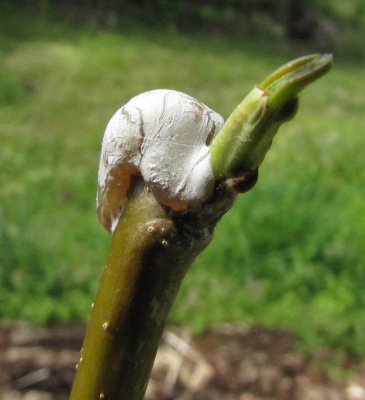 hardwood cuttings where bud
break can actually be a bad sign if the cuttings wake up before they
manage to root.)
As you can see, the pear
trees have leafed out quite a bit more below the graft union than
above, which is quite ordinary. When you graft onto one-year-old
rootstock pieces, you're often told to brush off the opening buds on
the rootstock if they wake up before the scionwood has budded out, but
that doesn't seem to be as good of an idea on a large, frameworked
tree. If all goes well, I'll let everything grow this summer,
then prune back the limbs of the old variety this winter, letting the
new varieties take over a bit at a time. Maybe we'll have
extra-tasty pears to enjoy in a few years.
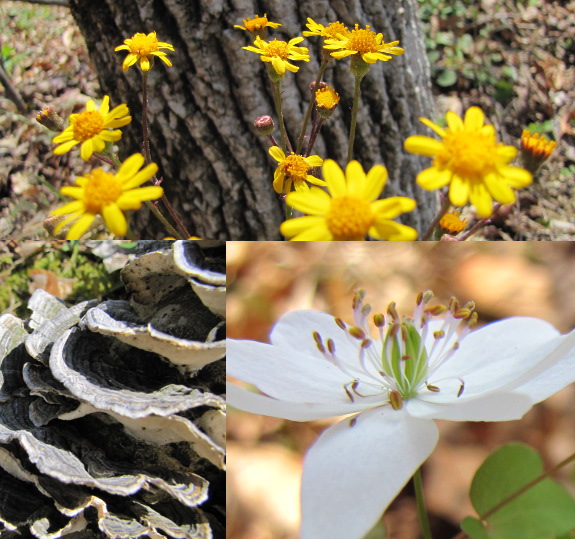
The shiitakes aren't the
only mushrooms who have decided
to start fruiting.
I plucked the Blue Dolphin oyster mushroom below off one of our totems, and figured that was a good
excuse to go check out wild logs. It turns out none of the wild
oysters were fruiting, but I didn't mind since the wildflowers were in
full bloom.
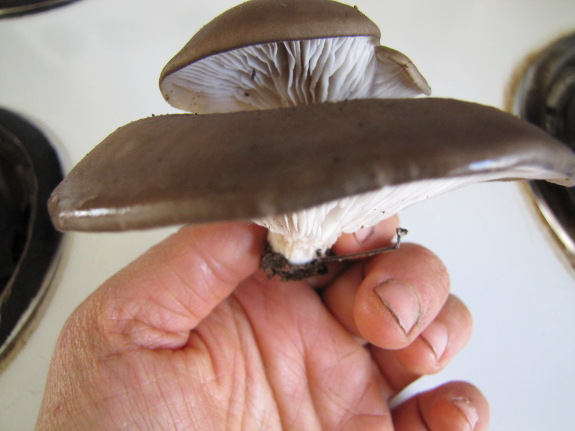 Now that our totems have been
in place for a couple of years, I feel ready to pass judgement on the
totems and/or the easy,
gash inoculation method. I suspect the latter
is the reason the bark has flaked off these logs much faster than from
our other box-elder mushroom logs, meaning that we're already nearing
the end of the totem logs' fruiting life.
Since I started the
spawn myself, I'm not out any cash, but I don't think I'd recommend the
gash method of inoculation if you're trying to make storebought spawn
give you your full money's worth. Meals from these three logs
might have amounted to two or three total, versus box-elder logs
inoculated with Blue Dolphin spawn in February 2009 that were still
churning out loads of mushrooms last fall. With mushroom logs,
the amount of food you get back does seem to be proportional to the
amount of effort you put in.
I first thought we might need
a more sturdy metal trailer to haul stuff with the ATV, but the Heavy Hauler seems to be doing fine.
Backing up is difficult
without a hitch ball, which we plan on adding in the near future.
 Forecast low --- 37
degrees. Actual low -- 33 degrees at porch height, light frost in
the garden. Luckily, I know how to read our weather forecast, so
I took all of our
plants in to spend the weekend on the plant table (and dining
table) just in case. We also ate the first delectable asparagus
spears so they wouldn't be damaged by frost.
This may not even count
as Dogwood Winter since the dogwoods are barely starting to bloom, but
I can't help hoping we've gotten off easy. Light frost isn't
enough to bother any of the copious blooms sprinkled around our
homestead, and it might not even nip the hardy kiwi leaves. Time
for a tour of the fruit flowers!
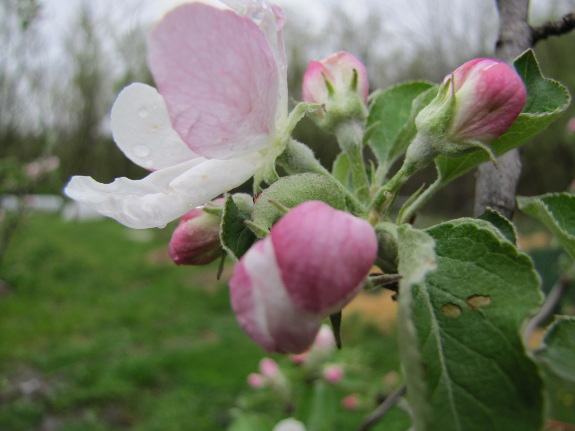
At the top of the post,
you can see our first real apple blossoms! Last year, we had a
handful of flowers, but this year, the apple blossoms are turning the
Virginia Beauty white and pink. Lots of flowers means the tree
probably feels ready to set fruit, so now I can just start hoping none
of the disasters occur that could cause that fruit to fail.
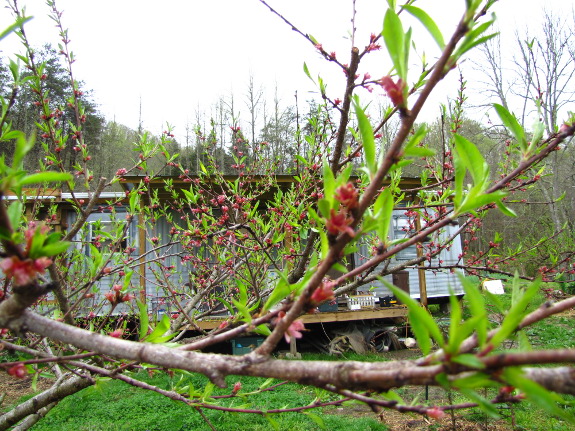
Our two older peach
trees are already setting fruit, which you can tell from a distance by
the color of the tree. Compare the tree above --- a hazy pink
from the sepals left behind after most of the petals fell --- to the
younger peach below.
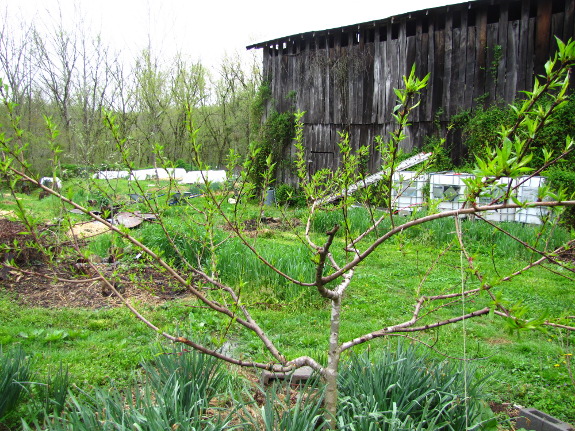
This guy bloomed
profusely, but only a few of the flowers stuck. No wonder ---
this Cresthaven peach has only been in the ground for two years and
shouldn't really set fruit until 2014. I won't turn down an early
taste this year, though, if it wants to serve one up.
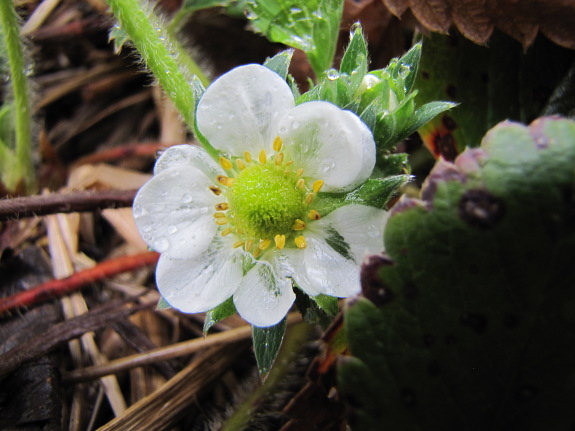
The strawberries are
also starting to bloom, at long last. I was really beginning to
worry about them, since at this time last year the plants had set
fruit, a few of which were already blushing pink. They're
probably smart to wait out the cold weather this year, but I'm itching
for homegrown strawberries.
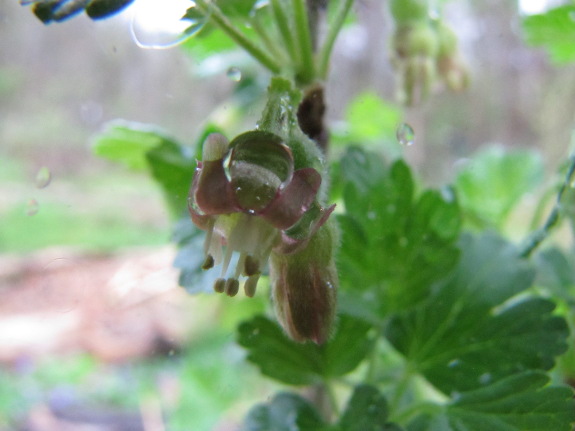
Last year, we enjoyed a
few gooseberries from our Invicta gooseberry (planted in 2010), but
nothing from our Poorman gooseberry (planted at the same time).
This year, both seem to be blooming, so hopefully we'll harvest more of
these tangy fruits. Mark had never tasted a gooseberry before
last year, but they became an instant favorite.
As you can tell, it's
been a sort of strung-out
bloom season this year, which probably is good for our bees.
Let's hope it's good for setting fruit as well.
Turns out a medium sized wood screw with a washer biting into a block of wood holds up pretty good as an alternative hitch pin.
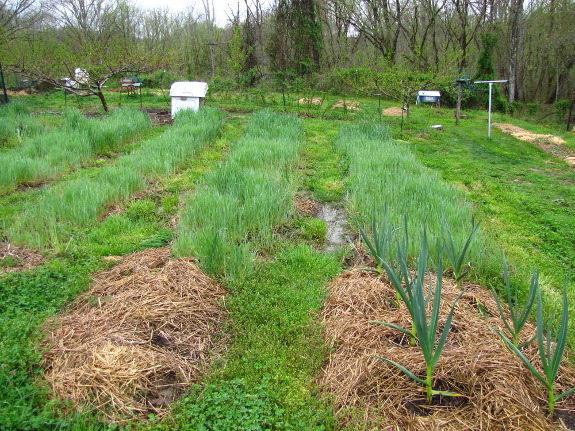
Around the beginning of
April, I started stressing about our rye
cover crop.
I'd seeded quite a few beds in rye last fall, figuring the plants would
have time to bloom and then be mowed down before vegetables needed to
be planted there in late May or early June. But the late-seeded
rye didn't get much more than three inches tall over the winter, and
despite other people's claims that the species grows on warm days, our
plants mostly sat there.
Then, suddenly, the rye
got its feet under it and started to grow. The plants seemed to
be measurably taller every day, with the happiest beds nearing two feet
tall already. Even in the troubled soil of the sodden back garden
(pictured above), rye seems to be producing demonstrable biomass.
The real question is ---
will the rye bloom and die on schedule? Only time will tell, but
I feel better about the experiment now that growth is finally happening.
Today our 2nd round of
incubated chicks graduated to the outdoor brooder.
The plexiglass window is
positioned to get the morning sun.
We'll keep them locked up in
there for a while before we let them free range during the day and then
they get locked back up at night for protection.
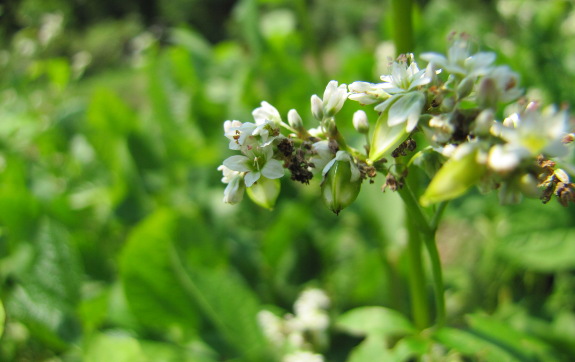 "I'm confused about rye and
buckwheat. I have used them before and tilled them in, but, with the
no-till method, how does just cutting them down allow you to plant
something else in their place? Would the cut areas not resemble cut
grass (for the rye) with the root mass still present? How do you plant
in this?"
"I'm confused about rye and
buckwheat. I have used them before and tilled them in, but, with the
no-till method, how does just cutting them down allow you to plant
something else in their place? Would the cut areas not resemble cut
grass (for the rye) with the root mass still present? How do you plant
in this?"--- Heather W.
 Even though I've written an
entire ebook on the
subject, I still get this question quite a bit, so I thought I'd answer
it in a post. The trick with mow-killing cover crops is to
understand the plants' life cycle. Lawn grasses are perennials,
but the cover crops I'm writing about are all annuals, meaning that
they sprout, grow for a while, then bloom and push all their energy
into a seed. After blooming, annuals naturally die and leave the
ground bare for whoever comes next.
While you can wait for
these annual cover crops to go to seed and perish on their own, you'll
then end up with a weed problem in your garden. Instead, I
recommend mow-killing when cover crops have just reached full bloom, at
which point the plants are totally committed to the reproductive
process. Plants that mow-kill easily will die if cut at full
bloom, rather than regrowing like a lawn grass would. You'll
still have a lot of root stubble, which I recommend topdressing with a
healthy dose of compost and letting sit for a few weeks (for rye) so
that microorganisms will turn the roots into humus. After that,
the ground will be bare and ready to plant into. (Buckwheat is so
succulent that you can plant into the
stubble nearly immediately.)
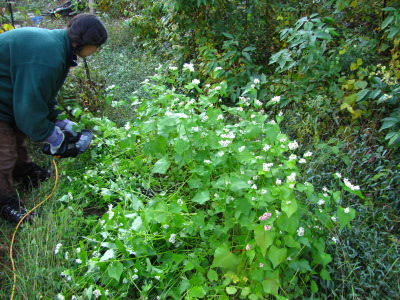 Not
all annuals mow-kill readily, of course, and if you don't pay attention
to their life cycle, your mow-kill attempt will also fail. For
example, many of the annual grains will respond like lawn grasses if
you mow them when they're young and in a vegetative growth stage.
And, of course, you shouldn't expect mow-killing to work on perennial
cover crops. I haven't tried all these myself, but Managing
Cover Crops Profitably reports you'll have good
results mow-killing the following cover crops: annual ryegrass, barley,
rye, buckwheat, oilseed radishes, cowpeas (although my
experience differed),
field peas, hairy vetch, and woollypod vetch. Finally, if you
plan to mow-kill and it fails, there's always kill
mulches.
For more information on
integrating cover crops into a no-till garden, check out Homegrown
Humus, only 99 cents
on Amazon.
The Stihl FS-90R trimmer/weedeater begins its
third year today and still starts on the first or second pull.
I've always put ethanol
free gas in it and have made sure it's bone dry for winter storage.
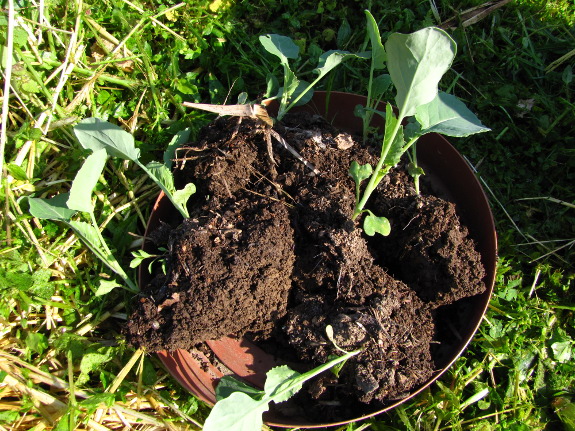
Every year, I'm
astonished at how well the broccoli sets do when I start them directly
in the ground under
quick hoops.
These guys are about 5 weeks old and are in perfect shape for
transplanting.
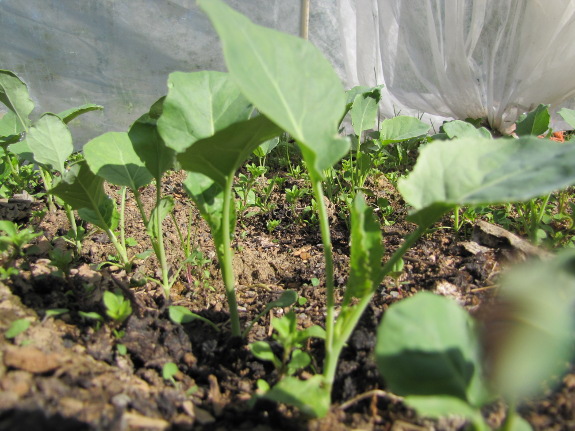
Despite a cold spring,
the broccoli and cabbage sprouted and grew quickly outside. The
quick hoop provided just enough protection to keep heavy frosts from
nipping the leaves, and it's easy to pry up a large hunk of dirt with
each seedling so they barely notice being transplanted.
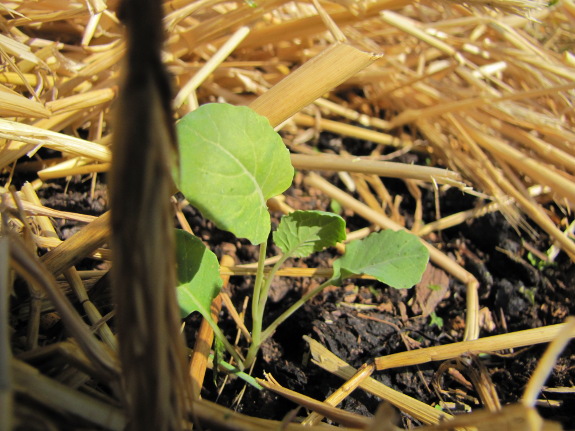
In contrast, the
seedlings I started indoors and planted out into the garden two weeks
ago are only in so-so condition. This is one of the better ones
--- still off-color and about half the size of the quick-hoop
specimens. Other of the early-planted seedlings were killed by
last weekend's heaviest frost (29 degrees), which wouldn't have been
enough to harm a healthy seedling.
Tuesday, I filled in the
gaps and used the rest of my quick-hoop starts to plant a few more
beds. Barring a hard freeze in the interim, we should have a
tasty crop of broccoli and cabbage in a couple of months.
Broccoli is one of our tastiest, most prolific, and most dependable
spring crops as long as I get the seedlings off to a good start, and
quick hoops seem to be the best way to make that happen.
Chimney
sweeping day always reminds me of my first day on a ship in the
Navy.
A shipmate handed me a broom
and said "Meet your new best friend".
I thought he was joking, but
soon learned the critical link between our nation's security and a well
swept deck.
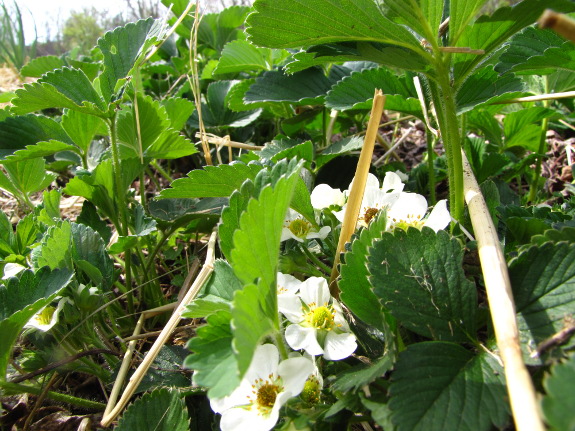
We've tried six
strawberry varieties so far, two of which I wholeheartedly recommend,
two of which were okay, and two of which were duds. Here's the
rundown (from best to worst) in case you're looking for excellent
strawberries for your own garden:
- Honeoye --- Honeoyes are very tasty and prolific. The variety is an early, June-bearing variety and usually gives us our first berries, then continues to ripen huge berries for a couple of weeks.
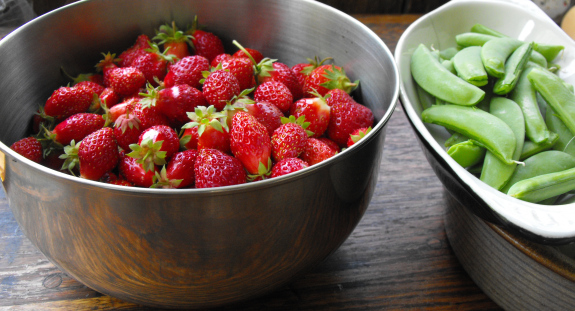 Ozark Beauty --- Depending on location
in the garden, sometimes these taste even better than the Honeoyes, but
I don't like them quite as much because the berries are smaller, so it
takes more effort to harvest them. (The photo above shows a
bowlful of Ozark Beauty berries from 2010.) Although supposedly
an everbearing variety, ours simply fruit for about three weeks in
spring. (I got the plants from Wal-mart, though, so they could
easily have been mislabeled.)
- Jewel --- This is a late, June-bearing variety, meaning that it starts to ripen just as Honeoye comes to an end and turns the strawberry season into at least a month of harvest time. I ripped out our Jewel strawberries a few years ago because the flavor isn't nearly as good as the previous two varieties, but I've yet to find a tastier, late variety. Perhaps you have a suggestion for a replacement?
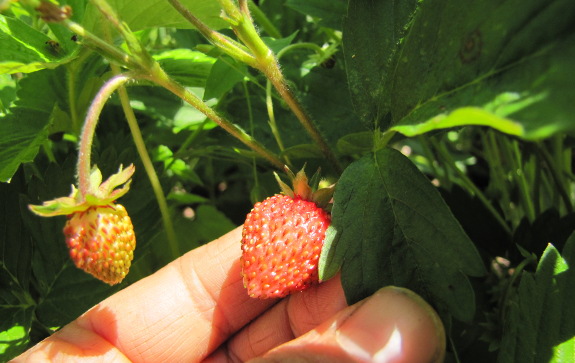 Mignonette --- This is an
alpine
strawberry, meaning that you can start
it from seed, it's everbearing, and the fruits are tiny.
Unfortunately, I don't think alpine strawberries are our style --- I'm
just not willing to pick teensy fruits when the garden is so busy, and
I didn't think the flavor was as good as my top-notch
June-bearers. (The photo above is a Mignonette strawberry from
2011.)
- Allstar --- This was supposed to be a replacement for Jewel since it is a late, June-bearer. However, the fruits tasted like storebought berries. Beware!
- Fresca --- This is
another variety you can grow from seed, but the fruits were
awful. I ripped it out.
I'd be curious to hear
about strawberry varieties you've tried and loved. We hope to
trial yet another late, June-bearing variety this year, but haven't
chosen which kind yet. Meanwhile, you might be interested in
reading about other
factors that influence flavor of the strawberry patch if you're trying to grow the
tastiest berries you've ever eaten.
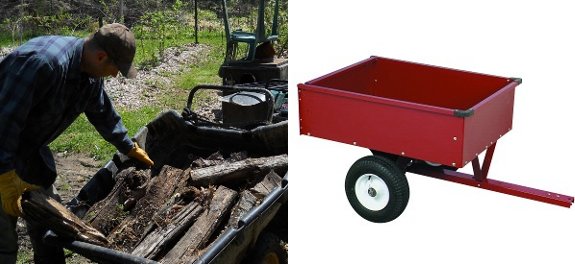
We did some research on ATV
trailers and settled on the Haul-Master
from Harbor Freight.
It'll hold 200 pounds more
than a similar trailer available at Lowes
and has a removable tailgate with nice reviews.
 Even
though I'm now spending most of my work time in the garden, the output
is only barely increasing over winter production levels. We're
swimming in lettuce and leafy greens, of course, but the freezer is
nearly empty so I'm glad to have some new additions to round out our
meals.
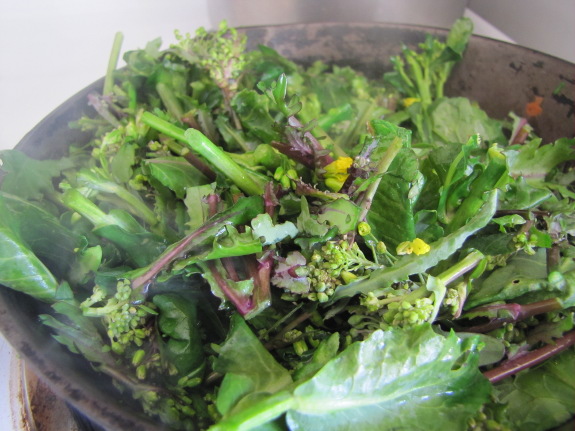
One of my favorites is
kale raab. I tried to grow broccoli raab one year, but was
disappointed by the flavor and by how quickly the plants went to
seed. The blogosphere (can't remember exactly who) taught me a
couple of years ago that you can eat the flower buds of any of our
edible crucifers just like broccoli raab, so now I don't plant anything
special, yet still enjoy the spring treat. Kale raab is our
favorite this year, brussels sprout raab wasn't bad, but oilseed radish
raab was a bit bitter and probably isn't worth repeating. (Our
other crucifers don't survive the winter, so no raab there.) All
raabs can be sauteed, but are even tastier roasted with a light coating
of olive oil, salt, and pepper.
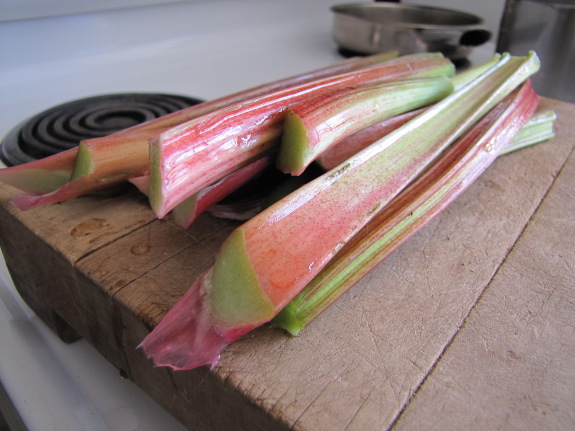
Now's also the time to
enjoy perennial
vegetables.
We've only had one mini-meal of asparagus so far, but are looking
forward to more sweet spears. In the meantime, I harvested
rhubarb (even though Mark won't eat it) and roasted some up with sugar,
orange peel, and a hint of cinnamon --- delicious with yogurt!
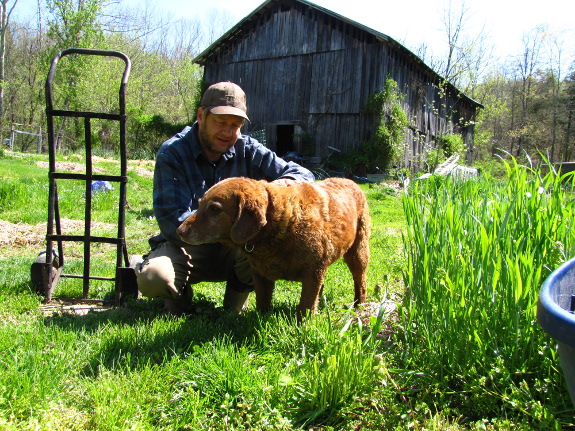
(No, we're not eating
Lucy, but I liked this picture too much to let it disappear into my
files unseen.)
Although many of you
might think it sounds spartan to eat so few types of vegetables in the
early spring, we vastly prefer a limited menu of high-quality food to
the out-of-season contents of the grocery store. We do splurge on
avocados, though, because I'm addicted and we can't grow them here.
We took the morning off to
drive Huckleberry to our favorite vet Dr Redwine.
He developed a rash under his
chin that was sometimes getting infected. Turns out maybe his food dish
is too deep letting the oils from the kibble transfer to his chin. It's
also possible he's allergic to the plastic dish.
A smaller glass dish with
just a light layer of food on the bottom should fix the problem.
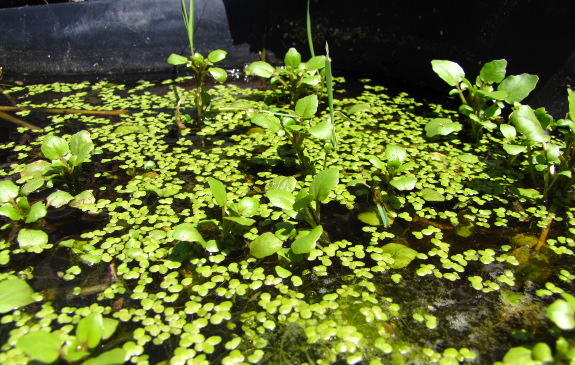
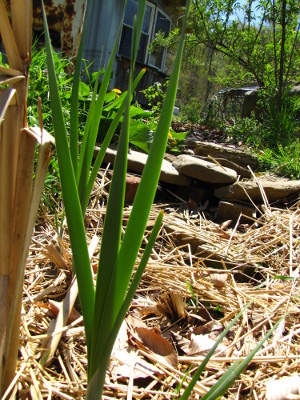 As I suspected would happen,
the main garden got going before I really finished our greywater
wetland and mini-pond. One of these days,
I'll come back to the project --- channeling roof water into the
wetland, putting rocks around the pond as edging so it's less obvious
the liner is a hunk of plastic, painting the washing machine so it
doesn't rust away, and making another cobbled area for a bathtub.
Luckily, nature has been busy smoothing out the rough edges of the
project despite neglect on my part.
I'll start your tour
with the wetland, which is definitely doing its primary job of soaking
up our sink water and keeping Lucy out of the food scraps in the
effluent. The cattails we transplanted near the entrance are
coming up too! The jury's still out on whether this spot will
stay wet enough to really support wetland plants, but so far so good.
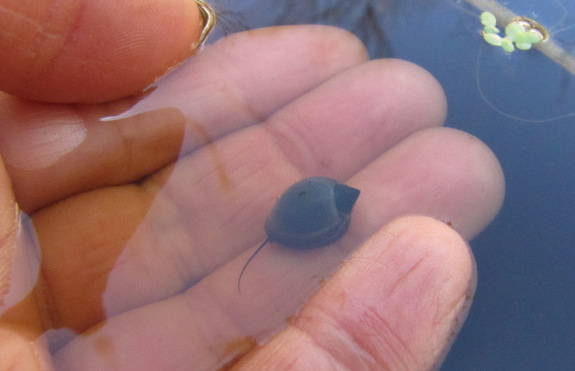
Meanwhile, the little
pond is coming to life very quickly now that we're getting some warm
days. I know at least two of the three goldfish are still alive,
and my various inoculants have done a good job of
introducing more pond life, like the tadpole snail above, a
subterranean striped beetle, and some nearly microscopic
something-or-others. Plus, the water is no longer crystal clear,
but is instead teeming with algae, and the surface is becoming covered
with duckweed. If we do decide to play with aquaponics, the pond is definitely
strong enough now to get a system going.
Or maybe it'll just sit
there through the summer and keep me happy whenever I look out the back
door. Either way works.
 Thanks to Mak and Marco for the
useful comments on my ATV
trailer research post.
The current plan is to leave
the walls off when we put it together so I can build a frame that
will hold 5 gallon buckets. My thinking is the way it is might hold 6
buckets, but if we had a frame that allowed each bucket to extend out
then the total goes up to 9.
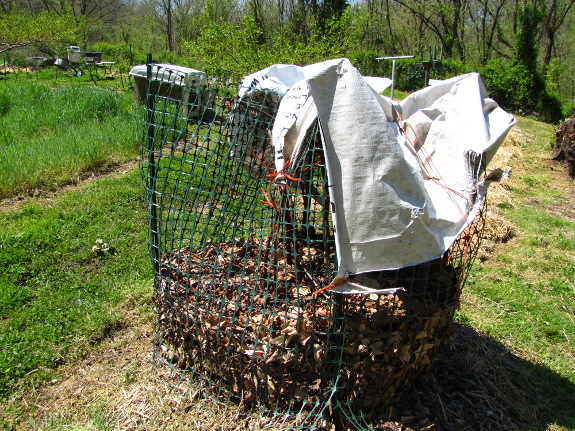
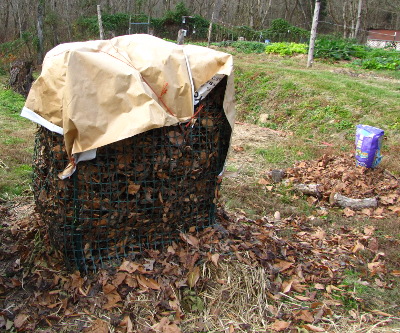 We fell in love with
homegrown figs last year, so I put a bit of extra effort into
protecting our tree from winter's cold. We live on the edge of
even the hardiest figs' survival zone, and in the past, a lot of our
tree's top growth has died back over the winter despite various forms
of protection. The more top growth that makes it through the
winter, the more figs we get to enjoy, so last fall I
built a cage out of plastic trellis material, stuffed the cage full of
leaves, and topped it off with a tarp to prevent rain from beating the
leaves down.
Unfortunately, over
time, the leaves settled just like the contents of a cereal box.
Since I didn't notice the problem until after some very cold snaps, I
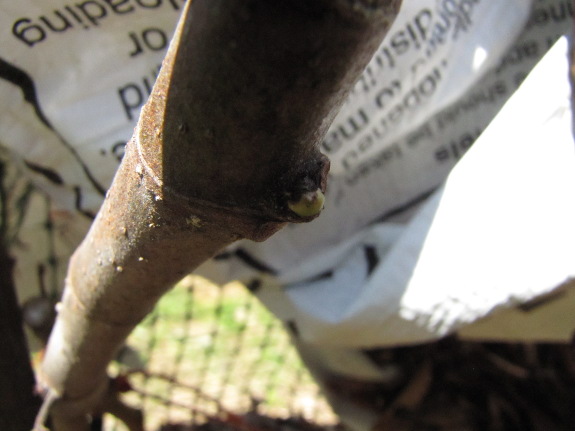
figured the damage was already done and left it alone. I was
expecting to have to cut back dead wood this spring, but as I was
walking by, I noticed buds breaking dormancy in the uncovered wood!
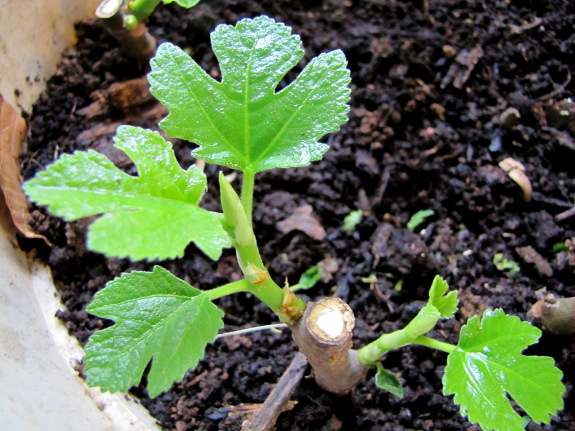
It's not entirely
surprising that the tops of the fig survived the winter
unprotected. We did choose one of the hardiest fig
varieties ---
Chicago Hardy --- and I've also read that figs become more cold hardy
with age. But it's still very heartening to think that our figs
will need less winter protection as they age...because that one fig
tree spawned two babies last fall, Mark picked up a Celeste on a whim over the summer,
and this winter I've been having great results propagating
hardwood cuttings of three more varieties. If all goes as
planned, we may have a dozen or more figs in the ground this time next
year. The only question is, how will I fit them all into our core
homestead? Eating the fruits shouldn't be a problem.
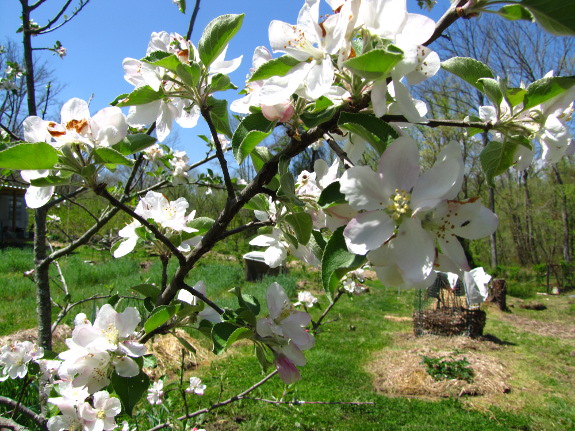
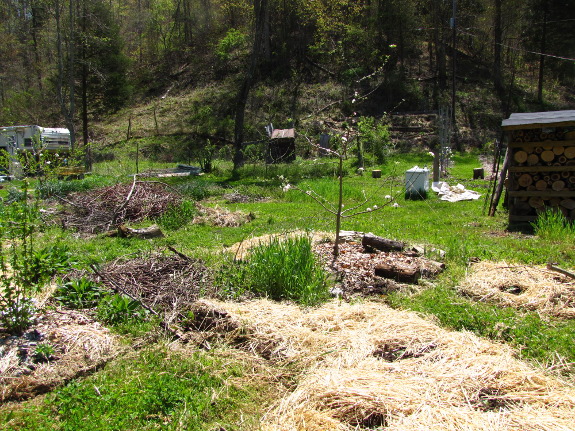
The apple blossoms are
so beautiful, they've been tempting me to take lots of extra strolls
through the forest garden. It's inspiring to see how this waterlogged,
terrible soil has
turned from a weed
pit into a budding
forest garden in just a few years.
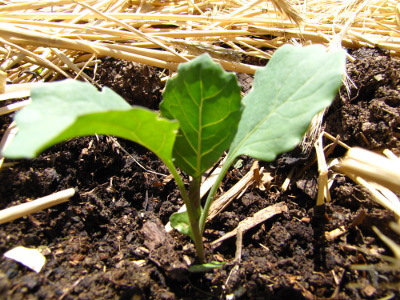 Adding
vegetable beds beyond the trees' canopies is the real root of the
current success. Last year, we grew tomatoes and butternuts in
these extra spaces, with broccoli and cabbage taking their place this
spring. My usual pre-crop topdressing of composted manure is
helping build soil that tree roots will eventually fill, and the
immediate gratification of vegetables prevents the forest garden from
becoming neglected.
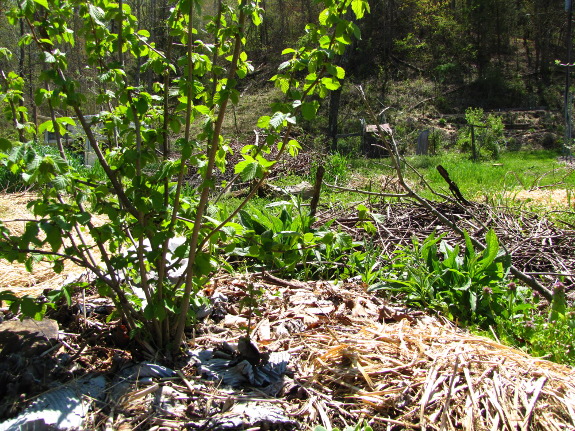
 All of my trees and shrubs
are planted on mounds so they don't perish during
the winter, when lower parts of the forest garden turn into a
swamp. The unkillable comfrey gets to live at ground level,
though.
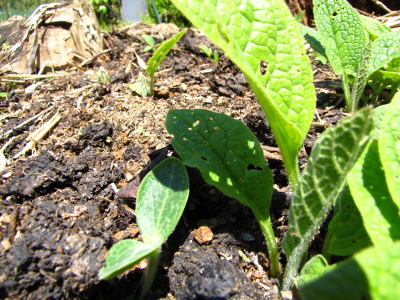
I've taken to planting
comfrey at what will be the eventual edge of the fruit trees'
canopies. I've learned the hard way that comfrey
can kill my fruit trees if planted too close, and that a bed planted in
comfrey will always be planted in comfrey. The little comfrey
leaves in the photo above pushed up through a kill
mulch two years ago,
had every root I could find transplanted out last winter, and are still
coming up copiously. I suspect this bed will be as full of
comfrey as ever in a few months, and it has also seeded approximately
50 new spots in my garden and beyond this spring.
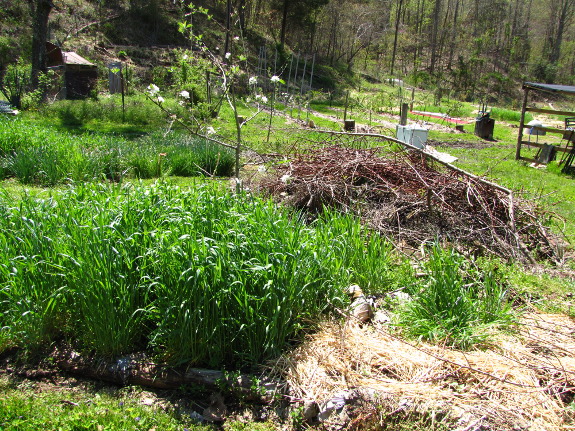
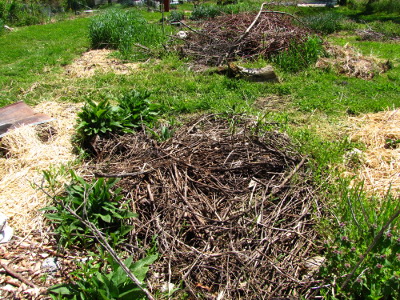 Since the soil is terrible,
one of my top forest-gardening priorities is to add humus to areas
where tree roots will soon reach. Piles of prunings from fruit
trees, berry bushes, and brush clearing are rotting down and creating
eventual spots of raised, rich soil. Rye is doing a similar job
in the short term.
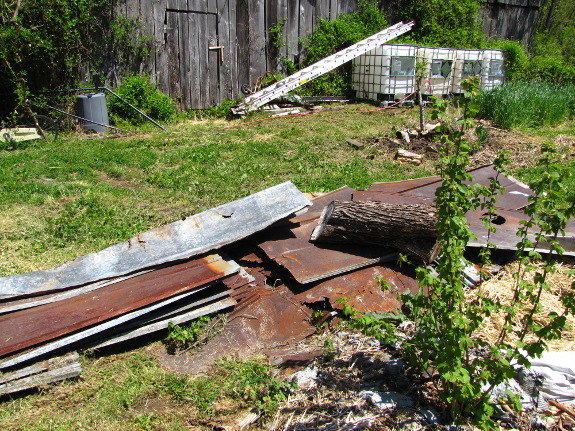
Of course, the forest
garden still has issues. For example, the old tin off the barn
roof is still sitting in a pile waiting to go to the scrap yard.
If I were a true permaculturalist, I'd say the tin is a protected
habitat for snakes that eat the voles that inevitably spring up in
heavy-mulch situations, but since Lucy kills snakes on sight, that
theory doesn't hold much water. Instead, I can only say that the
floodplain allows hauling only a few times a year, and junk tin has yet
to reach the top priority list. Maybe in 2013....
We purchased a new post
driver recently for the new pig
pasture.
They had one with a spring,
but we decided to skip the pogo version.
I've thought about welding
some weight to the top to increase the pounding factor.
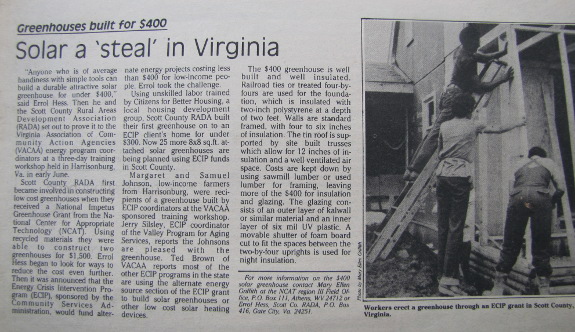
Mark and I are focusing
in on the idea of a small
greenhouse addition on the south side of our trailer to keep our dwarf citrus
happy next winter, so I was thrilled when Daddy sent me an envelope of
clippings. Back when I was in diapers, Daddy was working for a
non-profit (Scott County Rural Areas Develoment Association, or RADA)
that helped low-income residents of southwest Virginia build greenhouse
additions to lower heating bills.
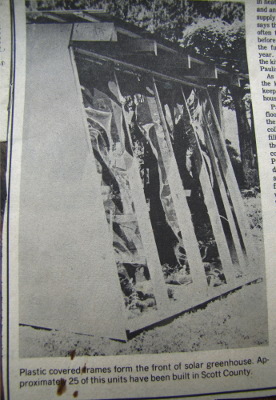 After some experimentation,
RADA came up with a way to build eight-by-eight-foot greenhouse add-ons
for $400 (about $994 in today's dollars). To keep costs low, they
used unskilled labor and simple construction techniques:
As you can tell from the
description, Daddy's greenhouses were really sunrooms, with solid roofs
and glazed walls. I've been pondering how to keep our add-on
greenhouse from turning the trailer into a solar cooker in the summer,
so this idea might make sense. On the other hand, you would
obviously get less winter solar gain using the sunroom concept than if
you glazed the roof as well.
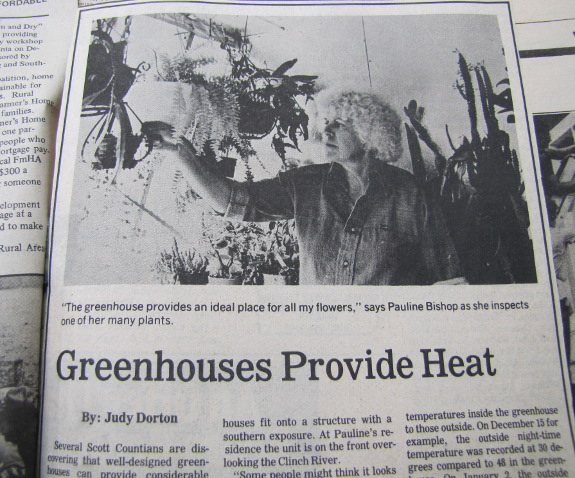
Another article provided
data on how well one of the greenhouses functioned:
 The article went on to
say that Pauline reported a decrease in her heating bills due to the
greenhouse add-on. She found it easy to manage how much heat
moved from the greenhouse into the kitchen since she could simply open
and close a window between the two structures. (As a side note,
most of the greenhouses built during this project used black water
barrels as thermal mass, but Pauline installed a brick floor instead so
she could use all of the greenhouse space for plants.)
If I were a real
reporter, I'd try to track down some of the recipients of RADA's
greenhouses to see how long the structures lasted and how the owners
ended up feeling about them in the long run. Since I'm instead a
lazy homestead blogger, I'll just followup with some more construction
techniques that Daddy's promised me --- stay tuned!
The DeWalt reciprocating saw seems to do a better job with a metal blade cutting through a thick chain compared to using the wood blade for tree limbs.
Want more in-depth information? Browse through our books.
Or explore more posts by date or by subject.
About us: Anna Hess and Mark Hamilton spent over a decade living self-sufficiently in the mountains of Virginia before moving north to start over from scratch in the foothills of Ohio. They've experimented with permaculture, no-till gardening, trailersteading, home-based microbusinesses and much more, writing about their adventures in both blogs and books.
