archives for 03/2013
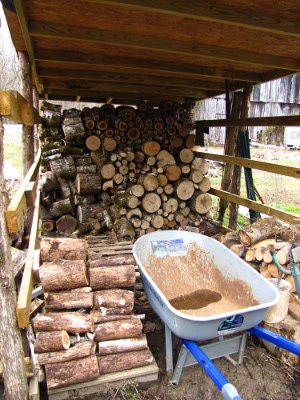 Unless March changes
personalities fast, we're going to run out of dry wood just a hair
before we run out of cold weather this year. While that sounds
like a bad thing, this past winter is the first one where I've kept the
trailer warm all the time (above 55 most days and above 40 most
nights!), so I consider it a major success.
On the other hand, I
still don't know how much wood we burn per winter. As usual, we
went into the fall with our woodshed only partially full and had to
hire Bradley to cut up a huge standing
sycamore to make up
the difference. As we split the sycamore, we stacked
it directly on the front porch, so I never got a
measurement of the amount of dry wood we started with, either in cords
or as a fraction of the woodshed.
My goal is for the
winter of 2013-2014 to be the one where I actually get an idea for how
much wood we burn. To that end, we've already got a couple of
rows of walnut and box-elder in the back of the shed and will be
filling up the rest as soon as the floodplain becomes passable and the
golf cart comes back into action. I've really enjoyed having dry
wood all winter this year, so hope to fill the shed in time to have the
same luxury next year.

Want to increase your
success rate rooting cuttings? Try out these ten tips.
1.
Pay attention to time of day and time of year. As I mentioned in a
previous post, softwood,
greenwood, and hardwood cuttings are all taken at different times of
year, and different
plant species respond better to different seasons. If you're
taking softwood or greenwood cuttings, it's best to actually cut the
stems early in the morning when they're full of water and the air is
cool to minimize wilting.
2.
Skip the tips and blooms. The actively growing
tips of twigs usually have less stored carbohydrates, meaning that they
don't have as much food to draw on before they root and start
photosynthesizing again. Similarly, parts of trees that have
flower buds are going to be putting their energy elsewhere, so it's
best to choose areas that aren't flowering this year.
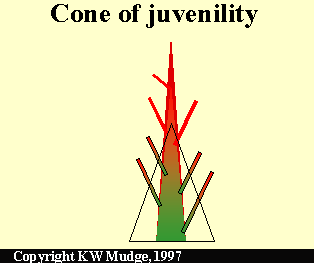 3. Stick
to the young.
Within the same tree or bush, certain parts of the plant act younger
than others. The so-called cone of juvenility shows the parts of
a tree that are the least mature biologically and most likely to root
easily. If you're trying to propagate lots of plants effectively,
it can be worth coppicing the parent plant so that it keeps putting out
new growth from within the cone. And even if you're selecting
cuttings from a mature tree, you can try to get more youthful
twigs by finding sprouts low and near the trunk.
4.
Choose a good rooting medium. As long as it's fluffy
and able to hold a lot of water, most rooting mediums work pretty
well. Options include sand, peat, perlite, pine bark,
pumice, or sandy soil (and I generally use stump
dirt).
Remember that your plants don't need much fertility in their rooting
medium, although you will probably want to add some kind of fertilizer
once they're well rooted and are putting out new leaves.
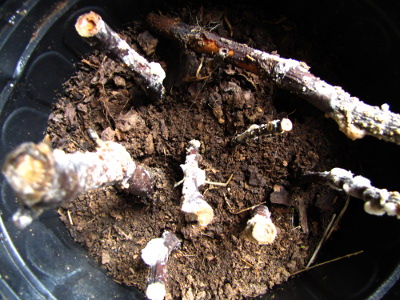 5. Rooting hormones and
fungicides can help. I wrote a whole post
about rooting
hormones, some of
which include anti-fungicidal agents. I learned the hard way that
cuttings can be the perfect habitat for fungi, but I also suspect that
if you do everything else right, you might not need the chemical aids.
6.
Wounding isn't always bad. Difficult-to-root
greenwood and hardwood cuttings are sometimes wounded near the base to
promote rooting. Wounding usually consists of scarring the bark
(but not the green cambium underneath) for half to one inch of the
base. Similarly, girdling can be used as a preconditioning step
for
rooting since it concentrates carbohydrates and hormones in small area,
which will make roots form better there.
7.
Keep cuttings moist but not wet. Softwood and greenwood
cuttings, especially, can dry out by losing too much water through
their leaves before they root. Steps as simple as partial shade
or a plastic bag over top of the pot can work, as can more complicated
misting setups used in nurseries. However, be aware that too much
moisture can be a problem, especially in the slower-growing hardwood
cuttings.
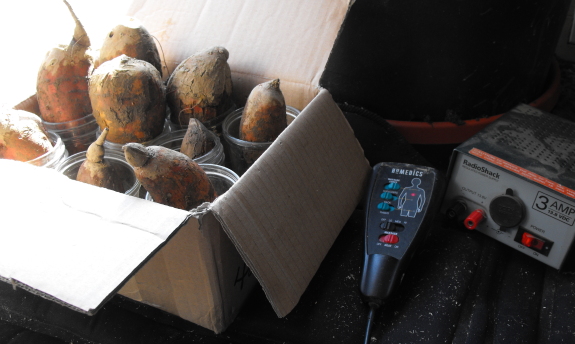 8. Some like it hot. Bottom heat can help
cuttings root...or it can prompt them to grow leaves, use up their
reserves too quickly, and perish. The most common use of heat is
beneath cuttings started outdoors in the winter. Next most common
is using heat to callus hardwood cuttings, which helps precondition
them for rooting. To callus cuttings, apply bottom heat for four
weeks, place in
plastic bag in
the dark at 50 degrees Fahrenheit, bury upside down in soil, sand, or
sawdust, or store in a warm, moist place for three to five
weeks. As you can tell from the various methods, it's probably
best to look up the species you're considering rooting before deciding
whether and how to callus.
9.
Don't rush them out of the nursery. Softwood cuttings,
especially, often benefit from spending two years being babied before
being planted in their final location. And a few cuttings even
need supplemental light in the fall to prompt them to put out a growth
spurt and store enough energy to make it through the winter. If
you're going to go to all the trouble of rooting cuttings, don't let
them die on you after the roots form.
10.
Keep notes.
So many variables can affect the success or failure of your cuttings
that it's essential to write everything down so you can make changes
and try again. And don't feel bad if the techniques that work for
someone else don't work for you. Some varieties within the same
species root better than others, so you might not even be on an even
playing field.
| This post is part of our Reference Manual of Woody Plant Propagation
lunchtime series.
Read all of the entries: |

We helped our neighbor with
one of his audition tapes today.
I play the part of a
reluctant time traveler.
Frankie is playing a hard
nosed cop investigating a grizzly murder.
When I was younger I thought
the idea of time travel was fun and interesting...but these days I'm
inclined to label it dangerous and arrogant. In my opinion the best
time to be alive is NOW!
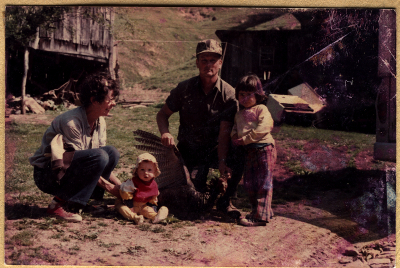 Most
of my memories of Silas come from that golden childhood period when I
assumed the stars (adults) revolved around the earth (me). In
other words, I really have no idea who he was. Except for the
obvious: farmer, father, salt of the earth, 'seng hunter, Gargamel.
We Pacifist-hippie
offspring reacted to Silas's deer- and turkey-slaying with taunts of
the worst evil we could imagine --- likening him to the villain in the
Smurfs. And our good-natured neighbor played along, pretended to
chase us, and didn't mention our inconsistencies when we took home
turkey primaries to cut into quill pens.
By the time I was in
sixth grade, my family was still being drawn back to our long-sold farm
like moths to a flame. Silas and Onie's next-door house was a
safe resting place in our afternoon journeys. Mom made us bring
shoes --- "You don't have to wear them, but they have to fit in case
the car breaks down!" And sometimes she'd let us sit in the open
hatchback and bump our heels on the "dirt" (gravel) road along the
way.
We'd stop and gather
berries or persimmons, depending on the season, at favored roadside
spots, then I'd hunt minnows, scooping fish out of Silas and Onie's
creek with a five-gallon bucket. Back home, I poured the bucket
through a banged-up colander and let our city cats enjoy a country
feast as the fish flopped vainly in search of liquid air.
"You'll use all of our
fish up!" Silas's grandson
complained once. Adult-Anna agrees, and cringes even more at the
use to which we put our creek-caught crawdads, racing them down the
gutter into the storm-sewer. But at the time I was mourning the
loss of our own wooded acres, and Silas and Onie tacitly took my side
and let me treat their creek as my own.
During my fishing time,
Mom was sitting under the spreading catalpa, talking to Onie, who had
been a life-line during Mom's ten years on the farm, her own family 800 miles distant in Massachusetts. I would drop by the
shade tree, but soon became bored with adult conversation.
Instead, I ended up coaxing Silas's kittens out of the hole at the
bottom of the shed. There were always new kittens, but the farm
didn't become overrun because the road was nearby and lethal. I
remember the passion with which Silas condemned the speeding drivers,
and how easily he stroked the soft balls of fur.
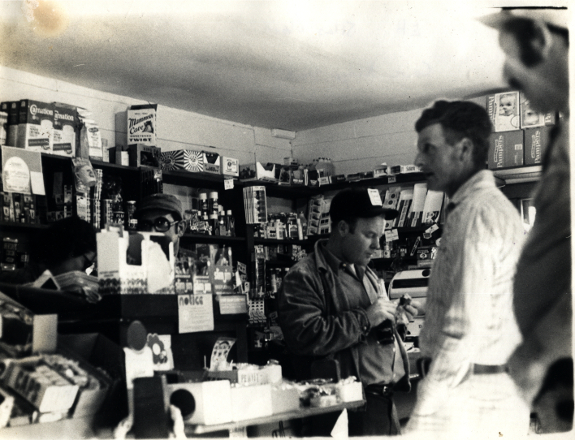 Recently, Mom told me she
learned easy family affection from Silas, mentioning how struck she was
to find him holding three young daughters on his lap, when her New
England parents had kept touch to a minimum. Love --- so
complicated for most of us --- was simple for Silas.
Years earlier, when
my mother-to-be showed up and turned a rented store
into a honkey-tonk, Silas's teenage son was attracted to the
action. What did the newly-saved Silas do? Invited the
hippie to dinner, then crammed her into the car with his five kids and
wife and brought them all to the fair. The more the merrier.
My father's relationship
to Silas was built around work. I can only guess how Silas must
have taken this overeducated, idealistic, new farmer under his wing and
shared ideas as well as equipment. Silas went so far as to turn
Daddy on to the farm being auctioned off next door, which is how we
became neighbors when I was a few months old. Our right-of-way
through Silas's land felt like a daily handshake, rather than an
intrusion.
But you have to remember
that the world still revolved around me then. That I was intent
on capturing tadpoles in Silas's cows' water trough and oohing and
ahhing over the year's newest calves in the barn. I was thrilled
to drink from a dipper at the outside faucet, the water so cold it
almost hurt, and to sneak stale potato chips discarded from the factory
and trucked home to feed Silas's livestock.
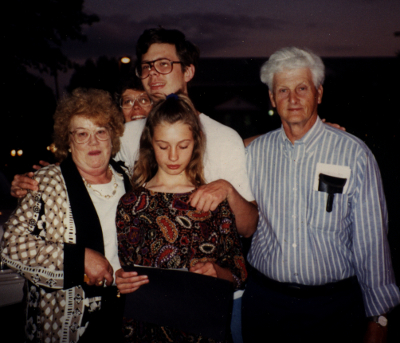 The
truth is that I knew Silas only as the non-astronomers among us know
the stars. He was bright and memorable --- definitely part of
Orion's belt --- but I'd be hard-pressed to tell you a fact as simple
as the color of his hair before it went gray. All I knew was the
gestalt of Silas --- warm and strong and full of boundless love.
And that's why, I
explained to my family, I couldn't begin to eulogize him on the
blog. Because all I really know is how much I miss him and how
his death has left a black hole in my life. And reminded me of a
time when the sun revolved around the earth...even though that sun had
kids and grandkids of his own. The more the merrier.
It's been cold lately, but the new Lectro heated kennel pad is keeping Lucy toasty.
 Brian sent me a copy of Got
Sun? Go Solar along
with a bunch of scionwood, and I skipped over some other items on my winter
reading list to
scarf it down. Rex A. Ewing and Doug Pratt have produced a quick
and easy read, with an explanation of the physics of solar that nearly
made me understand volts, amps, and watts. For that alone, the
book is worth a read if you're interested in solar, but I know I'll
have to delve much deeper to set up our tiny system.
The trouble with the
book from a DIY point of view is that it's all about grid-tie
systems, which the
authors explain average around $20,000 to $25,000. (You can build
a grid-tie solar system for around $5,000, but that "low-end" audience
isn't who the authors are aiming for.) In that price bracket,
most people are going to be hiring installers to do all of the hard
stuff, so Ewing and Pratt left out nearly all the nitty-gritty.
Next on my list is Photovoltaic
Design & Installation for Dummies, which already appears to go
too far in the other direction --- assuming I'm going to become a
career solar installer putting in other people's multi-thousand-dollar
systems. Hopefully between the two sources, I'll come up with
enough information to get our tiny backup system off the ground at long
last.
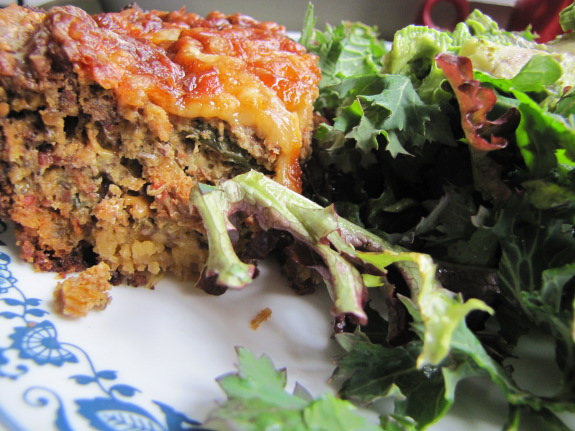
We're still
experimenting with low-carb, tomato-rich recipes, and this one seems
like it's a keeper. A bit like a mix between quiche and lasagna,
it's won the approval of both Mark and B.J. so far, mostly because I
called it a "tomato pie".
Crust:
- 3 ounces cheddar cheese
- 1/4 cup grated parmesan cheese
- 3/8 cup all-purpose flour
- 1 tbsp sugar
- 1/8 tsp paprika
- 1/8 tsp salt
- 1 tbsp butter
- 1 tbsp water
Filling:
- 4 strips of bacon (baked with grease removed)
- 6 eggs
- 2/3 cup Greek yogurt
- 1 cup dried tomatoes (soaked in water, but with water poured off)
- 6 Egyptian
onion tops (green onions work too)
- 2 tbsp pesto
- 1 tbsp Hollywood
sun-dried tomatoes (optional)
- a bit of salt and pepper
- 1 cup mozarella cheese (in parts)
- a bit more grated parmesan cheese
Three hours before you
want to eat, soak your dried tomatoes in water to plump them up.
Go away for two hours, then start with the crust.
Mix the crust
ingredients in the food processor, then pat into the
bottom of a greased pie pan. Bake at 350 degrees for about 10
minutes, until cooked but not browned.
Meanwhile, bake the
bacon on a cookie sheet. Discard the grease,
then crumble the bacon into a bowl.
Pour the water off the
tomatoes and cut them up. (I used a food processor.) Then
add the tomatoes to the bacon along with the eggs, yogurt, Egyptian
onion tops (cut
into small pieces), pesto, Hollywood sun-dried tomatoes, salt, pepper,
and half a cup of the
mozarella cheese.
Pour the mixture into
the crust and bake at 350 degrees until the eggs set (with the time
depending on the size and depth of your dish). Then spread the
rest of the mozarella and parmesan on top and continue baking until the
cheese is brown (about 10 minutes).
Serves six hungry people.
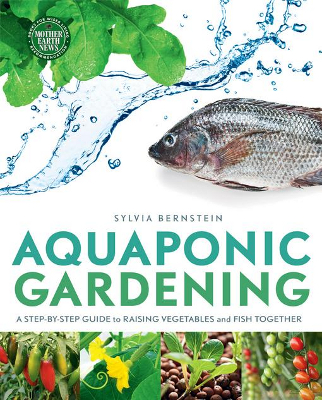 In the interest of full
disclosure, I'm not really a believer in aquaponics. My gut
reaction is that it's not sustainable in most situations, so it annoys
me that it's being marketed as a green agriculture solution. Part
of this may be a blind spot because I don't like seafood (although I do
love fish ponds), but mostly it's just a knee-jerk reaction not to use
electricity to grow things if you don't need to.
On the other hand, Mark
has been intrigued by hydroponics ever since he was a kid, imagining
austronauts growing their food in water, and he loves the idea of a
more sustainable form of hydroponics. So I decided to hunt down a
book and read more about it.
Aquaponic
Gardening by Sylvia
Bernstein is a good beginners' guide to the subject. Even though
her arguments for sustainability didn't win me over, she did present a
very good explanation of how to set up an aquaponics system, including
a fascinating look at the ecology involved in growing fish and plants
together. The book has some flaws, but as best I can tell it's
the main contender in a very new genre. I'll write about some of
the top points in this week's lunchtime series, but I recommend
checking out Bernstein's book to learn more if you actually want to set
up an aquaponics system.
| This post is part of our Aquaponic Gardening lunchtime series.
Read all of the entries: |
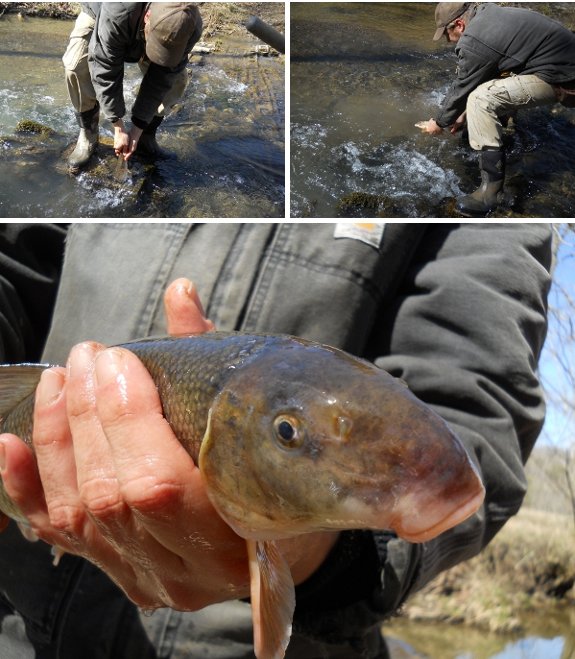
We were walking to our car
today and I noticed a medium sized fish had somehow got his head stuck
in the hole of one of the cinder
block stepping stones.
It's possible he was trying
to feast on the many snails that have attached themselves to each block
and just got a little greedy going for the deeper ones.
We debated having him for
dinner, but decided he was too cute to eat.
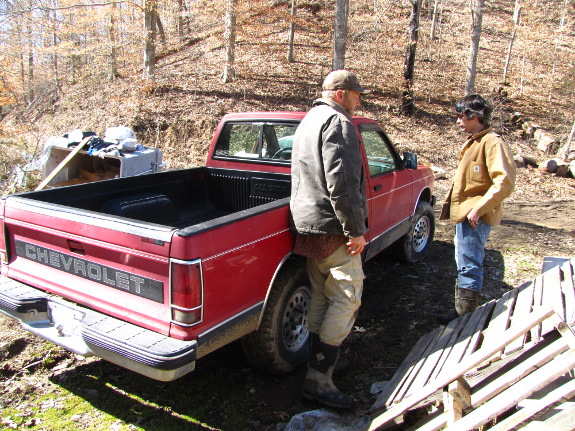
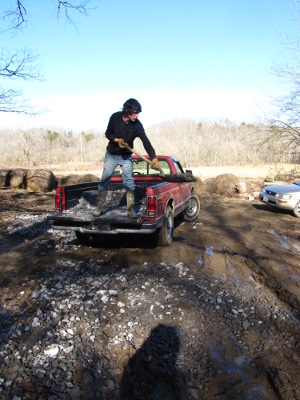 When we first moved to the
farm, we teamed up with our movie-star neighbor in a chicken-share arrangement. I can't
say for sure whether our neighbor got enough eggs to make the deal
worthwhile, but we certainly benefited. In fact, our whole business was built around those free
chickens.
So when B.J. turned up in our life,
lacking transportation, we decided to try the same sort of deal, this
time from the other side. He hunted down a quality used truck, we
bought it and paid the first year's insurance and fees, and he'll use
that truck to do some much-needed hauling for us. The truck-share
is born!
B.J. tells us her name
is Shelley, and, yes, it was love at first sight. Sure, they had
a long-distance relationship for the first couple of weeks, and B.J.
put in a lot of time talking Shelley's father around (and dated a few
other trucks in the meantime). But they finally got hitched and
are a hard-working team already. Congratulations, B.J. and
Shelley!
So, what is
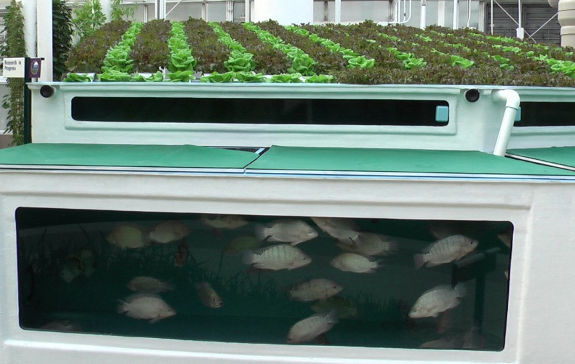
aquaponics? The gist is that you keep a tank of fish, circulating
their water through a plant grow bed to clean the water and feed the
plants.
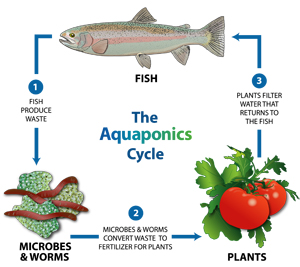 Although fish and plants are
what most people get excited about, an aquaponic system is actually
fuelled by a complex cycle including bacteria and worms. Fish
waste is full of ammonia, which is toxic to fish and which plants can't
use, but two types of bacteria convert that ammonia first to nitrites
(nitrosomona bacteria) and then into nitrates (nitrospira
bacteria). Plants love nitrates, so when you pump the fish-tank
water up to flow around your vegetables' roots, the plants quickly suck
up the nitrogen and return clean, aerated water to your fish.
Meanwhile, compost worms in the plant grow bed are
cleaning up excess solids. Without these wrigglers, dead bits of
plant roots and larger particles of fish waste would build up 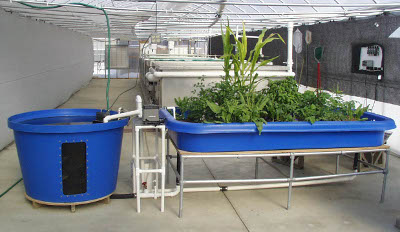 and require cleaning.
Luckily, compost worms can handle periodic inundations and do their
part to convert particulate matter into chemicals plants can easily
suck up.
The fish, bacteria,
plants, and worms all work together to give each organism just the food
and environment it needs. I suspect this elegant, created
ecosystem is why aquaponics has won so many fans in permaculture
circles.
| This post is part of our Aquaponic Gardening lunchtime series.
Read all of the entries: |
A few relevant details Anna
left out of this morning's truck share post.
The new truck is a 1993 Chevy S-10 four wheel
drive.
B.J. bought it off a trusted,
local mechanic for 1500 dollars who included a brief warranty.
Its got a Chevy Blazer engine
with just under 100 thousand miles. The 4 wheel drive won't go in 4
wheel low, but we can live with that. All 4 tires have at least 80
percent life left in them and it came with a nice bed liner.
 With
the worst of the winter's cold over (we hope), I figure I have enough
data to finish up my ebook about the fridge
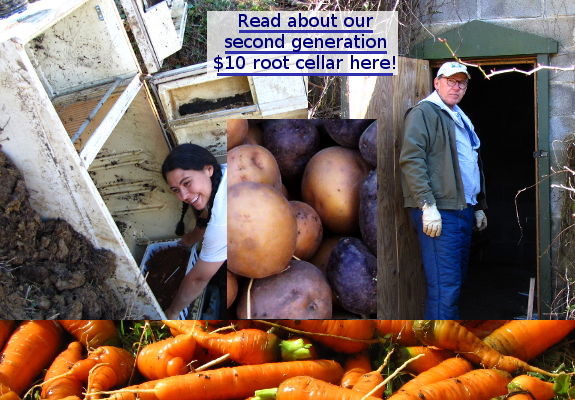
root cellar.
For a very low-work and low-cost option, it passed with flying colors,
using about 2 kilowatt-hours of electricity to keep a whole
winter's-worth of carrots in prime shape. During a power outage
that corresponded to a frigid spell, the interior dropped to 28 degrees
Fahrenheit (and I brought our carrots inside for a few days to protect
them), but otherwise the fridge root cellar stayed at the perfect
temperature all winter long.
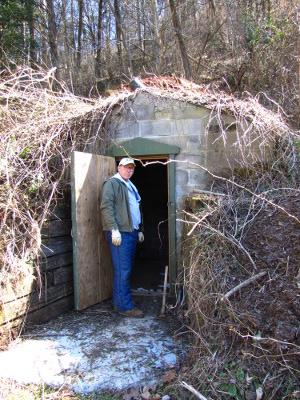
Even though I think our
fridge root cellar is awesome, I want to round out my ebook with
overviews of some more traditional root cellars, so I gave my
movie-star neighbor a call. You'll have to wait for the ebook to
hear all about his root cellar that taps into a cave, but I'll regale
you with the other highlights of my visit below. (Meanwhile, the
offer's still open
to be included in the ebook if you have a root cellar or low-tech root
storage technique to share.)
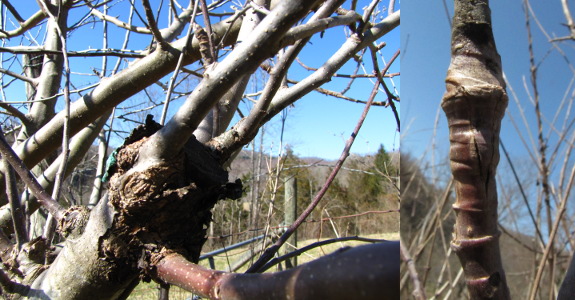
Our neighbor has been
grafting new varieties onto his apples for years, and it was intriguing
to see the grafts one to three years after joining. He even sent
me home with two little Colette pear trees grafted onto rootstock last
winter --- we tasted some of his homegrown Colettes last year and were
blown away by the flavor.
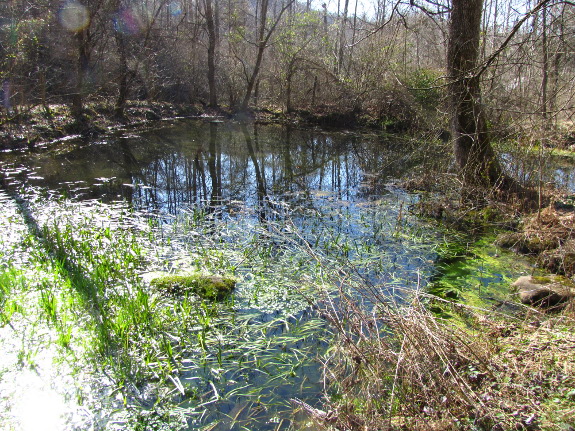
I also dropped by his
spring-fed pond to get a bit more inoculant for my tiny water
garden (as Sara suggested I call it instead of a puddle).
This pond's water will stay more cold and aerated than mine, so I'm not
positive the water snails and water cress will make the transition, but
I suspect the forget-me-nots and water mint will do fine.
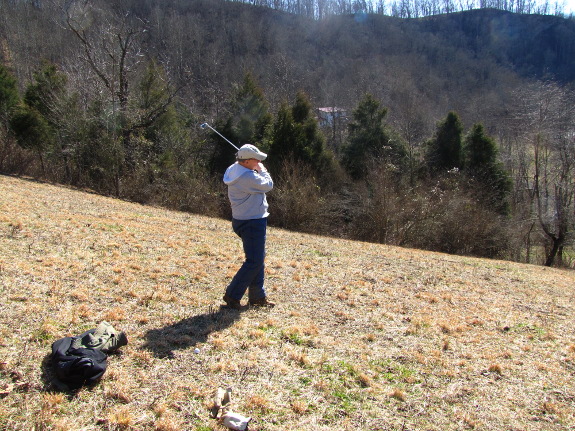
Finally, we gathered a
few wild golf balls and I watched my neighbor enjoy pasture
golfing. Isn't that the best part of homesteading --- you can do
whatever crazy thing suits your fancy?
If aquaponics
is such an elegant, created ecosystem, why am I down on it?
Simple --- electricity use.
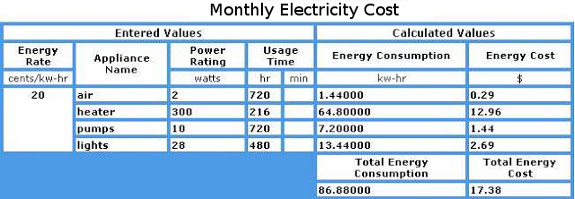
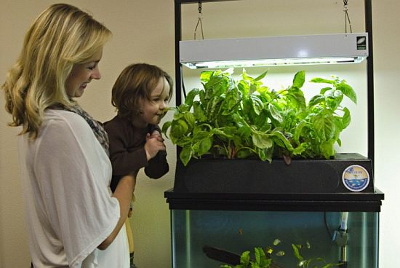 First, there's the pump (or
pumps) used to push water out of the fish tank and into the grow
beds. Next comes the energy used to heat the water --- to ensure
the bacteria and worms stay active enough to convert fish waste into
nitrates, most people keep their aquaponics systems running at or above
room temperature summer and winter. And then there are the grow
lights since many people run aquaponics systems inside to get more
control over the environment. To be honest, once you pour all
that electricity into the system, I'm not so sure aquaponics is any
better for the earth than mainstream agriculture.
Next, there's the fish
food to consider. Although aquaponics looks like a closed loop,
it really isn't --- nearly everyone just buys large quantities of
commercial fish food to nourish their tilapia or goldfish.
Granted, fish are more efficient at converting feed to meat than other
forms of livestock, but you're still basically running a fish CAFO (and
contributing to overfishing since most fish feed contains wild-caught
fish meal.)
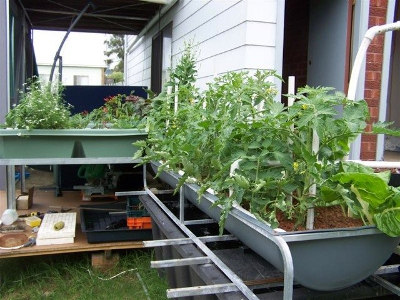 Aquaponics arose in
Australia, and there it makes much more sense. Throughout most of
their continent, Australians experience moderate-enough winter
temperatures that they don't need to bring their aquaponics systems
indoors. And rain is scarce enough that minimizing water use may
trump minimizing electricity consumption. Aquaponics also has
potential in other subtropical and tropical climates, especially in
cities where good soil is scarce.
The other place where
aquaponics shines is if you consider it a way of growing high-density
fish with the plants just being a side note. Wild-caught fish and
factory-farmed fish both have environmental problems attached, so it
makes sense to try to come up with a more sustainable solution.
That assumes, of course, that you actually eat the fish in your
aquaponics setup, unlike the author of Aquaponic
Gardening who came
to regard her tilapia as pets.
| This post is part of our Aquaponic Gardening lunchtime series.
Read all of the entries: |
A coal
shovel provides easier scooping and twice the carrying capacity of
a regular shovel.
Why did it take me years to
figure this out?
We've had a coal shovel since
we moved here, but I only recently re-found it behind a pile of stuff
in the barn this past summer.
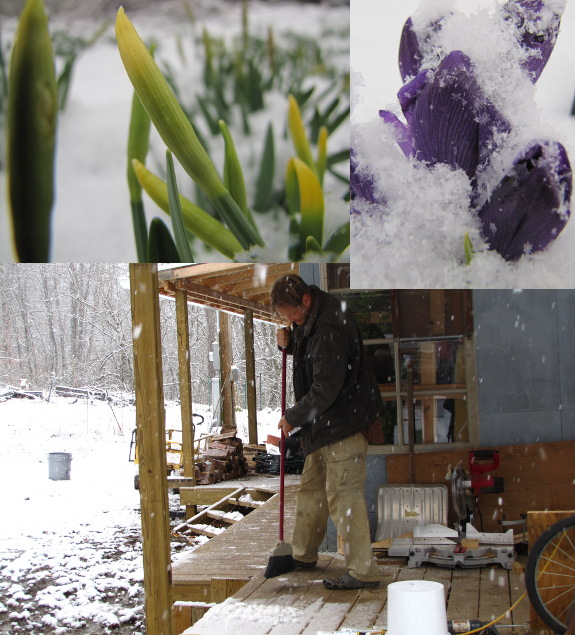
At this time of year,
you hear a lot of grumbling when the weather turns wintry. The
gist seems to be "Isn't it over yet?!" But, while I can
understand the sentiment, I've learned at the Mark School of Positive
Thought that the best place and time to be is right where and when you
are.
With that in mind, not
only am I cleaning the soot off the wood stove's glass door so I can
cherish the last fires, I'm also remembering that a slow spring often
means more fruit. Last year at this time, the peach
buds were swelling...and
a late freeze wiped out every tree fruit. Maybe 2013 will be more
like 2010 when
flowers were slow to open and our peach tree was
loaded with luscious orbs a few months later?
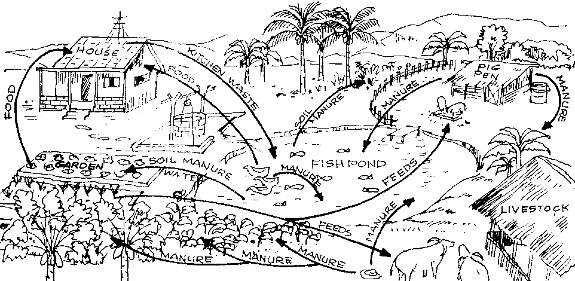
My challenge to the
Walden-Effect hive mind is --- can we take the
elegance of an aquaponics system and reinvision it without the
unsustainable aspects?
Here are some options I'm considering:
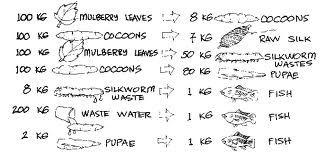 Follow the
lead of the Chinese.
I've read several tidbits about the way traditional Chinese agriculture
integrates fish into their agricultural systems. One system
involves silkworms eating mulberry leaves, fish being fed the sikworm
pupae after the silk is removed from the cocoons, and the fish waste
being dredged up to fertilize the mulberry trees. Humans get
money from the silk and food from the fish with no outside inputs.
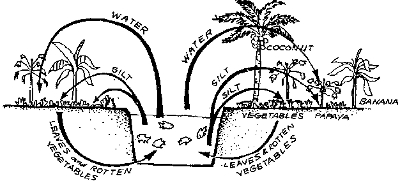 Go back to basics. A simple pond full of
aquatic plants, snails, and insects can feed low populations of
fish. Then you could harvest the aquatic plants to turn into
compost or mulch for the garden and eat the fish (or feed them to your
chickens if you'd rather).
Take
advantage of the water's thermal mass. If we ever built a passive
solar greenhouse,
we'd want to include tanks of water as thermal mass. Turn those
tanks into fish tanks, make an integrated ecosystem just like you would
in a pond, then scoop out water from time to time to water and lightly
fertilize plants in the greenhouse.
What kind of
fish-related permaculture systems have you seen or dreamed up that
require absolutely no electricity or commercial fish food?
| This post is part of our Aquaponic Gardening lunchtime series.
Read all of the entries: |
I finally got a latch
installed on the new chicken
pasture gate.
The plan was to paint it
next, but a shelf project and some wood chopping pushed painting down
the list.
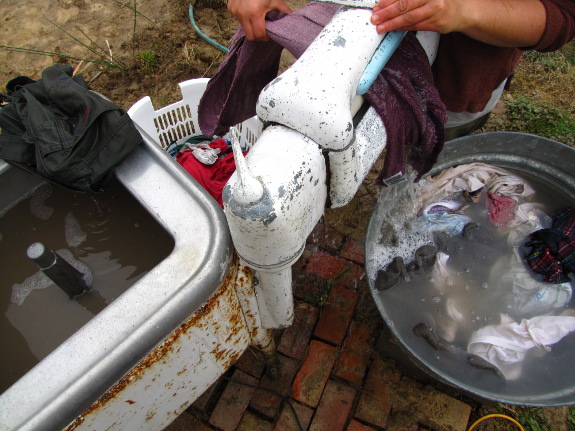
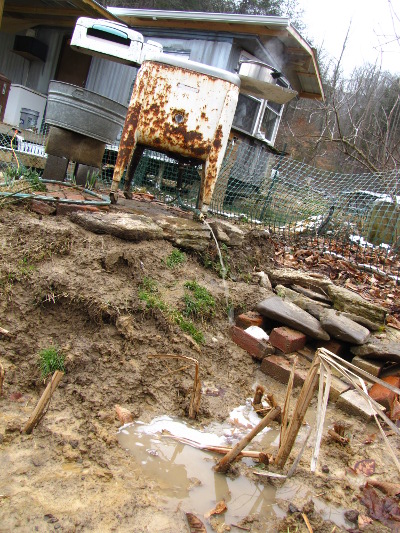 I've been looking forward to
laundry day so I could try out my new laundry
nook beside the greywater
wetland. And
it works like a charm!
I actually thought I
might need to add rocks to the slope between the laundry nook and the
wetland to prevent erosion, but the water gushes out with such force it
ends up right where I want it.
Dishwater hasn't been
enough to wet more than the entrance to the wetland, but the washer
dumps enough water to inundate the whole depressed area. Not so
much it runs into the pond, though, which is a good
thing.
So far, all the
greywater wetland does is prevent excess water from souping up the
yard. I keep planting things in the wetland and around the edges,
though, so in a few months hopefully leaves will pop out and the whole
ecosystem will come together.
 Paradise
Lot is Eric
Toensmeier's tale of how he tested the hypotheses he and Dave Jacke set
forth in Edible
Forest Gardens.
Toensmeier and his friend Jonathan Bates bought a duplex with a tenth
of an acre backyard in Holyoke Massachusetts (zone 6) in January 2004,
spent a year learning the site and planning out their forest garden,
then they dove in and made it happen. By 2009, salamanders,
fungi, and other wild creatures had shown up in what used to be a
compacted urban lot, Toensmeier and Bates had both attracted mates, and
all four of them were happily grazing on the bounty produced by their
forest garden.
Unlike Toensmeier's
other books, Paradise
Lot is fun, easy
to read, and inspiring. (Don't get me wrong, I think Perennial
Vegetables and Edible
Forest Gardens
are seminal works, but neither is something you'd read entirely for
fun, while Paradise
Lot is.)
This week, I'm going to include a few highlights in a
slightly-truncated lunchtime series, but I recommend you check out Paradise
Lot yourself to
while away a winter afternoon. Maybe you'll end up having an
epiphany and decide to try out something crazy this year, like raising
silkworms for chickens.
Or maybe you'll simply enjoy reading the first book I've seen profiling
the growing pains of an actual North American forest garden. Just
be aware that you'll need to keep a handle on your wallet because
you'll want to try out several new species by the time the book is done.
| This post is part of our Paradise Lot lunchtime series.
Read all of the entries: |
It's been just over 4 years
since we last cut sycamore
logs for shitake inoculation.
Some of those logs still
produce mushrooms, but not many.
Today we cut off 2 sections
of a large oak that fell during a recent storm.
We're not ready to cut them up into logs, but it was necessary to cut
them off from the main tree so they'll be ready in time to inoculate
this Spring.
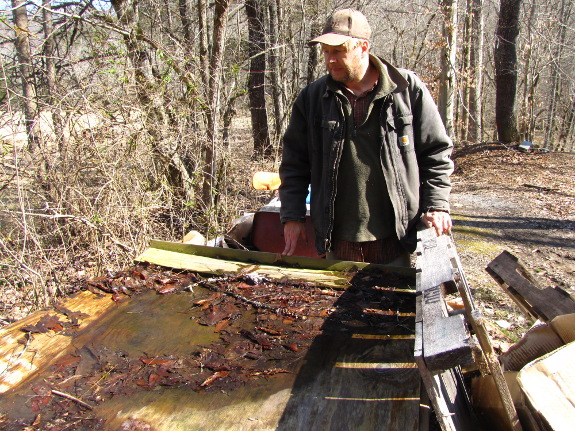
 Friday, the sun finally came
out and the cold weather broke. A perfect day to check on our
invertebrates! The honeybees were flying busily in and out of
their hive and even visiting the crocuses. But three of our four
worm bins were less vibrant.
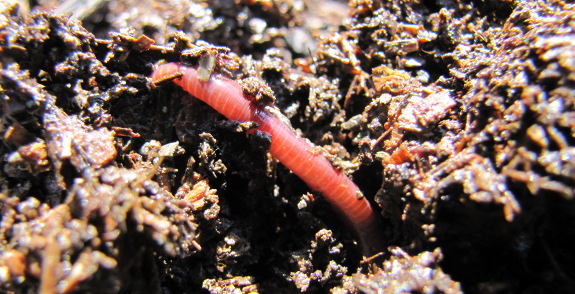
I'll start out by
telling you about the one worm bin that's thriving (pictured above and
to the left). This is our first bin, located at the parking area
with a lot of winter sun. The plywood lid bowed down on one side,
so water tends to pool there and seep into the bin. Sure enough,
the area under the pool is full of thriving compost worms, but the rest
of the manure has dried out too much to host worm activity.
I'm sure not sure if the
problem with our other three bins is lack of moisture, cold, or
both. We built
the lids on those bins at a slant
so rain would run off and the wood would last longer. I started
out
the winter by saturating the manure and sawdust bedding, but sometime
over the cold months, all of the water drained away and left the
contents quite dry. Even after I opened the lid this week and let
rain
pound down on the manure, there were still lots of dry pockets when I
poked around Friday, and very few worms were left.
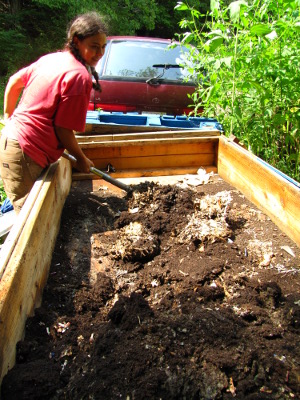 The three bins in our core
homestead are also in heavy shade during the
winter, so the contents probably froze solid a few times. And
there are several other differences between our oldest bins and our
three newer bins beyond moisture and temperature. Looking back at
old photos like the one to the right, I notice that the
vibrant-worm-area is on the side of the bin where I raked
all of the finished compost and worms last August,
so maybe they just haven't spread beyond home base due to the cold
weather? Or maybe they don't like the horse-manure-in-sawdust as
much
as they liked the original horse-manure-in-straw? Or maybe
variety is
the deciding factor since the
worms that went into the core homestead bins
were purchased from a different location than the locally-adapted worms
that went into our original bin.
Still, moisture is my
best guess, and I have a way to test my hypothesis. As I empty
out the core homestead bins to add manure to the garden, I should
eventually hit a wetter area near the bottom of the bins. If the
damp zone is full of worms, I'll know water was the difference between
the bin that thrived and the bins that didn't.
Mark's already talking
about ways to let rainwater soak in without losing the shade effect of
the lid in the summer --- perhaps drilling holes at intervals
throughout the lid might work. Other ideas for hydration that
don't require running hoses during freezing weather are appreciated.
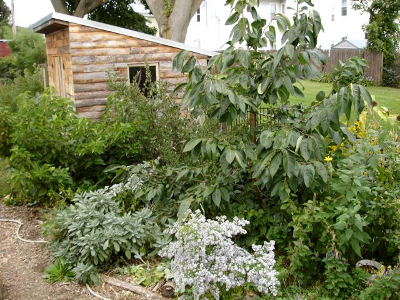 The best part of Paradise Lot is that Toensmeier is
completely honest about which parts of his forest gardening experiments
succeeded and which parts failed. It turns out that he had nearly
as many growing pains building polycultures in the forest garden as I
did, and came to some of the same conclusions. For example,
Toensmeier recommends letting trees and shrubs get established for a
year or two before adding anything to compete with them, and likes to plant
sun-loving annual vegetables in young forest gardens to take advantage of the
light before the canopy closes up and to keep your attention tuned to
these spots. He also intentionally places vigorous species in
subpar habitat to slow them down so they won't take over the world.
On the other hand,
Toensmeier was more tenacious than I've been and came up with some polycultures he considers a success, such
as:
- Hidcote Blue dwarf running
comfrey and walking onions under jostaberries. The
jostaberries are tall enough that they can handle the understory, and
the comfrey and onions are vigorous enough that neither outcompetes the
other.
 Ramps, toothwort, and hog peanuts under
pawpaws. The ramps and toothwort take over in the early
spring, then die back just as the hog peanuts begin vining over the
ground.
Ramps, toothwort, and hog peanuts under
pawpaws. The ramps and toothwort take over in the early
spring, then die back just as the hog peanuts begin vining over the
ground.- Jerusalem artichokes and hog peanuts. The Jerusalem artichokes are tall enough and grow fast enough in the spring that the nitrogen-fixing hog peanuts don't choke them out, and both need to be dug at the same time in the fall to harvest the tubers.
- Comfrey and mint.
Toensmeier planted this in his much-travelled alley since the two
vigorous growers can handle quite a lot of abuse.
Although it's not a
polyculture, I was also intrigued by so-called fodder banks --- dense
plantings of trees and shrubs that are coppiced one or more times per
year to produce leaves for livestock or people. Toensmeier
planted littleleaf linden, edible-leaf mulberry, and fragrant spring
tree to produce people food, but I've been planning a similar system
with mulberries to feed the chickens in their pastures.
| This post is part of our Paradise Lot lunchtime series.
Read all of the entries: |
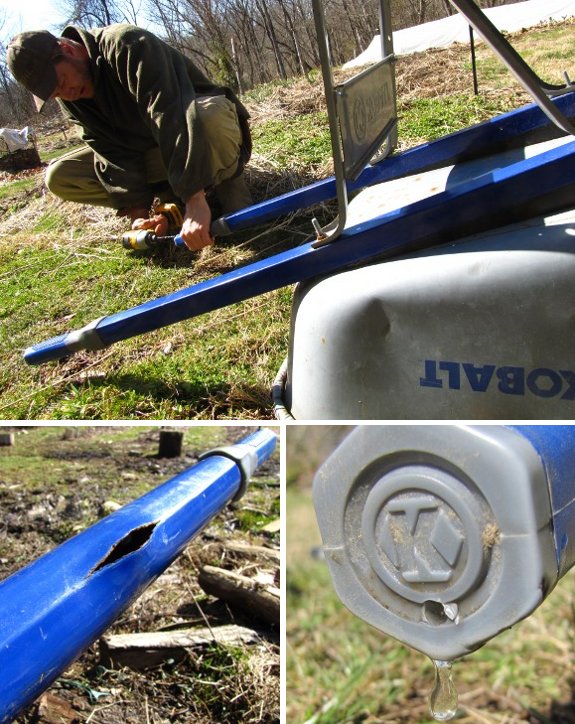
We still love both of our Kobalt Neverflat wheelbarrows,
but there's a problem.
It seems that rain can drip
its way into the hollow portion of the handles if stored outside in the
face down position.
I finally got around to
adding a drain hole today, which should prevent any further freezing
and expansion trouble.
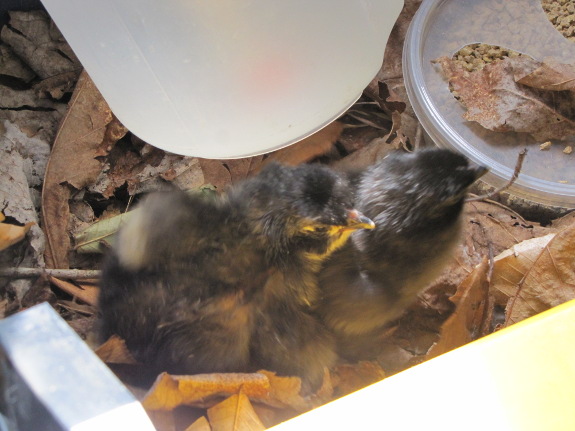
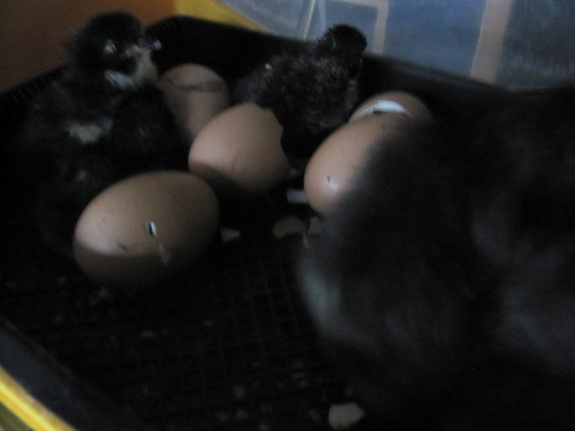
Chick weekend is in full
swing! Friday, the first few hatched. Above, two chicks are
groggily exploring the brooder before sleeping off their efforts.
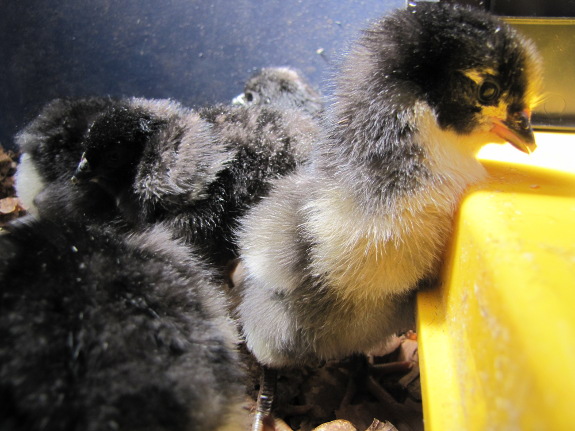
Saturday morning, I
awoke to six fully-fluffed fuzz-balls in the incubator. And the
hatch continued throughout the morning and early afternoon.
By noon on Saturday, the
sun streaming in tempted the older chicks out for a feeding
frenzy. I'm thoroughly enjoying the chicks' company while they're
cute and new, but have no illusions I won't be ready to move them to
the outdoor
brooder before the
week is out.
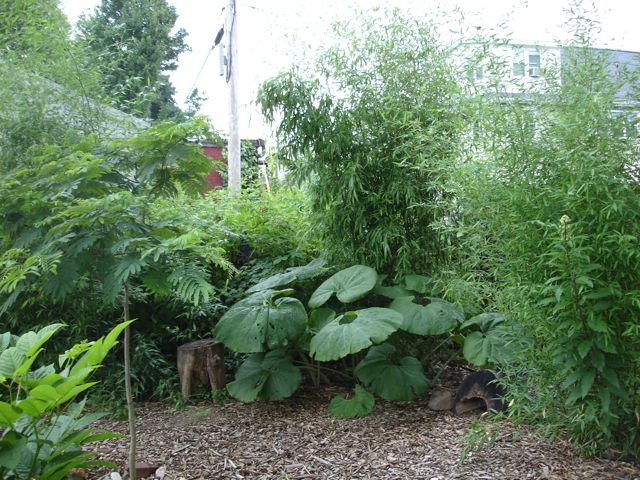 Toensmeier didn't only report
on his own forest garden in Paradise Lot; he also included tidbits
he'd seen in others' gardens around the world. In his experience,
forest gardeners tend to follow one of three main methods of
incorporating nitrogen-fixing plants into forest gardens.
The first method is
typified by Martin
Crawford's forest garden in England. Crawford includes a
tall, open canopy of nitrogen-fixing plants, which in his case is
primarily high-pruned alders. Toensmeier mimicked this technique
on a small scale by using a mimosa tree as a nitrogen-fixing canopy
species, but he wasn't very interested in using up much of his small
backyard with nitrogen-fixing trees.
Another method that
works well in extensive forest gardens is to alternate nitrogen-fixing
trees with food-producing trees. In general, Toensmeier wrote,
gardeners tend to alternate two or three edibles with one
nitrogen-fixer. Of course, space constraints again make this
approach problematic for the urban gardener.
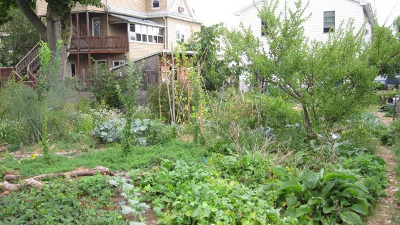 The final technique, which is
what Toensmeier mostly follows, is to use Geoff Lawton's chop-and-drop
method of coppicing nitrogen-fixing trees and shrubs. Toensmeier
also includes a lot of nitrogen-fixers in the groundcover category,
notably hog peanut, licorice milk vetch, and groundnut, although these
vigorous plants do outcompete some preferred species.
Foot-tolerant groundcovers like clovers and prostrate birdsfoot trefoil
in the pathways can also help bring nitrogen into the system.
I'm less of a
nitrogen-cycling purist than many permaculture advocates, and I have to
admit that if I had a only a tenth of an acre, I'd devote the whole
acreage to edibles and bring in my nitrogen as manure or compost.
Even Toensmeier admits at the end of his book that the forest-gardening
dream of a do-nothing paradise is unrealistic, and if you're going to
have to nurture the garden anyway, why not topdress a little manure
from your rabbit hutch or chicken coop?
| This post is part of our Paradise Lot lunchtime series.
Read all of the entries: |
I forgot to mention a safety
note on the Kobalt wheelbarrow modification.
Avoid drilling at an angle
while holding the handle for support. This will help to keep the bit
from popping out through the sides and scratching a finger.
Ouch!
 I've had James Marcus Bach's Secrets
of a Buccaneer-Scholar
on my reading list for a while just because it sounded interesting, but
when B.J. came into our life, the time
seemed ripe for giving it a read. B.J. had trouble with high
school (despite being sharp as a whip), and after completing his GED,
has considered college. Although my own experience with college
was 90% positive, I can't help feeling that most higher education isn't
worth the time and money nowadays, and Mark is even more
anti-establishment. So I opened Bach's book with the question ---
are we doing B.J. a disservice by recommending he self-educate rather
than enroll?
James Marcus Bach's book
covers both his own methods of educating himself and the reasons he was
forced to do so. Bach (son of Richard
Bach, who he writes
a lot like) ended up living in a motel down the road from his mother's
house at 14 due to a falling out with his stepfather, and he later
dropped out of high school due to differences of opinion with the
administration. His thesis is that school is great if you enjoy
it, but if you're not getting anything out of the experience, you
should get out. Bach had no problem getting a job at Apple
Computers and then embarking on his own software-testing consulting
business without a high school diploma, and he figures lack of
credentials isn't going to sink anyone else's boat either.
Most of the book is
engagingly written (and quite funny in parts), but I found Bach's
methods of educating himself more dense. Part of the problem is
that Bach clearly thinks and works very differently than I do --- I
suspect a type B person would get more out of this book than I
did. On the other hand, I'm not so sure that Bach's tips would
really work for a type B person who doesn't have a wife to keep the
accounting side of the business  going (as Bach readily admits
he does). And it also seems a bit unfair to assume that just
because the software industry can handle lack of credentials, that all
industries can.
I know that I would be a
very different person if I hadn't gone to college (but, also, that I
wouldn't have gotten nearly as much out of the experience if I hadn't
landed in just the right liberal arts setting). My social
education was probably the most important component of my college
experience, but I also learned a lot of critical thinking skills as
well as how to learn on my own. That said, I probably was ready
to start self-educating after a couple of years of college, and I've
vastly preferred my own recent self-directed learning to any classroom
work I'd done previously.
I'm curious to hear our
readers' take on higher education. If you had a young person in
your life, would you send him to college or mentor him to learn on his
own? Do you feel like college helped you become a more fulfilled
person or did you simply enroll to increase your earning potential (or
perhaps you skipped college for a particular reason)?
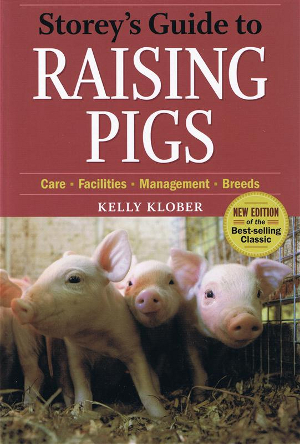 Now that B.J.'s truck makes us 85% sure we can try
pigs this year, I decided it was
time to crack open Storey's
Guide to Raising Pigs
by Kelly Klober. Although some volumes are better than others,
I've enjoyed Storey's
Guides to
various new livestock we've considered adding to our homestead.
The volume on pigs is no exception, being full of a breadth of
firsthand information (although perhaps without as much depth as I'd
like in certain areas).
Klober takes the same
middle-of-the-road approach in his book that he advocates when breeding
hogs. Sure, crazy permaculturalists like me will have to look elsewhere for in-depth information on
pasturing, but so will folks who want to raise swine in confinement
settings. The book has an excellent overview of what to expect
when raising a couple of finishing hogs for the family's table, when
showing swine, and when starting your own breeding operation.
Overall, I'd highly
recommend this book for the complete beginner (like me), but I'm still
waiting with baited breath for Walter Jeffries to hurry up and complete
his book on pasturing pigs. In the meantime, I hope you'll enjoy
this week's lunchtime series --- an introduction to pigs on the
homestead.
| This post is part of our Storey's Guide to Raising Pigs lunchtime
series.
Read all of the entries: |
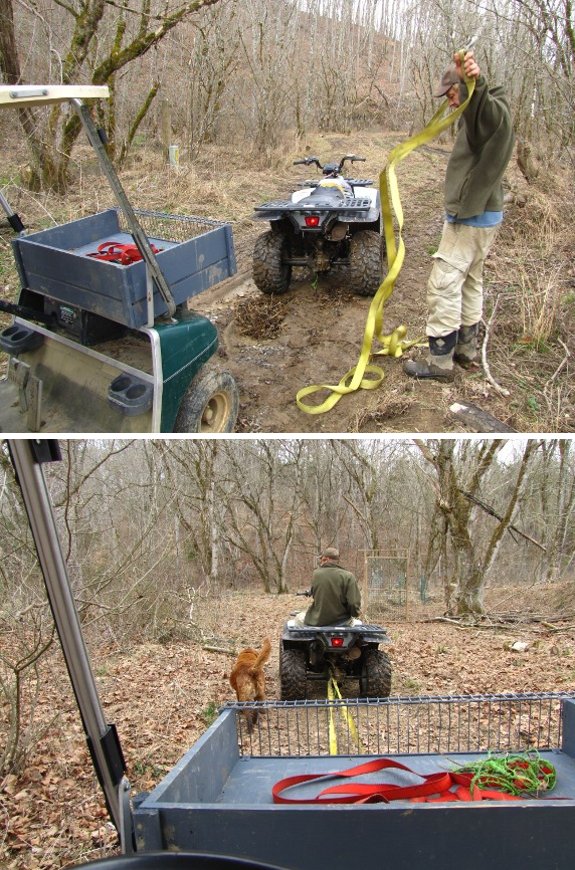
Our neighbor has an ATV with
a bad battery.
We offered to buy a new
battery in exchange for some hauling help.
It's not 4 wheel drive, but
it did a fine job towing the golf cart back home today.
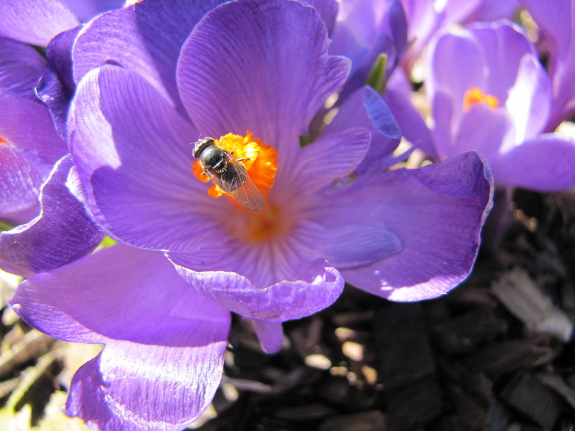
 I
went out to take a photo of our honeybees visiting the crocuses, but
instead caught this fly in the act. In fact, although our
honeybees were out working during the past warm days, flies were making
up about 80% of the pollinators.
Spring continues to be slow despite the balmy weekend,
so there's not all that much blooming yet. Speedwells and purple
dead nettle are in full bloom in the yard, but I haven't seen any
dandelions yet. In the woods, hazels are blooming, but I haven't
even seen a spring beauty on the forest floor. And the first few
daffodils are just beginning to open their blooms in the sunniest part
of the yard.
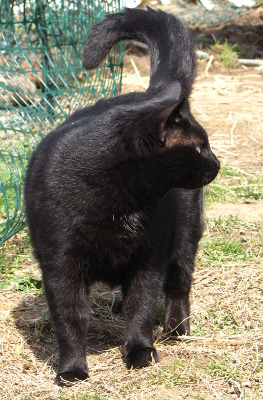
Meanwhile, Huckleberry
thinks he's definitely pretty enough to be highlighted in a post about
flowers.

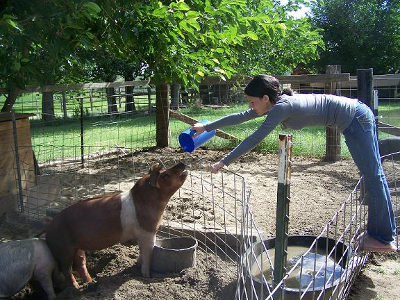 The first thing I learned from Storey's
Guide to Raising Pigs
was that my terminology was all wrong. I wrote previously about
my idea of raising two
pigs from when they're weaned (feeder pigs) until slaughter, which I now know is known
as finishing hogs. According to Klober, the term "pigs" is used
to refer to baby hogs, and piglet is "a layman's term for a young pig,
but don't use this around swine producers unless you want to be laughed
out of the coffee shop." After a short time, pigs grow into
shoats, than at 125 pounds they are known as hogs.
Except for getting the
wording wrong, though, my idea of starting our adventure by finishing
two hogs is a good one. The first step is to find someone who
will sell you pigs when they're around two months old and are well
weaned, at which time you should expect to pay anywhere from $50 to
$200 apiece for the pigs. I'll write more about selecting your
feeder pigs tomorrow, but it's worth noting that if you're skipping the
feeder-pig stage and going right into keeping your own breeding herd,
you'll need to pay more for top-quality genetics.
When you bring your
feeder pigs home, they'll weigh about 40 to 70 pounds, and they'll need
a little TLC at first. Until pigs are eight weeks old, it's best
to keep them on unlimited feed, to wire open the doors of self-feeders
and -waterers, and to keep littermates together. 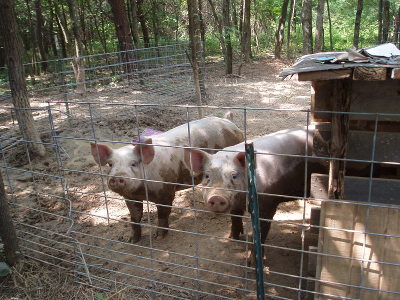 Even after that, when you move pigs to a
new location, they may go off their feed for a few days and need some
electrolyte in their water (and, Klober suggests, some flavored gelatin
powder sprinkled on their food and in their water to increase
consumption). Walter Jeffries recommends keeping your new pigs in
a 16-by-16-foot area for a few days to get them used to you and to the
fencing before moving them to pasture.
Three to four months
after you bring them home, your pigs should have grown into hogs that
weigh more than you do. Hogs are usually butchered at 220 to 260
pounds, with the lower end of the weight range giving leaner meat and
the higher end providing more cost-efficiency at the butcher.
Expect to spend a bit longer growing out your hogs if you're raising
them on pasture, especially if the weather is cold.
Stay tuned for later
posts in this week's lunchtime series walking you through more of the
specifics of raising feeder pigs.
| This post is part of our Storey's Guide to Raising Pigs lunchtime
series.
Read all of the entries: |
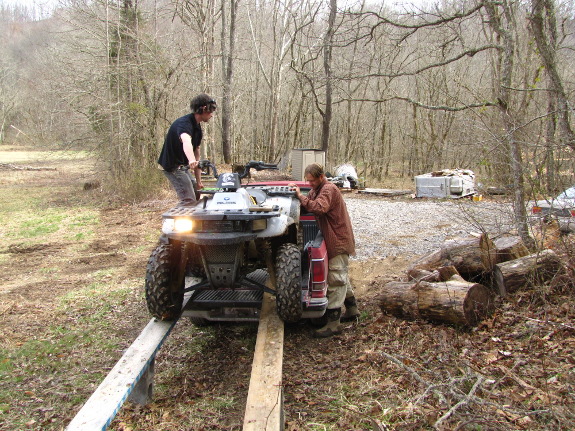
It took a couple of 2x6's and
an old plastic tool box to load up the ATV.
We learned that it needs to
go in backwards in order to "drive" it up over the wheel humps.
Getting it out was a lot
easier thanks to the help of a hill near our parking area.
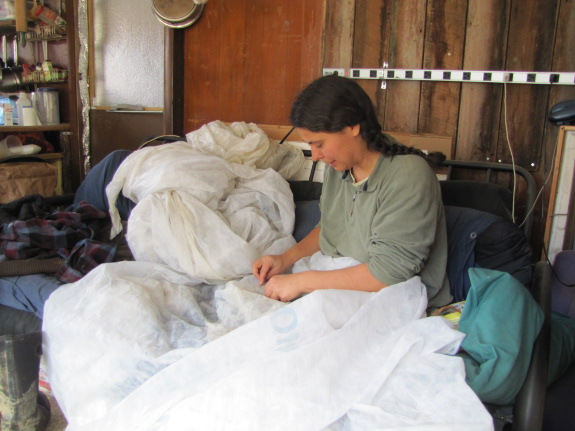
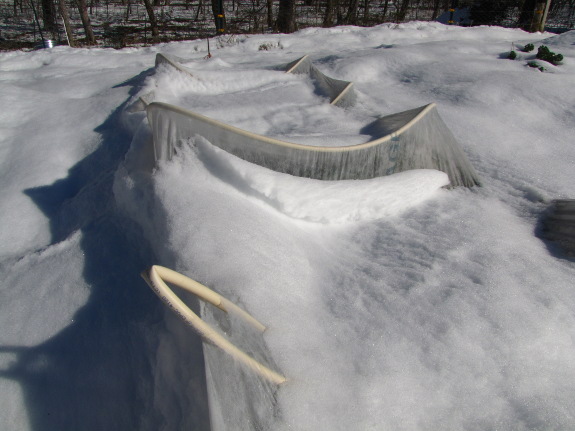 When I made our first quick
hoop, I figured the
stucture's cost-efficiency would largely depend on how long the row
cover fabric lasts. Luckily, the delicate fabric gets less
damaged on quick hoops than it did on cold frames, but the combination
of age, snow, and falling branches did result in some serious
dings this winter.
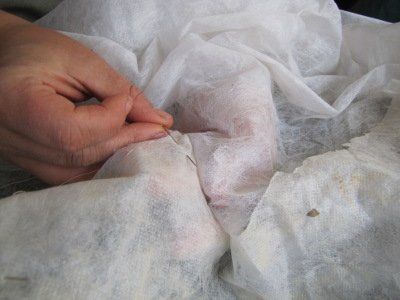
I waited to do my
mending until it was time to move the quick hoops from the
overwintering beds they were protecting to new beds of spring
crops. Although it's possible to mend fabric when stretched over
the hoops, it's much easier to take it inside, cut out a piece of
fabric from a ruined row cover, and then whip-stitch the patch over the
hole.
 I figure it cost about $50 to
make each of our 25-foot-long quick hoops, and after two years of use,
I'd say the fabric will last three years total. We've also had to
replace one of the hoops, and may need to expect to do that every year
or so. If so, our cost to keep a quick hoop going over a decade
will be about $75, or $7.50 per year. Not bad for spring
seed-starting, overwintering lettuce and kale, and protecting the last
summer crops from early frosts.
 If you decide to finish
a hog or two for your table, your
first big choice is what kind of pig(s) to bring home. Most
sources suggest starting with two animals since pigs are sociable, but
you'll still need to make decisions about breed, sex, and various
medical procedures. Let's start with breed.
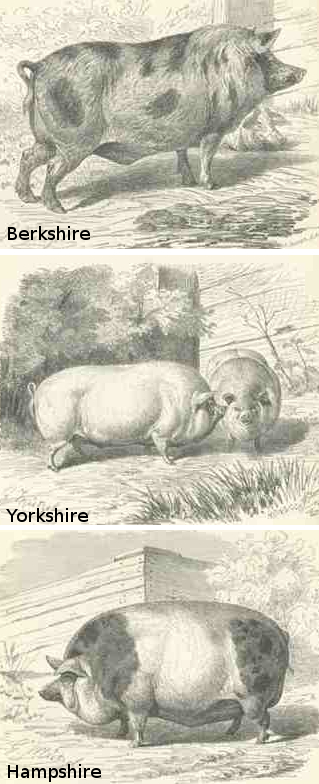
Commercial pigs are
generally pure or crossed Duroc, Hampshire, and
Yorkshire hogs, but small producers would be hard-pressed to maintain a
commercial-style hybrid without keeping two separate parent lines
going.
Klober considers purebreds best for small farmers keeping homegrown
herds, but my limited research elsewhere suggests that pastured pork
producers
often work with a single hybrid herd. For example, Walter
Jeffries' hogs are primarily a mixture of Yorkshire,
Hampshire, Berkshire, and Tamworth, while a producer local to us is
mixing Yorkshire, Hamphsire, Berkshire, and Duroc.
In general,
colored breeds may grow faster, taste better, and handle the outdoors
better in cold, damp weather, while white breeds are better mothers,
are
more docile, and do better in heat. Another factor to consider is
that fat flecks in the meat of
Duroc and Berkshire hogs are supposed to provide particularly good
flavor. But chances are, if you're just buying feeder pigs,
you'll
take whatever's available.
How about choosing
between gilts (girls) and boars (boys)? Gilts
are reputed to grow a bit slower, and to end up fatter (according to
Jeffries and our local producer) or leaner (according to Klober, who
raises his gilts on high-protein rations to speed their growth).
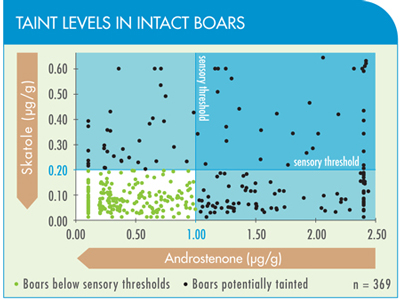
With barrows, the tricky question is whether or not to castrate the
pigs --- most sources recommend castrating boars (in which case they
become barrows) to prevent a bad taste in the meat known as boar
taint. However, Walter Jeffries believes boar taint is mostly a
myth and is only found in certain breeds, which don't include the ones
he raises. If you don't want to castrate and don't want to risk
boar taint, gilts might be a good choice.
 While you're deciding whether
or not to castrate, you'll also need to
decide whether to dock tails and knock out wolf teeth. Both of
these
surgeries seem to be similar to clipping the beaks of chickens ---
confinement farmers do it so their animals don't kill each other when
packed close together, but non-confinement farmers usually skip
it. Similarly, you might get away without deworming your feeder
pigs if you're raising them in a rotational pasture arrangement.
(Organic alternatives to chemical dewormers include garlic and
diatomaceous earth.)
The last factor to
consider when choosing your pigs is the environment
that they came from. If you plan to raise pigs on pasture, don't
buy them from heated nurseries. And, at the other extreme,
pastured pigs won't do as well in confinement.
I'd be curious to hear
from more experience pig-keepers out
there. Do you recommend gilts or boars? Do you
castrate? Any other tips for choosing a good pig for the
homestead?
| This post is part of our Storey's Guide to Raising Pigs lunchtime
series.
Read all of the entries: |
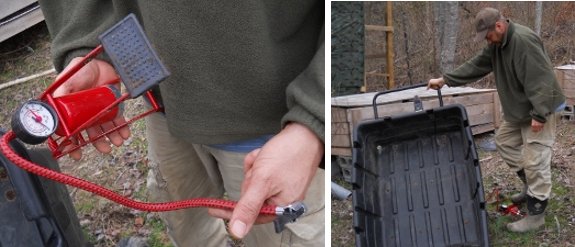
I bought this foot pump back
in the summer as a backup to the air tank.
We don't have a compressor,
which means filling the tank requires a trip to the gas station.
The foot pump worked nicely
today on the Heavy Hauler, which we're getting ready for an
upcoming feed store delivery.
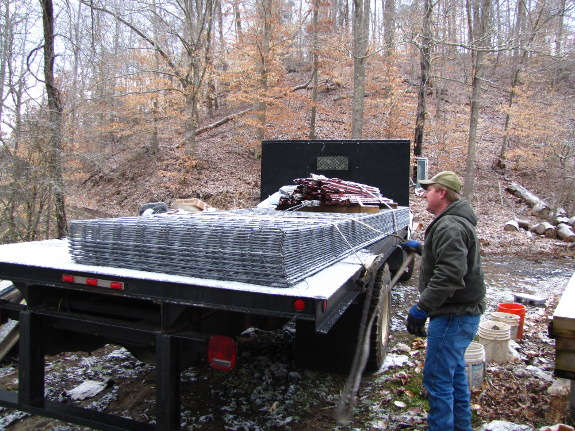
We'd figured getting pigs was dependent on finding a pickup truck to haul the stock panels
home. But after we considered the sixteen-foot length of the
panels, we ended up calling up the feed store and asking if they
deliver. It turns out they were willing to bring panels, posts,
and the rest of our gypsum and lime to our parking area for $40, which
seemed like a good deal. I figure it would cost about that much
in gas to make the many trips required to ferry all those supplies in a
smaller vehicle.
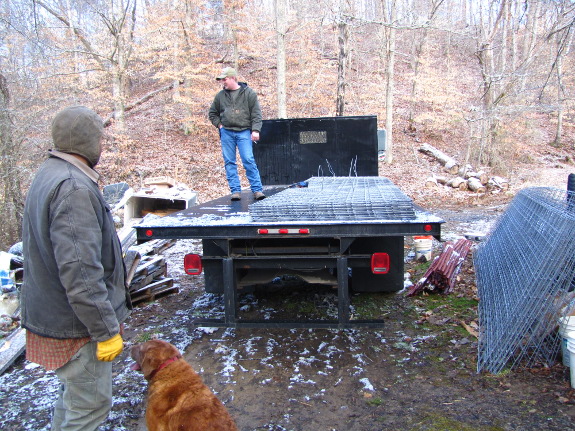
All of B.J.'s hard work adding
gravel to the parking area really paid off when the
huge truck showed up and barely spun at all maneuvering through our
small space. We did hit a snag, though --- it turns out that most
farmers have front loaders even in our backwoods location, so the
delivery guy thought I was a bit nuts when I said we were going to
unload the panels by hand. It wasn't really that tough with me,
Mark, and him all working together, though.
The next big deal is
getting those stock panels back to our core homestead, after which it
becomes time to clear some small trees, and make the fences. I've
promised Mark a fence post driver at long last in hopes that a new tool
will make this daunting project more palatable, but I'm not sure the
bribe is big enough for the amount of work involved.
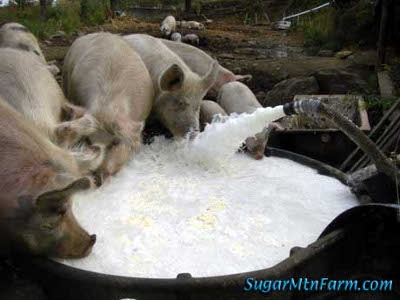 Now for the thorny part of
pig-raising --- feeding. As with most other livestock, the modern
method is to pour grains (and soybeans) down their throats to produce
fast growth. At the other extreme, diversified farmers like
Walter Jeffries raise their pigs with absolutely no purchased grain,
counting on fruit-tree-filled pastures, crops planted during fallow
periods then grazed rotationally, and byproducts such as whey and
brewer's barley to fulfill their hogs' nutritional needs. Going
back in time yet further, a hog was a bit of a farm garbage disposal
unit --- you'd keep just one or two pigs and they'd subsist on all of
the food waste that came out of a homestead kitchen, plus mast from the
forest.
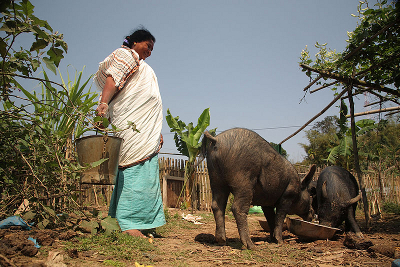 While I'd love to mimic Jeffries' method
in the long run, we're in the reclamation stage of our homestead, so I
suspect we'll be taking a hybrid approach our first year. Klober
notes that a quarter of an acre of good legume pasture will provide 25%
of the nutrition for 10 growing hogs, so I'm hoping a similar amount of
poor forest pasture will provide at least a bit of nutrition for
2. But we'll also supplement with storebought feed (and with our
food scraps, which will be much more copious in late summer).
Klober says we should expect to feed each hog 650 to 750 pounds of
storebought feed over its short lifetime, and I'll definitely be
keeping track to see how much we knock off that estimated total.
Finally, there are two
schools of thoughts on how much food to offer growing
hogs. Some farmers provide unlimited feed, which does make pigs
grow their fastest. On the other hand, if you limit feed to 90%
of their appetite, you end up with a leaner
carcass (although you don't lower your food bill any since the hogs
grow more slowly). Most modern farmers aim for leaner meat, but
as Simon
Fairlie wrote,
farmers used to consider lard one of the most important byproducts of
hog production, so the choice is up to you.
| This post is part of our Storey's Guide to Raising Pigs lunchtime
series.
Read all of the entries: |
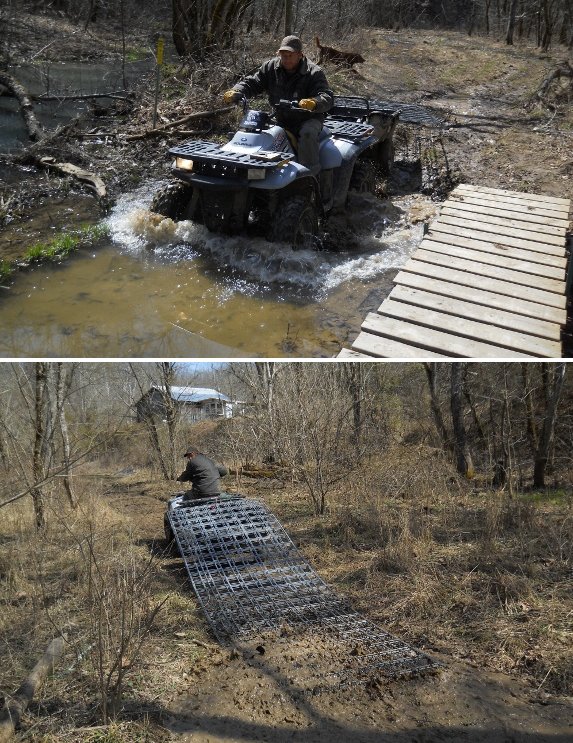
We got all 40 stock
panels back to the new
pasture area today.
The Heavy Hauler supports part of the load.
I started out doing 3 at a
time, but quickly figured out the ATV could handle 7.
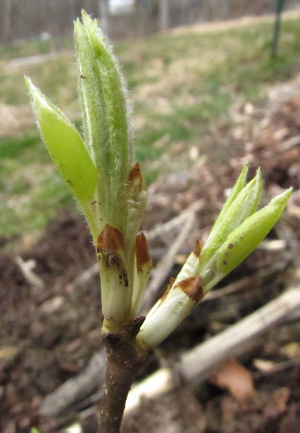 My movie-star neighbor kept
his grafted pears over the winter in pots in an unheated
basement. However, the bit of heat from the house was enough to
prompt them to break open their buds before I brought my
two home.
Afraid that nippy spring
weather would hurt the tender buds, I put them in the mostly-unheated
end of the trailer, but a week later the buds were yet more
unfurled. I figured there was no stopping the plants' awakening,
so I might as well put them in the ground where cool temperatures would
at least slow them down.
Since our main pears
have also started to break their buds open (although not in as extreme
a fashion), I figured our new pears would probably survive
outdoors. And, sure enough, I don't see any frost-burn even after
a frigid night (and a day of flurries).
I plan to keep our
little pearlets in our new nursery row for a year, then plant them into
the pasture prepared by hog snouts this summer. Pears are slow to
bear, but the taste of my neighbor's fruit is enough to carry me
through dreaming about the harvest of 2019.
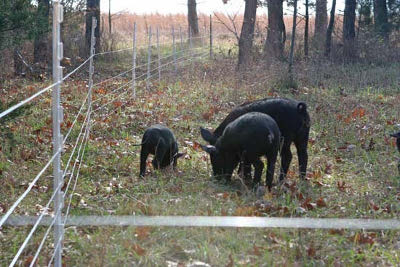 There are a slew of other
factors to consider when starting with pigs, but here are the top ones
on my radar:
- Housing --- Each pig needs 8 to 10 square feet of sleeping space, preferably somewhere dry, draft-free, and out of the muck.
- Feeders and waterers --- Plan on one foot of trough space per hog or one self-feeder hole for three to five feeder pigs.
- Fencing --- Assuming
you're pasturing your pigs, you need to choose a fencing method and pay
attention to the where the fencing touches the ground. Unlike
many other farm animals, pigs like to go under rather than over fences
(although they'll go through them too if given the chance). Most
folks choose electric fencing, but we're going to go the
more-expensive-but-also-more-permanent route of stock panels.
Other options that work for pigs include pallets and woven wire.
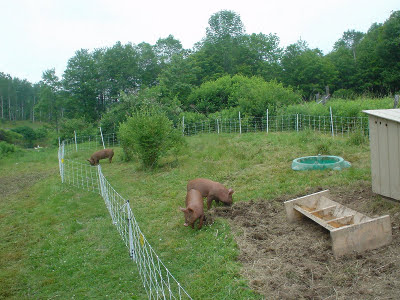 Preventing damage to the pasture
--- Many pastured pork producers put a ring on the end of their hogs'
noses to prevent rooting damage. On the other hand, others use
the rooting nature of pigs to their advantage by putting the
animals into an area where they want the current plant-life destroyed
--- we're using that route this first year. It's also worth
noting that sharp pig hooves will tear up pasture nearly as much as
their snouts do, especially in oft-traveled areas like around feed and
water stations.
Preventing damage to the pasture
--- Many pastured pork producers put a ring on the end of their hogs'
noses to prevent rooting damage. On the other hand, others use
the rooting nature of pigs to their advantage by putting the
animals into an area where they want the current plant-life destroyed
--- we're using that route this first year. It's also worth
noting that sharp pig hooves will tear up pasture nearly as much as
their snouts do, especially in oft-traveled areas like around feed and
water stations.- Keep them cool --- Hogs are naturally woodland creatures and need some shade in the summer.
- Plan your butchering before you
start --- Many homesteaders skin their hogs nowadays instead of
scalding them, but if you go that route, you'll lose most of the lard
and won't be able to cure the hams. (You'll still be able to cure
bacon after skinning.) So, don't buy a gilt and try to get her
really fat if you think you're going to skin.
What else would you
suggest new pig-keepers consider?
| This post is part of our Storey's Guide to Raising Pigs lunchtime
series.
Read all of the entries: |
Our stock
panel hauling had one problem.
The dump mechanism won't stay
latched, and even though I secured it with bailing wire it still
managed to work loose which resulted in a crushed Heavy Hauler.
Removing the offending small
stump the panels hung up on was all it took to smooth things out.
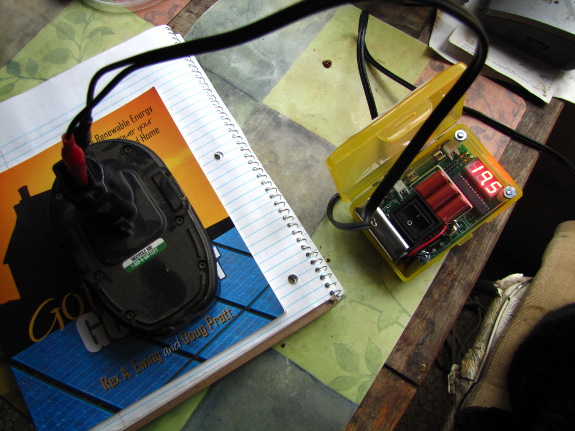
 Before
we hauled
the golf cart back to our core homestead, we were hoping the only
problem with it was bad batteries. As I wrote this winter, we
originally bought the golf cart used, and the batteries have had some
hard days' work since then, so it's not surprising they
weren't holding much of a charge. Rather than splurging
hundreds of dollars on replacement batteries right off the bat, we
decided to see if we could recondition the ones we have.
Da Pimp is a battery-saver dreamed
up by half of the Holy Scrap Hot Springs
duo (who, in the interest of full disclosure, I consider
e-friends). I have a hard time wrapping my head around
electricity, so you'll have to go to their site to read how the unit
works, but suffice it to say that Da Pimp will extend the life of
problematic rechargeable drill batteries, golf cart batteries, and more.
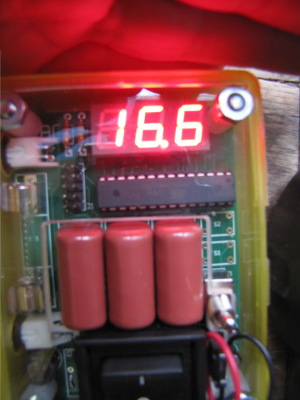
We gave the unit a try
on a drill battery that Bradley had pronounced dead --- it wasn't
holding a charge like he wanted. However, it turns out the
battery wasn't really dead. It started out at 16.6 volts, and I
charged it to 120% of its rated voltage (per instructions) with  Da Pimp. The next day,
the battery had only dropped to 19.5 (above its rated voltage of 18),
so it seemed to be holding a charge pretty well. I gave it
another charge with Da Pimp just to be on the safe side, and two weeks
later, the battery is holding steady at 19.4 volts.
Mark plans to give Da
Pimp a real test and workout with our problematic golf cart batteries
soon, but I'm already happy with the unit. It's an elegant little
device, easy to use even for electrophobes like me, and I figure if it
simply extends the life of our drill batteries, it will pay for itself
in a few years. Plus, I love microbusiness products, especially
those produced by homesteaders. So I have no hesitation giving Da
Pimp two thumbs up.
We've seen deer tracks this
winter, but not in the garden.
I've seen a few does in the
neighbor's field, but not as many as previous years.
Lucy has been chewing on a
rack of deer antlers the last few days. I'm guessing she sniffed out a
young buck that was shot and got away from whoever shot it.
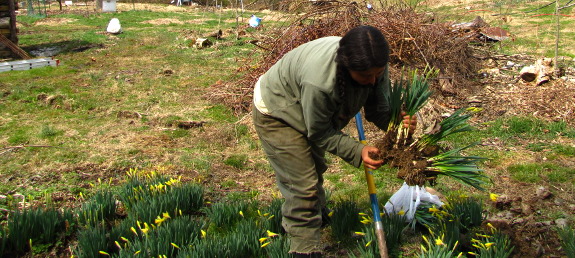
Back before Mark came up
with his chicken waterer invention, we were running
with every microbusiness idea we could think of. One of the first
was selling the daffodils that had multiplied like rabbits between when
the last humans left this farm and when we came to take the land back
several decades later. That March, I sold budding daffodil bulbs
for about 25 cents apiece on ebay and thought I was making a killing
--- those couple of hundred bucks were much appreciated since we were
getting a farm going on about $12,000 per year.
Always the long-term
thinker, Mark talked me into planting some of the bulbs out in rows in
what was then unused land (and which later became the forest
garden). He figured the plants would divide, and then one day we
might become daffodil farmers. Substitute teaching was getting
old fast, and Mark was willing to grasp at any straw that would get him
out of the classroom.
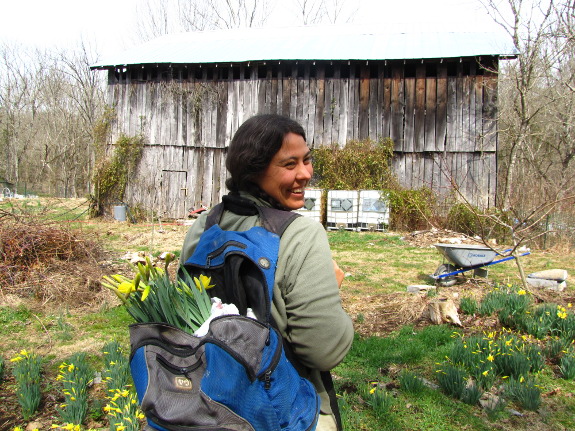
Our current
microbusiness derailed the flower plan, but the daffodils multiplied
anyway. So I give away as many as I can every year until it
starts to feel like I'm pawning off unwanted kittens on my family and
friends. I was able to talk Mom into taking home a backpack full
this weekend, but have many more looking for a home. If you're
local and in need of daffodils, just let me know how many dozen you'd
like!
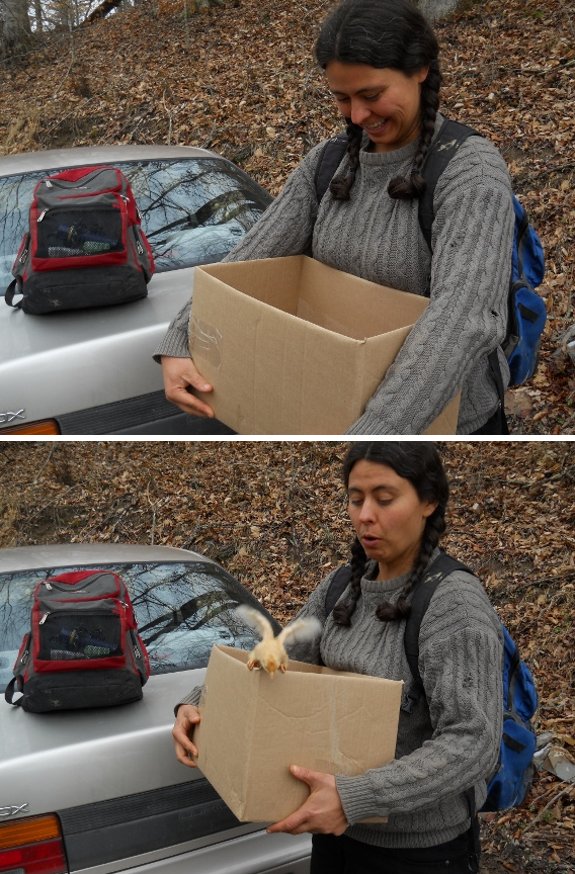
Today we swapped some
homegrown chicks with our friend Sarah for some of her mail order hybrid
chicks.
Anna put 2 firewall bricks in
the toaster oven on high for an hour, and then wrapped a towel around
the bricks to keep everybody warm for the trip.
The bricks were still warm to
the touch 4 hours later and all chicks are safe and happy in their new
home.
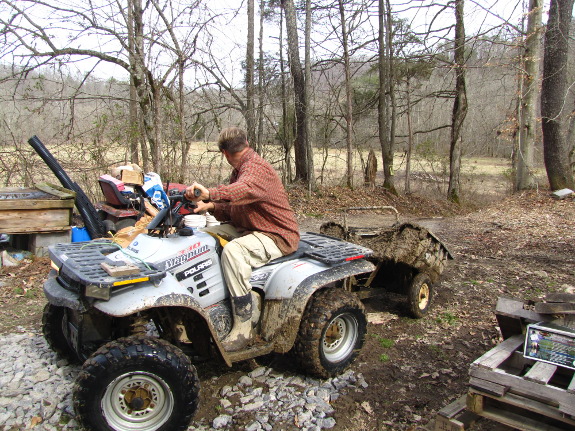
Over supper on Friday,
Mark apologized for being a bit surly when the time came to load up the
ATV and send it home. The
trouble wasn't what I thought (that he'd had a long day and didn't
appreciate working after hours). Instead, he told me he'd fallen
a bit in love and wasn't ready to see her go.
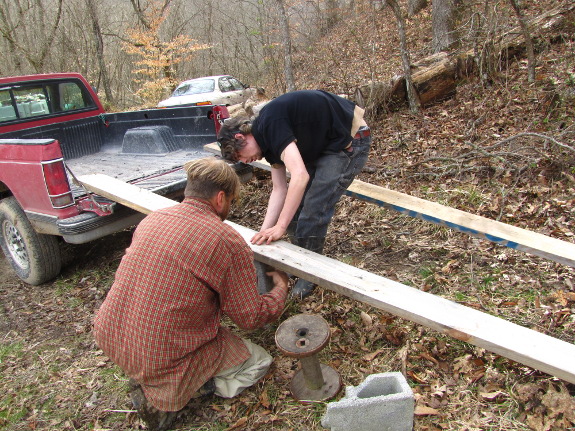
I should have known
something was going on earlier in the week when I caught Mark patting
the hunk of metal fondly as he filled up the tank. "Good girl,"
he said under his breath. Then, catching my eye, he tried to turn
the praise over to Lucy.
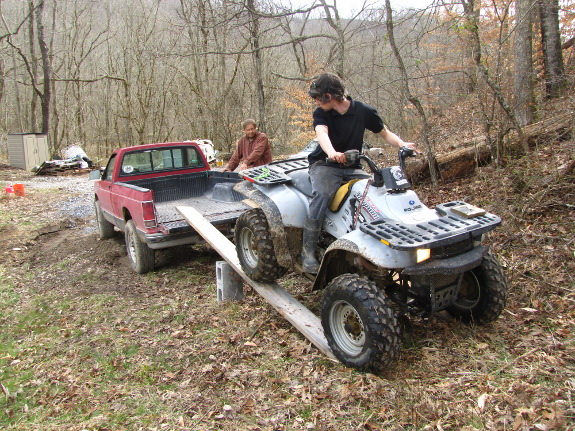
I've been adamantly
anti-ATV in the past, mostly because of the damage I've seen when
recreational riders tear up the woods. But after days of hauling
this week when the floodplain was pretty soggy, I have to say that Mark
is starting to change my mind. I'm willing to admit that I was
wrong when I said the golf cart is lighter on the ground than a
four-wheeler. Under Mark's steady hand, the ATV acts like a
tractor, creeping across wet terrain and only leaving tread marks
rather than ruts.
Does this mean Mark's
going to get an ATV to dote on in the near future? The jury's
still out. I suspect the decision will depend on a lot of factors
like whether the golf cart
batteries are salvageable and whether her dunking and extended sit in
the floodplain ruined other parts of the electrical apparatus.
But the option has finally made its way to the negotiating table, right
along with pigs.
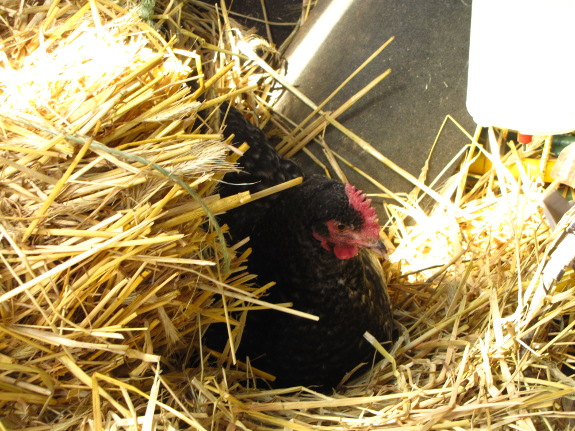
We're still trying to
encourage one of our hens to do the broody
thing.
One of the ladies has been
sitting in the barn near our straw bales, but she only seems half
broody.
Maybe some soft music would
help her relax enough to feel like she found a safe spot?
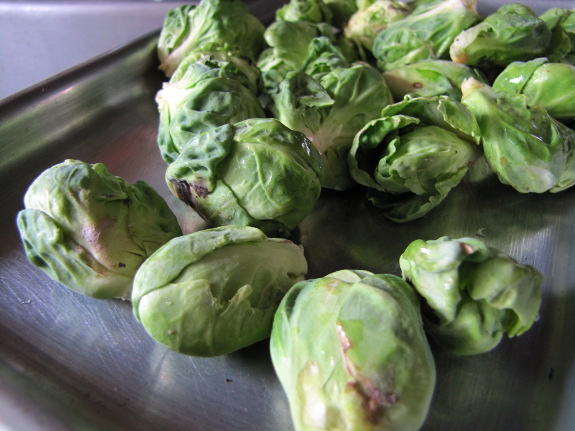
A couple of folks have
asked me how the garden's doing, so I thought I'd give you a quick
rundown. We're still eating Brussels sprouts and kale, and could
have still been eating last fall's lettuce, but I ripped it out since
the spring lettuce is nearly ready to eat and I needed the old
lettuce's space. The Egyptian onions are starting to put out lots
of new leaves, so I'm adding green onions into nearly every dish, and
the chickens are coming back up to speed on their egg-laying.
In the freezer, we've
still got enough vegetable soup to last another couple of months.
We're just about out of sweet potatoes (except the ones I'm saving to make
slips for this
year), but have plenty of carrots, white potatoes, butternut squash,
and garlic left. We're getting low on meat, but still have a few
homegrown chickens waiting to be thawed and turned into dinner.
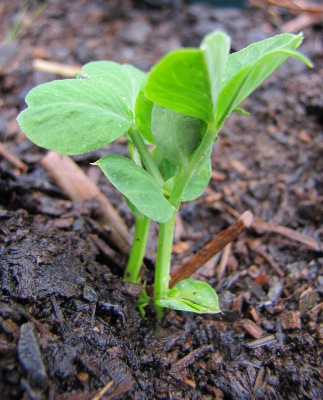 Meanwhile,
the spring garden is not edible, but is growing. The earliest
planting of peas (which I pre-sprouted instead of just soaking)
came up less spottily than usual, despite cold weather, and I've put in
a second planting, which will come up more evenly but will produce a
bit later. As I mentioned above, we'll be eating spring lettuce
in a week or two, and I've recently planted (but not yet seen) more
lettuce, arugula, tokyo bekana, cabbage and broccoli (under quick
hoops), and Swiss chard.
My inside-started onion
seedlings are big enough to transplant, but this week turned colder
than expected, so I think I'm going to keep putting them on the porch
for the day and bringing them in for the night, along with the flat of
early broccoli and cabbage. I just started a flat of early
tomatoes and peppers as well, although I raise the main set of
transplants under quick hoops (starting those a month from now).
The perennials are what
will spring to life first, but beyond the Egyptian onions and a bit of
sprouting from the rhubarb, I haven't seen much activity there yet
either. The fruit tree buds have barely begun to swell in what's
still a slow, cold spring. We haven't quite run out of firewood
yet, though, so I guess I can wait on the turn of the weather.
A coat of good exterior paint
should give us a few more years on this chicken
pasture gate.
I got to thinking after I
finished of maybe mounting a piece of scrap roofing tin to the top of
the frame which might help to deflect the bulk of the rain from hitting
the gate and the posts.
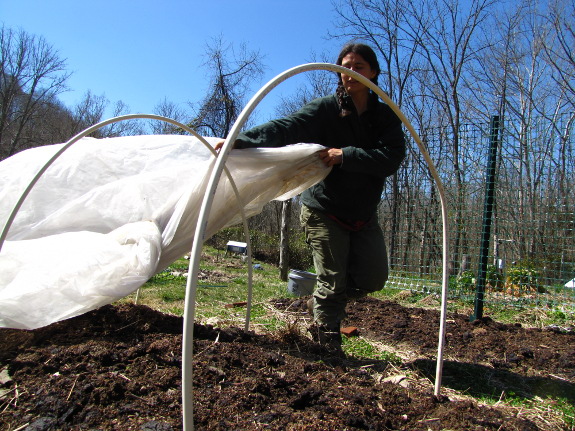
The kale no longer needs
covering, so I've moved our quick
hoops on to spring
crops. After mending
the fabric last
week, though, I left the covers off because I wanted rain to wet the manure I added to the recently
planted beds. Now cold weather is on its way back, so I figured
it was time to put the fabric on.
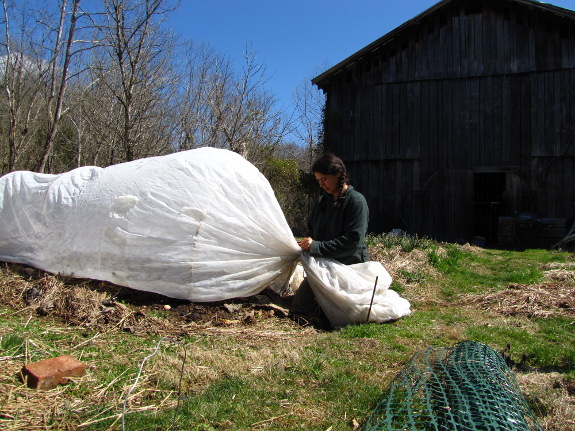
I initially cut my quick
hoop fabric to run the entire length of a mule garden bed. Since
the areas that currently need protection aren't quite that long, I
ended up untying the knot at one end of the fabric and retying it
further in. This is equivalent to using a safety pin to take up
pants for a kid who's going to grow more later.
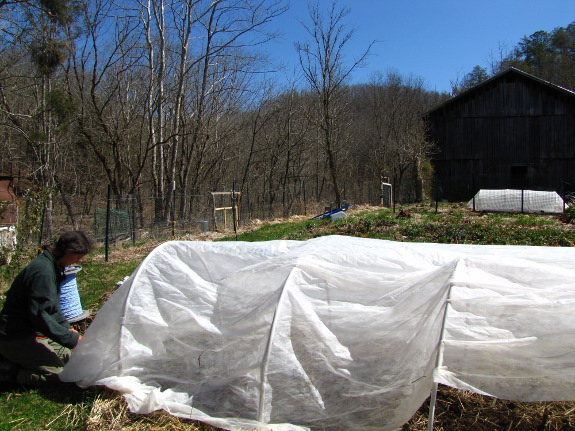
Despite a bit of wind,
it only took about fifteen minutes to get two new beds under
cover. The third quick hoop was already in place covering the
earliest planting of lettuce. Now we're ready for March to go out
like a lion.
We had some trouble with our Stihl
MS-211chainsaw today.
It starts up fine, but stalls
out when trying to idle.
I replaced the spark plug,
but it didn't help. Luckily our local mechanic shop was able to squeeze
us in for a visit.
Turns out the idle adjustment
slot is the one on the upper right side where the access holes are
located.
I asked our super friendly
mechanic how much for the speedy service? He wanted to charge 5 bucks,
I told him it was worth more like 20, and then we settled in the middle
at 10.

 While B.J.'s tracking down a
few more local root cellars/springhouses for me to include in my $10 Root Cellar ebook, I've started on another
project to keep myself occupied. I feel a bit self-indulgent with
this one, so I thought I'd check in and see if any of you are
interested.
Several readers have
emailed or commented in the last year or two to say that they got
sucked into our blog so deeply that they went back into the archives
and read through all the way from the beginning. That reminded me that
one of my few regrets is that we didn't start this blog at the same
time we started the farm, so even those hard-core readers aren't seeing
the true beginning. On the other hand, I do
have some earlier photos and journals that could be turned into an
ebook....
What I'm not sure about
is whether that ebook would be helpful to anyone, or whether it would
be just another farm memoir. Plus, my working title (Walden
Effect: The Early Years) needs serious help.
Suggestions? Am I wasting my time and should get back to
something serious like writing about chicken pastures or tips for
selling ebooks on Amazon? Or are you interested in hearing about
my rocky road to farm ownership?
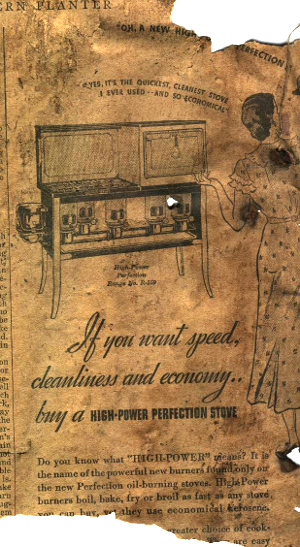
(By the way, the photos
here are of old newspapers from the 1930s that coated the walls of the
old farmhouse pre-demolition.)
We cleared some space for the
future pig pasture today.
Anna counted the rings and
figured out she's the same age as this tulip-tree.
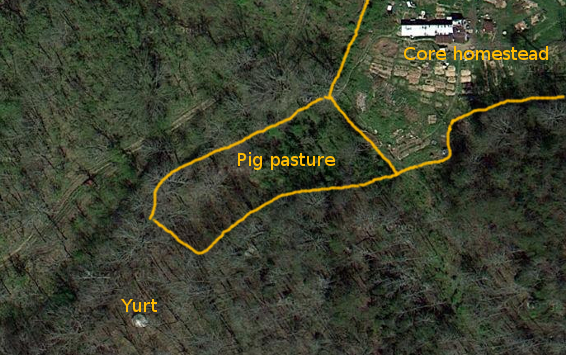
I realized I'd never
shared how the future
pig pasture fits
into the bigger picture, so here's a map for those of you who enjoy
them. The aerial photo is from around this time last year, before
we took
down the yurt.
What's hard to see is that our core homestead, the pig pasture, and the
yurt are all on little semi-flat plateaus, separated by gullies, but
elevated a good distance above the floodplain. I'm hoping the
semi-flat part will mean less erosion from pig feet as they tear up the
Japanese honeysuckle.
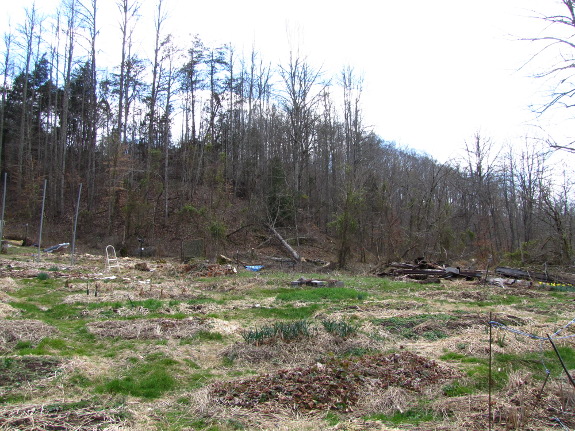
For map-phobes, here's a
photo instead. I'm standing in front of the trailer and looking
southwest over the front garden toward the pig pasture. (Yes,
Thursday was a very gray day.)
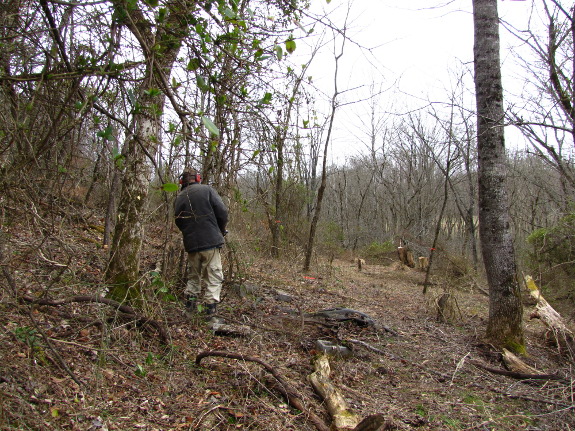
Entering the pig pasture
from the blueberry patch, Mark had already cut down a few little trees
at the time of this picture, but not very many. You would expect
more growth than this for an area that's been vacant for three or four
decades, but I suspect over-farming combined with invasive Japanese
honeysuckle held trees back. The vines also make it tough to cut
and clear the trees, but we persevered.
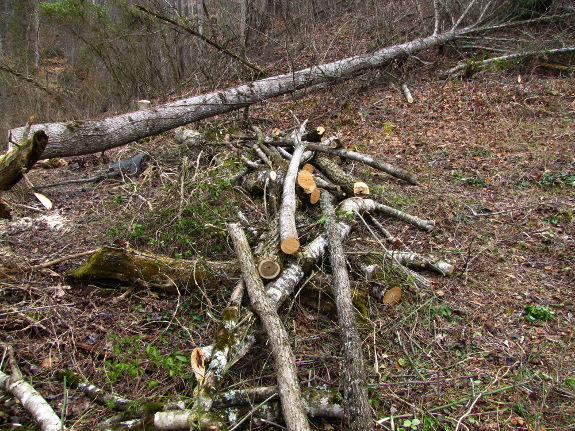
Here's the result of an
afternoon's work. Trees in this stack will become next year's
firewood and include sassafras, box-elder, sourwood (which I would have
kept for the bees, but missed IDing until it was already cut), and
black birch. Mark also cut some of the saddest-looking black
locusts I've ever seen, but I saved a few nicer-looking ones as nectary
plants. There's one big oak who will also be saved for the
acorns, along with some little nut trees I planted here a few years ago.
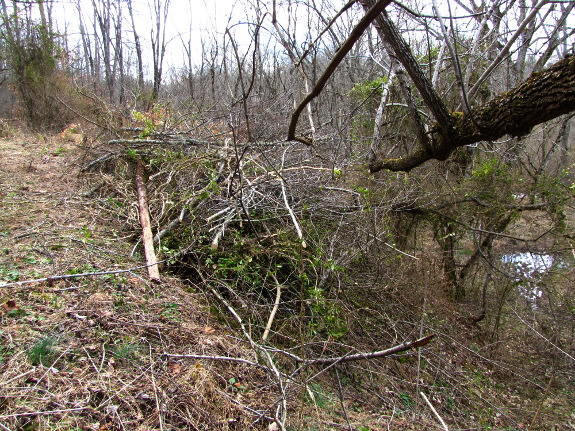
I always feel a little
guilty making brush piles because I know that in some parts of the
world, this would be the only wood available for cooking and heating
fires. For us, though, the juice isn't worth the squeeze, so I
piled branches up on the edge of the plateau, past where the fence will
run. In a perfect world, the brush might rot down in five or ten
years and provide a rich terrace for fruit-tree planting. Or
maybe it'll just keep the songbirds happy.
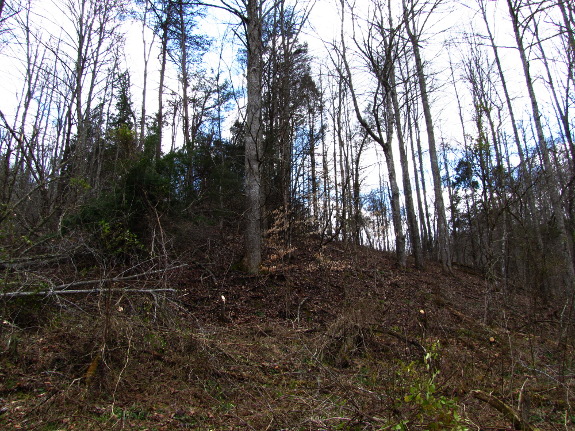
Mark cleared about a
third of the plateau in a couple of hours Thursday afternoon, but we've
got some big decisions to make today. I've started eying the
hillside just above the pig pasture for orchard expansion --- it
flattens out into a little ridge before heading back up the main
hillside. But if I want to clear this area, some of the biggest
trees will need to come down now before fences go up downhill.
I've regretted it in the past when I've rushed and left trees like this
in place, so I suspect we'll go ahead and take them down, even if that
makes it less likely we'll get all of the work done in time to buy pigs
this spring.
There's one thing I would've
done different on the stock
panel ATV hauling.
Attaching the top part of the
panels to the ATV would've been easier and faster with a few sections
of small chain with a leash latch for quick connecting.
The problem with using rope
was the high pressure. It took extra effort to untie each section when
the knot gets that tight.
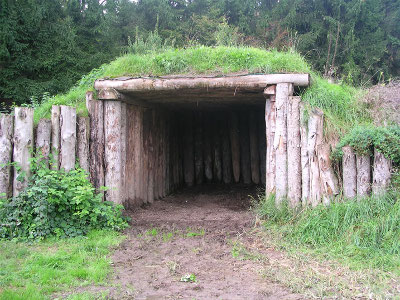 Before
we can cut up the big,
straight trees from the pasture clearing expedition, we need to
decide whether we want to use them for creating an animal house.
Mark has suggested making a Holzer-like, semi-underground
dwelling for this area and I'm intrigued by the idea.
Holzer creates
open-fronted shelters using logs as the walls and roof, puts on a pond
liner sandwiched between two layers of building felt, then piles dirt
on top. Heavy equipment means he can create a shelter like this
in a day, but it seems feasible to do it by hand over a longer time
period with three workers. I estimate the total cost would be
about $300 for the pond liner and maybe another $30 or $40 for the
building felt for a 6-or-7-foot-square structure.
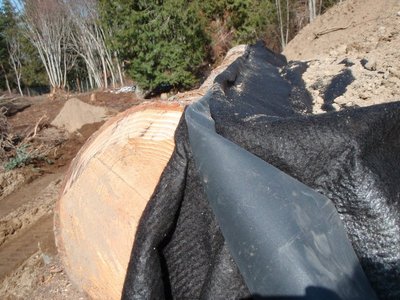 The question is --- would it
be a lot more work than an aboveground shelter? Would soft
tulip-trees stand up for at least a decade or two in the ground if the
liner extends out on all sides for a couple of feet and we try to
channel the water away from the structure? (Holzer apparently
uses tamarack, which as best I can tell is naturally rot-resistant, a
bit like cedar.) Would it be better to make the building
log-cabin-style with the few red cedars we have as the bottom layer to
lower the rot potential? At the other extreme, is it worth saving
a couple of hundred dollars by using cheaper plastic (as Mike Oehler
does in his underground houses), perhaps with a pond liner for the roof
only? And, since this structure would probably also be home to
chickens, would birds enjoy a cave-like dwelling as much as pigs and
cows apparently do?
I'd be very curious to
hear from anyone who has tried to make a Holzer-like underground animal
shelter on the backyard scale. What worked and didn't work for
you?
Spring cleaning this year is focused around new ways to store chicken waterers.
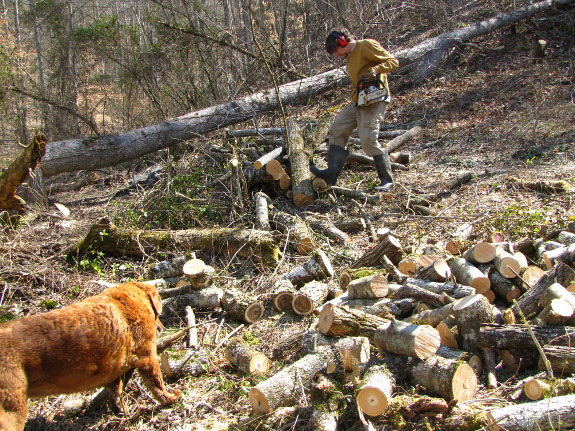
How many warm bodies
does it take for optimal efficiency on clearing
day? I was
going to say three for the first phase (Mark felling, me and B.J.
clearing brush), then one for the second phase (B.J. sawing logs into
firewood).
But pictorial evidence
suggests otherwise. Clearly phase two also benefits from a dog
dragging away logs to chew on them. If we were able to train Lucy
to carry firewood into
the pile instead of away from it, we'd use about 5% less wood over the
course of each year.
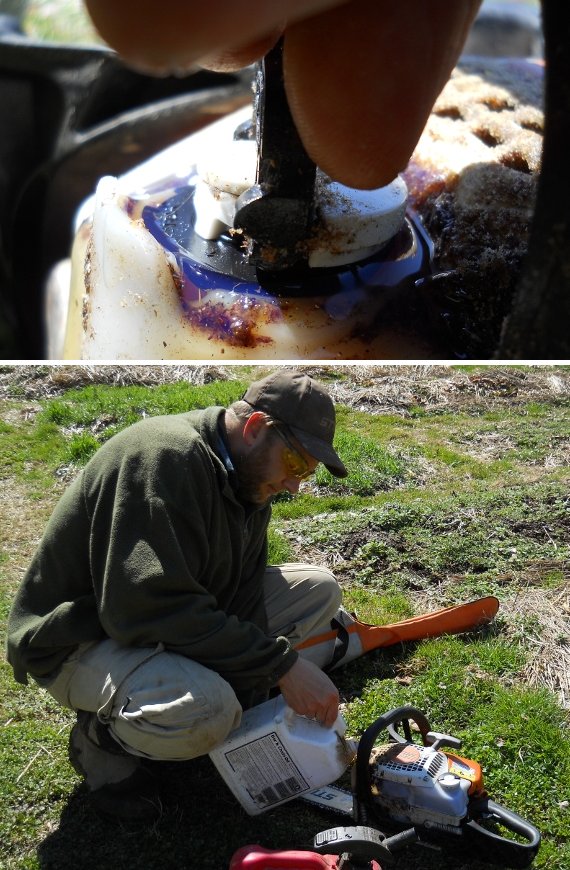
The only thing I don't like about our Stihl MS-211 chainsaw is the bar oil cap.
It has a funny final click
that if you don't get right will seem like it's closed but may open up
without you noticing.
I've found it's important to
take note of how the cap comes off and put it back on in that same
position before tightening.
When I spread the first
round of minerals on the front garden, my gut feeling was that adding
the trace minerals to the gypsum was a bad idea, and apparently I was
right. Since the trace minerals tended to settle to the bottom of
the wheelbarrow, it was tough to get them spread evenly, and I'm pretty
sure I overdosed certain parts of the garden. Within a week or
two, the overwintering strawberry leaves had turned brown and dried
up. Yikes!
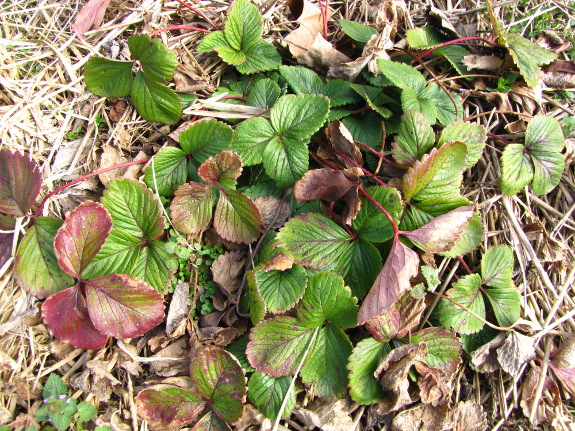
In contrast, the photo
above shows what our strawberry plants should look like at this time of
year. Sure, over-wintered leaves aren't vibrant, but they
shouldn't be dessicated either. I did spread minerals in the area
where this photo was taken, but it was during the second
round when I
carefuly scattered the trace minerals first, then went back over the
ground with gypsum. I'd say the living plants got very mildly
nipped in these regions, but trouble was barely evident within a few
days.
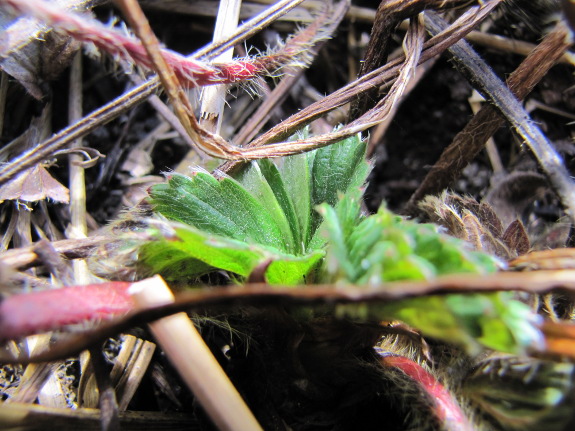
Luckily, the
mineral-burn on the front garden strawberries seems to have only
affected the leaves, not the entire plants. New green leaves are
poking up from the centers, so I hope the damage will be equivalent to
a herd of deer tromping through the garden and eating their fill (which
used to happen regularly in years past --- we still got crops, albeit
smaller ones).
The take-home message is
--- spread trace minerals very carefully. And, while you're at
it, try to pick a dormant season for mineral-spreading, although that's
not really possible in a hard-working garden like ours. Finally,
strawberries are more sensitive to minerals than any of our other
over-winterers (like garlic and herbs) are, so it might be worth
holding off on remineralizing strawberries until you're getting ready
to start a new bed.
 When I mentioned that one of our
long-term plans is to have a flood/tornado/guest
underground shelter
up on the hillside, a couple of you recommended Mike Oehler's The
$50 and Up Underground House Book. I'm glad I checked it
out, even though (for reasons I'll mention in a later post), we
probably won't use this technique for that structure.
My first reaction is
that Mike Oehler's book feels like Walden for the twentieth century,
both in good and bad ways. I enjoyed the under-building principle, but noticed that
the author put in an enormous amount of physical effort to create a
structure that focuses more than I think necessary on elegance.
Oehler's writing is also opinionated verging on snarky, which some
folks (especially those who enjoy Salatin's
later writing) might
find amusing, but which turns me off. Finally, there's quite a
bit of theorizing that isn't necessarily backed up by experience or
data.
On the other hand, if
you throw out 25% of what Oehler writes, the remaining 75% is
thought-provoking and helpful. In fact, I could see the book
being entertaining reading even if you're not thinking of building an
underground house and would simply like to see how one
back-to-the-lander from the 1970s made his home. Stay tuned for
the tips I took away from the book in later posts in this lunchtime
series.
| This post is part of our The $50 and Up Underground House Book
lunchtime series.
Read all of the entries: |
We've been letting the new
chicks free range on nice
days, rainy days we keep the door closed so nobody gets wet
and cold.
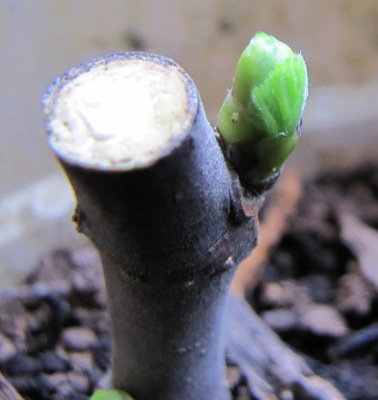 The
figs, gooseberries, and
mulberries sitting in pots under our table are starting to root!
Some cuttings are as-yet inconclusive, which I suspect means they're
growing roots, but more slowly than their peers, while others are
sturdily held into the soil and are already beginning to leaf out.
Even though I can't
proclaim this experiment a success until I repot the cuttings and see
good root growth, I'm ready to pass judgement on the two different
hypotheses I was roughly testing with this project. Hypothesis A
said that I can root hardwood fig cuttings by placing them directly
into a pot with no covering, using a heat pad underneath for a week or
two, then treating them just like any other potted plant (water lightly
as needed to keep soil moist but otherwise ignore). So far, I'd
say this method of rooting figs is definitely preferable to any I've
tried in the past --- easy and effective.
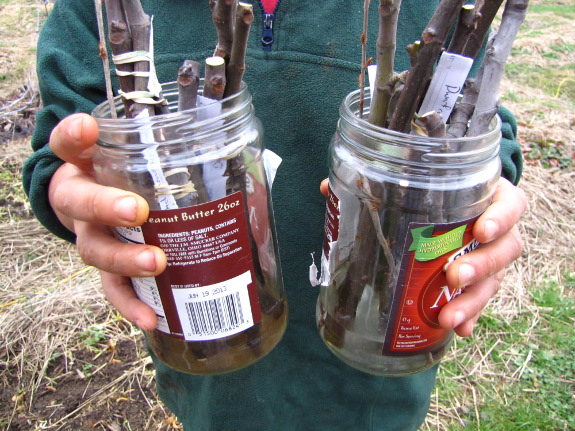 Hypothesis B said that a willow-extract
rooting hormone
would make fig cuttings root in greater numbers. This doesn't
seem to be the case...but only because both the control and
hormone-treated cuttings have already rooted at 78 to 100%. (The
range in numbers is because I'm not positive whether the ones that feel
like they're loosely rooted actually are.)
The great part of this
experiment in fig rooting is that I'll probably end up with at least a
dozen baby fig trees in the nursery row this summer and in the orchard
next year. Thanks so much, Brian, for sharing such vibrant
cuttings! Sarah, you can definitely have a few of these figlets
if they keep thriving at the rate they're going.
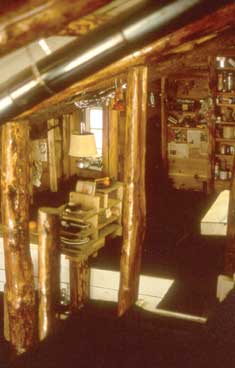 Mike Oehler built his first
underground house for $50 in 1971. He used mostly scavenged
materials, which he summed up in a very Thoreau-like table:
- Beams and post - free
- Millends (lumber) - free
- Polyethylene - $15
- Nails - $0.50
- Flooring - free
- Insulation - free
- Paint - $2
- Chairs - free
- Tables - $2.20
- Door - free
- Cooler - free
- Lamp - $4
- Stove, stove pipes, and damper - $22
- Windows - $4
The initial structure
was only 120 square feet, and even though he lived there for four
years, he admits he was on the lecture circuit for three of the four
winters.
In an effort to turn the
structure into a good place to spend a northern Idaho winter, Oehler
added on in 1975 to produce what he calls the $500 house (costing about
$2,000 in today's dollars). The new structure (which includes the
original $50 house) covers 370 square feet across three levels.
In addition to living in the $500 house since 1975, Mike Oehler has
expanded his experience by running an underground-house consulting
business where he designed and/or built several other houses using his
methods. (You can see more photos of the houses he inspired and
built on his website, which is where I found the
pictures in today's post.)
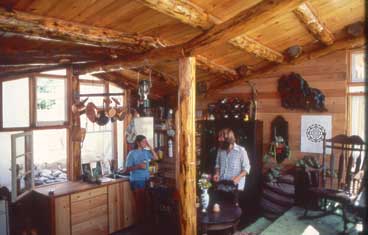 There's a lot to like about
Oehler's houses, but I want to throw in a few caveats up front (since
you won't find most of these issues mentioned until nearly the end of
his book). The fact his houses won't pass code doesn't really
bother me, but I am much more concerned by Oehler's update about the
parts of his houses that have and haven't failed structurally over the
years --- it sounds like root cellars built using his methods are
problematic, as are non-full-time residences that aren't aired and
warmed on a regular basis. You also should be prepared to put in
huge amounts of labor if you build using Oehler's methods on the cheap
--- his original, 120-square-foot house took about 105 man-hours simply
for the initial excavation. Finally, Oehler admits that you might
need to work harder to keep water out of your underground house if you
live in an area like the Pacific Northwest (or, presumably, here) with
"ridiculous rain."
Stay tuned for
tomorrow's post where I begin to show you what sets Oehler's houses
apart from mainstream underground structures.
| This post is part of our The $50 and Up Underground House Book
lunchtime series.
Read all of the entries: |
We wanted to cut down trees
today for the new
pig pasture, but ran out of fuel.
There's a gas station 10
miles away, but they put ethanol in their product.
It turns out the closest
ethanol free station is 20.1 miles away. I debated just getting some
higher octane gas at the nearby station to save time, but decided
against it since our Stihl MS-211 is only 2 years old and might be
more vulnerable to the negative
effects of ethanol.
Our
local mechanic has a chainsaw that's 15 years old and he uses
regular fuel with no problems, but agrees that the newer chainsaws
might need to stay away from ethanol.

Last year
at this time, the
strawberries were blooming, we were mowing the lawn for the first time,
and we even watered a few garden beds to get seeds to come up
quicker. In contrast, the last week has brought two days of snow,
more days of cold rain, and a fifteen-degree night.
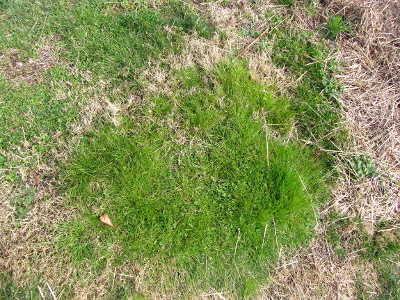
You can see what our
grass currently looks like --- just barely starting to regrow in spots,
but mostly winter-brown. The only cultivated plants blooming are
daffodils and crocuses, and I'm wishing I'd been more sparing of
firewood earlier in the year since I'm enjoying the warmth from
the last of our dry wood as I type.
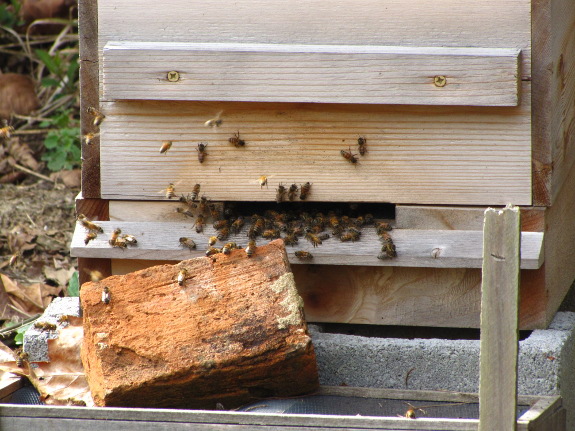
The honeybees are just
starting to have enough food to make it worth their while to be out
flying. In addition to the hazel bushes, other wild,
wind-pollinated trees are starting to open their flowers, providing
quite a bit of the high-value protein and fat source (pollen), if no
ready sugars (nectar). In the yard, purple dead-nettle,
speedwell, and a few dandelions are serving up the earliest nectar, but
it's a foraging expedition not a buffet. Mostly, though, the bees
are staying put because the temperatures have been too cold for hunting.
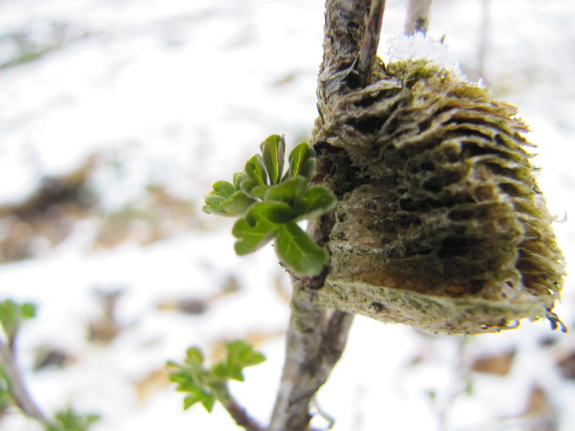
The Invicta Gooseberry
is starting to leaf out, and a few pear buds have broken, but most of
the rest of our perennials are barely accepting that spring is supposed
to be here.
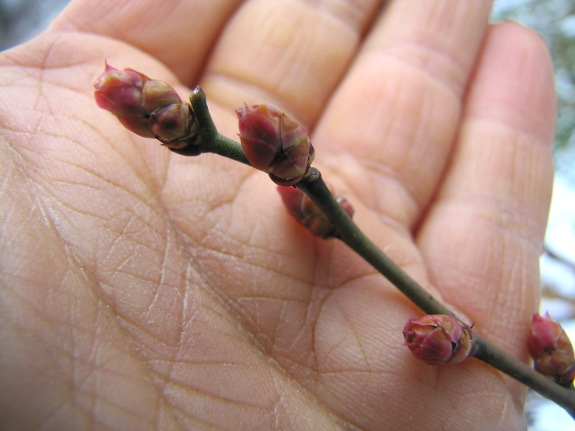
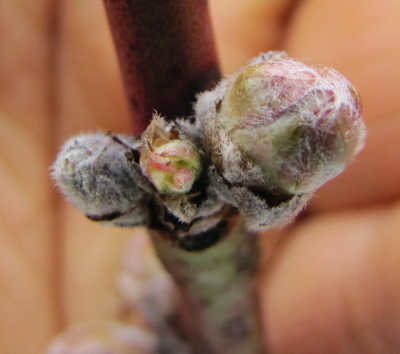 Blueberry buds are swelling,
but not so much they seem daunted by the cold weather. Similarly,
peach flower buds are just barely starting to break dormancy, although
many have clearly been nipped by the cold winter before this
point. (The photo to the left shows a dead flower bud on the far
left, a living leaf bud in the center, and a living flower bud on the
right.)
The moral of the story
is that the garden is telling me to slow things down, so I am.
Even though I have broccoli and onion sets ready to go into the garden,
there's no point transplanting them until the lows rise to the high 20s
at least. Maybe next week....
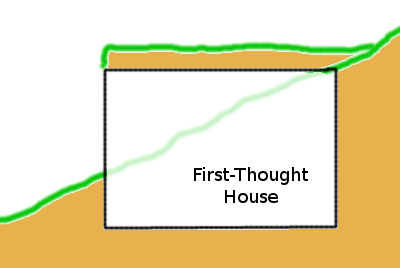 One of the biggest
differences between Mike Oehler's underground house and many other
designs is that he faces his buildings uphill. While houses
opening downhill have a better view (and better potential for passive
solar gain if you choose the right hillside), Oehler concluded they
also have poor drainage, ventilation, and light. In addition,
this type of building (which he calls a "First-Thought House") has to
be shored up very carefully since the weight of the hillside above is
constantly pushing down on the structure. Finally, First-Thought
Houses generally have doors only on one side of the structure, which
can be a fire hazard.
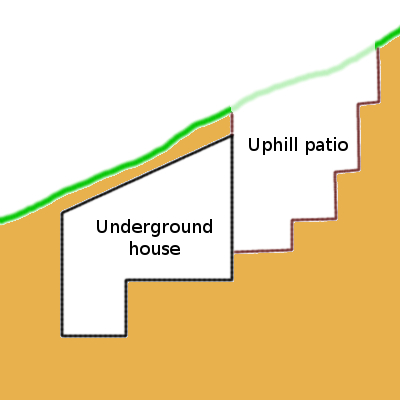 In contrast, Oehler's
buildings are bright, sunny and well-ventilated inside due to his
unique design. In addition to digging out the house itself, he
also excavates an uphill patio, which sucks up moisture flowing down
the hill, holds back the hillside with terraces (that are easier to
replace than walls of a house), and provides a shady garden area right
outside the front door. Then Oehler adds in an excavation for a
side door (not shown in this diagram), which brings in light and air
from the other side of the structure. There's much more to the
design than this, so you'll obviously want to check out the book if you
want to give the technique a try, but this is the gist.
My caveats in the
last post have much
more to do with Oehler's construction methods (which I'll mention in
later posts) than with the design (which I find fascinating). On
the other hand, I'm not so sure I see how his design promotes better
drainage --- it looks to me like water running down the hillside would
pool right at the front door (where Oehler adds French drains to move
water around to the back). Wouldn't you get better drainage from
a First-Thought House, especially if you slant the roof down toward the
front?
| This post is part of our The $50 and Up Underground House Book
lunchtime series.
Read all of the entries: |
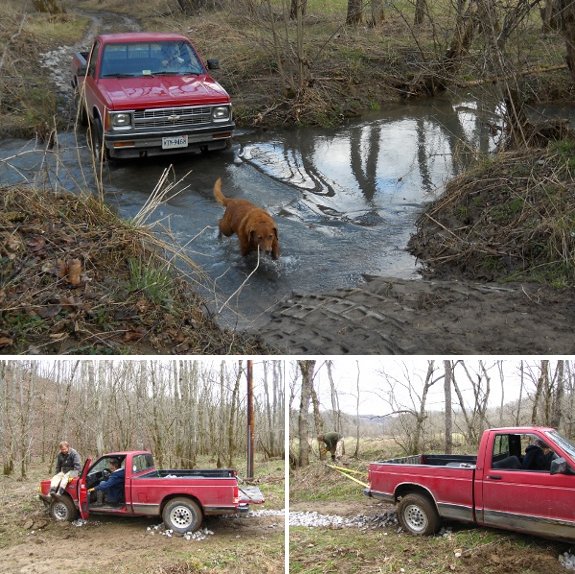
Lucy can often sense when a
big event is going on and tries her best to lend a hand.
We've been improving the
"driveway" up to the point of the creek and today was the day for
crossing to the other side.
We got a little stuck, but
the hand
winch made short work of
pulling it free.

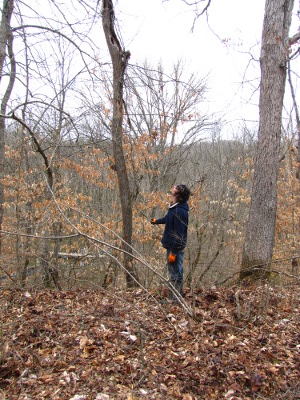 While working on clearing the
pig
pasture Wednesday,
we flushed this flying squirrel out of its day-time hiding spot.
The squirrel scurried across the ground into the brush pile, but ten
minutes later, B.J. caught it climbing up into a holey snag.
After deliberation (would the snag fall on the fence and ruin it?), we
opted to leave the tree in place rather than cutting it down and
forcing the flying squirrel to find a new home.
Flying squirrels are
nocturnal, so day-dwellers are unlikely to see them. I spent
several evenings a decade or so ago staking out a spot where flying
squirrels were known to live, hoping to catch a glimpse. No luck
then, so I was thrilled to see this wide-eyed rodent now.
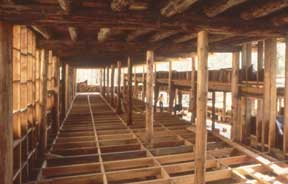 In addition to the
orientation of the house, Oehler's underground
buildings are unique because of their building methods. He calls
his system PSP, which stands for Post/Shoring/Polyethylene. I'll
write about the polyethylene tomorrow, but will explain the framework
today.
Basically, Oehler's
houses are timber-frame structures sunk underground. He uses
dried and de-barked trees (western cedar and lodgepole pine) that are
six to twelve inches in diameter to form posts and beams, notching them
together so they create a rigid framework. The  inter-connected timbers hold
back the force of the hillside because each wall is braced against the
opposite side.
The polyethylene layer
that I'll mention tomorrow keeps most of the wood dry, but the bottom
2.5 to 3 feet of the posts are exposed to soil moisture. Oehler
built his first houses by impregnating those portions of the wood with
penta (a chemical preservative), which he no longer advocates.
Now, he prefers to char
the wood, cool it,
then wrap each end with five layers of garbage bags.
Unfortunately, his new method doesn't have as much longevity behind it,
so you can't be sure how long it will last, but he does provide
instructions for changing out the posts in an existing house if
necessary.
| This post is part of our The $50 and Up Underground House Book
lunchtime series.
Read all of the entries: |
It's only been 2 months since
we installed the new Minox stainless steel drinking
water container and in that short time we've really grown to
appreciate the increase in storage and attractive good looks.
The brass
spigot we added to it developed a leak a few weeks ago. Once I took
it apart the problem was obvious. It got overtightened once just before
the leak, and I'm guessing the rubber washer got pinched and then
dislodged.
It only took a few minutes to
re-seat the washer where it belongs, which stopped the leak.
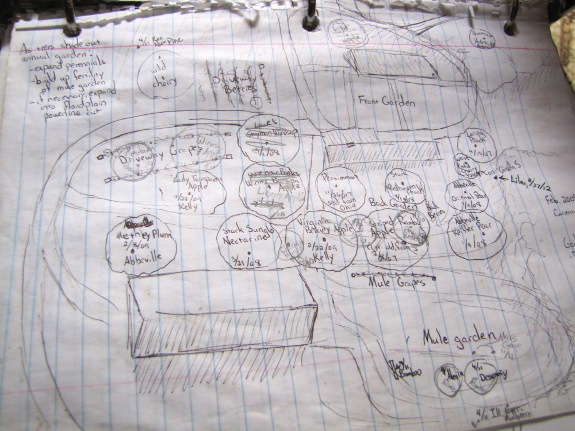
For the vegetable
garden, I keep most of my data on a spreadsheet, which makes it easy to
deal with variety changes. It's much tougher to grid off trees
and berries into permanently named regions, though, so I end up keeping
variety locations on paper maps like the one above (with other data
like source and planting date on a spreadsheet). Paper maps are
all good and well at first, but when trees die and new ones are
planted, the maps start to get confusing. Plus, I have a tendency
to draw new maps but leave the old ones in the binder, so I often don't
know which page is the most up to date.
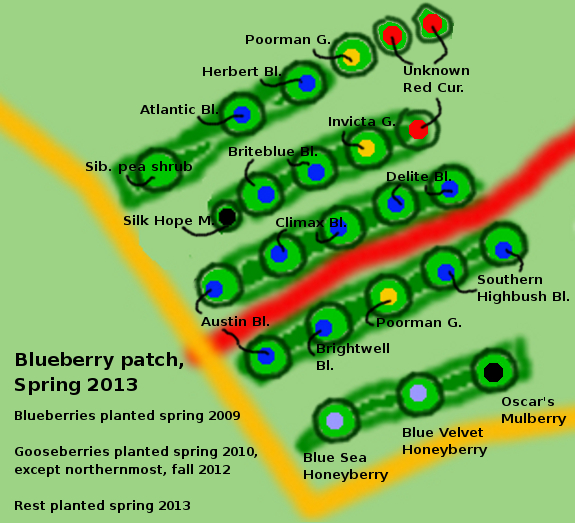
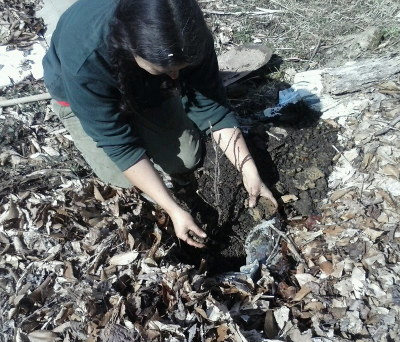 I decided to take an hour on
a snowy morning to get my notes in order so I knew what was
where. First stop was the blueberry patch, which is getting extra
beds and species this winter. In case you're reading the map
above carefully, the mulberries have tiny little zones because I plan
to keep them small via coppicing, using
the leaves for silkworms. The honeyberries, Siberian
pea shrub, and
mulberries haven't actually arrived yet, but should be here any day
now, and the currants went in the ground Friday.
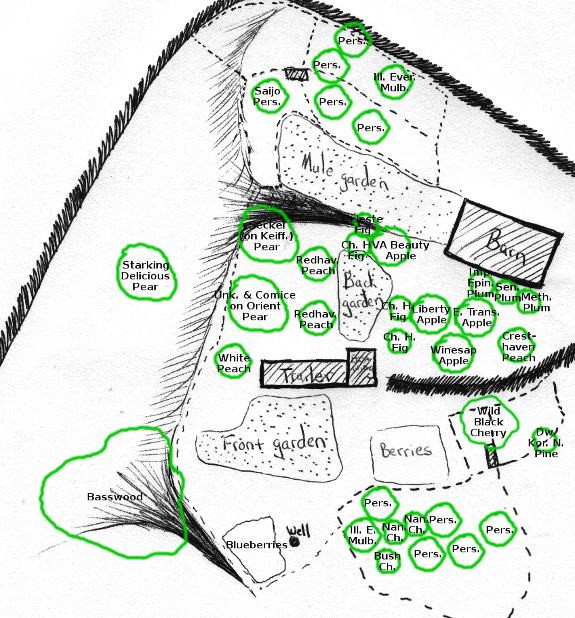
And here's a zoomed-out
map showing current tree locations, a printed copy of which will form
the base for the next few years' annotations. There's not much
room for more perennials, but I hope to fill in the few gaps and then
add trees into a new location or two --- perhaps the hill above the pig
pasture, the shady
zone north of the barn, or the equally shady valley south of the
well. Hopefully by the time I need to make the next revised map,
all of the oldest trees
will be in full fruit.
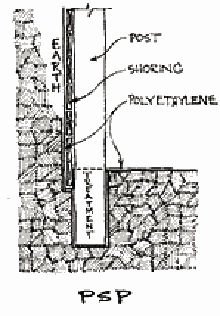 The outer skin of Oehler's
houses is a layer of polyethylene which is used as a moisture barrier
to keep the walls from rotting. Initially, he was using 4 to 6
mil plastic, but had upped that thickness to 6 to 10 mil by the time he
wrote his book about greenhouses, and noted that he's now using EPDM
pond liners for one of the two roof layers.
After making the
framework of the house out of posts and beams, Oehler digs another narrow
trench behind the walls and layers mill-ends (or other cheap boards)
against the outside of the posts. The plastic goes directly
outside the mill-ends, and the whole wall is held together by the force
of the earth rather than by any fasteners.
The roof gets a bit more
fancy treatment, starting with a layer of building paper and
polyethylene, covered by four inches of earth, another layer of
plastic, then fourteen more inches of earth. Eventually, plants
will take hold there 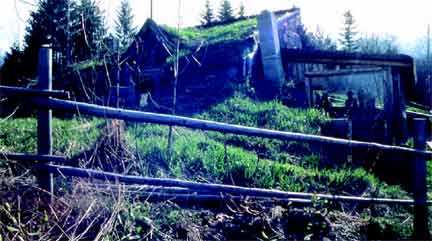 and create a living roof.
While a thin layer of
plastic doesn't seem like much to keep an underground house dry, the
design seems to be working, at least in Oehler's location. As he
points out in his book, you have to take his system as a whole rather
than pick and choose if you want it to work --- presumably polyethylene
wouldn't be enough to keep water out if you didn't plan the entire
structure so water's always flowing away from the walls.
Stay tuned for another
lunchtime series soon about his followup book, covering earth-sheltered
greenhouses.
| This post is part of our The $50 and Up Underground House Book
lunchtime series.
Read all of the entries: |
All this pig
pasture clearing is
yielding some serious firewood.
BJ brought his brother and
cousin over today who are pushing a wagon full in the background.
They also helped carry all
the stock
panels to the new pasture
area.
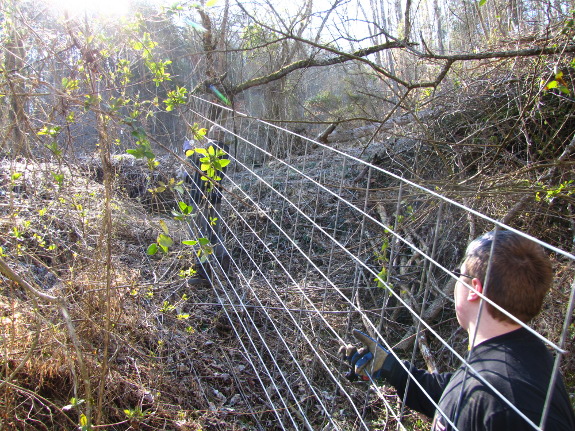
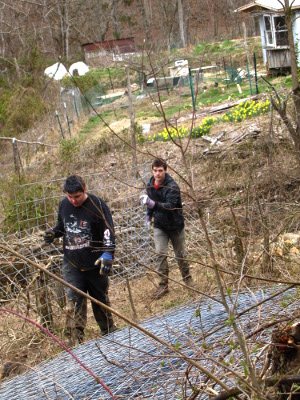 Mark's got a useful saying
for every occasion, and two of these gems came to mind on Friday.
Can "work smart not hard" involve paying someone else to do the
impossible task of carrying 41 cattle panels and 82 fenceposts through
a swamp and up a gully to the pig pasture? (It's smart because we didn't have to do it!)
B.J.'s brother and
step-cousin-once-removed (if I got that relationship right) did an
amazing job of plugging along through the back-breaking labor. A
passel of these
awesome cookies
helped. (I'd lower the sugar content by 25% to 50% for adults,
but the kids ate about 70% of the batch as-is.)
"If you're going to
break a man do it on a Friday." Yep, this one definitely
applies. The question is, if you break a man on a Friday, will he
come back Monday to continue working through the rest of his spring break?
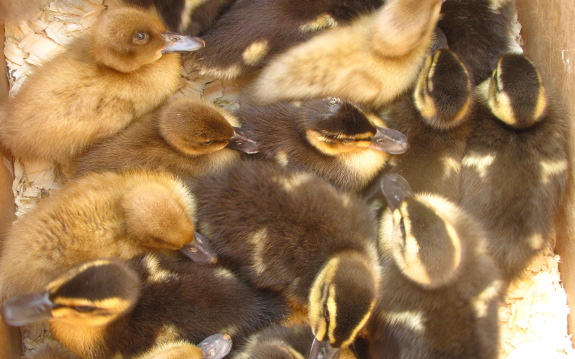
We piggy-backed on the
nearest Tractor
Supply Animal Swap
for our most recent meetup
in hopes that we'd get more random strangers dropping by. And the
location was successful in that I spread Egyptian onions to another
half dozen homes and met some interesting people. Unfortunately,
I don't think any of those people are interested in our our meetup
group.
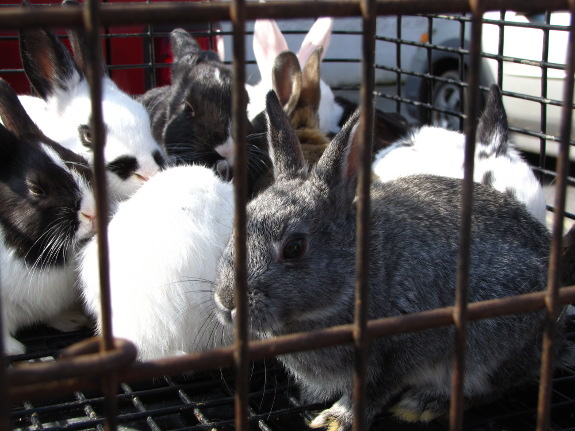
Sarah, Mark, and I
brainstormed over lunch afterwards and concluded that our meetups have
had too high of a barrier to participation. After all, even if I
say that you can come to a swap with nothing to share, most folks would
feel odd about showing up to take if they don't bring something to
give. So we're going to try more of a traditional meetup next
time, with everyone converging on Sarah's place just to hang out and
get to know each other. (Date to be announced --- join
our group if you'd
like to hear more details as they come down the pike.) Mark's
also promised to come up with a more melodious name that still gets the
point across.
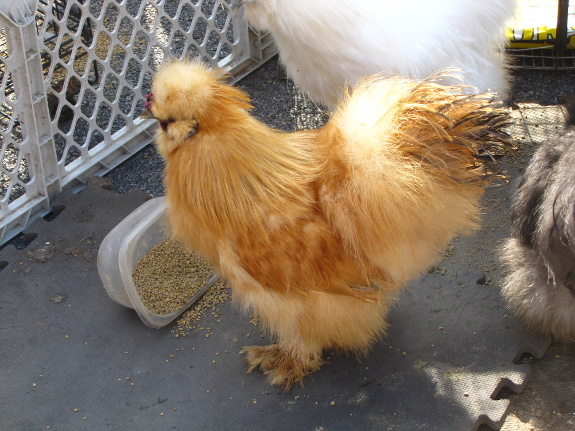
Building like-minded
community is tricky if you're extremely picky and antisocial, but we'll
keep plugging away. After all, B.J. is proof that interesting and
interested people live right down the road --- our job is to find them.
When
we asked BJ to cut
up some firewood last
week I noticed he was starting the Stihl MS-211 chainsaw on the ground with his foot on the
handle.
It's a Stihl approved method, the handle is
made for foot placement, but a little awkward.
I showed him the stand up
starting method and he likes it better, but we had some trouble on the
second lesson. It took him a while to get the hang of holding the rope
end while "pushing" the saw downward resulting in a flooded engine. I
tried taking the spark plug out and drying it, but we had to end up
waiting till the next day for more tree cutting.
Want more in-depth information? Browse through our books.
Or explore more posts by date or by subject.
About us: Anna Hess and Mark Hamilton spent over a decade living self-sufficiently in the mountains of Virginia before moving north to start over from scratch in the foothills of Ohio. They've experimented with permaculture, no-till gardening, trailersteading, home-based microbusinesses and much more, writing about their adventures in both blogs and books.
