
archives for 09/2012
Mark and I went to the
courthouse Thursday to research a property that's one possibility for
the Annex. (One of these days
I'll make a real post about the Annex idea, but our dream is still
evolving and I don't want to tie it down yet.) Our title
search turned up a
disappointing document --- an oil and gas lease from 2003.
Lost mineral rights are
one of the main reasons to perform a title search. As a
landowner, you can sell some of your property rights while still living
on and farming your land, and those lost rights don't come back when
the property is passed on to another owner. In Appalachia,
selling mineral rights is common since many folks are living very close
to the financial edge, so a few thousand dollars now and a few hundred
every year from now on sounds good even if it means your well might be
polluted, your house might cave in, and strangers can tromp across your
land at will.

In our case, it's
possible the lease has expired --- I'm waiting until the holiday
weekend is over to hunt down that data. According to the contract
I read, the gas company needed to either start drilling or start paying
the landowner a certain amount within five years, and there's no sign
of a well on the property, so we might get lucky and not have to deal
with the issue.
But if the mineral
rights are no longer attached to the land, Mark and I will be faced
with a hard decision. This property is within easy walking
distance (unlike
another one we've considered), has lots of road frontage (making it
easy to hold public events there), and is south-facing. There are
also several acres currently being managed as hayfields, so it would be
relatively painless to install our dream orchard and pasture.
Finally, the property is assessed at $600 per acre, which is right up
my skin-flinty alley. (That's exactly what I paid for our current
ugly duckling farm.)
On the con side, the
soil is terrible (which I consider more of an interesting puzzle than a
real disadvantage) and there's no water. And then there's the
potential deal-breaker --- the lost mineral rights. So here's my
question for thoughtful readers --- would you ever consider buying a
piece of land without the mineral rights? If so, how would the
lost rights impact your financial decision?
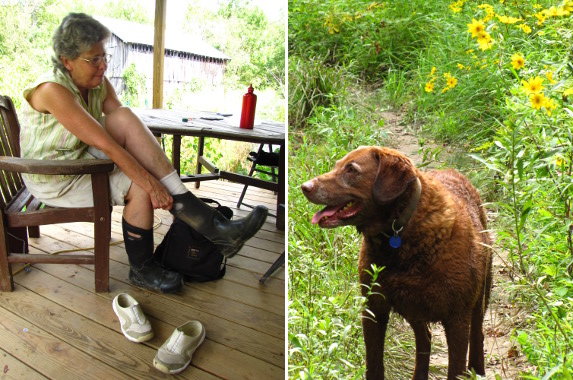
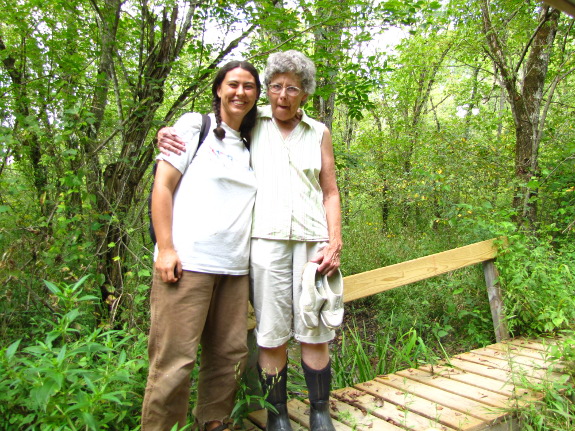
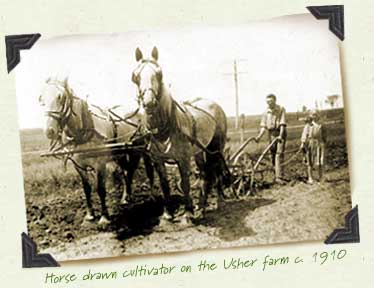
(As a side note, the photos have nothing to do with this post, as you probably
guessed. Mark and I celebrated Labor Day on Friday by inviting
Mom over and we had a lovely time watching a Barred Owl, picking stick
tight flowers, and hanging out on the porch.)

Back in the early 2000's a
person could dump their trash around here during normal working hours,
and if they were so inclined take home a discarded lawn mower, give it
a little TLC, and feel good about recycling the old fashioned way.
It's different now.
Scavenging is not only discouraged, but it's treated as criminal
behavior. I'm not sure what the fine or jail time might be, but each
station now has an attendant to keep an eye out for scavengers.
I'm guessing the cost of
those attendants is what forced the reduced hours of operation. A major
drag when you drive all the way there and realize they closed at noon,
which is the main reason I took this picture. It helps that our new
helper has a permit to use multiple county locations, but still
requires some basic knowledge of these odd times.
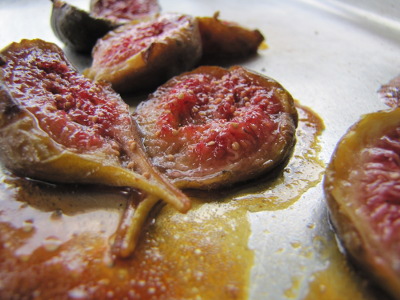 Last
week, I wrote that our first
homegrown fig was good, but not sensational. Roasting the next
four figs instead of eating them raw definitely popped them up into the
delectable category, though, which started me thinking (again) about
fig propagation.
Last
week, I wrote that our first
homegrown fig was good, but not sensational. Roasting the next
four figs instead of eating them raw definitely popped them up into the
delectable category, though, which started me thinking (again) about
fig propagation.
In our climate, a fig
"tree" is never going to be much more than a bush. Any branches I
don't protect
over the winter die
back, so the best case scenario is that our fig will expand upwards
from three foot tall trunks each spring. Since figs set fruit a
few at a time over a long season, that means our little fig bush will
be giving us four figs here and six figs there for a month or two,
which is clearly not going to be enough now that Mark and I have tasted
these homegrown fruits in their full glory.
 The
good news is that figs have turned out to be the most disease- and
insect-resistant fruits (tied with strawberries and brambles) in our
garden, so installing more won't require much effort after the initial
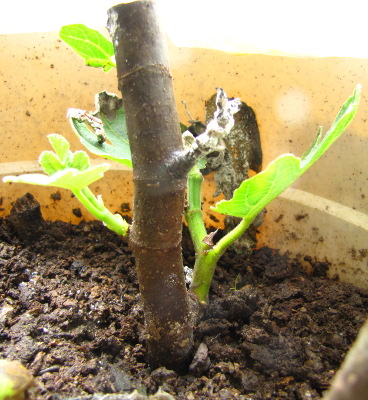
planting. In fact, I'd read that figs are relatively easy to
propagate from cuttings, so I half-heartedly tried a few hardwood
cuttings this spring. (If I'd known what the roasted fruits
tasted like, I would have put in a bit more effort.) While
pruning, I snipped off a few young branches and inserted them into a
pot, covering the top with a bag to hold in moisture. The
cuttings leafed out, but I think I removed the bag too soon because the
greenery ended up dying back and the figs petering out.
The
good news is that figs have turned out to be the most disease- and
insect-resistant fruits (tied with strawberries and brambles) in our
garden, so installing more won't require much effort after the initial
planting. In fact, I'd read that figs are relatively easy to
propagate from cuttings, so I half-heartedly tried a few hardwood
cuttings this spring. (If I'd known what the roasted fruits
tasted like, I would have put in a bit more effort.) While
pruning, I snipped off a few young branches and inserted them into a
pot, covering the top with a bag to hold in moisture. The
cuttings leafed out, but I think I removed the bag too soon because the
greenery ended up dying back and the figs petering out.
I'm curious to hear from
those of you who have successfully propagated figs. Did you use
hardwood or softwood cuttings? In the garden or in pots?
During what time of year? There's a plenitude of information
about fig propagation on the internet, but as usual, I'm looking for
the lowest tech solution possible, even if the success rate is only 20%
--- we've got plenty of scionwood to play with, but limited time during
the growing season.
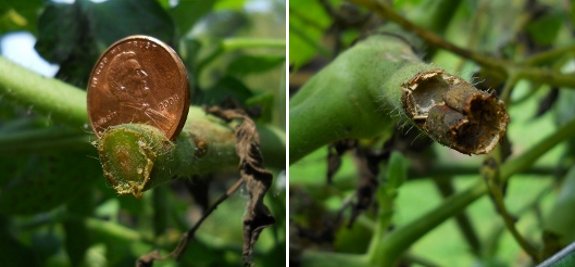
I think the penny only stayed
in place for a few days, the picture on the right is from today
compared to the left one which is from last Sunday with the penny
installed for fighting tomato blight.
The plant still has some
blight, but the fruit looks healthy.
Maybe a modified paper clip
would be strong enough to hold it in place?
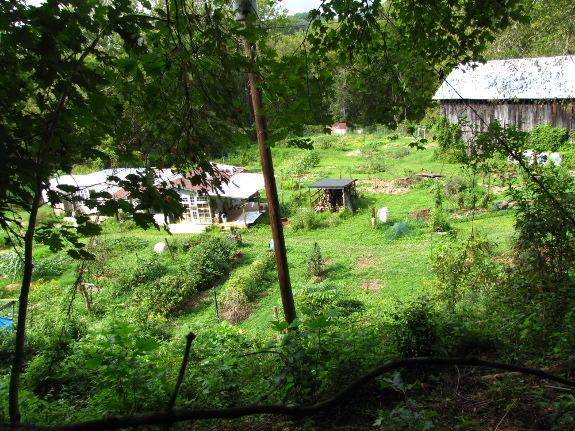
Mark and I don't
celebrate our anniversaries, but I always try to take an hour to bond
with the farm on our move-in date. This week marks the beginning
of the seventh year we've spent here, and the changes are more visible
than ever before.

Although Bradley's hard
work dragging our infrastructure out of the trailer trash category is
the most obvious change photographically, what I find more significant
is that our tranquility levels are at an all-time high. I'm
tempted to explain that mood away by saying we're mostly caught up with
seasonal farm chores, but the truth is we're at about the same place we
were in previous years. The difference is one of attitude.

Previously, glancing at
a blighted tomato plant would send me into a tailspin, but this year
I'm starting to realize that we can manage the blight and still harvest
fruits well into the fall. True, constant mulching has lowered
the weeding pressure, but I think part of my contentment with the 2012
garden comes from realizing that a certain level of weeds won't take
over and can simply be ignored.

Meanwhile, we're looking
forward to another winter like the last one, when we focus on creative
pursuits instead of struggling to catch up on all the tasks we didn't
complete over the previous year. While there are always projects
on the back burner, the most pressing improvements are already in
place, and Mark and I are both learning to quash our greed for
expansion in favor of time for tranquility.
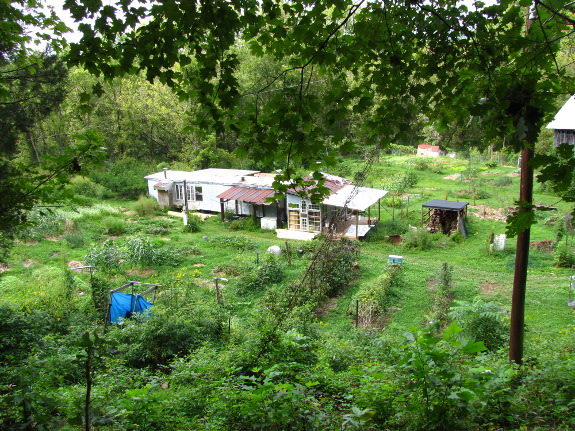
Which is all a long way
of saying that I'm able to look at last year's
anniversary post and
laugh at who I was then. (The pictures are worth a gander,
though, since they sum up the changes in our farm over the years quite
succinctly.) Thank you, farm, for helping me grow along with my
vegetables!
 The
Humanure Handbook is
another book that epitomizes self-publishing. There are some
flaws here and there --- rants that will turn 80% of the audience off
and scattered trains of thought --- but the positives far outweigh the
negatives. Instead of producing a book watered down
for the masses,
Joseph Jenkins has distilled his passion for composting toilets into
250 pages of essential reading for the serious humanure advocate.
(Plus, there are fun cartoons.)
The
Humanure Handbook is
another book that epitomizes self-publishing. There are some
flaws here and there --- rants that will turn 80% of the audience off
and scattered trains of thought --- but the positives far outweigh the
negatives. Instead of producing a book watered down
for the masses,
Joseph Jenkins has distilled his passion for composting toilets into
250 pages of essential reading for the serious humanure advocate.
(Plus, there are fun cartoons.)

Due to our book club Wednesdays
and popular meat
rabbit Tuesdays, my
humanure lunchtime series is going to be scattered across the next two
weeks. That gives you plenty of time to pick up a copy and read
along...especially since you can download a
digital version entirely free. Stay tuned to learn
why we don't compost our humanure yet and what kind of system we'd like
to use if and when we do.
| This post is part of our The Humanure Handbook lunchtime series.
Read all of the entries: |
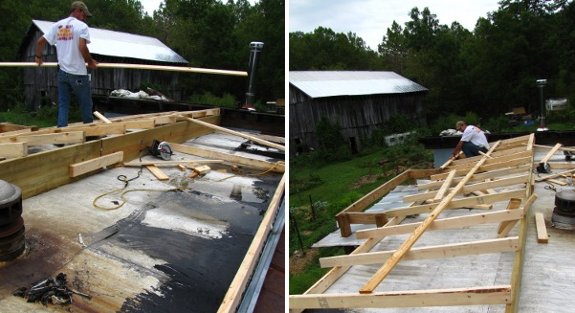
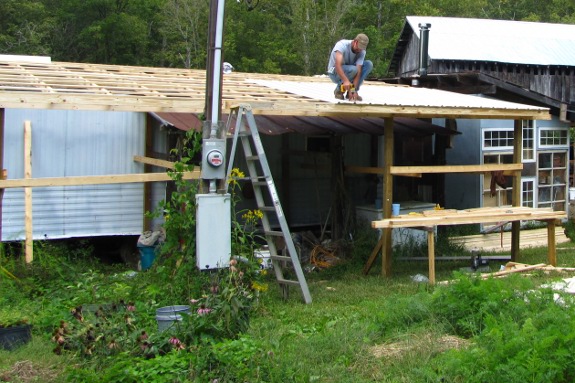
We've been having problems
with our roof leaking ever since someone gave us this trailer about 6
years ago.
I can't count how many times
I "fixed" a leak with roofing tar only to have it come back in a few
years.
The new trailer roof project
will not only take care of that problem but will cut back on wood
burned and split with the extra insulation we plan to install.
Edited to add:
Learn more about insulating and improving the efficiency of a mobile
home in Trailersteading. Now available on Amazon.
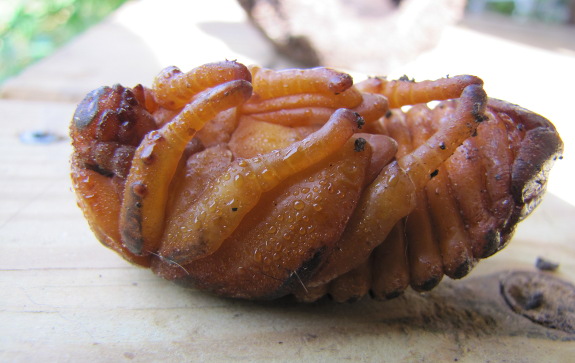
Somehow in the rush of
early June, I seem to have forgotten to post about the world's largest
grub, found by Bradley in the horse
manure as he
shoveled the biomass into buckets to be transported to our worm
bin. While I
do exaggerate slightly, the grub Bradley found was significantly larger
than a June bug larva, and we took the time to toss it in a flower pot
in hopes of learning what the plump youngster would turn into.
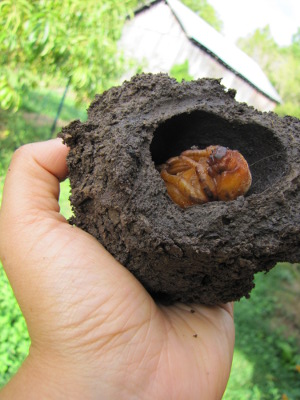 Saturday,
I decided to find out whether there was any life left in my fig cuttings,
so I dumped out the contents of that pot. And broke open a
fist-sized ball of dirt that housed a pupating beetle! The insect
was even larger than it had appeared on last viewing, so I carefully
fit its pupal chamber back together and refilled the pot, hoping the
tween will manage to make it to adulthood despite my poking and
prodding.
Saturday,
I decided to find out whether there was any life left in my fig cuttings,
so I dumped out the contents of that pot. And broke open a
fist-sized ball of dirt that housed a pupating beetle! The insect
was even larger than it had appeared on last viewing, so I carefully
fit its pupal chamber back together and refilled the pot, hoping the
tween will manage to make it to adulthood despite my poking and
prodding.
Mark's original idea
after seeing the size of the grub was to raise the species for chicken
feed, but I suspect the experiment wouldn't really work out. Stag
beetles usually spend several years in the larval stage, which would
make propagating them a slow affair, despite the amount of nutrition
each beetle would provide for our flock.
All utilitarian reasons
aside, we're itching to see the adult version of this hefty
critter. I suspect the stag beetle it turns into will be
awe-inspiring.
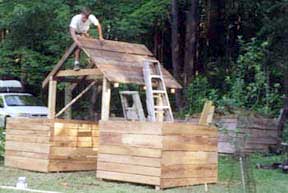
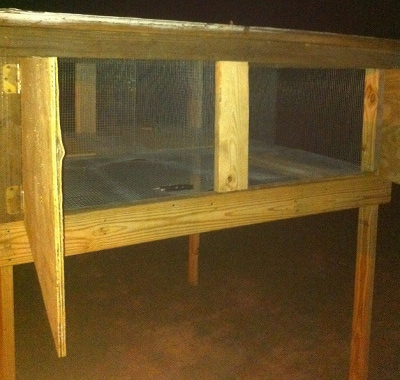 Before
we could actually bring any rabbits home, we had to build a hutch. I've
had some ideas in my head for how to
construct one, but, as things usually go, we ended up building the hutch
based on the materials we had at hand.
Before
we could actually bring any rabbits home, we had to build a hutch. I've
had some ideas in my head for how to
construct one, but, as things usually go, we ended up building the hutch
based on the materials we had at hand.
Dawn had
found two shed doors on the side of the road...and that ended up
determining the dimensions of the hutch we built. We used the shed
doors as the roof, and we'll later cover these with some tin for
longevity.
The hutch is approximately 6 feet by 7 feet, and
it's quartered into four separate spaces of roughly 3 feet by 3.5
feet. The hardware cloth I purchased was 2 feet tall, so that
ended up being the vertical dimension of the living area.
Dawn had also found some scrap 2x4s and plywood that we were able to
press into service for the hutch. The plywood became doors, and 2x4s
became the frame. I
purchased a few more 2x4s and two 2x6s at the local supply house. The
end product ended up being a quite robust hutch that stands about 6
feet tall, with a footprint of about 6x7.
Sorry about the quality of
the photo, it was about 9:30 at night when we
finished the hutch. We used a 2x6
across the lower support so that it will hold up a bit better over
time. The uprights are 2x4s, the roof is 1/2 inch plywood, and the
hardware cloth is 1/2 inch in order to allow the pellets to drop
through.
One of the major goals of raising rabbits here will be
to use the manure in the garden. We have very poor soil, so
anything we can add to it will greatly benefit my plants.
All in
all, I think the hutch cost us under $100 in material. Considering we
should be able to get many litters of rabbits out of it, the structure
will eventually pay for itself, I hope.
Shannon and Dawn will be sharing their experiences with raising meat rabbits on Tuesday afternoons. They homestead on three acres in Louisiana when time off from life and working as a sys admin permits.
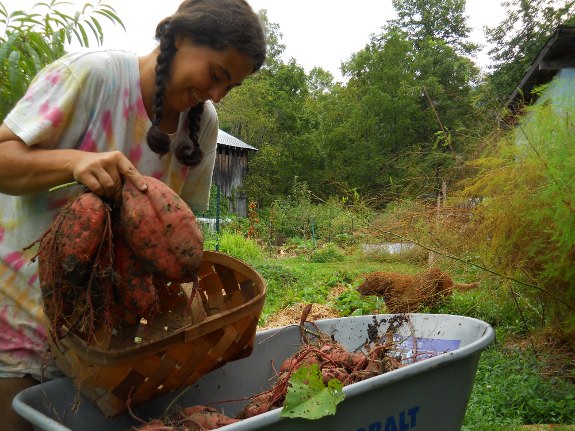
Big, big, really big sweet
potatoes this year, bigger than those big
ones from 2010.
In part due to having almost
zero deer damage this year.
We actually might have a few
extra that will need to find a home.
 When I posted last week about
the first
copies of my book arriving, I was too excited to give
you any details. Now that I've calmed down a bit, I should start
with the semi-bad news --- you're going to have to wait longer than I'd
originally thought to see The
Weekend Homesteader
in bookstores (and in your mailbox). My publisher decided to push
the release date back to November 13 to give them time to get some buzz
going, and to take advantage of holiday sales.
When I posted last week about
the first
copies of my book arriving, I was too excited to give
you any details. Now that I've calmed down a bit, I should start
with the semi-bad news --- you're going to have to wait longer than I'd
originally thought to see The
Weekend Homesteader
in bookstores (and in your mailbox). My publisher decided to push
the release date back to November 13 to give them time to get some buzz
going, and to take advantage of holiday sales.
Here's the good news ---
some of you may not have to wait. My publicist is willing to send
out some advance copies of the book for bloggers to review and/or give
away. I'm not sure how many books
that offer encompasses, but I figure it can't hurt to send him
information about any of my readers who are interested in reviewing The Weekend Homesteader on
their blog. Just email me
the URL of your blog and any relevant statistics that will make you
stand out from the pack, and I'll pass the information on to my
publisher ASAP. Thanks for your interest!
 The second chunk of Radical
Homemakers continued
the
historical journey begun in the first two chapters, but I'd like to cut to the
chase and instead discuss Hayes' conclusions. She wrote that
three "homewreckers" are responsible for many of the ills in modern
American society: "the compulsion to overwork, the reckless pursuit of
affluence, and the credo of individualism."
The second chunk of Radical
Homemakers continued
the
historical journey begun in the first two chapters, but I'd like to cut to the
chase and instead discuss Hayes' conclusions. She wrote that
three "homewreckers" are responsible for many of the ills in modern
American society: "the compulsion to overwork, the reckless pursuit of
affluence, and the credo of individualism."
In my opinion,
overworking and trying to get rich are closely related topics, and I've
discussed them both in some depth before. For example, Hayes
agrees with others that income
does not necessarily equate to happiness, and adds that despite the
price tag attached to renewable energy, poor people in general tread
more lightly on the earth. If you haven't read about and thought
this issue to death previously, I definitely recommend you look through
Hayes' data to see if it speaks to you.
Although I agree with
her about the problematic American work ethic, the most
thought-provoking part of Hayes' argument came at the very end.
The dream household for a modern American, asserts Hayes, is large
enough to allow each family member to hide away with a television in
his or her own room, spending little time interacting with the rest of
the family or community. She relates that only seven percent of
American families spend more than half an hour at family dinners and
that the average American couple has only twelve minutes a day to
converse. As a nation, we are not only pursuing money, but also
independent privacy at the expense of a society centered around
skill-learning and social-capital-earning.
Mark and I are above
average when it comes to building the health of our two-person
household, but we still struggle with creating an
interdependent community (one of our big goals for
the next decade). I'd be curious to hear which of these
homewreckers you find most troublesome in your own life, and ---
zooming back out to the larger picture --- I hope you'll chime in on
whether you agree with Hayes' setup of the problem. There were a
lot  of other things to think
about in these two chapters as well, so feel free to bring up points
I've skipped here.
of other things to think
about in these two chapters as well, so feel free to bring up points
I've skipped here.
We'll be discussing
"Meet the Radical Homemakers" and chapter five next Wednesday, which
will start to bring us back out of the land of theory. (If you
get sick of pure philosophy the way I often do, this might be a good
place for you to start the book.) Newcomers are always welcome to
join the club!
The
Weekend Homesteader is now
in print! (Your copy probably still won't arrive for a couple of
months though.)

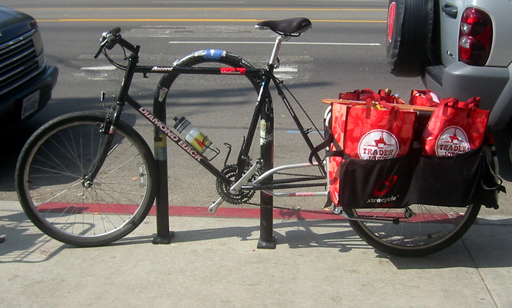
We've been hauling in enough
horse manure to fill all 3 new worm
bins along with the salvaged
stock tank.
A little bit of hindsight is
showing me that a slight increase in surface area might allow us to add
on 2 more buckets up front while snugging them all better for a more
secure ride.
Funny how so much horse
manure can make you feel extra wealthy.

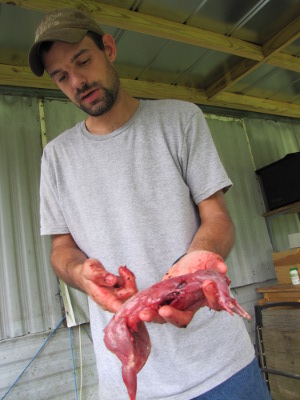
Bradley knows that Mark
and I are interested in trying out more kinds of wild game, so he
kindly brought a squirrel to work with him Wednesday morning. He
had shot it the night before, so the body had gone stiff overnight in
the fridge and took five minutes to skin --- a long time compared to
the one minute Bradley estimates it usually takes him.
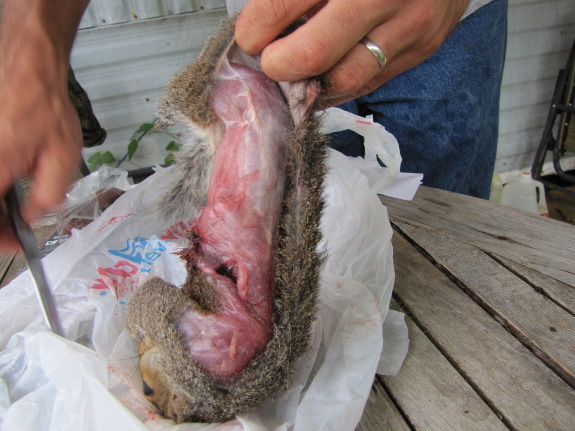
After Bradley
illustrated the proper skinning and cleaning technique, we chopped the
carcass up into thirds as suggested and boiled the meat to provide our
lunch. Unfortunately, neither Mark nor I were thrilled by the
taste. I could have spiced it up relatively easily, but wanted to
get an idea of what squirrel really tasted like, so left it plain.

 I'm not sure our analysis of
the flavor was really fair, though. When I was able to pretend I
wasn't eating squirrel, I thought it tasted a bit like chicken, but for
some reason the idea of eating a squirrel didn't sit well with
me. I don't think Mark was able to divorce the idea of "squirrel"
from what was on his plate at all.
I'm not sure our analysis of
the flavor was really fair, though. When I was able to pretend I
wasn't eating squirrel, I thought it tasted a bit like chicken, but for
some reason the idea of eating a squirrel didn't sit well with
me. I don't think Mark was able to divorce the idea of "squirrel"
from what was on his plate at all.
In a pinch, I'm now
confident that I could skin and gut a squirrel, and I suspect that
hidden in a pot of vegetable soup, neither of us would have any
complaints about squirrel meat. But for now, we're going to stick
to cultivated meat and venison, with the idea of rabbit still floating
around for later.
(As a side note, Lucy
was far more interested in the squirrel hide, head, and entrails than
she usually is in offal. Sounds like she, at least, has no
problem wrapping her head around eating squirrel.)
 Before we dive into
composting humanure, it's worth understanding what happens to your crap
if you are plugged into a conventional system. Your waste is
commonly known as sewage, but in the industry, it's generally referred
to as wastewater (or possibly blackwater if you're making a distinction
between the output of your toilet and sink). Wastewater disposal
methods range from the simple to the complex, and Jenkins does a good
job of pointing out the pros and cons of each system.
Before we dive into
composting humanure, it's worth understanding what happens to your crap
if you are plugged into a conventional system. Your waste is
commonly known as sewage, but in the industry, it's generally referred
to as wastewater (or possibly blackwater if you're making a distinction
between the output of your toilet and sink). Wastewater disposal
methods range from the simple to the complex, and Jenkins does a good
job of pointing out the pros and cons of each system.
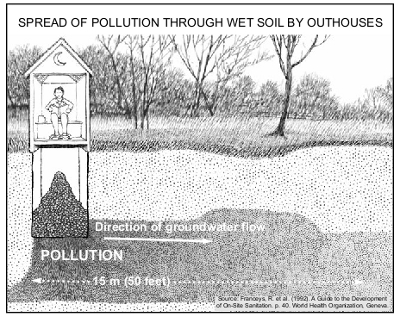
The cheapest way to
dispose of human waste is the pit latrine, which is basically our
system at the moment. The worst problem with a pit latrine is its
tendency to leak pollutants into the groundwater, which is why an
outhouse should always be more than fifty feet away from any well or
stream. Assuming you work around that issue, other problems
include disease-transmission, annoying flies, and smell, all of which
can be avoided by keeping the humanure covered with a high carbon
material after each use.
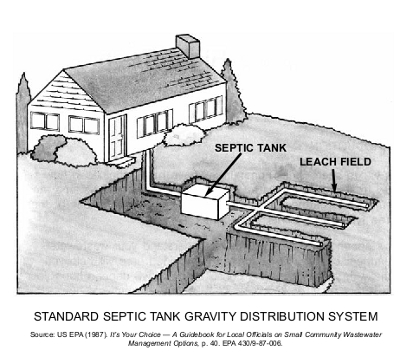
If your outhouse isn't
grandfathered in like ours, you'll be forced to install a septic system
in most parts of the United States. Septic system owners use a
conventional toilet inside the house, then the wastewater flows to a
septic tank for solids to settle out. The liquid continues on to
a leach field, which is simply a series of buried pipes that let water
drain out into the subsoil.
The biggest disadvantage
of septic systems, in my opinion, is cost, since even the cheapest
onces will set you back at least $2,000. In addition, you have to
 pump the solids out of the
septic tank at intervals, and that material ends up being sent to a
wastewater treatment plant, which has its own problems. Finally,
Jenkins notes that concentrations of more than 40 septic systems per
square mile lead to subsurface contamination, which means that if you
and your neighbors have lots smaller than about 16 acres, septic
systems are a bad choice. (I suspect this same issue would come
into play with pit latrines/outhouses.)
pump the solids out of the
septic tank at intervals, and that material ends up being sent to a
wastewater treatment plant, which has its own problems. Finally,
Jenkins notes that concentrations of more than 40 septic systems per
square mile lead to subsurface contamination, which means that if you
and your neighbors have lots smaller than about 16 acres, septic
systems are a bad choice. (I suspect this same issue would come
into play with pit latrines/outhouses.)
In the city, wastewater
is pumped to a central treatment facility, which can use any of several
methods to treat the human waste. I won't go into wastewater
treatment plants much here since I doubt any of you are thinking of
installing one in your backyard, but Jenkins explains in great depth
why the facilities are problematic. In addition to the puzzle of
disposing of organic matter laced with toxins (due to treatment) and
the chlorinated effluent harming receiving streams, we waste energy by
treating water and then using it to flush our toilets.
The Humanure Handbook
asks us to step back and change our view of humanure. If we
consider our effluent to be a valuable form of organic matter rather
than something to dispose of, we can create systems that recycle
humanure into apples. Yes, humanure composting systems require a
little more time, but they also use less money and create less
pollution, so they fit the homesteading ethic to a T.
| This post is part of our The Humanure Handbook lunchtime series.
Read all of the entries: |

It took us a little over 2
hours to shuttle the new roofing tin from our parking area back to the
trailer.
The color we chose is called
Lightstone, and the manufacturer claims it should last at least 40
years at a cost of $1.87 per foot.
Be sure to check back with us
in 40 years for a detailed report on the exact condition of the metal
and how well it holds up over the next 4 decades.

This week is our last
chance to plant oilseed radishes, so I made a lot of hard-nosed
decisions. For example, I ripped out all of the older beds of
beans and just kept one to enjoy until the frost --- I'd rather miss
out on some subpar beans than lose a whole season of
cover-cropping. Similarly, the oilseed calendar is the main
reason I harvested
my sweet potatoes
this week, since I wanted to be able to put cover crops in the tubers'
place.

Meanwhile, I slipped
oilseed radishes into gaps where fall crops didn't come up, and I even
pulled back the mulch and tossed down seeds around sweet corn that will
be done bearing this week and around tomatoes that look too blighted to
last much longer. Since my new method of cleaning up after large
crops involves cutting the spent plants at ground level and leaving the
roots in place, removing the finished vegetables won't disrupt the
radish seedlings. And I figure the oilseed radishes won't get big
enough to compete before the corn and tomatoes are done.
Since Mark talked me
into splurging on 25 pounds of oilseed radish seeds, I'm trying out
some crazy experiments too. I
seeded an entire chicken pasture in oilseed radishes and planted some radishes
around the base of a young apple tree. I'm not too thrilled with
the pasture planting --- I think the shade set the cover crop back --
but the apple has sparse enough leaves that I think it might coexist
quite well with the radishes.

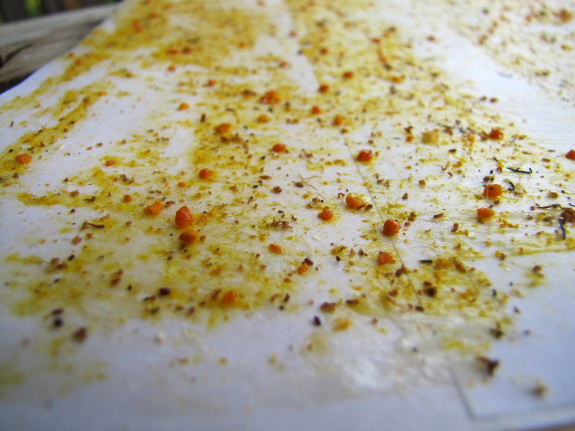
Unlike buckwheat seeds
(which get eaten up by cardinals in short order
if I don't sprinkle a light coating of straw over top after planting),
radish
seeds don't seem to be enjoyed by wildlife. So I simply scatter the
radish seeds on the soil surface by eye, often ending up seeding
thicker than I really should (like in the photo above). I figure
it's worth a bit more seed to keep effort to a minimum.
All told, I used 12
pounds of oilseed radish seeds this year, which cost about $43.
If I figure I planted about 5 pounds of that in 27 beds in the garden
(with the rest going into the pasture), that comes to 66 cents per bed,
compared to maybe 83 cents per bed if I overwintered the garden by
mulching it with straw. Of course, it
would be considerably cheaper to use oats as our winter cover crop, but we wanted to give
oilseed radishes a more serious try this year to see if they're worth
the extra money.
In case you haven't been
following along for the last couple of years, here are some relevant
posts about oilseed radishes:
- The
potential of oilseed radishes
- My two favorite no-till winter cover crops
- When to plant oilseed radishes
- How
to kill no-till cover crops
- What oilseed radishes look like in February
- Organic matter production of my favorite cover crops
- Improving soil with cover crops
- Choosing
cover crops
Hopefully that'll
inspire you to try out some cover crops in your garden, if not this
year, then next.
 Next week, I'll continue our
humanure lunchtime series by delving into several different types of
composting systems. However, before you get too excited, I want
to take a step back and consider the biggest issue with humanure
composting.
Next week, I'll continue our
humanure lunchtime series by delving into several different types of
composting systems. However, before you get too excited, I want
to take a step back and consider the biggest issue with humanure
composting.
No, I'm not talking
about disease. Joseph Jenkins does an admirable job of explaining
how a well-managed humanure recycling system is perfectly safe.
(Check out The
Humanure Handbook if
you don't believe me.) I'm more concerned with an issue that's
already problematic on our farm --- a paucity of high
carbon materials.
 We've been experimenting with deep
bedding in our
chicken coop for the last couple of years, which is a bit like a
humanure composting system for chickens. Theoretically, the idea
has merit, and it does work pretty well in practice, but I'm always
scrambling in search of quality bedding.
We've been experimenting with deep
bedding in our
chicken coop for the last couple of years, which is a bit like a
humanure composting system for chickens. Theoretically, the idea
has merit, and it does work pretty well in practice, but I'm always
scrambling in search of quality bedding.
In a pinch, I can use straw, but I don't like buying carbon for my
chickens to poop on, and the optimal bedding is higher in carbon and
smaller in size so chickens can scratch through and mix the bedding
regularly. When we run out of autumn leaves, either raked from
the woods or collected by my kind mother during city trash pickup days,
manure piles up, smells turn foul, and flies start to plague our porch
dinners. The conclusion is: we don't have enough high carbon
materials for essential uses right now without diverting some to a
humanure composting system.
Jenkins recommends
hunting down 20 cubic feet of sawmill sawdust per hundred pounds of
human body weight in the household per year, which (rounding up to
include guests and to give us a bit of wiggle room) would equate to 80
cubic feet (600 gallons) for us. That's 120 five gallon buckets
or 7 of our 95
gallon wheelie bins full --- a pretty hefty helping of sawdust for
which
we've yet to find a source. In addition, he recommends having
about ten bales of straw or hay on hand for covering the outdoor
pile. (I'll explain more about the uses of the two types of high
carbon material in a later post.)
 Jenkins does offer sawdust
alternatives, including peat moss, leaf mould, rice hulls, or grass
clippings (although I'm not so sure grass clippings would work well ---
they're pretty high in nitrogen). However, all of those sources
would either have to be bought or would require considerable effort to
gather, making their use equally problematic.
Jenkins does offer sawdust
alternatives, including peat moss, leaf mould, rice hulls, or grass
clippings (although I'm not so sure grass clippings would work well ---
they're pretty high in nitrogen). However, all of those sources
would either have to be bought or would require considerable effort to
gather, making their use equally problematic.
Mark isn't a fan of humanure composting, so he was very relieved when I
told him I couldn't even consider a system until we stock up on enough
high carbon bedding for the chickens plus a year's supply for a
humanure system. Looks like we'll be scouring the countryside in
search of a sawmill....
| This post is part of our The Humanure Handbook lunchtime series.
Read all of the entries: |

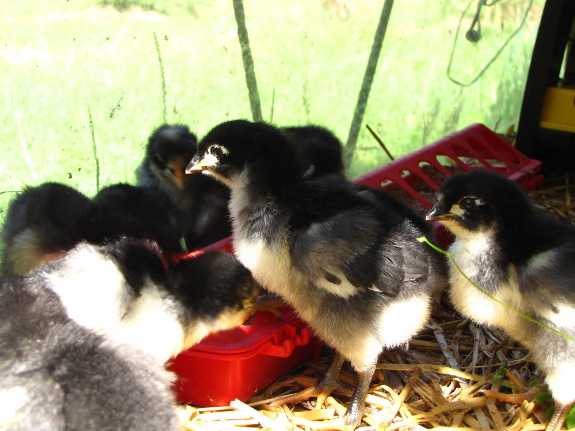
We've got a new batch of
fresh chicks. The last one of 2012.
They seem to have made
themselves at home and look at the new observation window with
curiosity.
Maybe being curious at such a
young age will make them better at foraging for bugs?
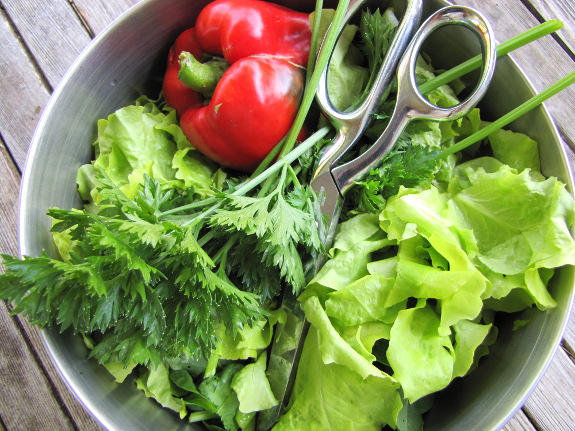
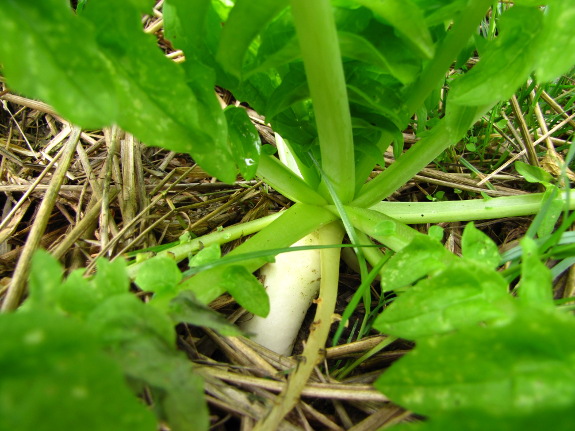
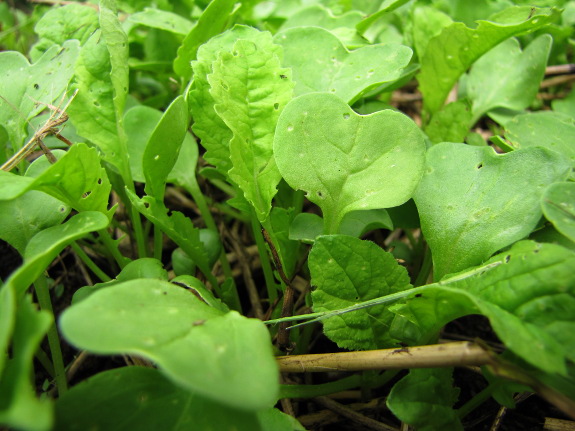
Celery is one of the
herbs/vegetables I used to eat a lot, but found too nitpicky to grow in
my garden. Luckily, I discovered that parsley fills in very well
as a substitute in soups and salads during the spring, fall, and
winter, although in the middle of summer, the herb becomes too woody
and strong to be pleasant raw.
This year, I decided to
try a new celery substitute for those hot summer months --- Par-cel
cutting celery, an heirloom herb dating back to eighteenth century
Netherlands. Cutting celery looks a lot like parsley, with small
stems and lots of leaves, but tastes more like celery. I found
the ribs and leaves very pleasant in tuna salad this year, but would
warn you that if you don't like the slightly bitter taste of celery
leaves, you won't like cutting celery --- there are a lot more leaves
than stalks.
The other downside of
cutting celery is that it didn't seem to want to germinate when
direct-seeded at the frost-free date in my garden. Out of my
small trial packet of 200 seeds, I only ended up with two plants.
If you want to try it out, I suspect that cutting celery might be
better started in flats so you can keep the moisture levels just right
for speedy germination.
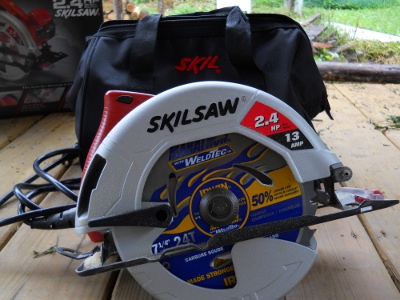 We replaced the
old 12
amp Skil saw with the
next step up this week.
We replaced the
old 12
amp Skil saw with the
next step up this week.
The main lesson I learned is
to keep an eye on the sharpness of the blade and to put a fresh one on
before it's too late.
It came with a nice tote bag
that could double as a purse for the ladies out there with an
industrial twist to their fashion sense. Perfect for date night when
you want to sneak a six pack of beer into the theatre.
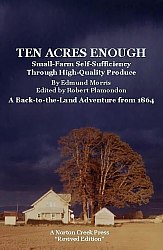 Ten
Acres Enough was
originally published in 1864, but the farming memoir stands the test of
time extremely well. I picked up the Norton Creek Press edition,
which includes Robert Plamondon's occasional footnotes and careful
calculations of what the original dollar amounts would come to in
today's terms. If you don't mind foregoing those small
conveniences, though, you can
read the book online for free.
Ten
Acres Enough was
originally published in 1864, but the farming memoir stands the test of
time extremely well. I picked up the Norton Creek Press edition,
which includes Robert Plamondon's occasional footnotes and careful
calculations of what the original dollar amounts would come to in
today's terms. If you don't mind foregoing those small
conveniences, though, you can
read the book online for free.
Those of you who were
struck by the careful use of organic matter in Farmers
of Forty Centuries
will be intrigued by Edmund Morris's fascination with manure. His
first year on the farm, he spent $248 on manure ($5,700 in today's
dollars), and when he had more money on hand, he was happy to part with
$358 ($8,228 today) for manure during his third year. He chose to
keep his livestock completely confined and cut
clover from his field to feed them as a way of maximizing his homegrown
manure production, and he also collected tree leaves from the wild to
add to the compost pile. All told, perhaps a third of Ten
Acres Enough is
devoted to discussions of organic matter.
 The larger theme, though, is
how to make a simple but dependable living on a ten acre farm. I
doubt that an American farmer could follow Morris's lead today due to
competition with factory farms, but some of his points are just as
valid now as they were a century and a half ago. Morris believed
strongly that debt is the downfall of many a businessman (since he
struggled against the problem for the first many years of his
life). He was also keen on focusing on a quality product (unique
if possible) marketed to a wealthy urban clientele.
The larger theme, though, is
how to make a simple but dependable living on a ten acre farm. I
doubt that an American farmer could follow Morris's lead today due to
competition with factory farms, but some of his points are just as
valid now as they were a century and a half ago. Morris believed
strongly that debt is the downfall of many a businessman (since he
struggled against the problem for the first many years of his
life). He was also keen on focusing on a quality product (unique
if possible) marketed to a wealthy urban clientele.
In the introduction,
Robert Plamondon describes this classic text as follows: "Ten
years after Henry
David Thoreau
learned how to be a poor farmer, Edmund Morris learned how to be a good
one." I totally agree. If you're interested in a glimpse
into American small farm life in the 1850s, this quick and fun read is
the book for you.
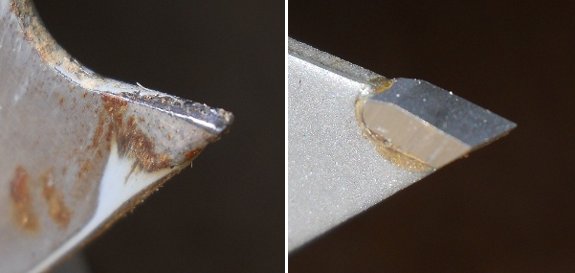
The main symptom of a dull
circular saw blade is the motor bogging down making cuts harder to push
through.
Above is a side by side
comparison of our old 12
amp Skil saw blade and a
brand new carbide tipped blade.
Maybe a circular saw from the
future will have a feature where it scans each tooth and shuts down or
beeps when the dullness is too much for the motor to handle.
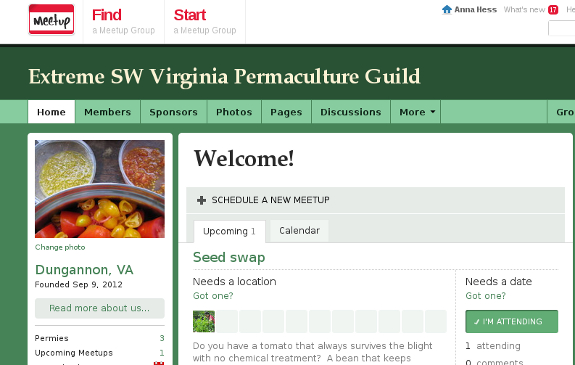
One of our goals in
creating the Walden Effect Annex is to build our community, either by
bringing in likeminded folks from outside the area or by tempting
intriguing locals to come out of the woodwork. While the Annex
remains a work in progress, Mark and I made a start on the second goal
this weekend by creating a Meetup group --- the Extreme
SW Virginia Permaculture Guild.
Do you want to learn more about forest gardening, homegrown edible mushrooms, top bar hives, or vegetable varieties that do well without chemicals? Do you want to talk to someone who's heard of Paul Stamets, Joel Salatin, or Bill Mollison (and maybe bring one of these experts to speak in our region)? Perhaps you'd like to meet up with folks interested in creating a cowshare or intentional community? If so, this group is for you, no matter how little or much experience you've had with permaculture in the past.
We're currently planning a seed swap full of heirloom tomatoes, locally adapted garlic, old-timey beans, and much more, with date and location to be announced on the meetup group soon. Everyone who lives within driving distance of Dungannon, Virginia, is welcome to join --- just follow the link and click the "Join us!" button in the upper right hand corner of your screen. I'm looking forward to meeting you soon.
Our POOP-free chicken waterer is sponsoring the first year
of Meetup fees, so membership is free.
 Before The
Humanure Handbook
hit the stage, most of the systems in practice were cool composting
toilets. In contrast to Jenkins' thermophilic composting system
(which I'll discuss in Thursday's post), these cool composting systems
relied on time to kill off any pathogens in the humanure.
Before The
Humanure Handbook
hit the stage, most of the systems in practice were cool composting
toilets. In contrast to Jenkins' thermophilic composting system
(which I'll discuss in Thursday's post), these cool composting systems
relied on time to kill off any pathogens in the humanure.
In general, leaving a
pile of humanure to compost for two years is a sufficient safety margin
even if the pile doesn't heat up at all, although roundworm eggs can
survive for up to ten years under these conditions. If you apply
composted humanure under the mulch around ornamentals or fruit trees,
though, this issue may not matter.
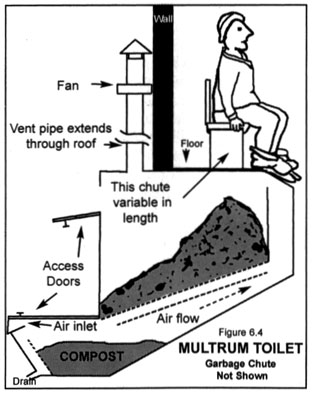
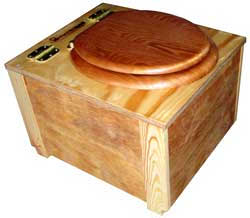
The Clivus Multrum is
probably the best known of the cool composting systems, and most of the
other designs work similarly. Jenkins recommends designing a cool
composting toilet with at least two chambers so you can close off one
after filling and let the humanure age for a couple of years before
removing the compost. When starting a new chamber, fill it about  halfway with an
absorbent, high carbon material, then keep more of the
sawdust on hand to drop down the hole after each use. A
chimney-pipe-type ventilation system will pull any smells up above
nose-level, and leachate can be collected in a five gallon bucket of
sawdust that is tossed back down the hole at intervals.
halfway with an
absorbent, high carbon material, then keep more of the
sawdust on hand to drop down the hole after each use. A
chimney-pipe-type ventilation system will pull any smells up above
nose-level, and leachate can be collected in a five gallon bucket of
sawdust that is tossed back down the hole at intervals.
Despite the problem with
using humanure compost from this type of toilet on food crops, it does
have a major advantage --- simplicity. Unlike Jenkins' system,
there's little regular maintenance required beyond finding sawdust, and
the compost is high quality after the extended aging period.
I'd be curious to hear
from anyone who's using a cool composting system like this. What
design did you use (or what brand did you buy)? How has it worked
out for you? Do you have additional pros and cons to add to this
description?
| This post is part of our The Humanure Handbook lunchtime series.
Read all of the entries: |

The framing should be
finished up tomorrow on the mobile
home roof project.
Insulation and metal after
that will make the winter warm and drip free.
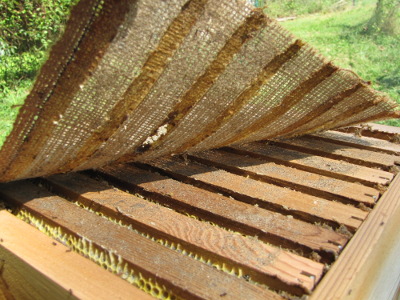 When I delved into the Warre hive for the first time last
week, I learned why I sometimes see Warre beekeepers with a wire tool a
bit like a cheese-slicer. The boxes aren't as keen on coming
apart as Lanstroths are, so I accidentally ripped part of a few combs
in half when they stuck to the top bars of the hive body below. I
guess I'll have to rig some kind of wax-slicer for the next time I open
the hive...a year from now.
When I delved into the Warre hive for the first time last
week, I learned why I sometimes see Warre beekeepers with a wire tool a
bit like a cheese-slicer. The boxes aren't as keen on coming
apart as Lanstroths are, so I accidentally ripped part of a few combs
in half when they stuck to the top bars of the hive body below. I
guess I'll have to rig some kind of wax-slicer for the next time I open
the hive...a year from now.
In the meantime, we'll
be pouring
sugar water down the bees' gullets to make sure they double
their winter
stores in the next
month. Except for only having only one box full of 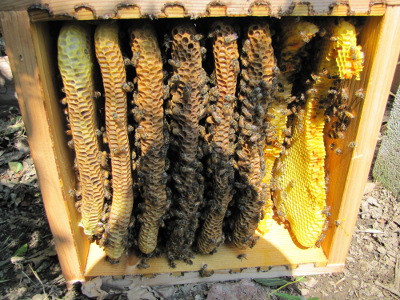 honey,
the hive looked quite healthy, with a lot of new workers about to hatch
out and get to work collecting ragweed pollen and goldenrod nectar.
honey,
the hive looked quite healthy, with a lot of new workers about to hatch
out and get to work collecting ragweed pollen and goldenrod nectar.
I also noticed that my ant
problem had been
taken care of with a biological control --- a skink moved into the
quilt. I love how the neglect method solves so many farm pest
problems.
We bought all of
Bradley's father's honey this summer since we want our bees to keep
everything they produce during their first year. I'm debating
splitting the hive next year and spending another year without
homegrown honey, or trying to find a local nuc next spring to increase
our apiary while allowing this first hive to feed us. Even though
the decision seems far in the future, we learned the hard way that
tracking down local bees should be started early, so we'll probably
choose between our options soon.
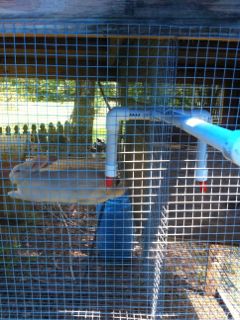 When keeping any animal, one of
the necessities is, of course, providing food and water. This post will
cover how I am providing water for my rabbits.
When keeping any animal, one of
the necessities is, of course, providing food and water. This post will
cover how I am providing water for my rabbits.
The result of my efforts is a
bit of an experiment involving some creativity in providing a constant
source of water for my rabbits, while not requiring that I tend to
their water needs manually every day. We have more problems here with
heat of the summer than freezing in the winter, so freezing isn't much
of a concern. Heat issues are very much a concern though, so water is
important.
We started with the
traditional rabbit water bottles until we could build the system that we
wanted. We also used one rabbit as a test subject to see if we could get
him to drink from one of Mark and Anna's chicken water
nipples. He took to this
method of drinking pretty well, so we then decided to expand on the
test. All three of the rabbits we have at present will now be drinking
from this watering system. And...it's expandable.
I started out with a handful
of supplies and some tools seen below:

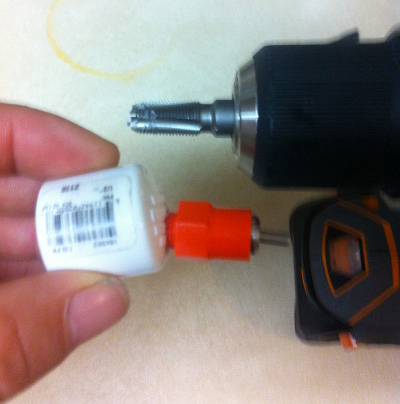 I used a toilet
tank fill valve assembly to autofill a bucket with water. I used part of an old broken
fill valve assembly to make the outlet in the bottom of the bucket.
From there, I used PVC pipe to go into the rabbit hutch.
I used a toilet
tank fill valve assembly to autofill a bucket with water. I used part of an old broken
fill valve assembly to make the outlet in the bottom of the bucket.
From there, I used PVC pipe to go into the rabbit hutch.
The chicken waterers seem to
be 1/8 male tapered pipe threads, so I used a drill bit and tap to
thread some PVC end caps. The waterer nipples are then screwed into
these, and it seems to work pretty well. I drilled and tapped the end
caps at a bit of an angle to make it easier for the rabbits to drink
from them. I'd say it's about a 20
degree angle...and they seem to still seal OK.
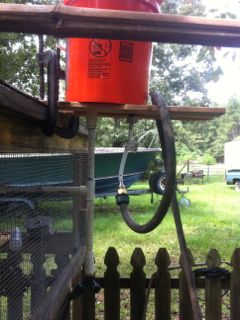 The bucket is suspended above the
hutch to give head pressure, and a benefit during dry times is
that we have a drip line that comes off the bucket to water some nearby
plants. This also keeps the
water in the bucket a bit fresher for the rabbits. There's a Y adapter
and shut off so we can drain the bucket and/or shut off the drip line.
The bucket is suspended above the
hutch to give head pressure, and a benefit during dry times is
that we have a drip line that comes off the bucket to water some nearby
plants. This also keeps the
water in the bucket a bit fresher for the rabbits. There's a Y adapter
and shut off so we can drain the bucket and/or shut off the drip line.
So far, the rabbits seem to
take to it pretty well. And it makes keeping them well watered almost
no effort at all.
Dawn managed to catch this footage of one of our rabbits drinking a few days after the new system was installed.
Shannon and Dawn will be sharing their experiences with raising meat rabbits on Tuesday afternoons. They homestead on three acres in Louisiana when time off from life and working as a sys admin permits.

It was a great day for
sliding metal up a ladder.
A bit more sliding and we'll
have a complete roof sometime tomorrow.
I was shocked to wake up
Tuesday morning to chilly weather in the mid 40s. While I'm never
really ready to see summer go, we've reached our freezer goals (20
gallons, mostly soup) and have changed over to drying
tomatoes for winter
treats.
 The fall garden is starting
to produce, and I've been zipping back through with another round of
weeding and mulching before the ground becomes too cold to enjoy
sinking my hands into. Winter weeds have snuck into small spots
of bare ground where I pulled the mulch back to plant seedlings, and I
want to stay ahead of them.
The fall garden is starting
to produce, and I've been zipping back through with another round of
weeding and mulching before the ground becomes too cold to enjoy
sinking my hands into. Winter weeds have snuck into small spots
of bare ground where I pulled the mulch back to plant seedlings, and I
want to stay ahead of them.
Now's also a good time
to kill mulch "lawn" areas that I want to fill with perennials this
winter or vegetables next spring. Mark's done a great job of
reclaiming some brambly patches with persistant mowing this summer, so
a simple kill mulch will be enough to turn those areas into arable
ground.
Despite planning ahead
for fall, winter, and even next spring, I'm far from ready for a
frost. Our average first frost date is October 10, but Bradley
predicts freezing weather to come before the end of September.
What do you think?
In the third selection
from Radical
Homemakers, Shannon
Hayes left the realm of theory and began to explore the similarities
she'd noticed among the radical homemakers interviewed. She
explained that radical homemakers had redefined poverty and wealth,
finding joy in free time, a strong marriage (if applicable), happy
friendships, a cohesive family, and good food rather than striving to
achieve the highest earning potential.
The chapter sought to
dispel the myth that the following facets of middle class life are
unachievable in a single- (or no-) wage-earner household:
- Transportation
- Housing
- Health care
- Child care
- Education
- Retirement
Many of the radical
homemakers' methods of achieving these goals on the cheap were
inspiring --- focusing on good food, low stress, and community bonds to
ensure your health, for example. Other methods were obvious ---
there's no need to pay for child care if at least one parent is at home
full time.
 But I was struck by how
middle class all of the assumptions (and participants) were. Many
of the radical homemakers chose to homeschool and not jump through the
expensive and time-consuming hoops required to get their kids into the
right preschool so they could get into the right private school and
then into the right college. And yet, 27% of those parents had
gone to grad or med school and 30% had a bachelor's degree (usually
listed as being from a prestigious private school), while only 3% and
6% had chosen the traditionally lower class options of the military or
a community college/technical school. (Actually, I suspect those
higher education percentages are underestimates --- anyone whose bio
didn't explicitly mention their education went into my "potentially
high school" category, but many of those people may simply have not
self-identified based on their school.) Those statistics tell me
that the majority of the participants in the study were culturally
middle class people who had access to options not available to the
average American.
But I was struck by how
middle class all of the assumptions (and participants) were. Many
of the radical homemakers chose to homeschool and not jump through the
expensive and time-consuming hoops required to get their kids into the
right preschool so they could get into the right private school and
then into the right college. And yet, 27% of those parents had
gone to grad or med school and 30% had a bachelor's degree (usually
listed as being from a prestigious private school), while only 3% and
6% had chosen the traditionally lower class options of the military or
a community college/technical school. (Actually, I suspect those
higher education percentages are underestimates --- anyone whose bio
didn't explicitly mention their education went into my "potentially
high school" category, but many of those people may simply have not
self-identified based on their school.) Those statistics tell me
that the majority of the participants in the study were culturally
middle class people who had access to options not available to the
average American.
 I could pick apart other
middle class assumptions (especially in the housing and income levels
of the radical homemakers), but I wanted to throw this week's thought
question out to my readers before you all roll your eyes and move
on. A couple of you commented on last
week's post to say
that when you're truly poor, you can't help working long hours to
support your family. With that in mind, I'm beginning to wonder
whether Radical
Homemakers really
represents a template that we can all use to live well on less, or
whether the book should be subtitled "how not to go quite as crazy as a
middle class American." We've
discussed this topic in relation to Walden previously, but
I thought it was worth rehashing with a more modern perspective.
What do you think?
I could pick apart other
middle class assumptions (especially in the housing and income levels
of the radical homemakers), but I wanted to throw this week's thought
question out to my readers before you all roll your eyes and move
on. A couple of you commented on last
week's post to say
that when you're truly poor, you can't help working long hours to
support your family. With that in mind, I'm beginning to wonder
whether Radical
Homemakers really
represents a template that we can all use to live well on less, or
whether the book should be subtitled "how not to go quite as crazy as a
middle class American." We've
discussed this topic in relation to Walden previously, but
I thought it was worth rehashing with a more modern perspective.
What do you think?
If you're still reading
along, we'll finish up the book by discussing chapters six and seven
(and the profiles if you feel so inclined) next Wednesday. Then
we'll take a week off before diving into a book that I've been itching
to savor for months --- The
Holistic Orchard by
Michael Phillips. I'm not sure how this text will do as a book
club selection since it's more factual and less philosophical than the other ones we've been
discussing, but I have a feeling from the sections I've dipped into
that Phillips' new book will change the way we all look at fruit trees
and bushes, and I know it's one of the few books that will make the cut
and stay on my permanent bookshelf. So put in that interlibrary
loan request now and we'll start discussing chapter 1 of The
Holistic Orchard
on October 3.
If
you want to be the first one on your block to see Walden Effect
readers' homesteading innovations in print, preorder your copy of The
Weekend Homesteader today.
 Mark
likes apples the way I like peaches --- he figures even a substandard
apple is better than nothing. While I wait for the Winesaps to
show up at the fruit stand, he works his way through supermarket
apples, trying variety after variety in hopes that one will finally
make the cut.
Mark
likes apples the way I like peaches --- he figures even a substandard
apple is better than nothing. While I wait for the Winesaps to
show up at the fruit stand, he works his way through supermarket
apples, trying variety after variety in hopes that one will finally
make the cut.
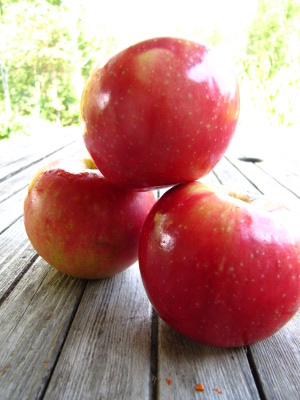
And, to my astonishment,
one did. The Zestar apples Mark brought home from the grocery
store last week taste like homegrown, unpasteurized apple cider, but
with the crisp crunch Mark craves. Sweet and sour at the same
time, the variety even won me over!
But was it the apple or
the tree? Always the sleuth, I was struck by the Zestar's
sticker, 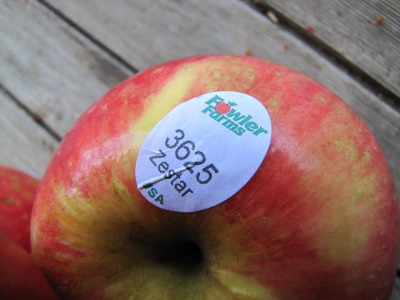 which
wasn't as slick and professional looking as usual. It turns out
our Zestars came from a family farm in New York state that's been in operation for
150 years. There, apples are grown using a method that I'd never
heard of before --- the super spindle system.
which
wasn't as slick and professional looking as usual. It turns out
our Zestars came from a family farm in New York state that's been in operation for
150 years. There, apples are grown using a method that I'd never
heard of before --- the super spindle system.
This system (and its
relatives, the tall spindle, slender spindle, and vertical axis) uses
dwarf trees and crams them so close together they're mere vertical
sticks. In addition to bearing quickly (you can expect 15 to 20
apples the second year), trees planted in the super spindle 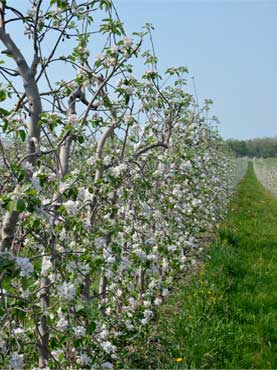 system
don't shade any part of the tree, so fruits get full sunlight that
leads to optimal flavor.
system
don't shade any part of the tree, so fruits get full sunlight that
leads to optimal flavor.
Like any orchard system,
super spindle has its downfalls --- in this case, fiddliness. I
haven't had any luck with dwarf fruit trees in the past, which I
suspect is because I expected them to live in poor soil areas without
irrigation. When you plant trees two feet apart in the super
spindle system, you have to treat your orchard like a high value
vegetable garden, giving it constant care.
But those Zestar apples
tasted so good, and I have a spot just the right size to try a row of
super spindle apple trees. So I think I'll give it a shot ---
stay tuned for more data on the system as it progresses!
 In contrast to the more
widely used cool
humanure composting systems, the author of The
Humanure Handbook
recommends thermophilic composting. His method is extremely safe
since all pathogens die when compost achieves a temperature of 143.6
degrees for an hour, 122 degrees for a day, 114.8 degrees for a week,
or 109.4 degrees for a month. As a result, Jenkins has used
homemade humanure compost in his vegetable garden with impunity for
decades.
In contrast to the more
widely used cool
humanure composting systems, the author of The
Humanure Handbook
recommends thermophilic composting. His method is extremely safe
since all pathogens die when compost achieves a temperature of 143.6
degrees for an hour, 122 degrees for a day, 114.8 degrees for a week,
or 109.4 degrees for a month. As a result, Jenkins has used
homemade humanure compost in his vegetable garden with impunity for
decades.
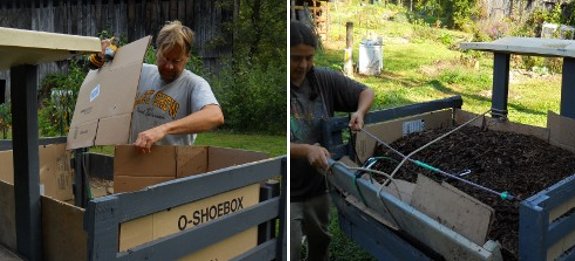
Jenkins' system uses the
inside toilet as a mere collection device. He fills a five gallon
bucket partway with sawdust, then adds another layer of sawdust after
each use. Once the bucket is full, he carries it out to his
Humanure Hacienda (a two-bin outdoor compost pile), rakes back the
covering material in the center of the pile, deposits his load, and
covers everything back up with straw, hay, weeds, leaves, or grass
clippings. After rinsing out the bucket, he pours that water on
the compost pile as well, and all of his food scraps are similarly
deposited.
 The Jenkins family of four
fills one bin of the Humanure Hacienda each year. On the summer
solstice, Jenkins shuts off the old bin and lays down about eighteen
inches of pile-covering materials in the other bin. By the time
the second bin is full, the humanure in the first bin has thoroughly
composted and is ready to apply to the garden, leaving the first bin
empty and ready to refill.
The Jenkins family of four
fills one bin of the Humanure Hacienda each year. On the summer
solstice, Jenkins shuts off the old bin and lays down about eighteen
inches of pile-covering materials in the other bin. By the time
the second bin is full, the humanure in the first bin has thoroughly
composted and is ready to apply to the garden, leaving the first bin
empty and ready to refill.
While Jenkins' system is
definitely tried and true, I don't really see the point of carrying
humanure around in buckets. After living for a few years without
a toilet in the house, using the bathroom indoors has started to feel
unsanitary (and also boring --- no wildlife viewing opportunities), so
I'd be more inclined to move the whole humanure system outdoors.
Tomorrow's post will end our lunchtime series with a couple of
iterations of Jenkins' design that keep poop-handling to a minimum
while retaining the benefits of thermophilic composting.
| This post is part of our The Humanure Handbook lunchtime series.
Read all of the entries: |
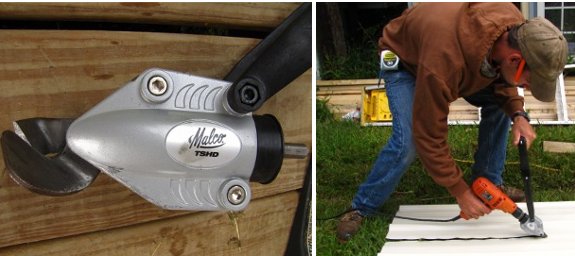
Anna and I were both
intrigued with Bradley's Malco TSHD Turboshear today.
The cost is around 80 dollars
and it hooks up to any powered drill.
It's the easy way to cut
metal roofing panels without cramping your hand.

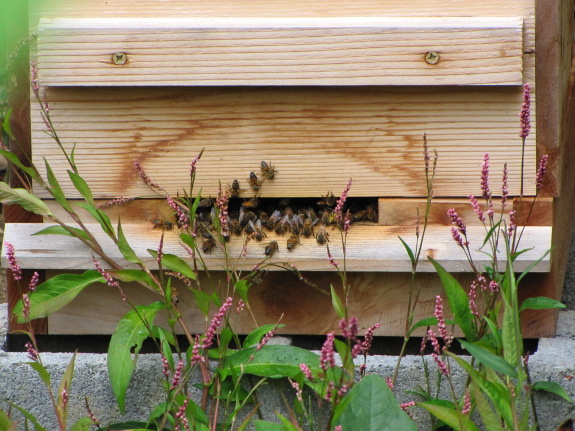
Why were my New
England asters ignored while my mother's neighborhood bees flocked to
her flowers? I
had to look a little closer to solve this two year old puzzle.
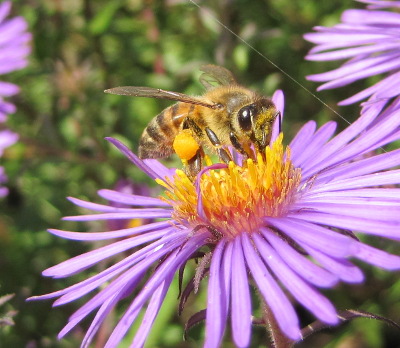 Notice how both girls I
photographed visiting our New England aster this week have full pollen
sacs (the bright yellow lumps on their hind legs)? All of the
bees hunting through our big aster bush were similarly encumbered,
which suggests that the plant species is a great source of pollen, but
not of nectar.
Notice how both girls I
photographed visiting our New England aster this week have full pollen
sacs (the bright yellow lumps on their hind legs)? All of the
bees hunting through our big aster bush were similarly encumbered,
which suggests that the plant species is a great source of pollen, but
not of nectar.
Since ragweed
produces even more pollen, I'm not surprised to find that our bees gave
the New England asters a pass until the better pollen source
faded. That's the same reason they're ignoring my sugar water
feeder and heading straight for the yellow flowers (wingstem, woodland
sunflowers, stick-tights, etc.) in search of nectar.
The upshot is --- if you
need late summer pollen, especially in polished city areas, New England
asters are a good choice. But don't bother if you live in a less
manicured area with lots of wild pollen sources.
 This week, I've written about
cool
composting toilets
like the Clivus Multrum (easy to use but not as safe) and Joseph
Jenkins' thermophilic composting system (more time-consuming but
producing vegetable-garden-safe compost). Today, I'd like to
mention two systems that seem to combine the best of both worlds.
This week, I've written about
cool
composting toilets
like the Clivus Multrum (easy to use but not as safe) and Joseph
Jenkins' thermophilic composting system (more time-consuming but
producing vegetable-garden-safe compost). Today, I'd like to
mention two systems that seem to combine the best of both worlds.
The first system isn't
one I've actually seen online, but it seems to be an obvious upgrade to
Jenkins' Humanure Hacienda for those of us who don't mind cold
butts. Why not simply make a platform above each composting bin
and deposit your waste directly? Presumably, the slatted bin
sides and the addition of straw or hay and food scraps would still
prompt the pile to heat up, and there'd be no need to handle poop.
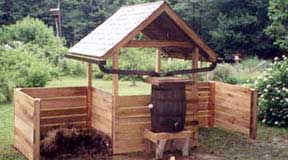
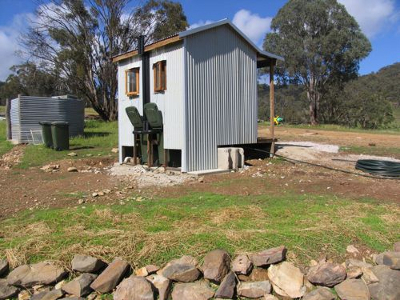 A design that's already been
tried out is Milkwood's
rollie bin composting toilet. This Australian farm
brings in a lot of students and interns, so the proprietors didn't feel
comfortable handling strangers' waste. Instead, they built a
raised outhouse that dropped humanure into a rolling trashcan.
When the first can filled up, it could simply be rolled out of the way
to compost in the sun for a year while a new can took its place.
A design that's already been
tried out is Milkwood's
rollie bin composting toilet. This Australian farm
brings in a lot of students and interns, so the proprietors didn't feel
comfortable handling strangers' waste. Instead, they built a
raised outhouse that dropped humanure into a rolling trashcan.
When the first can filled up, it could simply be rolled out of the way
to compost in the sun for a year while a new can took its place.
What kind of interesting
composting toilet have you come up with? I'm very curious to hear
from anyone who's designed a thermophilic humanure composting system
that's not based on Jenkins' design.
| This post is part of our The Humanure Handbook lunchtime series.
Read all of the entries: |

Finished up the mobile
home roof project.
The next step is to install
some gutters and figure out where to divert the water to.
 I enjoyed reading the varied
responses to my
post introducing high density apple orchard techniques, so I thought you'd like to
follow along as I lay out my experiment. Here are the first few
decisions I had to make:
I enjoyed reading the varied
responses to my
post introducing high density apple orchard techniques, so I thought you'd like to
follow along as I lay out my experiment. Here are the first few
decisions I had to make:
Do I
want to use an industrial-type, apple-planting system? Unless you're willing
to commit time every month to playing with your trees, you might be
better off trying something else. Other options for diversifying
your backyard orchard exist, such as espaliers and fruit
cocktail trees, and
if you just want lots of apples with little work, a semi-standard tree
is the way to go. But if your goal is to grow lots of apples in a
small space, and you are willing to put in the effort to win those
rewards, one of these industrially tested systems may work well for you.
Which
kind of high density system should I choose? There are perhaps a
dozen different systems that let you cram lots of apples into a small
space, and each one is managed a little differently. The systems
that put the trees closest together (such as the super spindle) cost
more per acre to begin with since you have to buy a lot more trees and
trellising, but many industry analysts suggest super spindle orchards
also bring in the most profit by the eighth year because apple yields
are higher. Those of us growing trees in the backyard are
probably less concerned about economics and more concerned with
cramming as many varieties as possible into a small space without
committing to an excessive amount of maintenance. I eventually
settled on the tall spindle system as best for most backyard growers
since it combines nearly as high yields as the super spindle with less
fidgety maintenance. (I'll make a post on maintenance later ---
this one's just about designing the planting.)
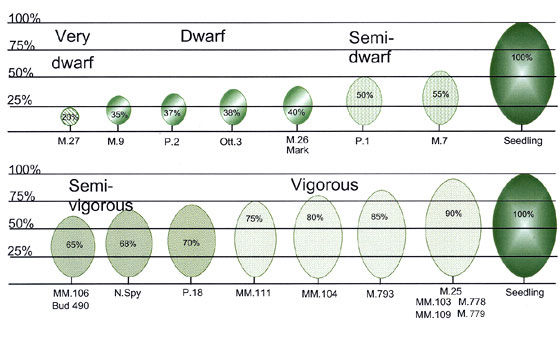
What
kind of rootstock should I choose? Experts suggest G.41,
(aka Geneva 41), G.11, G.935, M.9 (aka Malling 9), M.9T337, or Bud.9
(aka Budagovsky 9). These are all extremely dwarfing rootstocks,
so if you're planting a less vigorous apple variety, the next step up
(like M.26) might be better. Keep in mind that choosing one of
these ultra-dwarfing rootstocks means it's going to be mandatory for
you to keep your trees completely weeded, mulched, and watered at all
times, so if you're going to be neglectful, you might want to follow one
of our readers' suggestion and plant a semi-standard
tree, then use pruning and training to keep the apple's size
down. I'm going to include a few semi-standard trees in my
planting to allow me to compare and contrast with the dwarfs, but I
chose Bud.9 for most of my rootstocks.
How
close together should I plant the trees? Depending on which
expert you talk to (and which high density system you're using), trees
should be spaced two to nine feet apart, in rows that are ten to
fourteen feet separate. This
calculator is a
great way to get an 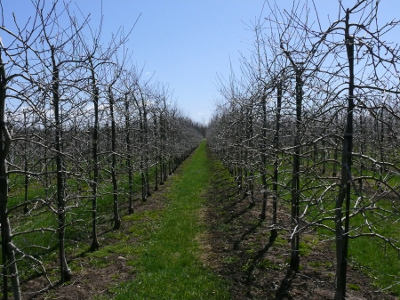 idea of proper spacing based
on your specific conditions --- I think that three feet is going to be
about the right distance between trees in each row in my garden.
Meanwhile, the recommended between-row spacing should be taken with a
grain of salt if you're squishing these dwarf apples into your home
garden since the distance is really meant to prevent shading of the
next row over. So I felt quite comfortable leaving a mere four
foot aisle between my new tall spindle apple bed and a bed used for
perennial propagation since new cuttings prefer moderate shade.
idea of proper spacing based
on your specific conditions --- I think that three feet is going to be
about the right distance between trees in each row in my garden.
Meanwhile, the recommended between-row spacing should be taken with a
grain of salt if you're squishing these dwarf apples into your home
garden since the distance is really meant to prevent shading of the
next row over. So I felt quite comfortable leaving a mere four
foot aisle between my new tall spindle apple bed and a bed used for
perennial propagation since new cuttings prefer moderate shade.
How
do I prepare for my trees? I laid down a kill
mulch of cardboard covered by well-rotted wood chips to prepare for
late fall planting of my dwarf apple trees. The mulched row will
be about three feet wide, then we'll mow the grassy aisles just like in
our vegetable garden. The one big difference between starting a
high-density apple row and a vegetable row is that I'm going to have to
erect some kind of support for the dwarf trees before they arrive ---
either a ten foot tall stake for each one or a trellis --- and will lay
out an irrigation system now so watering doesn't get away from me in
the spring.
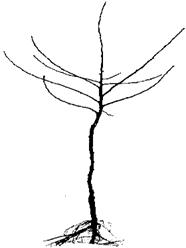 How many trees should I plant? Experts suggest you
may get 15 to 20 apples per tree the second year, 50 to 60 the third
year, 100 apples the fourth year, and a bushel the fifth year if you
start with well-feathered trees. ("Well-feathered" refers to
whether the tree has small branches --- experts on high-density apple
plantings recommend selecting a tree at least 5/8 inch in diameter and
5 feet tall with 10 to 15 feathers less than a foot long, all above 30
inches off the ground.) So take a look at how many apples your
family consumes, how well the varieties you've selected keep, and how
ripening times are scattered across the year when deciding how many
trees to order. (Don't forget to factor in other
fruits ripening up on your homestead too!)
How many trees should I plant? Experts suggest you
may get 15 to 20 apples per tree the second year, 50 to 60 the third
year, 100 apples the fourth year, and a bushel the fifth year if you
start with well-feathered trees. ("Well-feathered" refers to
whether the tree has small branches --- experts on high-density apple
plantings recommend selecting a tree at least 5/8 inch in diameter and
5 feet tall with 10 to 15 feathers less than a foot long, all above 30
inches off the ground.) So take a look at how many apples your
family consumes, how well the varieties you've selected keep, and how
ripening times are scattered across the year when deciding how many
trees to order. (Don't forget to factor in other
fruits ripening up on your homestead too!)
The only other tidbit I
considered when planning my experimental tall spindle orchard was
comparisons to normal apple trees. I'm curious to discover
whether the ultra-dwarfing rootstocks will be able to find enough
micronutrients to keep apple flavor at its peak, so I'm including a
couple of varieties in my planting that I already have growing as
semi-standard trees in the forest garden. Once they're all
bearing, we'll conduct some side-by-side taste tests.
But that's a long
experiment in the future. Stay tuned for another post about
training and pruning, an essential component of a high density apple
planting, coming up soon.
What could be more fun than aged wood chips and cardboard?
 Getting ready for cold
weather is a two-part project with our bees. The first step is to
make
sure they have enough honey, but equally important is
ensuring the bees are healthy enough to make it through the
winter. That means counting
varroa mites to see
if these blood-suckers will weaken our colony unduly.
Getting ready for cold
weather is a two-part project with our bees. The first step is to
make
sure they have enough honey, but equally important is
ensuring the bees are healthy enough to make it through the
winter. That means counting
varroa mites to see
if these blood-suckers will weaken our colony unduly.
I wasn't terribly
concerned about varroa mites this year for a variety of reasons.
Most importantly, we started with a package this spring, which (like a
hive split)
naturally causes a break in varroa mite reproduction and lowers
populations of this pest drastically. We also paid extra to get
bees from a source that doesn't treat chemically, meaning that the colonies
which can't handle mites have been bred out.
So I wasn't surprised to
find only 22 varroa mites on my stickyboard after a three day
test. There were so few mites on the board that I counted every
one rather than measuring out sample regions!
If your mite counts
don't turn up as stellar as ours, you should first estimate
how many mites you had fall per thousand bees in the hive --- it's not as big a deal
to see a lot of mites if you have a lot of bees. Next step is to use
these organic varroa mite solutions --- we've used options 1, 2,
3, 4, and 9 so far.
Now I just need to sit
back and watch the bees sock away honey, then leave them alone until
spring.
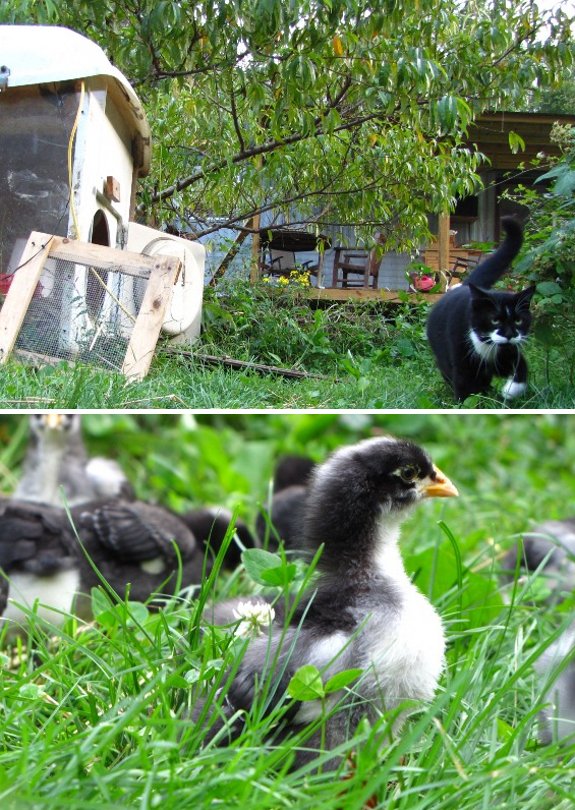
When we first started putting
our new chicks outside we put up a small fence to keep them from
wandering too far.
Turns out a few really brave
chicks would find a way through the fence and get upset when they
realized getting back in is not as easy or fun as escaping.
We took away the fence and
noticed they didn't go more than a few feet from the brooder. It feels
like they're getting lessons in foraging for food sooner than our
previous attempts at hatching chicks but that's hard to prove.
Our cats Huckleberry and Strider deserve a medal for figuring out
the chicks are connected to us and are not available for a quick snack.

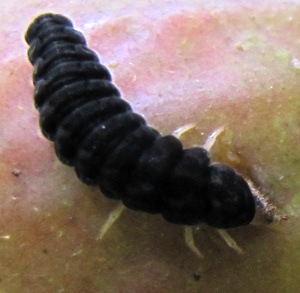 You can always tell where the
most luscious fruits are in my garden because these velvety black,
beetle larva soon show up to drink the juices. The scientific
community claims that soldier beetle larvae suck the liquids out of
other insects' eggs and young, but the fuzzy baby beetles clearly like
sugar water too.
You can always tell where the
most luscious fruits are in my garden because these velvety black,
beetle larva soon show up to drink the juices. The scientific
community claims that soldier beetle larvae suck the liquids out of
other insects' eggs and young, but the fuzzy baby beetles clearly like
sugar water too.
In my early days on the
farm, I'd be tempted to dub these guys "bad bugs". But the truth is
that battling insects is a thankless project --- it's much more fun to
tweak ecosystems into balance so no one is really bad.
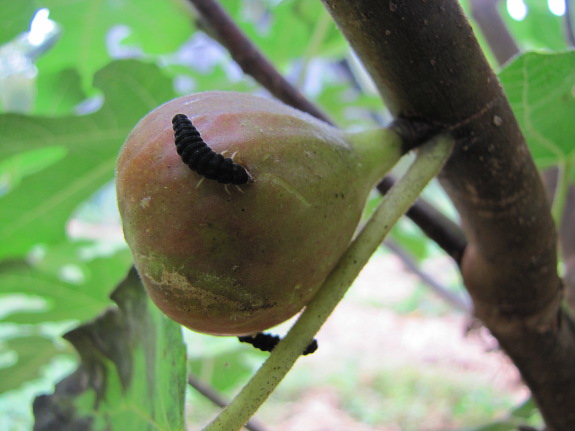
In fact, soldier beetles
are on most gardeners' list of good bugs since they'll chow down on
cucumber beetles, caterpillars, grasshopper eggs, aphids, and other
troublesome denizens of the garden. And the beetle larvae really
don't hit my raspberries unless I forget to pick for a day or so, at
which point the fruits are winey anyway. Plus, soldier beetle
larvae are a very clear indicator of exactly when
to pick a ripe fig!
Yep, after a week or two
off, the next round of figs are starting to plump up and droop
down. Good thing too since I've been literally dreaming about
roast figs --- they're that good.

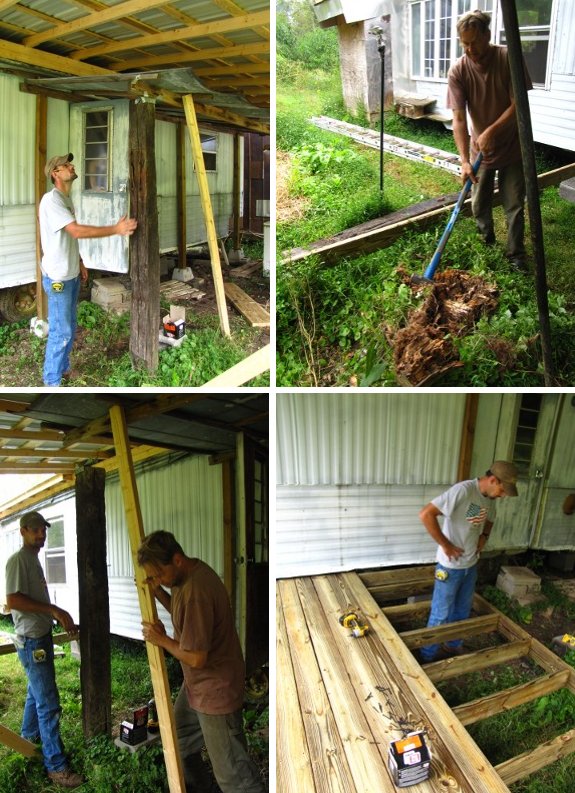
Today turned out to be a race
to see how much we could get done before an advancing storm reached us.
The rain started just as we
finished hauling in the new deck lumber.
It was a good test for the new
roof that seemed to pass
with flying colors while allowing us to work under its dry protection.
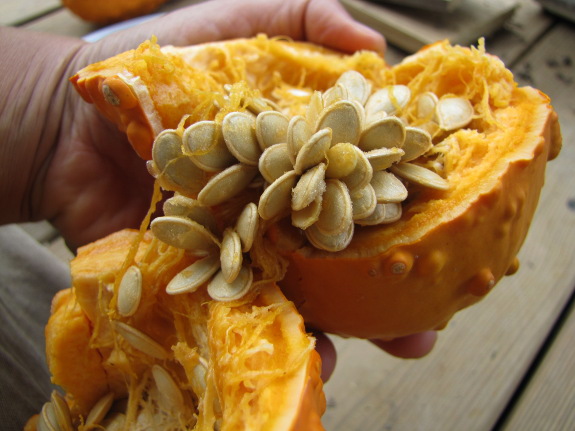
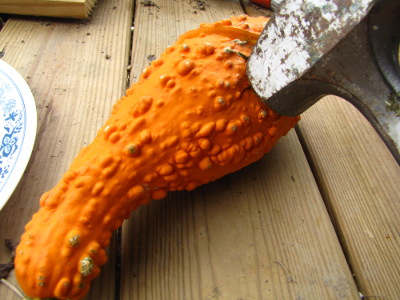 Our first meetup get-together
(a
seed swap) is coming
up on Saturday, which reminded me to process a lot of seeds that have
been sitting around on the porch for the last week or month (or
longer). It took the minisledge to bust open the summer
squash, but the output looks much better than last
year's seeds (which
dried down into slivers clearly too immature to sprout).
Our first meetup get-together
(a
seed swap) is coming
up on Saturday, which reminded me to process a lot of seeds that have
been sitting around on the porch for the last week or month (or
longer). It took the minisledge to bust open the summer
squash, but the output looks much better than last
year's seeds (which
dried down into slivers clearly too immature to sprout).
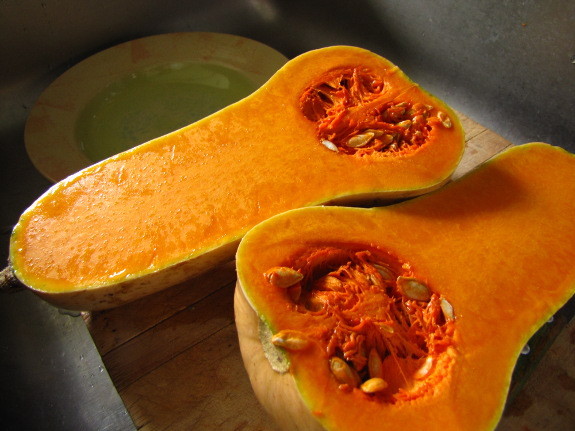
Meanwhile, I chose four
of the best-shaped butternuts for seed-saving --- fruits with a thick
abdomen are preferred to those with big butts. Then I shelled the
rest of the mung
beans and packed away the watermelon, green bean, and Swiss chard
seeds (all of which had been drying much longer than they needed to).
Even if only the
hand-invited few who have already RSVPed show up for the seed swap, it
will have been worth it to get those seeds off the porch and into the
seed box. Next up in easily-put-off fall chores --- harvesting
the rest of the butternuts and moving sweet potatoes off the drying
racks. I wonder what kind of event would tempt me to do that?
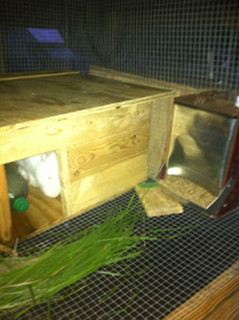 In addition to providing
water for one's rabbits,
providing a reliable source of food is of course a necessity.
In addition to providing
water for one's rabbits,
providing a reliable source of food is of course a necessity.
We started with one rabbit
in the beginning and just used a dish to provide food for the first
couple of weeks. Since the rabbit was pretty young when we got
him, this worked OK until we could come up with a better
solution. However, I wouldn't recommend it for long term
feeding. When food is in a dish for a rabbit, there tends to be a
lot of waste due to spillage and spoiling. For whatever reason
our young buck decided that his food dish would also make a suitable
litter box. This was obviously not a sustainable situation.
Most feed stores provide
ready made rabbit feeders for anywhere from $5 on up. Most have a
screen lined bottom which is supposedly there to allow some of the dust
from the feed to fall through. Dawn has read in some library
books that this helps prevent respiratory issues with rabbits.
I'll believe the experts' advice for now, but I've found that the
screened bottom can also contribute to spoilage of food due to allowing
moisture in from the bottom. We just dealt with Hurricane Isaac
here and the one rabbit that has a store bought feeder had much of his
food spoiled from moisture being blown up through the screen. Our
other two rabbits have feeders that I've made out of materials I had
around the house.
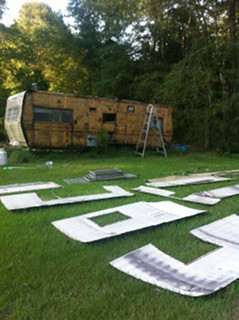 When Dawn brought home two new
rabbits donated to our experiment by our new neighbors, I quickly
needed to come up with some feeders for them. I already had some
ideas on building feeders inspired by Richard Proenneke and his mastery of making
complex items out of used fuel cans in the Alaskan wild. Richard
(Dick) Proenneke retired to the Alaskan wilderness in the 1970s when he
was in his 50s and has been an inspiration of mine. He built a
cabin with simple hand tools and very few materials which were not
natural and native to the area. (He lamented in his journal that
he used some plastic sheeting under the moss roof of his cabin.)
He built any number of useful items from the spent fuel cans that were
ubiquitous in the Alaskan wilderness as a result of their use by the
bush pilots. If you've seen the Coleman fuel cans in Walmart (and
in the first picture in this post), these are very similar to but a bit
smaller than what he used to make pots, pans, ovens, storage containers
and many other items.
When Dawn brought home two new
rabbits donated to our experiment by our new neighbors, I quickly
needed to come up with some feeders for them. I already had some
ideas on building feeders inspired by Richard Proenneke and his mastery of making
complex items out of used fuel cans in the Alaskan wild. Richard
(Dick) Proenneke retired to the Alaskan wilderness in the 1970s when he
was in his 50s and has been an inspiration of mine. He built a
cabin with simple hand tools and very few materials which were not
natural and native to the area. (He lamented in his journal that
he used some plastic sheeting under the moss roof of his cabin.)
He built any number of useful items from the spent fuel cans that were
ubiquitous in the Alaskan wilderness as a result of their use by the
bush pilots. If you've seen the Coleman fuel cans in Walmart (and
in the first picture in this post), these are very similar to but a bit
smaller than what he used to make pots, pans, ovens, storage containers
and many other items.
I usually have a few cans
around due to using a Coleman stove at my uncle's cabin in
Mississippi. I started out with a well cleaned fuel can for the
first of two homemade feeders. With a sturdy knife, I cut across
the wide part of the can about 4 inches up from the bottom, and then
down to the bottom from the corners. A couple of pieces of scrap
tin and a rivet gun, and I had what you see in the picture above.
On the inside is a piece of tin that is not visible which directs the
food to the trough, but also more importantly doesn't allow feed to
collect in the corners and spoil or rot. I'll have to see if I
can get a decent picture of what I am referring to, but it works pretty
well to keep the feed from spoiling.
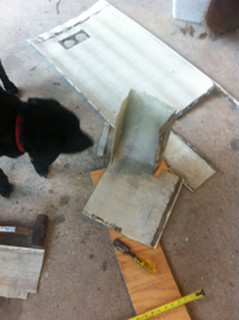 To replace the bowl we had been
feeding our first buck with, I used some other tin since I didn't have
an empty fuel can handy. We had recently been scrapping out an
old camper that was given to me. (See the second photo in this
post.) We will be using the frame to build a loft here for
storage, but we also ended up with a hefty supply of metal siding and
roof material.
To replace the bowl we had been
feeding our first buck with, I used some other tin since I didn't have
an empty fuel can handy. We had recently been scrapping out an
old camper that was given to me. (See the second photo in this
post.) We will be using the frame to build a loft here for
storage, but we also ended up with a hefty supply of metal siding and
roof material.
I started out with a flat
sheet of metal siding from the camper. I then started making cuts
with an old dull wood chisel and a hammer with plywood
underneath. You can see it start to take shape in the photo,
under the watchful eye of my labrador named Anna. This material
made for a very sturdy feeder once the rivets were in place.
All sharp edges on both the
fuel can and scrap tin feeders are rolled over to prevent injury to the
rabbits. Also, the feeders hold quite a bit more feed than the
store bought feeders, which helps reduce the daily upkeep we have to do
with the rabbits.
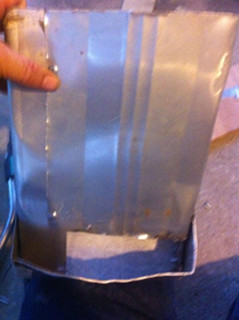 While I could have easily
purchased several feeders from Tractor Supply for a total of about
$20-25, there is a bit of pride that comes from recycling some old
scrap material into a new life as a feeder. Also, it allowed me
to spend the hour or so I would have spent driving to the store around
the house being creative and working with my hands. I am still a
"spare time" homesteader due to a full time career, but I strongly feel
that what makes a successful homestead is the ingenuity, creativity,
and drive of the folks that give it a go. People like Richard
Proenneke (and of course friends like Anna and Mark) continue to be an
inspiration of mine. We haven't yet made a break from the rat
race, but simple things like building a rabbit feeder give us a taste
of the self sufficient life.
While I could have easily
purchased several feeders from Tractor Supply for a total of about
$20-25, there is a bit of pride that comes from recycling some old
scrap material into a new life as a feeder. Also, it allowed me
to spend the hour or so I would have spent driving to the store around
the house being creative and working with my hands. I am still a
"spare time" homesteader due to a full time career, but I strongly feel
that what makes a successful homestead is the ingenuity, creativity,
and drive of the folks that give it a go. People like Richard
Proenneke (and of course friends like Anna and Mark) continue to be an
inspiration of mine. We haven't yet made a break from the rat
race, but simple things like building a rabbit feeder give us a taste
of the self sufficient life.
Shannon and Dawn will
be sharing their experiences with raising meat rabbits on Tuesday
afternoons. They homestead on three acres in Louisiana when time off
from life and working as a sys admin permits.

How does it sound when it rains on
the roof you insulated? Is it still noisy enough?
~Emily
The sound is muffled by about
75 percent, but it's still very enjoyable.
Thankfully the crazy high
temperatures were about over by the time we put the insulation in. That
means I'll have to wait till next year to see if the sitting on the
porch temperature drops enough to make it feel like it was worth the
effort.
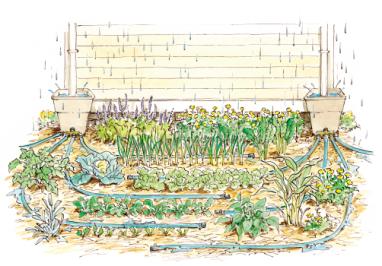 Storing water in garden soil
sounds too good to be true. Is it?
Storing water in garden soil
sounds too good to be true. Is it?
The idea is that you can
channel excess water (such as the output of your gutters or the
overflow from your rain barrel) into the garden. This
Mother Earth News article provides an example of a very
simple-to-implement system (shown to the right) and this
information on Steve Solomon's website provides more technical
details on the soil side. You can recharge the soil during winter
rains, then your plants will be subirrigated during summer droughts.
But does soil water
storage work? I've run across lots of people mentioning the
concept, but no one who shows a multi-year system in action. Here
are my reservations:
- Won't filling up the soil during the winter flush water-soluble
micronutrients too deep for roots to reach them? (I
can taste the micronutrient deficiency in certain crops after extended
bouts of heavy rain already.)
- Doesn't my soil already get saturated during the winter? (I know it does in certain areas.)
- Won't saturated winter soil kill perennials?
- Doesn't the water slowly drip down to the groundwater layer and
then trickle out into nearby creeks and springs?
I decided to crunch some
numbers and see if my qualms had any basis in reality. Solomon's
information suggests that two to three inches of rainfall can be stored
in the top foot of your soil (with the exact amount depending on your
soil type --- clay holds more, sand holds less). Since some
plants can access moisture ten feet deep, we'll work with a value of 25
inches of plant-available water stored in the soil, which equates to
15.6 gallons of water per square foot of surface area.
 But here's the trouble: we
receive an average of 49 inches of rain per year, which means normal
precipitation would fill the soil bank up twice without adding any
extra water from our gutters. Yes, there's a lot of transpiration
and evaporation happening during the growing season, but I'm pretty
sure that there's not much (if any) room left for water in the soil at
the end of a normal winter in our area.
But here's the trouble: we
receive an average of 49 inches of rain per year, which means normal
precipitation would fill the soil bank up twice without adding any
extra water from our gutters. Yes, there's a lot of transpiration
and evaporation happening during the growing season, but I'm pretty
sure that there's not much (if any) room left for water in the soil at
the end of a normal winter in our area.
In drier parts of the
world, filling up your garden soil bank by diverting excess flow from
your roof probably makes more sense. But I think we'd need to get
creative if we wanted to put any more water into our soil during the
winter. Perhaps filling the aisles in our terraced back garden
with wood chips would do the trick (but I never have enough wood chips
to "waste" them on a nonessential use like that).
Back to the drawing
board....
 The last section of Radical
Homemakers is about
the fundamental skills necessary to survive as a radical
homemaker. Hayes' list includes:
The last section of Radical
Homemakers is about
the fundamental skills necessary to survive as a radical
homemaker. Hayes' list includes:
- nurturing relationships with friends, family, and community
- entering the non-cash economy
- learning to learn on your own
- setting realistic expectations and limits
- redefining pleasure
- rediscovering the taste of good food
- losing your fear
I was intrigued to find
that her fundamental skillset matches up nearly perfectly with the
non-technical projects I scattered through The
Weekend Homesteader
(all guidance we learned the hard way during our first few years on the
farm). So my first thought question for this week is: What kinds
of lessons of this sort have you learned, or, conversely, what do you
feel is the biggest stumbling block you face in reaching a happy
homesteading lifestyle?
Meanwhile, Hayes
explained that most of the radical homesteaders she interviewed seemed
to be somewhere along a three-part learning curve. First came an
eye-opening stage when they renounced the mainstream consumer
society. Next, they became 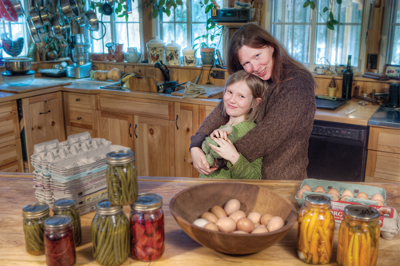 engrossed in recliaiming homemaking skills
--- learning to garden, cook, and so forth. Then, finally, they
reached a rebuilding stage where they began to reach outside their
homestead to embrace their creativity and engage with their
communities. Mark and I have definitely followed this path, and
we're stepping between stages two and three at the moment. Where
are you along the learning curve?
engrossed in recliaiming homemaking skills
--- learning to garden, cook, and so forth. Then, finally, they
reached a rebuilding stage where they began to reach outside their
homestead to embrace their creativity and engage with their
communities. Mark and I have definitely followed this path, and
we're stepping between stages two and three at the moment. Where
are you along the learning curve?
I've enjoyed hearing
your thought-provoking responses to this book club selection! For
those of you new to the club, you can read the previous posts here:
We'll be taking a week
off, and then we'll dive into the first chapter of The
Holistic Orchard on
September 3. If you're interested in trees and/or permaculture, I
highly recommend you join the club this time around since my
understanding of the orchard ecosystem has been altered just by
perusing the book's first few pages. The
Holistic Orchard
is more scientific and less philosophical than the books we've been
reading lately, while still being quite easy to read (and there
are lots of pretty pictures!), so it should give us a good
palate-cleansing break from a summer of deep thought.

The 50
pound feed backpack got
its second work out of the year today when I used it to haul in part of
a frozen
lamb.
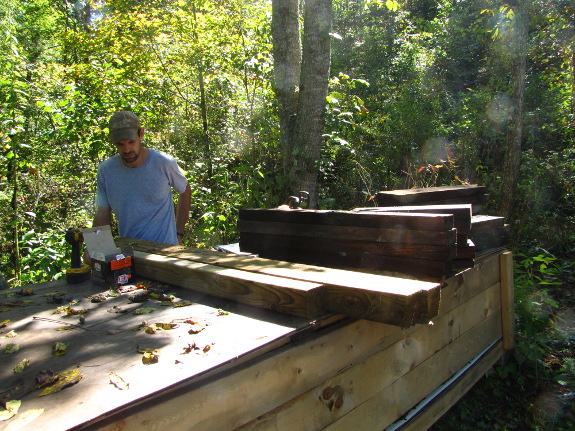
What do you do when your
husband is off the farm and you have an extremely handy helper at your
beck and call? Ask him to build you a composting
toilet, of course.
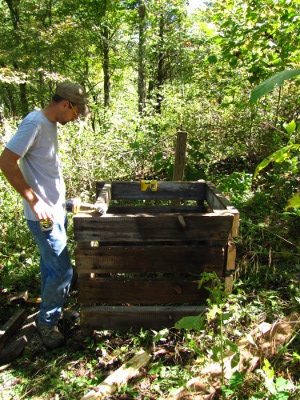 The first decision was
location. We've shifted our outhouse around the yard several
times since we moved here, so we know which areas are good, bad, and
terrible for humanure. In case you're curious, terrible is the
forest garden where the groundwater is so high your feces float right
back out of the hole during heavy rains....
The first decision was
location. We've shifted our outhouse around the yard several
times since we moved here, so we know which areas are good, bad, and
terrible for humanure. In case you're curious, terrible is the
forest garden where the groundwater is so high your feces float right
back out of the hole during heavy rains....
The best location is
perhaps two hundred feet from the trailer, just
behind the worm bins. Our original outhouse hole went there, and
it never caused any problems at all. Drainage was great, the
distance
was far enough from our core area that we didn't notice smells, and the
view was top notch. Mark and I decided to repeat that location
when the time came to build our composting toilet.
(See, now you can
tell I was using a bit of poetic license when I made it sound like I
snuck the composting toilet in while Mark was away. I traded Mark
an as-yet-undecided later project/favor for allowing me to barrel ahead
with my humanure project, so we're on the same page. But isn't it
more fun to pretend I'm naughty?)
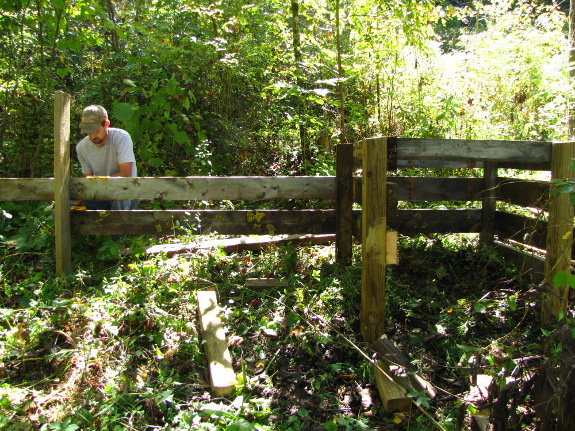
Since the flood waters
had only come down to knee height, Bradley had to
work with what we had on hand. Luckily, there were lots of heavy
oak
boards leftover from the greenhouse tables, and I figured they'd stand
up to rot pretty well. We also had some treated four by fours,
which I
let Bradley use once he explained that he could plan it so that they
wouldn't be touching my future compost at all.
Bradley and I teamed up
to design the new structure, the base of which is similar to Jenkins'
Humanure Hacienda.
The compartments in our composting toilet are only three feet by three
feet instead of four feet by four feet since that's how long my boards
were, but we're a family of two instead of a family of four, so the
smaller size should be about right. The other main change we made
was to have all three of the open sides facing downhill, since that
side will be much easier to access with the golf cart or wheelbarrow
when hauling in sawdust and hauling out compost.
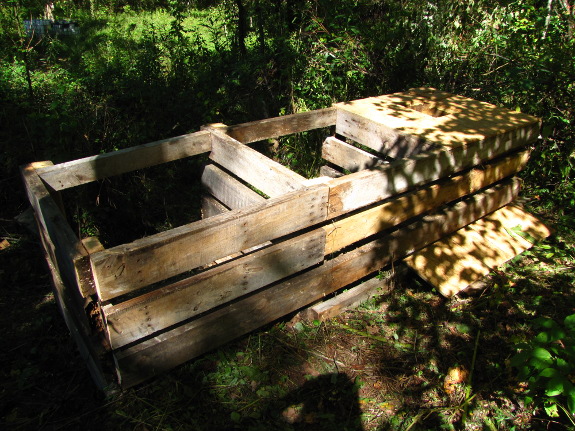
This is the nearly
completed lower story. We'll use the bathroom over one side for a
year, then switch to using the opposite side while the first round
mellows. The central compartment will be a storage spot for
sawdust (which we think we've found a source for), and will also soak
up any effluent trying to move between the two composting bins.
Liquids that want to seep out the back will get soaked up by a stack of
strawbales, which will be used as a wall to enclose the downhill side
of the compost bin currently in use.
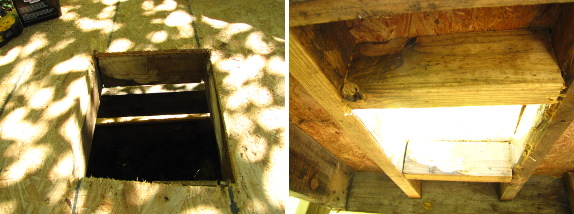
The next step will be
adding an outhouse on top, since we don't want to carry poop around in
five gallon buckets (and since we really enjoy the view from an
outhouse). I had one piece of scrap plywood, and Bradley framed
it up for the floor on the first bin, but we'll have to find some more
materials before we do the rest. And there's a roof yet to come
today. Stay tuned!
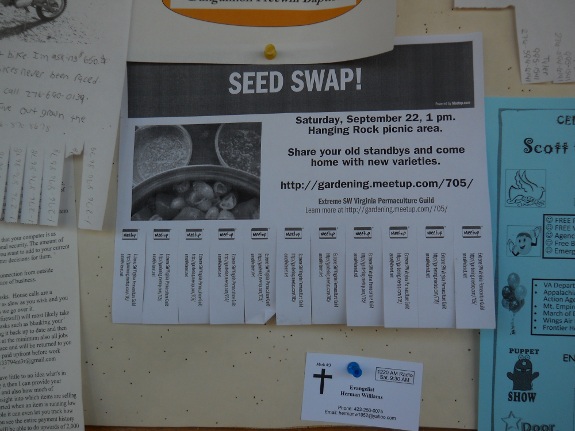
When? This Saturday at 1pm.
Where? Hanging Rock picnic
area just outside Dungannon Virginia.
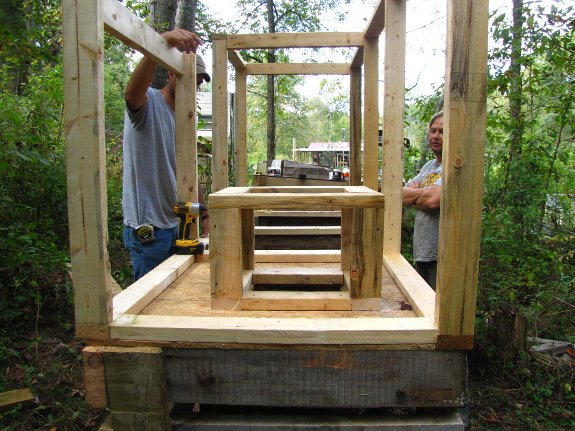
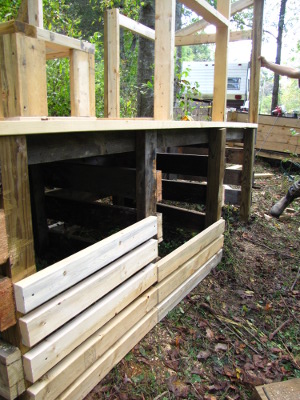 When Mark got home, he had
some great suggestions for making the
first phase of our composting toilet system more ergonomic.
When Mark got home, he had
some great suggestions for making the
first phase of our composting toilet system more ergonomic.
His biggest concern was
that my straw bales on the downhill side would drift out of place (or
get torn apart when Lucy heard a mouse inside), resulting in a
landslide of humanure.
That sounded pretty
terrible, so I was glad Mark also had a suggested solution --- screwing
some two by fours on as a temporary retaining wall between the compost
and the straw bales. By using screws, it'll be easy to remove the
wall in two years once the bin has filled and mellowed and is ready to
hit the garden.
While he was at it,
Bradley added a shorter wall for the sawdust storage compartment to
make sure we don't lose too much of our precious carbon, while still
making it easy to scoop out bucketsful to bring upstairs.

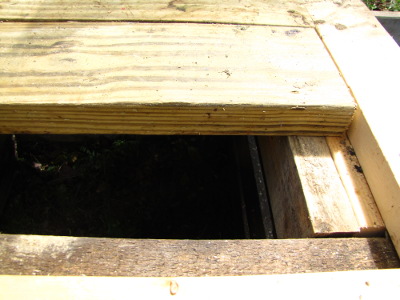 "And about that sawdust
storage compartment," Mark added. "How exactly are we going to
get sawdust into it if there's a floor over top?"
"And about that sawdust
storage compartment," Mark added. "How exactly are we going to
get sawdust into it if there's a floor over top?"
Bradley had an ingenious
solution there, turning the central floor into a trap door by setting
decking boards on a ledge of other boards. The floor feels very
solid when you walk on it, but the boards are easy to move to the side
so we can pour sawdust directly into the central bin.
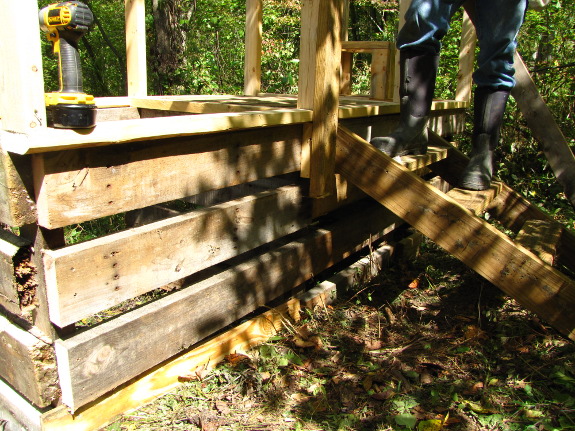
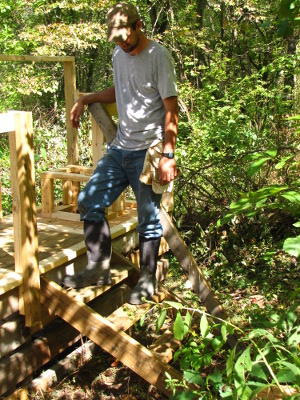 Mark's last concern was that
rain might cause runoff to roll down the hill during heavy storms and
wash under the compost bins, causing lots of seepage. A lip on
the uphill side of the compartments should serve to channel the water
away.
Mark's last concern was that
rain might cause runoff to roll down the hill during heavy storms and
wash under the compost bins, causing lots of seepage. A lip on
the uphill side of the compartments should serve to channel the water
away.
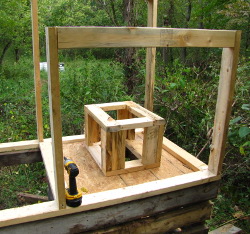
Meanwhile, Bradley was
busy putting the second story on top of the composting bins. He
built a beautiful set of steps without risers (just like the
second set he made for Mark's porch) and constructed a very
sturdy box for us to sit on. (We'll close in the sides with
plywood once we rustle some up.)
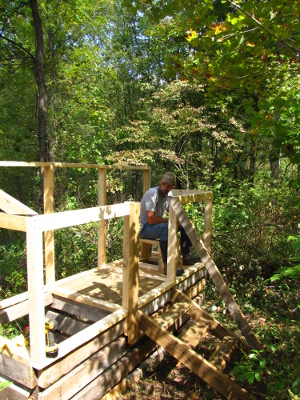 To keep the open air effect
that Mark and I both enjoy, Bradley chose to make a low privacy wall in
the front and a slightly higher wall in the back. The composting
toilet faces away from our core homestead, so there's next to no chance
someone will accidentally walk around to the front while doing other
tasks.
To keep the open air effect
that Mark and I both enjoy, Bradley chose to make a low privacy wall in
the front and a slightly higher wall in the back. The composting
toilet faces away from our core homestead, so there's next to no chance
someone will accidentally walk around to the front while doing other
tasks.
Mark had the great idea
to pin a brown tarp up around the walls rather than using plywood since
the tarp will likely last longer. We don't have the tarp yet ---
that's on the shopping list.
What you also can't see
(because it doesn't yet exist) is the roof. Bradley's going to
make that free-standing and large enough to keep the straw bales in the
back dry. We've got enough scrap tin lying around that we should
be able to build the roof without any extra purchased supplies.
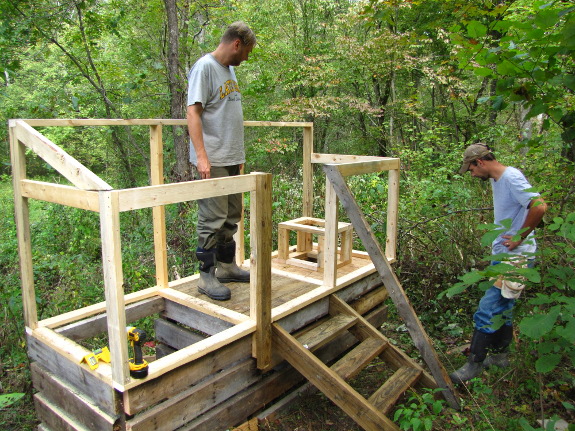
Here's the second story
so far. We hope to finish it next week around the same time the
driveway dries up enough to allow us to haul in sawdust and
straw. I think I'm going to have to put "anticipating using your
open air composting toilet for the first time" onto my list of
characteristics that brand the permaculture
redneck.

We might try to start extending
the chicken's daylight hours a few weeks earlier next year.
Starting today their morning
will begin around 3 am, which should get us close to the 14 hour point
needed to keep them laying on a more regular schedule.

This year, I've been
learning the dangers of no-till gardening --- you may accidentally
produce enough to feed a small army.
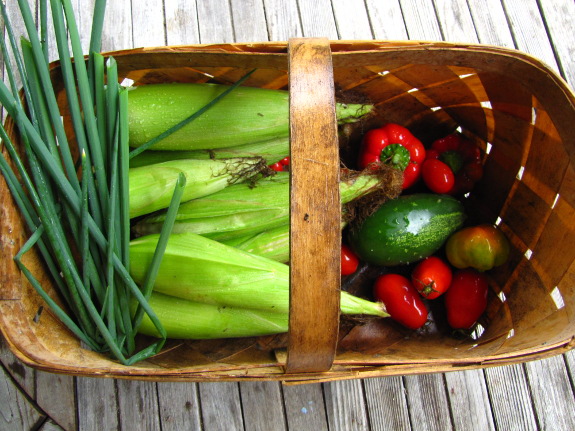
Of our three varieties
of garlic, two
produced significantly more weight per bed in 2012 compared to 2011. Music stayed the
same, but I got 42% more garlic from the Silverwhite Silverskin and a
whopping 88% more from the Italian Softneck.
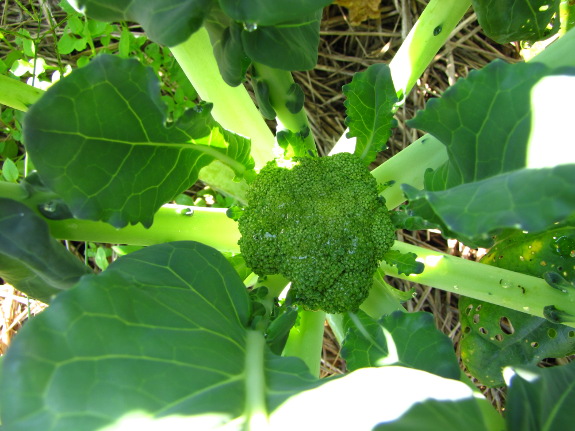
But that's
nothing. Last year's
sweet potatoes averaged 9.8 pounds per bed, giving us a total haul of
78.5 pounds of sweet tubers. That was way too much for us to eat,
so I cut our planting in half this year...and came up with a 83.5 pound
harvest! Yes, that's an increase of 114% per bed over last
year. (Guess what all of my local friends are getting for
autumnal equinox presents?)
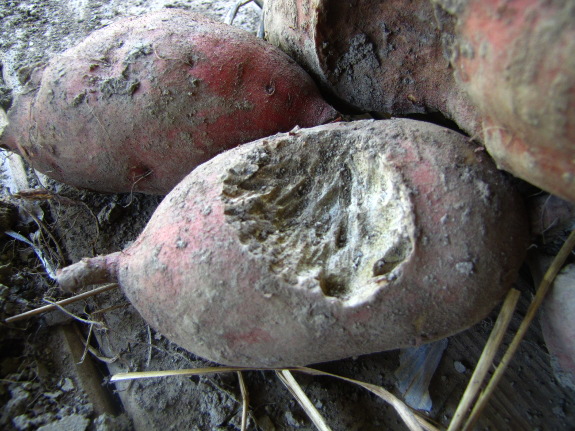
Granted, there have been
some downsides. Perhaps a tenth of the sweet potatoes had been
gnawed on by soil-dwelling critters despite Lucy's best efforts to dig
the garden apart in search of voles. But given such high
productivity, I don't mind cutting out a few teeth marks.
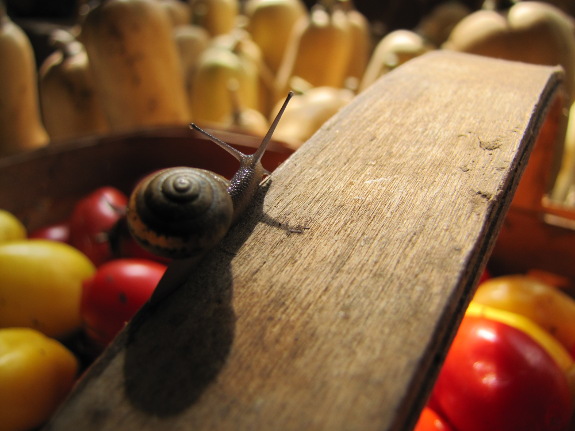
And, to be entirely
fair, I think this year's increase in sweet potato production is also
due to two other factors. First, we only had one tiny deer
incursion this summer, and sweet potatoes always suffer the worst when
deer come to call. Equally important is the fact that I gave the
sweet potatoes part of the loamy front garden --- the two beds I
planted on the dividing line between loam and clay produced much less
than the other two beds did.
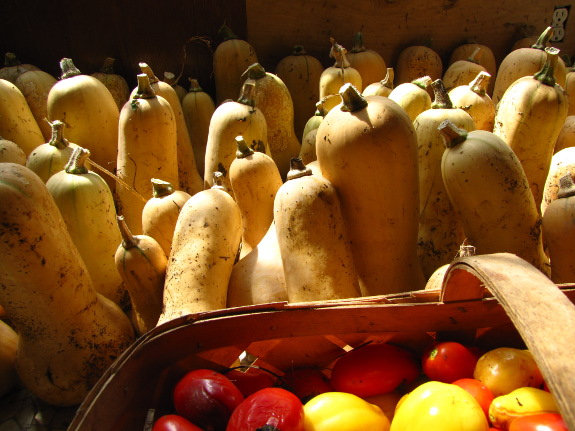
We don't weigh most of
our produce, so I can't tell you whether we saw increased production
among our corn, beans, squash, tomatoes, greens, and the multitude of
other vegetables we grow. But we sure had plenty to eat and
preserve this year.
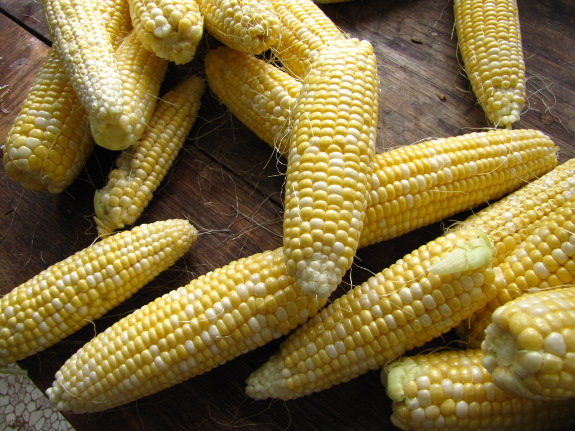
And I attribute a large
part of that success to the health of our soil. Doesn't that make
you want to at least try no-till on a few beds next year?
(By the way, all of the
photos in this post are from this week's healthy haul of late summer
crops.)

There was some talk of maybe doing another one in the Spring.
 Art
Ludwig's Water
Storage: Tanks, Cisterns, Aquifers, and Ponds shares many of the same
positive features of his Create
an Oasis with Greywater. I enjoyed the
author's less-than-mainstream perspective, and especially the chart on
page 7 listing the recommended cleanliness levels of water used for
various household tasks. I suspect Ludwig would enjoy our dual
water system, where only drinking and cooking water is treated to a
quality sufficient for human consumption, with all of our wash water
coming straight from the creek.
Art
Ludwig's Water
Storage: Tanks, Cisterns, Aquifers, and Ponds shares many of the same
positive features of his Create
an Oasis with Greywater. I enjoyed the
author's less-than-mainstream perspective, and especially the chart on
page 7 listing the recommended cleanliness levels of water used for
various household tasks. I suspect Ludwig would enjoy our dual
water system, where only drinking and cooking water is treated to a
quality sufficient for human consumption, with all of our wash water
coming straight from the creek.
My favorite part of the
book was the second chapter, which provided a quick overview of
situations in which you might choose to use water direct from the
source or to store it in aquifers, soil, ponds, open tanks and swimming
pools. Unfortunately, Ludwig only provided brief overviews of
these systems, devoting the vast majority of the book to water tanks.
In the end, my main
complaint with the book is that it really should have been named Water
Tanks instead of Water
Storage.
Still, I appreciate the author's willingness to focus on what he knows
rather than putting in a lot of secondhand information that may or may
not pan out. If you want to build, buy, or install a water tank
optimally, you can't go wrong with this book. But if you're
interested in another system, I'd recommend you simply check Water
Storage out of
the library.
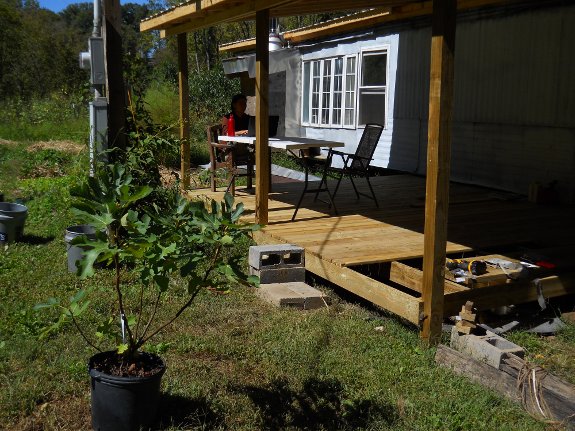
I found a healthy looking fig
tree at the store on Friday.
It's a Celeste, which has
been known to do well in our zone.
When it matures we should
have a nice side by side comparison with the Chicago
hardy fig next to it.
 I've never grown Brussels
sprouts before, but thought I'd give it a try this year. I put
them out a bit late,
but some are already starting to form little sprouts in the leaf axils,
so hopefully we'll get at least a few before the killing frosts come.
I've never grown Brussels
sprouts before, but thought I'd give it a try this year. I put
them out a bit late,
but some are already starting to form little sprouts in the leaf axils,
so hopefully we'll get at least a few before the killing frosts come.
Various websites suggest
that you might or might not want to remove the lower leaves once the
first sprouts begin to form. Others mention topping the plant so
it will put its energy into bulking up existing sprouts rather than
forming tiny new heads that will be wiped out by killing frosts.
Has anyone out there
grown Brussels sprouts? Did you cut off leaves and/or tops, or
leave the plant alone?

The perennials still
aren't as perfect as I'd like them to be, but the summer of 2012 marked
the first year that I was able to spend time thinking about trees and
berry bushes when the leaves were present. As a result, I got to
try out a few new techniques, which I'll be regaling you with during
this week's lunchtime series.
But first, new readers
might want to read some old posts that introduce you to forest
gardening in general and to our forest garden in specific:
- What is a forest garden?
- Some
of the challenges faced by our forest garden location
- My original plan for our large forest garden
- Our most successful experiment, a forest garden island
- My sumup of forest garden experiments in 2010
- 2011: An
overgrown forest garden and the
bright side of neglect
- Two mature Appalachian forest gardens
- The
most inspiring forest garden I've seen in person
- The oldest temperate-climate forest garden around
I hope that whets your
appetite to tune in during your lunch break this week. And I
invite anyone who has a forest garden of any age to provide a link to
the relevant parts of your blog in the comments section --- I'd love to
"tour" some more forest gardens from the comfort of my own home.
| This post is part of our 2012 Forest Garden lunchtime series.
Read all of the entries: |


A few months ago the golf cart was broke and Bradley brought his ATV to
haul in some particle
board.
It was a good chance to
compare hauling capacity between the two.
My rough estimate says the
golf cart can haul a little more than twice what you can load up on a
medium sized ATV.
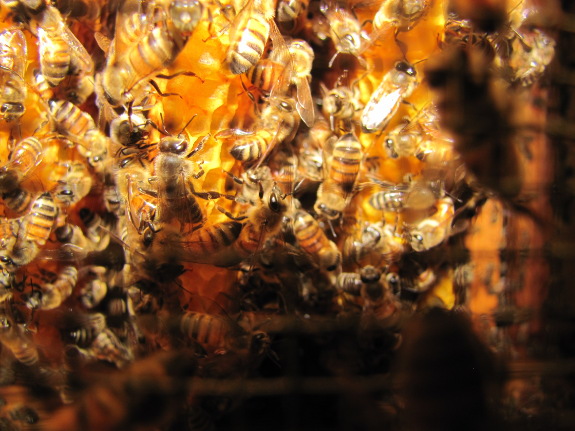
I gave up on feeding our
bees when I realized the only insects coming to the feeder were yellow
jackets. As one our readers pointed out, Wingstem
is "one of the underrated honey plants of North America", and since we have plenty of
those yellow flowers around, our bees find sugar water pretty
unappealing at the moment.
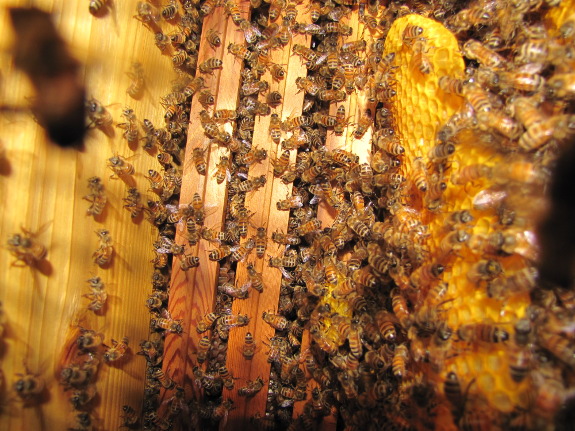
That does leave me in a
bit of a bind --- I can't do anything at all to ensure our colony fills
their third box so they'll be ready
for winter.
Luckily, they don't seem to need my help. When I took some photos
through the screened bottom of our Warre hive this past weekend, I could
see that the bees had drawn out all except three frames of the third
box.
I'm the kind of person
who likes to work ahead and be done early, so it seems a bit crazy that
the bees are cramming half of the year's labor into a few short weeks
right before the the days become too cool for flying. But you
can't mandate the work habits of the bees.
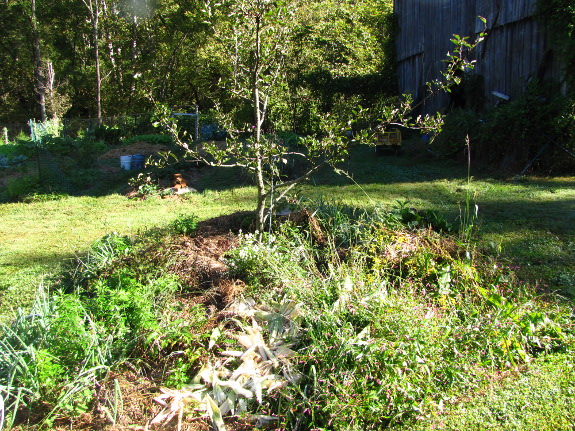
What's the best way to
manage the ground beneath your fruit trees? If you ask ten
people, you may get ten different answers, but the most widespread
choice (at least in the backyard, if you can find enough mulch) is to
smother out weeds using a well-rotted wood chip mulch so the tree roots
don't have to compete with anyone else. The forest gardening
alternative is to use dynamic accumulators that bring up micronutrients
from deep in the 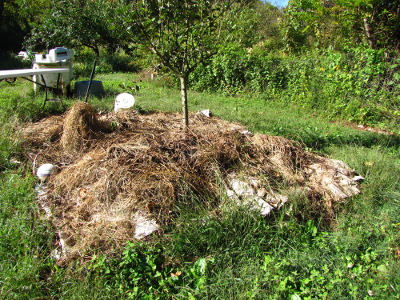 soil and make the minerals
accessible to your trees (although this
option can be problematic if your soil is less than stellar). Over the last few
years, I've stumbled across a third option that might work even better
--- haphazard mulching.
soil and make the minerals
accessible to your trees (although this
option can be problematic if your soil is less than stellar). Over the last few
years, I've stumbled across a third option that might work even better
--- haphazard mulching.
A few years ago, I
started dumping wheelbarrows full of garden weeds around a certain
apple tree throughout the summer. The reason behind my actions
was pure laziness, but at least it killed three birds with one
stone. I'd accidentally let some perennial weeds pop up around
the tree's roots, and the summer was too busy to take the time to root
them out and mulch the tree properly, so I figured dropping some
biomass on top would at least slow the competitors down (which it
did). Meanwhile, I was thinking ahead to the winter when I'd need
to expand
the tree's raised bed
(an effort to keep the roots above high groundwater), and I figured
garden weeds deposited around the edges of the tree's bed would slowly
rot down and expand the planting mound. My final reason was even
simpler --- the tree was at the junction of two vegetable gardens, so
this was an easy spot to drop off weeds rather than running them all
the way to various compost piles.
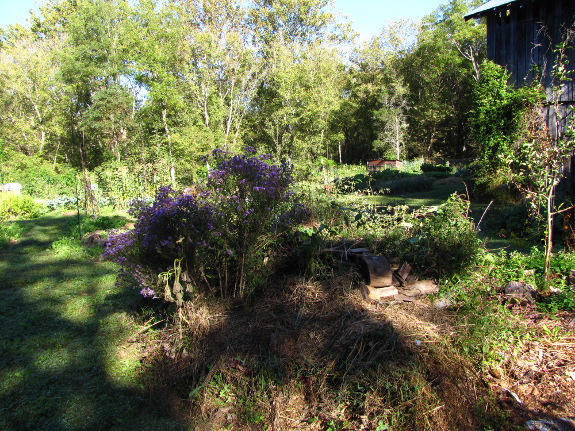
To my surprise, this
apple tree took off and grew faster than any of my other apples.
Now, you have to take this data point with a grain of salt because no
two apples in my garden are quite alike. They're all different
varieties, and each one is in a different microhabitat. It's just
as possible that this apple did well because it was located where the
groundwater drains into the gully, so it was subirrigated during summer
droughts. But no matter why the apple was doing well, the
haphazard mulching didn't seem to hurt.
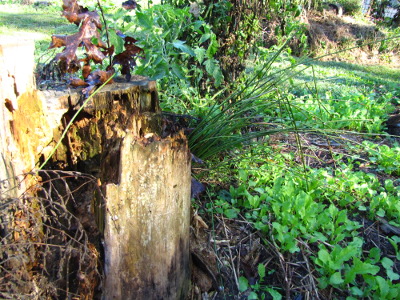 So this year I tried the
method around several more fruit trees. I also used haphazard
mulching to drown out weeds coming up through the brush
pile (my equally lazy approach to hugelkultur around another apple
tree), and around the stump that is adjacent to a third apple.
So this year I tried the
method around several more fruit trees. I also used haphazard
mulching to drown out weeds coming up through the brush
pile (my equally lazy approach to hugelkultur around another apple
tree), and around the stump that is adjacent to a third apple.
The haphazard mulch
allows some weeds to keep growing, but slows them down so they don't
seem to be competing with my trees. It doesn't look as manicured
as a well-managed wood chip mulch, but I'm more interested in results
than in beauty.
At the moment, I
consider haphazard mulching more of a hypothesis than a proven
technique, but I'd be very curious to hear from anyone else who's given
it a try. And from others who've come up with equally easy
solutions to managing the ground under their fruit trees. What do
you do?
| This post is part of our 2012 Forest Garden lunchtime series.
Read all of the entries: |

1. It grows and grows with
little attention.
2. Predator bugs are
afraid...very afraid to come near them.
3. If picked and cured right
they store nicely on an indoor shelf.
4. They make the most delicious
pie.
Anna harvested our second
round of butternut squash recently which makes this year's yield our
biggest ever.
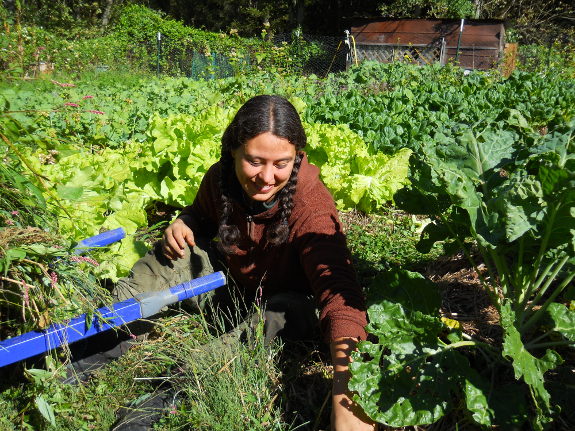
Although Mark and I
sometimes butt heads, I'm actually glad he's strong-minded and has his
own opinions. Yes, even when he's a non-believer about things
like composting
toilets.
If he was as gungho as me,
I'd probably play fast and loose with the carbon sources in the
composting toilet. But since Mark's only about 50% on board, I'm
putting in some extra effort to make sure there will be no flies,
leaks, or smells. That way, he won't be able to say "I told you
so", and our readers might inspired to follow our lead and slip a
composting toilet past their similarly unsure spouses.
Since I have them on
hand, I used spent sweet corn stalks and garden weeds to form a nest
inside the first compost chamber. I cut the corn stalks in half
so they fit flat on the ground, covering the earth completely, then I
set more corn stalks upright around the inside edges.
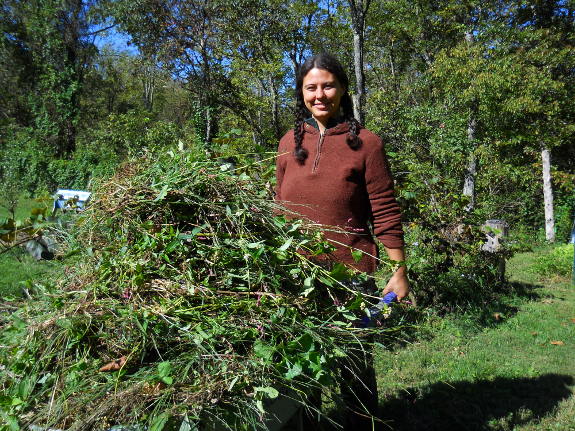
Next came the fluffier
garden weeds. I used a very heaping wheelbarrowful to loosely
fill the chamber about halfway full, then stacked weeds along the
inside walls (within the corn palisade).
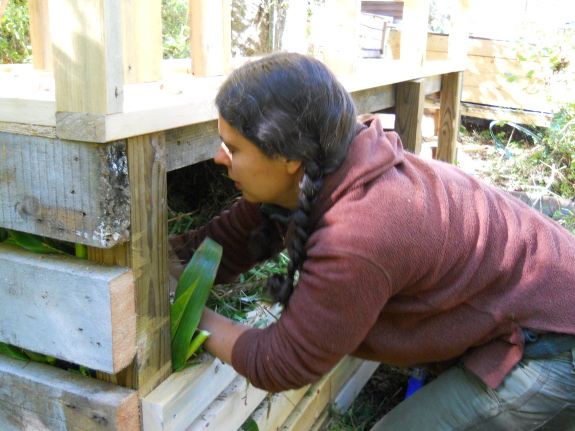
The idea is that urine
and feces will get caught by this carbon net and won't be able to creep
out the holes in the walls (which are necessary for aeration) or to
seep out the bottom. Although it seems like a bad idea to fill
the bin halfway up before even starting to use it, the bedding material
will mat down as it begins to rot, so it won't really use up as much
space as you might think. Hopefully, it will still take a solid
year to fill the first chamber.
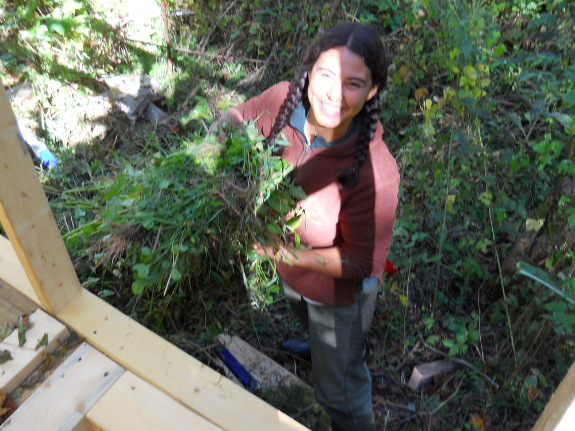
We're waiting on sawdust
before we put the composting toilet to the test. We'll have a
five gallon bucket of sawdust beside the seat to make it easy to drop a
scoop down the hole after each use, keeping the top of the pile just as
well sealed off with high
carbon material as the bottom and sides are. More on that later in
the week, hopefully.
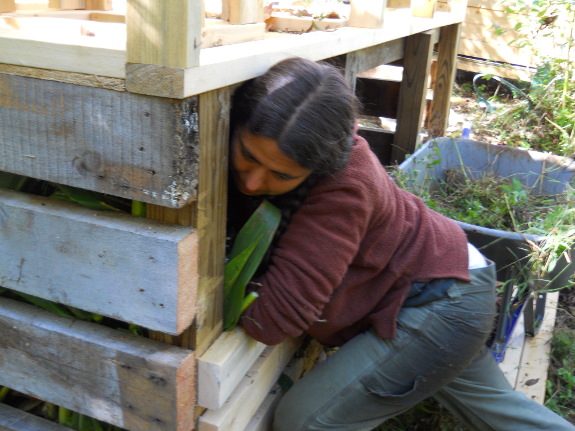
(Doesn't this look like
it's a yoga pose? Maybe Compost Pile Warrior?)
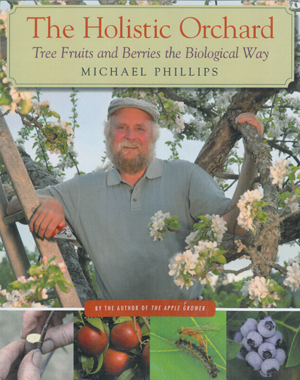 Today, I'll take a brief
break from our forest gardening lunchtime series to plug our upcoming
book club. We'll start discussing the first chapter of The
Holistic Orchard
during our regular Wednesday lunch post next week, so I thought I'd try
to drum up interest by singing the praises of the author and book.
Today, I'll take a brief
break from our forest gardening lunchtime series to plug our upcoming
book club. We'll start discussing the first chapter of The
Holistic Orchard
during our regular Wednesday lunch post next week, so I thought I'd try
to drum up interest by singing the praises of the author and book.
Michael Phillips is one
of the few gardening authors I've read who combines decades of hands-on
experience with a thorough understanding of ecology and permaculture
from the scientific and popular literature. His first book, The Apple
Grower, is so good
that I'm starting to feel the need to re-read it --- I felt like many
parts of the book went over my head on the first perusal and would help
me now that I've moved from being a beginner to an intermediate
fruit-grower. For comparison's sake, the only other gardening
authors I've wanted to reread lately are Paul
Stamets and Dave
Jacke and Eric Toensmeier.
I've only flipped
through The
Holistic Orchard
and read about ten pages so far, but I can already tell that this
second book is going to be as good as, if not better than, Phillips'
first. And it also feels like a dense (but readable) book that
could benefit from being bounced around a group. If you have any
interest in growing fruit trees or bushes, I highly recommend you join
the club in October and read along --- chances are The
Holistic Orchard
will open your eyes to a whole permaculture world you didn't even know
existed.
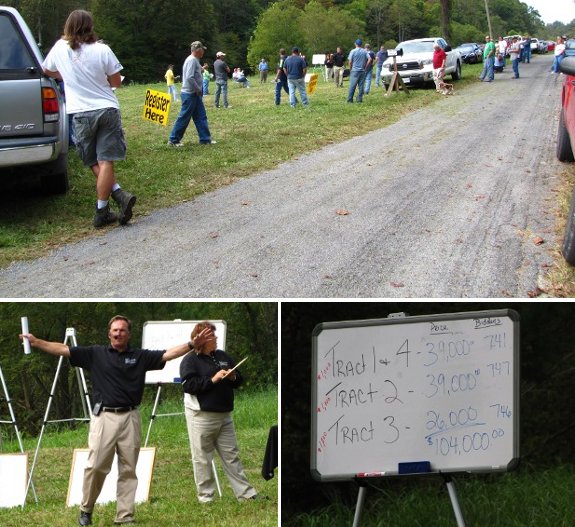
We went to a local land
auction today.
It seems like there was a
healthy crowd, but in reality there were just 5 or 6 actually bidding.
The only structure was a barn
that's ready to be torn down. All three tracts sold within an hour for
around 1000 dollars per acre. Rumor has it that all three buyers were
people who just wanted the hunting access, which is sometimes ripe with
white tailed deer and wild turkeys.
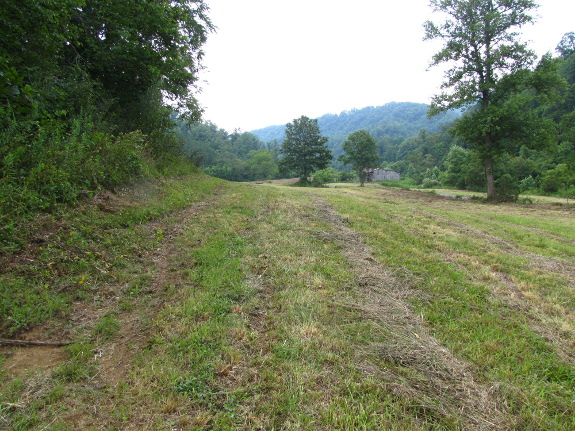
The auction
we visited yesterday was one possibility for the Walden Effect
annex. It's the land that's within easy
walking distance and
had an oil and gas lease
that had expired.
Since the property was a
foreclosure, we thought the tracts might sell
for much less than they did. I'd read that 75% of market value is
average for foreclosure auctions, which would have put the cheaper
tracts just barely into our price range ($15,525 for the cheapest one,
which is 35 acres). In fact, they went for 103% to 167% of market
value.
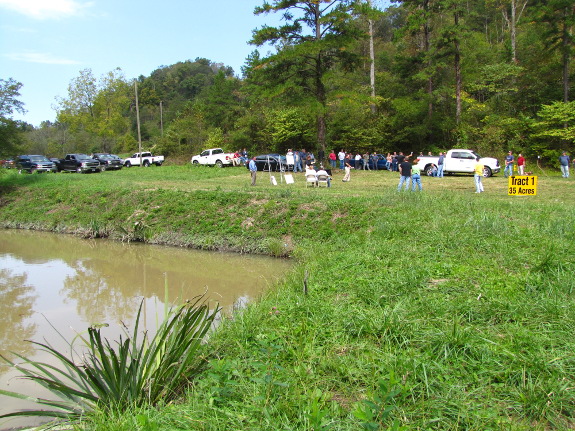
But we didn't even put
up the 10% to allow us to bid. After a
month spent cogitating on the repurcussions, we decided it just
wouldn't be worth it to have the annex if it meant we'd clean out all
of our emergency reserves and go slightly into debt. (Plus, we'd
heard through the grapevine that a lot of folks were interested in the
land, which made us doubt that the property would sell low.)
Yes, we probably could
have buckled down and paid off the loan in a
year or two (or three or four at the prices the land actually sold at),
but only if we focused a lot more on making money and lot less on
building relationships with folks like Bradley (and on our random
experiments). I think Mark and I both felt relieved when we
decided to put the annex off for a few more years until we'd saved
enough cash to buy another piece of land outright.
Instead, we'll be
focusing on building local community with our
meetup group.
Time to think of another fun get-together for local permaculture nuts
like me. Mark says a kill mulch party is crazy. Ideas?
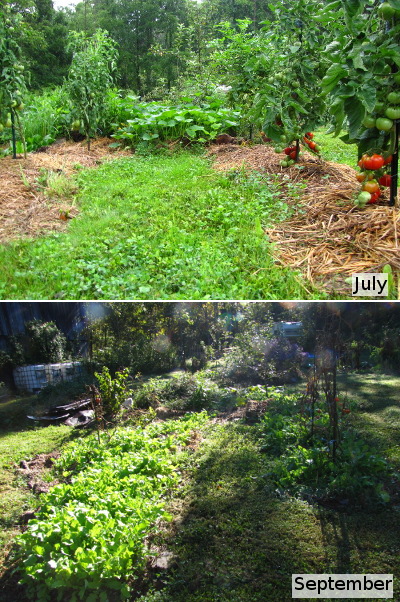 Another strange technique I
began last year, but which seems to work well, is mixing annual
vegetables into the forest garden. My trees are still quite
young, so there are plenty of patches of full sun, and the vegetables give
me an incentive to drop by the forest garden every week rather than ignoring it
until the busy summer vegetable garden passes by.
Another strange technique I
began last year, but which seems to work well, is mixing annual
vegetables into the forest garden. My trees are still quite
young, so there are plenty of patches of full sun, and the vegetables give
me an incentive to drop by the forest garden every week rather than ignoring it
until the busy summer vegetable garden passes by.
But I have a feeling the
vegetables do more good than simply drawing my attention to the young
fruit trees. This spring, I noticed that the garden beds I'd
overwintered under a straw mulch didn't seem quite as vibrant as those
which had been home to winter
cover crops.
I've read that there are two types of soil microorganisms --- the living
food web, which
interacts with the roots of plants, and the dead
food web, which
decomposes organic matter. I suspect that if you don't have any
plants growing in a spot for a while, the living food web might perish
and take a while to regrow once you seed new crops.
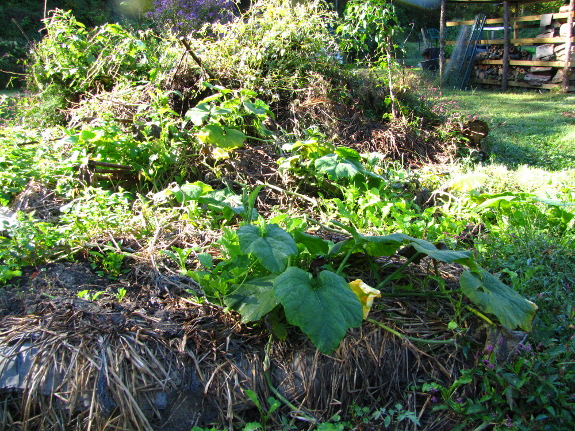
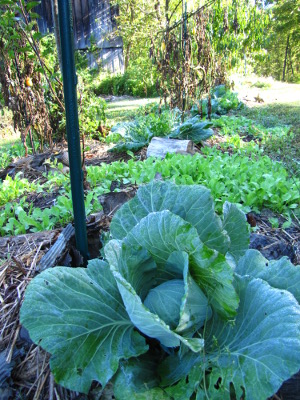 Like my haphazard
mulching, mixing
vegetables in with fruit trees is very theoretical at the moment, but
the technique doesn't seem to be hurting anything. I started out
the summer by filling every gap with tomatoes and butternut squashes,
then I added in cabbage and broccoli as the squash began to decline,
and I finished up the year by seeding oilseed radishes around the base
of tomatoes coming to the end of their lifespan.
Like my haphazard
mulching, mixing
vegetables in with fruit trees is very theoretical at the moment, but
the technique doesn't seem to be hurting anything. I started out
the summer by filling every gap with tomatoes and butternut squashes,
then I added in cabbage and broccoli as the squash began to decline,
and I finished up the year by seeding oilseed radishes around the base
of tomatoes coming to the end of their lifespan.
I don't really have a
way of measuring the results of my actions, but I can't think of any
negatives as long as the fruit trees aren't troubled by their
short-lived neighbors. And moving some veggies over to the forest
garden gives me more room to build soil in the main vegetable gardens
with cover crops.
Have you mixed trees and
tomatoes? As usual, I'm very curious to hear from other forest
gardeners who are busy thinking outside the box.
| This post is part of our 2012 Forest Garden lunchtime series.
Read all of the entries: |

A lumber mill in Norton
charges 15 dollars for a pick-up load of saw dust.
We had to hire someone with a
truck, which should come out to around 60 dollars with fuel and labor
and rental fee.
It's a heck of a lot of saw
dust for 75 bucks.
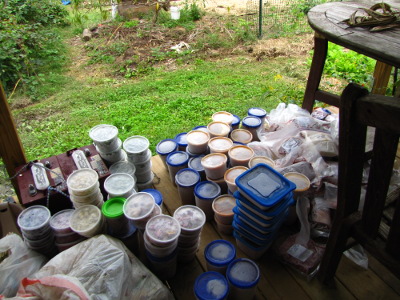 Freezer moving day is best
planned for the spring when stores are low, but sometimes you have to
strike while the iron's hot. Twenty-some gallons of carefully
processed garden goodies plus two lambs from our friend had filled
our freezer nearly to the brim when Bradley pointed out he couldn't
finish the front porch with the freezer in place. Oops.
Freezer moving day is best
planned for the spring when stores are low, but sometimes you have to
strike while the iron's hot. Twenty-some gallons of carefully
processed garden goodies plus two lambs from our friend had filled
our freezer nearly to the brim when Bradley pointed out he couldn't
finish the front porch with the freezer in place. Oops.
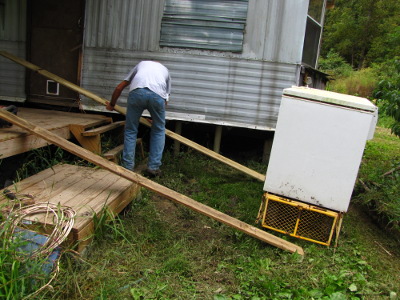 It took four
wheelbarrow-loads to move the freezer's contents around to the back
porch, then Bradley manhandled the freezer up onto our yellow wagon
nearly by himself. (Mark was in town, and Bradley seemed to be
doing better without me in the way.) It's amazing how a couple of
boards and an understanding of physics make it simple to slide a
freezer up onto the back porch.
It took four
wheelbarrow-loads to move the freezer's contents around to the back
porch, then Bradley manhandled the freezer up onto our yellow wagon
nearly by himself. (Mark was in town, and Bradley seemed to be
doing better without me in the way.) It's amazing how a couple of
boards and an understanding of physics make it simple to slide a
freezer up onto the back porch.
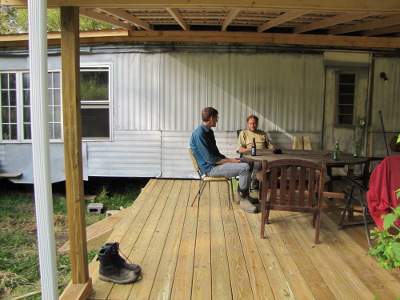 Now
our freezer is right outside the kitchen door, and as an added bonus
it's on the north side of the trailer where summer sun won't make the
motor work extra hard. I wonder how much energy savings that bit
of shade will gain?
Now
our freezer is right outside the kitchen door, and as an added bonus
it's on the north side of the trailer where summer sun won't make the
motor work extra hard. I wonder how much energy savings that bit
of shade will gain?
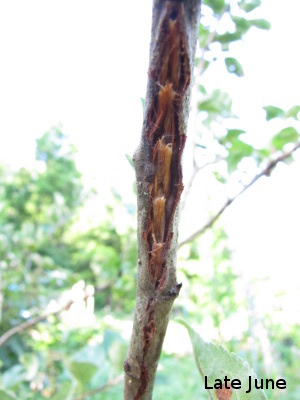 This has been a tough year
for our fruit trees. The waves of sound from the periodic
cicadas made us feel
like we were enjoying a spring by the seashore, and the chickens loved
the high protein snacks. But as the insects' reign came to an
end, the female cicadas laid eggs in tender twigs of blueberries,
apples, pears, and peaches. Many young limbs simply perished from
the onslaught, and everyone was set back.
This has been a tough year
for our fruit trees. The waves of sound from the periodic
cicadas made us feel
like we were enjoying a spring by the seashore, and the chickens loved
the high protein snacks. But as the insects' reign came to an
end, the female cicadas laid eggs in tender twigs of blueberries,
apples, pears, and peaches. Many young limbs simply perished from
the onslaught, and everyone was set back.
Although I didn't think
it was lucky at the time, we were fortunate to have a late frost that
wiped out many of the trees' fruits. It's possible that if our
trees had been weighed down with peaches and pears, they might have
been less able to overcome the cicadas' attacks, so the frost may have
done us a favor in the long run. As it was, I suspect we came out
about even --- the trees didn't have to expend energy setting fruits,
so they were able to take the time to heal.
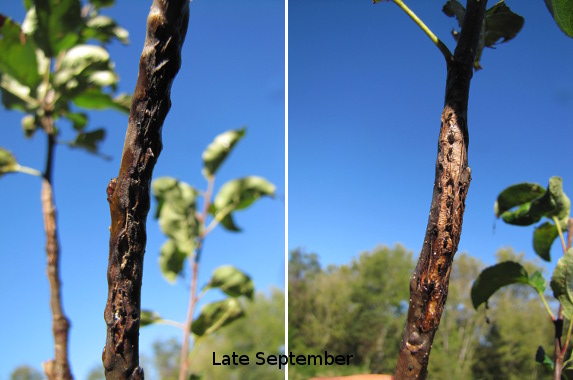
 Luckily, periodic cicadas
only come around every 13 or 17 years, and since cicadas prefer young
trees, we might be out of the woods by the next emergence date.
Experts also suggest marking your calendar with the possible years you
may see periodic cicadas, then delaying winter pruning until the
cicadas are gone so you can deal with damage without taking away too
much young wood. (You can look up emergence
dates for your area here, but the site didn't have
information about our local population this year, so take the
information with a grain of salt.)
Luckily, periodic cicadas
only come around every 13 or 17 years, and since cicadas prefer young
trees, we might be out of the woods by the next emergence date.
Experts also suggest marking your calendar with the possible years you
may see periodic cicadas, then delaying winter pruning until the
cicadas are gone so you can deal with damage without taking away too
much young wood. (You can look up emergence
dates for your area here, but the site didn't have
information about our local population this year, so take the
information with a grain of salt.)
If you're not quite
together enough to plan your cicada management 17 years in advance, you
can put netting around twigs less than half an inch in diameter as soon
as you hear the periodic cicadas beginning to call. There are
also plenty of chemical solutions, but I'd rather lose twigs every
decade or so than wipe out my beneficial insects.
What have you done to
deal with damage from periodic cicadas on young fruit trees?
| This post is part of our 2012 Forest Garden lunchtime series.
Read all of the entries: |

We hauled the sawdust
back to our area using the golf cart and 2 large plastic trash cans.
It was a bit more than we
needed. After filling up the new composting
toilet reservoir we sort of ran out of places to put it and made a
big pile on the ground and covered it with a tarp. We also decided to leave 2 of the
trash cans full.
I guess we need to dream up
some new uses for the extra saw dust.
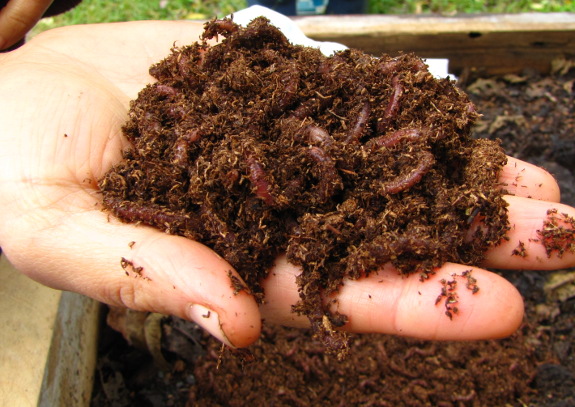
Sometimes I hesitate to
tell you just how many stupid mistakes I make. But I figure if
even 1% of you are as dumb as I am, I can save millions of lives with
this post....
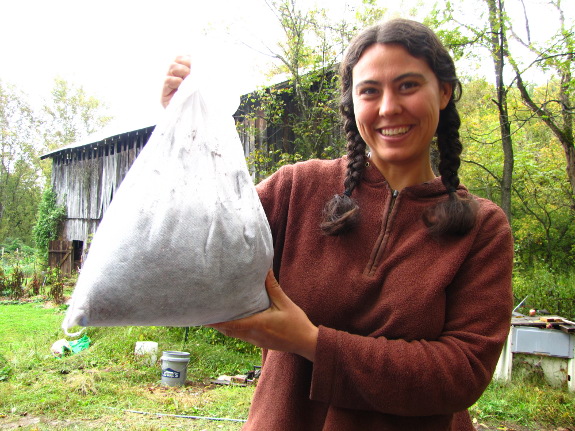
...Worm lives, that
is. Yes, the horse manure I seeded
compost worms into
earlier this summer was far
too hot for the
critters to survive. I ended up needing that manure for the
garden a couple of months later, and I looked carefully for wrigglers
as I emptied the bin out, but I found not a living soul.
 So
I did things differently the second time around. After filling
the three new bins up with horse manure and bedding, I left the lids
open for a few weeks so the contents would get well saturated with
rain. Wet compost allows microorganisms to work, so the bacteria
soon had the contents of each bin steaming. And then, slowly, the
warmth receded until the compost leveled off at ambient temperatures.
So
I did things differently the second time around. After filling
the three new bins up with horse manure and bedding, I left the lids
open for a few weeks so the contents would get well saturated with
rain. Wet compost allows microorganisms to work, so the bacteria
soon had the contents of each bin steaming. And then, slowly, the
warmth receded until the compost leveled off at ambient temperatures.
Time for another round
of worms! Even though the fault in the first batch was purely
management error, I decided to take the advice of one of our readers
and try a new source --- Red Worm Composting. We bought a three
pound bag for $70, and the worms showed up fat and happy, ready to
colonize the mellowed compost.
I dumped the worms on
the surface of the manure, a pound per bin. Rather than spreading
them throughout the large bins, I let each clump stick close together
since I know compost worms like colonies.
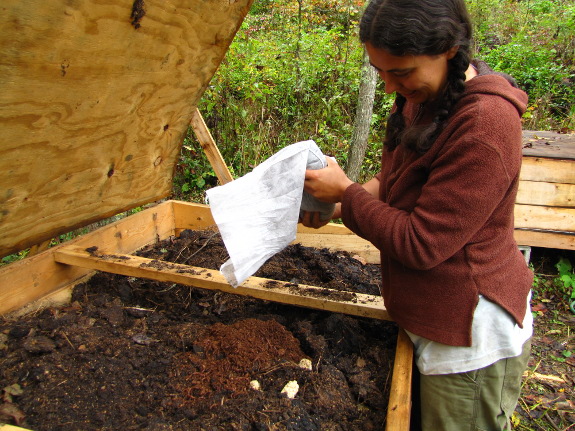
Except for one last bed
of lettuce, we've planted all of our crops for 2012, so the worm bins
will have all fall, winter, and early spring to work before I ask for
castings. Then I'll add fresh manure to one end of each bin and
let the wrigglers migrate over before scraping up the black gold to put
on the garden. Assuming nothing else goes wrong, I'm hopeful that
this will be the last set of worms we'll have to buy for a good long
time.
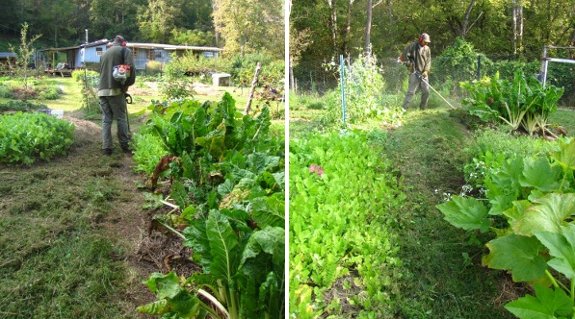
We discovered last year that
a simple quick
hoop can help most leafy greens survive the winter and the cold
seems to add a sweet flavor to the taste.
This year's list is quite
yummy.
Mustard
--- Tendergreen, Broadleaf, and Giant
Lettuce
--- Red Saladbowl and Black-seeded Simpson
Kale ---
Red Russian and Improved Dwarf Siberian
Tatsoi
Tokyo
Bekana
Swiss
Chard --- Fordhook Giant
It's my opinion that fresh
cut greens from the garden can perk you up on a cold winter day much
better than frozen produce no matter how awesome it was when you first
picked it.
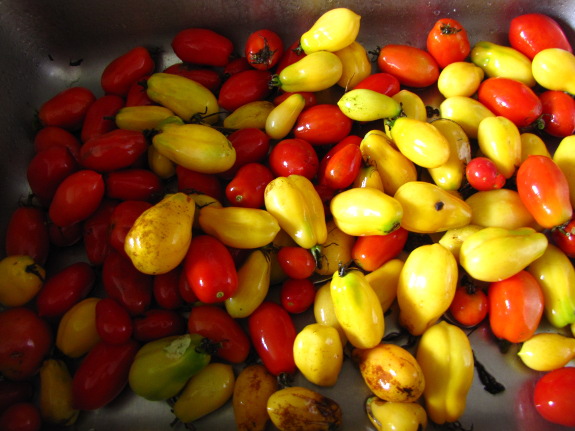
If you told me in June
when I was itching for a real tomato that I'd soon be sick of them, I
wouldn't believe you. But by the end of September, I'm actually
glad to see the harvest dwindle from two, to one, then finally down to
half a basketful.
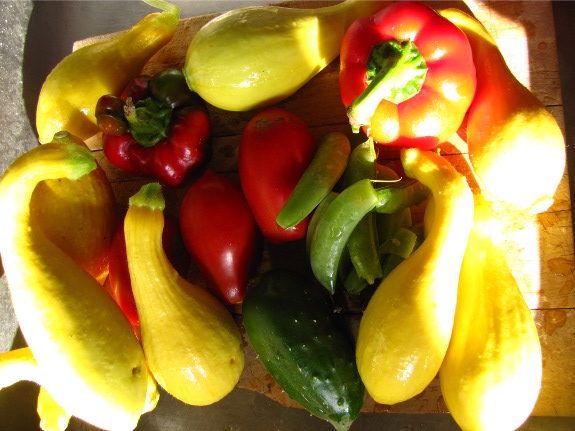
Instead, I'm enjoying
the return of the salad. Fall is the best time for salads, when
the lettuces are back, tender and sweet, and can share the dish with
sugar snap peas, bright red bell peppers, tomatoes, and
the last few cucumbers.
The fall greens
are vivid in the mule garden, but I'm mostly saving those to enjoy
after the frosts sweeten their foliage. Instead, the highlight of
the
weekend is when I pick the first broccoli, looking forward to a full
month of one of our favorite vegetables. Oh, and stumbling across
some
shiitakes poking up out of mushroom
rafts I'd given up
on.

There are rodent-gnawed
sweet potatoes to be eaten up, butternut squash to turn into pies, and
onions and garlic on the shelf. The white potatoes' tops are
finally dying back (although I've been rooting out immature tubers for
a while anyway) and the carrot beds are yielding up thinnings that
become more and more carrot-like very week.
I'll probably put a few
more containers of produce in the freezer, but mostly we're just
eating now. The goal is not to take any food back out of the
freezer until at least November, if not December, and the fall garden
seems happy to oblige.
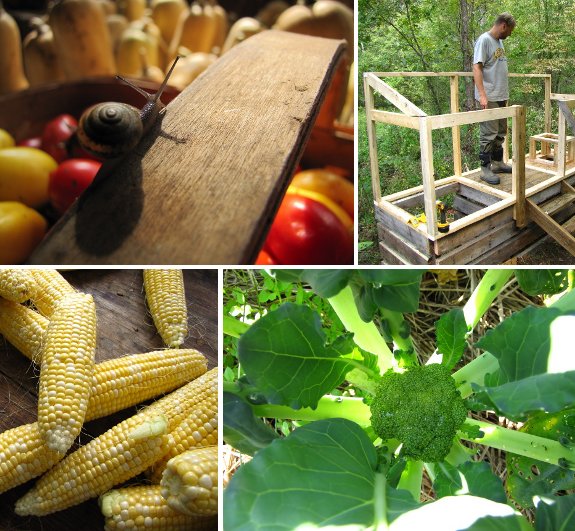
The folks at Mother
Earth News asked us to be
one of their blog contributors.
Once a week we post a summary
of what we've been up to with a few links.

Or explore more posts by date or by subject.
About us: Anna Hess and Mark Hamilton spent over a decade living self-sufficiently in the mountains of Virginia before moving north to start over from scratch in the foothills of Ohio. They've experimented with permaculture, no-till gardening, trailersteading, home-based microbusinesses and much more, writing about their adventures in both blogs and books.