
archives for 03/2012
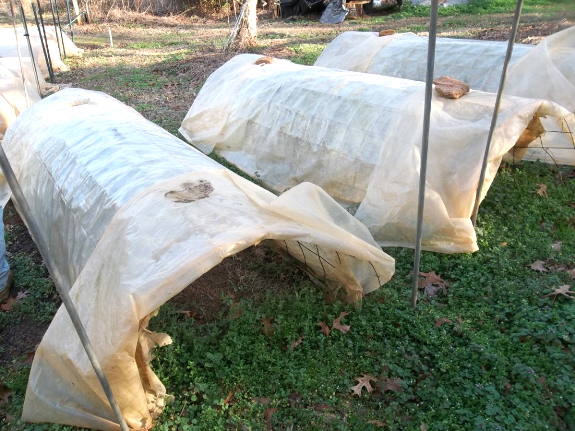
Joy wrote in recently to
tell me about an alternative quick
hoop design she'd
seen while touring a nearby farm. She wrote:
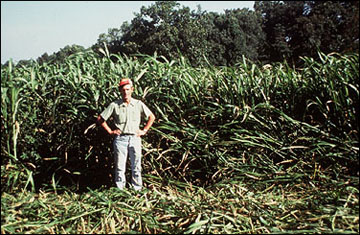
 Neither had I, so I thought I
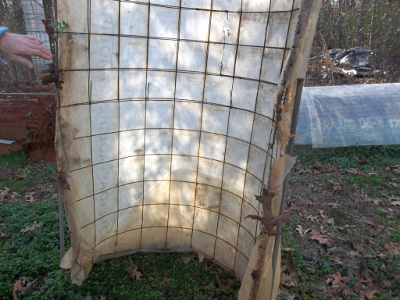
should share the design. It looks like the structure of the hoops
comes from remesh with metal pipes along the bottom.
Neither had I, so I thought I
should share the design. It looks like the structure of the hoops
comes from remesh with metal pipes along the bottom.I'm a bit afraid of the scratch factor from working with remesh, but I think the design has merit as a jumping off point for further experiments. If you try it out, I'd be curious to hear what you think of this alternative. And, as you spread the idea, be sure to credit it back to Steve Whiteman at Trillium Farms who can be reached at stevesmicrogreens@gmail.com.
Our chicken waterer prevents day old chicks from
drowning and gets them off to a healthy start.
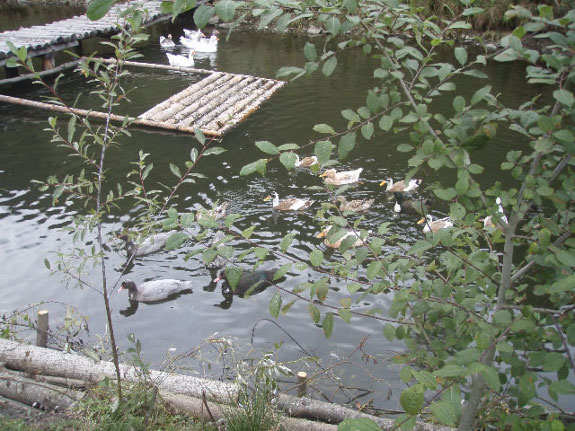
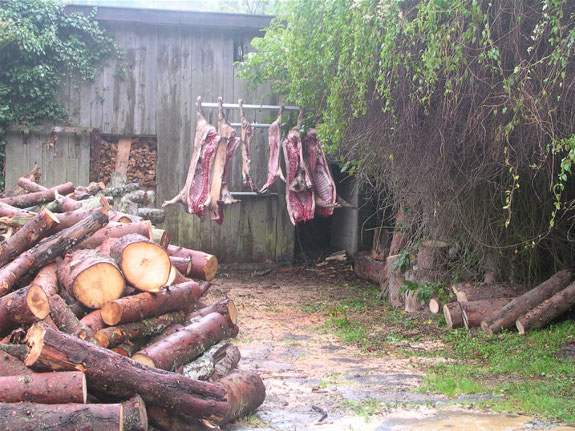
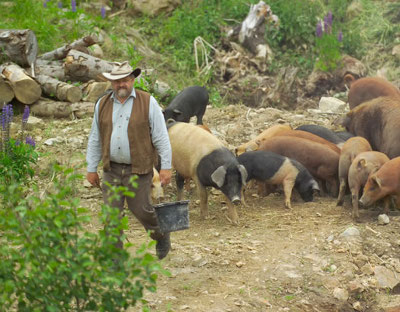
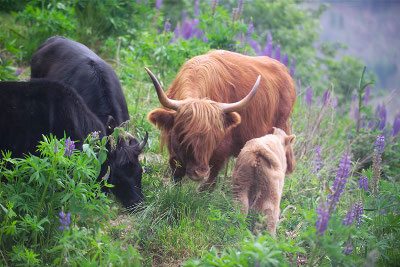 Sepp Holzer raises cattle,
bison, yaks, water buffalo, ducks, and chickens on his farm, but his centerpiece
animal is clearly
the pig. His swine are nearly self-sufficent, and also help out
by eating spoiled fruit in the orchard, increasing plant diversity by
creating small patches of bare ground, and regulating the snail
population. Holzer scatters feed on the ground when he wants the
soil loosened, and his pigs till that specific patch of earth.
And, of course, they provide meat.
Sepp Holzer raises cattle,
bison, yaks, water buffalo, ducks, and chickens on his farm, but his centerpiece
animal is clearly
the pig. His swine are nearly self-sufficent, and also help out
by eating spoiled fruit in the orchard, increasing plant diversity by
creating small patches of bare ground, and regulating the snail
population. Holzer scatters feed on the ground when he wants the
soil loosened, and his pigs till that specific patch of earth.
And, of course, they provide meat.
 Holzer's pigs (and other
livestock) live in rotational paddocks that encompass his entire
farm. So the pigs move through the vegetable garden when it's
fallow, through the orchard to clean up windfalls, and
through the green
manure areas busy
improving the soil.
Holzer's pigs (and other
livestock) live in rotational paddocks that encompass his entire
farm. So the pigs move through the vegetable garden when it's
fallow, through the orchard to clean up windfalls, and
through the green
manure areas busy
improving the soil.
The pigs are stocked at
a density of about one to five pigs per acre, and are allowed to do a
moderate amount of damage before moving to the next paddock.
Holzer ensures that perennial tubers like Jerusalem artichokes aren't
entirely dug up by swine snouts, and finds that pig action spreads
smaller tubers around so that the plants actually expand before the 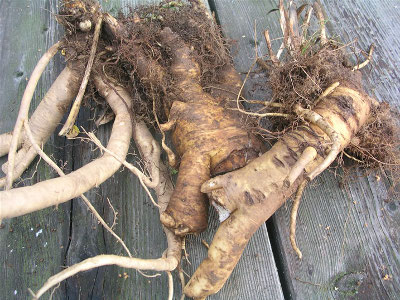 livestock come through
again. In the vegetable garden, he makes sure to leave lots of
crops unharvested at the end of the year, including beets, carrots,
turnips, cabbage, and potatoes, so that the pigs have something to eat
during the winter. And after the pigs leave a paddock, Holzer
seeds bare ground with green manure crops, tree seeds, or vegetables.
livestock come through
again. In the vegetable garden, he makes sure to leave lots of
crops unharvested at the end of the year, including beets, carrots,
turnips, cabbage, and potatoes, so that the pigs have something to eat
during the winter. And after the pigs leave a paddock, Holzer
seeds bare ground with green manure crops, tree seeds, or vegetables.
For those of you who
want to follow along at home, the trick to making sure that pigs
don't create a moonscape is variety choice and plenty
of space. Holzer's favorite breeds are Mangalitza, Swabian-Hall,
Duroc, and Turopolje, heritage breeds that may or may not be available
in the United States.
| This post is part of our Sepp Holzer's Permaculture lunchtime series.
Read all of the entries: |
There's a small piece of 1x1
attached to the bottom edge of the carpet
for weight.
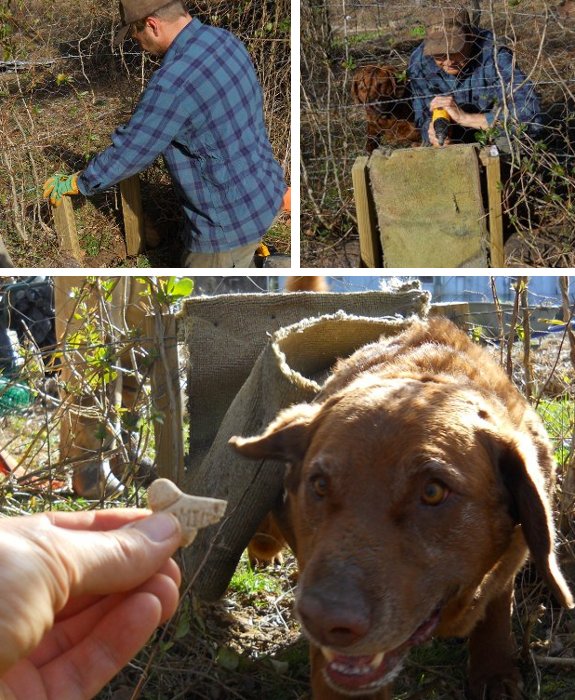
We will soon find out if
chickens are smart and or strong enough to push through.
Lucy figured it out in 10
minutes once we involved a chunk of Milk Bone.
 When
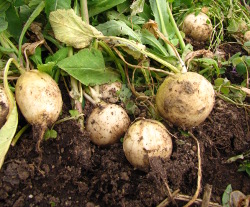
we started eating our Hakurei turnips in November, Daddy admonished me, "Don't
eat the turnips, eat the greens all winter long." So I left them
alone to see what would happen.
When
we started eating our Hakurei turnips in November, Daddy admonished me, "Don't
eat the turnips, eat the greens all winter long." So I left them
alone to see what would happen.
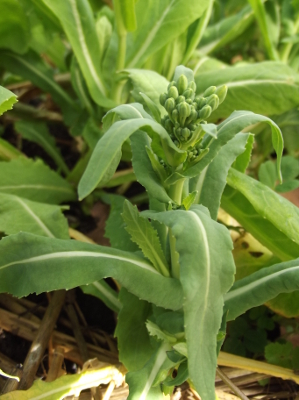
I was disappointed when
my turnips didn't put out many more leaves, but that's to be expected
since our Persephone
Days were beginning
by the time I cut the turnip tops the first time. Then, this
week, I discovered the real treat from overwintering turnips ---
"turnip raab" (aka "almost broccoli raab").
Despite the name,
broccoli raab is actually most closely related to turnips. Also
known as rapini, the vegetable is grown primarily for the unopened
flower buds, which can be cut repeatedly and which taste a bit like
broccoli. I haven't had good luck with broccoli raab in the past
--- it seems to bolt quickly and barely give me much of a harvest ---
so I stick to real broccoli.
That said, the flower
buds on my turnips were delicious, and the plants seem to be following
the lead of their relatives by sending out side shoots once I cut the
main head. 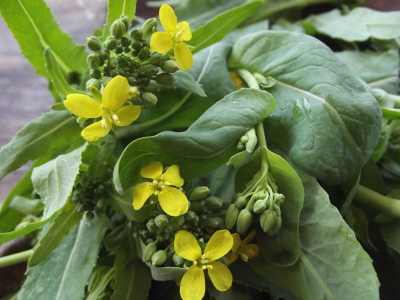 We've been eating bolted
mustard buds for a few weeks now, but the turnip buds are clearly a cut
above, with thicker stalks that don't go woody as quickly.
We've been eating bolted
mustard buds for a few weeks now, but the turnip buds are clearly a cut
above, with thicker stalks that don't go woody as quickly.
The moral of the story
is --- if you have overwintering turnips, go out and check on them now
for some bonus broccoli raab. The buds are best before they open,
but even young flowers like this are pretty tasty when you saute with
some mustard leaves and a bit of balsamic vinegar and peanut oil.
Whatever you do, don't pull out the bolting plants and consider them a
loss!
 Sepp
Holzer's book has a whole chapter on growing edible mushrooms, which
helped me realize that he was probably the one who came up with the
ideas of mushroom
totems and notching
logs for easy inoculation. He also has the
following helpful tips for the permaculture mushroom keeper:
Sepp
Holzer's book has a whole chapter on growing edible mushrooms, which
helped me realize that he was probably the one who came up with the
ideas of mushroom
totems and notching
logs for easy inoculation. He also has the
following helpful tips for the permaculture mushroom keeper:
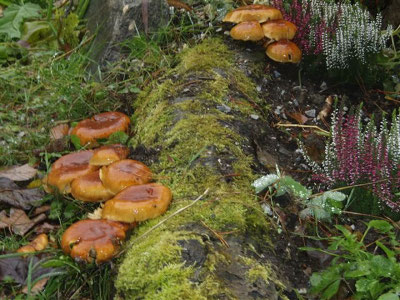
- Inoculate most logs ASAP, but wait to inoculate stumps until they stop resprouting. (I'll bet this is why neither of my stumps have produced fruit --- the living tree probably killed off the invading fungi.)
- Propagate most mushrooms by spawn, but use spores with woodtufts and enoki. Just place ripe caps on the end of moist, newly cut logs and the fungi will colonize them. However, spore propagation takes much longer than vegetative propagation, even among the mushroom species that handle the process well.
- To plug inocolution holes quickly when you're out in the woods, just stick in a twig of the right size and cut off the excess.
 When inoculating logs with
notches, cut more than half the diameter of the log, fill it with
spawn, and cover the wound with plastic sheeting or adhesive tape.
When inoculating logs with
notches, cut more than half the diameter of the log, fill it with
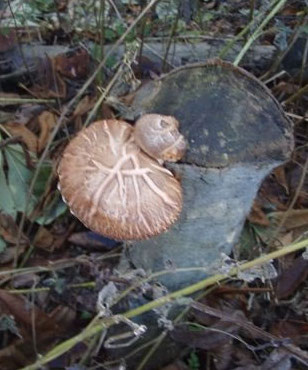
spawn, and cover the wound with plastic sheeting or adhesive tape.- Rather than sticking mushroom totems in the ground right away, expedite colonization by pushing all of the logs together and covering them with leaves and jute bags. Once fungi have grown through the logs, you can sink them a third of the way in the ground in the direction that the tree grew for low-work fruiting.
- Onion bags full of ripe mushrooms can be hung in trees to spread
spores throughout your woodland.
Although his mushroom
chapter is only twenty pages long, it's one of the best primers I've
seen for homesteaders who want to incorporate mushrooms into their
ecosystem in the easiest ways possible.
| This post is part of our Sepp Holzer's Permaculture lunchtime series.
Read all of the entries: |

Our new Eco-Glow chick
brooder works great, but
it needs some help on cold, wet mornings like today.
The above configuration is
full of possible hazards, but not a terrible solution if you can
control any possible delinquent
cats that might be in the vicinity.
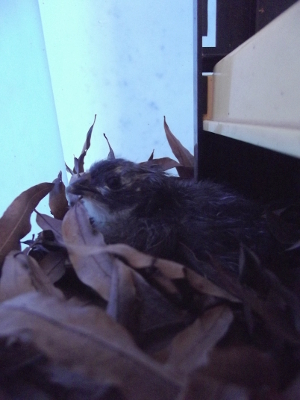
I was going to include a
picture of the first new chick, but I guess he's camera shy.
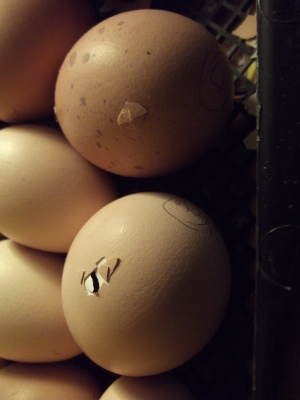 I
was totally unprepared for our first hatch of the year, for a couple of
reasons. First, our 2011 chicks never seemed to even consider
hopping out of their shells until day 22, which I now figure may be due
to our hatching
eggs being weakened
when they were jostled around by the postal service.
I
was totally unprepared for our first hatch of the year, for a couple of
reasons. First, our 2011 chicks never seemed to even consider
hopping out of their shells until day 22, which I now figure may be due
to our hatching
eggs being weakened
when they were jostled around by the postal service.
Which is all a long way of saying --- I thought I had all day Friday to
get the little indoor brooder ready for chicks so that I could be
prepared for a hatch to begin Saturday afternoon. The tupperware
container was outside, wet and dirty, and the leaves I planned to use
for bedding were still a bit damp.
Second, by this stage of
the winter, I've gotten acclimated to mild cold. Most
of this past week, overnight temperatures only dropped into the
forties, and
I woke to a trailer around 50 degrees Fahrenheit. It hardly
seemed
worth lighting a fire since my morning walk with Lucy warmed my blood
enough to tide me over until the sun came through the trees and heated
the trailer to summer levels. But chicks are less resilient (and
our brooder is only rated down to 50 degrees Fahrenheit with bone dry
chicks and bedding).
So our first chick of
2012 hatched into a household scurrying around to prepare his
brooder. I set Mark on cleaning out the brooder while I watched
the tiny ball of fuzz push its way out of the shell.
Last year, I got into
the habit of moving chicks out of the incubator nearly immediately
rather than waiting until they dried off fully since I didn't like
newly hatched chicks rolling the unhatched eggs around. So, half
an hour after hatch, I plucked out our hatchee and popped him under the
Brinsea
Ecoglow Brooder.
 Peep, peep, peep. The peeping got worse
and worse until I was tearing out my hair. I thrust the chick
back into the incubator, lit a fire in the woodstove, and turned on a
space heater, all at the same time. (At least the chick didn't
end up in the stove.) Then, half an hour later, I tried Operation
Chick Move again.
Peep, peep, peep. The peeping got worse
and worse until I was tearing out my hair. I thrust the chick
back into the incubator, lit a fire in the woodstove, and turned on a
space heater, all at the same time. (At least the chick didn't
end up in the stove.) Then, half an hour later, I tried Operation
Chick Move again.
Peep, peep, peep. Boy, that chick
wasn't a happy camper, and neither was I. With some trepidation,
I set the brood box up on top of the space heater and ran to get Mark's
input.
Peep,
peep, PEEP. The chick was still
yelling his head off, so Mark
added another space heater to increase the temperature inside.
Peep, peep, peep, peeeep.
Finally, peace and quiet! Lesson learned --- homegrown eggs might
pop open on day 20 and early spring chicks need some extra heat beyond
the Brinsea brooder during the drying off period. And here I
thought I was such an old hand that there wouldn't be any drama during
the hatching period. Stay tuned to hear the stats on the rest of
the hatch.
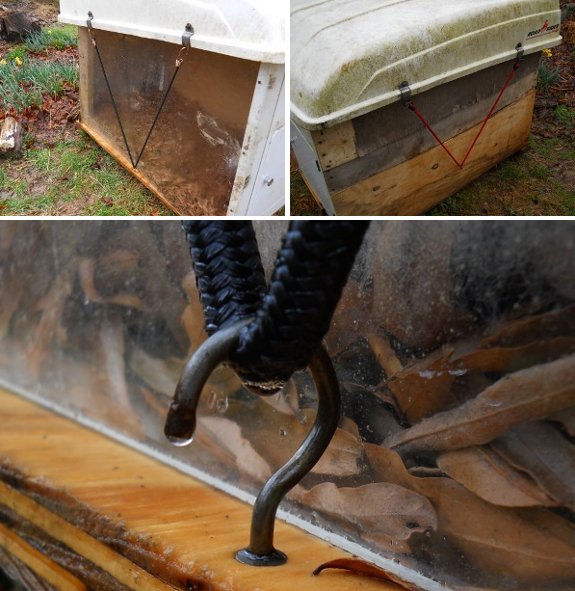
Two bungee cords was what it
took to make the new chick
coop convertible.
I've been using these mug
hooks on several projects lately.
They're self starting and
easy to install. I try to keep a package on hand for any emergency chicken projects.

We're flooded in and our
roofing
tin is partially
submerged halfway back through the floodplain. But talking about
that isn't nearly as much fun as pondering ebook ideas.
I told you two weeks ago
that working
hard to make Weekend Homesteader a text worthy of print publication had
worn me out...but
that I expected to be gungho about writing again by the end of the
month. Sure enough, last week I started dreaming up ebook ideas
as I weeded the beds to prepare for planting spring greens. Here
are the top contenders so far:
- Garden Ecology ---
Several books cover the identification of beneficial and pest insects,
but I would delve deeper, walking you through identifying large and
small critters, fungi, and plants that live in your garden but don't
cause enough problems to end up on the list of garden bandits.
With chapters on producers, decomposers, predators, and pollinators,
you'd learn about food webs and nutrient cycles and figure out how to
manage your garden to keep a healthy ecosystem in place.
Estimated length: 4 ebooks with 30 to 40 pages each.
- The Permaculture Chicken
--- This intermediate guide to chickens starts where most books leave
off and helps you turn your flock into a more self-sufficient and
integrated part of the homestead. Learn the pros and cons of
housing your chickens in tractors, pastures, or free range; choose
chicken varieties good at rustling up their own grub; and manage a
small-scale pasture of annuals and perennials that keeps your flock
healthy. A chapter on incubation will make raising your own
chicks less traumatic for newbies, while tips on cooking with heirloom
chickens will help you make the transition from supermarket chicken
breasts to more wholesome fowl. Finally, I'll give you ideas for
using chickens as more than mere producers of eggs and meat --- their
pastures can keep out deer, their manure can feed the garden, and the
chickens themselves can scratch cover crops into the ground.
Estimated length: 6 ebooks with 30 to 40 pages each.
- No-till Cover Crops ---
This short guide reveals the pros and cons of the three main types of
cover crops --- small grains, legumes, and everything else --- and
helps you choose varieties that match your gardening style. Learn
the easiest ways to plant and kill cover crops without tilling the soil,
then time your planting to fit into fallow periods you didn't even know
existed in your garden year. Estimated length: 1 ebook with 30 to
40 pages.
You did such a good job
of choosing a
winner
last year that I'm going to let you weigh in on this year's project as
well. Which of these ideas sounds like something you'd like to
hear me
write about at length? Is there another topic you wish I'd write
about instead? Thanks in advance for your feedback!

The creek is still too high
to cross wearing hip waders.
Not a problem if you're part
of the dedicated roofing team working on our barn.
They got the tin moved
back and all but one panel installed.
We are both very impressed
with their level of hustle!
 Rather
than braving
the raging creek to
carry in the milled grain we bought for our chicks, I've been
tantilizing their budding appetites with hard-boiled eggs.
Technically, I could have just waited until the flood waters receded
--- after all, chicks can go for three days without food or water after
birth. But they'd already figured out how to drink from
their chicken waterer within hours of landing in
the brooder, so I figured they could handle some solids as well.
Rather
than braving
the raging creek to
carry in the milled grain we bought for our chicks, I've been
tantilizing their budding appetites with hard-boiled eggs.
Technically, I could have just waited until the flood waters receded
--- after all, chicks can go for three days without food or water after
birth. But they'd already figured out how to drink from
their chicken waterer within hours of landing in
the brooder, so I figured they could handle some solids as well.
I can't help wondering
whether we couldn't get chicks off to an even better start by feeding
them real food for the first few weeks, while their appetites are small
enough that the fancy foods won't break the bank (or wear us out
foraging). I've seen a mother hen pecking apart worms for her day
old offspring, which makes me think animal products are the way to go.
What's your favorite
homemade chick starter feed? Have you ever raised chicks on
non-storebought feed?
 This
week's lunchtime series is a little unusual. I usually either
titillate you with a topic I feel (semi-) expert on, or highlight the
most interesting facts from a book. But topworking my pears was
so educational (and photo rich) last week that I decided to bring you
along and let you walk through the process with me.
This
week's lunchtime series is a little unusual. I usually either
titillate you with a topic I feel (semi-) expert on, or highlight the
most interesting facts from a book. But topworking my pears was
so educational (and photo rich) last week that I decided to bring you
along and let you walk through the process with me.
I have to admit, though,
that I'm far from an expert at grafting.
I've taken a couple of workshops and read a few websites and chapters
on the topic, but I'm still very much learning. I'm also
experimenting with ways to graft without buying the tools and
supplies most grafters think they need since I figure if I went out to
find the official
tools for every project I wanted to try on the homestead, we wouldn't
have room for them even in our huge barn.
Which is all a long way
of saying that I hope those of you with more
experience will chime in this week and point me in a different
direction if you think I'm going astray. And, as for the rest of
you with even less experience than me, take this series with a grain of
salt --- this is the way I did it, not necessarily the way you should.
| This post is part of our Grafting Experiment lunchtime series.
Read all of the entries: |
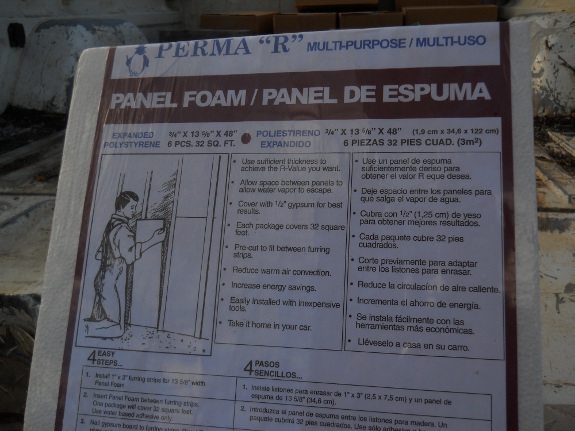
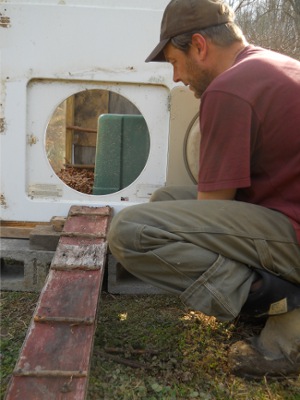
Need some foam,
but don't know how to get an 8 foot by 4 foot sheet in your car?
You could cut the sheet into
sections in the parking lot, or get one of these panel kits for about 6
dollars.
 We've had a strangely
elongated hatch this time around, which I think is due to cold weather
exacerbating differences
in temperature within the incubator. But it's hard to
complain when the final count is 18 living chicks, two yolkers (which
were either infertile or died very young), and one fully formed but
dead in the shell chick. (It's possible even that last guy might
have hatched, but I thought for sure he was dead when he hadn't pipped
by the end of day 23!)
We've had a strangely
elongated hatch this time around, which I think is due to cold weather
exacerbating differences
in temperature within the incubator. But it's hard to
complain when the final count is 18 living chicks, two yolkers (which
were either infertile or died very young), and one fully formed but
dead in the shell chick. (It's possible even that last guy might
have hatched, but I thought for sure he was dead when he hadn't pipped
by the end of day 23!)
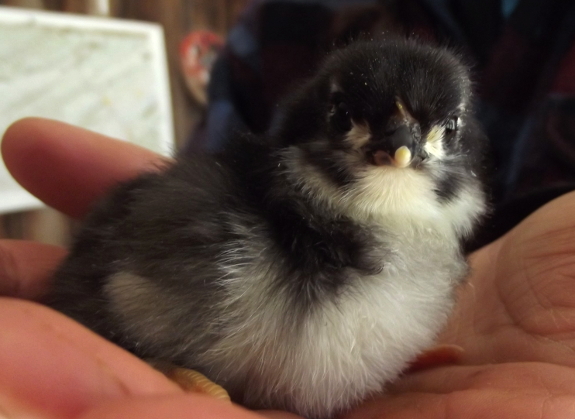
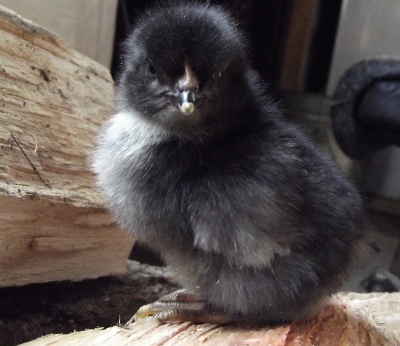
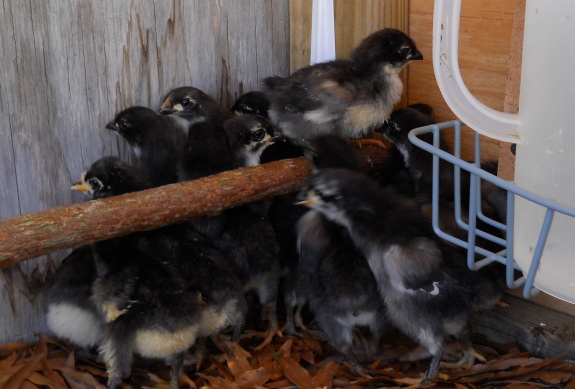
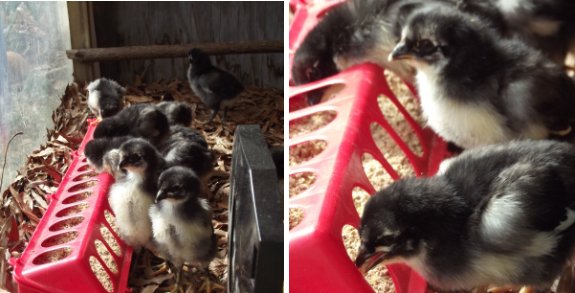
Most of the chicks have australorp
fathers and mothers, but two have sussex and seven have marans
mothers. You know how humans take one look at the squashed up
 face of a newborn baby and immediately say it looks like the father
(seldom the mother)? Well, I thought the same of our little
hybrids at first. But soon I noticed that some appeared blacker
than others, making me think those are the maransXaustralorp
chicks. I wonder if I'll see signs of hybrid vigor when the time
comes to weigh then eat them?
face of a newborn baby and immediately say it looks like the father
(seldom the mother)? Well, I thought the same of our little
hybrids at first. But soon I noticed that some appeared blacker
than others, making me think those are the maransXaustralorp
chicks. I wonder if I'll see signs of hybrid vigor when the time
comes to weigh then eat them?
(As you can tell, the
creek went down enough that I could bring in the chick feed. Our
youngsters thought the milled grain was almost as interesting as hard-boiled
egg yolks, but they
spilled it pretty badly until I made a homemade feeder. More on
that eventually if it works.)
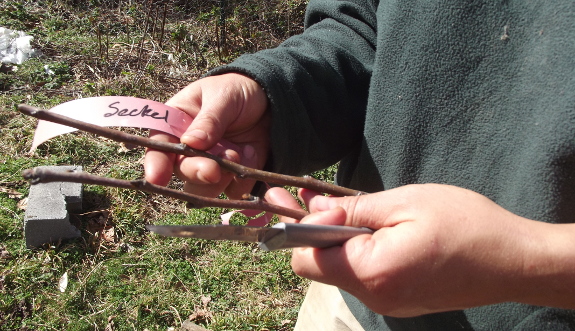
My first step after
deciding to topwork my two pear trees was to
find scionwood. I wanted to try specific varieties, so I ordered
some from Burnt Ridge Nursery, but you can also get scionwood from a
neighbor's tree if you know you like the taste and habits of their
fruit varieties. The best scionwood is about the thickness of a
pencil, is from last year's growth, doesn't contain flower buds, and
does contain two or three leaf buds. Longer scionwood is fine,
and gives you some wiggle room in case you make the first cut wrong ---
you can always shorten it to three buds later.
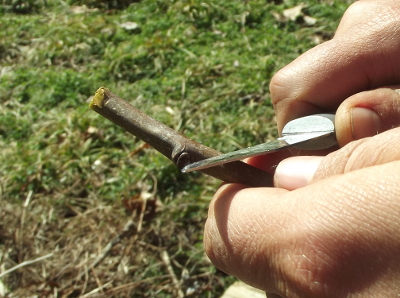
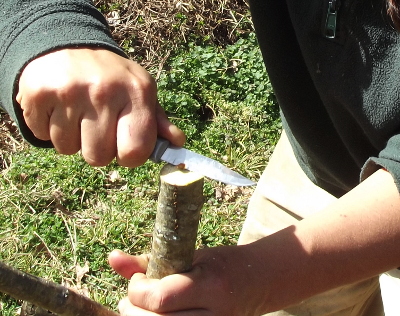
Although you should wait
to prepare your official scionwood until it's ready to go into place
(Thursday's post), raw beginners like me should practice first so we
become relatively adept at our cuts before working on the limited
scionwood. Grafting cuts should always be as straight as
possible, which means you should try to make them with a single cut
rather than "whittling" --- fixing incorrect cuts by making two or
three more cuts. The photo above shows some of my early practice
strokes --- you can see the curves that result from whittling.
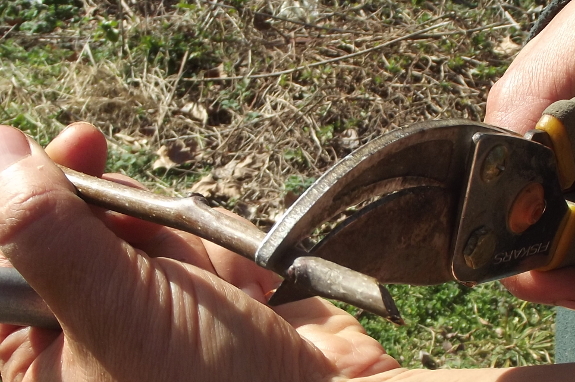
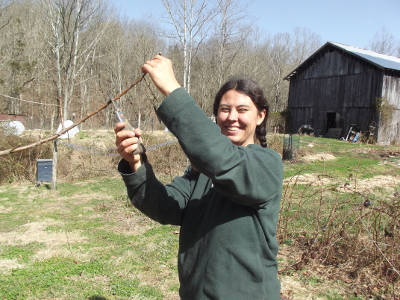 Luckily for me, I had plenty
of wood to practice on. I planned to cut the whole top off my two
small pear trees and insert new scionwood in a cleft graft, so nearly
all of the twigs on the tree were fair game.
Luckily for me, I had plenty
of wood to practice on. I planned to cut the whole top off my two
small pear trees and insert new scionwood in a cleft graft, so nearly
all of the twigs on the tree were fair game.
I actually practiced on
a little walnut tree I needed to cut out of the yard first, but soon
discovered that different trees' twigs behave very differently.
If you're going to graft a pear tree, practice on some pear twigs; if
you're going to graft an apple, practice on an apple.
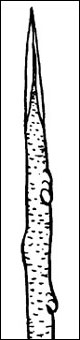 So, what did I want my cuts
to look like? The easiest grafting cut is for a whip graft, where
you attach two twigs of the same diameter together. That kind of
graft simply requires a long straight cut so that the scionwood comes
to a point, as is shown in the drawing to the left.
So, what did I want my cuts
to look like? The easiest grafting cut is for a whip graft, where
you attach two twigs of the same diameter together. That kind of
graft simply requires a long straight cut so that the scionwood comes
to a point, as is shown in the drawing to the left.
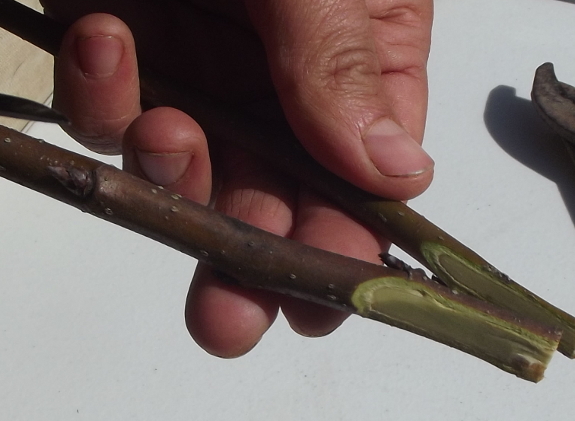
For my cleft graft, I
needed to make a slightly more complex cut. I wanted to turn the
base of the scionwood into a wedge by making two angled cuts. To
complicate matters further, the wedge needed to be pie-shaped in
cross-section, with the side containing the lowest bud larger than the
other side of the twig. This sounds complex, but wasn't really
that hard to cut, once I wrapped my head around the goal.
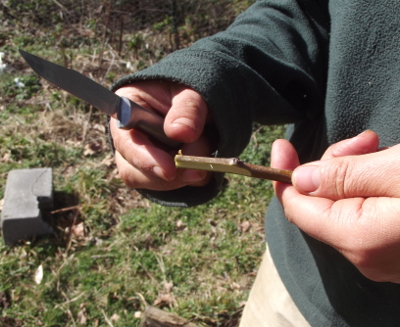
Time to start
cutting! Grafting teachers always warn you to make sure the buds
point up, which seems ludicrously obvious to me, but maybe folks not as
tuned into plants need to be told that? Once you turn your
scionwood right side up, decide which spot will be the bottom of your
cut. I learned the hard way that you won't get a nice, straight
cut if you try to go through a node (where the buds are), so I cut my
scionwood off just above a bud.
It's best if you also
choose a spot where the internode (length of wood between two buds) is
 relatively long since your angled cut should be at least an inch long,
preferably 1.5 to 2 inches. Longer cuts give your scionwood a
better chance of merging with the growing tissue of the tree it's being
grafted onto.
relatively long since your angled cut should be at least an inch long,
preferably 1.5 to 2 inches. Longer cuts give your scionwood a
better chance of merging with the growing tissue of the tree it's being
grafted onto.
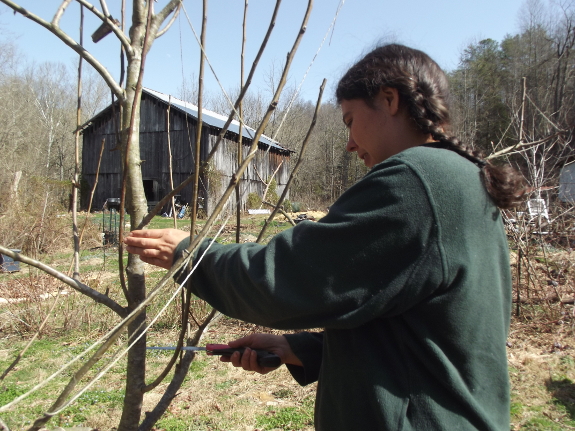
Now find a good sharp
knife (I used our chicken butchering knife, recently sharpened) and
make your first test cut. Remember, you don't want to whittle, so
you should create the wedge shape at the bottom of your piece of
scionwood in two quick cuts. Once you try it a time or two,
you'll see why I told you to practice on a twig you didn't care about.
 After making Mark stand
around in the sun and watch me whittle for about fifteen minutes, I
started to feel like my cuts were going more smoothly. Time
to move on to the next step --- preparing the tree to be grafted
onto. Stay tuned for tomorrow's post to learn tips in that
department.
After making Mark stand
around in the sun and watch me whittle for about fifteen minutes, I
started to feel like my cuts were going more smoothly. Time
to move on to the next step --- preparing the tree to be grafted
onto. Stay tuned for tomorrow's post to learn tips in that
department.
| This post is part of our Grafting Experiment lunchtime series.
Read all of the entries: |


We added 2 layers of foam to the floor of the chick
coop in an effort to retain more heat from the Eco-Glow brooder.
The plan is to use the above
Rubbermaid tub as a mini-enclosure for the brooder while inside the
chick coop.
Stay tuned to see if these
preparations will be enough to keep the new round of chicks warm and
happy.
 Can
you tell the flower buds from the leaf buds on your fruit trees?
The distinction is important if you prune in the winter, but it's also
handy to be able to guess whether your young trees are going to bear
fruit this year or not.
Can
you tell the flower buds from the leaf buds on your fruit trees?
The distinction is important if you prune in the winter, but it's also
handy to be able to guess whether your young trees are going to bear
fruit this year or not.
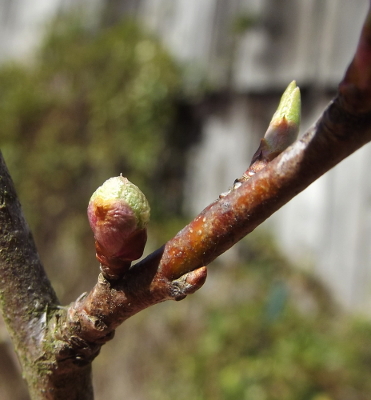
In general, flower buds
are fat and round while leaf buds are more pointy and less
significant. The differences really become obvious at this time
of year when the flower buds are swelling up in preparation for
opening, in contrast to leaf buds that are still dormant. (Well,
unless you're a plum, as is shown above, which tends to spit out leaves
at the same time it blooms.)
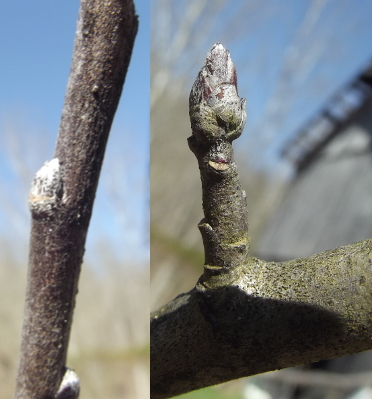 Apple
buds are a bit trickier, but share the same general theme. Most
apple varieties bloom on fruiting spurs, which are simply dwarfed twigs
sticking out the sides of your branches. You might find a single
flower bud (shown on the right) on a spur, or it might be an entire
cluster. The photo on the left shows an inconspicuous apple leaf
bud.
Apple
buds are a bit trickier, but share the same general theme. Most
apple varieties bloom on fruiting spurs, which are simply dwarfed twigs
sticking out the sides of your branches. You might find a single
flower bud (shown on the right) on a spur, or it might be an entire
cluster. The photo on the left shows an inconspicuous apple leaf
bud.
Pears buds are similar
to apples while peaches are similar to plums. Cherries fall
somewhere in between.
We got a slow start on
our apples, but our oldest tree (a Virginia Beauty planted three years
ago) seems to be covered with flower buds this year. Similarly,
our three year old Methley plum is also dotted with plump flower buds.
I'm trying hard not to
count my fruit before they ripen, though. I've learned from
experience that late
freezes can easily wipe out flower buds, and that young trees often
drop their flowers the first year rather than setting fruit. In
addition, since my Virginia Beauty may be the only apple in my orchard
who's ready to bloom this year, the precocious tree might not get
pollinated.
The plum might have
issues as well. When I bought the tree, it was marked as
self-pollinating, but now I'm seeing that Methley plums are Japanese
type plums and require pollinators --- I guess I'll see who's right
depending on whether we sink our teeth into juicy plum flesh this year
or not. Although it would be a bummer to have to wait another
three years to eat homegrown plums, I never mind an excuse to expand
our fruit selection.
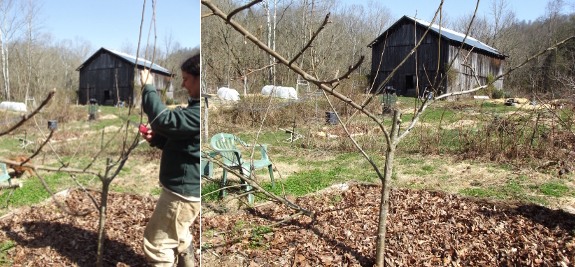
A previous post about topworking explained that my four year
old pears are small enough to graft all in one go. However, I've
also read that it can be tough for a tree of any size to suddenly lose all of its branches, so some
orchardists leave a few in place to shade the scionwood a bit so it's
not exposed to blazing sun while trying to get established. As a
result, I decided to cut into the main trunk just above the first pair
of limbs.
 The
other factor to consider when preparing your tree to be grafted onto is
ensuring you make a very clean cut. The success of a graft
depends on the cambium, which is the thin layer of living tissue just
under the bark. So, if you cut a tree and it tears half the bark
off one side in the process, your grafts are going to be less
successful.
The
other factor to consider when preparing your tree to be grafted onto is
ensuring you make a very clean cut. The success of a graft
depends on the cambium, which is the thin layer of living tissue just
under the bark. So, if you cut a tree and it tears half the bark
off one side in the process, your grafts are going to be less
successful.
I worked around this
potential problem by cutting about halfway through the tree, then
coming around to the other side and cutting through the bark
there. When I finished my cut, the top fell off the tree without
damaging the bark at all. (By the way, these sharp
little saws are awesome for making precise cuts like this.)
 Timber!
The final step in
preparing the tree to be grafted onto is to trim any irregularities
from the wood. One of my cuts came out perfect, and the other
needed just a tad of whittling with my sharp knife. Now the tree
was ready to accept scionwood and to be turned into a new variety.
| This post is part of our Grafting Experiment lunchtime series.
Read all of the entries: |
The new chick coop is ramped
up and ready for business.
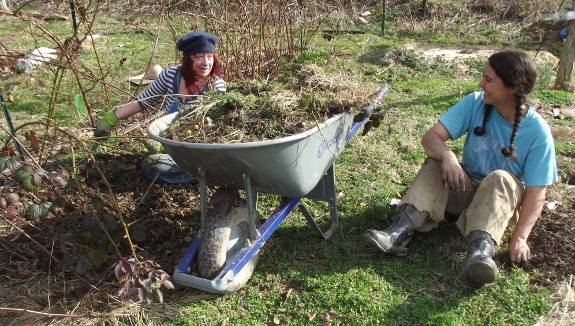
I've been lucky to have
a weeding buddy come over every week or two for the last couple of
months. Those problem perennials that I didn't quite remember to
weed in the last year? They're almost all ship shape! I
suspect that one more round of weeding will bring the last couple of
rows in line. Thanks, Anndrena!
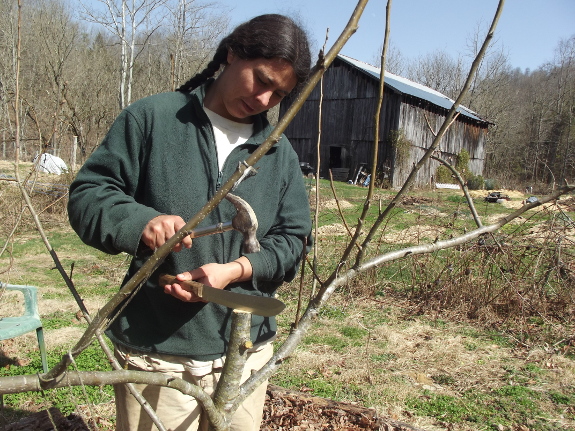
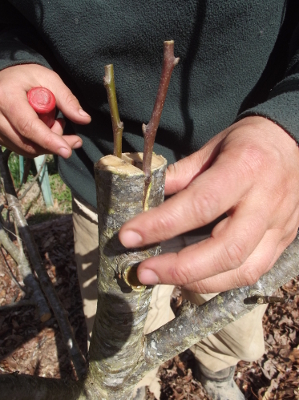
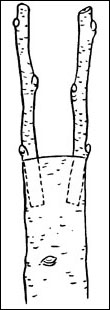
Now that I've cut
the top off of my young tree, I can insert the
scionwood. Step one is to slit the trunk of the tree vertically
for about two inches --- making the cleft.
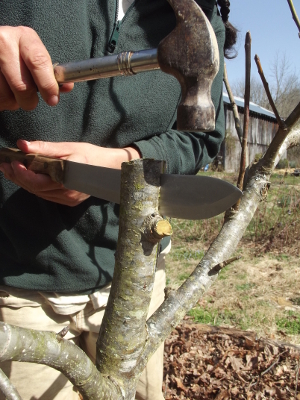
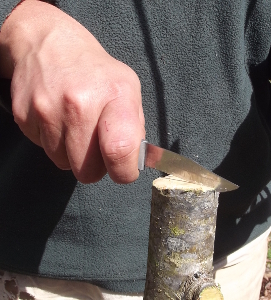
Orchadists have special
tools for cleft grafting, but I figured I could find everything I
needed between the kitchen and the toolbox. The small, sharp
knife shown below was too miniscule to do the job, but a big, dull
butcher knife combined with a hammer was just right.
I hammered the big knife
into the center of the trunk, then pounded on the sides of the knife to
insert it a bit deeper. On my second tree, I didn't make the slit
quite so deep, and found it more difficult to insert the scionwood, so
be sure to make your slit big enough the first time.
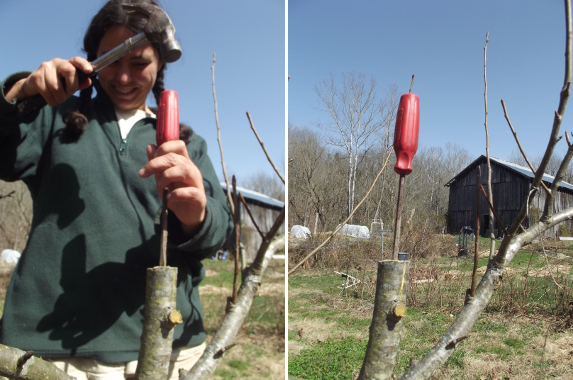
The next step is to
widen the cleft using a wedge. Again, professionals use a special
tool for this procedure, but a screwdriver pounded in easily and worked
great.
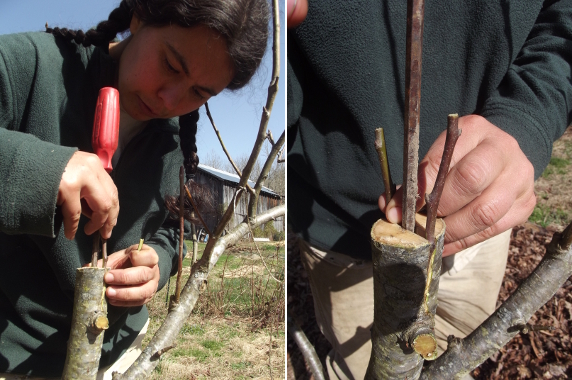
 Cut
the scionwood as described previously, then insert two pieces, one
on
each side of the wedge. If the cleft isn't quite as open as you'd
like, you can rotate the screwdriver slightly to widen the gap.
Cut
the scionwood as described previously, then insert two pieces, one
on
each side of the wedge. If the cleft isn't quite as open as you'd
like, you can rotate the screwdriver slightly to widen the gap.
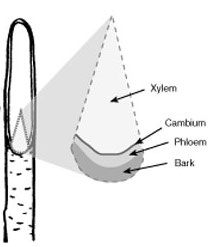
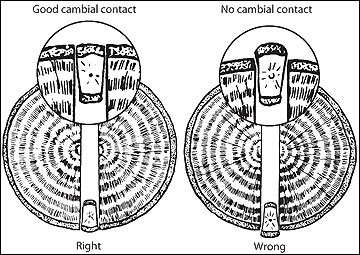
Scionwood insertion is
the trickiest and most important part of the whole process, so take a
few minutes to make sure you're doing it right. The diagram below
shows a cross section through a piece of scionwood, illustrating the
layers of different kinds of cells that make up a twig.
You can think of the cambium
as the stem cells of the plant world --- the cambium cells are still
physiologically flexible and can grow together with the cambium of a
different tree. The cambium is relatively easy to see if you have
good eyes since it tends to be bright green. Your goal is to make
sure the cambium of your scionwood lines up with the cambium of the
tree you're grafting onto.
Your gut reaction will
probably be to try to make the scionwood fit flush against the side of
the tree being grafted onto, but that's not quite right. As a
tree grows, it not only expands the xylem (the woody part in the
center), but also the phloem (which turns into the bark). So, the
cambium is going to 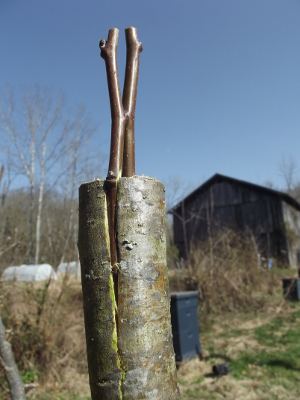 be a little deeper into the
older tree being grafted onto than it is on the little twig of
scionwood. That's why most people recommend making sure your
scionwood is slightly indented as you look at your graft from the side.
be a little deeper into the
older tree being grafted onto than it is on the little twig of
scionwood. That's why most people recommend making sure your
scionwood is slightly indented as you look at your graft from the side.
One way to hedge your
bets is to insert your scionwood at a slight angle, as is shown in the
drawing to above, so that the cambial layers intersect somewhere. This type of angled
scionwood placement won't give you as strong a connection, but is
better than nothing if you're not sure you'll get your cambial layers
lined up otherwise.
One last note on
scionwood placement (which you really should have considered when
making your cuts) --- most sources recommend that the first bud on your
scionwood sits just above the top of the tree being grafted onto.
If you had extra scionwood length, now is a good time to cut each one
down to two or three buds. Stay tuned for tomorrow's post, in
which I'll explain how to seal the cut surfaces.
| This post is part of our Grafting Experiment lunchtime series.
Read all of the entries: |
Lucy is still making holes in
the chicken pasture fence.
Arghhh...
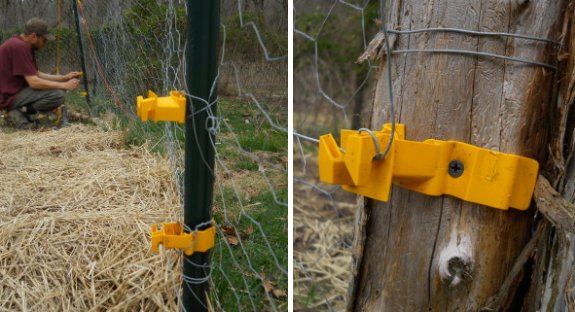
When I tested the electric
fence line we installed today it seemed a little weak. I first
thought we might be reaching the limit of distance, but the
instructions say it should go up to 1500 feet.
I'm thinking I may have not
tightened down the wing nut enough where the two wires attach. Either
that or maybe the unit is suffering some sort of power decline?
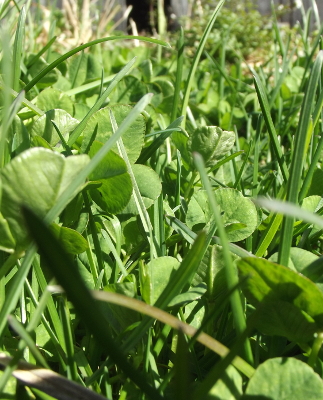
 Even though chickens get most
of their nutrition from insects and
seeds, tender young plants provide lots of vitamins and minerals (and a
surprising amount of protein). That's why I was thrilled to
notice grasses beginning to grow in several spots around the farm in
the last week.
Even though chickens get most
of their nutrition from insects and
seeds, tender young plants provide lots of vitamins and minerals (and a
surprising amount of protein). That's why I was thrilled to
notice grasses beginning to grow in several spots around the farm in
the last week.
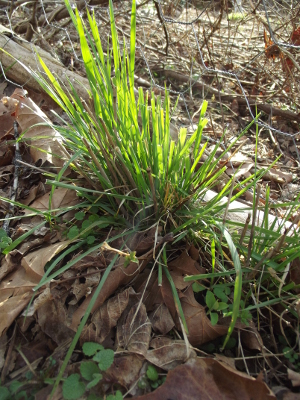
One of our newest
pastures is under the trees where "normal" grasses seldom grow.
However, a few clumps of bunchgrasses are evident. The chickens
ate them down to nubbins, but this clump has already started to regrow
in the last week since the chickens were turned out of the
pasture. Does anyone have a clue what kind of grass this might be?
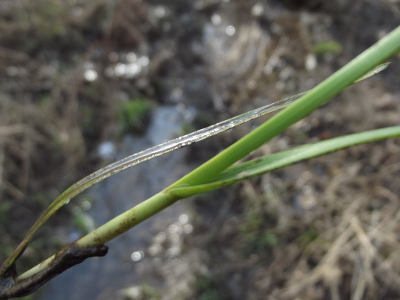
I'm relatively sure that
the tender-leaved grasses that pop up in closely mown parts of our yard
and in the treeless pastures are bluegrass. Bluegrass feels
delightful to bare feet, and 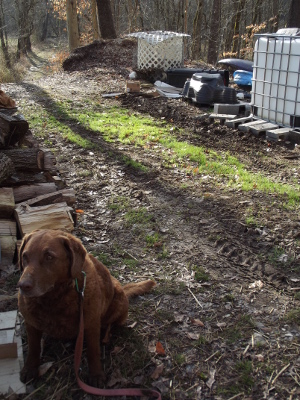 also stays tender enough for
chickens to enjoy even in the summer, so I'm pleased it sprouts
anywhere we open up the canopy and mow regularly.
also stays tender enough for
chickens to enjoy even in the summer, so I'm pleased it sprouts
anywhere we open up the canopy and mow regularly.
New bluegrass leaves
started to push up through the dead brown litter in the garden aisles a
week or so ago, but regrowth started sooner in more protected
areas. For example, this patch of green is underneath where we
usually park the truck --- I assume that big old hunk of metal
mitigated some of winter's cold and let the grass grow faster.
But the most vigorous
early spring grasses aren't in our cultivated areas at all. I
looked out across the floodplain on Monday and noticed a huge patch of
green in what we fondly term "the alligator swamp" --- a waterlogged
oxbow off our creek.
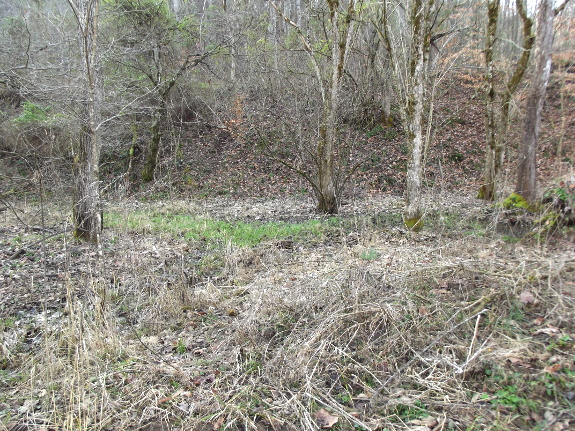
 I don't know if these
water-loving grasses are a species that always gets a jumpstart on
spring, or whether the thermal mass of the water is responsible for the
vibrant greenery. But maybe that explains why the chickens have
been hanging out in the damp area on the far side of the barn rather
than following the sun in the early morning the way they did a few
months ago.
I don't know if these
water-loving grasses are a species that always gets a jumpstart on
spring, or whether the thermal mass of the water is responsible for the
vibrant greenery. But maybe that explains why the chickens have
been hanging out in the damp area on the far side of the barn rather
than following the sun in the early morning the way they did a few
months ago.
Learning the patterns of
grass growth is essential to proper pasturing. For example, I'm
planning all of my broilers to hit the ground running just as the grass
is reaching its peak. However, I've still got a long way to go
before I thoroughly understand our sod, and grass species ID is
clearly near the top of the to-learn list. Has anyone tried out
various grass field guides and settled on one that helps from a
pasturing point of view?
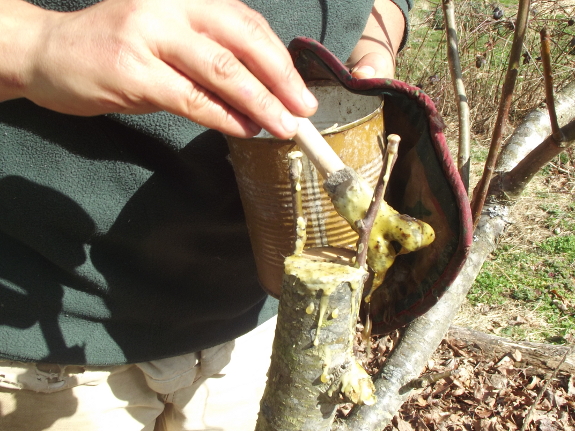
The final step in any
grafting project is to seal all cut surfaces so they don't dry out
before they're able to heal. Professionals buy grafting tar or
parafilm, but I wanted to try some materials I already had on hand.
The trick with using
beeswax or some other homegrown compound to seal your grafting cuts is
that hot wax can damage the cambium of the tree. I opted to dab
on mostly melted beeswax, figuring it wouldn't hurt the tree as long as
it didn't burn my finger when I dripped a bit of melted wax on my
skin. This is the most experimental part of my project, though,
since no one else seems to use straight beeswax to seal their wounds.
 One recipe for making your
own sealing wax includes 1 part raw linseed oil, 2 parts beeswax, and 4
parts powdered rosin. Someone else kneaded mineral oil into hobby
clay to make a sealing compound. I suspect both of these
compounds would be flexible enough that you could paint them on cold,
which would delete the potential heat problem.
One recipe for making your
own sealing wax includes 1 part raw linseed oil, 2 parts beeswax, and 4
parts powdered rosin. Someone else kneaded mineral oil into hobby
clay to make a sealing compound. I suspect both of these
compounds would be flexible enough that you could paint them on cold,
which would delete the potential heat problem.
No matter which compound
you use, you want to cover the tips of each piece of scionwood, then
liberally dab wax or tar on the top and sides of the cleft tree
trunk. Do your best to be more careful than I was and not cover
up any of the precious buds on the scionwood --- I had to pick a bit of
wax off with my fingernails.
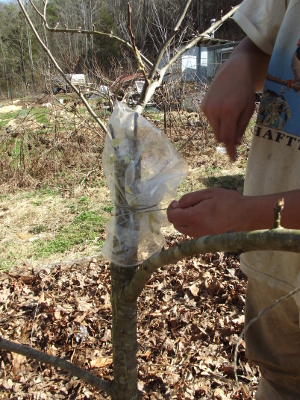
Some sources suggest
tying a plastic bag over the top of the grafted area when you're done
for an added layer of protection. It sounds like you can use
carpenter's glue to seal the graft as long as you top it off with
aluminum foil and then a plastic bag. However, plastic bags
require more work since you'll need to keep them out of direct sunlight
so they don't heat up, and then you have to take the bag off once the
scionwood starts to grow. I'm thinking of deleting the plastic
bags, actually --- what do you think?
Despite taking five long
posts to tell you about this, I performed a cleft graft on two pear
trees in less than an hour, counting all of my practice cutting
time. So don't be scared away from the process. I'll report
back this summer as our scionwood (hopefully) starts to grow.
| This post is part of our Grafting Experiment lunchtime series.
Read all of the entries: |

So I went out and tightened
down the wing nut where the two wires meet and at first I didn't notice
any change....just a low level prickly feeling when you touched
it....and then a few minutes later while I was taking a few pictures it
must have had time to charge up or something because ZOWWIE!!!!....the
darn thing jolted me so hard I dropped the camera, which softly landed
in a bed of straw mulch.

My mom sent me an email
that tickled my fancy a week or two ago:
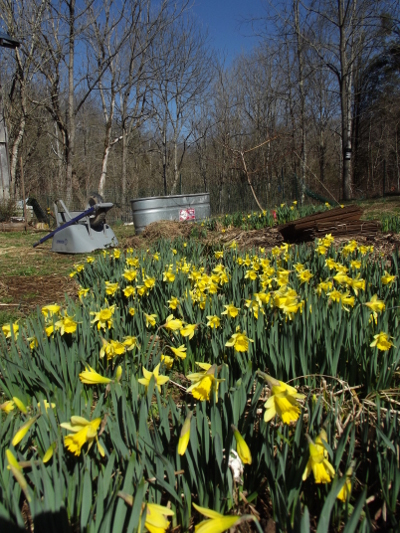 She
got interested in the idea of dandelions as an indicator of the
progression of spring, and stumbled across a Rodale pamphlet with a
chapter on "Using phenology to make planting decisions". The text
suggested paying attention to honeysuckle and lilacs "because of their
wide adaptability to different geographical areas, and their
reliability in making consistent responses to varying weather
conditons".
She
got interested in the idea of dandelions as an indicator of the
progression of spring, and stumbled across a Rodale pamphlet with a
chapter on "Using phenology to make planting decisions". The text
suggested paying attention to honeysuckle and lilacs "because of their
wide adaptability to different geographical areas, and their
reliability in making consistent responses to varying weather
conditons".
By noticing when the
indicator plants' leaves and flowers emerge, you can get an idea about
when to plant certain crops. For example, the Rodale pamphlet
recommended planting cool season crops (like peas) when lilac shows its
first leaves and waiting to plant warm season crops (like tomatoes)
until the lilacs are in bloom. Of course, oak
leaves are another classic indicator plant.
I loved Mom's idea of
testing indicator plants against soil temperature. What's your
most dependable indicator plant? Have you noticed whether it
responds to day length, air temperature, or soil temperature?

After more study I'm starting
to think tightening the wing nut was only part of the problem I was
having with the electric fence being weak.
What I missed until looking
at yesterdays picture was the washer
placement. It seems clear now that more surface area touching the
opposite wire means more charge.
Another mistake may have been
wrapping too many strands, which I think created gaps in the
connection. My new method is a simple bend that wraps around the bolt
without making a complete loop.
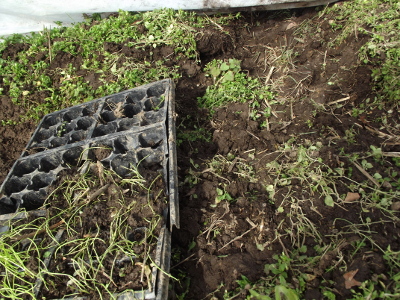
I've
tried to explain no-till
gardening to our
dog, but I just don't thinks she gets it. Last week, she tore up
a dozen beds in the mule garden, even breaking into the quick
hoops to continue
her vole hunt. She wreaked havoc on our young
onion beds, broke
the flats containing the extra transplants, but at least left me enough
living seedlings to replace her casualties.
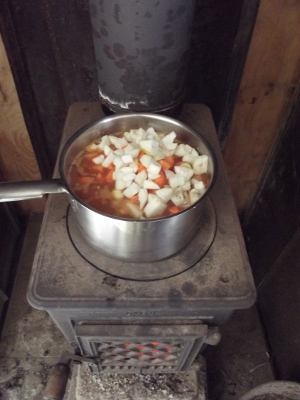 People
always say that the hardest folks to convert are your own family, so I
guess it's no surprise Lucy won't practice what I preach. At
least I found the uprooted turnips while most of them were still edible
enough to toss into a pot of lentil stew.
People
always say that the hardest folks to convert are your own family, so I
guess it's no surprise Lucy won't practice what I preach. At
least I found the uprooted turnips while most of them were still edible
enough to toss into a pot of lentil stew.
And, heck, now I know
that I don't need a pig if I ever want colonizer
livestock. I
can just turn Lucy into the paddock with a few rodents and watch the
dirt fly.
The first round of chicks
have out grown their blue Rubbermaid tub and graduated to the
new mini
coop.
Sometimes I wonder if a fake
mother hen would make new born chicks feel more secure in the first few
weeks when life is so dangerous and big.
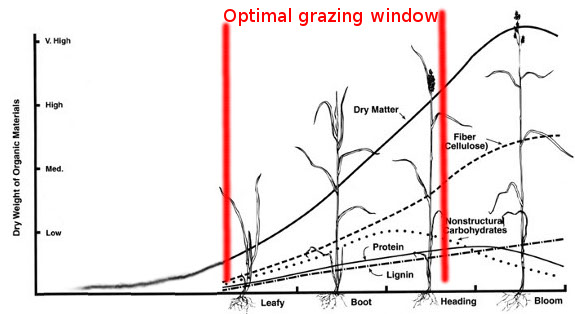
 Most pasture farmers know
that endophytes are hard on animals, causing problems ranging from
pregnancy issues to staggers. Other ailments include slow growth,
hoof gangrene, and a hard time handling hot weather. But what are
endophytes?
Most pasture farmers know
that endophytes are hard on animals, causing problems ranging from
pregnancy issues to staggers. Other ailments include slow growth,
hoof gangrene, and a hard time handling hot weather. But what are
endophytes?
If you're a ryegrass or
fescue plant, endophytes are the coolest thing since sliced
bread. These symbiotic fungi --- Neotyphodium coenophialum in fescue and Neotyphodium
lolii in ryegrass
--- spend their whole lives inside a single grass plant, eating sugars
the plant hands over willingly. In exchange, the endophytes
produce alkaloids that deter insects and keep grazers like deer, sheep,
cattle, and horses from gorging too much on the grass.
When
scientists discovered the dangers posed by endophytes, they got to work
breeding endophyte-free grasses. However, they soon learned that
plants share their sugars with endophytes for a reason --- without the
endophytes, fescue and ryegrass tend to die out 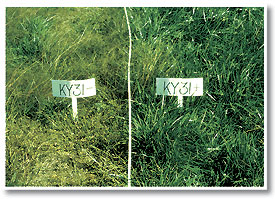 quickly. (The paired
photos show an ailing stand of endophyte-free fescue on the left and a
thriving stand of endophyte-infected fescue on the right.) Now
scientists have changed their tactics and are trying to breed
endophytes that produce the alkaloids that keep bugs at bay (peramine)
without making ergovaline (which is the most problematic alkaloid for
livestock). If you haven't planted a special (read: expensive)
strain,
though, chances are your ryegrass and fescue are infested with the
common endophyte varieties.
quickly. (The paired
photos show an ailing stand of endophyte-free fescue on the left and a
thriving stand of endophyte-infected fescue on the right.) Now
scientists have changed their tactics and are trying to breed
endophytes that produce the alkaloids that keep bugs at bay (peramine)
without making ergovaline (which is the most problematic alkaloid for
livestock). If you haven't planted a special (read: expensive)
strain,
though, chances are your ryegrass and fescue are infested with the
common endophyte varieties.
Luckily, you can work
around endophytes in many situations, giving your grasses the boost
they need to thrive without hurting your livestock's health. The
trick is to understand the life cycle of an endophyte-infected grass.
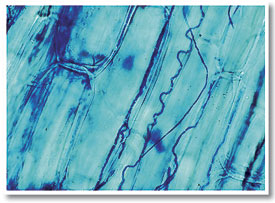
 The red lines in this diagram
show the general location of endophytes within a plant. (No, you
can't actually see anything with your naked eye.) The fungus
comes along for the ride when a seed drops off the parent plant,
spreads up into the lower portion of the leaves, and then heads up the
flower stalk to infect new seeds.
The red lines in this diagram
show the general location of endophytes within a plant. (No, you
can't actually see anything with your naked eye.) The fungus
comes along for the ride when a seed drops off the parent plant,
spreads up into the lower portion of the leaves, and then heads up the
flower stalk to infect new seeds.
As a pasture maintainer,
this life cycle tells you how to ensure your livestock don't munch on
too much of the problematic fungus. If you don't overgraze your
pastures and do graze often enough that the grasses don't want to go to
seed, your livestock probably won't get enough endophyte into their
systems to cause problems. No wonder endophyte-related illnesses
tend to show up in summer or fall, when our cool season grasses are
declining and we're forced to graze them down to nubbins.
My final
endophyte-related question was --- do endophytes harm chickens? A
quick search of the internet doesn't turn up much definitive
information. Chickens fed on a diet of endophyte-infected fescue
seeds did worse than those fed on a diet of endophyte-free fescue
seeds, but other sources suggest that, in the wild, chickens don't eat
enough grass to get sick. Fescue is generally too tough for
chickens to digest, but I did plant some annual
ryegrass in one of
our pastures since these tender leaves are supposed to be much more
palatable to non-ruminants. I'll make sure to treat the ryegrass
carefully and will let you know if I see any problems.
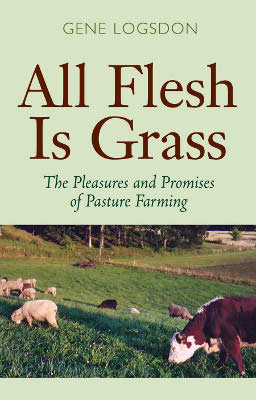 Gene Logsdon's All
Flesh is Grass
doesn't quite bring rotational grazing to the backyard, but the
author's focus on people with 2 to 100 acres who are growing meat for
personal consumption makes his ideas accessible to the average
homesteader. Don't get me wrong --- the intense information in Greener
Pastures on Your Side of the Fence and in Greg
Judy's mob grazing workshop were invaluable as I
continue to plan our pasturing setup, but it's also helpful to hear
from someone farming on a much smaller scale.
Gene Logsdon's All
Flesh is Grass
doesn't quite bring rotational grazing to the backyard, but the
author's focus on people with 2 to 100 acres who are growing meat for
personal consumption makes his ideas accessible to the average
homesteader. Don't get me wrong --- the intense information in Greener
Pastures on Your Side of the Fence and in Greg
Judy's mob grazing workshop were invaluable as I
continue to plan our pasturing setup, but it's also helpful to hear
from someone farming on a much smaller scale.
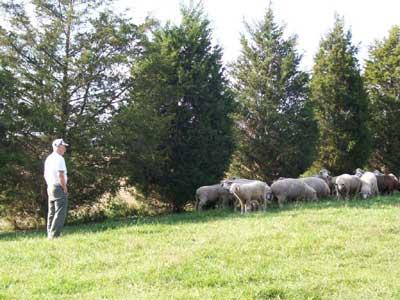
What does Logsdon's
pasture setup look like? His 32 acre farm in northern Ohio has
about 15 acres devoted to pasture, on which he raises cows, sheep, and
chickens for his family. The farm is divided into seven paddocks,
each of which is about two acres in size, and he lets livestock spend
about three weeks in each area before rotating them to the next paddock
in line. (Yes, it
is suboptimal to keep your livestock in a paddock for more than six days, but sometimes the
homesteader doesn't need to reach peak efficiency if he wants to keep
his sanity.)
Most of Logsdon's
pastures are a permanent mixture of bluegrass, ryegrass, white clover,
and tall fescue. However, he also rotates a few paddocks through
annuals (and short-lived perennials) like red clover, wheat, corn,
alfalfa, timothy, and ladino clover. Using all of these pasture
plants, Logsdon is able to start his animals on pasture in late March
and keep them there until they finish eating the stockpiled
grass in January or
February. Since he plans calving and lambing around the pasture
year, selling or eating meat animals in December, he has relatively few
livestock to feed during the nonpasture month(s).
This week's lunchtime
series will walk you through Logsdon's operation in more depth. I
highly recommend his book for the firsthand information on plant
polycultures, but have to warn you that if you have little patience for
pseudoinformation, you should skip
over the anecdotes that make up the chapters on individual types of
animals. I got bogged down in the sheep chapter for about three
months before plodding on through to the intriguing tidbits in the
second half of the book.
| This post is part of our All Flesh is Grass lunchtime series.
Read all of the entries: |
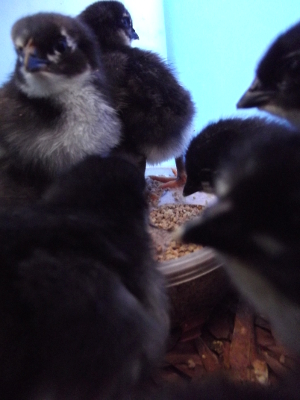
Chicks will stand in their
food dish if given the opportunity.
We've experienced this year after year, but always had bigger problems
to solve and payed the price by just adding more feed when they
scratched their way to the bottom of the dish.
This new automatic chick feeder seems to be big enough for our flock,
and so far none of them have figured out how to climb inside.
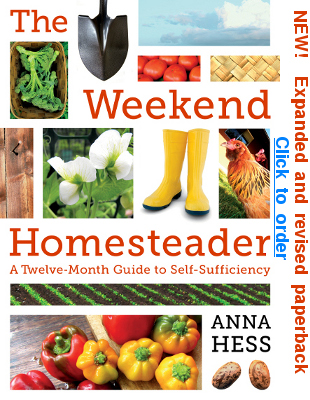 I figured that since Weekend
Homesteader is all grown up and ready to go into print, she deserved
her own page. Those of you who want to hear the blow by blow, be
sure to subscribe to the RSS feed.
I figured that since Weekend
Homesteader is all grown up and ready to go into print, she deserved
her own page. Those of you who want to hear the blow by blow, be
sure to subscribe to the RSS feed.
Meanwhile, I probably won't be blogging over here about Weekend
Homesteader until I have books in my hand. But I couldn't help
sharing the cover.
What do you think? I'm conflicted,
but I figure the publisher knows much more about covers than I do, so I
agreed to let it go to press as is.
 One of my favorite parts of All Flesh
is Grass is
Logsdon's fencing advice. Every other book and blog I've read
about rotational grazing sings the praises of temporary electric
fences, but Logsdon and I both aren't
fans of electric fences.
One of my favorite parts of All Flesh
is Grass is
Logsdon's fencing advice. Every other book and blog I've read
about rotational grazing sings the praises of temporary electric
fences, but Logsdon and I both aren't
fans of electric fences.
Logsdon started out his
operation with woven wire fences, mostly because he found a lot of free
materials. He uses heavy wooden posts that are nearly eight feet
long, driven two and a half to three feet in the ground and separated
by fifteen feet along the fenceline. As an old-fashioned farmer,
he likes posts he can cut himself --- red cedar, black locust, catalpa,
osage-orange --- but he will also split old electric poles or
railroad ties into thinner sections to use as fenceposts. His
corner posts are eight inch in diameter treated lumber, nine feet long,
sunk four feet into the ground, and braced. After pulling the
woven wire taut between these fence posts (and, yes, I was exhausted
before I even got to that part of the description), Logsdon adds a
strand of electric fence over top of the woven wire as a final line of
defense.
All of that said,
Logsdon is now changing over to livestock panels. These four foot
tall and sixteen feet long fence sections can be used on uneven
terrain, don't collapse if a tree limb falls on them, are modular and
easy to replace piecemeal, and are rated to last twice as long as woven
wire fences (for twice the price, of course). Installation is
easy --- just set a post every eight feet, with panels overlapping two
inches at the each end. After a year of closing up the holes Lucy
made in our chicken wire fences (and watching Mark swear as he tried to
stretch the fences up hills), I'm wishing we'd gone the livestock panel
route as well. Maybe for our next fences!
 While we're on the topic of
fencing, I should add that one benefit of permanent fences is that you
can plant trees long the fenceline, adding another layer of
productivity to the pasture while making animals less likely to break
through. Logsdon has tried many different types of trees and
sings the praises of apples and peaches (both grown from seed), pears,
thornless honey locusts, and chinquapin oaks for
providing extra food for livestock. Red cedars make a good
windbreak and don't taste good to livestock, so you don't have to fence
the animals away from the young trees as carefully, plus you can use
them to make fence posts.
While we're on the topic of
fencing, I should add that one benefit of permanent fences is that you
can plant trees long the fenceline, adding another layer of
productivity to the pasture while making animals less likely to break
through. Logsdon has tried many different types of trees and
sings the praises of apples and peaches (both grown from seed), pears,
thornless honey locusts, and chinquapin oaks for
providing extra food for livestock. Red cedars make a good
windbreak and don't taste good to livestock, so you don't have to fence
the animals away from the young trees as carefully, plus you can use
them to make fence posts.
On the other hand,
Logsdon has tried some trees he wouldn't plant in a pasture
again. Weeping willows and black walnuts love to drop limbs all
over the fenceline, black locust leaves are toxic to animals, and
cherries not only have poisonous leaves, they also don't make very
tasty fruits if grown from seed. In addition, even if you plant
the best-behaved  trees,
you'll need to spend a day every year cutting out grapevines, poison
ivy, and tree seedlings growing along your fencerow, but you'd spend
the same time weed-eating if you didn't have trees.
trees,
you'll need to spend a day every year cutting out grapevines, poison
ivy, and tree seedlings growing along your fencerow, but you'd spend
the same time weed-eating if you didn't have trees.
I've always liked the
idea of turning fencelines into productive zones, but with our small
pastures, trees are out of the question. However, when I bought
the scionwood
for our pear tree, I
threw in a couple of shrubs that are supposed to make good, thorny
hedges while providing edibles for chickens --- Rosa
rugosa and
Siberian pea shrub. Meanwhile, the timber
bamboo (Phyllostachys
vivax) that I
planted last year seems to be holding its ground. Maybe in
another five years or so, our fences will be lost in a sea of edible
and beautiful greenery.
| This post is part of our All Flesh is Grass lunchtime series.
Read all of the entries: |

Quick
hoop protection no longer needed?
We're crossing our fingers,
but at the same time we'll keep the hoops up and the Agribon material handy just in case.
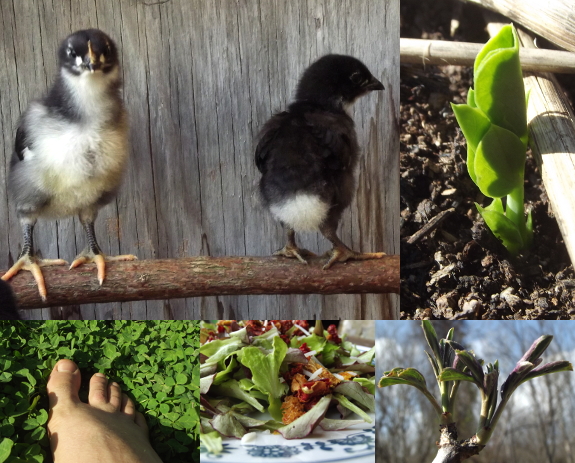
I let spring creep up on
us without telling you. The elderberry leaves have been poking
out of their buds for weeks now (although not getting terribly far),
and I noticed the first 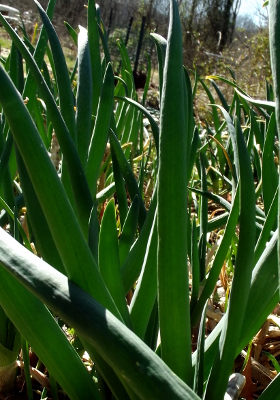 peas
slipping up through the soil last week. Meanwhile, the Egyptian onions are growing so fast my
frequent cuttings become invisible by the next day.
peas
slipping up through the soil last week. Meanwhile, the Egyptian onions are growing so fast my
frequent cuttings become invisible by the next day.
We also started eating
the first spring lettuce, but it wasn't quite as much of an event as
usual since we've been enjoying homegrown salads all winter. It
is fun to switch our salad greens from primarily kale to lettuce,
though, since that frees up the greens for sauteing.
I saw blooming spring
beauties and spicebushes (not pictured) while walking Lucy Tuesday, but
the real event was ground dry enough (in spots) to wander around
barefoot. With beautiful weather dominating the 10 day forecast,
I can't help but wonder if the floodplain might not become passable in
a week or two.
 The rest of this week's
lunchtime series is an overview of forage plants that match the three
pasture seasons --- spring/fall (this post), summer, and winter.
You should keep in mind that specifics like this are very location
specific, so if you live in the Deep South or in another area where
warm season (rather than cool season) grasses dominate, you should take
everything I write with several grains of salt. The closer you
live to Gene Logsdon's home base in northern Ohio, the more likely his
suggestions are to fit your pasture like a glove.
The rest of this week's
lunchtime series is an overview of forage plants that match the three
pasture seasons --- spring/fall (this post), summer, and winter.
You should keep in mind that specifics like this are very location
specific, so if you live in the Deep South or in another area where
warm season (rather than cool season) grasses dominate, you should take
everything I write with several grains of salt. The closer you
live to Gene Logsdon's home base in northern Ohio, the more likely his
suggestions are to fit your pasture like a glove.
In Logsdon's (and our)
location, spring is when pasture plants are at their peak, with a
lesser peak ocurring in the fall. You'll plan your meat animals
to match these peaks and (if your operation is big enough) will also
use the extra growth to make hay (or stockpiled
grass) for the
winter. So what do you plant in those spring/fall paddocks?
 Logsdon makes a good case for
not planting at all. His experience (and mine) has been that if
you open up the tree canopy and mow close to the ground regularly, bluegrass will eventually dominate
your pastures. You might or might not need to plant the white
clover that works
so well to round out the pasture polyculture.
Logsdon makes a good case for
not planting at all. His experience (and mine) has been that if
you open up the tree canopy and mow close to the ground regularly, bluegrass will eventually dominate
your pastures. You might or might not need to plant the white
clover that works
so well to round out the pasture polyculture.
A less permanent
alternative is to plant ryegrass in the place of the
bluegrass that springs up naturally. Ryegrass is a bit taller
than bluegrass, so it may shade out your white clover (unless you seed
specially formulated clover varieties that can handle the more
aggressive grass), and even the perennial ryegrass versions need to be
reseeded at intervals. On the other hand, ryegrass might make up
for the extra effort since it produces more dry matter per acre than
bluegrass does and establishes quickly. Both bluegrass and
ryegrass are among the most palatable grasses in most livestocks'
estimation, but ryegrass
is often infected with an endophyte.
 Ryegrass and bluegrass are
managed about the same. As I learned the hard way last year, you
need to graze or mow them hard and repeatedly in the spring and early
summer so they don't go to seed, since fruit production makes the
grasses less palatable and slows their growth considerably. You
can graze the pasture down to one inch, then let the grass regrow to
four to six inches before turning your animals back in. This
happens pretty quickly in the spring, and is one of the advantages of
short grasses.
Ryegrass and bluegrass are
managed about the same. As I learned the hard way last year, you
need to graze or mow them hard and repeatedly in the spring and early
summer so they don't go to seed, since fruit production makes the
grasses less palatable and slows their growth considerably. You
can graze the pasture down to one inch, then let the grass regrow to
four to six inches before turning your animals back in. This
happens pretty quickly in the spring, and is one of the advantages of
short grasses.
Drought, more than heat,
is what prevents bluegrass and ryegrass from barreling on through the
summer, so Logsdon suggests that it might be worth your while to
irrigate your pastures to keep them productive. I noticed that
the paddocks directly downhill from my oft-watered vegetable garden did
much better last summer than grasses in other areas.
Although bluegrass and
ryegrass aren't really winter grasses, you can let them grow in the
fall to stockpile forage for the winter. Logsdon notes that the
dense root structure of the bluegrass/clover sod prevents major damage
when smaller livestock are turned into the pasture in wet weather, and
he finds that the disturbed soil in hoofprints actually helps clover
gain more of a foothold. Stay tuned for later posts detailing
summer and winter alternatives to the bluegrass/clover pasture.
| This post is part of our All Flesh is Grass lunchtime series.
Read all of the entries: |
I'm starting a new
Appalachian myth.
A garden
gate built on Pi day will be magically impervious to deer.
 In a perfect world, I'd mulch
my vegetable garden with straw and my woody perennials with well
composted wood chips (or maybe leaves). If I needed to lay down a
kill mulch, I'd use corrugated cardboard as the kill layer. (Weekend
Homesteader: July gives the science behind these choices, but the
short version is --- it just makes the plants happy.)
In a perfect world, I'd mulch
my vegetable garden with straw and my woody perennials with well
composted wood chips (or maybe leaves). If I needed to lay down a
kill mulch, I'd use corrugated cardboard as the kill layer. (Weekend
Homesteader: July gives the science behind these choices, but the
short version is --- it just makes the plants happy.)
But we don't live in a
perfect world. Even though I'd been carrying in cardboard from
the parking area for a week, I managed to use up every lick of the
delicious kill mulch 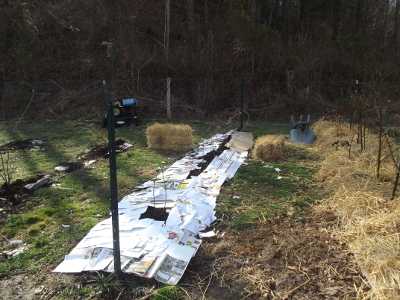 material in one busy
Tuesday. Plus, I'd already mulched with the leaves my mother
snagged on her city curb and didn't want to spend all afternoon raking
more out of the woods.
(The piles of
wood chips at our
parking area are mellowing very nicely, but no way am I carrying that
heavy organic matter in by hand.)
material in one busy
Tuesday. Plus, I'd already mulched with the leaves my mother
snagged on her city curb and didn't want to spend all afternoon raking
more out of the woods.
(The piles of
wood chips at our
parking area are mellowing very nicely, but no way am I carrying that
heavy organic matter in by hand.)
So, having run out of my
favorite mulches, I used...whatever. Wednesday found me laying
down kill mulches alongside the black raspberries
with junk mail and then topping it all off with straw. Yes, I've
had mixed
results with paper
in the past, but I figure woody  perennials
can handle the high carbon material better than a vegetable garden
could, and I also carefully pulled out all the slick pages (although I
left some colored newsprint in). I figure the high nitrogen straw
will help counteract the high carbon kill mulch (and will add nitrogen
to the soil this summer as the straw rots, making up for the fact that
I skimped a bit on manure --- we're running out of that too).
perennials
can handle the high carbon material better than a vegetable garden
could, and I also carefully pulled out all the slick pages (although I
left some colored newsprint in). I figure the high nitrogen straw
will help counteract the high carbon kill mulch (and will add nitrogen
to the soil this summer as the straw rots, making up for the fact that
I skimped a bit on manure --- we're running out of that too).
On the plus side, many
gardeners believe that it's a good idea to change your mulch and
compost source every year so your garden never gets overloaded (or
deficient) in one nutrient. So maybe I should be telling you I
thought all this through and decided a year under straw would make the
soil in our berry patch more well-rounded? Naw --- that's too
much like bright
yellow boots.
 Bluegrass
or ryegrass with white clover makes a great spring and fall
pasture, but where do you put your hungry critters during the summer
slump? Gene Logsdon offers a slew of possibilities, ranging from
semi-perennial legumes to warm season grasses and even weeds.
Bluegrass
or ryegrass with white clover makes a great spring and fall
pasture, but where do you put your hungry critters during the summer
slump? Gene Logsdon offers a slew of possibilities, ranging from
semi-perennial legumes to warm season grasses and even weeds.
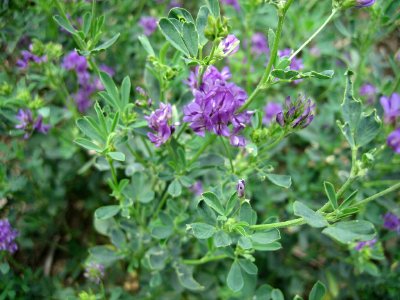
In his own pasture
setup, Logsdon focuses on alfalfa, red clover, and ladino clovers to
fill in the summer lull, planting these short-lived perennial legumes
in rotation with winter crops like grains. When choosing one of
these legumes, keep in mind that alfalfa is the most drought tolerant
and produces more biomass than any other legume if it's happy, but that
it hates clay and can't be planted 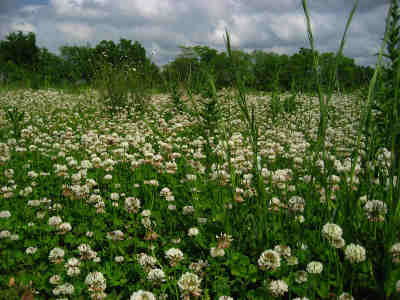 in the same spot for several years after the
stand dies out. Red clover outperforms alfalfa on heavy
soils and in cold, moist climates, finding favor in the Corn Belt, the
Northeast, and the mid-South. Ladino
clover is the
most palatable of these tall legumes and can handle heavy, wet soil,
but produces less hay per acre, won't survive drought, and requires
reseeding most often.
in the same spot for several years after the
stand dies out. Red clover outperforms alfalfa on heavy
soils and in cold, moist climates, finding favor in the Corn Belt, the
Northeast, and the mid-South. Ladino
clover is the
most palatable of these tall legumes and can handle heavy, wet soil,
but produces less hay per acre, won't survive drought, and requires
reseeding most often.
All three legumes are
managed about the same. In the Deep South, red and ladino clovers
are grown as annuals, but elsewhere the legumes are perennials that
should be surface seeded in winter, then given several months to get
established. You can begin to cut or 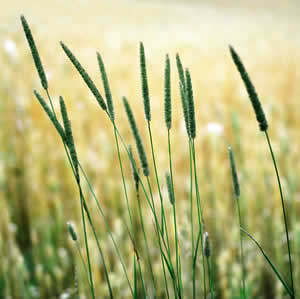 graze once the plants begin
to bloom, then continue to cut or graze at the same stage until
September, at which point the plants must be allowed to put on some
mass so they will survive the winter.
graze once the plants begin
to bloom, then continue to cut or graze at the same stage until
September, at which point the plants must be allowed to put on some
mass so they will survive the winter.
Timothy can be mixed with the
legumes (especially red clover), but if you combine the plants, it's
best to gauge grazing or cutting time by the legume since timothy grows
more slowly. Orchardgrass is sometimes mixed with
alfalfa in the lower Corn Belt and mid-South, but the grass becomes
unpalatable quickly in the spring if you're not careful. Finally,
smooth
bromegrass is
often combined with alfalfa in the North since the grass and legume
have similar drought resistance.
 At the other end of the
country, you might consider planting a paddock or two to warm season
grasses for the summer months. Quackgrass, crabgrass, and foxtail are weeds that spring up all
by themselves in cultivated ground, while bermudagrass (also a weed by many folks'
estimation) will take over in the Deep South. Sorghum-sudangrass
hybrid is often
planted for high production pastures in midsummer, but the leaves are
toxic when less than a foot tall, which gives the plant limited utility
for grazers like chickens who like tender forage. Although a
legume instead of a grass, lespedeza is a possibility in the
South, but can be a problem weed that becomes unpalatable if not
managed carefully.
At the other end of the
country, you might consider planting a paddock or two to warm season
grasses for the summer months. Quackgrass, crabgrass, and foxtail are weeds that spring up all
by themselves in cultivated ground, while bermudagrass (also a weed by many folks'
estimation) will take over in the Deep South. Sorghum-sudangrass
hybrid is often
planted for high production pastures in midsummer, but the leaves are
toxic when less than a foot tall, which gives the plant limited utility
for grazers like chickens who like tender forage. Although a
legume instead of a grass, lespedeza is a possibility in the
South, but can be a problem weed that becomes unpalatable if not
managed carefully.
Corn isn't exactly a pasture
plant, but Logsdon suggests a method to work the grain into your
pasture rotation without harvesting any of the ears yourself. You
can turn lambs into the pasture to eat the lower leaves and weeds when
the corn is above their heads, then replace them with hogs who harvest
the grain when the plants are mature. Finally, sheep and cows
munch on the fodder (and dropped ears of corn) over the winter.
 In his chapter on weeds,
Logsdon tosses out the idea of a temporary ley for summer
pasture. Newman Turner's Fertility Pastures and Cover Crops recommends planting the
following combination for midsummer:
In his chapter on weeds,
Logsdon tosses out the idea of a temporary ley for summer
pasture. Newman Turner's Fertility Pastures and Cover Crops recommends planting the
following combination for midsummer:
- Alfalfa (6 pounds per acre)
- Chicory (6 pounds per acre)
- Timothy (6 pounds per acre)
- White clover (3 pounds per acre)
- Burnet (3 pounds per acre)
- Late-flowering red clover (2 pounds per acre)
- Meadow fescue (4 pounds per acre)
- Perennial ryegrass (12 pounds per acre)
- American sweet clover (2 pounds per acre)
- Sheep's parsley (2 pounds per acre)
- Carraway (1 pound per acre)
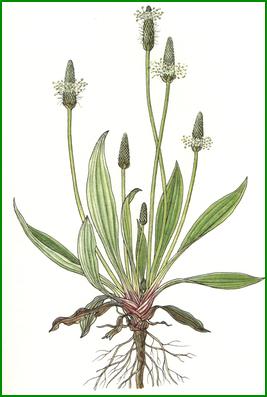
- Narrow-leaved plantain (1 pound per acre)
- Broad-leaved plantain (1 pound per acre)
Although Logsdon laughs
at the idea of finding seeds for notorious weeds like plantain, the
permaculturist might keep an eye on weedy spots for midsummer forage.
| This post is part of our All Flesh is Grass lunchtime series.
Read all of the entries: |
Our first roll of electric
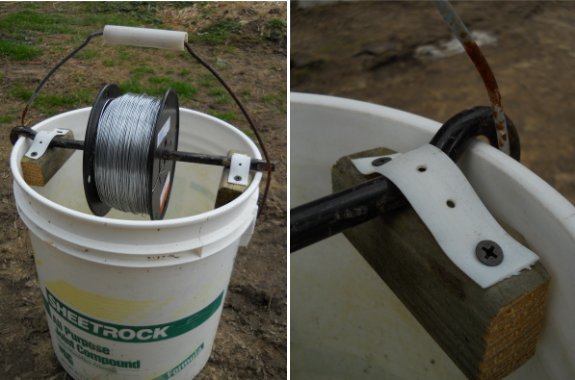
wire lasted years, and all that time I was unrolling it wrong.
I started out thinking a 2x4
frame with a handle would work as a holder for today's brand new roll. I
was low on scrap wood, but got inspired when I saw an empty bucket in
the garden.
It can also be used to carry
wire cutters and the mini-sledge
hammer.
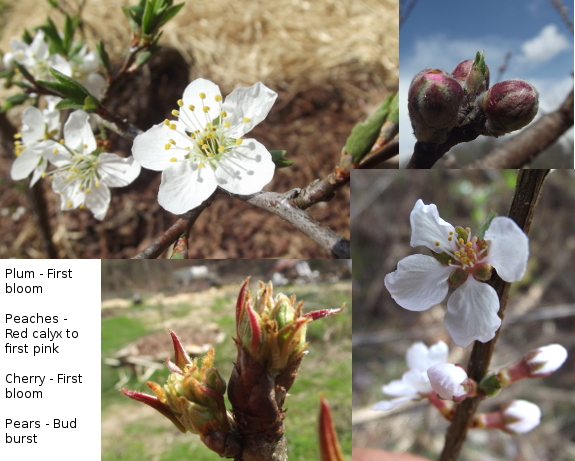
The first Nanking
cherry and plum
flowers opened on March 14, and the rest of our fruit trees aren't far
behind. Here's my best guess about when our orchard was in a
similar stage of bud break in previous years:
- March 23, 2009. (A late freeze wiped out all the blooms and
we didn't get any fruit.)
- April 3, 2010. (Great harvest of peaches!)
- March 22, 2011. (Would have been a great harvest of peaches if not for brown rot. We got two pears too.)
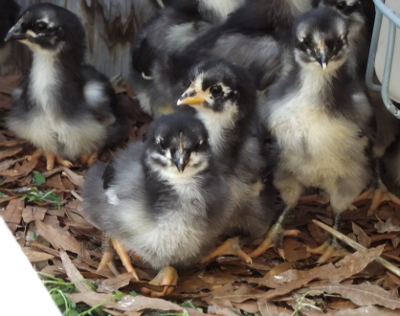 So, it looks like we're
running about a week or two early --- not as bad as I'd feared.
In fact, now might be a good time for the fruit trees to go ahead and
bloom since the ten day forecast looks like summer. We'll just
have to hope for no more freezes below the post-bloom critical
temperature of 28
for the rest of the season.
So, it looks like we're
running about a week or two early --- not as bad as I'd feared.
In fact, now might be a good time for the fruit trees to go ahead and
bloom since the ten day forecast looks like summer. We'll just
have to hope for no more freezes below the post-bloom critical
temperature of 28
for the rest of the season.
The other photos in this
post are totally unrelated. But I have a hard time not throwing
in gratuitous spring images. Enjoy!
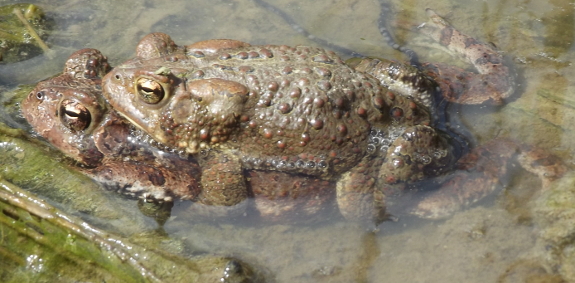
 Winter
is the trickiest time to keep animals fed, but Logsdon offers enough
suggestions to fuel years of experimentation. First, there are
the basics --- stockpile
grasses for
ruminants so they can eat in the fields, spreading their manure as they
go. But if you want fresh winter food for your animals to harvest
on the hoof, there are other options as well.
Winter
is the trickiest time to keep animals fed, but Logsdon offers enough
suggestions to fuel years of experimentation. First, there are
the basics --- stockpile
grasses for
ruminants so they can eat in the fields, spreading their manure as they
go. But if you want fresh winter food for your animals to harvest
on the hoof, there are other options as well.
Although fescue is not one of the most
palatable grasses, Logsdon (and his buddy Bob Evans, of restaurant
fame) consider this grass the key to year-round grazing since it will
grow a bit even in the winter. This photo shows a clump of fescue
in my garden, amid our usual bluegrass --- you can tell that the fescue
got a jump start on spring and is already too tough for a chicken to
nibble on. To manage a fescue pasture, Logsdon suggests keeping
it short and tender with frequent cutting in the spring, and being
careful of the endophytes that can make certain
animals sick. He lets fescue and bluegrass grow together, mowing
closer if he wants to encourage the bluegrass and higher if he wants
the fescue to spread.
 Winter grains can provide
lots of winter forage as long as you don't mind cultivating the ground
and replanting every year. Logsdon mentions a recent study
in Ohio where oats were planted in August and
then strip grazed by cattle from November through March (with a few
weeks break in February when ice was too thick for the cows to break
through). Tender young oat leaves contain 20% protein, and our
chickens were willing to nibble on them once other greenery died back
last winter. Other winter grains have varying levels of
palatability and winter hardiness, but you might try wheat, barley, and rye as well.
Winter grains can provide
lots of winter forage as long as you don't mind cultivating the ground
and replanting every year. Logsdon mentions a recent study
in Ohio where oats were planted in August and
then strip grazed by cattle from November through March (with a few
weeks break in February when ice was too thick for the cows to break
through). Tender young oat leaves contain 20% protein, and our
chickens were willing to nibble on them once other greenery died back
last winter. Other winter grains have varying levels of
palatability and winter hardiness, but you might try wheat, barley, and rye as well.
Roots like turnips, rutabagas, parsnips, mangels, and sugar beets fill the niche of corn
(providing lots of carbohydrates), but are generally more expensive to
grow. The positive side of roots is that you can sometimes plan
them so that the animals harvest the roots right out of the
field. Turnips and rutabagas are best for winter harvesting since
the roots stick out of the ground some, while hogs will harvest sweet
potatoes earlier in the year.
However, roots do have
their problems as winter forage for livestock. They're all very
watery, so animals have to eat a lot to get the same amount of energy
they'd get from grains --- it takes four bushels of sweet potatoes to
equal the nutritional value of one bushel of corn, and other roots are
even worse. Roots also tend to cause diarrhea in some animals if
fed fresh in the field, and all but mangels and sugar beets change the
flavor of milk. Bob  Evans feeds his livestock 75%
turnips and 25% stockpiled grass to work around some of the issues with
roots.
Evans feeds his livestock 75%
turnips and 25% stockpiled grass to work around some of the issues with
roots.
The final option for
non-grain winter feed is leafy greens. Crucifers like kale, rape, kohlrabi, and cabbage are all eaten happily by
sheep, while chickens love Swiss chard. Our chickens seemed
to prefer the mustard
greens we sowed
along with oats in our experimental winter pasture over the
grain. And although Austrian
winter peas have
a big following, our flock turned up their noses at the overwintering
legumes.
Are there winter pasture
options you use that I didn't mention here? I hope you'll leave a
comment and share your wisdom.
| This post is part of our All Flesh is Grass lunchtime series.
Read all of the entries: |
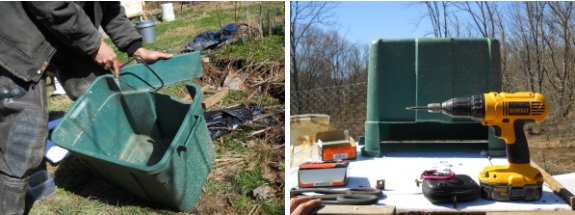
The experimental
mini-enclosure for our
new chick coop is retired for now.
We were planning on using it
to capture some heat from the Eco-Glow brooder in case the
night time temperature dropped below 50.
Turns out the big, green,
plastic tub was too scary for our chick's first day. Just a few went
under it, and they only stayed for a brief moment before scooting back
to the bunched up flock in the corner. Maybe a small night light would
make it look more cozy? Now that they're older it's not as big of an
issue and the weather forecast calls for warm nights in the near future.
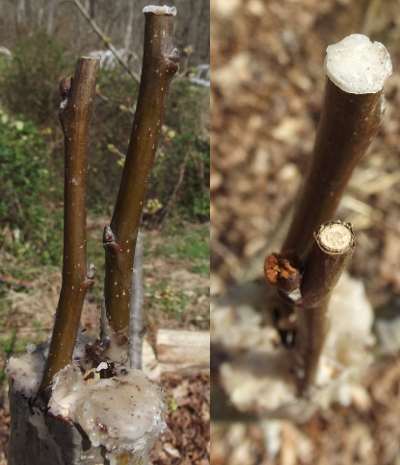 I
decided to take the plastic
bags off my pear
grafts since it's been getting so hot I was afraid the scionwood
would cook. The beeswax has done a remarkably good job of staying
put...except for on top of one of the four pieces of scionwood. I
thought I might have just missed that spot when initially dabbing on
the wax, but photographic evidence is to the contrary.
I
decided to take the plastic
bags off my pear
grafts since it's been getting so hot I was afraid the scionwood
would cook. The beeswax has done a remarkably good job of staying
put...except for on top of one of the four pieces of scionwood. I
thought I might have just missed that spot when initially dabbing on
the wax, but photographic evidence is to the contrary.
There's quite a
difference in vibrancy between the scionwood that lost its cap and the
one that retained its cap. The former looks a bit shriveled up
and the bud appears to have tried to open and failed, while the
wax-capped twig looks plumper and content to wait until the rest of the
tree starts leafing out.
Hopefully one piece of
scionwood will be enough to change the variety on that pear. I
don't expect to see any growth for a month or two since grafted
scionwood often waits to wake up until after the rootstock has already
put out leaves. Stay tuned for further updates.
1. 3/32 drill bit
2. 14 gauge galvanized wire
3. yellow electric fence
insulators
4. warped sense of aesthetics
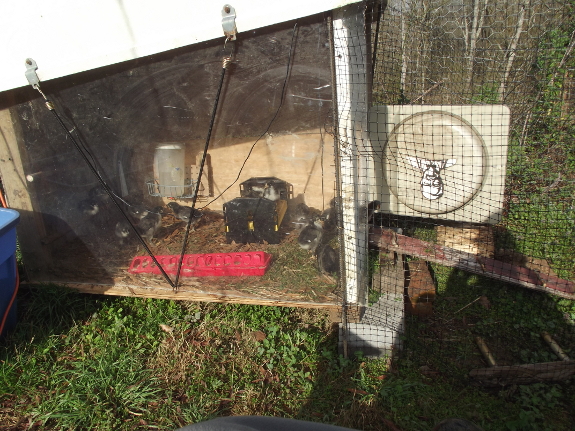
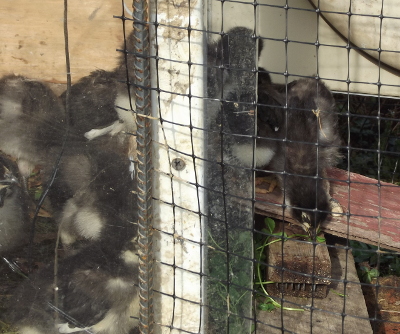 They don't call them chickens
for nothing.
They don't call them chickens
for nothing.
24 hours after I fenced
off an outdoor playpen for the
chicks, they were
still huddled around the doorway, drawing straws to decide who should
go first.
I cut off their fresh
greens deliveries, but sprinkled some clover on top of the ramp to tempt the chicks
closer. I had expected an Australorp to lead the way, so I was
surprised to find that a Marans/Australorp hybrid was the bravest.
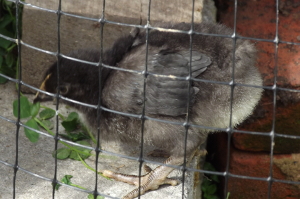 Once she hopped down onto the
ground a couple of times, of course, everyone else had to follow
suit. And they started grazing like cows!
Once she hopped down onto the
ground a couple of times, of course, everyone else had to follow
suit. And they started grazing like cows!
I don't think of
chickens as being able to digest excessive amounts of greenery, but our
Australorps continue to prove me wrong. I think that tender
spring growth, especially, is quite digestible even if you only have a
single stomach.
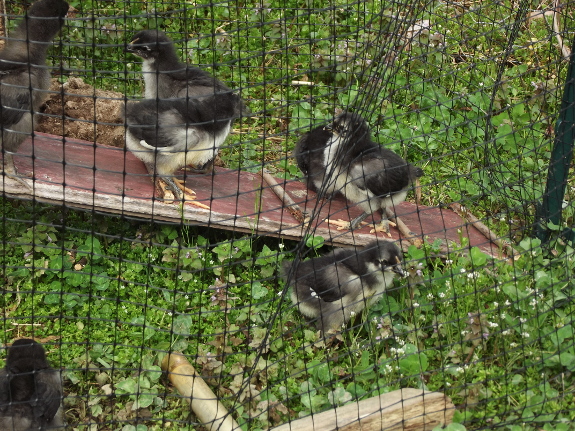
Looks like I'll need to
expand that playpen tomorrow or the next day.
Maybe by then, the chicks will be big enough that I can use our usual temporary
fencing material and
give them more room to play.

Our mechanic was able to
track down a used tailgate
at a local junk yard for only 100 bucks. 25 for delivery and another 25
for hammer adjustments and lubrication.
Anna thinks it looks like
just another tailgate, but for me it seems like an improvement. I know
the color doesn't match, but that shade of red has some sort of
emotional charge I can't seem to put my finger on. Maybe it's connected with that
scene in the original Matrix movie where a woman walks by in a red dress
during Neo's first self aware simulation?
There's hardly a scratch on
it, which implies it grew up with a silver spoon in its mouth and lived
a life of privilege not unlike our cat Huckleberry.
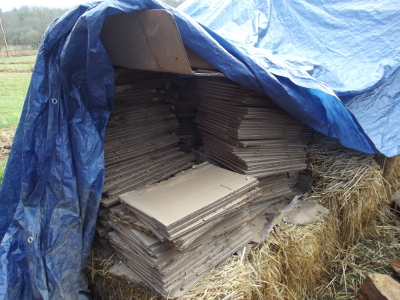 I
hardly know where to start telling you the story of the cardboard
motherlode. Mark was the one who found it, even though we were
both in the same room. My husband has developed quite a knack for
ferreting out biomass going to waste, so when our friends told us that
they were bringing a lot of cardboard boxes to the recycling center,
Mark's ears perked right up.
I
hardly know where to start telling you the story of the cardboard
motherlode. Mark was the one who found it, even though we were
both in the same room. My husband has developed quite a knack for
ferreting out biomass going to waste, so when our friends told us that
they were bringing a lot of cardboard boxes to the recycling center,
Mark's ears perked right up.
The story is a
bittersweet one of composting
old dreams, and made
me feel very lucky that we'd started our microbusiness and writing
ventures in the era
of the internet. The owner of the unwanted boxes is a writer who
had gone the semi-traditional self-publishing route decades ago.
He ordered thousands of copies of his books, enough to make it
worthwhile to get them printed, then a big truckload of cardboard boxes
to use when mailing the texts to customers.
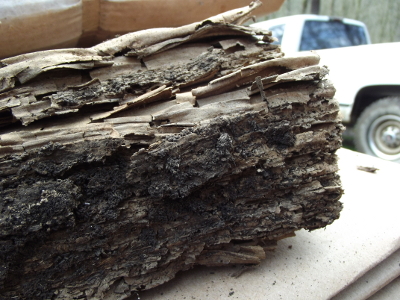 At that time, it wasn't
really possible to follow my microbusiness admonition to keep your
startup costs below $1,000 and not to fill your barn with inventory,
nor could our friend easily sell his books to a worldwide market at no
cost (except a per-book fee) on Amazon. I suspect he also didn't
really need the cash, and liked writing more than he liked marketing
his works --- having to go get a job in Kingsport if our
microbusinesses fail is a strong incentive to keep our noses to the
grindstone.
At that time, it wasn't
really possible to follow my microbusiness admonition to keep your
startup costs below $1,000 and not to fill your barn with inventory,
nor could our friend easily sell his books to a worldwide market at no
cost (except a per-book fee) on Amazon. I suspect he also didn't
really need the cash, and liked writing more than he liked marketing
his works --- having to go get a job in Kingsport if our
microbusinesses fail is a strong incentive to keep our noses to the
grindstone.
So the books sat in our
friend's office and the boxes moldered in his barn until Mark heard
about their planned journey to the recycler. The books were
already gone, but three huge bales of cardboard boxes were free for the
taking. They'd been sitting on the ground for years and some had
lost as much as half their mass into the soil, but most were perfect
kill mulch material.
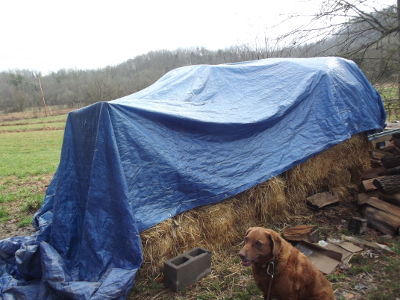 Some of the partially
degraded boxes had mycelium growing on them, which just supports my
hypothesis that corrugated cardboard is like candy for soil
microorganisms. I've been wondering lately whether Steve Solomon
is right to say that the glue is what makes cardboard so enticing, or
whether the answer is much simpler. Could the corrugations give
just the right amount of air space to keep the cardboard moist but
still well aerated, creating the perfect environment for fungal growth?
Some of the partially
degraded boxes had mycelium growing on them, which just supports my
hypothesis that corrugated cardboard is like candy for soil
microorganisms. I've been wondering lately whether Steve Solomon
is right to say that the glue is what makes cardboard so enticing, or
whether the answer is much simpler. Could the corrugations give
just the right amount of air space to keep the cardboard moist but
still well aerated, creating the perfect environment for fungal growth?
We've stockpiled the
cardboard with the straw at our parking area and I carry in a big
duffel bag full each time I walk Lucy. I'd like to say the
cardboard will feed my garden forever, but I figure it might last...two
weeks?
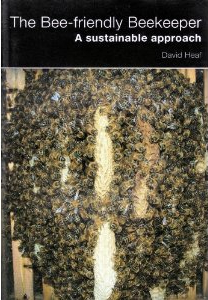 As regular readers know, I've
been pondering alternative beekeeping methods all winter. Both
of our hives (semi-traditional Langstroth) died last fall, so we're buying two
packages of chemical-free
bees to start over this spring. One package will go into a top bar hive courtesy of Everett, but I
haven't quite decided whether the other colony will go back into our
Langstroth hives (managed
in Michael Bush's style) or whether they'll go into
a Warre hive.
As regular readers know, I've
been pondering alternative beekeeping methods all winter. Both
of our hives (semi-traditional Langstroth) died last fall, so we're buying two
packages of chemical-free
bees to start over this spring. One package will go into a top bar hive courtesy of Everett, but I
haven't quite decided whether the other colony will go back into our
Langstroth hives (managed
in Michael Bush's style) or whether they'll go into
a Warre hive.
When I explained the differences
between Warre and top bar hives before, I said that the book
to read on Warre hives is Abbe Warre's Beekeeping
for All.
However, I ended up instead picking up a copy of David Heaf's The Bee-friendly Beekeeper. This modern book sums
up the experiments and innovations that have accumulated since the
Warre hive hit the English-speaking world in 2006. It has lots of
pretty pictures to make the text more understandable and is definitely
worth hunting down (even though it's expensive in the U.S. since the
book is British). The author is a bit preachy about
sustainability of materials and the book is short (referring you back
to Beekeeping
for All for more
information), but I like the way Heaf has clearly delved into the
scientific literature to find real facts about natural beekeeping.
Stay tuned for
information about the Warre hive all week in my lunchtime series.
Meanwhile, maybe you can help me decide whether it's crazy to try out
two new beekeeping methods at once, or whether it's an unparalleled
opportunity for a side by side comparison of horiztontal and vertical
top bar hives.
| This post is part of our Warre Hive lunchtime series.
Read all of the entries: |

It's been a full year since I
first posted about the chicken cam
project and I'm happy to report we've made some progress.
We're still working out some
of the technical details. Turns out the wireless feature is a bit
spotty, which we plan to fix with a long ethernet cable.
The webcam box will have a 5
gallon bucket lid for a roof so that it can extend out past the
plexiglass.
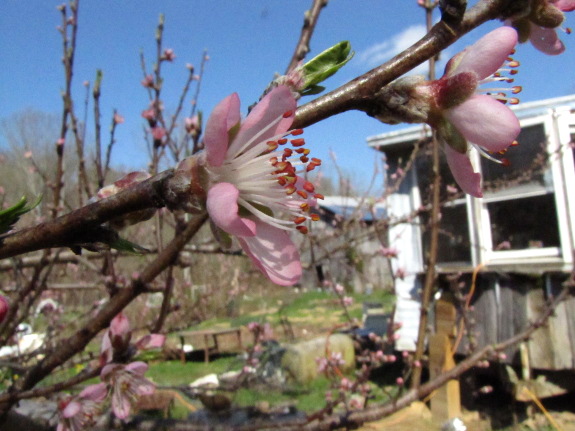
If you have the
opportunity to plant a peach tree right outside your kitchen window, I
highly recommend it. For the last few days, I've been torn
between watching chicken
TV and pollinator TV as we eat our meals, but I think I might
prefer the pollinators.
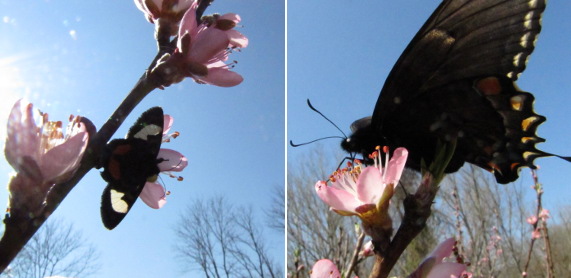
I can identify
butterflies, moths, greater
bee flies, honeybees, and bumblebees from a distance, but the
rest of the pollinators are too small for me to easily distinguish
unless I snap a photo to peruse inside. If you've got a lot of
tiny native bees you're itching to identify, I recommend flipping
through Attracting
Native Pollinators,
or asking for help at BugGuide.net.
Or you can just watch
the tiny pollinators buzz around your blooms and guess how many
different species are present. They work just as hard even if we
don't know who they are.
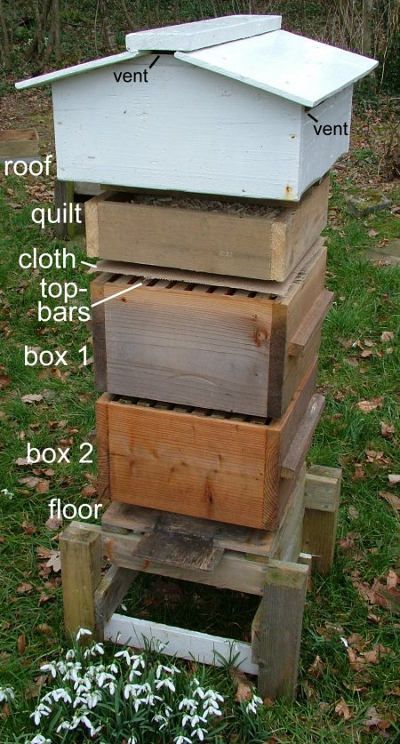 The Warre hive (sometimes
called the "vertical top bar hive") is named after a French abbot who
developed a simple hive that could easily be constructed by the common
Joe. On the surface, the hive looks a lot like the Langstroth
hives that are so common in the U.S., but the boxes are smaller, the
wood is thicker, and there's an insulated "quilt' and roof area.
In addition, beekeepers usually use top bars instead of framed
foundation.
The Warre hive (sometimes
called the "vertical top bar hive") is named after a French abbot who
developed a simple hive that could easily be constructed by the common
Joe. On the surface, the hive looks a lot like the Langstroth
hives that are so common in the U.S., but the boxes are smaller, the
wood is thicker, and there's an insulated "quilt' and roof area.
In addition, beekeepers usually use top bars instead of framed
foundation.
Even though the Warre
hive resembles the Langstroth hive, it is managed in a completely
different manner. Warre beekeepers believe that protection of the
natural heat and scent within the hive is of utmost importance, and
that every type of manipulation by the beekeeper requires the bees to
work harder to maintain the Nestduftwarmebindung. So beekeepers
refrain from rearranging combs (for example, to open
up the brood box)
since that moves scents around, and they strive not to take the top off
the hive more than once a year.
Despite what that last
sentence sounds like, Warre beekeepers don't ignore their bees all year
and then expect to harvest lots of honey. They understand that
the larger a hive is, the harder the bees have to work to keep out wax
moths and diseases, so they add extra boxes at intervals throughout the
spring and summer just like a Langstroth beekeeper would. The
difference is that they put the boxes on the bottom --- nadiring ---
which is achieved by hefting the whole hive upward using a pulley-based
hive lift. The bees barely notice the intrusion, and the
Nestduftwarmebindung stays in place within the hive.
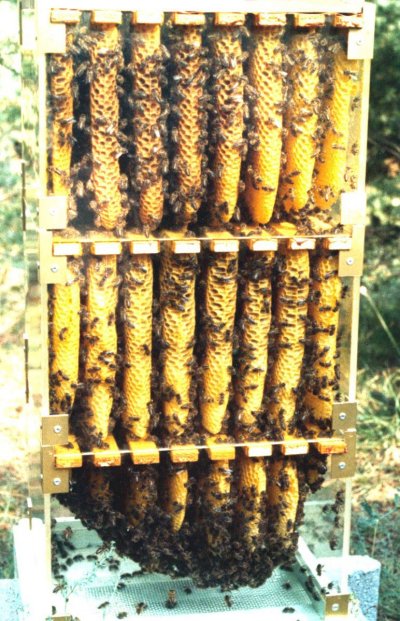 Throughout the year, Warre
beekeepers also spend a lot of time observing the hive to ensure that
all's well within. They listen to the hive, watch and smell at
the entrance, and even put their hand on the quilt that covers the top
box to estimate its warmth. Many beekeepers weigh their hives to
check on honey stores, and some Warre boxes have observation windows
(fitted within insulated shutters when not in use) to allow
non-intrusive viewing.
Throughout the year, Warre
beekeepers also spend a lot of time observing the hive to ensure that
all's well within. They listen to the hive, watch and smell at
the entrance, and even put their hand on the quilt that covers the top
box to estimate its warmth. Many beekeepers weigh their hives to
check on honey stores, and some Warre boxes have observation windows
(fitted within insulated shutters when not in use) to allow
non-intrusive viewing.
In the fall, the
beekeeper opens up the hive more fully for the first time. In the
past months, the bees have filled up box after box, naturally moving
their brood area into new boxes below and replacing brood above with
honey. The beekeeper is able to remove whole boxes of honey off
the top to crush
and strain, which is
the most intrusion the hive ever sees.
Here's the catch ---
Warre hives don't produce as much honey as Langstroth hives. In The
Bee-friendly Beekeeper,
David Heaf notes that you should expect only half as much honey from a
Warre hive as from a Langstroth hive, and Heaf insinuates that forcing
bees to make so much honey is one of the factors that leads to decline
of modern apiaries.
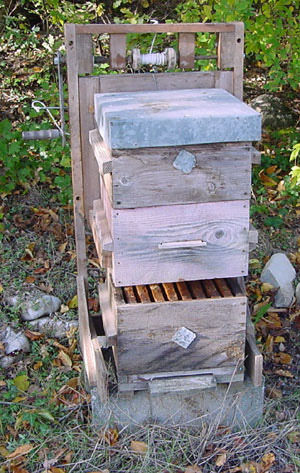 On the other hand, Heaf also
argues that Warre hives don't need as much honey to get them through
the winter due to the better thermal performance of the hive. He
leaves only 26 pounds of honey for his hives in the UK and says that,
in general, Warre hives need about 67% as much honey to overwinter as
Dadant hives do. (Dadant hives are related to Langstroth hives,
but have fallen out of favor.)
On the other hand, Heaf also
argues that Warre hives don't need as much honey to get them through
the winter due to the better thermal performance of the hive. He
leaves only 26 pounds of honey for his hives in the UK and says that,
in general, Warre hives need about 67% as much honey to overwinter as
Dadant hives do. (Dadant hives are related to Langstroth hives,
but have fallen out of favor.)
I'm very torn about the
idea of adding a Warre hive to our homestead, but not because of the
lower honey yields. On the one hand, the Nestduftwarmebindung
principle makes intuitive sense to me, especially once I read that a
hive can sometimes take three days to regain its temperature after
being opened and that cool temperatures in the hive can encourage pests
and diseases. On the other hand, I'm a nervous nellie, and can't
quite imagine not going through the brood nest at intervals to make
sure everything's okay. I'm also envisioning setting up a hive
lift wrong and ending up with bees spilled all over the ground, and
losing lots of swarms to the world since you can't manage reproduction
very well in the Warre hive. (More on that in a later post.)
On the third hand, it's
new, different, and intriguing. How could I resist?
| This post is part of our Warre Hive lunchtime series.
Read all of the entries: |
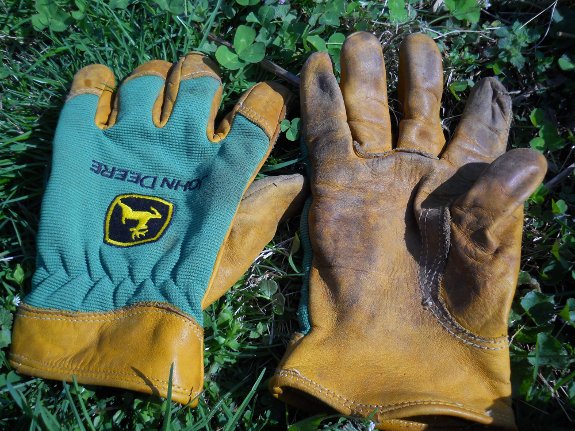
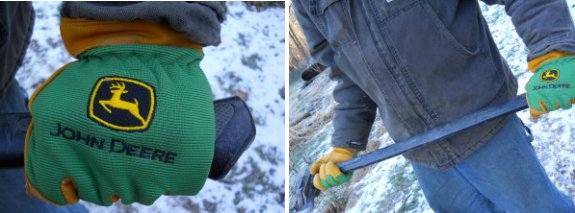 After a few months of medium to
heavy activity the new John
Deere work gloves barely seem to be showing much wear. Normally I'd
get a hole in one of the fingers by now.
After a few months of medium to
heavy activity the new John
Deere work gloves barely seem to be showing much wear. Normally I'd
get a hole in one of the fingers by now.
Of course the real test will
be to see how they hold up at the 6 and 9 month interval.

It's awfully easy to let
even thornless blackberries turn into an impenetrable jungle.
Just forget to tip
prune them one
summer, then you're unable to mow the tall weeds that pop up under
their arching canes. By fall, the row looks like a wild briar
patch.
The first step in
renovating a patch like this (or any other kind of overgrown bramble)
is to prune out the worst canes. I snip off all of the rooted
canes in the aisle and then cut the plants back to a main stem with
branches six to twelve inches long. Meanwhile, I pull or cut out
dead canes from previous years. I'm not really pruning yet, just
opening up the patch so I can get in there.
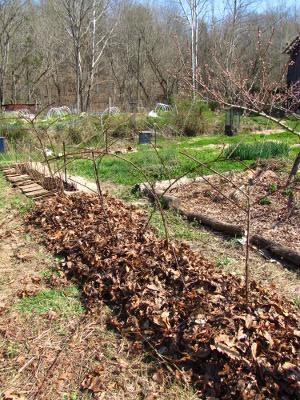 Next, I dig out any tall
weeds that rooted within the row. Ragweed isn't a perennial, but
once plants like wingstem get a foothold in your bed, even a kill
mulch will have a
hard time holding them back. I might accidentally dig up a berry
or two in the process, but that's not a problem --- there are plenty of
brambles left.
Next, I dig out any tall
weeds that rooted within the row. Ragweed isn't a perennial, but
once plants like wingstem get a foothold in your bed, even a kill
mulch will have a
hard time holding them back. I might accidentally dig up a berry
or two in the process, but that's not a problem --- there are plenty of
brambles left.
Now that I can see what
I'm doing, it's pretty simple to prune
the blackberries using techniques I've explained previously.
After a good pruning and weeding job, I lay down a kill mulch along
side of the berries to prevent the bad weeds I might have missed from
encroaching into the planted zone. Then I top it all off with
mulch and mark a remulching and summer pruning job on my June calendar
to ensure the problem doesn't reoccur.
Luckily, brambles are
awfully forgiving of even the worst care. Even though this patch
looked like a jungle last summer, it will probably produce pretty well
for me this year (and even better next year if I manage to keep the
weeds down). Our blueberries are more daunted by weeds, and I can
see a big difference between the plants I managed to remulch last
summer and the ones that got away from me. Maybe next spring,
I'll be so on top of the perennials, everyone will be in good shape.
 Heat retention is such an
integral topic to Warre beekeeping that I thought it deserved
its own post. The entire hive is designed around the idea of
making the inside easy for the bees to keep warm while preventing too
much heat loss (or gain in extremely hot areas) from the outside.
Heat retention is such an
integral topic to Warre beekeeping that I thought it deserved
its own post. The entire hive is designed around the idea of
making the inside easy for the bees to keep warm while preventing too
much heat loss (or gain in extremely hot areas) from the outside.
The extra boxes at the
top of the Warre hive are meant to prevent condensation inside the hive
while still keeping the interior warm. The part I'm the least
clear on is the vent under the eaves of the roof --- it doesn't connect
to the rest of the hive, and I think its purpose is to move hot air
away from the top of the hive when the sun is pounding down in the
summer.
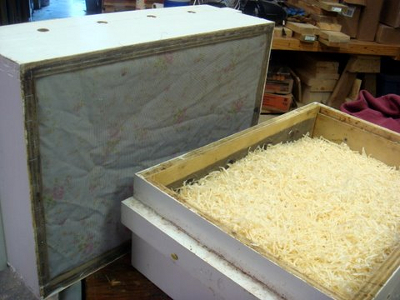 Below the roof comes the
"quilt" layer, which is actually a wooden box with burlap attached to
the bottom so it can hold straw, wood shavings, or leaves. The
organic matter acts as insulation and also soaks up moisture,
preventing the problem of condensed cold water dripping on the bees in
the winter. The beekeeper changes out the insulation layer every
year, or more often if it feels damp.
Below the roof comes the
"quilt" layer, which is actually a wooden box with burlap attached to
the bottom so it can hold straw, wood shavings, or leaves. The
organic matter acts as insulation and also soaks up moisture,
preventing the problem of condensed cold water dripping on the bees in
the winter. The beekeeper changes out the insulation layer every
year, or more often if it feels damp.
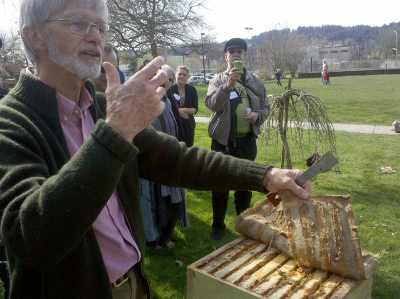 Next down comes another piece
of cloth that takes the place of the inner cover of the Langstroth
hive. The cloth is somewhat permeable to moisture-laden air, so
it allows damp to move upward into the quilt where it won't bother the
bees. The cloth can also be pried back partially to peek inside
the colony, a process that doesn't tend to jar the hive as much as
removing a wooden inner cover would.
Next down comes another piece
of cloth that takes the place of the inner cover of the Langstroth
hive. The cloth is somewhat permeable to moisture-laden air, so
it allows damp to move upward into the quilt where it won't bother the
bees. The cloth can also be pried back partially to peek inside
the colony, a process that doesn't tend to jar the hive as much as
removing a wooden inner cover would.
The Warre hive body
itself is considerably smaller than boxes in Langstroth hive, again for
the purpose of heat retention. The winter cluster fills more of a
Warre box than a Langstroth box, which makes it easier for the bees to
stay warm. Meanwhile, their honey stores are above the cluster
rather than to either side of them, so the bees can travel up to eat
(which is easier than sideways, around frames).
Speaking of frames, even
the top bar setup is part of the heat retention design. Warre
believed that frames make it harder for bees to heat the hive because
air flows up the gap 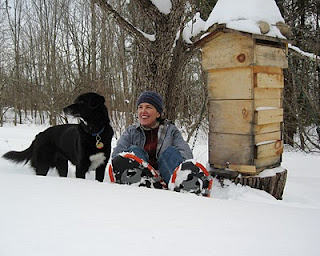 between the frame and the
walls. Without frames, the bees build their comb all the way to
the sides of the boxes, creating a more solid barrier to air movement.
between the frame and the
walls. Without frames, the bees build their comb all the way to
the sides of the boxes, creating a more solid barrier to air movement.
David Heaf's final
observation on the topic is that mesh floors are problematic because
they increase consumption of honey by 20% in the winter without (he
believes) cutting down on varroa numbers. Although some
beekeepers put a solid drawer under the mesh in the winter, that just
makes a spot for debris and microorganisms to accumulate where bees
can't reach and sanitize the hive.
The reason I'm spending
a whole post on talking about the heat-retentive design of the Warre
hive is because I think it would be possible to take a hybrid approach
without embracing the entirety of the Warre method. If you were
afraid of nadiring and really wanted to be able to check on your bees
at intervals, you still might get better results by changing over to a
Warre hive structure without using the entire set of management
techniques. Or you might simply add a Warre-type roof, quilt, and
cloth assemblage to the top of a Langstroth hive and see what
happens. I figure our eventual beekeeping system will probably be
a mish-mash of bits and pieces we like from many different beekeepers'
philosophies, so it's worth understanding how and why certain methods
work.
| This post is part of our Warre Hive lunchtime series.
Read all of the entries: |
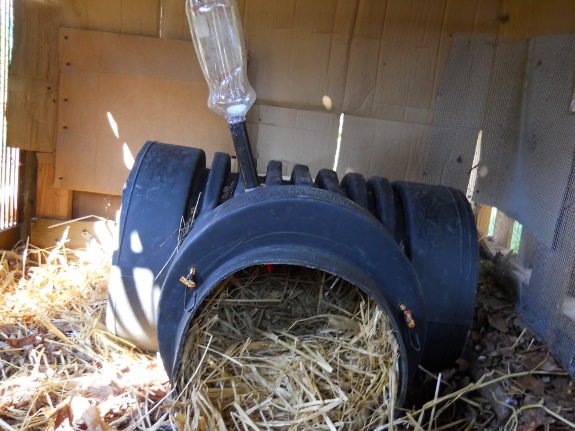
This is the latest attempt at
encouraging one of our hens to get in a broody
mood.
We've been saving fertilized
eggs, and with any luck one of them will start sitting full time in a
few days.
The plan will be to block her
in once she shows an interest. We also want to keep other hens from
disturbing that broody feeling.
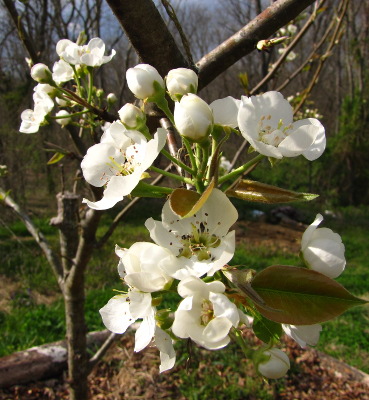
All of the websites say
you have nothing to lose by topworking
your fruit trees,
but that's not quite true. You do lose something very important
--- time.
Our young pear trees
bloomed enough to produce a couple of fruits last year, and judging by
the limbs I left behind this spring, the trees would have been loaded
this fall if I hadn't lopped off the tops. But I figure, better
delicious pears in two years than pears I consider insipid now.
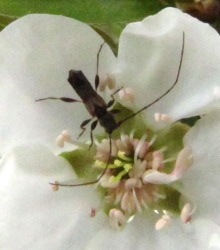
Of course, I got sucked
into photographing pollinators while I was out looking at the fruit
trees, and I was interested to see that the peaches and pears have very
different insects buzzing around their flowers. The pear trees
had attacted a few small bees and a wasp, but the most common
pollinator was the soldier beetles (or maybe long-horned beetles or
both?) shown below and to the left.
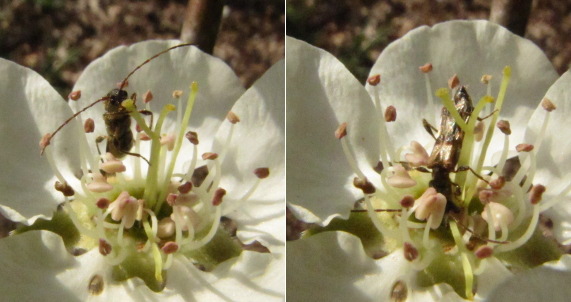
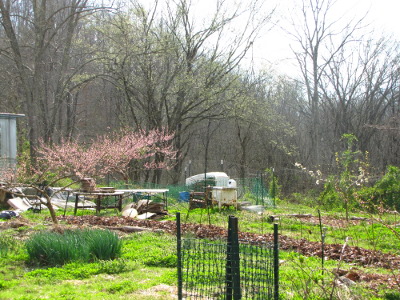 In stark contrast, I spent
two minutes walking around our biggest peach tree and saw honeybees, bumblebees, wasps, butterflies, several
types of smaller wild bees, a greater
bee fly...but no
beetles. I wonder if the pollinator preference is due to the type
of tree, or is just a byproduct of the bigger mass of peach flowers
drawing in more aerial pollinators. (That's an elm tree blooming
in the far background, by the way.)
In stark contrast, I spent
two minutes walking around our biggest peach tree and saw honeybees, bumblebees, wasps, butterflies, several
types of smaller wild bees, a greater
bee fly...but no
beetles. I wonder if the pollinator preference is due to the type
of tree, or is just a byproduct of the bigger mass of peach flowers
drawing in more aerial pollinators. (That's an elm tree blooming
in the far background, by the way.)
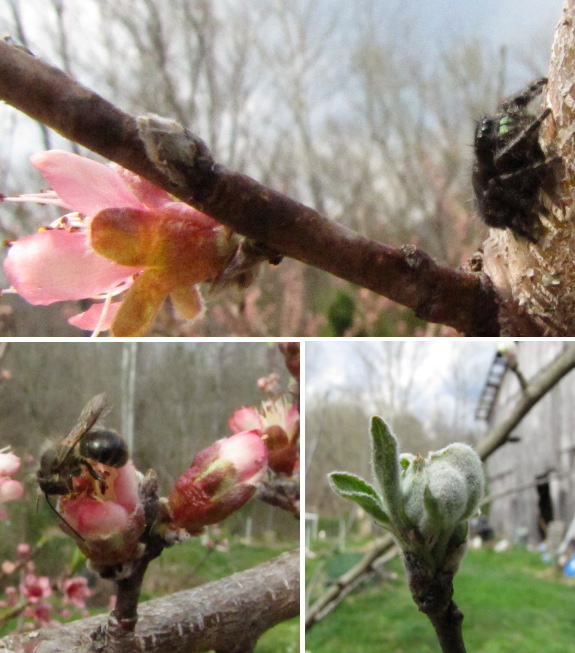
Three more gratuitous
spring photos, counterclockwise from top --- a hungry spider, the most
common bee out yesterday, and coming attractions (apple buds).
 Over the last three years,
I've gotten good at swarm
prevention, and even
splitting
hives to reproduce
them without buying new bees. However, David Heaf makes a good
argument for such manipulations being bad for bees and posits that our
honeybees would be healthier if we stayed closer to their natural
reproductive system.
Over the last three years,
I've gotten good at swarm
prevention, and even
splitting
hives to reproduce
them without buying new bees. However, David Heaf makes a good
argument for such manipulations being bad for bees and posits that our
honeybees would be healthier if we stayed closer to their natural
reproductive system.
Heaf explains that the
queens in commercially purchased hives are problematic for several
reasons. First, there's the issue of low genetic diversity since
most hives in the U.S. are the offspring of only 500 breeder
queens. There's a genetic bottleneck on the male side too since
traditional beekeepers believe in cutting out drone comb so the excess
males won't be a drain on the hive, and since some commercial
operations artificially inseminate their breeder queens.
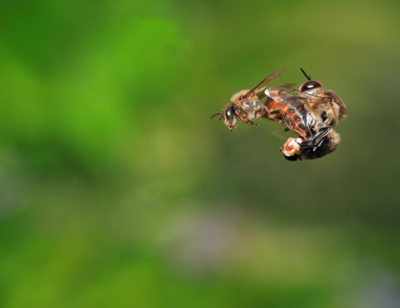 Since you probably didn't
learn about bee sex in high school, let me back up here. When a
queen bee matures in nature, she flies out of the hive to a drone
congregation area, where all of the male bees from the surrounding
region are hanging out and drinking beer...ahem, waiting for a queen to
appear. They fly after her and several drones will usually mate
with the queen (dying in the process). The queen stores all of
that sperm and uses it over the course of her life to fertilize
eggs. Despite the fact that there are plenty of drones in her
hive, the queen never mates again after having her youthful fling.
Since you probably didn't
learn about bee sex in high school, let me back up here. When a
queen bee matures in nature, she flies out of the hive to a drone
congregation area, where all of the male bees from the surrounding
region are hanging out and drinking beer...ahem, waiting for a queen to
appear. They fly after her and several drones will usually mate
with the queen (dying in the process). The queen stores all of
that sperm and uses it over the course of her life to fertilize
eggs. Despite the fact that there are plenty of drones in her
hive, the queen never mates again after having her youthful fling.
Multiply mated queens
seem to result in healthier hives, perhaps because the workers produced
by the queen are more genetically diverse. (Many of them are half
sisters, with different fathers who provided different traits to their
offpsring.) Perhaps that's why  workers prefer multiply
mated queens and may supersede a queen who wasn't
promiscuous enough during her Rumspringa.
workers prefer multiply
mated queens and may supersede a queen who wasn't
promiscuous enough during her Rumspringa.
Another issue with
mainstream beekeeping genetics is a lack of culling. When a
commercial operation raises bees, they keep all of the normal-looking
queens to send out to customers, but nature is much more
relentless. When a hive decides to swarm, the workers produce
several queens, but only 10% or so are allowed to survive and take over
the colony. Then there's another round of culling in the winter
when 80% of new swarms die in the wild. The result is that only
the toughest colonies survive, in stark contrast to our mainstream
beekeeping system that props up weak hives with chemicals and
feeding. True, we would lose lots of colonies if we simply
deleted the chemicals and culled weak hives, but we'd also slowly breed
for bees that are more self-sufficient and less prone to succumb to
disease.
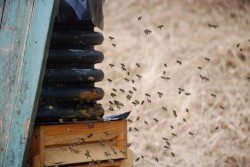 Which is all a long way of
explaining why David Heaf believes the potential of Warre hives to
swarm is a feature, not a bug. Letting the bees reproduce
naturally via swarming helps increase the genetic diversity of your
bees, while also culling weak hives before they start. You may
lose some bees to the surrounding area, but if you build bait hives,
you will capture some as well. Swarming cuts down on your honey
harvest for the year, but the theme of Warre beekeeping is healthy bees
not maximum honey yields.
Which is all a long way of
explaining why David Heaf believes the potential of Warre hives to
swarm is a feature, not a bug. Letting the bees reproduce
naturally via swarming helps increase the genetic diversity of your
bees, while also culling weak hives before they start. You may
lose some bees to the surrounding area, but if you build bait hives,
you will capture some as well. Swarming cuts down on your honey
harvest for the year, but the theme of Warre beekeeping is healthy bees
not maximum honey yields.
| This post is part of our Warre Hive lunchtime series.
Read all of the entries: |
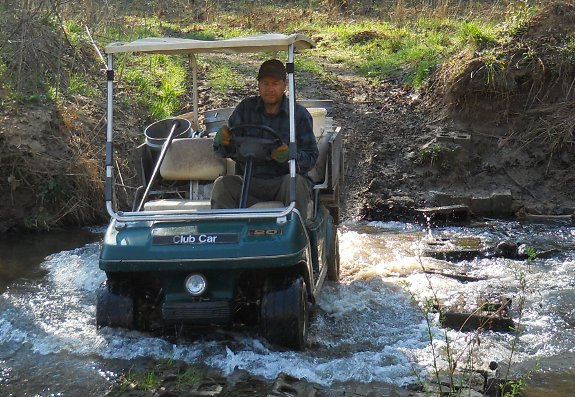
Today was by far our driest
day of 2012.
Big chance of rain tonight,
so we decided to push the golf cart past its comfort level.
Yeah....we got stuck a few
times, but a large stack of straw bales and several 5 gallon buckets of
manure made it well worth the effort.
 Regular
readers may recall our ill-fated
school worm bin project from last year. When
we decided that collecting food scraps from our local middle school
wasn't worth the effort, I let the worm bin contents mellow for a while
and then added some
raw horse manure and bedding. Next, I proceeded to
ignore the bin for another seven months.
Regular
readers may recall our ill-fated
school worm bin project from last year. When
we decided that collecting food scraps from our local middle school
wasn't worth the effort, I let the worm bin contents mellow for a while
and then added some
raw horse manure and bedding. Next, I proceeded to
ignore the bin for another seven months.
The extended neglect
wasn't as awful as it sounds since worms in an above-ground bin are
mostly dormant during the winter. Last week, I poked around
inside and was thrilled to see that the year-old contents --- food
scraps, wood chips, shredded newspaper, and torn 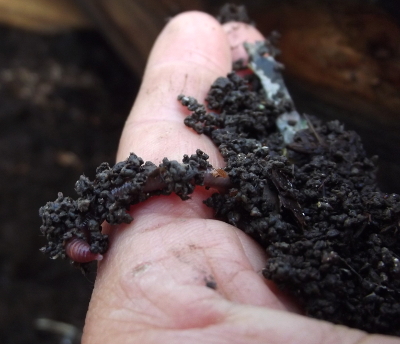 cardboard --- had been
completely digested into high quality worm
castings. Yes,
there was some junk in there, mostly shredded envelope windows and bits
of non-biodegradable trash that the kids threw in with the food
scraps. But the quality of the castings themselves was higher
than any I've ever seen.
cardboard --- had been
completely digested into high quality worm
castings. Yes,
there was some junk in there, mostly shredded envelope windows and bits
of non-biodegradable trash that the kids threw in with the food
scraps. But the quality of the castings themselves was higher
than any I've ever seen.
That said, there wasn't
much of it. Not counting the horse manure (which I left in the
bin to keep the worms active until I add more manure), we ended up with
9 buckets of worm castings from 7
initial buckets of worms and castings, plus around 500 pounds of
food scraps and about as much bedding. That means our entire
school worm bin project boiled down to 10 gallons of castings!
(It's possible that the initial 35 gallons of worms and castings shrunk
a bit too since the biomass wasn't 100% digested when we bought it, so
it might be more
fair to say we got 20 gallons of castings from the project.)
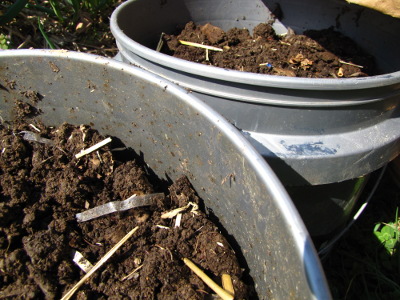 Although I'm amazed at how
much the compostables shrunk, I'm excited to put the compost to work in
the garden. We were lucky enough to be able to drive all 9
buckets in and I plan to put them to work immediately to feed the
carrots, cabbage, and parsley I'll be planting next week. I'm hopeful that, like
biochar, worm castings will increase
the long term health of the garden soil.
Although I'm amazed at how
much the compostables shrunk, I'm excited to put the compost to work in
the garden. We were lucky enough to be able to drive all 9
buckets in and I plan to put them to work immediately to feed the
carrots, cabbage, and parsley I'll be planting next week. I'm hopeful that, like
biochar, worm castings will increase
the long term health of the garden soil.
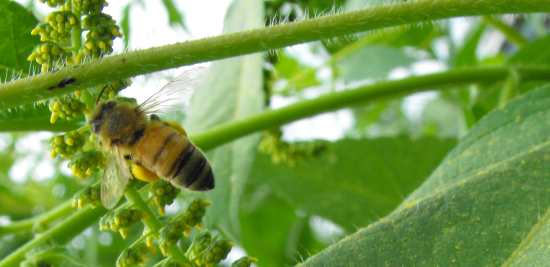 The
final eye-opener in The
Bee-friendly Beekeeper
wasn't specific to Warre hives at all. Instead,
Heaf's information about the optimal environment for apiaries is
relevant to any kind of beekeeping.
The
final eye-opener in The
Bee-friendly Beekeeper
wasn't specific to Warre hives at all. Instead,
Heaf's information about the optimal environment for apiaries is
relevant to any kind of beekeeping.
Most beekeepers, like
me, tend to think that as long as bees have plenty of flowers around,
they're in good shape for food. However, Heaf explained that all
pollen isn't created equal, and that each species' flowers produce
pollen with different amounts and types 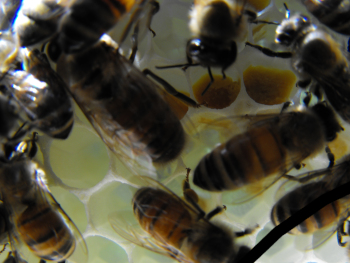 of
proteins, fats, vitamins, and minerals. Just like the healthy
homesteader wants to eat several types of vegetables rather than
relying on carrots alone, the healthy bee needs a diversity of pollen
sources to round out its diet. Scientists have found that bees
forced to subsist on only one or a few types of pollen tend to get sick
more often, presumably because they're malnourished. So, don't
just plant fields of white clover or buckwheat for your bees --- work
to diversify the wild and cultivated landscape to keep your hives
healthy.
of
proteins, fats, vitamins, and minerals. Just like the healthy
homesteader wants to eat several types of vegetables rather than
relying on carrots alone, the healthy bee needs a diversity of pollen
sources to round out its diet. Scientists have found that bees
forced to subsist on only one or a few types of pollen tend to get sick
more often, presumably because they're malnourished. So, don't
just plant fields of white clover or buckwheat for your bees --- work
to diversify the wild and cultivated landscape to keep your hives
healthy.
The other interesting
environmental issue relates to cramming bees together into
apiaries. A variety of scientific studies have shown that feral
honeybees spread their homes out across the landscape, both so they
don't compete with other hives for forage and also so they don't give
each other diseases. In areas like Australia where varroa mites
are absent 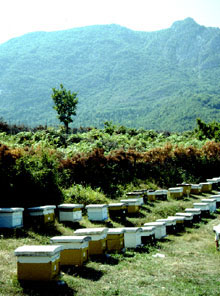 and other parasites and
diseases are rare, honeybees may live as close together as 197 colonies
per square mile (or 3 acres apiece). However, problematic areas
in the U.S. with high varroa mite counts have been found to support
only 3 feral colonies per square mile.
and other parasites and
diseases are rare, honeybees may live as close together as 197 colonies
per square mile (or 3 acres apiece). However, problematic areas
in the U.S. with high varroa mite counts have been found to support
only 3 feral colonies per square mile.
The middle ground seems
to be providing around 21 to 35 acres per colony of honeybees (a
density of 18 to 31 colonies per square mile). When you're
looking at your bee density, you should take your neighbors into
consideration, figuring that bees avidly forage within about a mile of
their home and do 95% of their hunting within the inner 3.7
miles. So, if you only own an acre, but know there are no other
honeybees within four miles, you can have a lot more hives in your
apiary without undue crowding than if you owned 50 acres but were
surrounded by beekeepers on every side. You might also consider
spreading your hives out across whatever land you do have rather than
keeping them close together in an apiary situation.
| This post is part of our Warre Hive lunchtime series.
Read all of the entries: |
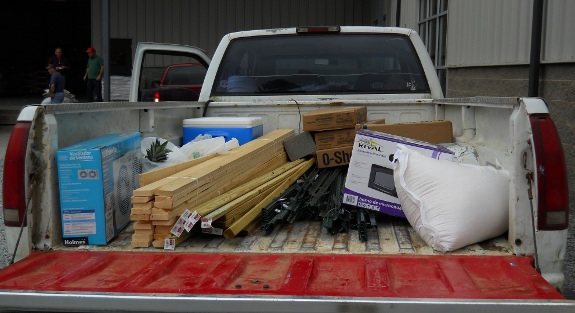
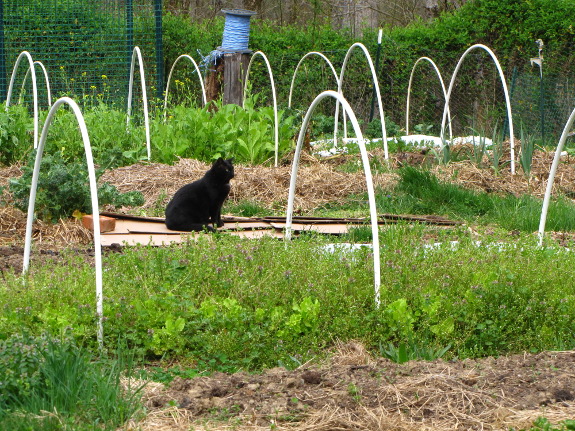
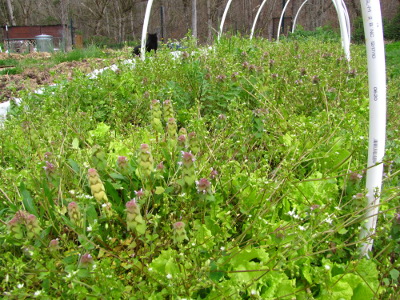 The
mule garden appears so idyllic...until you look closer and notice that
several of the beds have grown up in a mass of chickweed and
purple dead nettle.
My greens overwintered well enough under the quick
hoops to outcompete
most weeds, but the lettuce mostly died and left plenty of warm, bare
ground into which invaders could sprout.
The
mule garden appears so idyllic...until you look closer and notice that
several of the beds have grown up in a mass of chickweed and
purple dead nettle.
My greens overwintered well enough under the quick
hoops to outcompete
most weeds, but the lettuce mostly died and left plenty of warm, bare
ground into which invaders could sprout.
If I'd been smart, I
would have taken down the hoops once the lettuce died and let the cold
slow down the weeds, then ripped the chickweed out and mulched the bare
soil. But I've spent all month working on the perennials, only
giving the vegetable garden enough care to get early spring beds
planted. Luckily, there's a way to remediate the weedy ground
without tilling --- a kill
mulch.
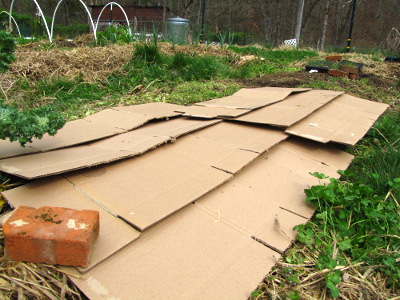 First,
I ripped off the worst of the above-ground weeds and laid down a thin
layer of cardboard. In my perennial patches, I've been using two
thicknesses of corrugated cardboard since I have hefty weeds like
wingstem trying to poke up, but one layer of cardboard is plenty as a
weed barrier in a mostly-well-maintained vegetable garden. I
tossed some straw on top of the cardboard and proclaimed it done.
First,
I ripped off the worst of the above-ground weeds and laid down a thin
layer of cardboard. In my perennial patches, I've been using two
thicknesses of corrugated cardboard since I have hefty weeds like
wingstem trying to poke up, but one layer of cardboard is plenty as a
weed barrier in a mostly-well-maintained vegetable garden. I
tossed some straw on top of the cardboard and proclaimed it done.
Meanwhile, other bare
beds that won't be planted until May or June are getting a very
experimental seeding of buckwheat. The cover crop isn't
frost hardy, but I've seen some leftover seeds germinating in the
garden already, so I thought I'd give it a shot. I'll let you
know if we get a frost-free month to provide optimal biomass
accumulation, or whether I threw my fifty cents and five minutes of time down the drain.
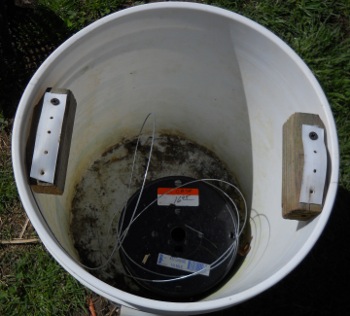
The Do
It Yourself electric wire holder didn't perform so well in the
field due to 2 major problems.
1. Top heavy to the point of
wanting to tip over.
2. No tension on the spool
equals a tangled mess.
Stay tuned for version 2.0,
which will make an attempt at solving both issues.
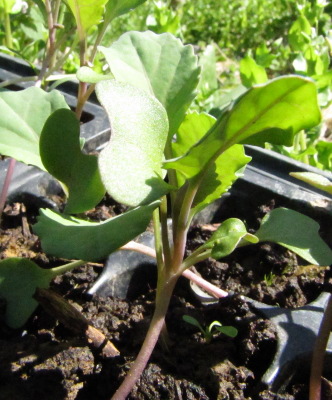 I don't usually start many
(or even any) seeds inside, for a variety of reasons. I don't
believe in extreme climate control, preferring to enjoy the temperature
swings of spring, so tender tomato seedlings on my windowsill are as
likely to get stunted as they are to thrive. Plus, even our
south-facing windows don't really provide enough light for young
vegetables, and I don't want the energy cost of running supplemental
lighting. Finally, I don't believe in buying potting soil, and
there's only so much stump
dirt to go around,
so it usually goes to my dwarf citrus
trees.
I don't usually start many
(or even any) seeds inside, for a variety of reasons. I don't
believe in extreme climate control, preferring to enjoy the temperature
swings of spring, so tender tomato seedlings on my windowsill are as
likely to get stunted as they are to thrive. Plus, even our
south-facing windows don't really provide enough light for young
vegetables, and I don't want the energy cost of running supplemental
lighting. Finally, I don't believe in buying potting soil, and
there's only so much stump
dirt to go around,
so it usually goes to my dwarf citrus
trees.
Instead, I start
broccoli, cabbage, and tomatoes in quick
hoops a month or so
before their outside planting dates. The seedlings get off to a
slightly slower start than those of our neighbors, but produce very
well --- in fact, I think we get more tomatoes off our vines than folks
do who buy big starts from the store since our tomatoes are never
shocked. (My seedlings are small when I transplant them, and I
generally get all their roots in a big gob of dirt that I move with the
young plant.) My method is very low work since the seedlings are
right in the earth and exposed to the sun from day 1, which means they
don't need to be waterered, turned, potted up, etc and I don't have
problems like spindly growth, damping off, and insects. I'm
willing to eat my first tomatoes a week later than my neighbors do if
it means less worrying and a bigger harvest in the end.
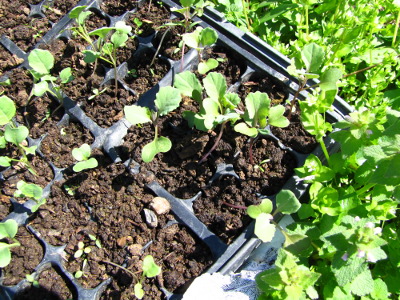 But this year has been a
little different. First, I found a second source of stump dirt
which I was itching to use. And second, our weather has been so
balmy that I've been able to put flats outside to spend most of their
childhood in the sun, just sprouting the seeds inside and then taking
the seedlings back in during really cold spells. So I have
broccoli and cabbage seedlings just about ready to go in the ground
weeks before I did last year, and am crazy enough to have started a
flat of tomatoes and peppers indoors. (I may regret the latter
since they'll have to be repotted once or twice before our frost-free
date. Unless spring continues to be crazy hot, in which case I'll
just put them in the ground really early and see what happens.)
But this year has been a
little different. First, I found a second source of stump dirt
which I was itching to use. And second, our weather has been so
balmy that I've been able to put flats outside to spend most of their
childhood in the sun, just sprouting the seeds inside and then taking
the seedlings back in during really cold spells. So I have
broccoli and cabbage seedlings just about ready to go in the ground
weeks before I did last year, and am crazy enough to have started a
flat of tomatoes and peppers indoors. (I may regret the latter
since they'll have to be repotted once or twice before our frost-free
date. Unless spring continues to be crazy hot, in which case I'll
just put them in the ground really early and see what happens.)
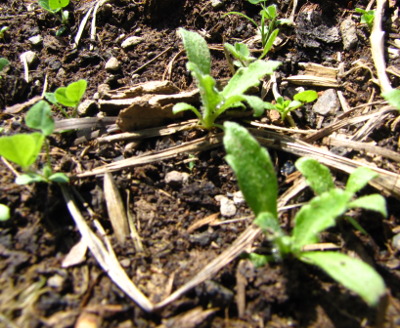 There is something to be said
for starting transplants inside for a no-till garden. If you
don't have to rake back the mulch and expose large expanses of bare
ground, there's less weeding work to be done later, which is why Mel
Bartholomew's Square
Foot Gardening method uses nearly all transplants. For
example, I'm going to have to weed this bed of poppies before I mulch
it to rip out the clover and other seedlings that popped up from seeds
in the compost.
There is something to be said
for starting transplants inside for a no-till garden. If you
don't have to rake back the mulch and expose large expanses of bare
ground, there's less weeding work to be done later, which is why Mel
Bartholomew's Square
Foot Gardening method uses nearly all transplants. For
example, I'm going to have to weed this bed of poppies before I mulch
it to rip out the clover and other seedlings that popped up from seeds
in the compost.
I don't think I'm ever
going to follow Bartholomew's lead and transplant things like lettuce,
but I'll be curious to compare transplants from my flats vs. quick
hoops this summer. Maybe my garden needs a little of both methods.
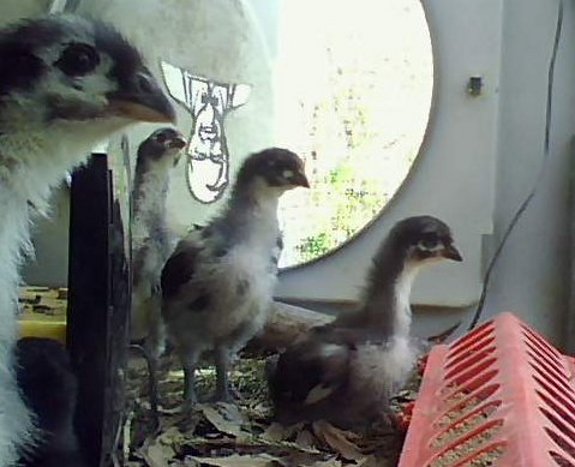
The new chicken
webcam is waiting for the mailman to bring us a 200 foot ethernet
cable from Amazon.
With any luck we'll have it
in place for the next group of new born chicks which should start
making some noise in a couple of weeks.
It snaps an image every
minute or two, and most are average scenes of chick life, but the above
picture seemed to capture them in some sort of group pose.
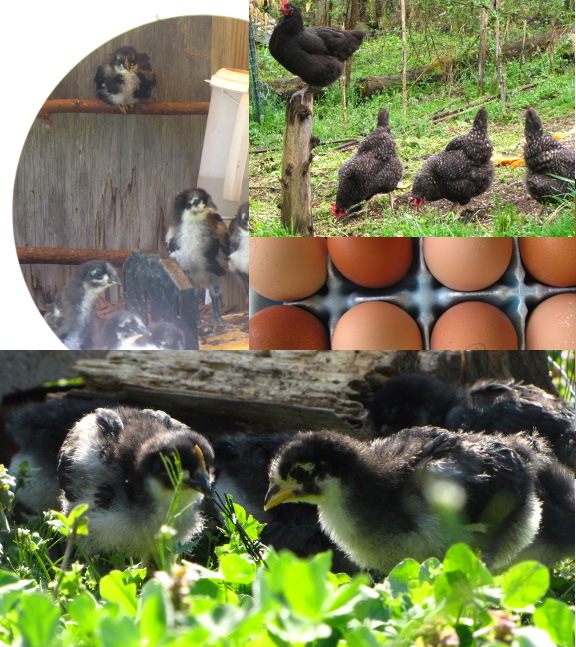
There's not going to be
a lunchtime series this week since I've been lazing around enjoying
spring. So I thought I'd plug my chicken blog, where I've been posting the
long versions of all of our crazy chicken experiments. If you're
interested in raising chickens on pasture, hatching your own eggs, or
just looking at cute chick photos, that site is the place to be.
Meanwhile, I've been
slowly but surely tagging old
lunchtime series so
they're easier to find. You can now read all of the lunchtime
series through March 2009 by clicking on that link.
Finally, there's always
the archives. Joey made it very
user friendly a year or so ago, and since then we've had half a dozen
emails from folks who have started at the beginning and read all the
way through. Maybe you'd like to join the ranks of the Walden
Effect obsessed?
Thanks for reading, and
happy spring!

It just doesn't feel like
Spring to me until I push the mower.
A piece of scrap carpet was
the only thing that got tangled up during today's mowing session.
That got me to thinking about
all the flywheel
shaft key problems I was
having back in 2009 and 2010, and how we made it all the way through
the 2011 season without breaking that darn shaft key.
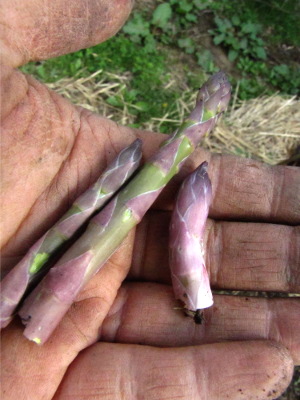 It was hard to believe in
Monday night's frost warning as Mark and I worked outside in t-shirts
on a sunny, 60 degree afternoon. But we live down in a valley, so
when the weather forecast predicts a low of 35, I figure it will
probably freeze. Luckily, it's going to warm back up today and
then stay above freezing for the rest of the week, so I could get away
with quick and dirty frost protection.
It was hard to believe in
Monday night's frost warning as Mark and I worked outside in t-shirts
on a sunny, 60 degree afternoon. But we live down in a valley, so
when the weather forecast predicts a low of 35, I figure it will
probably freeze. Luckily, it's going to warm back up today and
then stay above freezing for the rest of the week, so I could get away
with quick and dirty frost protection.
The first step in
protecting your garden from cold is to take care of the low hanging
fruit. Asparagus spears are frost sensitive, so go pick anything
you've got and eat them for dinner. If you have seedlings in
flats hardening off outside, bring them in for the night.
Next, decide which
plants are going to have the most trouble. Cold tolerant plants
like lettuce, onions, and leafy greens will probably be okay as long as
you don't have a killing frost (below 25), but younger seedlings are
more sensitive. I chose to cover up my baby broccoli, cabbage,
lettuce, swiss chard, and arugula seedlings since they are all in the
cotyledon or one true leaf stage, but I left my onions (at least two
true leaves apiece) and all of the over-wintered greens alone.
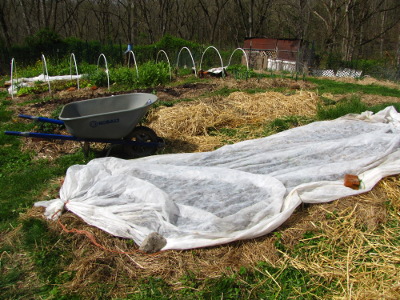 A lot of the seedlings I
chose to protect would have been under quick
hoops during a
normal spring, but it didn't seem worthwhile to erect the structures
when there were no frosts on the horizon. For just a few days,
row cover fabric draped over the plants and weighed down with rocks
works just fine. In fact, if you've only got one night of
predicted freezes, like we do this week, you can put just about
anything on the beds the night before and take them off once the frost
melts --- old sheets, blankets, filthy row cover fabric that doesn't
let light through anymore, tarps, upturned buckets, etc.
A lot of the seedlings I
chose to protect would have been under quick
hoops during a
normal spring, but it didn't seem worthwhile to erect the structures
when there were no frosts on the horizon. For just a few days,
row cover fabric draped over the plants and weighed down with rocks
works just fine. In fact, if you've only got one night of
predicted freezes, like we do this week, you can put just about
anything on the beds the night before and take them off once the frost
melts --- old sheets, blankets, filthy row cover fabric that doesn't
let light through anymore, tarps, upturned buckets, etc.
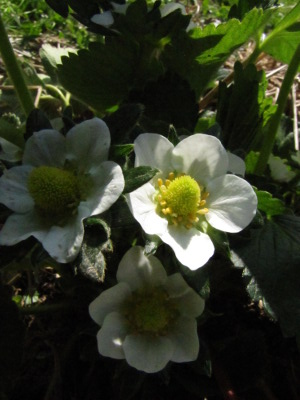 Fruit plants are also
sensitive to spring frosts once they start to bloom. According to
my critical
temperature chart,
we shouldn't be in danger of losing any of our tree fruits as long as
the temperature stays above 28, which is a good thing because I haven't
had much luck swaddling
peach limbs to
protect the flowers in the past. If I had a small tree I really
cared about, I might fill a kiddie pool or a bunch of five gallon
buckets up with water, line the containers up around the base of the
tree, then throw a tarp over the whole thing. Or, maybe, leave
sprinklers running all night, but that would use a lot of water.
Fruit plants are also
sensitive to spring frosts once they start to bloom. According to
my critical
temperature chart,
we shouldn't be in danger of losing any of our tree fruits as long as
the temperature stays above 28, which is a good thing because I haven't
had much luck swaddling
peach limbs to
protect the flowers in the past. If I had a small tree I really
cared about, I might fill a kiddie pool or a bunch of five gallon
buckets up with water, line the containers up around the base of the
tree, then throw a tarp over the whole thing. Or, maybe, leave
sprinklers running all night, but that would use a lot of water.
My strawberries are
another matter. The plants in the front garden are shaded by the
hillside all winter and haven't started to bloom yet, but beds in the
most sunny part of the garden are coated in flowers. Even though
strawberries are sensitive (open blooms will be nipped at 30 degrees),
they're small enough to protect easily, so I rustled up some old row
cover fabric and weighed it down over the berry plants with bricks.
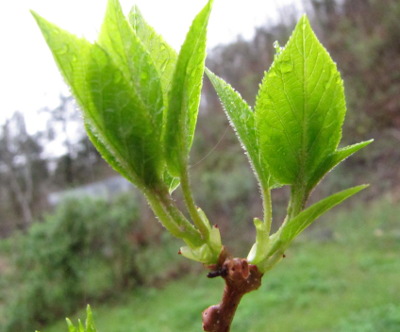 The plants I'm most concerned
about are actually my hardy
kiwis. Despite
the name, I've found them to be quite sensitive to frost once they wake
up in the spring, and I'm afraid we might lose the current flush of
leaves. Last year, the kiwis were so small that Mark was able to
protect each plant under a five gallon bucket, but the vines have run
for several feet along the trellis wires since then. I couldn't
quite wrap my head around protecting the tender vines, so I guess we'll
just have to wait and see what happens.
The plants I'm most concerned
about are actually my hardy
kiwis. Despite
the name, I've found them to be quite sensitive to frost once they wake
up in the spring, and I'm afraid we might lose the current flush of
leaves. Last year, the kiwis were so small that Mark was able to
protect each plant under a five gallon bucket, but the vines have run
for several feet along the trellis wires since then. I couldn't
quite wrap my head around protecting the tender vines, so I guess we'll
just have to wait and see what happens.
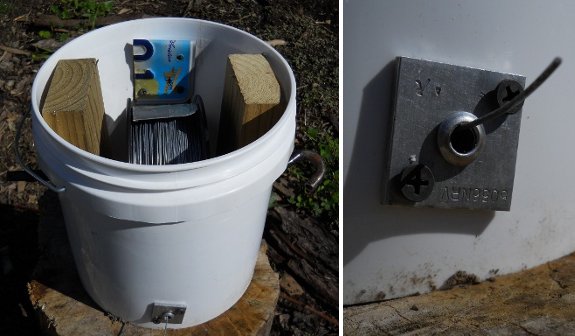
It works a lot better now!
Turns out a 2 gallon bucket
is just the right size for the new and improved DIY electric fence wire
holder.
Ordered a special orchard
gizmo that allows the wire to be pulled through one way and clamps down
on it when it's pulled in the other direction.
Cut an old license plate to
size so that it would fit over the spool and act as a tensioner. What
you don't see is a small hole in the bottom so you can reach in and
feed the wire through the orchard wire vise.
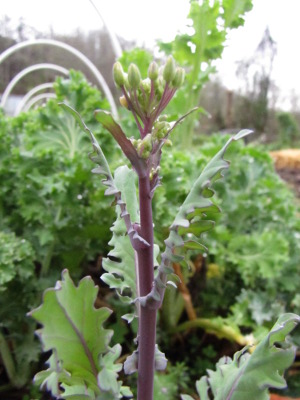 Saving
seed from kale is a lot more complex than I expected. We grew three
varieties this year,
of which Winterbor was my least favorite (not as productive and faster
to bolt in the spring without producing many leaves first). But
both Improved Dwarf Siberian and Red Russian are keepers, the first for
its cold hardiness and high productivity and the second for its color
and taste. What would I have to do to save seeds from both the
Siberian and the Russian?
Saving
seed from kale is a lot more complex than I expected. We grew three
varieties this year,
of which Winterbor was my least favorite (not as productive and faster
to bolt in the spring without producing many leaves first). But
both Improved Dwarf Siberian and Red Russian are keepers, the first for
its cold hardiness and high productivity and the second for its color
and taste. What would I have to do to save seeds from both the
Siberian and the Russian?
Seed
to Seed clued me in
to the fact that what we call kale can actually be in two different
species. The most common types of kale (including Winterbor) are
in Brassica
oleracea along with collards, broccoli, cauliflower, and
cabbage. On the other hand, some kales commonly called Siberian
or Russian are in Brassica napus along with rutabagas and
rape. (That said, some "Siberian" kales might be in B.
oleraceae, and
the source of my Improved Dwarf Siberian Kale lists it thus on their
website.)
To confuse matters even
more, Brassica
napus might not
really be its own species. Rutabagas appeared seemingly out of
nowhere in Europe during the Middle Ages, and some sources suggest that
varieties in this "species" arose from different hybridizations beween B.
oleracea and B. rapa (the latter of which contains
Chinese cabbage, Asian greens, turnips, and broccoli raab). For
example, Siberian kale might have sprung up when a B.
oleracea kale
crossed with a B. napa Asian mustard, while the
rutabaga might be a hybrid between kale or collards and a turnip.
This
website provides
evidence that Red Russian kales might be the result of a three way
hybridization when the already hybrid Siberian kale was crossed with
black mustard (B. nigra).
After doing all that
reading, my head was spinning and I still didn't know which kales cross
with each other. I digested for a while (and read some more) and
came up with these rules of thumb:
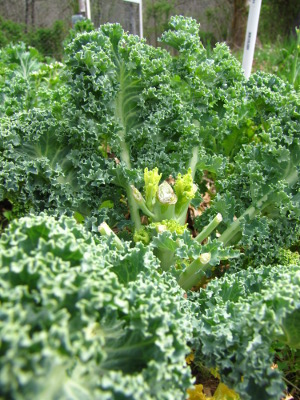 You can hand-pollinate and
sometimes get crosses between species, but
you probably don't need to worry about unintentional cross-pollination
between plants in different species.
You can hand-pollinate and
sometimes get crosses between species, but
you probably don't need to worry about unintentional cross-pollination
between plants in different species.- Most kales (B. oleracea) are outbreeding plants that will hybridize with other kales in the same species and with cabbage, broccoli, Brussels sprouts, cauliflower, collards, and kohlrabi.
- Siberian kale might be in B. oleraceae, in which case see above. If not, see below.
- Russian kale, Hanover Salad, and Winter Rape kale (B. napus) are inbreeding plants, but will cross with other kales of the same type, and with rutabagas, some turnips, and winter rape.
(See
this post to understand what I mean when I talk about outbreeding and
inbreeding plants.)
As long as I rip out my
turnips (which I wasn't going to save the seeds of anyway), it sounds
like I can probably save Red Russian kale seeds with no extra
effort. (That's assuming that the seed company is right and
Improved Dwarf Siberian is in a different species --- I've emailed them
to confirm.) To save seeds from my Improved Siberian kale, I'll
just need to make sure that the few broccoli plants that survived the
winter don't go to seed and to eat up the last of our Winterbor kale so
it doesn't bloom. Maybe keeping two varieties of kale in my
garden is easy after all.
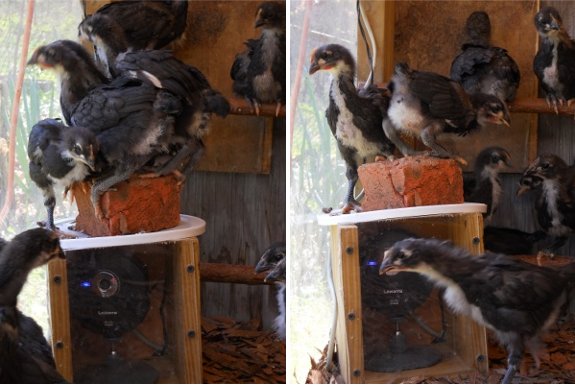
It's working!...and I'm now
prepared to announce the launch of what I consider to be the best live chick cam on the internet.
Sometimes you might just see
an empty feeder, but chances are one of them will migrate towards the
camera for the next refresh. They're very animated at this stage.
We don't have any way of
storing the cuteness unless one of us happen to be watching and then
right clicks to save image. If any of you capture a masterpiece this
way please email them to us and we'll display some of the more ultra
cute ones.
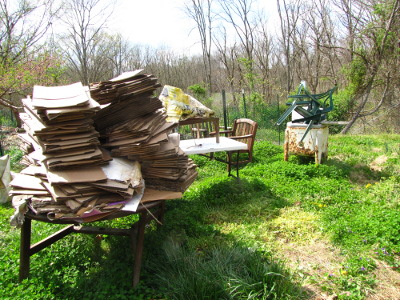 All winter, the yard fills up
with this and that --- cardboard
leftover from a kill mulch project, chairs from a family
gathering, dismantled
pieces of a chicken tractor. Since we don't have
neighbors to complain, I suspect I'd never clean up if mowing season
didn't roll around.
All winter, the yard fills up
with this and that --- cardboard
leftover from a kill mulch project, chairs from a family
gathering, dismantled
pieces of a chicken tractor. Since we don't have
neighbors to complain, I suspect I'd never clean up if mowing season
didn't roll around.
Starting last year, we
have a new spring tradition. The first lawn mowing afternoon is a
two person job --- I run around picking up bits and pieces while Mark
pushes the mower. Some things just 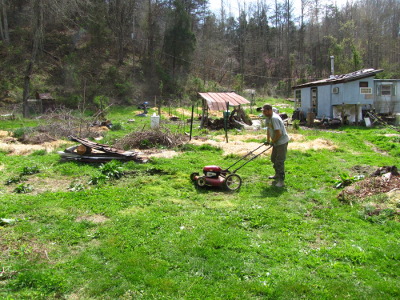 get stacked up to expedite
mowing, but I also fill a bag with trash, move building supplies to the
barn, and take down quick hoops that are no longer in use.
get stacked up to expedite
mowing, but I also fill a bag with trash, move building supplies to the
barn, and take down quick hoops that are no longer in use.
I know I failed at my
job when I hear the awful sound of the mower bogging down on a
forgotten bit of junk. Luckily, the piece
of carpet I missed
didn't do much damage.
If my house ever looked
so spic and span, I might let strangers inside....
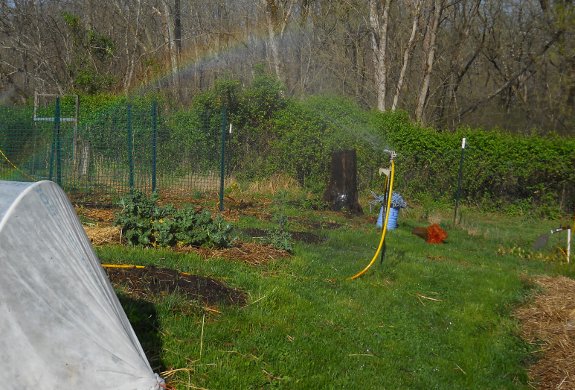
Dry enough to get the sprinkler
irrigation system going
today, but still too wet for golf cart
hauling.
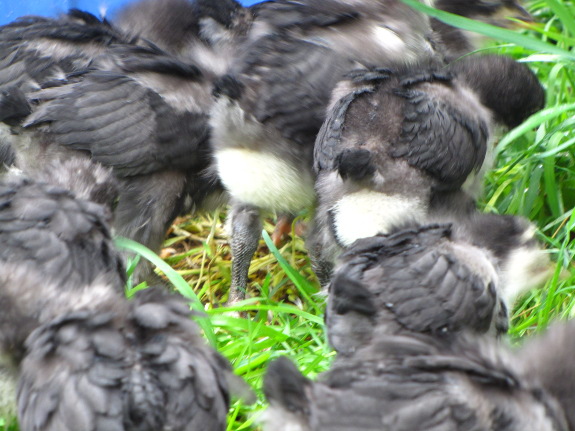
 The bad news is --- we're not
going to have another round of cute chicks on Monday. I made a
stupid mistake, plugging the turner that goes with our incubator into a
power strip amidst a jumble of unlabeled cords. Sometime during
the incubation process, the turner got unplugged, and I didn't notice
until Thursday.
The bad news is --- we're not
going to have another round of cute chicks on Monday. I made a
stupid mistake, plugging the turner that goes with our incubator into a
power strip amidst a jumble of unlabeled cords. Sometime during
the incubation process, the turner got unplugged, and I didn't notice
until Thursday.
The one flaw with the Brinsea
Octagon 20 is that
there's no indicator light on the turner. It rotates about as
slowly as clouds move (which means you can't tell at a glance that it's
working), and any motor noise is overpowered by the separately plugged
in incubator  unit. So it's awfully
easy to unplug your turner and not notice for days or weeks.
(Note to self: tape turner plug in place next time.)
unit. So it's awfully
easy to unplug your turner and not notice for days or weeks.
(Note to self: tape turner plug in place next time.)
If you don't turn eggs
during incubation, the embryos will stick to the shell and
die. Skipping a day or so is probably not a huge problem, but I
have a sinking
suspicion our turner actually got unplugged more than a week ago.
So I sent Mark out to bury the eggs and we started saving new
ones. (Yes, Mark does all the dirty (ie emotionally difficult)
work around here.)
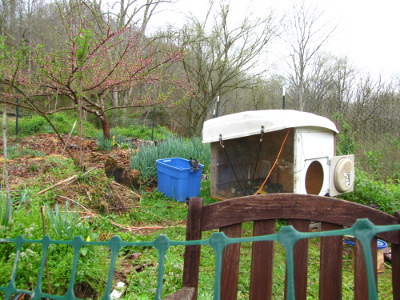 The good news is that the
chicks from the last hatch are thriving. I was actually wishing I
could leave them to work up the ground under the peach tree a bit
longer since they're finally starting to turn into leaf-scratchers and
I want to eliminate
as many bad bugs there as possible. Since our next batch
of chicks won't be hatching until the end of April now, I'll get the
benefit of larger chick feet under the fruit trees rather than having
to move the youngsters from the first hatch to the big coop right away
to make room for newbies in the brooder. I guess every cloud has
a silver lining.
The good news is that the
chicks from the last hatch are thriving. I was actually wishing I
could leave them to work up the ground under the peach tree a bit
longer since they're finally starting to turn into leaf-scratchers and
I want to eliminate
as many bad bugs there as possible. Since our next batch
of chicks won't be hatching until the end of April now, I'll get the
benefit of larger chick feet under the fruit trees rather than having
to move the youngsters from the first hatch to the big coop right away
to make room for newbies in the brooder. I guess every cloud has
a silver lining.

We've been trying to reclaim
this gully that's grown up with brambles and Japanese Honeysuckle for
years now, and thanks to the new Stihl
FS-90R weed eater we've
finally made some serious progress on cutting it all back.
It's a decent amount of space
between our mule garden and the back garden.
I guess we'll have to come up
with a name for it now so it will feel at home with its neighbors.
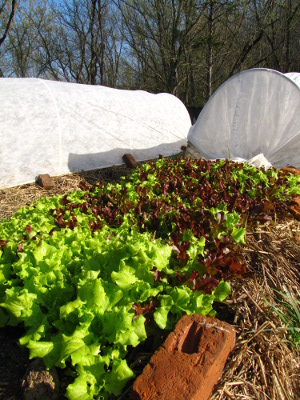 I know it seems a little nuts
to mow and sprinkle in March. My notes
tell me that we started mowing during the second week of April then
watered the garden for the first time during the third week of April in
2010, with both spring activities running a week or two later than that
in 2011.
I know it seems a little nuts
to mow and sprinkle in March. My notes
tell me that we started mowing during the second week of April then
watered the garden for the first time during the third week of April in
2010, with both spring activities running a week or two later than that
in 2011.
But gardeners have to
listen to the weather, and our garden is telling me to get a move on
and pretend this is mid April. I'm rushing out the remaining
spring crops --- every cool weather vegetable except broccoli is in its
final spot in the garden and I'll be putting out the broccoli next
week. In fact, the mule garden is just about full, which is why I
felt it was worthwhile to hook up the irrigation system instead of hand
watering.
Meanwhile, I'm doing
crazy things like starting tomatoes, cucumbers, and watermelons 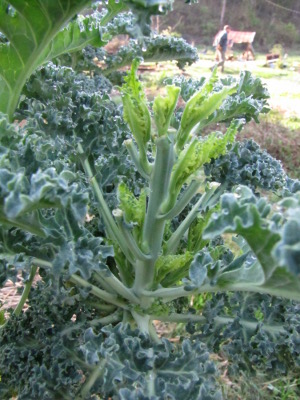 under
quick
hoops --- yes, in
March. The ground is warm enough for the seeds to sprout, and I
figure if the heat wave continues, our spring crops won't last as long
as usual, so we'll need early summer crops to replace them. This
is quite a gamble, but I'll only lose a few cents' worth of seeds if a
late frost is hard enough to get through the row cover fabric.
under
quick
hoops --- yes, in
March. The ground is warm enough for the seeds to sprout, and I
figure if the heat wave continues, our spring crops won't last as long
as usual, so we'll need early summer crops to replace them. This
is quite a gamble, but I'll only lose a few cents' worth of seeds if a
late frost is hard enough to get through the row cover fabric.
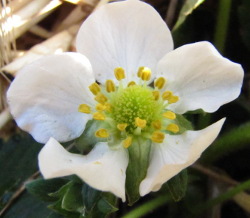
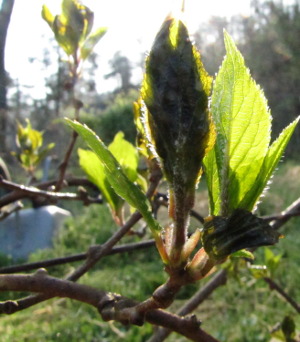 Luckily, this
week's frost didn't
do much damage. As you can see from the yellow center of this
strawberry flower, we might be getting an extra early crop despite the
frost. This strawberry was the lone indicator I left uncovered as
a gauge of the air temperature, which I'm guessing only dropped to
about 31. (Strawberry flowers turn black in the center if damaged
by the frost, which happens at 30 degrees Fahrenheit.)
Luckily, this
week's frost didn't
do much damage. As you can see from the yellow center of this
strawberry flower, we might be getting an extra early crop despite the
frost. This strawberry was the lone indicator I left uncovered as
a gauge of the air temperature, which I'm guessing only dropped to
about 31. (Strawberry flowers turn black in the center if damaged
by the frost, which happens at 30 degrees Fahrenheit.)
As I suspected, the kiwi
was the most tender, showing some frost-nipped leaves on the lower
cordon. It seems like the cold air only lingered in the foot
closest to the ground, though, since higher leaves are still vibrantly
green. I wonder if training a hardy kiwi to grow taller would
give it some frost protection?

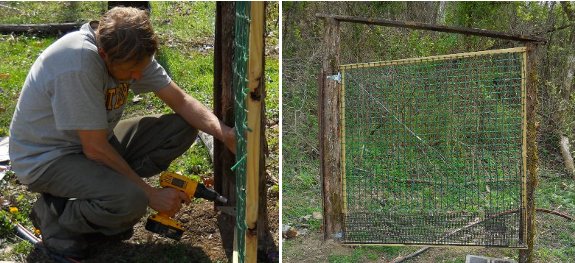
This new gate is our biggest
one yet, which prompted me to think about adding a diagonal brace
thanks to comments from our most recent chicken
pasture
gate last summer.
A small turnbuckle ended up
costing about 2 dollars, which can barely be seen in the photo near the
center point. A short stretch of 14 gauge electric fence wire connects
the end of the turnbuckle to a hole drilled through each corner.
The gap at the bottom should
be sufficient to let Lucy through. What we're not sure about is if it's
a big enough temptation for our invasive, white tailed friends looking for a big snack.

Or explore more posts by date or by subject.
About us: Anna Hess and Mark Hamilton spent over a decade living self-sufficiently in the mountains of Virginia before moving north to start over from scratch in the foothills of Ohio. They've experimented with permaculture, no-till gardening, trailersteading, home-based microbusinesses and much more, writing about their adventures in both blogs and books.