archives for 09/2011
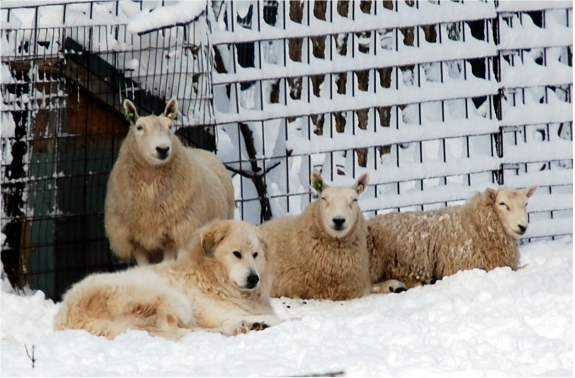
Mark and I have agreed
to table the issue of weed-eating livestock until spring or when we
have another
half acre fenced in
(whichever comes last), so I've been contenting myself with
research. I contacted a few breeders of Miniature
Cheviot Sheep to
figure out a ballpark estimate of how much it would cost us to get
started with a ram and ewe (around $500), and in the process "met"
Terri Brown, who turns out to keep both Miniature Cheviot Sheep and
Nigerian Dwarf Goats. She kindly agreed to let me post her
experiences (and some of her beautiful photos) on the blog to share
with you all.
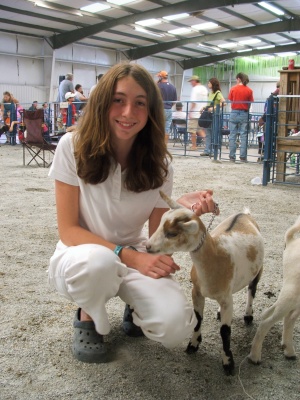 Terri's 4H clubs runs petting zoos as fundraisers and she also
uses her livestock for milk, show, and pets, so her farm contains quite
a menagerie. I'll let her tell you the story in her own words:
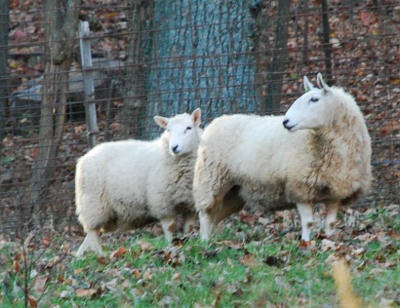 I explained our situation to
Terri and asked her whether she thought we'd be better off with
miniature sheep or dwarf goats, and she replied:
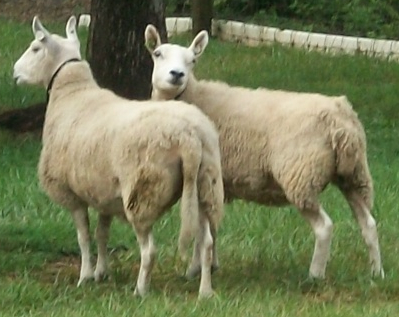
We got our Nigerian Dwarfs in 1993 and have never regretted it. They have doggy personalities and become part of the family. Nigerians are perfect for attacking wild
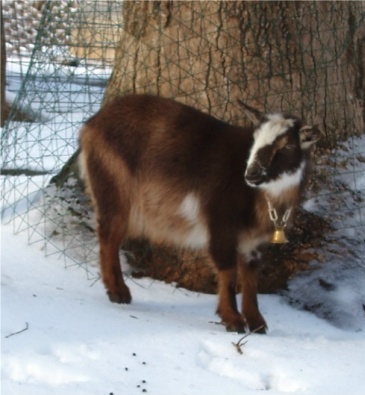 brush... honeysuckle, brambles,
poison ivy (don't pet them afterwards!), and unwanted saplings.
They don't prefer grass and low forbes, however, so you end up mowing
that. We got the lambs last year for our pet zoos but find they
are wonderful mowers.
brush... honeysuckle, brambles,
poison ivy (don't pet them afterwards!), and unwanted saplings.
They don't prefer grass and low forbes, however, so you end up mowing
that. We got the lambs last year for our pet zoos but find they
are wonderful mowers.The Nigerians are polyestrous and produce kids & milk in any season. The sheep only breed in the fall, and if you miss it, oh well maybe next year? They only have singles or twins, unlike our goats who have triplets, quads and more! So the herd grows slowly, especially when three quarters of the flock are rams (at least in MY flock....)
My hubby, Mark, and I both agree Miniature Cheviot Sheep are a delight! Their uncomplicated way of thinking is a respite in our busy lives. They hang out together in a simple, fluffy white, peaceful group, rarely putting on a show like the goats do. The mini sheep are a blast at the county fair, getting a lot of attention in addition to winning a bunch of cash because they have their own division. Each species has its charm, and they do complement each other.
If we had more pasture,
it sounds like Terri's system of using both sheep and goats would be a
good one. Here's what she has to say about dual-caprine pasture
weed control:
 They can be run together but I
prefer to rotate them through. I don't like having more than four
to six individuals per pen because of competition for food and my
attention, and mixing the two species is more complicated. They
have different ways of getting my attention, so it becomes a total mob
scene when they are together. Plus, although they can get along
sharing food, they each do better with their own special mixtures of
grain & minerals.
They can be run together but I
prefer to rotate them through. I don't like having more than four
to six individuals per pen because of competition for food and my
attention, and mixing the two species is more complicated. They
have different ways of getting my attention, so it becomes a total mob
scene when they are together. Plus, although they can get along
sharing food, they each do better with their own special mixtures of
grain & minerals.Never keep rams & bucks together; the bucks rear up and the rams bust their gut or bash them low from behind. I don't think wethers practice that behavior, but I don't have any yet so we'll see.
Terri concluded:
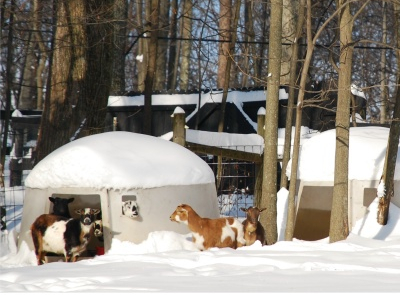 Miniature animals of all types are the rage
nowdays. Smaller families want a little taste of farmy life, and
they find poultry and small sheep & goats fit into their
lives. They want a small animal with less expensive shelter &
fence & transport requirements, and something that is more like a
pet. The Nigerian Dwarfs and Mini Cheviots win on both
counts.
 Being registered helps, too, which guarantees the buyer that their babies will also be small, and gives you credibility as a reputable breeder (which you honor by helping the buyer get started right and by not selling sick babies).
Thanks so much for all
of that great information, Terri! If anyone's interested in
hiring a petting zoo for their DC area birthday party or buying
registered Nigerian Dwarf Goats or Miniature Cheviot Sheep, drop by
Terri's website at WoolyDogDown.com.
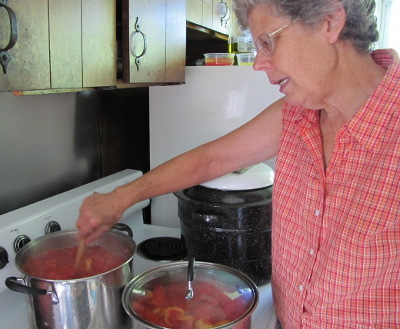 When hot water bath canning,
it's important to pay attention to
everything that goes in the jar. Sweeteners like honey and sugar
can be added with impunity, but including basil and onions in a tomato
sauce will raise the pH so much that you'd have to pressure can.
To stay on the safe side, look for proven recipes or simply can pure
fruits or tomatoes.
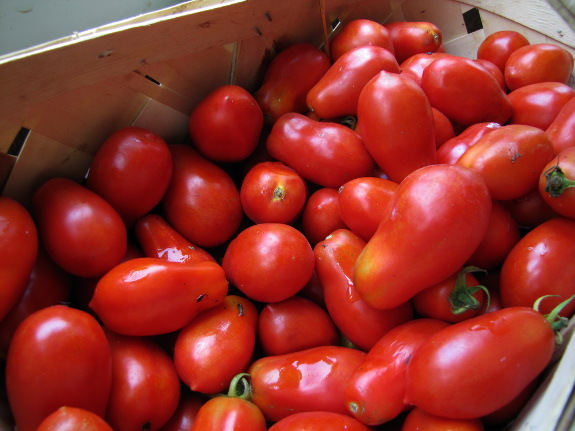
While I'm on the topic
of acidity, I should mention that the acidity
levels of tomatoes may sometimes be too low for hot water bath canning
unless you add a bit of bottled (not fresh) lemon juice or citric
acid. The magic cutoff point is 4.6 --- tomatoes with a pH at or
above this pH are not safe to hot water bath can on their own.
Proven tomatoes that definitely need lemon juice added include:
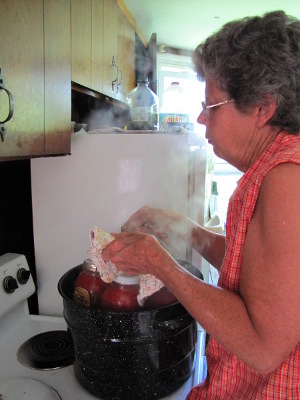 Depending on who you talk to,
San Marzano tomatoes may or may not be safe.
Varieties that
definitely have a pH low enough to allow you to hot
water bath can them without adding any lemon juice or citric acid
include:
 However, to make the decision
even more complex, a high acid tomato variety may
produce low acid tomatoes if the fruits are overripe, bruised, cracked,
affected by blossom end rot, or nibbled by insects. In addition,
tomatoes ripened off the vine, in the fall when days are shorter, in
the
shade, or on dead vines can all have a pH too high to allow hot water
bath canning without added lemon juice. To play it safe, you
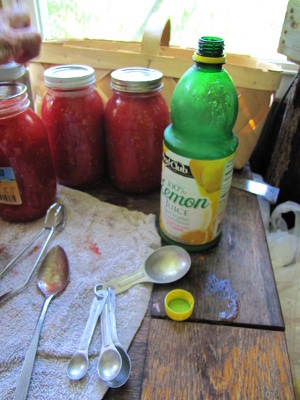
might as well add the lemon juice recommended in most modern recipes (2
tablespoons per quart of crushed tomatoes.)
To read more, check out Weekend
Homesteader: September
on Amazon (or email anna@kitenet.net and ask for your free pdf
copy.) Thank you to everyone who has already given the ebook a
try, and I would
be eternally grateful to anyone who takes the time to leave a review!
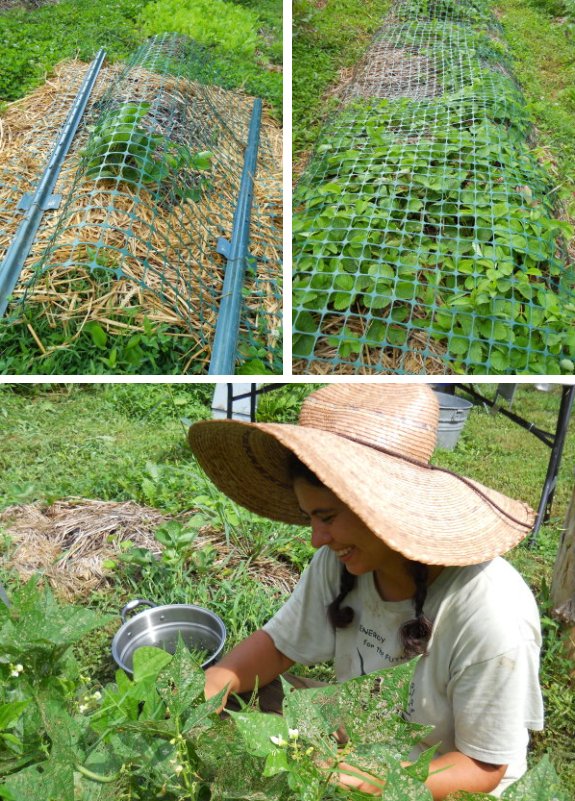
This new method of protecting
our delicate strawberry plants with a dome of plastic fence material is
working quite well during these recent
deer attacks.
 So
you want to mulch your garden to keep weeds at bay all winter, but
storebought mulch is out of your price range. What can you do?
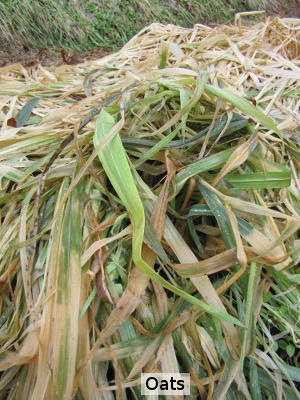
Oats
used as a cover crop
are the cheap and easy way to grow your own winter mulch. Prices
went up 35% since last year, but a 48 pound bag of oat seeds still cost
only $16 at our local feed store. I sow my oat cover crop very
heavily since I want to make sure weeds are shaded out, but the oats
are still far more economical than a bale of straw. My 48 pound
bag of oat seeds produces the same amount of aboveground biomass as
approximately 12 bales of straw ($48), not to mention the nitrogen the
roots capture and keep in circulation and the extra organic matter
produced underground.
An oat cover crop
instead of a heavy winter mulch of straw has another benefit --- labor
savings. We didn't have to haul straw onto and off of the truck,
onto the wheelbarrow, 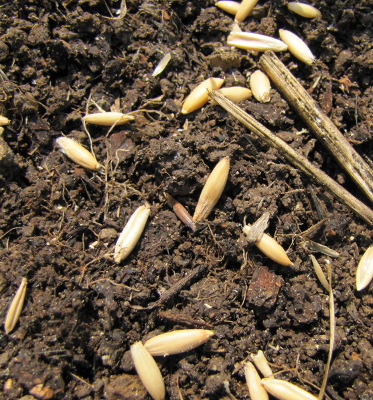 and
then spread it in the garden. Instead, I just raked back what was
left of the summer mulch, scattered oat seeds on the ground, and
lightly sprinkled a bit of the leftover straw back in place to help the
seeds stay moist until they germinate. After an hour and a half
of light gardening, over 10% of our growing area is off my agenda until
spring.
Before you go out and
buy your own 48 pound bag of oats, you should be aware that oats
dependably winter-kill only in zone 6 and colder (although parts of
zone 7 may see the same results, depending on the severity of your
winter.) No matter where you live, you need to plant the oats
early enough that they are well established before cold weather hits,
which means you'll have to come up with some other mulch in garden gaps
that come open later than a month before your first frost date.
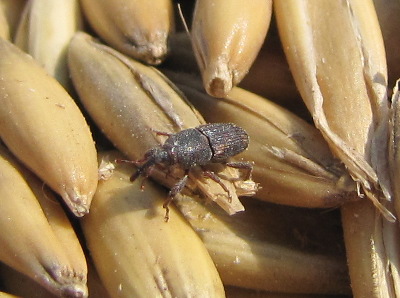 You may also have to deal
with weevils in your grain --- little insects that hollow out the seeds
and prevent them from growing. I eked out my 50 pound bag for a
solid year, but I noticed that the last beds I planted in early August
didn't come up fully, and a little investigation turned up lots of
insects in the seeds. For best results, only buy as much oat seed
 as you'll use this year --- most feed stores will sell you less than a
full bag if you ask nicely. On the other hand, if you put on your
thinking cap, you might find uses for the full 50 pounds. I used
over half of my bag in one morning of profligate sowing --- the bare chicken
pasture should be
green again shortly!
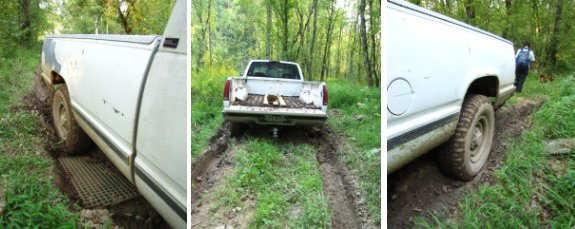
It's been really dry lately,
but I still managed to get the truck stuck yesterday.
We did a bit of research
prompted by a suggestion from Roland about the differential unit.
I called a local dealer, who
could tell from the VIN number that our particular model does not have
a "locker" mechanism, which locks up when your tires start to spin so
that each wheel turns equally, and then unlocks for regular driving so
that normal turning can still be done.
The parts alone were going to
be around 1000 dollars with an estimate of 300 for the labor. My
current plan is to track down a used differential unit that has the
"locker" feature and have our local mechanic swap them out.
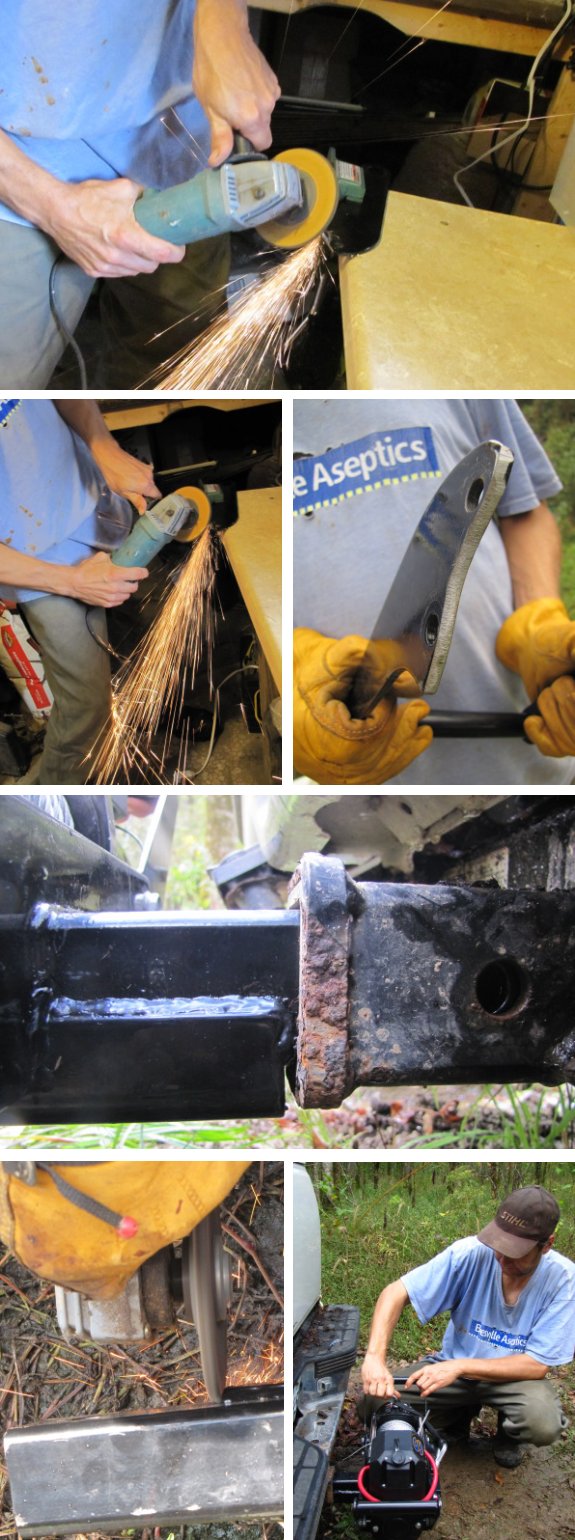
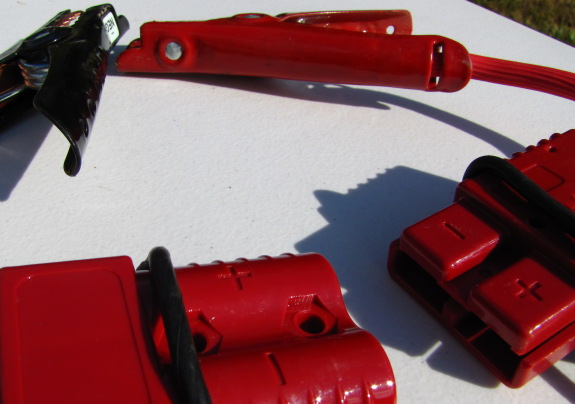
We've also decided to get an
electric winch in the hopes that it might be able to pull us out of
spots like this in the future.

Despite how much time I
spend posting and commenting on our blog, I rarely explore the
internet. I check the weather, read RSS feeds of over 100 blogs,
ask questions of google, visit extension service websites to see what
the accepted wisdom is on agricultural issues, and use google image
search to identify this and that. But I don't surf. I don't
watch videos, I don't spend time on facebook, I don't follow people's
links.
 And yet...I just spent the
better part of an hour poring over the Lexicon of Sustainability
website:
The images are stunning
--- a mish-mash of photography and words that illustrate many of the
agricultural concepts we embrace. The website is beautiful too,
but not very easy to use if you really want to pore over the
images. Instead, you'll need to right click on each image and
save it to your desktop so that you can zoom in and really read what
the artists/authors have to say. I've cropped a couple of the
images down so that you can read them here, but if you want a time
sink, I highly recommend you go check out the rest of the site.
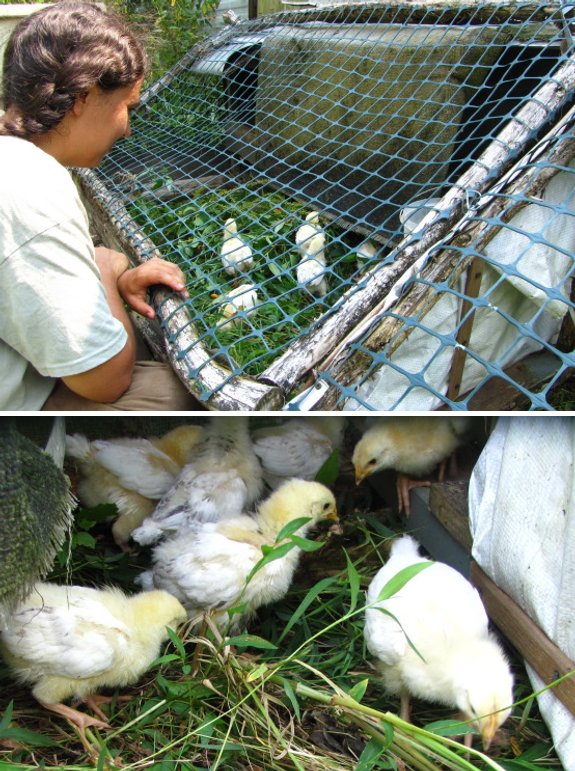
Instead of putting the new
batch of chicks out in the big bird pasture we decided to convert
an old
chicken tractor into a poultry junior high.
The indoor
brood coop was getting too small, but we didn't quite feel like
they were ready for the real world due to losing some chicks back in
the spring to a mystery predator.
We've got them located behind
the trailer for ample shade and maximum protection. Even a casual
observer can notice an increase in the spring of their step with the
addition of this new environment complete with untold numbers of insects
and worms.

Our tractored
chicks were having the time of their lives...until the thunderstorm
hit. Our chicken tractors have covered sections which kept our
adult chickens quite happy through all four seasons, but chicks are
another matter entirely. Without real feathers, the little bit of
rain that splashed under the covering was quickly chilling our baby
flock, so they started piling on top of each other in distress.
I decided it was high time to step in and bring them back inside, so I
scooped up damp chicks as fast as I could catch them. "One, two,
three," I counted as I plopped each one down in a tupperware container
for transport. "...Eleven, twelve, thirteen."
Thirteen?! There were supposed to be fourteen chicks in this
tractor!
Better thirteen living chicks than fourteen dead ones, I thought,
rushing the youngsters inside to warm up in their brooder. But
what had happened to number fourteen?
Back I went into the pouring rain, first calling for the chick, then
sitting quietly in hopes that I'd hear his anguished chirping.
Silence. Did he get out of the tractor and snapped up by one of
our cats in those three brief hours of pastured life?
 I poked my hand in the tractor and noticed
that the chick pileup had occurred right where two pieces of carpet
came together. Mark had simply overlapped the fabric by a few
inches during construction since the overlap was plenty to keep adult
chickens inside, but I was able to slide my hand right through the
gap. Maybe one chick had fallen out and was wandering in this
downpour looking for shelter.
I got down on my hands and knees and looked in all directions.
And there, under the trailer, stood one damp little chick, too scared
to cry. Mark and I captured him in short order and brought him
inside to join his siblings. Soon fourteen chicks were fluffed
back up, none the worse for wear.
One pastured poultry producer ran a side by side comparison
of coops with pastures versus chicken tractors and found that
chickens were healthier in the former. I see his point now --- I
wouldn't want to put chicks out in tractors permanently until they were
at least a month old. I guess we'll either be shoring up that
coop or keeping the youngsters inside for a little longer.
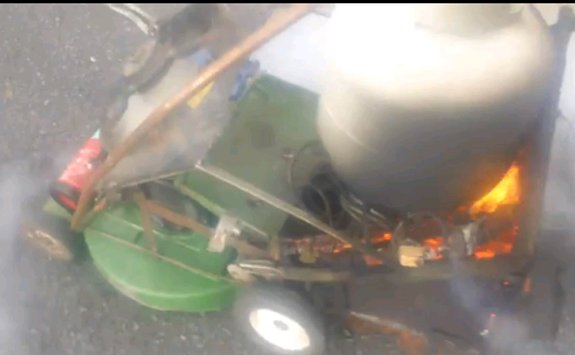

Have you ever wondered if it was possible to convert a lawn mower to
run on steam power?
I'm not sure how safe it is,
but I love the ingenuity of this project by Youtube user dsquad.

GreenPowerScience has a
neat video on how to take an old weed eater engine and convert it to
run on compressed air with the addition
of a well placed reed switch. This seems like a safer alternative to
steam power. It might be possible to build a contraption that powers a
small generator if one could somehow harvest compressed air.
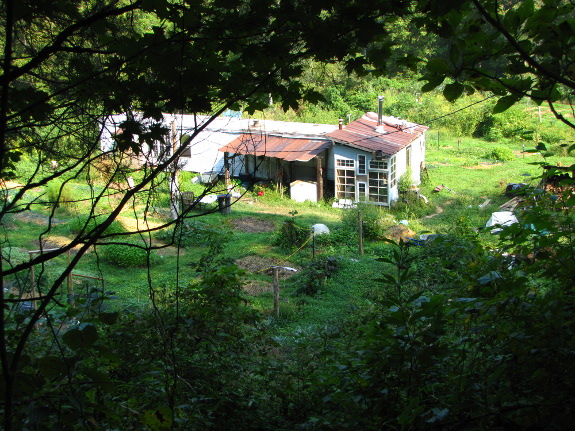
To be honest, farm life has been less than idyllic lately. First there's been the crazy hot summer with temperatures five to ten degrees above average, which means we can only work outside for limited periods. Then there's the fall garden, only about 20% of which survived cat scratching, dog rolling, deer nibbling, and (worst of all) intense heat. Finally, there's the relentless march of the deer, eating up our hard work. We try to keep this blog positive, but in my personal life, I've had two meltdowns in the last few weeks, and poor Mark has had to do a lot of wife propping.
Mark tells me that my problem is lack of perspective --- that never having worked a relentless 9 to 5 job in a field I hate, I can't tell how good even our worst days are. He says that even when I wake him up early to herd chickens out of the garden after Lucy breaks into the pasture at 6 am looking for food scraps...even when the day involves the minisledge breaking in half and barely missing his nose...even when the heat is so intense his brain turns off but he has to keep on going...he's still happier than he was working at the spring factory.
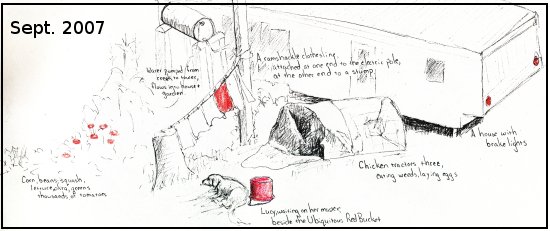
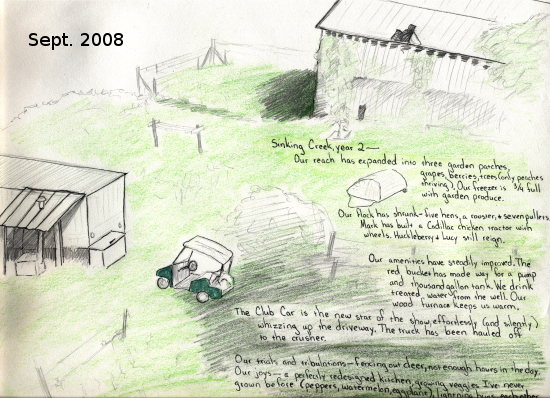
"Look out in the
garden!" he continues, and I take his hand as he helps
me up out of the mud at the bottom of my emotional pit. "See all
that mulch, those beautiful beds of buckwheat, the paucity of
weeds? Last year at this time, the weeds were winning the battle
and you were just barely starting to understand cover crops. Our
farm is becoming more fertile every day!"
By now, without
realizing it, I've followed my husband up far enough that a
metaphorical
breeze cools my face. "All of these problems are the price we pay
for freedom," Mark says. "Yes, it tears at your soul when the
deer eat the garden, because that garden is like an appendage of our
bodies. But we're spending our hours building our own
world. Despite minor setbacks, the farm is improving every
minute, every week, every year, and it's all ours."
Perspective can be hard
to find on a late summer farm when you have to
run as fast as you can just to stay where you are. But when I sit
outside with a book to enjoy the cool evening and a woodcock flutters
down
nearly at my feet from his mating flight...dragonflies skim the garden
like fighter pilots...and a lightning bug lands in my hand, I remember
why we're here. I take the last step out of my emotional pit to
join Mark on his tree-shaded hilltop and we revel in the farm.

These pictures were taken
early this morning.
It's clear she got spooked by
one mechanical deer deterrent
and then another in the opposite direction.
Photographic proof that a
mechanical contraption can be quite effective at making these deer feel
like they crashed the wrong party.
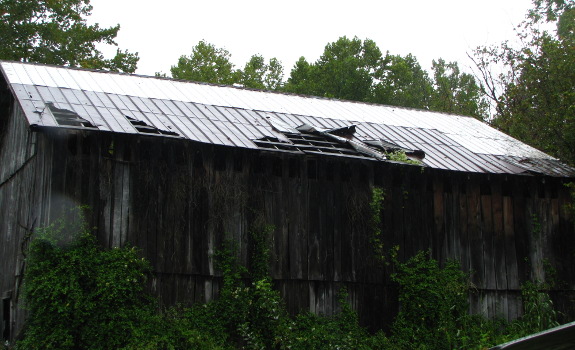
I decided this spring
that it was time to either figure out how to replace the barn roof or
to tear the whole thing down. Honestly, I covet that flat, sunny
growing space, but Mark has pretty much convinced me that it would cost
as much to dismantle such a huge structure as to fix it up so that we
can use it (and I do need more room to cure
sweet potatoes), so
we started saving our pennies. Rather than going on vacation,
this year we're going to be buying tin and hiring someone (or multiple
someones) to clamber up to the top of the huge pole barn and get it
back in shape.
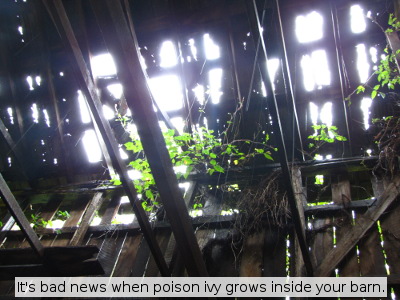 We've
been trying to find a dependable local guy who doesn't mind walking
half a mile through the muck to the job site --- no luck so far.
The barn was built to dry tobacco, which means it's absurdly high, and
I really don't want to climb up there (or to see Mark in such a
precarious position.) Do you have any ideas for how to find
someone crazy enough to work in our weird environment other than to
keep trying out every handyman we meet in town? How much do you
think someone would charge to do that kind of job? How many days
do you think it would take? I know there are specialized roofing
companies, but I suspect they're going to balk at the working
conditions.
Meanwhile, I want to go
ahead and order the roofing metal so that we can drive it in the next
time the ground is dry enough. Sometime in the last decade, the
previous owners of the property stuck new tin on top of the central
section of the barn, and that area (nearly) doesn't leak, so I think we can just replace the two
rows of tin below the good section. Of course, roofing tin needs
to overlap, so you should really start at the bottom of the roof and
work your way up rather than at the top and work your way down.
Do you think it'll be feasible to pry up the bottom of the top tin to
slide new tin underneath?
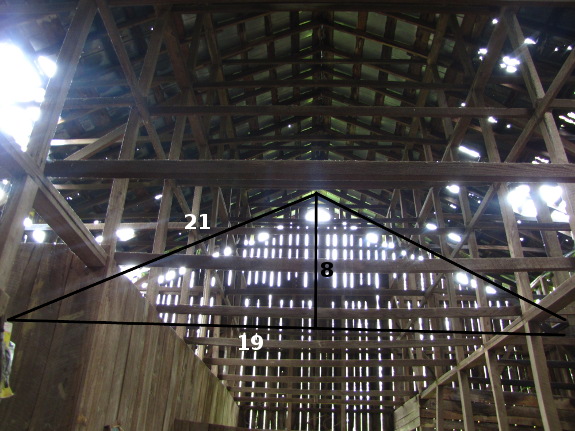
I'm also just a tad bit
confused about how large the roofing panels are. A hasty
measuring session in the pouring rain shows that the barn is roughly 45
feet long by 36 feet wide, and the roof extends a bit further in each
direction. Each row of tin has 26 panels in it, so I suspect the
tin is the same 24 inches wide that the tin off the old house was, but
how long are the pieces? Short of climbing up in the rafters and
measuring the barn height, I figured I might be able to get away with
some photographic math. If the horizontal distance from the center of the
barn to the edge of the roof overhang is right around 19 feet, it looks
like the height from that line to the peak is roughly 8 feet, which
would make the tin on one side of the barn about 21 feet long.
These measurements would make sense if the original builders used three
sections of 8 foot tin, overlapping each one a bit to prevent leaks.
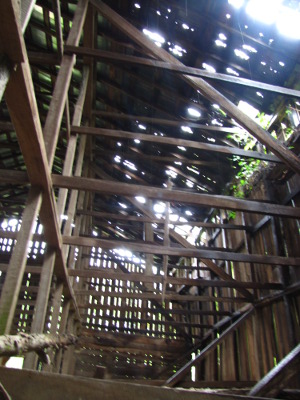 Assuming
my math isn't wrong, I'm thinking we need 104 pieces of eight foot by 2
foot "corrugated ribbed steel roof panels," aka "5V tin."
Presumably we need a bunch of roofing nails or screws too, and I'm
tempted to go ahead and have gutters installed on each side to take
advantage of that amazing rainwater catchment opportunity --- we could
be capturing 48,000 gallons of water every year if we had the
facilities. I think channeling that water somewhere other than the
forest garden would prevent the current gully erosion and waterlogged
conditions, and free water is nothing to sneeze at.
We're still very much in
the planning stages, and I'd love to get some expert advice before we
spend such a huge lump of money. Any amateur or professional
builders out there who can check my math or tell me where I'm barking
up the wrong tree?
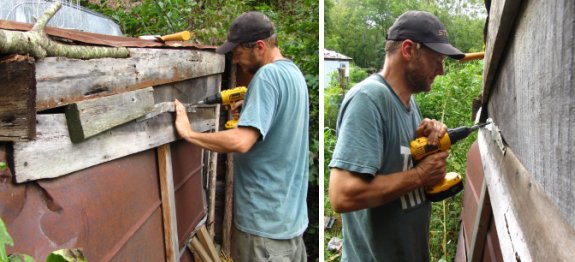
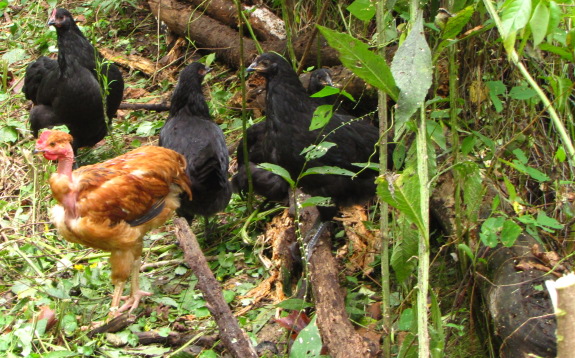
The ground got a good soaking
last night, which prompted us to clear the weeds from one of the
chicken pastures so we can spread out some seeds and take advantage of
this recent wet cycle.
We then shored up chicken
coop number one by closing off some of the holes. Once we get it
secured the plan is to move the new
automatic chicken coop door opener over to this coop which will make that vulnerable sleeping time a little bit safer.
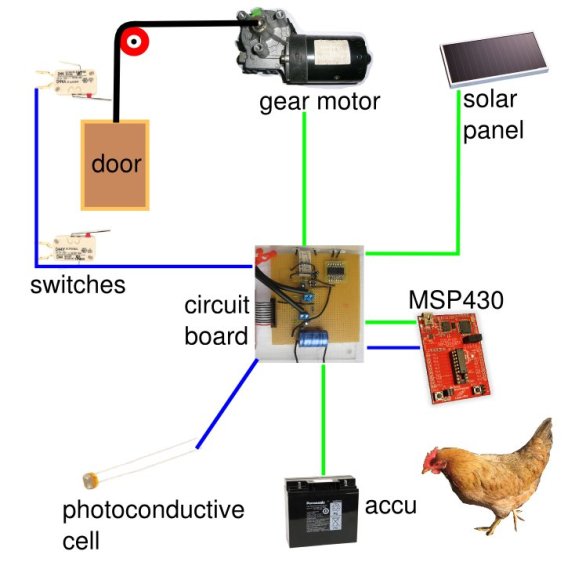
Maybe an alternative to an automatic
chicken coop door opener
is a simple dog door with a locking solenoid? A timer could control
when it's time to lock up at night, and maybe an electromagnet could be
used to crack the door open in the morning to encourage the flock that
it's time to push through. I guess the question is can a chicken learn
to open a pet door all by themselves?
I begged for drought to
slow the spread of blight on our tomatoes, and the weather
complied...for a while. You can only hold back our rain so long,
though, before the 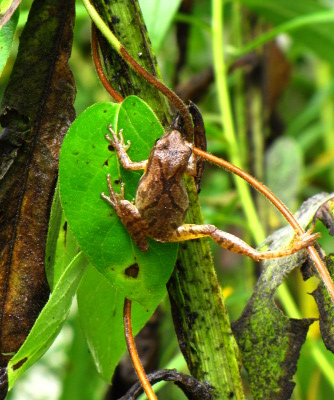 weather
gods rebel and drop six inches of water on you in one fell swoop.
The creek rose, the jewelweed revived, and the parched earth in the
chicken pastures gave a sigh of relief. Time to change our plans
and renovate the forest
pasture now instead
of later.
The forest pasture was
chock full of life, but it was all out of reach of our chickens.
Despite being birds, chickens don't really fly, and once the weeds get
more than a couple of feet tall, the flock might as well be foraging in
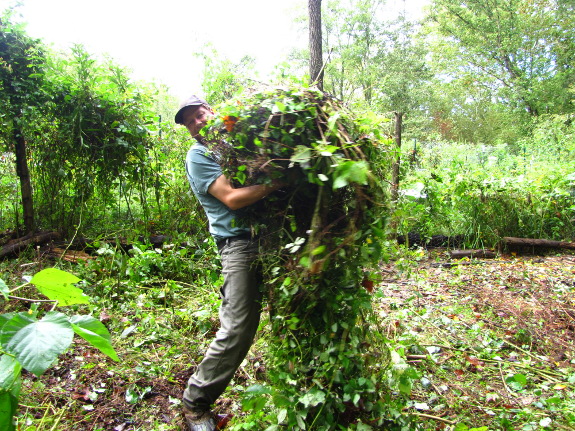
a desert. The ninja
blade, the chainsaw,
and brute strength served to whack down the weeds, root out the logs,
and move all of the biomass to the edges of the pasture.

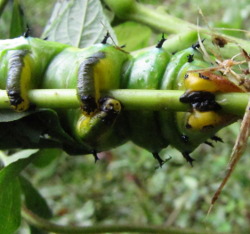
 In the process, we were
treated to some magnificent finds, like the chorus frog pictured
earlier and the hickory horned devil shown here. I'll bet you've
never seen a caterpillar this big and scary --- I hadn't. This
guy will turn into a regal moth --- the heaviest moth north of Mexico
--- and despite its spines, the caterpillar won't sting.

 We planted an everbearing
mulberry in this pasture in the spring, but I haven't even been able to
see the tree for months due to the smothering action of Japanese
honeysuckle, hog-peanuts, and virgin's bower. Imagine my surprise
to discover that the mulberry was vine-wrapped but thriving, having
doubled in height already. Maybe our chickens will be treated to
summer fruits sooner rather than later.
I'll be planting annuals
for winter forage (probably rye, oats, Austrian winter peas, and
oilseed radish) while the ground's still damp, but first I wanted to
give our chickens an opportunity to scratch the earth up a bit
first. Good thing we have such a large flock momentarily --- 19
near adult chickens, 8 of whom will go in the freezer this week.
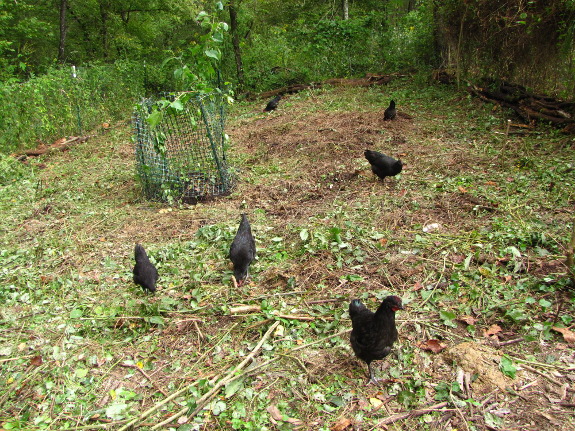
Turning them onto such a
bare pasture makes it much easier to see the behavioral differences
between our various types of chickens. The Golden Comets
were the first to find the new pasture (a process that involves going
into the coop and then out a newly opened pophole), eventually followed
by just about everyone else. The White Cochin
and one Cuckoo
Marans just couldn't figure it out --- they stood forlornly on the
other side of the dividing fence, watching their buddies eat the
insects knocked loose during our clearing spree.
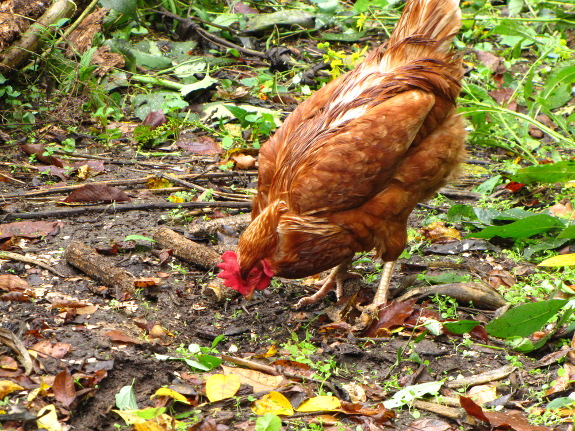
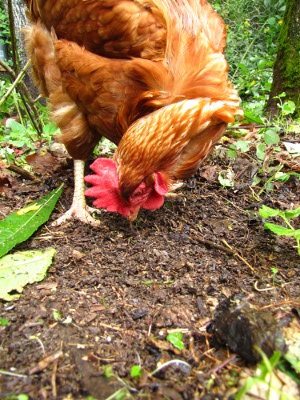
The Black
Australorps wandered around pecking for insects, but the Golden
Comets thought it was a better idea to stay in one place and scratch up
bugs. I got down close and was surprised to see that every swipe
of this old hen's foot turned up something edible --- little
earthworms, centipedes, and snails. The number of invertebrates
she consumed in such a short time was amazing.
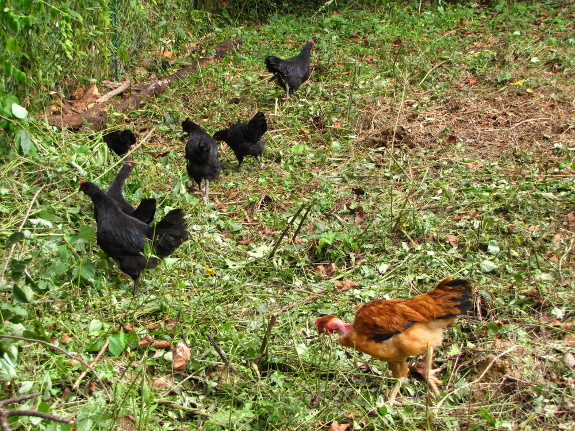
For more on the larger
picture of chicken pasturing (and my evolving plans for our pastures),
be sure to subscribe to our chicken blog. As you probably
figured out, this post is really just about pretty pictures.

The creek was too high to get out yesterday, but it's no problem today
with my new
Pro Line hip waders.
It just barely qualifies as a
flood.
This particular model of hip
waders came with a pad of felt like material glued to the bottom of the
heel. The increase in traction comes in handy when walking through fast
flowing waters.
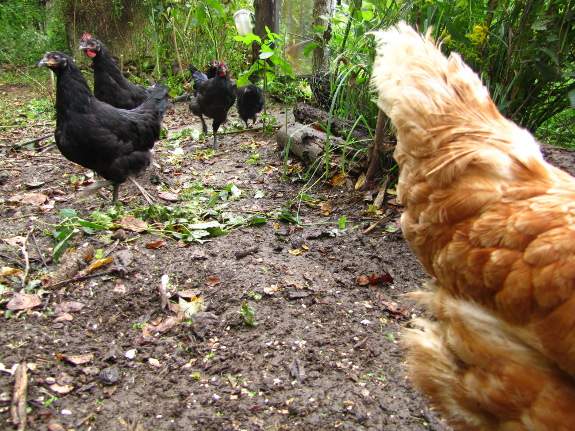
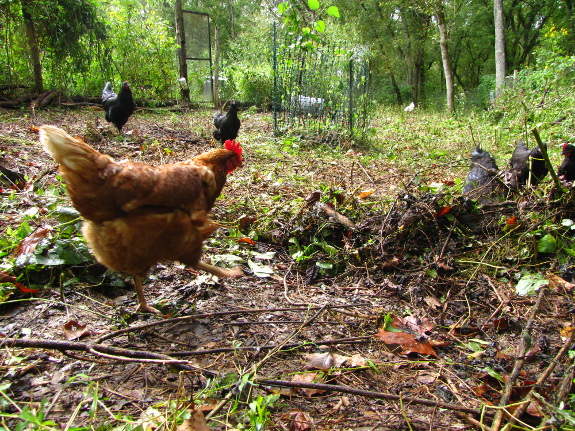
A bit over a day after
turning our flock into the
pasture we're renovating, they've already made quite
an impact. The photo above is the pasture's compost pile, so it
wasn't very weedy to begin with, but I can see bare ground in several
other locations as well.
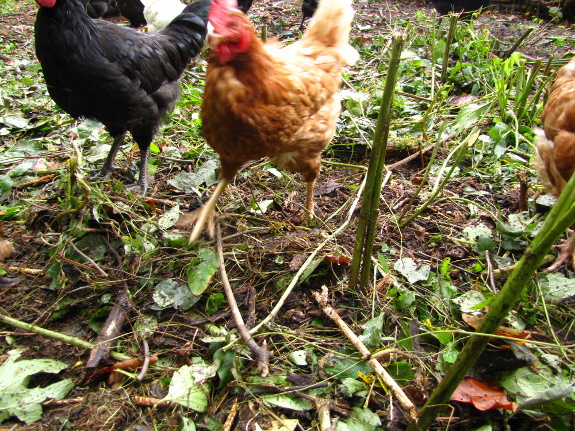
I figure the annual
weeds (most notably ragweed) will be wiped out by our weedwhacking,
followed by a heavy round of chicken scratching, and then planting a
winter crop. The perennials will have to be cut several more
times next year before they'll give up the ghost, though.
My friend Megan not only
sells amazing
pastured meat, she
is also an experienced keeper of dairy goats, sheep, cows, pigs,
chickens, and just about any other type of farm livestock you can think
of. I picked her brains about our idea of adding miniature
goats or sheep to
our menagerie for weed control in the chicken pasture, and she had some
great local advice. She hasn't worked with miniature animals, but
reports that full-size sheep really aren't going to cut it on our rough
pastures, and that goats will be hard workers but absolutely refuse to
eat wingstem. Drat! Wingstem is one of our most common
perennial weeds.
Megan seconded one of
our reader's suggestions of running goats on new
ground using four cattle panels to make a relatively easy to move but
heavy duty goat "tractor." Her goats love Japanese honeysuckle
and will eat it down to the ground, but of course the vines will
regrow. She actually thinks we should get a pig and let it root
out all of the perennials at once then turn it into bacon, but I'm a
bit scared of that idea. I'm okay with slow and steady progress,
and our hens are definitely making headway.
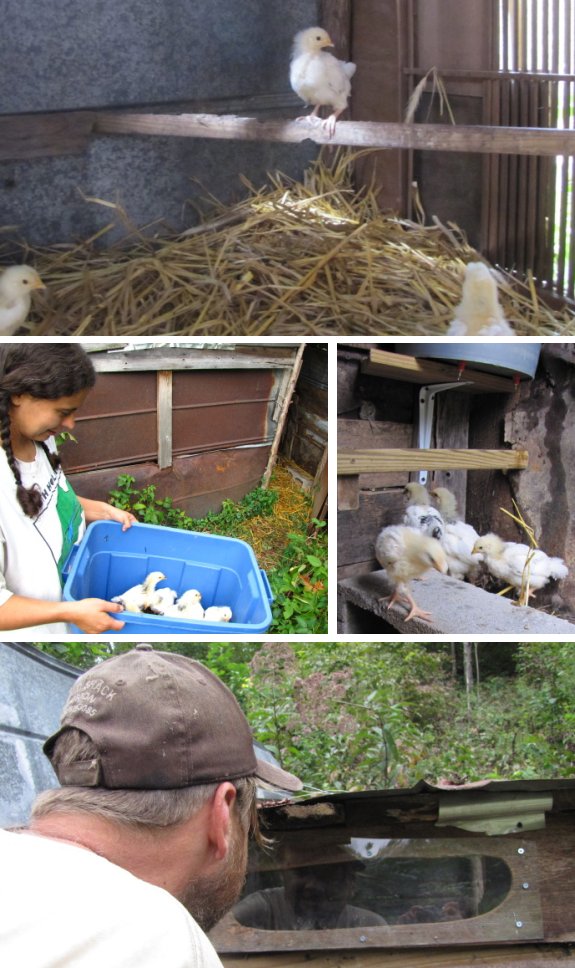
I was surprised at how dark
chicken coop number one got after I sealed up most of the cracks.
A scrap piece of plexiglass
made a nice window to let a little light shine in.
This will be our last
generation of chicks for 2011.
 When
I realized that soil
temperature was the limiting
factor keeping spring crops from sprouting early, I felt like I'd
discovered the scientific way to time my spring plantings. I
probably should have realized that there was a flip side to the soil
temperature coin --- many fall crops have trouble germinating in hot
summer soil.
| Vegetable |
Optimum
temp. (degrees F) |
Maximum
temp. (degrees F) |
| Beans, Snap |
80 |
95 |
| Cabbage |
85 |
100 |
| Carrots |
80 |
95 |
| Corn |
95 |
105 |
| Cucumbers |
95 |
105 |
| Lettuce |
75 |
85 |
| Muskmelons |
90 |
100 |
| Okra |
95 |
105 |
| Onions |
75 |
95 |
| Parsley |
75 |
90 |
| Peas |
75 |
85 |
| Peppers |
85 |
95 |
| Pumpkins |
95 |
100 |
| Spinach |
70 |
85 |
| Squash |
95 |
100 |
| Swiss chard |
85 |
95 |
| Tomatoes |
85 |
95 |
| Turnips |
85 |
105 |
| Watermelons |
95 |
105 |
This summer has been considerably warmer than average, but I assumed that as long as I kept my fall plantings well watered, they would grow. Not so. I managed to sprout a single spinach seedling out of three beds, only a third of my peas came up, and I wasn't able to germinate Asian greens and lettuce until I planted new areas at the shady end of the mule garden.
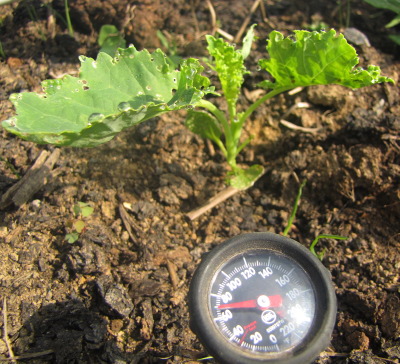 I finally thought to pull out
my soil thermometer one morning at the end of August, at which time I
discovered that the earth's temperature two inches down ranged from 65
degrees Fahrenheit in the more shaded front garden to 68 degrees
Fahrenheit in the sunny mule garden. Checking back at 6 PM when
the sun had pounded down all day, the mule garden soil temperature had
risen to 81 degrees. Yes, mulched spots were considerably cooler
--- clocking in at the low to mid seventies --- but my fall plantings
have all gone into bare soil since the seedlings are too small to push
aside mulch. A few weeks earlier when I was vainly planting
spinach seeds, I suspect the daytime soil highs easily exceeded the 85
degree Fahrenheit absolute upper limit for spinach germination.
I finally thought to pull out
my soil thermometer one morning at the end of August, at which time I
discovered that the earth's temperature two inches down ranged from 65
degrees Fahrenheit in the more shaded front garden to 68 degrees
Fahrenheit in the sunny mule garden. Checking back at 6 PM when
the sun had pounded down all day, the mule garden soil temperature had
risen to 81 degrees. Yes, mulched spots were considerably cooler
--- clocking in at the low to mid seventies --- but my fall plantings
have all gone into bare soil since the seedlings are too small to push
aside mulch. A few weeks earlier when I was vainly planting
spinach seeds, I suspect the daytime soil highs easily exceeded the 85
degree Fahrenheit absolute upper limit for spinach germination.So what's the solution for getting fall vegetables to germinate in the middle of a hot summer? Lowering soil temperature is probably the reason that some old gardening books recommend placing mulch or old boards over your fall plantings --- you just have to remember to uncover your seedlings as soon as they sprout. Another option is to plant fall vegetables in a cool, shady location, but that idea will backfire when winter cold nips those spots early. Perhaps shady beds could be used as nursery plots for larger fall vegetables, and the seedlings transplanted out into the main garden later? Or maybe there's a way to rig shade cloths to keep the soil temperature in range? I'd be interested to hear how those of you who live with this sort of summer weather every year get your fall garden to sprout.
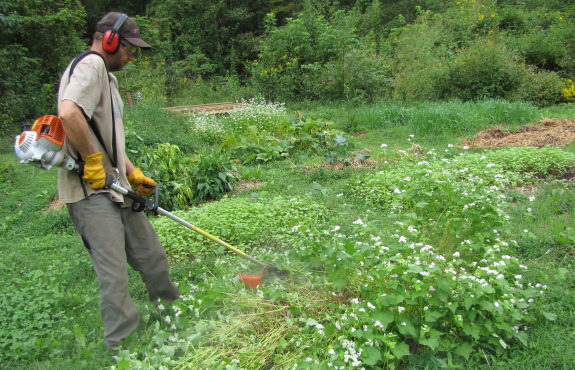
It's that time of year when
oat cover crops flower and need to be retired.
Rake cut oats evenly on bed,
apply 5 gallon bucket of manure, cover with straw and repeat.
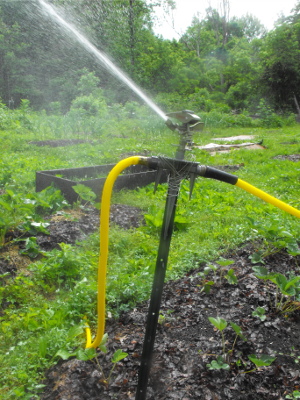 Many
gardeners don't water their garden at all, or just spot-water with a
cup or hose during transplanting or when specific plants wilt.
However, water is one of the most common limiting
factors, even in a
very wet climate like ours. Long before your plants droop,
they'll slow their growth to conserve moisture, so your yields in an
unwatered garden will be much lower.
The importance of
regular irrigation was brought home to me this year when I got sick and
skipped watering for one hot week right when our earliest bed of Sugar
Baby watermelons was bulking up. Those fruits clocked in around
five inches in diameter, compared to the fruits on a later bed of the
same variety (well watered throughout their life) that produced ten
inch fruits. The moral of the story is --- your yields may double
if you provide a steady supply of water for your crops.
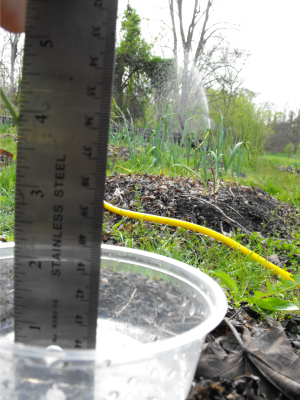 Of
course, watering your garden has many disadvantages. When you
look at the bigger picture, using more than your fair share of rivers
can cause them to dry up downstream, and there's nearly always at least
some energy required to move water to your crops. Closer to home,
irrigation equipment costs money, and so does either paying for city
water or paying the operating costs of your own pumps. I estimate
that we use a phenomenal 11,000 gallons of water every week during the
height of summer (exempting wet periods) to keep our vegetables
growing, which adds about $125 per year to our annual electric bill.
At the plant level, watering
can even do harm.
Overwatering hurts plants, and so does irregular watering. If
your crops are used to getting a regular dose of water every time the
soil starts to dry out, they won't have grown the deep roots needed to
withstand a drought (or to survive a week when you forget to water),
and wet leaves promote fungal diseases (like my tomato blights.)
If you water too much, you can also wash nutrients out of the soil,
which can stunt your plants and make your homegrown food less tasty and
nutritious. The trick here is to know your system and water
scientifically.
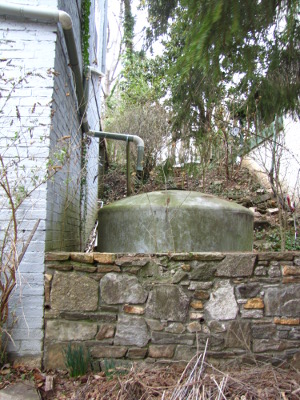 Unless
your climate is very arid (in which case it may not be sustainable to
live there in the first place), you can work around the other
irrigation-related problems as well. Catching rainwater is
something we want to get more serious about --- if you live in a large,
modern home and just have a small backyard garden, chances are your
roof runoff may be all you need to keep your plants hydrated. We
live in a small, unmodern trailer, but we're pondering adding gutters
to the East Wing, the barn, and/or the dreamed-of summer kitchen.
The next step to
watering in a sustainable manner is to make the water you do have go
further. Our watering method is the least efficient one out there
--- sprinklers --- which we chose for the
reasons listed here.
Using sprinklers means that we consume four times as much water as
necessary every time we irrigate --- some of that extra water hits the
garden aisles, some falls outside the garden perimeter, and some
evaporates into the hot summer air. Drip irrigation is the
typical solution to this problem, but it's far from my favorite since
turbid water messes up the system in short order, you have to use lots
of expensive, plastic hoses and replace them often, and drip irrigation
works much better with row crops than with beds. Pitcher
irrigation is a more
permanent solution, but one that only works on a very small scale and
is labor-intensive. I'm still pondering a more efficient watering
option appropriate to our vegetable garden layout.
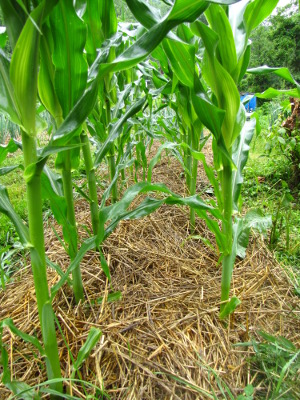 Meanwhile, there's always
mulch! Mulching around your plants cools the soil surface and
keeps water from evaporating away, so there's more water available for
your plants and you don't have to irrigate as often. Adding
organic matter to your soil with cover crops and compost will also make
watering less essential every year since this black gold acts like a
sponge, grabbing excess water during heavy rains and then releasing it
to plant roots on demand.
What watering system do
you use in your garden? Why did you choose it and what do you
love and hate about it? I'm especially curious to hear from
large-scale, no-till gardeners, of course, but everyone should feel
free to chime in!
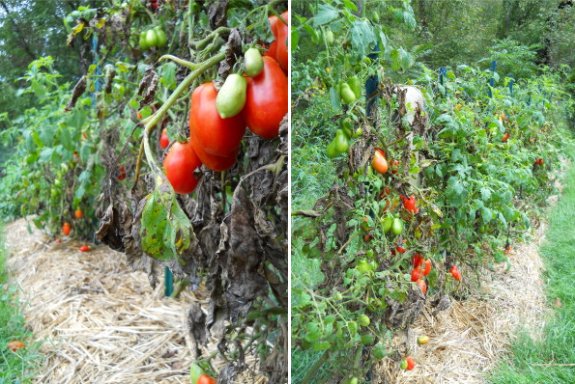
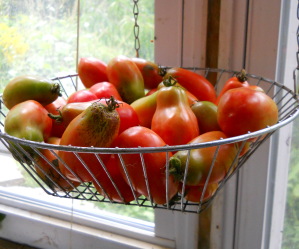 Our
tomato plants are on a downward decline, but I think they still look
great.
Anna says we're getting close
to meeting our goal of enough soups and sauces to get us through till
next year.
The plan is to dry most of
the excess and make enough ketchup to last the rest of this year
and most of 2012.

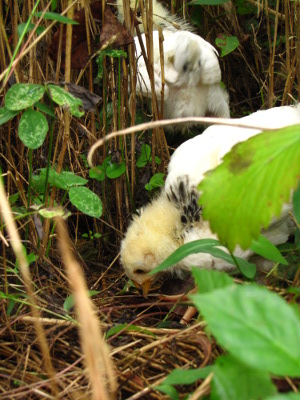
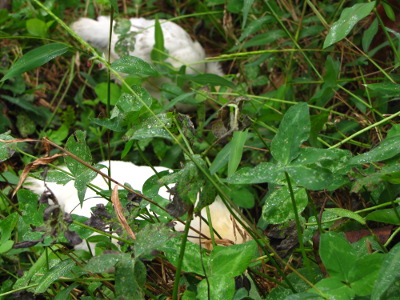 Our Light
Sussex chicks are
voracious. They're currently in our tiniest pasture, but I
thought for sure it would last them multiple weeks since the chicks
aren't even fully feathered. Instead, it looks like they'll need
fresh forage in less than a week.
My original plan had
been to let Mark finish up the pasture running up the hill behind the
coop, but I really don't want to turn the chicks in there until they're
at least four or five weeks old --- that pasture lacks tender,
chick-friendly food and has too much predator pressure. The other
pasture attached to our chicks' coop was overgrazed by the Cuckoo Marans and has been seeded with
pasture plants that need some time to get established. What will
our Sussex chicks eat in the meantime?
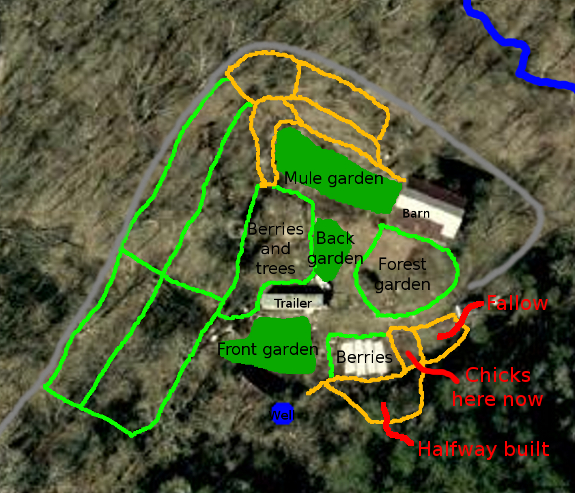
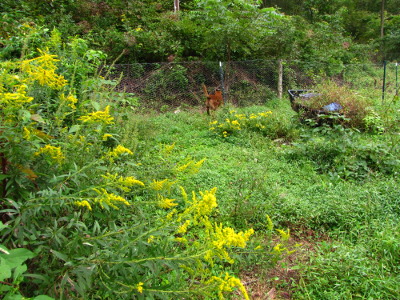 My eyes turn to the
semi-frequently mowed berry and fruit tree areas that bracket our
vegetable gardens. There's lots of chick-friendly forage
available on the ground and the chicks aren't big enough to do too much
damage (especially since the mulch in these areas has rotted into the
ground and needs to be refreshed.) I've been wishing I could run
chickens in there to deal with some insect problems, and we're sick of
mowing. The problem is fencing and housing.
 We could use chicken
tractors, but I think our chicks
need a tighter coop for at least a few more weeks, and they're already too big
to fit all fourteen in a yard-size tractor. Instead, I'm
pondering several options:
- Temporary fencing using the existing coop. I figure it would take me and Mark less than an hour to toss up some fencing around the berries adjacent to the chicks' current pasture. We have extra pea trellis material on hand to use if the deer come calling and can rustle up enough of the lightweight fence posts that we use for trellis posts and tomato stakes. After the chicks eat up the groundcover between the berry bushes, we could move the fencing to make an avenue across the driveway and then surround parts of the forest garden. By the time the chicks eat all that, surely they'll be big enough to run up on the hill.
 Permanent fencing and one or more new coops.
On the other hand, this time of year is a lull in our pasture
productivity, and we'll often want to have extra pasture areas.
So maybe it would be a good idea to fence these areas in
permanently? The problem there is that we'd have to build gates
(time consuming) and perhaps add one or more coops (even more time
consuming) since we wouldn't want permanent fencing crossing our
driveway. Plus, the area where the driveway ends in front of the
trailer is already pretty tight, and I'm not sure permanent fencing
along both sides of the driveway would be a good idea. On the
other hand, putting in the time to build permanent fences now would
save time in later years, and I suspect deer would be afraid to walk up
the driveway if it had fences on both sides.
 Portable coop with temporary
fencing. Another option would be to combine a portable
coop with temporary fencing, which would allow us to run the chicks all
the way over to the berry and tree area on the west side of the back
garden. The major bonus with pasturing this area is that we could
finally deal with some of the insects that hit our peach trees while
grazing more land that we're sick of mowing. The downside is that
a portable coop big enough for fourteen chickens would be heavy (and
harder to build than permanent coops.) Mark had an idea of making
a portable coop with two handles so it could be carried since dragging
definitely wouldn't be good enough in the tight spaces of our
yard. It almost seems simpler to just build an extra coop over
there if I want our chickens to graze that area.
 Any other ideas?
Additional pros and cons for the ideas above? At this instant,
I'm leaning toward temporary fencing around the berries to give us some
breathing space which we'd use to build permanent fencing around the
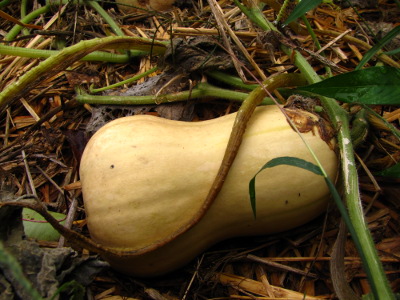
forest garden. Our butternuts need another week or so to finish
ripening anyway before we can take them off their dying vines.
But I'm always looking for better ideas.
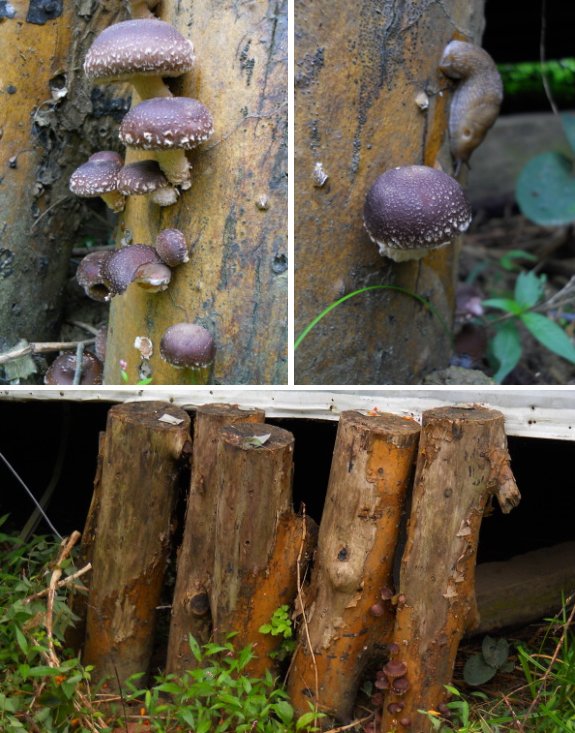
We were thrilled yesterday to
notice the first shiitake
mushrooms popping up.
These logs are mounted in the
ground like a fence post, which will hopefully allow each one to take
up as much water as it needs compared to our old
method of dipping each log in a small kiddie pool.
At least two of the logs are
still pumping out fruit, which makes me wonder if I need to sink the
other three logs a few inches deeper. It might be that those logs are
finished up. One amateur mistake we made in the beginning was soaking
some of them too long, which may have drowned the mycelium in the logs
that are now dormant. I think it depends on the condition of the log,
but now if we were still soaking we would be on the safe side and limit
the time to 12 hours.
 I've been researching sheep, both by talking with
shepherds and by reading Storey's
Guide to Raising Sheep, and I'm pretty sure these
fluffy livestock are not in our near future. On the plus side,
sheep are very efficient converters of plants into meat and if you
raise them on plenty of good pasture and let them lamb in late spring,
they need little or no supplemental feed or even housing. But the
trick is that sheep really need either high quality pasture (think:
beautiful green lawnlike expanses with lots of clover and other forbs
mixed in) or lots of space. Sheep just aren't going to be happy
with small, rough pastures like you find on a young homestead --- they
can handle small or rough, but not both.
That said, established
homesteads and farms can often benefit from sheep. These critters
are very good at:
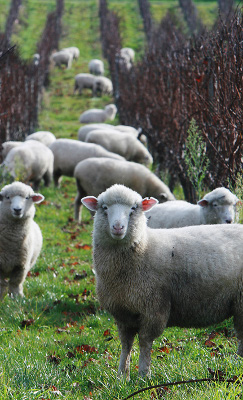 Grazing large expanses of
high and dry, subprime pasture that can't be used for anything
else without eroding away.
Grazing large expanses of
high and dry, subprime pasture that can't be used for anything
else without eroding away.- Keeping weeds down in established orchards, vineyards, and Christmas tree plantations. Just make sure you have other pastures to turn the flock into when young growth is present on the plants you care about and use miniature sheep if the trees are short.
- Maintaining well-sodded existing pastures. If you move onto a farm with lots of pastures that are quickly going to weeds, sheep could be a good answer to your mowing problem.
- Mixing in with larger grazers to eat the forbs that cows and horses don't prefer.
If you're trying to run
a flock of sheep with as few inputs as possible on poorer pasture, you
should stick to good foraging breeds. The ones listed in Storey's
Guide to Raising Sheep are Barbados Blackbelly, Black Welsh
Mountain, Border Cheviot (and, presumably, the related Miniature
Cheviot), California Red, Canadian Arcott, Debouillet, Gulf Coast
Native, Hog Island, Icelandic, Karakul, Katahdin (aka Hair Sheep),
Navajo-Churro, Panama, Polypay, Rambouillet, Romanov, Romney, Santa
Cruz, Scottish Blackface, Shetland, Soay, St. Croix, Targhee, Tunis,
and Wiltshire Horn. That said, even this book's sheep-loving
authors recommend that you get a goat if your pastures are overgrown
with brush. They explain that excellent foraging sheep breeds
will eat the leaves on the trees, but won't go after the twigs.
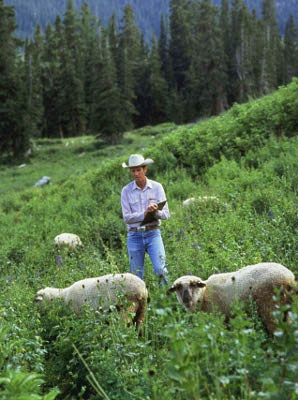 I think that if our homestead
was ever established enough that we felt it had sheep-friendly
pastures, we'd follow our neighbors' lead and get full size Hair
Sheep. The more I read about sheep, the more sheering sounds like
a hassle, especially since sheep are reputed to be skittish --- I can
just imagine trying to sheer our half-tame cat, Strider, and am not
relishing the image. Hair Sheep don't need to be sheered since
they naturally shed their hair, and they are also excellent foragers,
are docile and hardy, and lamb easily. Plus, since lots of people
in our county raise them, we would be able to keep just a couple of
ewes and rent a ram when needed.
The other point against
becoming a shepherd even if we had excellent pastures and steered clear
of sheering is that I'm not sure they mesh with our land and
lifestyle. As one of our readers mentioned, sheep are extremely
prone to internal parasites, and most of these parasites thrive in low,
wet areas --- sounds like our farm. Another big problem with
sheep is that they often need help lambing if you don't want to risk
the mother and/or lamb dying a premature death. That means
shepherds spend a lot of wakeful nights out with the sheep, and Mark
can attest to the fact that I'm not a pleasant person if I don't get my
nine hours of sleep every night. Maybe we'll just stick to buying
lamb from Megan?
As soon as we feel the
first signs of fall, my academic inclinations start tickling my brain
and I want to research this, that, and the other. Sharing my
findings with you all on our blog firms up my understanding of what I
read (and also files it away in an easily searchable format), but I
sometimes wonder how you all like these infodumps. Time for a
short survey!
My research posts often
jumpstart experiments, but they are also untried information. Do
you mind the lack of personal info in the posts?
Sometimes I write about
my research in five short posts --- a lunchtime series --- while other
times I mash it all together into one long post. Which do you
prefer?
Lately, some of my
research has been channeled into our Weekend
Homesteader
series. Even though I offer a free pdf copy to any Walden Effect
reader who emails me, I know that might feel like too much
trouble. What do you think?
Most of my chicken
related research gets fed into my chicken blog and then I try to remember
to sum up the most important points over here at least once a year. Do
you mind missing that information your daily Walden Effect read?
Thanks for taking the
time to answer the poll or comment below!
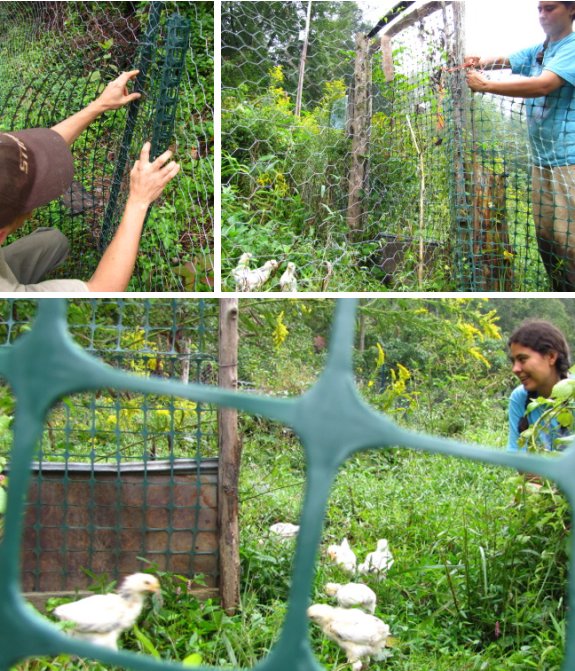
It only took Anna and me about
20 minutes to set up 100 feet of the experimental, temporary chick
fencing this morning.
The soft,
plastic green material was a dream to handle compared to the hard,
metal chicken wire.
I've got a feeling this new
temporary chicken fencing method is going to become part of our future
pasturing poultry routine.
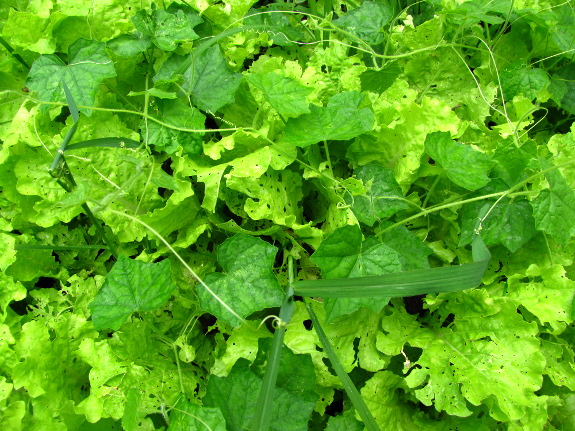
The fall garden could
use some weeding, but this week is the last call for planting oats
as a cover crop in
our climate, so the weeds will have to wait.
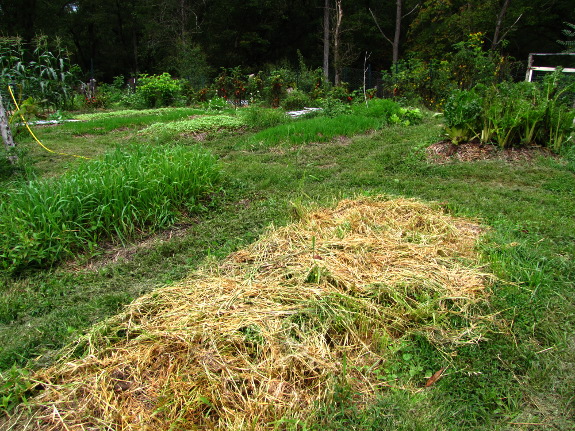
I find it hard to
believe that I will have used up the whole 48 pound bag of oat seeds by
the end of the week. The bag has already seeded 26 garden beds,
one of our larger chicken pastures, and will be used to plant another
heaping handful of beds in the next few days. I guess weevils won't be a problem this
year! I'm already drooling over all of the homegrown organic
matter and next year's lower weeding pressure.
 Even without setting foot in the
garden, you can save money by taking
better care of those half full seed packets you bought in the
spring. Nearly all vegetable seeds will last at least two years,
and many are viable for much longer. The chart to the right shows
the
storage life of many types of vegetable seeds under optimal conditions.
The trick to giving your
seeds as much longevity as possible is to keep water, heat, and light
at bay.
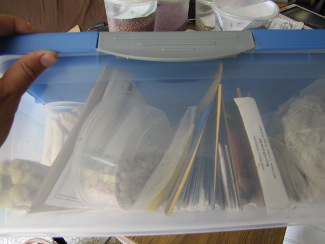
An air-tight box with cardboard dividers will keep your seeds safe and
organized, especially if you throw in a few packets of desiccant to
soak up excess moisture. To maximize shelf life, store your box
in
the freezer, garage, basement, or in another cool, dark place.
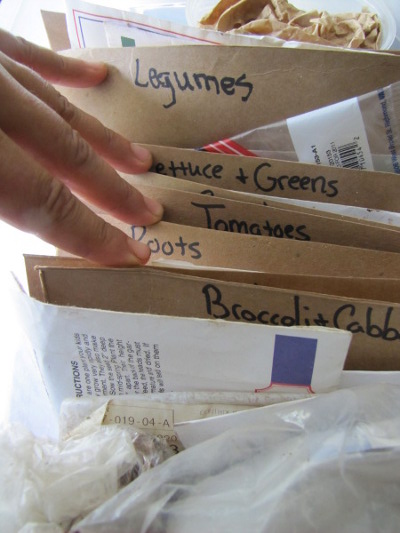
Once you optimize your
seed storage
tactics, you might be able to save yet more money by buying the
larger, value packs of many seed varieties, counting on the seeds
lasting for two or three growing seasons.
Excerpted
from the Seed Saving chapter of Weekend
Homesteader: September.
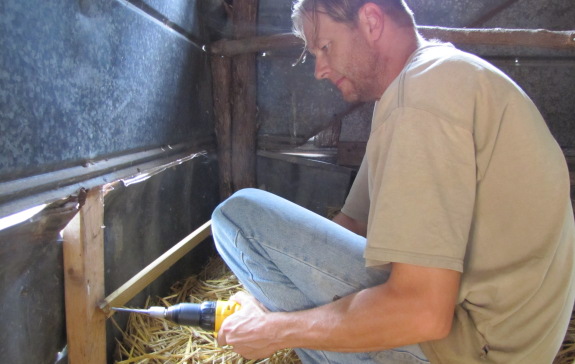
Still not sure how old it is
when baby chicks start roosting instead of crowding together in a
corner, but this new baby sized roost should do the job when they're
ready for it.
 We abruptly shifted into fall
mode a week or two ago. Cool, wet weather slows down the
vegetable garden considerably, but sends mushrooms popping out of logs
and stumps. Time to check on all of our experiments!
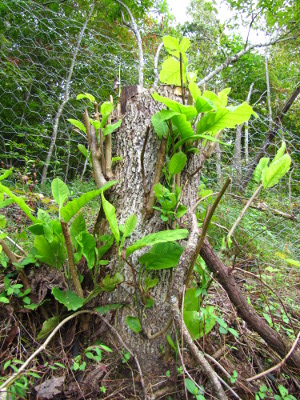
Our oldest mushroom
experiment is a magnolia
stump that we
inoculated with homegrown
oyster mushroom spawn
eleven months ago. (We inoculated a box-elder stump with more
homegrown spawn this past spring.) I've read a lot about using
mushrooms to break down stumps, but I think we're going to have do some
more experimenting since I haven't seen any signs of life and think I
should have by now. The trouble is that we cut down a fresh tree
to make the stump so that it wouldn't already be colonized with "weed"
fungi, but the tree vigorously sent up new shoots! Living trees
are able to fight off invading fungi, so it's possible that we need to
find a way to kill stumps before inoculating them with spawn.
Alternatively, it might just take longer for mushrooms to pop out of a
stump compared to a log --- after all, the mycelium has to colonize all
of the roots as well as the aboveground portion of the tree before it
will make mushrooms. We'll wait and see.
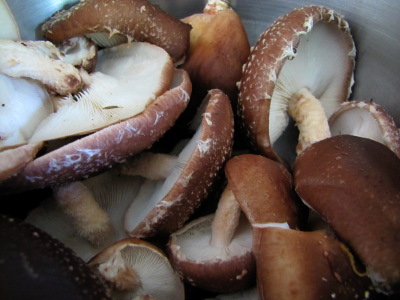 I'm pretty happy with our mushroom
totems since we harvested a big bowl full of shiitakes
Monday. True, we
didn't have any mushrooms all summer since the totem method lets our
fungi send out fruiting bodies more seasonally when weather conditions
are right. But the truth is that I've spent a lot of effort in
the past soaking mushroom logs and getting no results during the heat
of summer, and we certainly don't lack for fresh garden produce while
the mushroom totems take the summer off. I suspect mushroom
totems will last longer than the forced fruiting method of soaked
logs too.
We're still waiting for
results on other experiments, like the new King
Stropharia bed we
started this spring and the mushroom rafts that are overgrown with
weeds and need to be weedwhacked before we can see if they're
fruiting. I'll report back when we know more, but right now we're
just enjoying our flush of shiitakes.

A huge thank you to John, who
sent me my first piece of author fan mail (along with a $5 bill.)
I love emails and comments, but I have to admit that knowing someone
went to the trouble of printing out a note and putting it in an
envelope made my day.
 I don't want you to think
that
there are strings attached with the pdf copies I email for free to our
readers, though. I appreciate every reader of our ebooks, whether
they splurge to plop down 99 cents on Amazon or just ask for a free
copy. I never would have imagined that seven months into my
Amazon adventure, I'd be selling nearly a thousand copies a month ---
that's all due to you telling your friends and leaving glowing reviews
on Amazon. So thank you to all
of our other readers too! It's your enthusiasm that keeps us
writing.

We've been having trouble
with Lucy breaking her way through the chicken wire to get to an egg or
food scraps thrown down for the flock.
I thought the Zareba
K9 electric fence controller fixed this problem for good last year
when I surrounded the first chicken pasture with electric wire and
watched her learn a shocking lesson on why it's important to stay away
from our poultry fence.

This year I only strung up
about 12 feet of wire within two small stakes for pasture #4 because I had a pretty
strong feeling she might try to re-enter through a recent hole she
chewed and we only half fixed. It only took a few minutes for her bad
side to take over and try another unauthorized entry.
Zap!
She didn't jump quite as high
as the first time, but it's obvious she got the message.
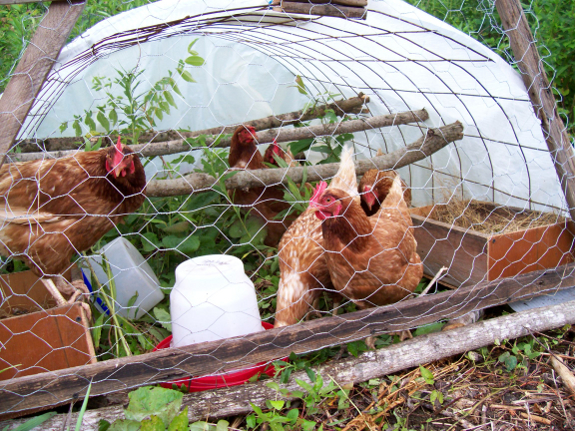
Tuesday was a
bittersweet day --- we killed the two hens surviving from our initial
flock of Golden Comets, purchased as adults in 2007. The photo
above shows some of those then-young ladies in an early chicken tractor
that July.
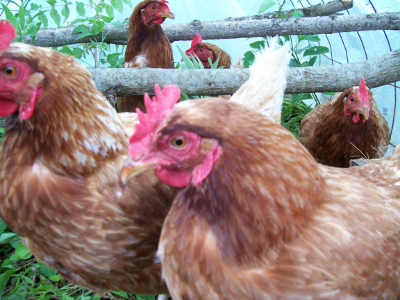 We started with twenty hens,
which was a crazy number --- we had moved to the farm not long before
and soon the few local people we knew didn't even want free eggs anymore. Two hens
died of heat exhaustion when their old fashioned waterer spilled (the
impetus for Mark's chicken waterer invention), and we gave
twelve away to my father to slim down the flock even more.
Slowly, four more
chickens bit the dust. One was a casualty of us thinking we could
keep a rooster in a chicken tractor --- he overmated our hens
mercilessly and one girl was too injured to survive. Another died
last winter when her old bones could no longer take the cold. And
to be honest I can't remember what happened to the other two.
 I've written before about why
you can't expect to raise chickens for eggs and not get your hands
bloody, but I guess
I just didn't feel like my words applied to these old girls. They
were our wiliest hens, the first to come running when I called them to
a new pasture (and the first to find a hole in the fence.) When
people came to interview us about our chicken waterer, all I had to do
was tap the chicken nipples and our old Golden Comets would obediently
trot over and drink, whether they were thirsty or not.
But they were also
laying very few eggs any more, at least after spring ended. Last
winter, we started having to buy eggs from the store to round out our
diet, and the old hens never really picked up steam even when warm
weather returned.
You just can't expect a
four and a half year old hen to repay your expenses of feeding her over
a hundred pounds of feed (at least $30) per year. And you also
have to figure in the wear and tear on the pasture (worst in winter)
and the fact that your old hens are 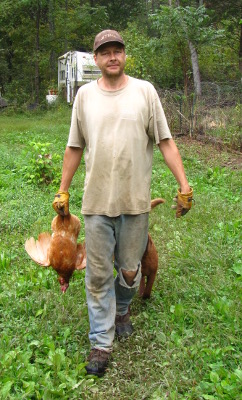 probably head of the flock and
get to eat the best food, leaving your better layers malnourished while
their elders get fat. So we bit the bullet and turned them into
dinner this week, along with a one-year-younger Golden Comet who was
also past her prime.
I'd gotten used to
slaughtering three month old broilers --- we've already processed 21
this year, and after the first few, I started enjoying chicken killing
day as a break from the hard work of the garden. But those
broilers were raised from birth with dinner in mind and they hadn't
really grown into their personalities yet. The Golden Comets felt
different. Even though we hadn't named them, they almost felt
like pets.
And yet, I can almost
feel the pasture breathe a sigh of relief. Three fewer chickens
to scratch up the turf! And this year's pullets and cockerel seem
thrilled to have moved up a notch on the totem pole --- access to
scraps! It isn't always easy to do the right thing, but I'm glad
we didn't let our farm turn into a rest home for chickens.

This old picture of our very first chicken
tractor makes me cringe today.
Even though it's twice the
square footage per bird that Joel Salatin and other sources on the
internet use, it feels too crowded and I would only put 2 full sized birds in it
today.
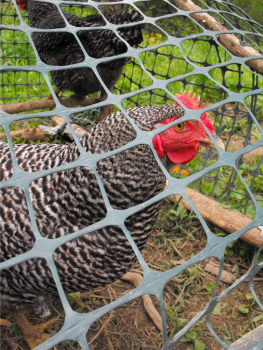
See that white plastic I used
for a covering? It was filtering enough light to make the chickens stop
laying eggs. It took us weeks to figure that out.
The nest boxes really needed
an easy access hatch and that ancient, old fashioned, gravity waterer
was exasperating.
I like to do a
full-scale analysis of the honey situation in each hive at this time of
year so that I know whether the bees need help preparing for
winter. That means delving down into the brood box to count
frames of capped honey, which sends spirals of confused foragers
circling above my head. The video really doesn't do the situation
justice --- when you're in the middle of it, it feels a bit like
standing in the middle of five lanes of speeding traffic.
In the past, I've been
terrified of this cloud of buzzing bees when they reach their
population peak in late summer. I usually ended up jerking around
and getting stung, but last year Mark talked me into getting a bee jacket. I was surprised how a
little bit of protection increased my confidence enough that I was able
to realize the bees were just confused by losing access to the hive,
not angry. Sure enough, with calm movements, nobody even stung my
protective clothing.
So how were the honey
stores? Lower than I would like, partly because when you split hives you set them back, and
partly because of weird weather --- too much rain kept the bees cooped
up during certain periods, then too much dry made later nectar flows
sparse. The mother hive currently has 30 pounds of capped honey
and the daughter hive has 12 pounds, less than they had a month ago and
far short of our goal of 50
to 60 pounds.
That said, there's a lot of nectar dehydrating that I didn't count, so
hopefully at my next inspection, the mother hive (at least) will be in
the clear. I may have to feed the daughter sugar water to fill up
her larder.
Last night our problem
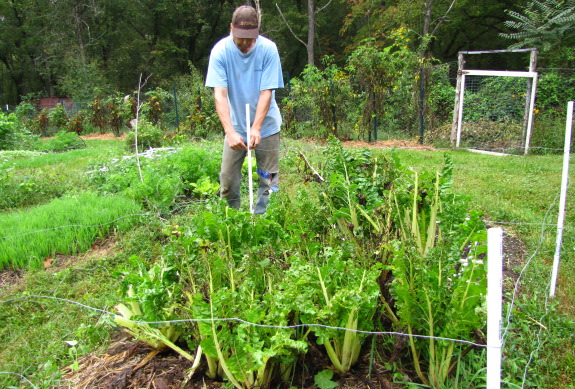
deer came in and nibbled on this buggy swiss chard.
Version 2.0 of the electric
deer zapper takes a lesson from the first generation and stays
clear of possible
leaf contact.
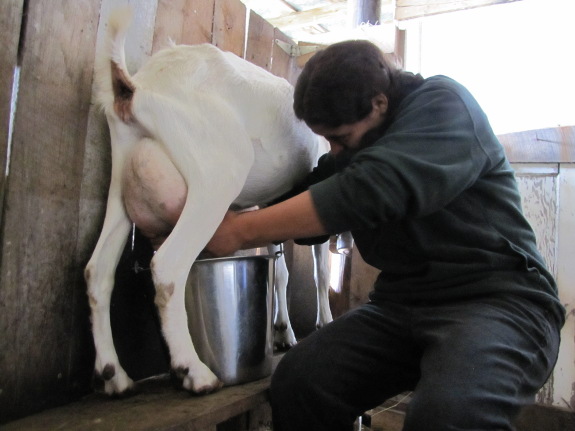
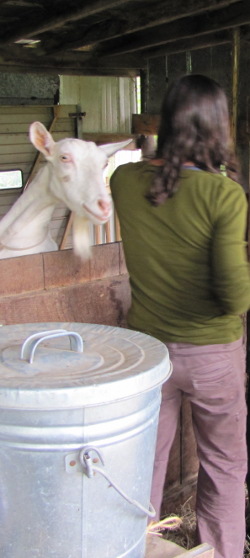 I learned to milk a goat
Friday --- a huge thank you to Megan and
Erek, who took time
out of their hectic harvest-time schedule to give us personalized
attention! Thank you to the duo of Saanen does, too, who waited
an extra hour with full udders so that Mark and I didn't have to get up
quite so far before dawn. (And thank you to Mark, who continues
to humor my goat obsession, hoping I'll grow out of it.)
Milking a goat is harder
than it looks, but I can tell that the knack is quite learnable.
Megan milked at the speed of light, and I managed to get some good
squirts after a while. Those goats were far more patient than I
deserve, due to a cup of sweet feed...and a head lock that kept them
from taking their noses out of the feed bowl.
One doe had slightly
smaller teats than the other, which made her much harder to milk for the
novice. Erek (Megan's husband) said that he wouldn't dream of
trying to milk a miniature
goat since the
problem would be exacerbated by the goat's diminutive size --- probably
the reason many miniature dairy goat owners use automatic milkers that
you can buy for a bit less than $200 apiece.
Megan estimates that it
takes her fifteen minutes to milk two full-size goats once a day
(turning in the kids after the morning milking so that they drink up
the other half of the daily milk.) That starts to answer one of
my questions --- whether keeping goats would take significantly more
time than just weedwhacking
our chicken pastures
a few times a year. (More number-crunching to come before I can
really answer that, though.)
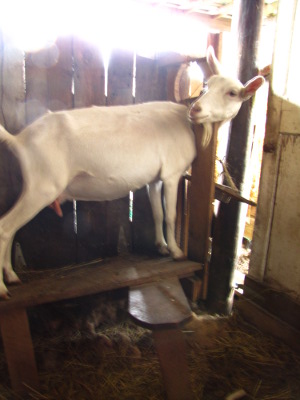 Megan
clued me in that the dream of feeding a dairy goat little or nothing
even if you only milk during the peak pasture season is just that...a
dream. If I'm remembering right, I believe that Megan said the
rule of thumb is a pound of grain per doe plus another pound per gallon
of milk produced. Otherwise, your poor goat will milk off all of
her fat and get skinny.
Next, Megan let me taste
some of the milk, which was a two-tiered test --- taste and ease on my
stomach. The taste test wasn't entirely fair because Megan had
left the milk out to come to room temperature so she could make cheese,
but I still thought it was quite tasty --- the slight aftertaste wasn't
enough to turn me off. That answers another question --- whether
the fancy dairy goat keepers who recommend you keep your goats off pasture so that the browse
doesn't impact the flavor of the milk are right. They probably
are if you have a highly advanced palate, but we'll eat
old chickens and
we'll also drink milk from a browsing goat.
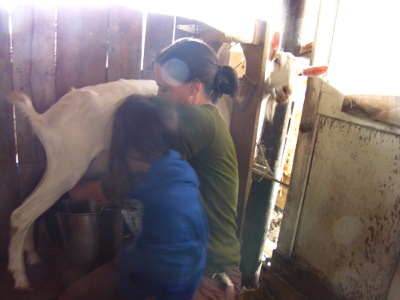 Over the last couple of
years, I stopped being able to drink grocery store cow's milk because
it began to make me queasy. I assumed I'd developed lactose
intolerance, but a bit more research turned up the factoid that what
most people of European descent call "lactose intolerance" is probably
a problem digesting certain proteins in the milk. Actual lactose
intolerance is more common among other ethnic groups. The
distinction is important because if you can't digest lactose, there's
no reason to try goat milk, but if you're having trouble with the
proteins in cow milk, you might not have a problem with the different
proteins in goat milk. Sure enough, Megan's milk sat lightly on
my stomach.
I had lots of fun, but
we made absolutely no decisions. Still lots more research to come
before we decide if goats are right for the farm.
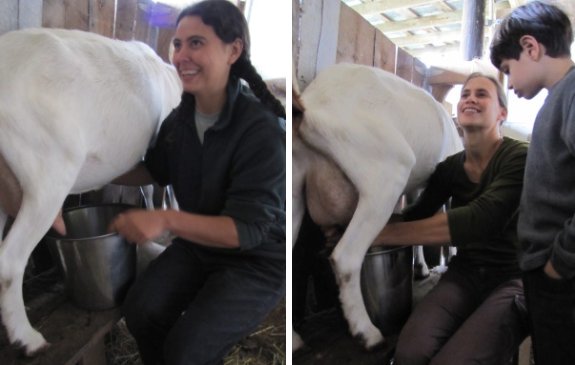
We've been debating the possibility
of getting goats.
My main resistance boils down
to time. Anna brought up the good point this morning that some of that
time will be when the garden reaches a speed of 110 Miles per hour.
Megan made the whole process look easy
and fun. Her goat was trained to climb up on a small milking station
and poke her head through a hole where a bowl of sweet feed waited.
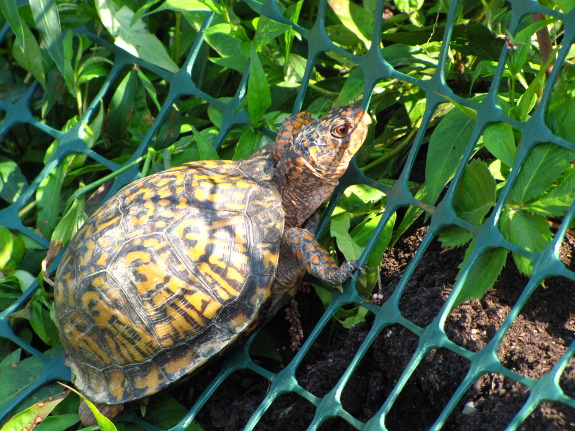
I discovered the one
problem with our temporary
chicken pasture fencing --- it hinders box turtle
migration. I suspect this turtle was heading over to eat the
everbearing raspberries that I missed and let fall to the ground.
He seemed less than pleased that his path was blocked --- hopefully
he'll discover the unfenced berry patch in the back yard.
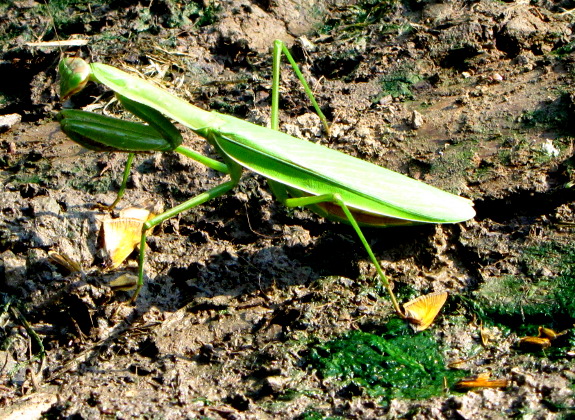
Meanwhile, a praying
mantis was hunting at the salt lick out front. Previously, we'd
seen butterfly wings in spots where we poured excess urine and I
hypothesized that one of this year's bumper crop of mantises was
enjoying the easy pickings. I was right! As I watched, the
mantis eased her way forward, starting four inches from an unsuspecting
skipper and ending up a mere inch distant. Then she pounced ---
butterfly dinner!

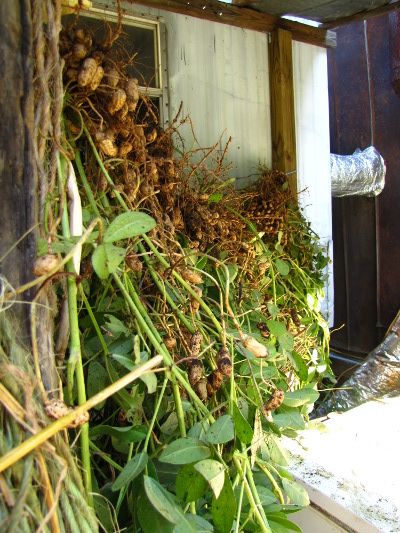 Peanuts are one of our
easiest crops...until the time comes to eat them. As long as I
choose a sunny, loamy spot for the plants, they grow like crazy and
outcompete weeds even if I forget to mulch them. Digging
them is easy, and
I'm testing out a new method of curing peanuts on a line under the
porch roof which seems to be equally speedy.
The trouble is that my
fingers get sore from peanut shell fibers after about ten minutes of
shelling. I'm extremely ashamed to admit that I made one batch of
homemade
peanut butter last
fall, and then let the other half of our harvest sit on a shelf while
we bought peanut butter from the store. There has to be an easier
way to get those doggone peanuts out of their shells!
"In Africa it takes 5 people all
day to shell 100 lbs. of sun dried peanuts," writes the Fully Belly
Project, who
send hand-cranked
peanut sheller kits
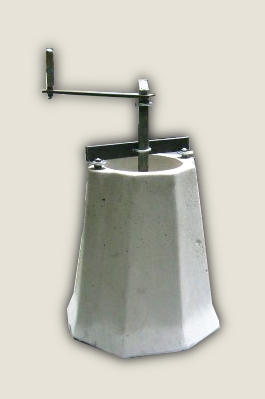 to Africa. But no one seems interested in making similar peanut
shellers for homesteaders in the U.S. Instead, the best I could
find on the internet is a little hand-held nutcracker, or the option of
taking your peanuts to an industrial-scale shelling facility.
Although I love peanut
butter, I wouldn't mind turning our peanuts into salted, roasted
peanuts since Mark enjoys salty snacks and would probably crack them a
few at a time as he ate them. It looks like if I mixed a cup of
salt into a gallon of water, soaked the peanuts for six to eight hours,
poured off the water and let the nuts drain for 24 hours, and then
roasted them for ten or fifteen minutes at 350 degrees Fahrenheit, I
might come up with a snack Mark would enjoy.
Any other ideas for
eating our peanuts that don't rub my fingers raw? Or has anyone
had experience with making homemade, salted peanuts? I'm all ears!
When you start reading
up on sustainable pasturing, Joel Salatin's name pops up quickly and
often. In case you haven't heard of him, Salatin's 550 acre farm
feeds various animals in succession on small patches of ground, using
the behavior of each species to improve the conditions for the next
animals in line. The result is pastures that become more
productive every year...oh, and lots of high quality meat to eat and
sell.
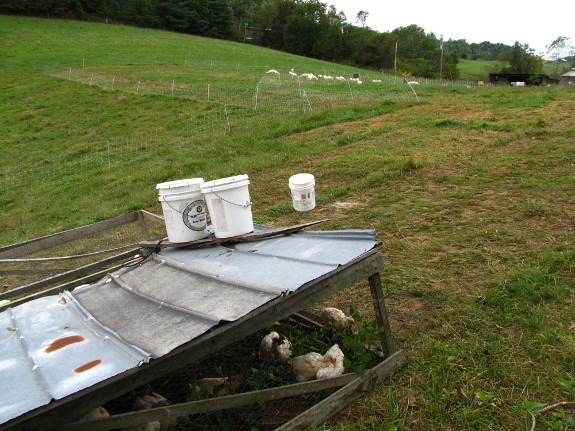
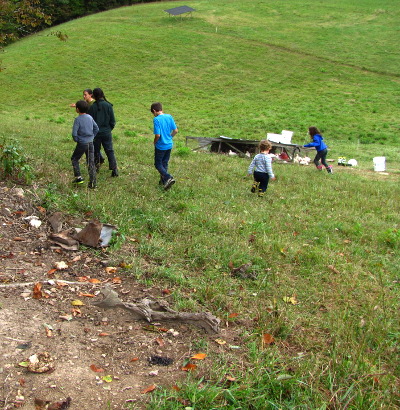 Our pastured
lamb suppliers follow Salatin's lead, so I thoroughly enjoyed
getting to tour their farm and see the livestock in action. On
perhaps six acres of good pasture (along with some more
weedy areas being reclaimed), Megan and Erek currently have four pigs,
two big tractors of Cornish Cross chickens (going in the freezer next
week), a flock of Christmas and Thanksgiving turkeys, seventeen lambs
and their parents, a calf, two milk goats, and three kids.
(That's goat kids --- they've got a human kid of their own, but he's
not for meat. The other younguns in the pictures are friends.)
Megan told me that it
takes the two of them only half an hour to attend to this huge
menagerie on an average day. (Of course, there are lots of
non-average periods when they spend sunup to sundown slaughtering
chickens or two full days chasing cows out of the woods.) Stay
tuned for the rest of this week's lunchtime series to learn about the
nuts and bolts of their Salatinesque operation.
 This post is part of our Salatin-style Pasturing lunchtime series.
Read all of the entries: This post is part of our Salatin-style Pasturing lunchtime series.
Read all of the entries: |

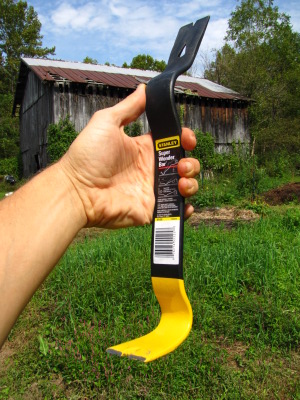
I've worked with the Stanley
Wonder Bar before and
went to pick one up last week at the hardware store for an upcoming
demolition project.
They had a good selection of
what I call wrecking bars, but when I saw the ergonomic curve of this
new Stanley Super
Wonder Bar I knew the
decision process was over.
The "Super" improved curve will cost you an
extra 4 dollars over the regular Wonder Bar, but after only 2 short sessions
with it I'm prepared to proclaim it worthy of that special adjective
usually reserved for comic book heros.
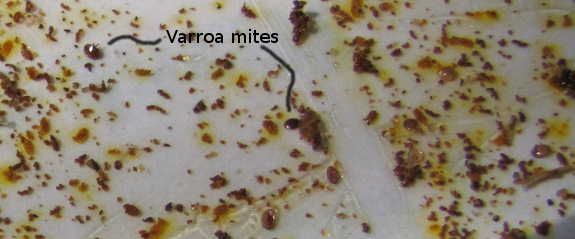
 Beekeepers
more interested in the health of their bees than in honey production
split hives as a matter of course each
year to lower varroa
mite
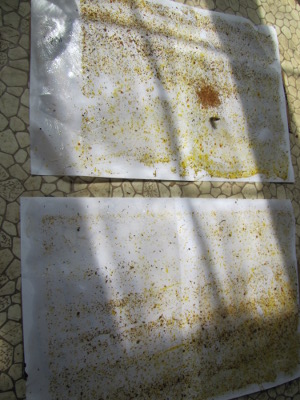
numbers. I did a sticky
board test
last week at the same time I'd done one the year before, and the
differences were striking. Here's what the count looked like on
September 13, 2010, in our three hives:
- East: 90 mites = 30 per day
- Middle: 540 mites = 180 per day
- West: 40 mites = 13 per day
I'm pretty sure that
scattered honey stores were the cause of
the demise of two of my hives last winter, but it's still striking to
see who fell when --- Middle hive was dead in January while West hive
died in March. Perhaps the high mite numbers in the Middle hive
were implicated in that hive's death after all?
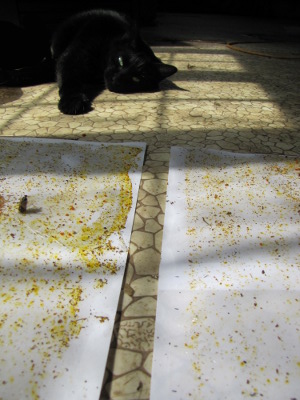 East hive was my sole living hive this spring,
which I then split,
moving the old queen to create a new Middle hive. Although East
hive was the parent location, it's the daughter hive since the bees
left behind had to raise a new queen --- that means they're the hive
that started nearly from scratch this year. September 18, 2011's
three day sticky board count revealed:
- East: 131 mites = 44 per day
- Middle: 36 mites = 12 per day
Interestingly, it seems
like more mites hung out in the daughter hive
than in the moved mother hive. Of course, the best news of all is
that both hives are well within normal bounds, so I don't need to worry
about varroa mites unduly weakening either this winter. Since
most
beekeepers around here use chemicals as a matter of course to keep
varroa mites within bounds, it's great to see that something as simple
as a hive split can have such a good effect.
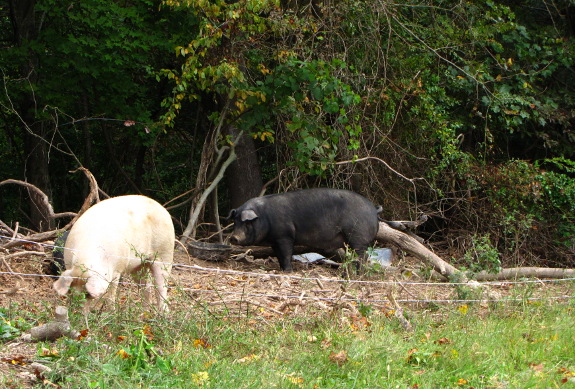
Although Megan didn't
explain it this way, I divide her livestock up into two categories ---
the colonizers and the maintainers. Today, I'll discuss the
colonizers, which are animals she and her husband turn into areas that
have become overgrown with troublesome weeds or turn into woodland
that's destined to be pasture.
Joel Salatin uses pigs extensively as
colonizers, and Megan's four pigs certainly had a huge impact on their
pasture in very little time. Unless you put a ring in a pig's
nose (did you know that's why pigs sometimes wear rings?), the pig's
favorite method of feeding is to snuffle through the dirt and find
tasty tubers and roots to eat. You can think of pigs as plows,
with all of the pros and cons that comparison entails. Both plows
and pigs will reduce weed pressure immensely and let you start at
ground zero --- whether you want to start there is up to you.
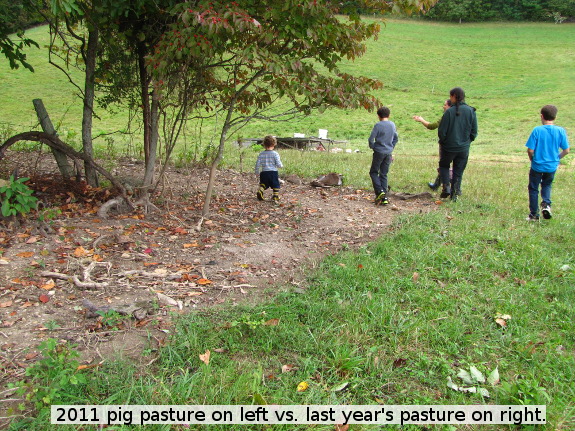
Of course, you don't
have to let your pigs graze all the way down to bare earth, and I don't
think Megan and Erek actually intended that to happen. At this
time of year, there are so many parts of a farm where you just have to
throw up your hands and say "The animals have food and water.
Everything else can wait until next year!" I suspect moving the
pigs to a new pasture was a bit like our vastly overgrown blueberry
patch --- just too much to handle at this instant. I'll talk more
about rotating animals later, but I should mention here that Joel
Salatin uses 30 to 50 pigs in eight paddocks per acre to kill off the
perennial weeds while maintaining a ground cover of pasture
plants. Each pig paddock is only grazed three times per year, and
the pigs are never allowed on pasture in the winter since they'll churn
the ground up to mud.
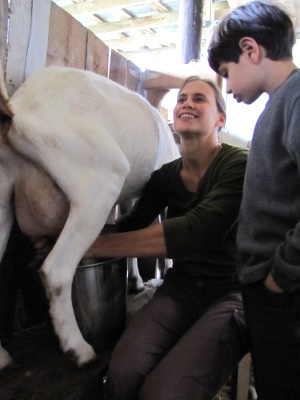 Goats are a less
destructive (but slower) colonizer species. They function more
like repeated bushhogging, eating the aboveground portions of tall
weeds, vines, and small trees constantly until the unwanted plants give
up the ghost. Salatin doesn't use goats in his system because he
didn't have a market for their meat and milk, but to my halfway
educated eye, goats seem friendlier to the earth. On the other
hand, goats need better fences than pigs and are more appropriate to
smaller operations where you can put more time into each animal.
In either case, goats or
pigs are used in a paddock for only a short time, then are moved on to
the next trouble spot. Megan walked me through last year's pig
paddock, which now looks like a nice grassy pasture with just a few
small patches of poison ivy. The whole thing had been chock full
of the troublesome vine before her pigs went to work, so Megan gives
her pigs high marks for dealing with poison ivy.
Once the colonizers have
done their work, the pasture is ready to be used by the maintainers ---
the subject of tomorrow's post.
| This post is part of our Salatin-style Pasturing lunchtime series.
Read all of the entries: |

Anna's Hardy
Kiwi pruning seems to be paying off with what looks like twice the
growth compared to last year.
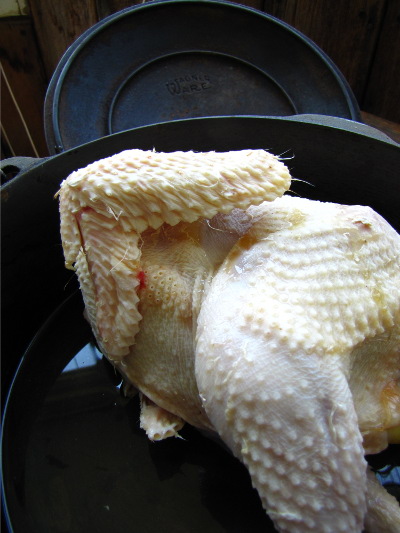 I've posted before about ways
to cook an old chicken:
Stew
it for eight hours.
Cut
the raw meat off the bones and grind it for use in potstickers,
sausage, etc.
Both of those methods
work (especially the second one), but I recently discovered that
neither is the traditional way to turn that hen who no longer lays well
into dinner. It turns out that old chickens were actually
preferred by many cooks until recently since chickens over a year old
have more flavor. These chickens were sold as "fowl" or "stewing
chickens" and were used to create chicken soup, chicken stock, chicken
salad, and chicken pot pies.
Both of the methods I've
used to cook old chickens in the past break apart the tough, stringy
fibers that inevitably form if you cook a fowl in boiling water, but
you can prevent these fibers from forming in the first place by using
moist heat that never raises the temperature of the chicken above 180
degrees Fahrenheit. I tried out two methods, my favorite of which
was to put two cups of water in the bottom of a Dutch
oven (or other
covered roaster) and bake at 325 degrees Fahrenheit.
Alternatively, you can get the same effect by cooking your chicken in a
covered pot on the stove as long as you make sure the water never
boils, but I thought it was more difficult to keep the liquid at a
simmer in that situation. Crock pots are reputed to raise the
temperature too high.
 Either way, you'll want to
cook your fowl about an hour per pound, removing the white meat as soon
as it's done and then stewing the rest of the chicken a bit
longer. Cooked in this manner, the meat will only be a tiny bit
tougher than meat from a grocery store chicken --- chance are, no one
will notice if you don't tell them.
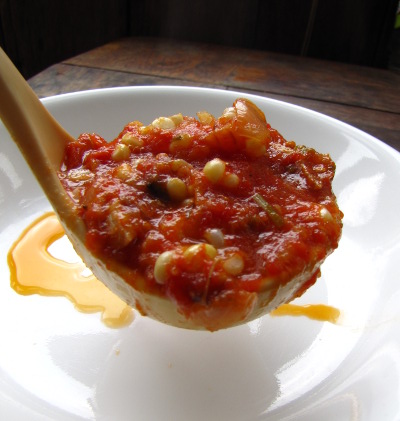
I consider chicken stock
to be the most efficient use of a chicken, especially at this time of
year when I'm turning my garden into soup for the winter as fast as I
can. To make the stock, I removed the breast after two hours,
then added more water and simmered the carcass for a few more hours
until it was easy to peel all of the meat from the bones. Then I
tossed the stock and meat back in the pot with all of the fixings for harvest
catch-all soup.
One old chicken made a gallon and a half of condensed chicken and
vegetable soup, enough for two dozen winter meals. Now that's a
good use of an old chicken!
Yesterday, I talked
about colonizer
livestock (pigs and goats) that can be used to turn
troubled areas into pasture. Today, I'll discuss what you do with
those new pastures to make them more diverse, fertile, and nutritious
every year.
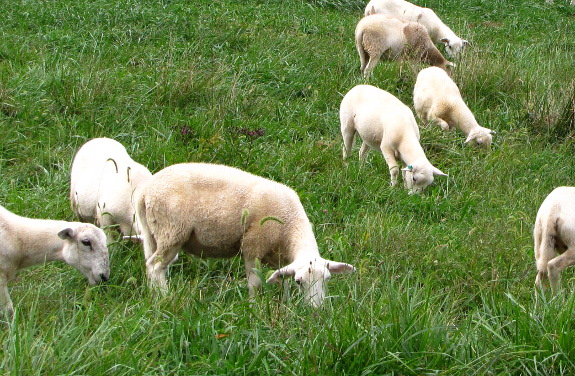
Maintainer livestock
live on good pasture, where they have two jobs. First, they need
to keep the pasture cropped relatively short so that it'll keep
producing succulent new growth that is easy to munch up (and that won't
turn into those less nutritious weeds that only colonizers
enjoy.) Second, maintainers add nutrients to the soil with their
excrement, fertilizing the pasture as they graze.
Joel Salatin's system
uses cows and chickens as his maintainer species, and in general a
grass-eating ruminant paired with some sort of poultry is a good
combination. Megan and Erek focus primarily on hair sheep and chickens, both being raised for
meat. Megan notes that the chickens, especially, increase the
fertility of the pasture dramatically, while the tearing action of the
grazing sheep seems to stimulate plant growth.
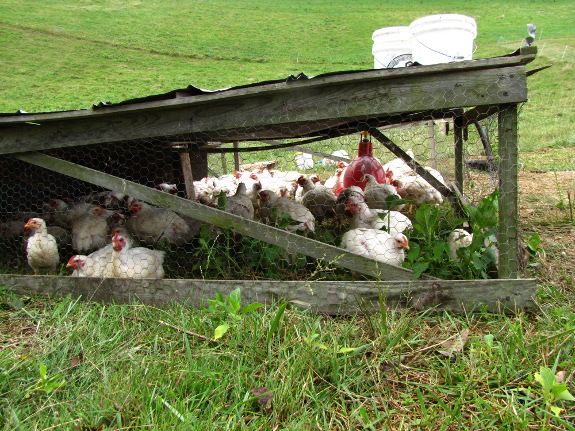
Salatin claims nearly
unbelievable savings on feed by raising his chickens on pasture.
He notes that his laying hens are able to eat just corn instead of
balanced rations while on summer pasture, getting their protein from
the land (a savings of 42% in cost per pound of feed.) Meanwhile,
these hens are only eating 0.07 pounds of feed per hen per day compared
to 0.3 pounds that some of his neighbors feed and 0.25 pounds that we
feed. His broiler savings are pretty serious too, with feed costs
30% less than they would have been off pasture. And, of course,
the meat and eggs from the chickens and cows are high quality, pastured
products.
Although the cost
savings are a bit debatable (others have trouble replicating Salatin's
results there), the pasture quality changes are dramatic. Grazing
two or more maintainer species that have slightly different food
preferences keeps the pasture extremely diverse and healthy.
Farmers who follow Salatin's lead say that they're growing pasture, not
animals --- this is additive farming, the furthest thing you'll find
from extractive, modern methods.
| This post is part of our Salatin-style Pasturing lunchtime series.
Read all of the entries: |

We got this Sierra Saw on the
left as a gift to commemorate
Anna's first deer kill(Thanks
Jayne).
It didn't get used for sawing
any deer bones, but turned out to be one heck of a hand saw.
The blade has a tooth pattern
that cuts while pushing and pulling, which makes the cutting go fast. I
started using it as a machete to clear away brush and may have pushed
its cheap plastic handle a little too far because it eventually broke
requiring some electrical tape surgery.
Our choice for a replacement
was the Felco 600 pruning saw. Expect to pay a little over 3 times what
the Sierra costs, but you'll feel like you got your money's worth the
minute you hold the Felco. It cuts a little better than the
Sierra with a handle that's easier to grip.
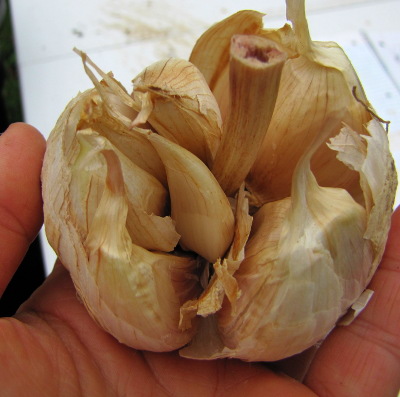 Garlic
is one of our best crops. We invested
$45 in locally-adapted garlic in 2008, and since then we've grown
all of the garlic we eat and plant. I estimate we've already
produced about 60 pounds of garlic in the first three years, and we'll
probably dig up another 20 pounds next summer. Not a bad return
on our investment, especially since we can keep planting the offspring
of our garlic as long as we live.
The biggest factors
involved in getting a stellar garlic harvest are:
- Choose locally-adapted varieties
- Use only the biggest cloves from the biggest heads as seed garlic
- Plant into well-drained, loamy soil
- Mulch well
- Snip off scapes of
hardneck garlic in the spring
- Harvest bulbs at the right time
- Dry your garlic carefully
- Sort
and store in an airy location
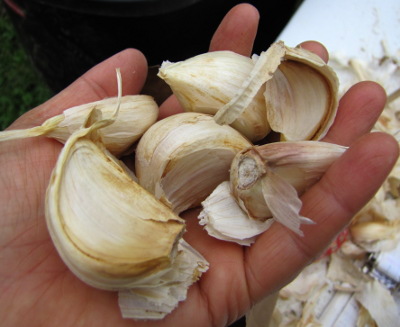 My list makes it sound
complex, but I'd actually say that garlic is one of the easiest plants
we grow. If you don't live too far south, I highly recommend
adding this delicious (and beautiful) crop to your garden. Now's
the time to plant!
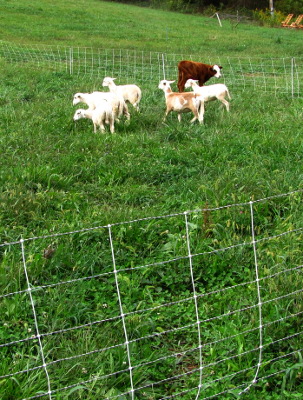 The heart of the multi-annual
pasturing setup is pasture
rotation. By
"mob-stocking" lots of animals in a small space, the livestock are
forced to eat everything rather than just nibbling on their favorite
plants. Then you move the animals to a new paddock quickly,
before they can eradicate those favorite plants. Your animals are
healthier because they eat better food and don't pick up diseases from
their own waste, and the pasture is more productive and diverse because
the least tasty plants don't take over.
That sounds great, but
how do you make the animals graze one small area and then move them to
a fresh spot quickly and easily? Chicken tractors are Joel
Salatin's method of mob-stocking broilers, but he relies on electric
fences for most other livestock. Each type of animal requires a
specific type of electric fencing --- two strands close to the ground
are plenty for the tender-nosed pig, but Megan relies on electrified
netting to keep her lambs in bounds.
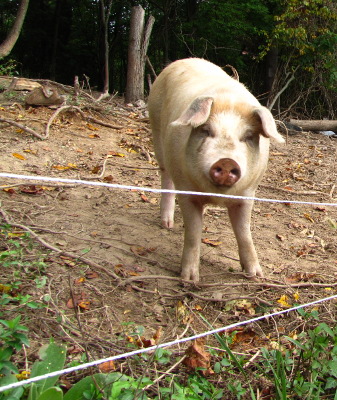 Electric fencing has the
benefit that it's easy to rearrange --- Erek takes about eight minutes
to move the lambs to a new paddock each day --- so you can graze the
whole pasture evenly without getting weedy plants growing up along
permanent fencelines. On the other hand, electric fence has some
major disadvantages too. Megan admits that the netting is nearly
impossible to deal with in the woods since it tangles up quickly, and,
of course, you have to keep weeds from growing high enough to touch the
wires or they'll drain the electricity out of the fence. And startup costs are steep (although startup labor is low.)
I have a feeling that
electric fencing is one of the aspects of Salatin-style pasturing that
carries over least well to the small homestead. But more on that
topic tomorrow!
| This post is part of our Salatin-style Pasturing lunchtime series.
Read all of the entries: |
 One area we've cut corners on when
we first moved to our homestead was comfort.
We talked about building some
sort of porch near the door, but both of us had 20 other things that
seemed more important.
In my opinion the joy felt
from starting the Fall/Winter season with a freezer full
of garden fresh produce outweighs the comfort of having a few less
mud puddles to walk through.
These old pallets
took just minutes to be converted to what I call a mini pallet porch,
which has already made me feel more comfortable.
I only use one knot
other than a half hitch on a regular basis.
(Yes, I did almost fail
kindergarten because I couldn't learn to tie my shoes correctly.
I figured out the normal method while bored one day in high school
calculus, but I still make two rabbit ears and then tie them into a
knot when my shoe laces need securing.)
I learned this knot from
my father, who used it to tighten a canoe down on top of a car during
our paddling forays.
It's a bit complex,
consisting of first making a solid loop, passing
the free end of the rope under the bumper of the car (or other solid
object), slipping the end through the loop, pulling tight, and then
securing the line with another knot.
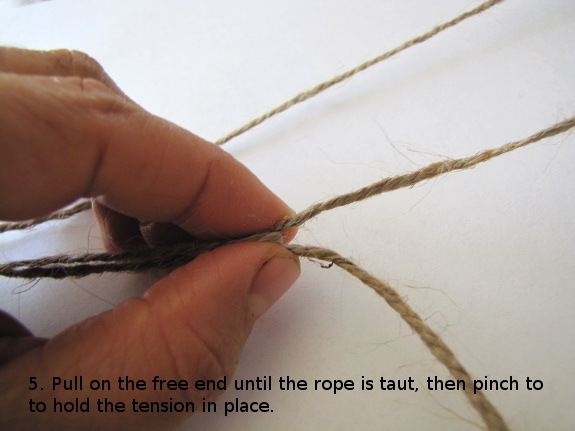
The photographs here
show the
steps in more depth.
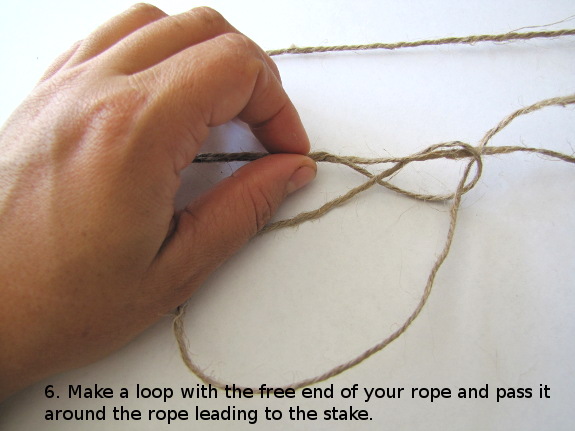
The knot is great for
securing a line tightly in
such a way that you can untie the knot quickly and easily.
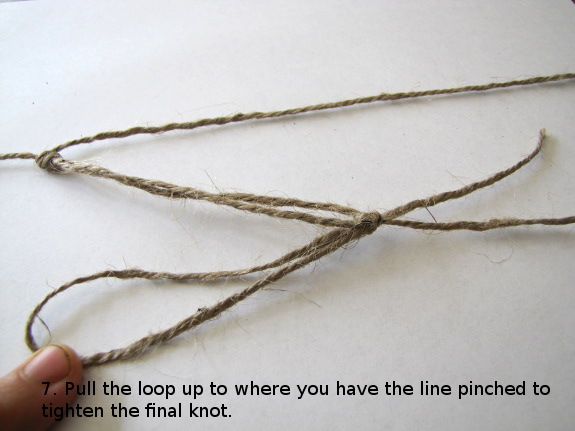
My question for you is
--- what is this knot called?
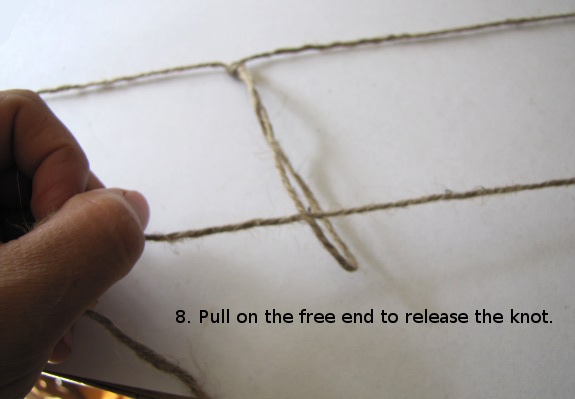
I use it to
secure the ends of my quick
hoops, which will be
profiled in the
October volume of Weekend
Homesteader, and I'd
like to use the knot's
real name. Any ideas?
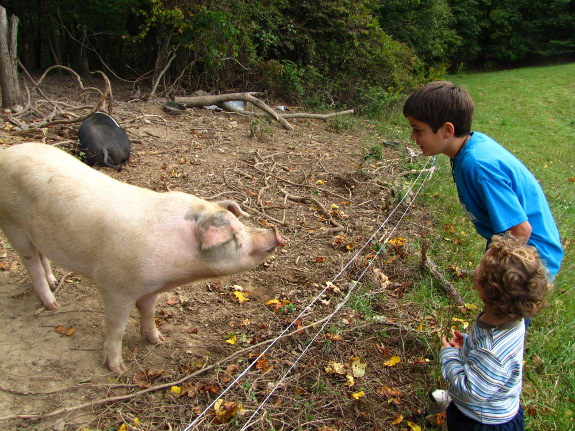
Joel Salatin's system
(and the many permutations you find on farms like Megan and Erek's) is
a beautiful permaculture invention. However, I think that
microfarmers should take a long hard look at each aspect before
deciding to copy it whole cloth on their acre or smaller
homestead. Here are some issues you might consider:
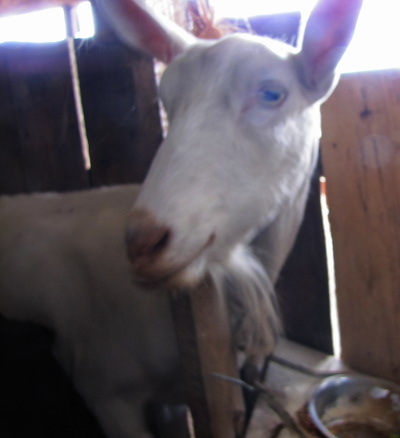 Are you
trying to make a living selling animal products? There is
a large and growing market for pastured meat and eggs, but the truth is
that you probably will make around minimum wage at such an endeavor if
you do it yourself on a small scale. Megan has a job off the farm
and Erek is considering one as well. I always recommend that
homesteaders find
a simpler way to make a living that gives them time to focus on the
things they enjoy without the pressure of monetization. If you
really want to make a living at permaculture-style farming, your best
bet is to scale up and hire interns.
- Which aspect of the system is most important to you? On a smaller scale, it's worth focusing in on what you want the most. If you try to cram a laying flock, a herd of sheep, and a pig into your 4,000 square foot backyard, you're probably going to ruin your soil structure and end up with unhappy animals all around. Think about the acreage requirements of each animal and decide which one or ones you're really in love with, then plan those livestock at the heart of your system. The homesteader might need to think small --- fewer individuals of fewer types of animals perhaps of miniature breeds.
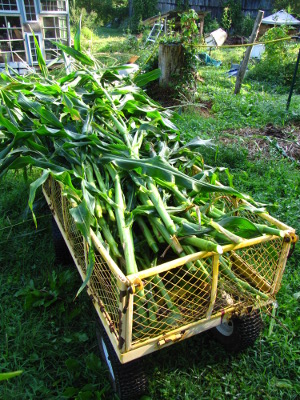 Can you take advantage of off-pasture inputs?
When you're running two hundred pigs, your family's food scraps won't
make a difference, but those scraps might make a moderate dent in the
diet of one porker. Whenever I cut down corn stalks, I smell the
sweet juices and wish I had an herbivore to feed them to. And
there's always the possibility of growing or capturing earthworms,
meal
worms, Japanese
beetles, black
soldier fly larvae and so forth for your chickens.
Can you take advantage of off-pasture inputs?
When you're running two hundred pigs, your family's food scraps won't
make a difference, but those scraps might make a moderate dent in the
diet of one porker. Whenever I cut down corn stalks, I smell the
sweet juices and wish I had an herbivore to feed them to. And
there's always the possibility of growing or capturing earthworms,
meal
worms, Japanese
beetles, black
soldier fly larvae and so forth for your chickens.- Can you use the permaculture
concept of stacking to create more space? Salatin's system
uses stacking to some extent by grazing animals with different dietary
habits one after another on the same patch of earth, but the
homesteader can go further. Why not put your compost pile in your
chicken pasture so that your flock can scratch through it for
worms? How about letting your animals graze in your orchard
during certain times of the year (appropriate only with some livestock
and tree sizes)? You can turn animals into a typical summer
garden after the crops are done and let the livestock eat bugs and
discarded vegetables (unless, of course, you have perennials and fall
crops mixed in.) And if you live in suburbia, there's always that
pasture known as "lawn."
- Where are you starting? Joel Salatin's system assumes your farm has a lot of grassy pasture ready to go with some problem spots. If your whole farm is a problem spot (like ours), perhaps you should focus on colonizing livestock. On the other hand, if you've inherited a well-maintained pasture, maybe you only need maintainers.
- Start with the infrastructure.
No matter what you do, think fencing, housing, and watering before you
bring home your dream animals.
However you tweak the
Salatin system to match your unique situation, the results speak for
themselves. Ten years ago, when I walked across the hayfield that
later became Megan and Erek's pasture, it was one large expanse of
fescue --- the roughest, least nutritious grass that grows in our
region. Today, their pasture is a lush and diverse mixture of
foxtail, orchardgrass, clovers, and other species. The proof is
in the pudding --- if you can work the kinks out of a multi-species,
rotational grazing system, your pastures will become healthier every
year.
| This post is part of our Salatin-style Pasturing lunchtime series.
Read all of the entries: |
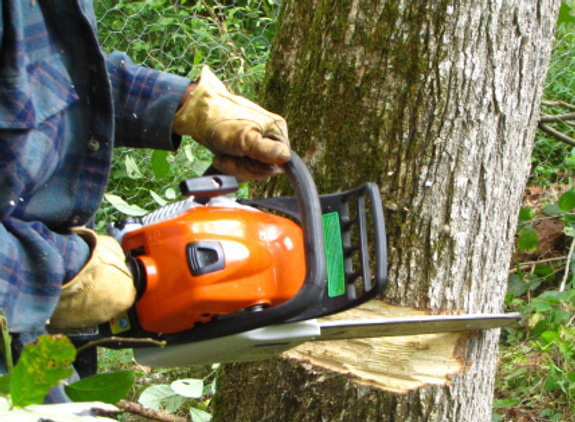
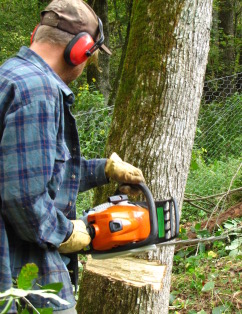 We
decided to cut down a few trees in a chicken pasture this week and
realized there was no way to fall them without hurting the new fence.
Cutting away the bark in a
complete circle should stop new growth next year.
I can't help but feeling as
if we swept some dirt under a rug that will require more attention in
the future.
Not sure how long it takes
for a Box Elder to dry up and fall in a situation
like this, but I'd say we bought ourselves 5 to 10 years.
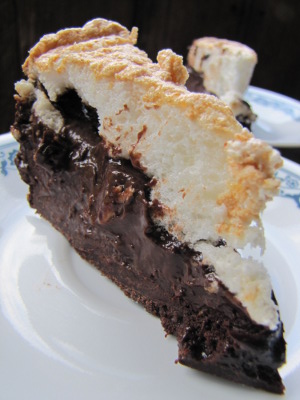 This
pie is not even the littlest bit good for you, but it is so full of
chocolate that even the chocoholic will feel little need to hunt down
an extra dose until the next meal. Plus, it's just delicious....
Crust:
0.5 cups flour
0.5 cups cocoa
0.25 cups sugar
7 tablespoons butter
4 tablespoons water
Add flour, cocoa, sugar,
and butter to the food processor and blend until butter is
well-distributed. Add the water and blend again to mix. Pat
into the bottom of a 9 inch cake pan and bake at 350 degrees Fahrenheit
until the crust is just barely done.
Filling:
2.25 cups milk
(separated)
5 egg yolks
2/3 cup brown sugar
1 teaspoon vanilla
6 tablespoons cocoa
4 teaspoons cornstarch
1 cup dark chocolate
chips
3 tablespoons butter
Bring two cups of the
milk to a simmer in a saucepan over medium heat (being careful not to
burn.) Meanwhile, whisk the other quarter cup of milk together
with the egg yolks, brown sugar, and vanilla. Mix in the cocoa
and cornstarch and then pour your cocoa mixture into the hot milk,
whisking constantly. Slowly bring it all to a boil, stirring
constantly --- at this point, your filling should become relatively
thick (although it will thicken more later as it cools.) Turn off
the heat and stir in the chocolate chips and butter, mixing until they
melt into the filling. Pour the filling into your baked pie crust.
Meringue:
5 egg whites
1 teaspoon vanilla
6 tablespoons sugar
 Beat
eggs until they form stiff peaks, then gently mix in vanilla and
sugar. Spoon meringue on top of the pie's filling, making sure
that it touches the edges of the pan all the way around. (If your
meringue doesn't touch the pan edges, it will shrink and won't cover
the whole pie surface.) Bake in a 350 degree Fahrenheit oven for
about ten minutes until the top is brown.
Chill for at least eight
hours before serving. Serves 16 if you have tiny appetites or 8
if you like chocolate.
I made this with some of
Megan's
goat milk, and it
was phenomenal. I suspect that lower quality milk from the store
won't result in quite as delicious of a pie, but it's hard to say.
Christian
Wolpert's automatic chicken coop door opener and closer is the second one I've seen so
far that is completely off the grid and designed to work on a battery
that gets charged with a solar panel.
It uses an MSP430
microcontroller as the brain along with a customized Linux source code
that Christian is kindly offering as a free download.

I know building and
programming your own microcontroller can sound advanced, but Christian
describes a clever short cut where he makes use of a tutorial as his
starting point. This trick reduces most of the number crunching work to
a process of adjusting specific interrupt routines to fit your
automatic coop opening needs.

Edited to add:
After years of research, Mark eventually settled on this automatic chicken door.
You can see
a summary of the best
chicken door alternatives and why he chose this version here.
If you're planning on
automating your coop, don't forget to pick up one of our chicken waterers. They never spill or
fill with poop, and if done right, can only need filling every few days
or weeks!
 A lot of you said you wished
I put all of my writing here rather than hiding some away in ebooks, so
this month is a compromise. I'll be featuring one of the four
projects from Weekend
Homesteader: October
as this week's lunchtime series, then to read the rest you'll need to
snag a copy of the book.
This month's volume of
Weekend Homesteader introduces two different ways
to eat fresh produce deep into the cold months --- plucking winter
squash and sweet potatoes right off the shelf and harvesting leafy
greens from under quick hoops. Meanwhile, you'll take advantage of free
mulch and compost going to waste in your neighborhood and will find out
whether life at the poverty line is something to be scared of.
For those of you who are
new to Weekend Homesteader, this series walks
you through the basics of growing your own food, cooking the bounty,
preparing for
emergency power outages, and achieving financial independence.
 I hope you'll consider
splurging 99 cents to buy
a copy of my newest ebook from Amazon's
Kindle store. And many thanks in advance if you can find the
time to write a brief review.
As usual, I'm also very
glad to email you a free pdf copy to read if you
don't have the spare cash, or just don't want to deal with downloading
an app so you can
read the ebook on your computer or phone. Just email
me with your request --- no strings attached. Thanks for
reading!
 Every young homesteader I
talk to has the same problem --- we put too much on our lists.
Day to day upkeep of a budding farm takes so much time that it's tough
to fit in the long term projects you dream about. No surprise
that we still haven't finished all of the projects on 2009's goal sheet, let alone on 2010's. (And that's after
making no list for 2011 in hopes of getting caught up!)
This fall, we're trying
out a new method of deciding which goals go on the year's list.
First, I'm starting the list when we have the entire cold season ahead
of us, rather than in January when the garden will be breathing down
our throats again in just a couple of months. Next, we're
deciding how many projects go on the list by time to complete rather
than by number.
Mark and I brainstormed
all of the activities we were interested in, and then I assigned a
person-day figure to each. (One person-day is how much work Mark
or I can get done in one of our three hour work mornings or
afternoons.) Finally, Mark and I each numbered the projects from
our most favorite to our least favorite.
Since I estimate we have
about 80 people-days to devote to long term projects over the winter,
the first 40 people-day activities on each of our lists hit the goal
sheet. Knowing that anything not on the main list isn't going to
happen for at least a year made us each go back and change our answers
slightly, but then we came up with the priorities below:
- Stepping
stones across the creek. (We decided that this will be
our main footworthy creek crossing option, at least for now.)
- Finish bringing the winter waterline into the trailer. (It's buried to only five feet away!)
- Tear out the footbridge. (The structure has rotted to the point that it's definitely hazardous if anyone is dumb enough to try to walk on it.)
- Blueberry kill mulch.
(Weeds in the blueberry patch got out of control.)
- Driveway repair.
(We're thinking of sinking cinderblocks into the
most problematic spot, a bit like the way we made
the ford.)
- Two more chicken pastures and another coop. (If we raise as many broilers next year, this should help keep the pastures from getting over-grazed.)
- Floor and workbench under the front porch. (The ground outside the door is a muddy mess in the winter, and a workbench would be awfully helpful for cutting firewood to size.)
- Deer fence along the southern border. (This is our main problem spot at the moment for incursions.)
- Shelving in Anna's room for towels and sheets. (They're currently stacked from floor to ceiling.)
- Herb beds for the bees. (We'd like to put a kill mulch around each hive so that the weeds don't grow up into the flight path. While we're at it, I want to plant thyme to cut down on varroa mites.)
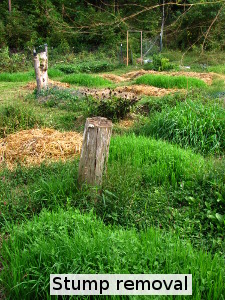 Stump removal around the yard.
(This will expedite summer mowing.)
Stump removal around the yard.
(This will expedite summer mowing.)- Bathtub/bench in the front room. (A winter bath right beside the wood stove sounds nice. I figure if we make a hinged plywood top for the bathtub, it can double as a bench when guests come over.)
- Reclaim the gully. (This mass of weeds is one of Mark's least favorite parts of the yard.)
- Diversify plantings in the chicken pastures. (I'm thinking of a few more persimmons, maybe another pear, and a goumi.)
- Woodshed expansion. (Our current shed is just about chock full, and it would be nice to have room to keep a bit more firewood under cover.)
- Root cellar. (We've been itching to excavate the fridge root cellar for a while. I figure if we build a roof over the area the fridge is in, the dirt won't slump again.)
- Loft divider. (Now
that the East
Wing is mostly done, Mark wants to close off his sleeping quarters
so he can get true darkness.)
- Goat path steps.
(We have a shortcut to our house that bypasses one of the loops of the
 driveway, but it's steep and slippery and
could use some work.

It's a long list this
year, but you'll notice that most of the projects are relatively
small. I was itching to put a summer kitchen on the list and to
prepare for goats, but the truth is that I'd rather have time for a
dozen small tasks than to put off my bathtub yet another year while
embarking on one big project. Maybe next year at this time, we
will have actually finished all of our long term projects on time for
the first year ever!
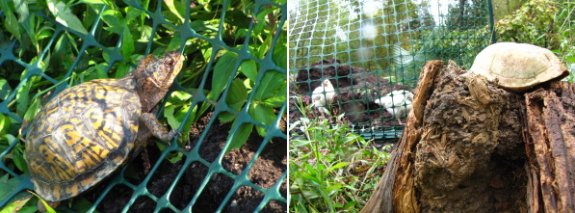
At first I thought the box
turtle Anna photographed last week was looking through the fence
towards an empty shell I recently found and placed on a nearby stump.
Box turtle mating season is
over and they hibernate from October to April.
Joe Heinen has some
interesting and graphic photos of the box turtle mating process for those who are curious and
need to know details.
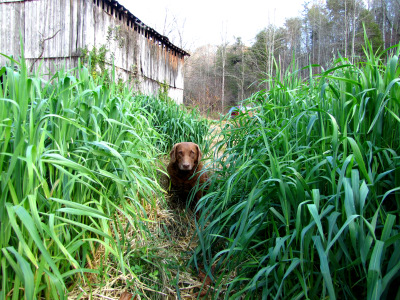 I'm
intrigued by the primary use of cover crops to
enrich the soil without tilling. I'm also interested in incorporating a
no till system.
How
would you convert a plot of grassy weeds into garden space? I would use
a hoe and clear all of the weeds out, cart them away and compost them
if I had a heated pile going. Then I would sow the seed of an annual
cover crop into the heavy clay soil I have (not sure what cover crop
I'd use. Maybe annual rye grass or oats I've read is good) in the
spring. I live in the deep south so I don't know if winter killing
would be optional. So I'd probably use a scythe or a mower to cut them
in place before fall and then leave them on the ground to rot. I would
then cover the rye grass with compost and sow fall vegetables in the
compost. That would be my ideal way to begin my bed. I'm curious if
this would work.
Also
how important is it that the cover crops be annuals? I've read of using
clover but I know this is a perennial but I'm not sure how it grows.
Does it just reseed itself or is it just not winter killed? Also I've
read of growing vegetables with clover as a living mulch. What is your
opinion of this? I imagine the clover would compete with the crops and
there wouldn't be significant growth in the vegetables.
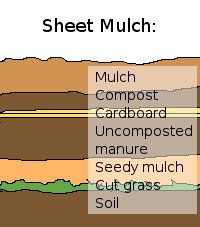
Thanks for the great
questions, Jalen! My favorite way to convert a grassy area into
garden without tilling is to use a kill mulch (aka a sheet
mulch.) You can read the long version in the May
volume of my ebook series (which I'm emailing you a
copy of), but the short version is that you lay down a few sheets of
damp corrugated cardboard to kill the grass, with compost above and/or
below, then top the whole thing off with mulch. If you've got
time to leave the kill mulch on for a summer before planting, you'll
then be able to grow anything you want. If you're going to plant
into your kill mulch immediately, I recommend putting a good layer of
compost on top of the cardboard and seeding only shallow-rooted crops
your first year.
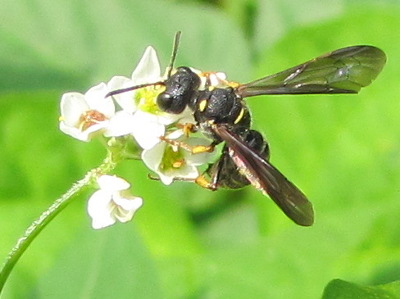 While your method would work
(especially if you used a shovel instead of a hoe), it would really
amount to tilling and you'd lose a lot of the organic matter right at
the soil surface. Granted, your cover crop would replace some of
that. An annual cover crop that works in the summer is buckwheat, which can easily be killed
using a mower, weed eater, or just by yanking the plants out of the
ground and laying them on the soil surface once they're in full
bloom. (Buckwheat's not a big fan of clay, though.) A
problem you might run into if you used a grain instead (generally
planted in the fall) is that the more woody plant matter would suck
nitrogen out of the soil as it decomposed, so you might end up with
hungry vegetables unless you added a lot of compost. I like to
rake oat leaves back in the spring, add my compost and plant my seeds,
and then bring the oat mulch back up around the young plants as they
get big enough to handle the occasional oat straw leaf blown out of
place.
To answer your question
about annual vs. perennial cover crops --- annuals have a big advantage
in no-till systems in that you can often find a way to kill
the plants without impacting the soil in any way. Perennial cover crops
are generally tilled into the ground (although you can also lay down a
kill mulch over top of them after mowing the cover crops close to the
soil.)
 There are several types of
clover, some of which are annuals and some of which are
perennials. The primary annual clover is crimson clover, which is generally planted
in the fall in the south, overwinters, and then is killed in late
spring or early summer as it begins to bloom. My father (in South
Carolina) has let his crimson clover go all the way to seed, at which
point it dies back naturally, then he plants into the mostly bare soil
and lets the clover come back from seed in the fall. He does till
his garden every year, though, so I'm not positive this system would
work with no-till. (In my own garden, I find that crimson clover
doesn't keep back weeds very well over the winter. In general,
grain cover crops are much better at suppressing weeds and adding
organic matter to the soil while legume cover crops are best at
providing a quick dose of nitrogen.)
I believe Steve
Solomon is the one
who wrote about growing white clover between the garden rows as a
living mulch. White clover is a perennial, so it will keep
plugging along unless you rip it out by the roots. Solomon's
method involved mowing the clover often enough so that it 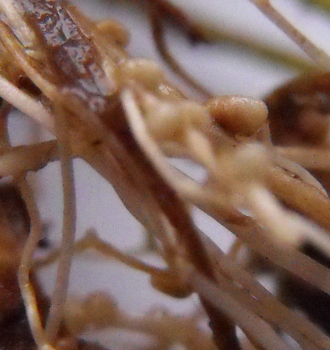 didn't
compete with the vegetables, allowing the high nitrogen clover leaves
to mulch and feed the garden, along with the high-nitrogen root nodules
that are shed by the clover when it is mowed. I didn't mean to
follow Solomon's lead, but in one of my garden areas, white clover
naturally sprang up in the mowed aisles between my beds, so I gave a
variation on his method a shot. In my garden, at least, the
living mulch system is problematic since my aisle clover tries to run
into the vegetables' space at every opportunity and I spend a lot of
time ripping it out.
You mentioned in your
email that you are seventeen and that your parents aren't into growing
vegetables --- I hope you're able to find space to give some of these
ideas a shot. The best way to learn about gardening is to get
your hands dirty and try things out. You'll soon discover what
does and doesn't work (and will have fun in the process.) Good
luck!
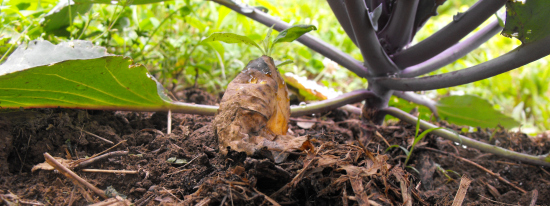
Many
of you answered my poll
to say that you wished I'd put all of my writing here rather than
hiding some away in ebooks. While I'm not going to reprint the
entirety of the October
issue of Weekend Homesteader on the blog, this
week's lunchtime series will highlight one of the month's four
projects: Scavenging biomass.
A century ago, many products that we think of as "waste" were cherished
as sources of garden fertility. The invention of chemical
fertilizers, though, made most farmers turn to easier to handle (and
less smelly) sources of nutrients. Although this sea change has
damaged our environment and degraded the nutritional quality of our
food supply, there is a silver lining --- the backyard homesteader has
dozens of choices of free biomass to choose from.
The type of biomass you hunt down for this week's project will depend
on where you spend your time. Many of you live out in the country
but commute into a city every day to work --- you can scavenge in both
places without going out of your way. If you spend most of your
time in one setting or the other, though, it's probably not worthwhile
to drive too far outside your usual stomping grounds for free biomass.
I've separated sources of biomass into those found in your household,
in rural areas, and urban areas to help you simplify your scrounging.
 Gathering free sources of biomass can be a bit time consuming and
physically strenuous, but the rewards are many. Since you'll
usually want to ask for permission before grabbing biomass out of
someone's dumpster, your scavenging will help you meet new people and
form connections in your community. In many cases, you'll be
keeping "waste" from ending up the landfill while building the long
term fertility of your soil. Last of all, it's just plain fun to
get something so useful for free.
 This post is part of our Scavening Biomass lunchtime series.
Read all of the entries: This post is part of our Scavening Biomass lunchtime series.
Read all of the entries: |
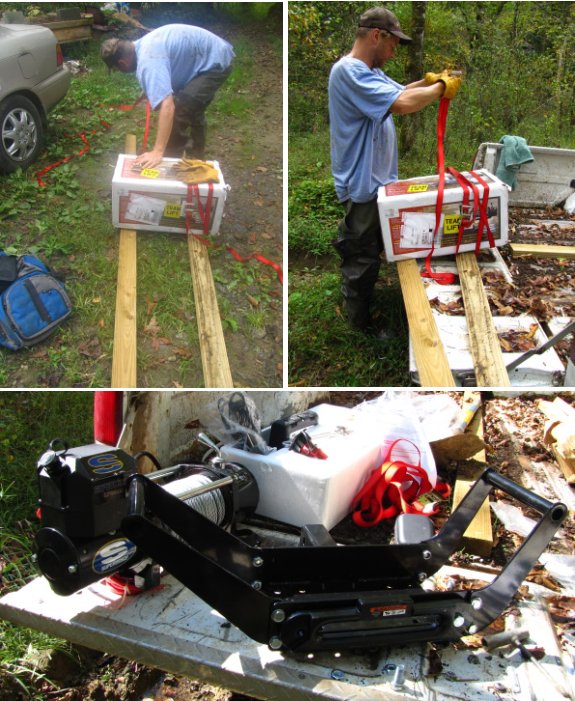
Step 1-Ratchet strap the
winch while it's still in the box to a 2x4 stretcher.
Step 2-Team lift it across
the creek and back to where the truck is stuck.
Step 3-Mount winch, unmount
winch, remount winch, unmount winch.
The mounting plate is
designed to slide into a hitch receiver. Our new Super Winch LP8500 lined up with the pre-existing
holes on the mounting plate, but it looks like I'll need to grind a
little off each handle for it to fit nice and tight.
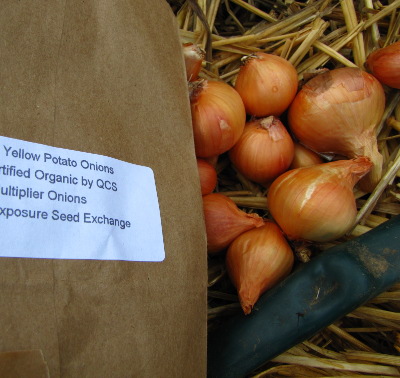 After planting Loretta Yellow
Multiplier Onions from Southern Exposure Seed Exchange for two years, I
finally pronounced the experiment a failure. When your onions are
smaller than your garlic cloves (no, not heads), you know something's
wrong. Yes, I've valiantly peeled and chopped two thirds of the
potato onions so far, but it took me a full hour to prepare enough
onions for one of my big freezer soup afternoons and that was the straw
that broke the camel's back. No more potato onions!, I swore.
But I adore the idea of
perennial onions, so I emailed SESE and got back the following note:
If you are getting good garlic you should be able to get larger bulbs from [our new] strain than the Loretta. We have a couple of growers in your area who do well with potato onions so I expect it would be worth a try with another strain.
So I ordered some
"Yellow Potato Onions" from SESE and put them in the ground along with
the garlic. I'll let you know next summer whether potato onions
are back in my good graces.
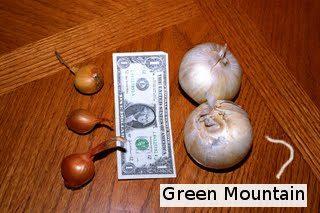 Meanwhile, Stevene commented to tell me about a
breeding experiment conducted by Kelly Winterton. Some of Winterton's
potato onions bloomed and (unlike mine, which flowered but produced
nothing), he was able to collect seed. The next year, he planted
out the seeds and saw the usual hodgepodge of traits that you'll find
when planting hybrid seed. But some of the onions both multiplied
(like a potato onion) and bulked up to the size shown here.
So the next year,
Winterton and a buddy planted the bulbs of the big potato onions ---
named Green Mountain Multiplier. They were planning to sell the
results...until the
deer struck.
As of September 7, there are 27 Green Mountain Multiplier onions in
existence. So, don't get your hopes up about buying some Green
Mountain Multiplier onions just yet.
Perhaps the reason
Winterton got viable seed and I didn't is because his potato onions
crossed with the Cepa type onions you grow from seed? It would
take multiple years to test my hypothesis out, but I may give it a shot
if this year's potato onion variety fails to exceed the size of a
garlic clove.
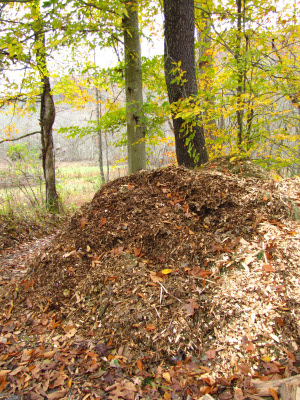 On a homestead, there's a nearly
unlimited need for compost, mulch, and
bedding for animals. But which type of biomass should be used
where? The characteristics below will help determine each
material's best use in your garden.
In the July
volume of Weekend Homesteader, I explained how a material's
carbon to nitrogen ratio (C:N ratio) determines its usefulness as mulch
or compost. The short version is:
Materials (like manure) that are high in nitrogen compost quickly and feed your plants within the first year. A C:N ratio of 30:1 is found in high quality compost. It's possible to have too much nitrogen in some biomass to apply it directly to your garden without composting, so materials like chicken manure (C:N of 8:1) are better used to heat up a compost pile.
Materials (like wood chips) that are high in carbon compost slowly and work better as mulch. A C:N ratio of 60:1 is too low in nitrogen to apply directly to your garden even as a mulch until allowed to compost for a year or more.
Another factor to consider when deciding what to do with scavenged
biomass is the presence of seeds. Seed-free biomass --- like
coffee grounds --- can be applied straight to the garden, but if you
use seedy grass clippings as mulch, you'll be sorry. I made the
latter mistake a few years ago and ended up with a massive weeding job
when the mulch sprouted a lawn around the roots of my sweet corn.
 But don't turn up your nose at uncomposted manure or other potentially
seedy biomass --- there are several ways to make good use of the
materials without creating a weeding problem. If you've got the
time, you can simply compost them. A well-build compost pile will
get so hot inside that it will kill any weed seeds, allowing you to use
the result on your garden with impunity. Another alternative is
to lay the seedy materials on the ground as the base of a kill mulch,
in which case the seeds will never sprout. (See the May
volume of
Weekend Homesteader for more information on kill mulching.)
Finally, if you have chickens, your flock will love picking through
weedy biomass on the floor of their coop, mixing in their high nitrogen
droppings to create stellar compost.
The final problem you might run into when using free biomass is
poisons. Try to collect your grass clippings from uglier lawns
rather than from beautiful green swards treated with herbicides.
You might also want to steer clear of tree leaves grown downwind of
industrial facilities. Colored inks, especially those found on
paper heavier than newsprint, may occasionally contain heavy
metals. As long as you compost questionable biomass well, fungi
will deal with most of these chemical problems for you --- heavy metals
are the only issue that seems to be too much for fungi to handle.
Learn
about other fun, cheap, and easy fall projects in Weekend
Homesteader: October.
| This post is part of our Scavening Biomass lunchtime series.
Read all of the entries: |
The right handle of this
special hitch receiver mount needed a bit of grinding for the Super
Winch to snug up with it.
More grinding was needed for
the part that slides into the receiver.
The next step will be to run
a heavy gauge wire from the battery to a connector near the bumper.
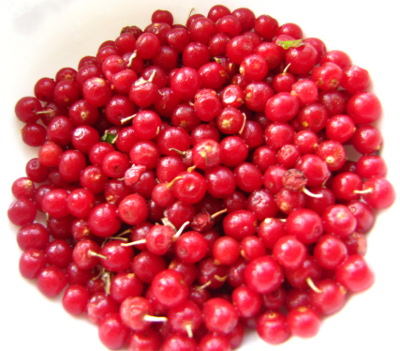 Our movie star neighbor has
been singing the praises of Autumn Olive
fruits for the least few weeks. He discovered that they are very
high in lycopene, so he set out to harvest gallons of the little red
berries, then turned some into fruit leather and froze the rest.
I have to admit that as
soon as someone says "Autumn Olive," I snarl "Invasive!!" and stop
listening to any words of praise. However, when Mark came home
from a visit to our neighbor's farm with a container of berries, I had
to sample.
My first taste of the
berries made me almost wish I believed in planting invasives in my yard
--- delectable! Autumn Olive fruits are both tart and sweet
(comparable to a Winesap apple), with a very unique flavor that reminds
me of the sweet, ornamental crabapples we used to scavenge on our walks
home from the library as a kid. Autumn Olive berries do have
seeds, but the seeds are about the consistency of a cashew, so it's
easy to just chomp the whole thing up.
However, as the first
delight faded, I noticed a bit of an odd aftertaste that made me less
and less inclined to nibble on later handfuls. There was also a
bit of the mouth-puckery feeling you get from accidentally imbibing a
chunk of pecan shell with your nuts, a sure sign of tannins. In
contrast to my usual behavior with fresh fruits, I ended up not feeling
inclined to finish the whole bowl.
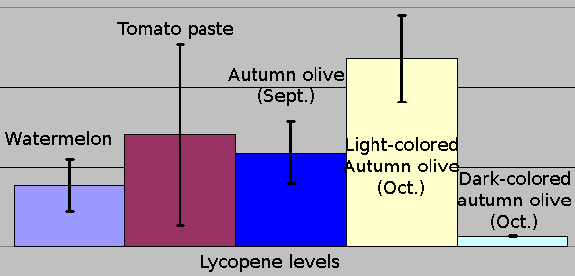
Meanwhile, I wanted to
check out Frankie's assertion that Autumn Olive fruits have twice as
much lycopene as tomatoes. I stumbled across this
study which compared
the lycopene content of watermelon, tomato paste, and Autumn Olive
fruits collected at different times. As you can see from the
large spread of values for each category (the black bars) in the chart
above, lycopene concentration is highly variable in all three types of
fruits. It looks like picking light-colored Autumn Olive berries
late in the fall will give you the most lycopene, and that in some
cases lycopene content can be twice as high as (or even higher than)
tomato paste's lycopene content.
If you're looking for
lycopene, please do harvest as many Autumn Olive berries as possible
--- birds spead the seeds far and wide when they eat the fruits, so the
more you eat, the fewer invasives will pop up next year. However,
be very leery of extracting the seeds and putting them in your compost
pile or of feeding the fruits to chickens (who will poop out the seeds
and start an invasive problem in your pasture.) I can't emphasize
strongly enough how I've seen Autumn Olives take over disturbed ground
in my area, outcompeting native plants. Don't plant your way into
becoming part of the problem; eat your way toward a solution!
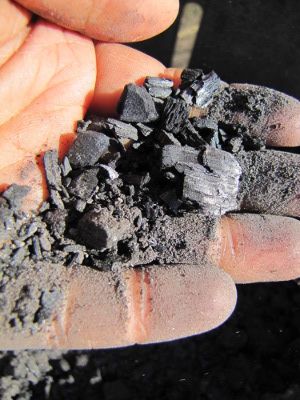 Before
heading out into the neighborhood, it's best to make sure you're
fully utilizing all of the sources of biomass that your own household
churns
out as waste. If you decide you like any of these products, you
can collect them on a larger scale in the typical city, or even talk
your rural neighbors into setting aside their waste for you.
Kitchen scraps tend to be high
in nitrogen and (generally) seed-free, making them good for adding to
worm bins or for heating up compost piles. (Of course, if you
have chickens, you should give them first dibs.) The downside of
kitchen scraps is that they tend to smell and can attract vermin, so be
sure to cover them with high carbon materials.
Grass clippings can be
collected from your lawn using a bagging mower. You'll only want
to remove between a third and a half of the clippings from your lawn to
keep the grasses happy (letting the rest of the clippings melt back
into the ground) unless you fertilize the soil using a chicken tractor
or
other sustainable method. The highest quality clippings grow in
the spring, when grass leaves are full of nitrogen and make a great
mulch if applied immediately to garden beds. Spring clippings
will also heat up compost piles quickly as long as you mix them in well
so that they don't turn slimy. Later in the year, grass clippings
are higher in carbon and tend to be full of seeds, so you'll need to
compost summer and fall clippings or put them on the floor of your
chicken coop.
 Paper is very high in carbon,
so it is best mixed into a compost pile with high nitrogen
materials. A quality
shredder will make paper much easier to
compost or to use as bedding in the worm bin. In both cases,
newsprint works best and you should steer clear of colored inks.
Heavier papers are best utilized to start fires in your wood stove.
Wood ashes
from your stove are high in potassium and calcium. They will
raise the pH of your soil or compost pile, so use ashes only if you
know that your soil is too acidic. Any charcoal
left behind from your fires is even more helpful --- follow the
link for more information.
Hair and feathers
are very high in nitrogen, but both resist absorbing moisture, so they
break down slowly. If you cut
your own hair, it's worth saving the results and mixing them with
wetter, high carbon materials (like soaked hay) in a compost
pile.
Ditto if you kill and pluck your own chickens.
Learn about other fun, cheap,
and easy fall projects in Weekend
Homesteader: October.
| This post is part of our Scavening Biomass lunchtime series.
Read all of the entries: |
The plan is to modify one end
of a good pair of jumper cables with the above quick connector, and
hook the other quick connector to the Super Winch.
A 20 foot set of jumper
cables is about 4 feet shy of making it to the battery. What I need to
research is the possibility of only having one strand reach all the way
to the positive portion of the battery and have a frame contact near
the bumper to connect a shorter negative strand clip to. This would
allow me to splice enough onto the positive side to reach the battery
and have plenty left over to make a short strand for the negative frame
connection.
I know a splice looks a
little sloppy, but is it still just as functional as a continuous
strand?
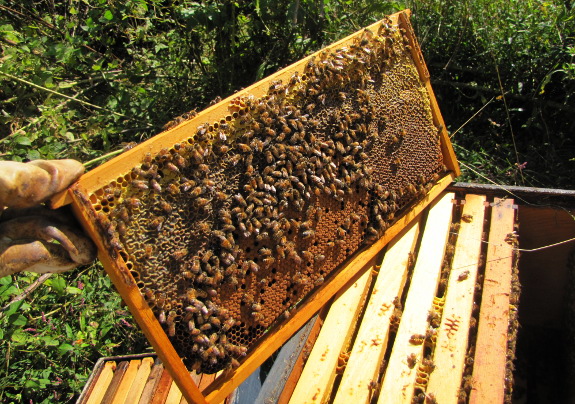
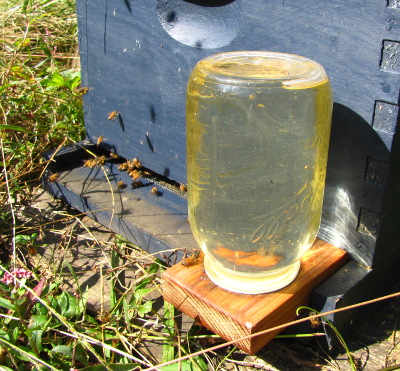 I started feeding sugar water
to our daughter
hive a week ago
because I figured they just weren't going to sock away enough honey
before weather cools to the point that the bees won't be able to
dehydrate nectar. My philosophy on feeding bees is well summed up
by the quote below, and by the website I snagged
it from, but
sometimes you've just gotta do what you've just gotta do.
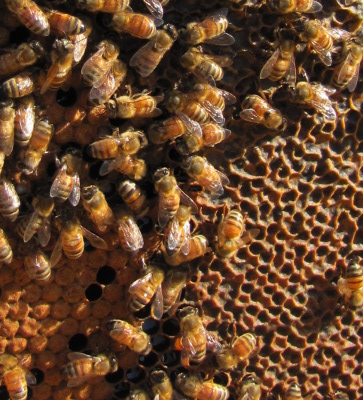 Since my goal is to get as
much honey into the hive as fast as possible, I've been feeding a
roughly 2:1 sugar to water solution made by dissolving 3.5 cups of
sugar in just shy of 2 cups of water. I heat the mixture gently
on the stove until the sugar dissolves (being careful not to let the
sugar caramelize, which can harm the bees), then pour the syrup into a
quart jar with a special top. Finally, I up-end the jar into a
front feeder.
The feeder is a simple
but elegant design that allows me to see how much syrup the bees have
taken (they tend to use up a quart in 24 hours) and to feed our hive
without putting on a bee suit. Meanwhile, the feeder doesn't
stimulate robbing since it opens directly into the hive and isn't
accessible to neighboring bees.
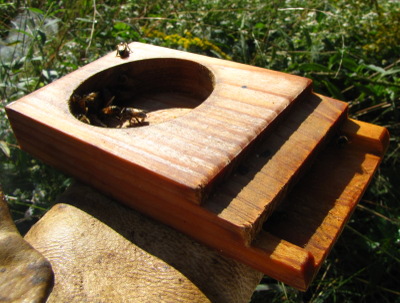
Two weeks ago, the
daughter hive had 12.25 pounds of capped honey, and after feeding them
around 11 pounds of sugar (plus water), they've gained 15.5
pounds. Since the unfed mother hive gained 8.5 pounds of honey in
that time, I suspect the sugar water turned into about 7 pounds of
honey. (You do tend to get a bit less weight of capped honey than
you put in as sugar.)
With 38.5 pounds and 28
pounds, respectively, of capped honey in the mother and daughter hives,
we've still got a ways to go if we want to meet the bare minimum 50 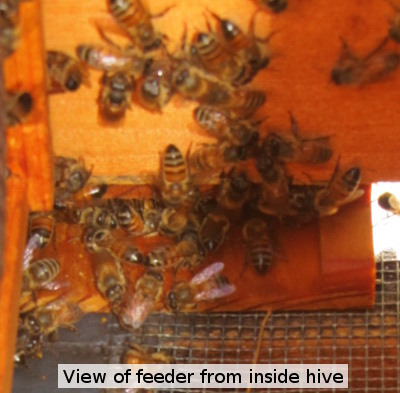 pounds required for winter
survival in our area. We're currently having a nice fall nectar
flow and there is quite a bit of nectar dehyrating in both hives, but
it still might require another week or two of constant feeding to get
the daughter hive up to weight. I'll do another honey count next
week and might even start feeding the mother hive if she's still low
--- I'm bound and determined to send two healthy hives into the winter.
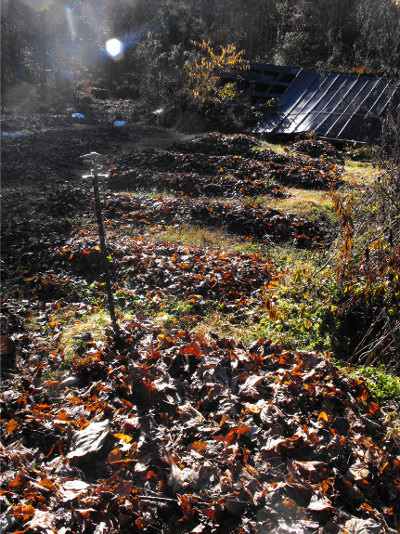 The
typical city or town
is so full of biomass going to waste that you could spend all day
harvesting. In addition to the materials listed in the last
section, you'll find:
Coffee
grounds are
produced in
large quantities at coffee shops. Grounds are seed-free and high
in nitrogen (C:N of 12:1) so they can be used straight in the garden or
in the worm bin.
Cardboard looks like it should
be lower in quality than paper, but the corrugated version is bound
together with biodegradable glues that soil microorganisms love.
I can never get enough corrugated cardboard for making kill mulches,
but if I had excess I would tear it up and use it as worm bin bedding
or in the compost pile. Corrugated cardboard can also be used to
propagate
edible mushrooms.
Most stores have cardboard boxes to give away, but furniture stores
will have the largest boxes that are best for kill mulches.
 Tree leaves are one of my
favorite curb-side attractions in the fall. Their C:N ratio of
around 50:1 (and lack of seeds) makes deciduous tree leaves a good
source of mulch, especially if you can find a way to shred the leaves
so that they don't blow away. Since trees suck up micronutrients
from deep in the earth, their leaves are rich in elements like calcium
that your soil may be lacking. To compost leaves, shred them if
possible and then mix with a higher nitrogen material like manure.
Spent hops and mash are a waste product of microbreweries.
These wet, high nitrogen materials are best added to a compost pile
with dry, high carbon materials.
Fish
waste
can be found at seafood processors and canneries. Fish waste
stinks to high heaven, so you'll want to mix it into the ground or bury
it deep in a compost pile immediately, but the fish are high in
nitrogen and trace minerals.
Learn
about other fun, cheap, and easy fall projects in Weekend
Homesteader: October.
| This post is part of our Scavening Biomass lunchtime series.
Read all of the entries: |
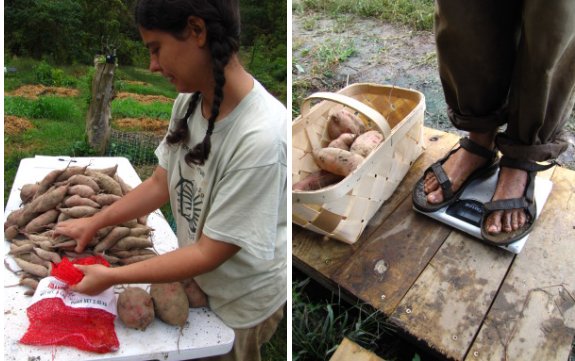
Despite repeated deer attacks
our sweet potato crop this year is 63% bulkier than last years haul.
78.5 total pounds which
equals 9.8 pounds per bed.
I suspect all that horse
manure and straw
mulch gets most of the credit for the impressive increase in yield,
but I also think Anna's green thumb had a major role to play in this
year's production.
 Writing about seed saving in the
September
volume of Weekend Homesteader tempted me to save a lot
more seeds than I usually do. I ended up with too many for next
year's garden, so I thought I'd share some of my favorite varieties
with one lucky reader. All of the seeds included are easy to
save, so if you enjoy them, you can keep the variety going in your
garden indefinitely. Here are the vegetables I'll include in my
starter pack:
- Masai
Beans --- Prolific, stringless, delicious, French-style bush beans.
We won't plant any other kind of green bean.
- Martino's Roma Tomato --- Although we plant a few other types of
tomatoes for fresh eating, this is our big producer. It's a
semi-determinate plant, so you get masses of tomatoes all at once,
which is perfect for preserving. The fruit dry well and cook into
sauces perfectly. Martino's Roma is somewhat resistant to various
blights.
- Tangerine Pimiento Sweet Pepper --- This pepper is perfect for the lazy gardener who doesn't want to start peppers inside before the frost. Direct-seeded, my plants still put out plenty of ripe peppers before the frost since the fruits are small and bulk up fast.
- Mexican
Sour Gherkin --- If you live in a warm, humid climate, it's tough
to grow cucumbers organically, but Mexican Sour Gherkins resist all of
the usual diseases. They're slower to fruit than cucumbers and
the fruits are tiny, so it's a bit like picking berries to harvest
them, but Mark thinks they have a superior taste to cucumbers.
Mexican Sour Gherkins would be an especially good choice for the
stealth urban homesteader since the vines are beautiful and don't look
much like vegetables.
- Sugar Baby Watermelon --- The small size of these watermelons
means that Mark and I can often eat a fruit in one sitting.
Having lots of small watermelons in your garden rather than one or two
big ones means you lose less if you pick them at the wrong time (which
is the toughest part of growing watermelons.) And unlike other
melons (which succumb to molds and mildews), my Sugar Baby Watermelons
shrug off our humid summers.
To be entered in the
giveway, just promote one of my ebooks in any way you choose. I'm
most in need of a review for the October
volume of Weekend Homesteader, but you can post a link on
Facebook or your blog, email your friends, tell your Mom, or do
whatever suits your fancy. No need to buy the ebooks to enter ---
just email me and I'll gladly send you a
free pdf copy of whichever ebook(s) you choose.
Leave a comment on this
post by midnight on Sunday, October 2, to let me know you've entered,
and I'll pick one of you at random on Monday morning to win the seed
package. Thanks in advance for helping spread the word about my
newest ebook!
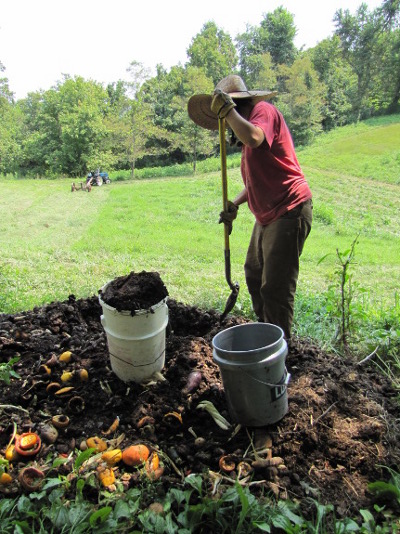 If your neighbors are farmers,
you may be in luck. Animal manure
(especially manure from dairy cows and well-loved horses) is some of
the highest quality biomass you can add to your garden. Here's a
run-down on the pros and cons of some of the main types of manures:
Cow manure is similar to horse manure but is wetter, so it might gross you out if not mixed with plenty of bedding. The highest quality cow manure comes from dairy cows.
Rabbit manure has a C:N around 12:1 and is dry, so you can get away with using fresh droppings straight on your garden. Rabbit manure tends to be seed-free and doesn't smell. You'll get more nitrogen if you include the urine-soaked bedding.
Chicken manure has a C:N of 8:1 and is high in phosphorus (which is often in short supply in the typical compost mix.) Too rich to be applied directly to your plants, chicken manure doesn't add much long term organic matter to the soil, so using the manure is a bit like pouring on chemical fertilizers. A monotonous diet of only chicken manure compost will tend to build up salts in your soil and result in an oversupply of phosphorus. Finally, chicken manure stinks if it's not enclosed in bedding. On the positive side, the high nitrogen content of chicken manure makes it a great addition to a slow-to-heat compost pile made of materials like autumn leaves or wood chips and chicken manure is usually seed-free. I consider chicken manure a good source of nitrogen and phosphorus in a well-rounded compost pile.
Don't let the mess-factor turn
you away from using free sources of manure. You can bring home
small quantities easily using a shovel and five gallon buckets.
Of course, you can haul much more in a pickup truck, loaded by hand
with a pitchfork or by a helpful neighbor with a scoop.
Spoiled hay is another type of
biomass that can sometimes be found for free in rural areas. Hay
is cut and dried pasture grasses, often full of seeds, which is meant
to be fed to livestock like cows and horses. (Even though hay
looks like straw, the two are very different materials and have
different uses on the farm.) If hay gets damp, it can mildew and
is no longer safe to feed to your animals, so farmers will often give
away the spoiled hay. From a gardening point of view, the quality
of hay varies widely depending on whether you've found spring hay (high
in nitrogen, low in seeds) or summer hay (high in carbon and seeds.)

Sawdust might be free for the
picking at carpentry shops or saw mills. Meanwhile, if you flag
down one of the crews that trim trees off the powerline or along the
sides of roads, they may dump a whole truckload of wood chips
in your yard. Both types of wood products have an extremely high
C:N, so you'll need to mix them with lots of high nitrogen materials
and compost for quite a while before using the result on your
garden. I let piles of plain wood chips rot for a couple of years
and then use the mulch around my fruit trees --- beneficial fungi love
well-rotted wood chips and the soil around my trees' roots gets
fluffier every year.
Rotten fruits and pomace can
sometimes be scavenged from orchards and cider mills. Pomace is
the
pulp, skins, and seeds left behind after you make apple cider.
Both of
these materials are wet and attract painfully-stinging yellowjackets,
so they're best mixed deep into a compost pile amid absorbent materials
like dry hay or sawdust. The fruit waste is high in nitrogen and
the
seeds will add phosphorus to your compost pile. Alternatively,
you
could feed both rotten fruits and pomace to your chickens, goats, or
other livestock.
Seaweed can often be picked
right off the beach if you live by the ocean. Seaweed is high in
nitrogen (19:1) and can be used as a quickly rotting mulch or can be
added to a compost pile. The major bonus of seaweed is the trace
minerals and potassium provided.
Learn
about other fun, cheap, and easy fall projects in Weekend
Homesteader: October.
| This post is part of our Scavening Biomass lunchtime series.
Read all of the entries: |
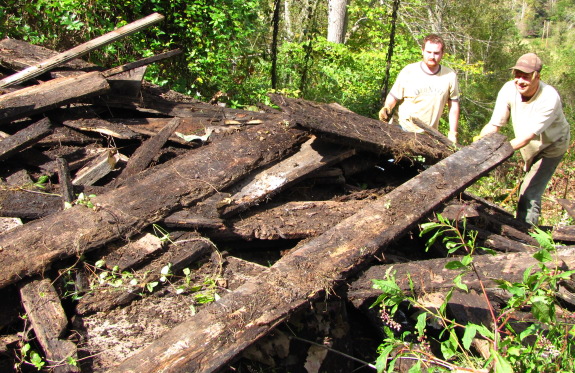
Money was tight when we first
moved to our homestead. Major projects had to get done in a low budget,
Do It Yourself fashion.
Lately we've been able to
save a little thanks to our chicken
waterer business and decided to hire some help for a few of the
bigger upcoming projects.
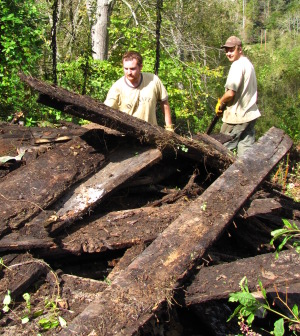
Turns out it's not so easy to
pay someone else to do your homesteading chores.
We've struggled in the past
to find someone that is both capable and interested enough to actually
show up. That's why we were so happy when our friend from Dungannon
arrived on time and ready to work this morning.
The old house
is well on its way to being converted to future garden space thanks to
Grant's hard work. We agreed on an hourly rate of 10 dollars but both
Anna and I were impressed enough with his hustle to throw in a bonus by
paying him 40 dollars for 2.5 hours of good labor, and added a bag of
fresh green peppers. I figure this will increase the chances of him
coming back and it really was worth it to us due to the difficulty of
this particular demolition project.
Want more in-depth information? Browse through our books.
Or explore more posts by date or by subject.
About us: Anna Hess and Mark Hamilton spent over a decade living self-sufficiently in the mountains of Virginia before moving north to start over from scratch in the foothills of Ohio. They've experimented with permaculture, no-till gardening, trailersteading, home-based microbusinesses and much more, writing about their adventures in both blogs and books.
