
archives for 07/2011
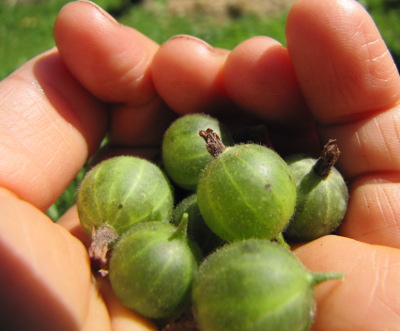 Although some varieties of gooseberries change color, others look
just the same when they're ripe as they did a month previously when
they were hard and sour. So, how do you know when to pick them?
Your best bet is to
nibble on a berry every week or two between June and August, waiting
until the fruits start to taste sweet. A ripe berry will also
give a little when you squeeze it, but will not burst open (unless
you've waited too long and it's overripe.)
Once you figure out when
your variety ripens up, you can mark that date on your calendar and
know henceforth to look for your Invicta gooseberries on June 30 (in
our specific example.) Enjoy!
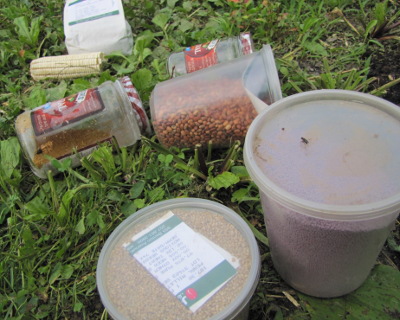 So now that I've told you the
hows and whys, I can finally share my own seed
ball
experiments. My goal was to plant the summer and fall crops in
the do-nothing
grain area at the
same time that I refreshed the clover population. For our winter
grain, I opted to switch over to rye, and my new summer grains include
field corn, oilseed
sunflowers, amaranth, and pearl millet.
I wanted to keep each
type of summer grain separate, so I made four different mixtures ---
sunflower/rye/clover, amaranth/rye/clover, millet/rye/clover, and
field-corn/cowpeas/rye/clover. You'll notice that the corn
mixture is a little different since I added cowpeas to give this heavy
feeder an extra dose of nitrogen.
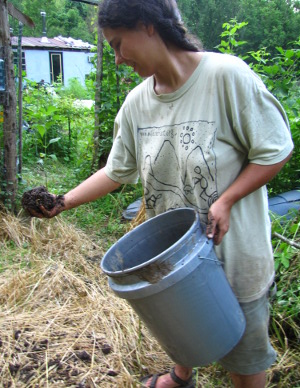 I also wanted to know whether
seed balls are really any better than the lower work method of just
mixing up the ingredients and scattering the dirt/seed mixture amid the
wheat stubble. So, all told, I had eight experimental treatments
--- corn/rye/clover balls, corn/rye/clover mixed into loose earth, etc.
Real conclusions will
have to wait a few weeks, but I already have a few observations.
First, I haven't seen any wild birds chowing down on my seeds, which is
a bit surprising since lots of seeds are visible on the outside of the
seed balls and in the loose earth mixtures. Even more exciting,
the seeds are already sprouting! Field corn may be a bit of a
problem in a seed ball since the kernels are so large that they tend to
fall out of the earth mixture and
sit on the wheat stubble, but clover and pearl millet leaves are poking
up through the dirt. I have high hopes that the other seeds will
soon follow suit.
| This post is part of our Seed Ball lunchtime series.
Read all of the entries: |
We've still got more Egyptian
Onion bulbs.
The new way to win is easy.
Just help spread the word about one of our
new E-books.
Make a blog post, mention it
on a forum, create a review(Thanks Jayne), or think of a fresh and new
way to promote it. Just drop Anna an email with the details and you
will soon know the awesome power of these perennials.
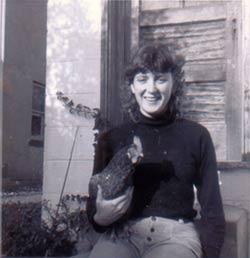 If
you're looking for a homesteading beach
read, look no further than Possum
Living by
"Dolly Freed." The chatty, informative, and
learned book was written by an 18 year old who dropped out of seventh
grade to live the "possum" life with her alcoholic father (before
getting her GED, putting herself through college, and going to work for
NASA.) The duo practiced urban
homesteading long
before it was cool, raising chickens and meat
rabbits in their basement, trapping pigeons, and rescuing wilted
produce from behind grocery stores. They lived on $1,400 per year
in 1978, using the library and the garden to keep body and soul
together.
There are plenty of gems of
information in Possum
Living that you
won't find
in more smooth, modern homesteading books. For example, the
author recommends that you eat seed potatoes and wheat from the feed
store to save cash on staple foods, walks you through moonshining on
the cheap, and reminds you that gleaning the food left behind in fields
after the monster tractors do their harvesting is a tradition that
dates back to biblical times. (Well, without the monster
tractors.)
The facts are fun, but
the reason I call Possum
Living a beach
read is
because it's really the heart-warming tale of a girl and her father
living the good life. Yes, there are plenty of passages that made
me roll my eyes and
imagine the book I might have written at 18 before adulthood had given
me a critical lens through which to view the words of my smart,
opinionated father. But how often do you read a book by a
teenager who is so thoroughly enamored of her daddy? To best
appreciate the bittersweet elements, flip to the back of the new
edition to see what the author has to say 30 years later. And
don't miss the embedded video, part one of three.
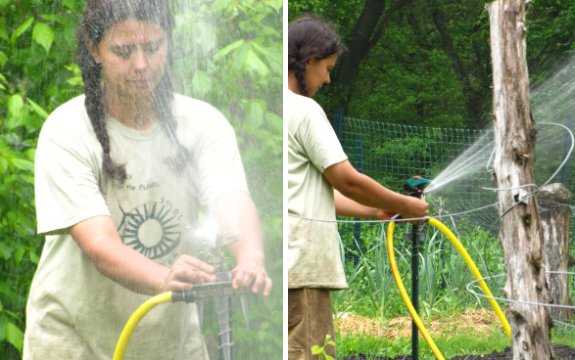
If I had to sum up our summer
season with one sound it would be the mechanical clatter and spray that
pulsate from these sprinklers on a hot day like today.
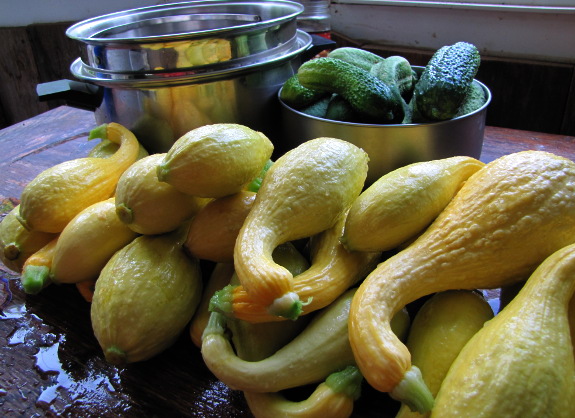
 The joke goes that July is
the only month when you have to lock your car in
[insert the name of your rural county here] or you'll return to find
it full of zucchini. Previously, I've rolled my eyes and held out
my hand when told that tale of garden bounty, but for the first time in
2012, succession planting and variety selection have allowed us to
defeat the squash
vine borer and we're
drowning under an ever expanding pile of summer squash.
We've done our best to
eat the bounty (and have at least one great new recipe to share), have dried
masses of the squash for the winter, but the inevitable finally
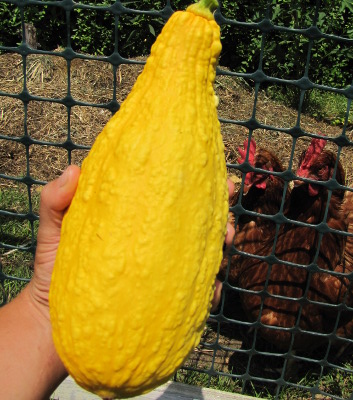
happened --- monster squash! In my gourmet
opinion, a monster squash is any summer squash where the seeds have
become more than a thin line within the flesh. There are so many
tender, young squash competing for my attention that I figure a monster
squash isn't worth my culinary time.
Of course, the
permaculture side of me isn't willing to let even a monster squash go
to waste, and once I started thinking up purposes for our one monster
squash, I wished I had a few dozen more. Here are my top ideas:
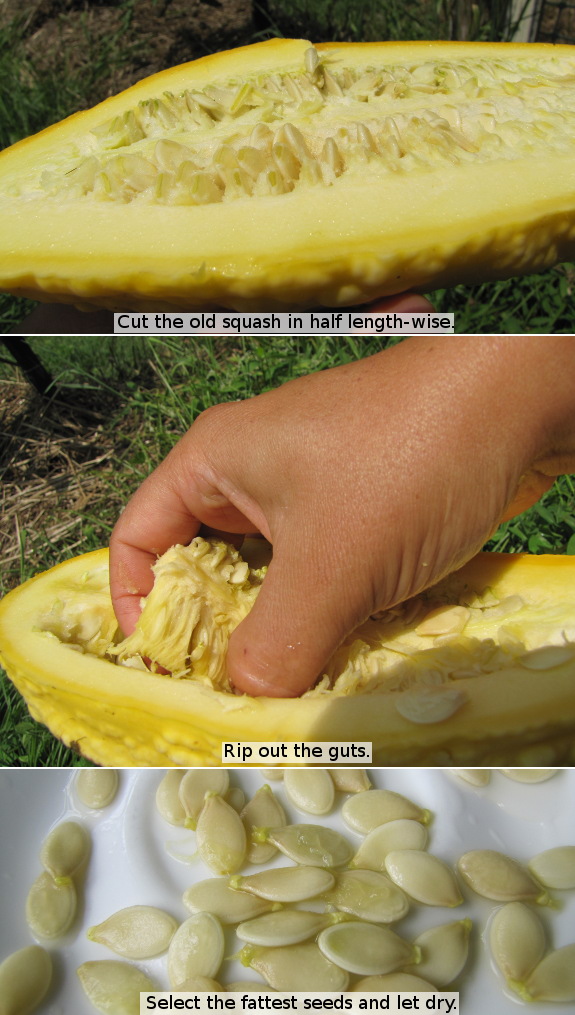
- Save the seeds.
Summer squash are on the easy
seed-saving list. Just let your monster squash keep growing
for an extra week or two until the seeds inside are well developed, cut
the squash open and carefully pull the seeds out, choose the fattest
seeds that didn't get injured, then let them dry before putting the
seeds away for next year. The only trouble you'll get into is if
you're growing a hybrid or if more than one variety of Cucurbita pepo is blooming in
your garden at the same time.
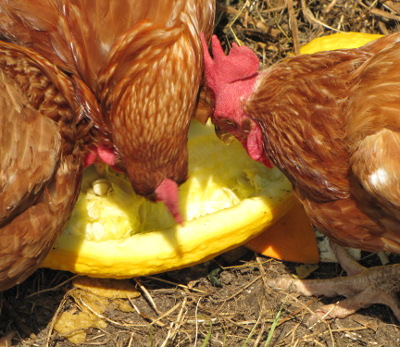 Feed the chickens, pig, goats,
etc. Monster vegetables are good to pass off on your
barnyard animals, especially if the flock doesn't have access to much
vegetation. If you're feeding monster cucurbits to chickens, be
sure to cut the vegetable in half or into smaller sections and drop it
cut-side-up in the pasture.
- Feed the worms. If you only have a small, under-the-sink worm bin, you'll have to be careful not to overload it. But outside bins can handle lots and lots of monster squash. For fastest results, cut the squash into chunks or throw it in the blender before feeding.
- Compost it. The
last resort with any kind of organic matter, of course, is to toss it
in the compost pile. You might end up with some volunteer squash
next year if your pile doesn't get hot enough, but won't have any other
problems.
I saved the seeds from
my monster crookneck squash and then gave the remains to the old girls,
who asked for more. What do you do with monster squash?
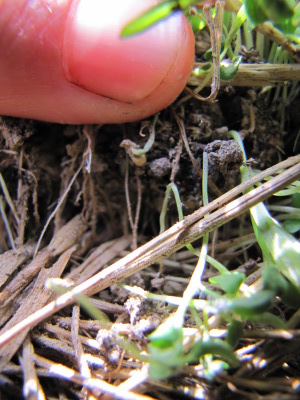
A week and a half after
"planting", many of my seed
balls have
germinated. In fact, the seedlings have already punched their
roots down out of the seed ball and into the ground below --- essential
if they're going to make it.
I'm excited to see the
seedlings growing so fast, but there are some clear problems with the
method. I tossed the seed balls out during a rainy spell and many
of the seeds germinated only to wither up when hot, dry weather deleted
the moisture from their exposed earth. I can see how smaller seed
balls would have nestled down into the ground and been less prone to
dessication.
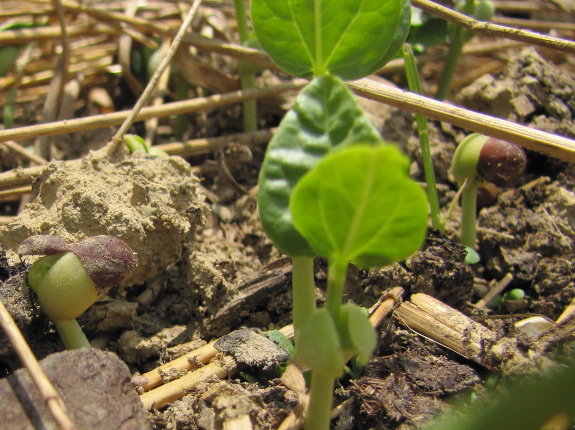
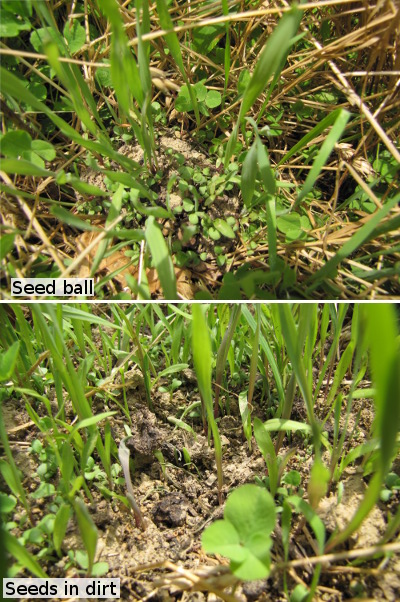 Some of the seeds did much
better than others. The clover
sprouted very well, but the seedlings were also some of the first to
wither when seed
balls dried out, while the grass-like rye and millet seemed to be the
best sprouters and survivors. Cowpeas also did surprisingly well
(since the seeds are large and prone to fall out of the ball), but I
only found two field corn seedlings and one sunflower seedling.
The jury's still out on the slower-germinating amaranth.
Finally, I was
interested to compare seed balls to the same mixture that hadn't been
formed into balls and had merely been scattered on the ground
as-is. It's tough to tell with the seedlings so young, but both
methods seem to be about equally effective, making me lean toward the
lower work, non-ball method for future experiments. I'll keep you
posted as my experimental seedlings grow.
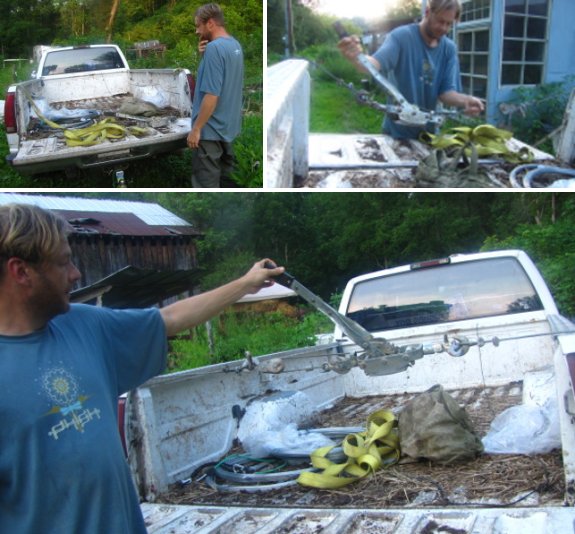
The 4 ton
hand winch did a good job
at squeezing the truck bed frame a few centimeters in an attempt to
make the tailgate latch stay closed.
It helped a little, but not
enough to feel like it won't pop open during a hard bump.
We've got a GMC dealer close
by that might know what's wrong, but I've been afraid to ask them due
to the fear of sticker shock.
 Egg production went way down
about a month ago, but I wrote it off as our ancient hens hitting
"menopause." I should have searched harder for the answer --- 24
eggs hiding in the deep grass of the pasture!
Usually, our chickens
are very good about laying in the nest box since we keep it comfy with
clean straw or leaves and seed the
pot with golf balls. But a lot of factors have made the spot
less conducive to laying lately. First, the broody
hen took over the box, then the tweens got bigger and bigger until
the huge coop Mark built me started to feel cramped. I guess that
with two strikes against the coop, the straw-like, dense grass matted
down in parts of the pasture looked more like a nest.
Egg production rebounded
about a week ago, so I'm hoping the naughty hens have decided to
behave. These old eggs would probably be fine, but since we're
not desperate, we'll use them to give Lucy a treat for the next few
weeks.
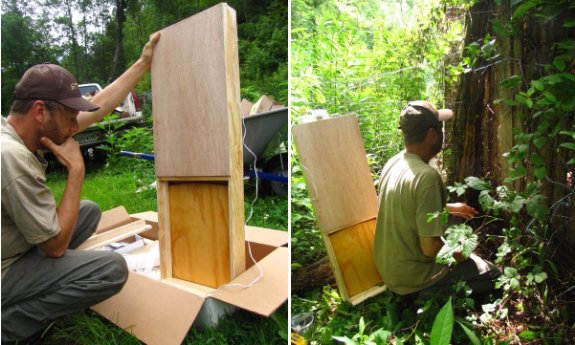
I've researched several
automatic chicken coop door openers and one thing they have in common
is the part where you need to build your own door.
Maybe you don't have the
time, tools, or skill to build a door, but still need to protect your
chickens?
Jeremy at automatic chicken coop
door.com has a product that is ready to go right out of the box and
was kind enough to send us one to review here.
This thing is made from high
quality wood and the slider piece is coated with linseed oil for
protection. It uses a proven drapery motor to lift and lower the door,
which is nicely enclosed towards the top. The cost is just over 200
hundred dollars and I would call it a good deal when you consider how
much time you save compared to hunting down the supplies and building it
yourself. It's also nice not to go through a trial and error process
working out kinks and risking more predator attacks.
Stay tuned for my field notes
on its operation and how easy it was to install.
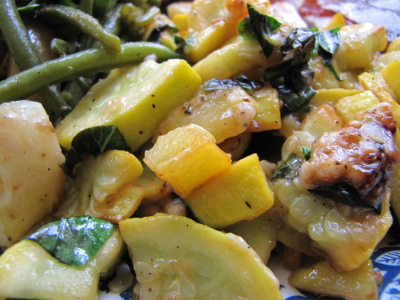 'Tis the season to eat summer
squash at least once a day. Unfortunately, since the tomatoes
haven't come in yet, we've gotten bored with sauteed or steamed squash
and can't branch out into my usual favorites --- squash in lasagna and
in harvest
catch-all soup.
At the same time, our basil bed needs to be nibbled on, but since we're
no longer using pesto pasta as a standby meal, I have little incentive
to pick the delicious herb. Luckily, I discovered a recipe in Possum Living that solved both my problems.
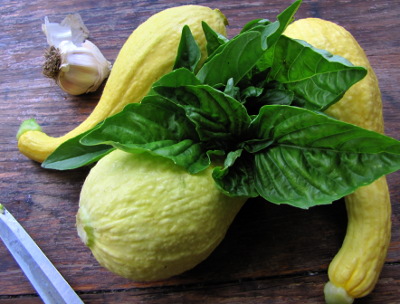 I tweaked Dolly Freed's
recipe a bit and actually ended up with two different recipes, quite
different but both delicious. Since we can't decide which one we
like best, I'll share both. First, cut up three or four medium
crookneck squash (or summer squash variety of your choice) into
moderately thin slices. Saute the squash in two tablespoons of
butter until all of the squash is soft and some is a bit brown, adding
salt and pepper as you cook.
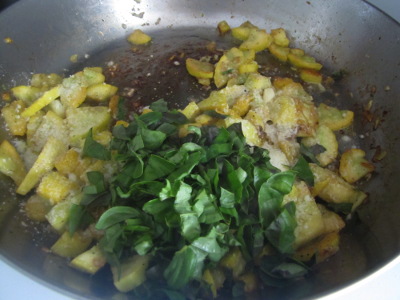 For
recipe 1, add three cloves of minced garlic, stir briefly, then turn
off the heat. Top the squash off with parmesan cheese and fresh
basil. This recipe tastes a bit like pesto pasta --- the garlic
is very evident.
For recipe 2, turn off
the heat as soon as the squash is done and mix in a bit of powdered
milk and plenty of fresh basil. Stirring should make the powdered
milk rehydrate slightly in the butter coating, but the milk will still
be chunky. This recipe tastes nothing like mac and cheese in a
box but seems to give me that same comfort food feeling, probably
because of the sweetness of the powdered milk combined with the butter.
Pasta with various
sauces used to be one of our quick and easy meals, but since we've been
lowering the grain content of our diets, I've discovered that what I'm
yearning for when I crave pasta is really the intense flavors of the
toppings. Summer squash seems to be a good venue for pasta
toppings, has a higher percentage of protein than pasta does, and a cup
of squash provides 18% of your daily allotment of vitamin C. Of
course, like most vegetables, squash also has a lot fewer calories than
pasta, so you wouldn't want to consider either of these recipes to be a
main course or you'll end up hungry.
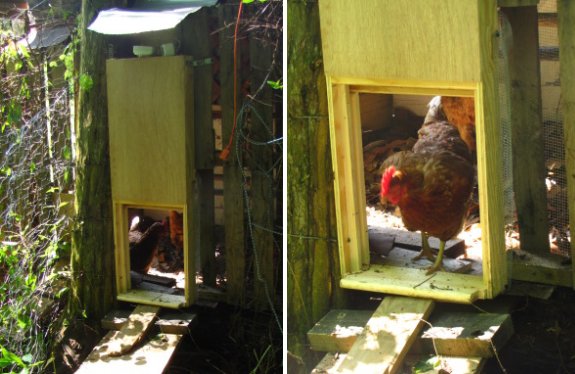
Installation of the automatic
chicken coop door can be done with just a few wood screws. Jeremy
includes some metal brackets that helped fine tune the door to our
latest chicken
coop made from pallets.
The new automatic chicken coop
door came with a timer
which makes it easy to set when the flock can go out. I first thought I
might try to get one of those dusk to dawn sensor switches, but the coop
gets shaded by a hillside that delays the full morning sun by a few
hours depending on the time of year.
I would suspect the moment
when the chickens can first start to see in the dawn light would be a
good time to hunt insects that are trying to get home after a full
night of crawling around. This might be a good reason to open the door
a little on the early side. That way they can decide when there's
enough light out to jump off the roost and start foraging. I guess that
means there's a chance that a racoon working the morning shift might
happen upon the door open, but I think it might be worth the risk if it
means the flock gets more protein rich bugs in their diet.
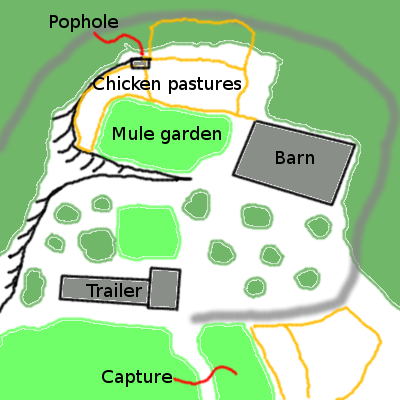 Unless
you have opposable thumbs, it's a long, long way from Mark's new
automatic chicken coop door (labeled pophole) to our trailer. We
can cut through the pastures, but a chicken has a choice of two
exhausting options. They can turn left outside the pophole and
skirt the pasture fence for quite a ways, then bushwhack through briars
and climb up the steep incline to the plateau that houses our
homestead. Or they can turn right outside the pophole and follow
the gentler slope of the driveway, traveling perhaps a tenth of a mile
around the barn and into our farm proper.
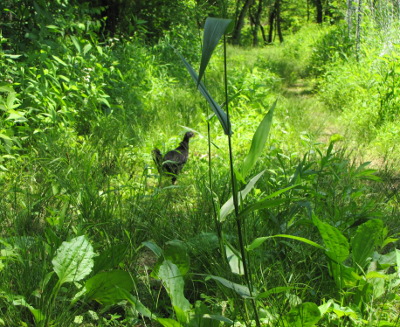 When our
australorps started slipping under the gate and exploring the floodplain a couple of months ago, I
was a bit concerned that they would make one of these treks and find
our delicious garden fruits and enticing mulch. But I soon set my
fears to rest --- even when I walked Lucy through our free ranging
flock, the chickens stopped following me at the end of the pasture
fence and headed back to the woods closer to the coop to look for
easier pickings.
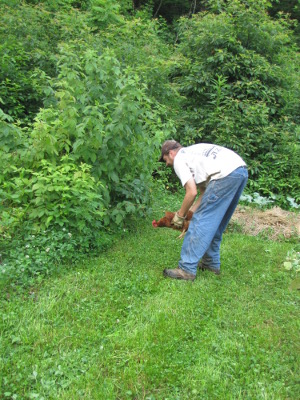 I'd been considering opening
a pophole directly into the floodplain so that the old girls could join
these youngsters on their free range jaunts, but I was a bit concerned
that an unfenced door into a chicken coop at the furthest limits of
Lucy's usual patrols would be too much for predators to resist. Jeremy's
automatic chicken door
seemed like the answer --- I could let the chickens out to eat all that
good food in the floodplain without worrying about predators. So
as soon as Mark had the door in place, I opened it up and called our
chickens to explore.
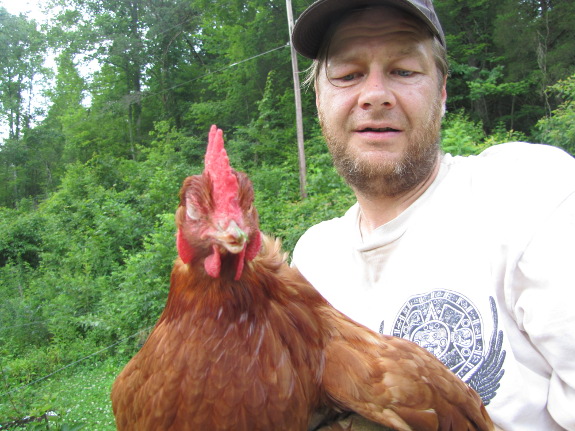
Less than an hour later,
our ornery old hens were eating raspberries in our front yard.
The good news is that the australorps didn't follow, so there's still a
chance that my plan to let the chickens free range in the floodplain
will work once we delete the old girls from the flock. But, for
now, the pophole is shut and everyone is relegated to the
pasture. I wonder if those few raspberries were worth such an
arduous journey?
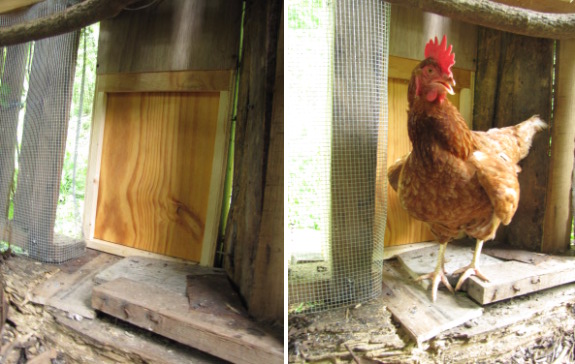
Here's what the new automatic
chicken coop door looks like from the inside.
While I was taking these
pictures all three of the older hens walked over to investigate.
It may have been my
imagination, but it seemed like they wanted me to open the door, which
got me to wondering if they had enough long term memory to recall yesterday's
journey to our juicy raspberries?
The garden is full of
almosts this week....
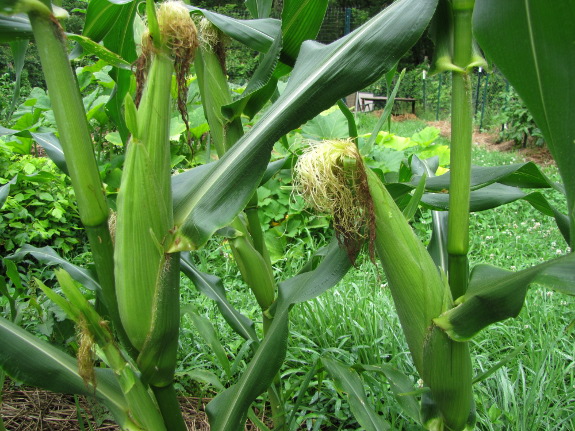
Almost sweet corn.
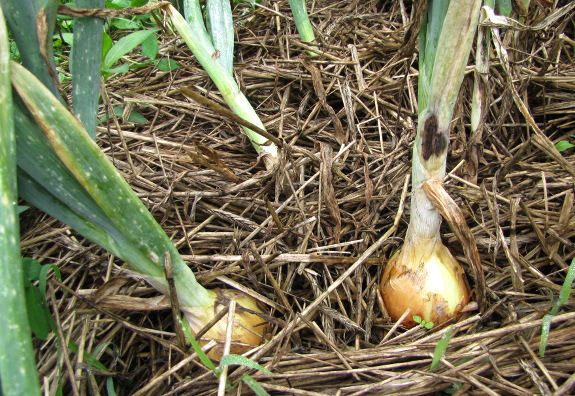
Almost onions.
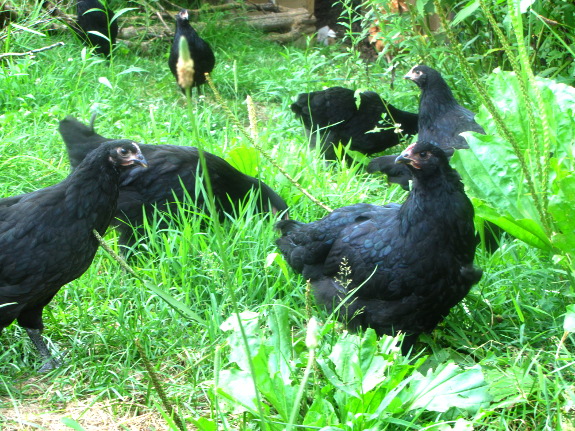
Almost crowing.
(Almost dinner.)
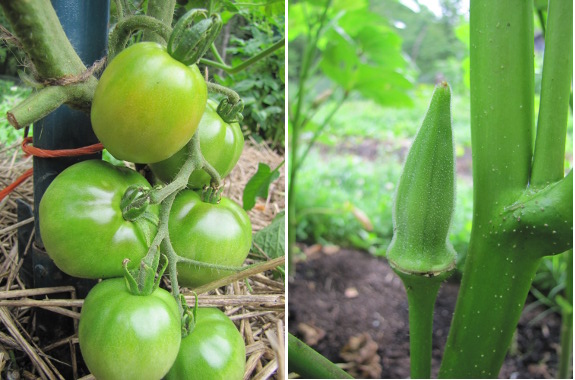
Almost tomatoes.
Almost okra.
Almost mountains.
Almost too many.
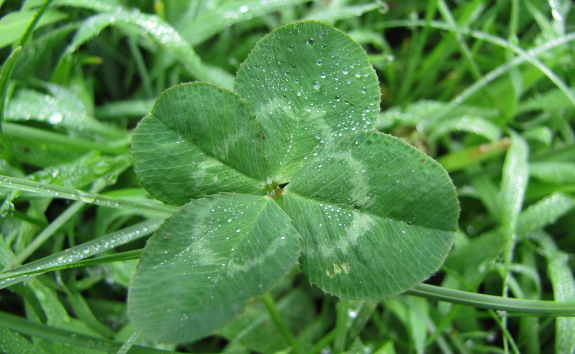
Almost impossible to
spend a day in the garden without realizing how lucky we are.
Last
year I struggled a bit
when it was time to catch a chicken for processing. The coop was 10
feet long and about 5 feet wide, which gave them plenty of room to
scurry away from me.
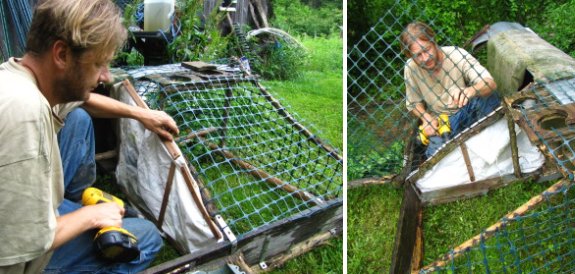
This year we decided to
convert one
of our old chicken tractors into a holding coop in an attempt to
make it easier on me and the chickens.
The white barrier wall is
made from a couple of chicken feed sacks turned inside out. It's a very
sturdy material that's easy to work with at a price that's hard to
beat.
 Mark had gone into town to mail chicken waterers on Friday morning, and I was
happily mulching the garden when what did I see coming around the
corner but....eleven chickens! Those old
hens must have talked up sun-warmed raspberries until our Golden Comet
cockerel decided to lead as many of his siblings as he could around the
bend and up into the garden.
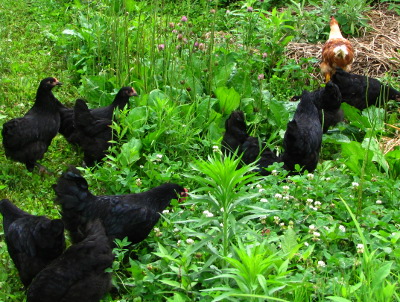
Luckily for me, Black
Australorps are very different foragers than Golden Comets. While
the Golden Comets head straight for color and then scratch up the
mulch, the Australorps 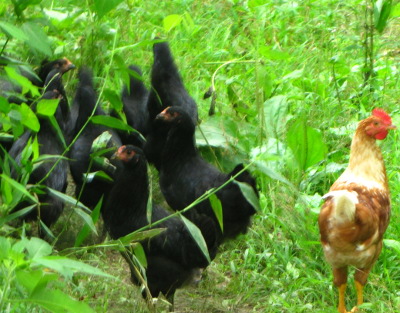 were more interested in
picking bugs off the undersides of leaves in the tall weeds of the
forest garden. That's the good news.
The bad news is that
Black Australorps aren't as easy to capture as Golden Comets
either. Our Golden Comets are some of the easiest chickens you've
ever wrangled
--- if they don't crouch down at your feet and let you pick them up,
they'll
follow
the sound of feed rattling in a cup and come right back to the
coop. On the other hand, Black Australorps are such good foragers
that grain in a cup doesn't sound
nearly as good as that grasshopper you startled, and I couldn't even
wrap my mind around 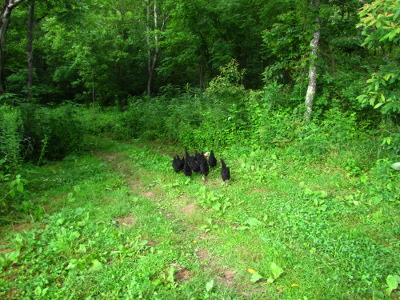 trying to catch eleven chickens
all by my lonesome.
What I could do, though,
was herd those pesky rascals back to their pasture and lock them
in. There's a trick to herding a flock of chickens --- you want
them alert enough to flock together rather than spreading out to
forage, but not so scared that they scatter in every direction.
If you keep your eye on the roosters and head those leaders off when
they try to walk the wrong way, then everyone else will follow. A
big hat in your extended hand turns you into two people --- one pushing
the main flock forward and another reminding that cockerel who's about
to bolt that he doesn't really want to veer off to the
right. Finally, keep your dog behind or beside the flock
--- no way those chickens are going to run straight into the
teeth of a canine.
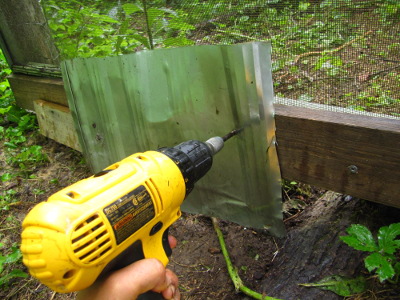 Once Lucy and I thought the
problem through, we made short work of herding the chickens back around
the barn and into the floodplain. Then I blocked up that hole
under the gate that I'd intentionally left open to let our flock free
range. Sorry guys --- I know your pastures are overgrazed, but
you're grounded. There'll be a lot more elbow room next week, I
promise.
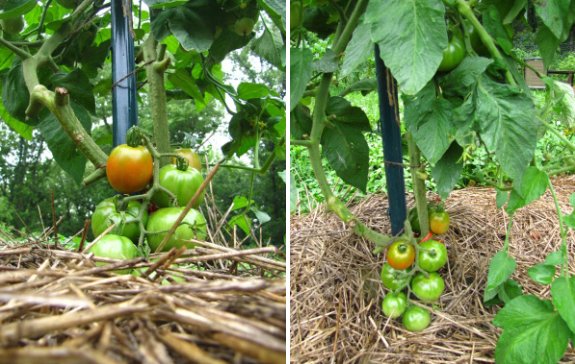
You know you're hungry for
fresh, home grown tomatos when you check the ripening process multiple
times a day.
 If Possum Living is the fun, beach read, Melissa Coleman's This Life is In Your Hands is a hard-hitting expose and
cautionary tale. The author writes about the joys and woes of
being the child of passionate organic farmers and homesteaders (Eliot
Coleman and his
wife) living next door to the Nearings.
Most people will
probably pick up the book the same way they would slow to gawk at a
wreck along the highway, but the death of Melissa's sister (perhaps
from parental neglect)  was not the only tragedy
found between its pages. Instead, a deeper and more universal
affliction seems to have befallen most of the idealists who went back
to the land in the sixties and seventies, and those of us following in
their footsteps would do well to take heed.
Eliot Coleman had
hyperthyroidism combined with a passion for uncovering the secrets of
organic gardening --- the first gave him the energy to work long hours
and the second made the farm seem more important 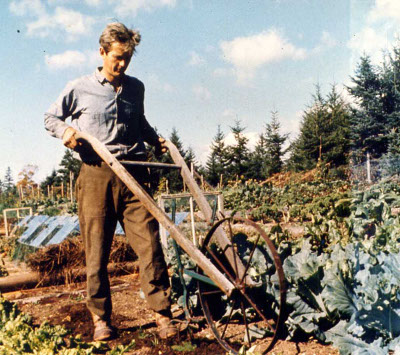 than his family. In
contrast, his wife was prone to depression and would check out of daily
life by fasting or standing on her head --- the only ways she knew to
combat a mental fatigue that her physically present but emotionally
absent husband did nothing to correct. The end result (yes, I'm
going to ruin it for you) was neglected children and, eventually,
divorce.
As Melissa Coleman wrote
near the end of her book:
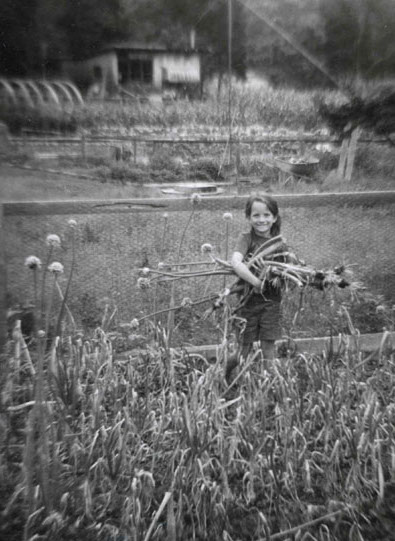 The sad truth is that
homesteads are like a lover or child --- enticing, beguiling, but also
oh so needy of your time and thoughts. If you can't mitigate your
relationship to the land in some way, you're bound to end up breaking
the human ties you also depend on.
The sad truth is that
homesteads are like a lover or child --- enticing, beguiling, but also
oh so needy of your time and thoughts. If you can't mitigate your
relationship to the land in some way, you're bound to end up breaking
the human ties you also depend on.While reading This Life is In Your Hands, I could completely envision what my homesteading journey would have been like without Mark's painstaking efforts to help me mix some realism with my idealism. I would have been hauling five gallon buckets of water from the creek to irrigate the garden by hand like my mother did, eschewing the idea of paying a neighbor for firewood, and generally working my fingers to the bone. In the end, exhaustion resulting from my passion for homesteading and permaculture would probably have driven me off the farm like so many other back-to-the-landers, leading to an overall harsher environmental footprint than the one I currently make when I allow us to drift away from the homesteading ideal from time to time. All I can say is --- I'm eternally grateful that the romantic lottery netted me Mark instead of Eliot Coleman!
Our chicken waterer keeps chicken chores to a
minimum so we have more time to enjoy our flock.
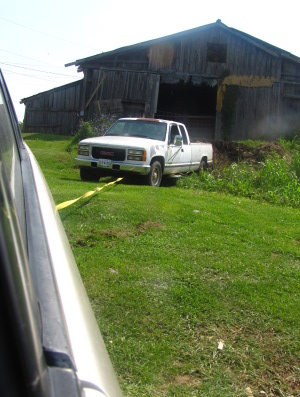
I parked a little too close to a horse manure pile last week and got
the truck stuck.
A new group of weeds had
grown up around the base of the pile hiding some of the richer material
and I forgot to bring a shovel.
This picture is Anna pulling
me out with the tow strap.
I've lost count on how many
times we've used that tow strap since it entered our tool bag.
 Which is better, conventional
asparagus or all-male hybrids?
First of all, you have
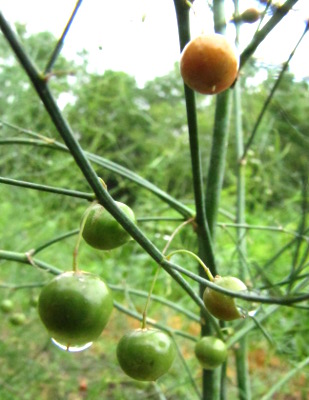
to understand the difference. Most plants have both male and
female flowers, but each asparagus plant is either entirely male or
entirely female, just like a person or a chicken. The female
plants are easy to see in late summer since they produce berries that
turn bright orange as they ripen.
If you grow conventional
asparagus, about half of your plants will be females and half will be
male. The female plants have to spend a lot of energy making
fruits every year, so they tend to have fewer and smaller spears ---
extension service websites say that females produce as little as a
third of the food that male plants do. That's why nurseries have
developed all-male hybrids --- strains in which nearly all of the
plants will be male.
The problem with
all-male hybrids is the same as the problem with hybrid seeds of other
garden vegetables --- you're no longer self-sufficient. I decided
I wanted to expand my 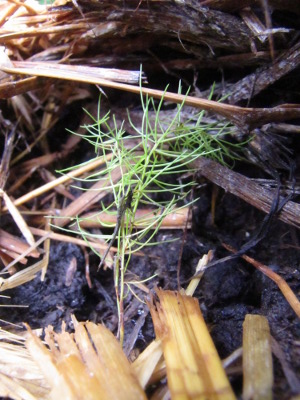 asparagus planting this year,
so I just dug up nine tiny plants that had self-seeded below our
conventional asparagus plants and set the seedlings out in their new
home. If I wanted to get a friend started with asparagus, it
would also be as simple as mailing him or her an envelope full of seeds.
Whether the lower yield
of conventional asparagus is worth the ability to easily propagate your
own plants will probably depend on your space constraints. If I
had less elbow room but wanted to stay self-sufficient, I might plant a
conventional variety, then rip out nearly all of the female plants once
I could identify them. I would keep one female to seed new
asparagus plants, still enjoying the high yields of the mostly male
planting. As it is, though, I'm too lazy to be that high tech,
and am just enjoying the complex mix of all-male and conventional
plants that my garden acquired over the years.
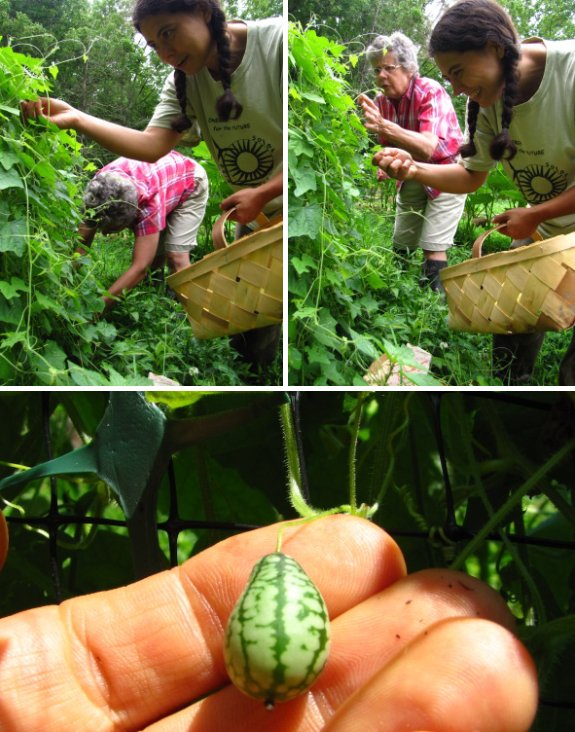
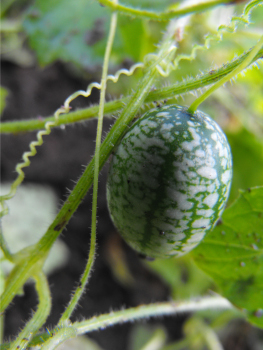
This is a great year for Mexican
Sour Gherkins!
A bite sized, cucumber like
snack that tastes great alone or in a salad.
I would choose these over
popcorn if they offered them at theatre concession stands.
 We slaughtered our two biggest
cockerels on Monday to get a feel for
whether we should plan to kill all the birds from flock 1 this week or
wait a little longer. My goal is to get a two pound dressed
carcass,
and our birds are still a little shy of the mark at 1.86 pounds apiece,
so most of our flock will get a short reprieve.
Although the cockerels
were light weight, I was thrilled to see that their feed to meat
conversion ratio was 4.5 : 1 --- vastly lower than what we got last
year with dark cornish and also lower than published figures for any
broiler breeds other than cornish cross. Stay tuned to our chicken blog this week for more serious
number crunching.
 In
addition to saving money on feed, these permaculture pastured chickens
will give us higher quality meat. I know it sounds unscientific,
but I'm starting to get a gut feeling for the gestalt of a healthy
chicken (probably based on cleanliness of the carcass and uniformity of
the internal organs.) As I pored over these birds' entrails, I
was so pleased with their quality that I cooked some chicken neck and
liver stew for supper. Sounds a bit crazy, but tasted pretty good.
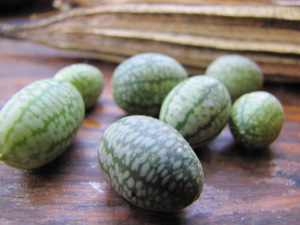 Where did you get your Mexican Sour
Gherkin seeds from?
Everett,
We got ours from Bakers Creek
Heirloom seeds the first year, but Anna discovered an easy
way to harvest Mexican Sour Gherkin seeds, and that's what we do now.
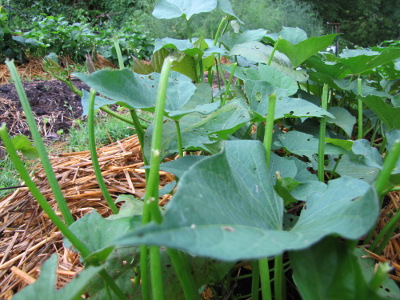 We
had a 22 hour power outage Monday and Tuesday, and we lost:
A few
sweet potato leaves
to marauding deer. (More proof that Mark's deer deterrents really work...as long as they're
running.)
Twenty
hard to find Light Sussex eggs when the battery
pack didn't last long enough to keep the incubator up to
temperature.
Sleep. I fretted over the
eggs far too much, waking up multiple times in the night, but  Mark was worse off since he
can't sleep without the white noise of a fan and didn't want to wake me
up by coming in to get a flashlight to read himself to sleep.
Every time the power
goes out, I think I've learned my lesson and I'll have backups on hand
next time. And every time, the ease of flicking that switch lulls
me into a false sense of security after a few weeks.
That said, we are slowly
improving by tweaking our life so that normal habits can go on if the
grid shuts down for a few days. Even though we need electricity
to pump water out of 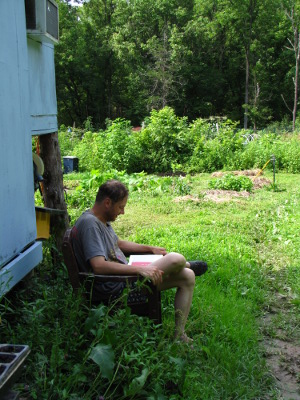 our well and treat it with UV
light, I keep at least a few of jugs of drinking water under the sink
in case of emergencies. I always leave my solar flashlight
charging on the windowsill since I use it if we come home after dark or
if I want to go out at night to check on the chickens, so the
flashlight is also ready for power outages. And after our extended winter
power outage, we
deleted the exterior wood furnace and replaced it with fan-less wood
stoves, so we will now stay warm no matter what.
On the other hand, we've
still got a ways to go, especially in the Mark comfort
department. Luckily, it was a mild enough day that hosing down
with creek water and sitting in the shade kept him cool, but I'm not
sure how he would have handled a power outage if the highs had been in
the mid nineties instead of the mid eighties. Let's see if I can
remember to ponder this problem now that the wide world of electricity
is once again at my finger tips.
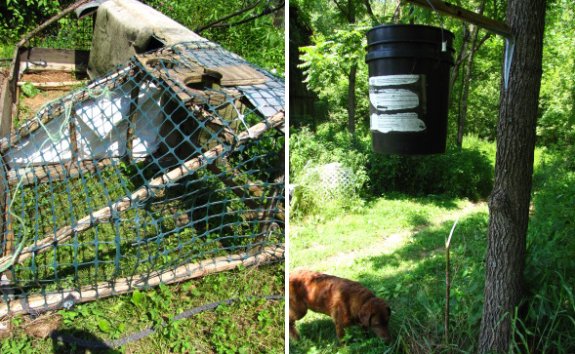
The new
isolation coop worked well at housing chickens the night before
processing and making the catching part easy and trouble free.
Some folks use a killing cone
to hold their poultry upside down before the final cut, but we've found
that a 5
gallon bucket with a hole cut in the bottom works just as well.
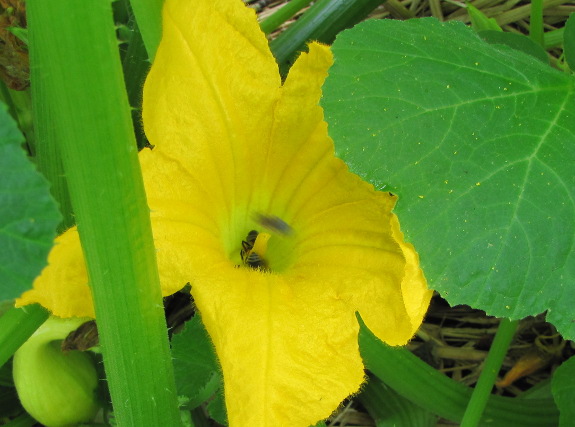
Those of you who
overthink everything (like me) probaby plant nectaries for your bees. Yet,
despite what I read, our bees seem to prefer the flowers that aren't
listed in books.
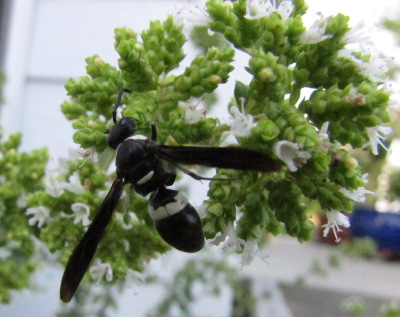 Wild pollinators are supposed
to love members of the aster family, but our Echinacea is mostly
bare. On the other hand, the squash patch is humming so loudly I
was almost afraid to stick my hand in there to pluck dinner.
No one mentions it, but
our asparagus is a hotbed of tiny pollinators in the spring and early
summer. And when I was down in South Carolina, I discovered the
holy grail of the local wild pollinator contingent --- oregano.
Which unconventional
nectary plants do you see abuzz with life right now?
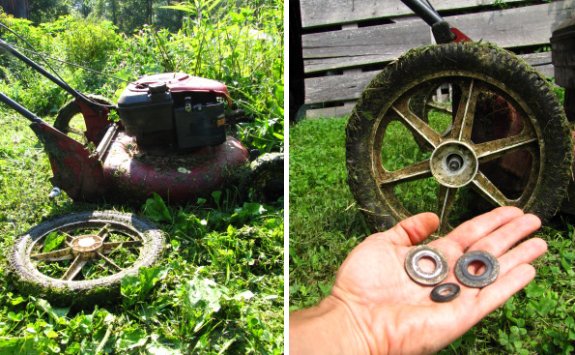
The other rear wheel fell off
the walk behind mower today.
Luckily I still had the
washers that are needed to fix this problem.
I had a feeling this would
happen when I replaced the first
rear wheel earlier this year with a new and improved version that came with its own metal
bearing. I guess all those extra vibrations went directly to the weak
wheel?
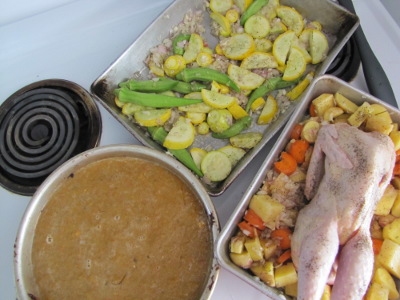 It takes a lot to tempt me to
turn on the oven in the summer, but trying out a new breed of chicken
made the cut. Roasting a chicken is not only easy, it keeps
the flavor of the bird very evident, and I wanted to be able to compare
and contrast the taste of our black australorps with last year's dark
cornish.
Since I was heating up
the house anyway, I figured I should fill that blistering cavern all
the way up. Roast roots went under the chicken to bake in the
drippings, a modified early summer ratatouille slid onto the bottom rack,
and a butternut
pie fit into the
space left behind. All told, the only off farm products involved
in the main course were salt, pepper, butter, and olive oil (although
the pie had more storebought components.) And now I won't have to
do anything except briefly heat up the leftovers for the next two or
three meals. Maybe that hour and fifteen minutes of oven time was
actually energy efficient?
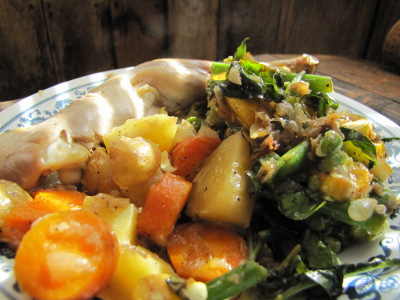 By
the way, the roast australorp got the Mark seal of approval. My
taster said he couldn't tell the difference between this year's and
last year's birds, which is high praise since cornish are supposed to
be one of the best tasting chickens around. I thought the
australorp might have been just a hint less tender than the similarly
aged dark cornish, but that's what you get when your broilers run
around and eat bugs. The broth I'm cooking up from the bones has
brilliant yelllow fat on top, a sign of omega
3s and good nutrition,
so we know the chicken is good for us.
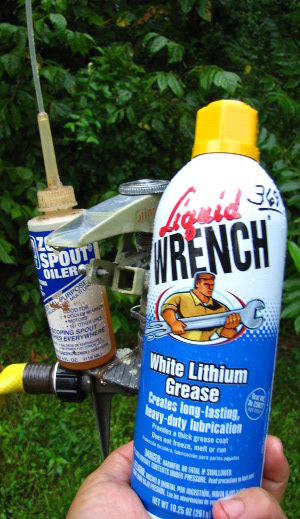
After two years of heavy use in all weather, one of our sprinklers
started sticking.
The sprinkler didn't have any obvious method of disassembly, so Anna
tried to use a zoom spout oiler to lubricate the trouble zone.
Unfortunately, oil quickly washes off when faced with high pressure
water. The sprinkler kept sticking.
Liquid Wrench White Lithium Grease came to the rescue. Unlike
more conventional greases, Liquid Wrench comes in a spray can for easy
access to hard to reach places.
I let the grease dry on the sprinkler for an hour, then turned her
on. No more sticking.
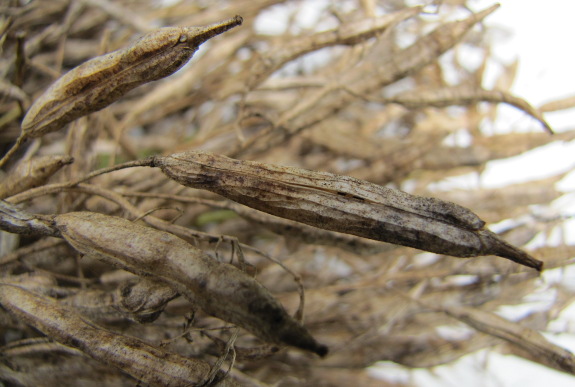
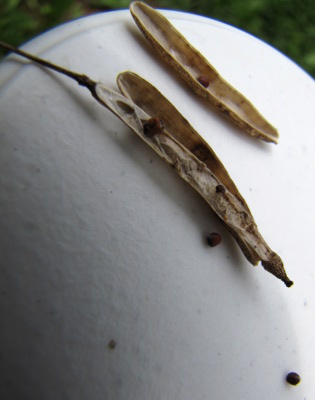 Although neither of the Asian
greens I tried this spring held together once the heat hit, Mark and I
both loved the taste of tokyo
bekana and want to
try it in the fall garden. I wasn't about to spend another $3 for
a tiny package that barely seeds one bed, though, so I decided to let
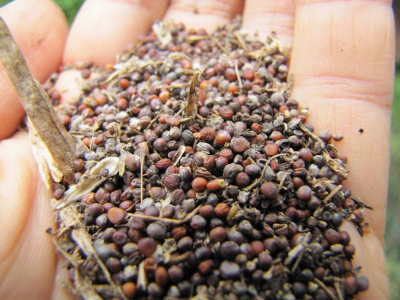
the spring crop go to seed and collect the bounty.
Asian greens definitely
fit into the easy
seed-saving category
since the pods dry on the plant and hang around for weeks until you
remember them. Snip off the brown seed heads when they are
brittle, then thresh them any way you feel like
it. Since Mom recently gave me this great pestle, it didn't take
me long to pound the seed pods into submission.
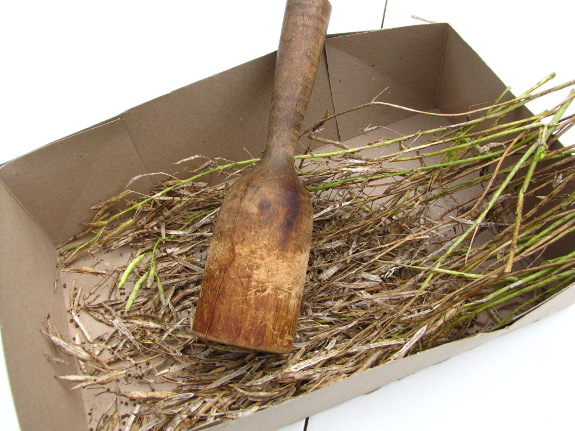
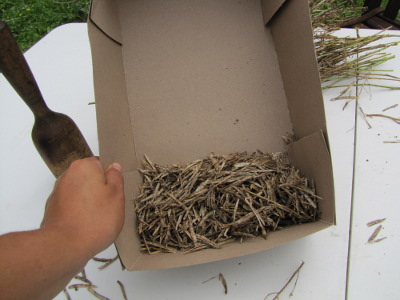 Shake
your container gently and the heavier seeds will settle to the bottom,
allowing you to lift most of the chaff off with your fingers.
Then blow into your box to finish the winnowing
process --- the light pieces of pod will float away while the heavy
seeds will stay put. I didn't winnow all that carefully since I'm
just going to be putting the seeds and debris back into the ground, but
you could also pass the seeds through a screen (like a flour sifter) if
you wanted them to be cleaner.
 The one potential sticking
point when saving seeds from brassicas is that many will
cross-pollinate. However, Asian greens share their species (Brassica
rapa) only with
turnips and with rape (the plants that are used to produce canola
oil). As long as you don't have any other Asian green varieties,
turnips, or rape plants in bloom at the same time as your select
variety, you can save the seeds with impunity.
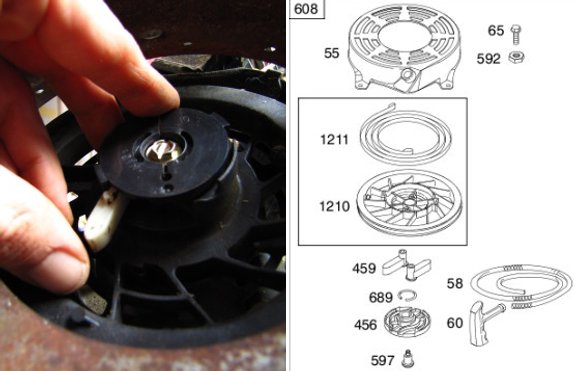
The pull rope on the mower
stopped doing its job about 10 minutes after I
fixed the rear wheel problem.
Most rewind starters have 2
white plastic fingers that extend out and grab when the rope is being
pulled and retract when the rope is released and its spring sucks it
back in.
These plastic fingers and the
groove designed to hold them are worn, causing the fingers not to
extend, and now when you pull on the rope nothing happens.
You can get the whole
mechanism for just under 40 dollars from Briggs and Stratton, which is
what I ordered. I was able to use sand paper to smooth out the rough
parts of the plastic to get it going for now, but I suspect it won't
last long due to the deformed groove.
 I don't want to make you
think I don't like art --- in fact, I majored in studio art (and
biology) in college. And any good vegetable garden becomes a work
of beauty, full of enticing textures and colors. Still, I think
that many beginning homesteaders fall into the trap of thinking about
beauty first and utility second when planning their garden.
My first year on the
farm, I chose the prettiest vegetables I could find in the seed
catalog. Bright Lights swiss chard with red, yellow, and orange
stalks, purple and ruffled cabbages, three colors of summer squash ---
I had it all. Over time, though, I've discovered that purple
carrots don't produce as high a yield as those ordinary-looking orange
carrots, striped zucchinis can't handle the vine borer the way yellow
crookneck can, and ruffled cabbages don't taste as good as plain Jane
cabbage heads. I've slowly started choosing varieties based first
on flavor, then on productivity (which includes bug and disease
resistance), third on seed-saving ability, and only finally on
appearance.
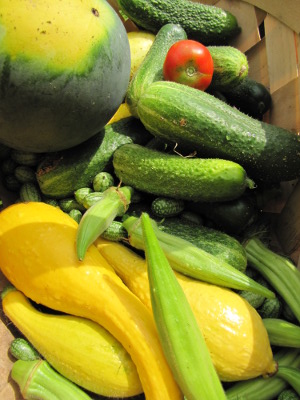
Our harvest basket still
looks beautiful, but now we have more, tastier food to eat and put
in the freezer. Mark's hypothesis is that folks who choose
seeds based on garden porn don't end up taking the time to harvest and
eat the produce, but I give art gardeners a bit more benefit of the
doubt. I think that, like me, they'll grow out of it.
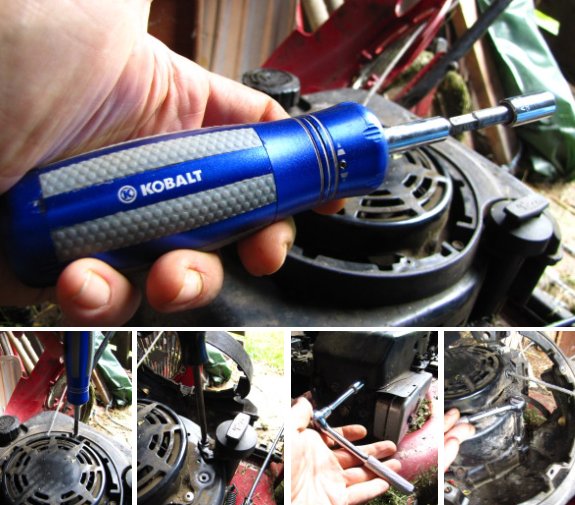
One of the best things about
the Briggs and Stratton engine attached to our Craftsman mulching mower
is a superior design.
It only took a Philips screwdriver, and two metric sockets to access the starter
rewind unit. The fuel
tank pivots back out of the way without needing to be disconnected or
drained, which is a lot less messy than the mower I grew up with.
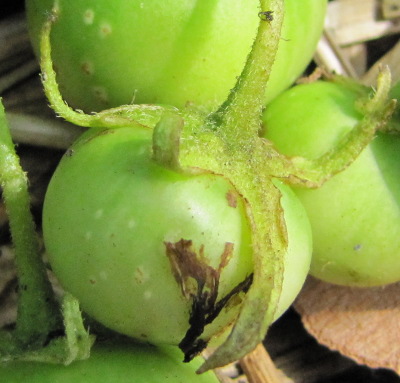 As
I weeded the potato beds, I stumbled across these little green fruits
nestled amid the foliage. No one seems to know why potato blooms
wither most years then develop into fruits every once in a while, but I
can attest that this is the first time in five years of growing
potatoes that I saw any fruits. I planted my potatoes very late
this year so that they'd store better, which might have had something
to do with it. Extension service websites also report that some
varieties (like the Yukon Golds I'm growing) fruit more often than
others.
Potato fruits are
poisonous, but if you let them ripen, you can save the seeds the same
way you save
tomato seeds.
The goal isn't really to get more potatoes --- cloning the tubers is by
far the most efficient method of growing potatoes. Instead,
starting potatoes from seed is a way of playing the garden lottery,
producing lots of new varieties that might just possibly be better than
their parents.
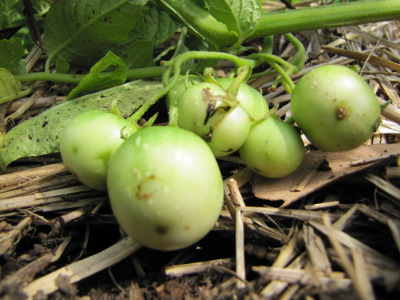 Extensive searching of the
internet turns up only a few people who have actually committed the
time and space to grow potatoes from seed, and from what they report,
the project sounds like a lengthy undertaking. If I saved these
seeds in 2011, I'd plant them in early 2012 and end up with tiny tubers
no more than an inch in diameter. Save those tubers and use them
as seed potatoes in 2013, and I'd finally grow potatoes large enough to
taste and test. Although the garden geek in me is itching to give
it a try, I don't think we care enough about potatoes to allot that
much space and energy to the experiment.

Filear.com has an informative
post on his new solar
powered Arduino controlled automatic chicken coop door opener.
He's got a 4 minute video
that helps to show what steps are needed to make something like this
work. I'm guessing it might cost over 150 dollars due to the solar
cell and back up battery. A bit complicated and somewhat expensive, but
a good choice for those out there who need this type of application and
don't want to run electrical power out to the flock.

Edited to add:
After years of research, Mark eventually settled on this automatic chicken door.
You can see
a summary of the best
chicken door alternatives and why he chose this version here.
If you're planning on
automating your coop, don't forget to pick up one of our chicken waterers. They never spill or
fill with poop, and if done right, can only need filling every few days
or weeks!
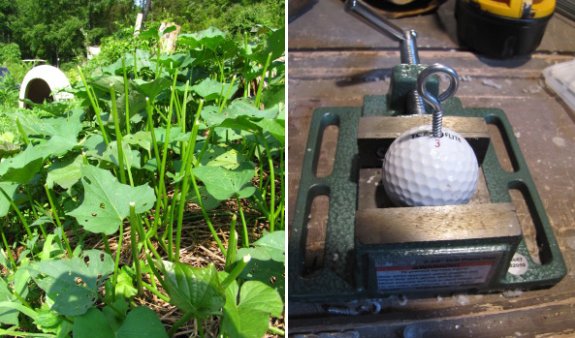
We suffered our 2nd deer
attack last night since last
week's power outage.
I'm thinking this time of
year calls for additional measures like moving the deterrent location a couple
times per week and making the sound louder.
We talked about dumping some
soapy water near the entrance area, but we both know that will only
last so long.
I think this level of damage
allows us to hunt the offending deer in question out of season and
a venison sandwich sounds like a yummy solution to me.
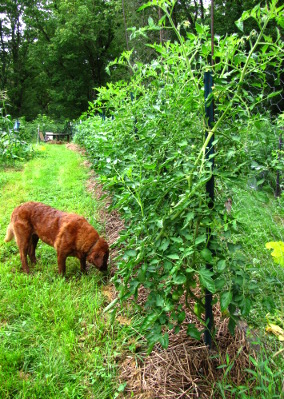 Tomatoes
can be some of the easiest vegetables to grow, but only if you have a
long, hot (but not too hot), dry (but not too dry) growing
season. We struggle with tomatoes in non-drought years because
our seemingly endless rains breed fungi that take out our crops.
I've posted about preventing tomato blights in bits and pieces before,
but I thought I'd pull all of our anti-blight measures together into
one post to make it easier for you to follow along.
Plant
your tomatoes in the sunniest spot. This year, we made an
extra bed running the length of the chicken pasture just for our
tomatoes. The fence line runs from east to west on the most
northern side of the yard, so this location gets the least shade from
the hillside and the plants are least likely to shade each other.
The only slight problem with this setup is that grasses on the pasture
side of the fence poke through the chicken wire, but they don't seem to
bother the tomatoes and I yank them out when I weed.
Space
the tomatoes far apart. The distance you
choose to provide between your tomato plants will depend on your
pruning method, but the goal is to make sure there's open air between
them. We prune to three main stalks and tie the plants to a
stake, so we only need about three feet between plants. If you've
got space, more room is always better.
Stake
your tomatoes.
You may be starting to notice that all of these techniques have a
common theme --- keeping the leaves of the tomatoes dry. It's a
big no-no to let your tomatoes sprawl across the ground since they'll
take much longer to dry off after a rain or even a heavy dew.
Cages are okay, but hinder air circulation. We tie up our
tomatoes once a week to keep them climbing their stake.
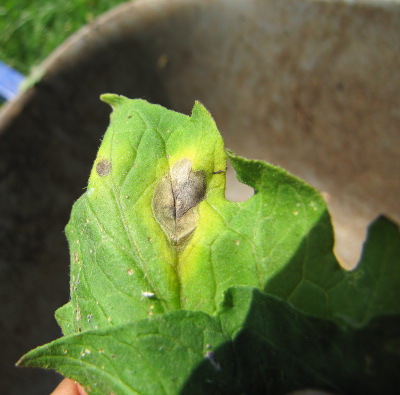 Prune relentlessly. Blight spores splash
up from the ground onto tomato leaves, where the fungi grow and
reproduce, producing more spores than can spread through your whole
patch. As soon as the tomatoes are about eight inches tall, I cut
off any leaves touching the ground, a process that I repeat weekly
since the higher leaves will start to bend down as they grow
older. Meanwhile, I snip off any signs of incipient fungal damage
--- early
blight showed up at
the beginning of July, but with constant leaf removal, seems to be in
check. Finally, I remove all suckers, leaving only three main
stems. When pruning, clean your clippers with an alcohol-soaked
rag between each plant and after you cut any dicey-looking
foliage. It's okay to let healthy leaves and stems fall to the
ground, but take diseased leaves as far away as possible or burn
them. If a plant seems to be nearly all diseased, rip the whole
thing out ASAP rather than hoping you can baby it back to life.
Choose
resistant varieties. We've tried out dozens
of tomato varieties, but now focus on ones that are a bit more
resistant than normal to early blight, late blight, and septoria leaf
spot (our three main problems.) None of these tomatoes are
entirely immune, though, so we can't ignore them and hope for the best.
Water
from below and/or in the early morning. If you have to get the
leaves of your tomatoes wet, make sure you do it first thing in the
morning on a sunny day so that the plants will dry off as soon as
possible. I've located our sprinklers so that they don't hit the
main tomato area, but we haven't got our drip irrigation installed
yet. The plants seem to be doing fine without the extra water so
far.
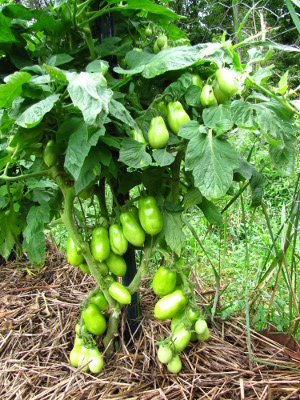 Race the blight. Of our three main fungal
diseases, late
blight is the real doozy, and it tends to hit late in the season just
as the name suggests. For fresh eating, it would be great to have
ripe tomatoes all summer, but if you put away a lot of sauces, it
wouldn't hurt to try out some determinate tomatoes. This year,
over half of our total tomato planting is devoted to Martino's Roma,
which will drown you in tomatoes for a month or two and then peter
out. Another facet of racing the blight is to make sure your
plants are always growing as fast as possible by providing lots of
manure and not starting the seedlings too early (allowing them to be
stunted.)
And now, two blight
prevention tactics that we've tried which have failed miserably:
- Stick your head in the sand and pretend nothing's happening.
- Plant patches of tomatoes here and there and hope the blight won't reach them all.
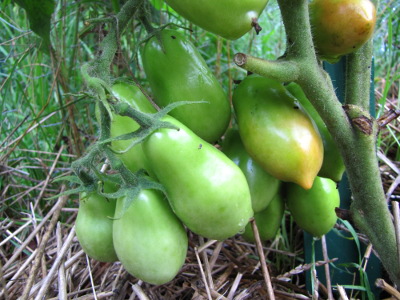 Despite
lots of rain, we seem to be in great tomato shape this year. We
ate 2011's first tomato (a Stupice) on July 12 and have enjoyed a
tomato every other day since. The main crop is about to come in,
at which point I'll be preserving as fast as possible and quickly
forgetting that a sun-ripened tomato is a rare treat.
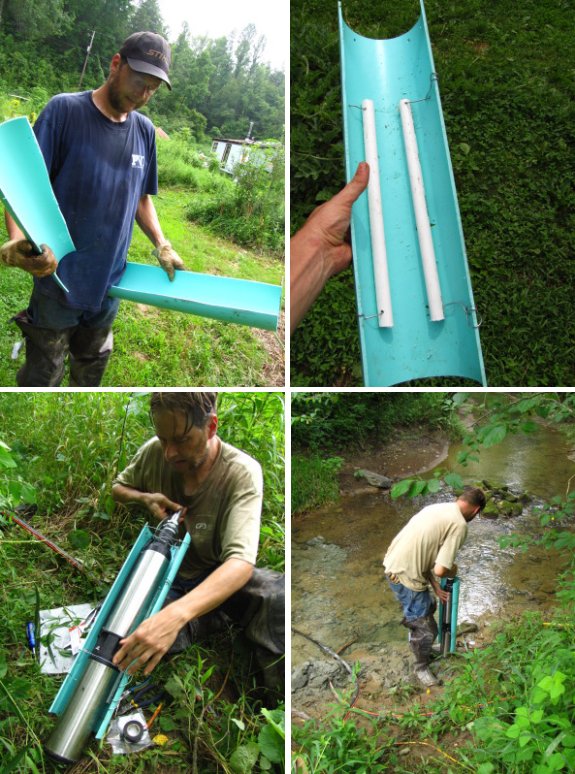
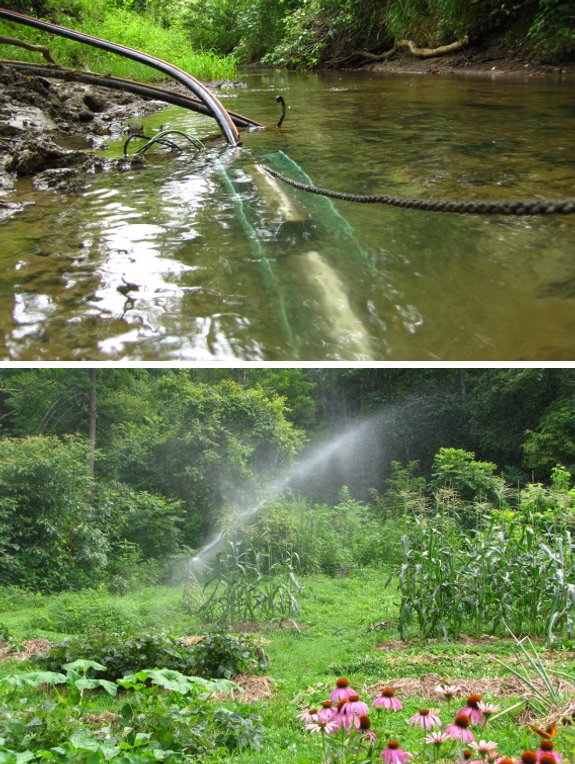
The pump that we
use to irrigate the garden
stopped working last week.
Anna found out through some
internet research that laying it nearly flat in the creek may have
allowed the lubrication for the internal bearings to shift over to one
side, leaving the other side vulnerable to excess friction.
Most applications have it
working in a deep hole where it stands straight up. What you need is at
least a 15 degree angle to keep everything happy inside. I think I got
close to this by digging a hole in the creek bed so the bottom of the
pump can be at least 7 inches lower than the top.
The other improvement is a
large piece of PVC pipe that I cut down the middle and secured the pump
to. This should help to keep the working end out of the mud and
hopefully decrease the amount of sediment that gets sucked up.
 Broadcasting seeds is one of my
favorite ways of planting most vegetables (with the exceptions of big
vegetables like squash, corn, beans, etc.) The method is most
appropriate for gardens with permanent beds in which you want your
vegetables to spread out and cover all of the available space. To
broadcast plant, I simply fill the palm of one hand with as many seeds
as I want to put on the bed, separate my fingers, and jiggle my arm
until the seeds bounce to the ground. Once you get the hang of
it, you can broadcast seed a bed in less than a minute and end up with
well-spaced seedlings.
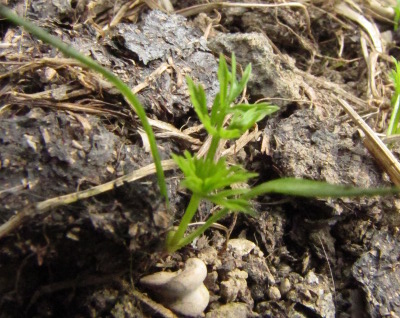
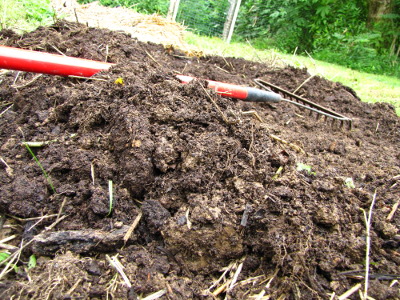 The one difficulty with broadcast seeding is
that the seeds sit on the soil surface, which means trouble
germinating during hot, dry summer days. (In the spring, I
rarely have issues with germination even though I don't cover my
seeds.) But if you rake the top half inch of soil to the sides of
the bed, broadcast seed, then carefully pull that excess soil back on
top, you can have the best of both worlds --- quick seeding and
efficient germination. I tried out this method a few weeks ago
with the first of our fall carrots and was so pleased with the results
that I think it will be my new broadcast-seeding standby.
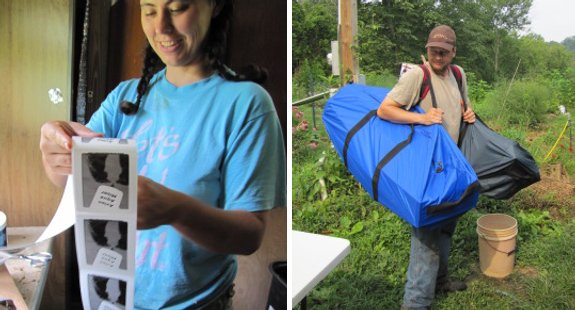
I figured out the other day
that one of my new favorite activities is making automatic chicken
waterers with Anna.
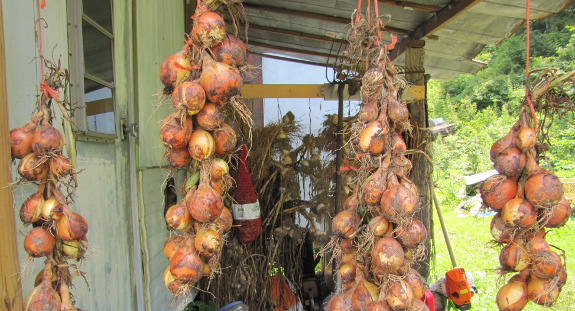
Like many storage
vegetables, onions need a curing
period after harvest
so that they'll dry thoroughly and won't rot on the shelf. In the
past, I've laid the bulbs out on screens, but this year I wanted to
give the traditional method --- braiding --- a try.
Some of our onions are
further along than others since I tried out several planting methods
this spring. First thing in the morning, I plucked out any that had
completely or nearly dried up leaves and turned them on their side to
do a little pre-drying. The rest of the crop will come out next
week.
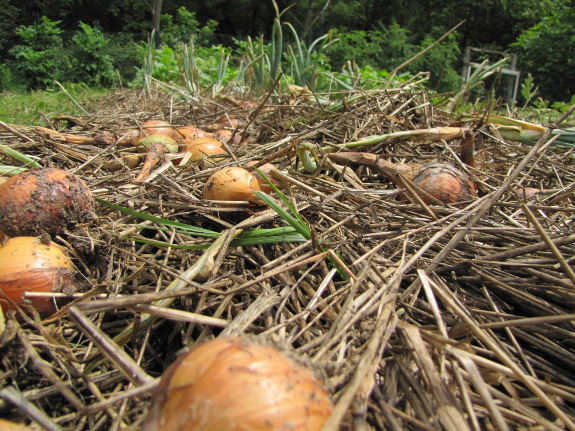
By afternoon, the bulbs
were dry to the touch (although some of the leaves were still
wet.) Time to braid!
Many websites will tell
you to braid around a string, and I can see the point --- you won't end
up with this:
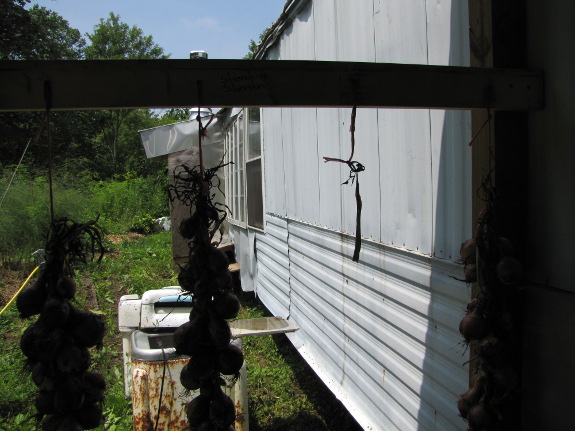
However, as long as
you're careful, you can braid your onions with just the leaves.
Start with three onions and braid them for a couple of loops for a firm
bottom, then start adding a new onion each time you loop one of your
three lines of leaves to the center. Once you get good at it,
you'll realize that some onions have long, strong stalks while others
have short, weak stalks. You can slip the weaker-stalked onions
in when your current line looks bulky enough to last another round.
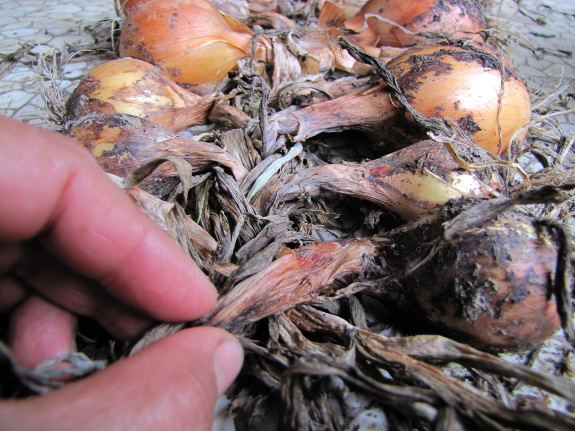
At the end, I tied a bit
of baling twine around the braided tops to give me an easy hanging
point.
As a side note, you'll
find it much easier to braid your onions if you
take them inside and work on a flat surface. Braiding in the
grass
means you tend to literally braid in the grass.
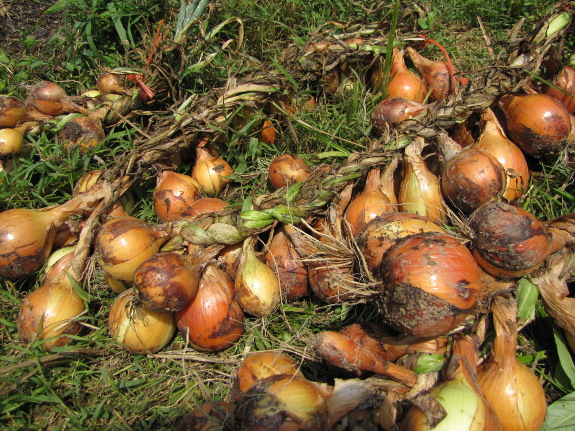
That said, braiding was
simple and fun. And the project required significantly less time
than it would have taken me to find a sheltered spot and set up my
drying screens.
I'll leave my onions in
braids for a few weeks until they're bone dry, then will cut the heads
off and store them in mesh bags on a kitchen shelf. I suspect
we'll run out of onions long before they go bad --- our total harvest
will probably clock in around 35 or 40 pounds, which should last us
about three or four months. Now that I've figured out the best
method (more on that in a later post), we'll be growing many more
onions next year!
Anna did the bulk of the
research for our new
creek pump which led us to the local Home Depot.
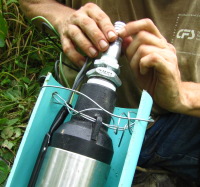 They
had a good selection of small to medium pumps, but no 220 volt well
pumps. I went to the front desk where the guy was grumpy and shuffled
me to the Home and Bath department instead of letting me ask the simple
question "Can you order me a pump so I can come in next week to pick it
up?" There was only one person working at Home and Bath and she was
taking care of a customer. She was nice and said she would be
with me soon. She was having some computer trouble and called Mr Grumpy
front desk back to help her. The guy actually sneered at me when
he made eye contact. I'm sure that could be a misinterpretation on my
part and my body language was sending a message that I was getting
tired of waiting by the way I was standing there with my arms crossed,
and maybe some frustration was building when my wait went past the 20
minute point?
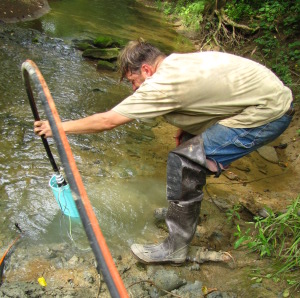
45 minutes after I entered
the store the lady was finally ready to walk over to the pumps to see
if she could help me. She confirmed that the pump was not in stock or
not in the back room and her solution was for me to order it on the
internet. I'm guessing the shipping on something this heavy is around
50 bucks or more and then you would have to turn around and pay that
again if there was a need to send it back. She offered to write down
the model number so I could take it with me. That's when I lost my cool
and calmly told her with a slight tinge of attitude "No thanks, I'll
just go to Lowe's down the street".
Lowe's had a variety of 220
volt well pumps to choose from. Our old one was a half horse power. I
decided to go up a notch to a 3/4 horsepower, which cost around 340
dollars when you factor in the connector parts.
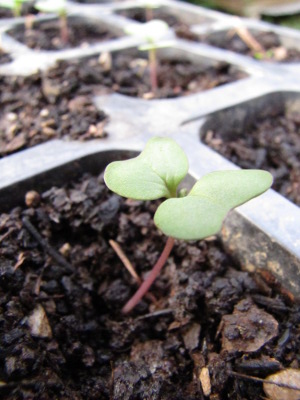 My new
method of broadcast seeding is perfect for small autumn vegetables,
but what about the big plants like cabbage and broccoli? I
usually start three seeds per spot to make sure enough come up, then
thin, but this year I was running low on seeds and only planted one per
hole. The result was extremely spotty germination and not nearly
enough fall crucifers.
Although it was a bit
late by the time I noticed the problem (the beginning of July), I went
ahead and moved on to plan B --- start broccoli and cabbage in flats
where I know I can get them to come up, then transplant into the garden
just as they get their first true leaves. It turned out that my
broccoli seeds had low germination even there, so I ordered another
batch and tried again. This last round of seeds will have to be
protected by quick
hoops if I want them
to head up, unless we get a late killing frost the way we do some years.
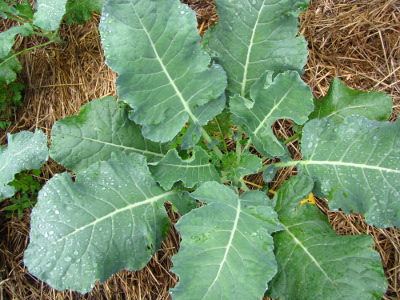 I seem to gamble with
broccoli a lot, and sometimes it pays off. I got spooked
by our constant rain
in the middle of May and planted a bed of broccoli as a consolation
prize if the blight took our tomatoes. So far, our tomatoes are
in good shape, but so are my summer broccoli! I guess we'll have
some fall broccoli no matter what happens with my late seedlings.
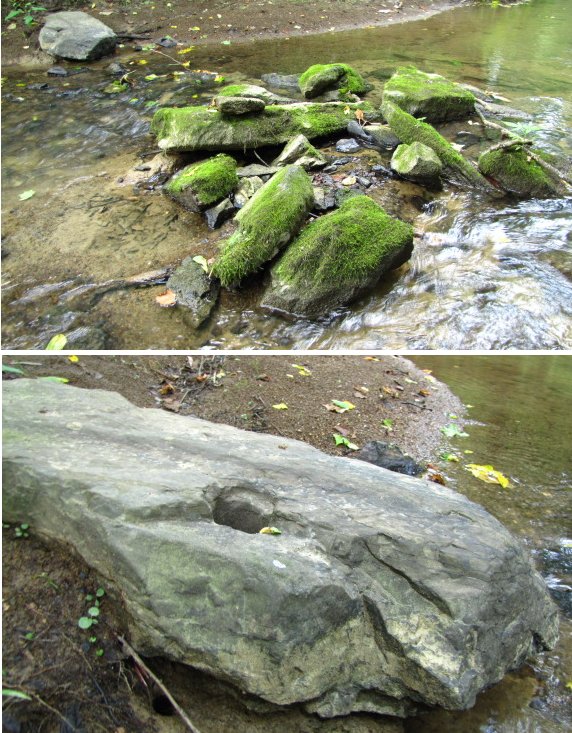
It looks like there was once
a hand made dam here in the creek next to our new
pump.
 I'm guessing that the water was channeled
towards the hole that seems to have been cut out with a hammer and
chisel.
Maybe a pipe was connected at
the bottom to carry the water to some sort of mini grain mill or
rudimentary electrical generator?
It must have taken the
previous homesteaders hours upon hours of hard, back breaking labor to
carry these rocks from I'm guessing the nearby river which is an 8
minute drive away. That kind of project must have surely yielded some
sort of mechanical advantage to make it worthwhile.

One month after the
solstice, I can feel the long, slow descent into winter beginning.
We're racing the shortening days now.
 Even though it seems strange
to be thinking of winter in July, we're in the middle of planting the fall
garden. I'm also putting in cover crops
(more on those in a later post) to add organic matter to beds that will
remain fallow until garlic planting time or until the spring.
It's already too late to direct seed anything except bush beans,
lettuce, greens, and garlic unless we plan to protect the crops from
frost.
Meanwhile, I'm
preserving the harvest as fast as I can. I've got 8.75 gallons of
vegetables and a gallon of fruit in the freezer, along with 0.8 gallons
of dried vegetables and 1.3 gallons of dried fruit. Although it
feels like a lot of food, I hope to freeze at least 30 gallons of
vegetables (exluding tomato sauces) this year, so we've got a long way
to go.
Even though I start
itching for the garden in January and February, I have to admit that
I'm looking forward to the fall now. I'm ready to tackle some of
those long-term projects we can't even think about during the summer
months (and I wouldn't mind sleeping past 6 AM either.) Still, I
can't find much to complain about when the first pizza of the year is
on the horizon.
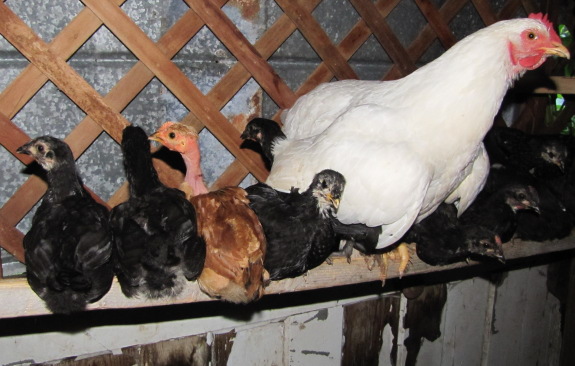
Last night the baby chicks
passed a corner in their youth when our mother hen decided they were
ready for night time roosting.


Although our buggy beans
are oddly beautiful, I can't say I'm glad the Mexican
bean beetle discovered our bush beans last year and stuck around to nibble
their way through another season.
So far, I've just been
squashing all stages of the pest insect as I pick beans twice a
week. Despite the scary looking spines, the larva won't hurt your
bare fingers, although they will leave a brilliant yellow pigment
behind.
But when it started
taking two or three times as long to pick beans due to bug squishing, I
decided to pull up the worst beds and just seed another planting.
Our favorite
variety produces a
light crop for the first picking, a huge crop for the second picking, a
big crop for the third picking, then slowly (or quickly if the beetles
eat the leaves) lessens in intensity from there. We have just
enough time before the first frost to make it through those first two
pickings, so I'm cutting my losses and removing this reservoir of pests
from the garden.
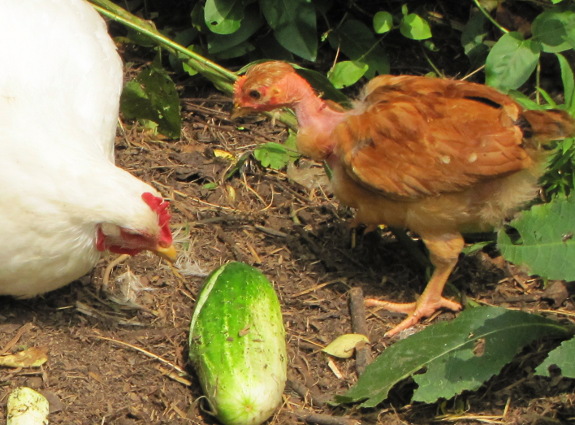
You can tell a pest
insect is trouble when the chickens ignore bug-laden plants and go
straight for the overripe cucumbers....

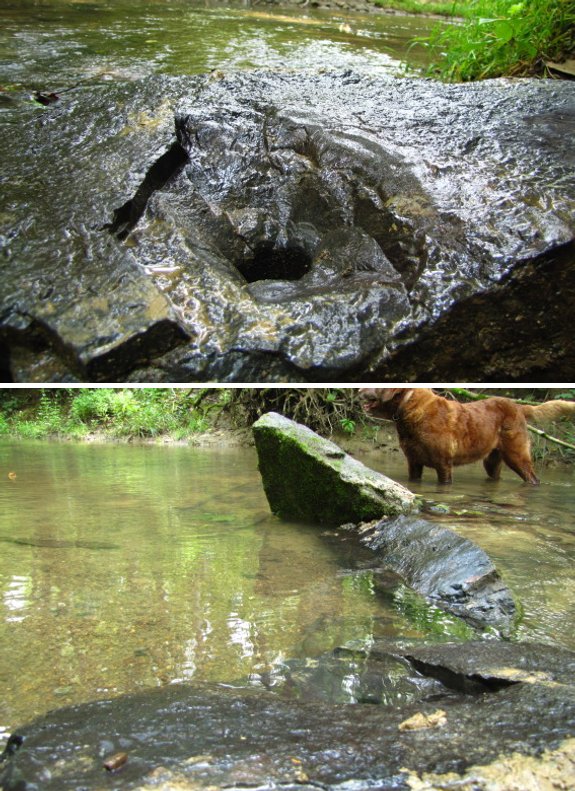
Big thanks to amateur
archeologist Adrianne for the suggestion of flipping over the mystery
creek artifact to see
what's on the other side.
The obvious right angle
element makes me rule out any natural erosion as a possible solution.
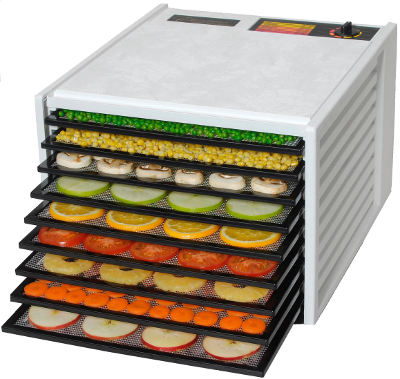 I've alluded to the fact that
we bought a food dehydrator because our climate has too much rain,
clouds, and humidity to allow us to sun-dry very often. I've been
waiting to tell you about what we got because it was a large purchase
(by our standards) and I wanted to give the dryer a few serious test
runs before writing a review.
What we chose and why
We bought the 9
Tray Excalibur dryer with timer (model number #3926T) for
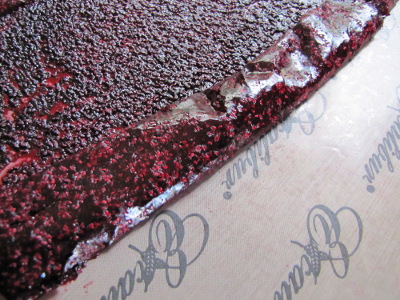
$237.03 (with shipping included) and splurged on 9 reusable
fruit leather sheets.
 I was pointed to the
Excalibur by my father, who's been using his for years with great
success. The ten year warranty that came free as part of my
special offer made me feel confident about the decision, as did
extensive perusal of reviews on Amazon. In fact, from my
research, the Excalibur seems to be the only serious homesteader-scale
dehydrator worth its salt. We've used the small, cheap, round
dehydrators, and they nearly turned me off drying completely.
What I like about our food dryer
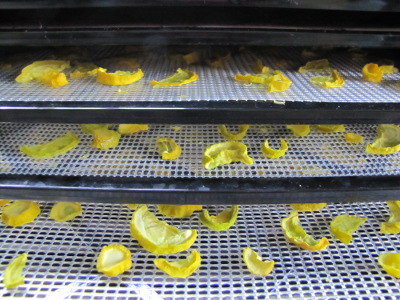 The most important selling
point for the Excalibur is that it works. The heating unit and
fan are in the back, so air is blown nearly evenly across all trays,
which means you're not constantly moving your fruits or vegetables
around to get even drying. I felt like the top and bottom trays
might dry very slightly slower than the middle trays, but only barely.
The 9 tray model is just
the right size for a serious gardener. If you only want to dry a
few tomatoes here and there, a smaller dehydrator will work for you,
but when I start drying, I tend to have a basket of produce fresh out
of the garden that needs to be dealt with now.
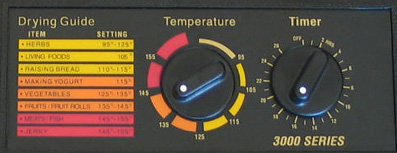 The
timer was definitely worth the extra cash. Rather than having to
start food in the morning and remember to monitor the dehydrator at
intervals throughout the day, I can just check the state of the produce
around bedtime, eyeball how many hours more it needs, and turn the
timer dial.
 Finally, I was fascinated to
read that Excalibur is a family run business that started as a mom and
pop operation and was bought out by the daughter. The family made
the same choice we did with our chicken waterer, to sell only directly
through their website (and a few other websites), which makes it easier
to notice when your customers are unhappy with certain features and to
constantly improve your design. I suspect that's part of the
reason the quality is so high.
What I don't like about my purchase
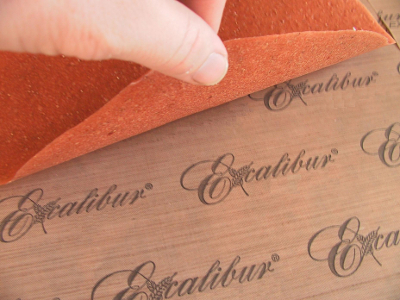 I'm thrilled with the
dehydrator itself, but the fruit leather sheets seem flimsy for the
price. You're not supposed to submerge them when washing, but I
couldn't quite figure out how else to get specks of fruit leather off
since they don't wipe down easily, so maybe it's my fault that they're
already looking a bit crumpled after only three washings?
But that doesn't explain
why Excalibur couldn't have come up with a solid tray to fit on each
rack that would hold juicy proto-leathers so that they don't drop
through onto the squash on the next rack down. The sideless
sheets also mean I can't use my jiggling trick to quickly smooth fruit
puree to one level, which means I had to spread it with a spoon and had
slightly uneven drying. If I was making my purchase today, I'd be
tempted to try to find a better fruit leather option.
My only other minor
complaint is the intro to drying booklet that comes for free with the
dehydrator. The text doesn't mention blanching at all, which I've
read (and my experiments prove) results in much tastier dried
vegetables. Remember, this is a free publication and do some more
reading on your own.
About the dehydator
itself, though, I have no complaints. If you decide to get
serious about drying and don't live in a near desert climate, this
model is the way to go.
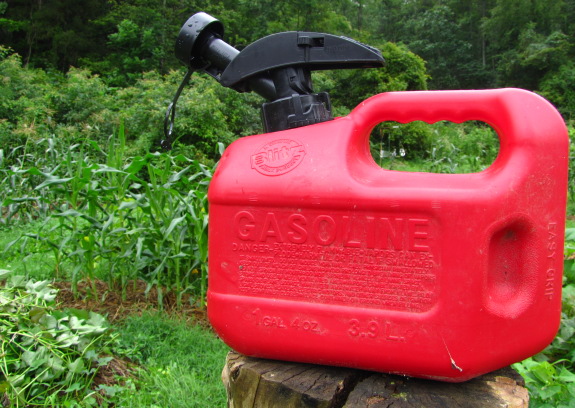
A few years back I got some
advice from multiple sources strongly urging me not to use ethanol
enhanced fuel on our chainsaw or weedeater.
Today I was reading the new
weedeater manual and the section on fuel removed any doubts for me as
to if the ethanol
issue is a myth or not.
"Gasoline with an ethanol content of
more than 10% can cause running problems and major damage in engines
with a manually adjustable carburetor and should not be used in such
engines."
I should probably read
instruction manuals more often.
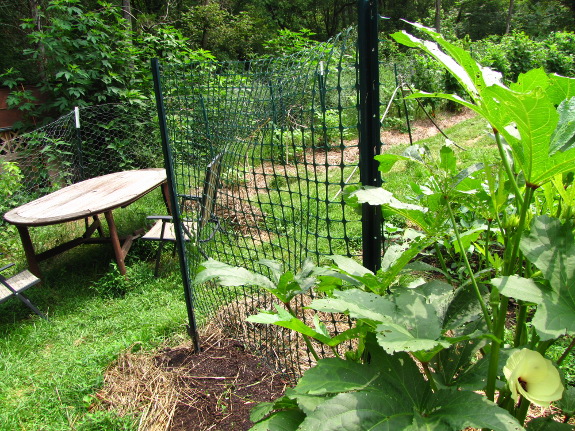
What do you do if your pets
are scratching up your newly sprouted seedlings? Here are the
best options I've come up with:
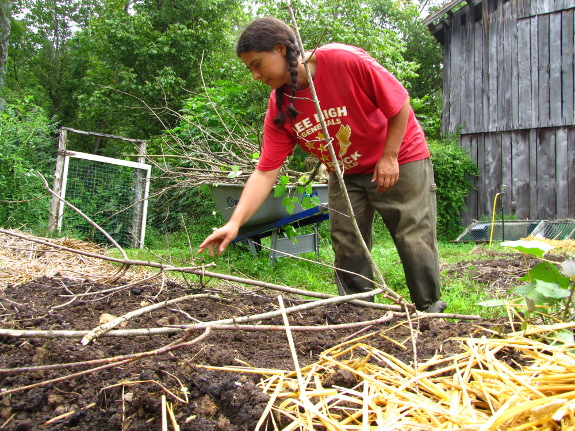
- Put up a trellis. If you're going to need one anyway (such as for your fall peas), go ahead and erect your trellis as soon as you put the crops in the ground. A determined cat might still play in the bare soil, but you'll at least keep the dogs out.
 Leave most of the mulch in place.
If you're planting large crops like peas or transplanting seedlings
like broccoli, you can just rake back mulch from small patches of
earth. It's the bare soil that your pets find so attractive, so
mulch
will prevent damage.
Leave most of the mulch in place.
If you're planting large crops like peas or transplanting seedlings
like broccoli, you can just rake back mulch from small patches of
earth. It's the bare soil that your pets find so attractive, so
mulch
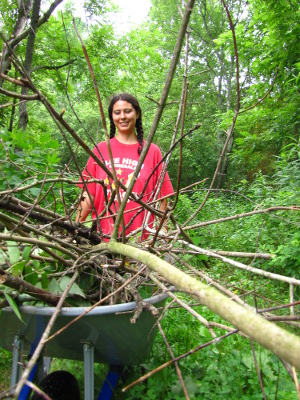
will prevent damage.- Stack small sticks on the bed. Just a few well-branched sticks will keep both cats and dogs at bay. Layer the branches in overlapping patterns so that the whole bed is very lightly covered, but not using so many that you block light to the soil. Once your crops are big enough that they would get tangled in the wood, your pets will no longer be interested, so you can move the sticks away (or use them as kindling.)
These tips assume
that your pets are actually interested in the beds in question.
If they're instead running through your plantings on their way to
somewhere else, you need to learn about nodes and natural
pathways. (See the June
volume of Weekend Homesteader for more information.)
Another way of keeping
your pets on the aisles and out of your crops is to figure out why
they're messing up your beds. (No, the answer probably isn't to
raise your blood pressure.) I'm pretty sure our cats dug up the
carrots and broccoli because they thought the loose soil made a good
litter box. Maybe the permaculture solution would be to build
them a sand pit so they could scratch with impunity?
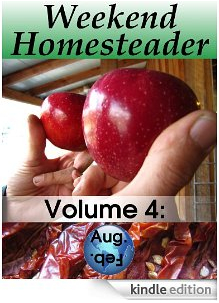 August's
Weekend Homesteader
focuses on what the month is
best known for --- the sun. You'll take advantage of solar energy
directly by drying tomatoes or peaches in your car and clothes on the
line, then will collect the sun's energy indirectly when you start a
fall garden and find local produce in abundance.
For those of
you who are new to the Weekend Homesteader, this monthly ebook series
walks you through fun and easy projects that introduce growing your own
food, cooking the bounty, preparing for emergency power outages, and
achieving financial independence.
I hope you'll consider
splurging 99 cents to buy a copy of my newest ebook from Amazon's
Kindle store. Your purchases (and extremely helpful reviews!)
kept last month's ebook in the top three percent of all Amazon ebooks,
which has helped it see the light of day beyond readers of this
blog. Weekend
Homesteader: July
has found its way onto 123 kindles already, which encourages me to keep
writing.
 As usual, I'm also very
glad to email you a free pdf copy to read if you
don't have the spare cash, or just don't want to deal with downloading
an app so you can
read the ebook on your computer or phone. Just email
me with your request --- no strings attached.
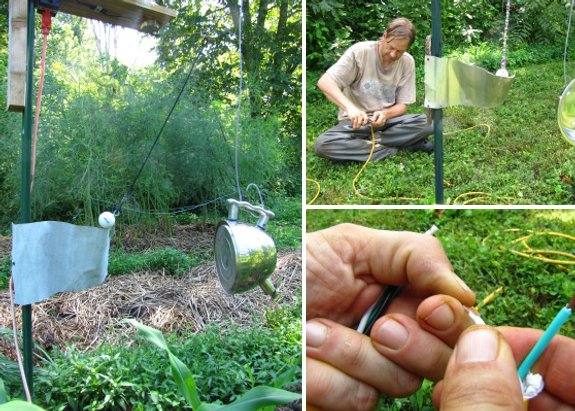
I think we've got the deer
attack of 2011 under
control with the addition of a new and louder mechanical deer deterrent.
A good sized stainless steel
tea kettle makes a solid thud when the golf ball swings down and makes
contact with its underside.
The total number of mechanical deterrents protecting
the garden is now at 4 with some serious talk about bumping it up to 5.
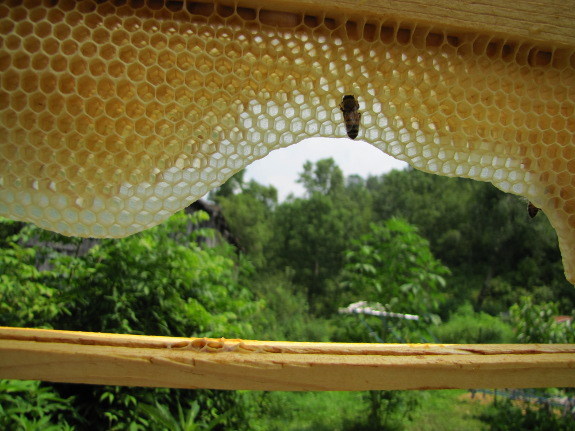
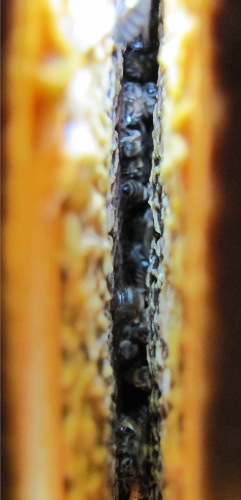 Both of our hives are well on
their way to putting away honey stores for the winter. I didn't
delve into the lower brood box because strong summer hives hate that
(and there's no need at this time of year), but I counted 34 pounds of capped
honey (and a lot more dehydrating nectar) in the mother hive and 21
pounds in the daughter hive. That's pretty good for a post-split year, especially since I
harvested about 5 pounds from the mother hive at the end of May.
Plus, if the upper brood boxes are any indication, there could be that
much again in the lower brood boxes.
Here in the mountains of
Virginia, you want to leave your bees 50 to 60 pounds of honey to make
it through the winter. That's 7 to 9 fully capped deep frames or
11 to 13 of the smaller frames in the supers. (It's best for that
honey to be in the brood box, though, so deep frames are definitely
preferred.)
With our double deep system, I suspect that any honey in
the supers should be fair game for our larder, so I'm excited to see
the mother hive drawing out new frames and filling up their
attic. I'm not quite confident enough with this assertion,
though, to risk stealing too much --- I think I'll just wait and take
any excess in the spring.
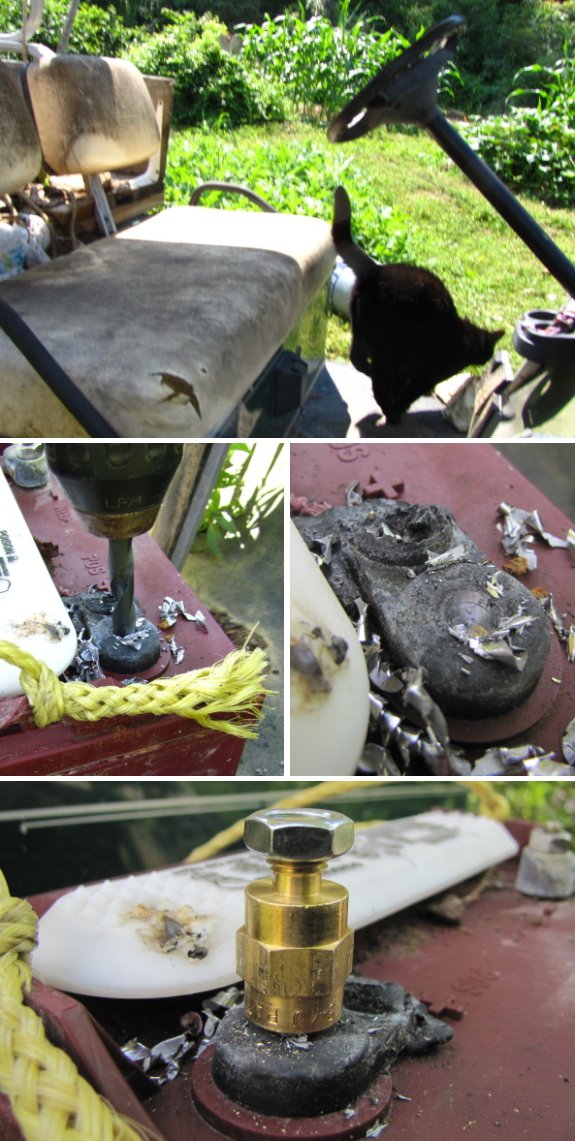
I took our golf cart battery with the broken terminal to a
Club Car repair person thinking I might be able to exchange it for a
used battery.
The guy told me he was fresh
out of used batteries and didn't recommend putting a new battery into a
bank of older batteries for a few technical reasons.
You can get a self tapping
repair terminal at most auto parts stores for around 3 dollars. Be
careful not to drill the pilot hole too deep.
![]() This year, we're learning
that it is
possible to grow more food than we can eat. Garlic is a case in
point. Last year, we
grew 25 pounds of it,
and despite giving away quite a bit, I had to put around 5 pounds on
the compost pile this week. (I'm leery of giving away subprime
produce since I think it often ends up in the trash. If that's
the case, I'd rather the biomass stay on our farm.)
This year, we're learning
that it is
possible to grow more food than we can eat. Garlic is a case in
point. Last year, we
grew 25 pounds of it,
and despite giving away quite a bit, I had to put around 5 pounds on
the compost pile this week. (I'm leery of giving away subprime
produce since I think it often ends up in the trash. If that's
the case, I'd rather the biomass stay on our farm.)
I didn't know we'd have
so much extra when I planted this year's garlic, so I put in the same
number of beds...and ended up with 8% more. I guess the folks who
say that if you keep planting the biggest heads, your garlic will adapt
to your climate and become more productive each year were right.
I've learned my lesson, though --- those extra 7.6 pounds of garlic
will be given away right now while they're still plump and beautiful.
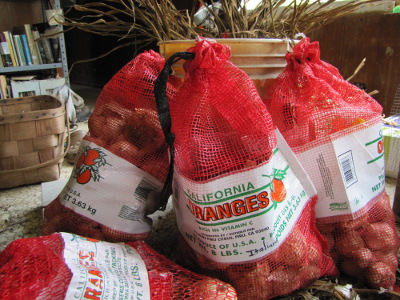 For
next year, I'm cutting back our planting by a third and focusing on the
most productive variety --- Music. I kept data on each type of
garlic for the first time during the 2011 harvest and discovered that
this hardneck garlic outperforms the softneck variety (Silverwhite
Silverskin) that we'd been planting as our main garlic crop by 50% per
bed! I'll still be planting some softnecks since they last more
than twelve months, while the hardneck starts to degrade in early
spring, but Music is going to be our new fall and winter garlic standby.
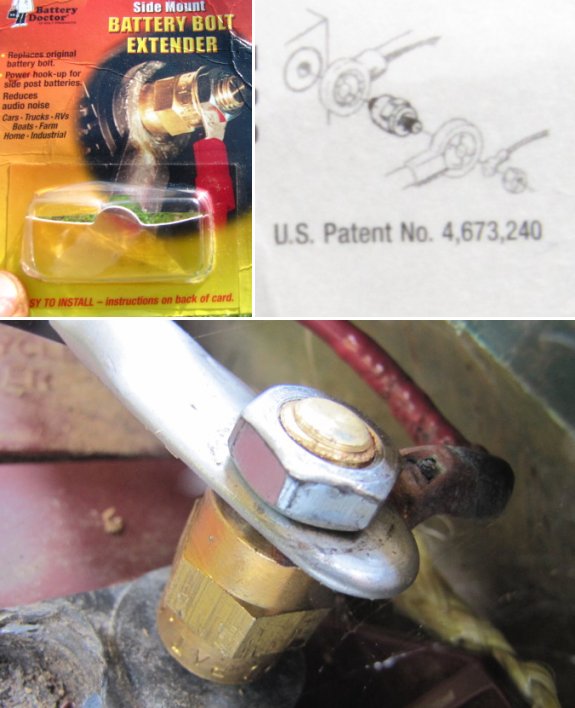
What I was calling a self
tapping repair terminal is actually referred to as a side mount
battery bolt extender-SMU-K#30300.
The bolt is solid brass,
which can help reduce noise when powering a fancy radio or MP3 player.
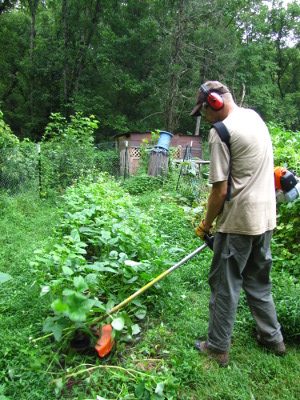 I've talked about the C:N ratio here before, and described
the concept in great detail in the July
edition of Weekend Homesteader, so you'd think I would have
realized the ratio has an impact on cover crops. But it took this
in-depth analysis by the North Carolina Extension Service to clue me in.
Previously, I've thought
of my cover crops as a way to grow nearly free
mulch for the garden, but summer cover crops have a slightly different
purpose if you want to plant your fall crops amid the cut cover.
The long term goal is still to add organic matter to your soil, but you
want your summer cover crop to melt into the soil quickly rather than
tying up soil nitrogen that will be used by subsequent crops.
10:1 is the magical C:N
ratio at which you don't have to worry about bacteria stealing nitrogen
from the soil to counteract the excessive carbon in your cover
crop. Of course, 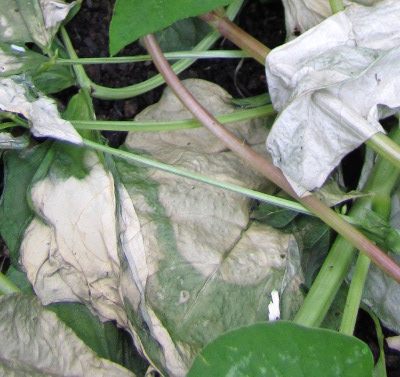 none of the cover crops have a
C:N ratio quite that low, so you need to give them a bit of time to
mellow into the soil after you kill them and before planting so that
the C:N ratio can plummet into the recommended range. Legumes and
buckwheat may just need a week or two to decompose enough to allow you
to plant amid the residue while grains/grasses need much more
time. The chart below shows the C:N ratio of some common summer
cover crops immediately after cutting:
| C:N | Nitrogen (lb/ac) | |
| Legumes | .. | .. |
| Cowpeas | 21 | 75 |
| Soybean | 20 | 80 |
| .. | .. | .. |
| Non-legumes | .. | .. |
| Sorghum-sudangrass | 53 | 78 |
| Sudangrass | 44 | 58 |
| Japanese Millet | 42 | 35 |
| Pearl Millet | 50 | 57 |
| German Foxtail Millet | 44 | 43 |
| Buckwheat | 34 | 43 |
Notice that the total
amount of nitrogen produced by the cover crop isn't directly
proportionate to the C:N ratio. A good way of eyeballing the C:N
ratio is to think of how succulent your plants are. If the leaves
feel woody, they're high in carbon and will take a long time to break
down. If they feel soft and fleshy, you've got a low C:N ratio
that probably won't tie up much soil nitrogen.
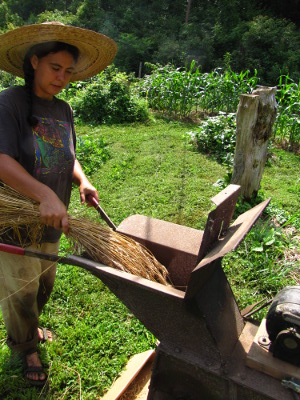 I originally meant to save
our first experimental wheat harvest for winter bedding/treats for the
chickens, but a pair of cardinals found the plants as they hung drying
under the eaves. I quickly changed my plans --- thresh
and winnow out the
grain so it doesn't all go in wild bird bellies.
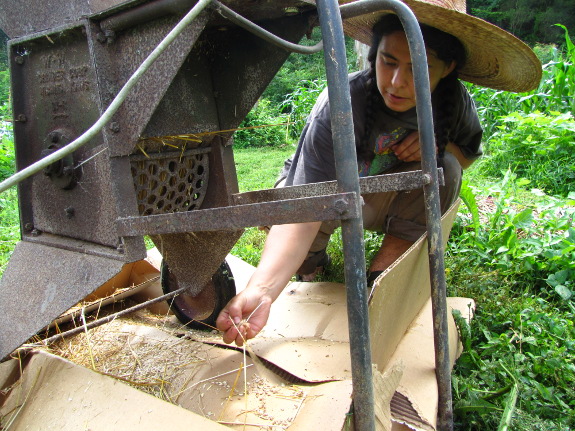
Mark's electric-converted
chipper/shredder was
a perfect threshing machine for the grain, with an old cardboard box
slipped underneath to catch the wheat. I learned that feeding
smaller hanks into the shredder works best, and that it is essential to
have all of the grain heads lined up. I'm glad I tried out the
threshing just for these pieces of wisdom since I'll save a lot of time
with future threshing by tweaking my harvesting technique.
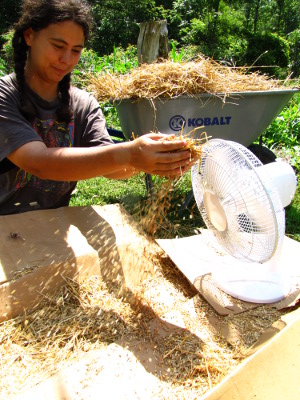 Plenty of chaff ended up in
the cardboard box with the wheat, so my next step was winnowing.
I raked the biggest pieces of stems together, tossing handfuls lightly
into the air so that heavy grains fell out the bottom to remain in the
box. Then I tossed handfuls of what remained higher, this time in
front of the fan, which worked quite well to remove most of the small
pieces of chaff from the seeds.
Total harvest was just
shy of three cups --- a terribly poor showing since I think I planted
about that much in the paddock last fall. However, I figure I
only got about 70% of the grain out with my quick and dirty threshing
(giving the rest to the chickens with their bedding
straw), and the
cardinals ate perhaps another 30% of the whole. And I had a lot
of problems
growing the wheat,
which is the main cause of the small harvest. I figure that for
our first real foray into growing grain, breaking even isn't too bad.
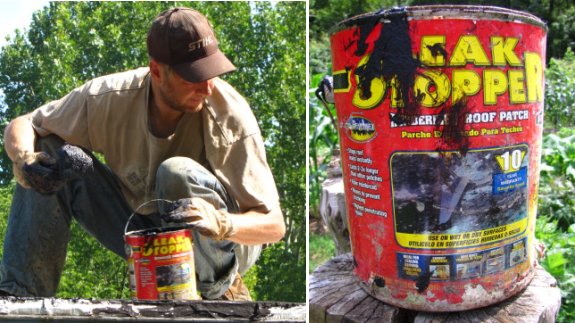
This rubberized roof patching
material takes advantage of a unique penetrating oil called Penetrex.
You can find it at most
stores for around 10 dollars a can.
It's sticky, and messy, and
sometimes requires multiple applications. I've got a dedicated pair of
gloves and spreading trowel that I wrap up in a bag and store in the
roof repair section of our office. It would take way too long to clean
all that gunk off the trowel.
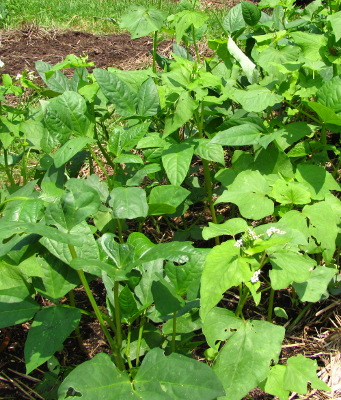 I've read that cowpeas and
buckwheat combined at one part cowpeas to two parts buckwheat make a
quick summer cover crop that
works well with no-till gardens. My trials (so far) agree.
Last year, I tried out buckwheat
as our summer cover crop, and wasn't all that
thrilled, but I think that part of my disappointment was not
understanding what I should be expecting. Like other summer cover
crops that fit between the harvest of your spring crops and the
planting of your fall crops, buckwheat isn't going to add as much
organic matter to your soil as the more woody winter cover crops
will. Instead, buckwheat soaks up nitrogen that might otherwise
get leached out of
bare ground, keeping
the nutrient in circulation for your next crop, and the buckwheat stems
and leaves also break down quickly after being killed so that you don't
need to let your beds rest long before planting. Depending on
your climate, you can slip buckwheat into a four to six week gap in
your garden year, cutting it anywhere from when the flowers first
appear until one week after full bloom, and then waiting one to two
weeks before planting into the tiny bit of stubble that remains.
Adding cowpeas to the
buckwheat cover crop reduces your need to add a layer of compost before
seeding your fall garden since you greatly increase the amount of
available nitrogen produced. Like many legumes, cowpeas fix
nitrogen out of the air, and they do that even
better when there's very little nitrogen in the soil for them to suck
up. Buckwheat steals soil nitrogen from its neighbors, tricking
the cowpeas into fixing more nitrogen than they would if grown by
themselves in the same soil. You cut the duo at the same time you
would have cut the buckwheat (which is several weeks earlier than you
would normally cut cowpeas) and end up with somewhere between 50% to
100% of your nitrogen needs for the fall garden taken care of.
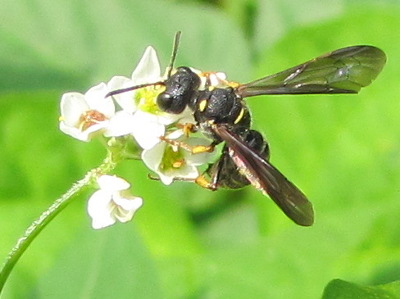 Of course, cover crops have
other purposes besides adding nutrients and organic matter to the
soil. They slow down weed growth, prevent erosion, and (in the
case of buckwheat) attract masses of beneficial insects. The only
potential downside is if you have trouble killing them, but the
weedeater seems to have done a good job of demolishing nearly all of
the buckwheat and cowpeas with one pass. They're so easy to pull
up that I won't mind at all hand-weeding the few plants left behind.
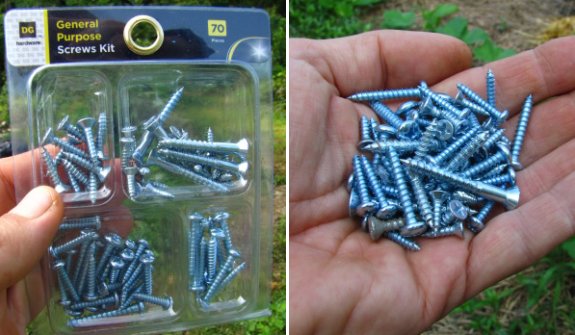
It's good to have multiple
size screws to choose from when you're experimenting
with something like a mechanical deer deterrent or trying to fix a broken chair.
Dollar General has a package
for 1.50 that provides what I consider a good collection at a fair
value. Sometimes I've seen large hardware stores charging this much for
a small bag with 4 or 5 of the bigger ones in this group.
I also discovered this
package will provide you with just the right size rounded head screw
that is perfect for attaching an electric motor to a piece of
appearance board if you ever have the need to build a mechanical deer
deterrent, which is still working at protecting
our garden from invading deer.
Want more in-depth information? Browse through our books.
Or explore more posts by date or by subject.
About us: Anna Hess and Mark Hamilton spent over a decade living self-sufficiently in the mountains of Virginia before moving north to start over from scratch in the foothills of Ohio. They've experimented with permaculture, no-till gardening, trailersteading, home-based microbusinesses and much more, writing about their adventures in both blogs and books.
