archives for 03/2011
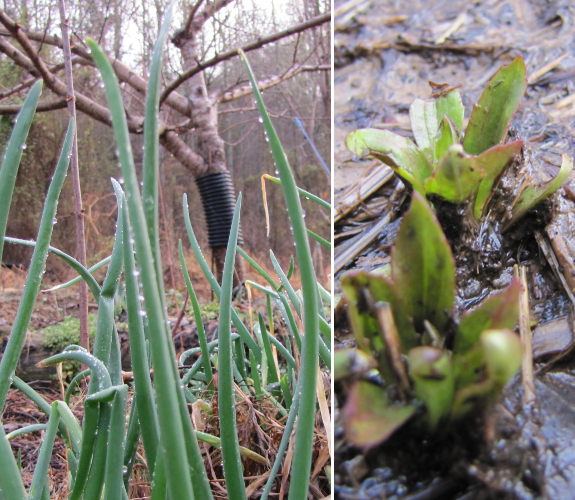
The perennials are
waking up much earlier than usual this year. New plantain leaves
are pushing their way up through the muck where we wear the "lawn" down
to bare soil in front of the door every winter, and the Egyptian onions
have been sending up scads of new leaves for a couple of weeks
now. I even saw a speedwell flower Sunday, but wasn't quick
enough to capture its smiling face before a deluge washed everything
away.
 As
heartening as these signs of spring are, though, I feel compelled to
ask the weather to slow down! You see, the same
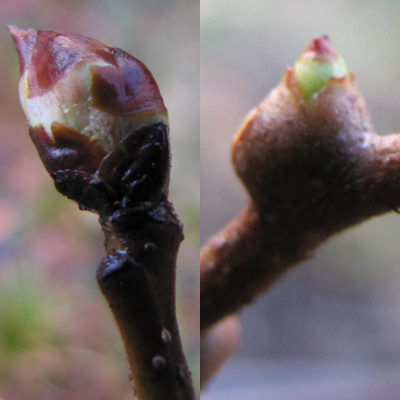
warmth that wakes up the onions is also tempting my fruit trees and
vines to burst open their flowers far too soon. I can already see
green in the swollen pear and kiwi buds, which means those buds are at high
risk of being frostbitten when the inevitable cold
swings of March return. Luckily, my peaches (the only fruit trees
old enough to bear fruit this year) still have tightly coiled buds, and
I'm sending them soporific thoughts. Please, don't open until
April!
 As I've explained previously,
black
soldier flies are primarily grown to provide high quality animal feed, although they can also be
considered a way to get rid of food scraps. The larvae are
voracious feeders that can consume huge amounts of high nitrogen waste
without any input of high carbon components. Since you don't have
to add bedding, the bins can be much
smaller than a worm bin while consuming the same amount of food
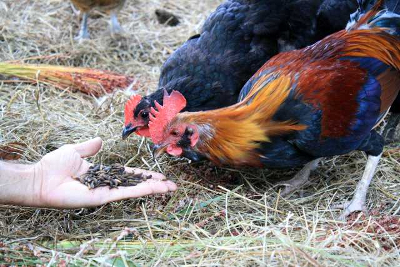
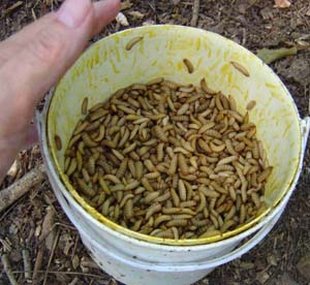
waste. Even better, the larvae self-harvest, crawling right into
a collection bucket so that you can feed them to your chickens,
lizards, fish, or other critters.
If you add 100 pounds of
food waste to your black soldier fly bin, you should end up with 20
pounds of prepupae (large larvae, ready to change into adults.) A
nutritional analysis of dried black soldier fly prepupae consists of:
- 42.1% crude protein
- 34.8% ether extract (lipids)
- 7.0% crude fiber
- 7.9% moisture
- 1.4% nitrogen free extract (NFE)
- 14.6% ash
- 5.0% calcium
- 1.5% phosphorus
 Take a look at your bag of
chicken laying pellets, and you'll probably notice some
similarities. If you fed your chickens a quarter of their daily
rations in the form of black soldier flies, you could take care of most
of their protein and calcium needs, then round out their diet with
cheap components like greens and grains. In addition to saving
money, folks growing black soldier flies for their chickens report that
the feed makes their hens' eggs brilliantly orange, a sign of high
nutrition.
Larvae are the primary
output of the black soldier fly bin, but you do get a bit of compost
--- about 5 pounds for every 100 pounds of food waste you put in the
bin. This small amount of compost can be good for city-dwellers
who don't have room to use up a lot of compost anyway and who would be
thrilled not to have to clean out their food composter for months at a
time. On the other hand, if you're primarily composting your food
scraps to add fertility to the garden, black soldier flies probably
aren't the way to go.
The other disadvantage
of black soldier flies compared to worm bins or compost piles is that
black soldier fly bins are relatively high maintenance. Since you
don't add high carbon bedding to absorb odors, you have to pay
attention and only add as much food to your bin as your larvae will eat
in a day. However, if you're running a diversified homestead and
have a bunch of chickens, that bit of time is probably worth it for the
high quality feed you get in exchange. I think that compost
piles, worm bins, and black soldier fly bins will all find a niche on
our farm.
| This post is part of our Black Soldier Fly lunchtime series.
Read all of the entries: |
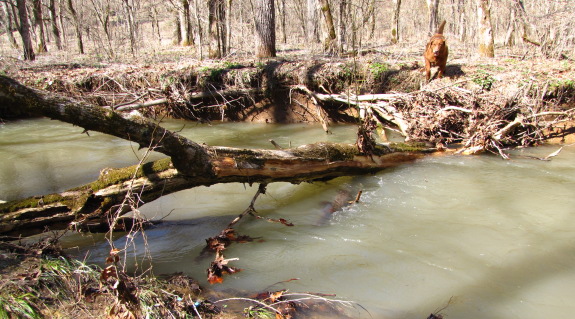
The storm that took down our big pine tree still has us flooded in.
I recently discovered this
semi-convenient tree crossing, which is in a smaller creek that connects
to our creek about a half mile down.
It's a handy detour that may
or may not be there after the next visit from a storm.
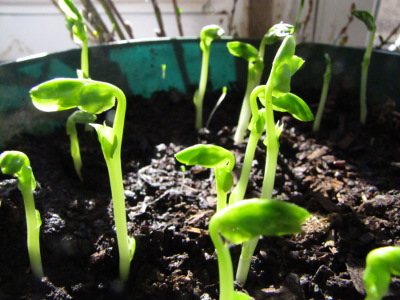
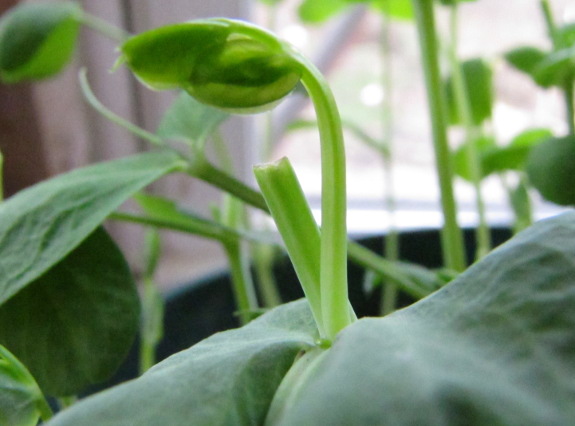
I put our pot
of peas on top of
the fridge, figuring that was the warmest spot inside during this
shoulder season when we're only running the wood stove now and
then. Just over a week later, the pea sprouts are up and growing
fast! I figure we'll be able to snip off tendrils to munch on
starting next week.
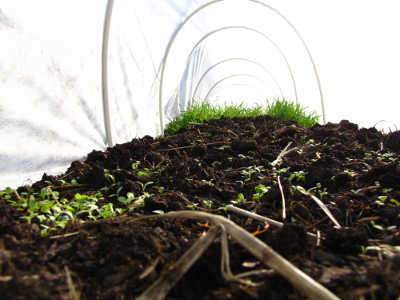 Meanwhile, out
in the quick hoop,
the lettuce bed has greened right up. I anticipate our first
spring salad by the middle of March.
(See that grass in the
background? That's the barley cover crop that didn't winter
kill. I'm going to have to figure out how to make it bite the
dust before I plant the March bed of lettuce.)
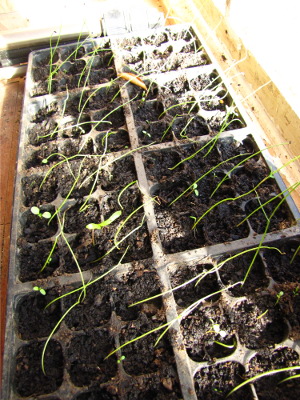 Rounding out my March baby
photos, the
onions I started indoors are so tall I'm starting to
wonder if they need to be repotted. This is the trouble with
starting seeds inside --- they look so cute and low-work when you drop
72 seeds in a flat, but what do you do a few weeks later when they need
more elbow room? I detest the endless round of potting up (and
the neighboring task of finding room for all of those larger and larger
pots), so I may choose to transplant these guys into the onion quick
hoop I plan to build next week. For those of you who start your
onions indoors from seed, how soon do you put your onions out in a cold
frame or straight in the garden?
 I've
dragged my feet about starting black soldier flies because the bins are
relatively complicated, but after a bit of internet research, building
our own is starting to feel feasible. It sounds like a successful
black
soldier fly bin will have good drainage at the bottom, air holes at the
top to let in adults wanting to lay their eggs, and a ramp for the
larvae to crawl up and out into the collection bucket.
Raising black soldier
flies is a relatively new endeavor, and there only seems to be one
company producing pre-made bins. The original bin was called a
Biopod, but now there are two different types of commercial bins
available --- the Biopod Plus (which replaced the original Biopod) and
the larger Protapod.
If you were going to buy
one of these bins new, you'd be shelling out $180 for the Biopod Plus, which composts 5 pounds
of food waste per day, or $350 for the Protapod, which composts 20
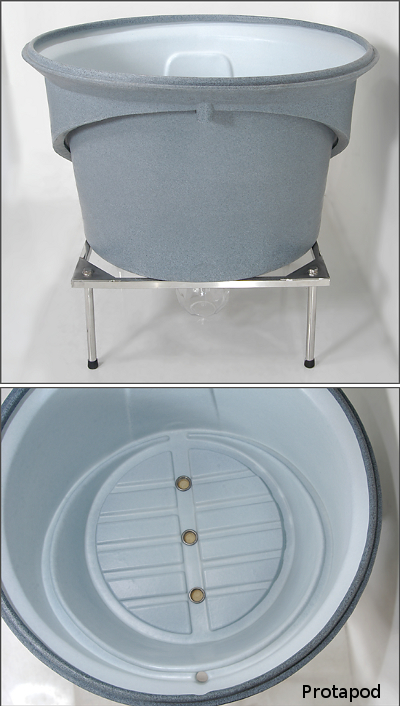 pounds of food waste per day. Both bins are way too expensive for
us, but they do serve as templates for the do-it-yourselfer. The
ramp seems to be the complicated part of the system, since it needs to
start at the bottom of the bin and lead up to the top at no more than a
40 degree angle. Most homemade bins I've seen have mimicked the
original Biopod (and Protapod), trying to make a ramp lining the inside
of a circular bin, but various websites report that it's tough to
attach the ramp to the inside of the bin since it's wet in there and
the larvae work hard to tear everything apart. Instead, the
rectangular bin of the Protapod Plus with the simpler ramp seems like a
system that could be replicated on the home scale with much more ease.
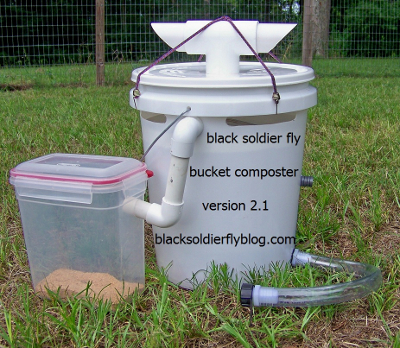
Black
Soldier Fly Blog's DIY five gallon bucket bin has been tried by several
folks and is reported to do quite well, although you have to manually
raise and lower the ramp. The site is a great place to start your
research into black soldier flies, but the bin is too small for most
people, handling only about a pound of food scraps per day.
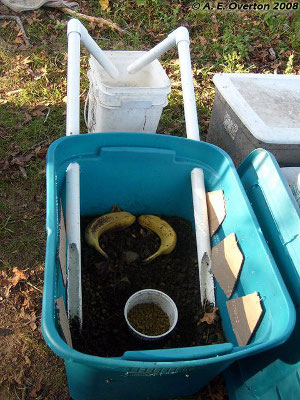
 My favorite DIY bin so
far has been the
one pictured below,
which uses the same idea as the Biopod Plus to make a simple, mid-scale
bin out of a tupperware container and some PVC pipe. The PVC
method makes it seem like you could scale this version
up
indefinitely. You can see a
similar bin with more step by step instructions here. Some experts worry
that the larvae won't be able to find the ramps in this sytem, but
others report that they get very good crawl-off.
When
designing your bin, keep in mind that surface area determines how much
food waste your bin will compost per day. Every square foot of
 surface area will allow you to put in about 3 pounds of food waste, so
for the 18 pounds of food waste currently going begging from our food
scrap program every
day, we would need 6 square feet of bin. It
seems remarkable that such a small bin could handle so much waste, but
black soldier flies are insatiable.
That said, black soldier
flies aren't out flying in cold weather and
their larvae can't work when temperatures are too cool, so this might
not be the short-term solution for our extra food scraps after
all. Stay tuned for more on the black soldier fly life cycle and
how to winterize bins in later posts.
| This post is part of our Black Soldier Fly lunchtime series.
Read all of the entries: |
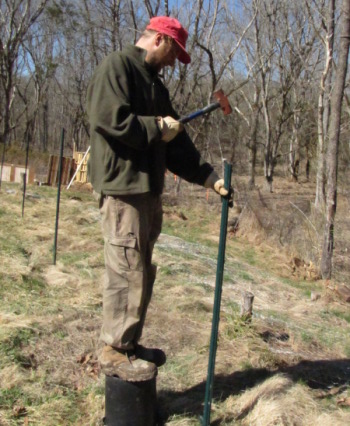
This looks dangerous, but
feels safer than using a step ladder on uneven ground.
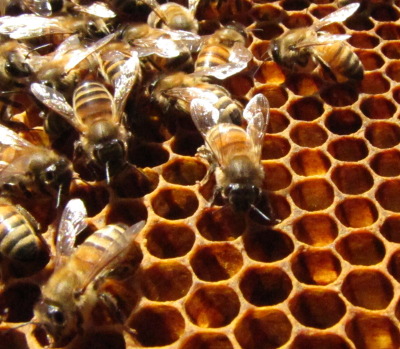 I
took advantage of a warm, sunny afternoon to
dip into the hives. As I suspected, the second weak
hive
was dead. I hadn't been entirely sure because our strong hive
found both empty hives so quickly that there were always bees coming in
and out, carrying honey home to their own colony. The robbing is
a good sign, since most people report that bees won't steal honey from
a colony collapse disorder hive --- more data to support my hypothesis
that my dead hives were due to excessive and sudden cold snaps combined
with (perhaps) too high varroa mite numbers.
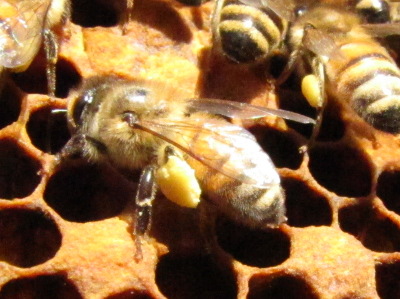 Inside the living hive, parts
of
two frames were already full of brood
in all stages of development (maybe a third of a frame of brood
total.) Since this hive is our only hope at the moment, I
lavished them with honey and pollen, moving a full brood box from the
other hives on top of their half-full brood box so that the colony will
have plenty
to eat. Not
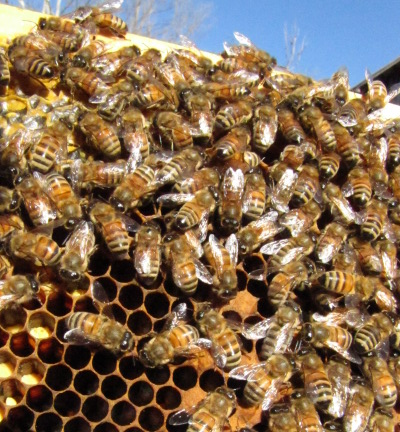
that they need it --- they're already carting home wild pollen.
But I figure I might as well save them the trouble of flying over to
the
neighboring hive to steal the abandoned honey.
 Now it's just a waiting
game. How soon will the hive be so full
of brood that I can split
it in half? I
saw the first dandelion
flower this week, which is a cue that spring has advanced far enough
to install new package bees, and I hope our bees also consider that
brilliant yellow orb a sign that they should have a baby boom.
I'm tempted to say that
the farm feels empty with just one hive of bees, but the truth is that
those workers are ubiquitous. In the last week, I've seen them
out at the worm bin, inside at the forsythia I'm forcing on the kitchen
table (left the window cracked on a warm day --- oops!), and buzzing
around me as I worked in the garden. Our honeybees are never out
of sight, out of mind.
Black soldier flies are probably the least domesticated of the
invertebrates we work with on our farm. Unlike managing a worm
bin, when managing
black soldier flies you have to be aware that your
insects spend part of their life cycle outside the bin, so you need to
find a way to attract these wild critters to lay their eggs in your
rotting food scraps. This task has two parts --- producing just
the right scent and then providing optimal egg-laying habitat.
Black soldier fly adults
don't eat, but they know that their offspring
are going to be hungry, so the females are drawn to the odor of rotting
food. If you live out in the boondocks like we do, you can
probably just throw some food scraps in your bin at the right time of
year and wait for the noxious smell to attract momma flies. But
if you're putting your black soldier fly bin outside your back door and
live in an urban setting, you might want to try out one of the
attractants shown to bring in black soldier flies without
also attracting complaining neighbors. Dried corn soaked in water
so that it ferments is supposed to be a good attractant, as is sour
milk. If you have a friend who's already running a black soldier
fly bin, you can ask for some of his compost tea and paint the liquid
on the inside of the lid of your own bin --- black soldier flies
are attracted to the
scent of other black soldier flies.
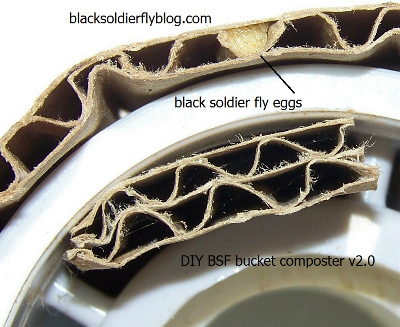 Unlike house flies, black
soldier flies
won't lay their eggs directly
into the rotting food, so you also have to give the mother fly a spot
to lay her eggs. In a pinch, she'll lay her eggs on the inside
walls of the bin, but it's better to make her a cardboard egg-laying
station. Just cut small strips of corrugated cardboard and
attach them to the inside of the lid of the bin so that lots of
crevases are exposed. Momma fly will lay her eggs inside the
cardboard corrugations, and when they hatch, the larvae will drop down
into the rotting food below.
Using these tips, you
should get black soldier flies coming to your
bin...as long as you're trying at the right time of year. Adults
fly only during warm weather, with April being the earliest you're
likely to see any and with the majority coming out later in the
summer. So if you build your bin now, you'll want to wait to bait
it until you're getting ready to plant your summer garden. Or you
can jump the gun and buy some larvae, but be aware that the larvae
won't turn into adults until warm weather, so their population won't
expand in your bin the way worms would. I'm not sure it's worth
it to buy black soldier fly larvae unless you live in an area where
they aren't found in the wild and are hoping to jumpstart a wild
population.
| This post is part of our Black Soldier Fly lunchtime series.
Read all of the entries: |
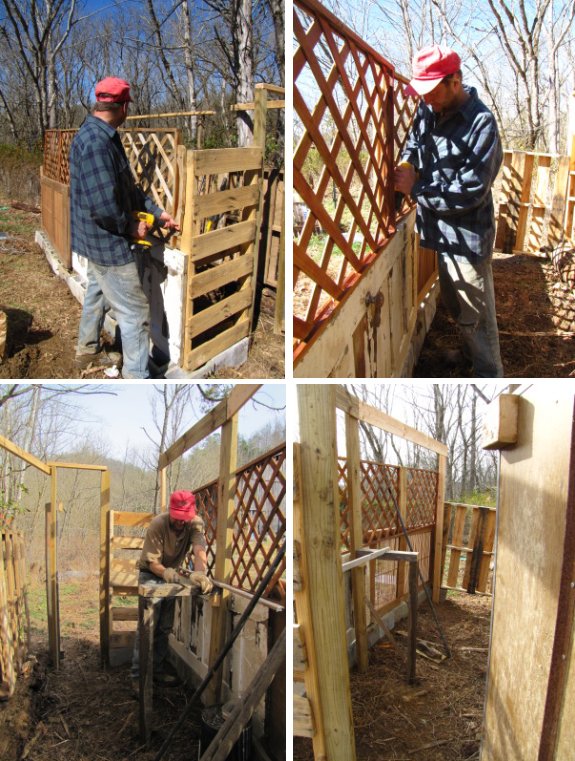
The used
pallets are working out nicely as construction material for the new
chicken coop.
When I put the second
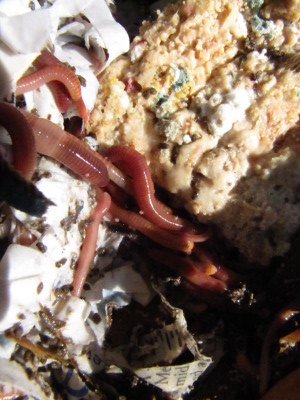
round of food scraps in the worm
bin this week, I was surprised to find some worms under fresh
bedding that I'd laid out on the far side of the bin to drain.
This area is six feet away from where we'd introduced the worms and had
no food to attract them, making me wonder what worms were doing there.
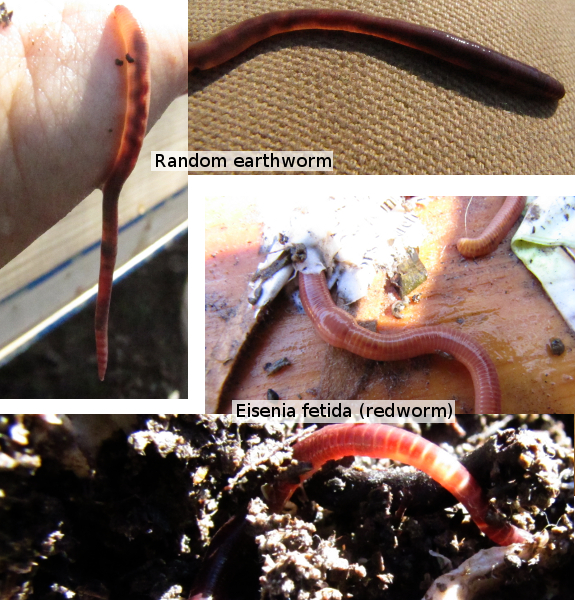
 My first thought was that the
worms might actually be run-of-the-mill earthworms since I'd had the
cardboard bedding sitting out on the ground before soaking it and
adding it to the worm bin, and I'd noticed at least a dozen worms
taking advantage of the moist hiding place. However, a close look
at the foraging worms in the bin versus a
typical earthworm from outside the bin showed that the foraging worms
were redworms --- notice the almost orangey cast to the redworms versus
a purplish cast to the random earthworm, and the obvious yellowish
lines around
the redworms.
Poking around inside the
bin, I also discovered that the worms had found all of the food scraps,
although they seemed to be congregated in some areas at much higher
concentrations than in others. I guess worms travel further than
I give them credit for. So, the question is --- how do worms
decide where they want to go? Do they just move randomly until
they hit something good to eat, or can they smell food from a
distance? Do they give off any chemicals to attract their buddies
when they find a good stash of vittles? Anyone know a good source
of information on redworm biology, behavior, and ecology?
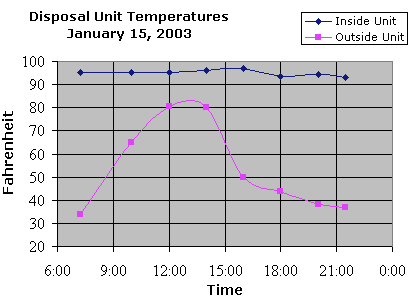 Although it's tough to get a
black soldier fly bin started during cold weather, some folks theorize
that you can keep summer-started bins operating all winter. Since
the larvae produce a lot of heat as they consume your food waste, a
piece of styrofoam placed on top of the compostables may keep the
larvae above the 70 degrees Fahrenheit they need in order to stay
active.
While winterizing a
black soldier fly bin sounded intriguing at first, the more I
researched it, the more I felt that I should probably just plan on
using the larvae during the summer months. An exhaustive search
of the internet turns up lots of folks who theorize about winterizing
their black soldier fly bins, but no one north of Florida who actually
kept their larvae active year-round. The problem is that if your
larvae stay active, they'll crawl out of the bin and pupate pretty
quickly, which leaves your bin empty of larvae since the adults won't
be laying fresh eggs in the winter.
On the other hand, if
you have the freezer space, you can toss extra summer pupae into your
larder for winter chicken treats. And since cold weather seems to
put the insects into a semi-hibernatory state, I wonder if you could
store a bucket of live pupae in a root cellar. Have you tried any
methods of extending your black soldier fly season into the winter
months?
| This post is part of our Black Soldier Fly lunchtime series.
Read all of the entries: |
I made this coop taller
inside so I could have room to add extra roosting areas.
Something tells me that our rooster would feel more in charge if he
had a spot slightly above the primary area where he can watch over his
flock.
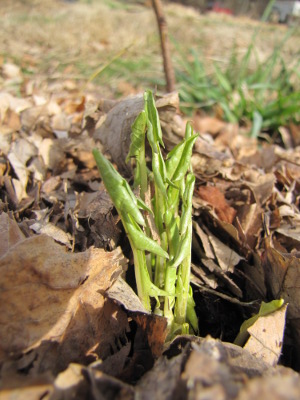 When I pruned
and mulched the berries a few weeks ago, I left the dandelions that
had grown up in the row but threw a bunch of leaves on top of
them. My goal was to get sweet, blanched dandelion leaves with no
work, and my experiment succeeded quite well. Too bad there were
only a couple of plants there to work with.... I had to round out
my scavenging with plain old dandelions out of the yard to come up with
enough greens to slip into our early spring, all-from-the-garden omelet.
Although you probably
think I'm nuts, I hunted high and low for named-variety dandelion seeds
and ended up settling for chicory (aka Italian Dandelion). Since
they're perennials, both chicory and dandelions will feed you greens
long before any unprotected annual is regularly putting out leaves, and
this is the time of year when I'm willing to put up with a bit of
bitterness to get fresh food. Eric Toensmeier's Perennial Vegetables noted that some 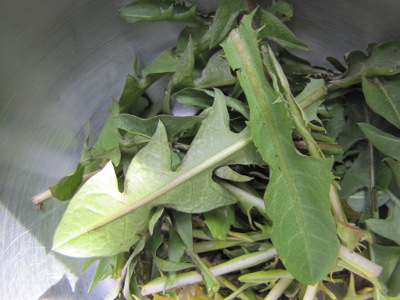 chicory varieties are
perennials while others are annuals, and I couldn't find any
specifically labelled "perennial" during my seed hunt, so I eventually
settled upon Catalogna Special and Red Rib from Johnny's. I'm
trying out both varieties, along with lovage, in the forest garden and
will hope that at least some of them become a self-maintaining
perennial addition to our garden.
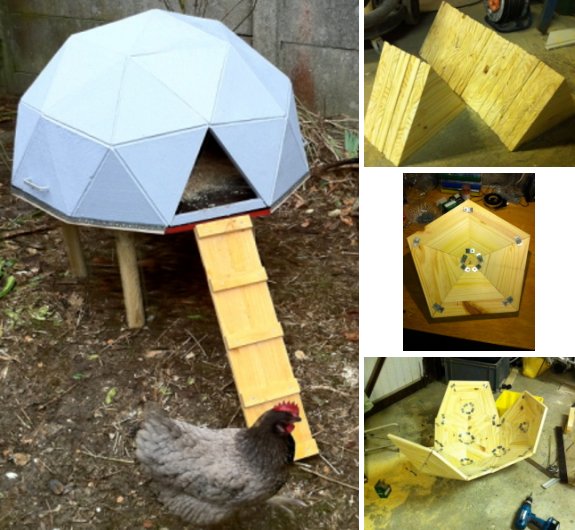
Anthony Liekens has created a
masterpiece with this geodesic
dome chicken coop.
He's done a great job
documenting how a person can take 30 isosceles triangles, 9 equilateral
triangles, a box of screws and some plumbers strapping and make such an
awesome home for his chicken.
I think I would have added
some sort of roosting bar inside. although I'm sure the elegant
geometry of the dome makes his hen feel safe and special.
 My compost
bin was dog-proof,
just as I hoped. Unfortunately, it wasn't squirrel-proof.
We usually walk past the
compost/worms/parking area at least twice a day while walking Lucy, and
that tends to keep critters away, but when we got flooded in, the
wildlife got bold. As soon as I was able to cross the creek, I
peered in the compost bin and saw two big holes where some kind of wild
animal (I'm guessing squirrels) had squeezed through the lattice and
had a feast.
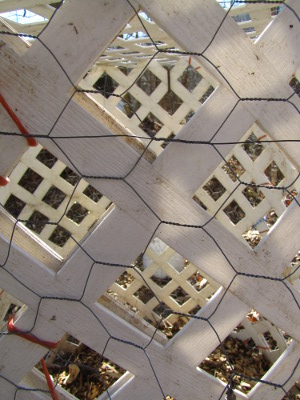
Although it doesn't
matter too much if a few squirrels nibble on the food scraps, I want to
keep my compost, so I added a layer of chicken wire around the outside
of the bin. I'm not sure if even that will be enough to keep out
a determined critter. I guess we'll just have to wait and see if
someone else breaks in to eat.
Anna and I went to a couple of
incredible lectures on mycoremeditaion and mycoforestry this weekend by
Tradd Cotter
at the Asheville growers school.
Mr Cotter gave a riveting
talk on the importance of mushrooms in our ecosystem and how we can use
low tech methods to give your fungi a helping hand. He sells bulk
spawn, plugs, kits, extracts and supplies at his website Mushroom Mountain.com,
which has become our new source for everything fungus related.
Not only did the seats fill
up on Sunday's talk, but the floor filled up and I even saw a few people
standing in the hallway listening. Clearly his passion for mushrooms is
contagious and with any luck it will spread just like the mycelium from which
this magical fruit is born from.
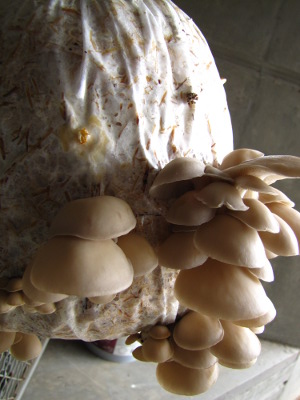 We had an astounding three
day weekend in Asheville, meeting great friends (hi, Everett and Missy!),
exploring established forest gardens (thank you, Alice and Dudley!),
and learning about mushrooms, mushrooms, mushrooms (and a few other
things) at the Organic Grower's School. I'll regale you with our
gleanings over the next few days, once my brain makes sense of all of
that new information.
As we drove home, we
looked down over the hill...and saw our creek
spreading out across the whole valley. I've never been able to
see our creek from that road before, so I knew we were in for a hard
walk home. We followed Mark's path across
the fallen tree (me
crawling to protect the electronics I wasn't willing to leave in the
car), then walked up the floodplain as dusk fell.
Two thirds of the way
home, we discovered the flaw in our plan --- the
alligator swamp was flooded just like the creek, and we either had to
climb up and around the slippery hillside or push our way through the
cold water. The former option is the slower, drier way, but we
opted to strip from the waist down and just plug on through. That
water was cold on our bare legs, but soon we were home to a fire in the
wood stove and a couple of lap cats. Quite a difference between
our farm and the big city, but I have to admit that I like it better
here...even during frigid floods.
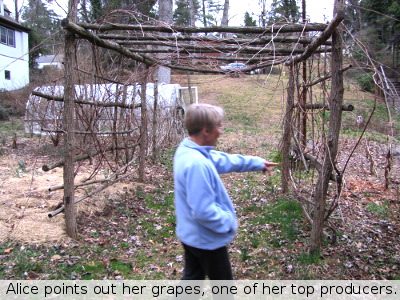 Five
years ago, Alice and Dudley started putting in edible perennials
in their large backyard, at the same time that their neighbor Robert
did the
same. Walking through their gardens was a bit like reading
through those catalogs I drool over, full of fruits I'd heard of but
had never seen in the flesh, like goumi, jujube, and more. Other
unusual plants were familiar from my own garden, where they haven't had
time to achieve
their full potential. Since most of Alice, Dudley, and Robert's
perennials were old enough to fruit, I was
 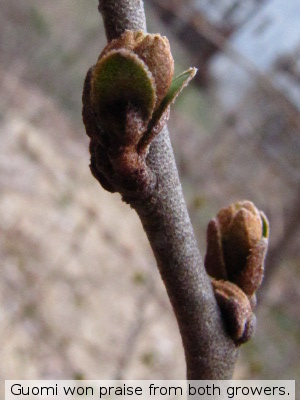 curious to see which ones
had been exciting (or disappointing) surprises in a climate much like
my own.
First for the big
disappointment. Both Alice and Robert told me
that their gojiberries never fruited. In our climate, the variety
they planted (and which I have in my own garden, a gift from Alice)
blooms so late that the fruits never have time to form.
Meanwhile, the thorny shrub takes over the garden. Robert has
plans to root out his gojiberries this year, and after hearing their
experiences, I think I'm not going to give mine the extra grace year
I'd promised it and will follow suit. There's no room in a
working garden for an underachiever.
Alice was also somewhat
disappointed in her bush cherries, noting that
the fruits were small and seedy, so they were tough to pit for
cooking. Robert mentioned that his jujube hadn't produced fruit
in five years. And Alice's jostaberry hasn't fruited in that time
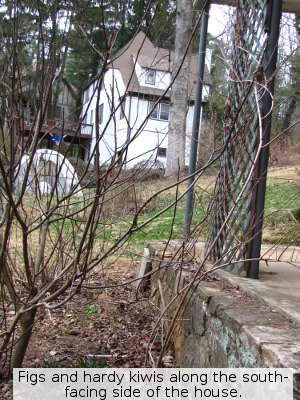 frame
either, although she mentions that the problem could be shade.
Other non-fruiters included Rosa
rugosa, Japanese
walnut (although nuts take longer and this plant still has hope), hardy
kiwi, plum yew, and
paw-paw.
Meanwhile, I
picked the gardeners' brains about their top perennials
--- ones that produce delicious fruit with little work.
Traditional fruits were at the top of each list --- ever-bearing
red-raspberries and thornless blackberries for Alice and a peach and
Asian pear for Robert. But so were some less usual fruits ---
both agreed that their Asian
persimmon (Eureka)
and goumi were tops for
flavor and ease. It sounds like I might need to add some of both
in our own garden.
| This post is part of our Real Forest Gardening lunchtime series.
Read all of the entries: |
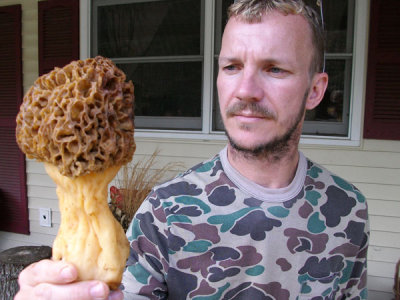 You can find a morel in every state except Florida and
Arizona, you just need to know where to look and how.
1. Carry a meat/soil
thermometer with you at
all times to test for when the season begins. Check the soil
temperature in the morning shade. When you find a spot around 50 it's
time to begin hunting, 58 is when it's all over and your only hope is
to go to higher elevations.
2. If you hunt in an old
orchard be aware that morels can absorb heavy metals which often linger
for decades in the soil from the spraying of a wide variety of toxins.
You can get a heavy metal testing kit, but I think it would be easier
and safer to go looking in another spot.
3. Go check out Tradd
Cotter's concise page on morel hunting. He's got a lot more tips
like which trees to look out for and what other mushrooms and plants
are making their appearance at around the same temperature.
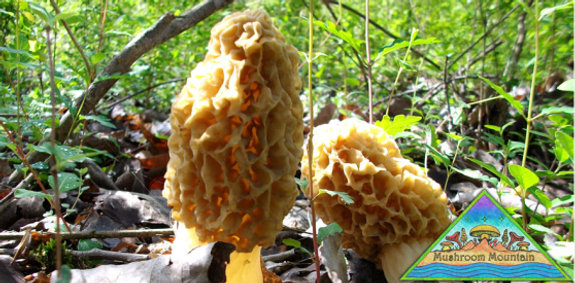
Yes...the mushroom in the
picture is real and not a photoshop trick, proof that this guy knows a
thing or two about what it takes to find them and he's working on new techniques to
cultivate them at home.
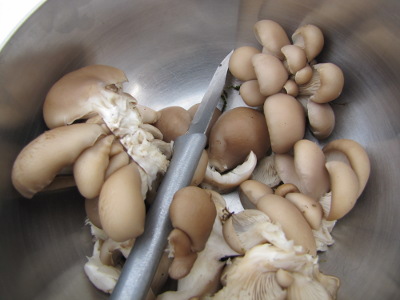
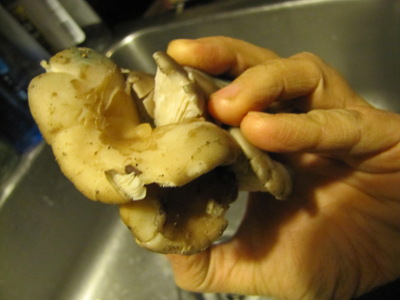 I'd been watching a wild
oyster mushroom budding out of a fallen snag in the floodplain for a
couple of weeks, but something ate it before I thought it was big
enough to pick. So I was thrilled to find an oyster mushroom
growing on a stump on the campus of the University of North
Carolina-Asheville during the Organic Grower's School. I broke
the oyster loose and put it in my coat pocket, where I surprised myself
throughout the day by putting my hand in the pocket and touching a
damp, slimy object.
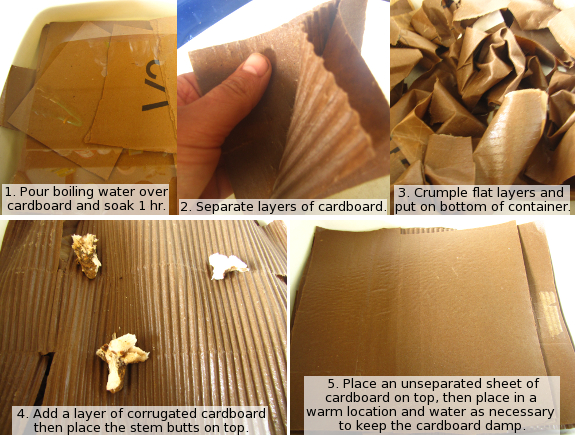
 Home at last, the mushroom
was a bit battered and dirty from its long ride, but I figured it was
in good enough shape to start up my cardboard
propagation
again. After soaking cardboard, separating the corrugated center
from the flat outer layers and layering the mushroom butts between the
corrugated cardboard sheets, I wandered outside to think about our
cultivated mushrooms. And there I found yet more oysters ready to
eat! Both Pohu and Blue Dolphin had sent out several fruiting
bodies. I used up our last container of frozen mushrooms two
weeks ago and was just wishing for more to go in our lasagna --- good
thing our mushroom logs came through.
 Yesterday,
I showcased the trees,
shrubs, and vines that did best in two Appalachian forest gardens, but what about the lower
layers? The first thing I was struck by in both Alice and
Robert's gardens was their deep mulches. Finding enough waste
materials to mulch with is always a struggle on our farm, but Alice and
Robert had both tapped into the copious organic matter being thrown
away in cities every day.
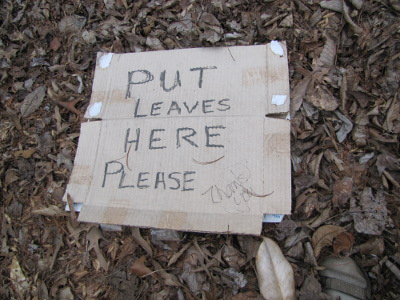
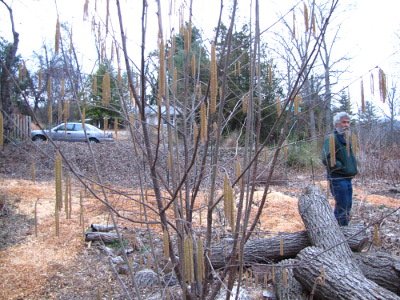 Alice uses leaves --- a
system easy to replicate for any city-dweller --- but Robert's method
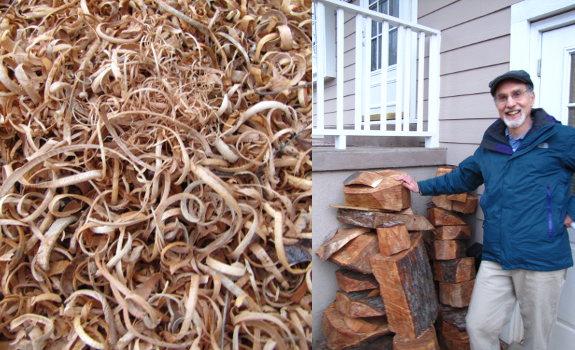
of finding mulch is even more elegant. Robert is a bowl-turner
who makes wooden bowls in his home studio, so he scavenges fallen trees
from the neighborhood. The trees are cut into pieces to make into
bowls, and the curly shavings are spread heavily on the soil of his
garden. Add in some alpaca manure for fertility, and you've got a
very healthy, happy forest garden.
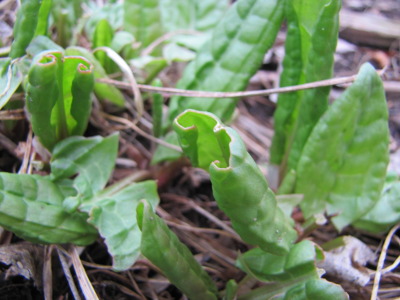 Although
it was too early to see most of the herbs in the forest garden, a few
were already poking up through the mulch. Alice had stinging
nettles along the shady edge of her garden and sorrel and horseradish
mixed in among the trees and shrubs. She mentioned that she
wished she hadn't planted the horseradish --- the plants are extremely
vigorous and nearly impossible to remove if you change your mind.
I'll have to come back in the summer to see the lower level of these
two forest gardens in all their glory.
| This post is part of our Real Forest Gardening lunchtime series.
Read all of the entries: |
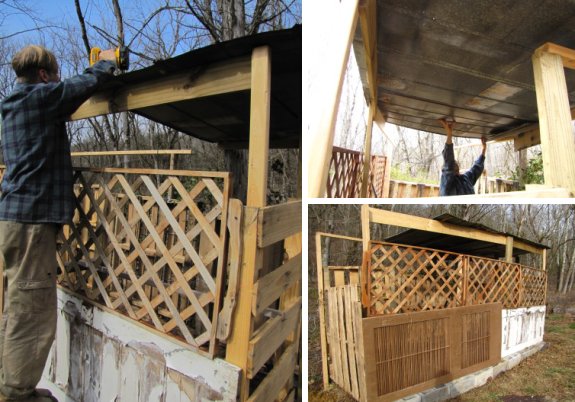
Another afternoon working on
the used
pallet chicken coop makes flock moving day that much closer.
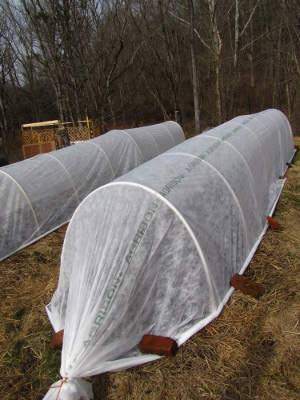 While
planting lettuce, onions, and spinach yesterday, I pondered the pros
and cons of quick
hoops versus cold frames. I'm not going to have
any side by side comparisons this year, but I have started noticing
that each system works a bit differently. Here are the main
factors to consider when choosing whether to build a quick hoop or a
cold frame:
- Light penetration --- This is where I suspect that quick hoops win. Cold frames have wooden walls that shade a relatively large area on the south side of the bed, and in early spring I've noticed that lettuce just won't germinate in that cold spot. Quick hoops don't create any shady areas, and so far I've seen no cold spots that restrict germination.
- Heat capture --- I have
no data here, but my gut says that the lower profile of cold frames
would hold the day's heat closer to the plants. However, Eliot
Coleman's experiments suggest that light penetration is more important
than heat capture when growing cold weather crops, so quick hoops'
lower ability to capture heat might not matter.
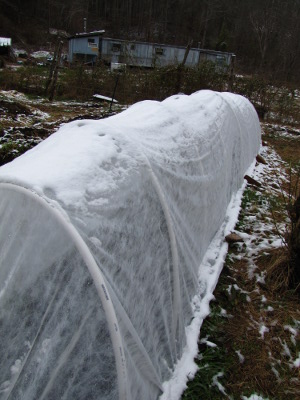 Water penetration ---
Here quick hoops lose. The flat top of cold frames lets water
pool on the row cover fabric just long enough to drip down through and
water your bed, but water mostly runs off the quick hoop. I was
surprised to see dry spots inside our quick hoops this week despite
about eight
inches of rain in as many days.
- Snow load --- The same structural features that make water slide off quick hoops makes snow slide off as well, so I suspect quick hoops would stand up much better under heavy snow conditions than cold frames do.
- Wind --- The higher
profile of quick hoops catches wind much more than our cold frames
do. We haven't had any more major trouble since I added the rebar
to the sides, but we also don't live in a very windy climate. If
you live in a treeless area, you might be better off with cold frames.
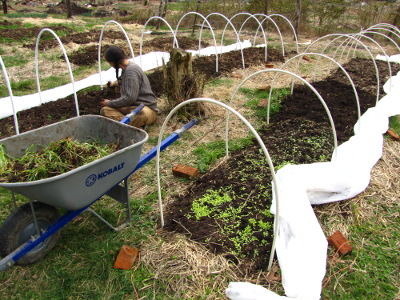 Ease of opening --- This
is a toss-up, but I think that cold frames win. It takes me about
five minutes to carefully unroll the rebar and take the row cover
fabric off the quick hoops, although if I just want to peek in I can
simply untie one end and stick my head under the fabric. My cold
frames are usually much
easier to get into. That said, I suspect that we can come up with
a more accessible quick hoop as we play around with the design.
- Cost --- If you have old
lumber lying around like we do, cold frames are a big winner since they
only cost as much as the fabric and screws. On the other hand, if
you're buying the materials new, I estimate that our quick hoop costs
29 cents per square foot (if you use the cheap PVC rather than the
hot/cold version) versus 64 cents per square foot for a cold frame (if
you use untreated 2X10s).
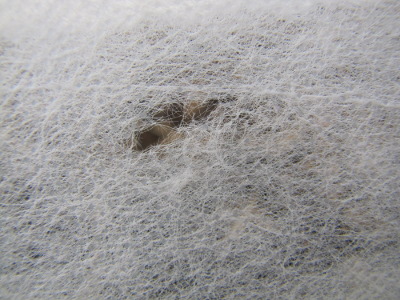 Longevity of fabric ---
After the initial construction, the only regular cost for either system
is replacing tattered row cover fabric. I've noticed that the
tautness of the quick hoop fabric makes it very
easy to punch your fingers through, and the rebar tries to snag and
tear holes as well. However, our animals don't think quick hoops
look like a fun thing to jump on, which is the fastest way to lose row
cover fabric, so we might actually get a bit more longevity out of our
quick hoop fabric than out of our cold frames.
- Modularity --- Our raised
beds aren't all the same width or length, so I've found it difficult to
move cold frames from bed to bed. With my rotten, salvaged
lumber, cold frames also tend to fall apart when I move them.
Quick hoops are much more modular since you can just drive in your
rebar stakes at the edges of the bed and cover irregularly shaped beds,
using the same raw materials in different years to protect beds with
somewhat different dimensions.
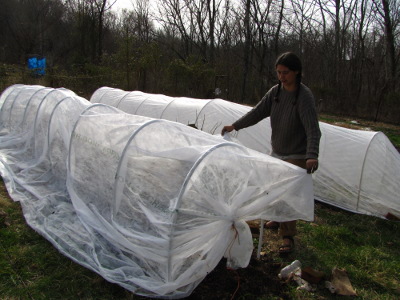 Speed of contstruction
--- Once we knew what we were doing, it took about two hours of my time
and half an hour of Mark's time to make a 23 foot long quick
hoop. Cold frames require two people for more of the process, but
probably take about the same number of man-hours.
- Ease of storage --- Quick hoops win big here. During the summer when I don't need our cold frames, they're leaning up against a fence or wall, which creates a weedy spot that's hard to mow around. Quick hoops disassemble into a few long poles and a bit of fabric, so they'll be easier to fit into storage.
- Aesthetics --- Our cold
frames are pretty enough, but there's just something striking about the
domed quick hoops that tempts me out into the garden.
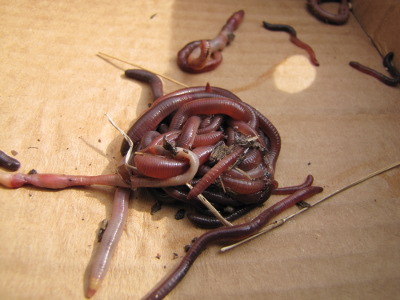 Worm collection --- I don't know if
this is a positive or a negative, but our quick hoop seems to collect
earthworms in the rolled up fabric on the edges. I pulled this
handful of worms out as I opened up the quick hoop Tuesday, and the
chickens were very appreciative.
Overall, my gut feeling
is that quick hoops are the winner, although
I'd love to figure out a way to make them easier to get into. I'm
pondering making long, skinny sandbags out of old dogfood sacks that
can be laid along the entire edge of the structure. Stay tuned
for more details!
Whenever I tell people
about forest gardening, the inevitable reply is "You really expect to
grow all of your food with perennials?" I'm quick to set them
right, explaining that we definitely plan to keep growing our
delectable tomatoes, broccoli, and other row crops. Forest
gardening and traditional annual gardens work well together --- you can
set aside the best land for your vegetable garden and put your forest
garden on the sloping hillside that would wash away if you tilled it or
down in the swamp where you'd never be able to plow. You can also
plant traditional vegetables amid your forest garden plants in sunny
gaps (especially as your perennials are slowly filling out.)
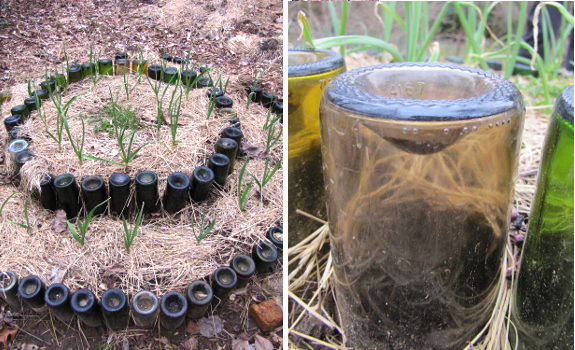
Alice and Dudley mixed and matched annuals and perennials very
elegantly in their city backyard.
Since trees run along
the south side of their property, they take advantage of that partial
shade to plant their forest garden crops. Real shade lovers like
nettles, currants, and elderberries gradually give way to trees and
shrubs that need full sun. In a gap in the forest garden, Alice
had built a beautiful raised bed out of colored bottles and planted it
with garlic.
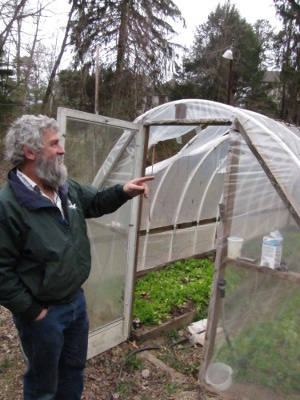
Meanwhile, Dudley had
selected the sunniest spot near the north side of the yard for growing
tomatoes and lettuce in his homemade greenhouse. You can read
about how he made this 20 foot long greenhouse for about $300 in just a
few hours on his website. You might notice in
this photo that the plastic is tearing --- Dudley explained that the
greenhouse covering is finally starting to get too brittle to repair
after five years and will need a new sheet of plastic.
I hope that Alice and
Dudley's garden will inspire some of you to take a look at your own
growing space and mix and match your annuals and perennials.
| This post is part of our Real Forest Gardening lunchtime series.
Read all of the entries: |
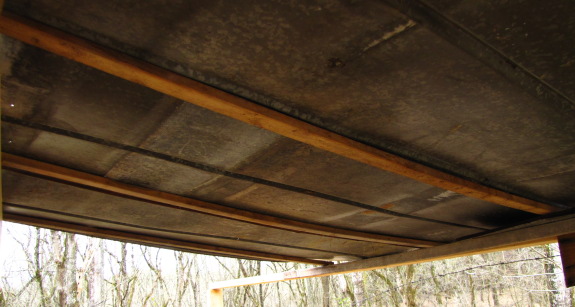
 I
used several furring strips as a roof supporting material on the used
pallet chicken coop because it's all we had on hand at the time and
I like experimenting with cheap options.
I
used several furring strips as a roof supporting material on the used
pallet chicken coop because it's all we had on hand at the time and
I like experimenting with cheap options.
The goal is to eventually
arrive at a design that is easy and cheap to replicate while lasting a
decent amount of time.
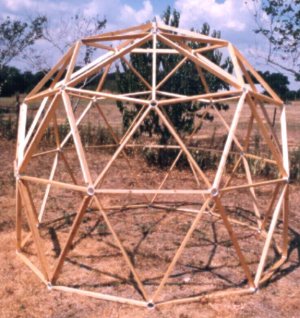
Lately I'm liking this
geodesic frame structure which I think is using 1x1's or 2x4's and
might even be able to be done with furring strips. Maybe as a future
mushroom lab or some sort of fruit tree hoop house or some other yet
unknown function.
 As a gardener, I have a hard
nose and a green thumb. In other words, I tell my plants "sink or
swim" and --- mostly --- they swim.
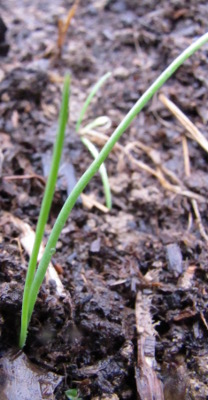
Which is all a long way
of explaining why I transplanted my onion
seedlings into the
garden this week even though they really aren't ready for the cold
weather that's yet to come. I hedged my bets by putting half of
the seedlings under a quick
hoop, then tempted
fate by planting the rest of the seedlings out in the open. I
figure that if the baby onions with no protection thrive, I will have
figured out the easiest method to get good onions from seed in our
climate --- start seeds in a flat and then put them out in the garden
when they have two leaves. I'm willing to risk some seedlings in
pursuit of long term laziness.
Of course, all that
experimentation isn't what I'm hanging our hopes of a summer onion crop
on. I direct-seeded another 200 seeds under the quick hoop and
yet another 200 out in the open. I figure that by the end of this
spring, I'll have tried most of the possible permutations for onion
seedling growing and will have chosen a method to use in following
years.
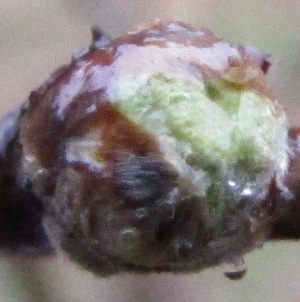
Meanwhile, my nectarine
tree thinks I might just get lucky this year with my transplanted
onions. The tree is already in the green bud stage, which means
she's counting on no
weather colder than 21 degrees so that she can keep 90% of her fruit. Here's hoping she's
right.
 Zev Friedman, vice president
of Living Systems
Design, regaled us
with an exciting talk about Real Life Forest Gardening at the Organic
Grower's School. He included a list of the top 13 species that he
recommends for every forest garden, reproduced below:
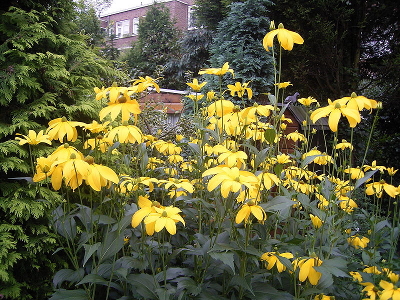
Sochan aka Cutleaf Coneflower (Rudbeckia
laciniata) is an
herb that can grow in shade or sun, damp or dry soil, and will feed you
spring greens followed by echinacea-like medicine in the summer.
I'd never heard of sochan and would be very curious to hear from
someone who has tried it in their own garden. I have a hard time
believing that sochan would win out over winter kale in a taste test,
but Zev asserts that he's changed over entirely to perennial greens.
Wood
nettle (Laportea
canadensis) is a
shade-loving native that's related to the more familiar (but
non-native) stinging nettle. Zev notes that wood nettle is
tastier but has fewer medicinal properties than stinging nettle.
I have wood nettle growing all over the woods of my property and I've
been meaning to bite the bullet and taste it --- maybe this spring!
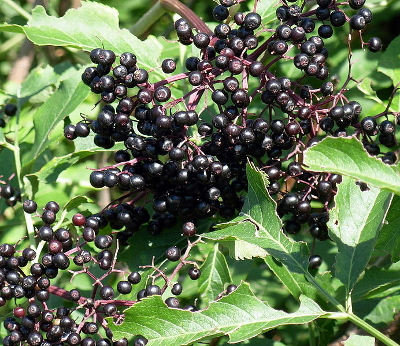 American elderberry (Sambucus
canadensis) is
grown for its fruit, and also for the shrub's vigorous habit that
allows it to form hedges and retain soil along streams. We've got
wild elderberries and I even let a shrub grow up in our forest garden,
but I don't think this plant will become one of our primary food
producers --- very few people eat the fruits raw and we're not
wine-drinkers or jam-eaters.
Mulberries (Morus alba, M. rubra, and M. nigra) produce edible fruit,
fiber, fodder, and wood for bow-making. I'll eat mulberry fruits,
but I tend to relegate them to the bottom of my taste test list.
Nevertheless, I have planted an ever-bearing
mulberry since the
copious fruits are great for chickens and other animals.
Lamb's
quarter (Chenopodium
album) is a
self-seeding annual green that grows in sunny, disturbed areas. I
suspect this species is of a lot more use to urban gardeners, who can
forage lamb's quarter from an abandoned lot. We try to keep the
weeds down in our garden, so don't provide much habitat for it.
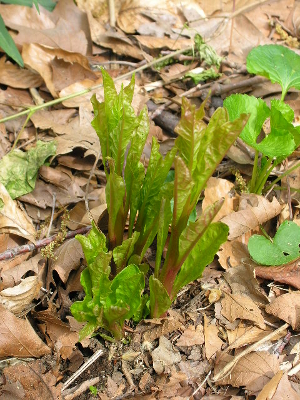 Poke (Phytolacca
americana)
produces edible stalks in the summer. I've always steered clear
of it because I don't believe you get much nutrition after you boil the
greens a few times to remove the toxic substances, but Zev likes the
flavor (with plenty of butter and salt) and notes that poke stimulates
the lymph system just when you need it, at the end of a long winter.
Hybrid
chestnut (Castanea sp.) is grown for its nuts
and wood. American chestnuts used to be a huge component of the
Appalachian diet, and have now been replaced by Chinese
chestnuts. I've planted a few trees in out of the way spots, but
I have to admit that I'm not as keen on this nut as on others --- it's
the one nut that is nutritionally more like a grain. If I was
raising pigs, though, I'd be a chestnut-pusher.
White
oak (Quercus
alba) is grown
for the nuts and wood. I consider oak more of a livestock-food
tree than a human-food tree, but (like poke) the nuts are edible after
leaching out the toxic parts.
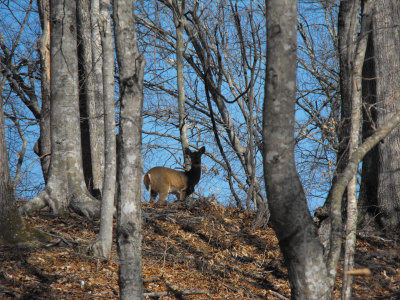 Deer (Odocoileus
virginianus) are
hunted for their meat and skins. Zev notes that deer prune plants
and distribute nitrogen, but that's where I think he's getting a bit
caught up in philosophy and not considering reality (a major downfall
of philosophical forest gardeners who don't garden their own
land.) I'd rather get my nitrogen from an animal that doesn't eat
up every food plant in its path!
Heritage
turkey (Melagris
gallopavo) is
grown for its meat. When an audience member (not us, though I was
thinking along the same lines) asked Zev why he suggests turkeys
instead of chickens, he replied that turkeys are more capable of
dealing with predators. I could write for hours about why I think
chickens are better suited to the homestead and forest garden ---
ability to eat food scraps, taste, small size, copious eggs, etc. ---
but I'll let you draw your own conclusions.
Ducks (various species) are grown
for eggs and meat (and to remove slugs from the garden.) I've
read on several blogs, though, that ducks are very difficult to pluck
and that they lay few eggs compared to chickens. I'm sticking to
my working chicken flock.
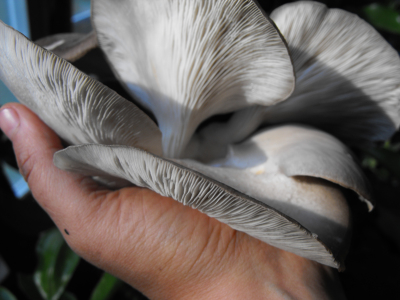 Oyster mushrooms (Pleurotus
sp.) is
(finally!) a recommendation I can get behind whole-heartedly.
We've found that these are the easiest mushrooms to grow in our
climate, can be propagated at home, and are among the tastiest.
Zev notes that in addition to eating the mushrooms, you can also use
them for myco-remediation. (More on that next week.)
Appalachian
reishi (Ganoderma tsugae) is a medicinal (and
somewhat culinary) mushroom that is Zev's response to the hemlock
woolly adelgid that is currently wiping out one of Appalachia's
keystone species. If we can't prevent the death of our mighty
hemlocks, Zev notes that we can at least grow some food on the fallen
giants.
After reading through
Zev's list, I can tell that he rates his plants quite differently than
I do. I tend to choose food species first by taste, second by
ease of growing, and only factor in multiple uses at the end.
Zev, on the other hand, clearly chooses first by multiple use, second
by ease of growth, and only considers taste at the very end.
(Either that or his taste buds are just very different from
mine.) Nevertheless, I think we can all learn a lesson just by
looking at his top 13 forest gardening species --- what other list
includes animals and fungi along with plants? We should each work
to create a diversified group of species that together provide greens,
nuts, fruits, mushrooms, and meat. What species would be on your
list?
| This post is part of our Real Forest Gardening lunchtime series.
Read all of the entries: |
 Today
was one of those wet and rainy days where puttering on a project
indoors makes more sense then trying to battle the forces of spring.
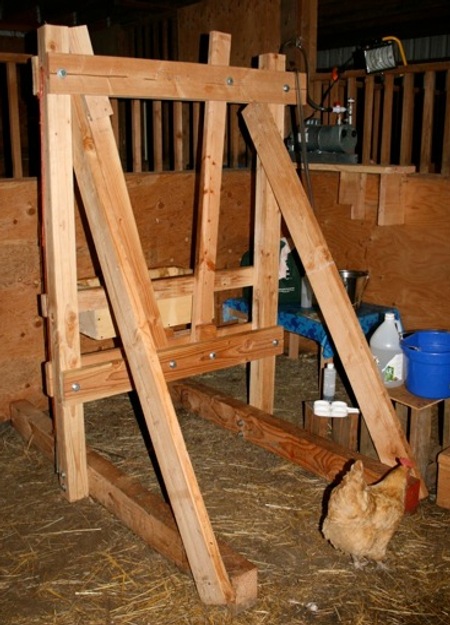
While working on fixing one
of the deer deterrents I
tried out a new podcast called Stumbling
Homestead by a guy named Darcy. I skipped back to episode 9 where
he talks about keeping a family cow and was reminded about how Anna and
I recently decided to let go of the cow owning dream due to our lack of
pasture.
I like Darcy's podcasting
style and the way he presents all the trial and error steps along with
a running list of how much he paid to get started in the home milking
business. Some really invaluable information if you've ever thought
about getting a cow or just like to hear these types of homesteading
escapades.
What most impressed me was
his ability to recognize what was wrong about his first generation
milking stanchion and how he simplified it to the one in the picture
here. The two before and after pictures along with his explanations
really break it down in a way that was informative while at the same
time entertaining.
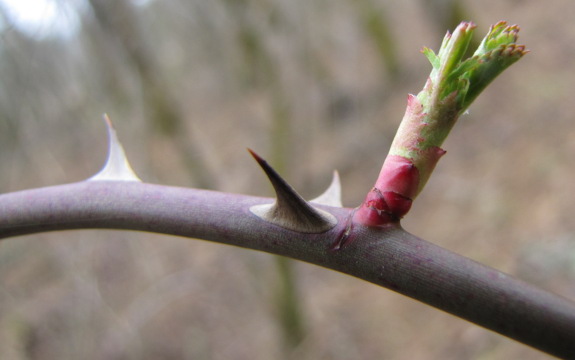
This is how I feel about
spring. It's beautiful and tender and colorful...and it has big
thorns and is an invasive species.
People who don't live on
a farm think that farmers are itching for spring right now...and we
are. But there's also the flip side of the coin. All summer
while the garden is dictating our every move, we're making a list of
the big picture projects we're saving for winter. And then all
winter we're trying to work our way through that list.
 March
is when reality sets in and we realize that the other twenty things we
didn't get done just aren't happening until next winter. It's a
bit devastating to me to realize that the big picture projects left
over from our 2010 to-do list (yes, we're still working on those) are
going to be 2012 projects. Heck, if the new age pseudo-mayans are
right, maybe my rainy day moan --- "We'll never install my bathtub" --- will
really come true.
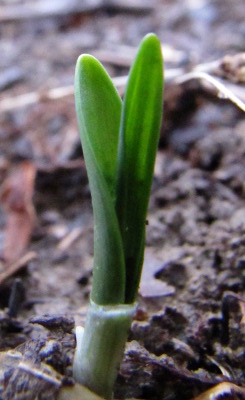
On the other hand, is it
possible to look at this baby ramp plant pushing up through the soil
under our kitchen peach and not smile? I can hardly believe that
two of the ramps I grubbed up with my fingers
in a rush last spring far too late in the season for transplanting
actually survived. And there are leaves coming out on the
elderberries, gooseberries, and gojiberries too. Our poppies have
sprouted and I can nearly taste the first spring lettuce.
The truth is that we
each make choices about what to do with our time. On the one
hand, it is a little nuts that we still take bird baths all winter four
and a half years after moving to the farm. But if you ask me
whether I'd rather have installed the bathtub or cloned oyster
mushrooms and planted spinach, swiss chard, and onions this week, I'll
tell you that there's no contest --- fresh food beats hot baths any
day. The average American's choices are hidden beneath a veil of
normalcy, but they're constantly making choices too, opting to spend
forty hours per week away from their loved ones so that they can take a
long hot bath (if they can find the time.) Our choices are more
overt, but the truth is that I'd rather be planting perennials that
will turn into a patch of edible leaves in a few years than working on
our living conditions. Bathtubs don't multiply exponentially over
time, but ramps do.
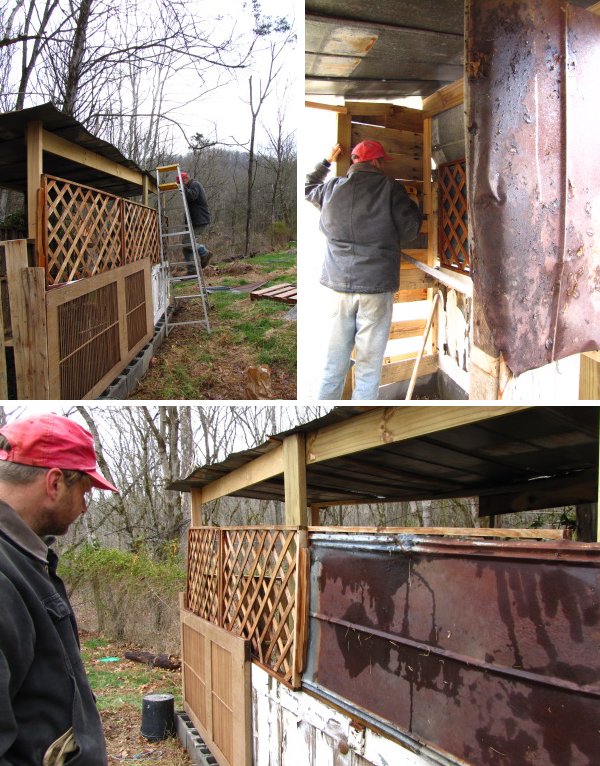
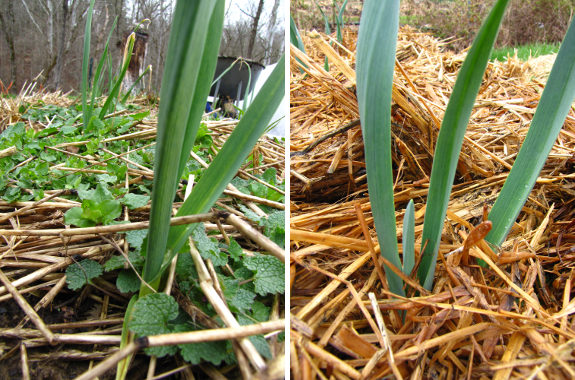
Last fall when I planted
our potato
onion and garlic bulbs, I left gaps in the
straw mulch so that the new shoots would be able to push up
through. If I'd been smart, I would have come along a month later
once the leaves showed and added straw snug up against my onion and
garlic plants. I didn't. Instead, once the snow melted, I
was chagrined to see big weed islands surrounding each plant.
At first, I figured I'd
have to hand weed each bed, but I put that off for about a month since
the ground has been way too cold to make weeding pleasant.
Eventually, it occurred to me 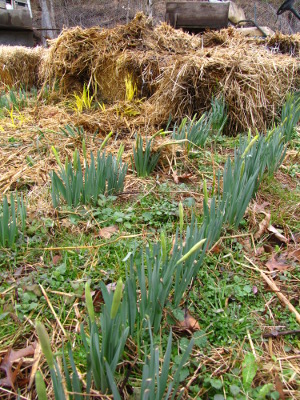 that I might be able to get
away with just adding another layer of straw over the problem plants
and let lack of sun do my weeding job for me. Some of these weeds
are very sneaky, and I wouldn't be at all surprised if the chickweed
slips up through the straw and continues to grow, but I figure it's
worth a shot at preventing all of that cold weather weeding.
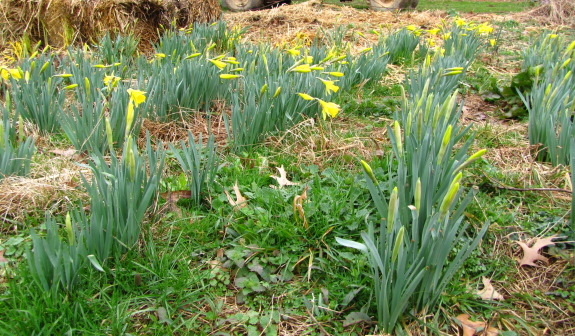
A side benefit of
mulching my Alliums
was moving our over-wintered straw off the secondary daffodil
patch. We have more daffodils than we can shake a stick at, and I
certainly wouldn't have spent energy moving the bales just to save a
few dozen of our thousands of bulbs. But with the first flowers
already opening up, I know we'll enjoy seeing a sea of yellow flowers
next week.
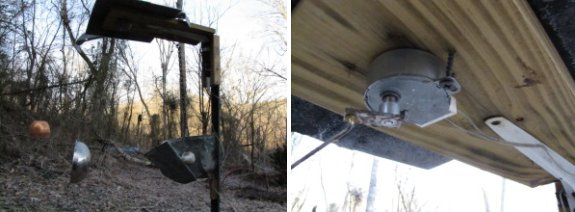
I tried ordering the type of
motor found in a rotisserie
unit and instead of
getting ones that ran on 120 volts I somehow mistakenly asked for 12
volts AC. I burned the first 2 out by applying 120 volts without
knowing any better. They only turned for a few seconds and then smoked
and sizzled.
It took me about 20 minutes
to remember a transformer from an old cordless phone was still in the
barn and its output was in the low AC range. 9 volts AC to be exact, a
full 3 volts under what I needed.
The lower voltage makes the
motor go slower, which is a good thing. Now the time in between clangs
is closer to a minute as opposed to 30 seconds. I also adjusted the
location to intersect with the two main deer paths near our blueberries.
I've got a feeling this new
configuration will last longer due to its reduced speed and low voltage.
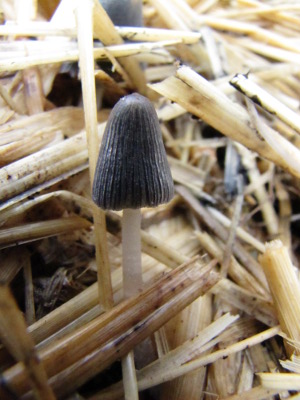 If
you've got cute, little mushrooms popping out of your straw mulch,
chances are you've grown inky caps. The aptly named inky cap
mushrooms dissolve into a mass of black goo as they mature.
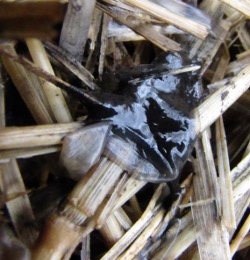
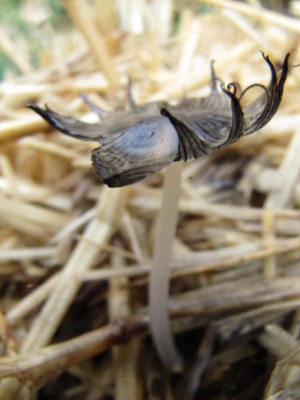 Scientists
think that the life history of these mushrooms is a way of spreading
their spores more efficiently, and recent evidence suggests that
various unrelated mushrooms have come up with the same trick through
convergent evolution. Older books lump them all into one "genus"
--- Coprinus --- and I'm not enough of a
mushroom expert to tell you which of the newly split off genera my
species is actually a member of.
I'm also disappointed to
discover that there doesn't seem to be much information out there about
how inky caps fit into the garden ecosystem. The fungi are
decomposers, working hard to break your straw down into compost, so I
guess that makes them beneficial (unless you were hoping not to have to
refresh the mulch this summer.) But I can't find any information
on whether inky cap inoculated straw is beneficial or harmful to garden
plants in any other way. Any ideas?
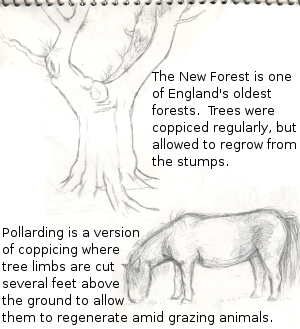 I've
been intrigued by coppicing ever since I visited the ancient New Forest
in England and saw huge trees that had been providing wood to the
locals for hundreds of years. The idea is simple --- certain
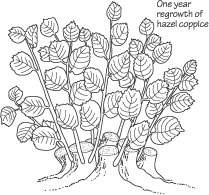
trees resprout when they're cut, so you can cut off the shoots every
five, ten, or twenty years and have a renewable source of wood without
disturbing the forest. Since I'd only read about coppicing in
Europe, I was excited to hear Zev Friedman's information on which
species can be coppiced in our neck of the woods.
The eight species that
Zev considers worth coppicing in the southern Appalachians are black
locust, mulberry, willow, basswood, tulip-tree, hazelnut, black cherry,
and chestnut. These trees not only resprout copiously, the bushy
habit you get after coppicing has a benefit to the forest
gardener. For example, mulberries bear fruits on first year wood,
so the fruiting area tends to move further and further out on the
tree. By coppicing, you keep the mulberries within reach, and can
even coppice part of the tree each year so that you have young wood
ready to bear fruit annually.
 On the backyard scale, you're
probably only going to have a few trees to coppice, but on the
homestead scale you might set up an entire woodlot in what's known as
"coppice with standards." Standards are full-sized trees that are
left alone and only cut every 75 to 150 years for timber, providing
shade and livestock feed in the interim. Oaks are a good choice
for standards in our area (or perhaps walnuts or sycamores in damper
areas?), and Zev recommends keeping 20 standards per acre.
Scattered amid the
standards are the smaller trees that are coppiced much more
regularly. These coppiced trees are generally spaced 6 to 10 feet
across on diagonal and provide firewood, fiber (mulberries), tender
young leaves (basswood), mushroom logs (tulip-trees for oysters and
oaks for shiitakes), and fruits or nuts. We might try coppicing
our mulberry tree and hazelnut bushes in a couple of years to see what
kind of growth form results.
| This post is part of our Real Forest Gardening lunchtime series.
Read all of the entries: |
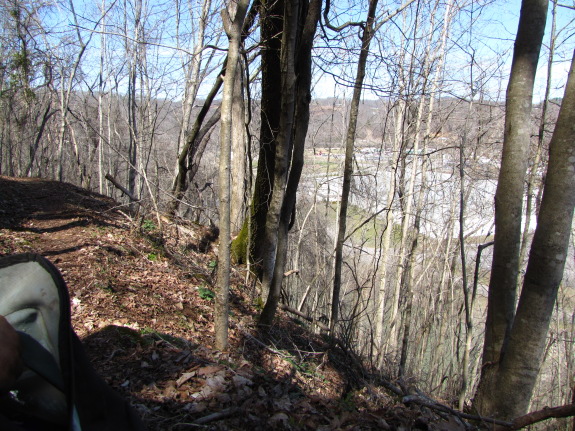

Our hillsides are shaded
and cool and still flower-free, but I had a feeling that our recent
warm spell had tempted out the early spring
ephemerals at the sunnier Sugar Hill.

The hepatica was in full
bloom, and two beetles were checking out one flower's stamens. I
guess I know who's out pollinating at this time of year.
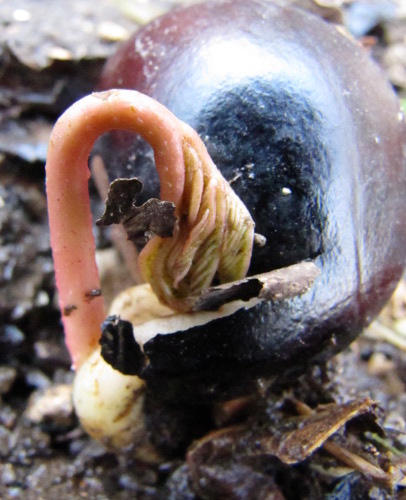
On the drive to town, we
saw two weeping willows starting to leaf out, and Sugar Hill's buckeyes
were also unfurling their leaves. I'd never seen a sprouting
buckeye before --- beautiful, isn't it? Since buckeye leaves are
easily nipped by heavy frosts, I guess that's one more vote for an
early spring.
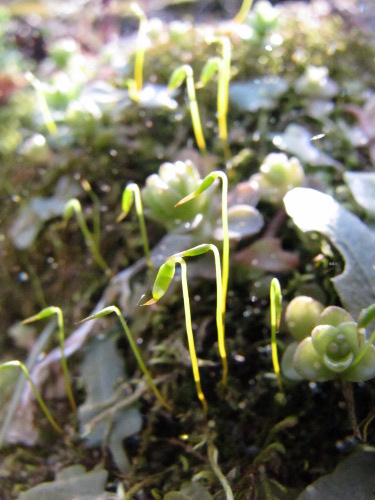
No photos, but I also
saw the year's first Spring Azure butterflies. These weren't the
first butterflies of the year, though --- Mourning Cloaks, Commas, and
Question Marks were already out flying in last week's warmth.
If you live in our area
or further south, now's a great time to head out and see spring in
action!
As Mark mentioned last week, our favorite part of the Organic Growers
School was the two talks we attended led by Tradd Cotter of Mushroom
Mountain. Even
though Tradd runs a big operation, supplying
spawn both retail and wholesale and testing out fascinating fungal
partnerships in the lab, he really understands what the little guy is
looking for --- simple, low tech techniques we can use to grow
mushrooms in our backyard.
For example, while most
people will tell you to carefully drill holes,
pound in your plug spawn, and paint over the holes with beeswax, Tradd
says that you'll get nearly as good results in much less time by
cutting two inch deep gashes in logs with your chainsaw, pushing in
(cheaper) grain or sawdust spawn with your hands, and then waxing over
the holes. Everyone else tells you to inoculate your logs
in late
winter, but Tradd
says if you've got freshly cut wood, go ahead and
throw spawn in it --- you won't get quite as good survival rates, but
why waste the wood?
This week's lunchtime series pulls together the most relevant
information from Tradd's talks, but I highly recommend that you visit
his website to download more in-depth mushroom cultivation
handouts, to watch
his tight and entertaining
mushroom videos, to buy
spawn specialized for the southeast, or to sign up for his mushroom
cultivation workshops
(a bargain even at the $150 price.) I
know I sound like a paid advertiser here, but the truth is that Mark
and I both fell in love with Tradd's passion, knowledge, and
independence, and have decided he's our new fungal guru.
| This post is part of our Low Tech Mushroom Cultivation lunchtime
series.
Read all of the entries: |
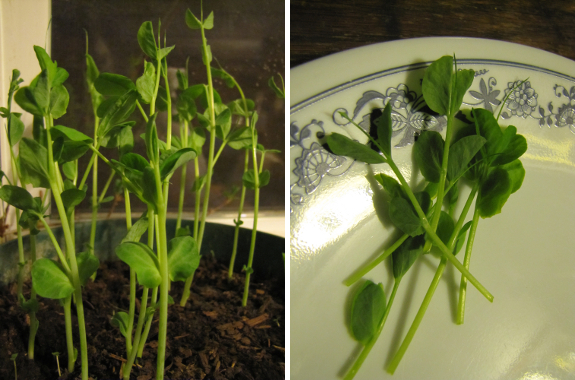
We had another nibble of
spring last week --- pea
tendrils from the pot of peas we started indoors. The tendrils taste
just like snowpeas, and are a sure antidote to the frozen winter diet.
If you need some
immediate gratification, pea tendrils are the way to go, requiring just
over two weeks from (indoor) planting to first taste. Our
little pot made just enough pea tendrils for a garnish for two, but one
week later, the peas are nearly ready to be cut again!
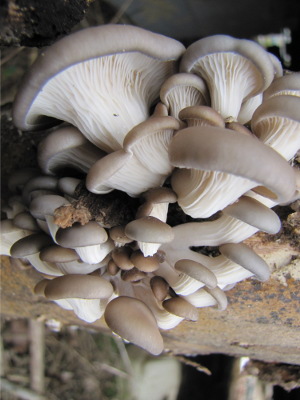 When we got started with
mushroom logs, we read that you need to soak your
logs to tempt them to fruit.
For the last two years, I've soaked our logs in batches of three or
four, sometimes getting a flush of mushrooms and sometimes not.
Tradd's talk helped me see why I was often doing more harm than good by
soaking my logs, and how I can keep our mushroom logs hydrated using
easier alternatives.
So what's wrong with
soaking mushroom logs? Like animals, fungi need to breath, so
when you dunk your logs in the water, they have to hold their
breath. Usually, the fungi in your logs will have no trouble
holding their breath for about a day (although during hot weather when
the dissolved oxygen levels of the water are lower, they might have
trouble), but if you forget and leave your logs soaking for two days,
you'll probably 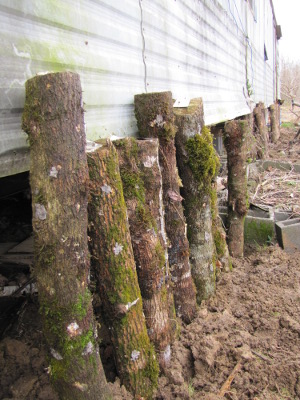 kill your fungi. The
main benefit of soaking mushroom logs over some of the techniques I'll
outline below is that you determine when you want your logs to fruit,
but if your memory is as bad as mine, you probably shouldn't risk it.
Tradd has developed
several methods for keeping your logs moist by allowing them to soak up
water out of the ground. One option is to dig a trench on the
north side of a building (or under a tree's canopy), turn your logs
upright, and bury about a third of the length in the ground. If
your house has gutters, you can channel the water to soak your
mushrooms. I've rearranged our best logs in this manner and will
see how they do this summer.
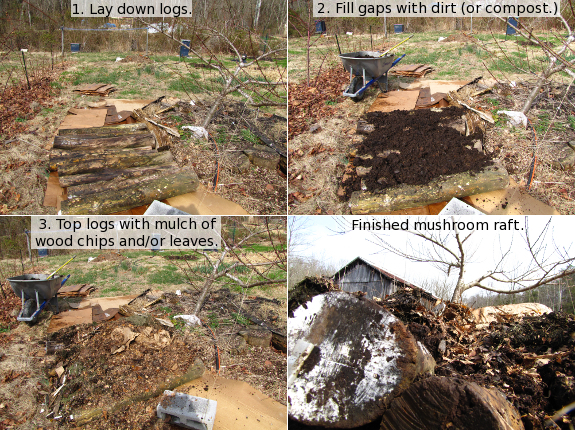
Another option is to
create rafts by burying your logs horizontally in the ground. If
you create a raft using logs that have all been inoculated with the
same strain of fungus, the mycelium will run through the mulch and soil
and turn your logs into one huge fungal body. This large body
will be more resilient and will be able to send up mushrooms anywhere
along the raft using the energy stored within all the logs. I
used a modified version of this technique (with a layer of cardboard to
kill grass and adding composted manure to feed the nearby tree) to turn
the logs that I drowned and the ones that are contaminated with turkey tails into mushroom-rafts/hugelkultur-mounds/lasagna-beds in the forest garden.
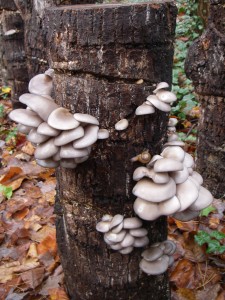 A last option is to create
totems, which are a bit like the upright logs I mentioned earlier but
are even easier to inoculate. Cut your logs into shorter segments
and stack them, layering sawdust spawn between the layers. With
no drilling or waxing, you'll still end up with the equivalent of a
mushroom log, and the mycelium will join the small rounds together just
like they join the logs in a raft together.
Before you get too
excited about these alternative methods of mushroom hydration, I have
to throw in a few words of caution. Burying your logs partly or
all the way into the soil increases your risk of contamination by wild
fungi (although oyster mushrooms can probably hold their own) and also
makes your logs rot a bit faster. You also won't be able to plan
your harvest dates as carefully, although in my experience, if mushroom
logs aren't in the mood to fruit, just soaking them isn't going to
jumpstart the process. But if you're looking for a low-work
method of growing mushrooms in your backyard, these techniques are a
great way to start.
| This post is part of our Low Tech Mushroom Cultivation lunchtime
series.
Read all of the entries: |
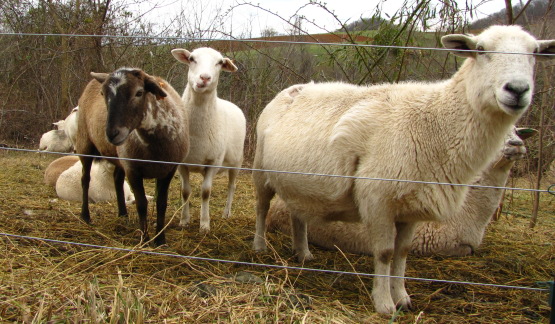
Killertarian: Someone who only eats
meat that they've killed or meat killed by someone else less than 2
degrees separated.
I think this is the new
direction Anna and I are going in, I'm just not so sure about the term killertarian.
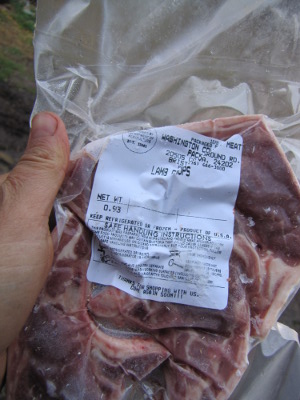 If you don't want to grow your own but do have
a freezer, the best way to get pastured meat is to find a farmer you
can trust and buy a whole, half, or quarter animal. The farmer
will take "your" animal to the slaughterhouse, then the meat comes back
to you in packages much like you'd find in the store, with the weight
and cut marked on the label.
We recently purchased a
whole lamb (thanks, Megan and Erek!) and wound up with about 30 pounds
of meat. Since I'm new to cooking with lamb, I opted to have the
front legs turned into hamburger meat for easy meals, but asked for the
bones back to make into soup and to feed to Lucy. I thought you'd
like to see a breakdown of the cuts of meat in case you're equally new
to buying meat on the hoof.
| Chops |
Legs |
Burger |
Riblets |
Shanks |
Sirloin |
| 5.74 |
7.6 |
7.07 |
3.38 |
3.3 |
2.43 |
I figure the (unweighed) extra bones, heart, and huge liver amount to perhaps another 10 pounds that wasn't included in Megan's calculations when she told me that the lamb would cost roughly $9 per pound. The total cost for the whole shebang was $275, which included the processing fee.
It would have terrified me years ago to consider buying meat for $9 per pound, but the more I read about pastured meat, the more I figure it's worth it just for the health benefits. Add in the ethics of eating pastured animals instead of factory-farmed animals, the taste benefits of delicious meat, and the feel-good effect from supporting a young homesteading couple like us, and Mark and I figure the meat is actually a bargain. Plus, lambs are ready in the spring when our freezer is emptying out --- perfect!
I've uploaded the world's simplest youtube video so you can hear what our dinner sounds like. Megan and Erek don't have a website, but if you live anywhere close to northeast Tennessee, you should consider buying a pastured lamb, turkey, or chicken from Cave Ridge Farm --- ereknapora@hotmail.com, 423- 367-9660. I've known Megan nearly since birth, and I personally vouch for their operation.
In addition to
suggesting ways to make our mushroom log operation lower tech, Tradd
also had hints to create morel and king
stropharia beds that
actually work. I've dabbled in both of these species, but have
barely gotten any fruit, so my next attempt will use the much more
specific techniques advocated by Mushroom Mountain. (I stole the images
here from their website, where you can go for more information and to
buy spawn.)
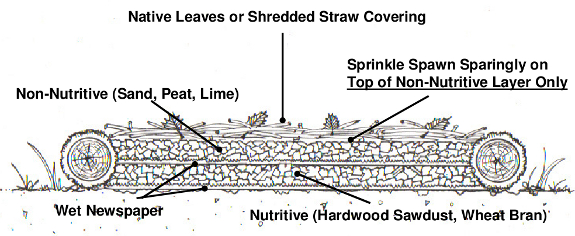
Morels are one of the
toughest mushroom species to grow, but Tradd has a lot of luck when he
locates his beds in a damp, shady area near one of the trees morels
associate with (tulip-trees, ash, cottonwood, etc.) Make a 4 foot
by 4 foot by 8 inch bed by layering wet newspapers; a mixture of soaked
hardwood sawdust, wheat bran, and shredded leaves topped with one cup
of pelletized lime; another layer of wet newspaper; a mixture of peat
moss, sand, and lime with a pH of 7.5 to 8.0; 4 cups of spawn; then one
to two inches of leaves or wheat straw. Water the bed to keep it
moist for two months, then water once a month until winter hits.
If you've followed these instructions to the letter, you should collect
your homegrown morels in the spring.
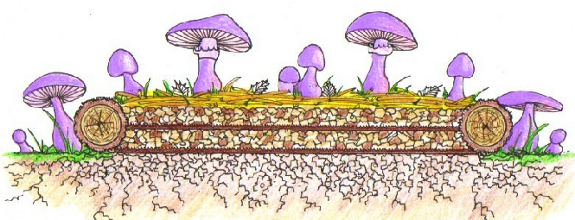
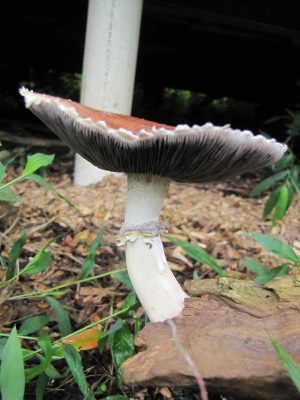 I'm a bit daunted by the
complexity of the morel bed, but I think that we can tweak our king
stropharia methodology and actually get a crop from this species.
The trick here seems to be using layers of cardboard to seal the
moisture into the bed. In a shady spot, put down a layer of wet
cardboard, then sprinkle on a bit of King Stropharia spawn. Add
three inches of hardwood chips or compost and mix in more spawn.
Lay down a sheet of wet cardboard or newspaper, punching or tearing
holes so that water will be able to pass through to the chips below,
then sprinkle on spawn and add three more inches of wood chips/spawn
mixture. Finally, mulch with straw or leaves. The tricky
part is remembering to water --- every day for a week, every other day
for the next three weeks, then once a month if you don't get rain.
I have to admit that
just writing out these directions makes me lean toward focusing most of
our efforts on low-work oyster mushrooms. But it's never good to
put all of your eggs in one basket (and I like a challenge), so I might
try at least another king stropharia bed this year, if not a morel bed.
| This post is part of our Low Tech Mushroom Cultivation lunchtime
series.
Read all of the entries: |
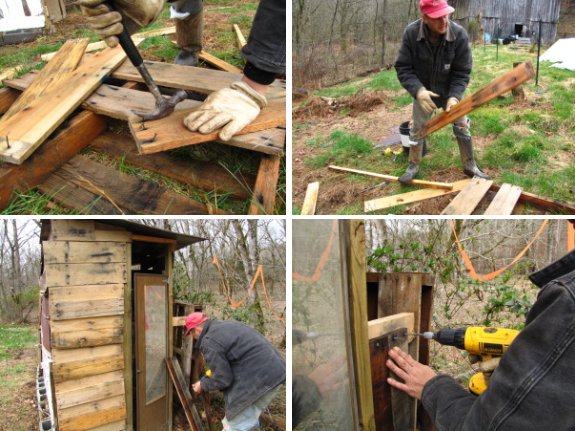
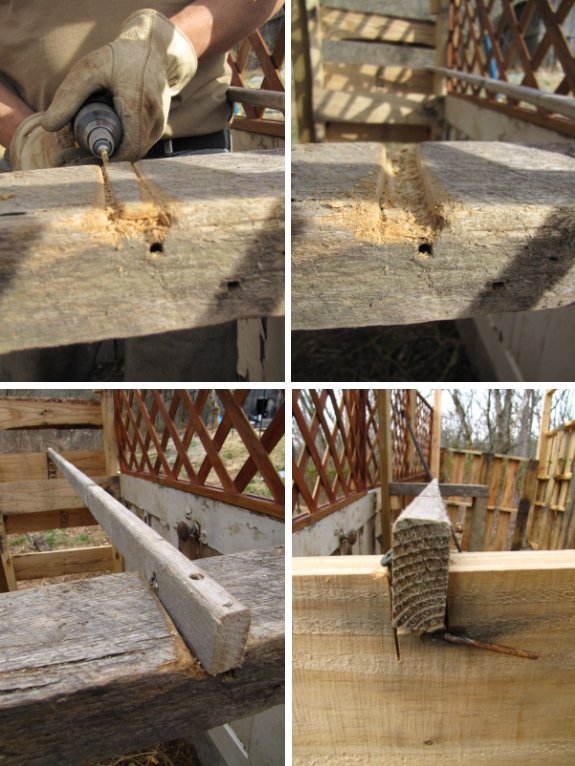
The thin pallet slats are
easy to work with, but require a pilot hole when attaching to another
surface.
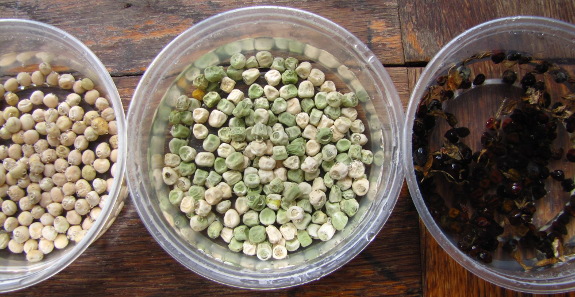
The planting calendar
looks totally different now that I have a soil
thermometer.
This week, I had planned to plant the rest of the peas, a bed of
garbanzo beans, and a quick hoop of broccoli and cabbage to make my own
sets. Then I was going to wait two weeks and plant carrots and
parsley.
 But
my seed
germination temperature chart notes that all of these vegetables
require the same soil temperature --- 40 degrees Fahrenheit. The
mule garden soil is currently 41 to 43 degrees, with lots of sunny
weather in the forecast, so the ground is only going to get
warmer. After learning all of that, I couldn't figure out why I
would wait to plant my carrots and parsley.
In fact, I probably
could have put all of these guys in the ground three weeks ago.
Although the soil chilled down a bit afterwards, it was just barely
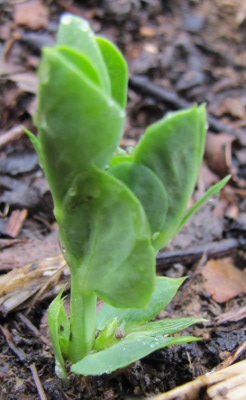
warm enough to plant a bed of peas on February 20, and the sprouts from
the pre-soaked seeds are already two inches out of the ground. If
I'd trusted my soil thermometer and taken full advantage of this early
spring, could I have been eating carrots in the middle of April without
even growing them in a quick hoop? Maybe next year I'll be braver
and give it a shot.
 If
you're like I was when I got started in mushrooms, you don't even know
where to start. Which species is easiest, tastiest, and best for
backyard cultivation? There's no one right answer, but I'll give
you a rundown on the top seven species I've got my eye on or have tried.
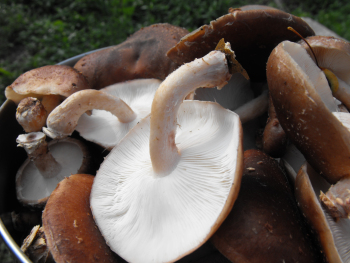
Shiitakes are the best known of
the mushroom species that can be grown in logs. We got our start
with shiitakes, and while I wouldn't discourage you from shiitakes if
you adore them, I've since changed my tune and fallen in love with
oyster mushrooms. After a bit of experience with both and then
some researching the topic, I've concluded that people like shiitakes
simply because they've heard of them, and that they've heard of them
because shiitakes have a longer shelf life than other wood-eating
mushrooms. I hesitate to say it, but maybe shiitakes are the red
delicious of the mushroom log world?
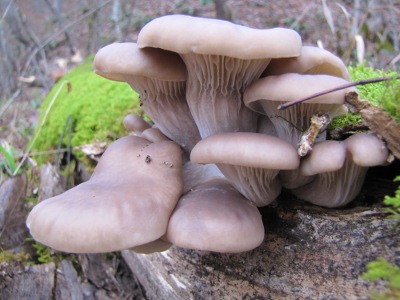 Oyster mushrooms are our new
favorite. We bought some spawn two years ago on a whim, hoping to
extend our mushroom season into the spring and fall, and we quickly
fell in love with the taste, which we consider equal to or even better
than shiitakes. A nutritional analysis shows that oyster
mushrooms have two or three times as much protein as shiitakes and a
slightly more balanced set of amino acids, while containing the same
amount of vitamins and minerals. When it comes to cultivation,
the species is an even clearer winner --- oyster mushrooms can
be grown on "weed trees" rather than on hardwoods and the vigorous
spawn
will even colonize straw, coffee grounds, and other waste
products. You often see fruiting the first fall after you
inoculate oyster mushroom logs while you have to wait until the
following year to eat your first shiitake. And oysters are easy
to clone with low tech, home techniques. Plus, they're native, so
you can spread them through your woods with impunity. Are you
sold yet?
 Maitake
would be a good choice if you live in a higher and drier location than
we do, where your woods is full of oaks. Around here, the maitake
is known as hen of the woods, but in Japan it is called the dancing
mushroom, presumably because you dance with joy when you find a twenty
pound hunk of edible fungus. I haven't tried to grow maitakes,
but I have been warned that they're a bit chancier to grow than oysters
or shiitakes.
Elm
Oyster is not a
true oyster
mushroom with white mycelium; instead it has brown mycelium. This
distinction is important since brown rot fungi tend to work better when
grown in straw as a companion to vegetable plants. This mushroom
would
be a good choice to add to your vegetable garden, although I haven't
tried it yet, so can't vouch for its ease of cultivation.
King Stropharia is a good choice for
mycoremediation (more on that tomorrow.) I'm not sold on King
Stropharia yet since our first experiment with it was only minimally
successful, but if you've got a lot of free wood chips and a problem
area where coliform bacteria from your cows, pigs, or chickens is
running into a stream, you should definitely look into King Stropharia.
And now for some tougher
to grow mushrooms with tempting tastes:
Lion's
Mane is on our
list of
must-try mushrooms because it is reputed to taste like crabmeat or
lobster. The mushroom will grow on oak and maple.
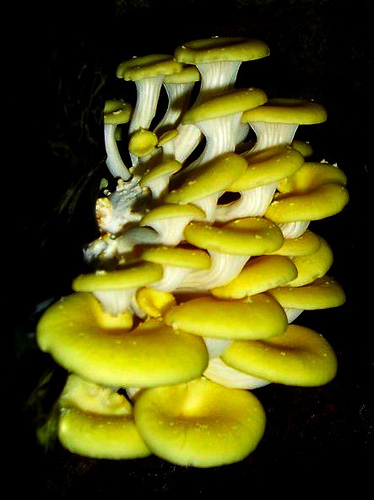
Yellow
Oyster sounds a
bit like
a hothouse mushroom (literally and figuratively), but with a taste
described as resembling roasted almonds, I think we might have to give
it a shot. This tropical oyster mushroom won't grow outside,
though, so we'd have to provide it with a warm, moist environment.
As a final note, you
might be wondering why I didn't talk about the best-known mushrooms ---
portabellas and white button mushrooms (which are actually the same
species.) Although you can buy kits that will produce a few
flushes of these mushrooms (we tried it with so-so results), button
mushrooms have to grow on an aged and pasteurized mixture of horse
manure, chicken manure, and straw. Most backyard hobbiests will
have a hard time coming up with the right substrate, so you won't be
able to keep your spawn going once the kit peters out.
| This post is part of our Low Tech Mushroom Cultivation lunchtime
series.
Read all of the entries: |
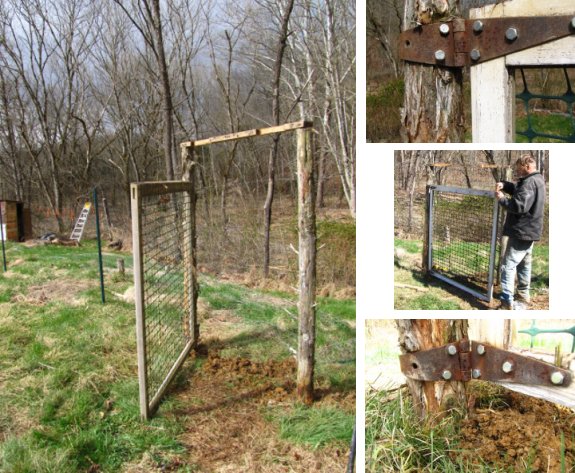
Since the deer deterrents have been
working we decided to transfer the original
garden gate from its old location to the new chicken pasture.
Looks like flock moving day
will be sometime tomorrow.
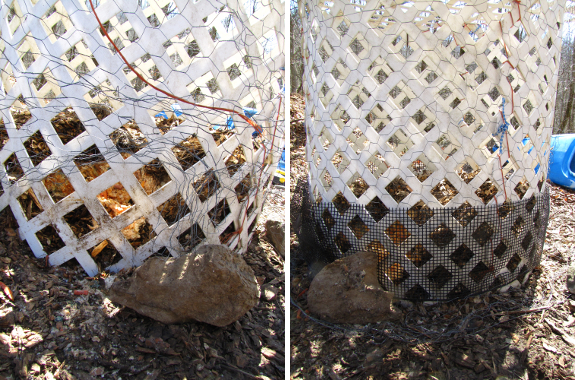
I really think that my
most recent incarnation of the compost bin would have kept out critters
if our dog and the local tree rats hadn't teamed up on me. Lucy
rolled the rock off the bottom of the chicken wire and pushed the mesh
up out of the way, then a squirrel jumped in through the medium-sized
holes left behind and shoveled food down to where Lucy could stick her
nose in and lick it up.
Version 3.0 is
reinforced with some heavy-duty plastic gutter guard, wired in place on
both the top and bottom. As long as the desparate duo don't
enlist a bear, I'm hopeful that our compost will stay in the bin.
Maybe.
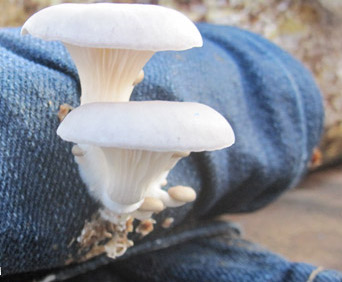 Previously,
I've written about how we can grow mushrooms to eat, but mushrooms are
good for a lot of other purposes. For example, King
Stropharia
seems to attract worms, so the spent substrate is great fodder for the
worm bin. Other fungi in the soil team up with plant roots and
help them suck up water and hard-to-find nutrients. And now that
we've started terrorizing our landscape with toxic waste, scientists have discovered that fungi are even capable of cleaning up our messes --- mycoremediation.
Mushrooms are voracious,
and Tradd Cotter has found species that can chow down on E. coli and Salmonella,
suck up lead, mercury, arsenic and other heavy metals, and break down
chemicals into non-toxic compounds. The trick to using mushrooms
to deal with these contaminants is to find the right species for your
problem. For example, morels and puffballs are great at absorbing
heavy metals, but they won't touch coliform bacteria with a ten foot
pole. Luckily, King Stropharia and turkey tails fill that
niche. Oyster mushrooms can break down 80% of DDT in 28 days and
the aptly named "Train Wrecker" fungus can eat through railroad ties
impregnated with CCA.
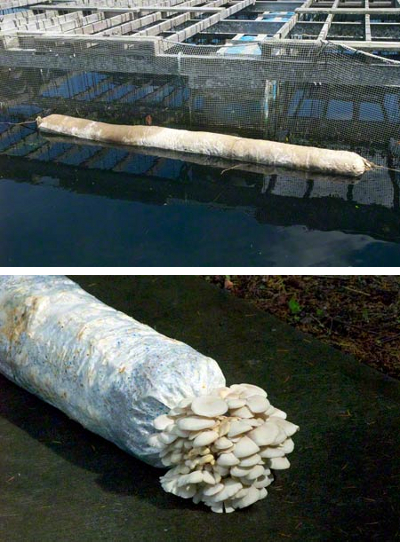 So,
how do you get your mushrooms to clean up your mess? Mushrooms
don't grow directly in soil or water, so you have to find a way to mix
your substrate into the contaminated area. The most common method
is to inoculate wood chips or straw with your mycoremediators and put
that substrate on top of the problem soil or where the contaminated
water has to flow through it. If you want to go high tech, Tradd
showed us pictures of floating mushroom islands that are let loose in
lakes to clean up sullied water. At the other extreme, you can
just put the raw substrate on top of contaminated soil and eventually
the right fungus will
show up and get to work. (This image is a Mycoboom
that Paul Stamets developed to clean up the oil spill in the Gulf. Too bad the powers
that be wouldn't let him use it.)
However you match your
fungus up with the contaminant, you have to
think a little differently to grow mycoremediators compared to growing
edible mushrooms in your backyard. In most cases, fungi deal with
contaminants by secreting enzymes that work like an inside-out stomach,
digesting the world around them so that the fungi can suck up the
nutrients they're looking for. Your fungus won't be breaking down
DDT while it's putting its energy into producing mushrooms, so you want
to keep your mycoremediators actively growing rather than changing over
to fruiting mode. That means you want to keep adding more
substrate so that the fungus doesn't hit a wall and figure it's time to
fruit and sent its kids off to explore a larger environment.
 I came to Tradd's talk on
mycoremediation for one reason --- to find
out if and how I could use fungi to eat up the glossy paper that has no
other use on our farm. He recommended trying oyster mushrooms on
the paper, but couldn't answer my question about whether the resulting
fruits would be safe to eat. In general, you can eat the
mushrooms that grow as part of the mycoremediation process, but not if
your fungi have been chowing down on heavy metals since fungi break
down most contaminants into non-toxic byproducts but just act like
dynamic
accumulators with
heavy metals. As best I can tell,
glossy paper might contain clay (tough on your compost pile but
probably fine for mushrooms), calcium carbonate (no problem),
petroleum-based inks (no problem, says the fungus), and chromium, lead,
and cadmium. The last three are heavy metals, so, unfortunately,
it sounds like our glossy paper will continue to go begging on the
homestead. Back to the drawing board!
| This post is part of our Low Tech Mushroom Cultivation lunchtime
series.
Read all of the entries: |
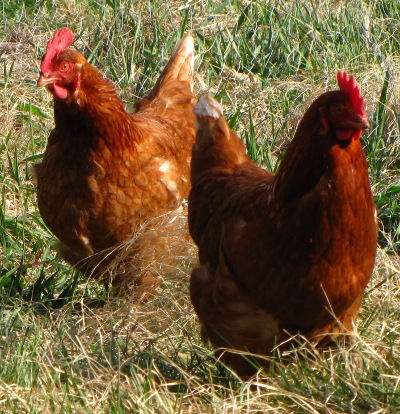 Despite
refusing to name the chickens in our flock, I can tell them all apart
and I enjoy watching their varied
personalities. On flock moving day, I opened the gate and rattled some
laying pellets and our two ancient hens came running fast as you
please. I think these two old birds would follow me anywhere ---
they've had four years on our farm to learn that my shovel turns up
worms, my bucket is full of compost, my wheelbarrow overflows with
chickweed, and my hands are sprinklers of grubs. Sure, the old
hens had to stop now and then to nibble on a luscious sprout along the
way, but they didn't veer off from my path.
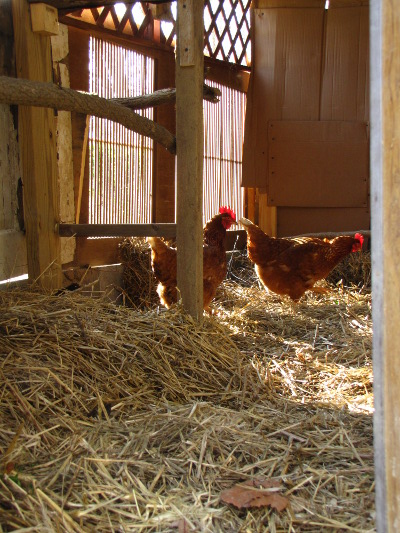 The
young golden
comet is nearly as keen as the old girls, so she followed on their
heels, but the rooster was a bit dubious. He was raised by our white cochin,
whose sole purpose in the flock is mothering chicks, so he's a bit
leery of human contact. Still, when three quarters of his harem
fled the old pasture, the rooster decided he'd better follow
along. He was less attuned to the rattle of grain than to the
locations of his flock and danger, so I had to ask Mark to back off as
he filmed from the rear --- Mark's proximity was getting the rooster
too excited and I was afraid the whole flock would turn into a pillar
of salt (or maybe a herd of cats) if they looked back.
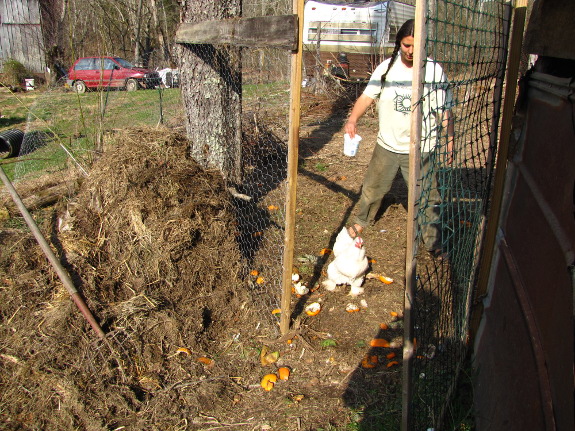
Within five minutes,
three hens and a rooster had walked calmly into their new pasture, but
the white cochin was nowhere to be seen. I closed the pasture
gate and headed back 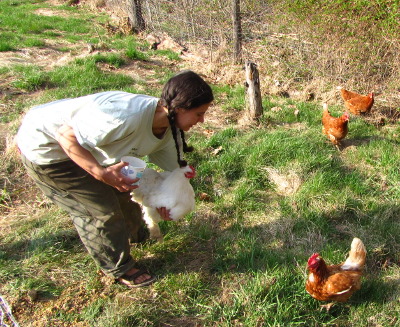 to
see where she'd gotten sidetracked, and was surprised to find her still
in the original pasture! She was remarkably unwilling to run
free, and I had to get behind her and chase her out the gate.
Even then, the cochin kept trying to double back and our least pastured
hen was finally ignominously carried to her new home. While her
flockmates were scratching through leaves and chowing down on
chickweed, the white hen wandered aimlessly through the pasture,
showing the clear difference genetics can make in a hen's foraging
ability.
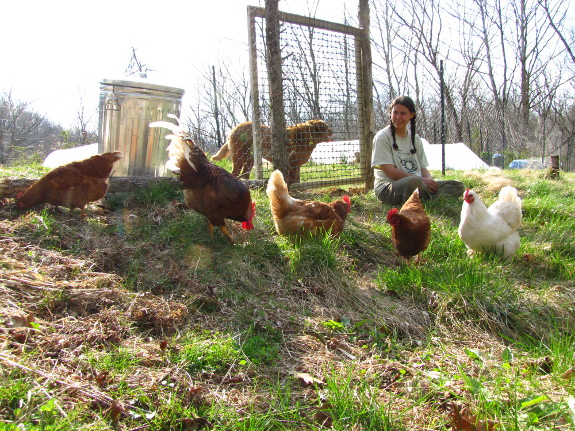
Stay tuned for more on
the flock's introduction to their new pasture and on our chicken plans
for 2011.
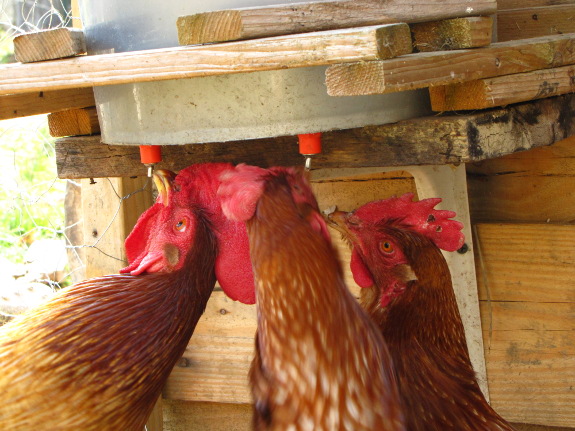
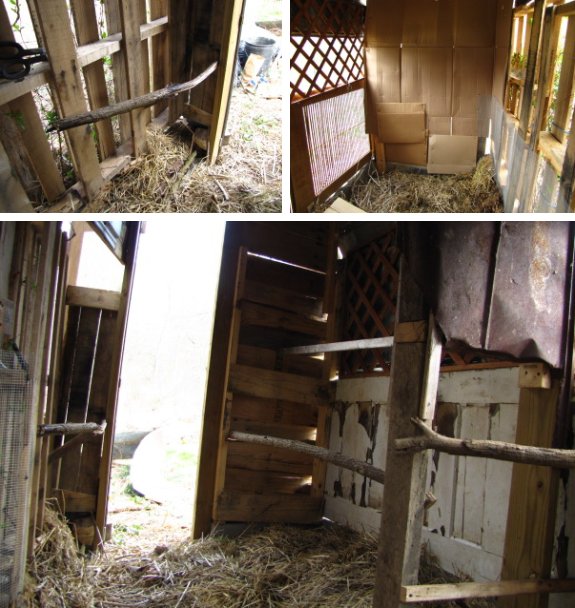
I'm thinking the best way to
see if any of these roosting options are to the flock's liking is to
install some sort of web camera to monitor perching activity.
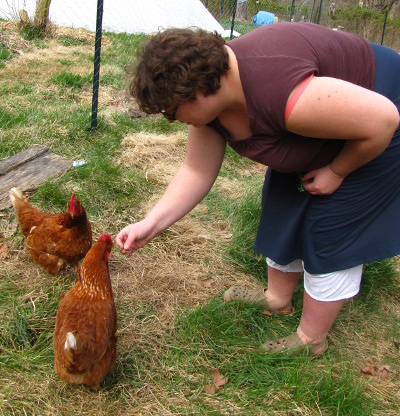 I
was interviewed for my first ever appearance on a podcast last
week. Boy was I nervous. Luckily, Darcy from Stumbling
Homestead eased me in gently and helped me out when I got stuck.
Thanks for being such a great host, Darcy!
If you want the real
dirt on the interview, here it is: I was so
scared, I had to go outside and weed while I talked. I hope you
can't hear the plants being ripped out of the ground. (At least I
wasn't ripping hair out of my head.)
My interview is up on Stumbling
Homestead now.
I hope you'll give me the benefit of the doubt when you listen --- I'm
a far better writer than I am a speaker.
As a side note, the
photos here are from my great visit with my sister over the
weekend. I don't think our hens have ever eaten out of someone's
hand before. Thanks for sitting me down and making me listen to
my own podcast, Maggie! I guess I didn't sound as awful as I
thought I did.
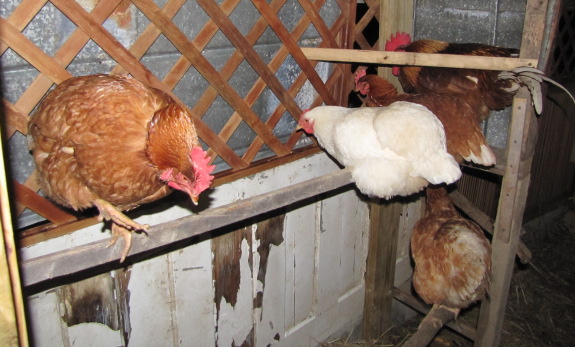
I went out to check on how
the flock was roosting on their first night in the used
pallet chicken coop and
found two of the hens hunkering down on a medium sized rock by the gate.
They're easy to pick up when
it's dark out, and I'm pretty sure they slept easier inside the new
coop once I moved them onto a roost.
We decided to lock them in
for the first night, which will hopefully send a clear message that
roosting time is to be spent inside the coop.
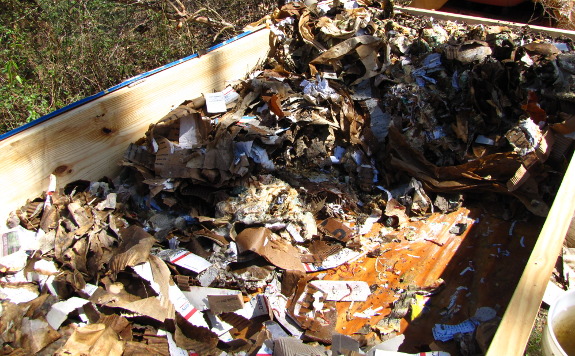
One month after starting
our worm
bin project,
three quarters of the bin floor was covered with food scraps. I
figured it was time to push the decomposing scraps and bedding toward
one end of the bin so that I would have room to put in the next batch
of food. This also gave me a great opportunity to see what was
and wasn't working in the main decomposition zone.
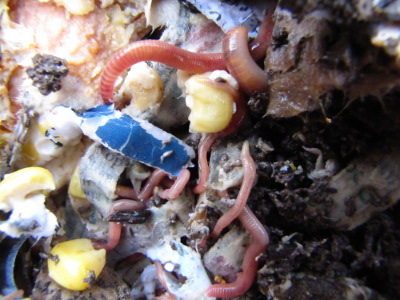 The
good news is that there are worms everywhere. Our redworms
seem to be reproducing very quickly since every bit of the bedding is
colonized with a healthy population of worms. The easy to
decompose waste --- spinach
leaves, for example
--- had already been converted into worm castings, but a few areas
where great globs of mashed potatoes hadn't mixed into the bedding were
moldy and not appropriate for worm action yet. I'll have to
remember to layer the food waste a little less thickly and include more
bedding with similarly gloppy waste in the future.
 I
was also pleased to see that the
worm bin was already turning into a healthy ecosystem. When I got
started with worms, I assumed that worms did all of the decomposing in
the bin, but the truth is that you'll find insects of all sizes working
alongside your livestock. Many of the wild critters are good
news, starting the decomposition process so that worms can do their job
faster --- I suspect that this picnic beetle (probably attracted to a
high density of pickles) falls into that category. On the other
hand, the few house flies I saw in the bin are warning lights, telling
me that I need to top off the food with a bit more bedding.
Total food waste
liberated from the landfill to date has been 699
pounds. We've put about a fifth of that in the bin so far, with
the amount increasing each week as our worm population grows.
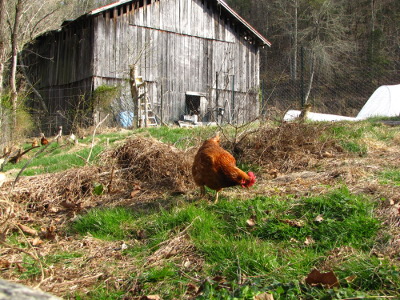 When
we got started with chicken-keeping, we were what I'd call chicken
enthusiasts --- we loved the eggs, thought the idea of getting chicken
manure for the garden was cool, and didn't consider whether we'd break
even with the endeavor. We spread our laying hens out in a few
chicken tractors and enjoyed the healthy eggs, but I eventually
realized that our
style of chicken keeping would require us to buy chicks every couple
years and chicken feed every couple of weeks. We also weren't
really making use of all that copious chicken manure either. Was
there a way to tweak our
system so that we were raising our own chicks and feeding them some or
all of their food from on-farm ingredients while making sure more of
the manure went to the garden?
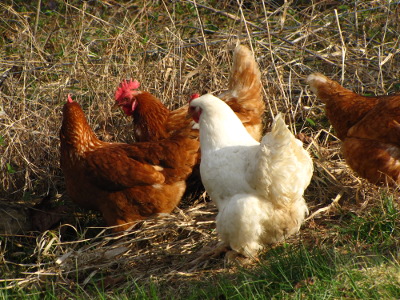 Our
first
experiment with becoming sustainable chicken-keepers was
starting a chicken pasture system last year. The most successful
part was using deep bedding in the coop to capture half
of the day's
manure --- I've got a pile of chicken manure mixed with leaves
composting right now and waiting to go on the fall garden. Our
pasture also cut
feed costs quite a bit during late summer with our
laying flock, but our
broilers were far too lazy and the pasture too
small for them to get much feed from the pasture.
This year, I've got
another ambitious pastured poultry experiment
planned out. This one is even more complicated than last year,
but I hope it will bring us closer to chicken independence! Stay
tuned for all of the facts and figures in this week's lunchtime series.
| This post is part of our Chicken Pasture lunchtime series.
Read all of the entries: |
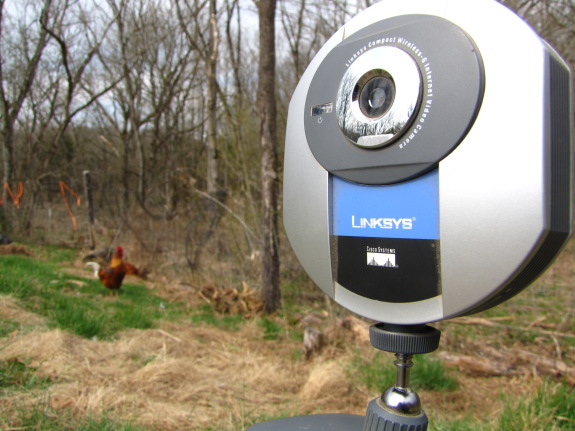
It's been over a year now
since I got the Linksys compact wireless-G internet camera, and each
time I try to set it up I'm reminded how huge the gap is between my
computer knowledge and what's needed to make this work.
When it does work it should
function as its own server, transmitting images to the internet
somehow, or we have the option of running a long ethernet cable back to
a computer.
I would be willing to send 2
t-shirts to anyone out there who can point me in the right direction on
getting this thing going as a full time chicken cam transmitting
exciting poultry action 24 hours a day.
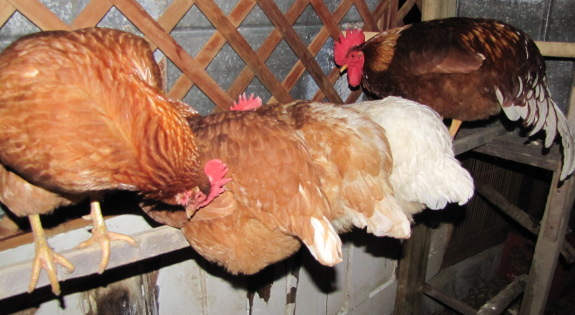
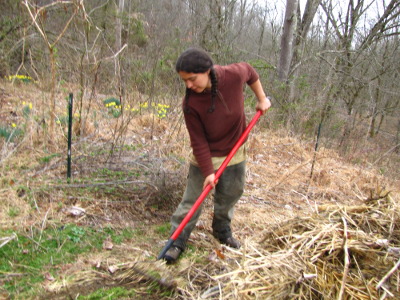 I
spent a lot of time last year combatting the asparagus
beetles in hopes
that our asparagus would keep their leaves all summer and give us a
crop this spring. After months of hand-picking
the asparagus beetles and squishing their eggs, predatory
stink bugs came along to help out in August, and I felt like we
kept the beetle population under control. Still, when I read that
the beetles overwinter in mulch and other garden debris and can be
deleted by burning, I decided to give it a shot.
Decided
is the operative
word here --- I put "burn asparagus beds" on my list in January and
here it is near the end of March with nothing done. I'm such a
wimp when it comes to fire that I didn't know where to start, and when
I did finally try to light the mulch, it was too damp to burn. I
didn't really want to burn up my precious organic matter anyway.
Didn't I carefully spread that straw around my garden for a reason?
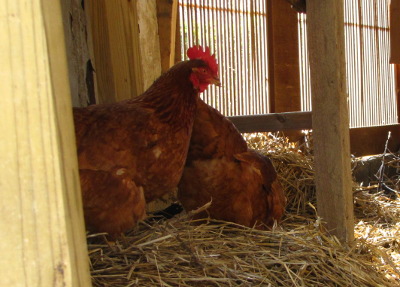 With
the
chickens moving to new digs, I opted to try a more
permaculture solution. I raked up all of the dead asparagus tops
and mulch and carted the whole shebang to the new chicken coop to form
the first layer of their deep bedding. Our chickens are
constantly scratching for bugs, and once they've eated up the bad
beetles and fertilized the straw, I can always spread the value-added
product back on the garden. I hope the mulch transport will help
keep asparagus beetle populations lower this year.
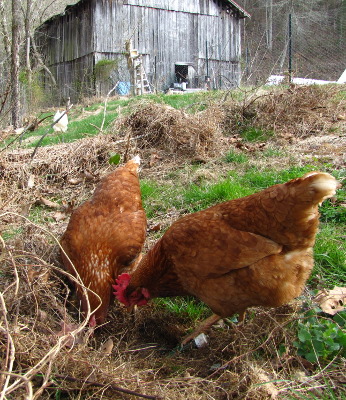 If you want your chickens to
get the majority of their food from pasture, they need to be alert,
intelligent foragers willing to scratch for their supper instead of
waiting by the food trough. A century ago, the common backyard
chicken probably fit the bill, but nowadays, chickens are primarily
bred for show qualities or to be efficient converters of corn and
soybeans to eggs and meat. After extensive searching through the
literature, I decided that if I wanted the best pastured chicken breed,
I'd have to develop it myself.
Over the last four
years, we've raised four breeds of chickens and they've all had widely
divergent foraging abilities. Last fall, we slimmed down the
flock considerably, deleting every bird who wasn't a lean, mean
foraging machine (and a good egg-layer to boot), and we're now down to
three Golden Comets, a hybrid rooster
(Golden Comet/Rhode Island Red), and a White Cochin who was spared the chopping
block solely because of her maternal abilities. My goal this year
is to get our cochin to hatch some homegrown eggs to see what sort of
hybrids we come up with. We'll eat the cockerels and keep several
of the pullets to renovate our aging laying flock. I also hope to
find at least one more hen who hasn't had broodiness bred out of her so
that we won't be putting all of our chick-starting eggs in one basket
(or is that nest box?)
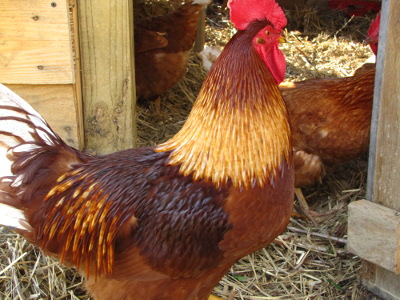 Before the Cornish Cross came
on the scene in the middle of the
twentieth century, a flock like the one I outline above was the
norm. However, we quickly became spoiled by the fast growth and
big breasts of these hybrid chickens, and no one is willing to go back
to eating light-weight cockerels, even if they do have a much higher
potential for getting more of their nutrition from scavenged
food. For all I know, Mark and I (both raised on supermarket
chickens) will be just as squeamish and will return to mainstream
broilers, but I hope we can work around chickens with more leg meat
than breast meat and slower growth. I'll be sure to keep you
updated on growth rates, feed costs, and taste tests as this year's
experiment progresses.
| This post is part of our Chicken Pasture lunchtime series.
Read all of the entries: |
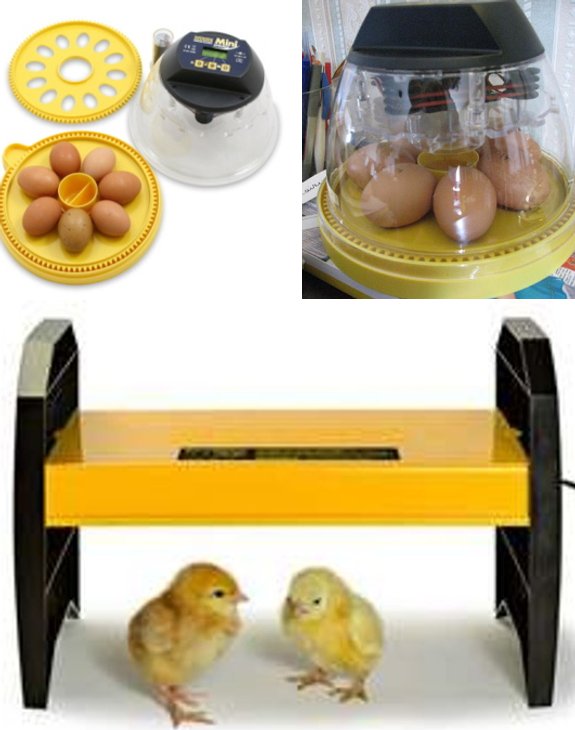
We've decided to give up on
our Cochin hen going broody and ordered some new chick gear.
The above mini advance
incubator only holds 7 eggs at a time, which feels like it might be
just enough if we plan on doing multiple sets throughout the year.
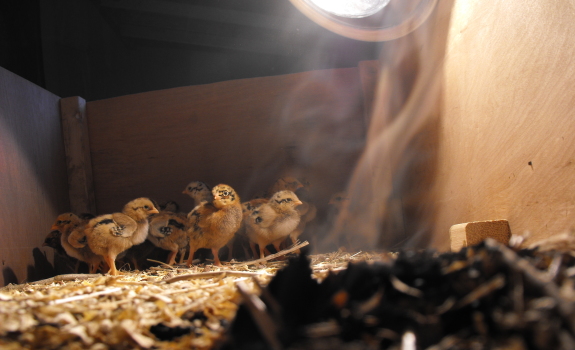 Using
the Eco-Glow chick brooder might pay for itself pretty quick compared
to the old heat lamp
system. They claim it's one 10th the cost at only 18 watts. Last year I
made an error in judgement when choosing the proper
distance for a heat lamp and almost burned the brooder down. This
new type of heat delivery feels 10 times safer, and I like the idea of
the chicks getting the full day night cycle. That light being on all
the time caused me to wonder if it was adding stress where we didn't
need it.
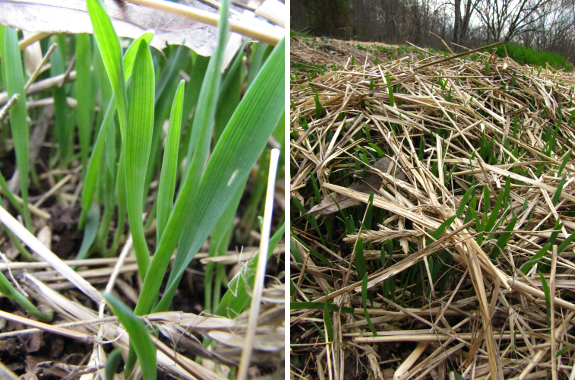
A month after planting,
our spring
oats cover crop is
pushing up through its manure and straw topdressing. The plants
only have a month to grow before they are slated to be mowed down to
turn into a mulch for our spring garden --- I hope they mow-kill as
well as they winter-killed this past year.
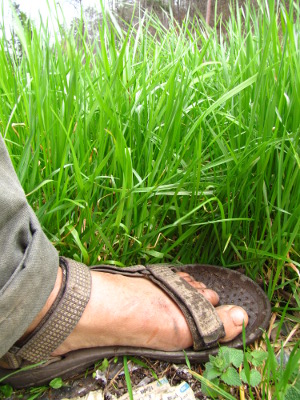 Unfortunately,
I'm stuck dealing with three fall cover crops that didn't winterkill
--- barley, annual ryegrass, and crimson clover. As you can see
from my foot in this photo, the ryegrass is shooting up fast, and the
barley is nearly as tall. I hand-weeded barley out of some beds I
needed for early spring planting, but am hoping that I can kill off the
rest of the beds faster by mowing close to the ground and then topping
them off with an inch of horse manure. If the cover crops don't
get the message, I might end up throwing down a layer of cardboard as a
kill mulch. I certainly won't be replanting these three cover
crops in our no-till
garden --- live and
learn!
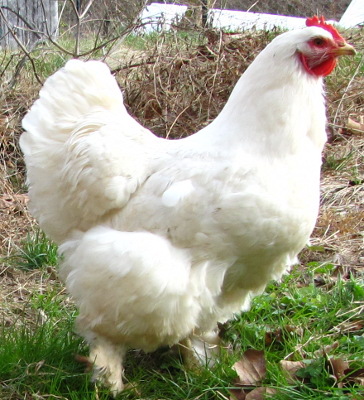 Since
we want to propagate the genes of birds who have proven themselves on
our farm, we have to find a way to incubate our own eggs. Our
experiments with cheap incubators in the past has been one long
failure, primarily due to our lack of climate-controlled living
conditions. Luckily, nature has a simpler answer --- the broody
hen.
Although most productive
chicken varieties have had maternal qualities bred out of them, some
old-fashioned breeds have a strong biological clock. Once spring
comes around, broody hens like nothing more than to sit on eggs, barely
hopping off the nest for a sip of water and a peck of food once a
day. Our White Cochin is a perfect example, and last week I
noticed that she was starting to lose her breast feathers, a sure sign
that broodiness is about to kick in. This week, we plan to give
her a quiet, dark spot in the back of the coop where she can sit on her
flockmates' eggs and raise up a new set of Walden Effect chickens.
 In the long run, it probably
costs more to feed a broody chicken all year than to run an electric
incubator, but after
watching our cochin teach her foster son to forage last year and
leaving all of the warmth worries to her, I was sold on the natural
route. Using a broody hen also keeps our chicken-raising on a
more manageable scale --- an average hen can sit on ten to twelve eggs,
so we won't be stuck slaughtering 25 meat birds at once the way we
would if we ordered chicks from a hatchery. Instead, I hope to
tempt our cochin to raise three batches of chicks this year, which will
pay her keep until she's called upon to do her duty again next spring.
Edited
to add: I wrote
this over the weekend, but since then have started to lose faith in our
particular broody hen, although not in the broody hen concept. I
thought our hen was pulling out breast feathers, but it looks like
she's instead molting...for the second time in six months! I
stuck her in a brood coop, and she started hyperventilating at being
separated from the flock --- clearly, she wasn't in brood mode.
So, we're going to hatch our first set the high-tech
way (I hope!), and
still hope that our broody hen will shape up eventually.
| This post is part of our Chicken Pasture lunchtime series.
Read all of the entries: |
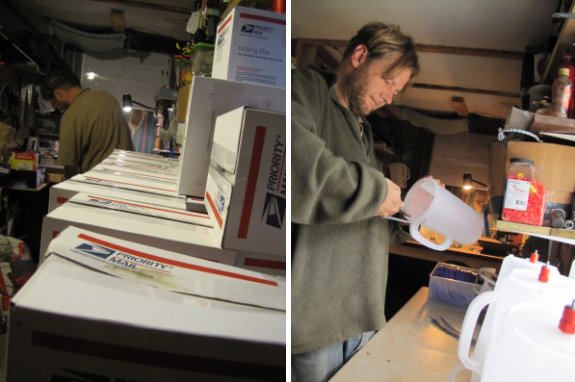
Hand fabricated in the United States....now with free shipping.

 Have you ever heard the term
"nipped in the bud"? That's precisely what we hope won't happen
to our baby peaches, pears, and nectarines tonight, when the low is
forecast to be in the 20s. This is the one case where we're lucky
that we live on the shady side of the hill, since our fruit tree
flowers (mostly) haven't opened up yet, unlike the trees on our movie
star neighbor's farm, which are in full bloom.
As a fruit tree bud
comes to life, it is less resistant to cold weather with every passing
day, and scientists have come up with charts of critical
temperatures,
telling us when we should kiss those summer peaches goodbye.
|
Apples |
Silver |
Green |
½
inch |
Tight |
First |
Full |
First |
Full |
Post
|
||||||||||||||
|
10%
kill |
15 |
18 |
23 |
27 |
28 |
28 |
28 |
29 |
29 |
||||||||||||||
|
Pears |
Bud
|
Bud |
Tight |
First |
Full |
First |
Full |
Post |
|||||||||||||||
|
10%
kill |
15 |
20 |
24 |
25 |
26 |
27 |
28 |
28 |
|||||||||||||||
|
Peaches |
Bud
|
Calyx |
Calyx |
First |
First |
Full |
Post |
||||||||||||||||
|
10%
kill |
18 |
21 |
23 |
25 |
26 |
27 |
28 |
||||||||||||||||
|
European |
Bud
|
Side |
Tip |
Tight |
First |
First |
Full |
Post |
|||||||||||||||
|
10%
kill |
14 |
17 |
20 |
24 |
26 |
27 |
28 |
28 |
|||||||||||||||
|
Sweet |
Bud
|
Side |
Green |
Tight |
Open |
First |
First |
Full |
Post |
||||||||||||||
|
10%
kill |
17 |
22 |
25 |
26 |
27 |
27 |
28 |
28 |
28 |
||||||||||||||
|
Tart |
Bud
|
Side |
Green |
Tight |
Open |
First |
First |
Full |
|||||||||||||||
|
10%
kill |
15 |
24 |
26 |
26 |
28 |
28 |
28 |
28 |
|||||||||||||||
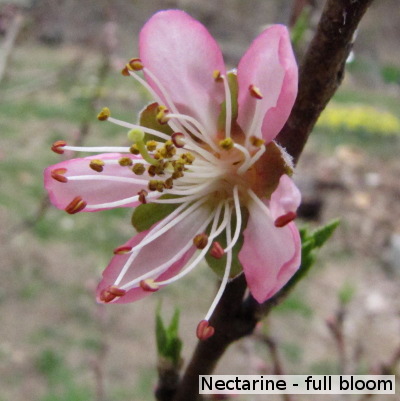 You can probably guess what
stage your fruit trees are at just based on the descriptions, but I've
included some photos here to help you decipher the differences.
Our peach trees are in the red calyx stage (10% kill at 23 degrees and
90% kill at 9 degrees), our pears are in the first white to full white
stage (10% kill at 25 to 26, 90% kill at 19 to 22), and our nectarine
has buds ranging from red calyx to full bloom (10% kill at 23 to 27,
90% kill at 9 to 24 degrees.)
You can probably guess what
stage your fruit trees are at just based on the descriptions, but I've
included some photos here to help you decipher the differences.
Our peach trees are in the red calyx stage (10% kill at 23 degrees and
90% kill at 9 degrees), our pears are in the first white to full white
stage (10% kill at 25 to 26, 90% kill at 19 to 22), and our nectarine
has buds ranging from red calyx to full bloom (10% kill at 23 to 27,
90% kill at 9 to 24 degrees.)As you can see, you often find an array of bud stages on a single tree, which is good for us because it means that a late frost is less likely to kill off all of our fruit. Even though the currently open nectarine buds and
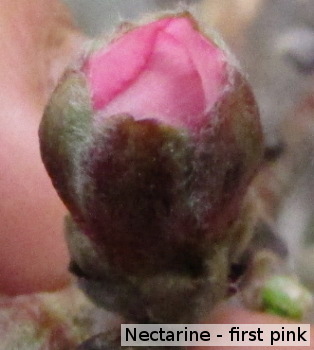 nearly open pear buds are probably going to die tonight, the less
precocious buds on each tree might pull through, and I'm not overly
concerned about our peach buds.
nearly open pear buds are probably going to die tonight, the less
precocious buds on each tree might pull through, and I'm not overly
concerned about our peach buds.All of that said, I'm not sure I expect pears this year. Although my sample size is very small, I've found that each of my fruit trees has produced flowers but no fruit the first year it blooms. Perhaps the trees aren't quite ready to pour that much energy into making fruits but are willing to make flowers in hopes that their pollen might pass on the tree's genes using someone else's energy budget? I'd be curious to hear if you've seen a similar strategy in your own young fruit trees. If my hypothesis is correct, we should see peaches from the tree that fruited last year and also from the tree that only bloomed last year, nectarines from the tree that bloomed last year, but no pears. Assuming we don't get any excessively cold weather in the next few weeks, that is....
 To
get the most food-value out of your pasture, you not only need to raise
chicken breeds that forage aggressively, you also have to plan your
pasture size and rotation well. I looked
everywhere last year to
figure out how big a pasture needs to be to provide a large component
of a chicken's dietary needs, and drew a complete blank. Finally,
this winter, I stumbled across the figure of 10
square feet of pasture
per bird per week
(with frequent rotations) in Raising Poultry on Pasture: Ten Years of
Success.
Granted, the type of operation outlined in the book uses pasture more
as a source of vitamins and minerals than as the flock's primary food,
but I thought their area estimate would give me an idea of the bare
minimum amount of land needed to graze our birds.
I've talked Mark into
building me five new pastures this year to join
our current two pastures from last year. Our old pastures are
small and shady in the winter, so I plan to mostly use them to grow
some grains and legumes to supplement the chickens' winter feed, though
I will graze the chickens there for a short time in the fall.
Three of the new pastures will be in the sunniest part
of the yard for
winter and spring grazing, while two more will be on the hillside above
the original pastures for summer shade. I estimate that the total
square footage from all seven pastures will be about 4250 square feet
(a tenth of an acre), which (I hope) will be enough to keep our
chickens healthy all year.
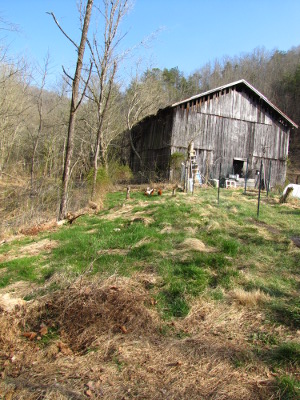 Optimal rotation frequency is
another big question mark. Last
year, I kept the chickens in their pastures way too long, mostly
because I wanted them to scratch the ground bare so I could use those
paddocks to plant grain in. For most of our pastures this year,
though, I want to keep the pastures vegetated at all times for optimal
chicken health. When rotationally grazing with ruminants (like
cows and sheep), the goal is to make your livestock eat everything to
the ground
in a short period of time (mob grazing), then move the animals to
another section of the pasture for a while to let the plants grow
back. This will give you lots of tender growth rather than
leaving you with a pasture denuded of the good stuff and with lots of
plants your livestock don't want to eat, which is what you get if you
leave your livestock in a pasture continuously.
Mob grazing works great
for cows, but I'm not sure yet whether it's the
best plan with chickens. Although chickens do nibble on leaf
matter from time to time, a healthy chicken is mostly eating
invertebrates, fruits, and seeds, so I should really be managing our
pasture to promote creepy crawlies, not grass. Tomorrow, I'll
write about what I'm planting in the pastures to keep the chickens fed,
but for now I'll just say that I don't really have a clue yet whether I
should be rotating the chickens quickly, thus keeping the browse low
and tender, or infrequently, thus attracting more grasshoppers.
I'll just have to keep an eye on the flock and pasture conditions and
make it up as I go along.
 This post is part of our Chicken Pasture lunchtime series.
Read all of the entries: This post is part of our Chicken Pasture lunchtime series.
Read all of the entries: |

This picture reminds me that
I need to fix that battery problem on the golf cart.
 Although
today the golf cart wouldn't have made it across the creek, I think
even a 4 wheeler might have struggled with knee high water levels.
Yup...that meant going across
in my boxers with my pants in the back pack. I have to stop once I get
across to empty out maybe half a gallon of water from each boot, which
has finally prompted me to order a set of hip waders for days like
this. A place called Sports Authority will sell you a set for 22 bucks
with shipping included.
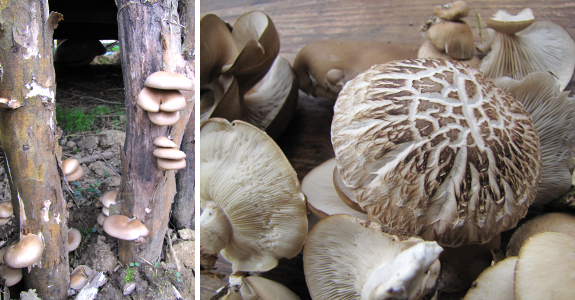
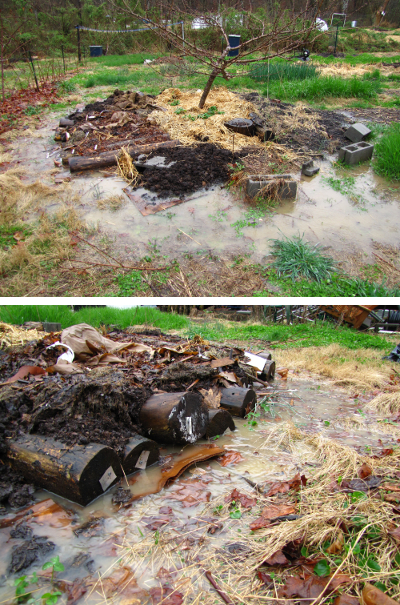 With
the addition of oyster mushroom to our myciary (yes, I made that word
up), fungi have become one of our earliest spring "vegetables."
Our mushroom
totems
are fruiting heavily, proving the utility of the method at least during
our wet spring weather. Notice the cracked cap shiitake --- a
gourmet delicacy.
Meanwhile, a heavy rain
turned our mushroom raft into an actual raft,
or at least an island. Perhaps you can see why I swear by raised
beds and mounds in our waterlogged soil? Even though the mushroom
logs I used to create this raft are ones that didn't fruit last year, I
suspect if there's any life in them they'll produce mushrooms after
this dunking.
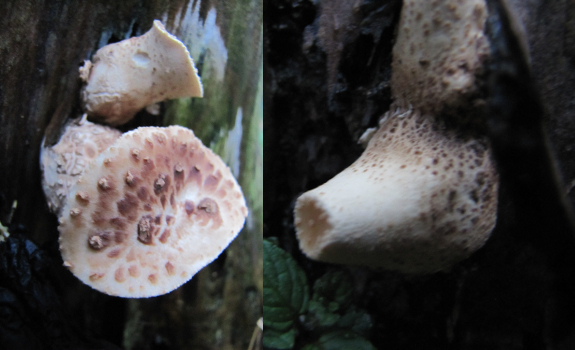
Over on the wild side, Dryad
Saddles
are poking out of one of the stumps in our front garden. I
remember planning to try to eat them if I found a younger specimen, but
Mushrooms Demystified has this to say about the
species --- "[Polyporus]
squamosus...is
edible when thoroughly cooked, but is thoroughly mediocre." With
such faint praise, I think I might leave the Dryad Saddles for the
wildlife.
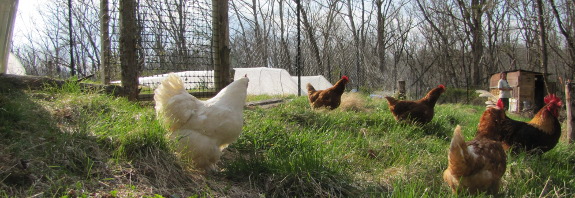
Doesn't this look
idyllic? Chickens, waist deep in grass. Surely, they are in
bliss.
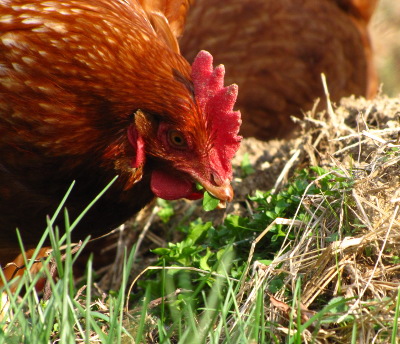 Now here's the truth about
what our chickens did when we moved them into their new, sunny
pasture. First, they headed straight for the small patch of bare
earth with chickweed growing in it and snarfed that tender green
down. Next, they ran over to the edges where leaves had drifted
against the fence, providing a damp, protected nook for worms.
Finally, our chickens started scratching through that one bare earth
patch looking for more worms. They didn't eat the grass.
I posted over on our
chicken blog about plants
grown in traditional chicken pastures. Most poultry farmers
are using their pasture as a source of vitamins and minerals and don't
expect their flock to get much nutrition from pasture, so they plant a
mixture of forage grasses, grains, legumes, and (occasionally) other
broadleaf plants. We're looking for a pasture that will feed our
flock a significant portion of their daily nutrition, so we're going to
have to think outside the box.
 I plant to continue to grow grains
and legumes in our
original two paddocks, in hopes of storing up some chicken feed for the
winter. I have winter
wheat growing in one
paddock where I have also interseeded clover, and will be planting the
other paddock in oats, clover, and field peas now that the chickens
have moved out. In May, I'll add in amaranth, millet, alfalfa, sunflowers, cowpeas, and corn, and will
round out the year with a late crop of wheat and rye. I suspect
I'll be able to graze the chickens in those paddocks once the grains
are tall, but I don't think the chickens will get much food value
(until I feed them the fruits in the winter, of course.)
The rest of our pastures
are going to be wilder, and I suspect my plans for them will change
drastically as I continue to observe what our chickens like to
eat. In at least one pasture, I'd like to experiment with letting
the grass grow tall to see if the prairie-like environment attracts
enough bugs to keep the chickens happy. Elsewhere, I want to let
the chickens scratch bare patches to promote the more weedy plants they
enjoy. In addition to chickweed, tick-trefoil seems to be a favorite of
our flock, and I need to put some thought into how to get this weed to
take over their pastures.
 Our chickens are big fans of
fruit, not only because the hens like the sweet, succulent food
themselves, but also because insects are attracted to the sugar.
I've planted an everbearing
mulberry and some bush
cherries in one pasture, but it will be several years until that
experiment pays off. I'm also working on collecting and starting
seeds from persimmons that fruit all the way from
early fall to mid winter. Meanwhile, I'll plant ground
cherries in some of
our pastures since our chickens were happily eating those fruits in
February.
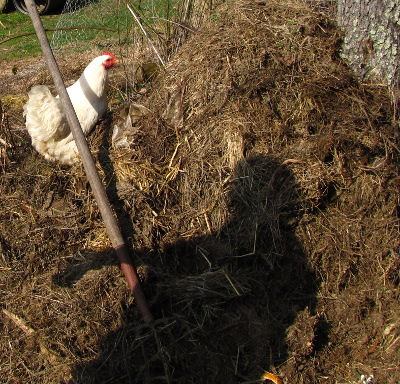 As much as I like to grow
plants, though, I'm starting to realize that chickens are far more
attuned to invertebrates. I'll continue to keep a compost
pile in each active
chicken pasture
since the flock loves to nibble on our food waste and to scratch
through the
decaying organic matter in search of worms. Another way to
attract invertebrates for the chickens is to keep the pasture at least
partially wooded since leaf mulch provides a perfect habitat for worms
and other creepy crawlies --- two of our new pastures for 2011 are
slated to be in existing woodland.
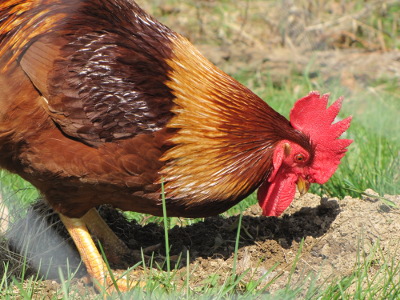 I'm starting to suspect that
the best chicken pasture doesn't look anything like the pastoral scene
most of us would envision. It probably has some green grass and
clover, patches of weeds, bits of bare earth, trees, shrubs, and
perhaps other factors I've yet to discover. I'll be posting our
weekly observations of chicken pasture year two over on our chicken blog, but will be sure to sum up
over here in the fall or winter for those of you who are just
interested in the big picture. I hope some of you will be
inspired to give chicken pasturing a try on your own farm and will
report your observations as well.
 This post is part of our Chicken Pasture lunchtime series.
Read all of the entries: This post is part of our Chicken Pasture lunchtime series.
Read all of the entries: |
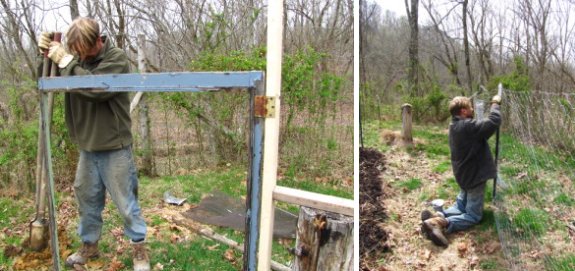
Chicken
pasture #4 is about halfway finished today thanks to some dry
weather.
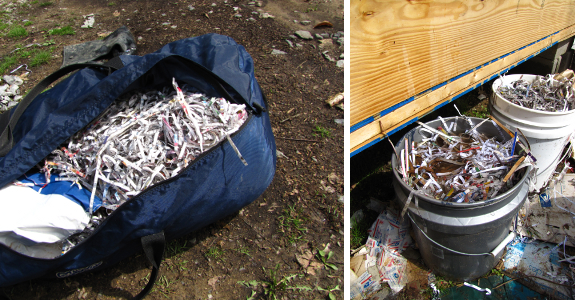
I'm starting to get worm
bin day down to a science. As soon as I get out to the parking
area, I soak the worm bedding. This week, I was
lucky to have shredded newspaper (thanks, Mom!), but sometimes I sit
out there and tear cardboard into a bucket of water. I generally
soak however much bedding I have, figuring that I can always leave any
extra sitting in the bin for days when it's too cold (or I'm in too
much of a hurry) to deal with bedding. This week, I soaked six
buckets full.
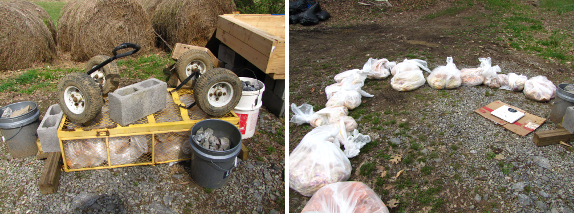
Next, I weigh all of the
bags of food scraps. Mark has put the bags under the yellow wagon
to keep the food safe from critters while they wait for me. I
write down each weight and line up the bags in a big arc so that I'll
know which bag weighs how much.
Then I select the bags
that will go in the worm bin. Since we're still only putting
about a quarter of the food in the bin each week, I choose the food the
worms like the most.
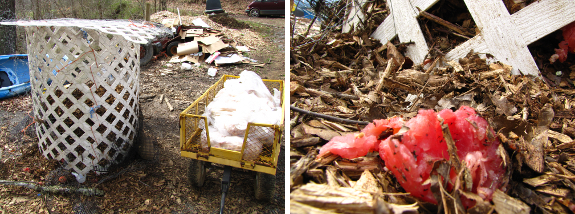
I load up the yellow
wagon and haul the rest of the bags over to the compost bin. I
sigh because Lucy has broken in, making short work of my gutter
guard reinforcement.
Then I have to laugh because Lucy and the squirrel both pawed out but
discarded the winter greenhouse tomatoes. At least our maurauding
animals have good taste.
I pour bags of food
scraps into the compost heap, layering wood chips every three inches or
so and being sure to top the last layer of food scraps off with yet
more wood chips. I'm putting things like meat and bread into the
compost bin, so it's important to keep the food well covered so I don't
attract flies.
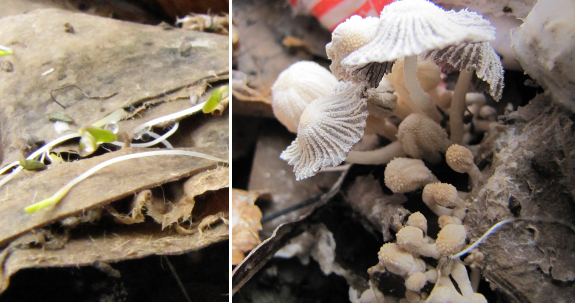
Back at the worm bin, I
take a minute to peruse the flora and fauna. The cardboard
bedding that had been sitting out on the ground all winter is
sprouting! And look at those cute little pink mushrooms growing
out of the bin!
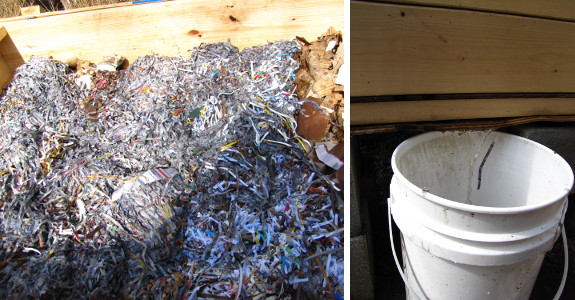
I tear myself away from
the worm bin ecology (the hardest part of the operation), and scoop all
of the bedding out of the soaking buckets to lay it out across the
empty floor of the worm bin. The bedding is too wet for worms at
this stage, but since we
included a false bottom and lots of drainage holes in our bin, the water quickly seeps out
of the bedding. I capture the drainage water with extra buckets
so that I won't have to go down to the creek for water next time I want
to soak bedding.
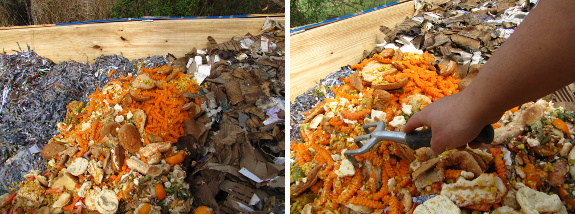
Now I open up the bags
I've set aside to go in the bin. After pouring the food scraps on
top of the bedding, I rake the food out flat so that the scraps are
only about two inches deep. Then I top them off with a hearty
helping of extra bedding. Keeping the food scraps thinner and the
bedding deeper is my solution to the minor
ailments I saw in the bin last week.
An hour and a half
later, I've dealt with 205 pounds of food waste. 52 pounds went
in the worm bin and the rest in the compost pile. A perfect
Friday afternoon activity!
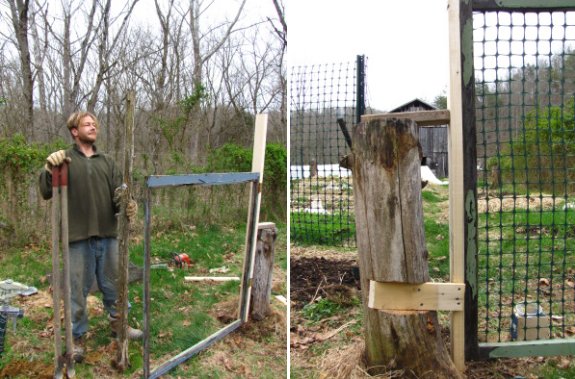
I'm not sure how much longer
this old stump will last, but using it to shore up one of the gate
posts helped to add some stability to the frame.
It just took a few minutes to
trim out a bottom notch with the chainsaw, and a scrap piece attached
nicely to function as a brace at the top of the stump.
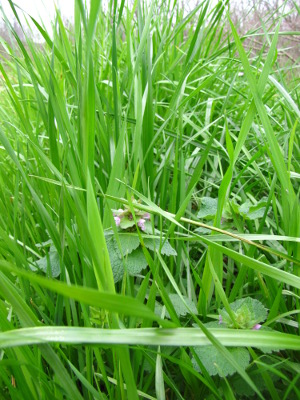 I finally got around to
cutting down the annual ryegrass and barley cover crops. I had
hoped they would die by themselves over the winter, but instead they
survived and have grown nearly a foot in this spring's warm weather. The biomass is much
appreciated, but only if I can turn it into soil organic matter before
time to plant vegetables in those beds.
The electric
hedge trimmer made
short work of the barley but got bogged down in the ryegrass. I'm
sure the lawnmower would have done a better job there, but I'm always
leery of internal combustion engines after a long winter, so I just
cleaned the hedge trimmer blade every few minutes and plowed my way
through. One of these days, I'll find a scythe that fits me and
learn to use it so that I can cut my plants with humanpower.
After cutting, I mulched each
bed with an inch of manure and then a healthy dose of straw and last
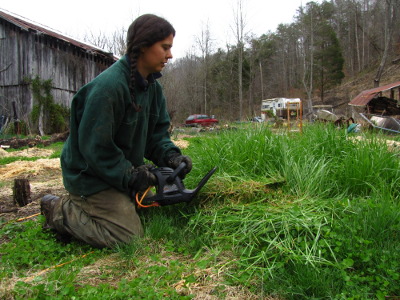 year's lawn clippings. Neither annual ryegrass nor barley is
supposed to reliably mow-kill, but I'm hoping that the mulch on top of
the weakened plants will make these cover crops lose heart. As
long as they don't sprout back up, I'll be happy.
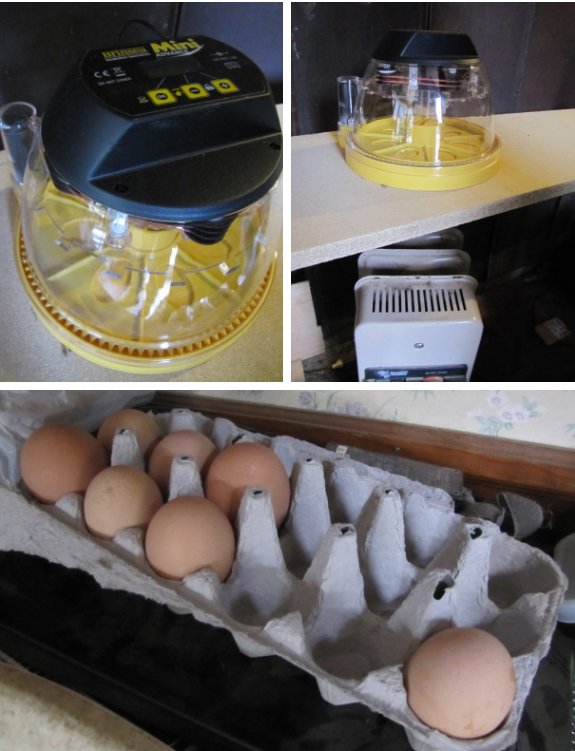
We got the Brinsea mini
advance Eco incubator in the
mail yesterday.
The room temperature should
be no lower than 63 degrees, which is why we located it right above the
space heater. One of the innovative features is an alarm that will beep
at you when it's too hot or too cold. The instructions say to let it
run a day to see if your chosen spot is cozy enough.
One thing we couldn't figure
out last night was why it was beeping every 45 minutes. Turns out each
time it rotates the eggs it also gives a gentle beeping sound that was
lower than the alarm when the temperature is wrong, but it's still a
noise. Not a big deal unless you're trying to sleep in the same room,
which is why we changed it to under the sink on a shelf with the space
heater directly below.
 The
Brinsea
Mini Advance Incubator gives you a lot of control over incubation
settings, so it takes a few minutes longer to set up than a traditional
incubator. Of course, you have to start with fertilized
eggs that have been stored properly --- our hens came through
with the seven eggs we needed within the four day window pre-hatch with
no trouble. I penciled the date each egg was laid on the shell
and tried to guess who each egg came from based on egg size and color
(maybe two from the old girls, three from the young
  Golden
Comet, and two from the White Cochin?)
Next step was to adjust
the turning angle, which Brinsea recommends setting between 90 and 120
degrees. The eggs sit in a plastic cradle with seven holes in the
bottom (one for each egg) so that the underside of the egg rests on
another surface below. When the turning motor spins the lower
surface, the eggs rotate like wheels, with their turning angle
depending on how long the motor runs for. The instructions  include a diagram to let you
measure the diameter of your egg and come up with a rough estimate for
turning time. Our extra large hen eggs seemed to be larger than
the biggest circle, so I set the turning time to 12 seconds, but after
marking an egg and watching it turn, I backed off to 8 seconds.
You can also set the
incubation temperature (99.5 for chicken eggs), number of days
remaining so that the egg turner will stop two days before hatch,
turning interval, and temperatures at which an alarm goes off. We
stuck with the manufacturer's settings for all except the turning angle
and the number of days (which, oddly, came pre-set at 40 rather than
the 21 day chicken incubation period.)
After preheating the
incubator and filling half of the well in the center with water, we
plopped our eggs in, making sure the blunt ends faced the center.
Although the eggs tend 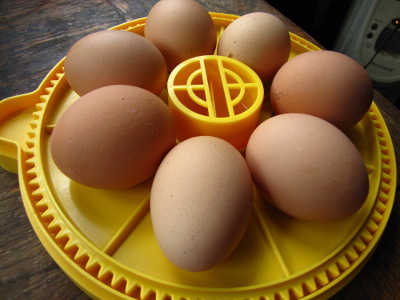 to sit pretty flat at first,
they will eventually tilt a bit so that one end points up. The
instructions explain that the big end should point up, and that we
might need to turn an egg around if for some reason the little end
starts pointing up.
Now we just have to wait
and hope that we can keep the temperature in range. I chose this
model because it's one of the few consumer-grade incubators that
actually tests the internal temperature and makes subtle adjustments
rather than relying on you to keep 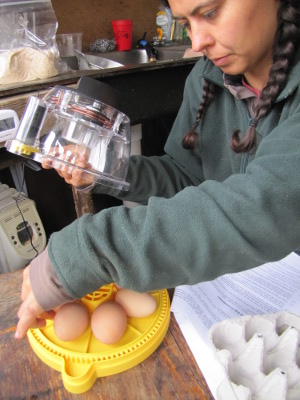 the incubator in a room with
constant air temperature. Still, the directions say that you
should, optimally, keep the room temperature between 68 and 77 and
never let room temperature drop below 63 degrees or let the incubator
sit in direct sunlight. I can promise the latter, but not the
former. In a week, we'll candle the eggs and hope to see signs of
life, then rethink our incubation area if need be. Even if we
don't get a hatch, I'm sold on this model --- it's easy to use and the
temperature control worked well all day Sunday. If the eggs die,
it will be our own fault.
 Despite
my unconventional lifestyle, I tend to be very trusting of
authority. In a dicey situation, I walk toward the policemen
rather than away. I scoff at Mark's conspiracy theories and
believe in sound science. And I lapped up the USDA food pyramid
in health class, vowing to eat 6 to 11 servings of carbohydrates per
day and to consume fats only in extreme moderation.
At the same time, I
believed in what I call the hippy food
pyramid. It looks a lot like the USDA food pyramid, but is a bit
stricter and more specific. Whole grains make up the base of the
hippy food pyramid, and soy replaces meat in many instances. The
vegetable and fruit section is a little heftier and red meat is bad,
bad, bad.
 Over the last year, though,
I've been slowly learning nutritional
factoids that don't seem to fit my old view of proper nutrition.
As Mark and I incorporated these anti-USDA nutritional guidelines into
our lives, we felt perkier, smarter, and thinner. But I was
concerned about making drastic shifts in our diet based on
half-understood truths, so I checked out Michael Barbee's Politically
Incorrect Nutrition.
The book was
eye-opening, full of twenty pages of small print
references to back up his nutritional guidelines --- ones that my gut
already told me made sense in my own life. I've excerpted the
most game-changing facts in this week's lunchtime series, but this is
one book I recommend checking out on your own and taking the time to
slog through. Yes, it is dense, but isn't it worth putting in a
bit of study time to take care of your most important possession ---
your health?
| This post is part of our Politically Incorrect Nutrition lunchtime
series.
Read all of the entries: |
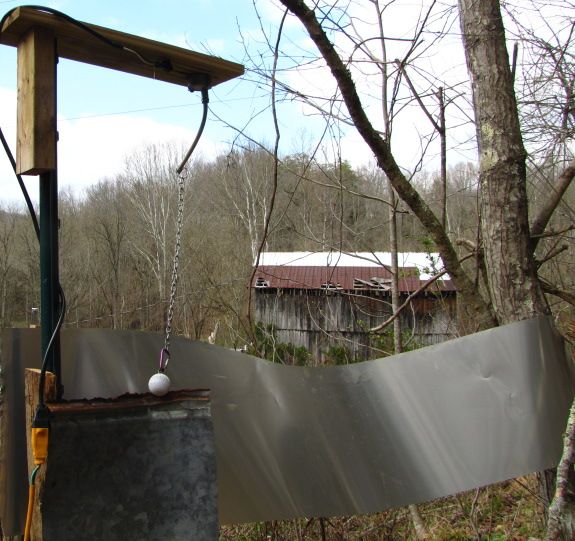
It's that time of year when
deer are roaming around looking for those tender new plants that start
popping up, which means it's also the time of year to get more serious
about deer deterrents.
I moved the number 2
deterrent up the hill a bit and changed the clanging sound to more of a
booming sound with a long sheet of flashing material. I'd guess the
total price on this contraption to be around 35 dollars.
We've got another deterrent
still clanging, but on a slower interval. It's my opinion that mixing
things up is what it takes to keep one step ahead of those beautiful
and tasty four legged garden wreckers.
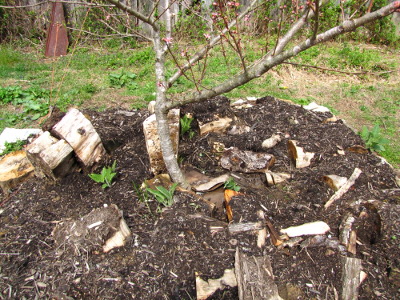 Last year, I decided that the
comfrey I had planted underneath my nectarine was competing with the
tree for nutrients
and had to go. I waited until the fall, then laid down a layer of
cardboard topped with punky wood, compost, and wood chip mulch.
Surely, I thought, the comfrey will die under such a serious kill mulch.
"Hi there!" the comfrey
called last week as it poked its way up between seams in the cardboard. "Such a nice
spring!" added another comfrey plant that had moved an entire 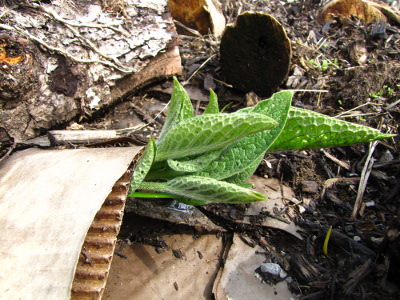 log aside to make way for its
new growth.
Folks who warned me that comfrey is hard to kill were entirely right. If you're thinking of
some comfrey interplantings, take heed --- once you put comfrey in a
location, it's there to stay.
 Why
don't our governmentally approved dietary guidelines line up with
proper human nutrition? A conspiracy theorist would say that
industry lobbyists run the tests that get unsafe food additives
approved and that their employees go to work for the USDA to make sure
that their interests are served. I think that there's a lot to be
learned by following the money trail, but I also think that there's
more to the problem.
Part of the issue is
that proper human nutrition is a very complex
subject. So many of the simple "facts" that I learned about human
nutrition in school don't hold up to the light of sound science.
Don't eat fat or you'll get fat. Don't eat cholesterol or you'll
have high cholesterol. Unfortunately, our bodies aren't so cut
and dried.
Good nutrition is all
about balance. Let's look at osteoporosis,
which common wisdom says is caused by not eating enough calcium to keep
our bones strong. In reality, a handful of factors all play into
whether that calcium makes it into your bones, and a deficiency of
essential fatty acids, zinc, copper, boron, manganese, silicon, vitamin
K, magnesium, or potassium can all rob calcium from your bones.
So can eating too much animal protein, pasta, beans, nuts (except
almonds), and unsprouted grains since these foods all make your blood
acidic. To counteract acidic blood, your body yanks calcium out
of your bones --- hello, osteoporosis.
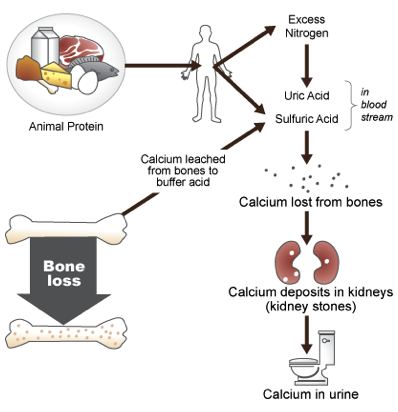 You can also get
osteoporosis by consuming too much vitamin A without
also increasing your dose of vitamin D. The dairy industry would
have you believe that drinking their vitamin A and D fortified milk
will keep your bones strong, but the artificial vitamin D in milk isn't
used in
the right way by your body, so you might actually be doing more harm
than good by chugging that white fluid. I guess the leafy green
and broccoli industries didn't have enough cash to outcompete the dairy
industry when it came time to tell the American public how to get
calcium in our diets.
The upshot is that we
need to think a little harder about nutritional guidelines we thought
we understood. We should check to see if there's a conflict of
interest involved in the recommendation and we should delve a bit
deeper into the science. Luckily, Michael Barbee did the legwork
for us with Politically
Incorrect Nutrition.
| This post is part of our Politically Incorrect Nutrition lunchtime
series.
Read all of the entries: |
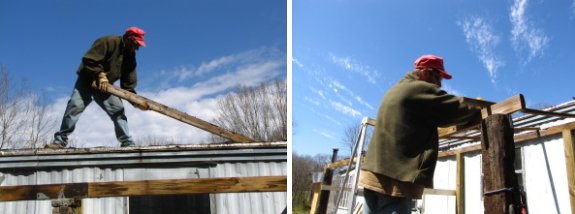
A little home improvement
mixed in with some spring cleaning today helped us to feel a lot more
organized for the upcoming 2011 growing season.
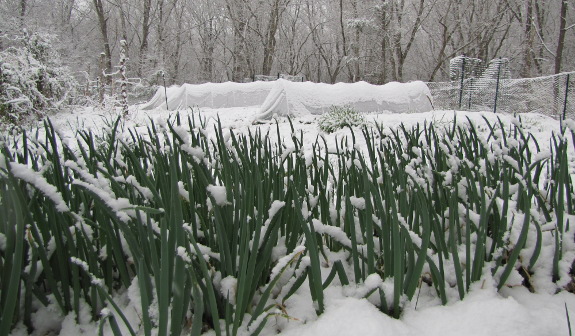
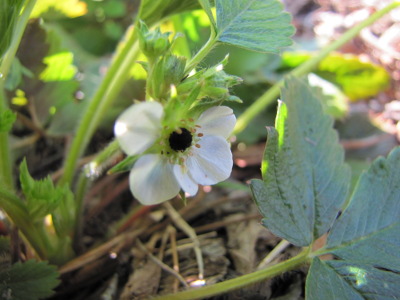 I understand why Zimmy sent
us an inch of snow Sunday night --- he was jealous
of our green grass
and wanted to cover it up. But a low of 25 on Monday night?
Really?
It's hard to tell what
got damaged by the freeze, but I'm willing to guess. Our alpine
strawberries,
blooming long before our June strawberries, were definitely nipped ---
the centers of their flowers have turned black. These small
plants aren't our main strawberry crop, and the alpine strawberries
will put out new flowers, so it's 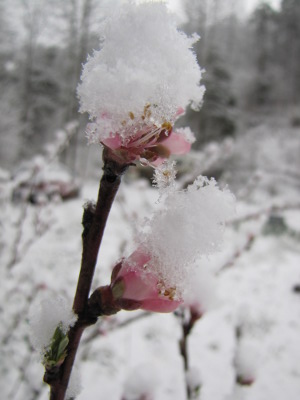 no big deal.
I expected the onions I
set out prematurely
to be injured, but they looked just fine, as do our early peas. I
can only guess about our fruit trees, but based on my critical
temperature chart,
I'd say this freeze probably just did a little early thinning.
Only the nectarine flowers that were fully opened will be completely
killed, and there are flowers yet to unfurl even on that precocious
tree.
As long as Zimmy keeps
his cold weather in Ohio after this, we should be in good shape.
Politically Incorrect Nutrition
has changed the way we eat by pointing out foods we thought were good
for us that are actually harmful. Like all of nutrition, the
science surrounding these recommendations is a bit controversial, but I
thought you'd like to see a rundown on the "healthy" foods Michael
Barbee says you should be avoiding.
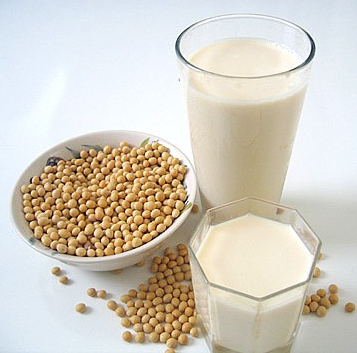 Unfermented soy --- I
used to believe that soy was a great meat substitute, but soy
isoflavones are related to estrogen and can cause breast cancer,
disrupt our hormonal balance, change our menstrual patterns, and
trigger hyopthyroidism. The use of soy in baby formula leads to
zinc deficiencies and early puberty and has also been linked to
diabetes and learning disabilities. In both adults and
children, soy protein is hard to digest and causes pancreatic
disorders, and the type of vitamin B12 in soy can't be
absorbed and actually increases our body's need for that vitamin.
Soy also causes deficiencies in calcium and vitamin D and has been
shown
to increase LP(a) in blood, which is a marker for heart disease.
In fact, it's simply a myth that healthy Asian diets are high in soy
--- the average soy intake in China is only 2 teaspoonsful per day, and
that is generally eaten in a fermented form like tempeh, soy sauce,
miso, and natto. If you want vegetable protein, you're better off
mixing and matching other high protein vegetables to find a balanced
set of amino acids rather than depending on soy.
- Many vegetable oils ---
Remember how butter is bad for you but vegetable oils are better?
Wrong! Polyunsaturated fats like corn, safflower, sunflower,
cottonseed, and soy oils are easily oxidized and contain too few
omega-3s. Trans fats found in partially hydrogenated vegetable
oils are even worse since they cause heart disease, cancer, obesity,
diabetes, allergies, asthma, and immune dysfunction. More on the
good fats tomorrow.
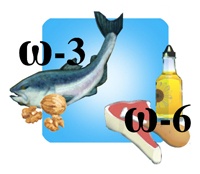 Grocery store dairy and meat
--- As
I'll explain tomorrow, animal fats from pastured livestock are actually
on the good list.
Unfortunately, typical supermarket meats and dairy are generally full
of hormones, antibiotics, omega-6s, and are too low in the healthy
conjugated linoleic acid and omega-3. In addition, homogenizing
milk makes it easier for our bodies to absorb the bad xanthine oxidase
that can cause heart disease. No wonder when I started listening
to my body a year ago, I stopped drinking supermarket milk.
- Fluoridated water ---
Although
topical application of fluoride to your teeth can be helpful, if you
eat flouride, it acts like a cumulative poison. Fluoride can
cause brittle teeth and bones, tooth decay, thyroid problems, learning
problems, joint pain, high cholesterol, depression, fatigue, weight
gain, early sexual maturation, and breast cancer. Fluoride also
interacts with aluminum in such a way that our body takes up more of
this problematic metal, so it's especially dangerous to drink any
liquid out of aluminum cans. I'm still pondering whether it's
safe to use fluoridated toothpaste and would love to hear your thoughts
on that.
- Green and black tea ---
We think of green and black teas as providing
helpful antioxidants, but the drinks also provide a hefty dose of
flouride.
The tea plant is a dynamic
accumulator of fluoride, and a single cup of
tea usually provides more than the maximum daily dose of fluoride
recommended by the EPA. Poor Mark has decided to live without his
sweet tea, and after two weeks of withdrawal, he's starting to fell
much healthier.
 Aspartame --- Aspartame
is often found in sugar-free foods consumed by folks hoping to lose
weight. Unfortunately, studies have found that people who eat
artificial sweeteners tend to gain more
weight since they
crave carbohydrates. Although somewhat controversial, many
scientists also believe that aspartame can cause fibromyalgia,
dizziness, vertigo, headaches, tinnitus, joint pain, depression,
anxiety attacks, slurred speech, memory loss, and cancer. We
never were fans of artificial sweeteners, but we do have sweet tooths
and have discovered that it's simple to recalibrate your sweet sensors
so that your taste buds think that desserts with half the sugar are
delicious. Just double
the cocoa content (or other primary flavor) and you can eat smaller
helpings of delicious foods and feel sated. The downside is that
we can't eat restaurant desserts anymore since they now taste
sickeningly sweet and give me a headache.
- Vitamin pills --- Do you
figure that you can eat whatever you want as long as you take a
multivitamin pill every day? Some studies are suggesting that
even water-soluble vitamins can cause problems in your body in excess
amounts. For example, doses of vitamin C above 500 mg/day
increase iron and decreases copper in your body. There is also
the question of whether your body can use vitamins in the synthetic
form provided by vitamin pills. To be on the safe side, it's
probably best to eat a well-rounded diet and get your vitamins and
minerals in your food.
| This post is part of our Politically Incorrect Nutrition lunchtime
series.
Read all of the entries: |
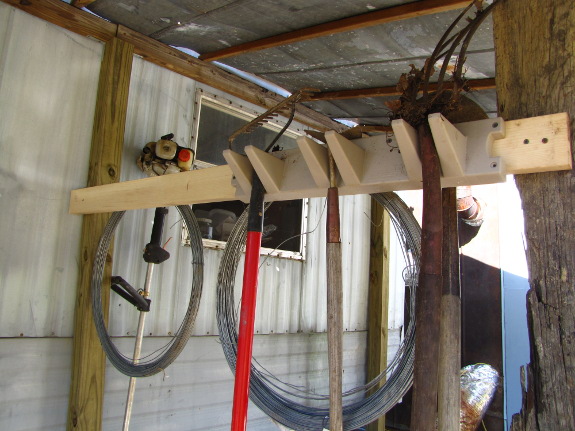
Part of our porch home
improvement project was
organizing our tools, made simple with a pair of Garden Tool
Hangers. The hard part was picking our most used six tools for
the prime spots. We narrowed it down to two shovels, the spud bar, the hard rake, Anna's
new favorite hoe, and the
pitchfork. No more tools on the
ground.
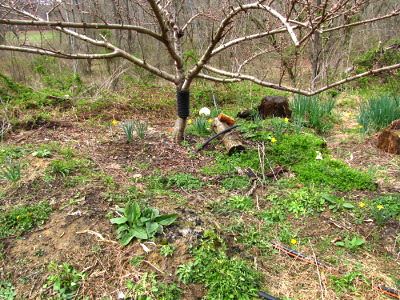 My
forest
garden islands
continue to be the most successful parts of our orchard. Since
they're working so well, I've been taking every spare hour I can tease
away from other tasks this winter to expand each tree's bed. In
the waterlogged part of the yard, I gave each tree a
big hugelkultur donut
to add to its current mound, and in better-drained areas I instead
built mushroom
rafts.
This week, I finally
reached my happiest tree --- the kitchen peach. The issue here
isn't drainage since I planted the tree just across the soil type
boundary in good loam instead of in degraded clay, but Japanese honeysuckle from the wild edges of the
yard tends to climb up my training lines and try to choke the
peach. The tree is just a few feet away from a steep dropoff that
falls nearly vertically for about twenty feet down to the floodplain,
so there's no way I can get rid of all of the honeysuckle. What I
can do is to make a mowed moat around the outside edge of the tree to
try to keep the honysuckle at bay.
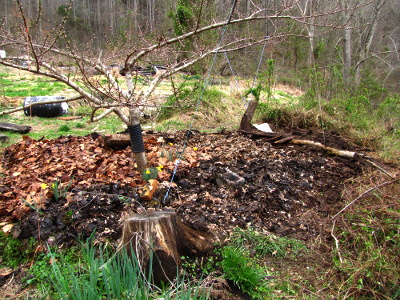 It took a couple of hours to
rip all of the honeysuckle loose from my new moat area, but when I did,
I discovered a gold mine --- a huge pile of rotten boards that I'd
tossed on the edge of the yard when tearing down the old
house five years
ago. The wood is now halfway decomposed, and I know our peach
tree will love pushing her roots into the stump dirt (if she hasn't
already.) I piled the rest of the boards up under the limbs of
the peach and shoveled a small, flat pathway through which I hope we'll
be able to push the lawnmower. Add some manure and a lot of
leaves and our peach should be pretty-much self-sufficient until I
pluck the juicy fruits in August.
Yesterday's
list of surprisingly
bad foods might be a
shock to some of you, but
there's good news --- delicious foods you thought were forbidden which
are actually healthy. Here's the dirt on...
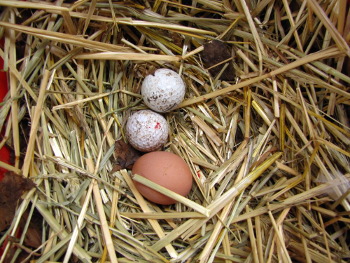 Cholesterol ---
Conventional wisdom holds that eating too much cholesterol causes heart
attacks. The truth is that our body needs cholesterol to create
sex hormones and to keep our cells, brain, and nervous system
healthy. Lack of cholesterol in the brain leads to depression,
agression, and suicide and very low levels of cholesterol is linked to
cancer. We can usually make cholesterol within our body if we
don't eat enough, and rising levels of cholesterol in our blood is an
indicator a bit like a fever. Artificially lowering high
cholesterol can do more harm than good since our bodies boosted the
cholesterol levels for a reason. Although mainstream doctors will
tell you differently, there are also some studies coming out that
indicate that folks with low cholesterol levels don't live as long or
as healthily as those with higher levels and people who die of heart
attacks often have low cholesterol levels. So eat as many eggs as
you want --- they're good for you. Just don't go for dried eggs
since oxidized cholesterol is trouble.
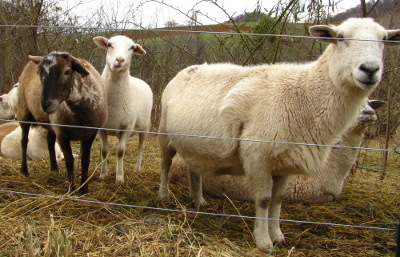 Good fats --- The fats
found in milk, cheese, butter, pastured animal meat, eggs, coconut oil,
lard, tallow, sesame oil, and rice bran oil are healthy for our bodies
since they provide omega-3s, essential fatty acids like conjugated
linoleic acid, and vitamin D in a form our bodies can consume.
Studies have shown that eating the right kinds of fat helps you lose
weight, increases insulin sensitivity, and builds muscle. While
eating saturated fat can increase our cholesterol levels, this
cholesterol is created in the body and is thus unoxidized, so it is
both harmless and helpful. Do be cautious to limit your sugar
while eating saturated fats so that the duo doesn't cause platelets to
aggregate.
Doesn't pastured lamb taste better than a
soyburger anyway? Maybe your body was trying to tell you
something when you started craving butter.
| This post is part of our Politically Incorrect Nutrition lunchtime
series.
Read all of the entries: |
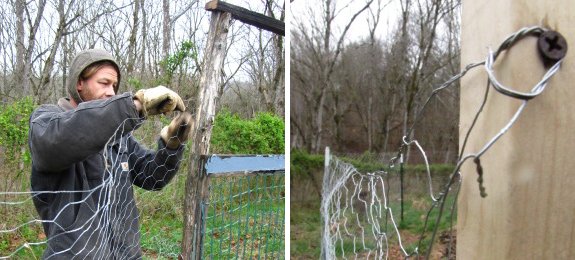
When I first started working
with chicken wire my main method of attachment was using a staple gun,
which works fine, but sometimes those staples will work loose over
a few seasons if there's any pressure on it.
Now I use small drywall
screws like in the picture above. It's pretty easy to wrap a few turns
of wire around the screw before you completely tighten it down, and if
you ever need to change anything it will be a lot easier to take back
out compared to staples.
Want more in-depth information? Browse through our books.
Or explore more posts by date or by subject.
About us: Anna Hess and Mark Hamilton spent over a decade living self-sufficiently in the mountains of Virginia before moving north to start over from scratch in the foothills of Ohio. They've experimented with permaculture, no-till gardening, trailersteading, home-based microbusinesses and much more, writing about their adventures in both blogs and books.
