archives for 09/2010
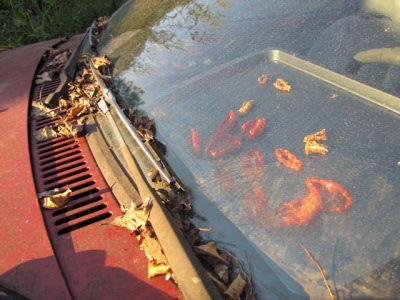 I
thought the drying
season had left us
behind, but this week the sun came back out and let me test a few
tomatoes in our automotive dehydrator. It tickles me pink to be
drying vegetables in a totaled
car, even if it is
running fine and useful for ferrying supplies back and forth rather
than being up on blocks in the front yard. My test tray dried
nicely, so today I'll add more tomatoes to the drier.
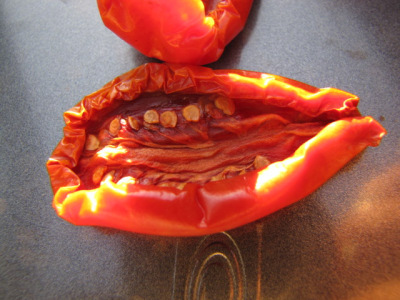 My
goal is to make Mark stop talking about our movie star neighbor's
sun-dried tomatoes and start talking about mine. Hollywood sun-dried
tomatoes (as I've decided to call the delicious concoction) are so
tasty you can't keep them in the fridge or they'll be gone
overnight.
Part 1 of the recipe is
simple --- slice plum-sized romas or other small, meaty tomatoes in
half, sprinkle the cut side with a hint of salt and pepper, and dry
until slightly moist (like a dried apricot). Stay tuned for the
taste explosion of part 2 once I have enough tomato morsels dried to
show you the steps.
The internet is chock
full of articles glowing about biochar's potential, but I seldom find
any useful, hands on information. The Abingdon
Biochar presentation
we attended delved into the nitty gritty.
Today's video highlights
methods you can use to make biochar on any scale. I was
especially intrigued by the idea of modifying a rocket stove to produce biochar while
cooking your dinner.
| This post is part of our Biochar Videos lunchtime series.
Read all of the entries: |
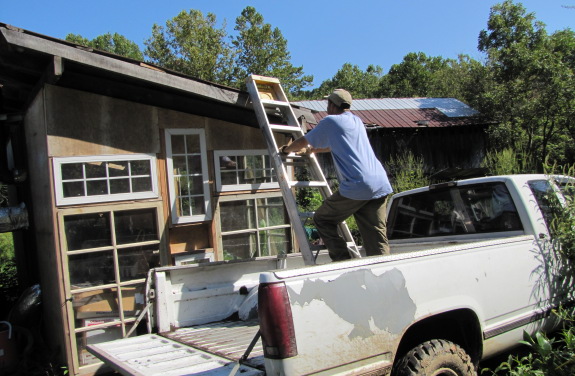
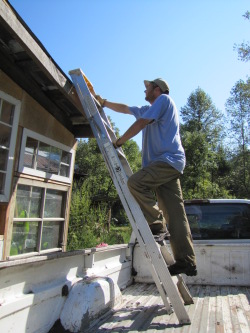
Call in Joey's truck for some assistance.
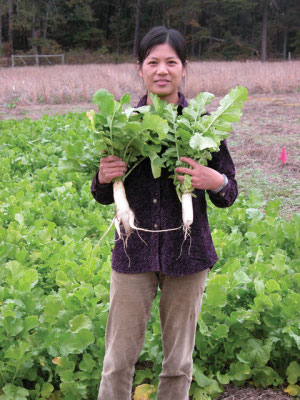 While hanging
out with other farmer geeks last week, I discovered that
there is a cool new cover crop making the rounds --- radishes.
Everyone's glowing about the way tillage radishes, oilseed radishes,
groundhog radishes, fodder radishes, forage radishes, and daikon
radishes mellow clay soil, adding copious amounts of organic matter and
tilling through hardpan. If you play your cards right, you can
even graze your livestock on the radishes a time or two during the fall
since most of the cover crop biomass comes from the roots. What
really caught my interest, though, is news that these cover crop
radishes winter-kill
here in zone 6, meaning that they work perfectly with no-till systems.
I clearly had to give a
radish cover crop a try, but which one to choose? A little
research made the choice simpler since all of the names I listed in the
last paragraph refer to the same species (Raphanus
sativus.)
Now, to be fair, cabbage, broccoli, and collards are all members of Brassica
oleracea, so it's
clearly possible to come up with multiple subspecies that act quite
differently. But in the world of cover crop radishes, there is
really only one huge distinction --- the daikon radish has been bred to
be eaten while all of the others have been bred primarily for biomass
and are types of oilseed radishes. Groundhog radish and tillage
radish, specifically, are terms that plant breeders have trademarked
for their line of oilseed radishes.
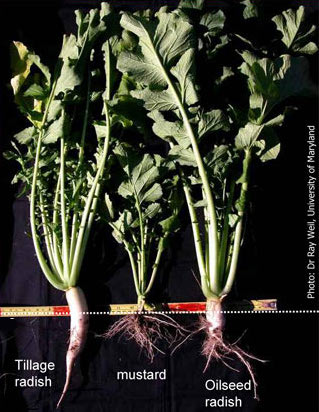 The
differences between the varieties seem to come down to the roots.
Many people want a long, thin taproot like that found in the tillage
radish, but we don't have hardpan, just heavy clay, so I chose to go
for a more branched root instead. That said, cover crop radishes
are so trendy that the ones I wanted the most were sold out and I had
to settle for a generic oilseed radish from Johnny's Select Seeds.
Before you go out and
seed your front lawn with radishes, though, I should warn you of one
factoid I noticed on every website. When oilseed radishes freeze
and rot over the winter, the resulting smell is quite foul. Maybe
it's best not to plant them beside your front door.
So you've made some
charcoal. How do you get it into the soil in such a way that it
helps your plants grow? The embedded video in this post walks you
through using biochar
in your farm or garden.
| This post is part of our Biochar Videos lunchtime series.
Read all of the entries: |
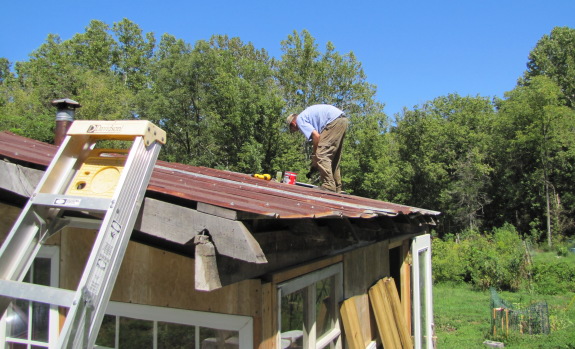

Putting the final piece of tin on the roof sort of feels like the last
piece of a marathon jig saw puzzle.
We recently upgraded the
WaldenEffect blog camera from the Fuji
Finepix S1000fd to a
beefier Canon Power
Shot SX20. I can already
tell a difference, but will wait for more experimentation before I give
a full report on how awesome it is.
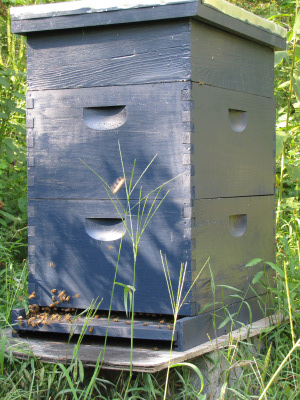 Both
the bees and I are starting to plan ahead to overwinter our three
hives. After harvesting
honey this summer, I
put all of the empty supers back on the hives to make it easy for the
bees to clean out the precious juices left behind. Many of those
frames are now empty, so I consolidated all of the frames of honey and
dehydrating nectar into one super per hive, removing the other supers
for winter storage.
Each hive now sports two
deep brood boxes and one super, a clue to my indecision. Last
winter, I overwintered each hive with one full super of honey atop a
single brood box partly full of honey and pollen --- this is what our
neighbors do. But I've had good luck with a double brood box this spring and summer and
have read that continuing the double deep through the winter helps bees
find their honey during cold weather. (Apparently, bees are
British and "mind the gap.") Anyone have thoughts on whether I 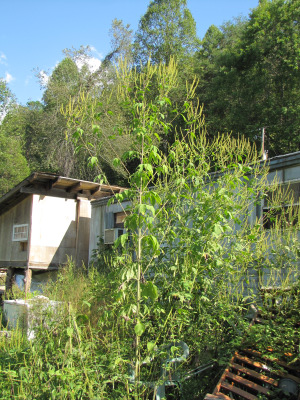 should stick to double brood
boxes or go back to one brood box and one super for the winter?
The bees aren't all that
interested in my experimentation. Instead, they're harvesting ragweed
pollen as fast as
they can so that the first spring hatchlings will have a high protein
diet. I like to tell visitors to the farm that the ten foot tall
ragweed plants around our yard were intentionally left behind --- of
course they didn't just spring up where we forgot to mow! Good
thing neither of us is prone to allergies.
The last video in this
week's lunchtime series may be too scientific for some of you, but I
highly recommend it to folks who are serious about giving biochar a
try. Ken Revell, graduate student at Virginia Tech, is
experimenting with turning overabundant
poultry litter at commercial chicken farms into biochar.
He'll tell you precisely how much biochar is beneficial in soil and why
it shouldn't be applied beyond a certain rate.
| This post is part of our Biochar Videos lunchtime series.
Read all of the entries: |
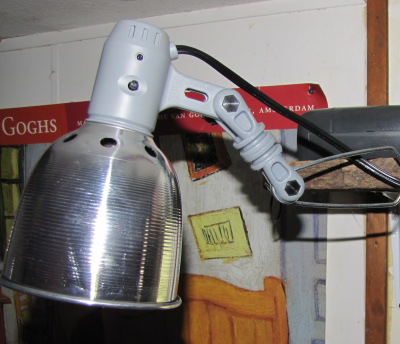
I got this 4 dollar worklight at Harbor
Freight as a replacement for our night time reading lamp.
It's a great value for the
price and flexible enough to fit several applications.
 I
posted earlier about Hollywood
Sun-dried Tomatoes
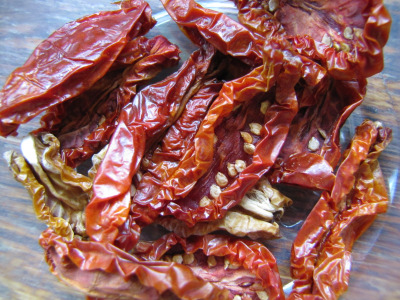
--- how much we love them, and how to dry the tomatoes in preparation
for the main event. Now it's time for the fun part --- assembling
the concoction. This recipe makes about 1 cup of Hollywood
Sun-dried Tomatoes.
Step
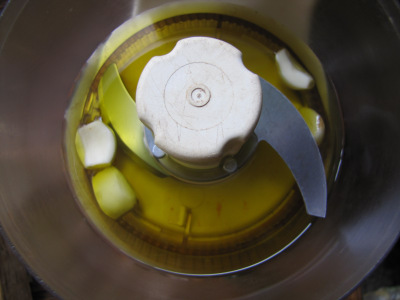
1: Put 3 large
cloves of garlic in the food processor and cover them up with olive
oil. Blend. (Yes, I can count. I figure those two
small cloves on the right equal one 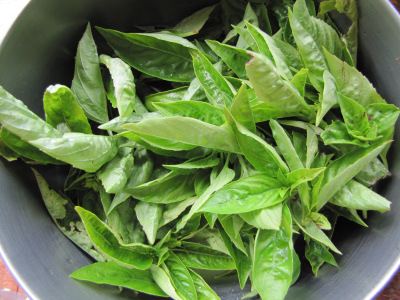 large clove.)
Step
2: Add about a
cup of loosely packed basil leaves to the food processor. Blend
again.
Step
3: Line the
bottom of your container with one layer of sun-dried tomatoes.
Step
4: Spoon on
enough of your garlic, basil, and oil mixture to liberally cover the
tomatoes.
 Step 5: Lay down another layer of
tomatoes, another layer of goop, another layer of tomatoes, and so
forth, until you reach the top of your container.
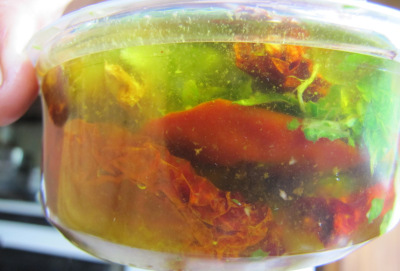
Step
6: Pour olive oil
over your tomatoes until the oil completely fills the container, as in
the photo below.
Step
7: Put on the lid
and let your concoction marinate in the fridge for a few days.
The tomatoes will plump 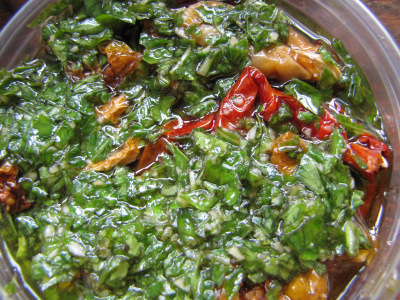 back
out and become infused with the herb flavors.
Alternate
Step 7: We
consider Hollywood Sun-dried Tomatoes to be a winter treat, so we toss
them in the freezer immediately after step 6. After they've
frozen, then thawed back out in the fridge months later, the flavors
have blended perfectly.
How do we eat the
Hollywood Sun-dried Tomatoes? Mark scarfs them down like potato
chips, but I like to save some for more serious cooking. A few of
these tomatoes act very much like a couple of slices of bacon in a dish
--- instant crowd-pleaser. Try them in egg salad, mixed with
pesto over pasta, or as a pizza topping. I usually throw the
tomatoes and a bit of their oil back in the food processor and whir
them up into little bits to make the taste go further, but you can put
whole tomatoes straight onto your winter sandwiches.
Our movie star neighbor
told me that the only flaw in his recipe is
that it requires so much oil, but I don't consider that a
problem. Once
you pull the tomatoes out of the juices, you're left with flavored oil
that will spice up just about any dish. If you can't think of any
other way to use it, try brushing the oil mixture over a piece of stale
bread and toasting it for instant, delicious garlic bread.
The real problem with
these tomatoes, in my opinion, is that there's never enough of
them. This week's bowlful of Martino's and Yellow romas shrunk
down into two scant cups of dehydrated beauties --- just enough for
birthday celebrations for two.
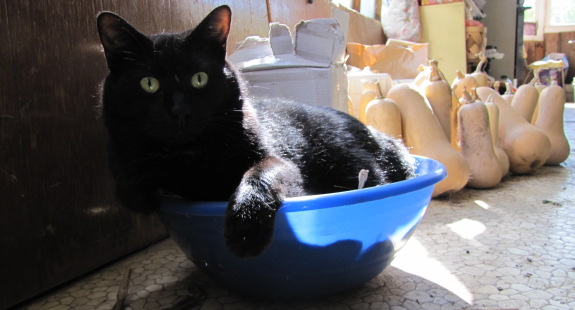
My first indoor picture with
the Canon
Power Shot SX20.
I thought this was a good
demonstration of the automatic setting with the subject bathed in a
mixture of direct light and shadow.
Huckleberry likes to express
ownership of something by taking a nap on it.
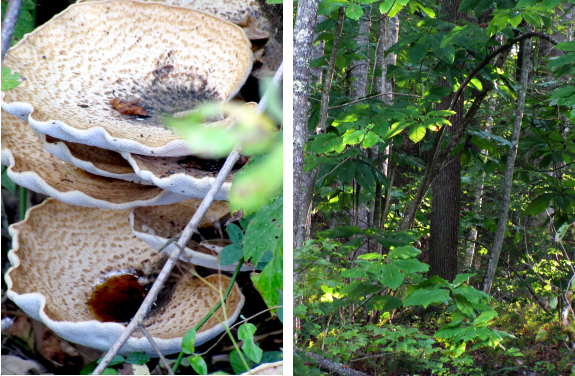
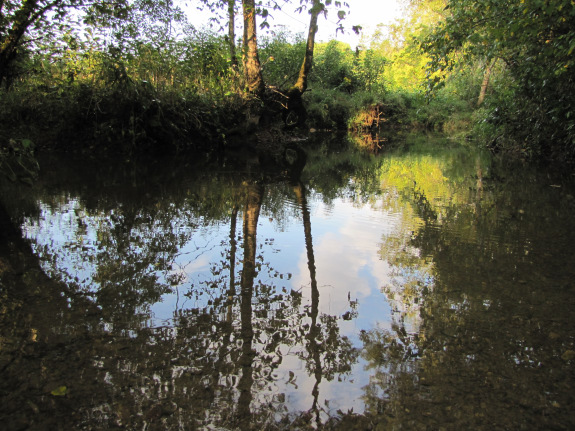
Even though the woods is
still green and vibrant, this weekend's chilly mornings herald fall.
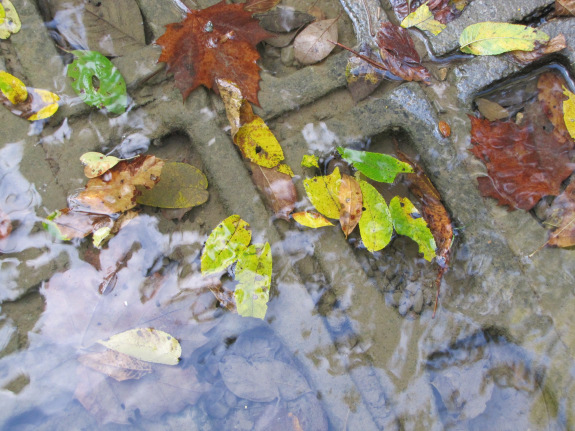
Colored leaves are
beginning to wash up on the ford.
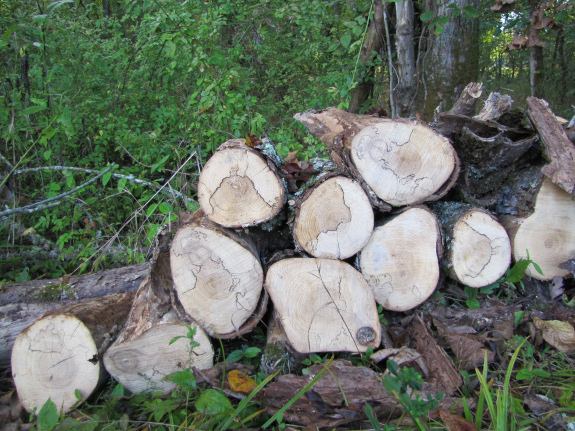
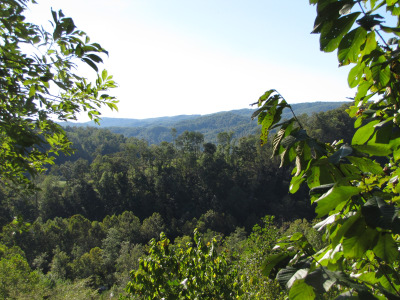
I've turned my mind to
winter and filled an entire page with chores that absolutely must get
done before cold weather hits. Near the middle of the list ---
finish cutting and hauling the deadfall from along the driveway to heat
our trailer through the winter. These logs wait patiently for our
attention.
Top of the list --- soak
up the green and sun to savor on a winter's day.
This is a short video of a new
deer deterrent experiment
that makes use
of a 4 dollar toy.
I glued a small hex key to
the wheel which creates a sizeable amount of
vibration and motion.
The video was created with
the Canon Power
Shot SX20 and uploaded to
Youtube with no problems.
 "I'm
on the 26th floor of a hotel in downtown Atlanta," our movie star
neighbor explained when I picked up the phone. He never tells me
much about his work since I can't tell actors apart and wouldn't
recognize the names of even the leads in the Footloose
remake he was
working on. Still, I enjoyed imagining our farmer friend rubbing
shoulders with these shining Hollywood stars.
 Back
in his hotel for a three day weekend, the movie star had taken off his
sunglasses and put on his straw hat (figuratively, at least.) The
purpose of his phone call was simple --- our neighbor wanted a weather
report. Once I mentioned our scant tenth of an inch of rain, he
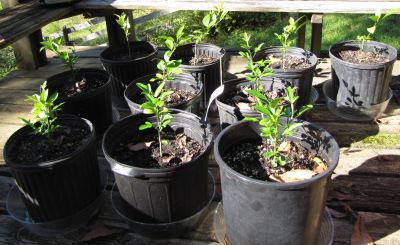
asked if I would mind heading over to his place to water his baby
collards and lemon trees.
 I'm
always glad to visit someone else's garden, and I was especially keen
on this project since my neighbor had recently added ten baby, dwarf
citrus to his collection. In case you don't remember, he's the
one who owns the gargantuan
dwarf Meyer lemon
that produces dozens of fruits every year.
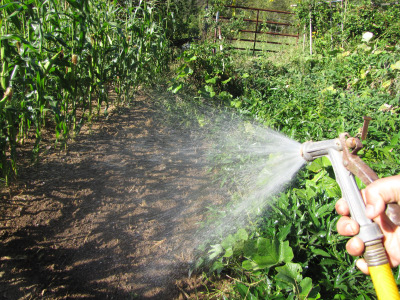
After checking on the
baby lemons, I hosed down his garden and explored his tremendous patch
of butternuts. Although I wouldn't want to live the movie star
part of his life, I love the idea that a homesteader can keep a foot in
both worlds, growing sweet corn and tomatoes in his down time between
making movies.
 Last
year at this time, I wrote a lunchtime series about lessons
learned during year 3 on the farm. I've been trying to
put together a similar series for year 4, but the truth is that my
lessons this year are both too large and too small to fit into a
lunchtime series. Basically, I learned relaxation, how to release
all worries on Friday afternoon and take the time to let my creativity
flow. I learned to love the journey of the farm rather than
becoming bogged down in daily problems and the far off glint of the
destination on the horizon. How do you write a lunchtime series
about bliss?
If anyone's interested,
I'll post another time about the complicated list of lists I use every
day, week, month, and year to keep myself on the bliss track rather
than on the overextended "we'll never get everything done in time!"
track. (This is only relevant to type A people.) But bliss
doesn't just come from lists.
 I
think that this year's journey toward bliss began when we went on our cruise
last October. Somewhere between gazing out at the ocean for hours
and climbing a pyramid, I realized that I'd never been on a true
vacation before in my life. Sure, I'd taken week-long trips to
the beach with my family, flown across the country to a friend's
wedding, but taking time off with the focus solely on myself?
Never.
After we came home from
the cruise, I started to notice how Mark made every day a little
special. A trip to the library turned into a mini-vacation ---
just the two of us together in the car, filling the great gaping hole
in my life that yearns for the printed word, then running together
through the rain into a gas station to splurge on an ice cream cone
that we ate under the gas-pump-overhang, licking streaks of sweetness
as water poured off the roof.
 As
spring came to the farm, I developed an allergy to mainstream
media. We haven't had a TV since we moved to the farm, but last
year I spent days listening to NPR while weeding the garden. This
year, even public radio felt like an intrusion, so I began to weed in
silence, watching butterflies
mate while I
wove permaculture relationships in my head. I practiced Spanish
as I built chicken waterer kits, dissolving myself into
the foreign language until I felt like I'd been on, yes, another
vacation during work hours.
Soon, I began to have
negative reactions to our twice weekly dose of Netflix movies --- when
romantic comedies give you nightmares, you know it's time to back
off. I bid farewell to quick scene changes and hello to sudden
urges to write and write and write. 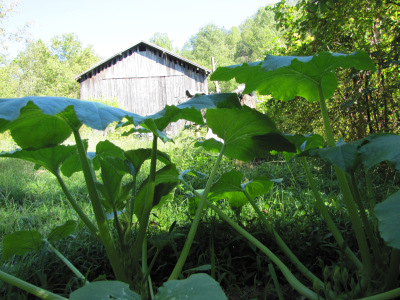 One
weekend, I pounded out the first quarter of a young adult novel (to be
finished this winter, if I decide the tale is as gripping as it felt at
the time.)
Mark knew he'd won when
I started to ask him if he'd mind taking random afternoons off.
Previously, I had been the task master, keeping our noses to the
grindstone from 9 to 4. Now I could tell when my body needed a
break, or when my mind was full of an idea that was aching to flow onto
paper or computer.
So, lessons learned in
year 4? Following my bliss. Unfortunately, I can't tell you
how to get there, but I can tell you that it's possible.
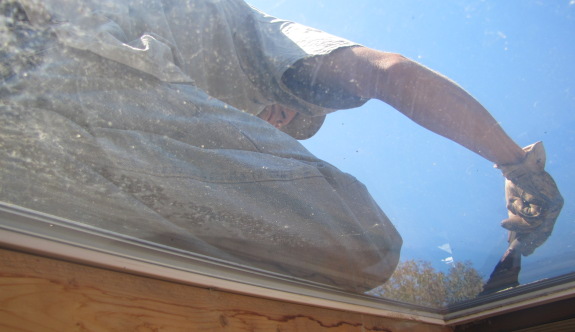
A few more days of dryness
and the sky light should be completely sealed.
We got a quick rain shower on
Friday just hours after the latest application which set the sealing
back a bit.
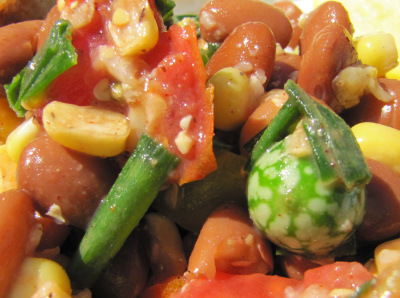 A
couple of years ago, a friend served a salsa that was so good it
tempted even me --- a non-salsa-eater --- to go back for seconds.
The salsa was full of fresh corn and tomatoes, and I figured with a
little tweaking it could be turned into a less spicy salad suitable to
be eaten on its own. Here's the result --- a quick, in-season
dish that is also delicious.
- 1 c. fresh sweet corn (2 to 3 large ears)
- 1.75 c. beans (black or pinto are best, pre-cooked)
- 2 to 3 large tomatoes
- 1 medium sweet pepper (optional)
- 1 to 2 cucumbers (optional)
- 1.5 c. loosely packed green onion tops (or about a quarter of an onion, finely chopped)
- 0.5 to 1 tsp chili powder (or finely minced fresh hot peppers. The smaller amount makes a relatively mild dish, the latter a tangy one.)
- 2 tbsp lemon juice (or lime juice)
- salt and pepper to taste
Fill a pot with water
and bring it to a boil as you harvest the sweet corn from your
garden. Drop the cleaned ears into the water and lift them out
nearly immediately (30 seconds or less). Cut the kernels off the
ear with a sharp knife, then run the back of the knife down the cob to
pull out the sweet juices left behind.
Chop the tomatoes,
peppers, cucumbers, and green onions and add them to the sweet
corn. Add the beans, chili powder, lemon juice, salt, and
pepper. We're not fans of cumin or cilantro, but this is the kind
of dish that could use either or both if you like the flavor.
Marinate in the fridge
for an hour or two to meld the flavors, then pour off the excess
juices. Serve as a side dish for burritos, fajitas, quesadillas,
or even pork chops and rice (as I did.)

Our local hardware store doesn't carry Liquid Nails, which means I've
been using an alternative glue known as "Beats the Nail".
It seems like a fine
substitute at a slightly cheaper price.
One thing to remember with a
product like this is to read the safety label on the tube.
Most of these construction adhesive chemicals give off an "extremely
explosive" vapor that could be a real danger if you're in an enclosed
space. Make sure to keep a window or door open and avoid any sources of
flame or sparks.
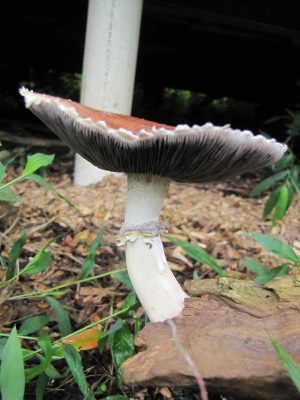 I'm a bit shocked by my own
mycophobia --- I almost threw away the first King
Stropharia mushroom
that popped up from our graywater
mycoremediation project. This is our first
year growing Stropharia
rugosoannulata, but that's really
no excuse. I was the one who researched and chose the species and
personally inoculated the wood chips. But the mushroom that
sprang up didn't look all that much like the pictures I'd quickly
browsed on the internet, and I thought a wild fungus had invaded my
mycoremediation project.
After a more lengthy
perusal of the internet (and my field guide to mushrooms), I decided
this lovely specimen was indeed a King Stropharia. We ate it
sauteed in garlic last night, so I assume I was right. Here are
the top tips I've run across for King Stropharia identification.
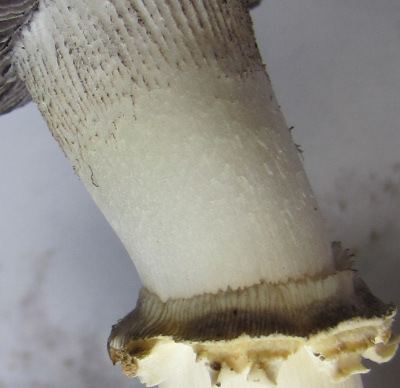 First,
take a look at the ring around the mushroom's stem. Several other
mushrooms have rings, but the ring on a King Stropharia mushroom has
indentations from the gills along the top, giving it a lined
appearance. The lined ring is probably one of the most diagnostic
features of King Stropharia.
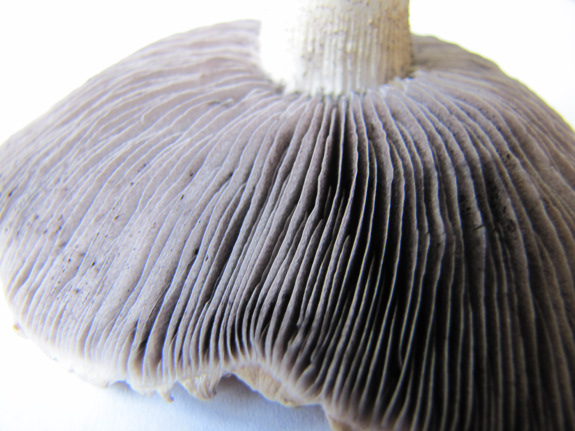
Next, take a look at the
gills on the underside of the cap. Notice that they are attached
to the stem and are a purply-gray in color. If the gills are
free, then you might have an Agaricus, so beware! Some Agrocybe mushrooms can look similar
too, but have brown gills.
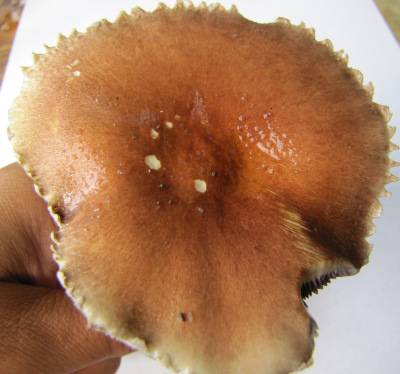 The
top of the cap is often maroon in young specimens, but can also be
plain old brown (especially as the mushroom ages), so cap color isn't
so diagnostic.
I find it interesting
that our mycoremediation patch has fruited while the patches I
inoculated at the same time under the canopies of nearby fruit trees
have not. Clearly, the bit of bleach in the dishwater doesn't
hurt King Stropharia one bit, and frequent soakings are a boon.
Paul Stamets has written that King Stropharia mushrooms may actually
depend on coliform bacteria for growth --- perhaps the bacteria going
down the drain have helped our mycoremediation patch come out ahead?
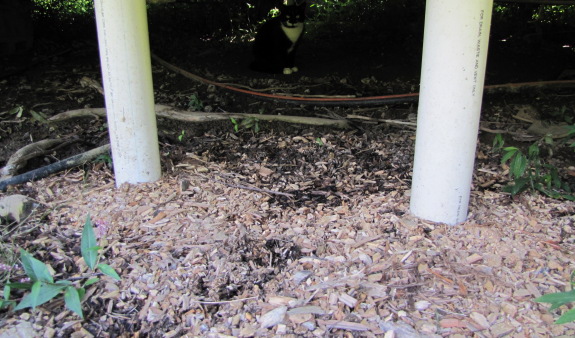
These two PVC pipes connect
to opposite sides of our double sink. We deleted the drain trap as an
experiment to see if I could get an increase in drainage. I was a bit
worried about a gray water smell making its way into the kitchen
without the trap, but after a year of heavy dish washing I think I can
safely report it works just fine without being stinky.
What you don't see here is a
large layer of gravel about a foot below the King Stropharia wood chip bed to prevent standing water.
 Even
though we haven't set up the solar panels from our plug
and play solar backup
yet, I wanted to test out our Chicago Electric 5-in-1 Portable Power
Packs and see what kind of use we'll be able to get out of them.
We charged the power packs up using house AC for 48 hours (as
instructed in the manual), then I plugged my laptop into one power pack
and turned on the inverter. Everything was going just
fine...until 13 minutes later, my laptop stopped drawing juice. I
turned the inverter off and on again --- still no electricity.
Did I break it already?
 After a more thorough read of
the manual, it sounds like it's best to turn the power pack's inverter
on for a two minute warmup, turn it off, plug in the laptop, then turn
the inverter back on. After following those directions, my laptop
ran quite happily for another three and a half hours. It probably
would have run longer, but we want our power pack's battery to last as
long as possible, so I turned it off when the indicator hit 50% charged.
 Even
though my laptop's power block rates its energy consumption at 60
watts, a previous experiment with a kill-o-watt device estimated the
laptop's actual usage at 25 watts. (The much higher wattage
listed on the power block assumes that I have lots of USB devices
plugged in, which I seldom do.) So I drew roughly 94 watt-hours
from the power pack --- a bit less than half of the 216 watt-hours the
battery is rated at holding.
The only (very minor)
flaw with the power pack is that the inverter has a fan that's about as
loud as a desktop computer. I'd gotten used to the near silence
of my laptop, but I know I  won't be complaining about a
little white noise when I enjoy nearly four hours of laptop use during
a power outage.
Although I'm quite
pleased, I've got another trick up my sleeve to stretch our power pack
usage further. The power pack has two cigarette-lighter-type
slots in the front, so I'm going to buy a "car charger" for my laptop
and see how much more runtime I can get when I'm not wasting energy
converting DC to AC and back to DC. Stay tuned for more
information as the experiment progresses.
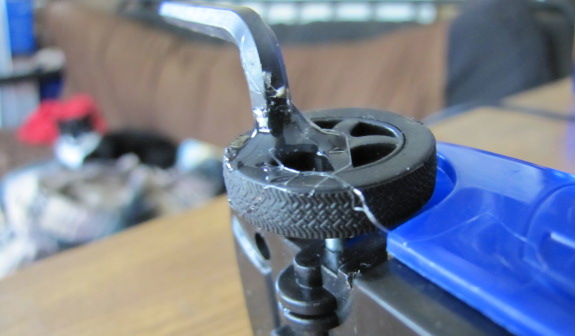
The latest
deer deterrent experiment
ran good for several days, but I forgot to build a roof for it. When it
rained a few days ago water seeped into the motor and burned it out.
This is version 2.0.
The picture illustrates the
one detail that gives this contraption enough unbalanced movement to
make it a funtional deer
deterrent.
It also provides a good
example of the Canon Power
Shot SX20's macro
capability in a low light setting.
 While my sister is experimenting
with Plug and play solar backup, I am in the process of learning
to live at a isolated, off the grid, solar powered house.
This house was built in the mid 90's, and designed for both passive solar power (with its southern exposure and earth-sheltered rear), and solar power, with a wiring system that is entirely 12 volt throughout. But 15 years is a long time for a solar system to age, and as it degraded, the occupants adapted to living with less and less power.
That is an adaptation I have not made yet, so will this aging system be able to meet my needs? Like Anna, I am starting off with some experiments. The first was to go live there for a week and use as much power as I wanted.
Today I'm back in town. After approximatly 4 full days of use, the first battery bank dropped to 9 volts, my cutoff point for safe use. Which turned out to be below the safe use point of my laptop power adapter, which burnt out the last evening I was there.
I decided to come back while the other bank is still relatively full, leaving the low one connected to the four 64 watt solar panels to charge.
Hurrying downtown to grab lunch in between work on Branchable, I noticed it was a beautiful sunny day, and I realized that this makes such days even better, because besides enjoying them, I know I'll be enjoying the yield on chilly nights sometime later.
Well, in theory. Actually, the very antique charge controller in the house was dead and bypassed, so I removed it. I called its manufacturer wondering if it could be refurbished, but they suggested it belonged in a museum. So I've ordered a new controller, a Xantrex C-35. Until that comes, pretty days like today will charge, or possibly over-charge the batteries, which will then drain back out at night.
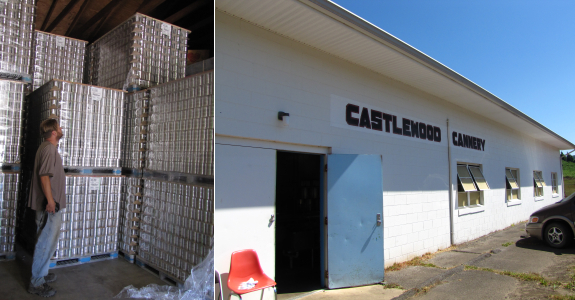
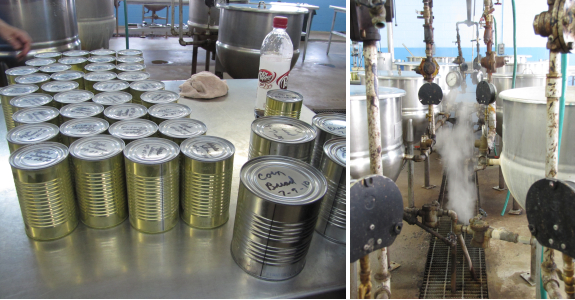
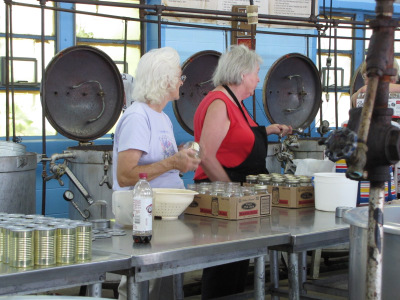 At
this time of year, fruit is often free for the asking. We went on
a tour of the Castlewood community cannery this week and stumbled
across a quartet of ladies who had gathered enough apples from trees
going to waste to fill a huge vat of apple butter. Their tale of
frugal scavenging reminded me that one of our neighbors has an orchard
of apples that fall to the ground and rot unless someone collects
them. Off Mark went with an empty basket and a dozen eggs, and
home he came with enough apples to turn into a year's worth of apple
sauce.
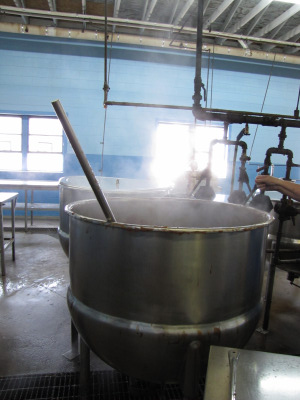
I opted to preserve my
apples at home since I generally put
food in the freezer (and process it a bit at a time, a quart here,
and a gallon there.) But community canneries make a lot of sense
for folks who don't want to buy (and maintain) a pressure canner, or
who do most of their year's preserving in one fell swoop. The
Castlewood Cannery will sell you cans for less than a quarter apiece
(if you live in Russell County), or let you bring in your own Mason
jars (charging you a few pennies per jar for use of their facility.)
The canning ladies
regaled me with tales of the bounty they had canned there, ranging from
the usual to cornbread, sausage, and apple sauce cake. I could
tell that spending a day at the Castlewood Cannery would earn me years
of free wisdom, along with the cheap use of kitchen facilities.
To find a community cannery in your area, visit this
website.
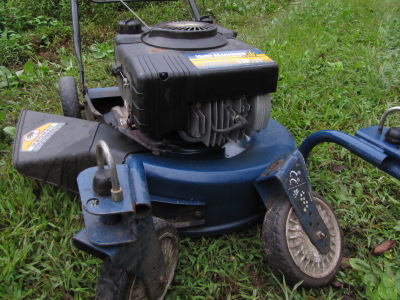 Since
the start of the summer I've been trying to figure out how I can
install larger, front swivel wheels on our Craftsman mower.
I found this Yard Machine
yesterday for 25 bucks that might just fit the bill once I fix the left
wheel.
The swivel action is said to
make manuvering around corners easy and fun.
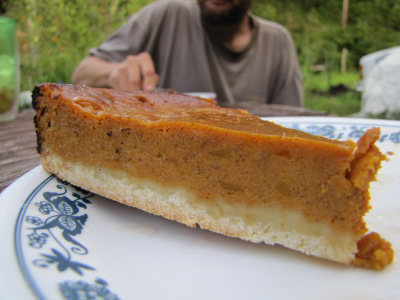 Do
you like pumpkin pies? If so, you're in for a treat because
butternut squash pies are twice as good. You can make
pumpkin-like pies out of any kind of winter squash, but after
taste-testing pie pumpkins, acorn squash, cushaw, and butternut we
concluded that the last was by far superior. That said, the
recipe below can be used to create a pie out of any kind of winter
squash. You can even turn Jack-o-lanterns into pie if they
haven't been sitting out for too long.
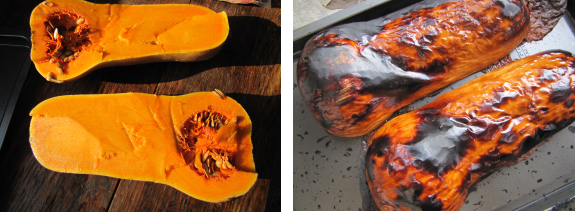
Step
1: Bake the butternut. Cut your butternut
squash in half (carefully!) and scoop out the seeds. Lay the two
halves, cut side down, on a cookie sheet and bake until the skin begins
to blacken and the flesh is very tender. You can bake the squash
at just about any temperature, so I try to plan this step to coincide
with my other baking needs, such as pizza night.
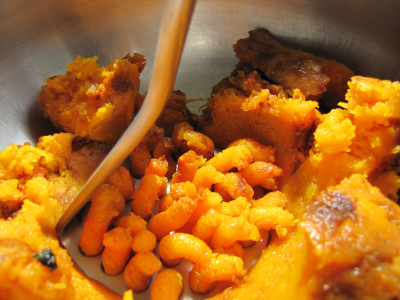
Step
2: Process the butternut. Cool the butternut and peel
off and discard the skin. Then mash up the flesh with a potato
masher (or just with the back of your spoon.) Measure out two
cups of flesh, which will equal one medium butternut, half of a large
butternut, or two small buttercups. I don't worry too much if my
butternut is a quarter of a cup too large or too small --- I throw it
all in.
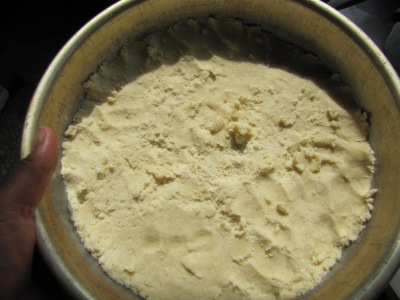 Step 3:
Make your crust.
I'm lazy, so I've settled on a quick and easy, pat-in-the-pan
recipe. I throw 1 cup of white flour, 0.5 tsp of salt, and 7
tablespoons of cold butter in the food processor and blend until the
butter is cut into coarse pieces. After adding two tablespoons of
cold water and blending a bit more, the dough generally starts to stick
together --- depending on your humidity, you might need to add more or
less water. Pour the dough into the bottom of your pan and press
it into place. Then put the pan in the fridge to stay cool while
you make the pie filling. (I like to make our pies in a cake pan
to leave room for more filling.)
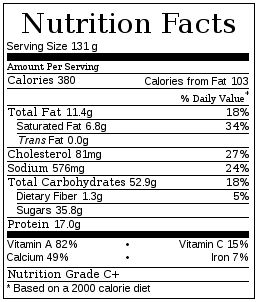 Step 4: Mix up the pie filling. Combine 2 cups of
baked butternut squash from step 2, 1.5 cups of evaporated milk or rich
cream, 0.25 cups of brown sugar, 0.5 cups of white sugar, 0.5 tsp of
salt, 1 tsp of cinnamon, 0.5 tsp of ginger, 0.25 tsp of allspice, and 2
eggs. Blend well. (I seldom have evaporated milk or cream
on hand, so I substitute a concoction of powdered milk and water ---
fill a cup with milk powder and slowly add water, stirring, until the
cup is full of liquid, then repeat with a half cup measurer. The
nutritional information reflects the extra protein from using
powdered milk rather than cream.)
Step
5: Pour the filling into the crust and bake at 425 F for 15 minutes,
then at 350 F for about 30 minutes. This combination of
temperatures just happens to work quite well for baking a chicken as
well, so once again you can double up your oven time.
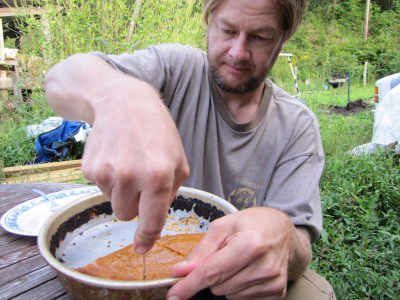 Step 6: Cool completely before eating. I usually ignore this
admonition, but with butternut pies, the spices really do meld and
taste better once the pie is thoroughly chilled.
These pies are the
reason Mark became so
obsessed with making sure we have plenty of butternut squash on hand. Although no dessert
is precisely good for you, the hefty dose of protein and vitamins found
in an eighth of this butternut pie make me feel better about baking one
every week.
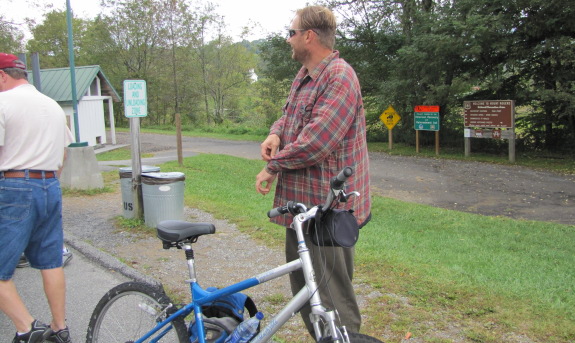

We spent a great day in Damascus coasting down the mountain with some
friends today.
It was our first bike
adventure together and we had a lot of fun. I'm sure it won't be our
last.
The bike guy charges 25 bucks
for the bike rental which includes a ride up to the top.
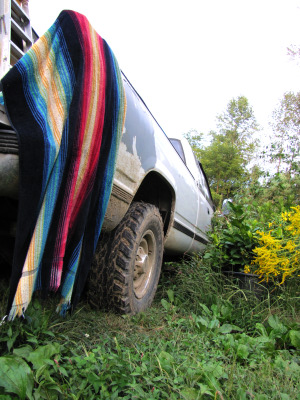 I
suspect I won't be seeing this view from my bathtub for much
longer. For the first time in months, I actually heated up water
for bathing --- winter is surely on its way.

 About
10,000 years ago, nomadic hunter-gatherers in the Fertile Crescent
(in the modern Middle East) cultivated
wheat and became the world's first farmers. They left their
nomadic ways behind and settled down into villages, domesticating
animals and other vegetables to go along with their grain. Food
surpluses allowed the villagers to specialize, and soon their arts and
technologies exploded, giving rise to the world's first civilizations.
Although a few
hunter-gatherer societies remain in remote areas, most
humans have followed these peoples' lead and created their own
agriculture-based societies. Those of us 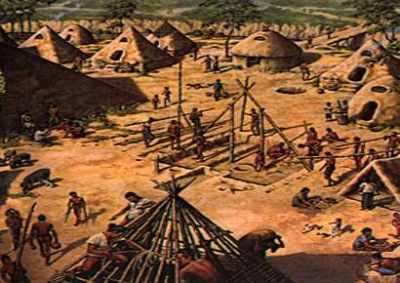 living in agricultural
societies tend to take a manifest destiny approach to the history of
farming and civilization, considering both to be part of an inevitable
march forward
toward better times. As Roland pointed out in a comment to a
previous
lunchtime series,
agriculture is at the root of what has
allowed us the spare time to develop ipods, refrigerators, and modern
medicine.
But a closer look at the
dawn of agriculture shows that farming had at
least as many detrimental effects as beneficial ones. Is there a
seamy underbelly to the advent of farming? Can modern societies
overcome the minefield left behind by early agriculture? This
special two-week lunchtime series explores these intriguing questions.
This post is part of our History of Agriculture lunchtime series.
Read all of the entries:
|

This slightly damaged stock
tank was rescued from the dump recently by someone who thought I could
use it for one of my contraptions. Thanks Dennis.
One of the many winter
projects on the drawing board is a do
it yourself black soldier fly bin, and I think this container will
work just fine.
 People
like to say that varroa mites on honeybees are a lot like ticks on a
dog, but when you compare the relative sizes, you'll see that a varroa
mite is more like a blood-sucking squirrel latched onto your dog's
back. Given the size of the mites, it's not surprising that a
heavy varroa mite infestation can weaken a hive so much that it dies
over the winter.
Most beekeepers treat
their hives with insecticidal strips during the fall and winter, but
the chemical control method has obvious problems. You have to be
extremely careful not to eat any of the honey that was in the hive
during the treatment period, which makes life difficult the next spring
if the bees didn't consume all of their winter stores. Beekeepers
who throw in chemicals every year without testing to see whether their
hives need it also start to run up against pesticide-resistant mites
--- bad news. Finally, the organic gardener in me has to wonder
what such a heavy dose of insecticide does to the honeybees.
Luckily, there are alternatives.
We use quite a bit of
passive management designed to reduce varroa mite populations in the
hive. Foundationless frames and screened bottom boards
both help cut down on varroa mite infestations, and the latter also
allows us to monitor how many varroa mites are actually present so that
we don't put chemicals in a hive that isn't very heavily
infested. With winter looming, I figured I'd better check the
mite levels in our three hives.
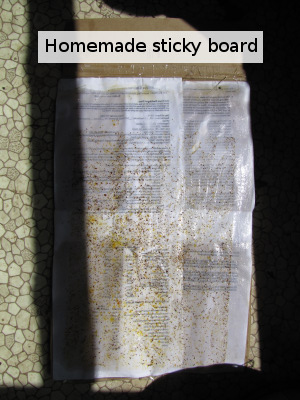
 Homemade
varoa mite test sheets
You can buy varroa mite
test sheets ("sticky boards") from bee supply stores, but I'm too cheap
so I've experimented until I figured out an easy way to make the sheets
at home. Just cut a piece of cardboard to 13" by 20", tape down
white scrap paper on one side, and smear on petroleum jelly (vaseline)
until it covers the entire surface of the paper. If you've got
more than one hive, it's best to label your various test sheets before
bringing them outside in order to avoid confusion. Slip one test
sheet under the screened bottom board of each hive, then remove it
three days later and take a look.
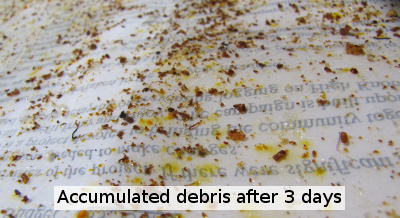
 Chances
are, your test sheet will be coated in debris, so you'll need to look
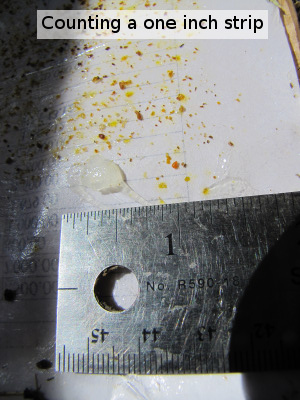
carefully to see the round, dark brown varroa mites. If you're
industrious, you can count every mite on the sheet, but I generally
just rule off three strips, each one inch wide, and count the mites in
each one. Since the screened section of the bottom board is ten
inches wide, adding up the number of mites in my three strips, dividing
by 3, then multiplying by 10 gives a rough estimate of total varroa
mite fall during the three day period. My three day mite counts
came to 57 and 40 in my two smaller hives, and a whopping 540 in my
biggest hive.
 Varroa
mite threshold
The hardest part of
checking on varroa mites is figuring out how many mites you can have in
your hive without worrying. A quick search of the internet and my
bookshelf yields up numbers ranging from 50 mites per day to 200 mites
per day as the treatment threshold. For a three day mite count
like mine, that means I can have somewhere between 150 and 600 mites on
my test sheets without taking action.
The reason the threshold
figures vary so much is that you'll get widely variable mite fall
numbers from the same hive when you test during different parts of the
year even if the percentage of bees infested by mites stays the
same. Since the typical hive has few bees in it during early
spring, few mites will fall to the ground. The same hive in the
middle of summer may have ten times as many bees present (or more), so
you'd expect to see ten times as many mites. With that
information in mind, it's not all that surprising that the hive we
bulked up with early double deeps has many more varroa mites
than the hives which began the year with a single brood box.
A North
Carolina beekeeping document suggests a way to deal with
this inherent problem in the sticky board test method. They tell
you to estimate how many adult bees are present in the hive by counting
how many frames are completely coated on both sides with bees during
your inspection. A medium frame thus coated will hold about 1,250
bees and a 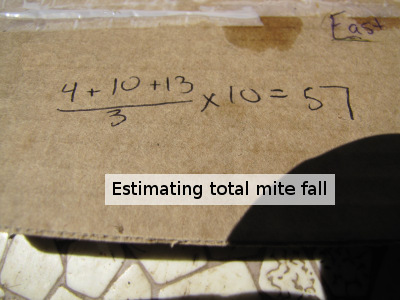 deep
frame will hold about 2,000 bees. If your sticky board count
shows more than 2 mites per thousand bees per day in mid-August or more
than 4 mites per thousand bees per day in September, you should find a
way to reduce the mite population. Unfortunately, I hadn't read
this the last time I opened the hive, so I don't have any data
available except my gut reaction that one of my hives has many more
bees than the others.
Clearly, I don't need to
worry about two of my hives at all since they averaged 13 and 19 mites
fallen per day. My biggest hive, though, has ten times as many
mites even though I estimate it only has perhaps two or three times as
many bees in the hive. I could treat that hive, but I had a
colony that was similarly on the edge last fall and it made it through
the winter with flying colors, so I'm going to take my chances.
As I turn into a more experienced beekeeper (and have more data from my
own hives), I'll feel more confident about which varroa mite levels are
no big deal and which ones require drastic action.
 Before I launch directly into the history of
agriculture, I want to spend a post citing my sources. Nearly all
of the information I'll discuss later comes from three books, each of
which is a fun read and chock full of fascinating information I didn't
have time to include in this lunchtime series. The books also
provide more in depth evidence for each of the assertions I'll make in
the following posts --- I've glossed over certain bits of data to keep
the posts short, sweet, and to the point. To paraphrase an old
folk song, if you want anymore you can read it yourself.
Diamond, Jared.
1997. Guns,
Germs, and Steel.
W.W. Norton & Company, New York.
Leonard, Jonathon
Norton. 1974. The First
Farmers.
Littlehampton Book Services Ltd.
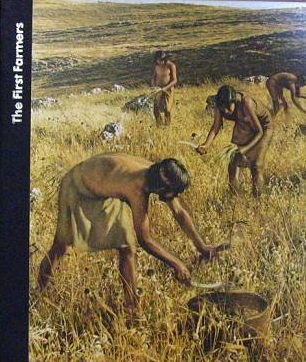 The only flaw in The First Farmers
is the book's age. Presumably, some of the individual facts are a
bit out of date, but the book is still a very good introduction to the
advent of farming, focusing primarily on the Fertile Crescent.
It's easy to read and full of beautiful photos, but at the same time is
clearly based on specific scientific studies.
Manning, Richard.
2004. Against
the Grain: How Agriculture Has Hijacked Civilization. North Point Press,
New York.
This post is part of our History of Agriculture lunchtime series.
Read all of the entries:
|

I predict this will save us 2 to 3 hours of weeding per bale.
 In
my early childhood memories, it seems like my mother was always cutting
up apples. Perhaps she was carefully removing the skins so that
my younger sister could wrap her toothless mouth around them (allowing
me to eat the parts left behind.) Or maybe Mom was making a
"Dan'l Boone apple pie" --- whole wheat crust with barely a hint of
butter, apples cored but not peeled, filling mildly sweetened with a
dab of honey. Often, though, it seemed like she was just cutting
up apples to be cutting them up, and she never minded me snagging one
or two or ten out of her bowl.
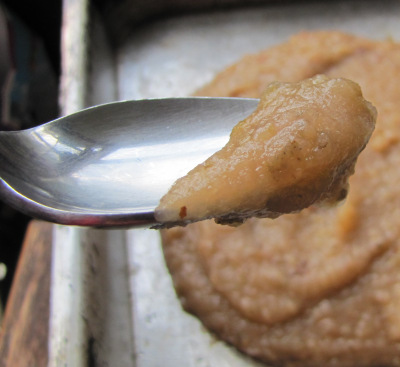 Mom's
apple sauce was simply stewed apples, skins left on. Although I
heartily approve of eating fruits and vegetables skin-on so that you
don't lose the vitamins, I like the texture of skinless apple sauce
(which can easily be made at home by stewing apple wedges, then passing
them through a Foley mill to remove the skins.) I invited Mom
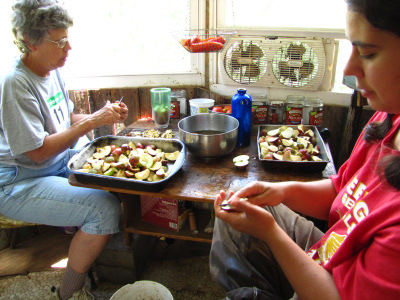
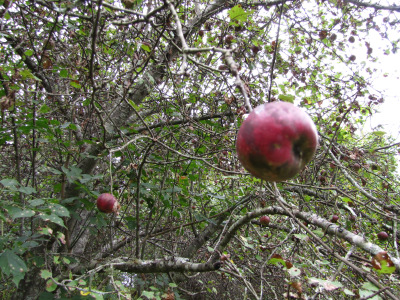
over to help me cut up our scavenged
apples, then
experimented with various methods of making skin-on apple sauce.
The best method seemed
to be --- cut the apples into quarters, removing the cores; cook in a
pot with some water until the apple meat begins to fall off the skins;
then blend in the food processor. You're less likely to scorch
the bottom of the pan if you cook up your apple sauce in a skillet
rather than a pot and fill at least a couple of inches in the bottom of
 the
pan with water. The result is very much like storebought apple
sauce in texture, but with flecks of skin here and there. (The
photo above shows the result of my experiment.)
I'd be curious to hear
if anyone else has a different method of creating skin-on apple
sauce. Meanwhile, if you're overflowing in scavenged apples (and
you should be --- it's that time of year), you might want to check out
a post I made a couple of years ago about how
to make apple cider in a juicer.
 Mankind
has fed ourselves as hunter-gatherers for 99% of our time on
earth. Why did
we suddenly put down our spears and pick up the hoe?
Archaeologists agree
that several factors coincided to make agriculture
possible around 8500 BC. Wild cereals were already part of the
diet of nomadic hunter-gatherers, but around 10,000 years ago climate
change increased the extent of these fields of native grain in the
Fertile Crescent. At about the same time, we began to develop
tools
and tricks necessary to take full advantage of the wild grains --- we
created sickles, baskets, and mortars and pestles; we figured out how
to roast grains so that they wouldn't sprout during 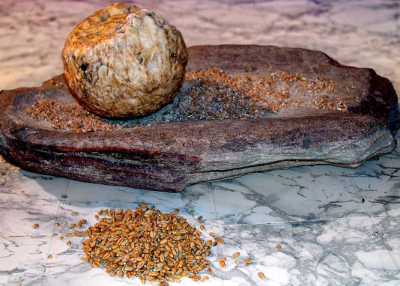 storage; and we
developed underground
storage pits.
Suddenly, a family could
gather enough seeds to feed itself for a year during the three week
ripening season of the wild wheat.
Now, as someone who
spends months during the summer carefully tending
my crops, I was a bit stumped when I read that last fact. If I
could just go out and pick wild swiss chard, okra, and tomatoes for
three weeks once a year and not have to plant and weed all season, I
think I would choose the former occupation. Why did these early
wheat-eaters
turn into farmers?
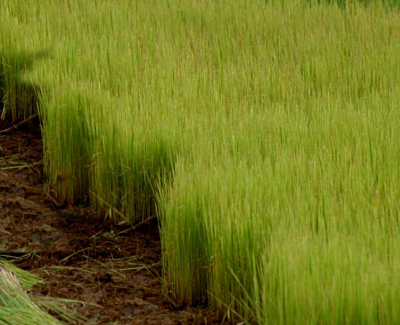
The switch from
gathering this abundant wild wheat to growing it seems
to come down to one factor --- overpopulation. At the same time
that wild wheat was expanding in the Fertile Crescent, large wild game
was becoming much less numerous, either because of climate change,
because we became better hunters, because our numbers exploded, or some
combination of these three factors. Whatever the reason, hunting
was no longer really working for us, so wheat became more and more
important in our diets.
It seemed sensible to
settle down near the important wheat fields, and
this change in turn dismantled the factors that had previously kept our
population in check. As nomads, our women had been limited to
bearing children about four years apart in age since the first child
had to be old enough to walk by itself before baby number two could
come along --- Mom could only carry one kid at a time during frequent
moves and I guess Dad wasn't the nurturing type. But we no longer
had this restriction in our new, settled lifestyle, so our reproductive
rate doubled, with women producing on average one child every two years.
When previously ample
wheat fields suddenly became too bit puny to feed our burgeoning
numbers, agriculture was the clear solution. By clearing
new ground outside the natural wheat fields, we were able to plant wild
wheat seeds and reap harvests from a larger area. Agriculture was
born.
This post is part of our History of Agriculture lunchtime series.
Read all of the entries:
|
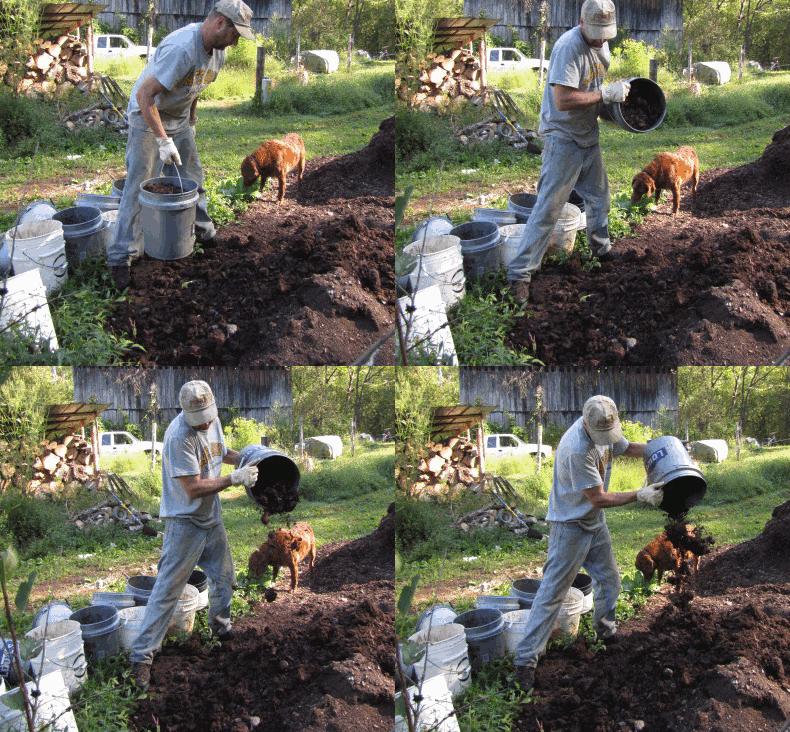
The 5 gallon
bucket method continues
to be an efficient solution for moving large quantities of horse manure
from the neighbor's field to our compost pile.
This latest trip yielded
almost 150 gallons of organic matter, which we traded a dozen eggs and
one of our valuable
butternut squashes for.
 After
researching fruit growing for a decade, I moved to the farm and quickly
discovered how much I didn't know. I've written previously about
how our heavy clay soil with high groundwater requires that we plant our
fruit trees on mounds --- learning that set us back about two
years. But what I want to talk about in this post is how to
choose a combination of fruit trees that will keep you fed throughout
the year.
Once I found the right
farm, the young, exuberant, farmer-wannabe Anna browsed the catalogs
and
gleefully picked out my favorite fruit varieties. Now, I'm not
going to tell you to plant a variety you don't like, but there's a lot
more to planning a homestead orchard than planting Stayman Winesaps
because that's the kind of apple you've always bought in the
store. Our Stayman Winesap tree will be hitting the burn pile
this
winter because it is so sensitive to the Cedar
Apple Rust that
there's no point in even trying  to
grow a Stayman here with organic
methods. Similarly, the self-pollinating, white dwarf cherry I
was so sure would start producing fruit in 2009 gets so
badly defoliated by Japanese Beetles every year that it may never give
us a
cherry --- I'm going to experiment for another year or two before I rip
it out, but I wouldn't say the variety was a good choice.
One way to find
varieties that will survive your local bugs and
diseases is to check out what kind of fruit trees your organic gardener
neighbors grow. The
apples we scavenged
are from Liberty apple
trees that are never pruned or sprayed, and
yet provide a bountiful crop every year. Not only that, I felt
like the apples were tastier than storebought Stayman Winesaps --- a
Liberty apple will definitely be making its way into our garden this
winter.
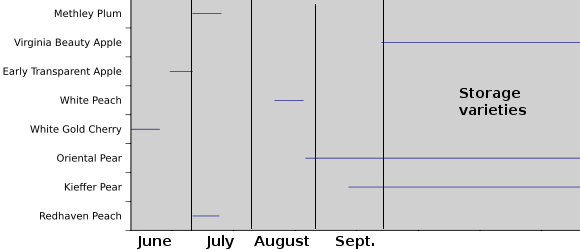
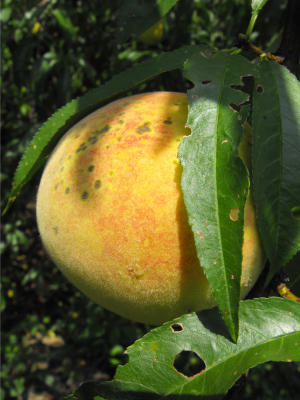
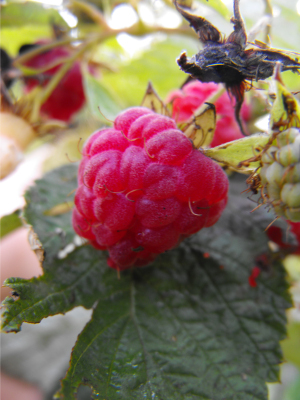 I
also didn't put enough thought into spreading our ripe fruit throughout
the year. I learned with our mature peach this year that I
wouldn't want to have more than one tree in full fruit during any
given week --- it just takes a lot of time to process that
bounty. On the other hand, if you're like me and think that the
only real way to eat fruit is
fresh, you'd better fill in all of those gaps so that you don't spend a
month in August wishing you had fresh fruit. Although our vine
and bush fruits bear relatively continuously through the growing
season, I'd still like to add in a late July and early August fruit
tree, replace our problematic cherry with a different early fruit,
plant a mid-season apple tree to feed me before the pears fully ripen,
and perhaps expand our storage apple selection to keep me in fresh
fruit through the winter.
My final word of wisdom
is --- don't price shop for fruit trees.
I am a skinflint, and have been guilty of picking the cheapest tree
from the cheapest catalog in the past. That's how I ended up with
an unknown white peach after three years of nursing
along what I
thought was going to be a yellow peach. (Luckily, the white peach
was still delicious.) Choosing a fruit tree is a lot like
choosing a spouse --- it will be an integral part of your life for a
long, long time. Choose quality.
I'm still barely a
seedling in a tree's eyes, so I'm sure I have a lot
more to learn. What other pitfalls would you point out for a new
orchardist to sidestep?
 The
results of the Neolithic
Revolution were
striking. On the positive side, a
farmer was able to grow more food than he needed to feed his family, so
for the first time in human history we saw specialization.
Agricultural societies were able to support leaders, artists,
craftsmen, priests, scribes, and soldiers, none of whom had to worry
much about where their food came from.
We also had time to
create
new tools and technologies. The first example of writing sprang
up in
the Fertile Crescent, probably as a method of recording information
about ownership and production of land. In fact, you can follow
the trail of agriculture all the way to present, tracing the
domestication of wheat, maize, and rice foward to most of humanity's
most striking
accomplishments.
Agriculture basically
created civilization as we know it. In fact, using
anthropologists' definition of civilization, farming was a prerequisite
for civilization in every part of the world. This is the
explanation you'll see in most modern history texts --- doesn't it
sound a bit like a revisionist history? "Look, the people with
agriculture won! Let's say that agriculture created civilization."
This post is part of our History of Agriculture lunchtime series.
Read all of the entries:
|
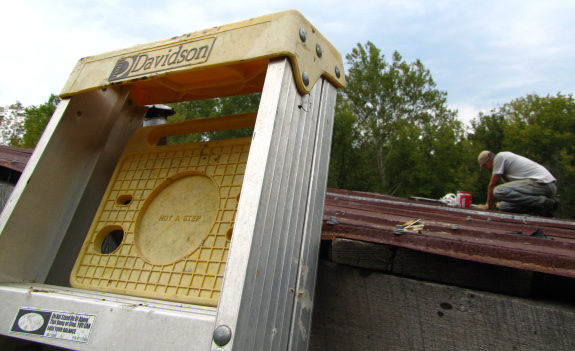
The first bit of feedback I
have on the new Canon
Power Shot SX20 comes
after only a few weeks of experimentation.
It's been my experience that
the automatic setting is not quite acceptable in most situations, that
is to say the picture either has the color off or it's a bit too washed
out. Anna has some
good examples of this on her more
in depth review.
The good news is that the
manual mode is easy to use and understand. Making this camera maybe not
a good choice for someone who struggles with basic point and shoot
units.
The above picture was taken
today by Anna on the SCN setting.
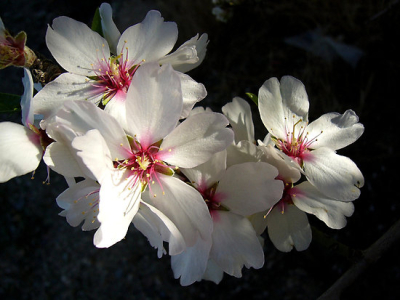 In addition to expanding
our fruit orchard,
this winter we plan to branch out into nuts. In the past, I've
steered clear of nut trees for a couple of very good reasons --- most
nut trees are much bigger than fruit trees and it takes a long time to
crack all of those nuts. However, I just discovered that almonds
are peach-sized trees sometimes no more than 15 feet tall, and Mark has
promised to invent an automatic nutcracker for me by the time they
bear. As you can see, almond flowers are also so beautiful that
the trees are sometimes grown as ornamentals. Time to pick out
some nuts!
A quick search turns up
the following nuts being sold to backyard growers:
| Variety |
Zone |
Spacing |
Pros and Cons |
| Almond |
5 - 9 |
10 - 22 ft. |
With new, self-pollinating
varieties on the market, the small size of almonds makes them easy to
fit into a nook in your garden. On the other hand, rain and high
humidity in July and August can rot the nuts. |
| Black Walnut |
5 - 9 |
30 - 40 ft. |
Very large trees with very hard
nuts. We actually have dozens of these growing on our property
already, but I rarely bother to gather the fruits since you have to
crack them with a hammer. |
| Butternut | 4 - 9 |
30 - 40 ft. |
Very winter hardy and tolerant
of poor soil. However, most of our native butternut trees have
been killed by a blight, so be sure to pick out a resistant variety.
Shells are very hard and the tree is large and needs a pollinator. |
| Carpathian Walnut |
5 - 9 |
25 - 40 ft. |
The Carpathian Walnut is
significantly more cold hardy than the English Walnut, but is still
damaged by spring frosts. The nut is supposed to be very similar
to the walnuts you buy in the store. The trees are large and
require a pollinator. |
| Chinese Chestnut |
4 - 9 |
20 - 40 ft. |
The trees are large and two
trees are required for good fruit set. The prickly cases around
the fruits are very tough on bare feet. Chestnuts don't store
well and must be harvested every day or two or they will rot on the
ground. All of that said, though, chestnuts are delicious and
have a thin shell that can be pried off without a nutcracker --- I can
bite them open in a pinch. Chestnuts are the most common nut
trees grown in our region. |
| English Walnut | 5 - 9 |
40 - 50 ft. |
Sensitive to cold weather and
spring frosts. Very large trees, but most don't require a
pollinator. These are the walnuts you buy in the store, with
relatively thin shells and a taste everyone can enjoy. |
| Hazelnut/Filbert |
5 - 8 |
15 - 20 ft. |
We've already planted a few
hybrid hazels and wrote
extensively about them here. In short, they're small and easy
to fit into your backyard, but you need to pick out a blight-resistant
version and plant two for pollination. |
| Heartnut | 5 - 8 |
20 - 25 ft. |
This is a variety of Japanese
Walnut. It seems to be mostly a gimmick --- people like the
heart-shaped nut. It needs a pollinator. |
| Hickory | 5 - 8 |
20 - 40 ft. |
Large tree that needs a
pollinator. Nut shells are very hard and the meats are small.
If I want hickory nuts, I'll gather them out of the woods. |
| Pecan | 4 - 9 |
40 ft. |
The pecan is a southern
specialty, but some hardy varieties can be grown as far north as zone
4. Like walnuts and almonds, the nuts are familiar and delicious.
The downside is size and the need for a pollinator. |
| Stone Pine |
varies |
??? |
The Korean
Nut Pine is hardy down to zone 4, while the more common Stone Pine (Pinus
pinea) is only hardy to zone 7. They seem to require very
little work, but take more than a decade to bear. I can't seem to
find any real spacing data on the internet --- some sites say you can
plant them 10 feet apart, while others tell you to go for 40 feet. |
As I mentioned, we're already trying out hybrid hazelnuts (highly recommended, though they're not big enough to fruit yet), and I planted a Korean Nut Pine from seed last year (which is now about an inch tall.) Of the other types of nuts, I'm most interested in trying out an almond in the sunniest part of the garden, where perhaps our humidity won't be so devastating, and an English Walnut in the shadiest part of the yard, where I might trick it
 into flowering late after
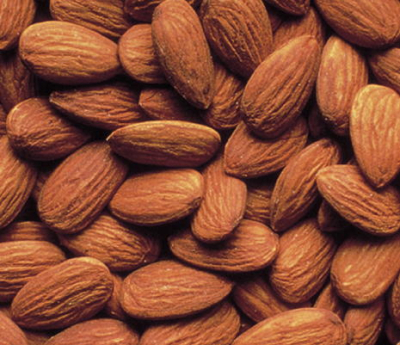
hard spring frosts have passed us by. Almonds (part of my
breakfast at the moment) and walnuts (integral to pesto) also happen to
be the nuts most frequently served in our household's meals.
into flowering late after
hard spring frosts have passed us by. Almonds (part of my
breakfast at the moment) and walnuts (integral to pesto) also happen to
be the nuts most frequently served in our household's meals.I've read varying reports about whether you need to buy named varieties or can just sprout shelled nuts out of the grocery store. Almonds seem to be a bad candidate for growing from seed since the nuts are bitter in most of the offspring, so I'll probably go ahead and buy named varieties for both of our nut additions.
As you can tell, I'm still very much in the research stage, but I thought you might enjoy some of the information I'm digging up. I'm very curious to hear about your own experience with growing nut trees in your backyard. Which trees did you choose and why? How did your experiment turn out?
 Despite the
innovations that sprang out of agricultural societies, Jared Diamond and Richard
Manning both argue that the first farmers were actually less healthy
than their ancestors. We can look at this question from a lot of
different angles, by comparing the skeletons of the first farmers with
the skeletons of contemporaneous hunter-gatherers or by looking at
modern hunter-gatherers. In both cases, average height is a basic
indication of nutrition, and hunter-gatherers come out literally on top
nearly every time. Did you know that only in the last century in
the richest parts of the world have the statures of agriculturalists
regained the heights of ancient hunter-gatherers?
Other indications of ill
health abounded among the first farmers. Tooth decay became  prominent along with high
infant mortality, iron deficiencies, and an increase in disease.
Farmers also had a significantly shorter life span than contemporaneous
hunter-gatherers.
The bad health of early
farmers was partly due to human populations expanding
faster than the farmers' ability to grow food for themselves, as well
as to famines when crop failures or fires destroyed
hoarded grain. But information from early agricultural societies
in the Americas show that it also took us a while to figure out how to
nourish our bodies adequately while eating huge amounts of just a few
foods rather than bits and pieces of this and that --- for example, we
had to learn to nixtamalize corn to unlock niacin and to combine that
corn in the right proportions with beans to create a well-rounded
diet. Mineral deficiencies were also more likely in a farming
society since nearly every soil is deficient in one more more micronutrient, a deficiency that farmed
crops pass on to their farmers.
Even in the seventeenth
century, the lifespan of an average European
was around 40 years, while transplants to Massachusetts (where
colonists by necessity had a partly hunter-gatherer diet) lived to the
average age of 71.8 years. Part of the increased life span  of
the colonists can be attributed to the lower population in North
America at the time, which carried with it a lower risk of parasities
and disease, but nutrition was a key factor as well. (As a side
note
--- yes, the Native Americans were taller than the first European
settlers.)
But we're better off
now, right? Actually, Jared Diamond notes in Guns,
Germs, and Steel that
even in the modern world, only those of us fed by agribusinesses are
really better off than our hunter-gatherer neighbors. Most modern
peasant farmers and herders spend more hours working than those in
hunter-gatherer societies and live less healthy lives. True, our
lifespans are now longer due to advances in modern medicine, but I have
to wonder if we would have needed those medical advances if we hadn't
weakened our bodies by changing over to a grain-based diet.
This post is part of our History of Agriculture lunchtime series.
Read all of the entries:
|
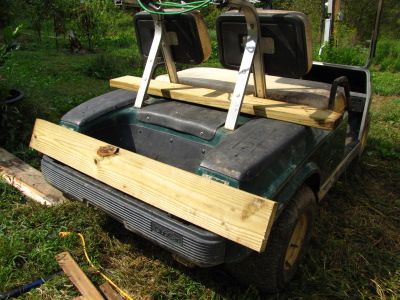 The original do
it yourself golf cart dump box had to be deleted when we had the
recent repair work done.
This next version will be
more sturdy thanks to a few lessons learned.

Stay tuned for more details.
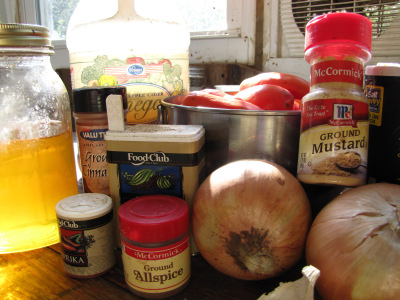 Despite
getting hit by early
blight, septoria
leaf spot, and late blight, our tomatoes are still
plugging away. We've met our quota of spaghetti sauce and pizza
sauce frozen for the winter, have run out of days hot enough to dry
whole tomatoes, and
can only make two batches of harvest
catch-all soup per
week since I didn't plant enough parsley this spring. Time to
experiment with ketchup!
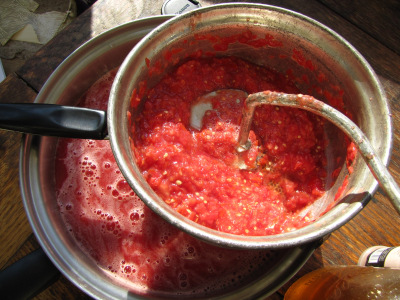
The internet is chock
full of ketchup recipes, so it took me a while to discover a recipe
that tasted a lot like the stuff in the grocery store's squeeze
bottles. (Yes, we have unsophisticated tastes when it comes to
ketchup.) The recipe that follows is quite mild, so you might
decide to increase the seasonings, or perhaps add some of the alternate
spices found in other recipes --- celery, cloves, hot peppers,
cinnamon, paprika, 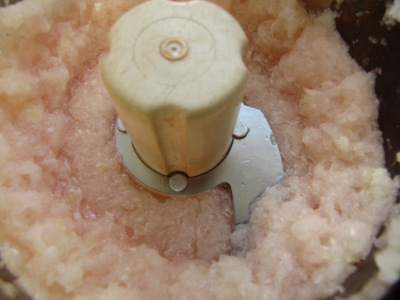 ground
mustard, etc. If you've developed your own ketchup recipe, please
tell me about it in the comments!
For my simple recipe,
you start with a medium-sized bowl full of ripe roma tomatoes.
Cut off the tops and any bad spots and blend in the food processor
until liquified. Pass the blended tomatoes through a foley mill
to remove seeds and skin. You should now have a large skillet
mostly full of thick tomato juice.
Next, remove the
exterior skins from 2 cloves of garlic and 1.5 large onions. Cut
into pieces small enough to fit into the food processor and blend until
liquified.
Add the blended garlic
and onions to the tomatoes, along with 3 tablespoons of apple cider
vinegar, 0.5 teaspoons of allspice, 2 teaspoons of salt, and 4.5
tablespoons of honey. 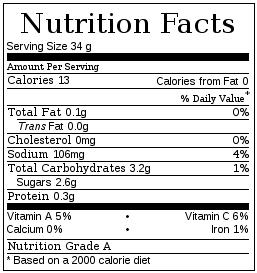 Cook
on high heat, stirring as necessary, until the mixture resembles
ketchup --- about an hour.
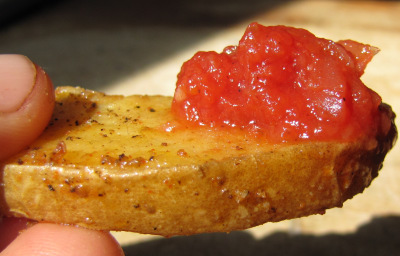
Allow the ketchup to sit
in the fridge for a couple of hours before tasting it. Then make
some baked sweet and white potato fries and dig in!
This recipe makes about
2.75 cups of ketchup. Since you don't put in corn syrup and do
use all fresh vegetables, I tend to agree with Ronald Reagan and
consider it a vegetable (although a very small serving of one.)
Compared to storebought ketchup, this concoction has about half the
salt, two-thirds of the sugars, and a third again as many vitamins and
minerals.
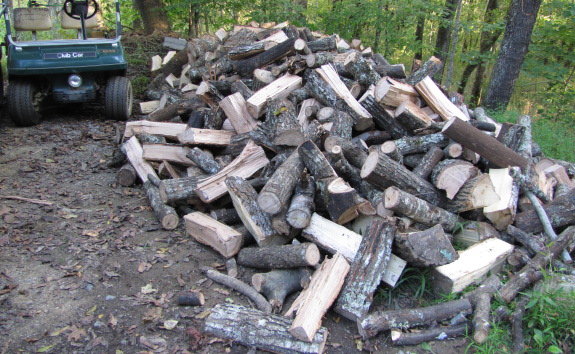
We got two small dump truck
loads of firewood delivered yesterday for 300 dollars.
The guy at the hardware store
looked at me funny when I told him this news.
"Don't you guys have plenty
of trees you could cut down?" He inquired.
I then briefly explained how
I've been converted by Anna to recognize how important a tree cover is
for the wetland area we live in. If we cut down too many trees the
fragile ecosystem could be damaged. I for one like to see the
occasional blue heron and wood duck stop by for a visit along
with hundreds of other signs of life in a swampy area.
Buying firewood feels like
part of the price that needs to be paid if we want to keep our little
piece of nature here humming along with such high levels of balance and
harmony.
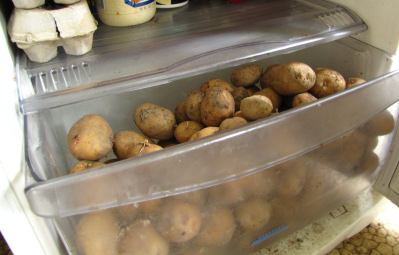 A
couple of months ago when I mentioned that I was storing
our potatoes in the fridge, Daddy emailed me to say
that was a bad idea. So I poked around on the internet, and
quickly found lots of unofficial sources agreeing with him.
However, when I went to the experts, I discovered that the worst
thing to happen to potatoes in the fridge is that cold temperatures
result in starches being converted to sugars, making your potatoes
taste sweet and fry up dark. We plant Yukon Golds specifically
because we like the sweet taste, so that chemical change wasn't enough
to deter me.
With digging out our fridge
root cellar still on
the back burner, I actually had to toss two thirds of the potatoes
under my bed for safe-keeping. I wasn't sure how they would do,
but the spuds are still hard and happy despite warm summer
temperatures. And every time my hand drifts down and rubs up
against a potato, I dream about my ancestress who was pulling potatoes
out from under her bed when Indians came to visit....
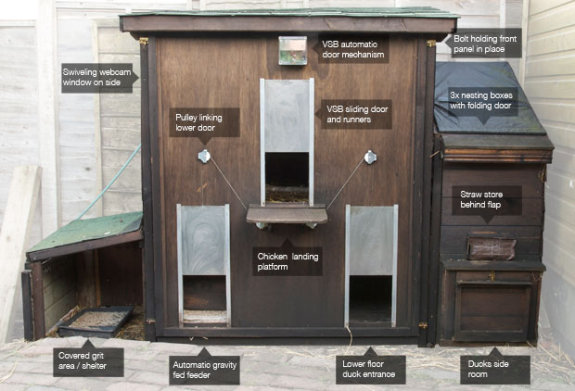
Siblify.com has a great post on how he fully
automated his chicken coop so he could leave for a 3 week holiday and
still come back to a happy flock still alive and clucking.
It even handles his two ducks
by giving them their own door at the bottom. Ducks like to stay out
about an hour past dusk which means he had to set their door on a timer.
My favorite feature is the
internet chicken cam, an innovation I've been trying to make happen for
over a year now. This allows him to check up on his birds online, which
I'm sure gives one a good feeling knowing their chickens and ducks are
safely tucked in for the night.
The only thing I would do
different here is replace his clunky, old fashioned waterer with an Avian Aqua Miser. He's got it set up to have the
water flush his system for 2 minutes twice a day, which is acceptable,
but in my opinion an Avian Aqua Miser would be a more simple solution
that would be less prone to fail while providing cleaner water for both
his chickens and ducks.


Edited to add:
After years of research, Mark eventually settled on this automatic chicken door.
You can see
a summary of the best
chicken door alternatives and why he chose this version here.
If you're planning on
automating your coop, don't forget to pick up one of our chicken waterers. They never spill or
fill with poop, and if done right, can only need filling every few days
or weeks!
 When
brainstorming
reasons why my potato onions stayed so small, I never thought to consider
planting date. Last year, I put in my potato onions at the
beginning of November, but the few bulbs I left in the ground this
summer to finish up their bloom cycle (no seeds resulted unfortunately)
started sprouting fresh leaves in mid-August. I tend to believe
that plants know best, so I went ahead and planted our summer harvest a
month ago rather than waiting for the late fall date I'd chosen last
year, and the onions are nearly all up. In fact, one plant that
had gotten a bit uncovered is clearly already splitting into two bulbs.
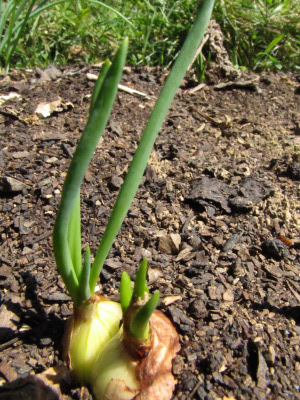
I can't remember why I
planted the onions so late last year, but most sources recommend you
treat potato onions like garlic, and many sources do recommend late
fall planting dates for garlic. However, I've always had great
luck planting our
garlic at this time of year --- the extra couple of
months of non-freezing weather seems to boost my yields
considerably. I'm hopeful that planting our potato onions in late
summer will give them time to produce the larger bulbs I crave to wean
us off annual onions.
 Last week, I pointed out how farming
actually made us less healthy
than our hunter-gatherer forefathers. Agriculture seemed to
make us less pleasant as well.
I started becoming
interested in early agriculture due to my obsession with Mayan pyramids and Native
American mounds.
As I read about the cultures that built these inspiring structures,
separated by thousands of miles and
years, their stories began to look eerily similar. Corn showed
up, kings sprang up, and the common guy got roped into building giant
edifices rather than paying attention to his own life. When the
same story (albeit with a different grain) was repeated in the Fertile
Crescent, I figured corn wasn't the culprit; agriculture was.
Evidence from modern
hunter-gatherer societies suggests that these
people have and had a 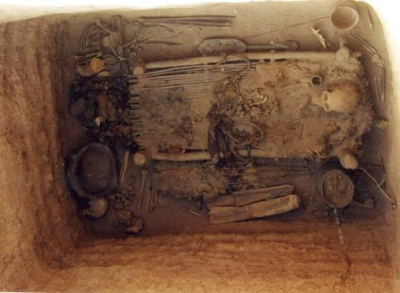 very egalitarian structure
with a focus on the
good of the tribe. Peopled lived in
communal villages where sharing with the group was the first priority,
and individual families and possessions weren't a big deal. There
was no such thing as richness and poverty. Instead, the whole
tribe ate, or the whole tribe went hungry.
As soon as people began
farming (and had the ability to store a surplus), our entire social
structure
changed. The family became the the first obligation of the
individual, and certain families became much richer than others.
Rather than living in nearly identical houses, rich families built
large edifices while poor families lived in hovels. The rich were
buried with luxurious goods, while the poor were tossed alone into
their graves. Ironically, surplus food had created poverty.

This new notion --- rich
and poor --- quickly gave rise to totalitarian
governments. Elite leaders were able to convince or coerce their
followers into building the huge structures that still remain as
tourist attractions in Central America and Egypt. Fast forward
ahead to the present and we see that even modern democracies are ruled
by an elite few. In essence, the first farmers seem to have
harvested inequality along with their wheat.
This post is part of our History of Agriculture lunchtime series.
Read all of the entries:
|
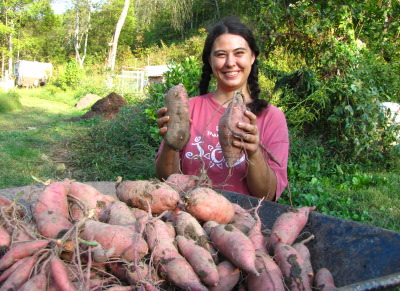
Anna decided it was time to check on the sweet potatoes and discovered
that we have some huge tubers!
I'm guessing this year's
harvest is bigger than all our other sweet potato years combined.
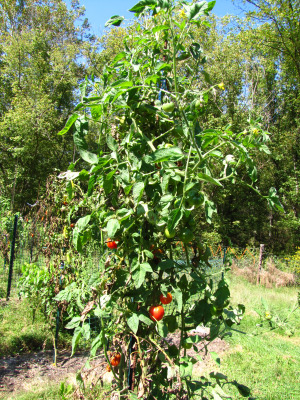 You
might remember that I planted tomato
islands and late tomatoes in various parts of the
garden in hopes of getting a crop even if the blight hit my main tomato
patch. I regret to inform you that the tomato islands didn't do
any good. In fact, since I planted the "islands" on the shady
side of the garden to get them as far away from the main tomato patch
as possible, once the blight hit, it wiped out the loner plants even
faster.
On the other hand, the
idea of succession planting tomatoes has merit. I planted a
yellow roma from seed in our main tomato patch at the same time I
transplanted in the seedlings. Although that roma did catch the
blight from its neighbors, its youthful vigor somehow helped it out,
and the late roma is now producing more fruits than its neighbors.
 My supposedly blight
resistant tommy-toe,
on the other hand, seems to be more susceptible to one of our diseases
(maybe the septaria leaf spot?) than its neighbors, so it's actually
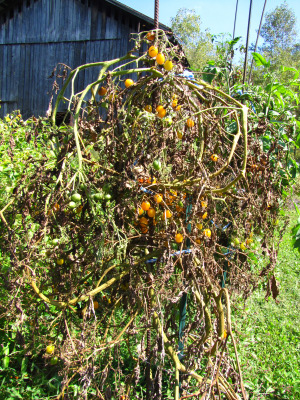
doing worse, not better. Meanwhile, the Blondkopfchen tommy-toe
that I thought would do well in blight situations is the first of our
tomato plants to become totally defoliated by blight --- little yellow
fruits are slowly ripening on a dead vine. This year, Stupice
seems to be our blight-free winner, putting out new green growth
despite shrivelled bottom leaves.
Next year, I plan to do
away with the most blight-prone roma varieties, to continue my pruning
campaign and
succession planting, and to plant all of my tomatoes in the sunniest
part of the garden. I'll also continue planting half a dozen or
more species of eating tomatoes, figuring that at least one of them
will be resistant to that year's fungal diseases. Meanwhile, we
continue to eat as many fresh tomatoes as possible to store up those
fond memories until next July.
 Nearly as soon as people in the Fertile
Crescent started to farm, they embarked on world domination. If
you'll recall, I argued that overpopulation
lay at the root of the original farmers turning to agriculture, but agriculture only
exacerbated the overpopulation problem. Not only did sedentism
allow early farmers to double their birth rate, children suddenly
became useful as farm hands and old folks became fonts of wisdom rather
than a drain on the tribe. Ill
health wasn't enough
to counteract this trend toward increased population, and those new
people had to go somewhere.
From the moment
agriculture began to spread beyond the Fertile Crescent, it took a mere
300 years for farming to displace hunting and gathering throughout
Europe. I'd like to 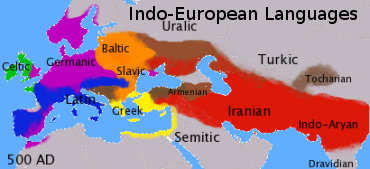 believe that the contemporaneous
hunter-gatherers (like those pictured above) saw how much fun it was to
grow wheat and jumped on the bandwagon, but archaeological evidence
suggests a different story. Archaeologists can tell the
difference between the artifacts of the hunter-gatherers and farmers of
the time, and there is absolutely no evidence of cultural interchange
between the two groups...except for spear points. By mapping the
offshoots of their language --- known to linguists as Indo-European
languages --- we can see that these people not only took over Europe,
but also spread out across southern Asia.
As Jared Diamond
eloquently argues in Guns,
Germs, and Steel,
you can continue to trace the spread of the first farmers to the
domination of the Americas. Europeans' early domestication of
plants and animals turned us into war machines --- we had
enough spare  food to feed full-time
soldiers and the leisure to invent
technologies of war like swords, guns, armor, and far-ranging
ships. Farming also led to the ability to write, and
effective communication was a big factor in our ability to win battles
against stronger foes.
Domesticated animals
were also essential in the European march toward
world domination. Horses were important because foot soldiers
can't stand long against a warrior on horseback, but the real reason we
devastated the native people of North, South, and Central America was
disease. Many experts believe that by the time Europeans returned
to the Americas with conquest in mind, smallpox and other diseases
from earlier contact had
already wiped out around 95% of the native population. Europeans
had evolved a partial immunity to the deadly disease
since we'd had to face smallpox ever since we domesticated its original
host --- cattle. In contrast, Native Americans had only
domesticated the
turkey and the dog, so they had no similarly deadly diseases to rebuff
us
with.
In essence,
overpopulation gave us the impetus to dominate the world and
agriculture gave us the means. Clearly, wheat has a lot to answer
for.
This post is part of our History of Agriculture lunchtime series.
Read all of the entries:
|
I've spent a day in an epic adventure to install a Xantrex C-35 charge controller in the old solar powered house that I am trying to fix up. It seemed it should be easy, there are only 4 wires to connect to it. Hah! After hours working by kerosine lantern light last night, and more hours this morning, it's hooked up and working well, though not in its final configuration.
 |
I have left the details of that adventure to my own blog, but thought I'd guest post here some more general thoughts of a mostly untrained electrician working on concrete floors way up in the holler, miles from any help.
I'm only mostly untrained because I did study electronics in high school. Sort of. Much of it didn't stick, and I mostly get by with what I intuited about electricity playing with batteries, wires, and motors as a kid.
What did stick, and what I kept thinking as I worked near potentially fairly high voltage from a PV array today, is the safety mantra of my teacher: "Use only one hand!" I also wore gloves, and insulated shoes. I've had one 120v AC shock through my body at 13, and one DC electric fence grab shock around 8, and either was more than enough.
Of course I also threw breakers when I could, but I needed live wires whose voltage I could check during some of the process of untangling the house's existing wiring. That included figuring out what the unlabeled wires went to, and what labels were wrong.
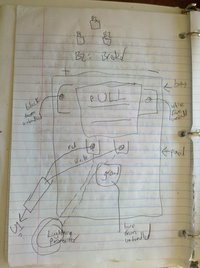
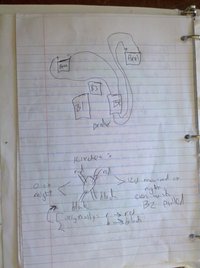
As I pulled open wiring boxes, disconnected breakers, and generally simplified the existing rats nest until I could understand where to hook the charge controller up to it, I found it very helpful to keep detailed notes and drawings of how the system was when I found it, and what I observed and changed.
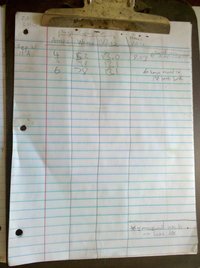
I've also started a solar logbook to record data from the charge controller, since it's not an expensive model capable of recording data for download to a computer.
 |
 |
With the charge controller hooked up, I've enjoyed a sunny day with plenty of power to use, and a good start at topping up the battery bank.
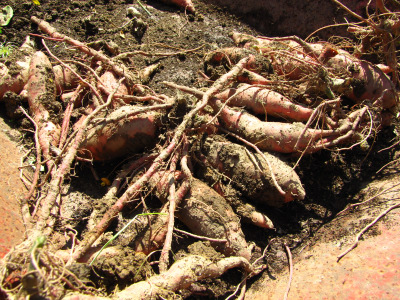 I
went out to dig the other 20% of the sweet potatoes Tuesday morning and
came home with this measly wheelbarrow full. And for the rest of
the day, I pondered why Monday's
beds yielded up dozens of mammoth tubers while Tuesday's beds gave me
just a few skinny roots.
I considered planting
date, since I put in a bed every week or so between mid May and late
June, but my measly beds were planted near the beginning of that
succession and even the latest-planted bed yielded up good-sized
tubers. Or maybe it was the type of fertilizer? Nope, I
gave all of our sweet potatoes the same chicken
manure compost.
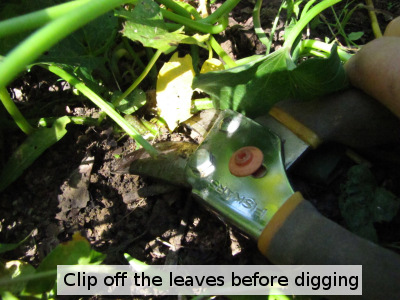 I
had just read Steve
Solomon's Gardening When it Counts when planting our sweet
potatoes this year, so I spaced the slips nearly twice as far apart as
last year (only four slips in an average sized bed.) That
planting method might explain why I had so many huge tubers, but since
I used the same method on the measly beds, it doesn't explain the
disproportionate yield between beds.
I
had just read Steve
Solomon's Gardening When it Counts when planting our sweet
potatoes this year, so I spaced the slips nearly twice as far apart as
last year (only four slips in an average sized bed.) That
planting method might explain why I had so many huge tubers, but since
I used the same method on the measly beds, it doesn't explain the
disproportionate yield between beds.
Finally, the simplest
answer came to me --- location. All of my hefty tubers came from
the upper garden where we enjoy a slightly clayey loam, while the
measly tubers came from the mule garden which is pure clay. I was
tricked into thinking the mule garden would be  okay
for sweet potatoes since I've had good harvests from garlic, white
potatoes, and carrots there, but my failure with onions in the mule
garden clay and with all of the above in the back garden's even more
clayey clay should have clued me in --- root crops just don't like
clay. Next year, I'll stick to the front garden for our sweet
potatoes.
Check out my previous
posts to learn more about when
to harvest sweet potatoes and how to
cure sweet potatoes.
Or, if you're really into planning ahead for next year, learn to
make your own sweet potato slips!
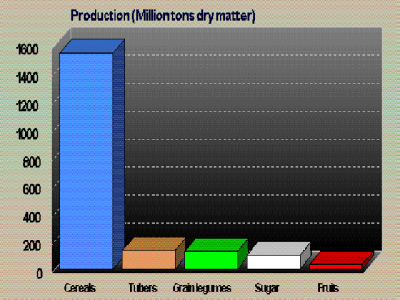 Modern
agribusinesses are the clear descendants of an agricultural system that
gave rise to ill
health, poverty, and wars
of conquest.
I'm not
going to bore you with a rundown on how modern agribusinesses have
created environmental devastation, poverty in developing countries, the
demise of the small farmer, and yet more concentration of wealth in the
hands of a few --- I assume you've heard it all before. Instead,
I want to talk for a few minutes about the modern diet and processed
foods.
Currently, twelve plant
species make up 80% of the world's crops by
weight --- wheat, corn, rice, barley, sorghum, soybeans, potato,
manioc,
sweet potato, sugarcane, sugar beet, and banana. Of those, the
big three are vastly dominant, and grains provide over half of the
calories for most people in the developing world. In the United
States, corn is king, and its derivatives can be found in nearly
every processed food on the supermarket shelves.

The current American
obsession with processed food can be traced back
to a Presbyterian minister named Sylvester Graham who preached a
message in keeping with the traditional Christian belief that
mortification of the body can elevate the soul. Graham advocated
vegetarianism, and pushed a particular cracker recipe so hard that it
now retains his name. Later advocates built on Graham's ideas and
argued that food is inherently dirty, having been grown in the
soil. Only by processing that food can we turn it into something
pure.
Agribusinesses took the
idea and ran with it. The market for
food was starting to butt up against its boundaries --- people can only
eat so much --- but processing that food turned it into a value-added
product that could be sold for more cash. The businesses marketed
processed food as a status symbol and time saver, and the American
public lapped up both the advertising and the corn syrup laden sodas.
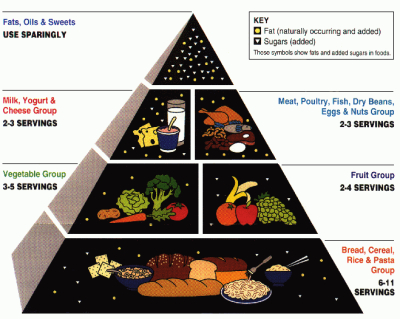 These
agribusinesses quickly discovered that they could grow far more
corn and wheat than Americans would willingly eat, so they turned to
the government for help. I grew up believing that the old USDA
food pyramid was gospel, but only recently did I realize that the USDA
has motives beyond making me healthy. With agribusinesses giving
huge donations to political leaders and those leaders funding the USDA,
it's no surprise that the food pyramid was used to tell Americans to
eat more of the foods we were growing in surplus --- grains.
During the Depression, our government even handed out two types of food
coupons; only after using the one for wheat and other surplus
commodities were Americans allowed to use the other and take home
fruits and vegetables.
Given this history of
our spiritual leaders and government pushing
processed foods and grain-based diets, we shouldn't be surprised that
America is caught in the throes of an epidemic of obesity, especially
among the lower class where people have little choice but to accept the
government's handouts. But the sad truth is that for most of us,
eating processed foods is a choice. Every day, we make a decision
about what we want to eat --- will we turn vegetables and fruits from
the farmer's market or our garden into the modern incarnation of a
hunter-gatherer's diet, or will we pull out that frozen pasta alfredo
or stop by McDonalds for a Big Mac? I believe that we owe it to
ourselves to see past the marketing and be aware of what we lose by
buying into time-saving processed foods.
This post is part of our History of Agriculture lunchtime series.
Read all of the entries:
|
I'm swinging on the front porch shade, with happy wifi bars lit up on my laptop. A good network makes for a happy home, isn't that how the saying goes? (Maybe not yet.)
Typically that's easy to achieve -- here it wasn't. The house is solar powered, the only connection to the outside is a phone line. So I needed a computer that would work in that environment, using minimal (12 volt) power, and getting the most out of the limited dialup bandwidth while providing those happy wifi bars.
Tecchies have been building little servers like this for years, to be used in our homes and the homes of family. We've only recently came up with a name for them -- "FreedomBox". Expect to hear more about FreedomBoxes soon.
All right then, here's my latest FreedomBox build. Some of its parts are recycled from a FreedomBox I set up years ago when Anna and Mark were just getting started at their farm, and were on dialup.
- Computer: Linksys NSLU2. There are faster choices than the "Slug", but on dialup, speed doesn't much matter, and there are not many lower-powered choices. And with the NSLU2, I can take advantage of years of development and experience, that has resulted in great support for running eg, Debian on it, and deep available knowledge of hardware hacks. It's proven, cheap, highly reliable hardware, and I had it lying around.
- Power: The NSLU2 is a 5 volt computer. There are some highly (90%) efficient 12 volt to 5 volt converters, which I covet. But the cheap and easy option is a automotive USB power adapter. So power is coming in to the NSLU2 on a USB cable. It's possible to just plug that into its usb port and it will run. But that wastes a port. Instead, I made the other end of the usb cable have a NSLU2 power socket on it. So, no wasted ports. The system has available as many amps as the voltage converter supplies. Not many. Booting it with too many usb gadgets attached could be an issue. (If I need to run an external usb hard drive, it had better have its own power supply.)
- Wireless: ZyDAS 2501 USB dongle. Not my first choice, just one I had lying around. This device cannot run in AP mode. It is, by the way, possible to use some USB dongles in AP mode with a modified hostapd, but the few I know that work are out of stock. No problem; this house won't have many visitors, and I can tell them the details for connecting using Ad-Hoc wireless mode.
- Storage: 64 gb thumb drive I had lying around. Hmm, last time I touched a NSLU2, I had only 1 gb drives lying around. Progress.
- Modem: My NSLU2 is modified to have an external serial port, so I can use an external modem if desired. But I suspect a USB modem will use slightly less power, even though this third USB device means I need a USB hub too. I was doubtful about finding a USB modem dongle that works with Linux, but it was actually no problem, the USR5637 Just Works.
- Software: Debian Linux. For the first time I'm using the polipo web proxy cache, and it works marvelously on dialup and on this low-spec system. Combined with dnsmasq, this makes web browsing over dialup actually not painful.
 |
(This guest post was previously posted on my blog.)
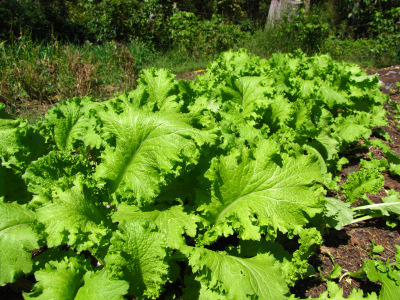 Now
that the weather has finally turned autumnal, the few fall crops I
managed to germinate are growing very quickly. I don't like
leaving beds empty in the summer, and didn't want to waste the warmest
part of the garden on cover crops, so as other fall crops
failed to come up, I just kept throwing curly mustard seed onto bed
after bed. On some beds, I had to throw the mustard seed down two
times to get good coverage, but now our winter garden is bright green
and full of delicious leaves, ones that I don't plan to eat yet.
In the past, I've
started eating my fall greens as soon as the plants got big enough, and
they lasted well into the autumn. However, last year I was
stunned to be served fresh greens in the dead of winter at a friend's
house, and he told me his trick. He lets the plants put out a lot
of growth in the fall, then starts to eat the greens in the
winter. Although the plants don't have enough sunlight to produce
new growth in the winter, under a row cover they do manage to hold onto
the green leaves they made in the fall (now turned sweet from cold
weather.) I would far rather eat from my summer garden now and
save our fall greens to be a winter delicacy, so I'm following suit.
Granted, mustard isn't
the most winter-hardy green, so I might be disappointed. Kale is
a more dependable winter crop here, but kale was one of the autumn
plants that barely germinated in the summer heat, and I didn't have
spare seeds on hand to replant. Here's hoping the mustard is
hardy enough to make my experiment succeed.
Agriculture
was humanity's solution to the problem of overpopulation --- a farmer can 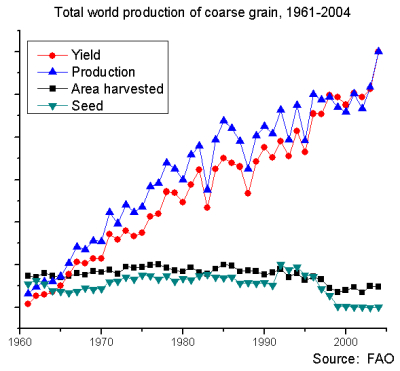 grow ten to 100 times as much
food in a certain area as a hunter-gatherer can collect from the same
amount of land left in its wild condition. But in the early
twentieth century, it looked like even agriculture couldn't save us
from starvation. In the United States, we were farming all of the
arable land, but people kept having babies --- clearly, we needed to
find a way to increase the yield per acre. So modern science came
up with hybrid corn and dwarf wheat that could be combined with
chemical fertilizers to feed our growing population.
The Green Revolution is
only a short term fix, though. One day, humanity will find the
limits of our planet's ability to support us --- unless, that is, we
can discover a method of bringing our population growth under
control. That's a tough order since every introductory biology
course teaches that the basic evolutionary urge of reproduction lies at
the root of all animals' actions, including humans. That urge ---
to have as many kids as possible so that our genes will spread across
the world --- led us to agriculture and our wars
of conquest.
 But humanity has a saving
grace. We are able to use rational thought to decide when and how
to override our ingrained evolutionary urges. For example, since
males of most species spend so little energy creating sperm, it's
understood that the
most efficient male reproductive strategy is to have sex with as many
females as possible. And yet, in modern society, most men have
found a way to sublimate that urge --- in fact, some men even choose to
practice monogamy and are quite happy with that anti-evolutionary
choice.
All of us are probably
familiar with another way that we buck our genes on a daily
basis. We've evolved in a world where salt and sugars are scarce,
so most of our bodies tell us to eat more potato chips and candy.
And yet, we somehow manage to listen to nutritional advice and keep our
salt and sugar intake within reasonable bounds --- human rationality
wins over bodily urges yet again.
I believe that modern
humans must make another ethical decision and choose to limit our own
birth rates, just as hunter-gatherers once limited their own population
growth. If we each opted to have only one child (or no children
at all), we could halve our population
at the same rate the first farmers doubled theirs. Of course,
that would mean directing our societies away from "growth economics"
--- living within our means as a nation, saving more since we won't
have so many young workers to support us as we age. In short,
choosing to limit our birth rate would mean living sustainably.
Mark and I chose the
no-children route years ago, and I wholeheartedly recommend it.
If I had been completely honest, I would have put Mark's vasectomy on
the list of factors
that turned our fourth year on the farm into the best year ever. Being child-free by
choice gives  us
a lot of benefits besides unprotected sex, though --- lack of children
is one of the reasons we can live so happily on very little income, and
we also have lots of free time to research permaculture, shoot photos,
and travel.
Neither Mark nor I have
an overwhelming urge to rear children, which isn't as unique as you
might think. I've spent a lot of time in the last few years
feeling out my friends and acquaintances about their decisions to
reproduce. Leaving aside those whose religion or laziness forbade
them birth control, the reasons people cite for having kids are varied
--- societal pressure, an assumption that having kids is simply what
adults do, a way out of an annoying job (a surprisingly common reason
among women), a way of bonding the spouses together, an urge to find
meaning in a currently unfulfilling life, etc. I
suspect that none of these reasons feels quite as important after those
new parents spend two years without adequate sleep, and I pity the
children who are reared by people who looked at kids as a means to an
end rather than as the full time, lifelong commitment they really are.
Sometimes I dream of a utopian world where the only people who embark
on parenthood do so out of an urge to raise a child to the best of
their abilities. From my informal poll, it seems like these
people make up perhaps a quarter of the population, if that, which
makes me feel like these true parent types could actually have three
kids apiece and the world's human population would still plummet.
In this real world, there are a lot of options for those who feel
called to the path of parenthood but who don't want to clutter up the
world with more humans --- fostering and adoption are at the top of the
list. In fact, I feel like I got all of my parental urges out of
my system by being an informal nanny to Mark's cousins for a few years.
If you have already become a parent, you can still be part of the
solution. Why not teach your kids and grandkids about birth
control (and pass out condoms like candy?) Various studies have
shown that having the ability to choose if and when to have kids is
especially important for women who may opt to have kids at an older
age, preserving the mother's health and allowing her to attain a higher
standard of living. (There's a reason the terms "barefoot" and
"pregnant" go together.) You might even consider cluing in
starry-eyed young men and women about the realities of parenthood
seldom spelled out on mainstream television shows.
Just as overpopulation initiated poverty, wars of conquest, and ill
health, I think that voluntarily reducing our population can solve many
of these problems. Choosing a route other than childbirth is the
biggest
contribution most of us can make to environmental protection and world
peace.
This post is part of our History of Agriculture lunchtime series.
Read all of the entries:
|
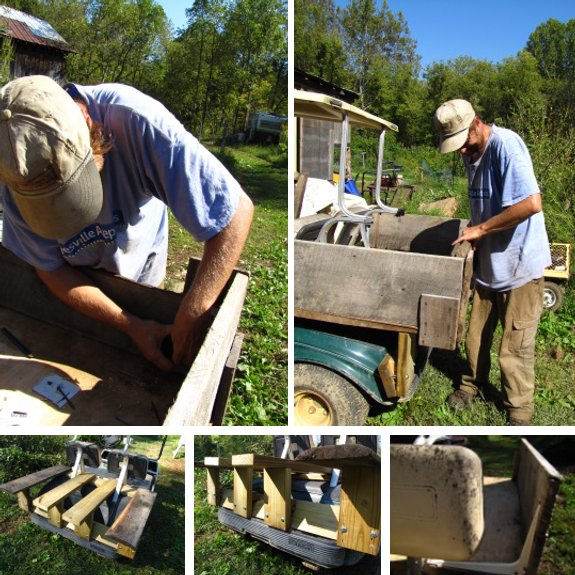
I improved the anchor points
for this new version of the do
it yourself golf cart dump box so as to
increase the stability.
The whole thing can be put
together for the price of six 2x6's, a handful of hardware, and half a sheet of plywood.
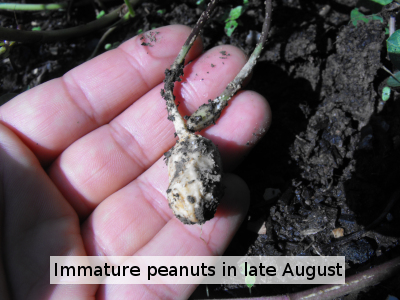 Figuring
out when your peanuts are ready is a lot like deciding when
to harvest sweet potatoes. First, check the days
to harvest. We grow one of the few varieties with a short enough
season to mature in zone 6 (Early Spanish --- 100 days to harvest),
which means that we could potentially dig our peanuts anytime after the
first of September.
Various websites
admonish you to wait until the leaves on your peanuts are starting to
yellow, but it's now nearly a month after our peanuts are supposed to
be ripe, and we haven't seen any yellowing. However, the plants
did mostly stop blooming a couple of weeks ago, which I suspect is a
good sign that they're nearing maturity.
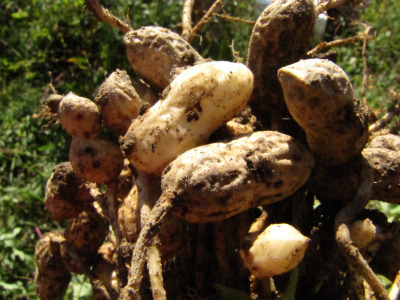 If
you think the date is close enough, dig up a test plant. To dig
peanuts, sink your shovel straight down into the soil about six inches
away from the plant's stalk and lever the pointed end toward the plant,
loosening the soil underneath. Then gently lift the plant out of
the soil. If the ground is clayey and too wet or too dry, you'll
lose peanuts in the process, so it's best to make sure your soil is
moderately damp before digging a test plant.
Shake off any clods of
dirt, then take a look at the beautiful peanuts clustered around the
plant's roots. There will definitely be a few paler peanuts that
aren't yet fully formed, but if the majority are full-sized (like in
the photo above), you're probably in good shape. To make sure,
crack a shell 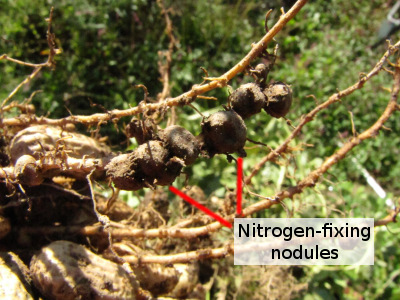 open
--- are the nuts filling up the whole shell inside? If so, your
peanuts are ready to dig. (Take a minute while you're peering at
the roots to notice the nitrogen-fixing
nodules lower down --- pretty cool, eh?)
Dig your whole patch
just like you dug the test plant, then put them on a screen or in
another airy location to dry. Don't eat any of your bounty yet
(including that test peanut!) Fresh peanuts contain a mild toxin
and need to cure for a few days before they can be eaten. Once
you've waited the requisite time, check out my post about making your own
peanut butter!
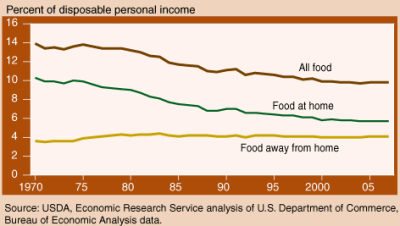 It
probably seems a bit strange to some of you to commit so much energy to
thinking about agriculture as the root of societal woes. After
all, most people in the developed world are so cut off from food
production that a cashier at our grocery store this spring had to ask
me to identify the asparagus in my cart before she could ring it
up. Thanks to government subsidies and externalization of the
true environmental effects of agriculture, modern agribusinesses feed
Americans at a cost of only about 9.8% of our income (5.7% for food
eaten
at home), a rate that has been steadily declining since 1970.
Modern agriculture means that food is easy and cheap --- who cares
about the historical problems associated with farming?
We should care.
Because, as the National
Institute of Health
wrote, "Over the next few decades, life expectancy for the average
American could decline by as much as 5 years unless aggressive efforts
are made to slow rising rates of obesity." Because that cheap
food in the grocery store also results in malnourishment and starvation
in the world's less developed countries, where peasant farmers grow our
shrimp and beef but can only afford to eat our cheap corn. Only
the truly short-sighted can believe that the ketchup we buy for pennies
at Food City doesn't have strings attached.
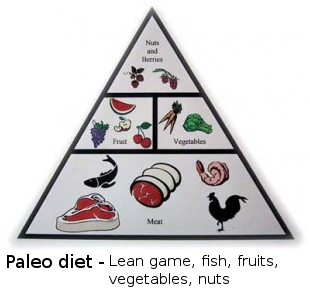 Luckily, there is a
solution. We can overcome many of the evils associated with
mainstream agriculture by planting our own backyard garden. Most
of us will plant vegetables, perhaps some fruit and nut trees, and keep
a few pastured poultry --- if we subsisted solely on produce from such
a homestead, our health would improve markedly. Permaculture and
organic gardening --- while only moderately suited to industrial scale
agriculture --- work perfectly for the home grower, allowing us to
create a sort of hybrid farmer/hunter-gatherer paradise in our own
backyard. If we raised our own pastured meat and killed deer to
fill in the gaps, those Third World farmers wouldn't be stuck in a trap
of spiralling malnutrition.
A couple of weeks ago,
Mark and I met a man who regaled us with the tale of his struggle to
conquer diabetes. He was 80 pounds overweight when his doctor
prescribed insulin, but through daily exercise and a strict diet, he
dropped the excess pounds and avoided medication. We ran into
this determined soul as he worked his second job --- a weekend addition
to the usual 9 to 5 grind that he took on not for the spare cash but
because he needed a way to mentally escape the pressure cooker of his
main job. "You must have a big garden?" we asked him, thinking of
how the fresh food would make his strict diet more palatable, how he
could put some of those hours of excercise to work building something
tangible, and how planting and weeding would help him release the
stress of his office work. The man looked at us as if we were
crazy. No, of course he didn't have a garden --- he simply didn't
have time.
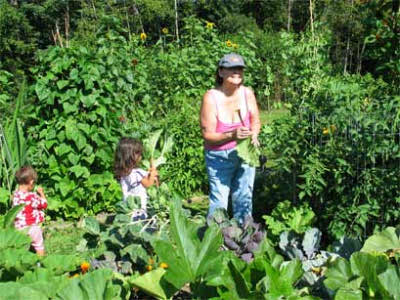 Lack of time
to grow our own food
is the neverending refrain I run into among people who care deeply
about world peace and the environment. We have been lulled into a
false belief that gardening is simply not important, that our personal
actions make no difference in the grand scheme of things, that our time
is better spent pecking away at the keyboard in pursuit of a buck or
relaxing in front of the TV. Even Mark and I fall into that trap
from time to time, and we admit that we are still a long way from the
food self sufficiency we crave. But we know that every successful
experiment is a step in the right direction and every failure is time
well spent.
By the way, if you live
in zone 6 or warmer, you can still plant fall greens if you
hurry. Or just put down a cover crop or kill mulch to jump start
the spring bounty. Gardening does matter, and we can each be part
of the solution...if we have enough time.
This post is part of our History of Agriculture lunchtime series.
Read all of the entries:
|
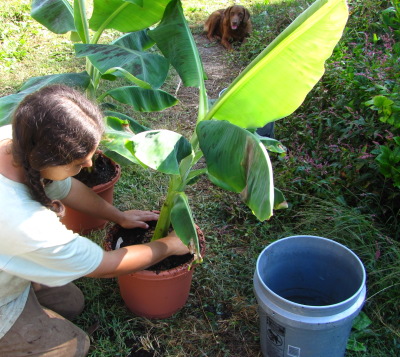 Definition:
1. Elongated crescent-shaped
yellow fruit with soft sweet flesh being transplanted by someone with
the first name of Anna.
Look how big these miniature
banana plants got after a solid summer of non-direct sunlight!
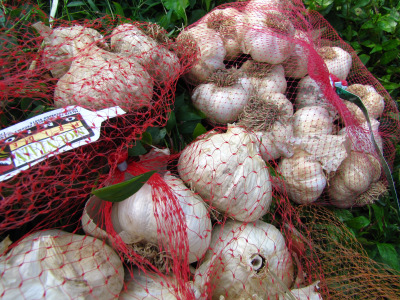 As
I poked holes in a straw mulch to plant individual garlic cloves this
week, I pondered whether we were saving money by growing our own
garlic. I usually figure we're saving quite a bit of cash with
our garden, but we did buy a lot of soil amendments this year as a long
term investment in our soil's fertility. Are we still coming out
ahead?
A cost-benefit analysis
of the backyard garden is a tough task because it's hard to know where
to begin and end your calculations. Seed is the least
straightforward part of analyzing this year's garlic cost --- we didn't
spend anything on seed this year, but we did buy two pounds
of seed garlic a
couple of years ago for $45. On the other hand, while seed
potatoes tend to accumulate diseases over time, seed garlic only
becomes more acclimated to your region and produces bigger yields in
subsequent years (as long as you are careful to always plant the
biggest cloves from the biggest bulbs.) I figure we'll use the
descendents of that seed garlic for the next sixty years or so, giving
me a cost of around 75 cents per year, or 4 cents per bed.
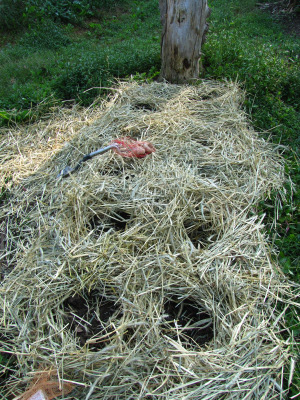 We
traded
a dozen eggs and a butternut squash for the horse manure I used to fertilize the
beds, which probably shouldn't even factor into the cost, but I'll give
it a shot. Our chickens are currently eating about $30 worth of
chicken feed per month and giving us back about 90 eggs (on the low
side since the days are getting shorter and we have a hanger-on who
needs to go in the pot.) That's $4 per dozen eggs (mental note:
we need to get off the commercial chicken feed.) I saw a
butternut for 99 cents at a fruit stand the other day, so I'll say we
spent $5 total, or 28 cents per bed, on fertilizer.
Straw is expensive in
our region since no one here grows grain --- about $5.50 per
bale. (This is another input I want to work on growing
myself.) But a bale is also a lot more mulch than it looks
like. Once you fluff up the flakes, one bale of straw mulches 6
beds, giving me a cost of about 92 cents per garden bed. Total of
these three storebought inputs is $1.24 per bed.
Assuming our harvest is
about the same as last year's (even though it's likely to be higher, as
the garlic continues to acclimate to our soil and weather), we will get
about 1.4 pounds of garlic per bed. That comes to about 89 cents
per pound of homegrown garlic. The internet tells me that
non-organic garlic in the grocery store costs roughly $2.50 per pound,
so we're nearly tripling our investment in just eight months.
Clearly, growing our own makes financial sense.

Once the back wheels are off
you can install 4 wood screws on each side while the rear plank is
resting on the bumper.
The seatback support bars are
what helps to secure the front plank.
One should be able to figure
out the rest from the previous pictures under the title of do
it yourself golf cart dump box.
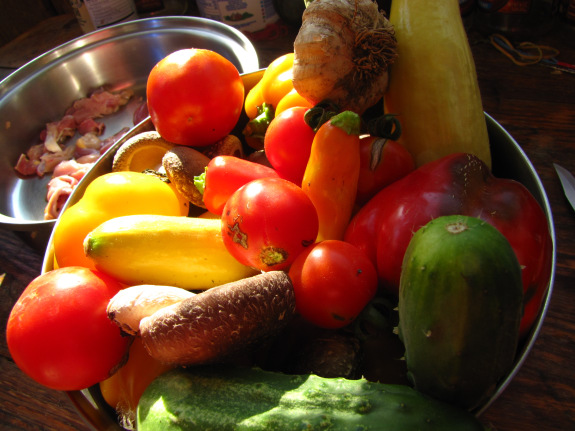
(Then freeze the other half bowlful of ripe, sweet peppers.)
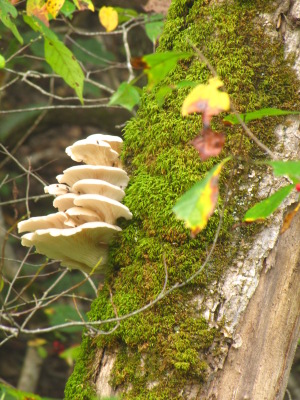 Anna
found these wild oyster mushrooms the other day while walking Lucy.
It took us a while to make a
100% identification, but now we know where to watch for future meals.
Very yummy, and very similar
to the ones we
cultivated on logs last year.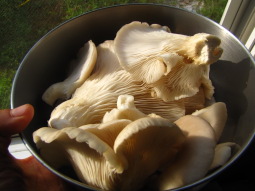
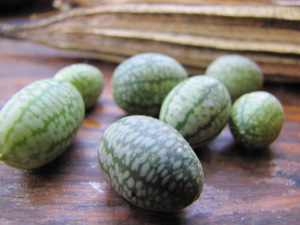 I'm
still on the fence about whether Mexican sour
gherkins will be a
permanent addition to our garden, but since the seeds are so expensive,
I decided to save some just in case. With no seed saving
information on the internet, I merged a tutorial on saving cucumber
seeds with my own observations on the natural history of the Mexican
sour gherkin to come up with the experimental protocol below.
First, I left some of
the earliest fruits on the vine to see what would happen. When
saving cucumber seeds, you're supposed to leave a cucumber on the vine
until it 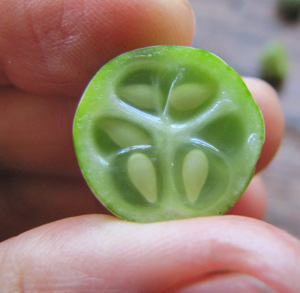 turns yellow and is fully matured, but Mexican
sour gherkins never seem to turn yellow (although they do take on a
yellowish cast.) Instead, after a while they drop to the
ground. I figured these fallen fruits must be mature, and
gathered them for my seed-saving experiment.
Cutting open one of the
fallen gherkins, I could see that the seeds now made up nearly the
entire interior of the fruit. I squeezed out the guts of several
fruits by poking a finger in each half. Like tomato seeds, these
gherkin seeds were surrounded by a frog-egg-like sack of fluid that must be
fermented away before the seeds can be saved. So I poured some
water into the cup with my gherkin guts and left it alone.
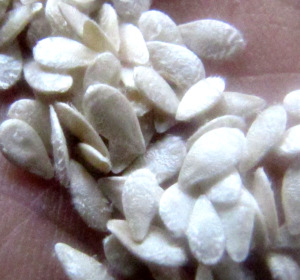
The internet reports
that the sack will have fermented away from cucumber seeds within three
days, but my experience has shown that these sacks tend to take about a
week to deteriorate in cool weather. Sure enough, a week later,
the water in my cup had become milky and, when swished, I could see
bare seeds settled at the bottom. So I carefully poured off the
water, rinsed the seeds in another round of water, then turned them out
onto a saucer to dry.
I'm very good at
remembering to save seeds, but once they get to the drying stage, they tend to accumulate in jelly
jars, cups, pans, saucers, and bowls in a long row along our
windowsill. I finally got around to 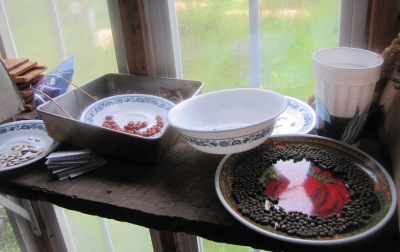 putting
away tomato, cantaloupe, watermelon, garbanzo, drying bean, urd bean,
okra, pepper, and poppy seeds while taking photos for this post ---
see, a blog is good for
something. Check out last year's lunchtime series for more tips
on which
seeds are
easy to save and how to start your own seed saving campaign.
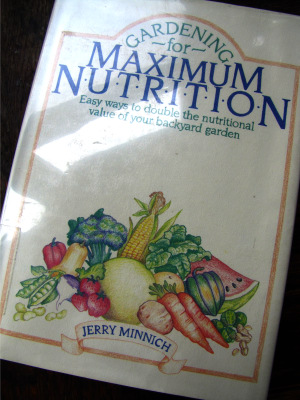 If
you were looking for a hearty dose of vitamin C in plant form, what
would you eat? If you answered "an orange", you're way off track
--- you'd actually get more of the immune-system-boosting vitamin from
a serving of broccoli, leaf amaranth, sweet peppers, or brussels
sprouts. In Gardening
for Maximum Nutrition, Jerry Minnich exposes
nutritional myths and drops hints for getting the most nutrition out of
your garden.
Minnich notes that
between 1925 and 1971, the American diet saw a 42% decrease in fresh
fruits and vegetables, with the slack taken up by a lot more processed
food. Perhaps
as a result of the focus on processed food, the
nutritional value of those fruits and vegetables declined by 10 to 20%
during the same period. However, processing wasn't the only
reason for the nutritional downturn --- growing methods and vegetable
varieties also led to the watering down of our nutrition.
Gardening
for Maximum Nutrition
was published in 1983, so it has a seventies perspective on
which food groups are bad for you (meats and fats are bad, the potato
is swell.) If you ignore that part, though,
the book is easy to read, full of fun line drawings, and very
informative. And the author boldly states that following the tips
in his book will allow you to double the nutritional output of your
garden without spending any more time or expanding your growing
area. With a claim like that, how could you stop reading?
| This post is part of our Gardening for Maximum Nutrition lunchtime
series.
Read all of the entries: |
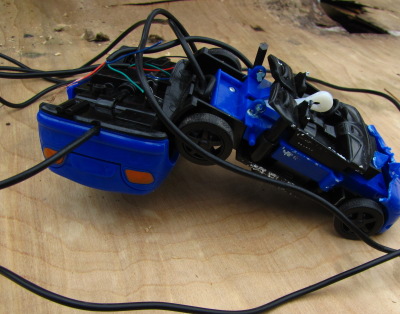 The
cost per day for the experimental
4 dollar deer deterrent
was just under 50 cents before it crashed and couldn't get back up.
It did provide some
protection while I waited for our additional rotisserie
motors, and I think if I had gone for one of the 10 dollar toys it
might still be working.
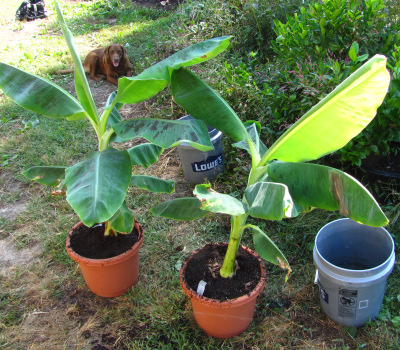 We've
had such good luck with our Dwarf
Meyer
Lemon that we
decided to try out a few other dwarf tropical
fruits. These are all house plants that live outside in pots
during the summer and then come in to sit in a sunny window in the
house through the cold months.
Mostly, we're trying out
different types of dwarf citrus, but Mark
talked me into taking on two Dwarf Cavendish Bananas as well. The
bananas are very pretty plants that many people would consider
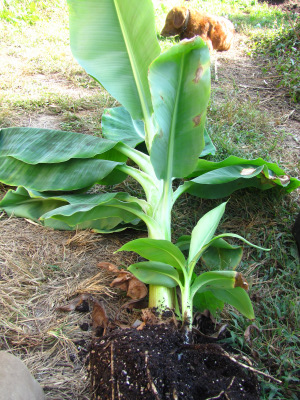 worthwhile
as simple ornamentals, but I'm bound and determined to raise
them all the way to fruiting. If you can pull it off, Dwarf
Cavendish fruits are only a bit smaller than the bananas you buy in the
store, and a single plant can produce up to 90 bananas!
We've only had our
bananas for five months, but I can already tell that
they are a very different beast than lemons. While our lemon
loves light and reaches toward the window, my bananas got sunburned
when I let their beautiful leaves get too close to the glass during the
summer. Lemons can deal with some sub-freezing temperatures
(although too cold weather will make them drop their fruits), but
bananas are supposed to be sensitive to drafts and stop growing below
57 F.
 Although they seem to be more
sensitive than lemons, bananas are quite
easy to propagate since they aren't grafted. From time to time, a
plant will send out an offshoot ("pup") from its base, which can be
teased away from the mother plant during repotting and will grow into
a new
banana. You'll need to take advantage of these pups because your
original banana will eventually produce one huge mass of fruits and
then die. The pups are your next generation, slated to produce
bananas in one to two years under good conditions.
While repotting our two
bananas (and separating out our first pup), I
discovered that bananas have a very different root form from
lemons. The latter likes to spread its roots horizontally, but
our banana had instead already sent big roots down to the bottom of the
pot. I'll have to remember to buy deep pots for our bananas
rather than wide.
So far
we're quite pleased with our bananas, but I reserve judgement until I
have a fruit in my hand. Until then, our Dwarf Cavendish Bananas
are yet another Walden Effect experiment.
Save yourself time and let us do the experimenting for you. Our homemade chicken waterer kits help you make a poop-free chicken waterer in less than an hour.
 Jerry
Minnich considered the
nutritional content of 89 common and not so common fruits and
vegetables then developed lists of all-star garden crops. In case
you're curious, here's his list (in declining order of importance) of
the crops that provide the most nutrition per serving: leaf amaranth,
sunflower seeds, broccoli, soybeans, almonds, navy beans, collards,
cowpeas, potatoes, dandelion greens, peanuts, peas, avocados, lima
beans, great northern beans, kidney beans, okra, watermelons, kale,
spinach, butternut squash, sweet potato, and turnip greens. Are
you as shocked as I am to see that the only fruit that makes the top 23
is the watery watermelon?
Minnich also provides
another list of vegetables that I choose to call
multivitamins. While the previous list merely takes into account
the total nutrition coming from the crop, this list looks at
versatility and chooses vegetables that provide a little bit of all or
most of the top vitamins and minerals: broccoli, leaf amaranth, lima
beans, cowpeas, watermelons, almonds, collards, peas, potatoes,
soybeans, and sunflower seeds. Why not choose a plant off this
list to go with your dinner every day rather than popping that
multivitamin pill?
Keep in mind that these
lists of nutritious vegetables are based on
USDA serving size, which I suspect might be why they're so strongly
weighted toward seeds. Half a cup of cooked beans is one serving
(350
calories) versus half a cup of broccoli (15 calories), 1 cup of
collards (11 calories), or half a cup of watermelon (23
calories.)
Another list in the book breaks 39 of the most common foods down by
pound per pound
nutrition, which is probably more useful (though dry weight would be
even more useful). That list is topped by broccoli, spinach,
Brussels sprouts, lima beans, peas, asparagus, globe artichokes,
cauliflower, sweet potatoes, and carrots.
Clearly, the healthiest
vegetable is still up for debate (although it can't hurt to cultivate a
liking for broccoli.) Still, we've decided to try out a few of
these high nutrition crops next year:
- Leaf amaranth --- We're experimenting with grain amaranth this year, but are going to have to spread out and try leaf amaranth next year. The latter is a summer green, which is a category underrepresented in our garden. (We only grow swiss chard during hot weather.) Since amaranth provides a hearty dose of calcium, iron, potassium, vitamin A, riboflavin, and vitamin C, along with lesser amounts of protein and niacin, it's hard to turn down.
- Dandelion greens --- We already gather these in the wild in the early spring, but I've nearly been pushed over the edge into buying a cultivated version and finding it a bed in the forest garden.
- Naked seed pumpkin ---
These come under a huge variety of names, such as Eat All Squash, Sweet
Nut Squash, Styrian Pumpkin, Lady
Godiva Pumpkin, Kakai Pumpkin, etc. The idea is that the seeds
don't have a hull, so they don't require any processing before eating
(except roasting, drying, or whatever you like to do with squash
seeds.) The downside is that the squash's flesh isn't very good
compared
to our darling butternuts so people usually give the insipid flesh to
livestock and grow something tastier for pies.
| This post is part of our Gardening for Maximum Nutrition lunchtime
series.
Read all of the entries: |
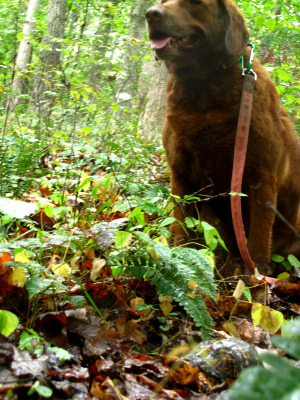
This seems to be the time of year when box turtles come out more than
usual. If you pay attention you can experience multiple sightings
during a short walk in the woods.
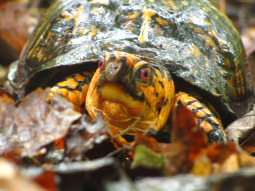
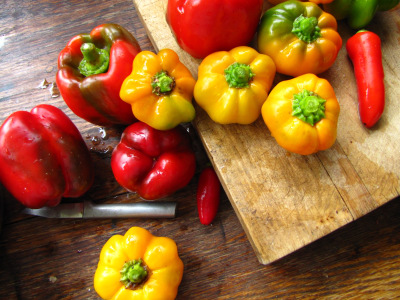 At
this time of year, everything in the garden feels like a bonus.
Since I don't care enough to start my peppers inside, we usually only
have a couple of weeks of sweet peppers, but this year we've already
frozen over half a gallon. Despite the blight, our tomatoes keep
producing, and my succession planting means that our summer squash are loaded with
fruits.
This week alone, we've
put away three quarts of summer squash, two quarts of vegetable soup, a
quart of ketchup, 1.5 quarts of green beans, a quart of swiss chard,
and 1.5 quarts of stewed tomatoes. Meanwhile, we're scarfing down
cucumbers and fall raspberries, huge heads of broccoli, and the first
few snow peas. Just like the spring to summer changeover, the
summer to fall changeover is a time of tremendous bounty, and we're
enjoying every minute.
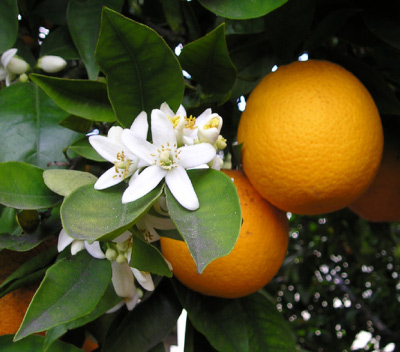 Did
you know that one study comparing Valencia oranges grown in Florida to
those grown in California showed that the former had only 33% of the
vitamin A found in the latter? Another study comparing the
biggest to the smallest red cabbages showed that the huge heads had
only 5% of the vitamin C by weight as the small heads. Clearly,
even within the same type of fruit or vegetable, growing conditions can
have a huge impact
on the quality of your food.
The Florida problem is
related to soil quality --- Florida's soil tends
to be sandy and lacking in organic matter, compared to the much richer
loams found in California's orange groves. Jerry Minnich explains
that organic matter is key to good food quality since the humus binds
soil together into aggregates, promotes microorganism growth, and as a
result holds onto micronutrients that quickly wash beyond the
reach of
crops in soil low on organic matter. If micronutrients aren't
within reach, your plants won't be able to provide those micronutrients
on your plate --- even plants are what they eat.
 The
solution is to add copious organic matter to your garden in the form
of compost, mulches, and cover crops. Minnich notes that manure
is a very good, all-around source of nutrients since most livestock
need many of the same micronutrients that you do, and tree leaves are
also especially useful since deep-rooted trees can soak up
micronutrients from the subsoil that are usually deficient in the
topsoil of your region. On the other hand, if you buy your food,
it might make sense to pay the extra money for organic since various
studies have shown that
organically grown produce has up to 3.6
times the vitamin C, 2.3 times the betacarotene, and 1.7 times the
protein as conventionally grown produce of the same type.
Light is another very
important factor, especially in the vitamin C
content of your crops. I've noticed that certain crops
(particularly berries) are twice as sweet if harvested on a sunny
afternoon compared to on a rainy day. During sunny weather, your
crops not only produce those delicious sugars, they also stock up on
vitamin C --- one study showed that when a plant was shaded for 24
hours, it lost a fifth of its vitamin C content. Other studies
have suggested a similar loss of vitamin A and iron during low light
conditions. To prevent this nutrient loss in your garden, give
your crops space so that overlapping leaves don't shade the produce and
harvest your bounty in the afternoon.
 I feel like I can taste the
final factor resulting in watering down our produce's nutritional
powers as well --- overuse of synthetic
nitrogen fertilizer. Have you ever noticed how grocery store
apples taste like they've taken the flavor from an apple half that
size, combined it with half a cup of water, and left behind a crunchy
but nearly taste-free fruit? When plants are given too much
readily available nitrogen, they grow quickly, but don't suck up
micronutrients in the same proportion. The result is a big,
watery vegetable with little nutrition or taste. Organic sources
of nitrogen, on the other hand, tend to be released slowly over several
years and don't cause this problem.
Feed your soil compost,
delete the high nitrogen fertilizer, and watch the sun --- that sounds
easy enough.
| This post is part of our Gardening for Maximum Nutrition lunchtime
series.
Read all of the entries: |
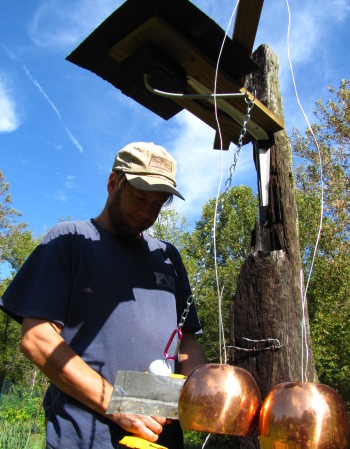
After months of trial and error I think I've finally found the most
sustainable motor for the do
it yourself deer deterrent project.
A rotisserie motor has been
going non stop for over a month now with no sign of letting up. We just
picked up 3
more at the local Ace hardware store in Abingdon to increase our
garden protection and test this solution even further.
It's a lot less obnoxious,
yet still unatural enough to stick out.
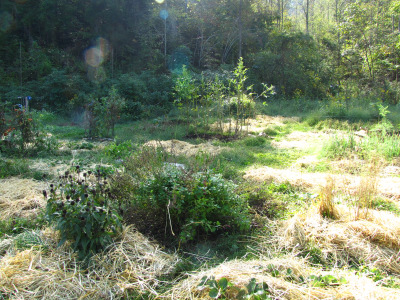 As
the days shorten, the sun quickly dips behind the hill and provides
only a smattering of sunlight to our upper garden. I took this
picture yesterday at 11:30 am when a third of the upper garden was
still in shadow --- no wonder the summer plants like okra are starting
to give up the ghost despite this garden's prime soil.
Since the front garden
is mostly out of the running until April or May, I decided to see
whether I could put at least some of those chilly months to good use by
growing cover 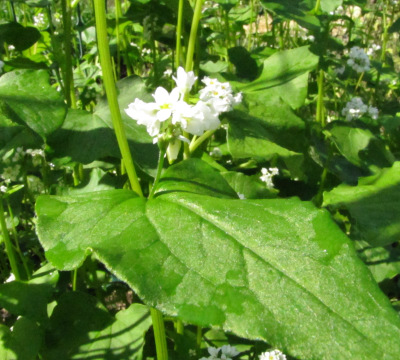 crops.
Cool weather cover crops need around 6 to 10 weeks to produce optimal
biomass, and our first killing frost is due anytime between early and
late October. Planting cover crops now is another gamble on a
warm fall, but any growth at all will be appreciated.
As you may recall, I
have four experimental cover crops already planted in various parts of
the garden, seeded between mid August and the first of September.
Here are my early thoughts on their productivity:
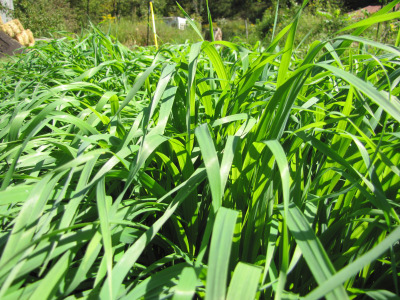 Oats - So far,
I'm very happy with the growth of oats, which took to our waterlogged
back garden soil like ducks to water. The plants are knee high,
but have fallen in on themselves a bit, perhaps because I planted them
too close together or gave them too much fertility. Despite the
lodging, there is clearly a lot of biomass already above ground, and
weeds are nonexistent.
- Buckwheat - My second planting redeemed itself in the upper
garden, where the buckwheat is twice as tall as the contemporaneously
planted oats. Our honeybees and wild bumblebees are lapping up
the nectar, making buckwheat the most versatile summer cover crop, even
if it
failed in the waterlogged back garden.
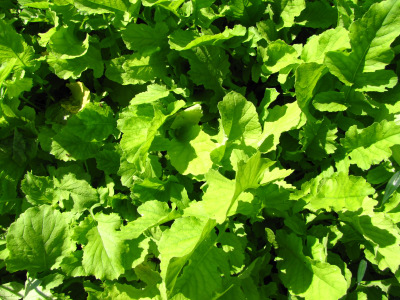 Oilseed Radishes
- In just four weeks, this cover crop has seemingly produced as much
biomass as the neighboring oats which have been in the ground half
again as long. I can tell that any weed that had the
nerve to sprout in the radish beds has long ago choked and died.
 Annual Ryegrass --- I put in a few beds of
ryegrass on a whim at the same time I planted the radishes. The
ryegrass beds look like a pretty lawn, but seem to have produced
significantly less bulk than the neighboring radishes and oats.
Annual ryegrass is the least likely to winterkill in zone 6, so I may
have to deal with resprouting ryegrass in the spring. On the
positive side, wet soil didn't phase the ryegrass one bit.
This week, I put in more
oats, radishes, and ryegrass in the front garden, skipping the frost
sensitive buckwheat since I'm already pushing the envelope. I
scattered cover crop seeds on the few sweet potato beds not filled with
garlic, slipped cover crops in between squash plants soon to keel over,
and even seeded an understory below buggy beans and fading okra.
Despite the new cool, wet weather, I went ahead and spread a thin layer
of damp compost over the seeds to hasten their sprouting. I'll
let you know how much mulch each crop leaves behind on the soil surface
once the real cold weather hits.
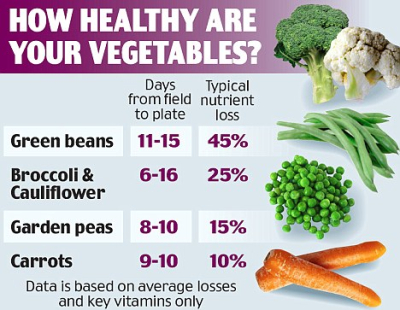 You
can grow the world's most nutritious produce, then lose most of the
vitamins and minerals before that food gets to your plate. I
picked up many of
Jerry Minnich's tips for preparing, cooking, and storing produce at my
mother's knee, but others are new to me. I
figured I'd share them all in case your mothers weren't as
health-conscious.
Eat
your food as soon as possible. My favorite method of
cooking
a meal is to wander out into the garden, grab a bowlful of fresh
vegetables, then cook them up immediately. Since fruits and
vegetables begin to lose nutritional quality the moment they leave the
vine, it's best not to pick your crops in the morning then cook them up
in the evening, or toss them in the fridge to be dealt with over the
weekend. In fact, this probably explains by grocery store produce
feels so dead in my mouth --- the plants have been losing vitamins and
minerals for days between the farmer's field and my table, and very
little nutrition is left.
Never
let your food wilt.
If you must store your food for some length of time before eating it,
put it in the fridge immediately rather than leaving it out in the sun
or on a hot counter. One study showed that kale lost 89% of its
vitamin C when left at 70 F for two days after picking, compared to 5%
for kale stored just above freezing for that same period  of
time.
On the other hand, a few crops are better stored outside the fridge
unless your kitchen is unusually hot --- okra, cucumbers, green beans,
peppers, eggplant, and tomatoes are shocked by cold temperatures and
lose more nutrients in the chill.
Wash
food using as little water as possible.
Many vitamins are water-based, so if you fill a bowl with water, pour
in your green beans, and pluck out one bean at a time over the next
hour while stringing them, you've lost most of those beans'
nutrition.
With produce from my own garden, I don't wash anything unless I see
dirt, and even then try to swipe the offending particle with a cloth
rather than submerging the food in water. I figure a little dirt
is good for you. (Don't follow this procedure with grocery store
produce, of course!)
 Cut your food at the last minute.
When any part of a vegetable except its protective skin is exposed to
air, the vegetable loses nutrients rapidly. So, those bite-sized
baby carrots in a bag at the grocery store? Probably pretty
nutritionally empty. In your own house, you can wait to cut up
fruits and vegetables until just before dumping them into the frying
pan or onto your plate.
Eat
the skins.
In many
fruits and vegetables, vitamin C, niacin, riboflavin, and vitamin A are
concentrated in the skins, so don't peel anything. Those same
skins are usually high in fiber, which everyone knows is good for you.
Cook
food quickly and away from water.
The best ways to cook your food for nutrient preservation are steaming,
pressure cooking (at least it's over fast), sauteing or stir
frying. If  you
really feel the need to boil your green beans for
three hours with a hunk of bacon, you shouldn't even consider them
vegetables. As a side note, Jerry Minnich also recommends cooking
only in stainless steel, glass, cast iron, enamel, or lined copper pots.
Don't
store your food.
Once you've chopped and cooked your food, the nutrients are
fleeting. After a day in the fridge, they're probably gone, so
try to cook only as much vegetables as you'll eat at one sitting.
(Meats, cheeses, and grains lose much less nutrition upon storage, so
these make better leftovers.)
Don't
add salt.
Salt in your cooked vegetables expedites loss of nutrients.
Apply
the same theories when preserving your food.
Anything
that can be stored in a root cellar is best stored there (with
the rare exception of potatoes, which are more nutritious but also more
prone to sprouting if stored between 50 and 60 F.) After root
cellaring, freezing
is usually the best way to preserve nutrients, but
be sure to steam blanch, cool without  submerging in water, and
freeze
at the coldest possible temperature. The long cooking time
required for canning results in the loss of three times the nutrients
lost during freezing, so increase the pressure to 15 pounds for all produce
and decrease the processing time accordingly. Store your canned
goods in a cool, dark place (where they will not lose any more
nutrients --- a year later, canned goods might actually be higher in
nutrients than produce in an old freezer where the temperature is 30 F
instead of the recommended 0 F.) Finally, drying is probably the
worst way to preserve your food since you lose significant quantities
of vitamins C, B, A, and thiamine, especially if you use sulfur.
In all types of food processing, keep the time from vine to larder as
short as possible.
| This post is part of our Gardening for Maximum Nutrition lunchtime
series.
Read all of the entries: |
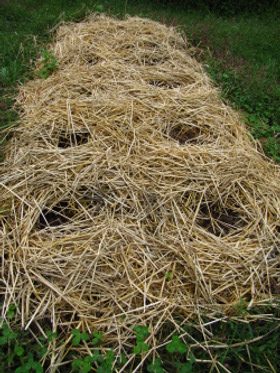 Our truckload
of straw bales is going to good use as a premium mulch for this
year's garlic crop.
I'm thinking we might go for
another load so that the other beds don't get too jealous and everybody
feels tucked in for the winter.
Want more in-depth information? Browse through our books.
Or explore more posts by date or by subject.
About us: Anna Hess and Mark Hamilton spent over a decade living self-sufficiently in the mountains of Virginia before moving north to start over from scratch in the foothills of Ohio. They've experimented with permaculture, no-till gardening, trailersteading, home-based microbusinesses and much more, writing about their adventures in both blogs and books.
