
archives for 07/2010
 Even
though I'm the primary cook around here, Mark does nearly all the
grocery shopping. I just hate shopping, so every two weeks, I
hand Mark a list and send him to the big city. He always comes
home with everything on the list...plus this and that. When I
first started converting him to Walden Effect eating, the "this and
that" were things like biscuits-in-a-can and lemon cookies.
Nowadays, I roll my eyes when he brings home...an out of season
butternut.
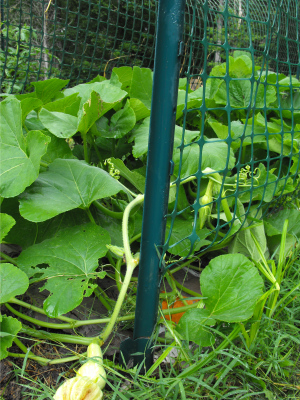
Yes, we've become such
fans of butternuts (especially butternut pie) that Mark's hard pressed
to live without them over the summer. I didn't know they would be
such a hit, so I only put in two small beds last year, and we ran out
of the delicious fruits in the middle of the winter. This year, I
expanded the planting to encompass three beds, and I fed the soil
well. Cucurbits love a good meal of manure, and before I knew it,
the butternuts had zipped off their own beds, across the aisle, and
were partying with the tomatoes. Bad butternuts!
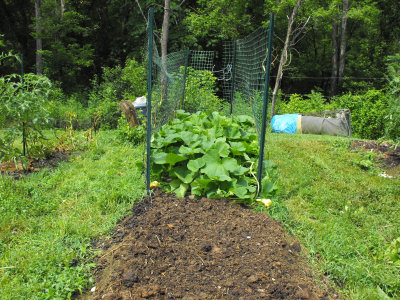 As every parent knows, proper limits are essential in raising a healthy
child...I mean, butternut. And parents definitely have to work
together to set those boundaries. So Mark and I went out as a
team to train our recalcitrant butternuts to toe the line. Mark
hammered in fence posts and I strung up pea trellis material to cage our butternuts
in. Now they can play as hard as they want and we won't have to
worry about them skipping curfew.
 I
know that many of you are still stuck on the ethics of eating meat
simply because you can't bear to think that you were personally
responsible for the death of a cuddly cow or cute chicken. If
you're going to go that route, you should definitely become a vegan,
since being a vegetarian doesn't prevent the death of livestock
--- check out my essay about the bloody side of eggs, for example.
But I hope you'll
consider the fact that most of the animals that we
kill are domesticated livestock that wouldn't be able to survive in
the wild if turned loose to fend for themselves. We've entered
into a contract with our cows and pigs, just as we have with our cats
and dogs (although the terms are a bit different.) We feed them,
shelter them, and give them a happy life...until the day the guillotine
falls.
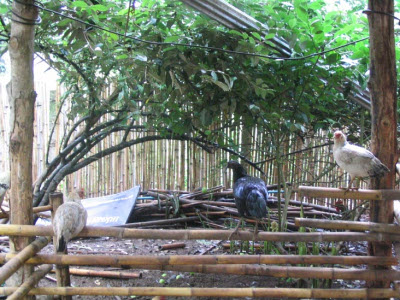 In nature, omnivores (like
humans) eat other animals, and death is part
of life. It just made sense to those first Red
Jungle Fowl
to hang around human villages, staying where the food was copious and
the predators were few. In effect, the chickens-to-be traded a
dangerous life full of wild predators for a safe and easy life with
only one predator --- man.
On the other hand, pain
and suffering are not part of the contract ---
I believe that CAFOs
void the terms of our domestication agreement. On our homestead,
chickens are raised on pasture, live a happy life, and are killed
quickly, so I consider this a valid way to honor the agreement early
humans and Red Jungle Fowl made when the latter started hanging around
camps of the former.
When I was in high
school, I knee-jerked toward semi-vegetarianism, but
since then I've examined the issue in more detail and concluded that
eating meat in moderation is better for the planet. In many ways,
I think that being a vegetarian is a lot like washing
the birds caught in the oil spill
--- both actions make us feel better about living in a dangerous world
in which things die, but neither action actually helps that world
become a
better place. I'd like to make the world a better place.
| This post is part of our Ethics of Vegetarianism lunchtime series.
Read all of the entries: |
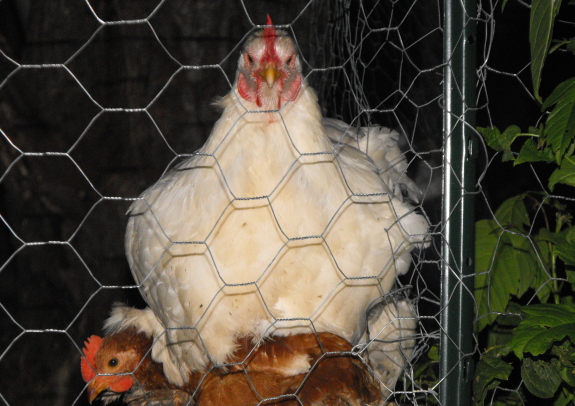
I've been curious to know how
long it might take for the baby chick to break away from the mother hen
and sleep on her own roost.
The current sleeping spot is
atop an old stump, which seems a little crowded to me.
 My
beekeeping mentor told me that he waits until June to plant most of his
potatoes, which means he doesn't have to store the mature tubers during
the heat of the summer. Since potatoes are primarily a storage
crop and have a
limited shelf life, planting them as late as possible makes sense.
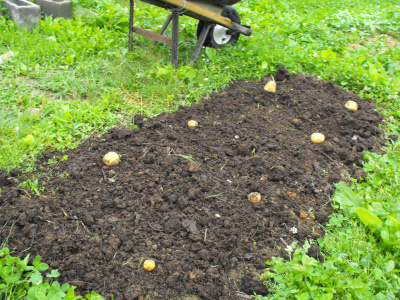
However, when I went
shopping for seed potatoes at the beginning of June, all of the feed
stores looked at me like I was crazy. Instead, I decided to see
whether I could just plant some of my halfway matured spring potatoes
in new beds for a fall crop.
I was so happy with the Ruth
Stout method of potato planting last time around that I
decided to take it a step further this time. I simply spread
manure on a freshly weeded bed, plopped down the seed potatoes, and
covered everything up with a thick layer of grass clippings.
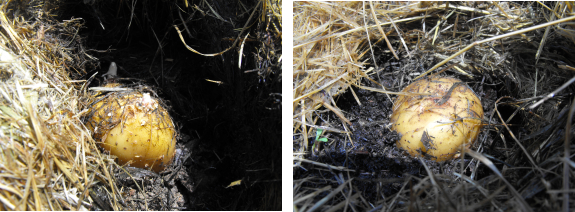
Since then, I've been
waiting, and waiting, and waiting. Nothing has happened.
When I poked around under the mulch, I discovered that very few of the
seed potatoes had sprouted. In fact, all of the small new
potatoes that I had put in the ground whole were sitting there, while
only the few potatoes that were large enough to be cut in half had
begun to grow. I've read that some companies sell new potatoes as
seed potatoes, but I clearly haven't discovered the trick yet.
Since the beds are well
mulched and growing no weeds, I'm going to let them sit for another
month or two even though I now have small hope of a fall potato
harvest. I'll let you know if anything exciting happens, or
whether I end up just digging the seed potatoes to eat.
 There
are really only two environmentally and ethically conscious ways to eat
meat --- buy from very small farmers who raise livestock as part of
permaculture systems or raise those animals yourself. We're
still a long way from reaching this optimal state, but I hope you'll
let me show you what I hope our homestead will eventually look like.
Here in the eastern
United States, forests are the native ecosystem for
most areas, so I envision creating forest pastures to raise both
chickens and pigs while allowing many native plants and animals to
coexist. In the prairie states, long-grass pastures are
probably more appropriate. In either case, it's also essential to
spread livestock out so that manure
becomes a boon rather than a pollutant --- don't raise more pigs than
can be used to fertilize your garden.
We already feed all of
our food waste to the
chickens, but we don't waste much, so the scraps don't make up much of
their diet. We've approached all of the local grocery
stores, hoping that they might give us spoiled produce, but
unfortunately that is against corporate policy. Those of you who
live in urban areas would probably have better luck approaching small
restaurants, and might be able to feed your livestock on food waste
alone.

Hunting is another way of feeding
ourselves high quality meat in a
relatively natural setting. Since deer are overpopulated in our
area, we'll be focusing more on this option as time goes on. Then
there are honeybees --- while they only provide empty calories, it's
hard to complain about a source of food that takes up no more than two
square feet of land and produces roughly 49,000 calories per year.
Unless you make weekly
airplane flights or turn on the air conditioner
with the windows open, changing your eating choices is probably your
best bet for helping the earth. 37% of the earth's
terrestrial area is currently devoted to producing food, and at the
same time habitat destruction is the biggest cause of extinction on
the planet. Isn't it time that we put some deeper thought into
our food choices so that there will be a bit of space left for wildlife
to survive?
| This post is part of our Ethics of Vegetarianism lunchtime series.
Read all of the entries: |
This automatic
chicken coop door design is called the up swing version for obvious
reasons.
You can get the complete kit
from a guy named Jeremy for around 135 dollars which includes an
adjustable timer.
I like the way the movement
goes out, which seems less risky than the guillotine like action of
most automatic chicken coop doors.

Edited to add:
After years of research, Mark eventually settled on this automatic chicken door.
You can see
a summary of the best
chicken door alternatives and why he chose this version here.
If you're planning on
automating your coop, don't forget to pick up one of our chicken waterers. They never spill or
fill with poop, and if done right, can only need filling every few days
or weeks!
 Despite
their
uncomfortable roosting arrangement, the mother hen and her
chick are clearly midway through the weaning process. Our
youngest chicken is no longer glued to its mother's side, and instead
opts to spend most of its time foraging with the cockerels.
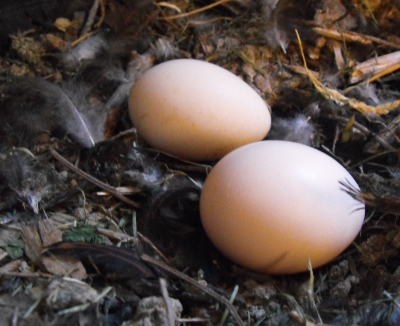
With her first chick ready to fly the coop, Mama Hen has decided to
move on. Tuesday, I noticed her exploring the cockerel's coop,
and Wednesday I found two eggs tucked in an out of the way
corner. I'm tempted to leave the eggs alone and see if our broody
hen
will successfully raise a larger clutch of chicks, but I'm not sure
whether our cockerels are actually mature enough to be fathers.
Some of them are crowing, but the sounds are far from a real
"cock-a-doodle-doo!" What do you think? Is a three month
old rooster old enough to be a father?
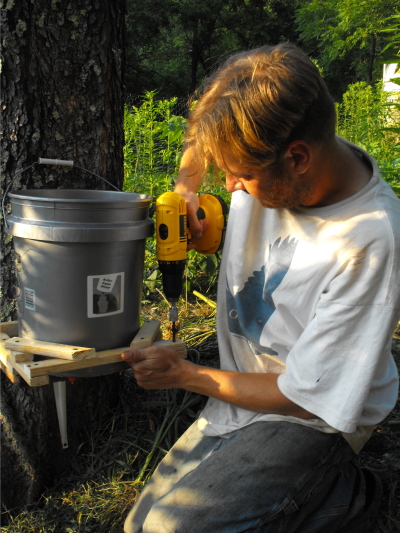
This automatic bucket waterer was easy to put together with a DIY kit, a shelf bracket, some scrap
wood, and a handfull of drywall screws.
A future system will make use
of a 50 gallon plastic drum with some sort of gutter collecting
run off water from the roof of the chicken coop.
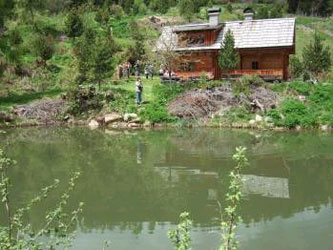 Has anyone ever tried gleying
a pond? Gleying seems to be an old Russian method that mimics the
way ponds sometimes form in nature. The goal is to produce an
anaerobic layer in the soil underneath the pond, which somehow prevents
water from percolating through (perhaps due to slime on the anaerobic
bacteria.) Here are tips for gleying a pond, compiled from
various websites (none of which feels very definitive):
Create
a six to nine inch layer of fresh compostables. Some sites recommend
using a layer of animal manure covered by a second layer of high carbon
waste material such as paper or cardboard. Other sites note that
grass clippings can be used in place of the manure, and still others
leave out the high carbon layer.
Get
your compostables wet, then seal out the air. Most people recommend
adding a layer of soil on top and tamping it down, but others mention
putting plastic over the pond to keep air out completely. Still
other sources seem to consider the cardboard layer to be the one that
seals air out.
Wait
two to three weeks.
During this time, you shouldn't allow your gley to dry up, but you
can't fill the pond yet. After the wait, your pond is supposed to
be permanently sealed...or sealed for a couple of years (depending on
who you talk to.)
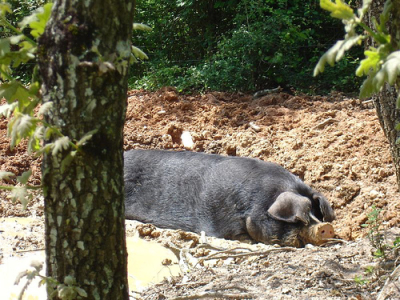 I'm a bit leery of the
technique because I can't find anyone who mentions that they have tried
it personally, although second and third hand reports abound. I'm
also curious to know whether anaerobic pond muck from the alligator
swamp would provide instant gley. If I hauled out a few
bucketsful and used the muck to line a little indentation in our forest
garden, would we have a mini pond? Or is the anaerobic layer
something that forms in place and can get disrupted by digging?
Clearly, gleying a small pond is going to have to be added to my
post-growing season experiments list!
(As a side note, I
couldn't find a single picture on the internet of gleying a pond.
The closest ones were these photos of Sepp Holzer's pig method of
sealing a pond. As usual, click on the image to view the source
website.)
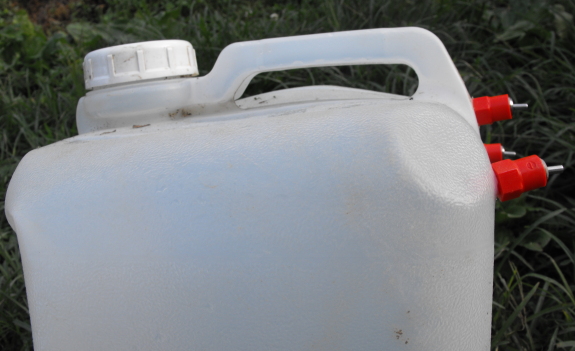
This was my first attempt at
the latest automatic
bucket waterer. I think
it once held cooking oil.
The main problem with a
container like this is the thickness of the plastic. Two of the nipples
screwed in fine, but one of them didn't seem to have enough plastic to
bite into and ended up leaking.
 This
weekend, I tricked Mark and his mom into taking me to Sunwatch Indian
Village in Dayton. My companions win the patience award for not
even looking bored while I took notes for three hours on how Native
Americans fed themselves 800 years ago. Okay, maybe they do look
a little bored....
I was intrigued by this
particular window into the past because corn had just become the
mainstay of the Native American diet, making up over half of the
villagers' diets. Meat (76% of which was venison) made up another
40% of their diets, so I wasn't surprised that the Sunwatch villagers
were actually less healthy than their recent ancestors, with over half
of their children dying before the age of six. We all know that a
diet of corn and meat with very few fruits and vegetables isn't going
to promote good health.
The villagers stored
their corn for the winter in large, grass-lined storage pits.
Each family of six to eight people had their own pit, which would hold
500 or more pounds of corn. I loved the museum's reconstruction
of a typical storage pit while in use:
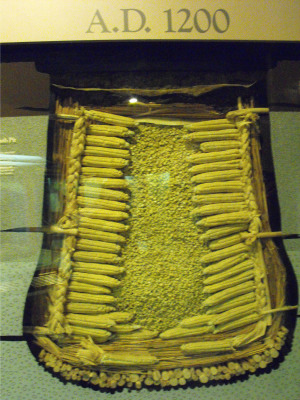
...and then, once
emptied of corn, how it might have looked when filled with the family's
garbage...
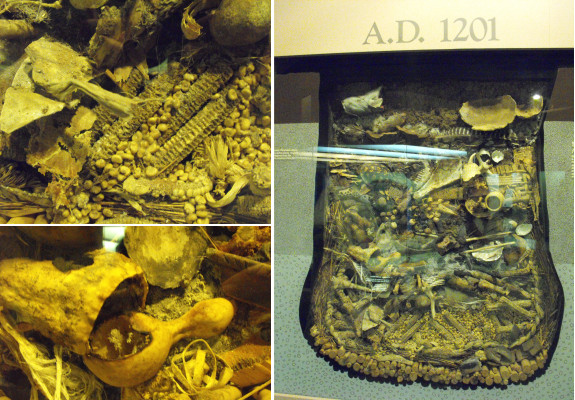
...and, finally, what
the pit looked like when archaeologists carefully picked through it 800
years later:
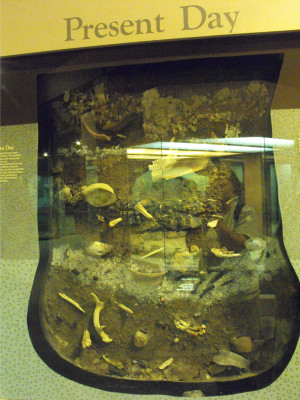
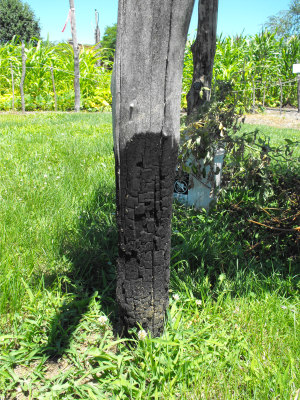
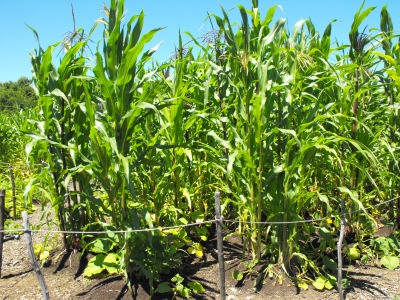 The
reconstructed village also included a typical three
sisters garden,
which I've pictured here. Unfortunately, there was much less
interpretation about the garden than about the buildings, so I came
away with more questions than answers. Most importantly, I ended
up curious about how the Native Americans combatted the squash vine
borers, which my
trained eye noticed were already hard at work wiping out the pumpkins
in Sunwatch's garden. Does anyone know?
 I
posted some images of the lodges in my review
of Sunwatch Village
over on our Clinch Trails website (which I've decided
to reenvision as our travel website), but what caught my eye in the
architectural arena was the way the Native Americans burned the bases
of their posts to protect the wood from insects and rot. I would
have thought that charring the base of a post would make it less
structurally sound, but presumably they knew what they were doing.
On the other hand, the
buildings weren't meant to last forever. Like my method of intentionally
underbuilding, the
Sunwatch villagers were used to moving on after a couple of decades
when firewood and game in the immediate vicinity had been
exhausted. As with slash
and burn agriculture,
the sustainability of using up all of an area's resources and then
travelling to a new region is questionable, but the method might make
sense if populations are low enough that the land is given a century to
recover after each episode.

Finally, doesn't this
watch platform look perfect? I've long wanted to have one of
these in the middle of the garden with a ramp up to the platform so
Lucy could nap there and watch over our entire domain. Who knows
--- the Sunwatch villagers might have even let their dogs stand watch
there too!
 Our Black and
Decker 18 volt drill has been replaced with a DeWalt.
You can feel the increased
power and torque the first time you use this beauty.
Well worth the extra cost if
you find yourself delving into more advanced projects.
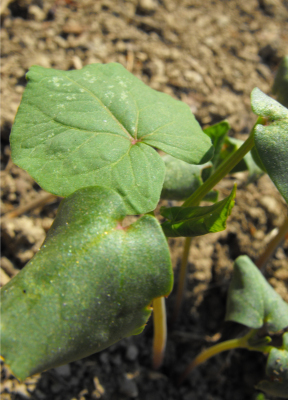 I'm
searching for a cover crop that:
- is reliably winter-killed in zone 6 (meaning that I don't have to till it in or pull it out)
- is non-leguminous (so that I'll get lots of organic matter rather than lots of nitrogen)
- will survive in our problem spots --- dense, clayey soil with a
high water table
So far, buckwheat and oats seem to be my top
contenders. I've been slipping buckwheat into gaps in my rotation
this month, beds where spring crops have been pulled out with nothing
to take their place for at least six weeks. Next month, I'll
plant oats in empty beds.
If all goes as planned,
our cover crops will turn into a heavy mulch that will partially or
entirely decompose in time for spring planting. It's even
possible that the buckwheat will die in five or six weeks when I mow it
down at bloom time, allowing me to plant garlic under the green manure
a few weeks later.
Do you have a favorite
no-till cover crop? I'm open to any and all suggestions since
this year is our first trial.
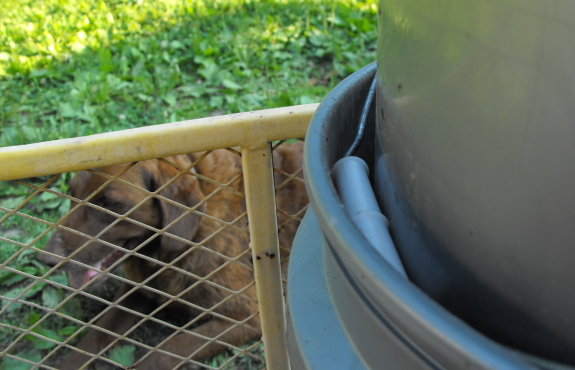
I take back my previous 5
gallon bucket stacking suggestion after todays discovery.
The handle is obviously made
to tuck into another bucket to prevent stickage.
I need to take more time and
listen to my tools more often...I wonder what other obvious secrets
will be imparted my way if I can just listen a little harder?
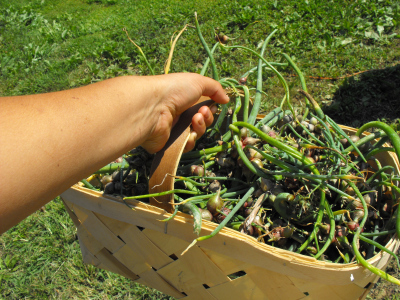 I
seem to have slightly over-planted our Egyptian onions this
year. I only put in three small beds...and then three more
patches sprang up from compost piles where I'd tossed the excess
bulbs. The result was so many
onions that I didn't even put a dent in the population by pulling whole
plants to eat over the winter, and now that it's time to harvest the
top bulbs,
I'm officially overwhelmed. This basket is less than a third of
the harvest!
I
seem to have slightly over-planted our Egyptian onions this
year. I only put in three small beds...and then three more
patches sprang up from compost piles where I'd tossed the excess
bulbs. The result was so many
onions that I didn't even put a dent in the population by pulling whole
plants to eat over the winter, and now that it's time to harvest the
top bulbs,
I'm officially overwhelmed. This basket is less than a third of
the harvest!
Rather than composting
the top bulbs (a method that clearly failed last year),
I'm going to sell them in big bunches to anyone willing to start a
good-sized Egytian onion patch. I don't really want to get into
the retail side of mailing off a few bulbs here and there, but if
you're a regular commenter and just want a tiny start, email
me and
I'll likely oblige you. You definitely want these plants in your
garden if you grow in
zones 3 through 9. Sorry, I can't mail them outside the U.S.
To order, click on the
paypal button above to buy 100 top
bulbs for $25 (with free shipping.) 100 bulbs will weigh
approximately 5 ounces and will be enough to start one good-sized bed
that will feed one or two average people. Your package will
contain small, medium, and large bulbs.
If you really want to
feed an army (and help me get rid of these top
bulbs as quickly as possible), you can buy 500 top bulbs for $75 (with
free shipping.) If so, click this button instead.
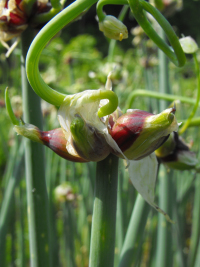 Once
you receive your bulbs, plant the Egyptian onions as soon as
possible in good garden soil in full sun. The very top of the
bulb should be poking out of the ground, but the rest should be
submerged. Some people recommend planting them a foot apart, but
I've found that my plants do well in raised beds spaced only about
three inches between centers. Leave the plants alone for a few
months, then you should be able to start
harvesting green onions in the middle of the fall through the winter.
To maintain a perennial
patch, cut only every second or third leaf,
making sure that the plant has enough green leaves to continue
growing. You can also dig up entire bulbs in the winter to use in
recipes that call for leeks, but you'll want to let all your plants
grow
the first year. By this time next year, your plants should be
putting up top bulbs, each of which can be planted to expand your
patch. As long as you don't get too greedy and overharvest,
Egyptian onions will soon become your most dependable --- and easiest
--- vegetable.
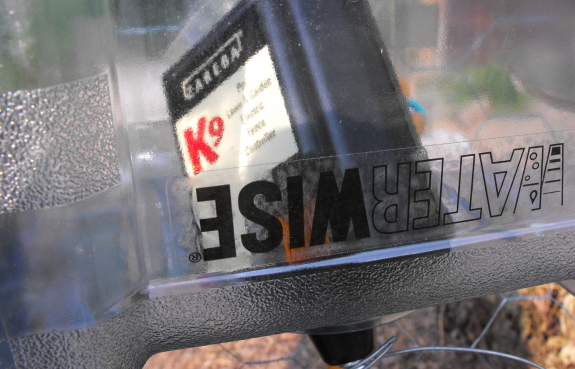
The K9
electric pet barrier
continues to keep Lucy from even coming close to the chicken
pasture area.
It seems to have taken only
one zap to get the point across.
I'm thinking of unplugging it
to see if the threat alone is enough to keep her away.
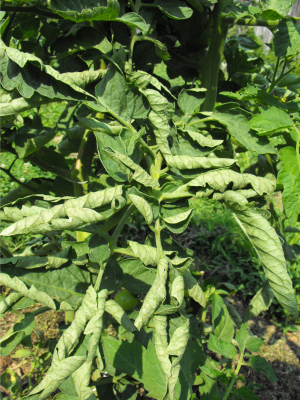 Last
week, I noticed that the bottom leaves of our tomato plants were curled
up. The leaves weren't yellowing, browning, or developing spots;
they were just bent in an odd curve that made the pale undersides
visible.
Even though I usually
try to be very proactive and look up problems as soon as I see
symptoms, this time I procrastinated. I've been living in fear of
the blight all growing season, and,
honestly, if my tomatoes were blighted, I didn't really want to know.
It turns out that I
could have set my mind at rest days ago. There is a leaf curl
disease caused by the Tomato Yellow Leaf Curl Virus, but the virus'
symptoms include yellowing leaf margins and crumpled leaves, neither of
which my plants show. Instead, chances are my curled leaves are
the result of letting the plants get a bit drought-stressed, then
saturating the soil a bit too much, all combined with my new, drastic
pruning regime.
The leaves may stay curled, but it sounds like I won't see any damage
to the plants' growth or fruiting.
I'm very relieved that
my tomatoes aren't going to die, but I would still like them to hurry
up and feed me! The plants are dripping with huge green fruits,
but none has even shown a tinge of color. As I read on more and
more blogs about homegrown tomatoes, my patience is wearing thin.
Fresh sliced tomatoes, vegetable soups, sweet pizza sauce --- I'm
aching to taste them again....

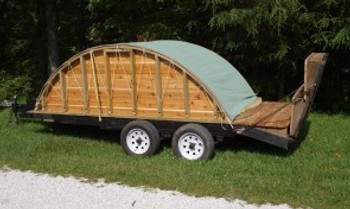
I've always thought the
traditional pop up style campers had room for improvement.
The Yurtle will put an end to
your square lodge blues with a nice circular structure to rest within.
This portable model will run you about 6800 bucks, which seems
comparable to other new pop up campers. The Yurtle will take at least
an hour to set up compared to seconds on the pop up.
Seems like this might be a
great alternative to the FEMA trailers we heard so much about after
hurricane Katrina?
 Go
to Laurelnestyurts.com for more round options and
details on their small community of 14 yurts. They've got a few
sections to their blog where they discuss permaculture and gardening,
topics that drove me to their site in the first place.
 We
went a little overboard with experimental beans this year, and now
we're starting to get an idea of which ones like our garden.
First of all, I should note that our old standby Masai Beans are still
plugging right along. We already have a
gallon of delicious green beans in the freezer, with many more to
come as my later-planted beds start to bear. Masai Beans
are really the best green beans I've ever tasted, and they're
stringless, so preparation is a breeze. Plus, you can save the
seeds --- we haven't bought green bean seeds in three years.
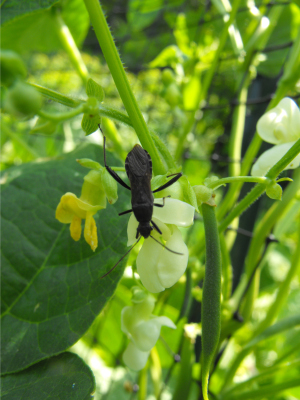
On the experimental
side, a friend of mine mailed me a few of her favorite dried
beans to play with --- Yellow Indian (pictured above), Allubia Criolla,
and Cayamento
Cranberry. My goal here is to find a dried bean that will capture
even Mark's interest, and I'm willing to try as many varieties as it
takes to reach that point. Currently, the pole beans are happily
running up their trellis, blooming like crazy, and setting big
pods. I won't really have information for you, though, until we
run a taste test.
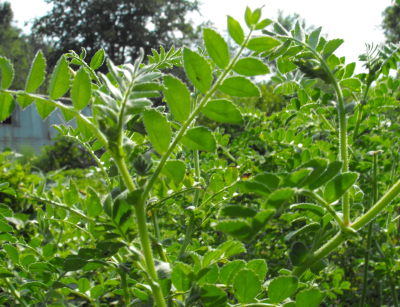 Our
garbanzo beans are less happy. I planted Black Karbouli Bush
Garbanzo at the end of April, but later learned that garbanzos like
cool weather and should be planted at the same time as the peas.
No wonder a
third of my plants dried up and the rest have luxuriant foliage but no
signs of blooms. Even if we get nothing out of this experimental
bed, I'll try the garbanzos again next spring, planting in a more
proper time frame to see what develops.
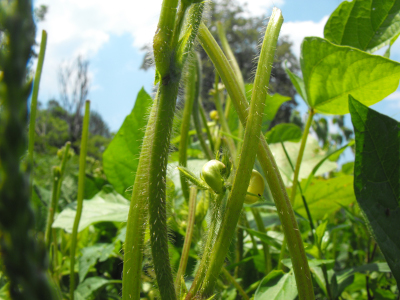 We
also planted Urd Beans (for sprouting) and some Endamame Soybeans
(for endamame). The two types of beans seemed
happy as little clams...until the deer came in and ate them. We
had a few minor deer incursions this summer when deterrents went
down, and our four-legged f(r)iends seem
quite partial to my experimental crops. So, just like with our
garbanzos, if we fail to get a crop this year, I won't despair.
Now that we've done
everything wrong that we possibly can with beans, I'm hoping next year
will be a stunning success. For the sake of comparison, oilseed
sunflowers were one
of our big experiments last year, so the deer ate them down to the
ground. This year, the sunflowers were no longer experimental, so
the deer left them alone and the plants are now towering over my
head. Clearly, there is a moral here, if I can only figure it
out. Maybe the deer are bored by my experiments posts?
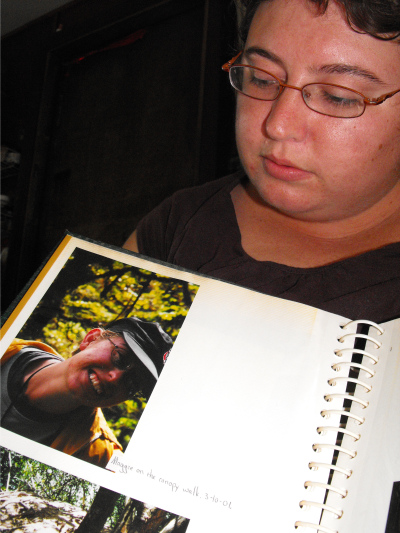 "Come
right on over," I said. "But be prepared --- I may not want to
see you in the morning."
No, I wasn't setting up
a one night stand. I was inviting my sister to the farm to leaf
through our journals, photo albums, and sketchbooks from our Costa
Rican adventure a decade ago. (And being realistic about my
introvert tendencies that consider house guests and fish bad after
about five hours.)
I don't want to be too
specific, because it's summer and a bad, bad, bad time to take on new
writing projects. But I'm currently fired up to summarize
the highlights of our past journey on my Clinch Trails blog. I'll let you
know if it turns out to be anything more than a pipe dream, but for now,
Maggie and I are enjoying the music.
 Although
I should have been taking advantage of the cool, rainy weather to get
the garden weeded, I
played hookie on Friday. I've discovered that
when I get an idea for a written or visual project, I should drop
everything and explore while I'm enthusiastic, letting those creative
juices flow while they're in motion. This freedom to create is
the best part of homesteading.
The truth is that I'd
been wanting to work up some sketchbooks from my year abroad into a
story for common consumption, but my memory is so fuzzy that I couldn't
visualize life a decade ago well enough to write about it.
Maggie's memory is considerably better, and she wrote interesting
tidbits in her journal that complement my copious scientific notes very
well. We churned out a
joint post last night about our first day in Costa Rica, and I'm excited to keep
collaborating on the project.
As usual when I get
obsessed with a non-homesteading topic, I'll stop posting about it over
here after this entry. So, if you're interested in reading about
my decade-old journey (and the natural history of Costa Rica), be sure
to subscribe to the RSS feed over on Clinch Trails. Maybe this will make
up for the continued summer vacation of the lunchtime series.
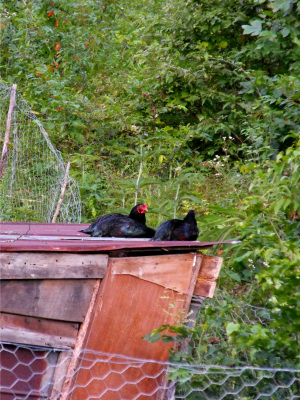 "That
fence is just there to keep the dogs out, right?" said one cockerel to
the other as they roosted on their coop roof and peered out into the
unknown wilds.
"I think I'll stay
inside anyway," replied his brother, drowsily.
(I consider this
evidence in support of the domestication
contract.)
Fulfill your side of the contract by providing your poultry with copious clean water using our homemade chicken waterer.
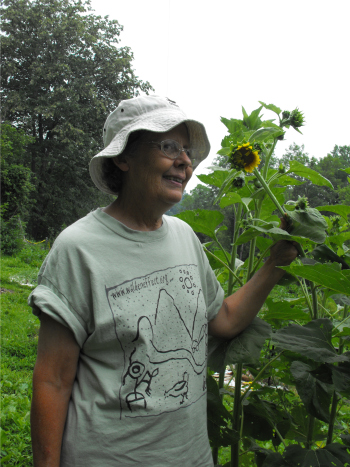 As
you can see in this photo of my mom, we've had our Walden Effect
t-shirts for two solid weeks. I've been holding out on you
because I can't seem to figure out whether we'll be able to send the
t-shirts for a couple of dollars as first class mail or if we have to
pay $5 for priority mail. I finally decided to just let the first
few customers buy them at the cheap price ($10), and if it costs more
to mail the shirts, we'll raise the price later. So buy them
while they're hot!
Here are some quick
stats so you'll see whether our t-shirt is right up your alley:
- Color is "serene green" --- as pictured. I chose the color
because it's light enough to work in outside in the sun, but earthy
enough that those pesky weeding stains will be less visible.
- T-shirt is "2000 Gildan Ultra Cotton", which is 100% cotton, unisex, 6.1 oz.
- Printing is on the front in black and gray. The image is
based on a petroglyph, tweaked to suit our permaculture farm. You
can see a more head-on image of the design here.
- Sizes are M, L, XL, and XXL. Be sure to note your size with your order! I decided to merge the slight additional cost for the XXL into the overall price, so all of the t-shirts cost $10 apiece (with free shipping in the U.S.) But I ordered fewer XXL and XL than perhaps I should have --- if that's your size, you might want to buy now. (If you're medium or large, you can probably wait a while.)
I hope you'll enjoy our
t-shirts and then email me an image of your Walden
Effect style in your own garden. I'd love to post a collage of
all of our loyal readers on their home turf. (If you hate the
design, though, don't feel in any way obligated to buy one.)

In searching for more low
budget do it yourself cooling options I came upon this cooling
tower design.
It seems like one of the more
expensive solutions out there, but might end up saving money in the
long run. The tower should be at least 6 feet square, 20 to 30 feet
tall with as much insulation as you can muster.
I wonder if this concept
could be scaled down for just one room instead of an entire house?
Image credit goes to the thefarm.org which has a well written article
on this method of sustainable cooling. They've also got a good section
on
permaculture in Tennessee.
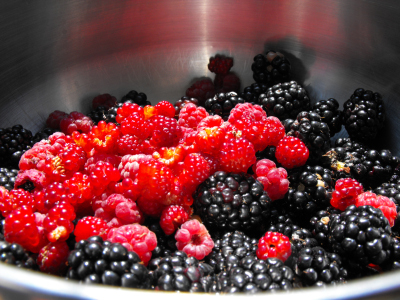 When
I was a kid, we never cultivated brambles (blackberries and
raspberries.) Instead, we knew spots where big patches grew wild,
and we'd go on a pilgrimage to pick by the side of a country
road. With such good wild berry patches, why grow your own?
Lately, I've decided
that cultivated brambles do have definite
advantages. The large cultivated berries are quick and easy to
pick, and in many cases taste as good or better than the wild
berries. You can grow thornless varieties (particularly of
blackberries) to cut down on the scratch factor and everbearing
varieties (particularly of red raspberries) that extend the bramble
season from early summer through the killing frost. If you find
varieties well suited to your soil and climate, you can also expect
much higher production out of cultivated brambles than out of wild
canes.
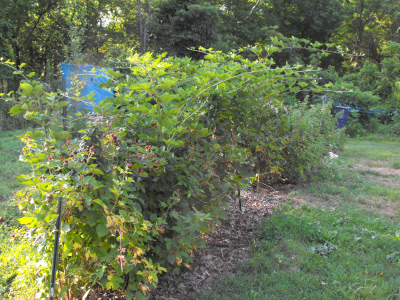 Although cultivated blackberries
and raspberries can be pricey, the frugal homesteader quickly learns
that she only needs to buy one plant of each variety. If the
brambles like your garden, they'll grow so fast that you'll be overrun
with offshoots to give away by the end of the second year. (But
do be prepared to
run through a few varieties before you find one well
suited to your garden.)
The only real
disadvantage I've found with cultivated brambles is that they take up a
good deal of space. On the other hand, they tend to grow well in
awful soil that wouldn't support anything else, and if you prune them
ruthlessly (and mow up any shoots that wander out of their row), you
can definitely keep brambles under control. Our patch of
blackberries and raspberries is the easiest and most productive part of
our fruit garden so far.

This is the petroglyph we
based our Walden
Effect T-shirt on.
Petroglyphs are rock carvings found all
around the world dating back as far as 12 thousand years.
This one seemed to be trying to
transmit some sort of message which I'm still trying to decipher.
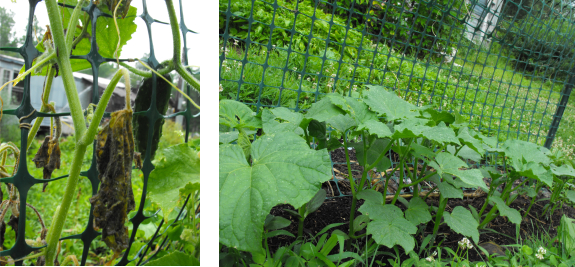
This year, I
decided I was going to wean us off Bt even if it meant a
squashless season. Maybe it's a fluke, but we've actually had a
much better cucurbit year than ever before. My new secret is
succession planting.
Notice how the cucumber
vine on the left is starting to wither up? This time last year I
would have been pulling out my hair, but now I simply shrug my
shoulders and look at the bed of three week old cucumber plants nearly
ready to bloom. I plan to seed a third bed of cucumbers this week
so that we'll have a final glut of cucumbers around the end of August.
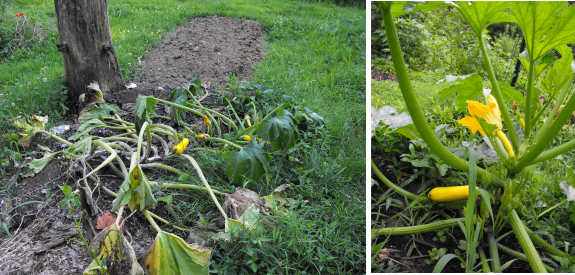
I did even better with
the summer squash. Our four spring plants gave us nearly two
gallons of fruits to go in the freezer (with who knows how many eaten
and uncounted), but now the squash have collapsed into a mass of vine
borers, squash bugs, and disease. No worries --- check out our
month-old youngsters who just gave us their first fruits. Again,
I've got more squash on my succession-planting list for this week to
take over when our second planting bites the dust.
To be fair, succession
planting isn't my only innovation this year. I'm growing a different variety
of cucumber (Diamant)
and of summer squash (Butterstick Hybrid.) I also gave our
cucurbits quite a bit of extra compost so that they'd grow quickly and
give us produce before disease and pests struck. And the weather
has been perfect --- droughty weather with us irrigating
regularly. Still, I think succession planting has been key in
this year's success, and I suggest giving it a try before spraying Bt.

I got this scar today by not obeying the first rule of the Hitch
Hikers Guide to chickens which is to always have a clean towel
handy.
This round of chicken
catching was twice as difficult due to their increased size and speed.
One of the more aggresive
roosters jumped up and karate chopped me during my first attempt.
Once I took a moment to catch my breath it became obvious where I went
wrong. No towel.
A good sized towel can act as
a shield/net when you're going up against a coop full of roosters.
Once I developed my towel
technique it started to feel similar to what you see during a bull
fight, minus the sword and dangerous horns, but those chicken claws are
nothing to sneeze at.
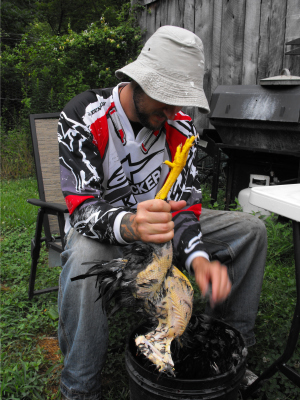 In
my opinion, chicken butchering is not something you want to learn out
of a book. We acquired the skill by helping out at a
couple of different chicken-processing days on friends' farms, picking
up lots of hands on information that we never would have found in
print. So when we read on Everett's blog that he'd had a hard time
with poultry processing on his new farm, we invited him to our next
kill day.
We thoroughly enjoyed
meeting one of our long-time readers in person, and hope that Everett
got something out the experience too. He certainly sped the
processing along, not only with his hands but with his fascinating
tales of his business endeavors (beginning with selling gum in grade
school, progressing through writing about surfing in Australia, and
culminating with his current SEO skills.)
We feel very lucky that
Everett ended up settling only two hours away, and we're looking
forward to meeting his wife. Maybe next time, Missy will come
along to paint our fence...um...er...kill our chickens.
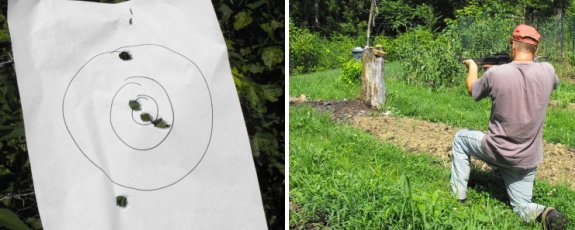
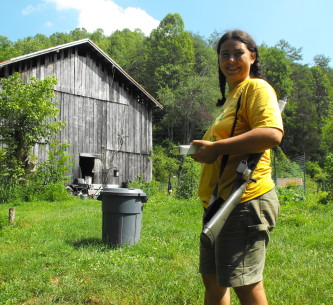
When Anna and I target practice with the Highpoint
rifle we usually take turns shooting 4 shots each and then check
the results.
There's room for improvement,
but we're getting better.
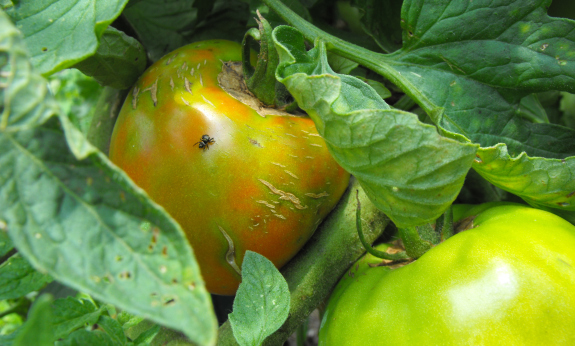
I've had my eye on our
oldest tomato plant for weeks. (This is
the one that volunteered in our lemon tree's pot this winter and which
I set out in the garden on April 21, babying
through cold spells.)
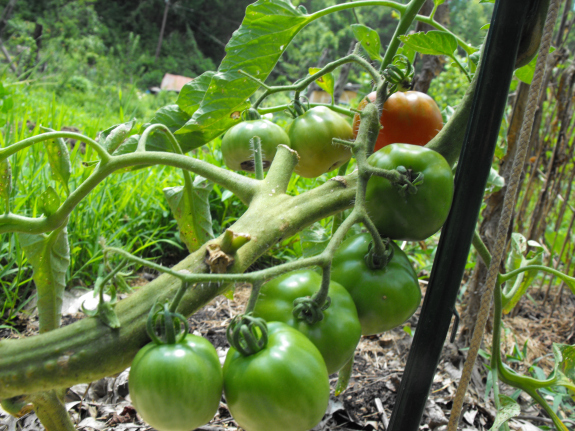
The plant swelled up huge fruits, then
kept swelling more and more fruits, none of which changed color.
Last week, I saw the tiniest hint of red on the oldest fruit, and
crossed my fingers. But I was looking in entirely the wrong spot
for our first tomato.
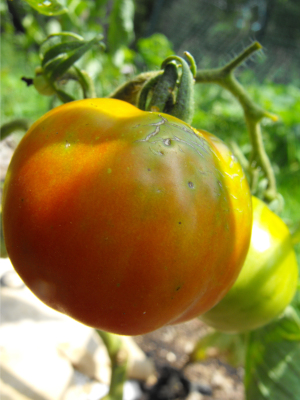 Wednesday
morning, I caught a glimpse of
orange from the tomato bed on the opposite side of the naughty
butternuts. I
peered closer and saw a fruit nearly ripe!
A few years ago when we
splurged on seeds for several heirloom
tomatoes, I picked out Stupice as a very cold-tolerant and early
variety. Sure enough, it looks like the Stupice tomato will
probably be the first one on our plate, perhaps by the end of the week.
To be fair, though, this
mini-experiment doesn't prove that tomatoes started in a cold frame and
set out at the frost free date ripen just as quickly as those started
indoors and transplanted out three weeks earlier. I have
absolutely no clue what variety my volunteer belongs to, and I suspect
it might have been the seed of a storebought tomato that made it into
our neighbor's compost and thus to us. At this point, though, I'm
at the who-cares stage --- as long as I get a sun-ripened tomato
shortly, experiments will fly out of my head.

One way to improve shooting
accuracy is with a
targeting laser.
This one can be switched from
red to green depending on lighting conditions.
Stay tuned for a full report
once we get it installed and run it around the block.
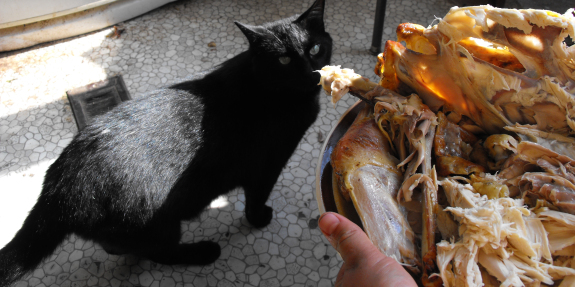
Although I'm a vegetable
conneisseur, I don't have enough experience to tell the difference
between mediocre meat and awesome meat. This is where Huckleberry
comes in handy.
When I take a piece of
meat out of the supermarket wrapper, Huckleberry naps on the
couch. I can even open a can of tuna, and our spoiled cat will
barely twitch his nose. But when I bring in freshly slaughtered
chickens, he comes running to the kitchen where he meows (in vain) for
a treat.
After its two
day grace period, I
roasted up one of Tuesday's chickens yesterday and Huckleberry was
suddenly ready to help out with anything, no, really, anything. Meow! (Yes, this time I did
give him a tidbit of meat to nibble on.)
To my untrained taste
buds, the 16 week old Dark Cornish roosters are less flavorful
than the 12 week old roosters, falling on the taste gradient somewhere
between a storebought, organic, uncooked chicken and a storebought
rotisserie chicken. But to Huckleberry's nose (and mouth), our
homegrown chickens are ten times better than either. I suspect
Huckleberry is sniffing out the superior nutrition, which makes me even
more inclined to keep experimenting with a good way to raise our own
meat.
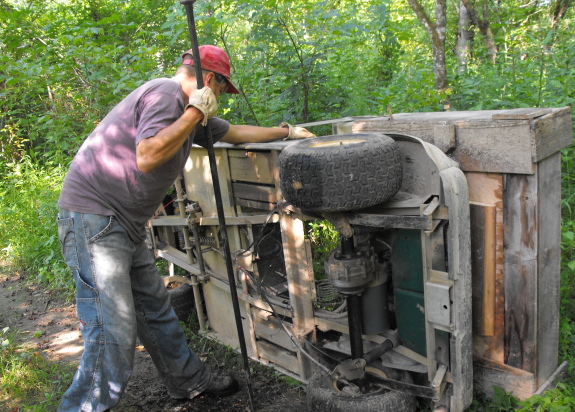
The golf cart stopped going last week and I
finally got a chance to start the troubleshooting process.
We've been running it pretty
hard lately on some rough ground, and my first thought was to take the
batteries out so I could flip it on its side to see if anything had
gotten damaged.
Everything looked fine, and
the batteries measure a full charge. It could be the solenoid, or a
problem with one of the switches. The next step will be to seek some
professional advice from the guy we took it to last year.
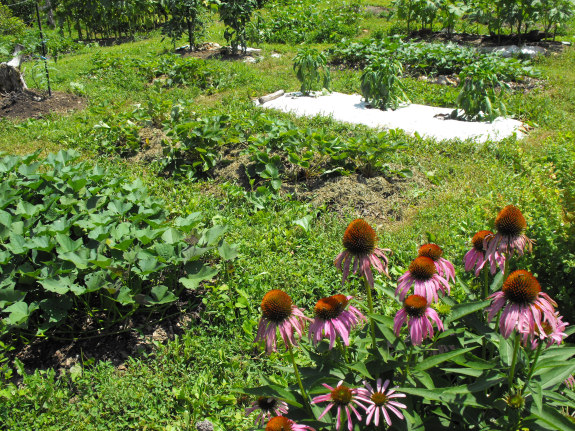
I like to pretend that
our garden looks like the image above --- well-weeded beds separated by
carefully mown aisles. But at this time
of year, a lot of it actually looks like this picture:
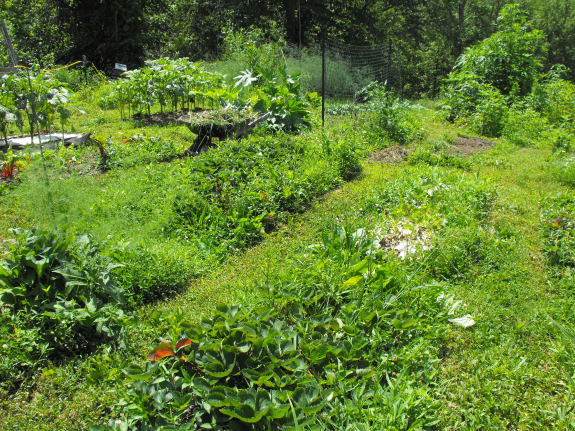
Yes, our garden is full
of weeds. We're slowly developing a mulching technique, but this year is
a bit of an experimental year, so we haven't mulched nearly as much as
I would have liked. Instead, I weed the garden constantly,
rotating through so that each area is weeded at least once a month.
Or at least that's the
plan, which I manage to achieve in the spring. By the height of
summer, though, my rotation extends out to nearly two months, which is
how long it's been since the portion of the garden in the second photo
was weeded. Luckily, our vegetables have grown tall in that span
of time, so they don't seem to have been stunted by their weedy
neighbors.
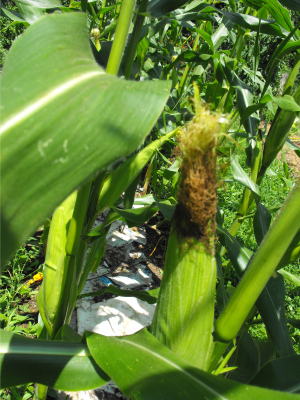
I've been reading Corn
Among the Indians of the Upper Missouri (which may become a
lunchtime series if I ever get my act together), and at first I was
stunned by the traditional cultivation method the Native Americans
employed --- plant and weed like mad until the entire garden has been
weeded twice. Then go off to hunt buffalo for the rest of the
summer, returning just in time to harvest your corn, beans, squash, and
sunflowers. But the truth is that if you weed carefully when your
vegetables are in the seedling stage, most veggies can quickly outstrip
the weeds and form a leaf canopy that excludes competitors. Sure,
we might get a slightly higher yield if I weeded more obsessively, but
there are only so many hours in the day.
The primary point of
this post is --- don't feel bad if your garden is weedy! We've
passed the point of no return (July 4), so the worst that weeds can do
to your garden now is seed a new crop of weeds for next year. If
you do your best to pull the weeds out before they fruit, I think it's
quite all right to focus on the harvest.
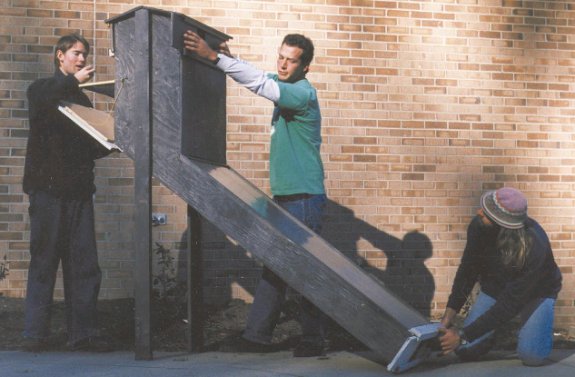
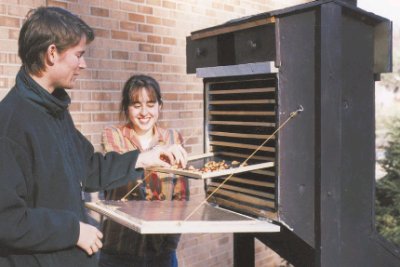
This seems to be the best
do it yourself solar dryer design out there.
You can thank the good folks
of Appalachian State University for the design and testing.
We plan on building one in
anticipation of our upcoming tomato harvest.
ASU has put this thing through many testing situations with documented
data available as a PDF download.
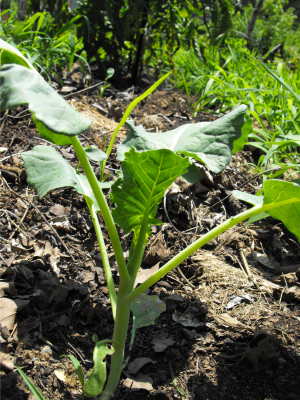 This
spring, I decided that broccoli
is our most productive cool season crop per unit space, so I decreased our planned
pea plantings and increased our broccoli plantings for the fall.
The broccoli came up quite well, although I did have to transplant a
few seedlings that were too close together, filling in gaps where dry
soil had prevented any broccoli from germinating.
Since we gorged on
broccoli this spring and still managed to put away two gallons of
the florets, it feels a bit decadent to have planted half again as many
broccoli beds for the fall. However, the later in the year we can
eat fresh produce, the healthier and happier we'll be. I also
like to keep the garden full and productive, and I know that my usual
recipients of excess garden produce all love broccoli.
As a side note --- the
freezer is nearly half full, and we're also halfway to our winter
goal. We've put away 9 gallons of vegetables as well as a good
deal of pesto and homegrown chicken. I can tell we won't be
reduced to buying produce from the grocery store in March of 2011.

I first discovered
permaculture pioneer Sepp Holzer when I posted about do it
yourself aquaponics back
in the spring.
The guy from Richsoil.com got
a chance to spend 12 days with Sepp and he did a great job of
documenting his visit with pictures, videos, and detailed
descriptions of the Sepp Holzer style of permaculture.
Richsoil.com also has an in
depth section on his experiences and
observations with raising chickens that I found informative and
useful.
 Mark and I are in the
research stages of putting together a very small solar backup for use
during power
outages, and I'm
hoping that some of the more technical folks among you can give us the
benefit of your wisdom. During three power outages over the last
few months, we've figured out that running the generator for an hour a day keeps the
farm ticking along, but that we miss two major creature comforts ---
lights on winter evenings and more steady access to the internet.
Luckily, these gadgets
don't draw much juice --- about 25 watts apiece for our laptops,
another 23 watts for the router, and 13 watts for a CFL. We
figure that if we increase efficiency by buying a car charger for the
laptops (deleting the inefficiencies from converting DC to AC to DC)
and buy a couple of DC LED lights, we could coast along on very little
electricity, allowing us to work and play online for perhaps 3 hours
per day on a solar system costing less than $300.
 A
simple solar system that doesn't seem to require much technical
know-how consists of a 600 watt Duracell Power Pack (basically, a 12
volt, 28 amp-hour, AGM battery; a controller; and a 600 watt inverter
combined into one unit, costing roughly $125) along with a 25 to 30
watt solar panel (roughly $150.) Many solar panels come with the
right connectors, so the system would be basically plug and play.
The flaw I see in the
combo above is that the solar panel might not fully charge the battery
in a single day of sun --- some websites say the system will charge up
in 5 to 7 hours, but other sites think the system will take 16 to 18
hours to charge. We can't just add a larger solar panel for
quicker charging since the manufacturer notes that you can't hook a
panel larger than 30 watts directly to the power pack without adding an
external charge controller.
So here are my questions:
- Is it okay to shop around and find the cheapest 30 watt solar
panel, or are cheaper solar panels going to burn out quickly? Are
there solar panel categories I should be aware of in the low end,
consumer market?
- We're willing to pay a bit extra for plug and play (and
portability), but don't want to be seriously ripped off. Would it
be smarter to do more research and buy the battery, inverter, and
charge controller separately?
- If we bought an external charge controller and a 50 watt solar panel, would the larger panel charge our power pack faster? My very vague understanding makes me think it wouldn't, that the charge controller would just filter out the extra power from the larger solar panel since it's more than the battery can handle.
- One website notes that this system would give us around 160 watt-hours per day. I'm not actually sure where people came up with that figure --- does it make sense? Does that mean that I could run a single 25 watt laptop for 6 hours?
Basically, these
questions all come down to one major one --- is this a bad idea?
We like the modular nature of the system, especially since Mark thinks
we could use the power pack with pedal power, a bit like this article describes. But we
don't want to spend a few hundred bucks on a dud.
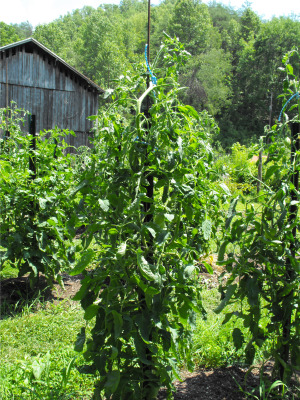 With
tomato season officially underway, we're
going to have to make some hard
decisions. Like --- now that our happy plants reach over my head,
do I keep tying them up and harvest with a
stepladder or do I let the plants hang
down?
Or, how about this ---
do we plan ahead for a future blight year and can some tomatoes
as well as freezing them?
And --- what do I do
with that first roma when it doesn't have enough sisters to make into
sauce?
This week's lunchtime
series doesn't actually answer any of those
questions, but it does explore some of the cosmetic problems you might
run into while wandering through your tomato patch. I mentioned
in an earlier comment that orange
tomatoes are caused by high heat, and the truth is that
tomatoes will complain about lots of environmental variations in
several different ways.
I subscribe to the "eat
it or give it to the chickens" school of
thought, so discussing vegetable cosmetics is out of the
ordinary. But I recently realized that beginning gardeners might
not know the difference between pissy tomato plants upset by two days
without adequate water and blighted tomatoes that are going to wipe out
your entire tomato garden. If that describes you, stay tuned for
a look at all of the tomato problems that aren't contagious and can simply be
cut out of the ripe fruit.
| This post is part of our Minor Tomato Ailments lunchtime series.
Read all of the entries: |
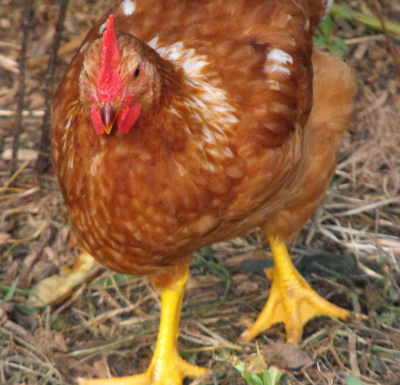
The new chick
continues to grow and is no longer attached to the mother hen.
I guess this growing up thing
happened a week or so ago.
He's an outsider to the flock
and flies by his own rules.
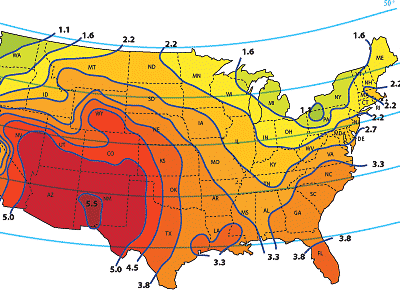 Thanks
to everyone's great advice, I'm starting to narrow down our choices for
our power
outage solar backup system. First of all, Joey
and Roland (and the web) helped me figure out what size system I should
be looking for. I added up two hours run time on our laptops,
router, and two lights and came up with 150 watt-hours per day.
Using Joey's math, or just dividing by the 3 peak sun hours our area is
rated to receive in the dead of winter (from the map above), we would
need a 50 watt solar panel to achieve our goal. Since it's bad
business to discharge your batteries more than halfway, we would need
to buy two Duracell Power Packs and two 25 watt panels to reach this
level --- total cost roughly $450.
For comparison's sake, I
followed Daddy's advice and gave Backwoods Solar a call. The salesman
there was happy to walk me through my choices, even though he clearly
wasn't going to make much money off me. Here are the components
and prices he quoted me for a 50 watt system:
- 50 watt solar panel - $275
- charge controller - $33
- 400 watt inverter - $45
- 2 RV or marine batteries (bought locally) - $180
 He
also mentioned buying a tilt mount ($68), which would let us adjust the
panel's orientation seasonally for slightly higher output.
Assuming Mark could make our tilt mount, but that we would have to buy
some connectors not on the list, the total would come to around
$600. On the other hand, I suspect I could shave around $100 off
the cost by hunting down the components elsewhere on the web.
In other words, the plug
and play version and the real DIY version have a comparable price
tag. But do they have comparable longevity? I asked the
Backwoods Solar salesman what he thought of using a 600 watt Duracell
Power Pack as our battery, controller, and inverter. "That would
probably work," he said (and I paraphrase), "if you're just going to
use it very ocassionally as a backup. However, if you'd like to
take the laptop and lighting loads permanently off the grid and run
your solar system daily, you would be better off with a different
battery."
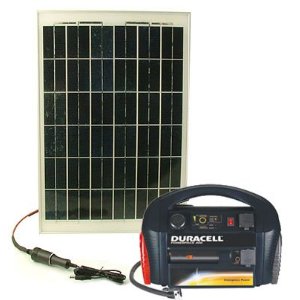 Now, I trust that he knows
what he's talking about, but I don't quite understand why he would be
right. My research shows that AGM batteries have a rated lifespan
of 4 to 7 years while marine batteries have a lifespan of 1 to 6
years. In addition AGM batteries are sealed, which means no need
for us to fuss over them, worry about fumes, or freak out when I
accidentally knock them over. Finally, they can be shipped, so we
can shop around and buy the ones at rock bottom prices on Ebay.
As far as I understand it, the main disadvantage of an AGM battery is
price, but the cost of the Duracell Power Pack seems to be roughly
comparable to a marine battery when you consider that the former
includes a charge controller and inverterter.
So, I'm opening up to
questions and answers again. Can anyone think of a reason that
the Duracell Power Pack would have less longevity than a different
system? Currently, I'm leaning toward trying out one 25 watt plug
and play system, doubling it later if all goes well.
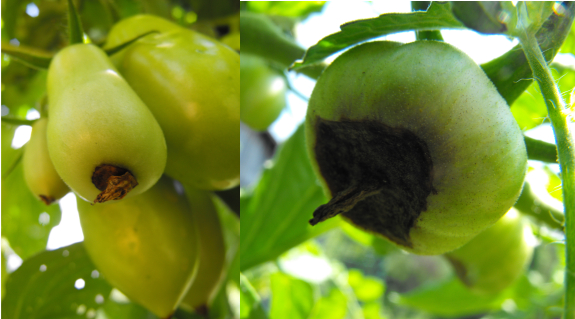
If some of your tomatoes
have a black spot on the bottom, chances are
they've come down with blossom end rot. This condition isn't
something to be overly concerned about since it's not caused by a
virus, bacterium, or fungus and won't travel beyond the fruit in
question.
Technically, blossom end
rot is caused by lack of calcium, but that
doesn't necessarily mean your soil is low on the essential
micronutrient. A variety of other
factors can reduce your plants'
ability to take up calcium, including drought, damage to the plant's
root system, excessive heat, or even rapid plant growth.
I'm not as careful as I
could be about making sure my tomatoes always
have an even supply of water, so I often find a fruit here and there
that has succumbed to blossom end rot. The affected plants are
most common at the beginning of the season, and are more prevalent in
certain varieties than in others. If blossom end rot seemed to be
excessively widespread in your garden, you should mulch your tomatoes
to maintain an even supply of
water in the soil and should take care not to overfertilize.
Otherwise, just cut out the spot and enjoy your homegrown tomatoes.
| This post is part of our Minor Tomato Ailments lunchtime series.
Read all of the entries: |

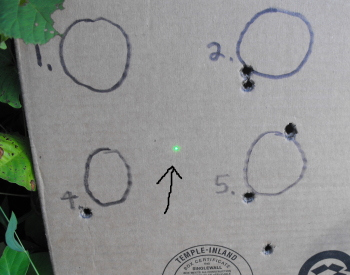
The new NcSTAR
red/green laser is now
mounted and ready for action.
It was easy to move the laser
dot to a desired location with just 2 adjustment screws.
The hard part will be
learning how to work within the limitations of the laser. I can already
tell you need to be lined up pretty straight otherwise the laser tends
to drift the further you tilt the angle up or down. There's also an 8mm
difference in the point of impact at 20 yards when you switch from
green to red, with the difference increasing as you increase the
distance. I think that can be solved by just using the green all the
time.
With a little practice I
think this laser aid can help to improve our accuracy under certain
conditions, but I think we should also be ready to take a shot without
the laser when the angle needs to be tilted beyond its range of
effective use.
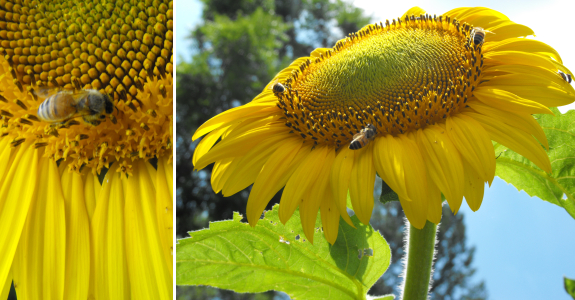
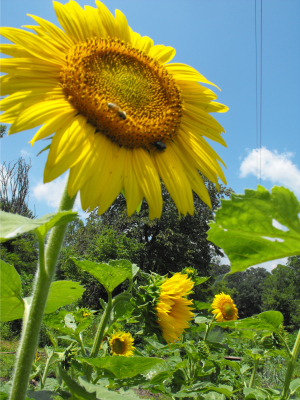 I'm
not sure why no one talks about planting sunflowers for their honeybees
--- our bees adore them. We put in two beds of oilseed sunflowers
so that we could experiment with pressing
our own oil this
fall, but the flowers have already paid for themselves by feeding local
pollinators.
During the day, it's not
at all unusual to catch several honeybees on
the same flower head, along with lots of smaller pollinators. The
action doesn't even stop when night falls --- yesterday, I snuck out at
dusk and found a moth on every flower, each dipping its proboscis deep
into the tiny florets opening around the circumference of the sunflower
head.
On a semi-related note,
if you're interested in native
pollinators and have
a bit of time on your hands, you might want to check out the Great
Sunflower Project.
Just plant a Lemon Queen Sunflower seed, watch the pollinators flock to
your flower for 15 minutes, and input your data to help scientists
figure out how pollinator populations are doing in your area. I
suspect this project would be especially good for science-oriented kids.
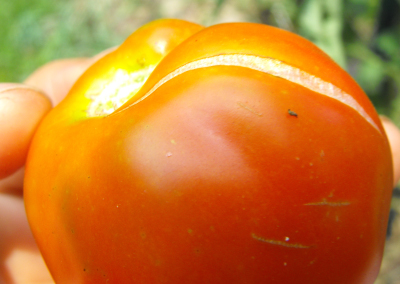 Cracking
is probably the most common tomato blemish out there. Like
blossom end rot, split tomatoes are often
the result of improper
watering, but the symptoms usually show up when the fruit is closer to
maturity.
At a certain point in
the tomato ripening process, your fruit has
achieved its full size and it toughens up its formerly stretchable
skin. If a heavy
rain soaks the soil after the tomato epidermis hardens, the tomato can
swell
up further and crack its skin. Alternatively, cracks sometimes
occur when hot days are followed by cold nights, causing the skin to
expand and then contract quickly.
My advice is about the
same as it was for blossom end rot --- mulch if you're worried --- but
I tend
to think that cracking is just an inevitable fact of life. I cut
out hardened cracks and just eat soft cracks. Life's too
short to throw out a delicious tomato just because it has cosmetic
damage!
| This post is part of our Minor Tomato Ailments lunchtime series.
Read all of the entries: |
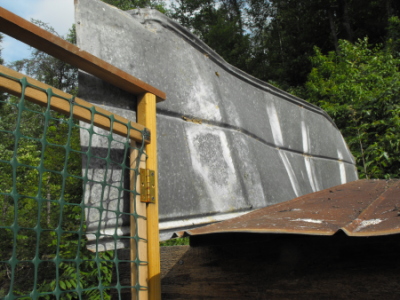 The
problem with chickens
roosting on the roof at
night is that the roof gets fertilized and the chickens avoid the small
coop where a guy like me has a fighting
chance at catching one for dinner the next morning.
Maybe this sheet of tin will
keep them off tonight?
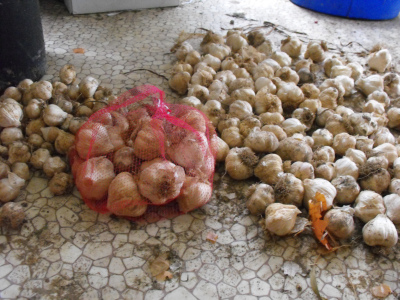 Our
garlic has had a good month plus of drying
time hanging under the eaves, so I decided it was time to clean it
up and move it inside for storage. I took down our strands of
garlic, rubbed the dirt out of the roots, and trimmed both roots and
leaves back. Next step was sorting --- I like to pull out the
very biggest heads for planting, and at the same time I set aside the
tiny or damaged heads for immediate eating. We've saved lots of
mesh bags from buying oranges and onions, so I popped each variety into
its own bag and put the whole mess on our scales.
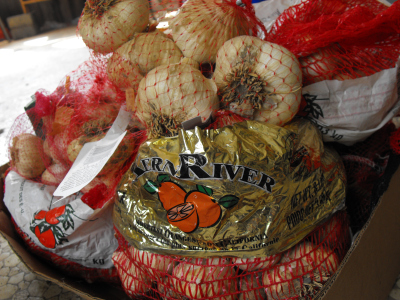 "How
many pounds of garlic do you think we grew this year?" I asked Mark
minutes later, wanting to brag.
"Six pounds?" was his
less than ambitious reply.
"No!" I hooted.
"25.5, plus whatever we've eaten in the last month." Then, as the
wheels turned in my head, I added "That's half a pound of garlic per
week. Do you think we grew too much?"
Mark got a puzzled look
on his face --- clearly, the idea of too much garlic had never occurred
to him. "Of course not," he answered. "You'd better get
cooking!" Garlic green beans for supper it was.
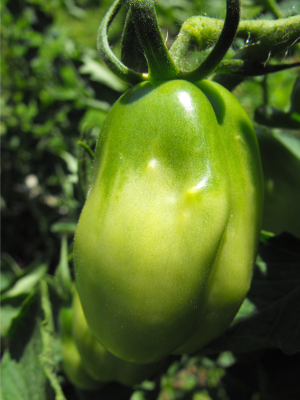 Green
shoulders are the most purely cosmetic problem I'll discuss. I
have certain tomato varieties --- notably this yellow roma and our
pear-shaped "black" tomato --- that ripen the bottom two
thirds of the fruit quickly, but leave the top third green. My
solution, as usual, is to cut off the tops
and give them to the chickens, but I was interested to discover there's
a reason for the green shoulders.
Green shoulders form
when tomatoes deal with high temperatures and
strong sunlight during ripening. The light and heat prompt the
fruits to retain
chlorophyll around the stem area, and the "shoulders" often become hard
and leathery.
Unless you've pruned
excessively and removed leaves that would normally
shade your fruits, you haven't done anything to cause green
shoulders. And there's not much you can do to fix the "problem"
either, short of ripening your tomatoes indoors or choosing a different
variety. This is definitely one of those times I'm glad not to be
a market gardener whose customers demand blemish-free fruit.
| This post is part of our Minor Tomato Ailments lunchtime series.
Read all of the entries: |
 Yesterday's
roof
roosting prevention tin
worked well to persuade the remaining pasture flock to sleep in the
coop last night.
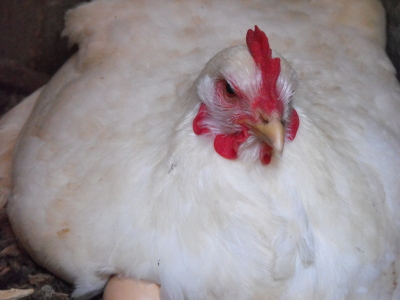
Now the mother hen and
chick have the whole
place to themselves and we have enough farm raised chicken to last most
of the winter.
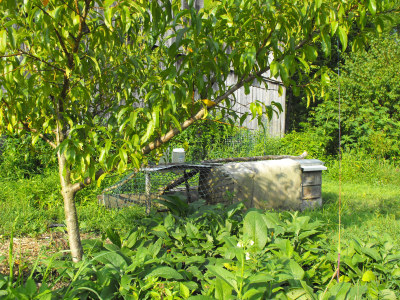 We
killed the rest of our broilers this week, and while we were at it we
deleted our three Plymouth
Rocks for failing to
meet their egg quota. The farm feels very quiet without them.
We've learned a lot from
this year's broiler experiment, mostly things we want to change for
next time. Our chickens were tastiest and cheapest
per pound (and least
wiley) when we slaughtered them at
12 weeks, so we'll be killing broilers young in the future.
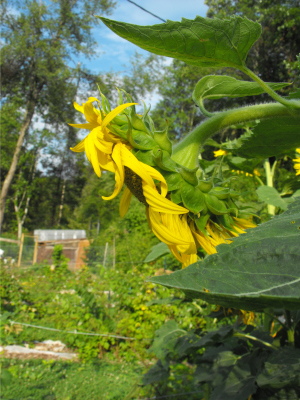 We
also plan to raise two or three smaller batches next time rather than
one large one. After spending two mornings this week covered in
blood, my gutting skills have improved, but I feel like I also became a
bit numb to the process. We strongly believe that if we take a
life, we should respect the animal and be entirely in the present,
which means killing no more than eight chickens a day and killing them
no more often than once a month.
Of course, that means we
have to start hatching out our own chicks. We're saving this
year's Rhode Island Red
chick and will breed him with our doughtiest Golden Comets next spring. A hybrid
of a hybrid is a strange direction to go for chicken breeding, I know,
but our three oldest Golden Comets have proven to me that their
genetics are exceptionally sound. At four years old, they still
lay nearly an egg a day apiece, and they're the only ones I trust to
peck up a cupful of Japanese Beetles before the insects disperse back
into the garden. If raised by a mama hen rather than spending
their early childhood stuck in a brooder, I have high hopes that these
chicks could be prime foragers.
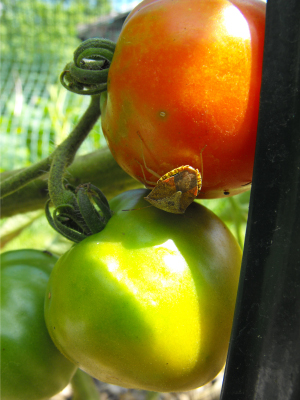 While
researching tomato blemishes, I stumbled across a piece of data that
seems unbelievable to me --- vine ripened tomatoes taste no better than
those picked at the first hint of red and ripened indoors. Chuck
Marr, the horticulture program leader at Kansas
State University Research and Extension, says:
Marr says that you can
avoid most of the cosmetic problems I discussed in this lunchtime
series by picking your tomatoes early and ripening them in your kitchen
out of direct sunlight. The
blogger who tipped me off to this process
notes that storebought tomatoes taste awful not because they were
picked too soon, but because they are a variety bred to be tough and
easily transportable.
I think it's time for a
taste test! I've picked a couple of
blushing tomatoes to ripen in the kitchen, and will report on our taste
test in a week or so. I hope some of our loyal readers will try
it at home and report back too.
| This post is part of our Minor Tomato Ailments lunchtime series.
Read all of the entries: |
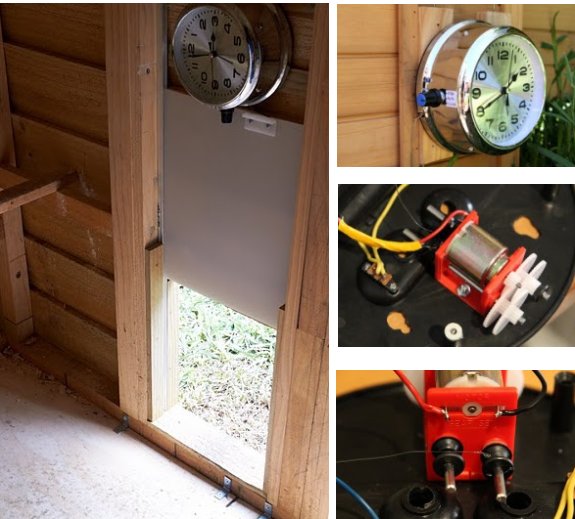
Mark Stead from Melbourne
Australia has created a clever, low
budget, automatic chicken coop door opener that takes advantage of a cheap
alarm clock.
I estimate he's spent around
45 bucks, which is not bad compared to commercial units over twice that.
What makes this design cost
less is the fact that you still have to manually close the door at
night. His instructions are clear with a generous helping of images to
guide you.
I'm thinking this alarm clock
opener could be modified to also close at night by incorporating the Chris
and Keri limit switch method.

Edited to add:
After years of research, Mark eventually settled on this automatic chicken door.
You can see
a summary of the best
chicken door alternatives and why he chose this version here.
If you're planning on
automating your coop, don't forget to pick up one of our chicken waterers. They never spill or
fill with poop, and if done right, can only need filling every few days
or weeks!
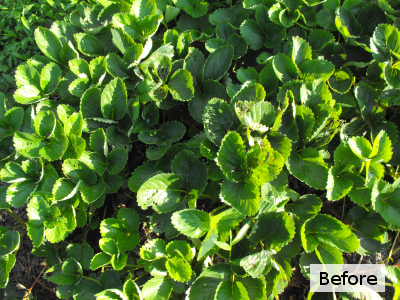 When
I first got strawberries, I thought that since they were perennials, I
could just eat fruits every year and mostly ignore the plants. So
I just picked off runners now and then, mulched, and weeded.
Along came the plants' second year of bearing, and the berries were not
as tasty as I remembered. What happened?
The problem turned out
to be multifaceted. I suspect that heavy rains last spring washed
away some of the soluble minerals, resulting in a micronutrient
deficiency.
But it didn't help that I'd let the beds become matted masses of plants
and hadn't given the berries a good top-dressing of compost to make up
for their hard work the year before.
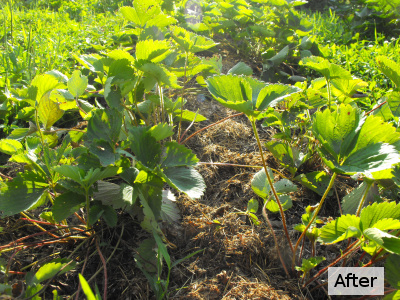 I've
now tentatively settled on a three year cycle for strawberries.
At this time of year, I pull out any beds that are three years old or
older, then renovate the one and two year old beds. Renovation
consists of ripping up any runners I've let set between the parent
plants and breaking off new runners starting to form. Add a
little manure and some grass clippings, and the plants are ready to
soak up the rays in preparation for next spring's harvest.
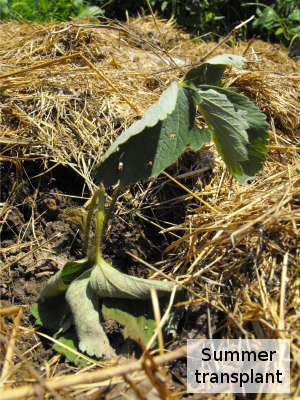 While
I'm renovating the middle-aged beds, I take a little care to dig up the
best-looking runners and transplant them into new beds.
Transplanting strawberries in the heat of summer is a bit dicey, but
the payoff is large --- you gain enough growth that you can eat plenty
of berries from the beds next spring rather than picking off all the
blooms and waiting until the second spring to taste the crop.
I've found that if I dig the roots up carefully enough, my transplants
will wilt in the hot sun but will be putting up new leaves within a
week.
My hope is that this
three year cycle will keep me sated with my favorite fruit for years to
come. Only time will tell if this method needs more work, but
strawberry yields this spring were heavy and delicious. The proof
is in the pudding --- strawberry shortcake.
The British use the
word "pudding" to mean "dessert", in case this isn't clear.
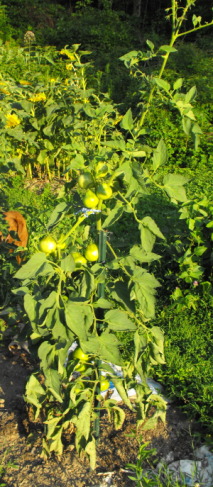
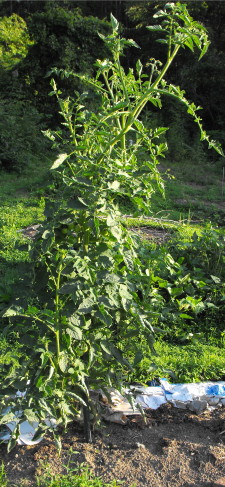
Our tomato
support structure is very different from last year.
We pruned for tall growth
instead of bushing out, which seems to be working.
They've grown past the 5 foot
posts so we started using long sections of rebar to encourage higher
growth.
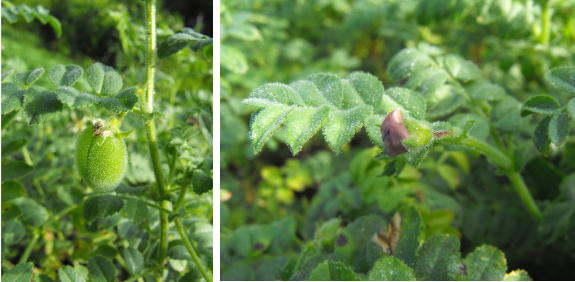
 Remember how I told you that
the deer ate our experimental
beans? It turns out I spoke too soon.
I finally took a close
look at our garbanzos and saw that they were liberally sprinkled with
tiny pink flowers that are swelling into balloon-like fruits.
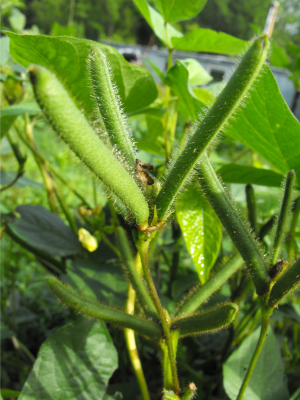
Meanwhile, our urd beans
bounced right back and are now decked out in the fascinating pods to
the left. I assume I should leave both beans on the plant until
they dry out, so I'm just watching them grow at the moment.
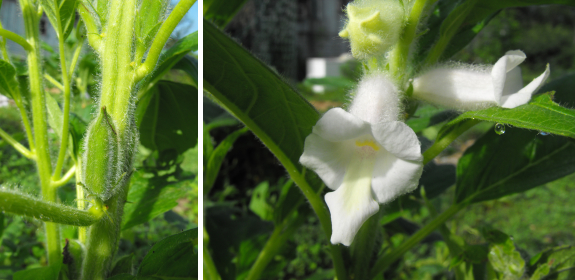
Another experimental
crop also seems to be doing well --- our sesame. Several of the
plants have oddly twisted leaves that I suspect is the result of some
sort of pathogen, but they're blooming and setting pods anyway.
It looks like at least three of this year's experimental crops will be
successful.

We went to see our 2nd movie
of the year today in an attempt to beat the heat.
Inception is a non stop,
intellectual thrill ride that did not disappoint.
It was a little heavy on the
action scenes, but that's Hollywood for you. Christopher Nolan has
created a compelling story with one of the most convoluted plots I've
ever enjoyed.
I'd give it a solid 8.5 out of
10. Compare that to our first movie of the year....Avatar, earning a
rare 10 out of 10, and you get an idea of how I rate films these days.
 I
used to think I had a favorite season, but
recently I've discovered that I just like seasons in general. I
love the way you can start to feel winter losing its grip on the world
by New Year's, when the days get noticeably longer. And now, in
the middle of the dog days of
summer, I cherish
the first inklings of
fall in the air.
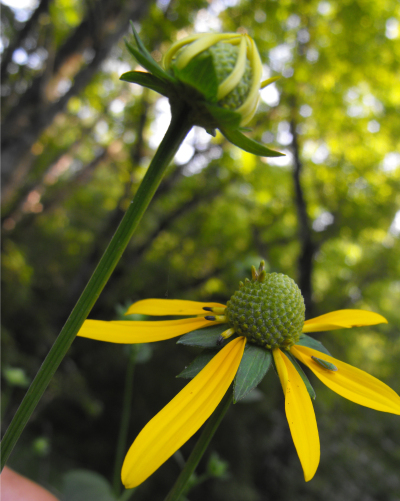
Autumn flowers are slowly opening --- first a shade-tolerant goldenrod,
then this woodland sunflower, then hints of ironweed and Joe Pye
weed. Here and there, a drought-stressed tree loses a brilliantly
colored leaf, and I continue to plant the fall
garden (peas and
turnips
this week.)
This post has no thesis,
except this --- I would be a very bad candidate to retire to Florida.
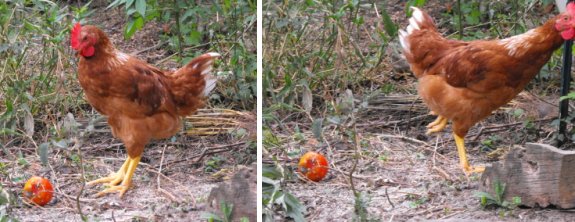
I found this tomato being
munched on by a few Japanese Beetles and thought to myself this is the
day our youngest chicken gets to experience the tastiness
of a tomato.
He seemed to be a bit
perplexed and decided to go ask his mother what he should do.
 Space in
our freezer is suddenly starting to get tight, something that never
happened last year. Pretty soon, I'm going to have to make a
decision --- stop freezing and start giving produce away, turn on one
of our inefficient freezers, or buy another energy
star model.
Such bounty!
I also harvested about
half of our potatoes Monday because I needed the space for fall
peas. The average yield per bed was about 6.5 pounds (from about
1 pound of seed potatoes per bed.) Yukon Golds aren't the most
productive potatoes, but I'm still a bit blown away at the sheer mass
of tubers I grubbed out of the soil. If we had only a tiny bit of
ground and were desperate to feed a family, potatoes would be the way
to go.
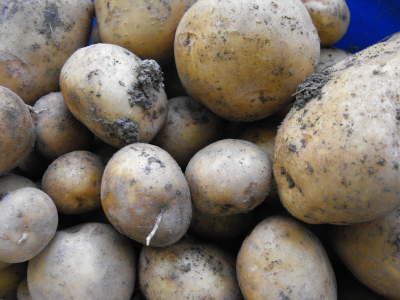
At the moment, our
potatoes are cooling it in our refrigerator's crisper drawer.
Even though we downgraded to a much smaller and more efficient
fridge last year, I still run the fridge about half empty most of
the time. I'm a strong believer in keeping close tabs on
leftovers and eating them within two days, so there's plenty of space
for a few dozen pounds of potatoes. Still, we're going to have to
excavate the refrigerator
root cellar soon and
put it back to work --- I've got three more beds of potatoes to
harvest, and the fall carrots are finally starting to germinate in the
garden.
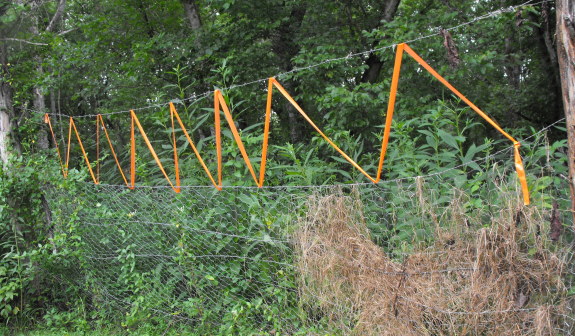
One of the casualties of last
year's big
winter storm was our high fence to keep deer out of the mule garden
in case one of the deer
deterrents fail.
I finally got around to
repairing the damage last week and decided one of the upper gaps was
big enough for a deer to jump through. An experimental solution was to
use some of this orange marking tape to deter any possible breach.
I know a deer could rip right
through this thin plastic ribbon material, but if he or she does the
evidence should be obvious, and then I'd know if this was a failure.
If it does prevent deer from
thinking of jumping, then maybe someone else could use this as an ultra
cheap fencing material that could be installed within a few hours
depending on what type of posts or trees get incorporated.
 Our
blog clearly attracts the rabble --- people like me who open Mother
Earth News and
recoil, muttering, "But it's so mainstream!" If an ordinary
homesteading blog had offered t-shirts for sale, I suspect that people
would have bought t-shirts. But I should have known that if the
Walden Effect tried to sell t-shirts, our readers would instead donate
their own designs.
New
t-shirts
Walden Effect Junkie put
together this awesome image of Naughty Butternuts, and even built us a Zazzle store so that we could sell as
many or as few t-shirts as we wanted without setting aside space in our
miniscule trailer to stockpile inventory. We followed her lead
and made our own Walden Effect store so that you can browse all
of our homesteading goodies in one place.
If there are any other
think-outside-the-box types out there, I'd love it if you emailed
me your own Walden
Effect design. We'll throw our favorites up on the Zazzle store
and donate all of the proceeds to Mark's favorite charity ---
Appalachian Community Fund.
 New giveaway
Meanwhile, I've decided
we're long overdue for a giveaway, and again Walden Effect Junkie came
to the rescue. She told me that the best way to reach more
readers is to get our friends to tell their friends about us. So,
to enter our giveaway, just tell a friend about our blog and then leave
a comment on this post letting me know how many friends you've
told. You can email your friends, tell them in person, leave a
comment on their blog, or recommend that they become our friend on Facebook. You'll be entered
into our contest once for every friend you tell! The contest ends
at midnight on July 31, and one lucky U.S. winner will receive a Walden
Effect welcome pack --- our petroglyph t-shirt, 100 Egyptian onion
top-bulbs, a 3 pack DIY chicken waterer kit, and our microbusiness
ebook. (Visit our store for details.)
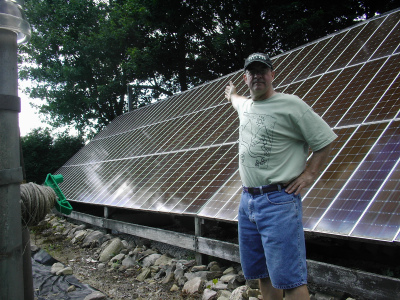
A thousand thanks to
Walden Effect Junkie for her words of wisdom and beautiful
artwork! And thanks to Zimmy who emailed me this great photo of
his petroglyph t-shirt hard at work on his own homestead.
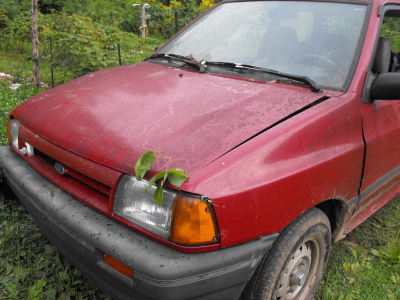
I decided our driveway was in a good enough state of dryness to see if
the parts
Festiva had what it takes to help tow out the golf cart
for some expert repair.
It only got stuck once, which was quickly fixed by modifing the ruts to
fit the bigger wheel base.
I'm pretty sure this is a
once a year opportunity and when the rain kicks back to a more regular
schedule the flood plain will earn its name back. In the meantime it's
nice to have a back up to our much valued golf cart.
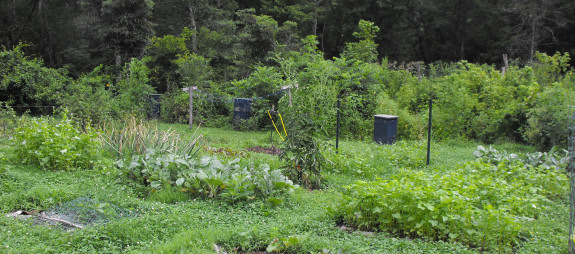
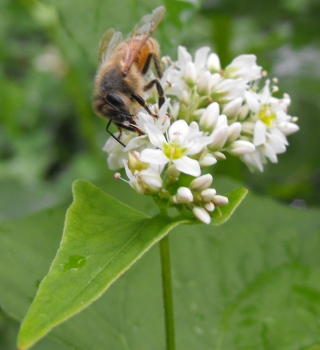 Our
buckwheat
experiment is not
what I would call a success. The best thing
I can say is that our bees did really enjoy the flowers. And the
plants do bloom, as promised, a scant month after planting. But
all of the biomass that was supposed to be ready when the
plants bloomed? Nope, not so much.
Buckwheat doesn't like
heavy clay soil, which is the precise
kind of soil I was asking it to rejuvenate, so I shouldn't blame the
failure entirely on the crop. And, to be fair, a deer came
through for a midnight snack a few weeks ago and clipped the tops off
plants in a couple of beds. Those buckwheat plants never
recovered, and weeds quickly sprouted up to fill in the bare soil.
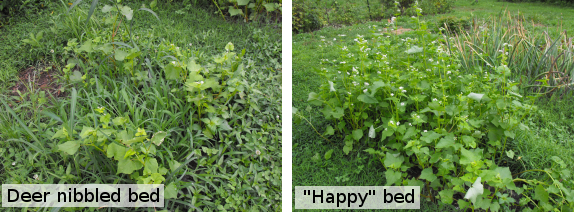
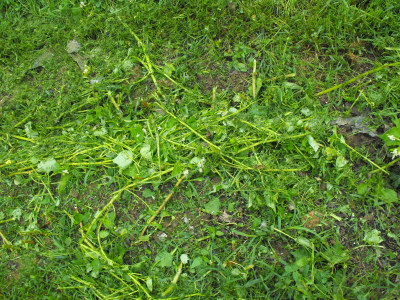 Still,
I would have expected a bit more growth out of the cover crop.
When I mowed down the buckwheat, it seemed like the
succulent stems disintegrated into a mere handful of plant
matter --- and that was in the beds that escaped deer damage. I
may give buckwheat another shot in the loam of the upper garden, but
our troublesome back garden is going to need another cure. Next
try --- hullless
oats.
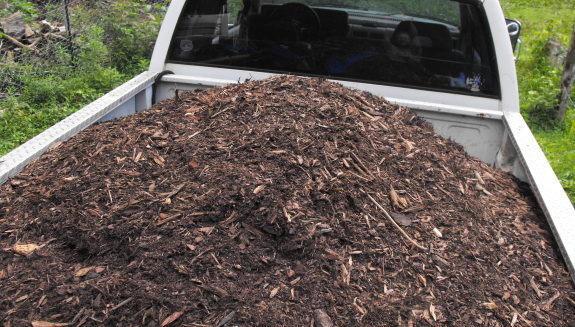
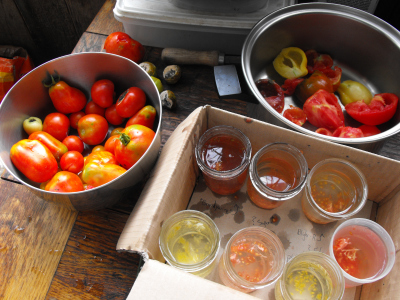
We picked up our 2nd
truckload of mulch for the year today.
This time the guy managed to
fit 3 scoops in the truck, which was a little priceier than the first load, but well worth it when I saw the
look on Anna's face.
 It's
never a good idea to hide things from
your spouse, but I'd been keeping something from Mark. When he
tossed a
half-rotten tomato to the chickens, the truth came spewing out.
"You can't give tomatoes
like that to the chickens," I admonished him.
"There was barely
anything left," my sweet husband
explained. "Just a bite for each
of us."
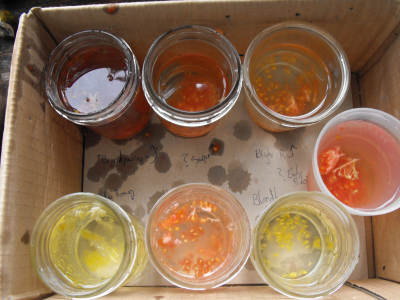 "No,
you don't understand," I said. "I'll cut off bad
spots. Any tomato is precious. You see, the blight has
struck."
I knew that our tomatoes
had a high likelihood of contracting the
blight this year even though I planted them on the far opposite side of
the garden from last year's tomato patch and pruned them
heavily to
promote air movement. Once the blight is in the air, you tend to
see symptoms the next year no matter what you do. The trick is to
be proactive and stay ahead of the disease.
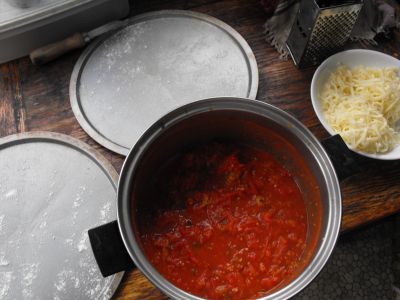 I
could have dusted my tomatoes with copper and prevented
the blight, but this "organic" treatment seems too harsh for my
garden. Instead, I plan to yank out the worst plants and cut off
diseased leaves as soon as we have a day dry enough to make it safe to
work in the tomato patch. Meanwhile, I picked a bowlful of ripe
fruits to save
tomato seeds for next year.
What do you do with a
bowlful of gutless tomatoes? Make pizza
sauce of
course! That pizza I've been craving for the last few
months really hit the spot.
 Once
the parts
Festiva blazed a trail through the now mostly dry flood plain I
decided it was ready for the big truck.
It made it with no problems
once I added a few buckets of gravel in a few key spots saving us hours
of labor compared to hauling with the golf cart.
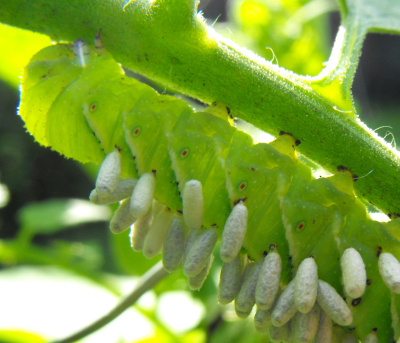 The
tobacco hornworm is easily confused with the closely related tomato
hornworm. Both caterpillars are the larval form of hawk moths,
and both like to nibble on your tomato plants, but the tobacco hornworm
has seven white lines running down each side of its body while the
tomato hornworm instead has eight Vs.
Some gardeners resort to
hand-picking their hornworms, while others
believe that planting marigolds or basil between their tomato plants
keeps the pests at bay. I just ignore the hornworms of both
types. In our diversified environment, parasitic wasps quickly
lay their eggs in each plump hornworm, and the wasp larvae eat the
caterpillar alive from the inside out. By the time these white
cocoons show up on the back of the hornworm, he has long ago stopped
nibbling on my tomatoes, so I am careful to leave hornworms like
this in place to hatch out the next generation of parasitic wasps.
(I know I left you
hanging about the tomato
blight. It turned out I had too much to say to fit in one
post (surprise, surprise), so you'll hear all about it in a lunchtime
series next week.)
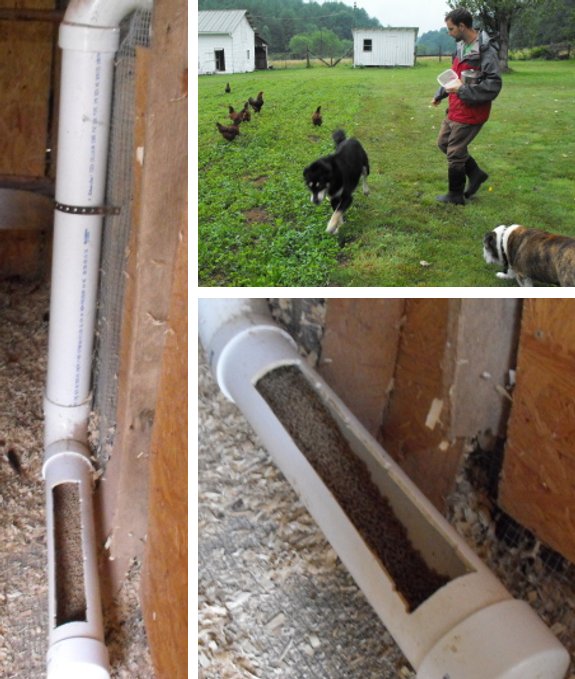
I've seen a lot of automatic
chicken feeder designs and I think this simple use of PVC pipe with a
cut out trough is an idea that works the best if you need to leave your
flock for a few days and you want the feed to be automatically
replenished with the help of gravity.
Usually I see these projects
from afar on the internet, but today Anna and I were lucky enough to
see this setup first hand when we got a chance to visit Everett and Missy's new
awesome farm today.
I could even see a version of
this being practical in a chicken
tractor if someone was
needing to be away more than a couple of days at a time.
Want more in-depth information? Browse through our books.
Or explore more posts by date or by subject.
About us: Anna Hess and Mark Hamilton spent over a decade living self-sufficiently in the mountains of Virginia before moving north to start over from scratch in the foothills of Ohio. They've experimented with permaculture, no-till gardening, trailersteading, home-based microbusinesses and much more, writing about their adventures in both blogs and books.
