archives for 05/2010
 Friday
was my reward for a long week spent
weeding and preparing the garden. I finally put out the first of
our tender vegetables, plants that can't bear the frost and that will
be coming up around the time of our frost free date. Reading
straight off my spreadsheet, I ended up planting in alphabetical order
--- basil, beans, cantaloupe, corn, cucumbers, garbanzos, okra,
peppers, quinoa, summer squash, urd beans, and watermelon. Even
tenderer plants will be hitting the dirt in a couple of weeks.
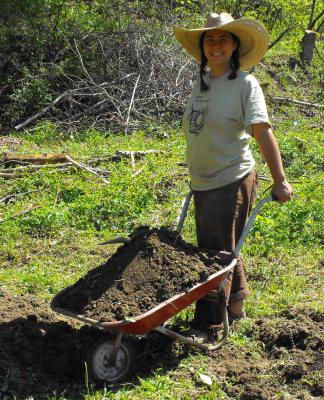 Even
though the 80 plus degree heat wore us
out fast, my Mexican sombrero let me keep moving long enough to slip
some summer flowers into gaps in the forest garden. Last year, I
finally threw flower seeds in the ground in June, and was stunned by how they
brightened my day in October. Mark points out that
with bees
in our lives, it only makes sense to take a few minutes and plant
flowers, so I raked back the mulch in a few sunny gaps and dropped in
seeds of Mexican sunflower, pink and white cosmos, zinnias, marigolds,
fennel, sunflowers of two varieties, a bumblebee
habitat mix (thanks, Jennifer!), and asters (thanks, Mom!) Except
for the last two, these are tried and true flowers that bear my neglect
admirably and bloom with no care from me.
This is the first year
we're growing garbanzos, and the seed packet confused me. It told
me that garbanzos are a cool season crop like peas, and then combined
that with an admonition to plant them after the frost free date.
Um? Has anyone grown them? When did you plant them?
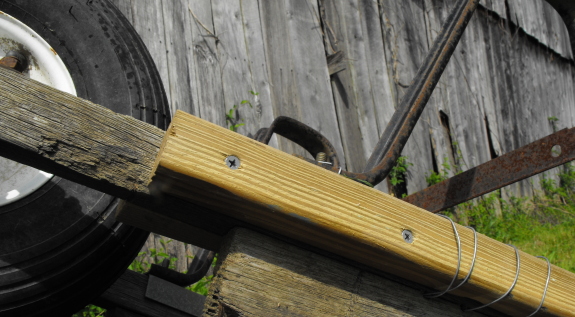
Don't forget to drill pilot
holes through the wheelbarrow
frame and the new 2x2 handle.
I placed another section of
2x2 on the other side with a pilot hole only half drilled to give the
new screws something to bite onto without splitting anyone's grain.
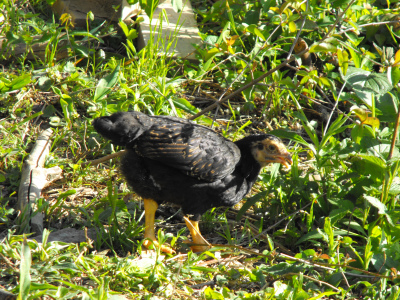 So
you lost your bet on the Kentucky Derby? Don't despair --- we're
holding a betting contest you're much more likely to win! And
this one is chicken related --- aren't chickens better than horses?
If you're interested,
you can read about our
plans for creating several rotational pastures for our broilers, complete with food-bearing
perennials. We'll be rotating our chickens through future
pastures every couple of weeks so that they don't demolish the
vegetation, but we want them to scratch this first pasture up pretty
good so that we can sow it with grains for their winter diet.
When will the ground become bare enough to plant in?
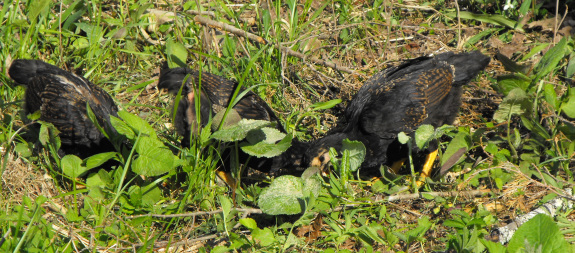
Post your guestimate
date in the comments, and whoever is closest will win bee
balm and Egyptian onions. Both plants are hardy
perennials that need next to no care and either attract bees and
hummingbirds (the bee balm) or feed you for ten months
out of the year (the Egyptian
onion.)
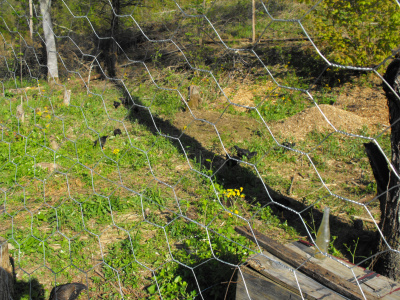 For
the scientific minded among you, here's some more data to help you
choose the very best date. Our chicken pasture is about 800
square feet and holds 25 birds who will be six weeks old on Monday, May
3. They've been eating at the pasture since April 23, and have
already started to scratch their most traveled spots bare. On the
other hand, they have been concentrating their attention on less than
half of the area so far and haven't really found the far corner
yet. I've been adding wheelbarrow loads of weeds every few days,
and am feeding them about a gallon of food a day. (They're hungry
little birds!) All of the photos in this entry were taken Friday
and are relatively representative of the pasture at this moment.
It's built around a big wild cherry that is starting to leaf out, so
the vegetation is weeds that do well in partial shade, not grass.
The fine print: The
ground will be considered bare enough when I randomly decide it's bare
enough. Only one guess per person, please!
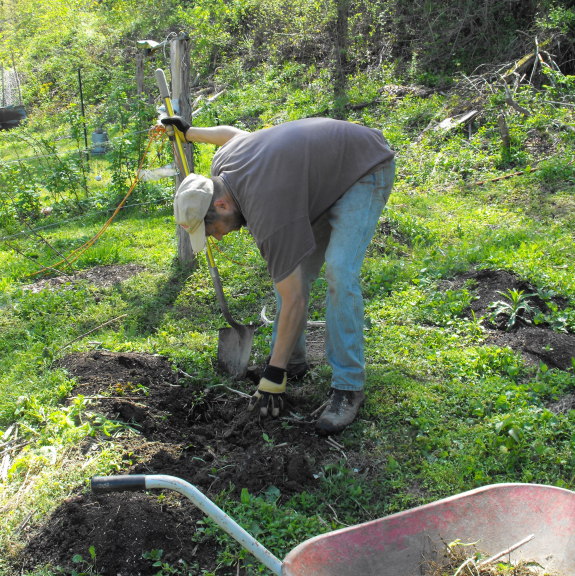
Sometimes an old fashioned
shovel beats out a fancy roto tiller.
Big, thick, Poke root extraction is a task that
needs someone to invent a solution for in the form of a tiller like
machine. Maybe it will somehow use a small, flexible auger to chase
down and grind up any unwanted roots within a 4 foot deep perimeter?
Hopefully it'll be easier
to start up than our tiller was last year.
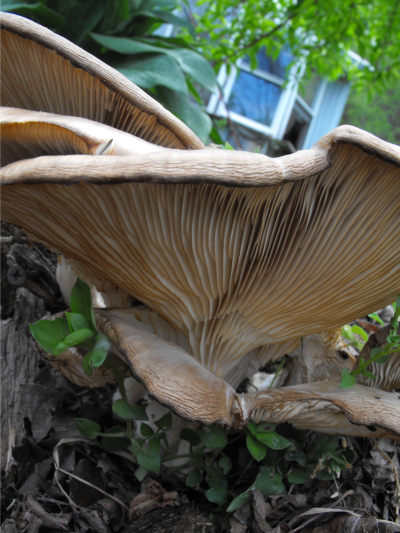 This
beautiful mushroom popped out of the half-buried log bounding one side
of our three year old peach raised bed. I've been piling
weeds and dirt along the sides of the raised bed every year, but was a bit concerned
that the peach roots would get stuck inside and not make it out into
the surrounding soil. Clearly, some fungi are hard at work
breaking those logs down into prime compost and clearing the way for
the peach roots' expansion.
For a few minutes, I
thought this might be a wild oyster
mushroom, enhancing
the edibility of our forest garden. But my best guess at the
moment is Smooth Panus (Panus
conchatus), a
relative of the oysters, but one which has edibility listed as "tough
but apparently harmless." I guess I'll let the mushroom work in
peace, although I'm tempted to harvest the dozens of insects hiding in
the gills for chicken feed.
 Last week, I discussed how micronutrient
deficiencies in our soil make even homegrown vegetables less nutritious
than they were a few decades ago. Steve Solomon's
solution to this problem is to enrich his soil with what he calls
"complete organic fertilizer." Gardening
When It Counts gives
you some leeway in blending this fertilizer, but the gist of the recipe
is as follows:
- 4 parts seedmeal
- 1 part lime. (The best mixture is a quarter agricultural lime, a quarter gypsum, and half dolomite lime. If you're only using one type, dolomite is best because it includes both calcium and magnesium.)
- 1 part finely ground rock phosphate, bonemeal, or high-phosphate guano
- 0.5 to 1 part kelpmeal or 1 part basalt dust
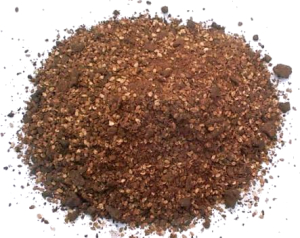 The recipe is mixed by volume
and results in a fertilizer with NPK of
5:5:1, along with substantial amounts of the most important
micronutrients. Solomon says that not only does complete organic
fertilizer result in balanced nutrient levels in the soil, it is also
easy for beginning gardeners to deal with and doesn't require hauling
so much bulk to your farm.
I was leery of the price
tag attached to Solomon's mixture, but he says
that the ingredients are relatively cheap when purchased at feed
stores. He spends about $300 per year buying
the components, and gets $4,000 to $8,000 worth of vegetables in
return. Solomon uses a gallon to a gallon and a half of his
complete organic
fertilizer on every 100 square feet of garden, then adds the same
amount again as side-dressing on his higher demand vegetables.
This fertilizer is in addition to a quarter inch coating of compost
added to the garden each year.
Before you all rush out
to buy seedmeal, here are some potential disadvantages of complete
organic fertilizer:
- The price tag is still considerably higher than buying enough compost to reach the same fertility level.
- Complete organic fertilizer doesn't add much organic matter, which is a definite problem if you have a clayey garden like mine.
- Lime should be used with care when gardening over limestone, the
way we are. Your soil will probably already be somewhat alkaline
and may be very high in calcium and magnesium. Do a soil
test before adding any lime!
All of those warnings
aside, I suspect some of you might like to give
complete organic fertilizer a shot. If you do, please check back
and let me know how your experiment went!
This post is part of our Gardening When It Counts lunchtime series.
Read all of the entries:
|
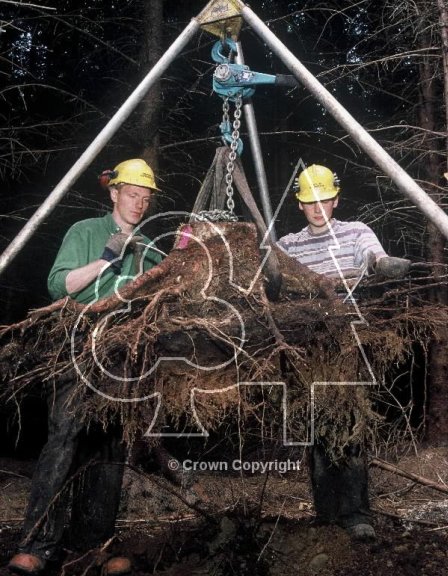
Thanks goes out to Roland for pointing me in the winch/tripod direction for any future heavy
root extraction.
With any luck our Poke roots won't get as big as this
Sitka
Spruce root in Scotland.
 Some
days, my life lacks coherence and is simply an unending string of awed
discoveries. Here's Monday in a nutshell....
I woke to the sound of
rushing water --- the floodplain is submerged.
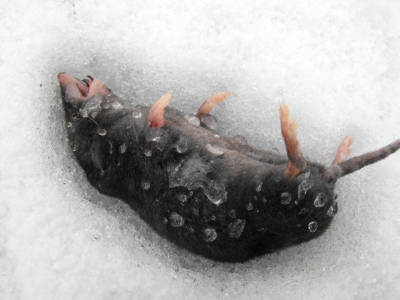
A scuffle in the hallway
--- Huckleberry caught a mouse.
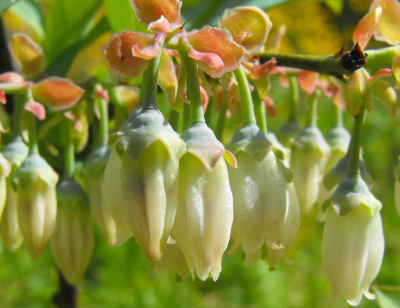
 Blueberry
bushes are coated in hundreds of flowers, some starting to open.
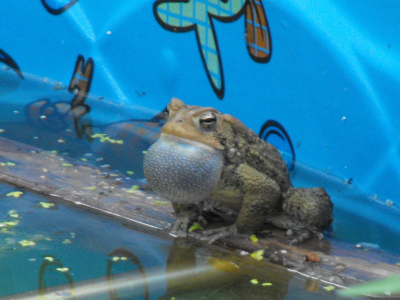
Seven male toads
beckon lovers from our mushroom soaking kiddie pool.
Tiny fuzzball peaches
are swelling fast, now bigger than my thumbnail.
Stir-fry for dinner ---
dozens of Egyptian onions, some overwintered carrots and parsnips, and
shiitakes sodden from three plus inches of rain.
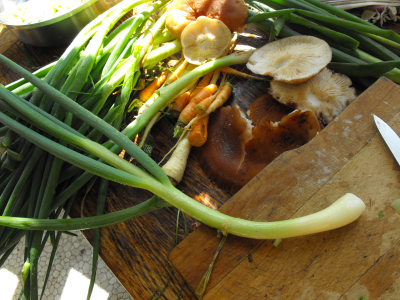
The first lightning bugs
danced in the dark.
I hope your spring days
are as sweet!
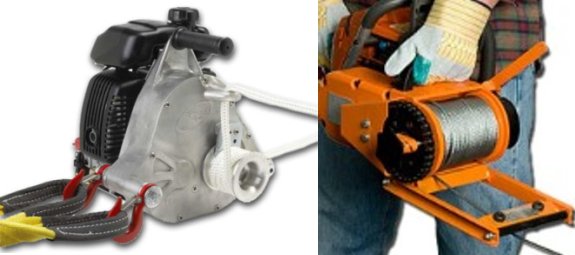
How do large logs get moved
on a remote log cabin construction site that has no power or heavy
machinary?
Gas powered winch of course.
The one on the right will cost you about 800 bucks and hooks up to most
chainsaws. The bigger one comes with it's own engine and will run you
over 1300 dollars.
A good equipment rental store
might rent these out for around 50 bucks a day, which would be well
worth it if you're trying to carve out a log cabin structure in the
middle of nowhere.
That style of building would
qualify as extreme homesteading in most people's book.
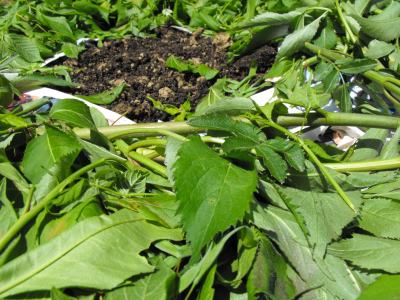 Ever
since I read that traditional
Guatemalan farmers use young elderberry leaves as mulch
around their vegetables, I've been aching to give it a shot...and to
figure out why they focus on elderberries rather than on other
trees. The answer to that question may be a combination of early
leafing, compound leaves that are easy to pull off the trunks and quick
to decompose, and elderberry's inherent resilience. I've been
mowing over some elderberry sprouts in the mule garden for three years
now, and they just keep coming back up (and spreading), so I'm not
concerned that I'll harm my shrubs by pulling off a few leaves.
Tuesday I decided to
strip the patch of elderberries by the barn as part of my neverending
search for more mulch.
The big leaves broken off quickly and easily --- if I had a good-sized
plantation of elderberries, I might not need any other source of mulch.
After I ran out of
elderberries, I moved on to the box-elders that are still sprouting up
from stumps along the garden edges. These leaves took longer to
harvest, but not by much. I just closed my gloved hand around the
base of a small branch and pulled my way to the tip, stripping off all
the leaves in my path. The result is a little bin of leaves that
densely covered a couple of raised beds.
At the moment, it looks
like my
eventual solution to the weeding problem will be to try to keep my beds
under a near permanent mulch rather than spacing
the plants far enough
apart that they can be hoed. But Solomon is very
anti-mulch ---
disturbing since he's been spot on about so many other things.
Maybe mulching isn't such a good idea after all?
 Solomon lists half a dozen
disadvantages of permanent mulching.
His biggest gripe is the "plague levels of small animals" that move
into the mulch if you don't live in a cold enough climate. I
assume he's talking about moles and voles and shrews here, and I feel
extraordinarily lucky that Lucy is a small animal killer and doesn't
let any of these survive in our garden.
Solomon's other
arguments against mulch don't carry as much weight with
me. He notes that if you use hay, you end up with a lot of weeds
--- so don't use hay. If your summers aren't hot enough or if
your mulch is too woody, it won't rot into the bed before summer and
will tangle with your hoe --- but you shouldn't need to hoe much if
your bed is well mulched. Mulched garden soil is slower to warm
up in the spring than bare earth --- so rake the mulch off a few weeks
before you need to plant your earliest crops. He thinks that
adding too much compost
or mulch to your soil will result in soil
nutrients out of balance,
which will make your food less nutritious --- so use dynamic
accumulators to reachieve that balance.
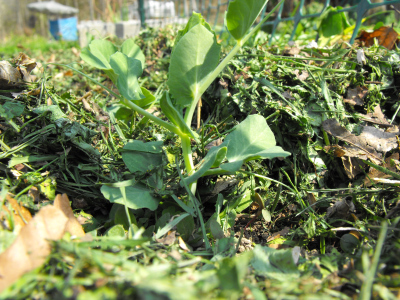
Proponents of mulch
argue that the practice conserves water, but
Solomon makes the legitimate point that most water lost from the soil
comes out of plant leaves, not from bare soil. He points out that
mulching only
keeps the soil surface moist and doesn't reduce overall moisture
loss. On the other hand, I would argue that mulching does prevent
soil crusts from forming (something that Solomon considers a big
problem in his garden) and allows more water to soak in rather than
running off in clay soil. I suspect that overall, mulch results
in a net gain of moisture for the plants in our garden.
So far, our experiments
with mulch over the last year have been highly successful, but I'll
keep all of Solomon's arguments in mind and will be willing to give up
on mulching if I start to see major disadvantages.
This post is part of our Gardening When It Counts lunchtime series.
Read all of the entries:
|
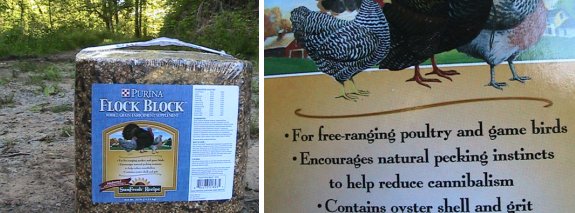
A solid 25 pound brick of
chicken yummyness was acquired in the big city today for about 13 bucks.
Stay tuned for a full report
on how the new
chicks respond to the
Purina Flock Block.
 Our
beekeeping mentor (aka our movie star neighbor) called to remind me
that the first major nectar
flow of the year is
about to begin. "The Black Locusts and Tulip-trees are starting
to bloom," he warned. "Be sure to put an extra super on your
hives!"
So I suited up and
headed out to check on our honeybees. Although the nectar trees
are blooming at our mentor's nearby house, our shady farm is a bit
behind and the bees were miffed at my intrusion into their lives.
Nevertheless, I was able to see that all three hive bodies were full of
brood and pollen, and that one of the hives had filled the first super
and started on the second. I popped a third super on our
strongest hive, remembering with a smile how one beekeeper I met told
me that he likes to add plenty of supers to a hive. "It can't
hurt," he said, "And everyone passing by will think you must be an
amazing beekeeper to need room for so much honey!"
At the other extreme,
one of our hives was down to its last small frame of honey. The
queen in this hive started laying about a week later this spring than
the queens did in the other two hives, and I suspect it's just taken
the late queen longer to raise enough workers to sock away honey rather
than consuming it. I'll check on them again next week and give
them a bit of spare honey if necessary.
Did you know that proper
watering is a lot more complicated than providing your garden with that
critical one inch of water per week? To figure out the best
watering method for your area, first figure out how much water needs to
be lost before vegetables are stressed using the chart below:
| Soil type |
Amount of
water lost before vegetables experience moisture stress (inches of
water per foot of soil) |
| Sandy |
0.5 to 0.75 |
| Medium |
1 |
| Clayey |
1.5 |
Next, pick out your climate zone from this chart:
| Climate zone |
Inches of
soil moisture lost per sunny day in the summer |
| Cool (western Washington) |
0.2 |
| Moderate (northern U.S.) |
0.25 |
| Hot and humid (mid-Atlantic and
southeastern U.S.) |
0.3 |
| Hot and dry (prairies and
northern California) |
0.35 |
| Low desert (southwestern U.S.
and California) |
0.45 |
Then plug your numbers into this formula:
For example, in our clayey soil in the hot and humid climate zone:
So, every fifth day, I need to add 1.5 inches of water back to the soil. My father, who lives in the hot and humid zone too but has sandy soil, may need to water every day or two but will add less water each time.
Of course, to maintain a perfect watering schedule, you need to keep track of weather conditions. On cloudy days, the soil doesn't lose much water, so you can wait an extra day to water. When it rains, the amount of precipitation can be added back into the soil's supply, putting off watering even longer.
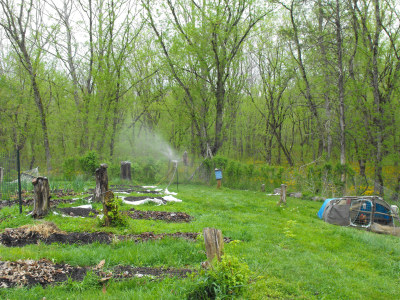 As further evidence that Steve Solomon and I
are on the same wavelength, Gardening
When It Counts gives
the same irrigation advice I do --- buy high
quality impulse sprinklers and ditch the trendy drip
irrigation.
Solomon notes that drip irrigation equipment is expensive, short-lived,
troublesome, easy to cut
through, and prone to shifting away from the plants it's meant to
water; and doesn't work in sandy soil because the
water won't spread horizontally; but is potentially good for permanent
plantings like
raspberries.
As further evidence that Steve Solomon and I
are on the same wavelength, Gardening
When It Counts gives
the same irrigation advice I do --- buy high
quality impulse sprinklers and ditch the trendy drip
irrigation.
Solomon notes that drip irrigation equipment is expensive, short-lived,
troublesome, easy to cut
through, and prone to shifting away from the plants it's meant to
water; and doesn't work in sandy soil because the
water won't spread horizontally; but is potentially good for permanent
plantings like
raspberries.For other prime gardening advice --- like why you should never water seedlings --- go read the book!
This post is part of our Gardening When It Counts lunchtime series.
Read all of the entries:
|
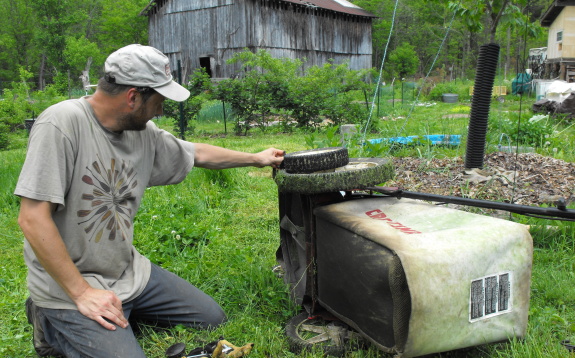
After almost 3 weeks of
waiting, the new Briggs
and Stratton flywheel puller arrived in the mail and today was
the day to put it into action.
I was planning on having
pictures of the operation and maybe a short video, but all that went
out the window when I realized my mistake in ordering the wrong
flywheel puller.
At least I know which one we
don't need. Hopefully with a bit more homework I can determine exactly
which flywheel puller is needed for this particular Craftsman.
 Mom
picked up another half dozen bags of yard waste along her city curb
and brought it out to me last weekend. "It smells foul," she
warned me. "I think there might be dog poop in it, or something
awful."
She was right that the
grass clippings and autumn leaves stunk to high
heaven, but when I opened the bags and sent my gloved hands feeling
around, all I came across were some sodden bits. My best guess is
that a gardener bagged up his refuse last summer, then tossed the bags
into the garage and forgot about them. The moisture in the leaves
started some anaerobic decomposition and resulted in a stink, but no
real harm was done.
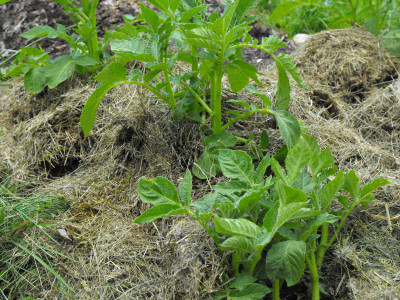
I'd been
meaning to hill my potatoes --- you're supposed to hill them
at four inches, and they somehow leapt from three inches to a foot this
week --- but decided to use Ruth Stout's method instead and just put my
spoiled grass clippings and leaves on top of the raised beds.
Technically, I'm not really following her lead since I planted the
potatoes in normal soil, but I've read that planting potatoes straight
into spoiled hay really only works when you've built up wonderful
garden soil, and I was planting in new beds. Take a look at the
embedded video to see a 90 year old Ruth Stout in her garden, or skip
ahead to 7 minutes into the video to see her planting potatoes.
In other potato news, I
should mention that the potato plants I covered
with
buckets during the last frost are three times bigger than
the ones I
let the frost nip. On the other hand, the beds that I let the
chickens work on for five days instead of three days have potato plants
twice as big as the
other beds, even though the fomer were uncovered during the
frost. I'm
guessing the boost of nitrogen let them grow large enough not to mind
the cold weather.
Thanks, Mom, for the
time-saving mulches!
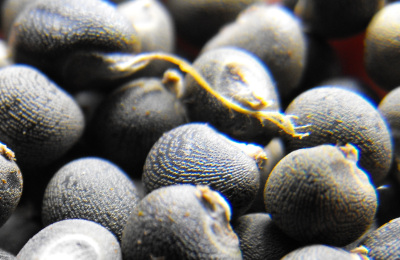 For those of you who don't like numbers ---
thanks for slogging through this technical lunchtime series. I've
saved the best for last!
In a previous
incarnation, Steve Solomon was the founder of Territorial Seeds, so
it's no surprise that his personal experiences with seed companies and
seed storage are the most powerful part of the book.
He explains that most seeds sold to the home gardener are low quality,
primarily because most of us don't know any better. ("Those seeds
didn't come up? Oh, I must have done something wrong!")
Nearly all seed
companies catering to our demographic simply buy bulk seed, repackage
it in pretty envelopes, and sell it for high prices. Only a few
seed companies either grow their own seeds or perform large seed trials
to ensure that the seeds they're selling are the proper variety, are
vigorous, and have high germination rates. Without these tests,
you could end up in the same boat I was in last year --- I bought some
Goldbar Hybrid seeds from Jung last year, and ended up with a squash
that looked nothing like the picture on the website.
Steve Solomon contacted
dozens of seed companies to inquire about their growing methods, and
came up with these few recommended suppliers for the United
States. He notes that you'll get the best results by buying from
a company in your climate zone.
- Northern U.S. -- Stokes, Johnny's
- Middle U.S. --- Stokes, Johnny's, Harris, Southern Exposure Seed Exchange (with the caveat that SESE stocks a lot of relatively unproductive heirlooms)
- Southeast U.S. --- Park
(which is currently going through bankruptcy and may end up a worse
company)
- Maritime U.S. --- Territorial
I've always wondered
which seed companies were good and which ones were not, so I'm glad to
finally read an in depth analysis without lots of guesswork!
This post is part of our Gardening When It Counts lunchtime series.
Read all of the entries:
|
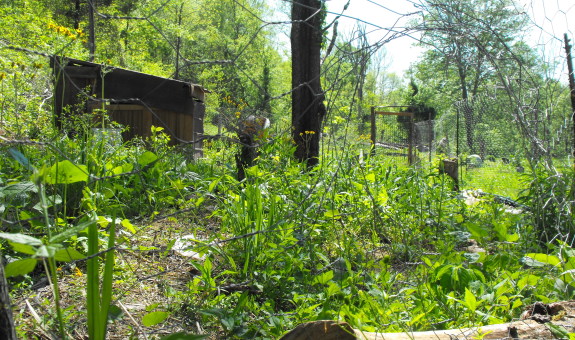
I just noticed this back door
to the chicken
pasture Lucy installed
recently and growled at her while I stitched it back together.
We could double down on
securing the bottom edge with some additional fastening, or hook up the
electric fence charger and run a strand at nose height all along the
perimeter.
Another option would be to
stop giving the pastured chickens any scraps and divert that nutrition
to the chicken
tractors or worm bin.
None of these choices work
for me because they avoid the root problem of Lucy's failure to
recognize that all food scraps belong to us and she needs special
permission to access even a banana peel.

It may seem like a tall order
to train a dog to fight the urge to eat something yummy, but I've seen
it happen before and feel that Lucy is serious about doing her part in
being a team player.
We just need to discover
where the communication is breaking down and put some extra effort in
explaining this critical lesson.
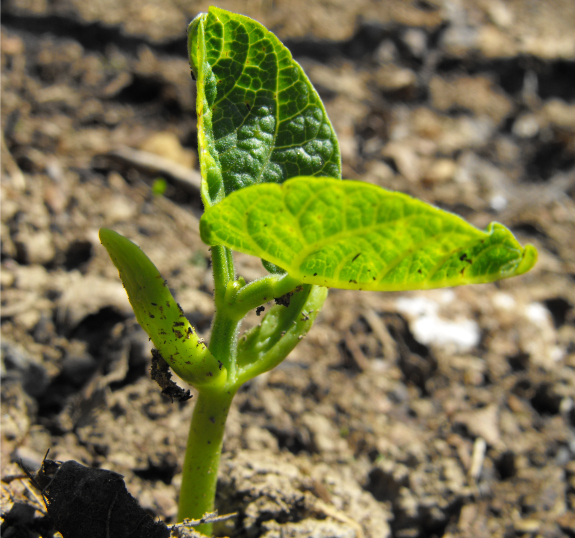
Torrential rains last
weekend hastened germination of the previous
week's planting.
First came the corn, then the green beans.
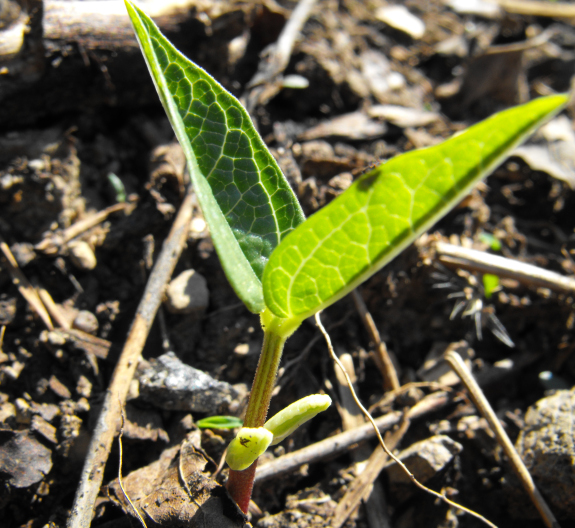
A day or two later, I
noticed a strange little seedling that looked like a weed but was
growing in straight rows. I checked my garden map and discovered
that the seedlings were one of this year's experiments --- urd beans
for sprouting.
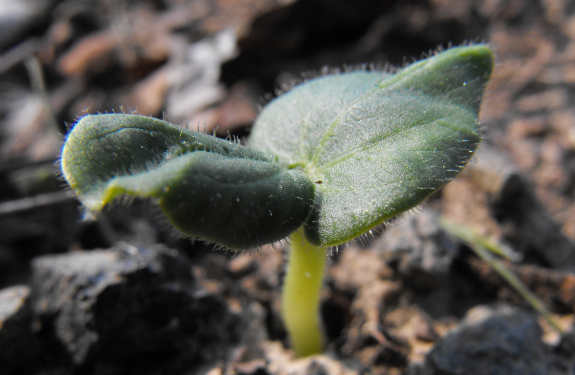
Scorching temperatures
(highs near 90) tempted even the extreme heat-lovers out of the
ground. By Friday, a few of the okra, melons, and cucumbers were
up.
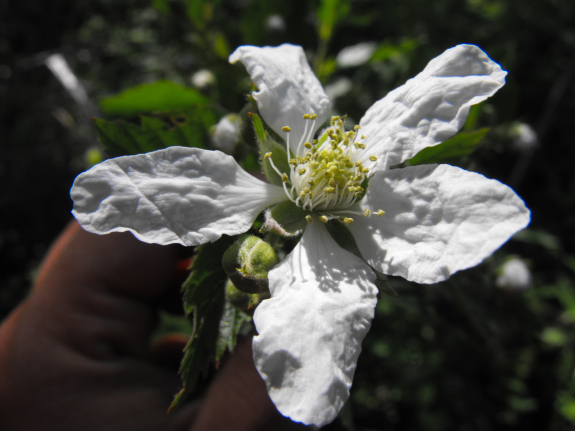
But these plants are all
gambles, put in the ground two weeks before the frost-free date, and I
suspect this will be a year for replanting. There's a good chance
of frost both tonight and tomorrow night, and I probably don't have
enough row covers to protect everyone. What were the odds we'd
get a redbud
winter, dogwood winter, and blackberry winter all
in one year? Probably pretty good considering that our frost free
date is still a week away.
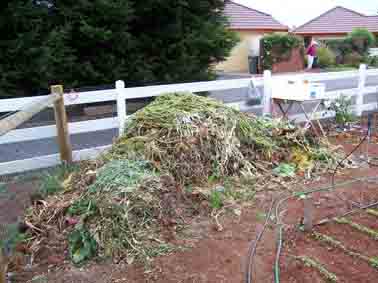 Despite relying on complete
organic fertilizer
as his primary source of soil nutrients, Steve Solomon is clearly an
expert compost-maker. For those of us who use a slapdash approach
to composting, Solomon's composting description in Gardening
When It Counts is a
must-read. He explains that a good compost has more than 1.5%
nitrogen, a C:N ratio no higher than
15:1, and lots of micronutrients.
The
carbon to nitrogen ratio, often shortened to "C:N" or "C/N" is at the
heart of building a perfect compost heap. The availability of
nitrogen in the compost is largely determined by this ratio, which can
be thought of as a bit like the pH scale. A C:N ratio of 12:1
(twelve parts carbon to one part nitrogen) is "neutral" --- this is the
C:N ratio of soil humus and is relatively stable. Most plant
matter has a C:N ratio higher than 12:1, which means that decomposing
microorganisms require a net input of nitrogen while they're
breaking down the first of the carbon --- this is why putting fresh
wood chips on your garden does more harm than good, locking up the soil
nitrogen for the first few years before the chips break down (and their
C:N ratio drops low enough) so that they begin releasing
nitrogen. On the other end of the spectrum, chicken manure has a
C:N ratio of about 6:1, which means that the manure provides nitrogen to the soil, and
actually breaks down soil humus in the process. The table below
lists the C:N ratios of various compostables. For immediate use
on your garden, you can mix and match until the C:N ratio of your pile
is around 15:1.
| 6:1 or lower |
12:1 |
25:1 |
50:1 |
more than
100:1 |
| Meat scraps Chicken manure Hair/feathers Urine (0.8:1) |
Vegetables Garden weeds Horse manure (no bedding) Cow manure (no bedding) Spring grass Garden soil Comfrey leaves Coffee grounds |
Summer grass Legume hulls Fruit waste Grass hay (green) |
Cornstalks (dry) Straw (cereal) Grass hay (poor) Corrugated cardboard Tree leaves (deciduous) Autumn grass |
Sawdust (500:1) Paper (175:1) Tree bark Pine needles |
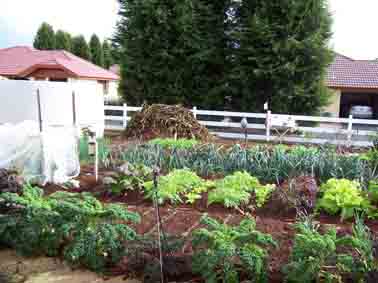 Luckily for those of us with large masses
of high C:N waste, a compost
pile's C:N ratio will slowly drop over time as microorganisms break down
the carbon-based compounds and make nitrogen more available. If
you mix an incipient compost with a C:N ratio of 30:1 into warm soil,
for example, it will break down in about six weeks. Compost
grinders and tumblers will expedite the process, but your compost will
overheat in the process and you will lose a lot of your nutrients as
gases like methane, ammonia, and carbon dioxide. Steve Solomon
instead recommends composting slowly, starting a pile in the fall,
turning it when the apples bloom, and then turning it again a month
later if it's not done.
Luckily for those of us with large masses
of high C:N waste, a compost
pile's C:N ratio will slowly drop over time as microorganisms break down
the carbon-based compounds and make nitrogen more available. If
you mix an incipient compost with a C:N ratio of 30:1 into warm soil,
for example, it will break down in about six weeks. Compost
grinders and tumblers will expedite the process, but your compost will
overheat in the process and you will lose a lot of your nutrients as
gases like methane, ammonia, and carbon dioxide. Steve Solomon
instead recommends composting slowly, starting a pile in the fall,
turning it when the apples bloom, and then turning it again a month
later if it's not done.One of my favorite things about Steve Solomon's book is that it's full of numbers and formulas. Here's his favorite recipe for compost:
- Spread garden and kitchen waste in a pile 5 to 7 feet across, five feet long, and eight inches thick.
- Add half an inch of good garden soil (to inoculate
microorganisms.)
- Add a low C:N component --- 5 to 10% of the mass of layer 1 if you're using poultry manure or cow or horse manure with no bedding, or 2 to 5% if you're using seed meal.
- Water well.
- Repeat steps 1 through 4 until the pile is 4 to 6 feet tall.
- Cover the pile with a thin layer of soil.
This post is part of our Gardening When It Counts lunchtime series.
Read all of the entries:
|
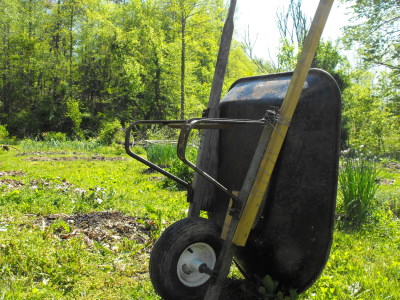 I
figure if the ramshackled
wheel barrow makes it through its first week back on the job then
its got a bright future here on the farm.
No complaints from its main
operator after several heavy trips.
I predict this fix to last
around 2 years.
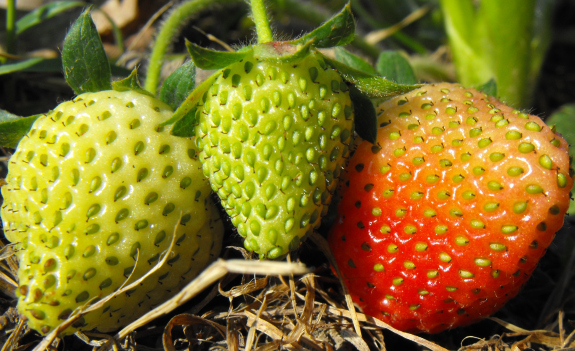
While we were gone on
our honeymoon last fall, our deterrents
got stuck and the deer ate the recently transplanted strawberries down
to the ground. This spring, the plants grew so slowly, I lost
faith. After seeing the size of my father's plants a zone or two
south in April, I figured our measly plants wouldn't give much of any
strawberry harvest this year.
Then came warm weather,
and our strawberry plants grew like crazy. Before I knew it, they
were big and blooming, then the little fruits started to swell.
And now the first strawberry is blushing pink! Maybe we'll be
eating luscious strawberries by the end of the week.
Homegrown strawberries
are a lot like homegrown tomatoes --- once you eat one, you'll never
touch storebought again. No, I won't share. Plant your own!
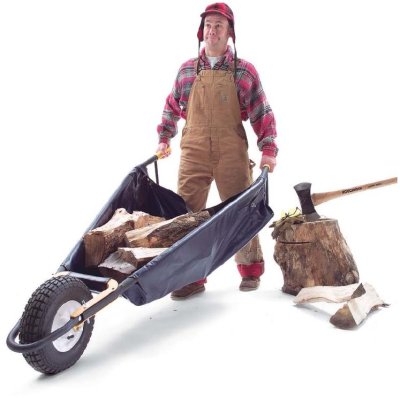 I
thought I would end my wheelbarrow
thread with an extreme
version that cost a bit over a hundred dollars.
What I like most about this
flavor is the ability to lay it flat on the ground to ease loading.
It's way more wheelbarrow
than we need around here, but I can't help but to admire the design.
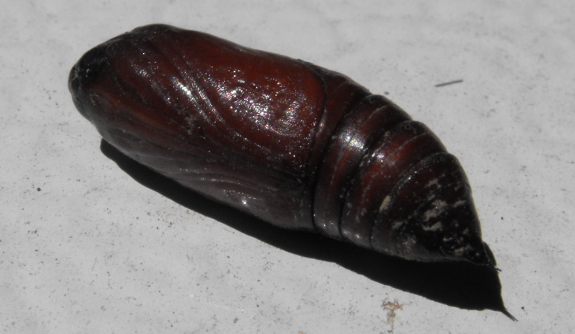

I run across these
interesting pupa now and then when I dig around in my garden in the
spring. They're hard and shiny, seemingly sound asleep, but then
the tail end begins to rotate slowly when you pick the pupa up.
Disturbing.
I usually don't go in
for wholesale destruction of insects, but for some reason I got it into
my head that these pupa were the overwintering stage of the squash vine
borer. So I
fed every one I found to my chickens (who were very
appreciative.) A bit of research doesn't turn up any images of
squash vine borer pupa, but does show several hawk and sphinx moth pupa
that look a lot like this. If I remember, I'll stick the next one
I find into a jar and see what hatches out. Any better ideas?
 When
I was a youngster, our nearest neighbor's front yard was decked out
with a
huge tire, painted white and filled with flowers. A metal glider
and chairs, also painted white, stood nearby under the shade of a large
catalpa, just waiting for a visitor to come by and sit for a
spell. There were flowers --- nearly all annuals that were easy
to grow from seed, like marigolds and cockscomb --- and a blooming
bush. Across the yard was a pen of chickens, then the barn, and
in the other direction was the vegetable garden, laid out in straight
rows. The couple clearly spent considerable time, though little
money, keeping their yard in impeccable shape.
Although my neighbors
were white, their space could have graced the pages of Richard
Westmacott's African-American
Gardens and Yards in the Rural South,
with the notable lack of a hog butchering station and a swept dirt
floor. Westmacott analyzed the yards of 47 rural families
spread across
Alabama, Georgia, and South Carolina, focusing on folks who had reached
or passed middle age. If there was such a thing as a traditional
Southern, African-American garden, he wanted to find it.
 And he did see similarities,
many noted in my opening paragraph.
Rather than being showcased landscapes, the yards were subsistence
gardens
where work and leisure intermingled. In most cases, the yard had
become an extension of the house, the spot for a family barbecue or hog
butchering session.
But where did the
similarities come from? Could they be traced
back to the families' heritage in western Africa, to their slave
background, or were the similarities simply the common byproduct of
being poor
in the South?
| This post is part of our African-American Gardens and Yards in the
Rural South lunchtime series.
Read all of the entries: |
How dare you talk about extreme
wheelbarrows without mentioning the Honda HP450 power carrier!
Norman, Phoenix Arizona
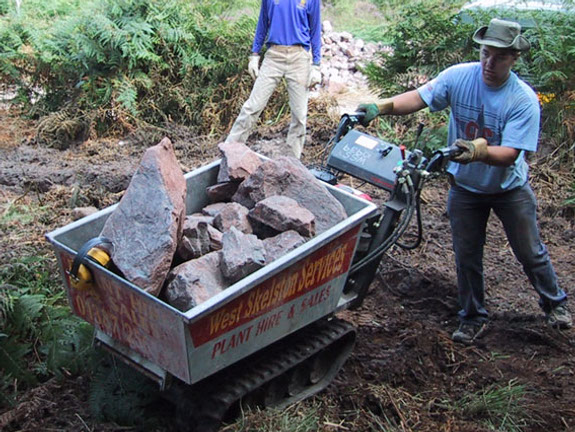
I stand corrected.
Norman is right, this Honda HP450 is one tough cookie.
I wonder if you could modify
it to accept some sort of seat where you could sit and steer the thing
to your jobsite, get out and put the seat aside till the work gets
done, and then drive it back to the truck?
Photo credit goes to the good
folks at IMBA for this great shot of the HP450 in action during a
trail building day.
 Everything
I do in the garden at this time of
year is a gamble. Will a late frost negate my efforts?
Or will I get away with pretending summer weather is here to stay and
reap an early harvest?
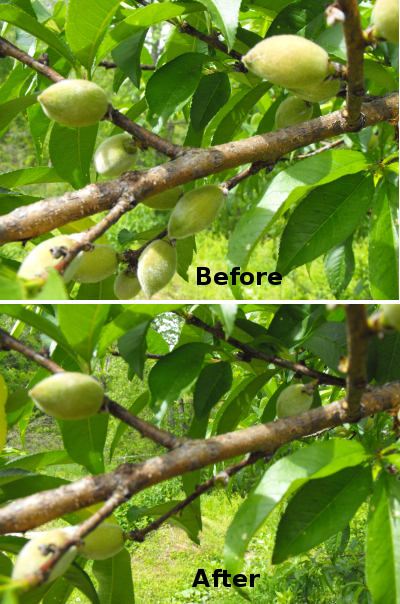
I've been eying our peach tree for weeks as the ovaries
began to swell
and resemble miniature fruits. If nothing goes wrong, this year
will be our first harvest and I've resolved to thin the fruits even
though thinning is really optional.
On the negative side,
thinning takes time, and if you thin and then get a heavy, late frost,
you will lose a lot of your crop. On the other hand, timely
thinning is supposed to result in fruits that are bigger and sweeter,
and will reduce the chance of limbs breaking under the fruits'
weight. I've read that you get about the same weight of fruit
whether you thin or not; it's your choice whether you want a lot of
small fruits that are mostly pit or fewer big fruits.
As long as you don't
think you'll have any more below freezing weather,
the earlier you thin the better since the tree will now be pumping all
of its energy into the chosen fruits. Extension service websites
tell you to thin peaches to six to eight inches apart, but I couldn't
quite bear to take off so many fruits and instead settled on about four
to five inches between peaches. I still pulled a full quart of
immature fruits off our oldest peach, and a smattering from our younger
peach and nectarine. I'm trying very, very hard not to count my
peaches before they hatch...um, ripen.
 Westmacott
perused accounts and photos of western Africa from the eighteenth and
nineteenth centuries, searching for similarities between historical
African gardens and current
African-American
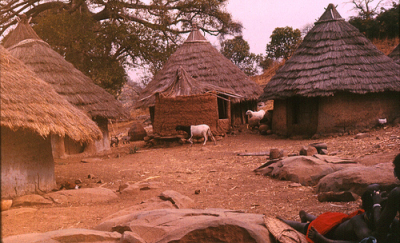
gardens in the rural South. Western Africa is a
diverse area, ranging from rainforest to subtropical desert, and the
agricultural heritage of west Africans is similarly diverse. Some
people were nomadic herders, others had grain-based diets much like our
own, while still others practiced what Westmacott called "vegeculture"
but which I would call forest
gardening --- edible
trees, roots, vines,
and grains all mashed together into one space.
West Africans who grew
what we now consider traditional gardens
typically clustered their houses into fenced compounds. They
grazed any livestock they might happen to have outside during the day,
but took the animals in at night. Crops were grown outside the
village compound in intensively tilled and manured land, while trees
with edible fruits (like bananas, coconuts, and mangos) were planted
within the village for shade.
As you can probably
guess from my previous lunchtime series on Chinese
and Central
American traditional gardening practices, I was intrigued
by this look into traditional African agriculture. But very few
of the African practices seemed to carry over to the United
States. Shade trees are ubiquitous in African-American yards in
the South, but the trees are not edibles, and there is no sign of
forest gardening.
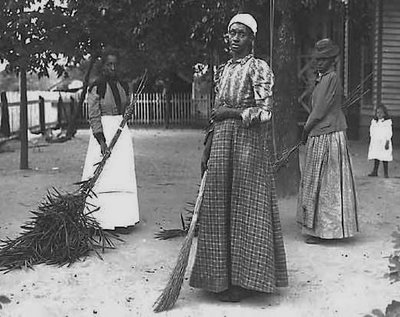
The one aspect of the
southern gardens that Westmacott felt confident
tracing back to Africa was the swept yard. Although inexpensive
motorized lawnmowers are now pushing swept yards into history, many of
the old timey African-American families in Westmacott's study stuck to
the traditional bare earth yard. The families spent time every
day
hoeing weeds out of the yard, then sweeping every bit of trash and
debris out of the living space. The result was an area where
children could play and adults could easily sit and talk, without
danger of snakes or ticks. The practice can be clearly traced
back to Africa, not only because Africans still keep up swept yards,
but also because bare earth yards just don't work in more temperate
climates. In areas without long dry seasons a swept yard will
turn to mud and become impassable for a large portion of the
year. I guess we won't be making a swept earth yard here!
| This post is part of our African-American Gardens and Yards in the
Rural South lunchtime series.
Read all of the entries: |
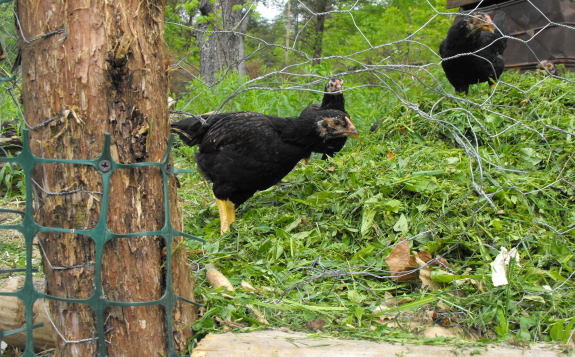
This is the 4th breach
of security for the chicken
pasture perimeter thanks
to Lucy and her naughty behavior.
Since the spring mowing and
future fence building is starting to crunch our time I think I'm
leaning more towards that nose high stretch of electric fence wire as a
new method of keeping her out.
With any luck Lucy will get
the message right away and reclaim her title as best dog in the galaxy.
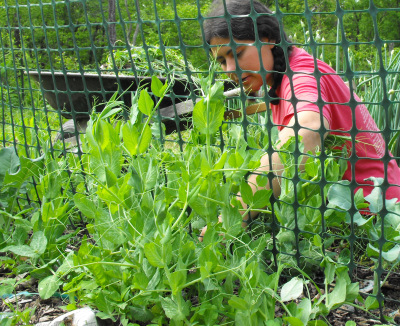 If you peruse the homesteading and serious
gardening blogosphere at this time of year, you'll see that most of us
are clinging to our sanity by dirty fingernails. I went through
my own little meltdown last week:
Mark: "You know, we're better off than we were at this time last year. Cheer up --- you said you wanted things to grow, and they're growing."
For those of you who are
in the midst of gardening frenzy, I hope you can take Mark's advice
(along with a deep breath) and enjoy the beauty of spring.
Remember, there's always winter to catch up on all of those important,
long term projects, and it does seem to help to let the weeds grow up
and hide problem spots you aren't going to have time to deal with this
year. Right now, I figure we're doing well if we manage to tread
water and not sink much further behind than we already are.
On the other hand, if
you're living vicariously through our blog, now's when you can snicker
in your cubicle....
 Westmacott
explained that gardening practices of slaves in the American South were
almost as diverse as those
in Africa.
Slaves unlucky enough to
live in upland regions tended to be worked from sunup to sundown under
the heavy thumb of an overseer --- they usually had no time to tend
their own garden, and were seldom allowed to keep livestock for their
own consumption. The "luckier" slaves on large plantations along
the coast were often given a daily quota of chores to pursue at their
own speed, and if they were fast and hard-working, they could make time
to grow their own vegetables and keep a hog and chickens. The
families craved this bit of self-sufficiency, which could mean the
difference between malnutrition and relative health.
A focus on pigs and
chickens as a path to meat self-sufficiency carries
through to the modern day in the African-American families Westmacott
interviewed.
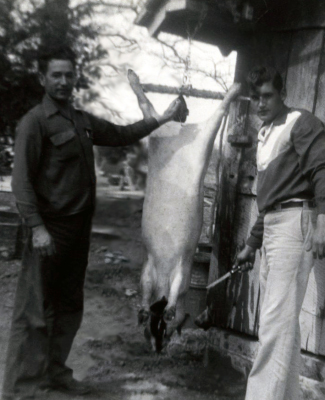
Many of the families had either hogs, chickens, or both, and hog
butchering stations in nearly all of the yards showed that the families
not currently keeping pigs used to. Despite the daunting size of
a full-grown pig, about half of the families still slaughtered their
own hogs, explaining that butchers won't return ears and chitterlings,
which the families like to cook with.
Pigs and chickens (and
mules, nearly all of which have been replaced by
tractors and rototillers) made the traditional Southern,
African-American family very self-sufficient. Families used to
feed their food scraps and excess produce to the animals and get meat
and manure in return. This homesteading feature is quickly
disappearing, with purchased fertilizers and grocery store meat now
cheap enough that families see little need to keep their own livestock.
| This post is part of our African-American Gardens and Yards in the
Rural South lunchtime series.
Read all of the entries: |
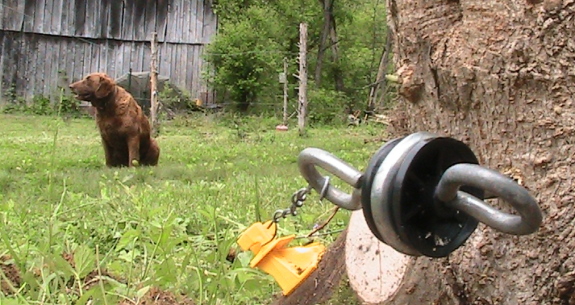
This nose high strand of
electric fence wire will help to keep Lucy out and any other stray
critters that might be a potential threat when she takes her random
naps.

Despite being a
vegeholic, I have to admit that the prettiest part of the
garden right now is the flowers. Our chamomile and columbine are
in
full bloom, and the first brilliant red poppy unfurled its petals
Wednesday morning. It's hard to walk through the yard without
having my eyes drawn to that splash of red.
But the most exciting
flower is white and relatively small, sitting atop a pea vine.
Juicy pods are now only days away, and they promise to spice up our
current garden diet of lettuce, greens, pea
tendrils, kale
flowers, mushrooms, Egyptian onions, parsley, fresh eggs, and
slightly woody overwintered carrots and parsnips. The best thing
about eating in season is that when you're starting to get sick of
collards every day, something new pops up to tempt your palate.
 Perhaps
the most important factor influencing
African-American
gardens in the rural South --- and the hardest to
disentangle from other potential factors --- is poverty. If you
were born black in America, you are nearly three times as likely to
live in poverty as if you were born white. Many of the "unique"
aspects of African-American gardens are ones I grew up with in my own
area, since Appalachia is nearly as poor as the so-called "Black Belt"
further south.
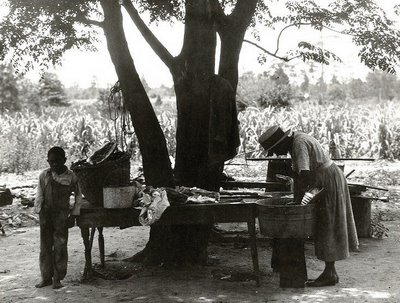 Poor people tend to have smaller houses,
so it's no surprise that their
yards act as an extension of their living space. Even though most
of the families in Westacott's study now have electricity and running
water, many continued to use the back porch and/or the area around
their well as a center of cooking and washing. Anyone who has
cooked in the South in the summer without air-conditioning can
understand why you might want to can, make soap, or even fry up your
dinner outside over a fire rather than heating up the whole
house. And if you've been crammed into five hundred square feet
with five other human beings, you might choose to shell the peas
outside under a shade tree too.
Westacott noted that
"piles of temporarily discarded or
recently-acquired-for-some-unspecified-use-in-the-future materials are
commonplace on most small farms and rural properties." See, that
trash heap by our barn is just a sign of frugal ingenuity! The
author explained that similar piles grace most of the properties he
visited, for use in building animal pens and fixing other objects
around the farm. The families he visited even used found art to
brighten up their front yards, lining their paths with colored bottles
and tacking hubcaps to the fence.
| This post is part of our African-American Gardens and Yards in the
Rural South lunchtime series.
Read all of the entries: |
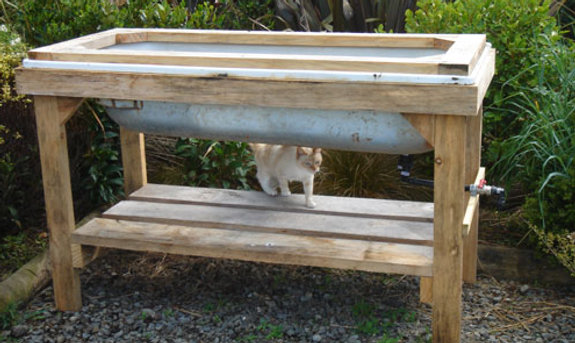
In looking for ideas to
expand our outdoor worm
farming I found this
clever use of a discarded bathtub as a medium sized worm bin at the pleasant lifeboat.co.nz.
We've decided to give this
approach a try along with a few others so we can determine which one is
most trouble free.
If you've got a good source
of horse manure then you really need to put a
small army of worms to work on that manure to speed up the composting
action and take advantage of that wonderful worm tea. It's one of those
things we neglected to set aside time to build back in the beginning, but sometimes it takes a while to wake up to the wonders of worm assisted home grown
compost.
 I'm
afraid our chicken
pasture contest is a
bit of a wash. As the weeds grow taller and taller and our pudgy
chickens become slower and slower, it's becoming clear that there will
be no scratching the earth bare at this rate. Our Dark
Cornish chickens
don't seem to be as avid foragers as I'd hoped they'd be, although they
do like picking through the huge mound of weeds I keep wheelbarrowing
into their pasture.
 What
you all probably care about the most is --- who wins?! I've
decided to name Bethany our grand prize winner since she picked the
furthest away date which is closest to infinity. Bethany, drop me
an email with your address and your onions and flowers will be in
the
mail next week.
The more scientific
among you may be asking --- what now? I still want to have the
chickens scratch up some of the earth to expedite grain planting, so
we're going to subdivide their current pasture in hopes that a smaller
enclosure will actually get scratched bare. Given the proximity
of butchering day,
we may wait to build more pastures until next year, and will be
rethinking our broiler experiment --- maybe we'd be better off having
the slow, fat broilers in tractors and our perky layers achieving self
sufficiency on pasture? Stay tuned for future experimentation!
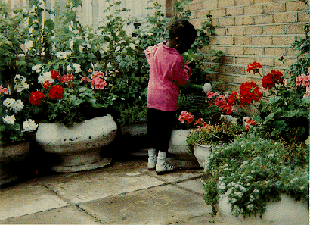 Other
common features in African-American gardens in the rural South were
probably also linked
to poverty.
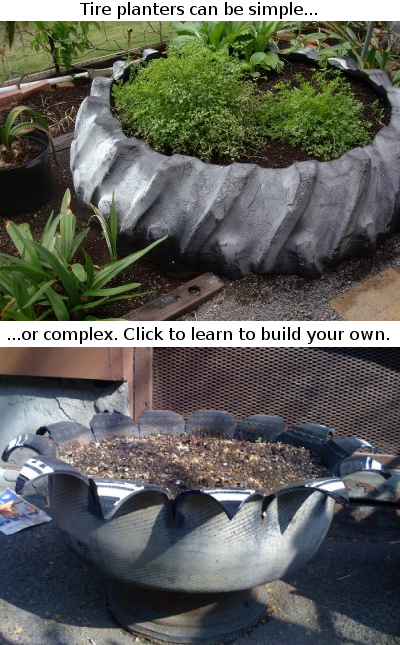
Although potted plants were
common --- presumably a remnant of a transient past --- nearly all
gardening was extensive
instead of intensive.
Only one gardener
of the 47 families studied used raised beds, and hers were really
vegetables grow in tire
planters.
In most of the gardens
Westmacott studied, plants were spaced far apart in rows and were
seldom watered except
during transplanting. Although records from earlier
African-American gardens showed the ubiquity of rain barrels, current
gardeners tended to rely solely on rain and to believe that drought was
God's
will.
 Mulching and composting
were nearly absent from the gardens.
Instead, weeds were removed by cultivation, often with a hoe but
sometimes with a tractor or mules. One gardener explained that
cultivation brought moisture to the surface for the plants (although I
can't quite figure out how this makes scientific sense.)
In the end, I'm
disappointed that I can't extract any permaculture
techniques from the African-American gardens, but they do seem to prove
Solomon's point. People who value yield over beauty, who garden
on a shoestring budget to feed their families, do seem to practice
extensive gardening.
| This post is part of our African-American Gardens and Yards in the
Rural South lunchtime series.
Read all of the entries: |
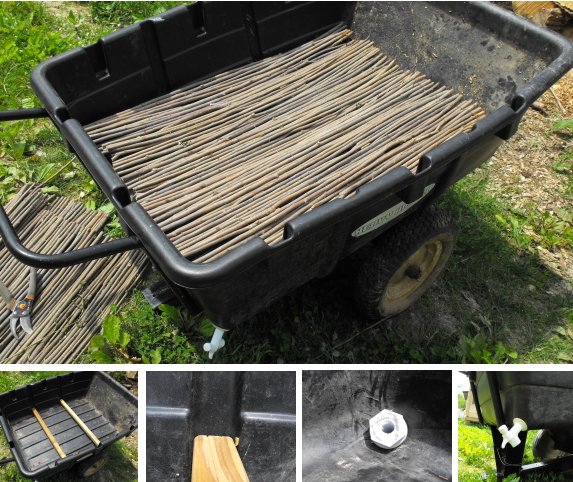
Since the do
it yourself golf cart dump box is working out so well we've
decided the Heavy
Hauler garden cart can
start its new carreer as a large
outdoor worm bin.
It took less than an hour to
scrounge around for the parts and put it all together.
The spigot was salvaged from
a thrift store drink dispenser. (Thanks
Mom)
I used a couple of 2x2's cut
to 30.5 inches for the bottom support and modified a portion of the willow wall to function as the floor. A small
gap at the bottom helps to prevent the spigot from clogging and worms
from drowning in their own tea.
Being on heavy wheels makes
it easy to manuever and tilt for the most effecient drainage
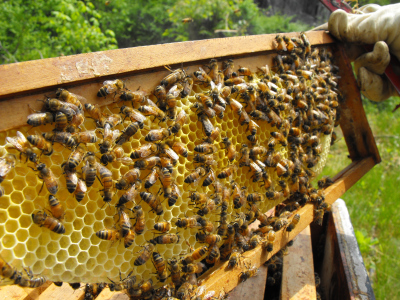 When
I checked the bees at the beginning of May,
I was a bit concerned about one colony. The hive was chock full
of
brood, but had only one shallow frame of honey, a vast reduction in
stores since the last time I checked. Would the bees keep
consuming honey and starve despite the nectar flow?
A few days later, I
noticed a lot of aimless activity in front of that
hive. Usually, a busy hive is like an airport with lots of
takeoffs and landings, but this hive had a bunch of circling workers
just wandering around in the air. I'm pretty sure I caught the
orientation flight of new foraging workers getting their bearings so
that they'd know which hive was their home.
Sure enough, a hive
check on May 13 showed that my hungry hive was
honeyless no longer. The bees were drawing out comb and filling
it with nectar just as fast as their sister hives, making me think that
we may need to make plans for our first honey
harvest soon.
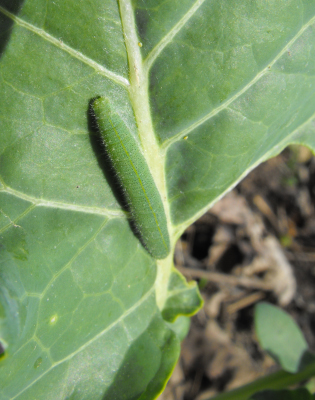 In
the last couple of weeks, "bad bugs" have started to show up in the
garden. This guy is a "cabbage worm" (aka Cabbage White
caterpillar) and it enjoys gobbling big bites out of our broccoli and
cabbage plants.
My approach to cabbage
worm control is pretty lackluster, but it seems to work --- I handpick
the caterpillars whenever I happen to notice them, then feed them to
the chickens. If you're going to head out to check your plants,
look for the dark pellets of frass (poop) on leaves, then lean in
closer and hunt down the caterpillar who left the traces behind.
Cabbage worms like to orient their bodies parallel to veins, making
them difficult to find without the tell-tale frass.
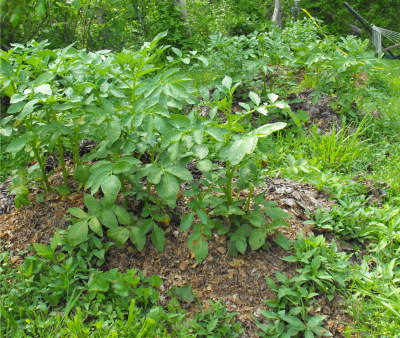 I
spend even less time worrying about flea
beetles. Tiny
black specks hopping around on the potatoes alerted me to their
presence last week and a close look showed that the potato leaves are
now perforated with hundreds of tiny holes. But the plants don't
seem to mind, so I'm ignoring the flea beetles.
I don't mean to suggest
that all "bad bugs" are harmless or easy to deal with. I'm still picking
asparagus beetles
every week, hoping to put a dent in their population and save our
fronds, and I know that we'll be battling squash vine borers all
summer. But I hope that you'll consider a more laissez-faire
approach to bad bugs, at least until they prove themselves a major
hindrance to your garden.
 We've
had issues with using a broody hen to hatch eggs in the past, and our current experiment
(which I'll outline in detail at lunch) was only minimally
successful. But the idea has so much merit from a homesteading
perspective that we'll keep plugging away until we make it work.
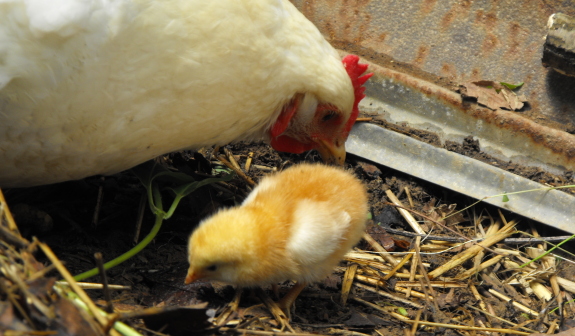
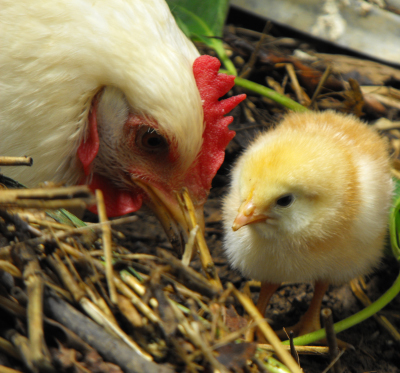
For example, look at
this --- a mother hen teaching her chick to forage on day two!
They spent the first day hunkered down in the nest, but by midafternoon
Sunday, the Cochin had led the way to the ground and was scratching up
worms. She picked up each wriggler, clucked over it
enthusiastically, then dropped it at the chick's feet. Granted,
the chick was less than sure what to do with this largesse, but I still
think such early exposure will turn it into an awesome forager.
If that's not enough to
convince you of the utility of the natural approach to chick-rearing,
consider how much electricity we'll be saving by not having to run an
incubator for three weeks and then a heat
lamp for another
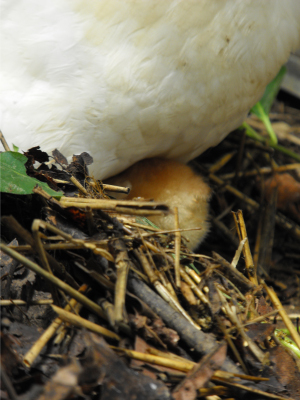
month. After following its mother around the brood coop for ten
minutes, the chick decided it was chilly, so it poked at its mother's
feathers, then tunneled underneath the hen and disappeared.
Best yet, I've
discovered that I can delegate most of the worrying to the mother
hen. Yes, we will definitely be trying the broody hen approach
again, and I have high hopes the third time will be the charm.
 When
we were in South Carolina last month, Daddy gave me eleven fertilized
Rhode Island Red eggs to try to hatch out. I brought them home
and started preheating the incubator, only to discover that the cheap
brand we'd gotten at the feed store only works if you keep your room
temperature very constant. So I made a spur of the moment
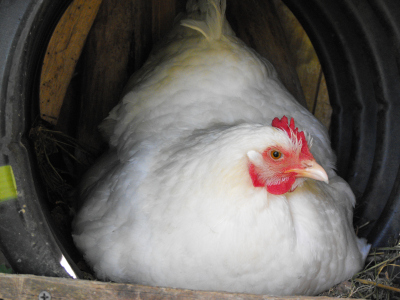
decision and popped the eggs in the brood coop with our White Cochin instead.
 Regular
readers may remember that we tried a similar experiment last fall, with
the result that our
hen killed the only chick that hatched. But I wanted to give
our hen another chance before putting her on the dinner table, figuring
she may have killed her first batch of chicks because their color made
it obvious that they weren't her own. Rhode Island Red chicks are
pale, so color wouldn't be an issue this time around.
I added a lip to her
culvert nest so that none of the eggs would roll out, then I threw the
hen in the coop. I'd heard her make a broody moan the week
before, but she wasn't really broody yet and it took her most of the
week to decide the eggs were worth sitting on. By then, I figured
our chances of getting a hatch were close to nill, so I didn't even
post about it, but I left the hen to sit on the nest since I figured I
might as well get the broodiness out of her system.
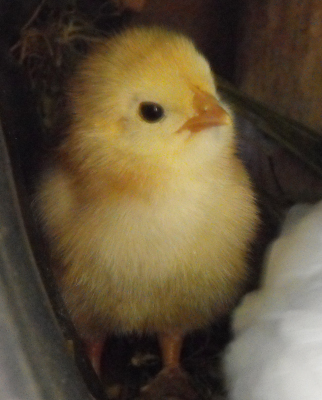
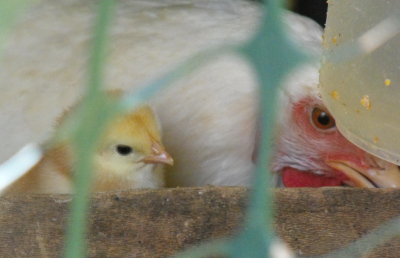 Saturday
morning, I dropped by to toss in a bit of feed...and saw a fluffy chick
running in and out of the Cochin's feathers! I moved the automatic chicken waterer into the culvert nest at
chick eye level and tossed in some chick feed, and the peep immediately
followed the mother's lead, eating and drinking. It seems quite
healthy, and the Cochin has clearly accepted it, so the only question
now is...will it be a new layer or a broiler? And have I finally learned enough that next time we'll get a good hatch rate?
| This post is part of our Farm Experiments lunchtime series.
Read all of the entries: |
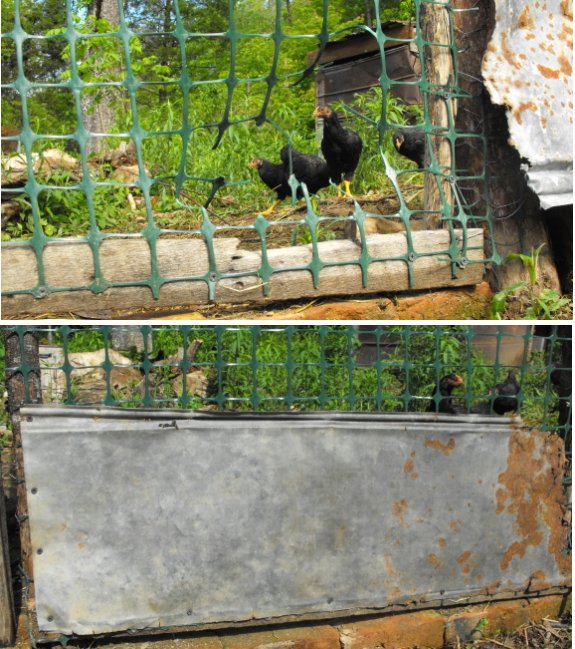
I decided to use an old piece
of tin to shore up the chicken
pasture gate.
Putting a strand
of electric wire across the gate bottom would make getting in and
out of the pasture a small hassle.
After several days of basking
in the sun the solar fence box seems to have a weak battery, which
means our next step will be to spring for the 40 dollar electric fence
charger.
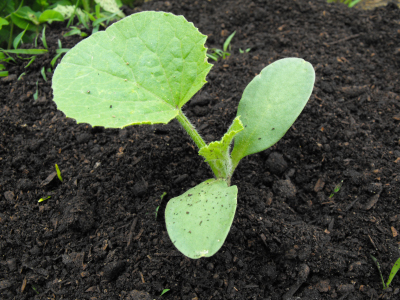 We
have a horrible time with most of our cucurbits. Even before the
squashes fall prey to the vine borer, the cucumbers and
canteloupes come down with powdery mildew. Or maybe it's cucumber
mosaic or bacterial wilt. All I know is that the plants start to
bloom, then they keel over.
I've never seen data to
back this up, but many organic gardeners
believe that pest and disease infestations originally stem from ill
health on the part of your crop. The idea makes sense --- if we
don't eat a well-rounded diet, we're more likely to catch a cold, so
why wouldn't the same
be true of our cucurbits?
Following this
reasoning, I top-dressed all of our baby cucurbits with a hearty scoop
of compost, hoping to perk them up so they'll outgrow their diseases
(and the weeds.) Native Americans used a similar idea when they
planted squash on hills of dirt over fresh fish. Maybe I'll get
lucky this year and taste our first home-grown canteloupe?
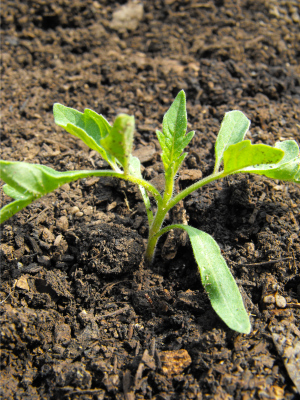 The
tomato
blight of 2009 left
me close to tears last summer, and with a serious
craving for red sauce this spring. This year is also a tomato
seed turning point. I last saved seeds in 2007, assuming that I
could collect more in 2009, but I didn't manage to harvest any tomato
seeds before the blight hit. This spring, my three year old seeds
had low germination percentages, so I absolutely must have ripe
tomatoes to save seeds from this year or I'll have to rebuild my
collection of the
tastiest and most utilitarian tomato varieties from scratch.
So I'm experimenting
with spacing, location, and timing in search of a
blight-free tomato harvest. The goal of the first two experiments
is to allow lots of sunlight and air movement around the plants so that
they'll dry off quickly after rains. To that end, I've planted
all of our tomatoes in the sunniest part of the garden, and am doubling
the spacing between plants to three feet. In addition, we'll be
individually staking the plants and pruning off the suckers to promote
even speedier drying.
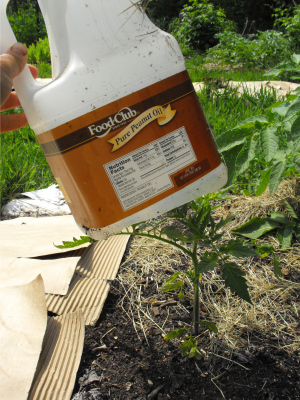 Meanwhile,
I'm trying three different planting
times/ages. I've discovered in the past
that young seedlings started
in a cold frame then
transplanted to the garden do better than
leggy
tomato plants that have been struggling on a windowsill for
months. So the majority of my plants have just been transplanted
out at
the two sets of true leaves stage.
On the other hand, my
neighbors believe in buying big transplants and
putting them out earlier, covering the plants with bottomless milk jugs
during cold spells and hoping that they will bear at least some harvest
before blight sets in. A volunteer tomato came up in our lemon
pot in the sunroom this spring, and I decided to transplant it out into
the garden on April 21 to see how its growth compares to that of my
younger transplants --- it's currently big and hefty, with about six
pairs of true leaves.
Finally, my father
likes to tell me that he once direct-seeded tomatoes into the garden
after all danger of frost was past and still got harvests nearly as
quickly as from transplants. So I filled the last tomato spot
with ten seeds and will weed the seedlings down to the strongest one
once its up. Will it catch up with its transplanted
siblings? Only time will tell.
If all else fails, I
have one last trick up my sleeve. One
volunteer tomato plant survived the blight of 2009, and I carefully
saved its seeds to add to my collection. I have high hopes that
at least this one variety will be resistant enough to give me a
crop. Here's hoping something works!
| This post is part of our Farm Experiments lunchtime series.
Read all of the entries: |
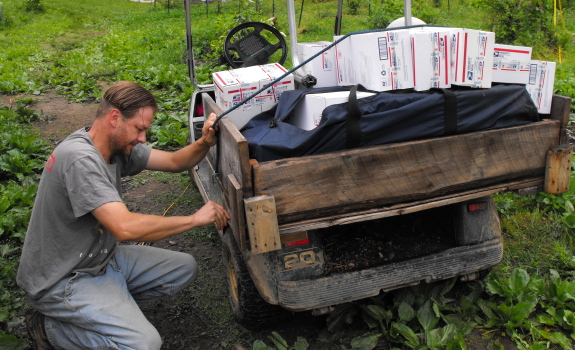
It only took about 2 minutes
to install an eye hook on the port and starboard side of the do
it yourself golf cart dump box.
Now we have tie down points
to attach a bungee cord to for easy snugging.
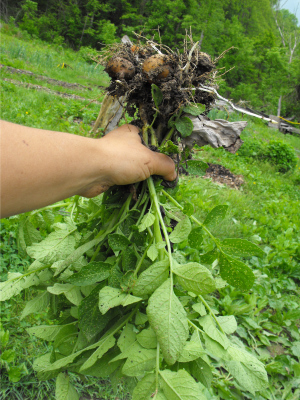 Once
you've been gardening in an area for a while, you'll start seeing
volunteer vegetables. Unless they're impinging on the space of a
beloved crop, I often leave volunteers at least for a while, as a sort
of insurance against catastrophe in other parts of the garden.
But Mom reminded me that blight overwinters in left behind
potatoes,
and that my volunteers are vectors of infection. Oops! I
ripped out those volunteers as fast as I could, hoping I hadn't let the
blight loose on our farm again.
On the other hand, I've
also read that the blight can overwinter in
weedy nightshades, which we have several of around the farm. In
the spring, the spores can travel several miles through the air,
infecting all
potatoes and tomatoes in their path. There's no way I can destroy
all of the nightshades even on our farm, so I'm just hoping that the
blight
control measures
I've put into place will be enough to protect
my tomatoes.
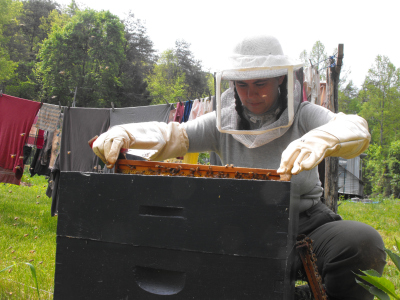 When
we started our hives last year, we had to take a stand in the great
excluder debate. A queen excluder is basically a screen that you
place between the brood box and the honey supers to ensure that the
queen stays down where you want her and doesn't head up to lay eggs in
the honey frames. Some folks swear by excluders, but other people
point out that excluders make your hive more likely to swarm since your
brood box can get congested in the spring. We opted to join the
anti-excluder camp primarily because I knee-jerk in favor of anything
that sounds more natural, and because I am too cheap to buy equipment
we don't really need.
Last year, our lack of
an excluder caused absolutely no problems. Our bees were working
hard to build up their hive, and the queen had no time or inclination
to lay eggs in the honey supers. This year, though, I noticed
that two of our hives have a bit of drone brood at the bottom of the
lowest honey super. Which brings us to beekeeper debate number
two: are drones a drain on the hive or an asset?
I won't go into bee
biology too far, but you need to understand that there are three kinds
of bees in a honeybee hive. There's the queen --- one per hive,
who lays all of the eggs and does nothing else. There are the
workers --- many, many per hive, who do all of the work from foraging
for pollen and nectar to cleaning the hive and raising the babies
(brood.) Then there are the drones --- the only males in the
hive, whose sole purpose is to head out every day in search of a
mate. Since the queen only has to copulate once in her life, you
can see that keeping a bunch of drones on tap is wasteful --- they eat
like crazy and don't pull their weight. As a result, many
beekeepers try to keep drone production to a minimum.
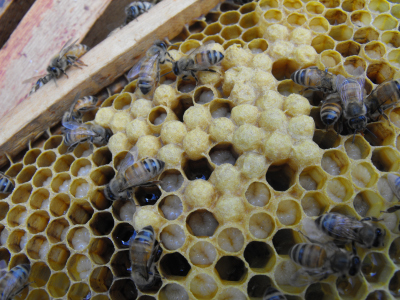 Drone
management comes down to managing the cell size in the brood box since
the queen decides whether to lay eggs that will become workers or
drones based on the size of the cell. Big cells are for drones;
small cells are for workers. When drones reach their pupal stage,
they're too big to fit into even their extra large cells, so workers
build a little domed cap to seal the drone pupa in rather than the flat
caps they build over worker brood. As a result, it's pretty easy
for us to take a look at capped brood and know at a glance how much of
it will turn into workers and how much into drones --- the photo here
shows the domed caps of drone brood (along with some drone larvae too
young to be capped.) Beekeepers who want to limit drone
production will cut out drone-sized comb and replace it with
worker-sized comb so that the queen will lay the latter rather than the
former.
Now we come back to the
queen excluder. Without the excluder, when the brood box starts
filling up but the queen still feels like laying eggs, she'll move up
into the first honey super to lay. The problem is that honey
cells are large, so the queen lays all drones up there --- a drain on
the hive. On the other hand, a
fascinating article by Walt Wright makes the point that natural
hives keep 20% of their brood area in drones and that the hive will
build all kinds of jurry-rigged drone cells if we prevent them from
laying that 20%. He concludes that it's better to go ahead and
let the hive produce drones rather than running the risk of lowering
honey production with a queen excluder.
I'm still in the
learning stages of bee management, so I'm taking a bit of a wait and
see approach. If there's a lot more drone brood at our next hive
check, I'll probably put a super of foundationless frames beneath the brood box,
letting the hive build more worker cells for the queen to lay in.
That way, the queen will get to keep expanding the worker population,
which will mean more nectar brought in from the field and more honey
for the winter. On the other hand, if there's still just a bit of
drone brood at the bottom of the first honey super, I'll figure the
hive deserves their boy toys and leave it alone.
| This post is part of our Farm Experiments lunchtime series.
Read all of the entries: |
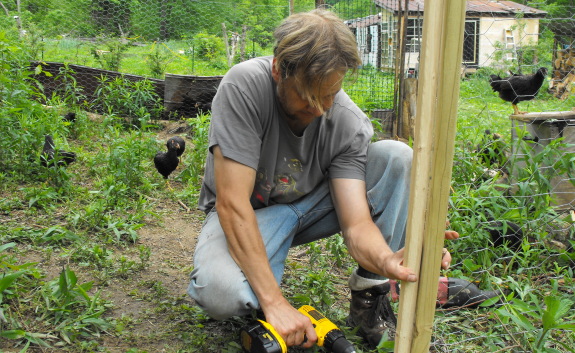
The new flock
steadily grew more interested in what I was doing to their pasture as
the day went on.
Now we have it split in two
sections with a gate connecting each area.
 When
I posted yesterday that weedy
nightshades can carry the potato blight, both Mom and Zimmy asked
me to clarify. Sorry to be confusing --- sometimes the botanist
in me assumes things are obvious when they aren't.
Potatoes and tomatoes
are both members of the Solanum genus, which is why they
are able to share the blight. Here in southwest Virginia, we have
two common members of the same genus that tend to spring up as
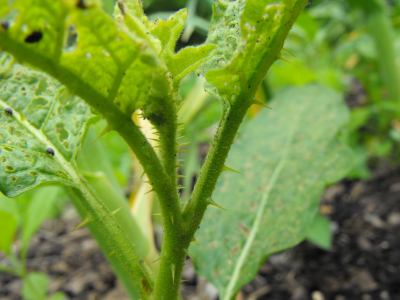
weeds in pastures and other disturbed areas. Horse-Nettle (S.
carolinense, top
photo) is very memorable
after the 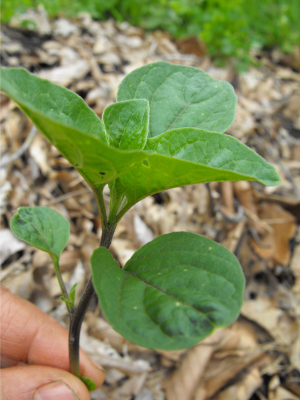 first
time you try to hand-weed it and end up with fingers
full of thorns, while Black Nightshade (S.
americanum,
middle photo) is most obvious in
the fall when it is coated with small black berries (that my plant
manual says are poisonous when raw but can be cooked into pies when
ripe.)
Since both Horse-Nettles
and Black Nightshades share the same genus
with tomatoes and potatoes, they also share susceptability to the
blight and can help the disease overwinter. I call these plants
"weedy nightshades" because all members of the family are sometimes
referred to as "nightshades", and these two species are weeds in my
garden.
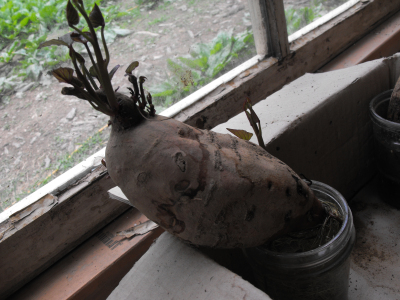 Last
year, I thought I had sweet
potato slip production
figured out. My method was quite simple --- submerge about a
third of the potato in water, put the containers on a heat mat, break
off sprouts once they form, then put the slips in water to grow roots.
My only complaint was
that starting the potatoes in early April meant I could only plant one
bed at the frost free date and had to put out the rest of the sweet
potatoes a bed or two at a time until early July. So this year I
started my sweet potatoes near the end of March...and the tubers sat
there doing nothing for a few weeks before over half of them rotted
away. We're still on schedule to plant a bed of slips this week
and will fill in all of the parts of the garden I'd allotted to sweet
potatoes, but we didn't get the jump on the season I'd hoped for.
Maybe March is just too early to start sweet potatoes?
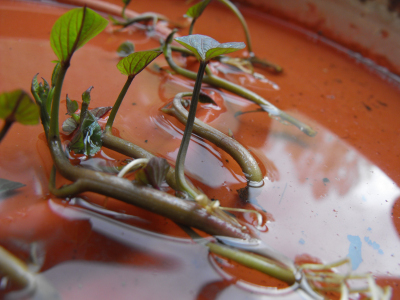 I
also think I blew it by focusing on big tubers for sprouting, compared
to the small tubers I used last year. Various extension service
websites suggest that the optimal sweet potato for sprouting is only an
inch and a half in diameter. Next year, I'll bypass those chunky
monsters and use mini-tubers as seed stock.
If I remember, I'd like
to try another alternative technique next year as well. The pros
start their sweet potatoes in hot beds of moist sand, and I think I can
mimic that on a small scale by putting a seed starting tray full of
sand on the heat pad instead of jars of water. I suspect the sand
would prevent this year's molding problems by keeping the tubers moist
but not wet.
On the plus side, I
discovered that chickens really enjoy half rotten sweet potatoes.
Maybe once we work the kinks out of our propagation method, sweet
potatoes will be a component of farm-grown
chicken feed?
| This post is part of our Farm Experiments lunchtime series.
Read all of the entries: |
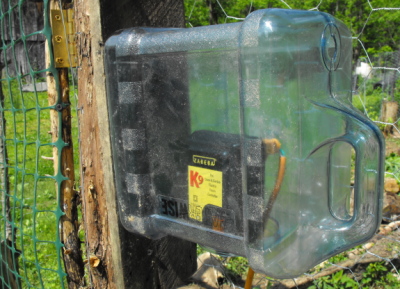 The
drink dispenser I salvaged the spigot from for the garden
cart worm bin is now doing duty as a waterproof enclosure for the
new K9 electric fence charger.
These units somehow get their
grounding from the electric line, which is a change from other chargers.
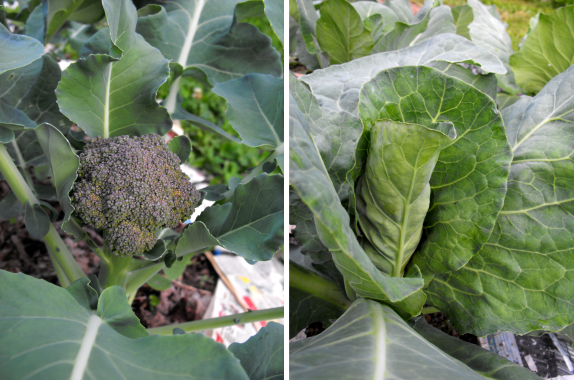
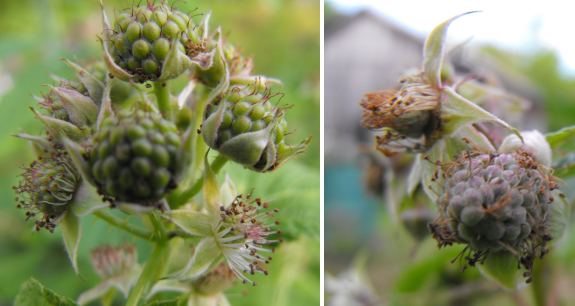
The farm is brimming
with life this week. The strawberry crop has reached the point
that we made strawberry shortcake, and we finally ate our first snow
pea. Coming attractions include broccoli and cabbage heading up
(above) while black and red raspberry fruits begin to swell (below.)
Of course, I haven't
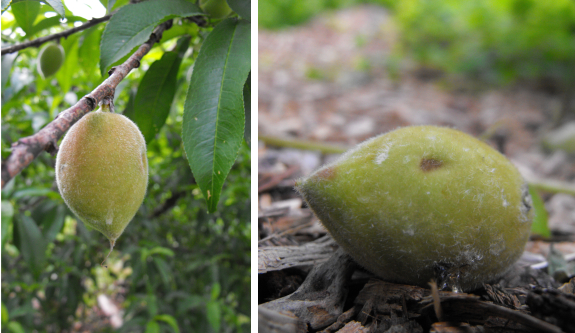
forgotten the peaches! How could I when our biggest tree is
directly outside the kitchen window? Daddy was right that the
tree would self-thin --- it wasn't quite happy
with the job I did and dropped another couple dozen fruits the next
week. But the remaining fruits are bigger every day and are still
so numerous I can hardly wrap my mind around the bounty.
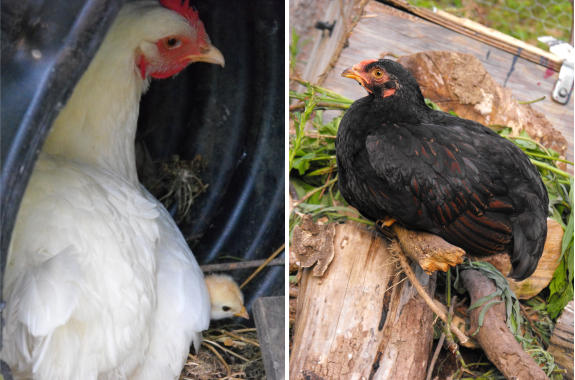
Speaking of bigger every
day, our growing flock is...growing.
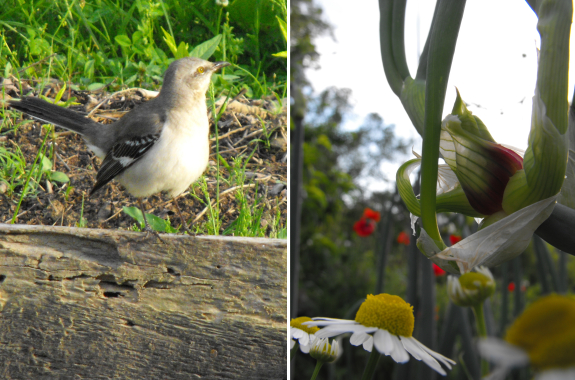
And our forest garden
continues to attract wildlife and fill our lives with beauty.
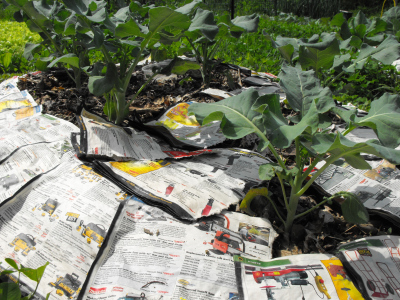 The
last experiment I want to talk about this week is our summer
mulch experiment.
You'll remember that I've been testing out lots of different mulches
this spring, including grass clippings, autumn leaves, newspaper, and
cardboard. How are they doing a month later?
When I laid down the
mulches, I was hoping I could put them directly on top of small weeds
rather than taking the time to weed each bed before I mulched it.
Newspaper and cardboard did an admirable job of smothering the weeds,
but the naughty plants grew right through the grass clippings and
autumn leaves. In the case of the former, I couldn't even tell
that the bed had been mulched a month later and just weeded as usual,
but it was quite difficult to pull weeds from the autumn leaf mulched
beds without taking half the mulch away with them.
I was a bit concerned
that mulches with a high C:N ratio would retard the growth of
my plants by locking up nitrogen in the soil, and three of our pea beds
do seem to have some
problems. Rather than growing lush and green, the peas are
yellowing at the base and barely growing. Interspersed broccoli
is huge and luxuriant in some beds, but puny and purple-tinged in
others.
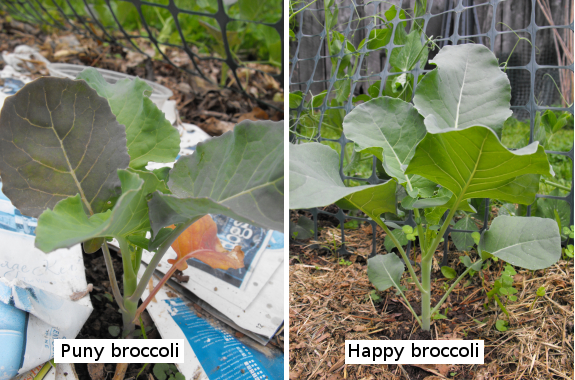
But is there a
correlation between mulch and plant health? I can't be
sure. All three of the sad-looking beds were mulched with a
combination of paper with colored ink and autumn leaves, but some
similarly mulched beds are fine. My best guess is that the puny
plants are reacting to something in glossy paper, but I didn't keep
records of which beds got glossy and which didn't, and the paper has
decomposed enough that gloss is no longer visible. It's also
quite possible that some non-mulch-related variable is at work, but
I'll play it safe and keep glossy paper away from my plants in the
future.
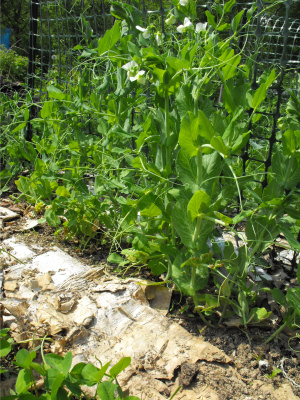 Although
the grass clippings didn't do much for weed control on already weedy
beds, they did keep weed-free beds from growing new weeds. In
addition, the grass clippings seemed to work as a light fertilizer,
resulting in plants that were big and healthy. If I have time to
weed first (and enough grass clippings to go around), grass mulch seems
to be a winner.
I only mulched one bed
with cardboard, but this mulch seems to be a winner as well ---
cardboard is a great weed retardant, has no ill effects on plants, and
doesn't blow around the way paper did for the first few days before it
melded to the soil. I'm not surprised since I learned in Steve
Solomon's book that
corrugated cardboard has a C:N ratio comparable to straw rather than to
paper due to the nitrogen in the glue. I'm mulching several more
beds with cardboard this week and will give you an update in a month or
two on positives and negatives.
| This post is part of our Farm Experiments lunchtime series.
Read all of the entries: |
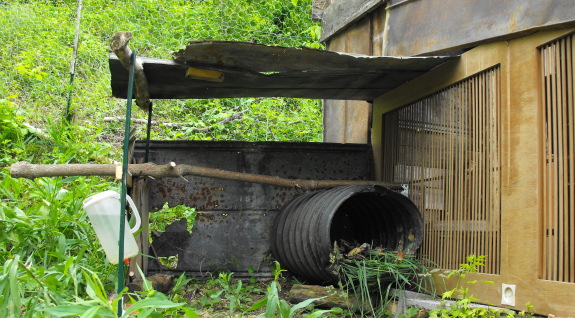
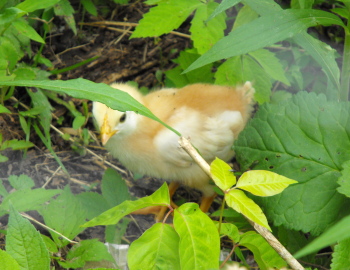
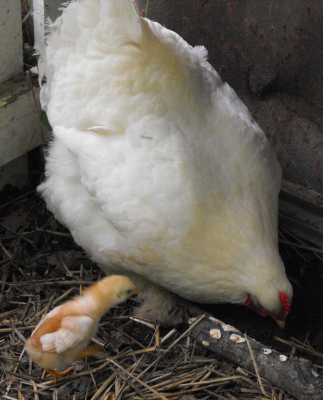
We both feel a lot better now that the new chick and
her mom have the whole 2nd half of the chicken pasture all to
themselves.
The day's lesson in foraging
started as soon as they got over the shock of the short move to
their new zipcode.
 "Soooo...."
I said. "I think the best way to move the hen and her chick to
their new home is for one of us to grab the hen and the other the
chick. What do you think?"
Mark had finished
building a
protected nook in
the fenced off portion of the chicken pasture, and we were dying to get
the chick to its new home. The brood coop was damp and stinky,
both from accumulated poop and from the ten eggs that didn't hatch
(ticking time bombs, just waiting for a wrong move to send waves of
rotten egg scent through the farm.) But the mother hen is pretty
intimidating and I was, frankly, a bit afraid to grab her.
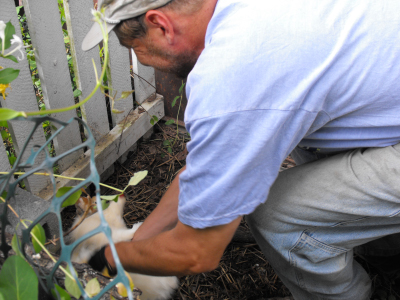 "I'll
get the hen," said my brave husband, donning his gloves. And he
did --- one minute later, the squawking bundle of white feathers was
being deposited into the chicken pasture.
The trouble was, I
couldn't catch the chick. It was just too fast for me, slipping
in and out of the brood coop, then fleeing in fright into our
barn. I went in after it, trying to tease it out of a stall full
of old boards, until Mark called a halt to the proceedings.
"Just wait a minute and
see where it is," he admonished me. We waited, and seconds later,
the fuzzball reappeared.
"Mom! Mom!
Where are you?!" it cheeped desperately.
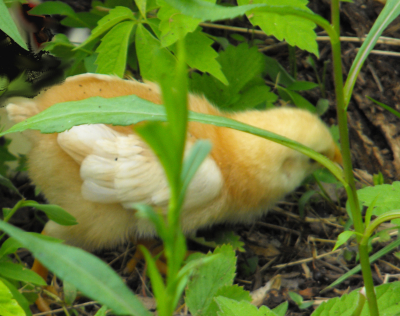
"Cluck, cluck, over
here," she replied from across the yard.
We stepped back, and the
chick sprang forward. "Mom! Mom!" it exclaimed as it scaled
the plum's raised bed. "Mom! Mom!" as it trotted through
the blackberries. "Mom! Mom!" as it crossed the driveway,
its mother now in sight.
"Well, get in here," the
mother clucked soothingly, and her adoptee slipped through the chicken
wire to be reunited at last.

I think we've finally found a product that will help Lucy figure out
that she's not allowed to steal food scraps from the chicken pasture.
Just minutes after the new
chick made it back to mamma Lucy went sniffing around the fresh
chick trail. It didn't take her long to follow it to the chicken
pasture. I just happen to be watching when she got too close to the Zereba K9 lawn and garden
electric fence controller. The backward leap she made seemed to
break a few laws of doggie physics.
It's easy to set up. Just wrap each end of the perimeter wire onto the
wing nut at the bottom. It uses something called direct discharge
technology which eliminates the need for a grounding rod. With a
maximum range of 1500 feet the K9
electric charger makes an excellent solution to keeping unwanted
pets out of sensitive areas. Expect to pay about 25 bucks for the unit
and maybe another 20 to 200 depending on how long of a perimeter you're
protecting and the quality and quantity of the fence posts used.
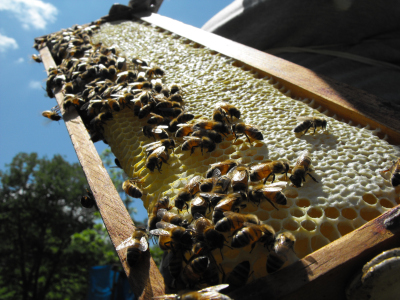 We
headed to the hive Thursday to steal some honey, but ended up deciding
to wait another week. Although there's
plenty of honey present, I couldn't find a single
frame that was completely capped.
Capped honey can be
stored indefinitely since it's so low in moisture
that microorganisms can't get a foothold in the gooey goodness.
Uncapped honey, on the other hand, can host several yeasts that ferment
the honey, slowly turning the precious sweetener into mead. You
can get away with extracting frames with a bit of uncapped honey, but I
decided to play it safe.
The last week has been
cool and wet, so I'm not really surprised our
bees sat around playing poker instead of making and capping
honey. Hopefully next week we can take our borrowed extractor for
a spin.
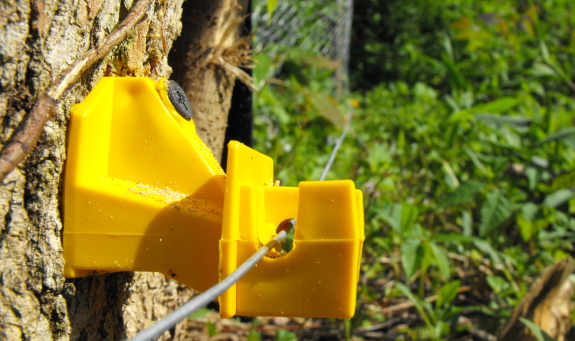
I estimate the total cost of
the chicken pasture electric fence installation to be around 75 dollars
which ended up including the following items.
- Zereba K9 lawn and garden charge controller
- small bag of yellow plastic insulators
- about 300 feet of electric fence wire
- a half dozen small metal fence posts
Each bag of
insulators comes
with enough nails, but I prefer using drywall screws because it makes
adjustments easier after you've got it all together.
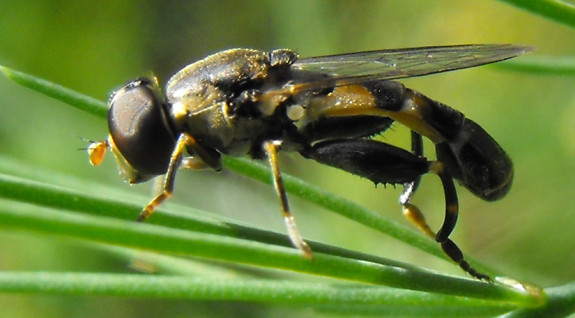
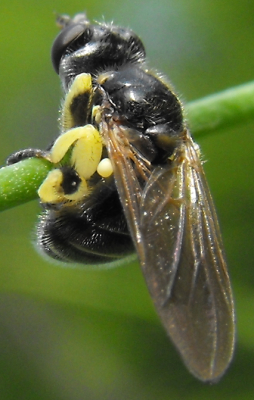 I've
been dutifully plucking asparagus
beetles and squashing eggs once a week, hoping that a predator will
show up soon and take over. By now, the eggs I missed have given
way to plump larvae nibbling on asparagus fronds, so I was thrilled to
suddenly notice half a dozen insects I'm unfamiliar with sharing the
habitat. Could this be my long-awaited pest control?
Sadly, no. The new
bugs are just some of the seemingly unlimited supply of different native
pollinators in our
garden, these attracted to the just opened asparagus blooms. The
scary looking guy at the top of the page is a Syrphid Fly (aka Hover
Fly) that feeds on nectar as an adult and on moist organic debris as a
larva. The strange percher on the right is a Thick-headed Fly
taking a break from a snack of nectar before she lays her eggs on a
bumblebee or wasp in flight.
 I'm still rooting for a
predacious wasp, but until I see one I'll keep squashing beetle larvae.
I
hope you'll bear with a second lunchtime
series of experimentation. If you're bored, say so and I'll try
to cut back
on future lunchtime series about experiments. Meanwhile, I've got
a book-related series on comfrey coming up, so stay tuned.
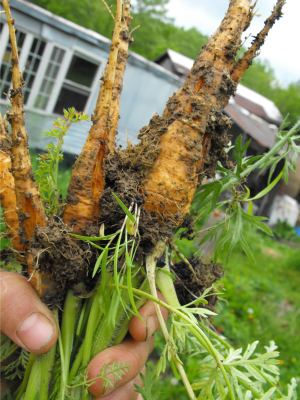 Last summer when
the blight hit, I
was faced with several empty beds in
August. Even though it was a bit late for planting most fall
crops, I decided to seed carrots and parsnips, and the umbellifers did
grow beautiful ferny leaves to replace the blighted tomatoes.
However, when cold weather approached, I had to face the fact that my
crops hadn't been in the ground long enough to thicken their
roots, so I decided to cover them up with mulch and see what would
happen
in the spring.
I uncovered the carrots
and parsnips at the same time I uncovered the
strawberries, and the plants took off, once again turning their beds
into a jungle of leaves. I was so hopeful...until I pulled a few
up. The parsnip roots had gone woody inside while the carrots had
paled in color and turned bitter.
They were just barely edible enough to use in soup, but I would have
been
better off eating the small roots last fall when they were sweet and
crunchy.
I haven't gotten around
to pulling all of the parsnips out yet, and
they're starting to send up flower stalks --- the one positive result
of overwintering a biennial. I don't know if I have
enough plants to prevent inbreeding, but I'll at least let them bloom
since umbellifer
flowers are beloved by beneficial insects. And if I need
something to fill garden gaps in August, I'll stick to a late planting
of summer squash.
| This post is part of our Farm Experiments lunchtime series.
Read all of the entries: |
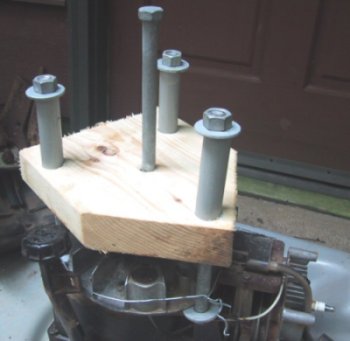
When I first discovered that I'd
ordered the wrong flywheel puller I had a brief fantasy of
fabricating one of my own to get the job done.
I never could figure out a decent direction to go in and decided to
give up on it for a while and just mow with the semi un-balanced blade.
Well some guy with an interesting blog named Ed had a bit more gumption
than I did and almost made his own
diy flywheel puller tool pictured here.
He reports the wood
breaking before the flywheel came free, which is a bummer. The way he
finally solved the problem was to take it to a local shop where they
used the crude but effective hammer and screwdriver approach to pop it
off.
I'm starting to wonder if
anybody out there uses these flywheel puller tools for the basic small
to medium lawn mower engine?
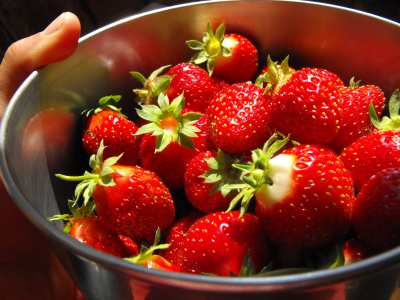 Left-o-ver
straw-ber-ry
[left-oh-ver straw-ber-ee]
--- noun, plural -ries.
1. Fruit that makes it into the house to be shared with the
long-suffering husband after the primary gardener has glutted herself
for two weeks on sun-warmed strawberries.
Origin: Previously considered an erroneous combination of "leftover"
and "strawberry". Added to the dictionary in 2009 when excess
rain caused a decline in flavor. Despite full flavor in 2010,
the phrase has been retained.
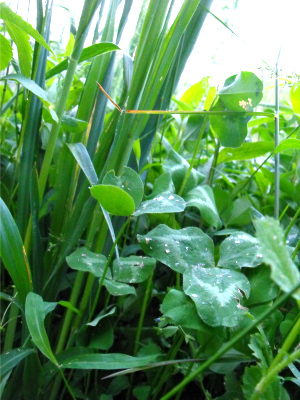 It's
been months since I've talked about our do-nothing
grain experiment,
but what can I say, I've been doing nothing. You may recall that
I let the chickens churn up a couple of areas in the yard, then threw
down hull-less oat and red clover seeds in early March. For a
while, the weeds seemed to be growing faster than the grain and clover,
so I figured the experiment was a failure.
I mowed down one plot
accidentally, but remembered to mark off the other small plot with
cinderblocks. And suddenly the oats have overtopped everything
else and the clover is starting to outcompete the weeds. This is
all with no tilling, no kill mulch, and no weeding.
Granted, this first
incarnation has too many flaws to be considered a success. There
are only about a dozen oat plants in my three foot by three foot plot,
presumably because I didn't cover the seeds with anything and hungry
critters made off with most of them. Fukuoka prevented this
predation by wrapping the seeds in balls of clay, but I suspect just
raking them into the soil a bit better or covering them with straw
might do the trick.
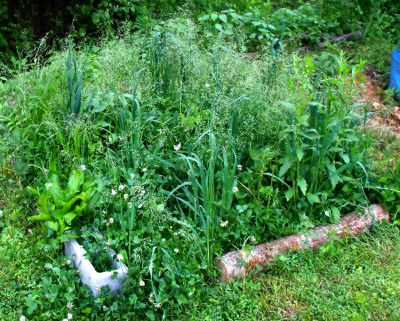 There
are also plenty of weeds mixed into the plot, but I consider this less
of a problem. The clover and oats are clearly doing better than
the weeds, and I think a few generations of do-nothing gardening might
clear out the unwanted visitors in the plot.
I'm gearing up for a
second do-nothing grain experiment shortly, using the buckwheat/wheat
rotation that seems
better adapted to our climate. Mark fenced
our cockerels out of two thirds of the chicken pasture last week, and the flock is
finally starting to denude their remaining space. In a few weeks,
we'll rotate the chickens out, rake up the ground, and sow some
buckwheat and clover seeds for do-nothing experiment part two.
| This post is part of our Farm Experiments lunchtime series.
Read all of the entries: |
 First of all, we're really lucky to live out
in the country where the trees mitigate a lot of the heat. Even
though our trailer isn't shaded (nor insulated nearly as well as
Zimmy's), it cools off enough at night that open windows and a fan are
all I need even in the peak of summer. In the city where I spent
part of my childhood (just an hour down the road from our current
farm), asphalt collected the heat and we weren't nearly so lucky.
The cool nights definitely help!
First of all, we're really lucky to live out
in the country where the trees mitigate a lot of the heat. Even
though our trailer isn't shaded (nor insulated nearly as well as
Zimmy's), it cools off enough at night that open windows and a fan are
all I need even in the peak of summer. In the city where I spent
part of my childhood (just an hour down the road from our current
farm), asphalt collected the heat and we weren't nearly so lucky.
The cool nights definitely help!We also tweak our daily schedule to work around the weather. In the winter, we spend the mornings indoors working on blog posts, chicken waterer construction, or fixing things, then do our outside chores in the afternoon when the sun has had a bit of time to warm the day. I feel like summer has really begun when we flip-flop that winter schedule, working outdoors in the morning when night's cool temperatures are still around to mitigate the heat, then coming inside for the afternoon.
All of that said, Mark has an air-conditioner in his room where he retreats to cool down several times a day. I snipe at him off and on since I sincerely believe that air conditioners are counter productive, preventing his body from acclimating to hot weather. I know that the first week of serious heat is really hard on me --- I can't think straight or work hard. But after a while, things even out and I no longer feel hot as I sit typing this in eighty degree heat in the trailer. (I'm certainly not going to bake a cake, though, and I may jump in the creek later.)
On the other hand, I don't know if Mark's body could acclimate to the heat the way mine does. I was raised without major climate control --- we kept the house temperatures cool in the winter and had no air conditioner in the summer (though I often walked to the library to bask in their cool temperatures.) Did early exposure to temperature extremes adapt my body to the warm blanket of humidity in ways Mark's body could never adapt? I seem to need less heat in the winter too, although I think that's partly because I have no problem wearing long johns and a winter coat, if necessary, even in the house.
I'd love to hear from you about your body's ability to acclimate to hot and cold. Are you the one always turning the thermostat up, or always turning it down? Were you raised in climate-controlled splendor, or jumping in the creek to cool off on a hot summer's day? Bonus points to anyone who can point me to some serious science about what happens when our bodies get used to hot weather.
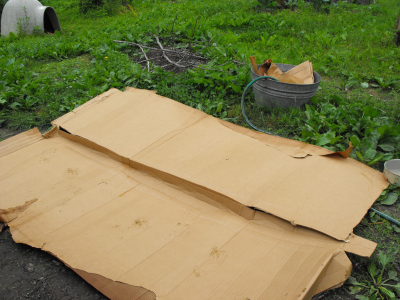 Last
week, I detailed the
results of my first summer mulch experiment, noting that cardboard is a
potential winner. Meanwhile, Mom found a stash of huge boxes
being thrown away and snagged them for my continuing mulch
experiments. I'm trying the cardboard out on some cucurbits and
okra, as well as on two troublesome, weedy beds that need a kill
mulch. Sister cucurbit and okra beds are being left bare for
comparison.
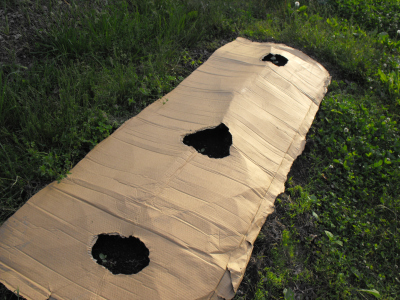 Despite
the fact that I soak the cardboard well before using it as a mulch, I'm
a bit concerned that it might be too slick for easy rain
penetration. I'll keep a close eye on the cardboard-mulched
plants and perhaps add some organic matter on top of the cardboard or
punch small holes in it to increase water penetration. As Mark
pointed out, if I can work the kinks out of cardboard mulch, there's a
neverending supply in nearby towns and it's much easier to transport
than other mulches.
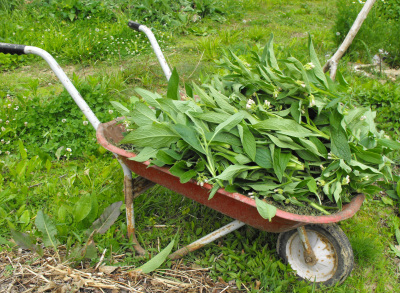 In
other mulch news, last year's newly transplanted comfrey patches are now big enough
that I'm cutting them biweekly, adding the low C:N mulch to
select garden beds. So far, comfrey seems to be equivalent to
grass clippings as a mulch --- providing fertilizing power, breaking
down quickly, but letting some weeds through. I have to mention
that the bumblebees continued to feed from the cut flowers for over 24
hours after they were detached. Another reason to plant comfrey
in your yard...as if you don't have enough reason already!
| This post is part of our Farm Experiments lunchtime series.
Read all of the entries: |
Working on a tip I got from
the local hardware store last week I went out this morning in search of
the Flywheel Wizard. I was not only lucky enough to see him without an
appointment but was able to record the short sequence of events that
needs to transpire before the flywheel will finally yield its secrets.
It was a father and son team,
and I asked them about flywheel puller tools. It seems they both agree
that a special tool is needed if you're an amateur, but if you perform
each step with care the old pry bar and hammer trick
will work without doing any damage.
What you need is:
- long, hard screwdriver/prybar. (20 dollars)
- heavy mini sledge hammer. (20 dollars)
- replacement flywheel nut.(?)
- someone to help apply pressure to opposite side.
- flywheel shaft key
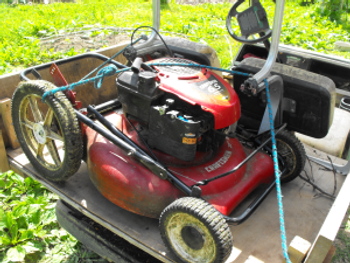
The flywheel nut should be positioned at the very top of the flywheel shaft so it will receive the
brunt of the hammer pounding which helps to protect the flywheel shaft
threads.
What you don't see in the
short video is the flywheel nut being replaced due to something going
wrong. I suspect he should have had his Dad pulling since the first
hammer hit.
The Wizard only charged 18
bucks and had me on my way within minutes.
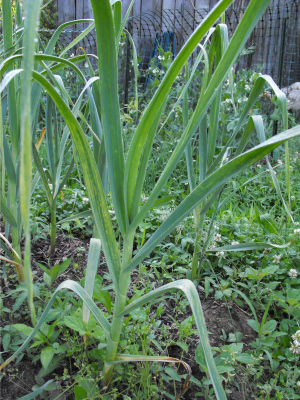 Garlic
is on my list of crops so easy I barely
post about them. I'll mention curing in a month or so since that
was our downfall last year --- we lost nearly a
third of our crop due
to improper drying.
Other than that, timing is the only
concern. Specifically, when do you harvest garlic?
If you harvest your
garlic too early, the heads will be small, and some
may not have divided themselves into cloves yet. If you harvest
your garlic too late, the outer wrapper layers will have rotted off and
the garlic head won't store well. We're looking for Goldilocks'
"just right" stage, when the heads have achieved their full maturity
but are still enfolded by several protective layers of paper.
A rule of thumb is to
harvest when the lower leaves of the garlic plant
start to die back but four to six living leaves remain. Folks say
that each living leaf equates to a wrapper layer still encasing the
garlic head. Depending on where you live and what type of garlic
you're 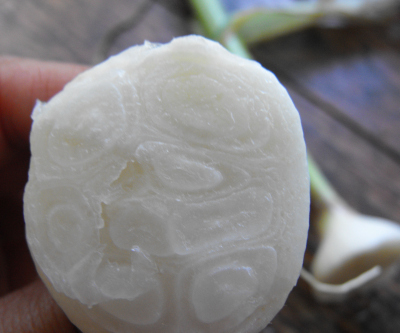 growing,
the magic date may arrive any time between June and August.
I planted so many beds
of garlic this year that I
can afford to harvest a few early to get a feel for what's going on
underground. Monday, I pulled the plant at the top of the page
and cut open the bulb to see what's inside. Notice the eight
living leaves still on the plant, but only seemingly three or four
protective layers around the head. I could probably harvest the
garlic now, but I'd rather let the plants grow for another week or two,
testing at intervals to discover when the outer layers begin to rot off.
We've still got thirteen
heads of garlic from last year to eat up, so I'm in no big hurry to
harvest. I do wonder, though --- what was I thinking to plant
twice as much garlic as last year? Christmas presents? Fear
of vampires?
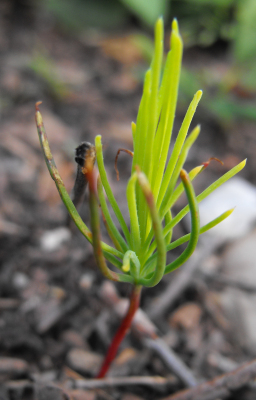 Is
that a baby stone pine? Hmm, I don't
know. What do you think?
The problem with my stratification method --- toss the seeds in
a garden bed and wait over the winter --- has become clear. I
very rarely mark anything in the garden because I write down which bed
I've planted seeds in and I know how to distinguish vegetable seedlings
from weed seedlings. But what do you do when you've planted seeds
that will turn into unknown seedlings, like the stone pine, honey locust,
and persimmon seeds
I popped into the garden to stratify this winter? By definition,
these guys need extensive time in the ground before they'll sprout,
which means I've been scared to weed those beds for the last six months
in fear I'll pull out my tree seedlings. Now I'm left wondering
whether a few odd seedlings are the ones I've been waiting for, or
whether my carefully collected seeds came up and choked amid the weed
patch.
I can't believe I'm
saying this, but winter
sowing would have
come in handy here. That's actually how I started my first
persimmon seeds --- I popped them in a pot of soil and forgot about
them until seedlings miraculously sprang up many months later.
Maybe I'm going to have to start this experiment over next year,
keeping better track of where my slow-to-germinate seedlings are
located?
| This post is part of our Farm Experiments lunchtime series.
Read all of the entries: |
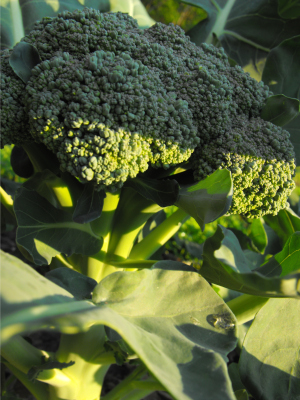 I
started to write that this is the year of the broccoli, then stopped
myself. After all, it's only May. Who knows what bounty
the garden year will bring?
Plenty of broccoli,
that's for sure. We've eaten three medium
heads, and I'm eying this huge one as it continues to swell larger and
larger every day. Six and a half beds are devoted purely to
broccoli this spring, and I also slipped in a few plants amid the peas
and
garlic.
The varied planting
dates this spring due to frost
damage
mean that our
broccoli will ripen over a few weeks rather than all at once, which is
all to the good. But already I'm considering packing some away in
the freezer, along with the greens that have finally outgrown our
appetites. We're eating sugar snap and snow peas too, and I spent
the whole week working in the upper garden so that I could lean down
and nab a juicy strawberry whenever the fancy struck.
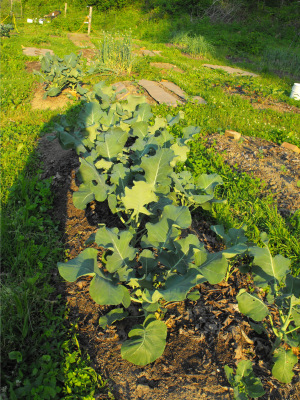
On the other hand, the
last of the lettuce is turning bitter, slated to be torn out and
replaced with summer crops shortly. The first set of beans is
nearly ready to bloom, a few tomato plants sport flower buds, and
cucurbits seem to double in size every day. The garden wheel has
turned from spring to summer and our stomachs are full.
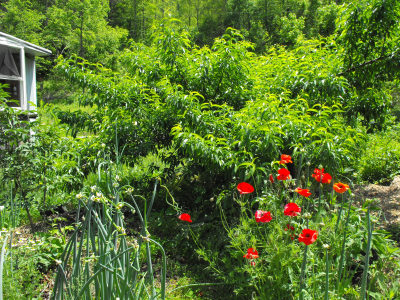 Over
the last year and a half, we've been experimenting with three different
forest gardens. My ambitious
plan to turn the
nectarine-plum-apple area in front of the barn into a forest garden in
one fell swoop has been going as slow as molasses --- I've mostly been
spreading comfrey around for fertility and building a few mounds here
and there to raise plants' roots out of the waterlogged soil. My
low maintenance plan to subtly
tweak a nearby area of young woods to encourage edibles and nectaries is in the growing stage,
with little active management needed.
The star of the forest
gardening has been my third variation on the theme --- a little forest
garden island
outside the kitchen window, an area that receives our concerted
attention twice a day as we gaze out the window while eating
meals. As a result, I'm often reminded to spend two minutes
pulling weeds or raking back the mulch to throw some flower seeds on
the ground, and the result is a mass of color and fertility that the
central peach seems to enjoy.
 While
the concept of creating a forest garden whole cloth seems pretty
daunting, slowly expanding a forest garden island has turned out to be
easy and fun. A heavy leaf mulch on the compost mounds from last
year resulted in a weed-free area to sow cosmos, marigolds, zinnias,
and other easy flowers this spring. The self-seeded poppies I
transplanted out of the vegetable garden last year are now in full
bloom and the extra Egyptian onion bulblets I tossed beside them are in
just the right spot to make it easy to snip a few leaves for our
dinner. I snuck in a few Good King Henry plants --- a perennial
green that will bear in partial shade --- and randomly poked some giant
pumpkin seeds into the ground.
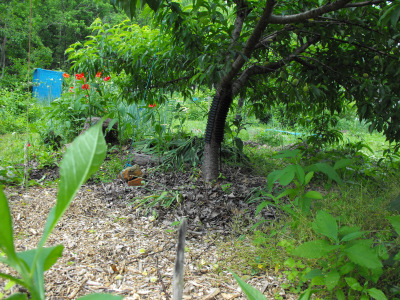 Underneath
the peach's canopy, comfrey continues to grow in the shade, ready to be
cut back to feed the tree's roots. A mass of wood chips
innoculated with King
Stropharia spawn
gives me an easy spot to sit and enjoy the view of swelling
peaches. In my nook under the peach, I feel like I'm immersed in
the woods, but with edibles and flowers within reach. No wonder
our visiting songbirds like to perch in the peach's branches before
flying out into the vegetable garden in search of bugs.
If you're intrigued by
the idea of forest gardening, but are daunted by the extensive planning
and initial work load, I highly recommend starting with a little forest
garden island. A few minutes' play can turn that tree in your
yard into the cornerstone of a vibrant ecosystem, feeding you and the
local wildlife. As the tree grows, so will the understory, and
soon you'll have plenty of perennials to spread under the enlarged
canopy.
| This post is part of our Farm Experiments lunchtime series.
Read all of the entries: |
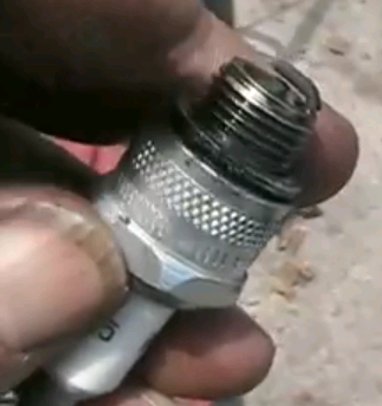
Need clear instructions on how a Briggs and Stratton engine really
works?
Davidsfarm
channel on YouTube does a great job at distilling down years of
experience into minutes. I appreciate David's simple approach to DIY
videos and feel like I've already learned a thing or two from watching
what I've seen so far.
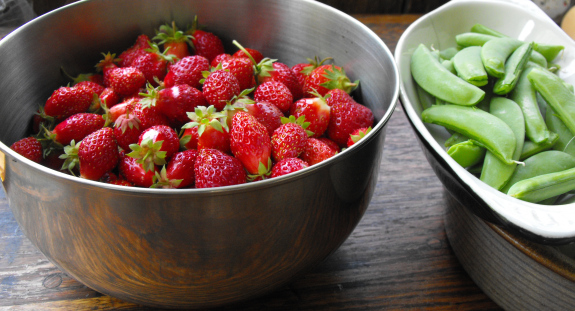
Yes, this is another gratuitous
strawberry photo.
I may have to rename this The Strawberry Blog if I don't pull my
attention elsewhere soon. But aren't three quarts of strawberries
at one picking pretty awesome?
In the interest of at
least pretending like this post imparts useful information, here's your
strawberry tip of the day. For maximum sweetness, pick fruits
before you water and wait at least 24 hours to pick again. Try to
time your harvest to the sun --- bright, hot days churn out sensational
berries.
Since I wanted to water
the front garden Friday, I picked every berry that was ripe or nearly
ripe. One quart went into our bellies whole for lunch (along with
the sugar snap peas shown here); one quart was sliced, lightly
sprinkled with sugar, then topped with whipped cream for supper; and
the final quart is going to my mother today. Only mothers are
high enough up in our esteem to merit gifts of strawberries --- I don't
want you to think we're giving them away because we're sick of them!
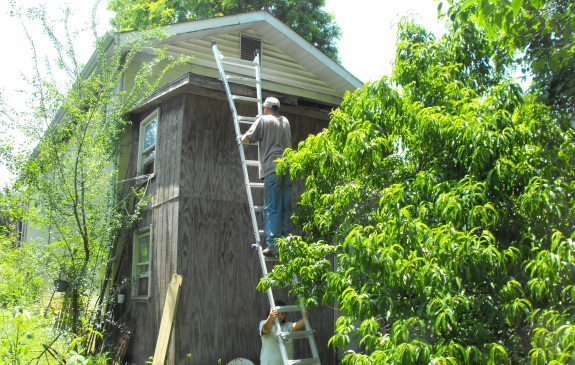

My brother in-law was smart
enough to buy a Little Giant
type ladder years ago and I'm glad he did. It helped this small home
improvement project be a bit safer and smoother than a neighbor's older
ladder which wasn't quite long enough. I've always thought the old
standard extension ladder was overdue for a make over and this is one
of those times when the engineers got it right.
You can find them in a wide
variety of sizes and shapes. The big plus is how compact this thing
folds down to.
Harold Ray Wing discovered
the first prototype in Germany back in the 1970s. He came back home to
Utah, got a U.S. patent, started building them in his garage and
selling them at trade shows and the rest is what they call ladder
history.
Photo credit goes to Maggie Hess for
capturing this Little Giant Chinese knockoff in all its long and sturdy
glory. I wonder how
much of a percentage Harold got from this big box store deal as the
original patent holder?
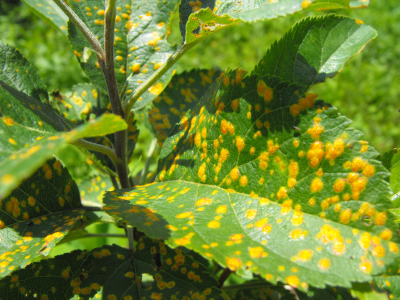 Cedar
apple rust has struck again. This winter, we cut down
dozens of
nearby Red Cedars,
but we only girdled the ones that were too
close to the electric line for easy felling. The girdled trees
are taking their own sweet time to die, so they were able to transmit
the fungus to our fruit trees yet again.
These orange spots are a
sure sign that our trees are infected.
This means another year of malingering, although I hope by next year we
will have wiped out the closest Red Cedars and our apple trees will
finally take off.
To be fair, not all of
our apple trees are malingering. I've noticed quite a range of
sensitivies, from the Winter Banana and Stayman Winesap, which
would just as soon not do
anything as long as the rust is in the air, to our Virginia
Beauty and Early Transparent, which are growing quite happily with just
a few
small spots speckling their leaves.
If cutting the nearest
cedars doesn't bring relief to our apples, I'm not
going to have Mark fell all of the cedars on our property --- there
are just too many. Instead, I'll take a permaculture approach and
replace our susceptible trees with resistant ones. For example,
old fashioned Winesaps are resistant to cedar apple rust, while Stayman
Winesaps are
not. The best list of resistant species I've run across is in this pdf
file from the Arkansas Extension Service, unique in that it includes
heirloom species as well as those specifically bred to be disease
resistant. In our neck of the woods, where Red Cedars are a very
common early successional tree, it probably would have made sense to
only plant resistant varieties in the first place.
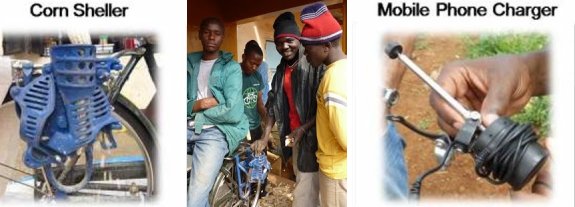
If you had chickens 100 years
ago in America you would've most likely used a hand cranked corn sheller every day to keep your flock fed.
Thanks to Global Cycle Solutions
now you can give your hand a rest and get all your corn shelling done
with pedal power.
The device can be unattatched
so you can operate the bike for transportation or hook up another
clever gadget to charge your mobile phone or flashlight or whatever
else you can imagine that needs a little power.
The cost is 60 dollars plus shipping which seems like a bargain.

Our movie star neighbor
had noticed a lot of bees hanging around on the front of the hive,
which led him to believe they might be getting ready to swarm.
Since he had to leave town for the weekend, he asked if we could drop
by and check on the apiary. We were more than happy to oblige.
I didn't notice any
swarm activity, although I did see some bees sitting around on the
front wall of one hive. I've seen this on my own hives in the
past, and at first was terrified it meant I'd missed the boat and let a
hive reach swarming stage. But each time, the bees hanging out on
the sidewall just turned out to be a new batch of worker bees, getting
used to the great outdoors. A day or so after the sitting stage,
they reach the aimless
flight stage, and
the next day the hive is back to normal, just with yet more workers
flying in and out. I'm hopeful our neighbor will come home to
happy, productive hives.
 Books
in the popular press about permaculture are quick to sing comfrey's
praises, but they are much slower to give any practical advice about
how to use the wonder plant. When I discovered that an entire
book was written about comfrey in 1953, and that it can be downloaded
for free from the Soil and Health library, I had to check it out.
Lawrence D. Hills' Russian
Comfrey: A Hundred Tons an Acre of Stock Feed or Compost for Farm,
Garden or Smallholding
details the history and uses of comfrey from a British
perspective. I was surprised to read that comfrey has been used
for over two hundred years in the United Kingdom, where the plant is
praised for the high protein content of the leaves and for its prolific
growth. One farmer planted a quarter of an acre of comfrey, which
provided feed for three cows and two horses, while others
feed comfrey to poultry and pigs. The same qualities make comfrey
a great crop to create copious compost or compost tea.
On the other hand, Hills
is quick to point out that not all farmers love
the wonder crop. Comfrey was immensely popular in the mid 1800s,
but soon letters started appearing in agricultural publications and
newspapers. Hills wrote: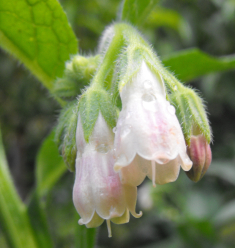
So, what's the deal? Is comfrey worth its salt? How should it be grown and used? Stay tuned to hear the answers in this week's lunchtime series.
(By the way, all of the black and white pictures in this lunchtime series, with the exception of the one above of Lawrence Hills, are taken directly from his book.)
Escape the cubicle with Microbusiness Independence.
| This post is part of our Comfrey lunchtime series.
Read all of the entries: |
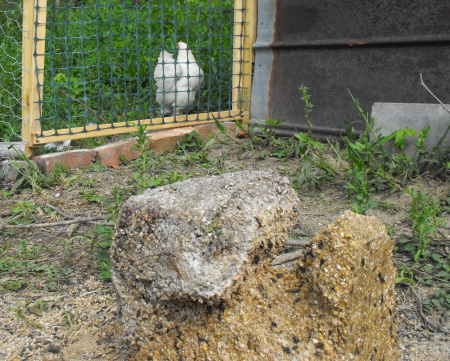
I made the mistake of storing the flock block in a
place where it could get wet, and about 1/5 of the top portion started
to mold.
It seems to be a hit with the
boys once they figured out what it was.</span
Want more in-depth information? Browse through our books.
Or explore more posts by date or by subject.
About us: Anna Hess and Mark Hamilton spent over a decade living self-sufficiently in the mountains of Virginia before moving north to start over from scratch in the foothills of Ohio. They've experimented with permaculture, no-till gardening, trailersteading, home-based microbusinesses and much more, writing about their adventures in both blogs and books.
