archives for 09/2009
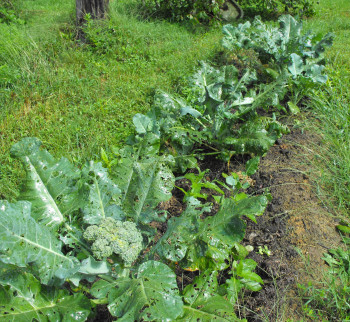 Our oldest broccoli is getting a bit buggy, as
you can see in the foreground. But I'm not worried --- we'll be
eating those heads this week. The broccoli and Egyptian onion
omelet we had for lunch Monday was truly delicious.
If you remember, we put in broccoli
seeds as gaps came open in the garden during the height of the
summer. The seeds went in over the course of a month from early
June to early July, and I couldn't have planned it better if I'd
actually put thought into the process. The late-planted broccoli
is a bit stunted, nestled amid the larger early plants. As the
early plants head up, I rip them out, opening up space for the
late-planted broccoli to thrive. I'm hopeful that we'll be eating
broccoli through the end of September, or maybe even later.
Shame-faced plug: Check out the automatic chicken waterer
that funds this blog.
 Despite
pretty much beating last year's top farm problems, we still had some
sizeable learning experiences this year. First and foremost, we
discovered that it really is possible to get too much rain. On a
similar vein, grapes
hate wet feet and tomatoes need to be planted as far apart as
possible in the sunniest spot if you're overwhelmed with summer
precipitation.
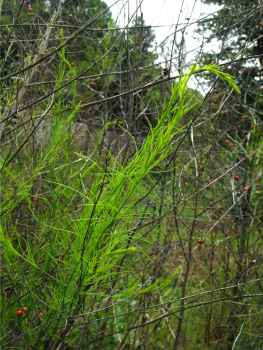
We also had a major run-in with asparagus
beetles this year. When I first noticed them this spring, I
thought they were an interesting phenomenon, but by July they had
escalated to the point where the beetle larvae nearly killed all of my
asparagus ferns. My garden guru suggested spraying Bt on
the larvae, and even though the label says that Bt is only effective
against caterpillars, our asparagus has begun to recover. I hate
to advocate spraying (even of a bacterium), but it seems like weekly
spraying of Bt is a very effective method to wipe out asparagus beetle
infestations.
| This post is part of our Third Year of Homesteading lunchtime series.
Read all of the entries: |
Adding a 25 ohm variable resistor gave the Black and Decker battery
powered deer
drill deterrent enough control to be dialed down to an effective
range. It would be easy to recycle an old battery powered drill into
this configuration which could keep the cost well under 20 bucks if
you're lucky.
Stay tuned for a solar powered version in the near future.
| We finally solved the deer in
the garden problem, and the solution was so elegant we gave it a new
website. Check out our deer
deterrent website for free plans! |
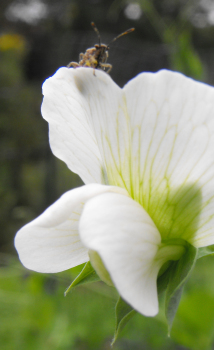 The fall
garden is nearly coming into its own now. This week, I saw
the first pea flowers --- surprisingly, the bush shelling peas opened
first even though they're considerably shorter than both the snow and
sugar snap peas.
We have a few tommy-toe tomatoes still coming on, even though their
plants are blighted. For a couple of weeks, we're able to eat the
typical American salad of lettuce, tomato, and cucumbers --- summer and
fall gardens overlapping on our plates. Meanwhile, the week's
freezer bounty includes pesto, swiss chard, broccoli, a tad of
tomatoes, green beans, corn, and okra.
We're actually watering everything this week, since it's been 10 days
since our last serious rain, but the year never really gave us the
usual summer break from weeding and mowing. Instead, Mark and I
are still putting in many hours a week keeping the yard and garden
ship-shape. But I'm starting to put a few beds down for the
winter rather than filling each gap with new seeds. Soon it will
be too late to plant anything except lettuce, spinach, and garlic.
Shame-faced plug: Check out the homemade chicken
waterer
that funds this blog.
 We've learned a lot about
animals this year too. Strider joined our
menagerie and has since become an indispensible purrer. Now
that our pet count has reached three, we've gotten a bit more serious
about bad behavior. Last year, it seemed like Lucy picked a
couple of garden beds and lay on them every day or so, crushing all of
the vegetables there. Huckleberry would also pick favorite beds
and tear up young seedlings in the loose soil.
This year, we've pretty much nipped that behavior in the bud.
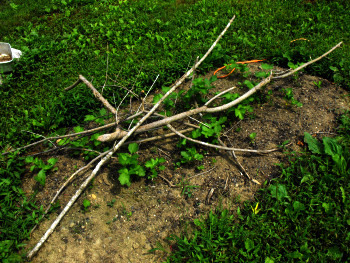
When I see the first signs of pet damage in the garden, I loosely stack
branches on the bed to keep all animals out. The branch technique
seems to be 100% effective, and branches can be safely removed once the
veggies get tall enough to make a scratchy bed.
We've also added two new types of livestock to our farm this year --- earthworms
and honeybees.
We're still learning how to make the best use of them, but I'm thrilled
to learn that both are relatively easy and that honeybees aren't
scary. Probably by this time next year, I'll have something more
to say about bees and worms.
| This post is part of our Third Year of Homesteading lunchtime series.
Read all of the entries: |

We decided to merge the weak hive with a stronger one today using the
newspaper trick. You place a layer of newspaper between the two hives
and cut a few slits here and there. It takes the bees a few days to eat
through the paper...giving them time to acclimate to a new frequency of
the same hive mentality.
Our Cochin has been almost too good of a mother --- for days at a time, it looked
like she hadn't moved an inch. Only lowered
water levels in her Avian Aqua
Miser reassured me that she wasn't going to die of thirst.
(Yes, I am a worrywort.)
Then the worst
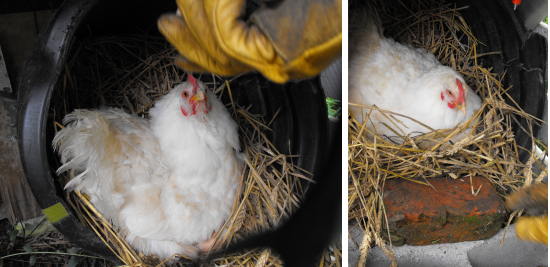
happened. One morning I peeked in her brood coop and noticed five
eggs lying on the ground! Our brood hen had worked her way to the
edge of the drainage tile and a full third of her eggs had slipped off
the nest.
Mark risked his life by tossing all five gently over the hen's back,
hoping that they hadn't been away from her warmth for too long.
The he stacked a cinderblock and brick in front of the culvert as a
temporary lip.
If everything
goes according to plan, we should see the our farm's first homegrown
chicks sometime tomorrow or Saturday. Whether we'll have thirteen
chicks or just a few, though, is still up in the air.
Read all of the entries about
our broody hen:
|

As long as I can
remember, I've hopped from obsession to obsession --- Robin Hood, water
gardening, identifying native plants. This year's obsessions are permaculture
and forest
gardening, topics that will probably take me decades to truly mull
over. In the last year, we have started two forest
gardens around young fruit trees in the yard and a
more traditional forest garden in existing young woods, all of
which are in early stages.
One of the biggest things I've learned about permaculture is that comfrey is
unstoppable. We started off the year with one large, two-year old
plant. All summer, I hacked off pieces and spread them around our
new forest gardens. Now we have dozens of thriving comfrey plants
that don't seem to mind being mown to the ground once a week.
I'm also starting to feel the homestead turn into a closed food
web. Mulching
with grass clippings
has turned our grassy areas into working elements of the forest
garden. Nitrogen flows from chickens to grass to my garden beds,
and I
get pure joy out of seeing my plants thrive. Meanwhile, our
honeybees pollinate garden plants and will eventually feed us
honey. Around and around the permaculture wheel rolls.
| This post is part of our Third Year of Homesteading lunchtime series.
Read all of the entries: |
 I used up our last extension cord last
week when I installed the first Black and Decker deer
drill deterrent which meant I had to unplug units 1 and 5 to get my
share of electricity for a drill press project I was doing this
afternoon.
Well....I got busy doing something else and forgot to plug deer
deterrents 1 and 5 back up....so that makes about 45 minutes of down
time. I looked out our living room window in shock to see the ugliest
deer I've ever seen munching down on a few sweet potato leaves like it's
nobody's business!.....I quickly ran out the door and chased after the
four legged monster to show it who's boss around here.
Now I know the local deer population is so bad I can't take a
brief pause even during a sunny day from the new mechanical deer drill deterrents without being
munched on.
| We finally solved the deer in
the garden problem, and the solution was so elegant we gave it a new
website. Check out our deer
deterrent website for free plans! |
 Every
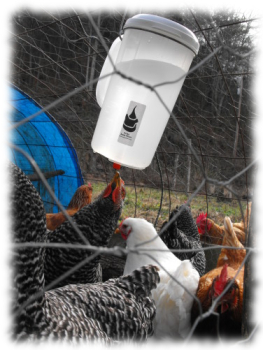
week, Mark and I mail off dozens of chicken waterers. They seem
to disappear into the void, since we seldom hear back from any of our
customers. We especially miss not getting to see how our waterers
fit into other folks' lives.
In hopes of dredging some photos out of that void, we're holding a
photo contest over on our automatic
chicken waterer
site. If you bought one of our waterers, or just made our own
waterer, we hope you'll wander over there and email us your
photos. To sweeten the pot, we're giving away three ready to go
waterers to one grand prize winner. Good luck!

Perhaps our largest
learning experience this year has been our microbusiness. At this
time last year, I was just starting to burn out on my job, but I was
terrified to quit. Everyone was talking about the economy tanking
and I knew that jobs in our area were scarce.
 But I did it anyway, and together Mark and
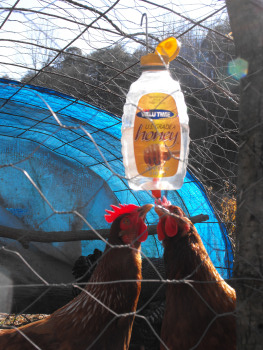
I started marketing his automatic
chicken waterer. It took a few months for us to get our feet
under us, but before long we were making more money and working fewer
hours. We had shed 85% of the stress associated with my old job,
and we both felt immensely empowered by the experience. Why did
we ever want to work for someone else?
We have a lot of projects in the hopper for the next year, of
course. As I mentioned a couple of days ago, we want to share all
of our deer deterrent secrets with the world --- we figure we owe the
community something totally free. Next on the agenda is finishing
up the ebook we've been drafting to help other folks mimic our
microbusiness success.
We don't plan to expand our gardening perimeter over the next year,
just to keep bringing it closer to a state of equilibrium. I want
to keep exploring permaculture, and Mark has several new inventions on
the drawing board (automatic bug feeder for your chickens, anyone?)
Most all, though, we want to keep feeling the power of the Walden
Effect. I hope you can all catch a whiff of the fragrance through
your monitors. Just as this year was better than last year, I
suspect next year will be the best one yet!
| This post is part of our Third Year of Homesteading lunchtime series.
Read all of the entries: |

One manure lesson we learned this year was the 5 gallon bucket method.
It makes the portions easy to handle and load into the back of the
minivan. The haul in this picture is a typical amount we get in trade
for a dozen fresh eggs from some friendly neighbors down the road.
 Friday afternoon, I stopped by to check on our
broody hen.
At first, I thought she was turning her eggs --- she was raised off
the nest a little bit, and her beak was underneath her belly.
Then I saw that one egg seemed to have a small hole in it. I
leaned closer....
"Grawwk!!" Rather than losing a finger, I backed off and the
mother hen settled back into place. I started to leave, then
heard the first tiny "peep" from underneath her.
I sat by the coop for about an hour, hoping to catch a shot for you all
to see (or at least a glimpse for myself.) But despite hearing
several peeps, and what seemed to be the sound of a tiny chick pecking
its way out of its shell, I never got a glimpse of a chick.
Do we have one homegrown chick or a dozen? Maybe I'll know by the
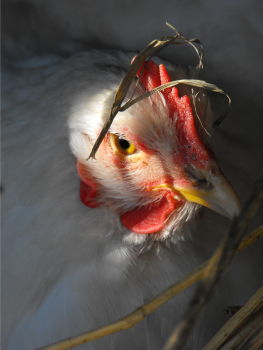
end of the day. Meanwhile, I'll leave you with this photo of the
mother hen, a piece of straw stuck to her comb. She may look cute
and fluffy, but I won't be petting her anytime soon.
Read all of the entries about
our broody hen:
|
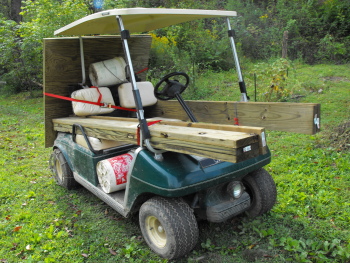 I've had a few of those small ratchet straps
for a couple of years now and they really come in handy...but they also
have a problem getting hung up and stuck in some pretty nasty tangles
if the load shifts.
We got a set of the medium sized ones a few weeks ago and I'm still
kicking myself for wasting so much time on the small version. No more
pinched fingers and frayed straps with the bigger more substantial
mechanism.
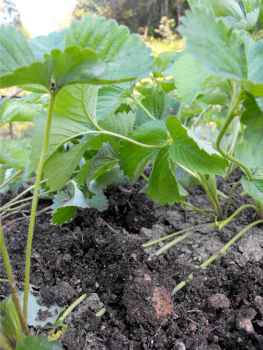 Without
deer to nibble them back, our strawberry beds have turned into a sea of
three-part leaves. While the beds look lush and beautiful, the
farmer inside me knows that the plants are overcrowded and won't bear
well next year. Time to take drastic action.
Many gardeners mow their strawberry beds to the ground in early summer
as soon as they pick the last berries. Their goal is to stimulate
the production of runners so that new plants will form. My
strawberries didn't get this treatment, nor did they seem to need it
--- runners formed every which way, growing across the aisles to the
next bed over.
Instead of mowing, I finally bit the bullet and ripped out three
quarters of the plants, giving the remaining strawberries room to
breathe. I tucked well-rotted manure around their roots, and plan
to add a nice load of grass clippings after our next mowing.
Although it would have been smarter to renovate my beds in June, I'm
hopeful that there's still enough growing time left for the plants to
suck up summer sun and prepare for spring berries. Hopefully next
year, we won't be disappointed by micronutrient
deficient berries the way we were this spring.
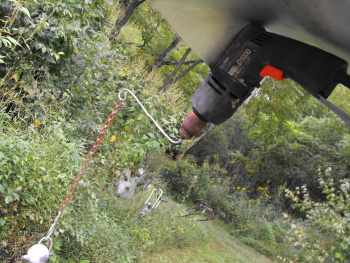 A variable speed drill with a conventional
cord turns out to be a good and cheap option for the locomotion of our mechanical deer deterrent
contraption.
A quick search of E-bay shows that several can be had in the 10 dollar
range, and new ones go for a bit over 20 at the big box stores.
I wonder if a lamp dimmer switch would be strong enough to provide a
variable speed option for drills that only have on and off and nothing
in between?
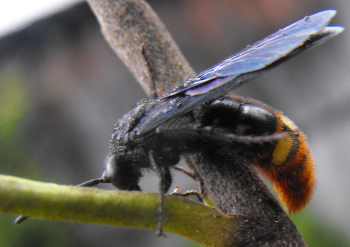 These wasps have been flying low over the
garden for a couple of weeks now, but I only got a closer look on
Sunday morning. Five had settled down on a young apple tree, and
the cool, dewy morning kept them in place even when I stuck the camera
in their faces.
I'd assumed the insects were adult squash vine borers, but I wasn't
even in the right ballpark; instead of being garden pests, these wasps
are our new best friends. Digger Wasps (Scolia dubia) are the primary
natural enemy of both Japanese
Beetles and June Bugs. The female wasps burrow into the soil
in search of beetle grubs, paralyze the immature beetles with their
stingers, then lay an egg on each paralyzed grub. The grub serves
as a comatose but living buffet for the baby wasp, who eats the grub
beyond repair. Now I just need to figure out how to further
encourage our Digger Wasp population and knock out the Japanese Beetles
once and for all!
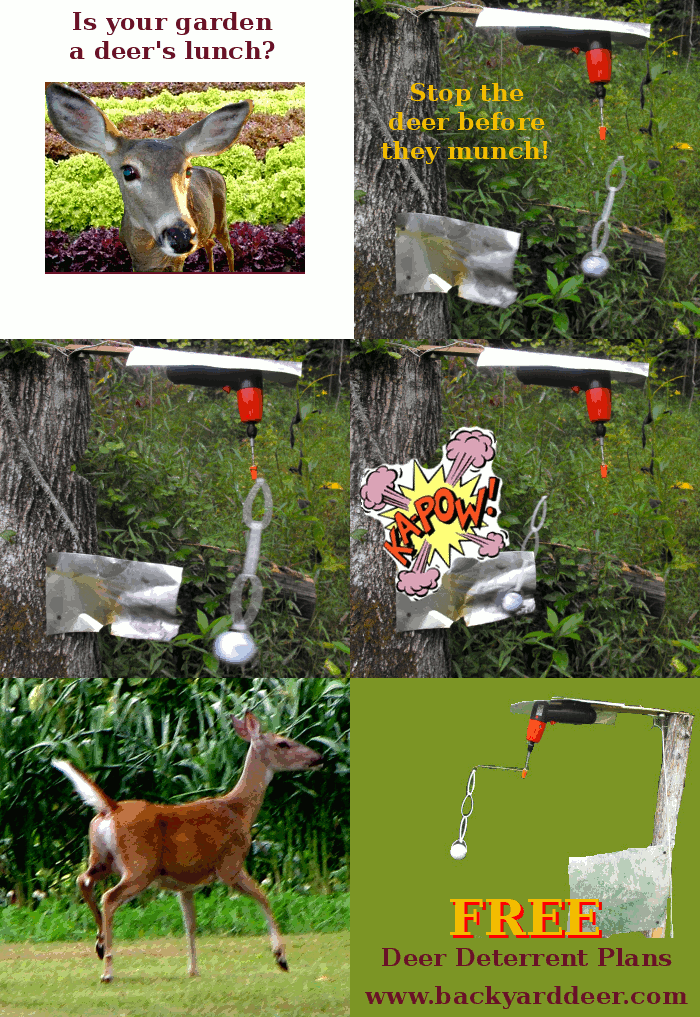 Autumn is peak deer damage season in
gardens across the U.S. Your neighborhood doe probably had a
couple of fawns this spring, and those three mouths are hungry.
I've fought deer in the garden for nearly a decade now, and I have to
admit that until this year they've won every battle. Give the
deer half a chance and they'll wipe out your garden in short
order. Last year, they ate our strawberries and sweet potatoes,
then moved on to swiss chard, and ate onions for dessert. We
barely had anything fresh from early autumn on.
But as our regular readers know, Mark saved the day with a homemade
deer deterrent that really works. He's been working on making a
version that everyone can copy out of cheap supplies, and I've been
working on a deer repellant
website to go along with it.
This week's lunchtime series skims over the highlights of what we've
learned, but feel free to head over to the other website for more
information.
| This post is part of our Homemade Deer Deterrent lunchtime series.
Read all of the entries: |
Our number 5 deer deterrent got hung up today due to some cracks in the
metal flashing. No doubt the increased banging was the cause. I
replaced it with some thicker metal salvaged from a junk pile. I then
moved some longer flashing towards the back for it to absorb the second
hit, which provides a unique vibration and some added motion for any
potential 4 legged garden poachers out there who have yet to get the
message that our vegetables are off limits.
You
may have noticed that our website has received a face lift.
Hopefully now it will show up properly for all of you Internet Explorer
users. Stay tuned for other upgrades as we celebrate our first
year on the internet!
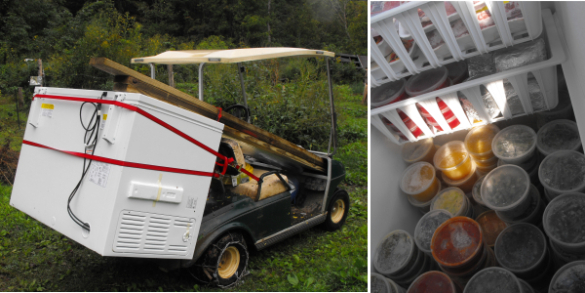
Meanwhile, Mark and I splurged and got a brand new, Energy Star
freezer. We'd filled our small freezer to the gills over the last
few weeks, but I didn't want to plug in the big freezer because of its
leaky gasket.
The new freezer has handy sliding baskets and lots
of room to put away more produce, and its annual energy usage is on a
par with our little fridge. Can you believe that Mark
attached it to the golf cart and hauled it back to our trailer all by
himself?
Finally, the bad news. I've waited to post about this until now,
because I didn't want to think about it. Remember how I said that
our broody hen
was poking
around under her belly when I heard the peeping Friday
evening? It seems that she was killing the chick, not helping it
out of its shell. She continued to pummel the dead chick with her
bill Saturday morning until I scooped it out of the nest, and now the
hen is happily sitting on top of what may be more dead chicks for all I
know. No more peeping. I have no idea what we're going to
do with this hen who is so obsessed with brooding that she kills her
offspring when they get in the way. (Well, the stew pot
beckons....)
 Mark's homemade deer deterrent is based on a cheap
drill you can get at Wal-Mart for $10.48. He used a transformer
to switch the drill from battery power to AC electricity, then wired in
a potentiometer to allow him to speed up and slow down the drill.
The drill bit has been modified to attach to a wire, chain, and golf
ball. The golf ball swings around, hitting a piece of tin and
making a metallic noise. The combination of man-made noise and
motion has been 100% effective in keeping deer out of our garden this
summer, and has even kept them away from our perimeter.
Check out our step by step instructions to make your own deer
deterrent for $30 (or much less if you scavenge supplies.) In
case you're curious, I did the math on operating costs too --- each
deterrent costs a little over $3 to run per year. Definitely
within my skinflint price range.
| This post is part of our Homemade Deer Deterrent lunchtime series.
Read all of the entries: |
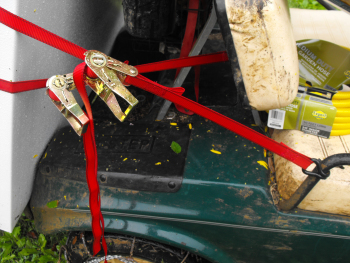 Having 2 medium ratchet
straps made it possible to hold the freezer in place while I used
the other strap to finalize the mount.
Speaking of freezers, We saw a fresh independent film last month by the
name of Freezer
Burn. The hero is a quirky scientist who sells his house in order
to raise enough money to modify a freezer so that he can be frozen for
15 years in an effort to capture the attention of a girl he has a thing
for. It's that good kind of whacky that makes you feel just a little
bit more alive after viewing it. I give it 2 thumbs up for its charm
and wit.
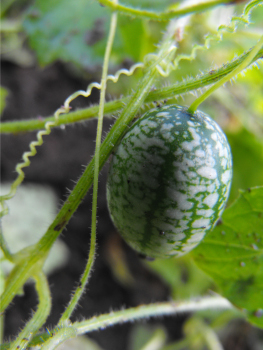 One of the new vegetable varieties we're
trying out this year is the Mexican Sour Gherkin (Melothria scabria). It's
billed as a tiny cucumber that is resistant to the wilts that tend to
kill normal cucumbers on our farm, and I can attest to the species
being much less disease-ridden.
On the other hand, I don't think they really taste like cucumbers ---
the gherkins are more sour and lack that cucumber tang. Another
disadvantage is that Mexican Sour Gherkins get off to a slow
start...but maybe that's an advantage since in our garden they started
bearing at about the same time our cucumbers gave up the ghost.
Mexican Sour Gherkins are certainly cute, and they are tasty even if they don't really
taste like cucumbers. It's also pretty cool to be growing a
vegetable variety which seems to have been cultivated unchanged since
before Europeans showed up in North America. While they're not a
new superhero of the garden, I think we'll keep growing gherkins.
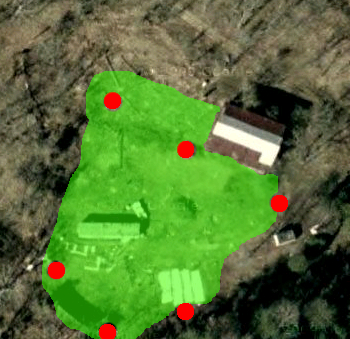 The trick to keeping deer out of the
garden with our deer deterrent
is understanding deer behavior. Deer follow the same paths day
after day from one known food source to another. Chances are that
if your garden has been nibbled, deer have one to several well worn
paths through the perimeter. A deer deterrent should go smack dab
in the middle of each path.
Finding deer paths is pretty easy. Head out after a rain to look
for the heart-shaped hoof prints in soft soil, and follow them backward
to where they breached your garden. If the ground is too hard for
tracking, keep an eye out for freshly nibbled leaves and use those to
track the deer's path through the garden.
If your garden is large, the deer may try to bypass the first deterrent
and make a new path. That's why I recommend that you keep a close
eye on your garden for the first couple of weeks after you put your
deterrent(s) up. If you see a new path forming, immediately build
a new deer deterrent. It's much easier to keep deer out of the
garden before they consider it their main food source. As you can
see in the aerial photo above, it doesn't take many deterrents to
protect even a large space --- we have six devices to cover about two
acres.
| This post is part of our Homemade Deer Deterrent lunchtime series.
Read all of the entries: |

I was describing my new home
made frame perch tool design to a friend and he furrowed his brow
when I mentioned how I used wood instead of metal. He was concerned
about a full frame of honey being too much weight for such a "light
duty" structure.
That possible problem was fixed easily with the next size down L
bracket being secured in each corner. You might need to chisel out a
groove for the bracket depending on how much wiggle room your frames
have to move back and forth while still staying snug.
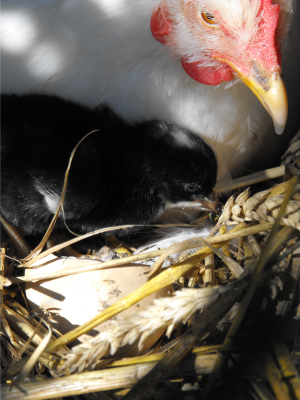 We never did anything about our murderous
hen because I didn't want to think about it, and there's always
plenty of other stuff on the farm to catch our attention. Then,
on Wednesday afternoon, I heard peeping from her coop again. I
wandered over and...chick! Living chick! Hatched and dried
and playing nice with Mama!
So, I'm revising history. Perhaps that first dead chick wasn't
quite strong enough to make it out of its shell, as sometimes
happens. Maybe Mama tried to help, but the chick died anyway, and
the extra pecking was just pecking at a dead thing in her nest.
Maybe Wednesday's chick didn't hatch on day 21 as it should have
because of temperature inconsistencies. We got our eggs from a
friend who had been storing them at room temperature for a couple of
days. Maybe it took the eggs a few days after getting under our
broody hen to warm back up to incubation temperatures. Maybe even
more chicks are due?
One of Mark's favorite phrases in relation to me is "ye of little
faith." And...I guess he's right!
 When I talk to locals about
the deer overpopulation problem, their inevitable response is "why
don't you get a gun?" The problem with hunting as a solution to
deer in the garden is that it's illegal to kill a deer out of season,
even on your own property, unless you get a special permit from the
game warden. Hunting during the normal season does keep deer out
of your garden...for about a week.
That said, I'm convinced that hunting is the long term solution to our
deer overpopulation problem, but only if our game laws are
changed. Currently, most game management agencies are actively
working to promote deer population growth, a throwback to a few decades
ago when deer were scarce. If laws are changed to allow hunters
to kill more does, we might be able to get our deer populations back
under control.
| This post is part of our Homemade Deer Deterrent lunchtime series.
Read all of the entries: |
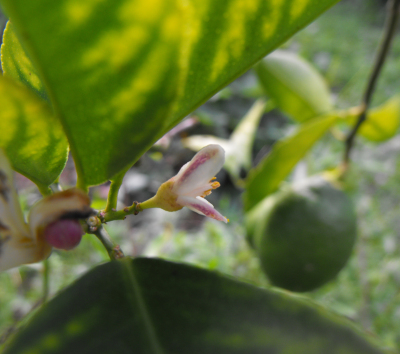 Our movie star neighbor has an absolutely
stunning Dwarf Meyer Lemon that he brings inside for the
winter. Last year, he got 91 delicious lemons from a tree no more
than three feet tall (though more like six feet wide.)
Mark's mom heard us enthusing over our neighbor's tree, and Christmas
2007 a baby lemon tree was waiting for us at her house. We put
our tree in a five gallon pot, showered the lemon with love, compost
tea, and vermicompost, and ate
our first four lemons at this time last year.
This year, there are two big fruits starting to ripen, seven baby
lemons no more than a couple of inches in diameter, and another passel
of blooms just opening. But as you can see in the photo above,
the older leaves are starting to look chlorotic (turning yellow between
the veins), denoting a nutrient deficiency. Our movie star
neighbor fertilizes his tree regularly with Miracle Grow, but we're
trying to go the organic route. This spring, we topdressed with a
gallon or two of compost, which prompted scads of blooms, but our lemon
has clearly worked her way through all of the nutrients. I fed
her again this week, this time with a gallon of composted horse manure,
and am hoping that the recent rain has washed enough nutrients over her
roots to keep her producing.
Mark dreams of some day having two mature dwarf lemon trees, which we
figure would be just about enough to keep us in lemons all year.
I'm hoping our dwarf tangerine (a year younger than our lemon) will
join the mix and keep us citrified. Citrus is often one of the
hardest things for locavores to give up, and we'd like to avoid that
sacrifice.
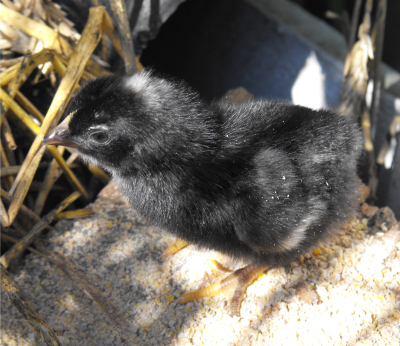 Due to the new
trend of backyard chicken-keepers, figuring out the sex of chicks
at birth has turned into big business. Most people with a small
flock
of chickens can only handle one rooster or they'll end up in a lot of
cock fights, while other people want only male birds since males put on
weight faster and thus make better broilers. If you check out the major
online hatcheries, you'll see that you can buy all male chicks, all
female chicks, or a straight run (mix of both.)
The eggs I was given are from two breeds that are easy to sex at
birth. I believe all of the eggs have Dominique fathers while
some have Dominique mothers and some have Black Sex-Link mothers.
In Dominickers (as Dominiques are fondly called), yellow
feet and a diffused white spot on the head mark males, while grayer
feet and a compact white spot mark females. Black
Sex-Links are even easier to tell apart (that being the whole point
of the hybrid breed), with males but not females showing a white spot
on their heads.
Chances are that Wednesday's chick is a male, due to its yellow feet
and white spot. That means we won't get too attached and will instead
start calling him "Thanksgiving Dinner."
 Although our deer
deterrents work like a charm, Mark's got a lot of other related
ideas in the pipeline. We enjoy the sound of our deterrents ---
they're on a par with the crickets at night --- but I suspect they
wouldn't go over well in suburbia. We're also intrigued by the
idea of running a deer deterrent on some kind of cheap solar panel, and
finding a way to make them even cheaper for folks to build.
We're testing out a Creative Commons open source system for our deer
deterrent, giving away the information for free, but asking folks to
credit us if they use it. We're hoping that adding several
hundred inventors to the mix will result in an even better deer
deterrent by this time next year. So, feel free to tell all of
your friends about the plans, and get them to send us their innovations
and pictures! If you're interested in hearing about those
innovations, subscribe to our deer deterrent blog
--- we won't be posting all of the nitpicky details here. And
good luck with keeping the ravenous deer out of your garden!
| This post is part of our Homemade Deer Deterrent lunchtime series.
Read all of the entries: |
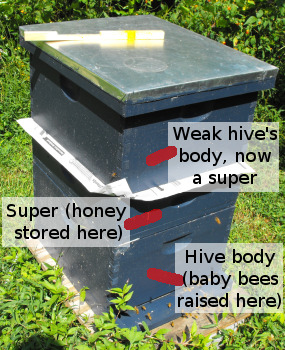 Soon after we united our
two weakest hives, the weather turned cool and wet --- bad
bee-checking conditions. Finally, I got impatient and went out to
inspect the bees between showers.
Outside the hive, a fringe of newspaper was clearly evident between the
merged hive sections, so I figured I'd need to remove the paper
divider. But when I took off the super from the weak hive, I saw
that the industrious bees had carefully eaten away the entire newspaper
up to the wooden hive walls!
The hive merge is complete and very successful. While our other
two, formerly strongest hives are still filling up their first super
apiece, our newly merged hive is starting to store honey between
hatching brood in the big top super! I can only assume this means
that the queen from the weak hive has been assassinated and her workers
assimilated into the population. Although I probably wouldn't
repeat my frame
swap experiment, the hive merge is going to be added to my toolkit.

Note: Mark hasn't been posting
because he's a bit under the weather. I expect him to be back
online in short order, but until then you'll just have to put up with
me. If you miss his ingenuity, go visit his homemade chicken
waterer site and his homemade
deer deterrent site. There, don't you feel better?
 Thursday night, our new chick (nicknamed
Thanksgiving Dinner), squeezed out of the brood coop through a tiny
hole. His mother couldn't follow him, and apparently he wasn't
bright enough to squeeze back in.
Temperatures dropped to the low fifties. When I found
Thanksgiving Dinner the next morning, he was cold and peeping
desperately. I popped him back into the brood coop, but Mama Hen
no longer seemed interested in him despite his obvious need for warmth.
The next best bet, I figured, was to rig up a light over a box to warm
him the way you do with motherless chicks. The problem is that
we've
completely converted over to compact fluorescents and don't have a
single incandescent bulb left in the house! I dashed to town, but
by the time I got home an hour later, Thanksgiving Dinner had given up
the ghost.
I honestly can't blame this second chick death on Mama Hen. It's
entirely my fault for not chick-proofing the walls of the brood coop
better (and for not keeping an incandescent bulb on hand for
emergencies.) I feel awfully guilty (strange since I was going to
eat him in a few months anyway!), but have resolved to try again in the
spring. I suspect our second attempt will be a lot more
successful --- surely we've done everything wrong that we possibly
could on this first attempt!
Anna and I finally got a chance to watch a film my cousin was in a
couple of years back and I couldn't resist the urge to swipe the scene
under the fair use doctrine. He's the one sleeping on a bench. I slowed
down the video to half speed so you won't miss him.
The film was directed by Fred Durst and it's a period piece set in the
early 1970's titled "The Education of Charlie Banks". It was a good
coming of age story that unfolded nicely and captured our attention.
Great job Ben, can't wait to see what you star in next.
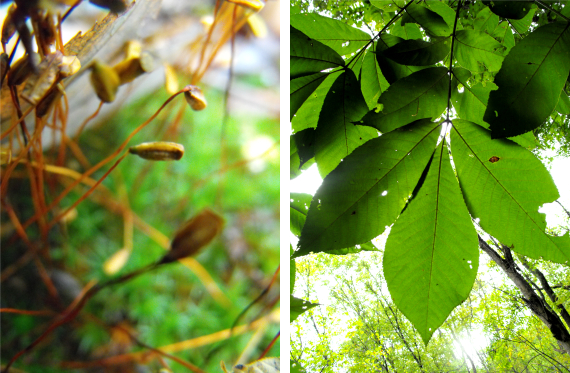
Summer and fall are starting
to intertwine in the woods, just like they are in the garden. Our
"unused" 56 acres really pull their weight, providing us with unlimited
natural beauty and a great buffer from our neighbors.
That said, a few neighbors made the half mile trek back to our trailer
Saturday afternoon, beers in hand. One suggested that we could
sell the siding from our hundred year old barn for $17 per board
foot. This price seems phenomenal to me --- could it have been
the beer speaking? Surely our barn isn't worth tens of thousands
of dollars?
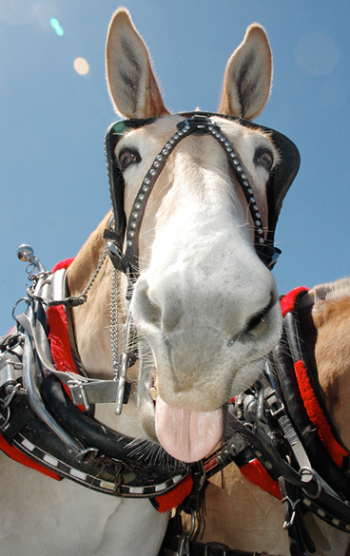 Like Anna said this morning, we had a few
visitors drop by yesterday, and I still can't get over what they were
thinking as they made the hike back here.
What they heard was a lot of banging from the home made deer
deterrents, what they assumed was that we were "working like mules
back here!"
The nice picture of the handsome mule is from the Blue
Ridge Blog, which has some really nice photos of farm life on a
similar frequency as our own here.
I wonder if our other neighbor within ear shot has the same
misconception of our work day, and if I should make a point to let them
in on the secret to working like a mule without breaking a sweat?
 I've been watching our second
planting of summer squash
like a hawk, waiting for the first sign of the vine borers that killed
our spring planting. I even dreamed about the huge, spiky leaves
multiplying and growing.
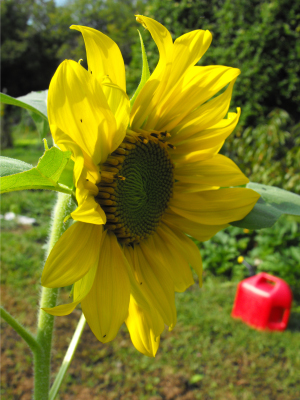
Sunday morning, just like the climax of my dream, the first plant
opened a glowing yellow flower. I guess we won't be squashless
after all! I wonder if I could plant in early August every year
and not have to spray Bt?
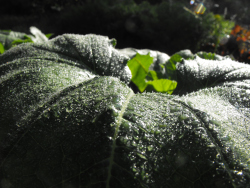
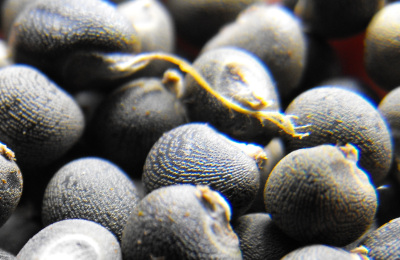 Many homesteaders save seeds because they
don't trust the big companies to keep producing varieties they care
about. Skinflints like me save seeds because seed prices have
been skyrocketing in the last couple of years. Whatever your
reasoning, saving seeds can be pretty painless if you understand a bit
of plant biology.
First of all, let me say up front that we don't save all of our seeds
--- we basically stick to the really easy species. Some types of
vegetables --- like carrots and onions --- are just not worth bothering
with since they are biennials and take two years to mature and produce
seed. Other types of veggies, like lettuce, have seeds that I
find hard to catch and harvest at the right time.
Even within certain vegetable species, some varieties are much easier
to save than others. Many of the varieties you'll pick up at the
local feed store or big box store are hybrids, produced by mating two
different types of plants together. Gardeners are often impressed
by hybrids because of hybrid vigor --- the tendency of hybrid offspring
to be bigger and sometimes better than either of their parents.
Unfortunately, if you save seeds from a hybrid, your seeds will sprout
into plants that all look different and that often are not as exciting
as the hybrid you started with. If you want to save seeds, look
for varieties marked as heirlooms --- these varieties will breed true,
with your seeds sprouting into plants just like their parents.
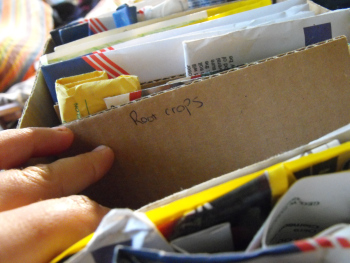 The rest of this week's lunchtime series will
explain how to save seeds from some easy vegetable varieties. But
before you go, a couple more words of wisdom. First of all, you
won't need to save seeds every single year --- many seeds
last up to five years, so you can easily skip a season or two and
your seeds will still sprout. Second, most places recommend that
you store your seeds in an airtight container, but I have to admit that
I'm lazy and just throw my homemade paper packets into a cardboard box,
with no ill effects. I do put in dividers, though, and sort the
seeds by plant family and growth habit so that I know what I've got.
Finally, don't forget the plants that you can reproduce without
resorting to seeds. If you have some leftover potatoes next
spring, you can just cut them up and put them in the ground.
Garlic, of course, can be divided into individual cloves and planted in
the fall. This year, we also had great luck with sprouting
our leftover sweet potatoes to make slips. You can do it too!
| This post is part of our Seed Saving lunchtime series.
Read all of the entries: |
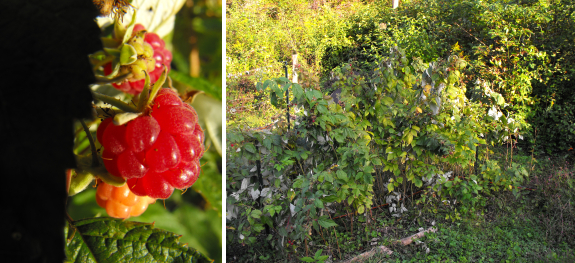
There are varieties in my garden that I grow because they're okay, and then there are ones that I'd recommend to anyone. The Caroline Red Raspberry fits in the latter category. It's an everbearing raspberry, which means that it starts bearing near the first of June, takes a break for part of the summer, then is dripping with fruits again from the middle of August until the first frost. It isn't my tastiest bramble in the spring (Wineberries and Black Raspberries tend to win the contest there), but by summer its cultivated red raspberry taste hits the spot. It grows and bears so well in our soil that I'm considering replacing my waterlogged grapes with Caroline Red Raspberries.
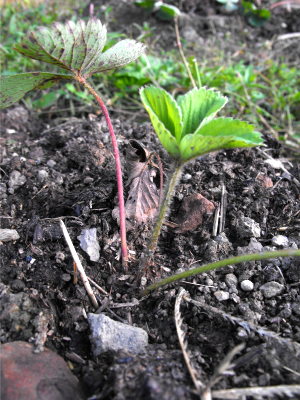 We were disappointed with the flavor and size
of our strawberries this spring, so we're working to remedy the
situation. A week or so ago, we renovated
the one and a half year old beds, pulling out a lot of the plants
so that the ones left behind had room to grow. Meanwhile, we
transplanted strawberries from the two and a half year old beds to
start entirely new beds, in preparation for rotating the old strawberry
beds into a garlic patch.
Most gardeners are used to planting new strawberries in the spring, and
if I'd had my act together that would have been a good time to start my
new beds. But spring is such a frantically busy time in the
garden that I never got a chance to touch the strawberries.
Instead, I'm following the lead of the local you-pick operation that
transplants its strawberries in early September then eats fruits from
them the next spring. If you plant early enough in the fall ---
and your plants don't die from the heat or get deer-munched during
their critical period of gaining a foothold --- they should get enough
fall sunlight to do nearly as well as spring planted
strawberries.
We experimented with planting strawberries in the middle of the summer
(the end of June), and those plants mostly died. The ones I
planted a week ago, though, are doing well, already putting up new
leaves. I can't wait to taste them in spring 2010!
 One of the biggest risks when saving seeds in
a diverse garden is unintentional hybridization. Say you're
growing two varieties of okra relatively close together, the way we did
last year. If you try to save the
seeds from those okra plants, bees will have moved pollen between
the two varieties, and you'll end up with a mixture of different types
of okra when you sprout your saved seeds. None of the offspring
of the cross-pollinated okra will look like either parent, and chances
are most of them will be substandard.
Luckily for us, some vegetables are primarily self-pollinating, so they
don't have the hybridization problem. Peas and beans are two of
the easiest self-pollinating varieties for beginning seed savers since
you can usually plant different varieties right next door to each other
and still have each variety breed true (meaning that the seeds sprout
into plants just like the parents.)
The actual process of saving pea and bean seeds is also simple.
Some people set aside a whole row just for the purpose, but I don't go
to all that trouble. I inevitably miss picking some pods on each
pea plant, and by the time I find them the pods are too woody and old
to be tasty. Alternatively, with my bush beans, I pick the first
heavy flush of beans, then let the next flush go to seed. In
either case, I let the pods ripen on the vine for a month or two until
the pods turn brown and dry up. Then I pick all of the dried
pods, shell out the peas and beans, and put them in a bowl or open jar
to finish drying for a few weeks. When I stumble across the seeds
again, they're ready to be sealed in homemade paper packets, or just
sealed into a canning jar. Don't forget to label the variety and
year!
| This post is part of our Seed Saving lunchtime series.
Read all of the entries: |

When we first moved to the farm we had fantasies of owning our own
mini-tractor. Once we did the math and figured out just how many times
we would really need such a piece of equipment we scaled down the dream
to a golf cart.
I've discovered it's far more efficient to hire out what little tractor
work we need. Today we got 6 tons of crushed cinder blocks for 40 bucks
delivered. The same guy is half way through scooping it up and
spreading it around to troubled spots on our driveway for an equally
reasonable fee.
It sure beats filling up 5 gallon buckets and spreading it around the
old fashioned way.
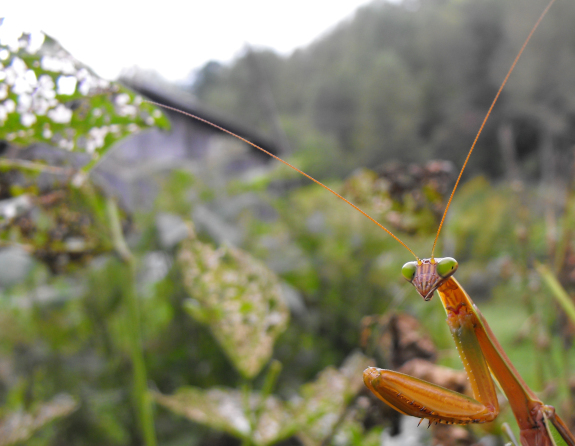
Imagine my surprise when
I looked to my left and saw a second mantis! One mantis
had brilliant green eyes while the other had brilliant brown
eyes. Could they be male and female?
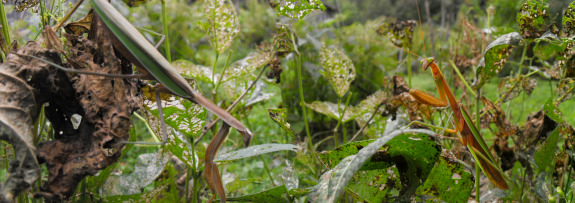
That would be a resounding yes... The green-eyed male leapt
across my buggy beans and landed on the female's back.
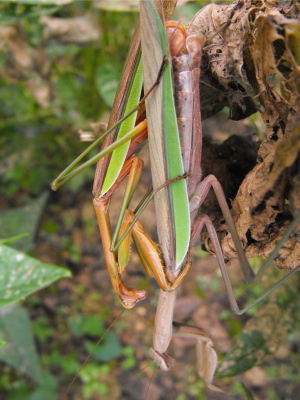
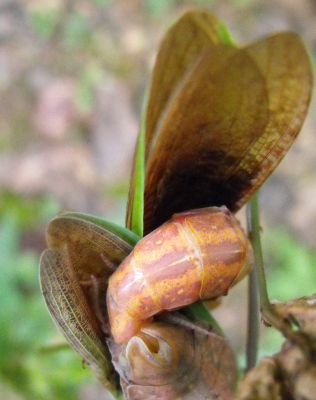
They stuck together for three hours until dark, when I stopped checking
on them. Below is a closeup of their alien-looking mating
paraphernalia.
By the way, technically these guys are praying mantids, not praying mantises, since they're not in the Mantis genus. Also, chances
are the female won't consume the male's head after they finish mating
since praying
mantis cannabilism is probably an artifact of captivity.
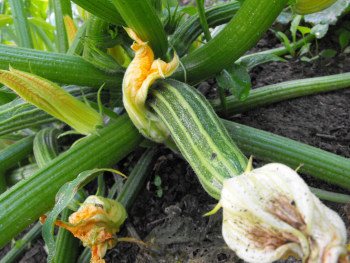 Cucurbits (squashes, pumpkins, cucumbers, and
melons) are a bit more difficult seed-saving candidates than peas and
beans because cucurbits hybridize readily. If you're careful,
though, they can be on your easy seed-saving list.
The trick to saving cucurbit seeds is understanding which varieties are
related. If you haven't had biology in a while, now's the time to
remember that any individuals within the same species can interbreed,
while individuals of different species mostly can't interbreed.
(That, after all, is the definition of a species.) So, if you
only grow one variety in each cucurbit species, you're pretty much home
free.
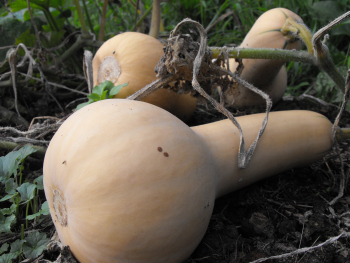 Some species are simple --- cucumbers are all
in the same species (Cucumis sativus)
while most melons are in a related but distinct species (Cucumis melo.) Watermelons
are in their own species --- Citrillus
vulgaris. So, if you want to save cucumber seeds, plan to
only grow one variety of cucumber in your garden. Same with
melons, though you can grow watermelons and canteloupes side by side
with no problems since they're in different species. If you want
to save seeds from two different kinds of watermelons, you need to
either separate the plants by at least half a mile (hah!), or cover the
flowers with a bag before they open and hand-pollinate them. That
clearly goes beyond our easy seed-saving mentality.
How about
squashes? That's where the taxonomy gets messy. Even though
gardeners divide squashes up into winter and summer squash, there are
actually four species which cover the vegetables we call squashes:
- Cucurbita pepo --- all summer squashes (zucchini, yellow squashes, etc.), some varieties of pumpkins, and pattypan, spaghetti, delicata, and acorn squash
- Cucurbita moschata --- butternut squash
- Cucurbita mixta --- cushaw, some pumpkins
- Cucurbita maxima ---
kabocha squash, some pumpkins
Now, if, like me, you've
decided that the only winter squash worth growing is butternut, you can
save your seeds with no problems since butternuts are in their own
species. However, if you want to save summer squash seed, you
should plan to grow only one variety and to delete the other members of
that species from your garden (and from your neighbor's garden if they
live within half a mile.)
| This post is part of our Seed Saving lunchtime series.
Read all of the entries: |
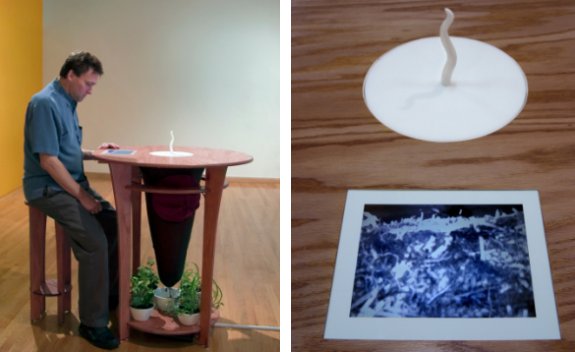
If you've ever wanted to have a table that eats food scraps and
entertains you with visions of worms crawling about, then Amy Young
has an interesting design you can build if you've got the stomach for
it.
It's basically a fancy worm bin with a low light security camera wired
up to an LCD screen embedded into the table for your viewing pleasure.
I like the idea, but wonder about the smell level and the possibility
of a fruit fly problem?
 If Mark and I seem a bit flaky this week, it's
because we're planning a big party for four or five dozen of our
closest friends and relatives on Saturday. We figured we owed
them a get-together for running off to get
married in secret last December. My original goal was to grow
a lot of the food for the picnic ourselves, but it seemed that every
crop I earmarked for the party --- tomatoes, potatoes, etc. --- failed
miserably. So we've been buying a lot of food, and tidying up the
farm so that it looks more presentable.
Throwing a party for masses of people where I'll have to be the center
of attention is up there on my list of nightmares (right after being a
long distance truck driver, in case you're curious.) So I've been
using mowing therapy to keep myself calm. My favorite method of
mowing is to spend time up front getting the difficult edges so that I
can then walk in easy circle after circle, ending up smack dab in the
center of the area. I wish it was so simple to find the exact
center of worry circles....
Since this is a homesteading blog, not an angst blog, I'll end with a
little factoid. We took the mulching bag off the mower for my
therapy this week because the grass is starting to go to seed. As
someone (Everett?) warned us when we first got our mower, grass
clippings only make great mulch when there are no weed seeds
involved! If your lawn is made up of cool season grasses, chances
are they're going to seed now too, so put those clippings in the worm
bin or on the compost pile (or just let them fall back down and feed
the lawn.)
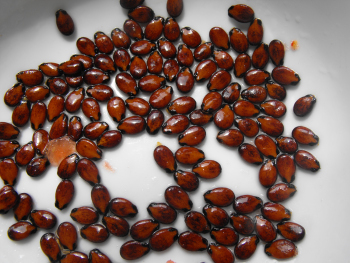 Okay,
now that you've planned your cucurbit garden with seed-saving in
mind, how do you actually save the seeds? With melons and winter
squashes, all you do is wait until your fruits are mature, scoop out
the seeds, rinse them, and dry them. You don't even have to waste
the
flesh since it's at just the right stage to go on your plate!
With summer squashes,
just leave a few fruits on the vine the way you
do with pea pods. Surely at least one zucchini will miss the
knife and
get too big to be tasty. Wait until the summer squash has
developed a
hard rind, like a winter squash, then cut it open and harvest the
seeds. Again, rinse and dry the seeds before storing them.
Cucumbers are the only
relatively difficult cucurbit seed to save.
Like summer squashes, they need to be allowed to mature on the vine
beyond the point at which you would usually pick them. Then the
seeds
and surrounding liquid should be scraped out of the flesh and allowed
to ferment in a jar for three or four days. Stir the mess every
day, and when the seeds sink to the
bottom, pour off the goop, rinse the seeds, and save them. The
fermentation is necessary in order to break down a covering over the
seeds that inhibits germination.
| This post is part of our Seed Saving lunchtime series.
Read all of the entries: |
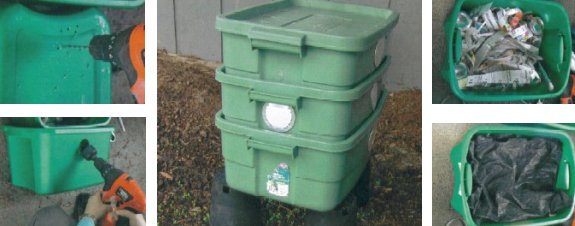
What makes a good worm bin better? A series of multiple levels that
takes advantage of gravity, making it easy and fun to harvest the super
valuable worm juice.
You can spend about a hundred bucks on a fancy
commercial worm bin complete with drain spout, or you can build
your own home made
worm bin for well under half of that and use the left over cash to
build a 2nd unit. Why build another one? It might help to experiment
with some different kinds of worms to better match your climate, and 2
cups of worm juice is better than one.
The difficult part of outdoor worm bins is finding a warm place to move
them in the winter or rigging up some sort of passive solar or electric
blanket set up to keep the little rascals from freezing.
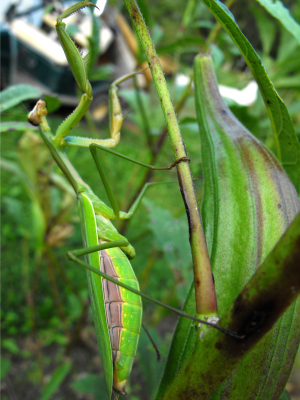 This seems to have been a very good year for
praying mantids in our garden. I stumbled across this green-eyed
male as I picked okra for our supper on Thursday. Can you believe
how full his belly is?
No one else on the internet seems to believe that eye color is a good
way to tell male and female praying mantids apart, so it's possible the
field marks I noted on my mating
mantises were just a fluke. If for some reason you really
need to know if your mantid is male or female, count how many segments
are in the abdomen. Males have 8 segments (though sometimes only
7 are visible) while females have 6 (though sometimes only 5 are
visible.) My okra mantis passed both the green-eye and the 8
segment test, so he's definitively male.
 The last of the easy seeds we save are
tomatoes and peppers. I've combined them into this post even
though they have different seed-saving techniques since they're in the
same family. If you've been reading along daily, these guys are
just a repeat of the methods we've been discussing all week.
Pepper seeds are a lot like squash seeds --- easy to save as long as
you keep hybridization in mind. Many hot peppers are in the same
species as your bell peppers, so don't grow them close together or you
may be surprised by the zest of next year's "sweet" peppers!
However, peppers don't hybridize quite as readily as cucurbits, so
you'll probably be okay saving two different varieties from the same
garden as long as they're separated by at least 50 feet. To save
pepper seeds, allow the peppers to ripen completely (to yellow, orange,
or red, depending on the variety). Then cut out the core, brush
off the seeds, dry the seeds in the open for a while, and put them in
your seed box. Just keep in mind that the hottest part of hot
peppers is the seeds, and you won't be thrilled if you touch your face
after handling hot pepper guts.
 Although some sources say differently, in
my experience heirloom tomatoes don't cross-pollinate. I've had
good luck saving seeds from different types of tomatoes growing next
door to each other, and I suspect you will too. To save tomato
seeds, pick ripe tomatoes, squeeze out the guts into a jar, add a bit
of water, and ferment the seeds for a few days just like you did the
cucumber seeds. Then pour off the liquid and film of fungus,
rinse the seeds, dry them, and save them.
I'd be curious to hear if anyone out there has reached beyond the basic
seed-saving level we've attained. What would be the next
vegetable on your list to save after the ones mentioned in this series?
| This post is part of our Seed Saving lunchtime series.
Read all of the entries: |
I couldn't resist the urge to grab the camera for a close up view of my
window spider embraced in a fierce battle with a wasp 3 times its size.
After several tries I got lucky and seemed to have captured the moment
when the spider demonstrates control by securing all the legs of the
wasp into one spot as if he's been handcuffed. You can notice less fight in the buzz of his wings
and an overall feeling of giving up.
If you listen close you can hear the mule garden deer deterrent in the background.
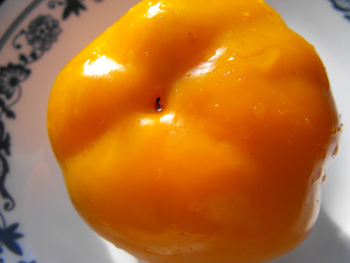 We like our peppers red or yellow and sweet,
but I'm not usually willing to put in the time to start them indoors in
early spring. They seem to be more tender than tomatoes, and
unable to be started in a cold frame. That means I direct sow
peppers right around our spring frost free date, and hope some will
have time to ripen all the way before the first fall frost. Last
year, we didn't have much luck --- I gave
away grocery bags full of big, beautiful green peppers right before the
frost, but only got to eat a few ripe ones.
This year, we tried another variety which may prove to be our new
favorite. Tangerine Pimiento Sweet Pepper is extremely early
producing --- we've been eating the sweet, orange fruits since early
September despite direct-seeding them at the end of April. The
peppers are small, which is probably how they're able to ripen so
early, and are held upright so the bottoms point at the sky. I
can't find any data on whether Tangerine Pimiento Sweet Pepper is an
heirloom, but I'm saving some seeds anyway and hoping to have an
equally good pepper season next year.

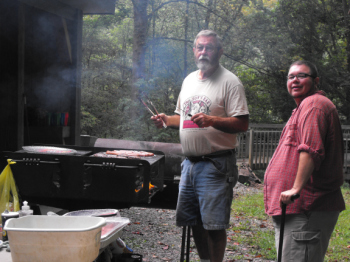
Thanks to Chaos for taking these pictures, and thanks to everybody for
helping with our picnic/wedding party, and a big hug to all those who
have sent warm wishes and provided positive thought in helping the
celebration be a smooth one with fun to be had by all.
A super huge thanks goes to whoever is in charge of the weather control
network and the wonderful delaying of that thunderstorm until well
after the party was over.
 Now
that it's over, I think I understand the point of a wedding. It's
the one time in your life when you can count on the people you care
about to show up together and at least look each other in the eye ---
the bare minimum for community formation. Mark's uncle and my dad
talked about tinkers, my college buddy and my brother talked about
Debian, and every sibling I own came together under one picnic shelter
for a few hours.
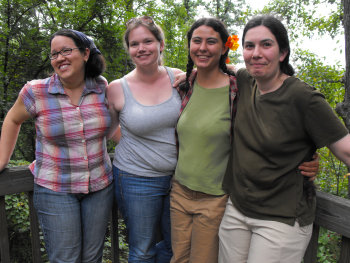 Although
to many women, their wedding is their "big day," I now realize that in
a proper world the ceremony is not really about the bride and
groom. It's about forming connections between two circles of
family and friends, hoping that maybe something will stick. After
a week of angst and tearing out my hair, it's pretty funny that I
finally figured out the point of our wedding after the fact!
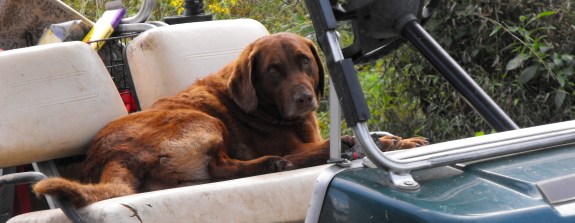
If you listen closely you can hear the very distinct sound of Lucy's
tail hitting the seat of her golf cart, which is one of my personal top
10 favorite sounds of all time.
It's really nice of her to let us use it whenever we need to haul
anything or anybody back to the trailer.
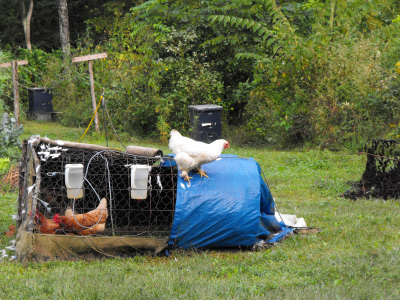 Our White Cochin started her broodiness early
this spring, and spent most of the rest of the year on one nest or
another. She barely got off the nest to nibble on some chicken
feed and definitely didn't do much pecking in the grass for months.
So when her chick died, I decided that she needed some supplemental
vitamins to help regain her strength. I've been letting her run
around free all week --- her spa week, I call it. She's taken to
roosting on top of one of the tractors, though she seems to prefer
hanging around with a second tractor during the day --- quite a social
butterfly!
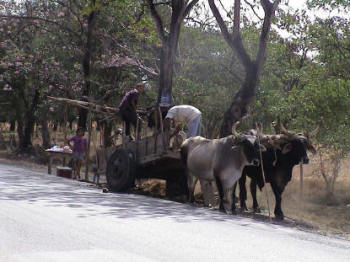 Good
Farmers: Traditional Agricultural Resource Management in Mexico and
Central America by Gene C. Wilken explores the methods Central
American farmers have used for centuries to maintain the health of
their farms without fossil-fuel-driven machinery or chemical
fertilizers. Farms were small, and the materials used came from
the farm itself or from nearby.
Although farmers in Central America are now giving in to modern farming
techniques, those of us intrigued by the permaculture concept of
creating a healthy food web within our garden have a lot to learn from
traditional American farmers. I'm going to skip over the
traditional techniques everyone's heard of --- like interplanting
legumes with hungrier crops to keep the soil rich in nitrogen or
applying manure to the soil. Instead, this week's lunchtime
series explores four intriguing management techniques we are
considering working into our own farm ecosystem.
| This post is part of our Central American Permaculture lunchtime
series.
Read all of the entries: |
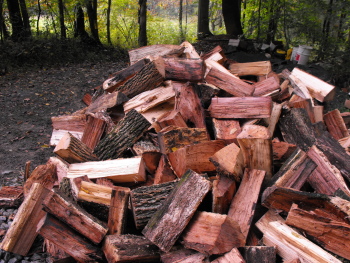 We bought a large truck load of firewood
recently due to the fact that we were too busy to cut any this summer,
and we've decided the extra time we get will be well worth the price.
I believe it takes a certain amount of experimentation when contracting
out essential chores in order to find the most comfortable balance
point of having enough time and money left over to relax. I already
have a good feeling about the value of this wood pile and how much time
it will free up for a few projects
we have on the drawing board this winter.
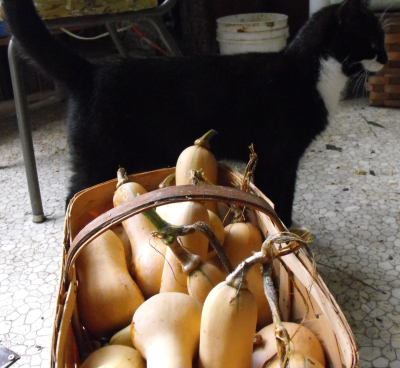 There's nothing that says
"first day of autumn" quite like a heaping basket of winter
squash! People obsessed with appearances grow pumpkins, but folks
who are attached to flavor grow butternuts. You can guess which
camp I fit into....
You can leave winter squash on the vine until just before the frost,
but our wet weather was starting to rot the fruits so I harvested
early. We got an overflowing peach basket full of squash from our
four plants, which is a bit low due to vine borers,
but not bad.
Unfortunately, I had to cook up over a third of the butternuts
immediately due to nicks and rotten spots. The best way to cook a
butternut is to roast it --- slice each squash long ways, scrape out
the seeds (don't forget to save
some!), and place them cut side down on a baking tray in the oven
to roast until soft. Scoop out the sweet, orange flesh and use it
in butternut
squash soup or turn it into a pie every bit as tasty as pumpkin
pie. (We may try both of these options this week to use up the
nicked fruit.)
The photo above shows the squashes we plan to store for the
winter. I gently rinsed off the mud, cut off bits of vine
attached to stems, and will now let the squash cure for a while at room
temperature. The optimal curing period for winter squash is 10
days at a temperature of 80 to 85 F and a humidity of 80 to 85%.
Our humidity will probably fit the bill, but our temperatures have
already cooled down so that we'll probably have to cure longer.
After curing, I wouldn't be surprised if our butternut squash feed us
all winter --- we gave away a cushaw this month that had been sitting
in our kitchen for nearly a year!
 Guatemalan farmers harvest vast quantities of
fallen leaves (broza) out of
nearby woods to incorporate into their soil. Wilken estimates
that farmers rake up leaves from 5 to 8 acres of forest for each acre
of crop they cultivate, although he hastens to add that farm fields are
small. Some farmers just hoe the leaves directly into their
soil, while others use the leaves as animal bedding for a week, then
incorporate the poopy bedding into the soil. The latter method is
especially effective since nitrogen in the manure and urine offsets the
nitrogen lost during the initial stages of leaf decomposition.
Leaves are an especially intriguing soil amendment for our farm since
they improve soil structure and water retention/drainage in clayey
soils. In fact, Guatemalan farmers use leaves primarily in clay
soil, while they tend to lean toward manure in sandy soils.
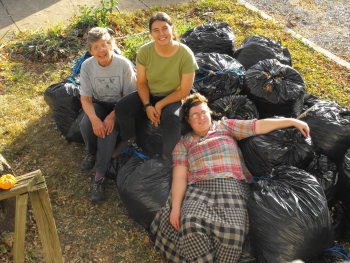
Last year, I begged my city-living family members to scavenge bags of
leaves left on the curb, and we ended up with 31 big garbage bags
full. I used them as mulch around our berries and trees, but I
could have used about ten times as much leaf matter. Since we've
decided to buy firewood this year, maybe we'll have enough free time to
rake masses of leaves out of the woods and use them as soil
amendments. I may experiment with using our chicken tractors as
leaf-shredding and manure-amending factories, or may try to harvest the
nitrogen in our urine by peeing on our leaves. Stay tuned for
lots of leafy experimentation this fall and winter!
| This post is part of our Central American Permaculture lunchtime
series.
Read all of the entries: |
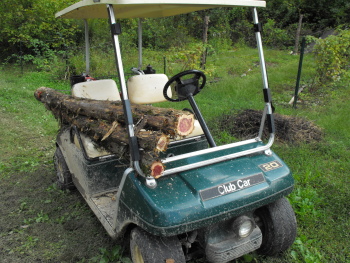 I was working on a small structure to protect
the firewood today. Stage 1 is to obtain 4 really long posts to work as
the frame. It will be like a mini pole barn without the walls.
Reducing our nearby cedar tree population has been on the list of
things to do for a while due to the fungal disease known as cedar
apple rust.
It's always especially sweet when you can get 2 things marked off the
list with just one task, although we still have several more cedars
that need to come down.
| Read all of the entries about
our Firewood Shed Building Project.
The project took a couple of afternoons and cost about $5. |
Reports of first frosts
trickle down to me from friends in New England. We're supposed to
be safe in southwest Virginia until October 10, but I can feel the
change of season pushing against our garden. Tuesday, I scurried
around freezing the year's last batch of corn along with some okra and
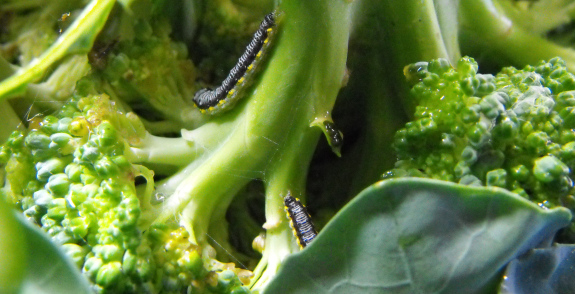
broccoli. Cross-striped cabbage worms had crept in amid the
broccoli florets while I ignored the garden last week, so I tried to
soak the heads in salt water with little success, instead ending up
just picking off the caterpillars.
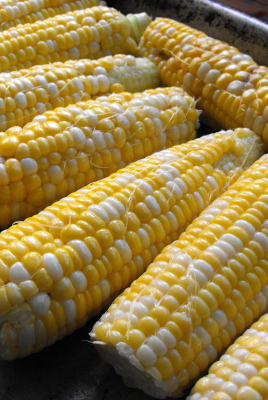 Still to be harvested this week are peas,
swiss chard, green beans, basil, and summer squash (ate our first
squash from the fall bed Monday!). We might even dig up
our sweet potatoes since they need a warm
curing period just like winter squash.
Suddenly, other projects
are also asserting their importance. That water line we nearly
buried in the spring needs to be finished, our bathing and chicken waterer construction
shed looks awfully important all of a sudden, and even the worm bin
will require some care to bring it through the winter. Since we do our
laundry in a wringer washer outdoors and dry the clothes on the
line, now's a good time to hurry up and wash all of our bedding before
cold weather makes drying comforters impossible. We'd also
like to turn our broken fridge into a cheap root cellar, but that
project may not make it onto this year's agenda. Fall sure is a
busy season!
 Today's traditional soil amendment method
was little more than a footnote in the book, but I'm intrigued by it
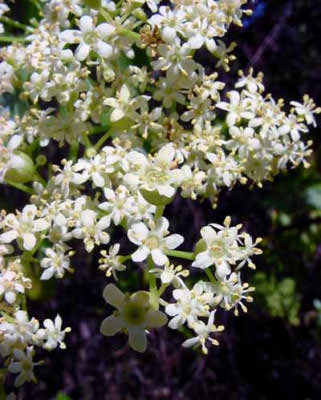
nevertheless. In southwest Guatemala, elderberry bushes (sauco) are interplanted amid
vegetable crops. Every year, the farmers cut back the bushes to
stumps, and use the young leaves and branches to mulch around crop
plants. The leaves have a high nitrogen to carbon ratio (a lot
like grass
clippings), so they decompose rapidly, feeding the crop plants in
the process.
The elderberry bushes in Guatemala are closely related to the
elderberry bushes that grow wild here --- depending on who you talk to,
the Mexican Elderberry (Sambucus
mexicana) is either a subspecies or a closely related species to
our Common Elderberry (Sambucus
canadensis.) We have elderberry bushes growing in our
garden that I've tried to eradicate, but which keep sprouting back up
from the stumps. This year, I stopped the eradication campaign
and instead decided to include the bushes as a mulch source in our
forest garden since elderberry flowers are useful nectaries to attract
beneficial insects. I'm intrigued to read that some Guatemalan
farmers also consider elderberries so important that they let them take
up valuable crop space.
| This post is part of our Central American Permaculture lunchtime
series.
Read all of the entries: |
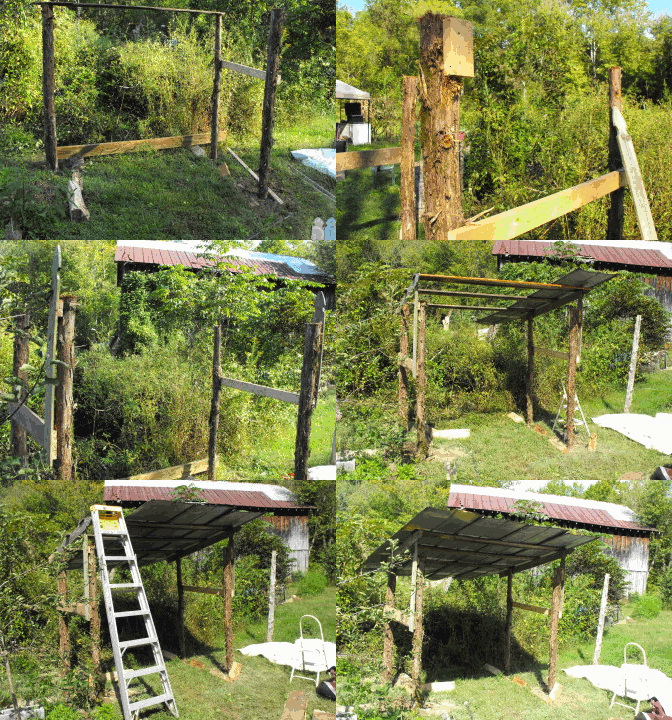
We decided to use some scrap tin pieces from the old house for the roof
of the firewood shed.
I already feel warmer knowing that our prime energy source for heat
will be out of the rain and close by.
| Read all of the entries about
our Firewood Shed Building Project.
The project took a couple of afternoons and cost about $5. |
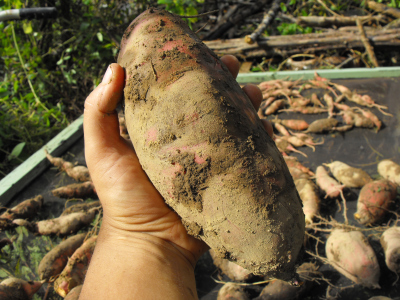 We want to plant twice as much garlic this
year as last year (more on that later), so I started eying the sweet
potato beds this week, wondering if they could be dug. A search
of the internet admonishes you to harvest
your sweet potatoes before the frost to avoid damage to the tubers. But how long before?
One easy way to know
when to harvest crops is to look at the variety's days to
maturity. Beauregard sweet potatoes (our variety) require only 90
days. Since we put out our slips between May 12 and July 1, they
should be ready to harvest between August 12 and September 1.
Looks like we can take a look!
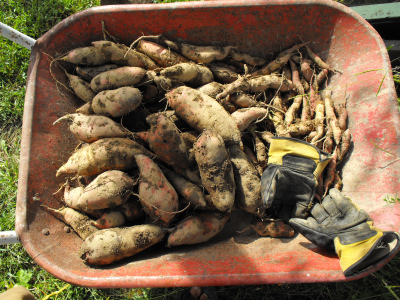 I dug up a few test plants and discovered a
good selection of large, medium, and small tubers. Presumably,
some of those useless tiny tubers would turn into useful medium tubers
if we let them wait another week or two. But I decided to harvest
anyway. After all, harvesting at this time last year let us cure
our sweet potatoes completely before the frost and we're
still eating those tubers.
I dug up a quarter of our sweet potatoes on Wednesday and was very
impressed by the showing. Last year, the deer ate our sweet
potato plants mercilessly, which led to small tubers that were few and
far between. Looks like Mark's deer deterrent is doing its job!
 While Guatemala is full of methods of adding
plant matter to farm fields, it seems like Mexicans spend more energy
on harvesting sediment out of water. In the Tehuacan Valley of
southwest Mexico, elaborate systems of canals and dams are used to
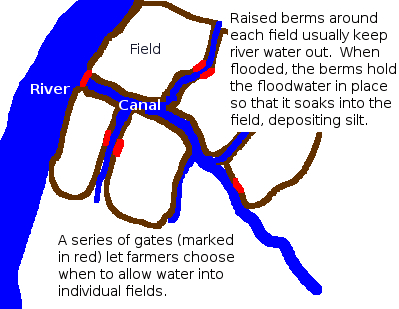
apply just the right amount of top quality silt to fields.
Neighboring farmers all work together to build the infrastructure
required to channel water from rivers to nearby farms. Each
farmer builds retaining walls around his fields out of soil, then
decides when to open gates and allow flood water to flow from the
canals into his fields. Silt settles out as the water sinks into
the ground and the result is about half an inch of high fertility
topsoil per flood.
 Farmers have about a dozen
floods a year to choose from, and most opt to open their flood gates
for just three or four. Since storms in the region
are often spotty, silt quality varies widely from flood to flood.
Floods fueled by storms in a certain part of the watershed will wash
high quality topsoil into the river while storms in another region
result in lower quality silt. Experienced farmers are able to
tell the difference and pick the right floods to feed their
fields. Even when floods contain high quality silt, farmers
usually let the first flush of water flow past unharvested since it
tends to contain trash and dead animals they don't want on their fields.
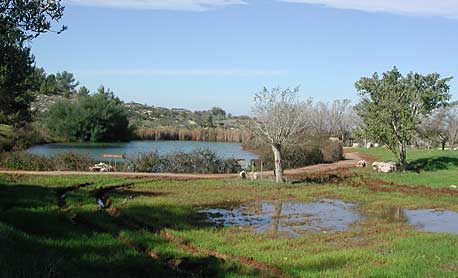
We actually saw a system like this at work in the Rio Grande Botanic
Garden several years ago (although the primary purpose there was
irrigation), and I've been intrigued ever since. Our creek floods
several times a year, but we just let the muddy water flow past,
untapped. Our current garden is up out of the floodplain and
wouldn't be eligible for silt harvesting, but this is certainly an idea
I'd like to keep on the back burner.
| This post is part of our Central American Permaculture lunchtime
series.
Read all of the entries: |
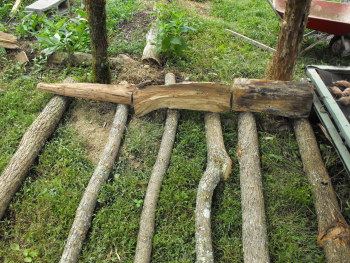
We cut down a small sassafras tree today to provide a crude floor for
the firewood to be stacked on in the new shed. I think it's going to
work nicely.
The next step will be to install 2 middle columns to support the center
stack on each end.
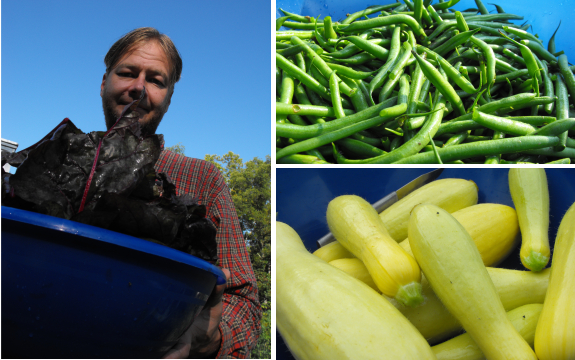
We bought a bunch of
cheap, plastic bowls at the Dollar Store in preparation for last week's
party, and they're already coming in handy. It sure is nice to be
able to carry a week's worth of green beans into the house without
having the veggies drip away over the sides of our formerly largest
bowl....
It's been quite a harvest week, with gallons of vegetables making their
way into our freezer. I'm most excited by the scads of summer
squash from our late planting. We've been spraying them with
Bt just in case, but this week I decided to leave a few plants
unprotected. If those guys get bored, we'll know we have to keep
spraying until the frost. If not, we might be able to leave our
fall planting of summer squash completely unprotected next year.
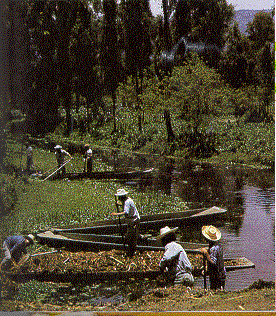 A more arduous method of
harvesting the silt carried by water is to wait until it settles into
drainage canals and then dredge out the muck. This method is
employed in wet areas of south-central Mexico that were turned into
farmable land by a series of drainage canals. Farmers have to
dredge muck out of these canals about once a year in order to keep the
canals from turning into swamps, and the harvested muck makes a high
quality soil amendment.
Since muck is so energy-intensive to harvest, it is traditionally
poured into small molds made by mounding up a soil lip around four
sides of a rectangle on the ground. The water quickly soaks into
the underlying soil, leaving a rectangle of solidified muck that can be
cut into small squares. A seed is planted into each square, then
the resulting seedlings are transplanted into the main fields.
The muck seed bed gives the seedlings a good start on life, and the
cubes of muck are a good amendment to the regular seedbed after
transplanting.
We certainly have plenty of muck going to waste on our farm.
Previous owners rerouted the main creekbed, leaving behind an old
creekbed that we've dubbed the alligator swamp. I suspect that we
could harvest many buckets of muck out of the swamp and add the high
fertility soil to our garden with the help of the golf cart.
This week's lunchtime series only
covered the first third of Good Farmers. Stay tuned for another series if I
get my act together before the library book is due!
| This post is part of our Central American Permaculture lunchtime
series.
Read all of the entries: |
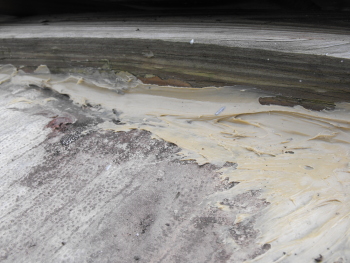
Liquid nails.
More liquid nails.
And still yet a bit more of the liquid nails to the time battered roof
of our trailer. Each dab of glue getting us that much closer to a
completely leak proof home.
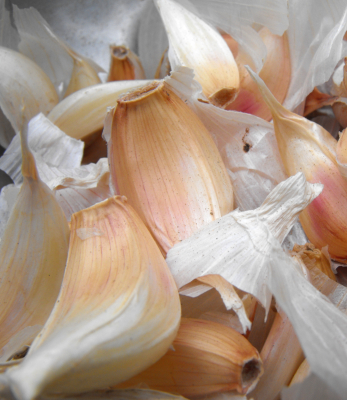 After two years of failed garlic harvests,
last year I spent $45 on a sampler pack of four types of garlic from Southern Exposure
Seed Exchange.
I'd read that garlic needs to acclimate to local conditions, and they
were the closest company I could find with garlic for sale. I
also figured that by trying four varieties, we could find one well
suited to our farm and our palates.
I planted about two thirds of the two pound sampler (giving away the
other third), and was stunned by our harvest in June.
Both the Silverwhite Silverskin and the Inchelium Red grew like
gangbusters, while the Music and Italian Softneck made a pretty good
showing. I figured the garlic we harvested would last us all year
with some to give away.
But then two things happened. First, we went out of town
immediately after the harvest and didn't cure the bulbs properly, so
about a quarter of them went wormy and rotted. And our tastes
seem to have changed. Not many years ago, I wouldn't even eat
garlic, but lately the bulbs have been taking a more and more prominent
place in our diet. Suddenly, our June harvest looked...small.
So this year we're planting twice as many beds as we did last year ---
18 instead of nine. (Each bed is approximately 18 square
feet.) I put the first half in the ground on Friday and plan to
plant the rest early next week.
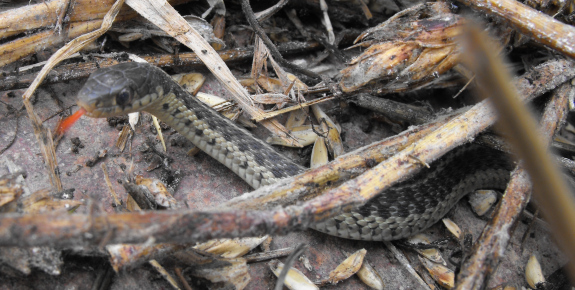
It's always a good sign when I stumble across two snakes in the course
of a planting day --- the garter snake below was hiding in the moldy
straw I used as mulch while a worm snake
(and a toad) slipped out of the soil as I dug in manure. Here's
hoping that the snakes are telling me that next year we'll have garlic
to give away!
 Mark's out saving the world this weekend, so I
thought my Mom might like to come over for the day and keep me
company. She drove up from town and arrived as the rain started
to pick up.
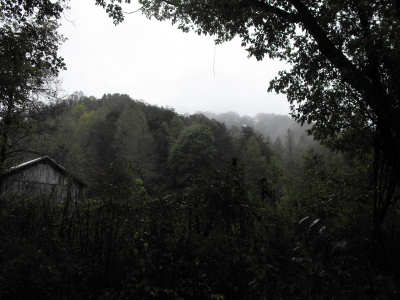
After a drenching ride to the trailer in the golf cart, we settled in
for girl time --- hot chocolate and board games. The rain kept
drumming on the trailer roof, but I didn't pay much heed.
"Will the creek flood?" Mom asked worriedly.
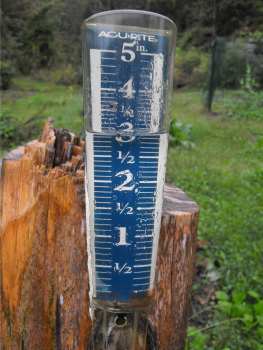 "Naw," I reassured her. "Unless we get
three inches in a day, we'll be fine."
We glanced out the window. Was the rain gauge really full nearly
all the way to the top?! That looks a lot like three inches!
"Um, I just made that three inch figure up..." I said as we scurried
around collecting wet clothes and produce. Down we rolled into
the floodplain, through the first miniford without a problem, splashing
through a wet second miniford, then stopping in distress in front of
the third miniford. Time to leave the vehicle and head out on
foot!
The water was too high to make boots worthwhile. Even rolling up
your pants gets pretty useless when the muddy floodwater reaches above
your knees. We splashed through the last miniford and peered at
the raging waters in the creek itself --- about chest high. No
way we were walking through that.
 Lucy was in her element, galloping along the
water's edge. She jumped onto the footbridge, thrilled at the way
the creekwater was even with the boards. Bits of trash washing
down the creek lodged on the side of the bridge so that she barely had
to bend her head to grab them. A farm dog paradise!
If Lucy could get across, so could we. I took one of the
produce-filled backpacks and carried it across, then came back for the
other and to hold Mom's hand. My mother is pretty plucky --- most
folks won't even walk across our footbridge when the creek is low and
the boards are dry. But Mom cut down a Christmas tree and dragged
it home when she was nine months pregnant with me. She canned
endless loads of produce when she was nine months pregnant with my
sister. A floating footbridge was no problem.
The good thing about raging water is that it blocks out the sound of
old walnut logs creaking and cracking beneath your feet. The
water under the footbridge actually made it feel more stable than usual
--- like walking on a waterbed! Mom reached her car safely, then
Lucy and I braved the footbridge again for the wet walk home. Now
I'm holed up with two dry cats, hoping the flood waters recede in time
for Mark's return tomorrow evening. Too bad he missed all the
excitement....
 Our homemade chicken
waterer
photo contest ended last week, and we were thrilled by the ingenuity of
the entries. Alexandra Kent submitted our favorite entry --- a
bucket waterer mounted on a plant hanger. Why didn't we think of
that?

The photo to the right by Vance Foster was a close
runnerup. I like the simplicity of the drinking
water bottle reservoirs, and I have to admit that the pullets made me
laugh.
Many thanks to everyone
who took the time to capture their chickens in action. Stay tuned for another photo
contest next year!
The Walden Effect for me is a path from noise to nature and what
happens when you manage to surrender to the everyday beauty of life. My
understanding of its exact nature is a work in progress, although I think it's
safe to say that it has an emotional element that relates to dealing
with unresolved conflict of whatever one feels strong about.
Youtube user Holofractalist has made a clever edit of a Greg Braden
interview that goes a long way in explaining what I'm trying to say
here. I liked it so much I watched it twice in a row and I'll most
likely review it again and again. A fantastic 10 minute chunk of
enlightenment that I give 2 thumbs up.
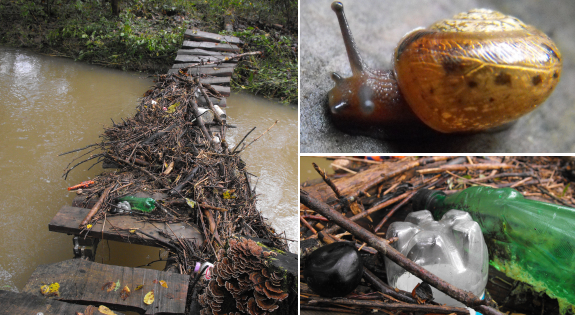
The aftermath of the flood
reveals no major damage, though I had to clear a lot of debris off the
footbridge. At least four snails seemed to have survived washing
down the creek, and I carefully plucked them to safety on the shore
before brushing the rest of the debris back into the water. I
pondered whether it would be worth it to harvest all of the sticks for
mulch --- maybe next time.
 The
gardener lives for fresh produce straight out of the garden, but the
homesteader wants more. She wants to be eating her own vegetables
straight through the winter and into the spring. But how?
Last year, I got
obsessed with freezing,
and we did eat our own vegetables all winter long. With some
judicious use of cold
frames,
we even had fresh lettuce and greens for most of the winter to keep us
healthy. But by late winter, I was still craving more fresh
produce.
The solution to the
fresh-produce-in-winter problem is growing more vegetables that can be
kept fresh straight through the winter. Why freeze those carrots
and cabbage (like I did last year) when you could crunch into them
fresh and crisp in February? This week's lunchtime series
explores storage vegetables --- what to plant, how to harvest, and how
to keep them fresh through the winter. I drew my information from
personal experience and from Root
Cellaring: Natural Cold Storage of Fruits and Vegetables by Mike and Nancy
Bubel. I highly recommend the latter if you want more information.
| This post is part of our Storage Vegetables lunchtime series.
Read all of the entries: |

Secrets of
shed building.com is jam packed with information on building a wide
variety of sheds. You can tell the people who put it together really
have a passion for everything shed related.
There's a place you can ask questions about your shed project with
someone to give qualified answers for free.
If building it yourself doesn't sound like fun then maybe you could get
something out of their review section of available shed kits and shed
building companies.
I think I might incorporate a few tips I've learned from this site into
our next firewood shed, but that won't happen until we fill the first
one up with split logs.
 Our deer
deterrents are still working like a charm, but one got hung up this
weekend and a deer came through the gap in the sound barrier.
After looking at my munched strawberries, I resolved to kill a deer
before the fall season is over.
I spent a while Monday afternoon poring over the Virginia hunting laws. Turns out that if we
were good enough,
Mark and I would be allowed to kill 5 deer apiece on our own property
without a license. The rules are complex and confusing ---
no hunting on Sunday (even on your own land?! What happened to
separation of church and state?), no more than two bucks per person
(great --- I want to kill does!), and no more than one deer per day per
person.
We were thinking about hunting last year, but never found the time to
practice amid the rush of winter preparations. But this year we
freed up some time by buying
firewood, and are even prepared with a 40 caliber rifle. I'm
hoping that in the next six weeks before hunting season begins, we'll
have time to become proficient marksmen.
 Although
a lot of fruits and vegetables can be saved for a few weeks or even a
couple of months in the fridge after harvest, I'm most interested in
the ones that will stay fresh long into the cold months. White
and sweet potatoes, winter squashes (including pumpkins), carrots,
onions, and garlic are the obvious six. We're starting to
experiment with some other good keepers too, including beets, cabbage,
parsnips, and turnips. Once our trees mature, we'll add apples
and pears to the mix.
You should start
thinking about winter storage while planning your garden. First,
take a look at your soil conditions. Did you know
that soil with higher levels of potassium will produce vegetables with
better storage quality? (Add manure, compost, wood ashes,
comfrey, and
citrus peels to increase your potassium levels.) Too much
nitrogen in
the soil will have the opposite effect on root crops since the
vegetables will be watery and will spoil quickly.
Next, consider planting
dates. Your goal should be to have your storage crops ripening in
early to late fall, just in time to tuck them away for the winter
without any risk of them becoming overmature. The spring carrots
I've been munching on all summer are now starting to get woody and
bitter --- no point in storing vegetables already past their peak
perfection. Instead, I planted
a fall garden
with storage carrots that are just now starting to ripen.
Although I didn't think this far ahead in spring, I should have planted
my winter squash at the end of May rather than at the end of April, so
that the squash would be turning ripe in Sepetember rather than having
sat in the rain and started to rot for a few weeks before
harvest. Basically, you should plant your storage vegetables as
late as possible to still get a mature crop.
| This post is part of our Storage Vegetables lunchtime series.
Read all of the entries: |
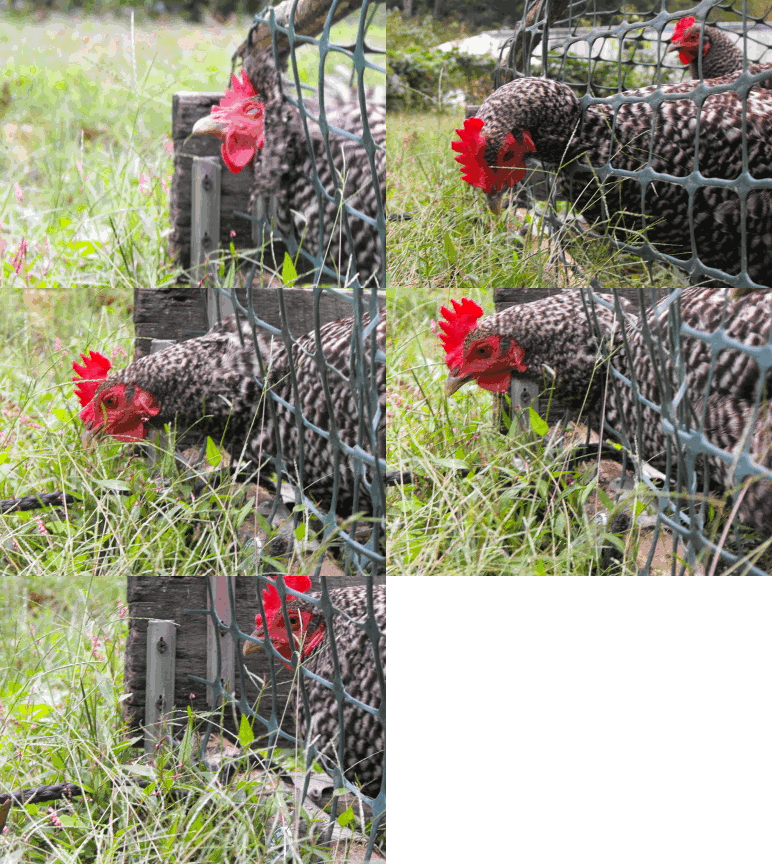
The green plastic material we used for the latest chicken
tractor has an added advantage of being a nice comfortable size for
each hen to poke her head through to access some goodies outside the
tractor.
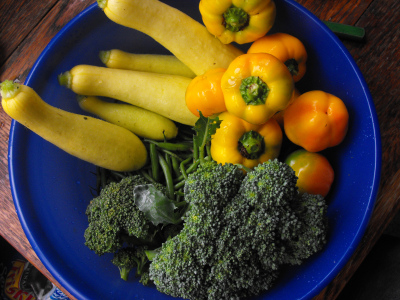 Nights have started dropping into the low 40s
this week --- time to get serious about freezing the last of the summer
crops.
Now that we suddenly have enough summer squash to preserve, I decided
to try to find a mush-free way to freeze them. Last year, I
steam-blanched the squash then froze them, and the thawed squash turned
out watery --- okay in a spaghetti sauce, but not so great
otherwise. A friend of mind grills her summer squash before
freezing them with great results. I decided to slice the squash
lengthwise and broil them in the oven rather than firing up the
grill. The result was certainly tasty in the short term --- we'll
have to wait and see how they thaw out once winter hits.
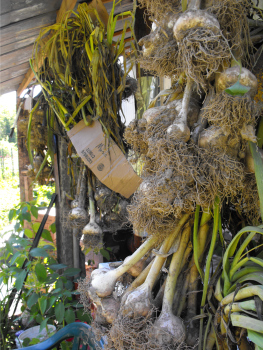 Now
the fun part --- the harvest! The frost is already looming large
in our minds, but most of our storage vegetables don't care so
much. Do be sure to take in your onions, garlic, winter squash,
and sweet potatoes before the frost, but don't be concerned about the
other root crops. Some --- like carrots and parsnips --- convert
starches to sugars after a frost and become much tastier. These
guys can be harvested as late as October or November as long as you
make sure that no parts of the roots stick up above the soil surface.
When harvesting
vegetables for storage, try to dig them in dry weather when less soil
is clinging to the roots and the vegetables themselves are less turgid
with water. Gently brush off the dirt, but don't scrub or wash
the vegetables. Although you may be tempted to toss these
seemingly indestructable roots into a basket or wheelbarrow, you should
instead handle them gently since the smallest bruise can make
vegetables rot in storage.
Pick through your haul
as you harvest and take out any imperfect, bruised, or cut vegetables
to be eaten immediately. These guys probably won't last long in
storage and will rot the surrounding vegetables in the process.
Cut off any leaves immediately, but don't break off small feeder roots.
| This post is part of our Storage Vegetables lunchtime series.
Read all of the entries: |

When installing the 2 middle posts for the new firewood
shed I decided to take a cue from the original barn builders and
use a simple stone support for each 2x3.
The tarp is a temporary addition for the next couple weeks to protect
several garden items from the rain as they cure.
| Read all of the entries about
our Firewood Shed Building Project.
The project took a couple of afternoons and cost about $5. |
Want more in-depth information? Browse through our books.
Or explore more posts by date or by subject.
About us: Anna Hess and Mark Hamilton spent over a decade living self-sufficiently in the mountains of Virginia before moving north to start over from scratch in the foothills of Ohio. They've experimented with permaculture, no-till gardening, trailersteading, home-based microbusinesses and much more, writing about their adventures in both blogs and books.
