
archives for 08/2009
 I've been refraining from saying this because
I don't want the water gods to think I'm ungrateful.
But...please...can we have just a
little break from the rain?
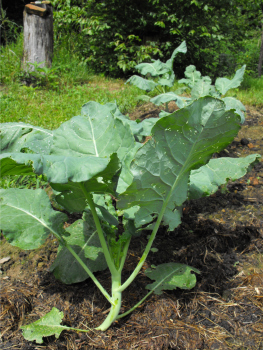
The fall crops have all sprouted with no problem. In fact, the
broccoli looks so lush I wonder if the plants are going to head up
prematurely. We haven't had to water in over a week.
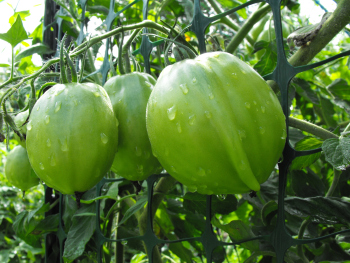
But the tomatoes. My poor, darling tomatoes. They are so
plump and juicy and totally green
on the vines. Whenever I talk to my garden friends, our
conversation revolves around the lack of ripe tomatoes. For
goodness sake, the ironweed is starting to bloom and I'm still eating
last year's pizza sauce!
My work pants have developed mildew and the roof has sprouted a
leak. There's so much humidity in the air that it cost
significantly more to mail out our chicken waterers this
week. I really could use a few sunny days to dry my laundry and
ripen the tomatoes. Please?
 A few weeks ago, our Barred Rocks stopped
laying in their nest box. Something must have clicked in the lead
hen's head, because she suddenly decided it made a lot more sense to
lay her eggs hidden back under the weather flap of the chicken
tractor.
A quarter of the time, I'd catch the first hen to lay and move her egg
to the box, then the other hens would lay in the right place.
Another half of the time, we found the eggs before dragging the tractor
across them. The rest of the time, the eggs got smashed and Lucy
got a treat.
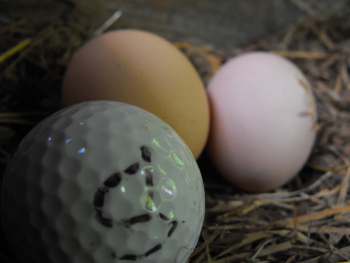
Last week, I tossed a golf ball in the nest, hoping it would act as a
nest egg and prompt the hens to lay in the right place. Sure
enough, the ball did the trick! The few times I manage to
outsmart them, I'm awfully glad that chickens are none too bright.

Emily
Cummins is a 21 year old student/inventor who has come up with a
clever and simple way of using the sun to cool things like perishable
food and temperature sensitive medications. The concept works with no
electricity and can be built with materials like cardboard, sand, and
recycled metal.
It takes advantage of conduction and convection to create an
evaporative cooling effect. You place what you want to keep cold in the
interior chamber and either some sand, wool, or soil in the outer
chamber that gets saturated with water. The sun warms the water soaked
material...the water evaporates, reducing the temperature of the inner
area to 43 degrees Fahrenheit for days at a time. To recharge you only
need to add more water once your material gets dry.
 I've decided to give up on my pleas for a
break from the rain. We did get 24 hours of partial sun on
Saturday which mostly dried three loads of laundry and brought the
first blush of red to a few tomatoes. And then Sunday brought
another deluge, filling all of the puddles back up and dripping onto
our kitchen floor.
I could whine and complain, but the truth is that the best farmers roll
with the punches. If they get record low July temperatures, they
plant more cool season crops. While I gave up on lettuce as soon
as the first heat wave hit, my garden mentor just kept planting and is
still eating sweet lettuce. Time to follow her lead and focus on
the fall
garden!
 I
have to admit, I was raised on the "Noble Savage" belief that American
Indians had a pure connection with the nearly untouched wilderness they
lived in. I spent my childhood running wild and pretending that I
was an Indian, not a plain old American of mixed European
descent. My preservation ethic was built in large part on these
beliefs...which have now been debunked by the scientific community.
I
have to admit, I was raised on the "Noble Savage" belief that American
Indians had a pure connection with the nearly untouched wilderness they
lived in. I spent my childhood running wild and pretending that I
was an Indian, not a plain old American of mixed European
descent. My preservation ethic was built in large part on these
beliefs...which have now been debunked by the scientific community.
In actuality, evidence suggests that the pre-Columbian American Indians
lived in a highly constructed landscape. Over two thirds of the
United States was devoted to farmland, game was scarce (having been
hunted close to extinction near settled areas), and forests were young
and impacted by frequent, human-lit fires.
Then Europeans arrived and brought with them diseases that nearly wiped
out the Native American population. The suddenly human-free,
formerly
cultivated landscape gave rise to huge populations of bison, elk, deer,
and passenger pigeons, which feasted on corn left uneaten by dead
Indians. Then the forests began to grow up and take over the
cultivated land, so that explorers in the eighteenth century reported
vast expanses of "virgin" forests.
Despite, or perhaps because of, the deeply human-impacted nature of the
American landscape, we have a lot to learn from the American
Indians. This week's lunchtime series summarizes the permaculture
implications of Charles C. Mann's fascinating book 1491:
New Revelations of the Americas Before Columbus.
I highly recommend you check the book out of your local library and
peruse it on a suddenly sunny Saturday between visits to the wringer
washer, the way I did.
| This post is part of our American Indian Permaculture lunchtime
series.
Read all of the entries: |

The Graupner
Funky Chicken is your chance to really give that troubled rooster
something to think about when he sees a super large hen flying
overhead. These birds won't be laying any eggs, but they seem like a
fun way to enjoy an afternoon at the park while spreading the word on
how cool it is to fly a chicken.
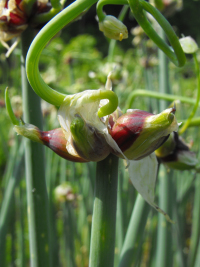 Congratulations,
Allie! You are our new Egyptian Onion winner!! Drop
me an email with
your mailing address and we'll pop your top bulbs in the mail.
For everyone who didn't
win --- don't worry, those onions produce like crazy. There will
be more to give away next year, and I already know we have surplus snow
pea seeds and daffodil bulbs to give away soon. It was great to
hear from you all!
Cahokia was an
ill-fated, American Indian settlement near present-day St. Louis.
When the city was settled around 1,000 A.D., Indian
populations had grown to such a level in the eastern United States that
game was becoming scarce. Luckily, maize (corn) was making its
way north from Central and South America, allowing the Indians to
replace their hunting lifestyle with a more agricultural one.
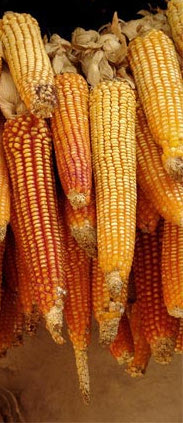 One visionary leader realized that
changing to a lifestyle centered
around maize would require building granaries to store the kernels over
the winter. He figured the best way to go about it would be to
create a huge communal granary so that the combined might of the
community could protect the maize from depradations by neighboring
groups. Some 15,000 people joined this unnamed leader in his
quest to construct a giant city --- the largest north of the Rio Grande
--- and to plant vast fields of maize.
Unfortunately, the population of Cahokia grew so large that the water
from the stream flowing by the city couldn't support the city's
people. So the Cahokians channeled a nearby stream from its
normal path, rerouting the water to join their existing stream and
turning their water supply into a river. More water! More
maize! More people!
The Cahokians continued to clear the surrounding land, cutting down
trees as building material, for fires, and to open up land to grow more
maize. Eventually, disaster struck. Heavy storms which
would have been soaked up by forest quickly ran off the agricultural
fields, bloating the river, and causing floods and mudslides in the
city of Cahokia. A subsequent earthquake was the last straw which
broke Cahokia's back. Within a few hundred years of its
inception, the city had
dissolved back into the earth.
The story sounds astoundingly familiar. Clearcutting, stream
channelization, monoculture, and overpopulation leading to flooding and
ecological
collapse --- it could be set next door to my house. The end of
the story, though, is something I only see dimly in modern
agriculture's future. The Indians fled the city and developed a
more sustainable agricultural system based on small fields of maize
surrounded by managed forests of fruit and nuts. Maybe those
Noble Savages were pretty smart after all.
| This post is part of our American Indian Permaculture lunchtime
series.
Read all of the entries: |
We added anti-deer
machine#5 to the upper garden to cover a another weak point in our
perimeter. I had to use the cat bowl to get a more full dinging sound.
Sorry, Huckleberry....
Just found out today from a neighbor that a large black
panther* has been spotted less than a mile from us. Maybe this shield of
noise will send a signal to this new player in the woods to stay away
from us and our chickens?
*"Panther" is the local word for Mountain Lion. Although Mountain Lions are usually light brown, the half dozen sightings we've heard of locally in the last two years have all been of large, black cats.
| We finally solved the deer in
the garden problem, and the solution was so elegant we gave it a new
website. Check out our deer
deterrent website for free plans! |
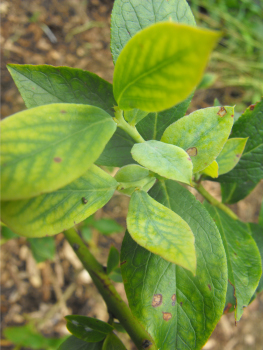 Remember how I experimented with chemical
versus organic methods of acidifying the ground for our blueberries?
The results are in, and I'm afraid the chemicals won.
I only had a dozen data points, so the results of my paired t-test
weren't significant. But there was a definite trend toward better
health among the blueberries grown on sulfur-treated soil versus those
grown on pine-needle-treated soil. The photo to the right shows
one of the stressed plants --- yellow leaves with green veins are a
textbook sign of iron deficiency due to high pH.
I guess I'll probably buy some more elemental
sulfur to drop the pH in the short term, but will also keep
applying pine needles as more of a long term fix.
 The Amazonian forest is considered by many
environmentalists to be the Holy Grail of untouched biodiversity.
Or it was, until recently when scientists started uncovering evidence
that anywhere from 8% to 100% of the Amazon forest is anthropogenic.
Slash and burn agriculture is currently the norm in the Amazon basin,
and for a long time scientists assumed that slash and burn was the
ancient method of managing the forest. In this technique, farmers
hack a small opening out of the forest, burn the fallen trees, then
plant crops in the resultant rich bed of ash. After a few years,
trees begin to grow up in the gap, and farmers move on to cultivate a
new area. Although slash and burn is harmful to the air, the
method is vastly superior to trying to till the poor soil, which would
ruin the land in less than a decade. Instead, slash and burn
seems to be marginally sustainable.
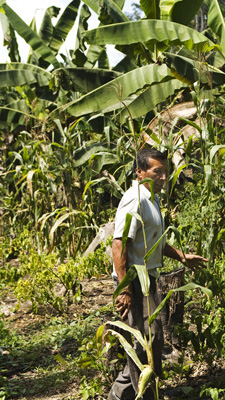 The slash and burn technique, though, is
clearly dependent on the European introduction of metal axes.
Using the Amazonians' indigenous stone axes, scientists estimate it
would have taken about three weeks to chop down a single tree.
Creating a forest gap in this scenario must have been a long term
undertaking with long term rewards.
Scientists are now beginning to understand that slash and burn was
merely a method that Indians resorted to after disease devastated their
populations. Previously, the Amazonians did hack gaps out of the
forest canopy, but into each gap they planted small food crops like
manioc between carefully selected tree species. The trees were
the real crop, with the manioc being a secondary addition to their
diet. Over one hundred carefully bred tree species now dot the
Amazonian forest with their edible fruit. In essence, the
Amazonians were creating a forest
garden.
| This post is part of our American Indian Permaculture lunchtime
series.
Read all of the entries: |
 The new mower lost its get up and go today,
which prompted a search of the internet for some free advice.
Samuel Goldwasser
has a fine collection of tips and instructions for the do it yourself
crowd. He is of the opinion that most lawn mowers function on a low
compression ratio and therefore can do without the high octane fuel.
Our mulch machine
just needed a new spark plug and a bit of oil to get back in the game.
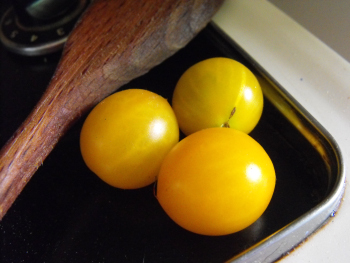 Finally! The first four
tommy-toes! (Yes, I can count --- Mark snitched one before I was
able to take the picture.) They are nearly two weeks later than
last year, but are no less delicious for their lateness.
Our butter dealers told Mark that you just have to expect to lose the
whole harvest one year in ten down in these bottoms. I'm a huge
believer in diversification in farming --- unless the flood waters come
up here and physically wash us away, we're bound to do well with at
least a few crops. The fall peas and broccoli, for example, are
growing a mile a minute.
And I believe our luck is changing. Folks nearby got six inches
of rain in a sudden downpour Tuesday, but we only got a quarter of an
inch. Maybe we'll have a summer harvest yet!
 Amazonians also developed a method called
terra preta to increase the fertility of their low-nutrient
soils. Scientists estimate that up to 10% of the Amazon's soil
consists of this man-made, high fertility, "dark earth." Terra
preta is high in phosphorous, calcium, sulfur, and nitrogen, is rich in
organic matter and microorganisms, and has been shown to have elevated
moisture and nutrient retention capabilities. The soil grows good
crops too, even hundreds of years after being created.
Although popular
articles about terra preta suggest that all you have to do is
create charcoal and work it into the ground, terra preta production is
actually more complicated. The Indians mixed charcoal with
excrement and animal bones in long trenches when creating terra
preta. The charcoal consisted of charred wood, weeds, cooking
waste, and crop debris. Copious pottery shards in the terra preta
suggest to me that the technique may have begun as simply a modified
midden heap.
I'm curious about whether terra preta could be the answer to some of
our waste disposal problems. I try to keep our homestead as
self-sufficient as possible, and the influx of cardboard from our automatic chicken waterer
microbusiness doesn't seem to fit that model. I've tossed some of
it on the worm bin, but am starting to suspect that I'm overwhelming my
poor worms with the mass of sodden cardboard. (Recycling isn't
really an option since we live an hour away from the nearest
facility.) Could I use the excess cardboard along with those
troublesome chicken bones and maybe even our excrement to create terra
preta? Only time and experimentation will tell.
| This post is part of our American Indian Permaculture lunchtime
series.
Read all of the entries: |

Hae-Jin
Kim has an interesting idea to harness the waste heat generated by
a typical refrigerator. It's not quite enough to function as a hot
plate, but 150 degrees might be able to dry a pair of socks or keep a
burrito warm? I wonder if this heat could be channeled to a small green
house structure for a steady flow of warmness as long as the
refrigerator is on?
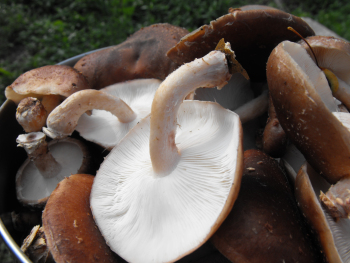 I was raised on the old USDA food pyramid, and
even though I know it's not quite healthy, I still tend to plan my
meals based on its teachings. I try to make sure every meal has
plenty of vegetables, a bit of protein, a bit of starch. And, of
course, I eat fruit like it's candy.
But mushrooms mystify me. They have so many vitamins and minerals
in them that they are clearly in the vegetable group. On the
other hand, they are relatively high in protein, which means that I
might lump them in with meats (where I put eggs and legumes.)
Given this week's massive harvest, I'm tempted to say that shiitakes
fill both niches. After all, we have enough mushrooms this week
to cover the entire food pyramid!
 1491's
summary of American Indian agricultural practices reveals societies
full of people a lot like current farmers. Neither Indians nor farmers aren Noble
Savages who live in totally harmony with the land, but we are constantly striving to achieve
a more sustainable system. I hope that recent forays into
permaculture show that we are on the cusp of reaching a new
relationship with the natural world.
Although I'm a bit sad to see my childhood image of Indians dashed, in
a way the reality is much cooler. I wonder what other ancient,
permaculture-like techniques scientists will turn up in the years to
come?
| This post is part of our American Indian Permaculture lunchtime
series.
Read all of the entries: |
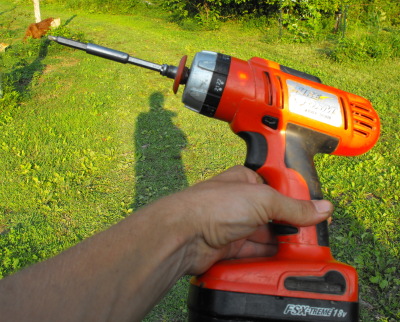 I've had this 18 volt Black and Decker
Firestorm drill for over 4 years now and it's still as strong and
dependable as the first day I got it.
Its taken some serious drops and bangs over the years ...proving itself
in the heavy duty tool league at a price well below the heavier brands.
I've worn out one battery so far...but still have 2 more that provide
more than a day's worth of work at an impressive charge time.
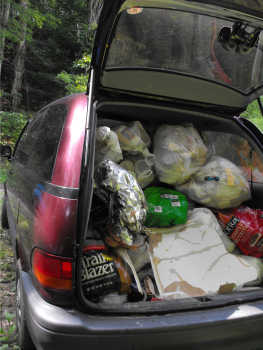 Over
the last year, we've made mountains and mountains of trash, which we
tossed in the barn to be dealt with later. This photo shows about
half of the trash, and I'd estimate three quarters or more of it is
plastic packaging.
We cut down on our trash
by buying in bulk and by using food scraps, paper, and cardboard on the
farm. But plastic seems inevitable. Milk jugs, styrofoam
meat trays, thin sheets of plastic wrapping everything from toilet
paper to boxes of tea bags. In many cases the plastic is entirely
redundant, seemingly tacked on for the sole purpose of filling my barn
with trash.
The worst part is that plastic isn't really
recyclable. So
how can we cut down on our mountain of trash? The best options I
can come up with are:
- finding a way to buy even more things in bulk
- growing more of our own food
- buying less
If you have any better
ideas, I'm all ears! I'm especially interested in ways you
might reuse plastic on the farm.
 The folks at pedalpowergenerator
have added some step by step videos to the free diy section.
This setup takes advantage of an adjustable V-belt, which will cost you
50 bucks. You take the tire off your wheel and replace it with the
V-belt to get maximum efficiency from the exerted energy. The
Duracell power pack functions as a storage unit with a built in
inverter and usually sells for a bit over a hundred dollars. The
generator will cost you more depending on which one you choose, and all
that's left is the charge controller and blocking diode, which can be
had for under 100. I almost forgot the bike stand....which could be
made from scrap material or you can just buy the industrial model.
I've been studying different versions of pedal
power over the years and would say this configuration is the
smartest one I've seen yet. If you add a small solar cell and reduce
your use you might just make enough power to get you through the day.
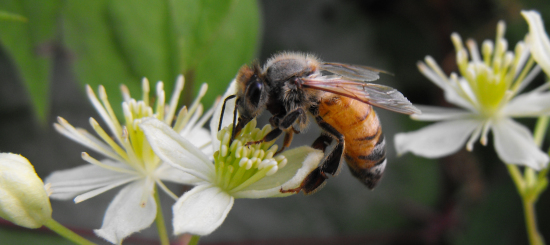
The fall flowers are starting to bloom, so I wandered outside to see
which plants are attracting the honeybees. Our worker bees seemed
to be flying right past ironweed and wingstem and making a bee line
directly toward the Virgin's Bower.
These pretty white flowers are relatives of the cultivated Clematis you
might grow in your flower bed, but around here Virgin's Bower grows
wild in open, weedy areas. The vine is currently twined around
several spots which I plan to "clean up" this winter --- knocking down
the wild plants to make way for some extra berries. Given
Virgin's Bower's attractiveness to the bees, though, I wonder if I
should move some into the forest
garden to act as a nectary.

Microhydropower.com has
some exciting new products that allow the common guy to harness the
power of a small stream for the purpose of generating electricity.
Their setup will cost you about 3 thousand bucks...and then you'll need
to figure out how to store it and get it where you need it.
Not a bad solution for home made electricity if you live close enough
to a steady stream of water.
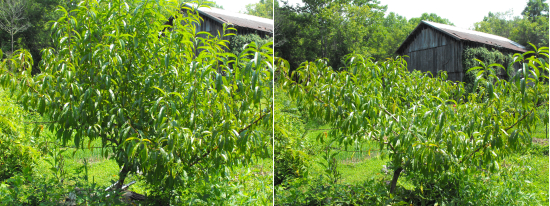
Remember how I pruned and trained my
peach trees to the open center system last winter? A good
orchardist would have done a followup pruning and training in June, but
I missed the boat and only just now got around to my summer
pruning. As you can see in the photo on the left, water sprouts
had sprung up vertically from the center of the tree, so I had to do a
lot of cutting. Optimally, these water sprouts would have been
trimmed back when they were much shorter so that all of that energy
would have gone into growth of the main branches.
Last winter's technique of training the tree with yarn seems to have
worked very well. Sunday, I cut off the old pieces of yarn since
they were starting to grow into the branches. (Once again, this
would have been better done six weeks ago.) I was expecting
branches to spring back to their former vertical form, but instead they
sat just where I'd trained them --- success! So I added a few new
training yarns back in to hold down lengthened branches and called it a
day.
Shame-faced plug: Check out our new Avian Aqua Miser website full of
information about the home made
chicken waterers which fund this blog.
--- Naomi
 That's
a wonderful question, Naomi! The truth is that when I bought our
farm, my head was in a similar state. As a result, it took us
years to actually move here. After that we wasted a lot of time
running around like chickens with our heads cut off, trying to figure
out where to start. Hopefully we can save you from making the
same mistakes.
Before we dive right
into the specifics, I'd like to point you to a previous lunchtime
series on the
top qualities you'll need to be a successful homesteader.
I'm going to stick to the nitty gritty in this week's lunchtime series,
but it's worth cultivating the qualities I recommend there too ---
moderate strength, frugality, ties in the community, and pacing.
| This post is part of our Starting Out on the Homestead lunchtime
series.
Read all of the entries: |
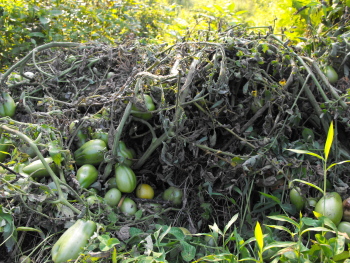 Our tomatoes are now just a big blob of
twisted and mangled branches in a few piles outside the garden.
The blight took hold pretty strong here. We're holding off on deleting
the tommy toe varieties in hopes of getting some more healthy ones
before the blight robs them of all their delicate juices.
It was just too depressing to think of watching them die a slow death
over the next few weeks. This way we can double down on some fall peas
and other Autumn crops.
 For one week, we ate tomatoes --- a handful of
Blondkopfchen tommy-toes, a Cherokee, and a Green Zebra. Then,
much faster than their ripening, the blight consumed the plants.
Walking out our door, all I could see was curling, brown tomato
leaves. Green fruits were dropping to the ground while red fruits
were rotting on the vine.
We did nearly everything right. We started our heirlooms from
seed, rather than risking the infected plants in the big box
stores. We fed them well and gave them trellises. But the
endless July rain took its toll, and blight spores found their way to
our tomatoes.
Monday morning, we made the hard decision to pull them all out rather
than building up our farm's blight spore bank further. I couldn't
bear to be involved, so I begged Mark to do the deed. Still, I
was nearly in tears. Goodbye, dreams of tomatoes.
Hello, dreams of the best fall crop ever! We're going to fill the
holes with even more fall veggies so that we can, hopefully, eke out
our harvest much later in the year. Although tomatoes are my
favorite vegetable crop, I suspect that extra months of fresh peas,
greens, and root crops may heal the wound in my heart. Meanwhile,
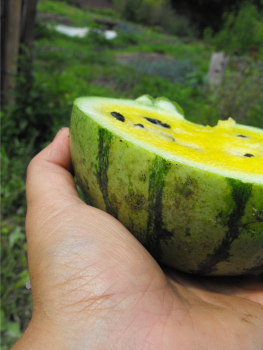
take a look at this yellow watermelon we had for lunch yesterday!
(I can't bear to include a photo of the blight.)
Shame-faced plug: Our new Avian Aqua Miser website
gives Mark's invention space to spread its wings.
 When
we finally moved onto the farm, I had spent years dreaming and planning
about what I wanted our eventual homestead to look like. I was so
excited to be realizing my dream that I started planting things
willy-nilly, with the result that a lot of my early effort went for
naught. I wish I'd had the foresight to spend a few days
assessing my property before beginning on any of the projects.
If I could go back in
time, my first step would be to make a map of the
farm. Since most of my property is wooded, I'd just focus on the
areas we plan to to farm for now. Within that area, I'd map
existing structures, water sources (well and creeks), power and
telephone lines, septic systems and/or sewer lines, and
driveways. I'd also keep my eye out for existing cultivated
fields, orchards, or pastures. Fences are very useful --- put
those on the map.
Next, I'd start thinking
about the land as a farm. Which areas
are flat or have little slope? Which areas have good soil or poor
soil? It's very much worth it to send off some soil samples to
the extension service to find out if your soil needs help in certain
areas. But you can also learn a lot by just looking at what's
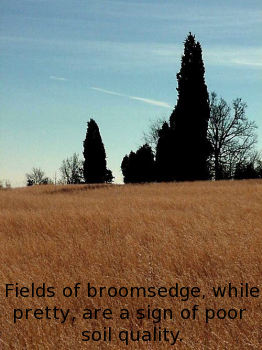
currently growing in an area --- blackberry brambles are a good sign
because they mean your soil is relatively rich, while broomsedge is
sign of worn out soil. You should use high quality soil for your
garden and orchard, if possible.
| This post is part of our Starting Out on the Homestead lunchtime
series.
Read all of the entries: |
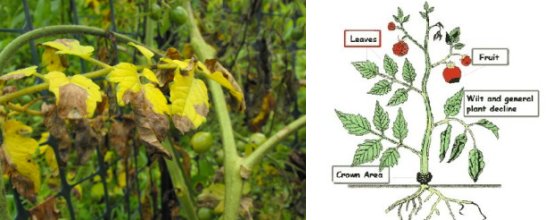
I was talking with one of my uncles on the phone today about this year's
blight and he still has some hopes for his tomato crop. His remedy is
to clip off the offending leaves stricken with blight, get them far
away from the garden, cross your fingers and wait.
Anna and I considered this option...but decided the stress from
multiple leaf trimming would set back the fruit production even more.
This episode of vegetable loss has further reinforced my new way of
thinking which involves rolling with mother nature instead of fighting
her. Not unlike the theme of my favorite Rolling Stones song "You can't
always get what you want".
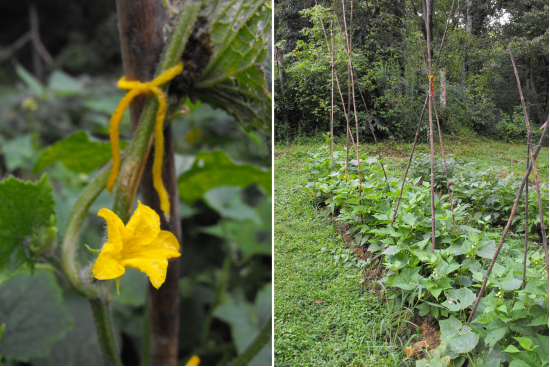
Although the traditional three
sisters method of growing beans, corn, and squash together
worked miserably in my garden last year, I decided to modify it and
give the method another shot. The concept is sound --- the
problem was that my vegetable varieties weren't right. The squash
was too vigorous for my sweet corn and bush beans and ended up
overwhelming the entire garden plot.
This time around, I'm instead growing cucumbers amid my beans.
Since cucumbers are much less vigorous than squash, they haven't taken
over the bush beans. They did try to run off the sides of the
beds, though, so I gave them some teepee trellises to climb.
The nitrogen from the bean roots seems to be doing its job well.
The cucumbers I planted amid the beans are much larger and greener than
the ones I planted earlier this summer on their own. And the
beans don't seem to mind the little bit of competition the cucumbers
give. Success!
Shame-faced plug: The new Avian Aqua Miser website is chock full of
information about chicken
waterers.
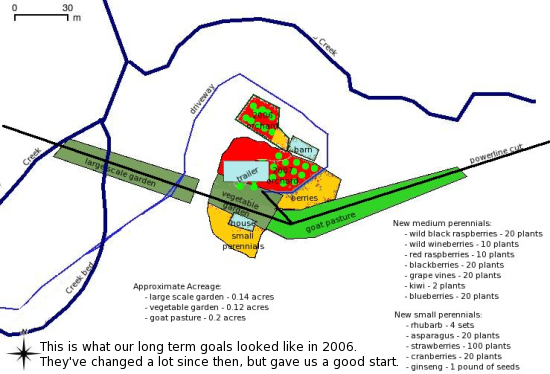
Based on your assessment
of the property, it's time to make some long term plans. These
plans don't have to be set in stone, of course, but they will
definitely help you prioritize which areas to work on first and will
prevent you from having to move your fruit trees three times.
Start
out with a ten year plan. What are your goals for the next
decade? To grow all of your own food? To live in a forest
garden?
To be running a chicken hatchery as your full time job? What
physical changes to the property will those goals entail? Break
your goals down into manageable chunks and prioritize each one.
Do you plan to build any new structures? If so, where will they
be? Do you need to bury water lines or build driveways?
These steps will be easiest if you put them early in your long range
plan rather than trying to bury a water line through your vegetable
garden, the way we did.
If you want to have an orchard, pasture, or garden, it's best to start
planning them now. If possible, plan your trees where they will
shade your house in the summer but won't block passive solar heating in
the winter. Gardens are most effective if they are very close to
the house so that you can step out the door and pull a weed. Make
a
copy of your map and add your long range goals onto it.
| This post is part of our Starting Out on the Homestead lunchtime
series.
Read all of the entries: |
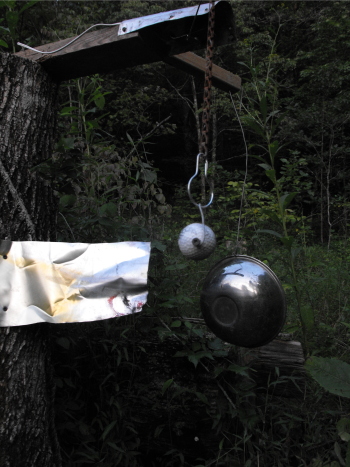 Its been over 2 weeks now since we've had any
deer damage to the garden.
We've got all 5 deer
deterrent devices running 24 hours a day now due to the cloudy days
we've had lately.
The experiment will continue till the end of our fall growing season,
at which time we should know if this is indeed a cheap and long term
mechanical solution for the deer problem.
| We finally solved the deer in
the garden problem, and the solution was so elegant we gave it a new
website. Check out our deer
deterrent website for free plans! |
 Remember my ambitious plans to construct
a forest garden between the baby fruit trees near the barn? I
planted a couple of beds, then the normal gardening season started and
the project got pushed onto the back burner.
Since then, I've started a slightly less ambitious method of forest
gardening, one that fits in the scanty time gaps between vegetable
gardening. Instead of trying to create an entire forest garden in
one step, I've been creating "forest islands" by slowly extending the
raised beds around each tree. Whenever I pull weeds and don't
have anything better to do with them, I'll dump a wheelbarrow load
against the side of a tree's raised bed. A few weeks later, the
weeds have rotted down into rich soil.
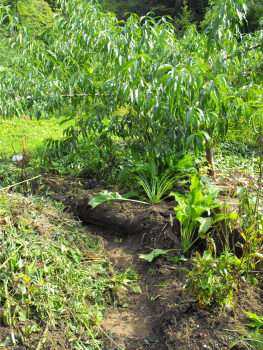 My oldest peach tree has been receiving this
treatment (albeit in a more willy-nilly fashion) for nearly three years
now. Wednesday, I pulled out another mass of weeds and poked
around at the humps of soil which now expand out in two directions from
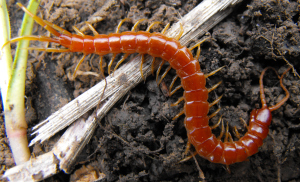
the raised bed. White threads of fungi, a startled toad, and a
brilliant centipede all turned up --- signs that my little ecosystem is
healthy.
A little judicious shoveling and transplanting later and I've created a
forest island there. I planted comfrey and bee balm under the
peach's canopy, and fennel, echinacea, rhubarb, and Egyptian onions
further out from the trunk. My primary goal with these plantings
is weed control, with a secondary goal of strengthening the soil using dynamic
accumulators, and a tertiary goal of feeding hummingbirds and
parasitic wasps. Of course, I also chose the plants because I
have masses of them that need to come out of other parts of the
garden. I'm excited to see how this new forest garden island will
take hold!
Shame-faced plug: Create your own unique chicken waterer with our DIY
instructions.
 Unless
you happen to have bought a farm from an organic gardener, chances are
that fertility should be your first concern when it comes to
gardening. Although I don't recommend that beginning homesteaders
do much in the way of livestock, I do believe that everyone should
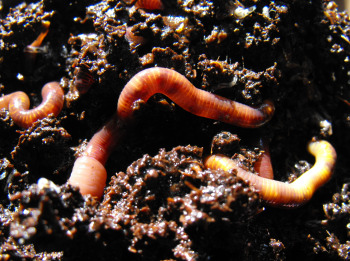
start a worm
bin immediately. Worms take nearly no time and create some
high quality compost to get you started.
If you have a half hour per day to put into
the operation, I also recommend that you build
a chicken tractor with two to five chickens in it. (Start
small!) You can use the chicken
tractor to add fertility to worn out parts of the soil while you
start gardening in higher quality areas.
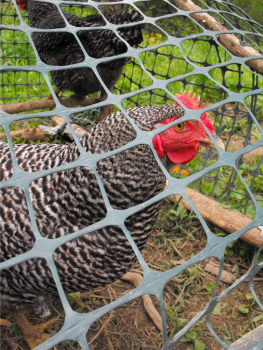
Next, start scrounging for free fertility in the surrounding
area. If you live in town or near town, stock up on
garbage bags full of leaves in the fall. If you're out in the
country, start asking your livestock-owning neighbors what they do with
their manure.
Chances are they'll give it to you for free if you haul it away.
If your farm has a large wooded area attached, you should also go out
hunting stump
dirt, which is some of the best potting soil around.
Stop and chat with the tree cutting folks and ask them if they will
dump some mounds of wood chips in your yard --- they often need a way
to dispose of these chips and will give them to you for free. Be
aware that you need to let wood chips rot for a couple of years before
using them as mulch.
Building the fertility of your soil is a long term investment in your
land. Not only that, mulch will cut your weeding work in half
while increasing yields. You will have a better garden in the
long run if you hunt down fertility sources before planting a huge
garden.
| This post is part of our Starting Out on the Homestead lunchtime
series.
Read all of the entries: |
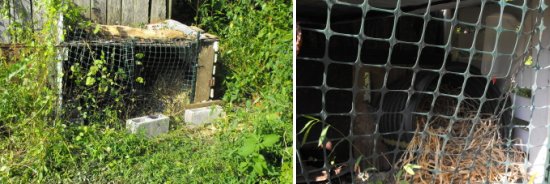
Our one Cochin
hen is in a broody mood again. The plan is to put her in this new
mini-coop sometime tomorrow when we pick up some fertilized eggs from a
friend who has a rooster.
I'm looking forward to this for completely selfish reasons. Each time I
urge her off the nest and steal her eggs she immediately begins chewing
me out with her very harsh tongue. It usually only lasts for a few
minutes....but I've always had a problem with listening to angry
females on a tyrannical rant.
I installed an Avian Aqua
Miser so that she can get to it without leaving the nest. I hope
this makes her stay a bit more comfortable.
Read all of the entries about
our broody hen:
|
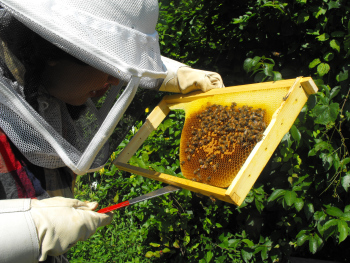 We took advantage of a brilliantly sunny day
on Thursday to peek into two of the hives. The weak hive
was still just as weak --- the photo to the left shows how they still haven't finished building on
all of the frames in their brood box. Worker populations in that
hive are distressingly low, which means they're not saving much honey
and may not survive the winter.
So I popped out an empty frame from the weak hive and swapped it with a
frame of capped brood from one of our strong hives. The capped brood will
hatch out into hundreds of workers who will build up the weak hive's
population, and I suspect the strong hive won't miss the new workers
that much.
I hadn't thought ahead to realize that the frame of capped brood would
be covered with nurse bees tending to the brood, so I got a little bit
worried as I carried this buzzing frame to the new hive. I
needn't have been concerned --- I've now read that the nurse bees will
be assimilated into the weak hive with no problems.
The strong hive was not thrilled at having their lives interrupted
during such a big honey flow, so I made my inspection as fast as
possible and got out. No stings this time, though --- I'm so glad
not to have to be inspecting on a
cloudy day when the hive is crowded!
Shame-faced plug: The Avian Aqua Miser poultry waterer works great
for turkeys and ducks as well as chickens.
 If
you're like me, planning is fun but you really want to start eating
your own tomatoes ASAP. My gardening advice for beginning
homesteaders is --- think big, start small.
You will be a lot happier in the long run if you spend most of your
energy the first year working on garden infrastructure. Plan
permanent paths based on nodes,
and make sure that your paths are wide enough. I've found that
paths between garden beds should be about three feet wide to give me
room to easily maneuver a wheelbarrow, lawnmower, and garden cart
through them.
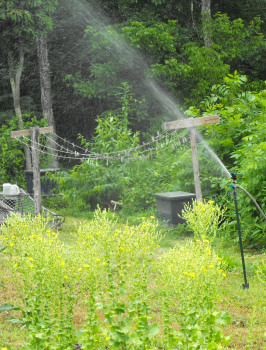
Think about irrigation from the beginning. We started planting
before we had any way to get water to our crops, so we ended up hauling
water in five gallon buckets from the creek. Don't repeat our
mistakes --- check out our irrigation
series for more information.
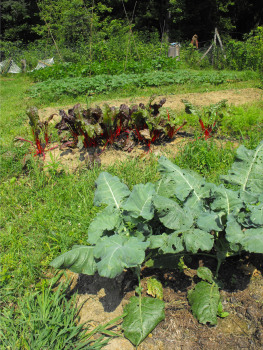 Chances
are you're going to have to deal with deer or other animals nibbling
your crops. If you have a small garden, go ahead and put in the
time up front to build a fence. If your garden is going to be
large, like ours, now's the time to start experimenting with deer
deterrants
the way Mark has. There is nothing worse than waking up one
morning to find out that your carefully tended garden has been eaten
overnight.
When you are ready to plant, I highly recommend building
wall-less raised beds. Or, if you have access to the
materials, build
no-till raised beds
to protect your soil ecology. Raised beds are very energy
intensive at first, but they're good for your garden and will also
force you to start small.
You may also be dreaming of fruit trees. It can't hurt to put in
a few your first year, but make sure that you have time to take care of
the ones you put in. It's better to build a really good raised
bed for one tree the first year than to hastily throw ten trees in the
ground and watch them all die.
| This post is part of our Starting Out on the Homestead lunchtime
series.
Read all of the entries: |

It was a smooth transfer from the chicken tractor to the mini coop.
We picked 15 of the best looking fertilized eggs for our Cochin to
adopt as her own. Now we wait a few weeks to see how dedicated she is
to bringing in the next generation of egg layers and broilers.
Read all of the entries about
our broody hen:
|
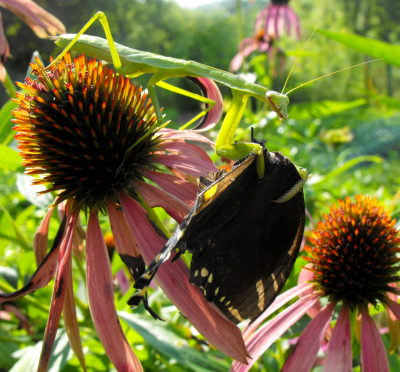 It looks like butterflies aren't the only
insects who like our echinacea. I caught this praying mantis in
the act of consuming a butterfly from the head down yesterday afternoon.
Yum!
Shame-faced plug: Mark's invention is
built around a device called a chicken
nipple. Sometimes I think he invented our waterers just
because he liked the name.
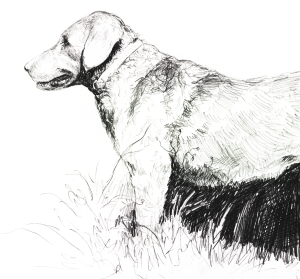 Eventually,
every homesteader will be faced with the thorny issue of
livestock. Chances are that your homesteading dreams included
lots of animals giving you fresh milk, eggs, and meat. The
reality,
though, is that animals can use up your time so quickly that you're
working for them instead of vice versa.
My first piece of advice for new homesteaders is to make a distinction
between pets and livestock. Use your own judgement on the pet
front --- we love our cats and dog and believe that the time we put
into them is totally worth it for our own mental stability. We don't even pretend that
our pets pull their weight on the farm with their limited
mouse-catching and deer-chasing abilities. But we also know that having
more than our current two cats and one dog would be too much for us to
handle.
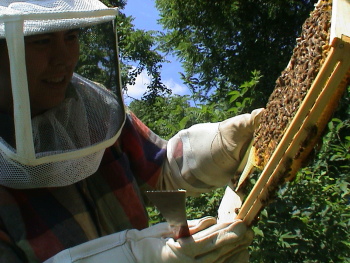 In
the world of livestock, as I mentioned earlier I do recommend that all
homesteaders start out with a worm bin. Most homesteaders will
also be able to handle a few chickens either their first or second
year, especially if they are careful to start small. If you are
big
honey eaters the way we are, I would recommend getting honeybees around year two
or three, once you're established and have a bit of time to devote to
their care.
 What
about bigger animals? We divide larger livestock into three main
categories --- draft animals, dairy animals, and meat animals.
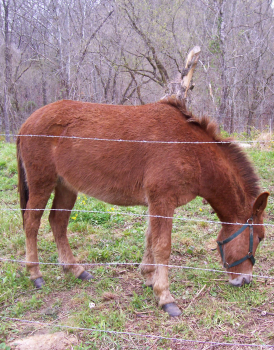
Due to
our own failed experience with mules, I recommend that unless you've
had experience with draft animals in the past and have at least an hour
a day to devote to them, you save draft animals for later (if
ever.) To me, dairy animals are in the same boat --- you need to
be willing to be tied down twice a day for the rest of your life.
(With just our pets, chickens, bees, and worms, we can go out of town
for a few days without needing to find a farm-sitter.)
If you want to branch out beyond worms, bees, and chickens, I
would start with meat animals. Even so, I wouldn't consider
embarking on the project unless I had a good pasture and a place to
store hay for the winter. Small meat animals like poultry and
rabbits might fit into year three or four of your ten year plan, but I
suspect that larger animals would be closer to year nine or ten.
Of course, as with all parts of your homesteading plan, you should
decide what's most important for you. If all you've ever dreamed
about is having a milk cow, then by all means move it up to year two
and put off the garden until year four. After all, the best part
of a homestead is the way it allows you to choose your own
adventure. Don't forget to have fun!
| This post is part of our Starting Out on the Homestead lunchtime
series.
Read all of the entries: |
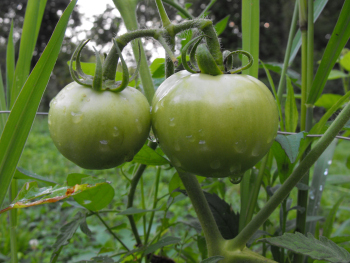 We didn't really completely give up on
tomatoes for the year, despite pulling out our
blighted tomato plants
on Monday. The saving grace of tomatoes is that they come up
prolifically from seed, so every garden tends to have volunteers.
Ours is no exception.
I tied up the best volunteers who were already in okay spots --- beside
the pear tree and in the berry patch, far from the blighted
tomatoes. Then Mark transplanted some younger volunteers to
garden beds.
I even started a few tommy-toes from seed. I figure we probably
don't have time for them to bear before the fall frost, but it's worth
a shot!
Shame-faced plug: Lots of our customers have started using our DIY kits
to make chicken
bucket waterers to water up to 50 birds.
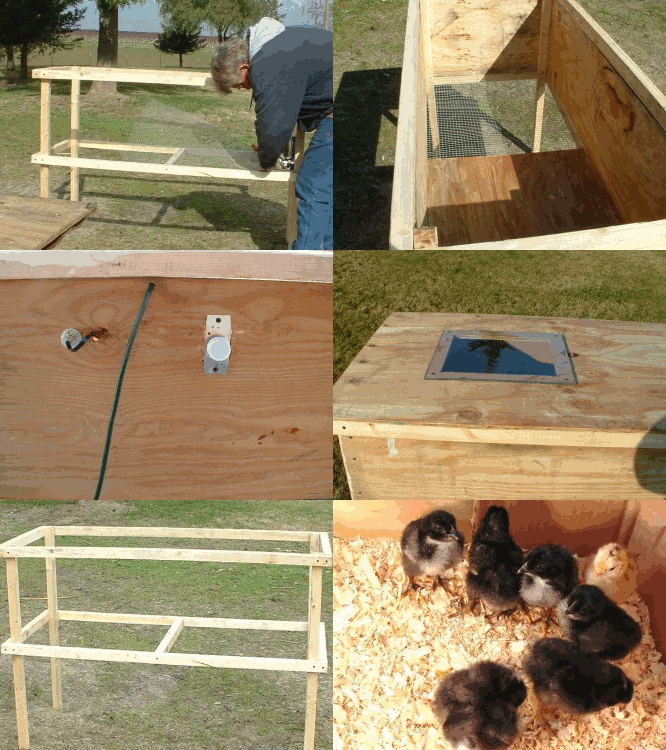 We tried incubating some eggs with an
incubator a couple of winters back and didn't have any to make it
because the outside temperature was fluctuating too much.
Chickenschickens.com
has a nice set of free plans to make your own brood box for the typical
Styrofoam incubator.
If I didn't have the Cochin hen to
do most of the mothering work I'd be building one of these to get ready
for operation brood.
 One of our sweet potato plants started
blooming last week, clearly illustrating the plant's relationship to
morning glories. I'd never seen sweet potato flowers before, so I
poked around on the web to see if I should cut off the blooms
the way you do with garlic.
It turns out that sweet potato flowers are extremely unusual, and are
actually in pretty high demand. Since sweet
potatoes are propagated vegetatively, it's hard to develop new
varieties. Blooms add an element of randomness to the plant's
reproduction --- a lot of the seeds will probably turn into shoddy or
mediocre plants, but one of the seeds might just turn out to be the
next best thing in sweet potato land.
Scientists have tried a lot of tricks to get sweet potatoes to flower,
and one of the most effective seems to be high humidity combined with
damp soil. Check! Another method they've tried involves
clipping off the ends of sweet potato vines, hoping to stimulate apical
bud growth. Since the deer got in and nibbled our sweet potatoes
once before we added a deer deterrent to that part of the garden, we
accidentally used that method too.
I plan to collect the seeds from our sweet potato flowers and give them
a shot next year. Maybe we'll develop a new variety of sweet
potato and name it after Huckleberry!
Shame-faced plug: To me, the best part of
the Avian Aqua Miser is that it's an automatic chicken waterer.
If you put a couple in a small tractor, you won't have to worry about
water for days on end.
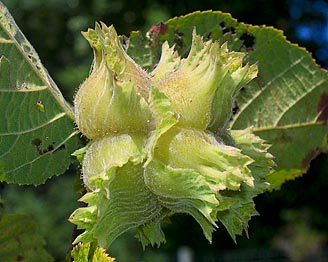 Last winter when I started
reading and dreaming about forest gardens, I put hazels on
my list of possible forest garden plants. I was primarily
interested in the shrub because I knew we had wild hazels growing in
young areas of the woods nearby, where the honeysuckle tends to
strangle them every year and prevent them from fruiting. The fact
that Mark and I are addicted to Nutella, and that hazels can grow well
in partial shade, also added to my interest.
I kept considering
transplanting some of the strangled shrubs out of the honeysuckle and
into the forest garden. I never got around to it, though, because
I wasn't sure if I should devote precious garden space to unproven wild
plants, or if I should find a cultivated version instead which might
bear more nuts. Last week, I finally took an hour to research
hazels, and I found so much information I had to turn it into a
lunchtime series. Stay tuned and be prepared to end up as enthused
as I am.
| This post is part of our Hybrid Hazelnut lunchtime series.
Read all of the entries: |
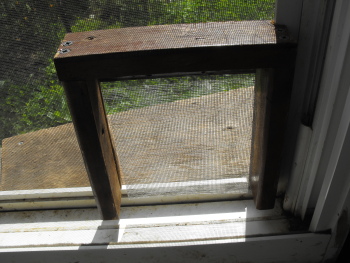 I tried to find something like this in the pet
department of the big store I was in last week and struck out.
It's just a compilation of 5 scrap pieces of wood and a folded over
flap of screen material. A notch on the right side with a dab of glue
seems to be enough to anchor it to the screen frame. I hope our cats
are smart enough to adapt to a proper pet entrance which can be easily
closed down at night by shutting the window.
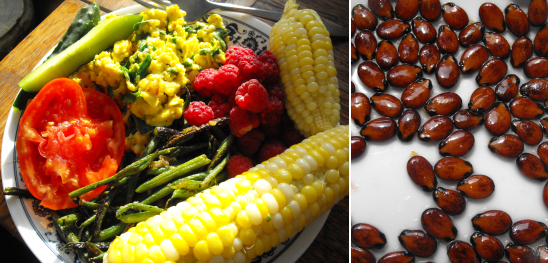
There's so much going on here on the farm that I can't for the life of
me choose a single thing to post about. We're still eating all
garden meals
whenever possible, and I've discovered that I suddenly like omelets
with Egyptian Onion greens in them. Our ever-bearing raspberries
are starting to fruit again, which turns the meal into a feast.
I'm also getting a bit more serious about seed-saving.
We've never had a good crop of watermelons before, so this year we
tried out four varieties. The most successful and prolific was
Sugar Baby, which is billed as being both disease and drought
resistant. I'm hoping it didn't cross with its less prolific
neighbors and that these seeds will give us an equally exciting crop
next year.
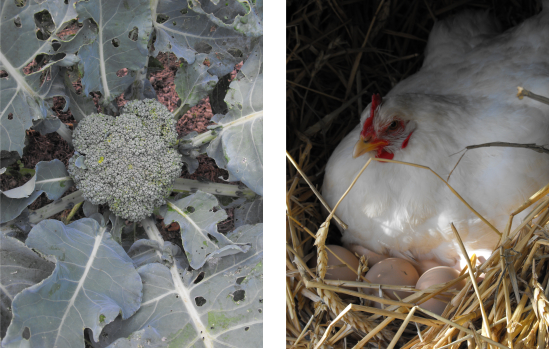
Meanwhile,
the abnormally cool and rainy July has tempted my broccoli to start
heading up in August. The bug damage has been minimal and I
staggered my plantings so I expect to be eating broccoli for several
weeks once this one is ready. Finally, a success big enough
to outweigh our potato and tomato failures!
Our broody hen
has settled in for the duration. She did hop off the nest for a
couple of minutes on Monday to eat her breakfast, but otherwise has
barely moved. It seems like she has the entire farm's biological
clock energy. We'll enjoy eating the fruits of that energy
this fall and winter.
Shame-faced plug: Our DIY kits include information on how to make a
chicken waterer for as low as $1 per bird.
 My
primary question about hazels was --- is there a more prolific,
cultivated variety that I should plant instead of the wild shrubs
growing around my yard?
The answer is that here
in the eastern U.S., we have both Beaked and
American Hazelnuts, but both of these wild species produce small nuts
in thick shells. In contrast, all of the hazelnuts we buy in the
store are a completely different species of hazelnut --- European
Hazelnut --- which has big seeds and thin shells.
Unfortunately, we can't
just grow European Hazelnuts here. The
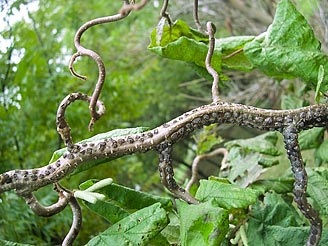
European species is very sensitive to an American disease known as Eastern
Filbert Blight,
which you can see in the photo above. If you try to grow European
Hazelnuts in the eastern U.S., your shrubs will wither away. Only
American and Beaked Hazelnuts are able to resist the fungal infection.
Is there a solution to
the small nut vs. dead shrub dilemma? You bet!
| This post is part of our Hybrid Hazelnut lunchtime series.
Read all of the entries: |
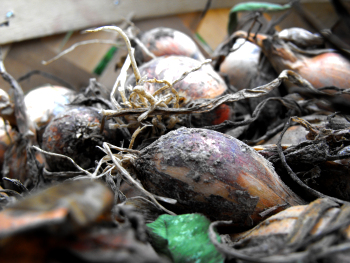 Our garden learning curve has been steep this
year --- that's my new way of looking at our copious failures.
Last year, I tossed onion seeds in the ground, watched them grow like
crazy until they were as big as storebought, then ate them
until Valentine's Day.
This year I rotated to another part of the garden, planted twice as
many beds, and expected to eat onions for a solid year. Instead,
we ended up with a slightly lower volume of harvest and much smaller
onions. What happened?
I'm starting to realize that some crops (like onions and potatoes and,
to a lesser extent, carrots) just don't like heavy clay. We have
three different garden patches, one with excellent loam, one with
mediocre loam-clay mix, and one that's pretty much all clay. I
grew our onions in the excellent loam last year and in the nasty clay
this year, with predictable results. Next year, I'll have to be
sure to put my root crops in the loam where they'll excel and leave the
clay for veggies like greens and peas who don't really care what their
soil's like.
Shame-faced plug: I usually make our DIY chicken
waterer kits while Mark makes the ready-to-go waterers.
 Many of you have probably
heard of the breeding experiments currently underway to cross American Chestnuts with
Chinese Chestnuts
and hopefully develop a hybrid that can be reintroduced to the woods
without succumbing to the chestnut blight. Scientists are taking
a page out of the chestnut project book by crossing American, Beaked,
and European Hazelnuts, hoping to develop a hazel variety resistant to
the Eastern Filbert Blight but capable of producing high quality nuts.
Efforts have been
underway for twenty years, and the hybrid hazelnuts are finally
beginning to bear fruit. According to Badgersett Research
Farm and the Arbor
Day Foundation, the
results are delicious! Good quality nuts, thin shells, and
disease resistance --- just what I was looking for.
| This post is part of our Hybrid Hazelnut lunchtime series.
Read all of the entries: |
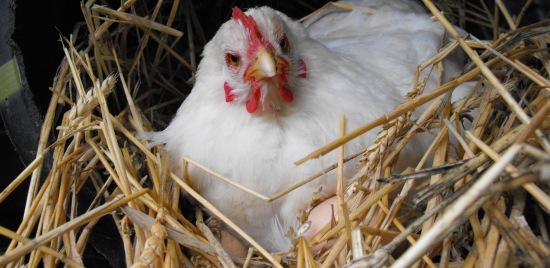
It would seem that 15 eggs is one egg too many for our broody Cochin hen
to sit on because she ate one the other day bringing the total down to
14.
You might want to consider leaving the empty egg shell in there with
her for safe keeping.....unless you need to know what it feels like
when a chicken's beak bites down on a human finger.
Read all of the entries about
our broody hen:
|
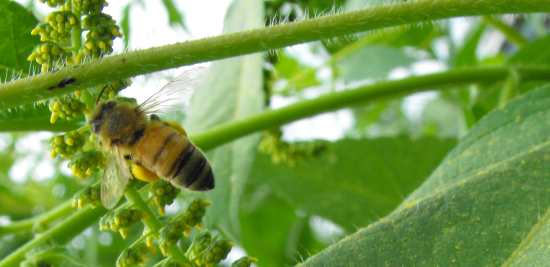
A couple of weeks ago, my mom came to visit. As I took her on the
grand tour of the garden, she looked toward the back of the trailer
where tall annuals had grown up over the roof. "What are those
beautiful plants?" she asked in awe.
"That's ragweed," I answered, and hurried her on by, to a more
manicured area of the yard. The truth is that we have patches of
ragweed growing all around, wherever it's hard to mow. I'd been
meaning to pull them out...until yesterday when I noticed that they are
our honeybees' new favorite plant!
 All
of that pollen which makes ragweed the bane of allergy sufferers also
means that honeybees can load up on winter protein with ease. I
was first alerted to their activity when the bees' buzzing broke into
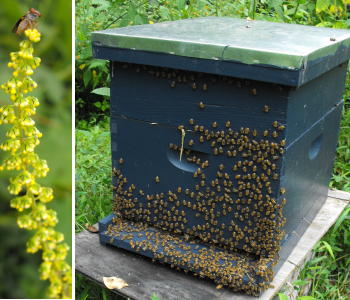
my weeding trance Wednesday morning. I stopped to watch as the
worker bees brushed their hind legs together, pushing pollen into the
bright yellow sacs at the base of their legs. I even noticed
other insects visiting the ragweed, like the little fly in the skinny
photo to the right.
The picture on the far right is an example of what our three strong
hives look like during sunny days when there's a good nectar
or pollen
flow. The first time I noticed this, I thought something was
wrong, but the truth is that it's merely a bee version of rush hour
congestion. I guess I'll have to leave some ragweed around after
this --- good thing neither Mark nor I has allergies!
Shame-faced plug: Check out the chicken
waterers which fund this blog.
 I
started this adventure merely searching for a tasty hazelnut to plant
in the understory of my forest garden, but the researchers who produced
the hydrid hazel have
loftier ambitions.
They figure hazels can produce food for people, a new cash crop for
farmers, a high protein feed for livestock, and an efficient way to
make biofuel. The scientists even promise that planting woody
hazels instead of the usual annual vegetable crops will help combat
global warming.
I'm most intrigued by
the potential to produce hazelnut oil. As
long-time readers probably know, we've been interested in the idea of making our
own cooking oil
for a while. We had settled on sunflowers as the easiest crop to
turn into oil on our farm, but now I'm starting to wonder if hazelnuts
wouldn't be easier. Hazelnuts have the definite advantage over
sunflowers of being perennials which need less care after the initial
planting. And even though deer and squirrels love hazelnuts,
birds are less attracted to them than to sunflowers --- our sunflower
crop this year went into the bellies of birds.
Producing our own oil is
a long term goal which will require several
steps, but it wouldn't hurt to start growing hazels as a potential
source of oil. After all, hazelnut
oil has a nearly identical nutritional makeup compared to the healthy
olive oil.
| This post is part of our Hybrid Hazelnut lunchtime series.
Read all of the entries: |
 I was picking up some bee hive supplies
today and heard a weird tale of some unusual honey bee activity from
the owner Ken.
He's got a group of 7 hives that seem healthy but have not produced any
honey this year. They have over 6 acres of clover to work with along
with their neighboring hives which seem to be doing fine. The local
inspector was giving him a visit just before I got there and the
mystery had him stumped as well.
Maybe it's the quality of the clover, and maybe it's connected
to the reason why hay fields around here only got one good cutting this
year?
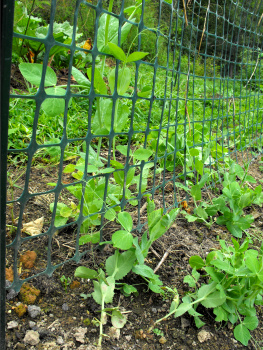 One month after putting our first set of fall
peas in the ground, differences between varieties is extremely
apparent. Usually we just plant Mammoth Melting Sugar snow peas
and some random kind of shelling pea (I'm still choosing my favorite
variety there.) But on a visit to Ohio, Mark fell in love with
sugar snap peas, so I added a third type --- Sugar Daddy.
The photo to the left shows the massive size difference between the
Mammoth Melting Sugar peas (behind the trellis) and the
Sugar Daddy peas (in the foreground.) Yup, the snow peas are
already four times as big when planted in the same ground at the same
time! None of the peas are supposed to start bearing fruit until
nearly October, but our snow peas look like they might start flowering
any second. I sure do love our prolific and delicious Mammoth
Melting Sugar peas.
Shame-faced plug: Check out the chicken
waterers which fund this blog.
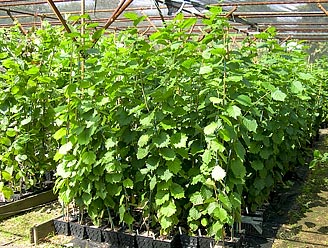 After
learning about all of the benefits of the new hybrid hazels, I had to
go out and buy one. A quick search of the internet turned up two
options. If I was willing to buy at least $75 worth of shrubs, I
could get proven hybrids for $3 apiece from Badgersett
Farms. I was
sorely tempted, but twenty plus shrubs seemed to be a bit too much for
us to handle.
Instead, I joined the Arbor
Day Foundation's Hazelnut Project
for $20 and will soon receive my three "free" bushes. On the down
side, these bushes are experimental and may not have the proven results
I would have gotten from Badgersett Farms. On the up side, I'll
be participating in a scientific experiment, seeing how new hazel
varieties grow in different parts of the U.S. I'll look forward
to seeing how the hybrid hazelnuts integrate into our forest garden.
| This post is part of our Hybrid Hazelnut lunchtime series.
Read all of the entries: |
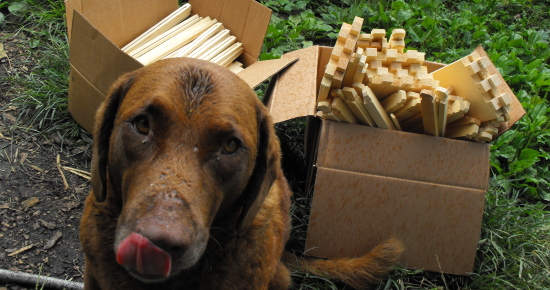
Time to put together the 4 supers I picked up yesterday.
I wonder if some Gorilla
glue might work as a quicker substitute to the old fashioned tiny
nails that sometimes cause a crack in the wood when being hammered in?
 If you have ever wanted to know more about
the mechanics of the mind and how consciousness works then you might
find a new website I discovered a few months ago of great value.
It's a husband and wife team that have struck out on their own with
what they call the Conscious
Media Network. They interview authors of books in the growing field
of consciousness and awareness and varying degrees of finding the
truth. They have hours and hours of interviews going back to 2005 and
it's all free at this time. You need to become a member to view the
interviews the same month they come out, but the archives are
generously offered as a gift to the public. I've heard enough really
good free interviews that I'll probably get around to sending them a
donation as a show of gratitude for a job well done.
Each interview is like a juicy sample snack of what new and or old
concept the author is exploring in their book or documentary. It's a
great way to taste a book and its essence before dedicating your
valuable time and resources to actually obtaining the book and finding
the time to read it. I dare anyone out there to listen to the Bob Dean
or Jim
Marrs interviews of the most far out and fantastic material
out there and try to dismiss what they're saying as "fantasy" or
"crackpottery". If anything it's going to really make you
think...Question Everything is the Conscious Media Networks motto and
it's a simple way to sum up this kind of search for truth at its most
fundamental level.

For this weekend, though, I'm just enjoying the floral abundance. The seeds I tossed in the ground this summer are finally starting to bloom, like the brilliant red zinnia on the right. At the edges of the woods, goldenrod, joe-pye-weed, wingstem, thistles, jewelweed, and ironweed are blazing.
In the garden, we're eating our first crisp lettuce with none of the summer bitterness. Butternut squash vines are dying back as sugars concentrate in their fruits and the last of our staggered corn plantings is starting to tassle. Even the air is starting to smell of autumn --- that first tang of falling leaves. The dog days of summer are over. It's all downhill from here.
Shame-faced plug: Check out the chicken
waterer that funds this blog.
--- various people including my mother and friends
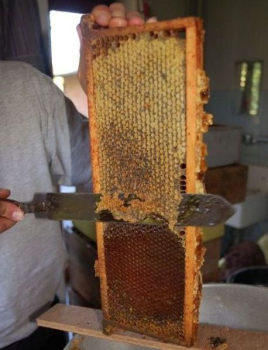 Like many aspects of homesteading life,
beekeeping is a long term endeavor. A new package of honeybees is
a very small colony, and they spend a lot of their energy in the first
year beefing up into a regular size colony. If you do everything
right, they'll put away enough honey to get through the winter, but
they won't have much to spare. So, we don't plan to harvest any
honey until next fall.
Many American beekeepers harvest a lot of honey immediately, planning
to feed their bees sugar water or corn syrup to keep them going through
the late winter and early spring. We did feed our new
package bees sugar water, but I consider sugar water feeding a last
ditch effort afterwards. My gut reaction is that sugar water for
honeybees is a lot like corn chips for humans --- tasty, but not
fulfilling all of their nutritional needs. Instead, I want to
overcompensate and make sure they have plenty of honey to last them
until the first nectar flow next spring.
I read on one website that the modern tradition of harvesting honey in
late summer or early autumn is a recent invention. Supposedly,
beekeepers traditionally harvested honey in mid spring after the first
nectar flow began so that the beekeeper could be sure that the honey
they were taking was truly excess. Of course, you can't do this
if you use chemical mite control over the winter, but otherwise this
option seems to make a lot of sense.
Shame-faced plug: Check out the chicken
waterer that funds this blog.
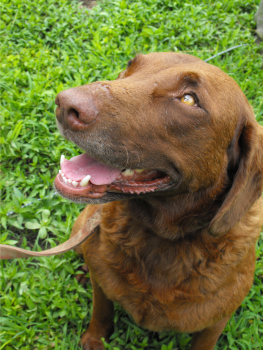 After
television watching, our number one pet peeve with American society is
probably dog care. Most dogs we meet are neurotic and/or out of
control. We're not saying that Lucy is the best dog in the world
(well, Mark might say that....), but she is a pleasure to be around and
makes life on the farm easier.
Lucy keeps predators out of the yard, sits patiently as we eat outside,
doesn't hurt our cats and chickens, and only gnaws on gloves now and
then. This week's lunchtime series is a brief look at quick and
dirty techniques you can use to turn your pampered pet into a working
member of the farm without any inhumane treatment or expensive dog
obedience courses. Chances are your dog will end up happier too.
| This post is part of our Training a Farm Dog lunchtime series.
Read all of the entries: |
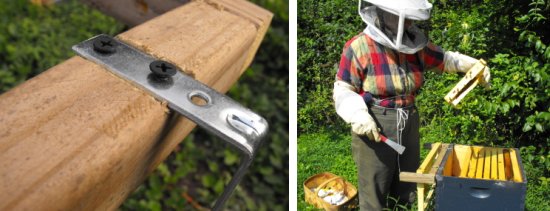
I made a slight improvement to the home
made frame perch tool by drilling an additional hole on the L
brackets for another screw. It's more solid and has less wiggle room
between the frame box and the tool.
It did the job with no problems today during its first field test.
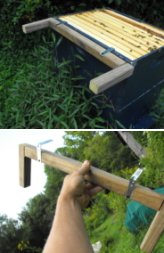
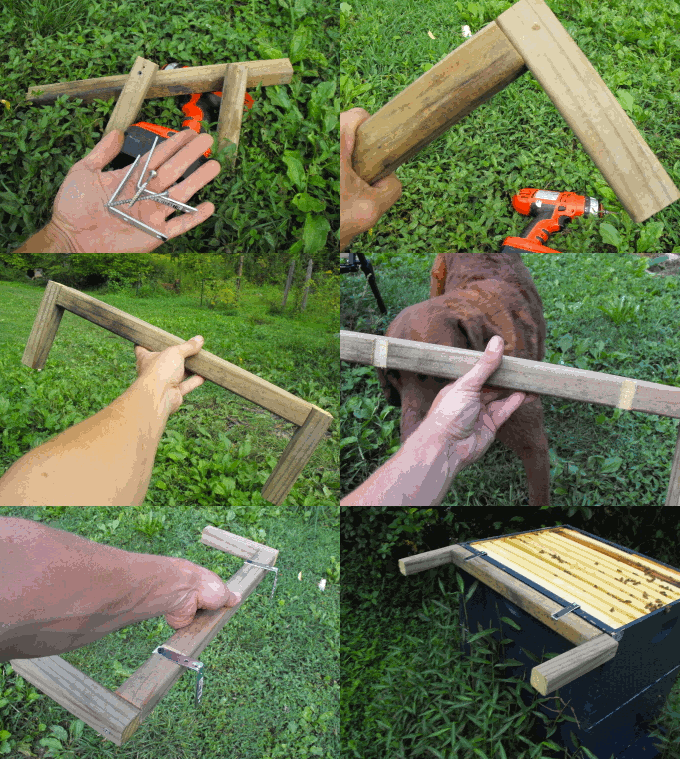
I almost bought one of those fancy metal frame perch tools the other
day at the bee keeping supply store. What stopped me was my cheapness.
I thought there might be a less expensive way to make one with a couple
of L brackets, some scrap wood, and no welding.
 One of the hardest parts of running a
homestead is killing. It took us quite a while to wrap our heads
around killing our chickens...but it seems to be taking me even longer
to wrap my head around pulling out perennials which just aren't
functioning properly.
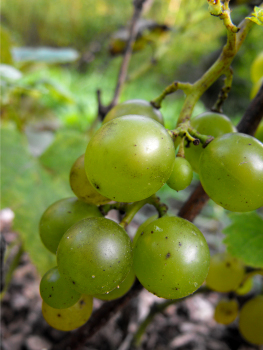
Monday, I realized that we had ripe grapes on one of the Golden Muscat
vines we put in this spring in the well-drained soil of the mule
garden. The grape vines there, despite being less than a year
old, have grown rapidly until their tendrils nearly touch the next
plant over along the trellis.
The mule garden grapes' exuberance makes it hard to continue ignoring
the sad state of the grapes along the driveway. These grapes are
anywhere from one to three years old, but none have ever fruited. Most
of the vines there are French
hybrids, so the Japanese beetles have eaten the leaves down to lace
despite my thrice-weekly picking. Their decline is exacerbated by
soil that is pure clay where water puddles during wet weeks.
And yet, even though my mule garden grapes have done more in one year
than these grapes have done in three, I have a hard time pulling the
driveway grapes out. Why is it easier for me to kill a spare
rooster or bottom of the pecking order hen than to kill a grape vine?
Shame-faced plug: Check out the chicken
waterer that funds this blog.
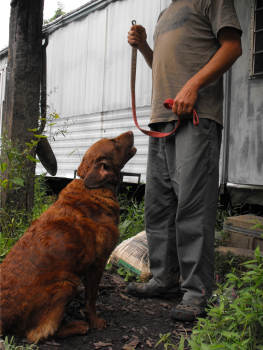 We based our extremely simple dog training
regimen on Cesar Millan's book Cesar's
Way: The Natural, Everyday Guide to Understanding and Correcting Common
Dog Problems.
The entire book can be broken down into a couple of paragraphs ---
Cesar argues that dogs are naturally pack animals with one leader and a
lot of followers. Rather than training your dog lots of fancy
tricks to get her to do what you want, you only need to make her
understand that you are the pack leader. Then be sure that your
pet also gets plenty of exercise and you'll have a well-behaved dog.
Cesar solves both the pack leader and exercise problem with one simple
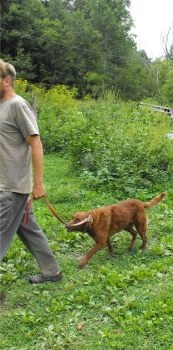
answer --- walk your dog. Sounds simple, but most people
(including us before we read the book) do it all wrong. When you
walk your dog correctly, she should be walking at your side or behind
you --- you're in charge of determining where you're going and how fast
you're going. The dog shouldn't be stopping to sniff and pee
unless you decide to stop and let the dog sniff and pee. The goal
is to get the dog used to following your lead and looking to you for
directions.
 Cesar recommends that your dog should have an
hour of exercise a
day. We are a bit more lax than that --- I generally walk Lucy in
the morning for about 20 minutes and Mark generally walks her in the
evening for about 20 minutes. If she were cooped up indoors all
day, though, rather than able to run around on the farm, we'd probably
have to walk her longer.
Food is also an integral element in the walk. Rather than giving
your dog meals as if it were his or her due, you should start feeding
your dog after the walk. When I come back from walking Lucy in
the morning, I take off her leash and tell her to sit and stay at the
door. She waits for a couple of minutes as I go in the house and
get her breakfast, and she stays seated until I've put the food in
front
of her. This is yet one more way to make sure that Lucy knows
that I'm in charge of the food and that she has to be calm and obedient
in order to get any.
The walk is an important ongoing piece of training for your dog.
When one of us isn't feeling well and we just toss her a bowl of food
without a walk, Lucy is far more likely to misbehave the next
day. When we're out of town for a few days and she doesn't have
any walks, she's a bit wild when we return. I like to think that
walking Lucy is like keeping an eye on our relationship. Strong
human relationships are based on constant negotiations, and your
relationship
with your dog is no different.
| This post is part of our Training a Farm Dog lunchtime series.
Read all of the entries: |
A video montage of all 5 home
made deer deterrent noise signatures back
to back inspires me to dream up the next level of mechanical deterrence
for the garden.
| We finally solved the deer in
the garden problem, and the solution was so elegant we gave it a new
website. Check out our deer
deterrent website for free plans! |
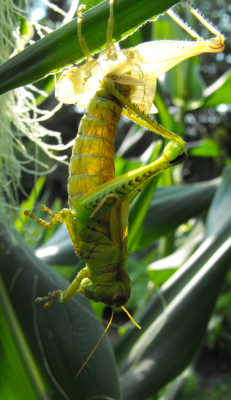 I stumbled across a grasshopper slipping out
of its nymph skin this past weekend. The old skin was clinging to
a corn leaf so that the living insect dangled below. Backlit by
the falling sun, the empty skin glowed and the grasshopper seemed to be
descending out of summer.
Earlier this year, I obsessively listened to NPR as I weeded the
garden. Lately, though, I've been backing off from the radio and
listening to my own thoughts. Sometimes I find it hard to be in
the present without distractions, but the occasional glimpses into the
profound make it worthwhile.
Shame-faced plug: Check out
the homemade
chicken waterer that funds this blog.
Now,
I have to admit that you won't see instant results the first time you
walk your dog correctly. When we got Lucy, she'd been tied up for
months on end and she was wild. I could barely hold her leash as
she galloped up the driveway --- no way I was going to be able to get
her to walk beside or behind me.
 So, we bought a couple
of tools to get Lucy to pay attention to us (and to wear down a bit of
her boundless energy!) The one dog-lovers are least likely to
approve of is the Gentle
Leader.
No, this isn't a muzzle --- your dog can open her mouth just
fine. The Gentle Leader is a lot like the harness on a horse ---
it allows you to steer a large, powerful animal by turning its head
rather than by trying to make the whole animal go where you want it
to. The Gentle Leader also puts pressure on top of your dog's
nose if she tries to pull. This simulates the way a pack leader
will put its mouth around a follower dog's nose if the follower
misbehaves, and both the pack leader's mouth and the Gentle Leader's
pressure cue your dog to calm down and listen.
 We also bought Lucy a doggie
backpack
and weighed it down with water bottles and gravel. Carrying the
backpack gave her quite a workout, even when walking at human
speed. I think that without the backpack, we would have had to
walk Lucy for a couple of hours a day in the beginning when she was
blowing off her leftover steam from being tied up.
Both the Gentle Leader
and the doggie backpack did their job admirably, but after a few months
Lucy had learned that we were in charge. We slowly stopped using
them --- after all, both were just tools to get our dog's attention.
| This post is part of our Training a Farm Dog lunchtime series.
Read all of the entries: |
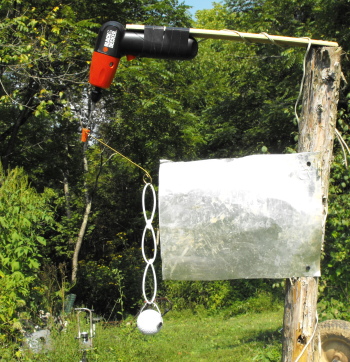 I did a few experiments today on using one of
the 10 dollar Black
and Decker drill/drivers as a turning force for the next generation
of home made deer deterrent.
It spins a bit on the fast side...but with some adjusting and tinkering
it might just do the trick as a more easily constructed do it yourself
deer deterrent.
| We finally solved the deer in
the garden problem, and the solution was so elegant we gave it a new
website. Check out our deer
deterrent website for free plans! |
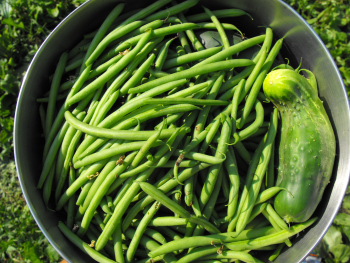 We're in the midst of harvest season on the
farm, gorging ourselves on things like cucumbers, watermelons, and
lettuce while freezing
masses of everything else. So far this week, I've put away a
quart of okra, a gallon of green beans, and about half a gallon each of
pesto and pizza sauce. Still on the horizon for tomorrow are
broccoli and more green beans.
Despite plenty of other farm chores, I stole Wednesday afternoon to
visit the intentional community where my movie star neighbor
lives. There, an ex-nun and I splashed in the river, counting
critters to determine the water quality. Stream sampling was my
very favorite part about my old job, and I was thrilled to realize that
when I'm not getting paid I can do the fun stuff (play in the water and
count the bugs!) rather than just training other folks to do
them. In case you're curious, the river passed with flying
colors, chock full of mayfly larvae.
It was even fun when the ex-nun's car got stuck in the mud and we had
to call the movie star to bring the huge rusty tractor and pull us
out. He and I talked bees while she and I talked blight, then I
headed back home to our own harvest.
Shame-faced plug: Check out
the homemade
chicken waterer that funds this blog.
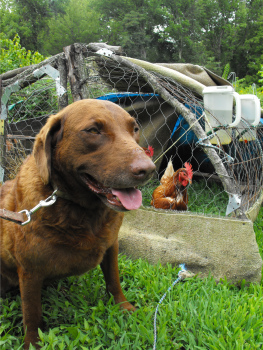 Walking
your dog is really most of what it takes to create a good farm dog, but
we did put in the time to teach Lucy four basic commands --- sit, stay,
come, and no. There are lots of books and websites that will tell
you how to get those few commands into your dog's head, but once you've
got her used to looking at you as the pack leader, it's pretty simple
to train her.
It's nearly as simple to
train your dog to do things against her nature --- like leaving cats
and chickens alone rather than eating them for dinner. When we
brought home our first chickens, Lucy was extremely excited and I think
she might have killed a chicken immediately if we'd let her.
Instead, we took her for a long walk to calm her down and remind her
who was in charge, then we made her sit and stay beside the chicken
tractor. Every time the first bit of predator instinct kicked
in
and Lucy started getting excited about the chickens, we said "no" very
firmly. After about 15 minutes of this, she understood.
Now,
when chickens accidentally get out of their tractors, Lucy has been
known to try to help us herd them back in.
When introducing your
dog to "prey" animals, you should always have a way to enforce your
commands. Your dog should be on a leash so that she can't lunge
forward and grab the chicken. If you play your cards right, your
dog will catch on very quickly and you'll be able to take the leash off
and trust her alone with your livestock in short order.
| This post is part of our Training a Farm Dog lunchtime series.
Read all of the entries: |
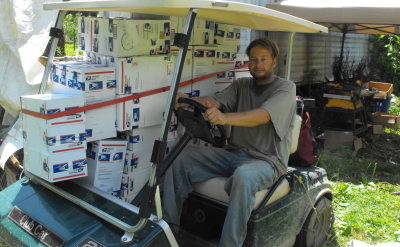 A day spent fabricating, packing, and driving
to the post office is a good day indeed.
I keep expecting the excitement of going to the post office on shipping
days to wear off, but it just seems to get stronger as I settle in on
the fact that a micro
business lifestyle is a perfect fit for me and our way of life here
on the farm.

I woke up just before
dawn on Thursday, shocked that the sky wasn't yet awake at 6:30
am. Even after the sun came up, it stayed behind the hill,
settling already into its sulky winter pattern. I was able to
weed in the shade until 11 am --- which I have to admit felt pretty
good given current warm temperatures!
This is our upper garden, where the tomatoes have been ripped out and
replaced by seeds for fall crops. Still, the garden is very alive
with okra, corn, cucumbers, herbs, and next year's strawberries.
Peas and carrots have come up, but I think I may have to replant a
couple of beds due to the cats getting excited by the soft bare soil....
Shame-faced plug: Check out
the homemade
chicken waterer that funds this blog.
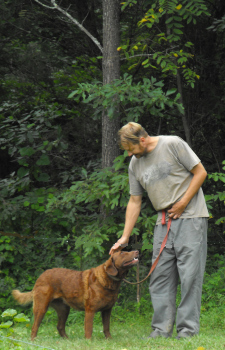 Of
course, Lucy isn't a saint. She's been known to carry off tools
and spread the contents of trash bags all across the yard. She
used to tear up the garden pretty badly too, running across raised beds
and choosing a few as favorite napping spots.
Dogs aren't large
picture thinkers the way we are --- I'm pretty sure
that I could train her not to chew on a tool, but I'd have to train her
on every tool we own to really get the point across. Similarly,
Mark
trained her not to go in the front door of the barn...but then caught
her trotting through the back door because all she got out of the
training was
"don't go through the front door" not "don't go in the barn."
In cases like this,
we've figured out that it's better to train
ourselves rather than train the dog. How hard is it to keep trash
in the barn and gloves in the house? We also developed
main paths
in the garden based
on Lucy's regular routes, and when necessary put
branches on the beds she was obsessed with to physically keep her
off. In our early days on the farm, I yelled at Lucy a lot.
Now, we've trained her and she's trained us and we're like a happy
married couple.
| This post is part of our Training a Farm Dog lunchtime series.
Read all of the entries: |
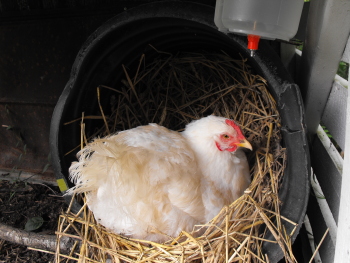 She's taken to facing inward for some reason,
and she ate another egg.
I wonder if she can somehow sense if the egg is bad or not?
We'll know how good she's been sitting in about a week. That reminds me
that I should chick proof the mini coop so the little guys can't jump
through the holes once they arrive.
Read all of the entries about
our broody hen:
|
At first, I thought my
weak hive had remarkably grown stronger. Then I realized I was
watching a full scale battle --- a stronger hive had decided to rob the
weaker hive.
Robbing is a honeybee behavior most prevalent among Italian bees during
a nectar dearth. Our strong hives have hundreds (thousands?) of
worker bees who just a few days ago were out collecting pollen and
nectar from the late summer flowers. Suddenly, the ragweed
stopped blooming and nothing else filled in the gap. Who can
blame these out of work bees for stealing honey from their weaker
neighbors?
At first, Mark and I were just going to let nature take its
course. That weak hive has been on its last legs for a month, and
I don't think they're worth babying through the winter. (In fact,
I'm a little surprised they had any honey to be robbed!) But then
the robbing swarm moved on to our second weakest hive, which I actually
consider a pretty strong hive. I slapped on gloves and a veil and
smashed entrance reducers in all four hives.
Now, only a bee at a time can go in and out of our hives. This
makes it a lot easier for the robbed hives to fight off the marauders,
but I'll have to be vigilant and take the reducers out if we get
another honeyflow.
Shame-faced plug: Check out the automatic chicken waterer
that funds this blog.
Today was the day our windshield wiper blades decided to give up the
ghost, and after stopping by 3 different auto part stores on our way
home we discovered that our Toyota Previa is rudely excluded from the
computer list of replacement wipers.
4 dollars worth of Rain-X solved the problem nicely. This stuff really
works. You just apply the transparent polymer to a clean and dry
surface, let it dry, and buff it in for a coat of near magical
protection.
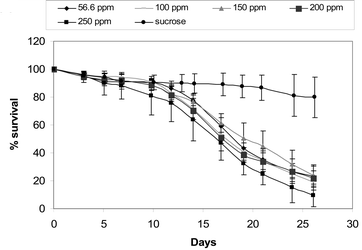 Although small backyard beekeepers like us
traditionally feed bees a mixture of sugar and water when their
colonies need help, commercial beekeepers largely use high fructose
corn syrup. The corn syrup is cheap and easy to get in the
U.S...but now scientists are starting to suspect that feeding
bees corn syrup could be one cause of colony collapse disorder.
Maybe that's why commerical operations seemed to be a lot harder hit
than folks with one or two hives?
When heated to 120 degrees Fahrenheit, a substance called
hydroxymethylfurfural is formed from high fructose corn syrup. In
the scientific
article that the popular article linked to above is based on,
nearly all bees fed hydroxymethylfurfural died within 25 days.
Even if you don't keep bees, you should be concerend about
hydroxymethylfurfural. Our much larger bodies probably aren't as
easily affected by the chemical as bees are, but scientists are
beginning to wonder if the high fructose corn syrup in soft drinks and
other processed food may be bad for us.
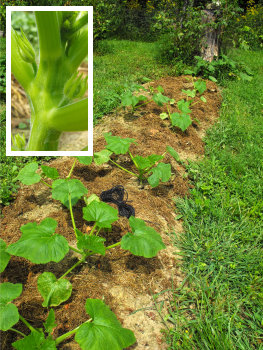 It's a bit of an exaggeration, but I think of
this as the year without a summer. Our tomatoes succumbed to the
blight and our summer squash gave up the ghost due to vine borers.
Usually, we're able to keep the borers at bay with weekly sprayings
of Bt, but this summer was so wet we just couldn't get the bacteria
to stay on. About a month ago, I threw in the towel and ripped
out the soggy squash.
But I didn't really give up. Without blogging about it here
(didn't want to give the borers any ideas!) I pushed more summer squash
seeds in the ground at the opposite side of the garden. The
copious rain did its job and sprouted the seeds in no time, and now
there are flower buds on my second planting of squash. Even
though the weather is still a bit soggy and foggy, I'm hopeful that we
can keep Bt on these plants. It's also possible that it's late
enough in the year that vine borers are no longer active, but I'm not
taking any chances.
In the long run, I'd like to find a variety of summer squash which the
borers don't find so tasty. Last year, we tested out half a dozen
winter squash varieties and were thrilled to find that butternut was
both the tastiest to humans and the least tasty to vine borers.
If any of you have discovered a similar miracle summer squash, I'd love
to hear about it!

September 14 is our big
anniversary --- three years after the day we moved to our farm!
Every fall, I take a bit of time to think
back over the year before, and every year I'm stunned by how far
we've come in a short twelve months. This navel-gazing lunchtime
series explores the top lessons we've learned this year on the
farm. I'll start where I left off last fall: "our trials and
tribulations --- fencing out deer, not enough hours in the day."
We've discovered that it is quite possible to keep
deer out of the garden without a fence! Last week, I
tentatively pulled the last protective row covers off our sweet
potatoes and strawberries, and still nary a nibble. Deer damage
was one of my hardest trials last year, and I can barely believe it's a
thing of the past. Pretty soon, we'll be rolling out a website
entirely devoted to helping other farmers and gardeners beat the deer
problem, so stay tuned.
As for not enough hours in the day --- well, some days I still feel
that way. But due to the wonders of taking weekends off,
I suddenly feel like I have more time. We've managed to pretty
much stay on top of the weeding and mowing and harvesting, and still
zip through some long term projects. Maybe by this time next
year, I will have forgotten feeling pressed for more daylight hours.
| This post is part of our Third Year of Homesteading lunchtime series.
Read all of the entries: |
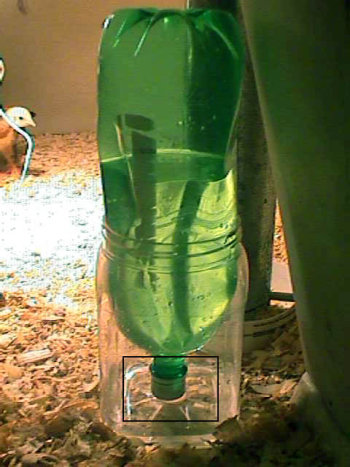 Fowlvisions.com
has an interesting picture of an automatic chicken waterer one can
build from scrap material in 5 minutes or less.
This might be fine for small chicks who aren't strong enough yet to
knock it over, but once those little chickens start growing up they're
curiosity increases and eventually the clown of the group will get out
of hand one day and spill everybody's water all over the pretty wood
chips.
For just 15 bucks(shipping included) they could have ordered a do it
yourself kit from us and installed an Avian Aqua Miser in about
the same amount of time it took to throw a 2 liter plastic bottle into
a mixed nut container.
Want more in-depth information? Browse through our books.
Or explore more posts by date or by subject.
About us: Anna Hess and Mark Hamilton spent over a decade living self-sufficiently in the mountains of Virginia before moving north to start over from scratch in the foothills of Ohio. They've experimented with permaculture, no-till gardening, trailersteading, home-based microbusinesses and much more, writing about their adventures in both blogs and books.

